In the first of our Navigation 101 articles (HERE) we covered the Basics of Navigation , this encompassed maps, compasses, setting your map & how to set a bearing.
The second article we looked at intermediate navigation (HERE) & it consisted of the following information & techniques:
- Declination/Magnetic Variation
- Grid Numbers/Plotting a Grid Reference
- Back Bearings
- Re-Orienting/Re-locating
- Thumbing the Map
- Hand-railing
- Catching Features
- Aiming Off
Now in the final article, which compliments the interview in Talk Ultra Episode 73, we look at Advanced Navigation techniques for Ultra, Trail & Mountain Runners.
In this article we cover the following techniques:
- Resection
- Rough Navigation
- Pacing & Timing
- Reading the map whilst running
- Memorising the map
- Night or poor weather navigation
Remember that we’re not just looking to learn these simple techniques, but more so turn them from a skill we have to think about, into something that becomes 2nd nature & we naturally do, without thinking.
Lets look at each one in more detail:
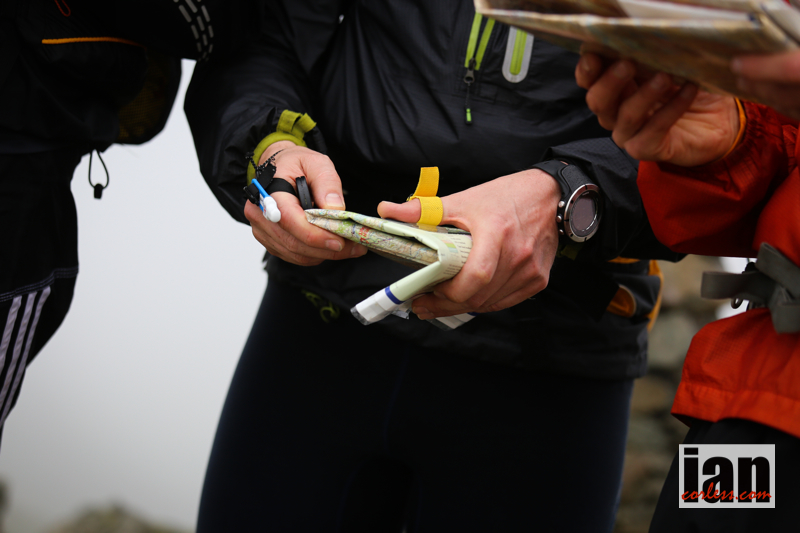
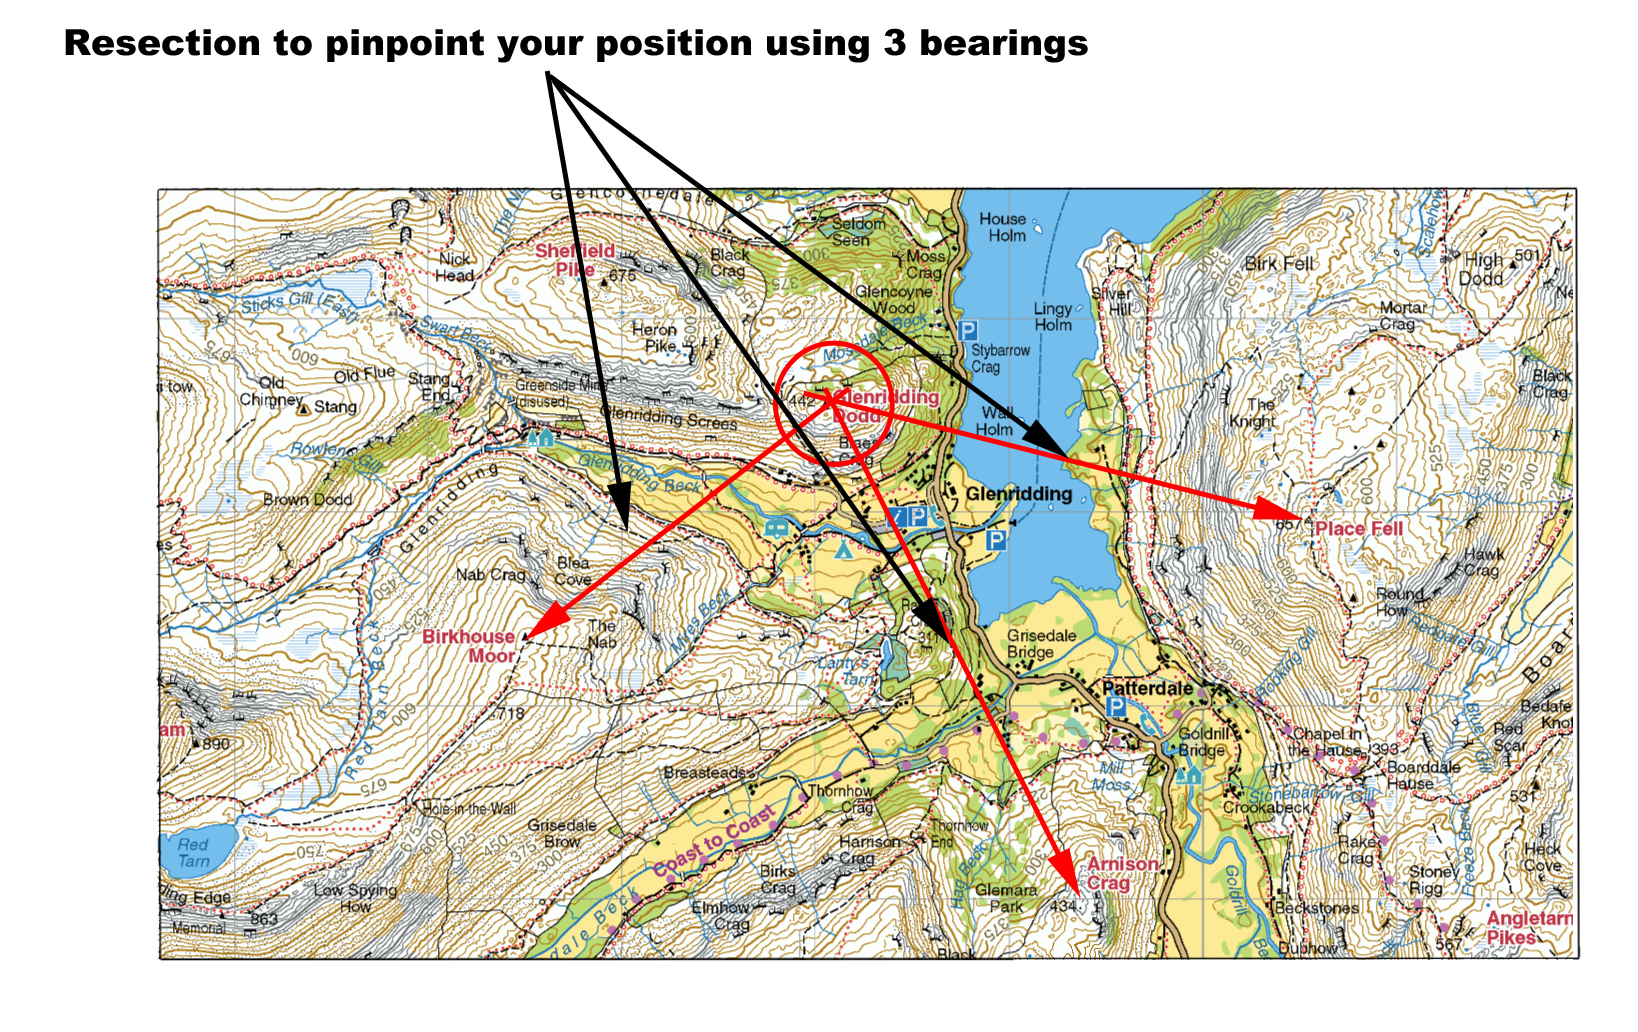
1) Resection:
A resection is the next step on from Relocating. It might sound technical, but its easy to do, as long as you have the clear vision around you to be able to take bearings at a distance!
You find yourself not where you thought, not lost, but certainly miss placed on the map. Maybe you weren’t thumbing the map, maybe you made a navigation error & your only just picking it up now, no matter, whats important is to pinpoint yourself back on the map! So what do we do?
Orientate your map!
Now assuming you can see summits around you, the easiest & quickest thing to do is take 3 bearings from 3 peaks/summits in view. This is by sight, not by applying the compass to the map. Take each bearing & apply it back to the map, remembering to subtract the Mag Variation, should there be one present, so your bearing is accurate. Draw a line from the summit you have identified as a feature, from the one you are assuming/have located on the map & do the same for the next 2. By doing this you will have 3 lines coming together in 1 point on your map, or at least you will have 3 lines crossing, making a triangle of sorts on your map. You are either at the point the 3 lines cross, or in the triangle. Or at least you should be, assuming you are identifying the peaks/summits you see around you to the map you have in your hand, correctly!
So what happens if you can’t see the summits or you realise you are in the clag and you are lost? First thing is not to panic, as this will induce fear and adrenaline and then you will spin. Next have a good look at the map & then have a good look around you. Can you see any features to take a resection from? Buildings, crags, tarns, ponds, sheepfolds etc. If you really can’t see anything, your only option is to drop down until you are out of the cloud & then perform a resection on what you can see.
Remember, Orientate the Map!
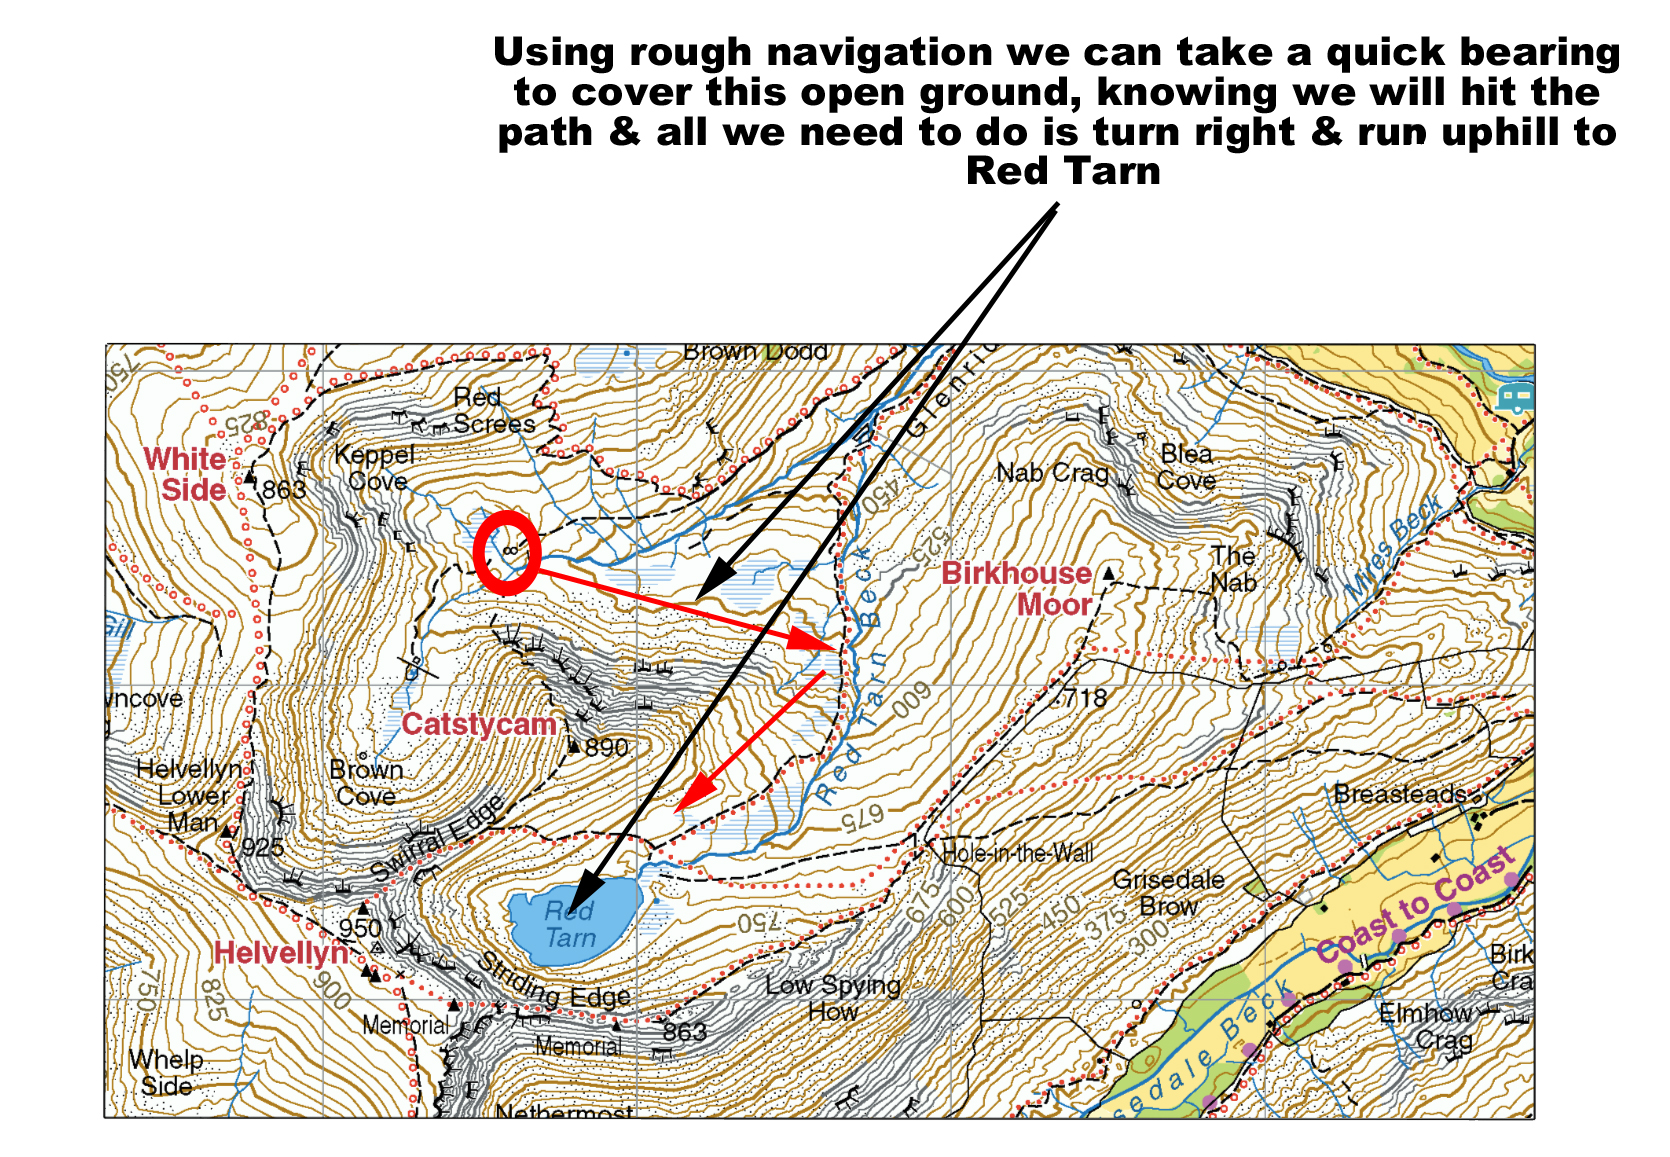
2) Rough Navigation:
Why use rough navigation when you can be 100% accurate is the first question you should have springing to your mind?
The reason is that 100% accurate navigation is not always necessary to be honest, sometimes you just need to know you are traveling in the general direction, rather then running completely on an accurate bearing. Plus rough navigation is very quick & can be employed more easily whilst you move at speed.
So how does it work?
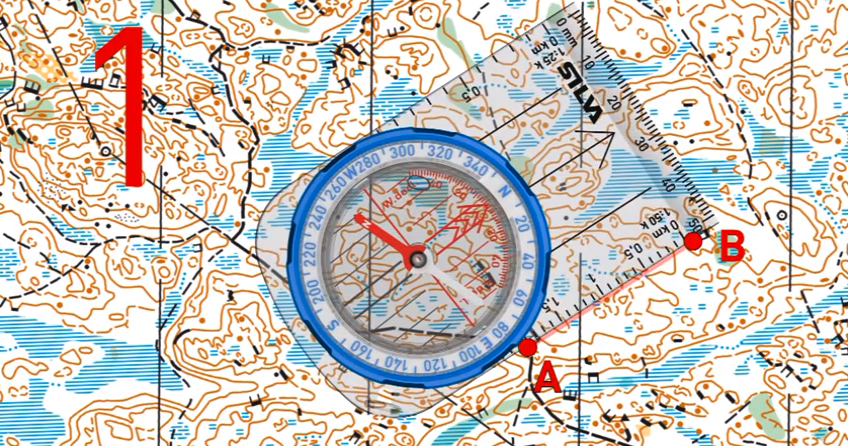
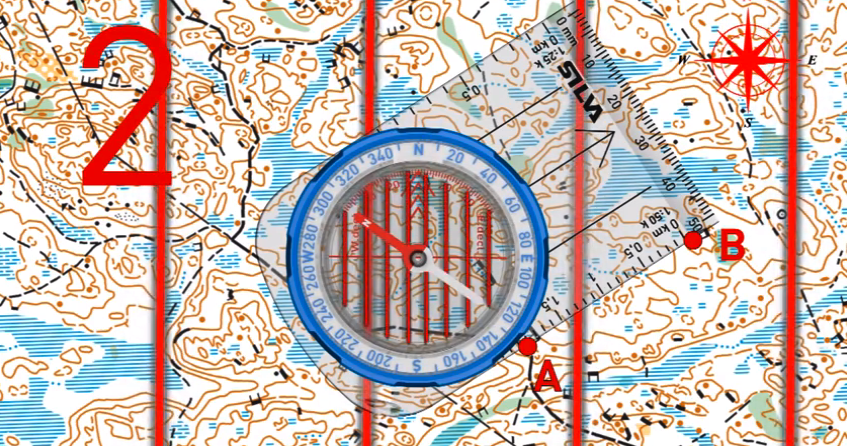
You are moving from A to B, along a path. You really just need to know the path your running on is going in the right direction, so a quick rough bearing can be taken from the map as you move at speed & applied to the track your are on. It doesn’t need to be 100% accurate, unless there is a multitude of tracks, all running in a similar direction to the one you are wanting. This is unlikely.
You might also need to cross an expanse of open ground, but there is a ‘line feature’ – (remember from Intermediate Navigation – Handrails are line features!) to catch you, so you don’t need to hit an accurate point, as when you hit the line feature, assuming you were ‘Aiming Off’, you will turn the direction of travel you want to along the line feature. With this type of crossing, its not important to be working on pinpoint navigation & therefore you can just use rough navigation.
If each time you want to take a bearing it has to be extremely accurate, you will find that you will be stop starting all the time & this will take plenty of extra time, meaning you are not as fast as your competitors. Rough navigation, as with everything, comes with practice & confidence at what you are achieving.
3) Pacing and Timing:
This is a very personal thing. Not meaning you should be out of sight when you are doing it, but that you need to work out your own pacing especially & get a good handle on timings.
I find pacing very useful & don’t really use timing, but we’re all different & we all like different methods. Timing might suit you better, but I find pacing more accurate.
To work out your pacing a GPS can be handy. You need to walk for 100m over differing terrains & count the number of paces you take, as you do this. Start with flat ground & then maybe get some rough ground, an incline, a decline & more. Count every step or every other step, your choice & then make sure you write it down.
Pacing is to be used for crossing small expanse of open ground & generally you will only use this technique in the dark or when the mist is down. Start going over 500m & your pacing will be come less accurate, so either only use it for small legs, or take the distance into account with your accuracy settings in your brain!
Use pacing once the Attack Point has been established, or in the case or Ultra Running, to keep ahead of the game so you know when the next junction in the track is coming. Use in conjunction with ticking off features as you run to your destination.
Timing is great for longer distances, where a general time scale will be more accurate, but never 100%. Great for switching off & switching back on as you are running. Navigation, especially when you have to be on it, can be very mentally tiring & a pretty intense experience, especially when the mist is down.
I find the best way to use timing is to have a ‘Timing Card’. Hand up if you crap at Maths on the move! (My hand is up!). So have a quick & simple card to view, meaning you don’t have to think & you can concentrate on the navigation, rather than the maths.

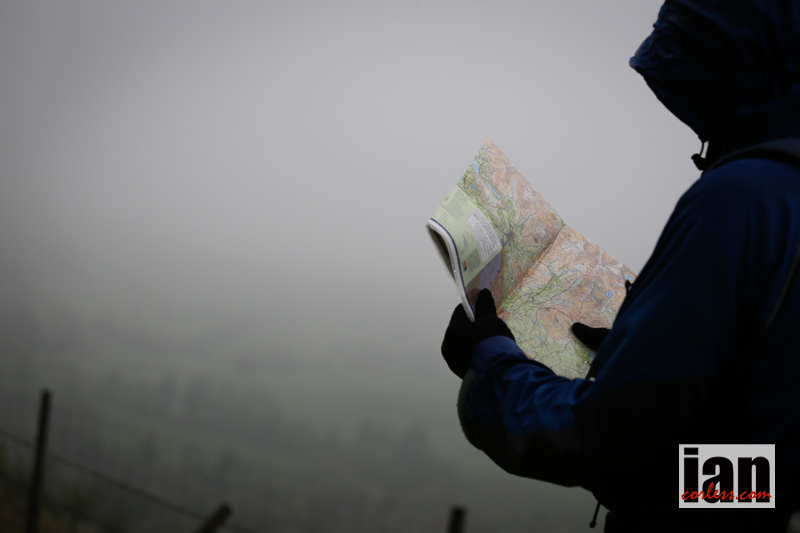
4) Reading the map on the move:
This is a definite skill. Some find it easy, some find it really tough. I think the only way to learn this is to practice, its not something that can be taught really & its as simple or as hard as it sounds to you. It can make the difference between winning a race or not.
The ability to run across rough ground, whilst reading a map takes plenty of time. There are certain things that facilitate the concept & these are:
- Having focus for the map & the ground at the same time (I like to call this Macro/Micro Focus)
- Thumbing the map – if not done, its very hard to see your location on the map at speed across rough ground!
- Being able to see only the important information & blocking out the rest
Whilst running with Shane Ohly (OMM Elite Winner & Owner of Ourea Events), we discussed map reading on the move. He breaks the map down in his mind to find the really important bits of information in order to simplify the whole map reading skill. He told me of a elite orienteer who simplifies the map to such an extent that he only see’s 4 or 5 key features on the map, memorises them & makes directional changes once he has reached each feature. This is combining the next technique as well, but in essence, this allows him to view the map very quickly, at top running speed & keep up with navigation & map reading whilst on the move.
The best advise is to get out there, and try reading your map whilst walking on different surfaces, once you have got this bossed, try a gentle run. The more you do, the easier it will get.
5) Memorising the Map:
Its easier than you think, but it takes time to get sorted & longer to trust yourself whilst racing. Really top level orienteers memorise vast sections of maps on slower, longer races. The same applies to mountain marathon runners. The less time you spend looking at your map the better, as you can then concentrate more on your running & trying to maximise on your speed.
How do you get better?
Sit at home and practice. Read your map for 10 seconds, memorising all the features you see on the map from Point A (where you are) to Point B (where you are traveling to). Now turn the map over & make a simplified drawing of the map & see how many features etc you remembered accurately.
Now get outside & practice whilst running, when ever you are out. Because repetition really does work, it might be tedious sometimes, but drilling something into your mind means when you are cold, hungry & tired, you still will revert to good practice!
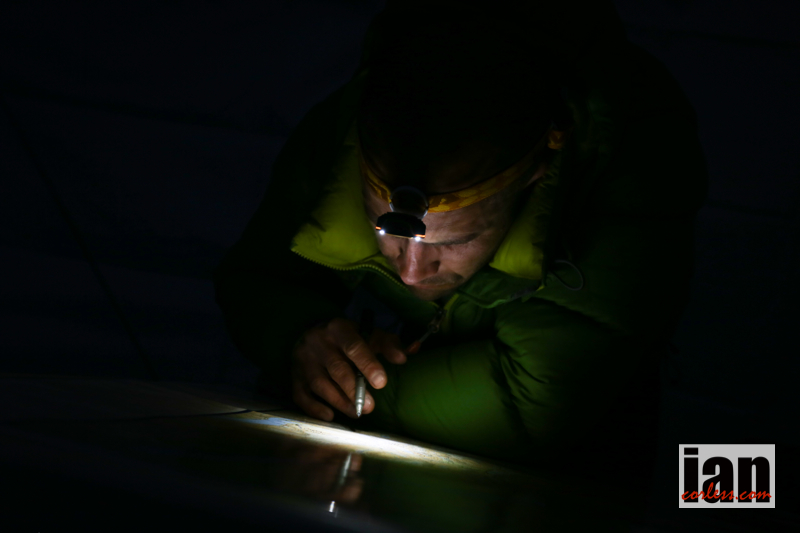
6) Night Navigation & Poor Weather Navigation:
Its really simple, you know it already. You’ve been practicing it (I hope), from the first 2 articles in this thread. Remember these:
- Thumbing the Map
- Hand-railing
- Catching Features
- Aiming Off
Thats all it is really, combing all the skills that make up Basic to Intermediate Navigation & then removing the FEAR and giving yourself full confidence by practicing when ever you can.
Remember, Fear is the Mind Killer!
So all we really need to do when the clag is down or the night starts to roll in, is move away from Rough Navigation and advanced techniques and take things back to basics. Follow handrails, use all the features at your disposal, tick everything off you run past & make sure you know exactly where you are by thumbing that map.
Wow, thats a lot of techniques to employ, but as long as you practice them all, every time you run, you’ll be a master in no time!
Disclaimer:
Please remember to be safe out there. Practice your navigation in a group, make sure you get the basics dialled before heading out in the clag or dark. Mistakes often make you learn quicker, but its not desirable.
Experience counts for everything, but if your struggling to get it all sorted, there is nothing like booking on a course, designed to teach you the necessary skills. Look out for our Navigation for Ultra Running courses in the new year, or the joint TalkUltra/MountainRun Navigation weekend coming next Spring!
Information and article provided by Charlie Sproson at Mountain Run