All running, particularly in the mountains, remote areas and particularly if going ‘solo’ brings an element of danger that must be managed. Winter and extreme conditions do increase risks and I discussed this in an in-depth article on Winter Running HERE
Following on from the article, I have had many questions to elaborate on the pack and the equipment I would use for day-to-day adventures and then how I would expand that equipment list for more adventurous and specific trips.
Firstly, understand yourself and your level of experience. I write about this in the article above, but it is worth emphasizing that no two people are the same. The ethos of ‘fast and light’ is great if you can go fast… BUT and this is a big BUT, what happens if you can’t go fast? What happens if you fall, are immobilized, waiting for help or a rescue?
Imagine a scene, stuck on a mountain side, you have broken your leg. You were moving fast and so were warm. But now you are still, the temperature is dropping well below zero and you are unable to move or generate heat. It’s a disaster waiting to happen, and THIS is the scenario you MUST think off when packing for an adventure.
I have a simple attitude of it’s better to carry it and not needed it.
Weather can change in minutes at any time of the year, especially in a mountain environment. However, in winter the changes are often far more extreme, Hypothermia can hit in minutes and it is deadly.
Preparation is key and assessing what ‘may’ happen on any adventure or run is crucially important to make sure that a day or multiple day’s activity remains safe.
The equipment list below are my personal choices, and I must stress here that I have tested many variables and brands to come up with the list below. Importantly, there is most definitely multiple ways and solutions to any problem, so, while my list below could be seen a perfect shopping list, it’s also fun to find out what works for you.
YOU AND WHAT YOU WEAR
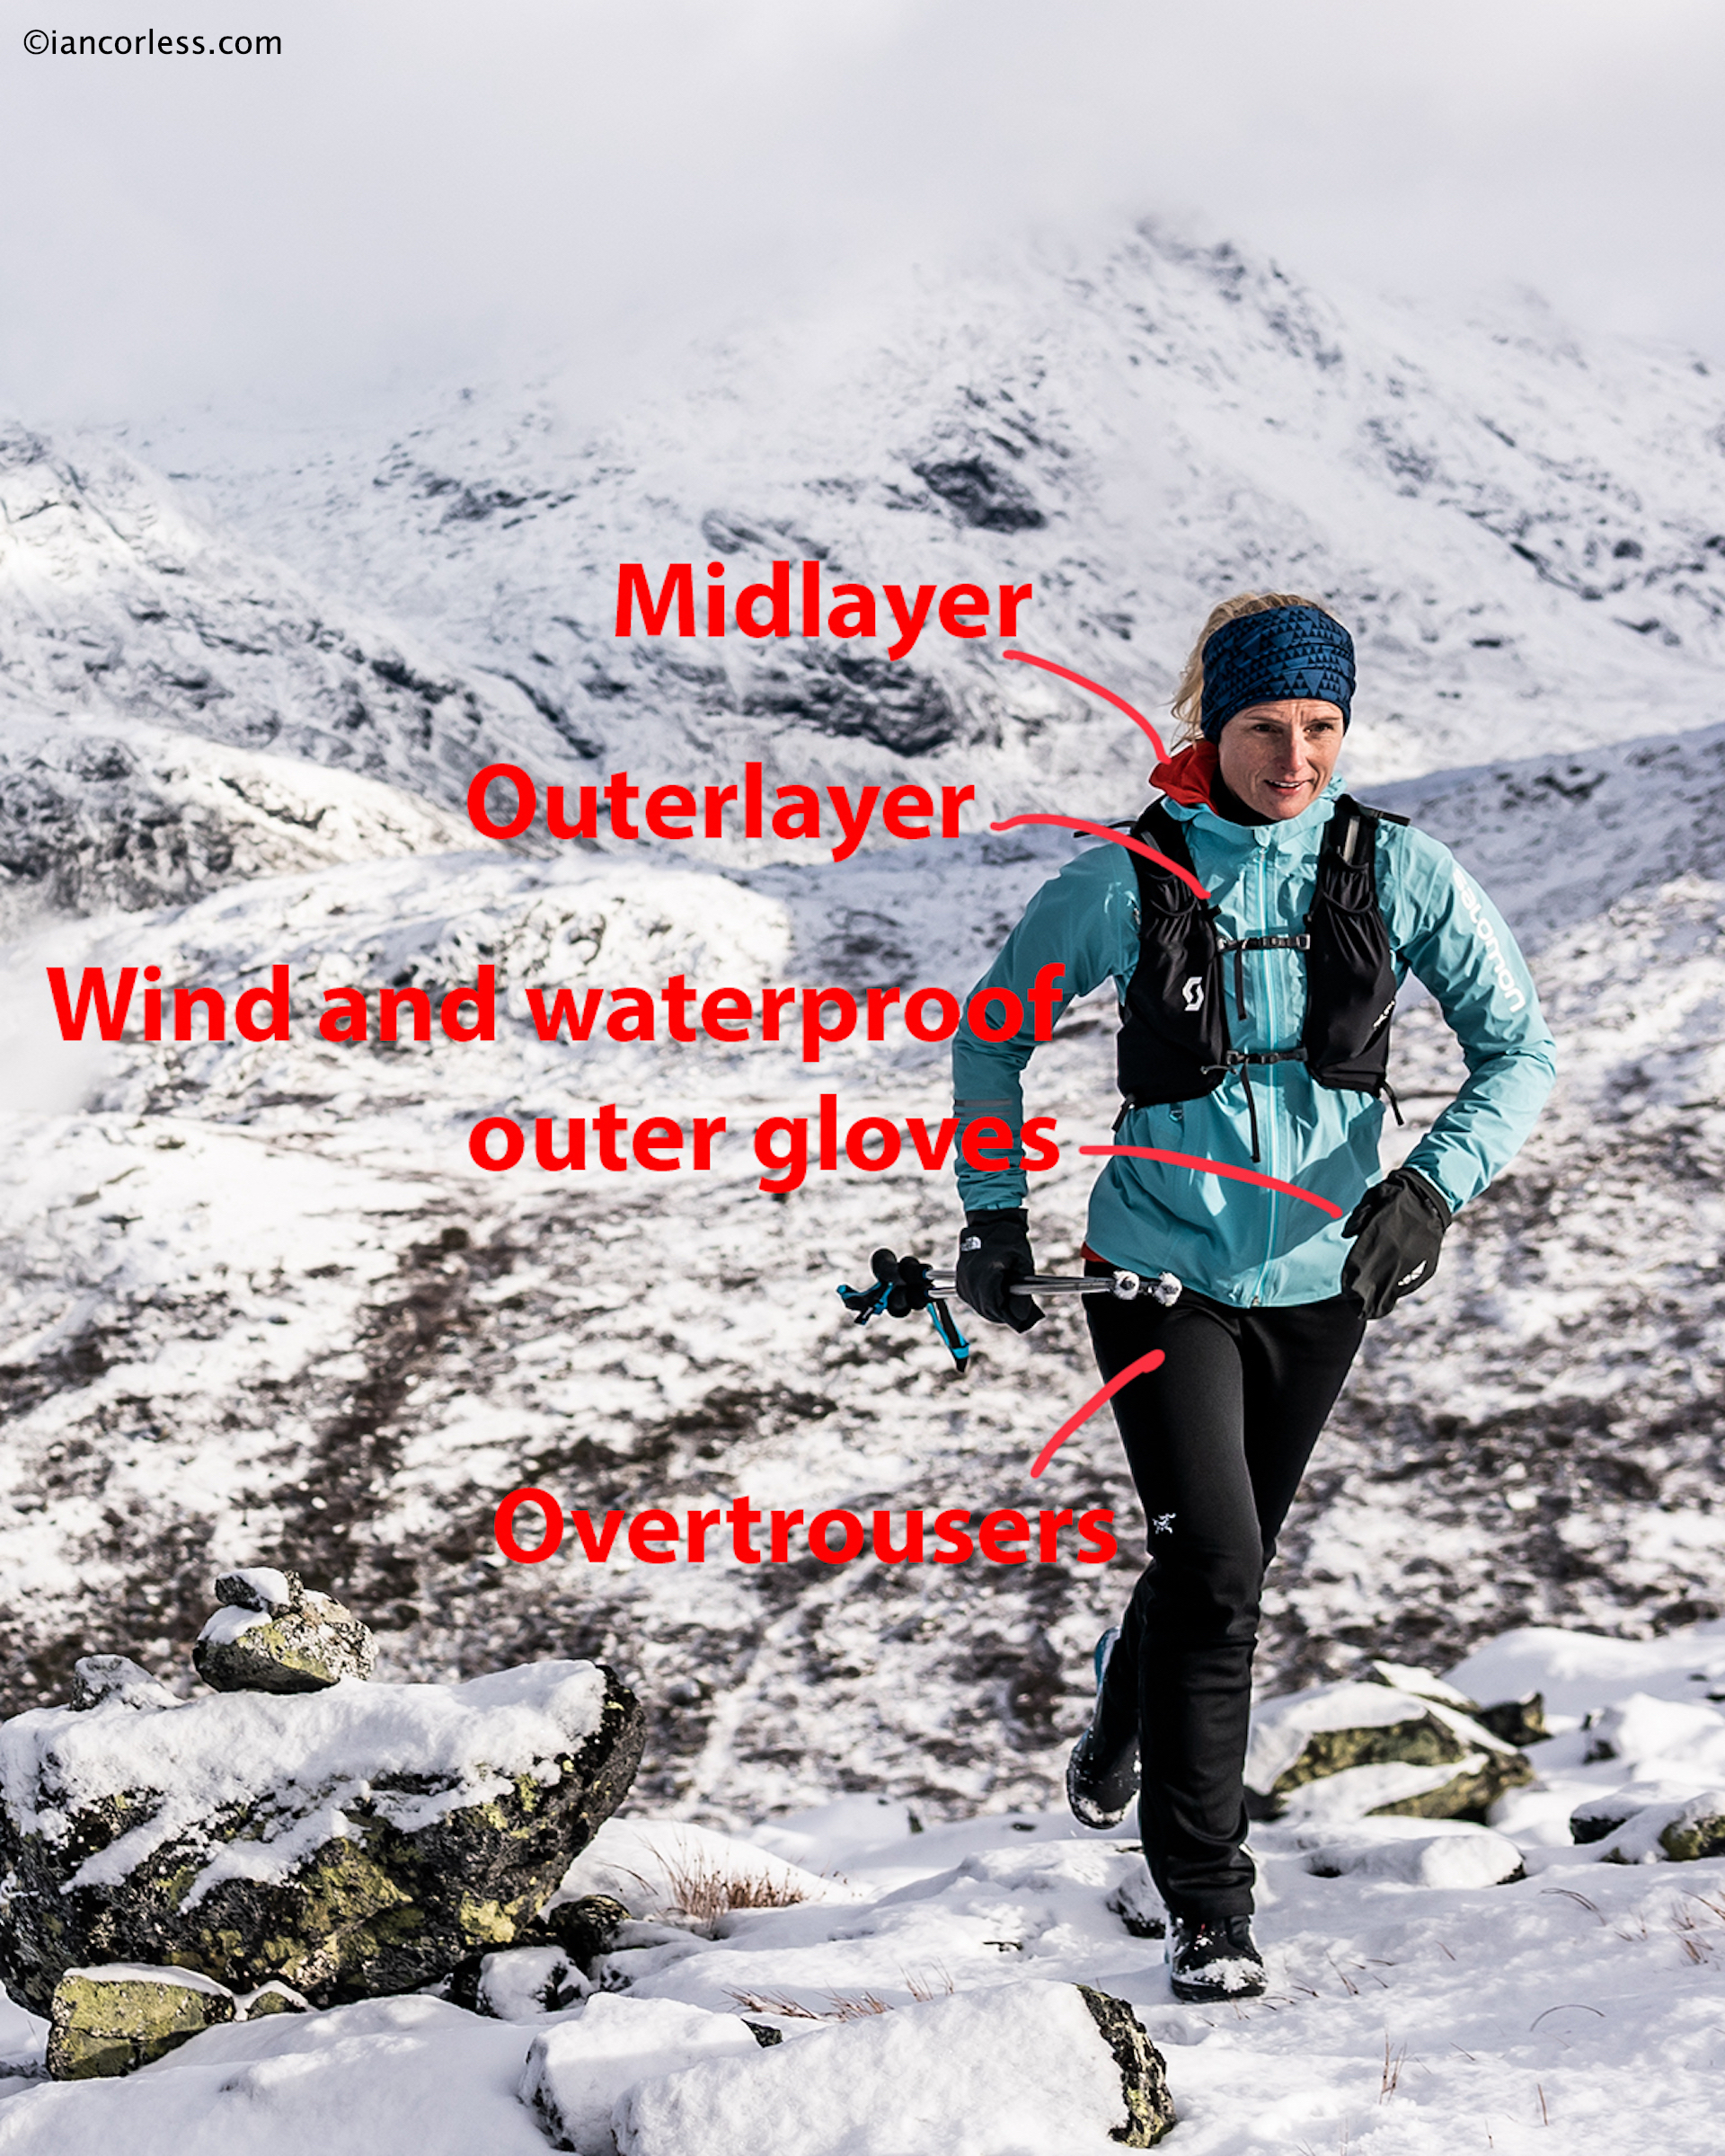
What you wear for a run/ adventure should come as second nature, but it can often be a real dilemma understanding how to balance the layers so that you don’t overheat or equally, get too cold.
Personally, I find the most difficult temperatures around 0 to +5 degrees C (32-49 Fahrenheit.) It’s cold enough to make you feel chilled (often will feel damp too) but within 15-minutes of running you feel warm.
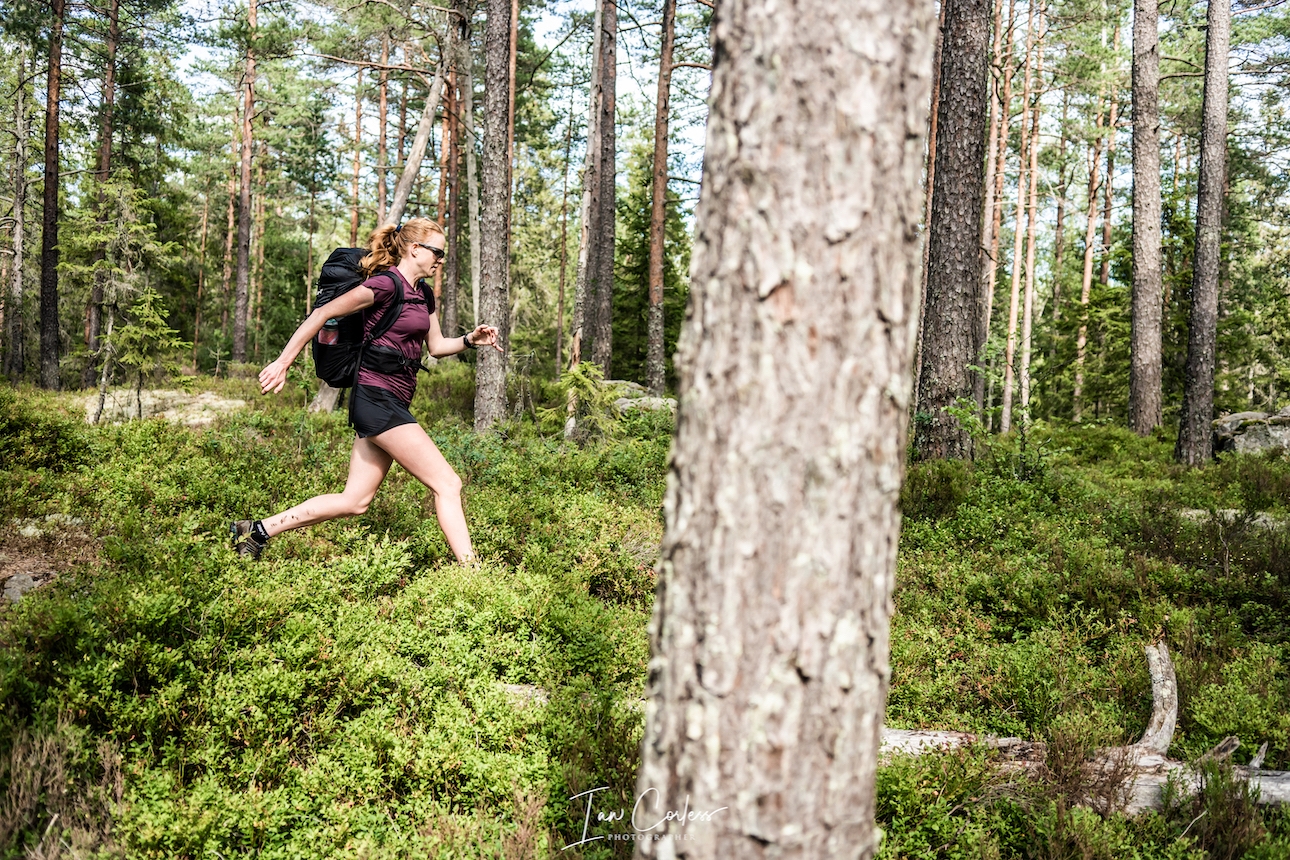
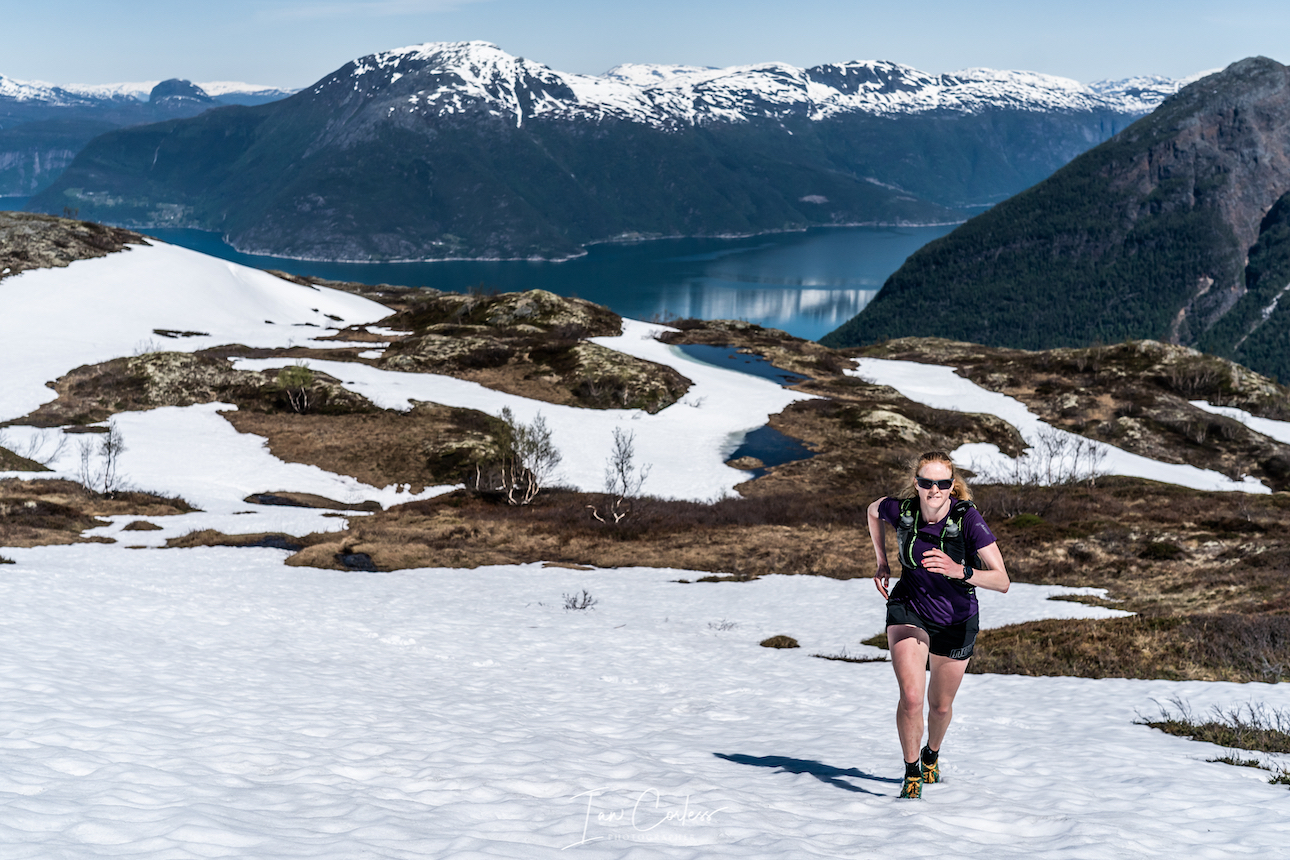
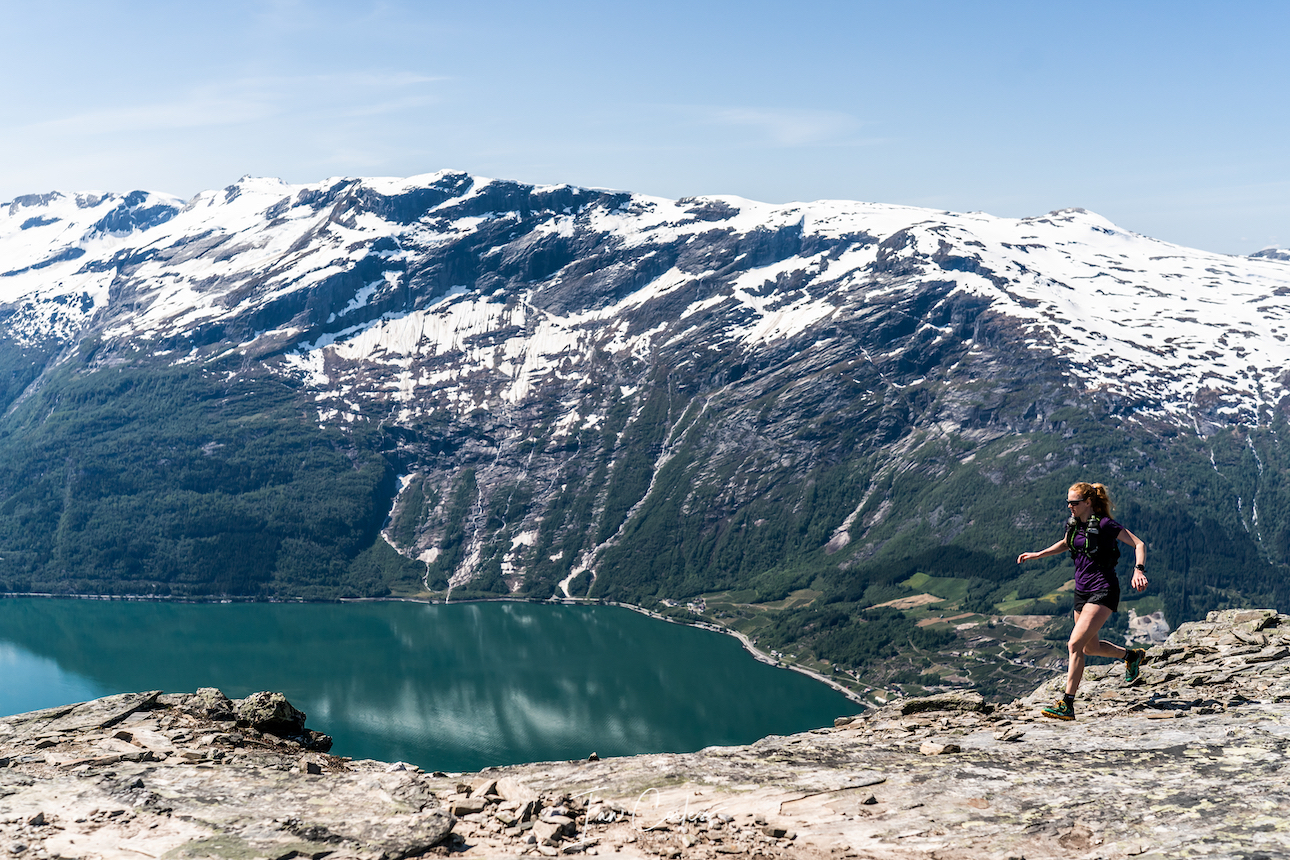
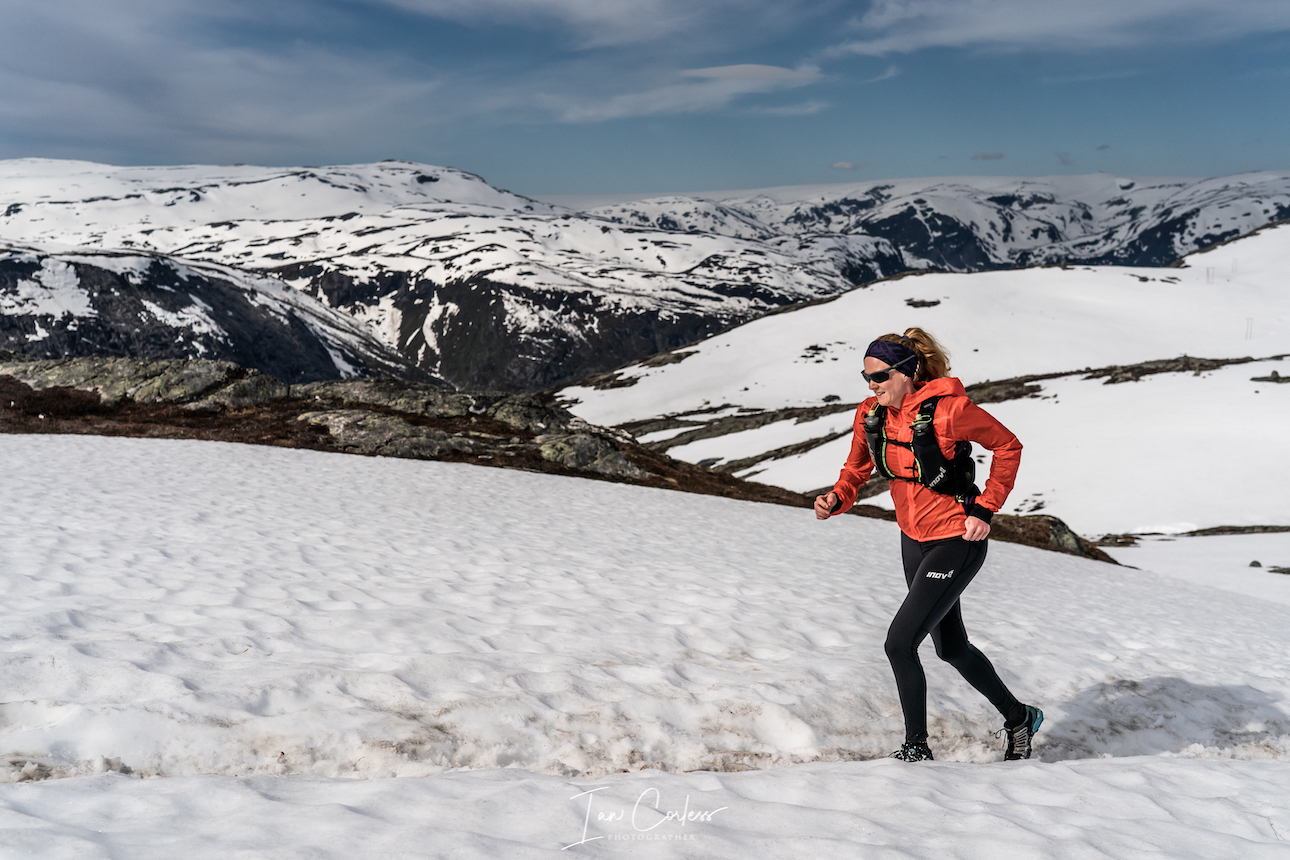
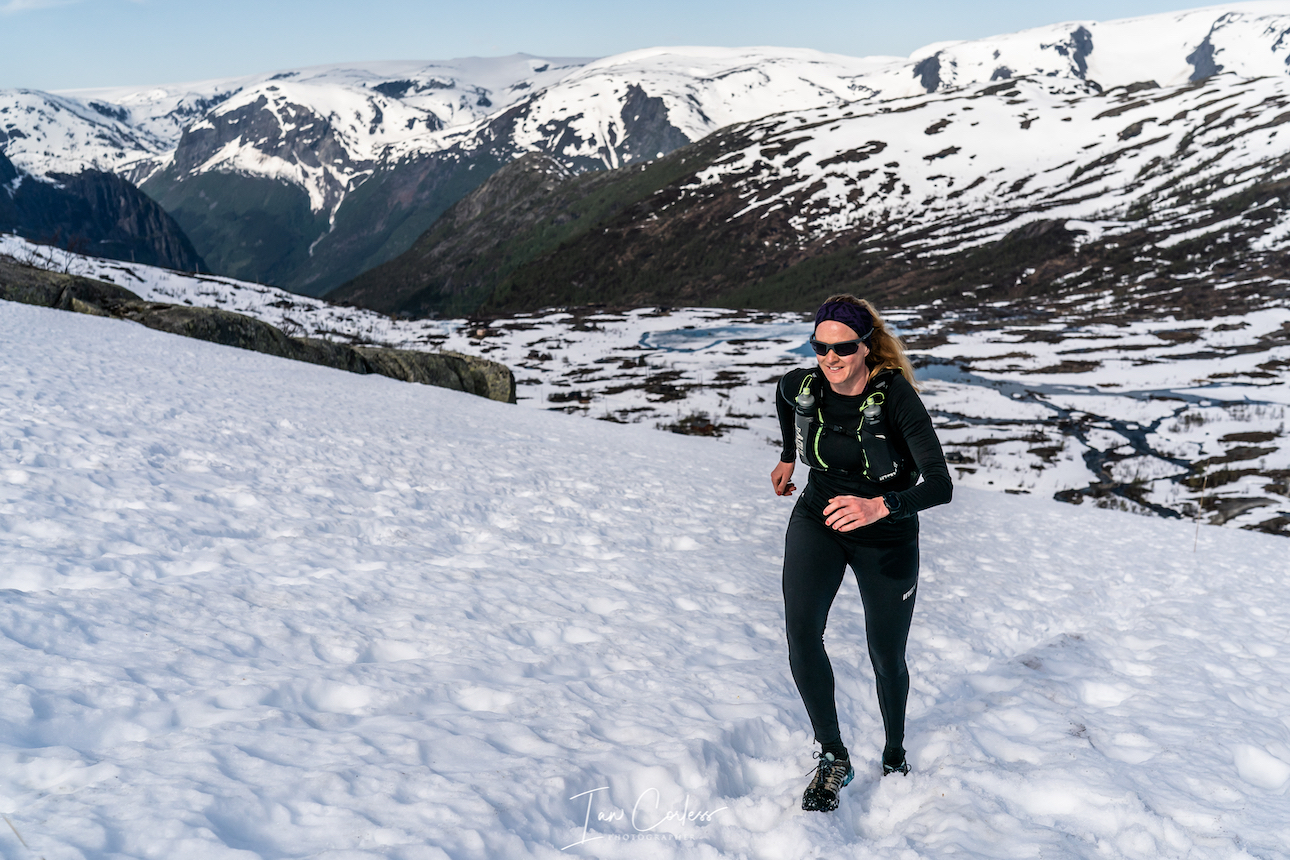
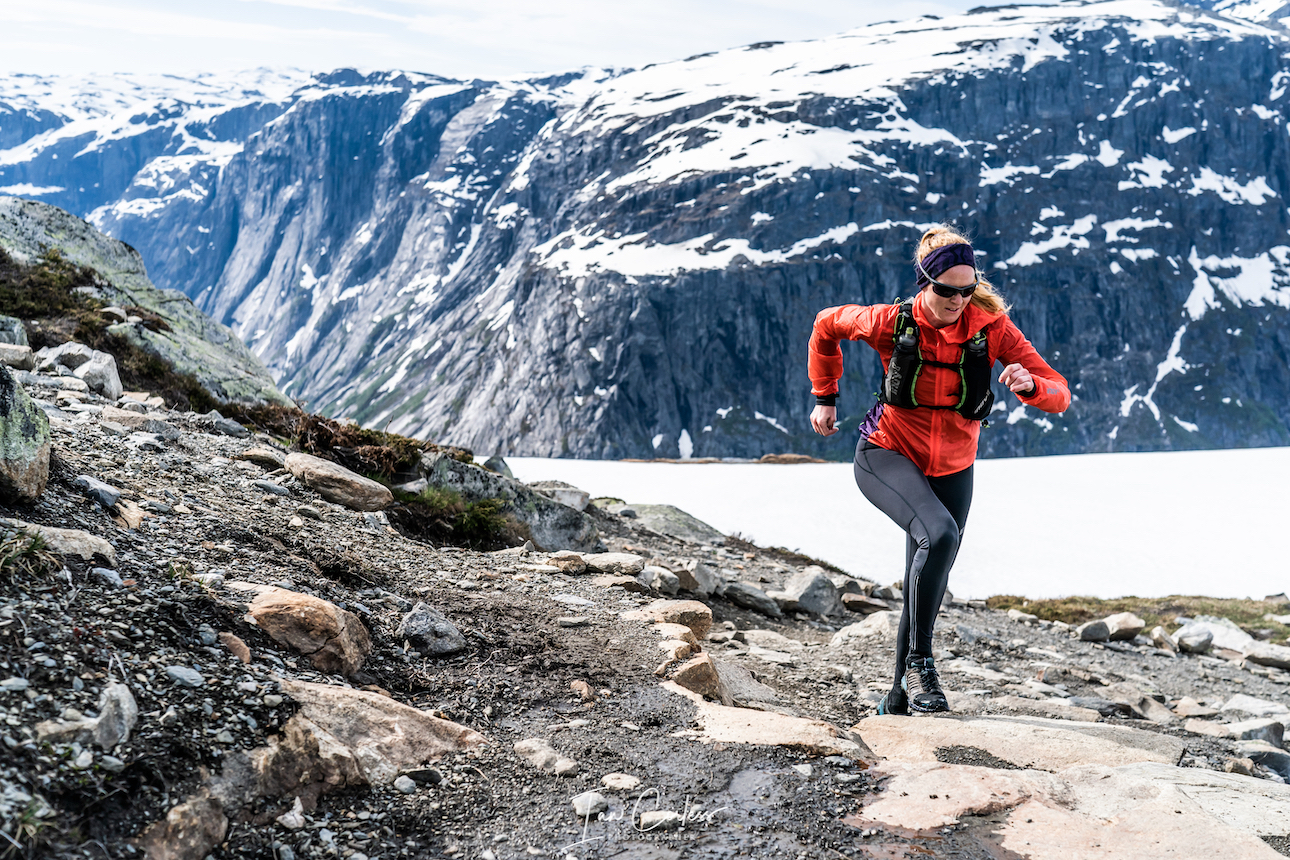
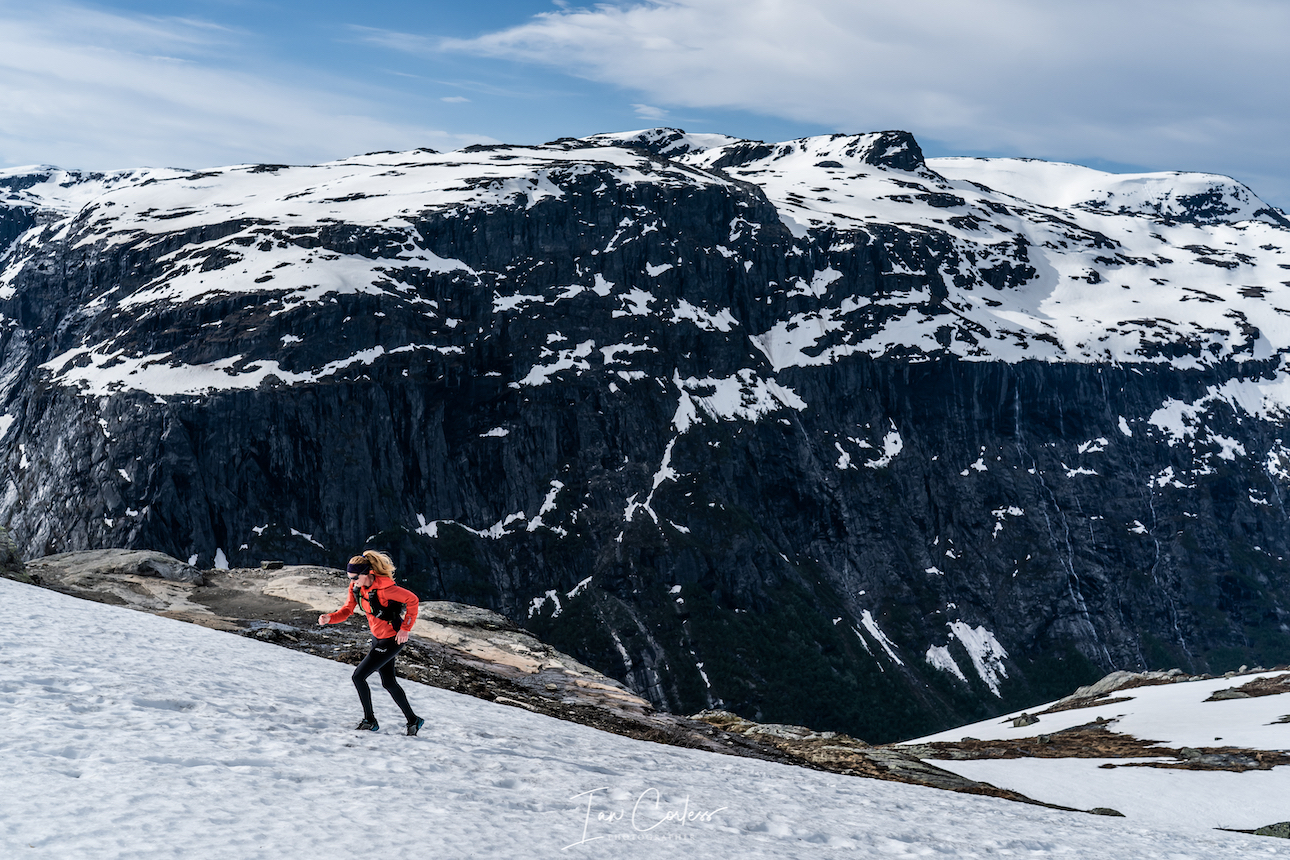
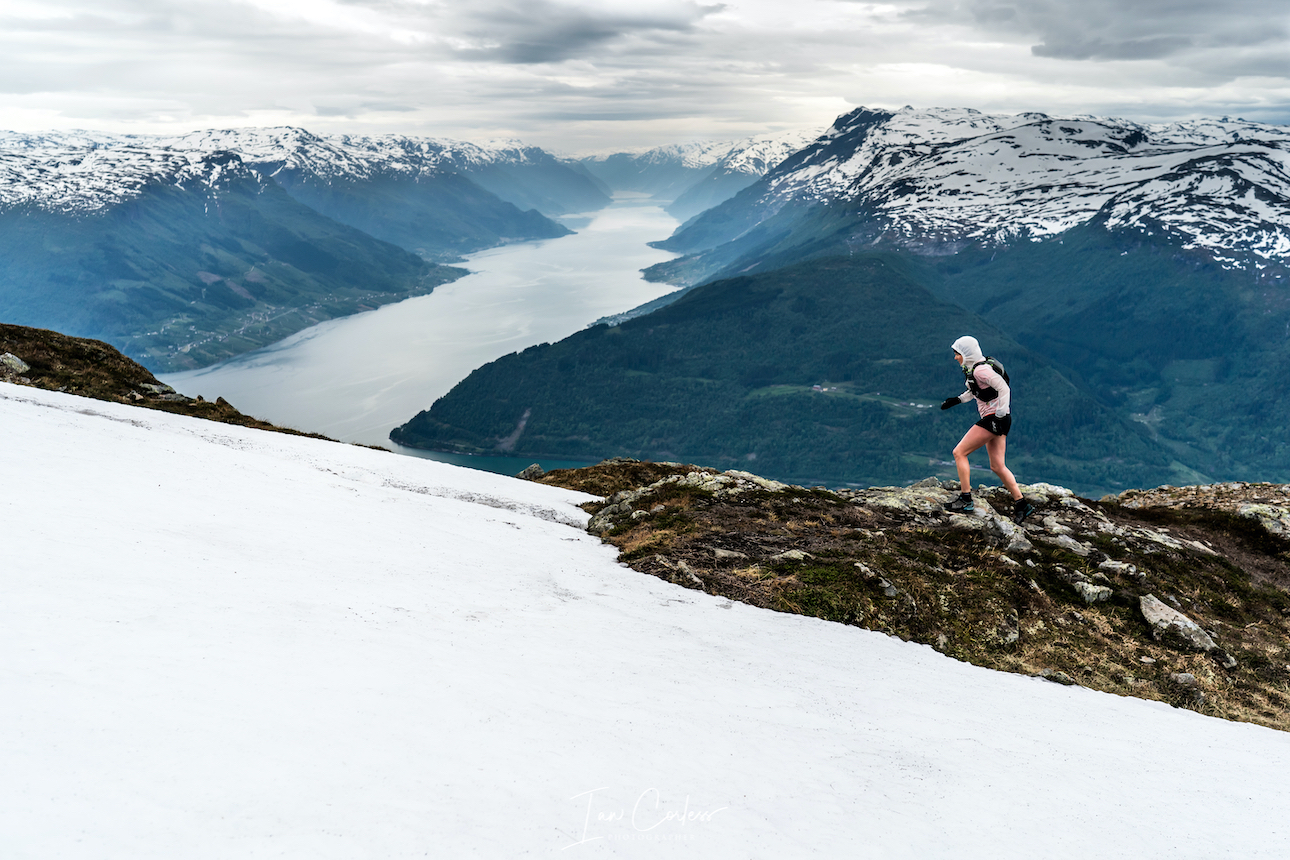
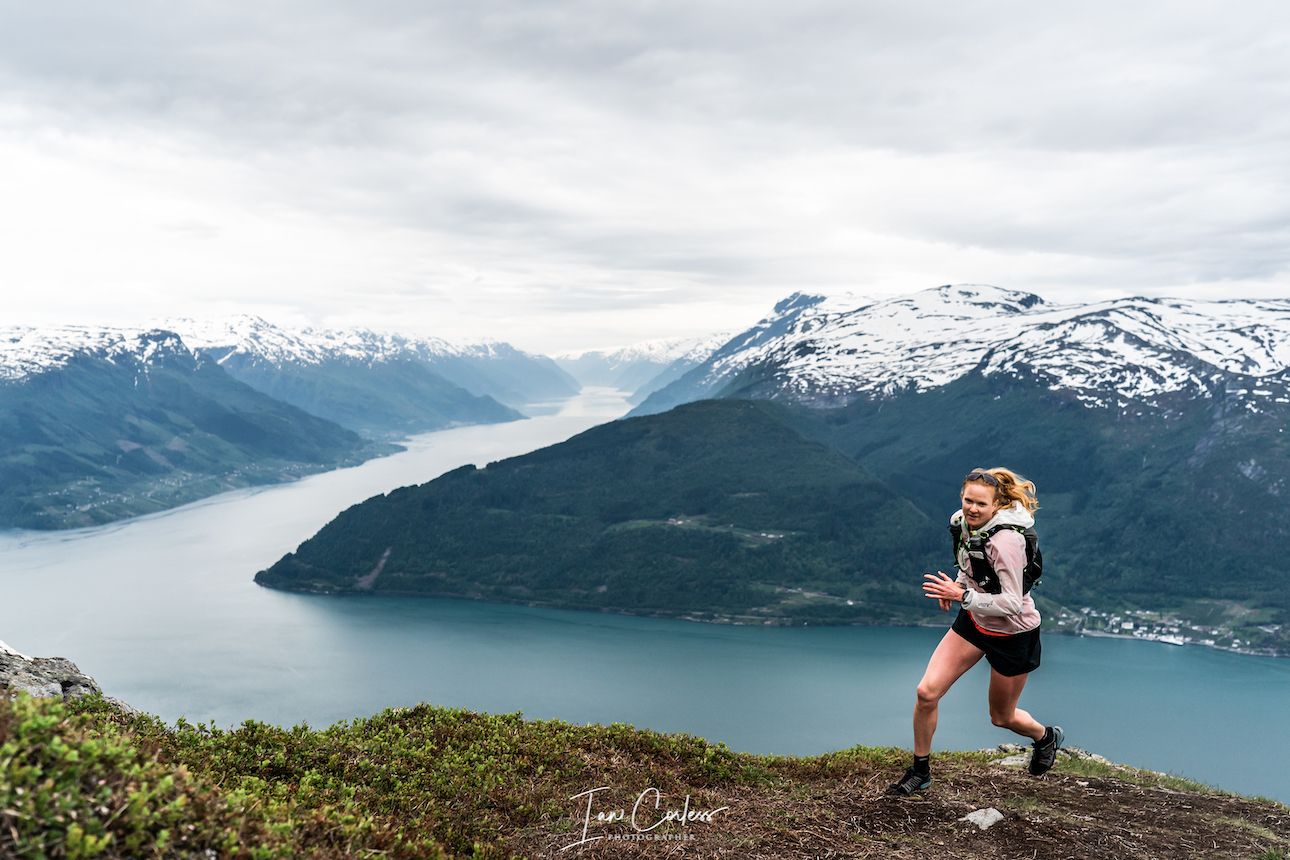
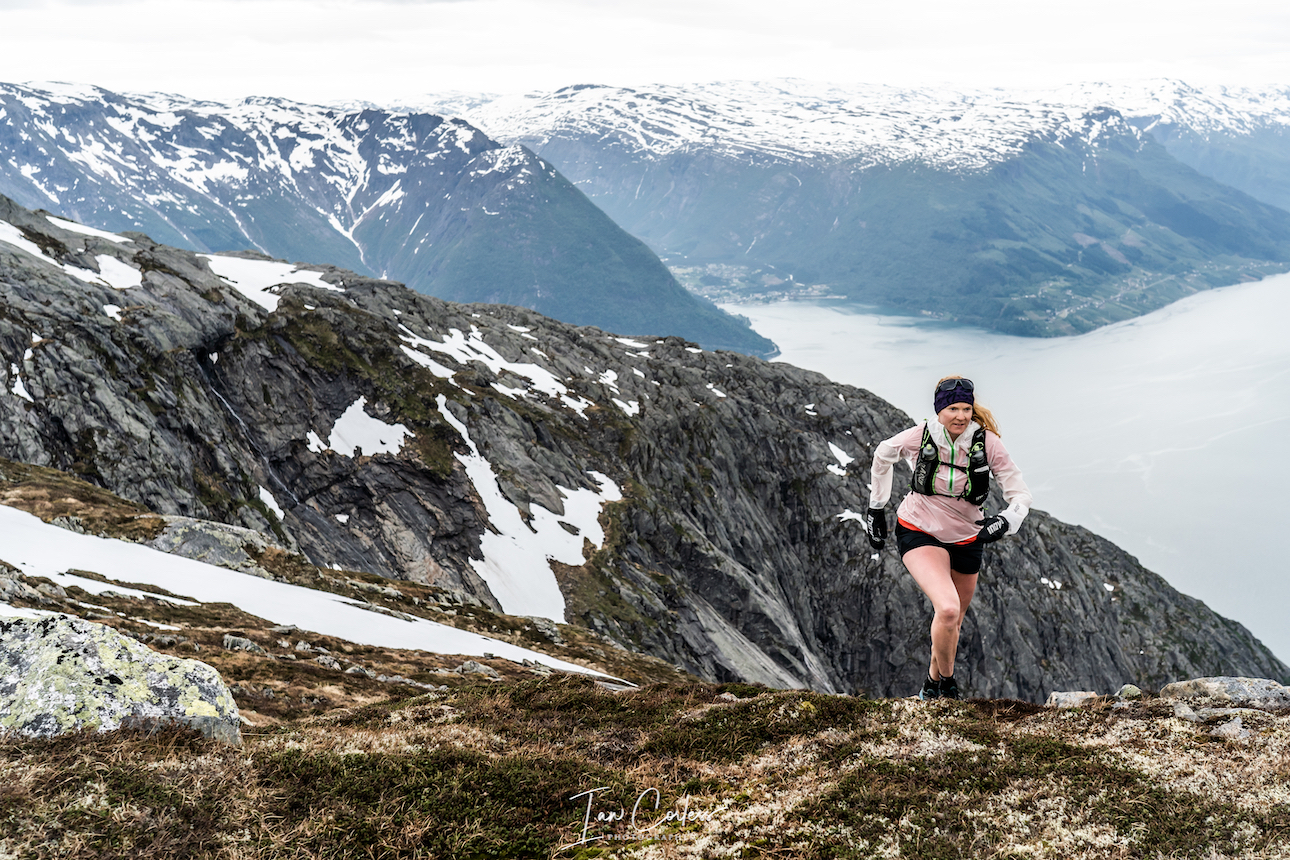
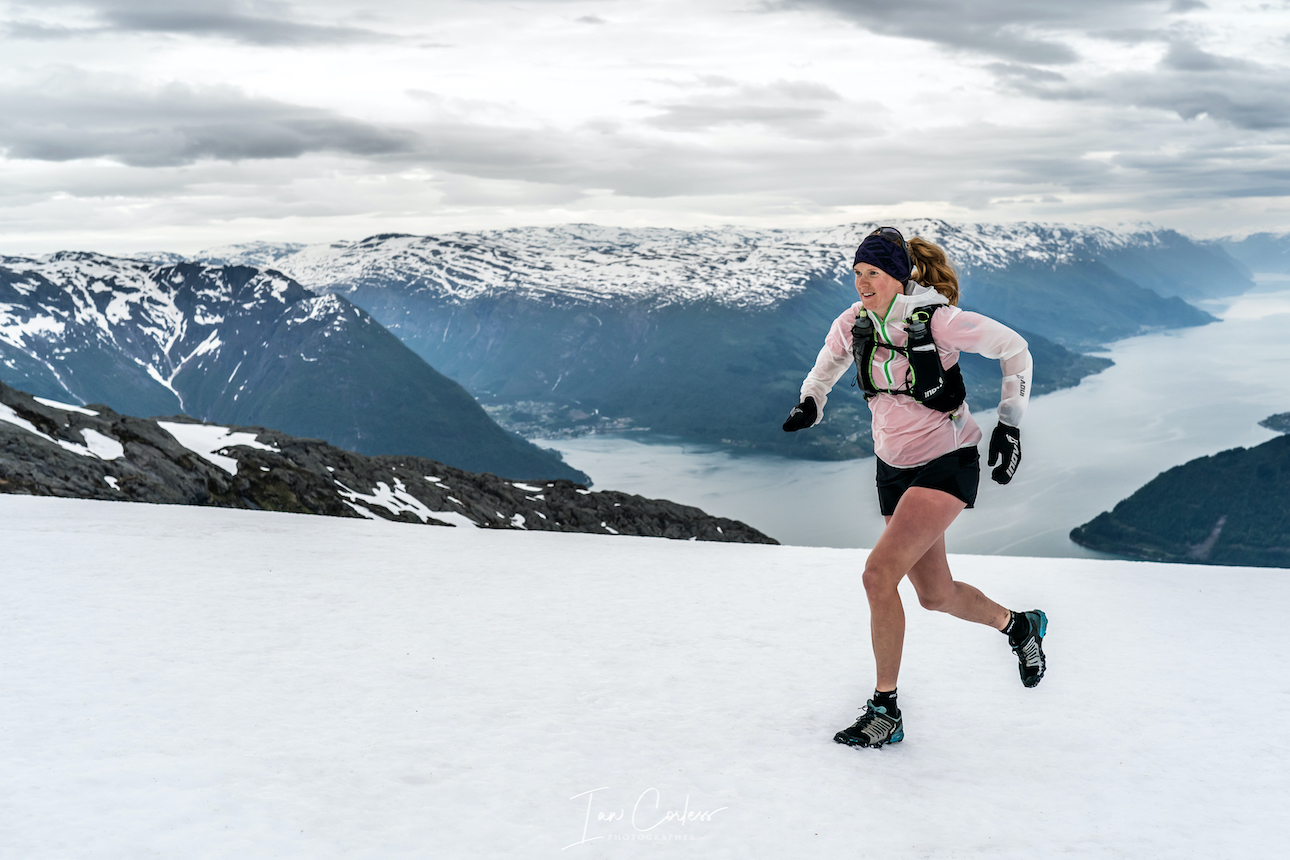
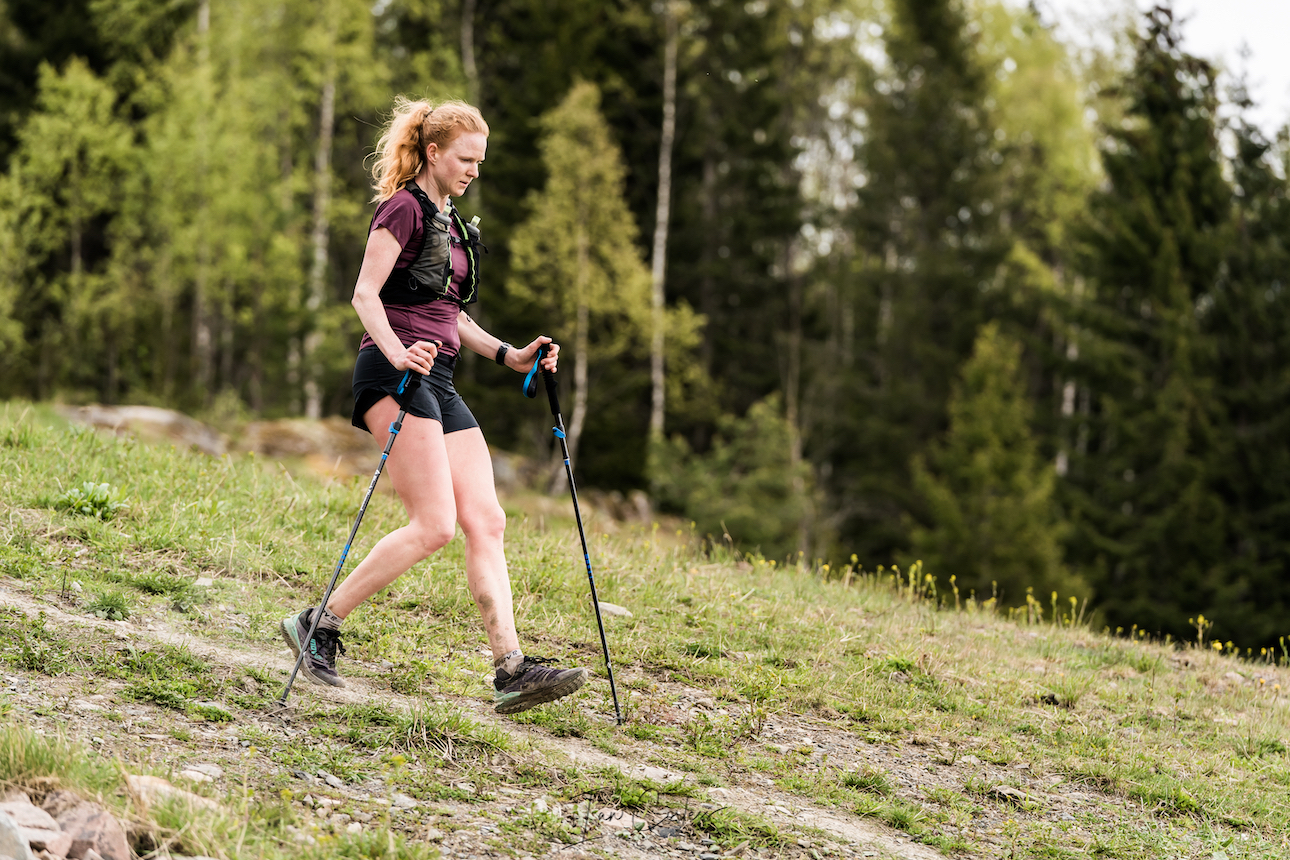
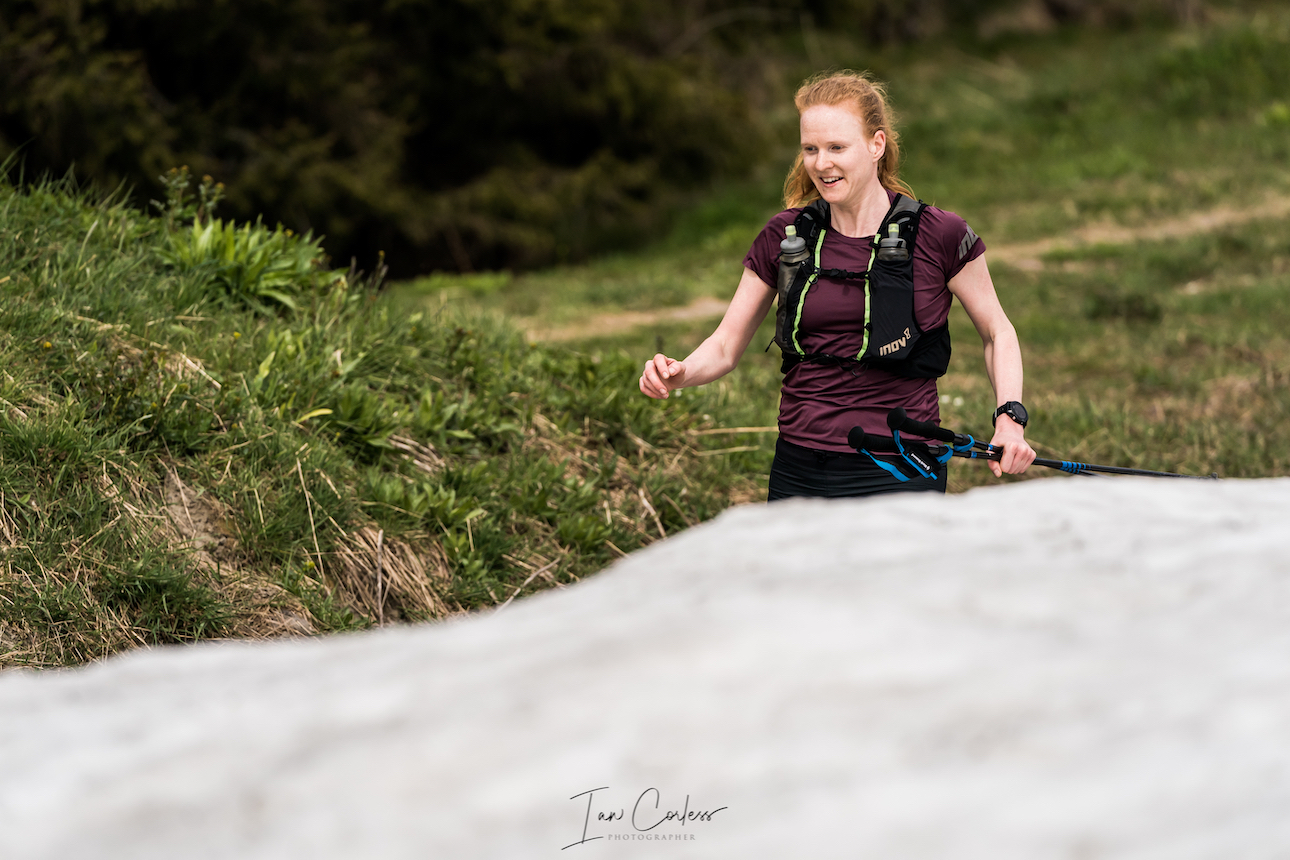
inov-8 ambassador, Abelone Lyng
The starting point for me is a merino wool base layer, it naturally helps regulate body temperature, remains warm when wet, transports sweat away from the body, and is very good in regard to odors. Icebreaker is my product of choice and they have a simple system of 150/175/200 and 260 products, the higher the number, the thicker and warmer the product. I personally find 150 ideal, especially for running and active sports.
My jacket will balance warmth, breathability and protection from the wind, Haglöfs L.I.M Hybrid Hood manages to balance all these elements in a really lightweight package. It can even be worn directly against the skin. The inov-8 Technical Mid Hoodie is also a good choice.
Leg wear will depend on the weather and arguably I would potentially look at 3 scenarios. On milder winter days hovering around 0C I would use my standard inov-8 run tights. 0 to -10C I would use a thicker winter tight, potentially with wind block panels on the front by Swix. Below -10 and I would use Icebreaker 150 merino underneath the thicker Swix tights.
Keeping feet warm is essential in winter and again, based on weather, temperature and conditions. I will go with one of three scenarios: Merino wool, neoprene socks or Sealskinz. My default is neoprene as it works well in most conditions. It’s not unusual to wear two pairs of socks in winter, say a merino liner and thicker over sock or a merino liner inside Sealskinz, keep this in mind when getting winter run shoes, you may need a half-size larger shoe?
Hands, like feet, need to be warm. I use Icebreaker liners, with either inov-8 Extreme Thermo Mitt which is incredibly warm.
I wear a Buff or similar product around my neck, and I use a Haglöfs Fanatic hat which manages to be always warm, but not too warm!
Shoes will depend on conditions but for me, once winter arrives, I usually require a winter shoe with studs to provide grip, particularly in ice. The VJ Xero 5 works exceptionally well. Of course, in most scenarios you could use your favourite trail shoes and carry micro crampons which you can add and remove as required. However, if you know you will be in snow/ ice all day, a specific winter shoe provides a much more enjoyable experience.
Finally glasses with a specific winter lens are often essential to protect from cold air, snow and reflected brightness from snow. I use Oakley Radar.
THE PACK
Black Diamond Distance 15is a somewhat unique pack that manages to appeal to trail runners and alpinist/ climbers who have discovered that all important link-up of sports coming together for unique adventures and/or fastpacking. These adventures tend to entail a bit of easy climbing, some scrambling, some fell running and some walking – or just about whatever you can string together.
Black Diamond Distance 15 balances running and alpinism perfectly.
A hybrid between running and climbing pack, the Distance 15 fits snug to your body and is stable with minimal bounce. The main compartment of the pack includes a quick draw-string main opening which Black Diamond say is waterproof – it is not! Please use a waterproof bag inside like those provided by Sea to Summit. A zippered security pocket inside is ideal for a wallet and there is a stretch mesh divider that will hold a bladder, or it can be used for storing nylon or dyneema.
Elasticated compression straps either side of the main bag are ideal for reducing the volume of the pack and keeping everything tight together and they can be used to secure a pair of ice axes that also have specific storage at the bottom of the back and security buckles that pass through the ice axe head. Integrated into the main compartment (on each side) are ‘Quiver Sleeves’ for Black Diamond Z-folding walking poles. The front of the pack has a vest fit with two adjustable straps and two 4-way stretch zippered pockets and four front stretch pockets that will hold soft flasks, snacks or any other essential ‘on-the-go’ items.
IN THE PACK
Icebreaker 150 top and bottom
Spare base layer, top and bottom – These would be duplicates of the Icebreaker 150 as worn.
Spare socks – Merino run sock.
Jacket
Mid layer/ insulation – In winter, I will already be wearing a mid-layer, either the Haglöfs or inov-8 as mentioned above. My additional insulation would be down and the Haglöfs Essensis an incredible all season product. It has warmth, very low weight and first-class goose down with 800 CUIN filling that it is DWR treated – the filling stays dry for up to 10,000 minutes with exposure to wet conditions.
Barrier shorts
*Barrier Shorts – Haglöfs make an excellent, light and packable barrier short for the extreme cold.
Haglöfs Gore-Tex Paclite
Waterproof jacket – The inov-8 Ultrashell Pro is an excellent very lightweight waterproof jacket but in winter I will usually take a heavier duty Gore-Tex Paclite L.I.M jacket by Haglöfs.
inov-8 Trailpant
Waterproof pants – inov-8 Trailpant waterproof and breathable designed for really cold, wet conditions.
Icebreaker liner gloves
Liner gloves – I would carry an additional pair of Icebreaker merino as mention above.
Sentinel by Mountain Equipment
Black Diamond waterproof over mitt
Outer gloves – I would typically carry two outer gloves as I suffer with cold hands, a warm Sentinel mitt by Mountain Equipment and a waterproof over mitt by Black Diamond.
Hat – Spare hat as above.
Buff – Spare as above.
Food and hydration – In winter, a main issue can be frozen bottles, so I carry one or two small Thermos flasks with coffee, sweet tea or hot chocolate. It can make a big difference to have this option. For snacks I will use energy bars, Kvikk Lunsj or similar. Always a good idea to plan a cafe stop on longer runs too!
Phone – I use an iPhone and I make sure I have mapping software such as Footpath and what3words for emergency use.
Petzl e-lite
Silva Trail Runner Free
Headtorch – A simple Petzl e-lite as a ‘just-in-case’ for all runs but if running at night I use a Silva.
Waterproof liner bag – (maybe 2 depending on needs) – Sea to Summitmake excellent lightweight bags to make sure all spare clothes etc remain dry.
Survival bivi
Bivvi – Terra Nova Survival bivi that is fully waterproof, breathable and has a simple drawcord closure. It packs away into a small stuff sack.
Hand and feet heat pads
Heat pads – An essential back-up for hands and feet by Nevercold or similar.
First aid – Lifesystems small emergency kit in waterproof protection.
Additional power.
Batteries/ Battery pack – Modern tech doesn’t last long in extreme cold so carrying a back-up battery can be a good idea, Goal Zero make good products.
*Hand Ice Studs – Isvidda Isdubb If you are running on the ice, it is important that you use ice hand studs both for your own and others’ safety. (These are often sold for those ice fishing.)
All items with * are only applicable based on the adventure, the type of terrain, weather conditions and personal experience. The inReach is a wonderful security blanket that is arguably ideal for any run/ adventure but if you have a phone (with power) at least you have one emergency back-up. However, phones don’t always have reception.
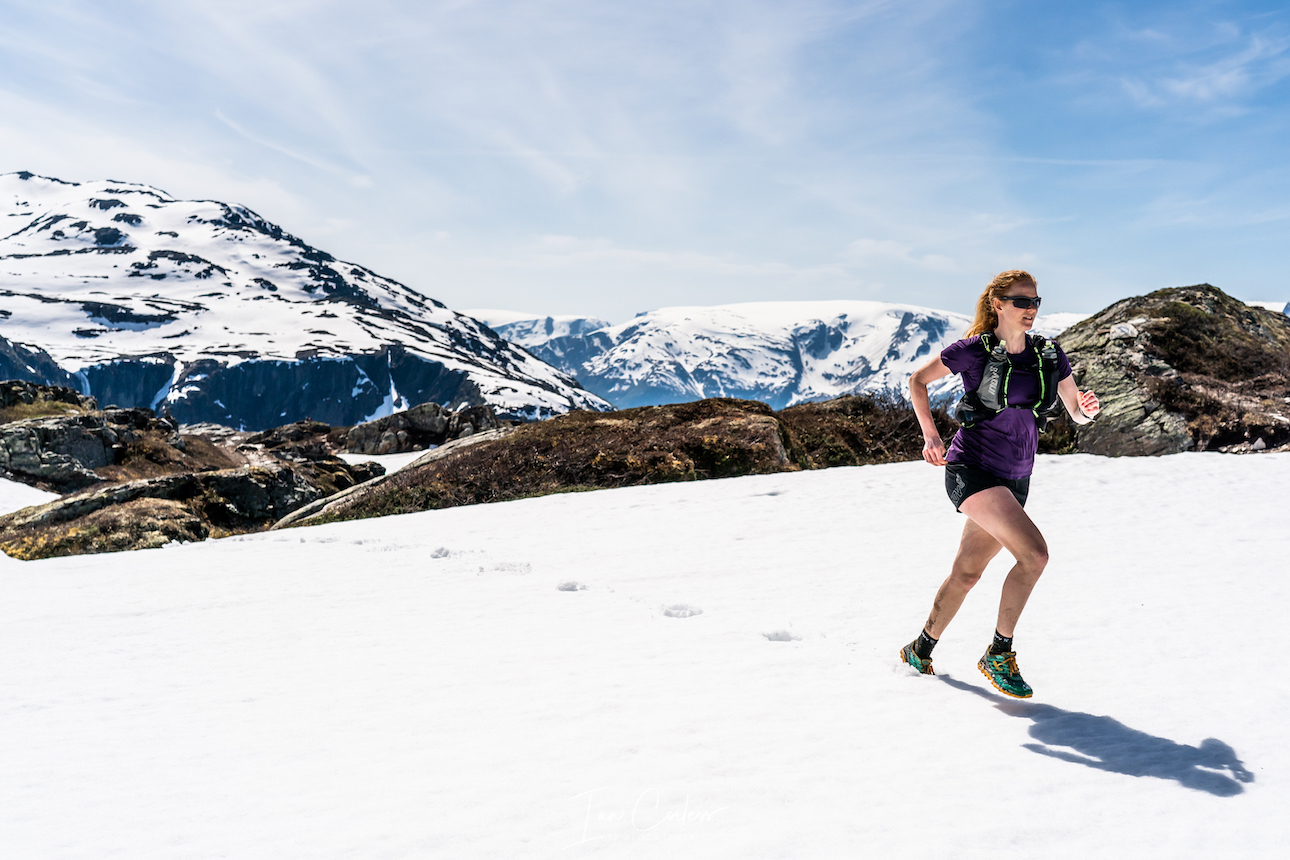
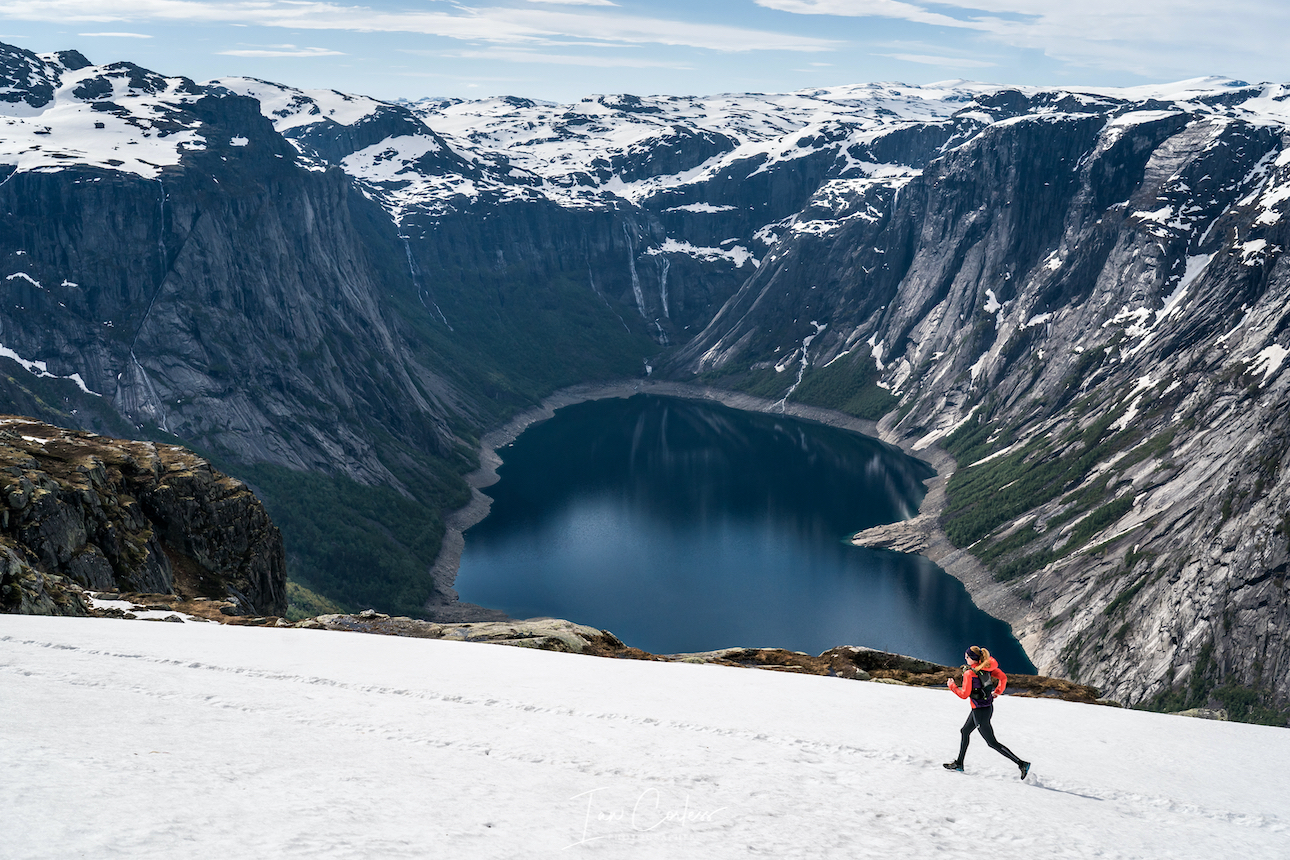
Running across a frozen lake, Norway.
LIGHTERPACK is a great online tool that helps you manage equipment and keep track of pack weight and contents, HEREis an example of what is listed above.
SUMMARY
Winter adventures are incredible and exhilarating. On a personal level, I find them more challenging and exciting than many Spring/ Summer trips due to the added complexity. However, that complexity can prove to be fatal.
Don’t compromise in winter. Be prepared.
The above list of equipment is designed to show you what is possible and how to make weight as minimal as possible without losing efficacy of the items. You could go away and purchase this list of items and you’d have all you need for winter running.
However, if you are like me, looking around, testing items and comparing is part of the fun… It’s actually what I have been doing for years, that is how this list came about.
So, do the research, make sure you not only have what you need for an adventure but make sure you have all the extras needed should a situation arise leaving you vulnerable.
Please support this website. I believe everyone deserves to read quality, independent and factual articles – that’s why this website is open to all. Free press has never been so vital. I hope I can keep providing independent articles with your help. Any contribution, however big or small, is so valuable to help finance regular content. Please support me on Patreon HERE.
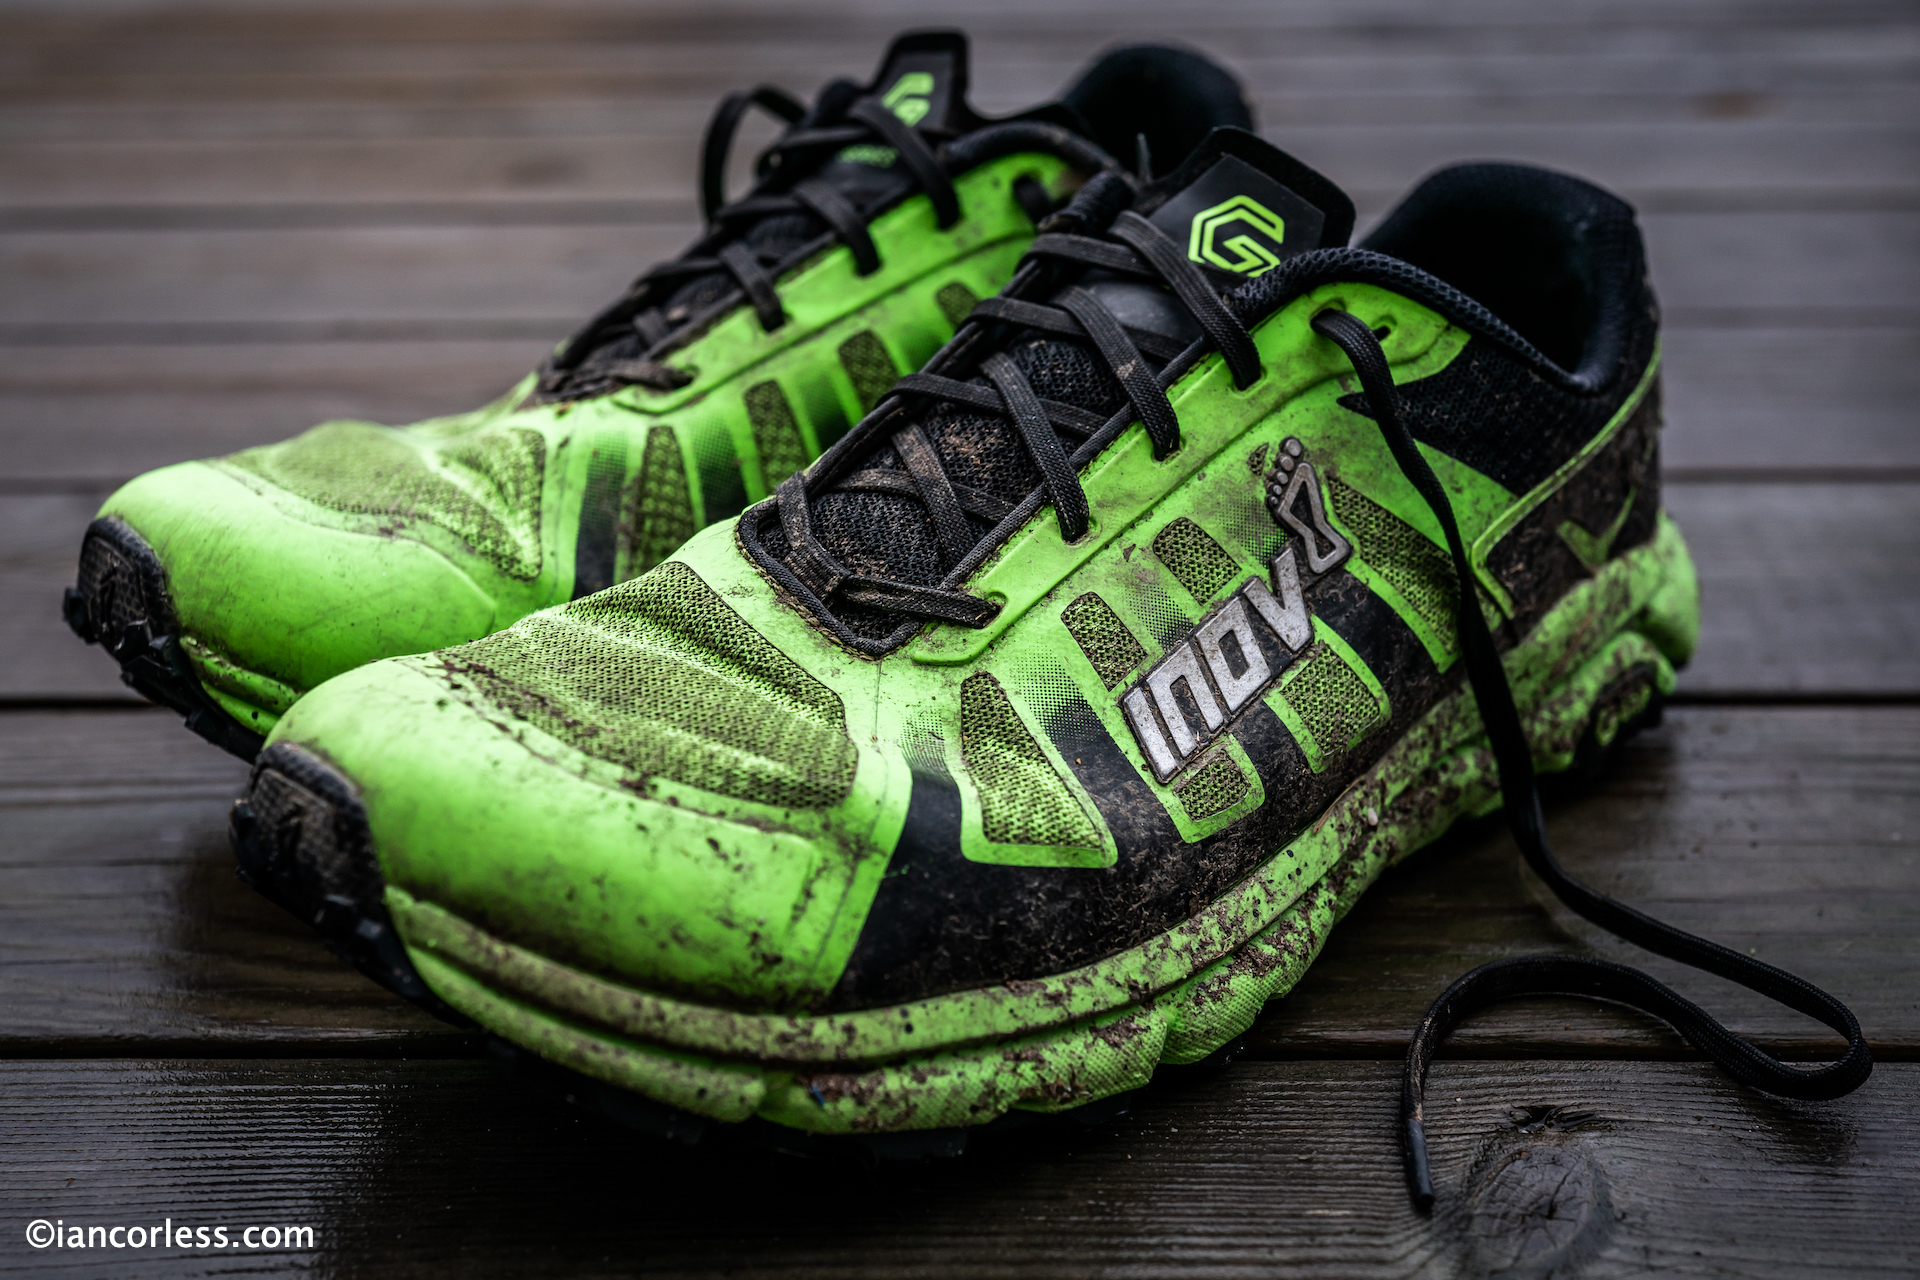
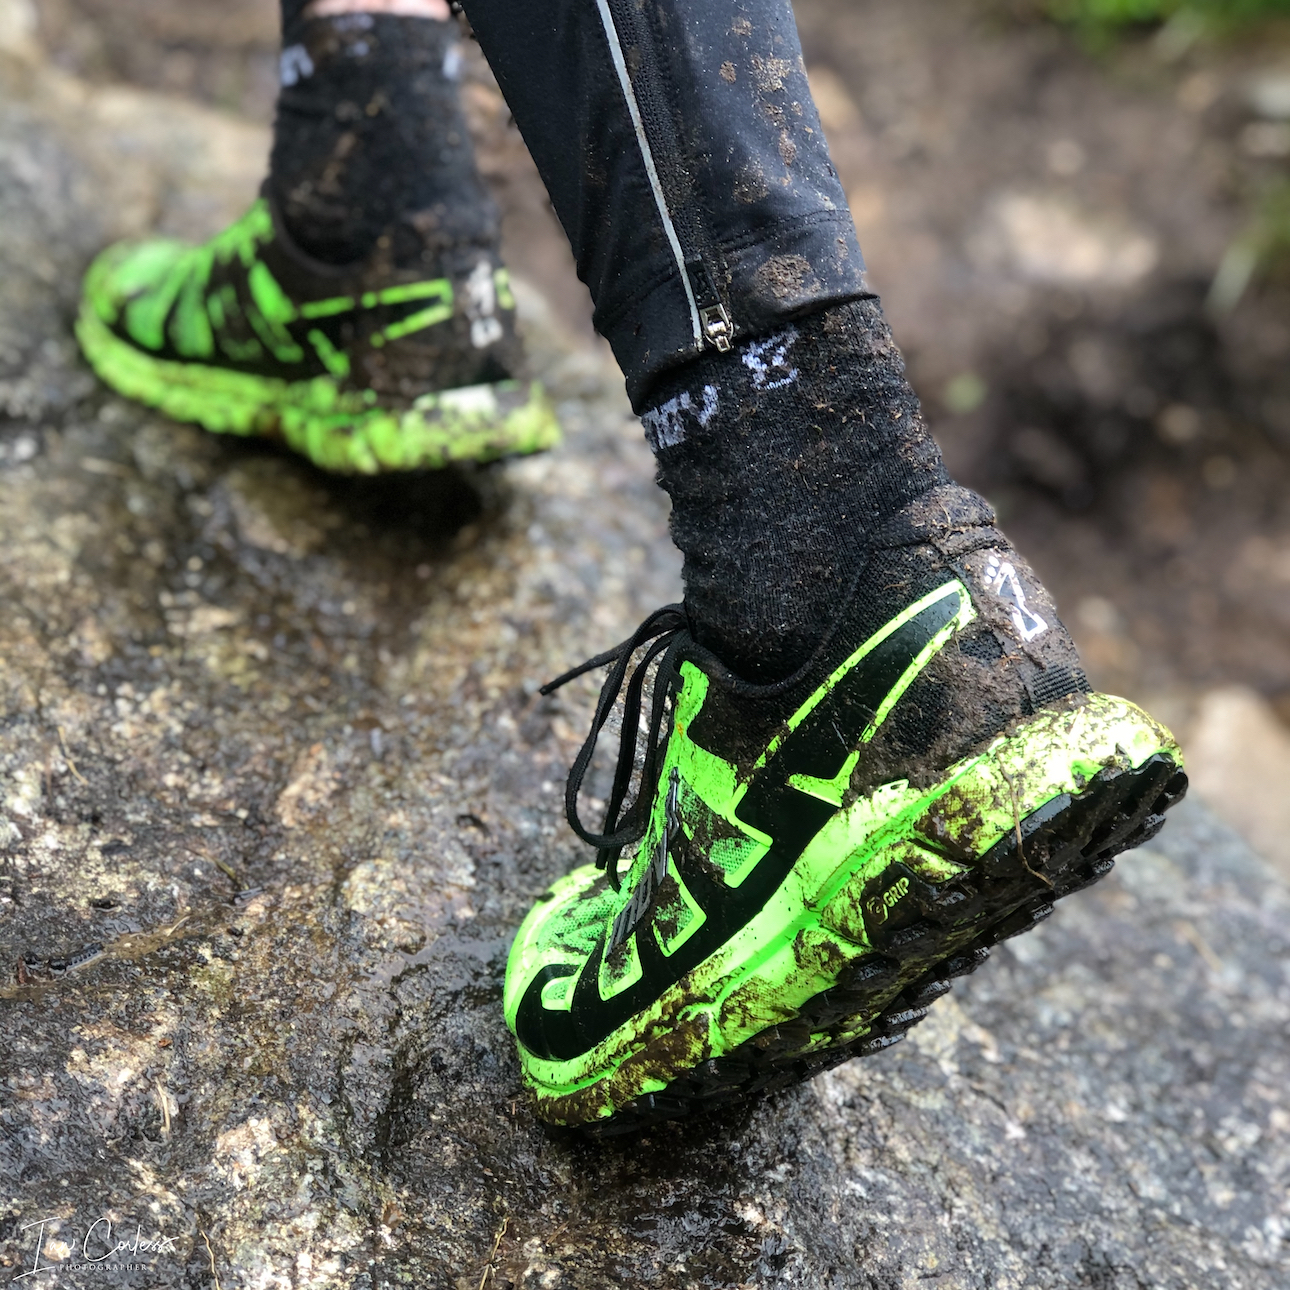
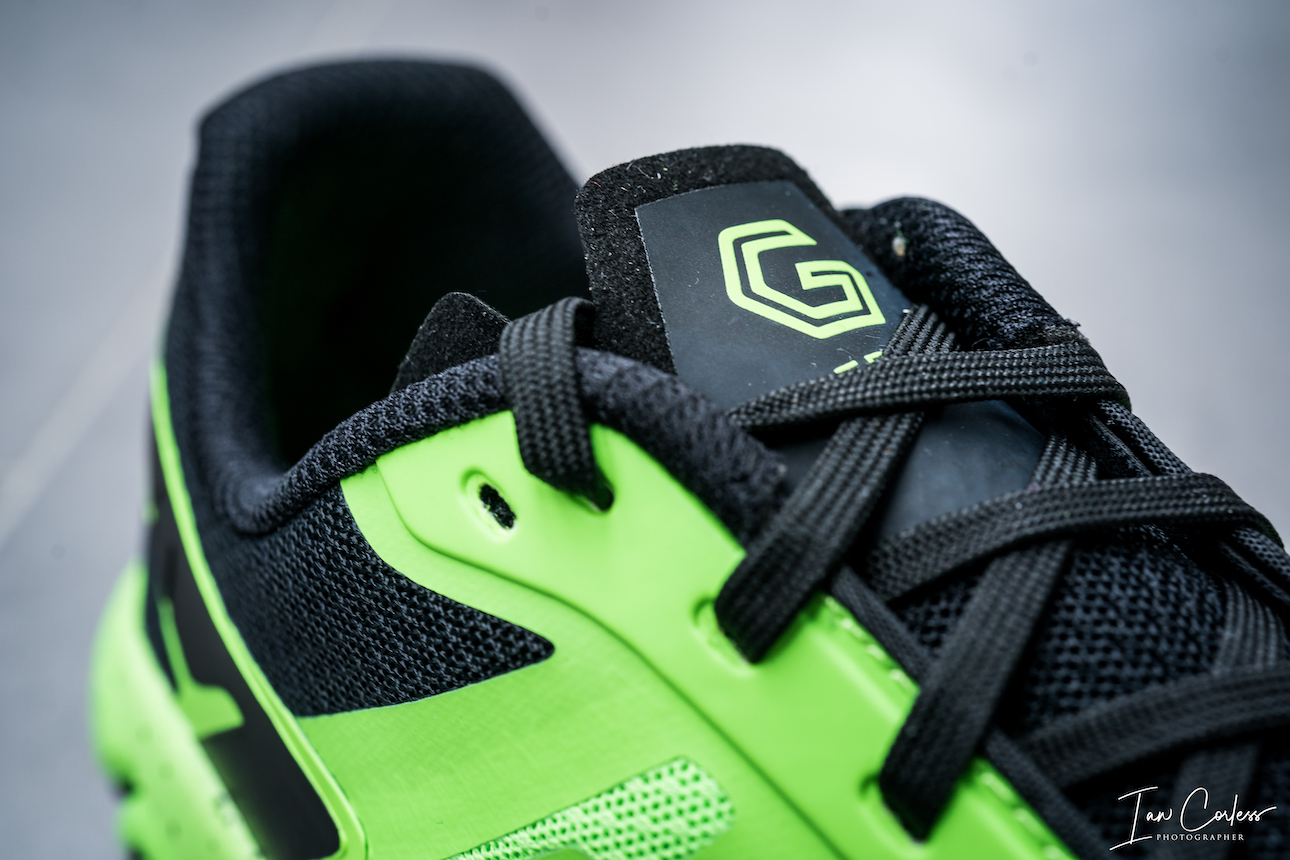
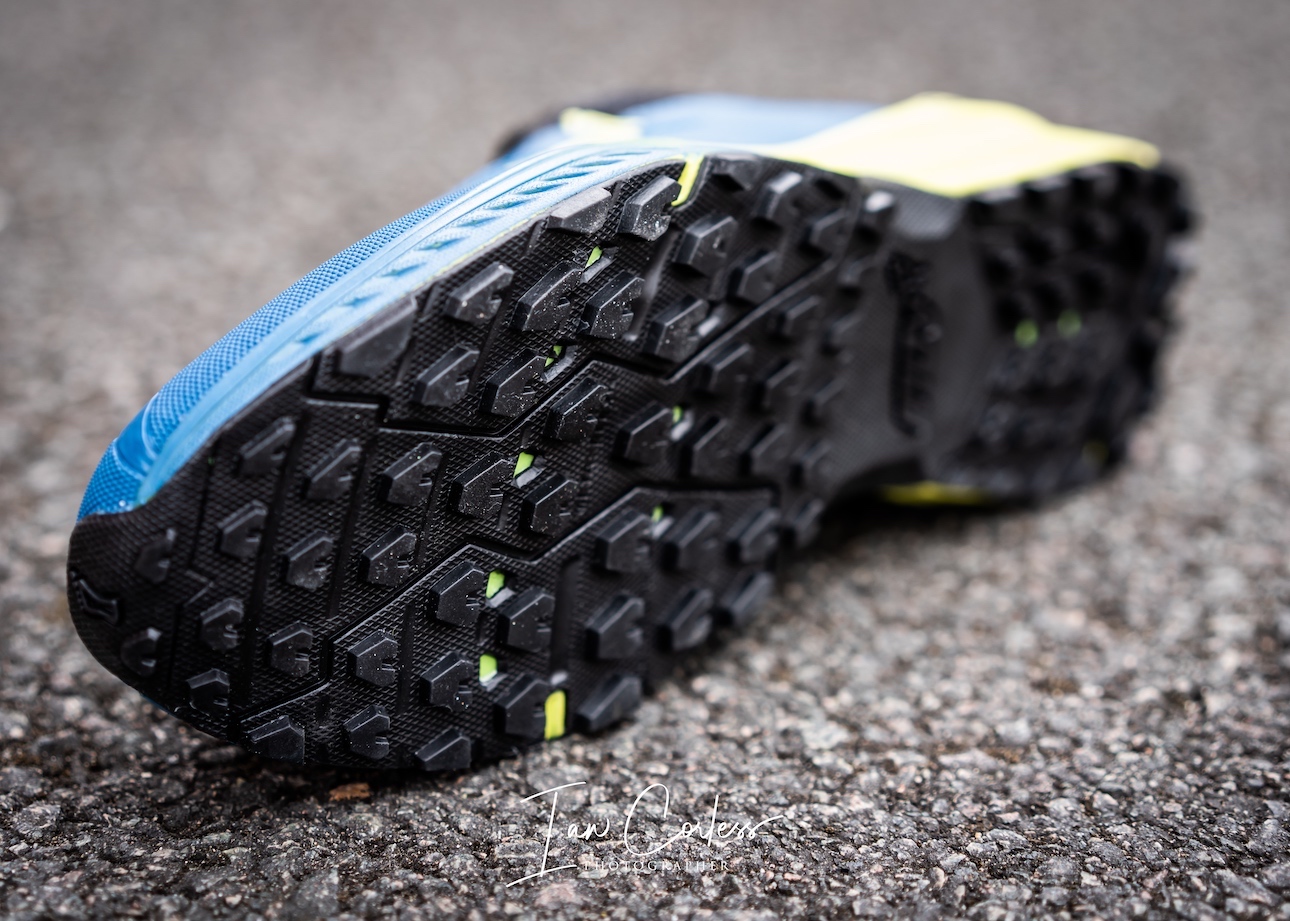
The name says it all, MUDCLAW, if you are looking for a shoe to handle soft, deep and slippery mud, then look no further. The inov-8 MUDCLAW G260 is for you…
BUT, before we go into what makes the MUDCLAW great, let’s have some perspective. This shoe needs perspective.
I often like to compare choosing a run shoe to cars. Going on a long drive with many hours and miles, you will no doubt want something a little more plush, relaxed and comfortable – a family car. Going off-road with mixed terrain, then maybe a 4×4. If going for spin on a summer’s day, feeling the wind in your air and the need for some speed and feel; maybe a sports car? And if you are going to go as fast as possible, want to stick to the ground and comprise comfort for speed and grip, then a Formula 1 is for you.
The inov-8 MUDCLAW G260 is a Formula 1 of run shoes.
If you are looking for a jack of all trades – the Mudclaw is not for you!
If you are looking for comfort for hours and hours – the Mudclaw is not for you!
If you are looking for insane grip in sloppy mud with an almost barefoot feel for the ground – the Mudclaw is for you!
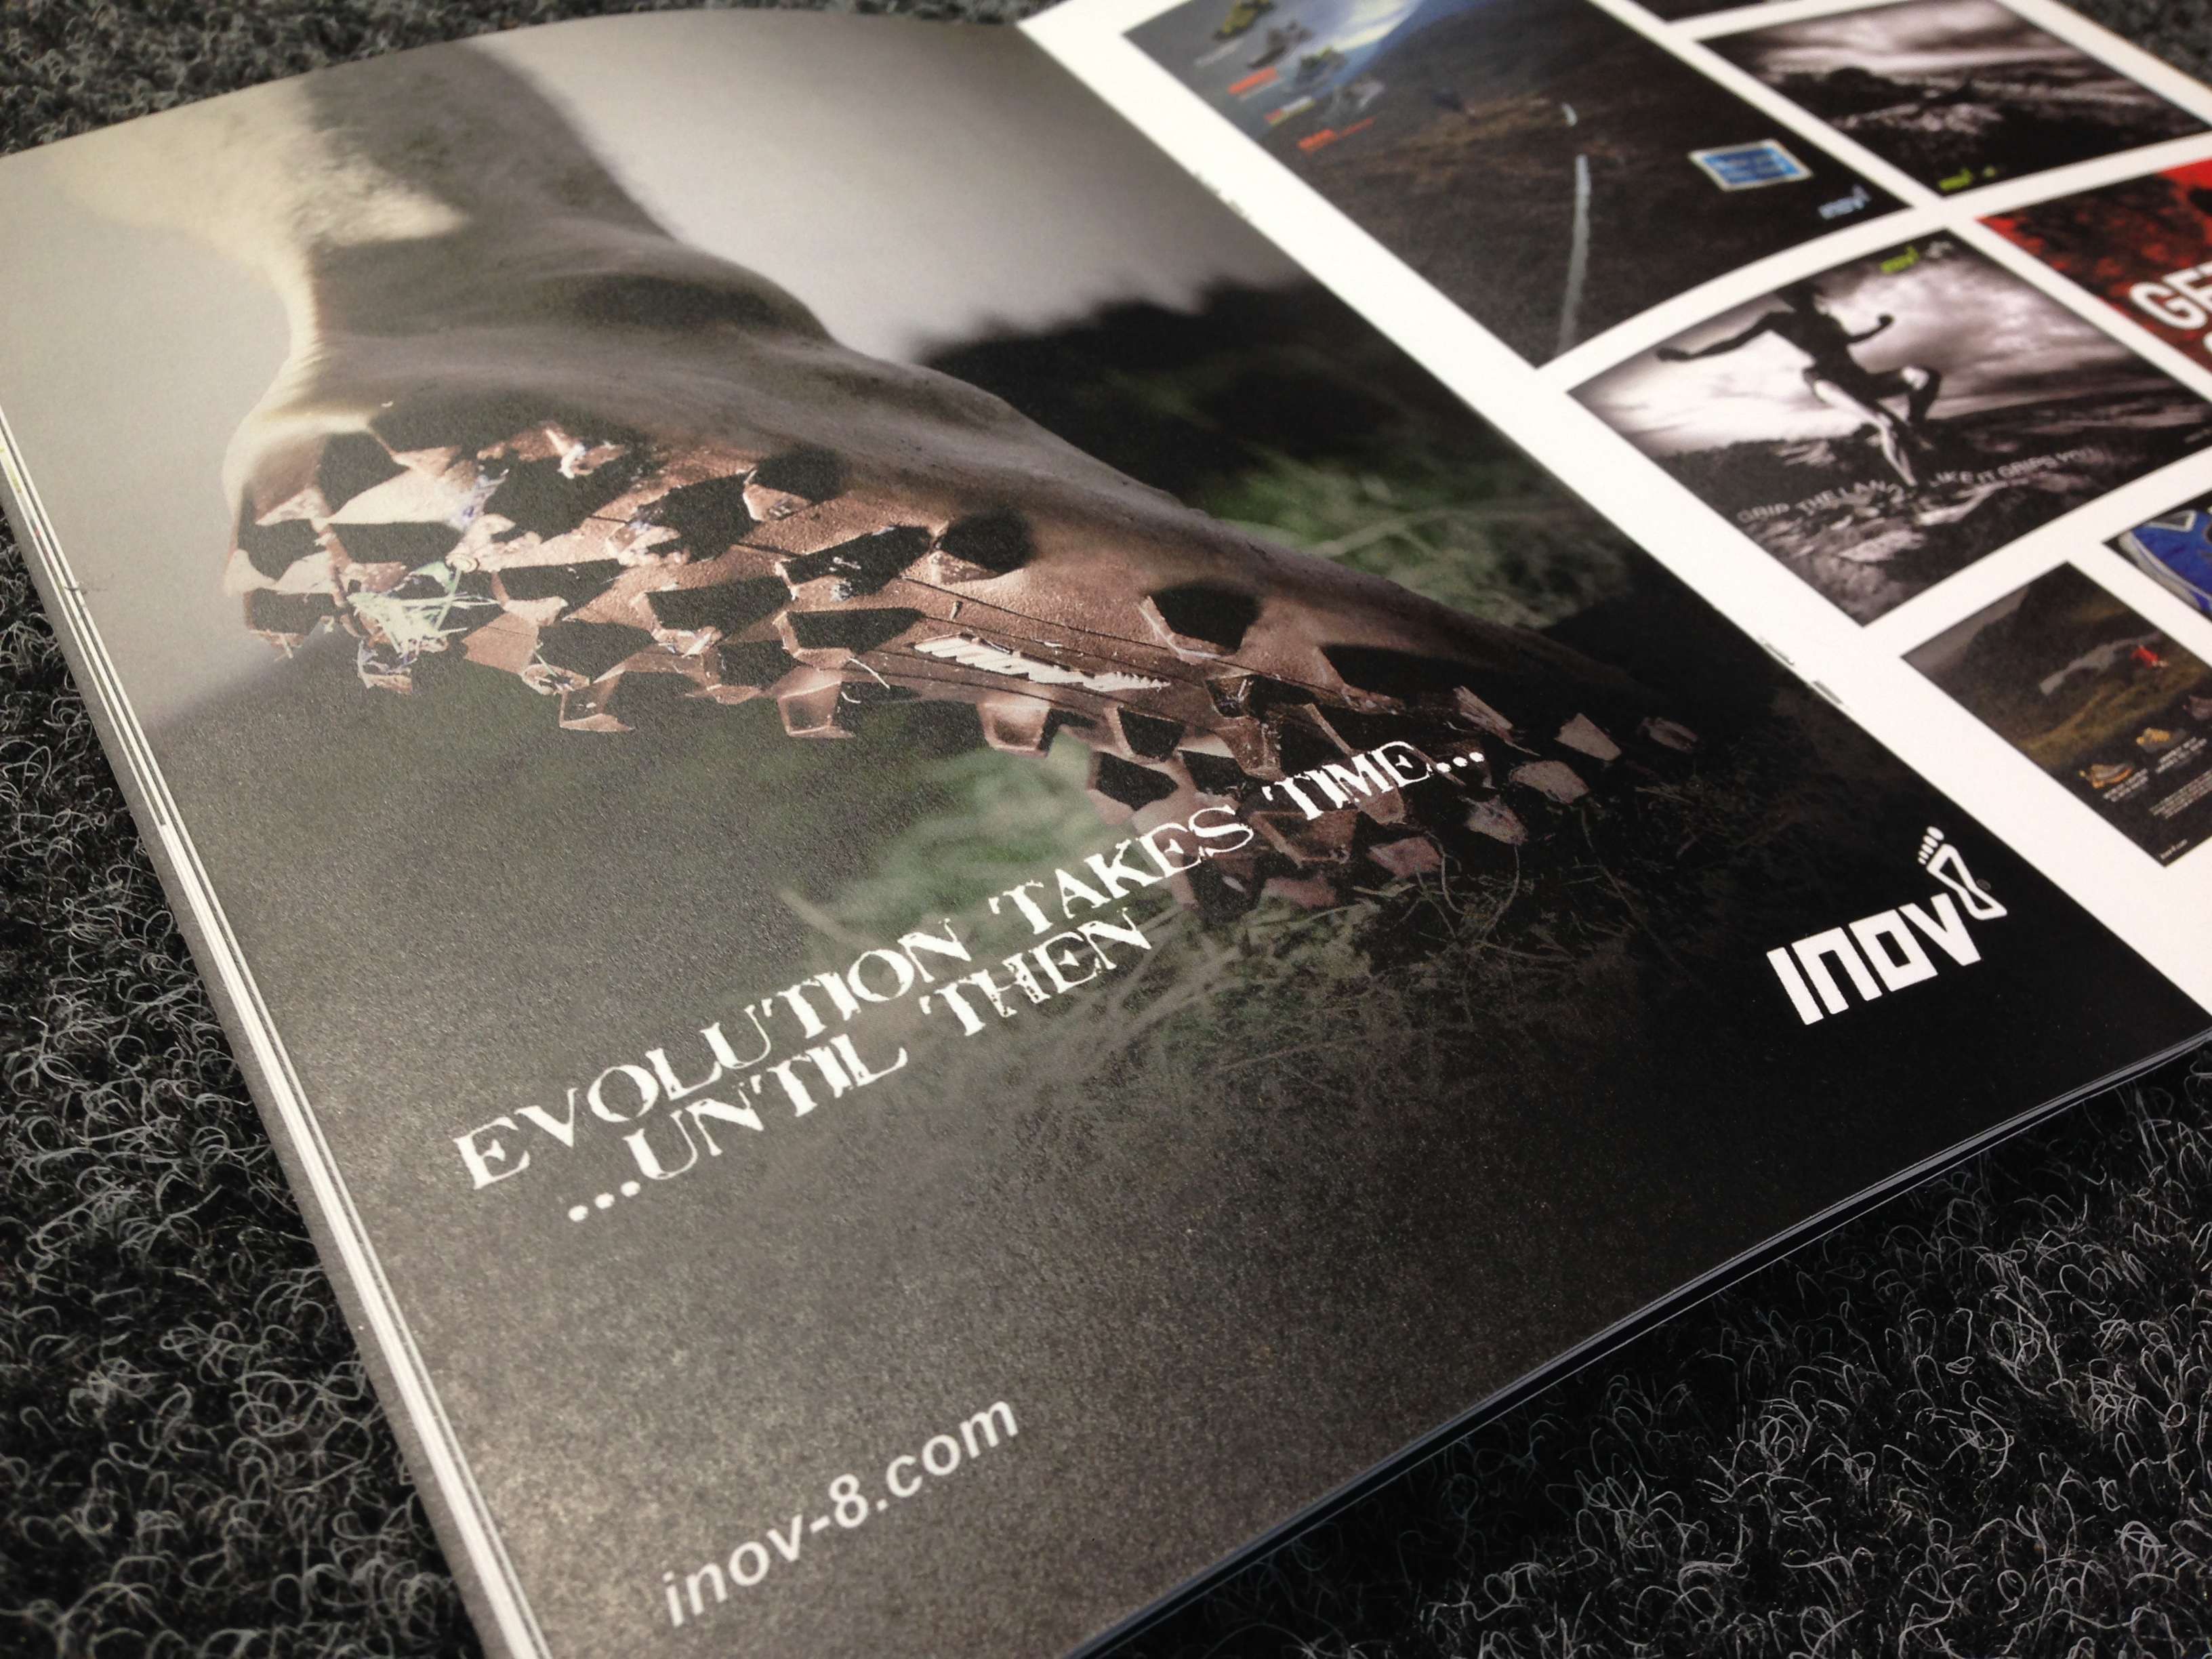
The Mudclaw is a stripped back Formula 1 shoe for trails, fells and OCR racing. Running in the shoe reminds me of the early inov-8 posters showing a shoe tread on a foot.
inov-8 advert that really echoes the feel of the Mudclaw
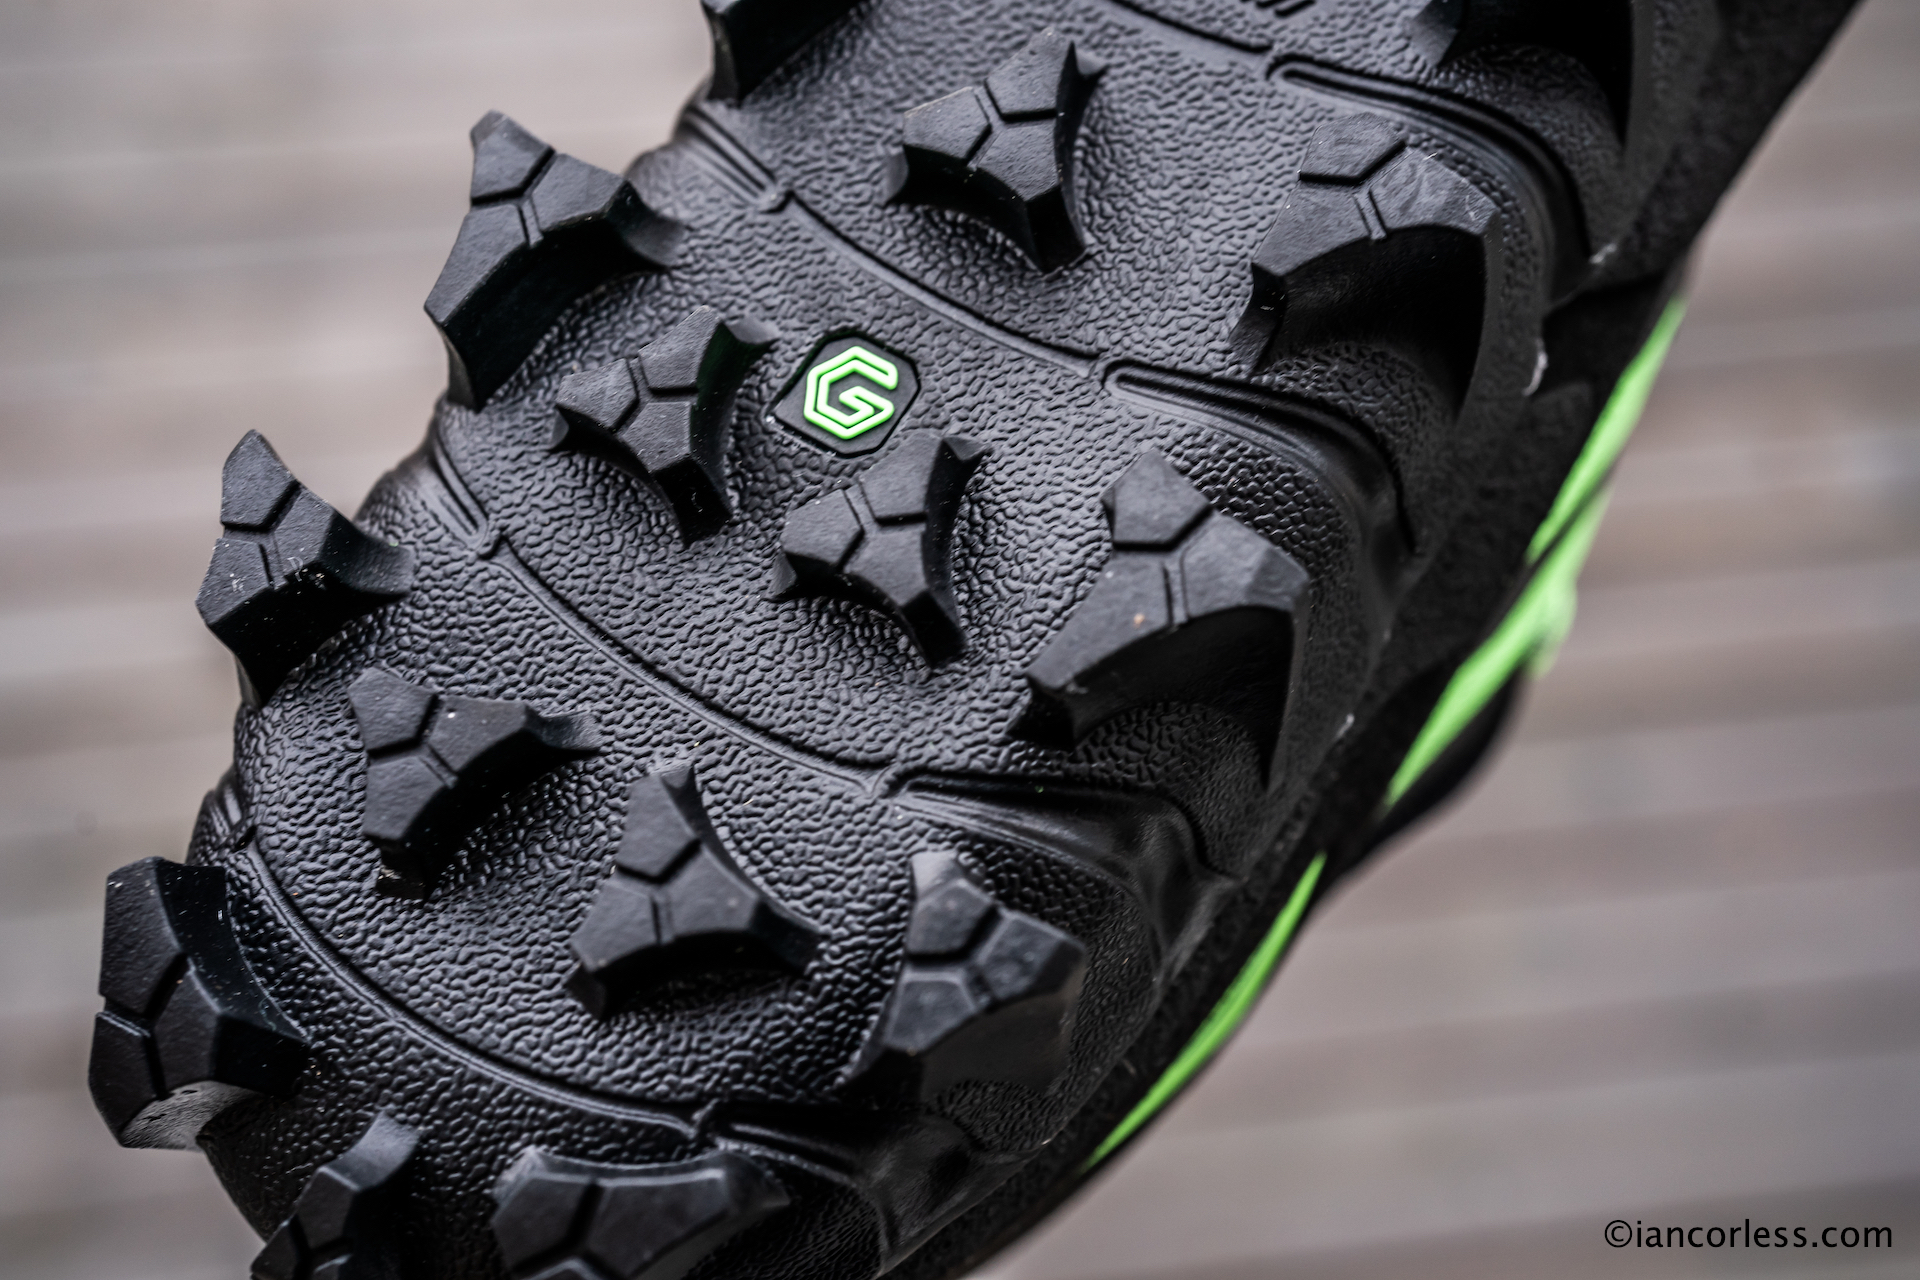
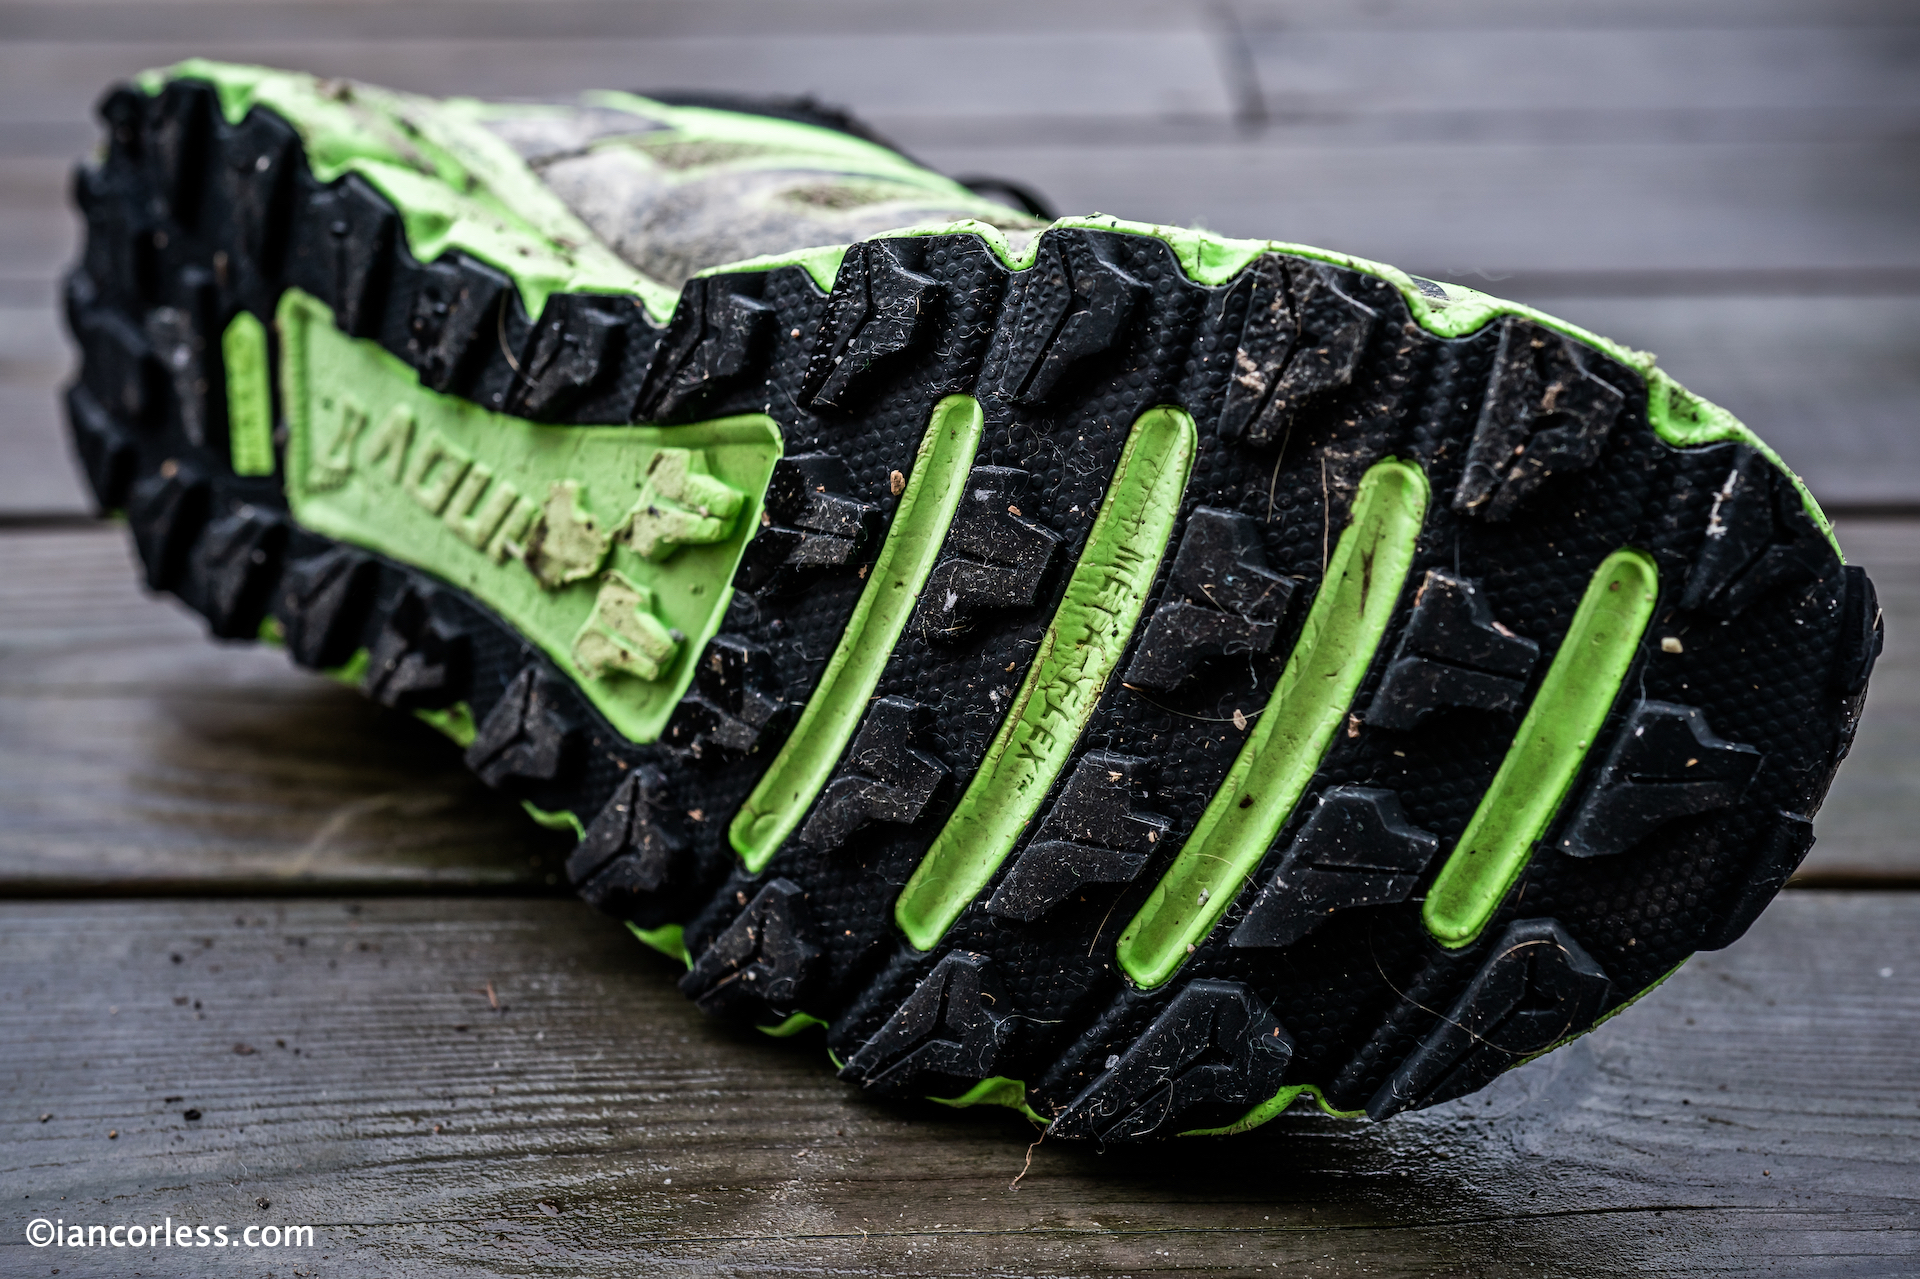
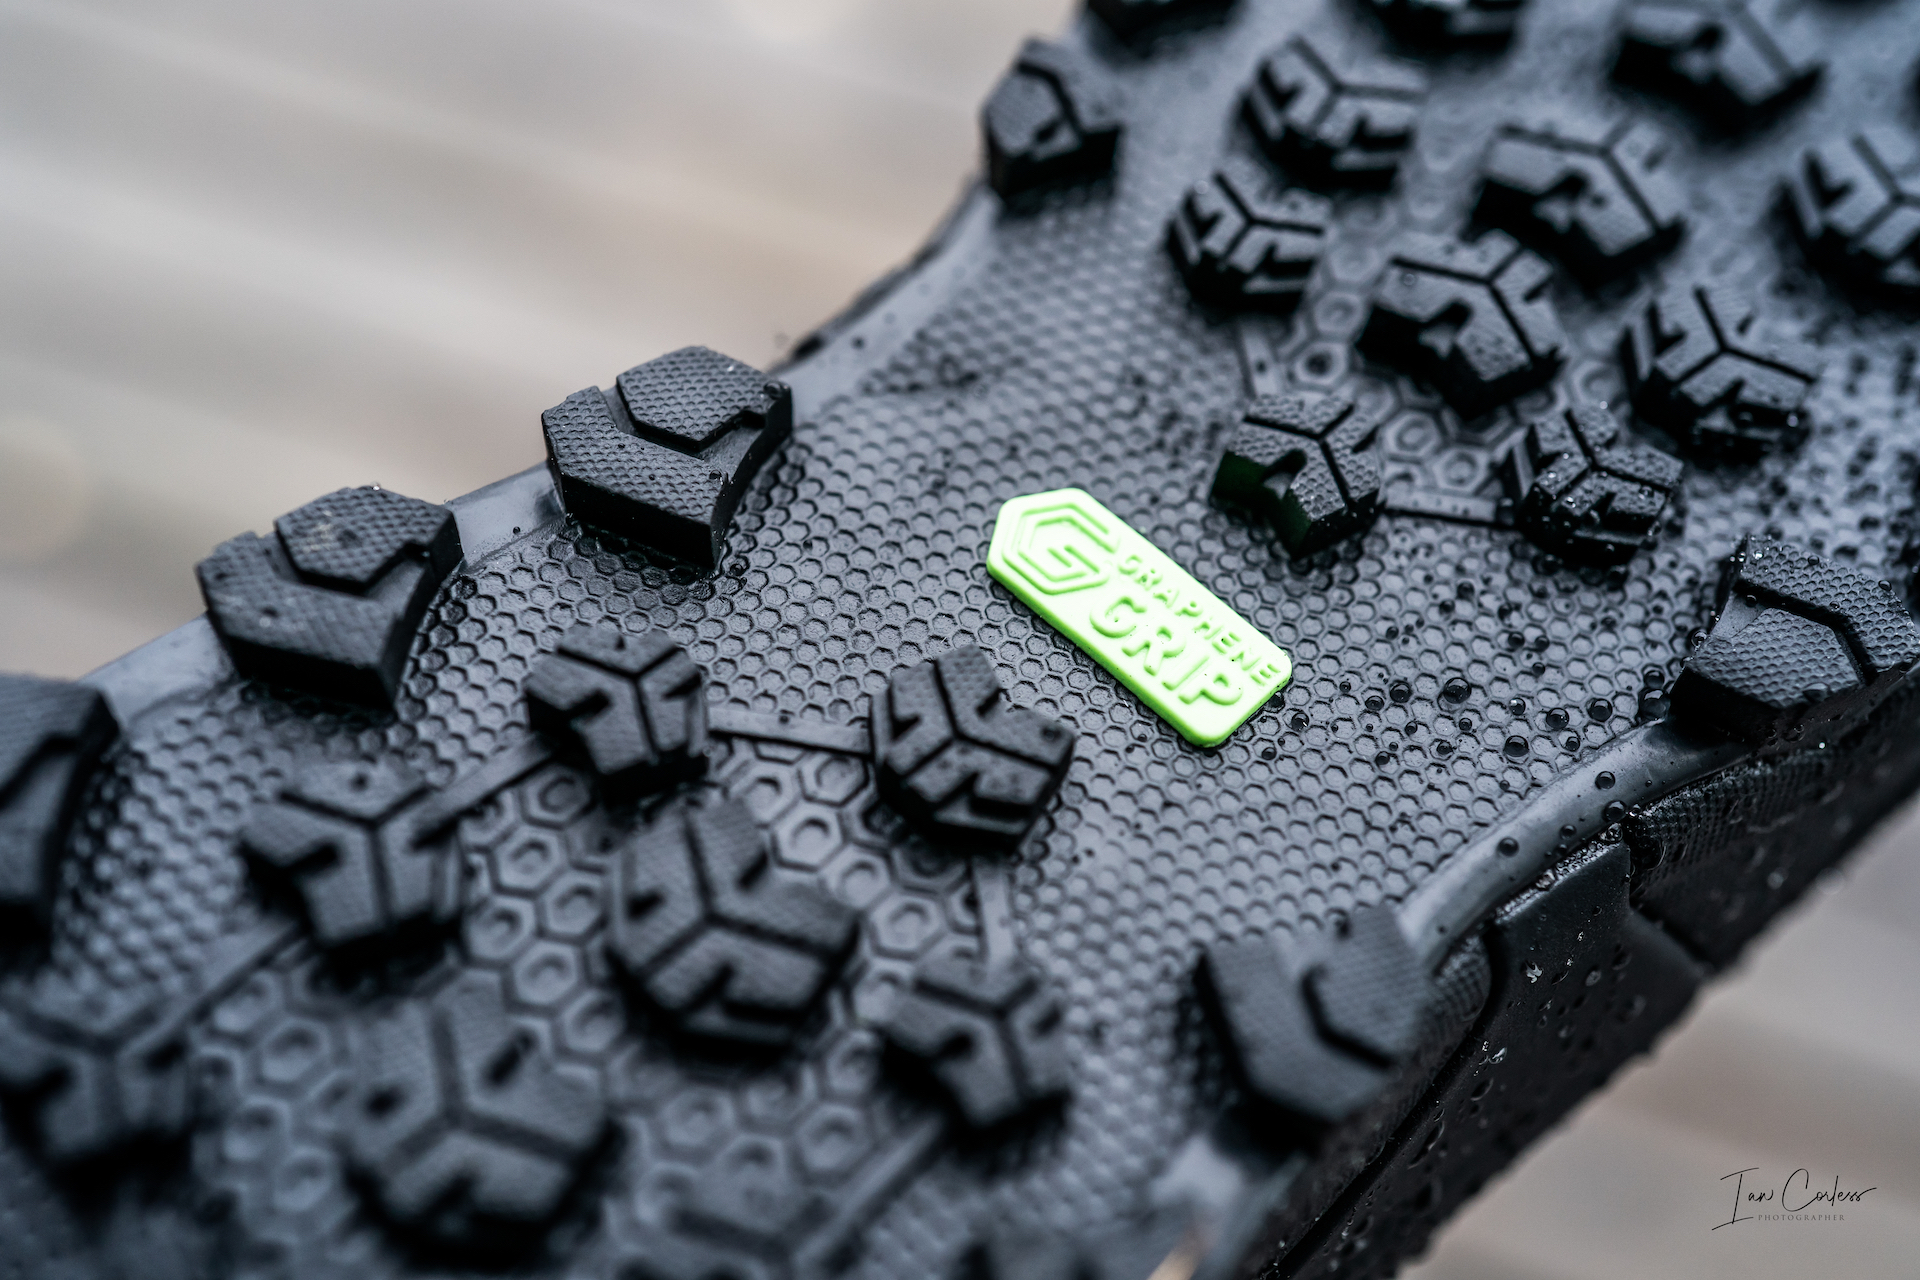
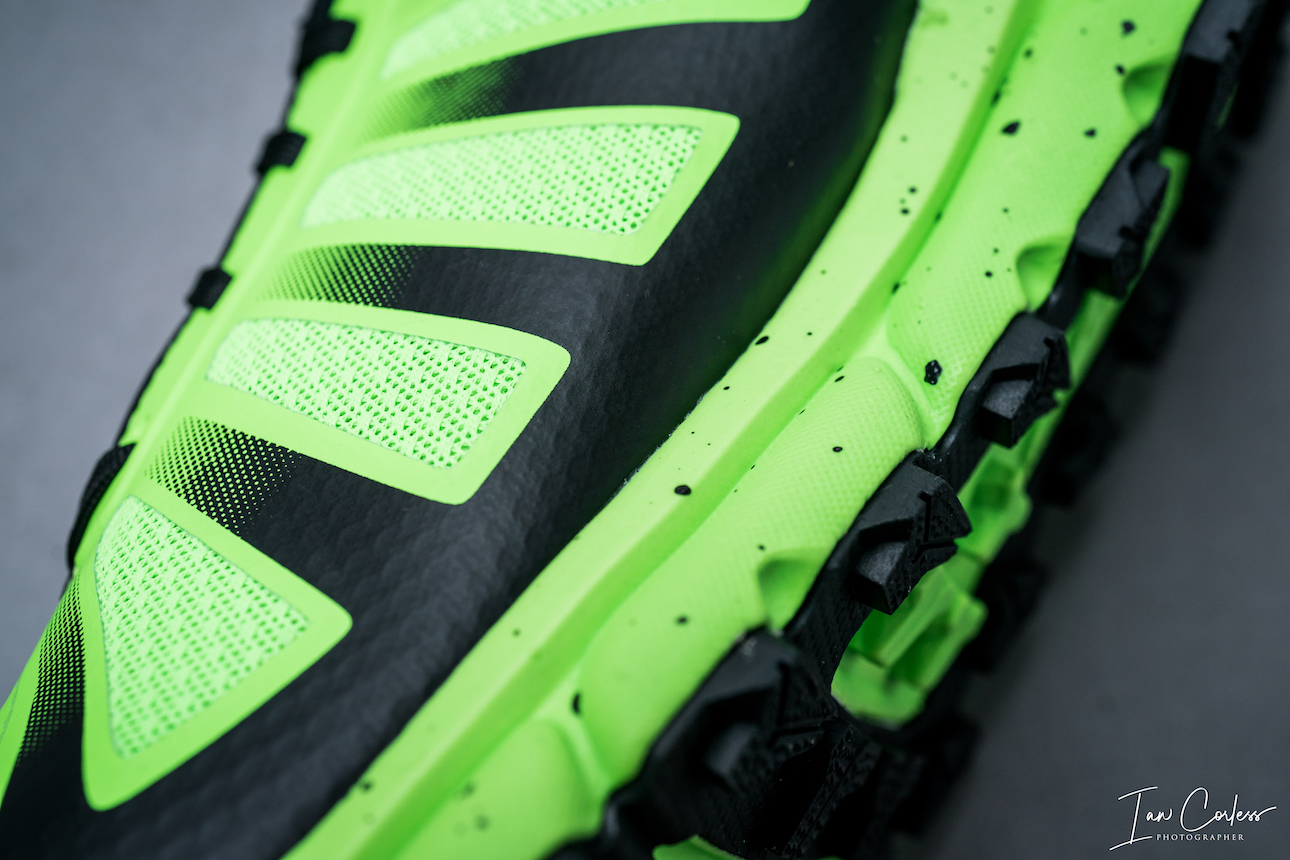
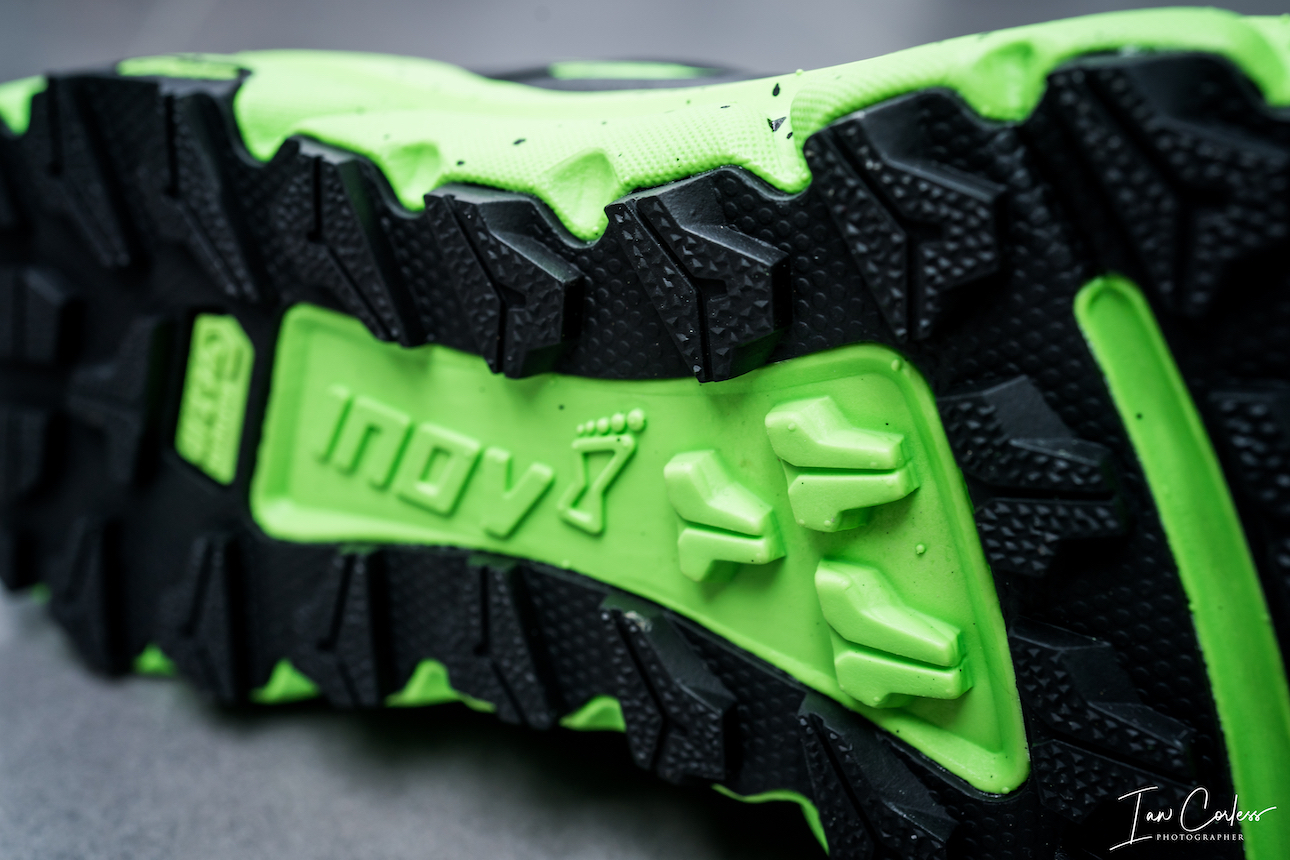
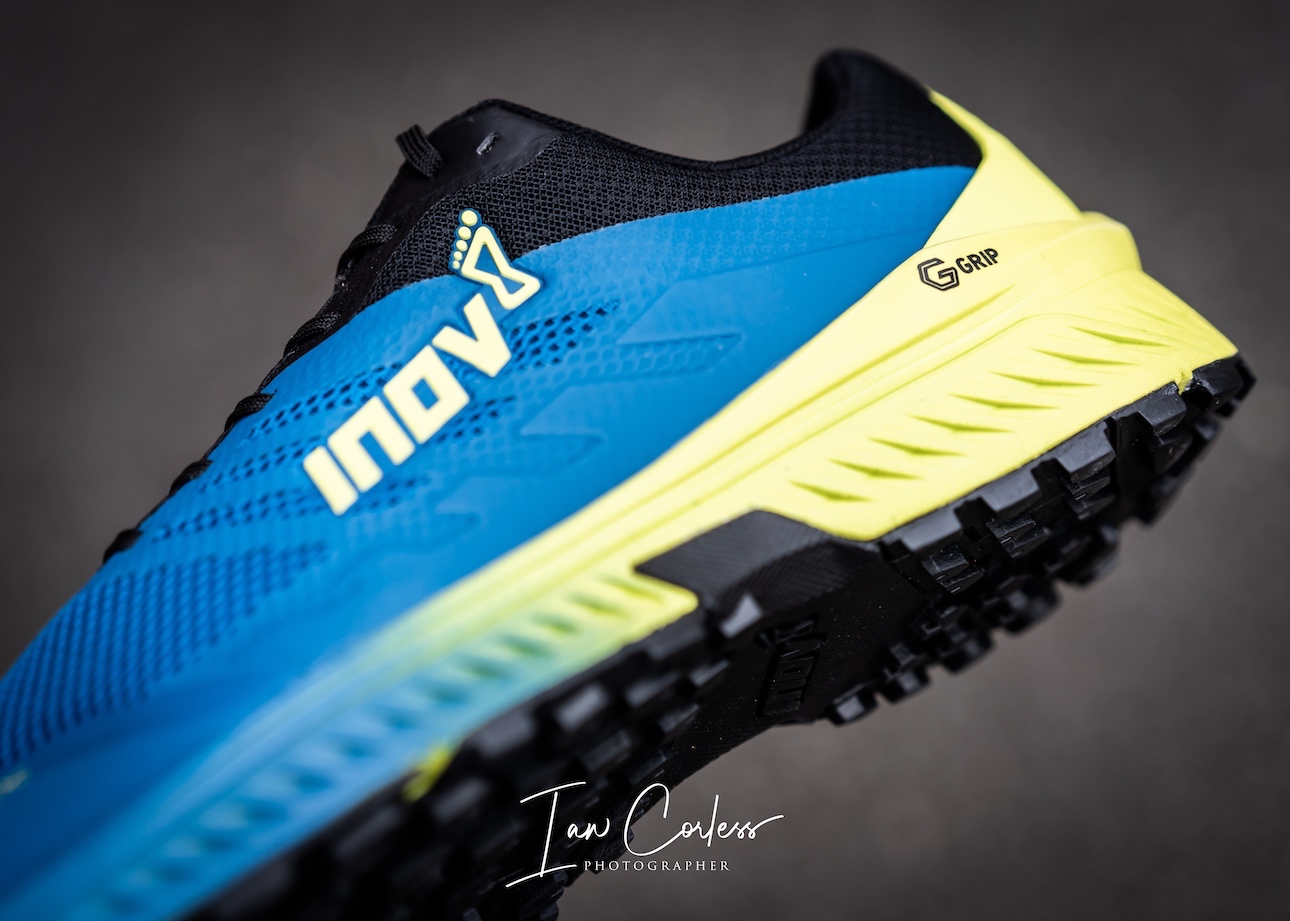
The 8mm Graphene lugs are akin to football boots and hark back to what elevated inov-8 to a world-stage many years ago. Grip, grip and more grip. There is currently no other shoe on the market that has soft-ground grip that compares with the Mudclaw G260. One shoe comes close, the iRock3 by VJ Sport, but even the 6mm Butyl of the VJ does not claw and grip like the G260.
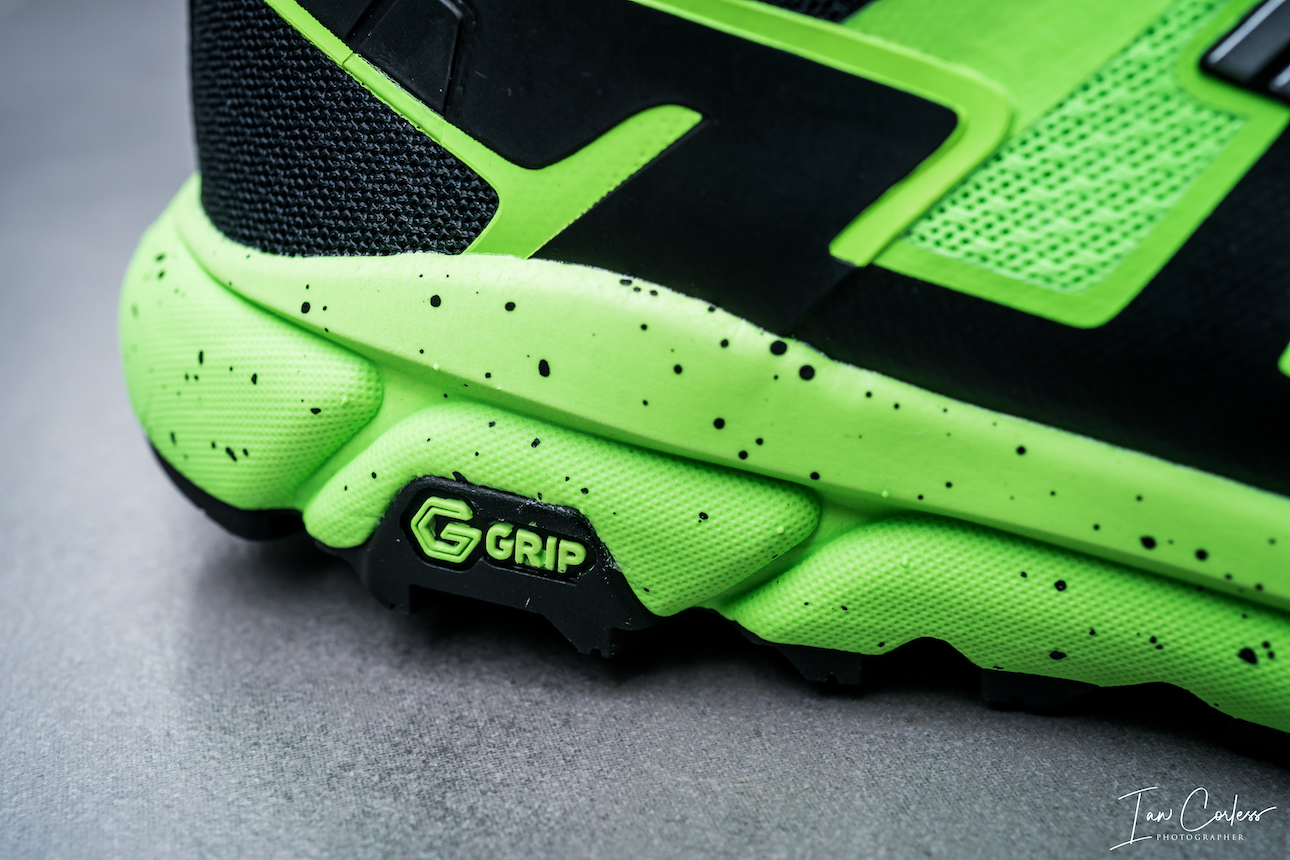
The Graphene outsole (renowned sticky rubber infused with Graphene) is now reaching many of the shoes in the inov-8 line-up and the recent success of the Terraultra G270 (here) has really turned heads. The G260 takes that Graphene and adds it to crazy lugs. So, is the grip between the G270 and the G260 comparable? Yes and no. The G270 grips incredibly on dry and wet trail, on rocks (wet or dry) but is compromised in mud as the lugs are only 4mm. With the G260, the grip in mud is incredible but with less overall contact points, the grip on wet rock is not as secure as the G270.
Quite simply, the G260 is for mud and lots of it!
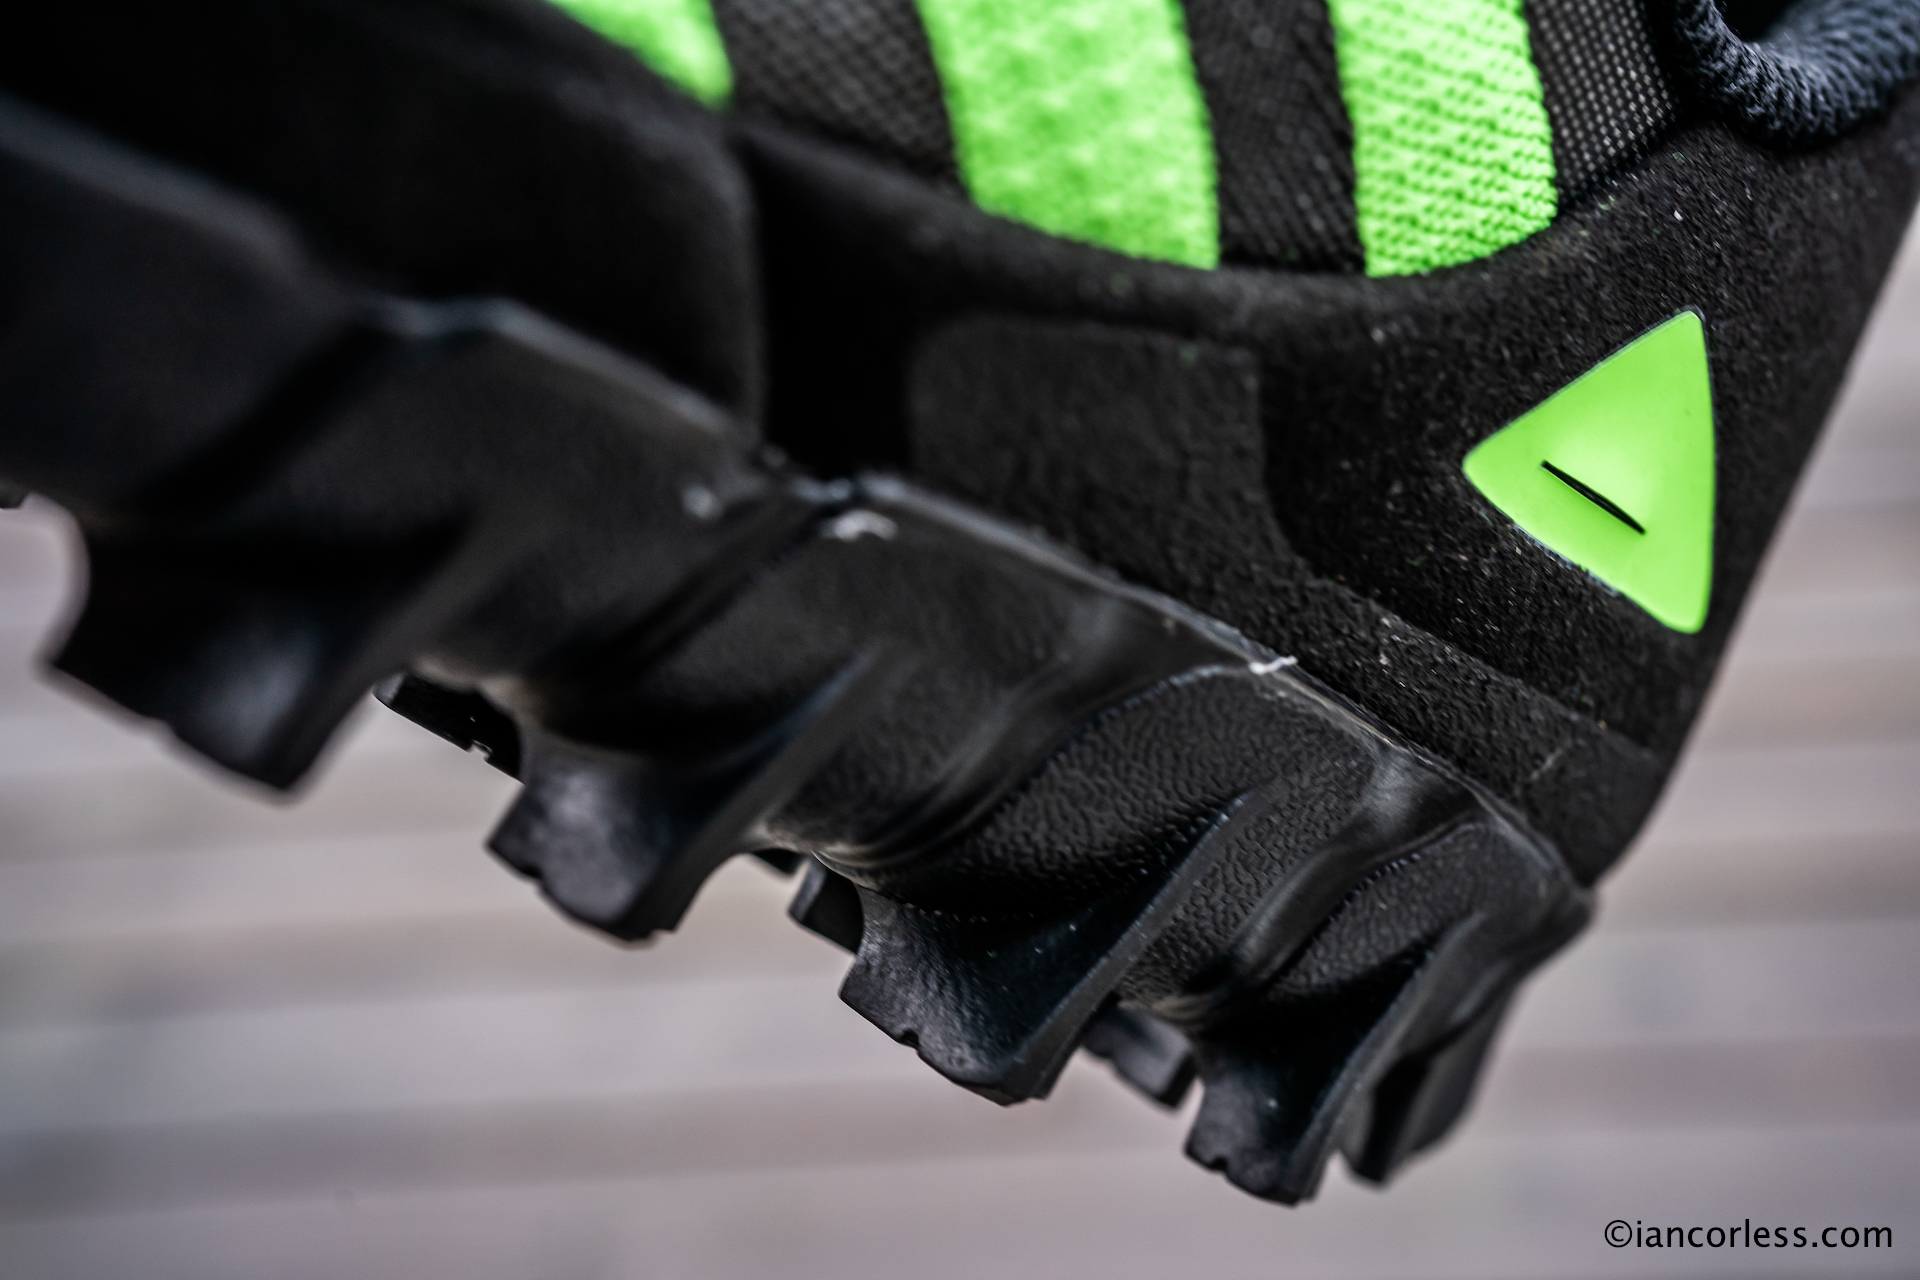
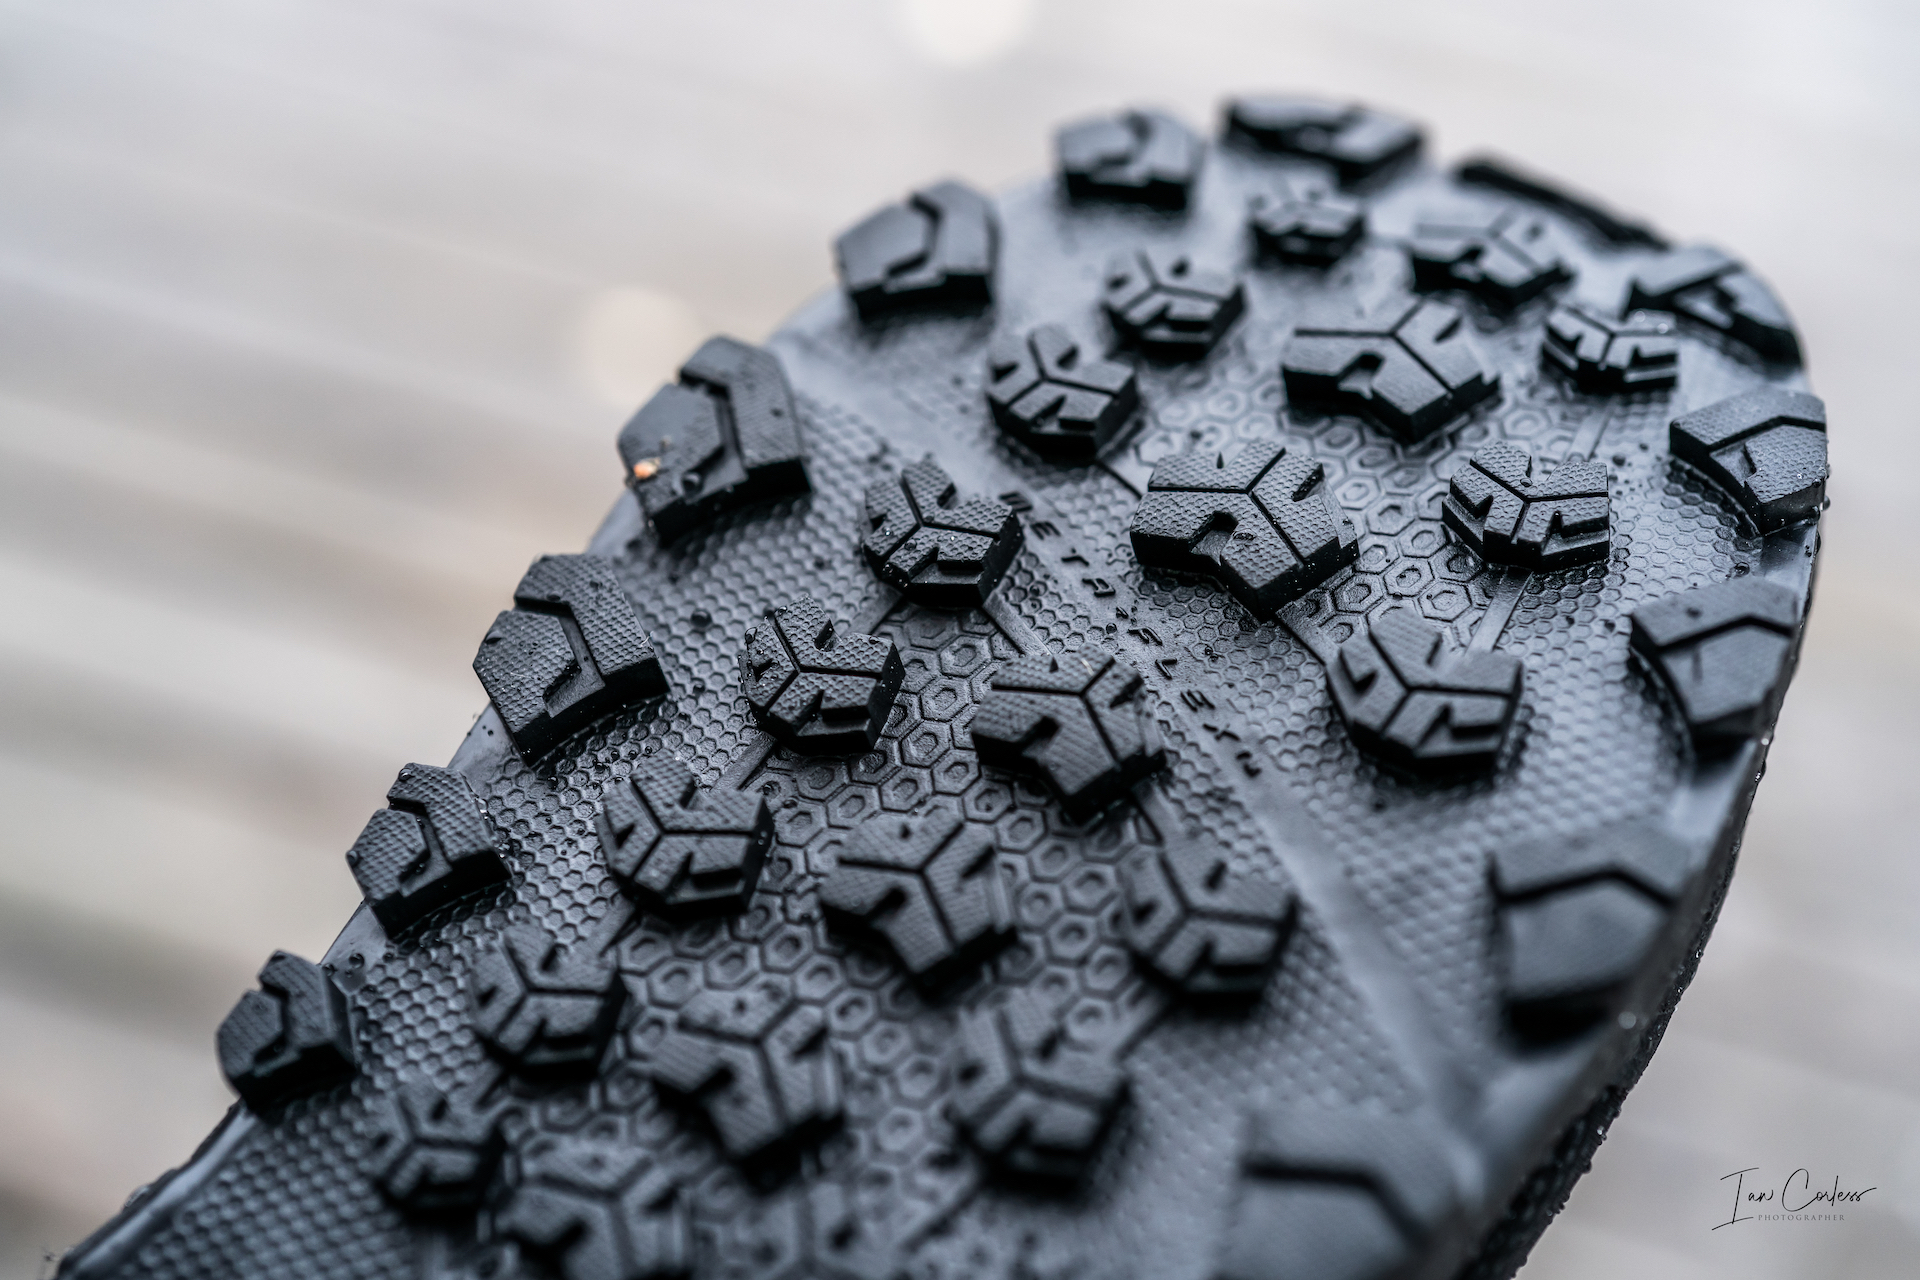
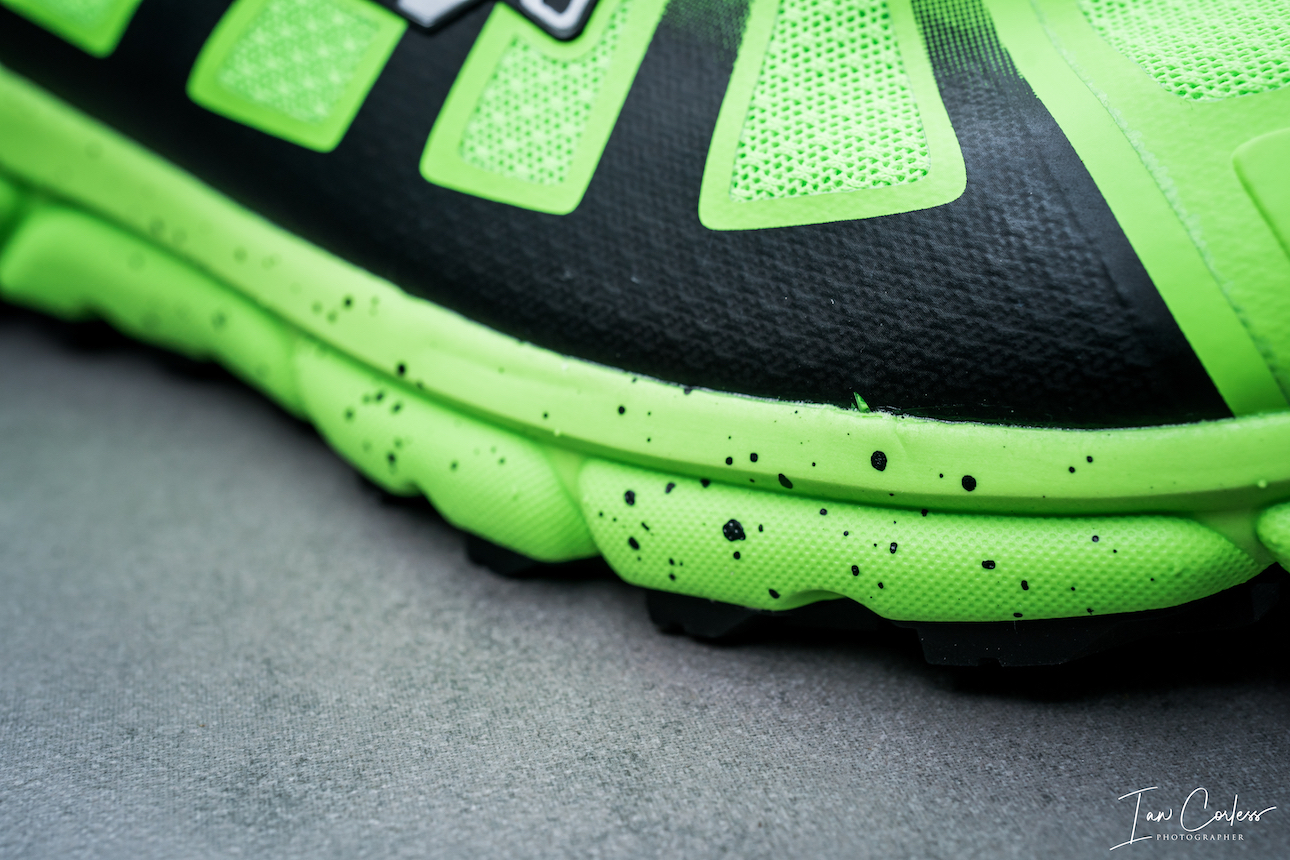
When running off-road, particularly in mud, feel for the ground is important and inov-8 know this, they have therefore reduced the cushioning in the G260 to a mere 4.5mm at the front and 8.5mm at the rear. It’s almost like running barefoot. The principal is, the mud and soft-ground provides the cushioning and any additional cushioning would only compromise feel and responsiveness.
The 4mm drop, 6mm footbed and minimal Meta-Plate is ideal and in-keeping for the Mudclaw’s intentions; low to the ground and increased feel for the ground.
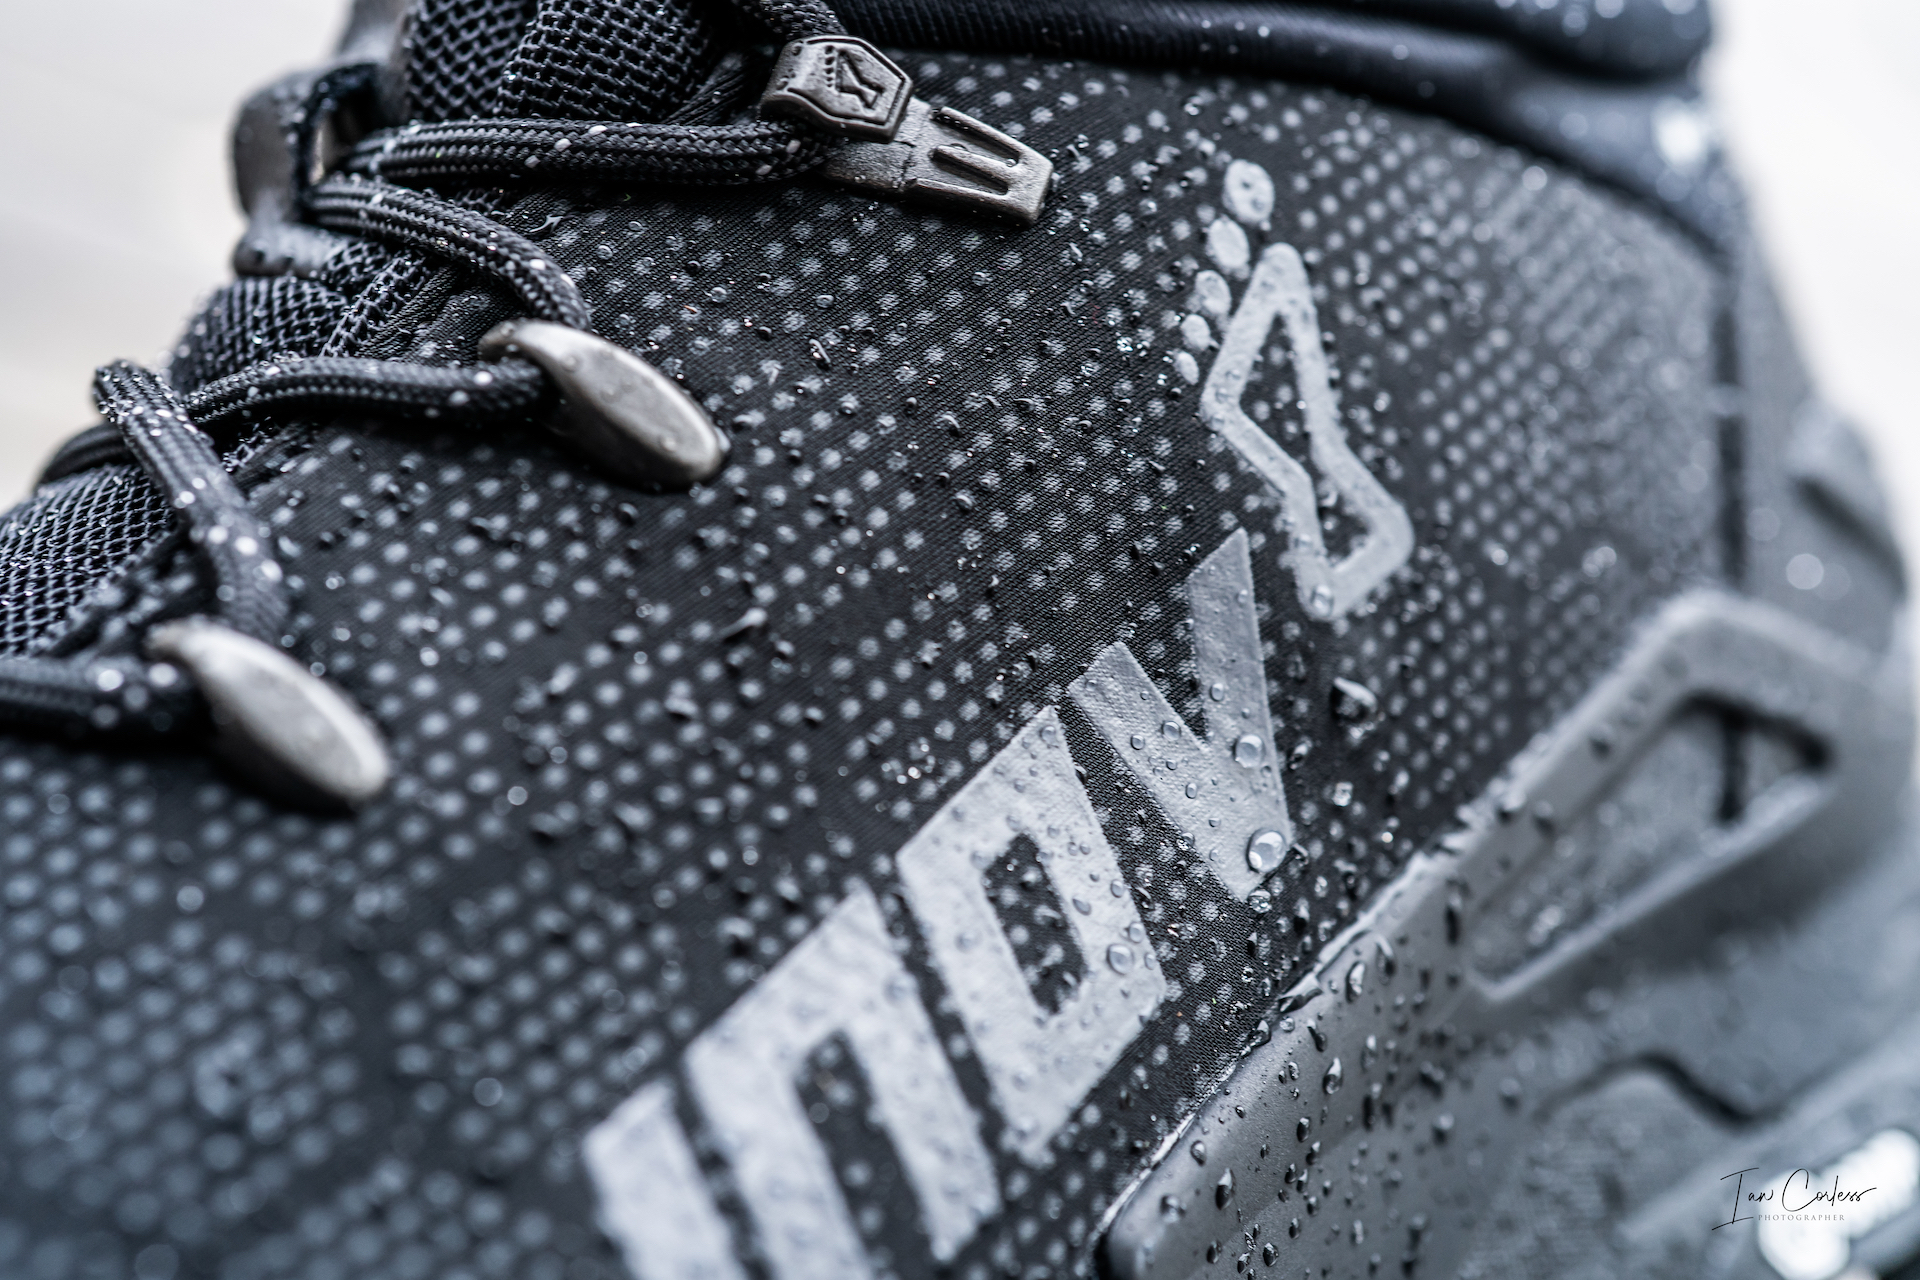
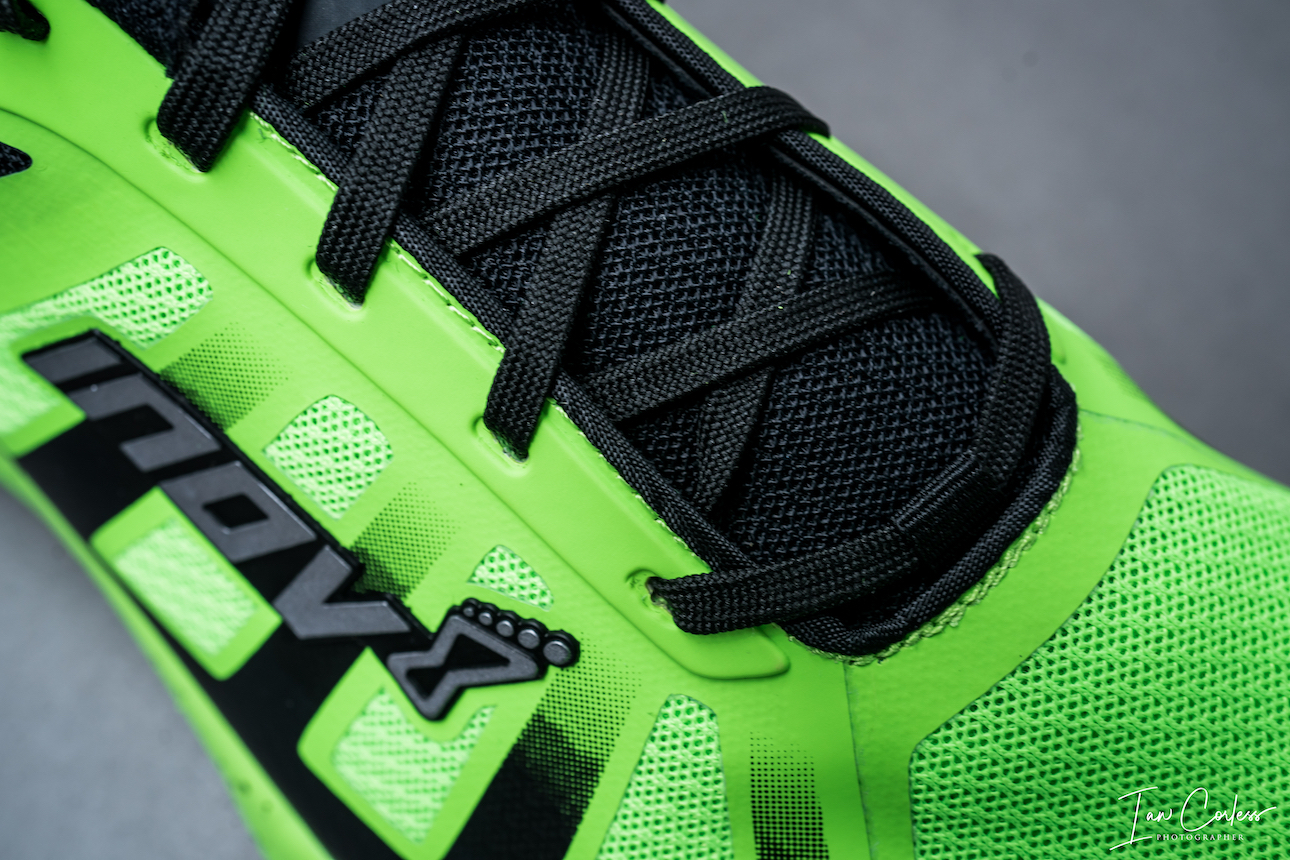
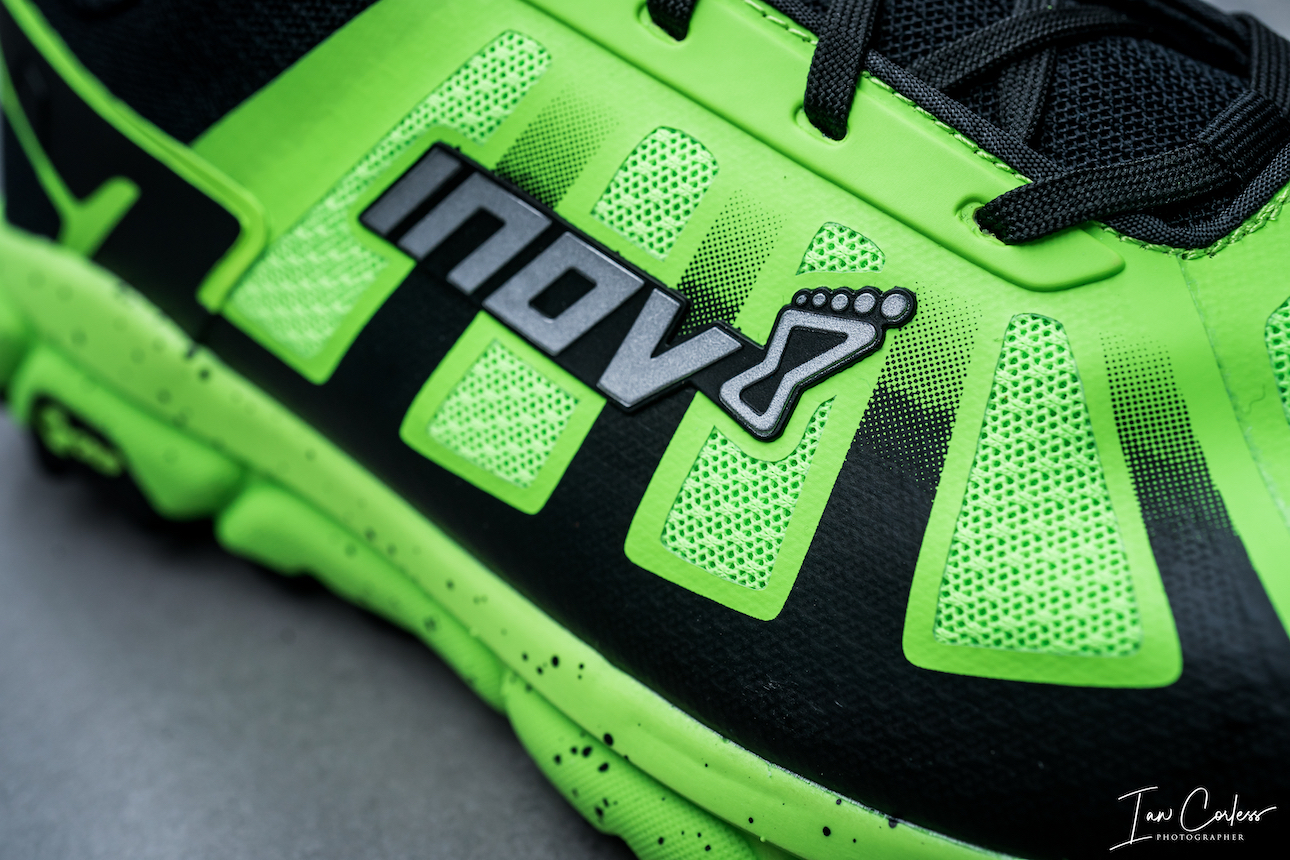
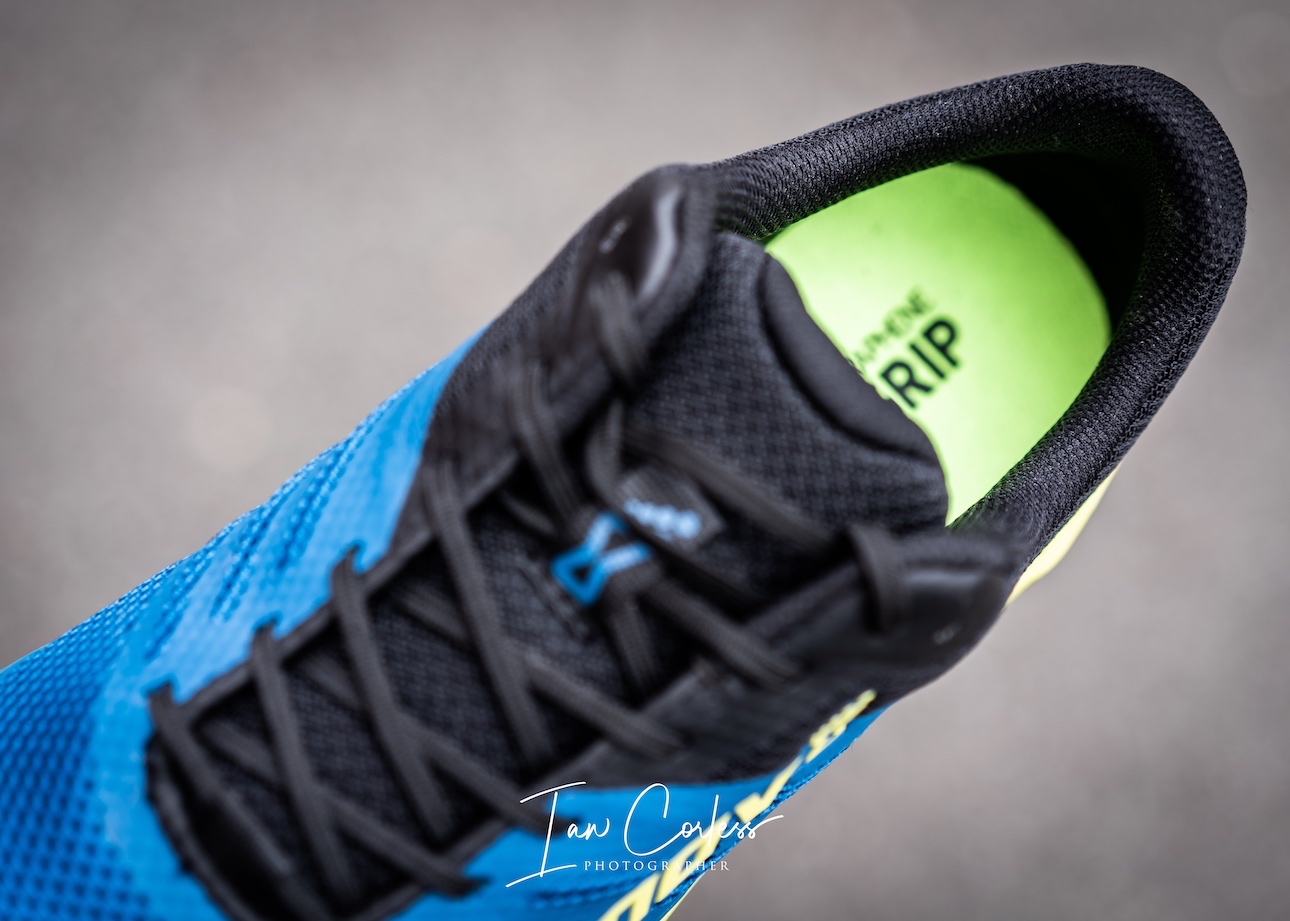
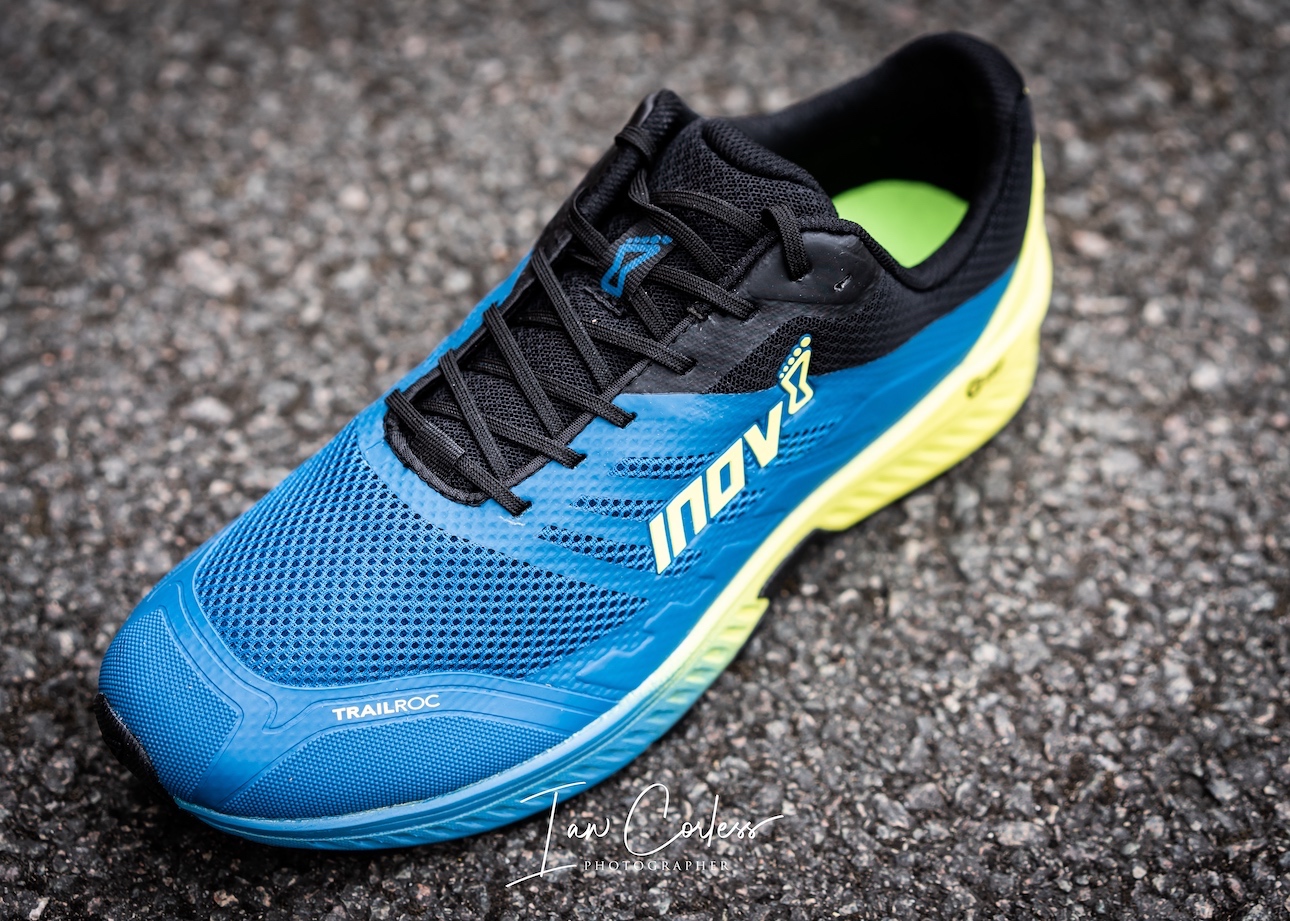
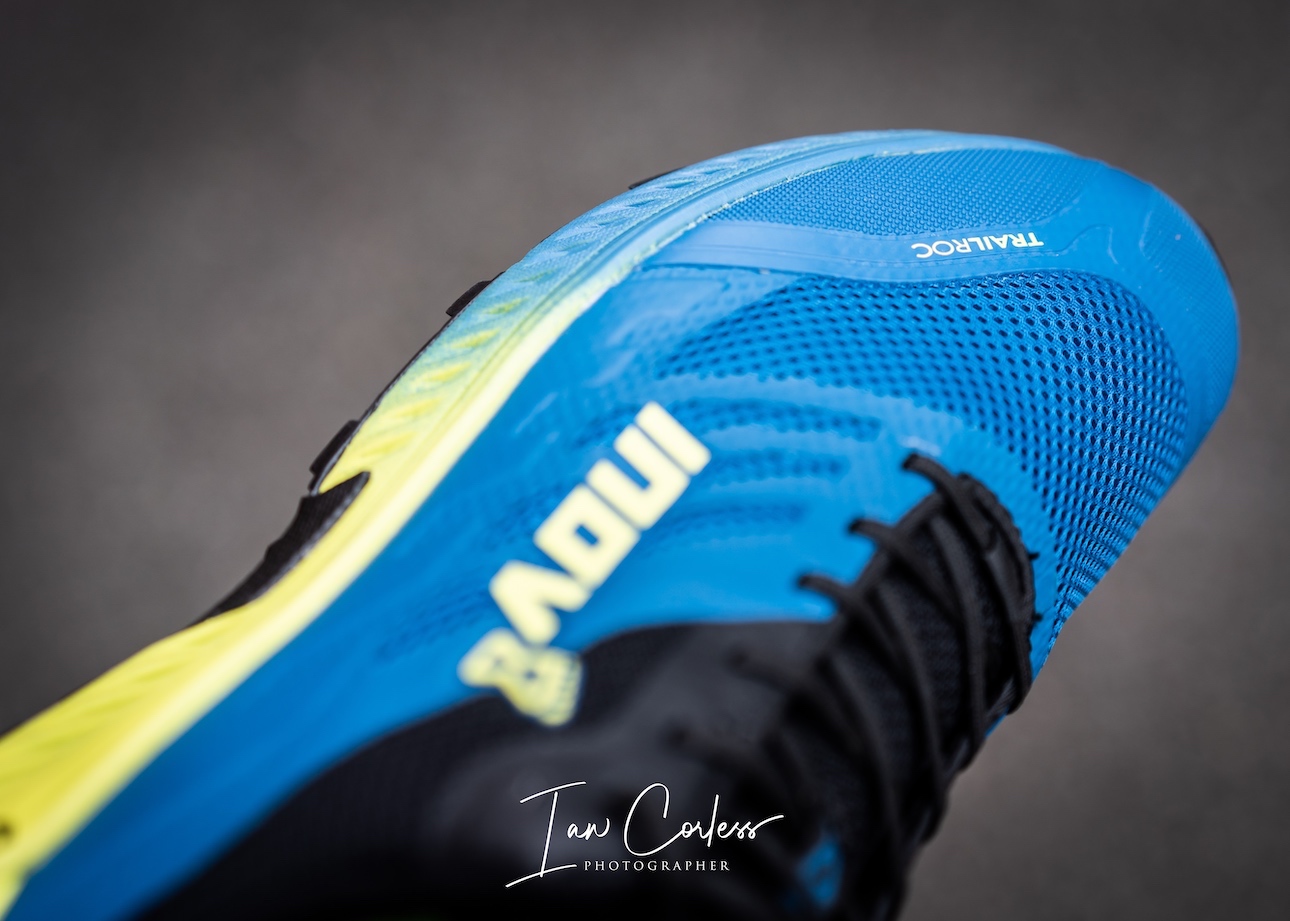
The upper has been reworked and like the Terraultra G270, it has a super-strong materials give high levels of durability and breathability which is proving to be a real plus with considerably less wear and tear over previous inov-8 uppers. The upper is also extremely breathable and this has an added bonus for water drainage.
As the name suggests, the weight is 260g in a UK8, so, they are super-lightweight.
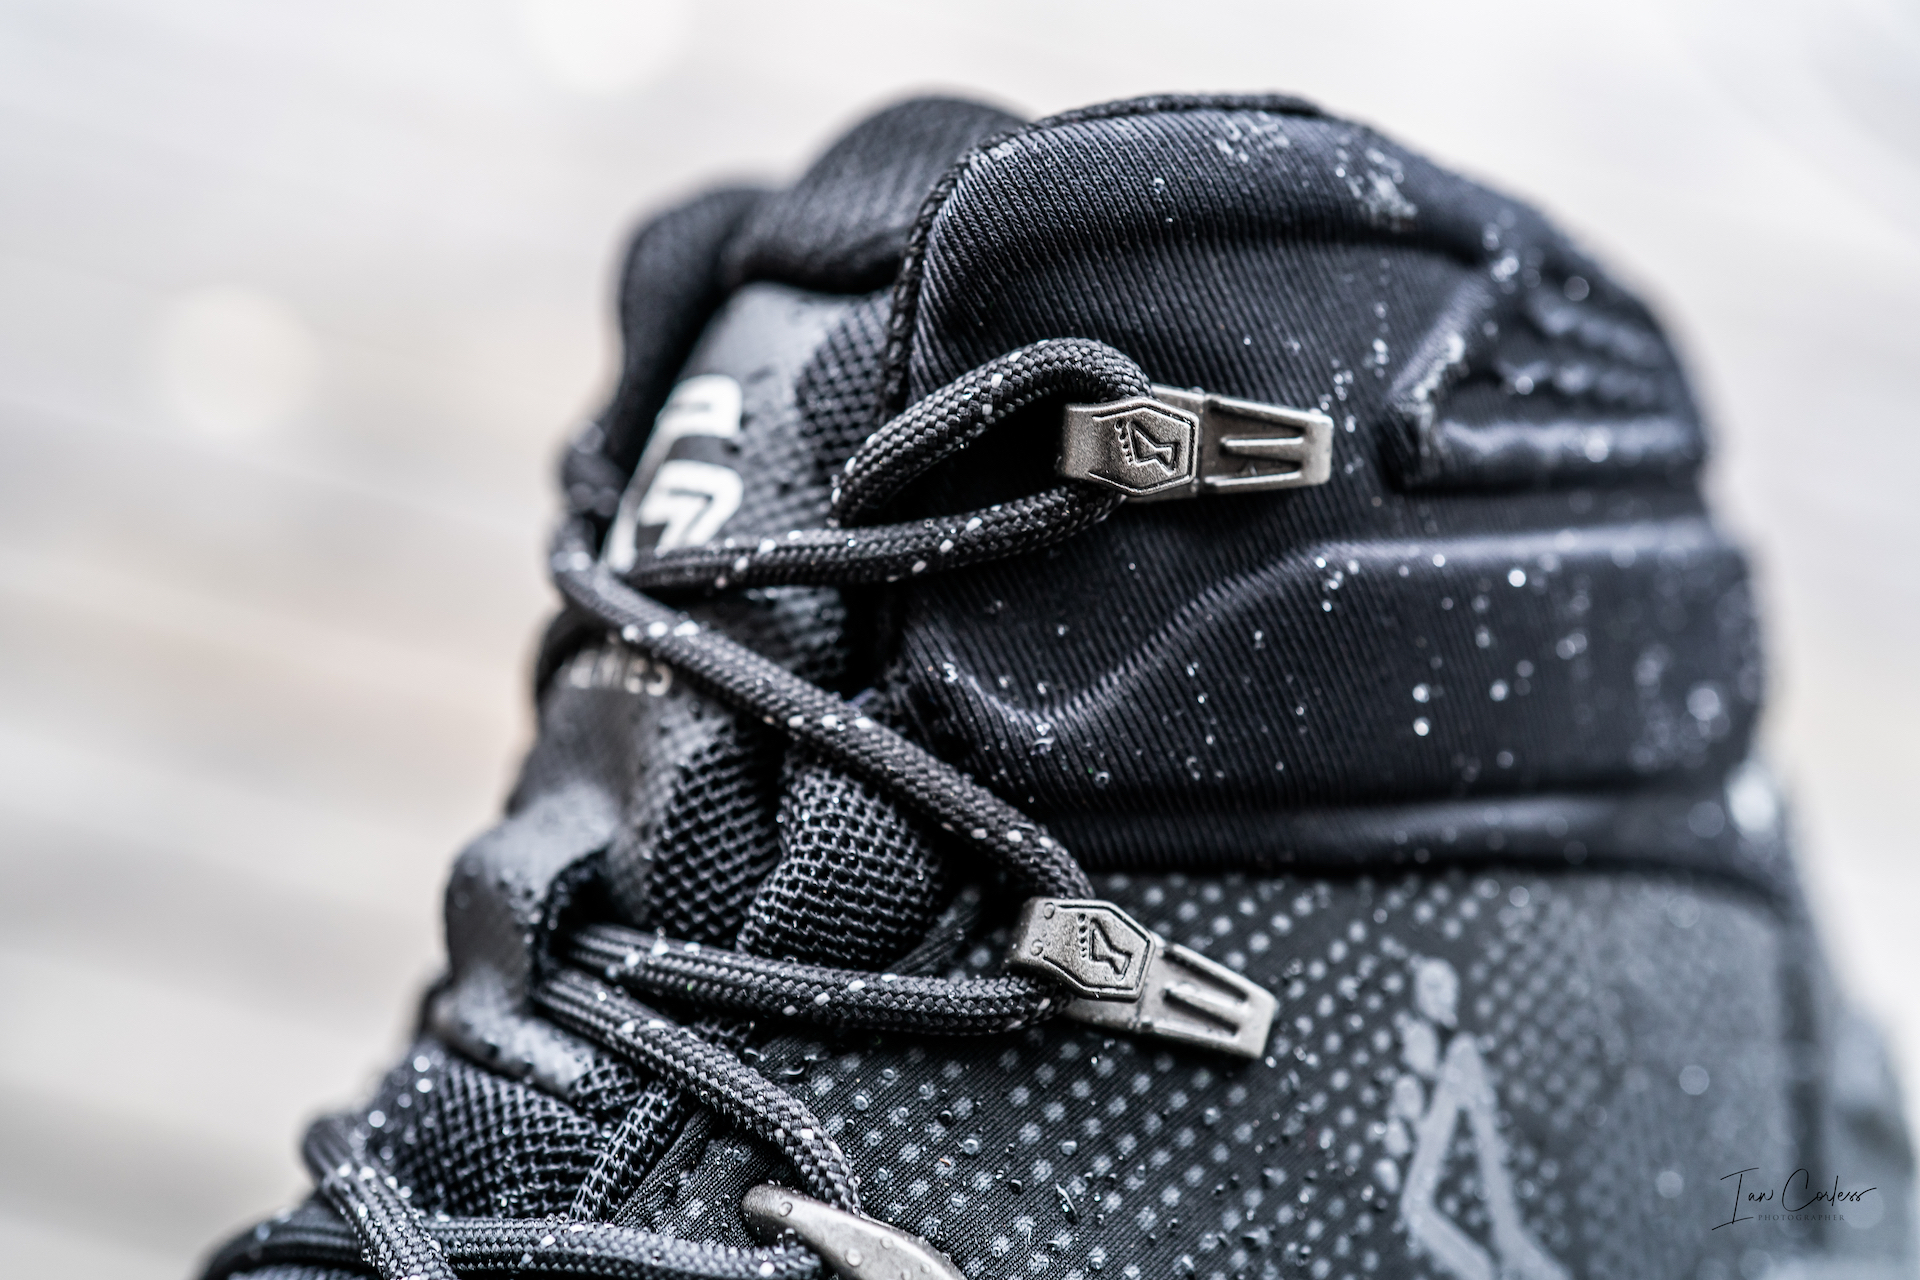
Like many inov-8 shoes, the rear of the shoe has gaiter attachment points on either side to help keep out or reduce debris entering the shoes.
The fit is ‘1’ on the inov-8 scale and that quite simply means precision – no surprise for a Formula 1 shoe.
IN USE
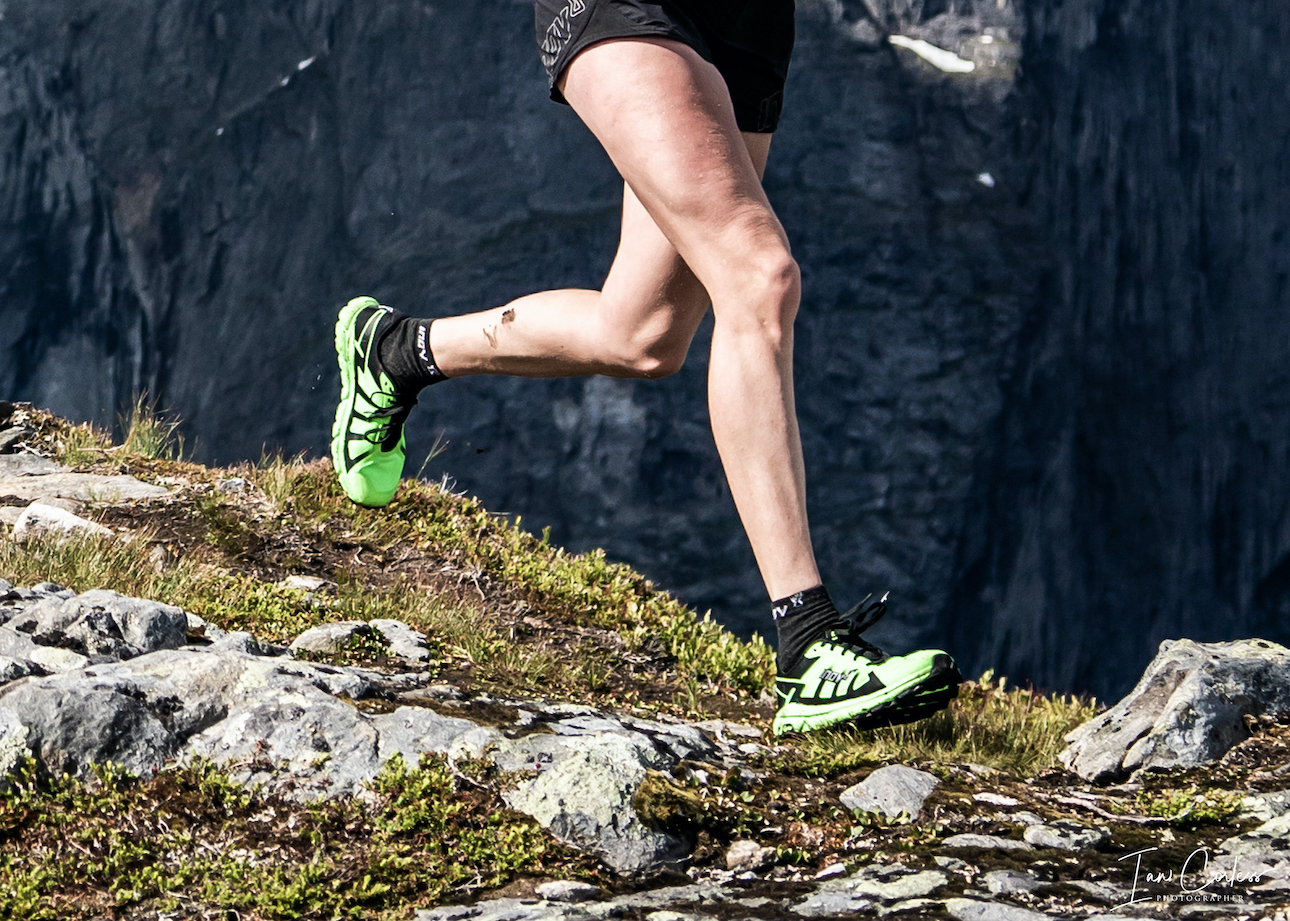
I keep referring to a Formula 1 car and this is really important when explaining how the shoe feels. To drive a F1, you would have it toed out of the pit lane and then you would drive on the circuit. The Mudclaw is no different, you really want to put this shoe on at the trail head and run immediately off-road and in mud.
It’s hard for me to go directly to trail unless I drive there, so, even for a ‘normal’ run I will have a minimum of 1-mile of road or path. You can really feel that the shoe has little to no cushioning. It’s bearable for short distances but you really do need to keep to a minimum.
When in mud, the shoe is wonderfully at home. It grips when other shoes would not, you have a feel for the ground without compromise and the foot-hold is excellent from the lacing configuration.
The upper is robust for the conditions and gladly drains water quickly. The overlays add structure and help hold the foot in place.
The Mudclaw is a narrow shoe and particularly narrower at the heal. Back to the Formula 1 scenario; this is a race shoe and as such some comfort is compromised. Think of a Ballerina, they would not walk around in ballet shoes, but when they perform they need a very specific shoe. The Mudclaw is the same.
Sizing leaves me with a question mark. I have been testing inov-8 for years and I am always a UK9.5. The Mudclaw feels a little too long for me in ‘my’ size but having said that, I have used them… Despite the narrow fit, I used a very thin Merino liner sock with a thicker Merino sock over the top to make some compensation. It has worked for me but I would recommend trying normal size and maybe a half-size smaller to be sure.
Back to the upper. The flex point (Meta-Flex with inov-8) in the propulsive phase is always a problem area in many shoes and in the Mudclaw the upper flexes differently, no doubt due to the material used.
At times it can feel as though there is a little too much fabric and this may cause a weakness at the bend point? With over 100km in the shoes, there is no wear showing. I will do a long-term update after 400km.
Heel box is minimal and it holds as one would expect but there is little cushioning comfort. Toe bumper is great and offers excellent protection.
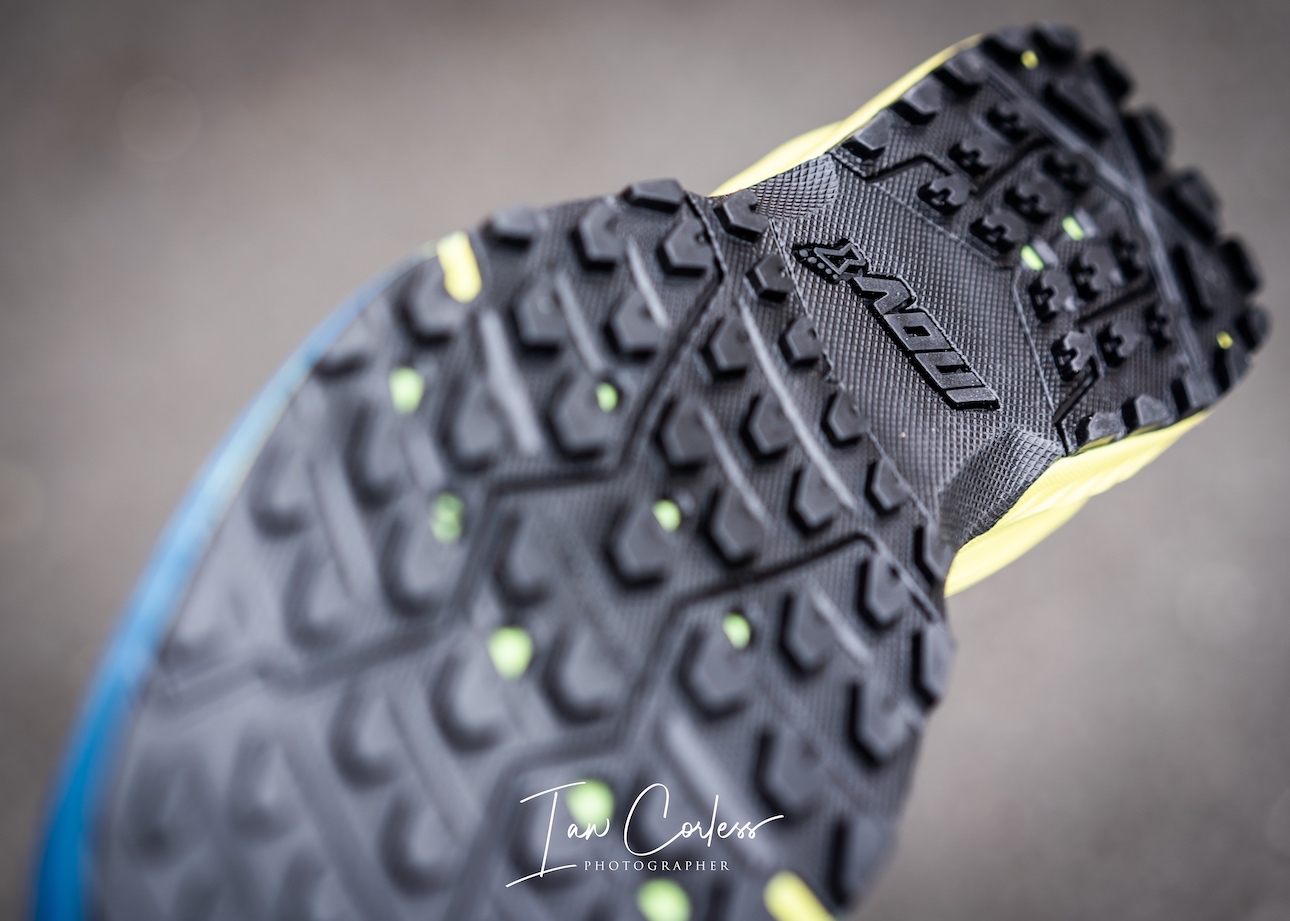
The outsole is the hero of the shoe and the 8mm lugs are quite simply the best I have tried or used in mud. Give or take, there are 40 +/- lugs designed to claw into the ground and provide purchase on what normally would not be possible. This applies for soft-grass too. Despite the same Graphene as the G260, I found the hold on wet rock not quite as assured as the Terraultra G260. I put this down to less contact points. But then again, I need to clarify, this shoe is for mud!
IN SUMMARY
The Mudclaw is a shoe to be considered in addition to other shoes that you already own. It’s not a shoe that you can use for day-to-day running, it’s not even a shoe that you can use for trail runs. This shoe is for mud and mud alone. Yes, it can take a little hard-trail, yes it can take some rocks, wet or dry, and yes, you can run a little road to get to muddy trail but all times, you need to keep this to a minimum. It’s narrow, has a precision fit, offers a great feel for the ground and return gives you speed and grip.
If you want a shoe that does the above but has more comfort and has more flexibility then you need to look at X-Talon 260 which has a wider fit (4,) considerably more cushioning (6/16mm,) 8mm drop and still 8mm lugs.
It’s a shoe for mud…
Specs:
Fit 1
Drop 4mm
Footbed 6mm
Lug 8mm
4.5mm front / 8.5mm rear
Graphene Grip
Meta-Plate Shank
RRP £140
To clarify, the shoes were provided to test, as are all the shoes that I review. But this is not a paid review.
Please support this website. I believe everyone deserves to read quality, independent and factual articles – that’s why this website is open to all. Free press has never been so vital. I hope I can keep providing independent articles with your help. Any contribution, however big or small, is so valuable to help finance regular content.
Since its release, the inov-8 Terraultra G270 has received acclaim all over the world. Many magazines, reviewers and bloggers hailing it the shoe of 2020. In late July I wrote my review HERE.
Now, with over 600km+ in the shoes it’s time to make a long-term review and assessment.
I am not going into the analysis of the shoe as in a typical post, you have a review linked above that goes through the pros and cons and all the technical jargon. This is a usage review.
First off, the Graphene outsole and 4mm lugs is a 100% winner. The durability has been superb, the grip incredible and the traction has been without equal. Even in mud, the outsole has performed but of course it is compromised. The lugs are just not aggressive enough to grip in very soft or deep mud, but a thin layer of mud and the G270 really does perform. Wet rock grip has been superb and arguably the most impressive aspect. Many have raved and provided a 5/5 review. I can’t give 5/5 because it is compromised in mud, therefore it gets a 4/5 BUT and this is a BIG but, in all honesty, you should not be using the G270 in mud, there are other shoes for that. So, if reviewing for intended purpose, it would get a 5/5. This may sound a little weird, but the G270 has become my ‘go-to’ road shoe, especially with the arrival of Autumn and Winter, the grip on wet roads, pavement and hard-pack trail has been superb. Although not a ‘hybrid’ shoe (road to trail) it performs like one and I would recommend for that use.
The cushioning has really surprised me. It’s plush without being squidgy. It’s super comfortable without losing that all important feel for the ground. It takes 20km hard trail runs in its stride and still allows legs to feel fresh after. The G270 is designed for longer races and as such, it comes highly recommended. An improvement on the G260. There was a mention of a ‘Boomerang Insole’ in the technical jargon that provides extra energy return, I have no idea if this is resulting in the positive feel of the shoe, but something is definitely working better over the previous G260 incarnation.
Zero drop – you are either going to be for or against. I am fortunate, I test shoes all the time and I am regularly mixing up drops from 0 to 10 and all the steps between. With zero I am usually careful not running too long or too often. The G270 changed that, I have been running regularly 3-4 runs per week since November with total distances of 50-80km (per week) just in the G270 and they have been superb. The days between I have been using 4, 8 and even 10mm drop on the odd occasion. Drop is very personal, so, I just warn against potential problems if zero is not normal for you.
The toe box is wide, and I have really enjoyed the extra space and comfort on long road or hard trail runs. With Injini socks, my toes can really splay for comfort. The G270 would be a great fastpacking shoe or multi-day shoe. I can see it being really popular in races like Marathon des Sables. The wide toe box though is too wide for me on technical trail… I don’t have the control or the precision I need, so, it’s not a shoe for me when running on technical terrain.
A major improvement is the upper. After 600km+ I have no signs of wear. The important ‘bend’ area behind the metatarsals that can often split in the corners is still good and showing no weakness. I mentioned the hold of the foot in my initial review and that has been one of the key pluses of the G270, particularly over the G260. The lacing, ‘Adapterfit’ and hold of the instep is reassuring, particularly important for me with a wider toe box.
All things considered, the G270 is one of the shoe highlights of 2020 without a doubt. It’s not perfect, but then again, show me a shoe that is. If you want zero drop, grip, traction, cushioning and a wider toe box, I think you’d find it hard to find a shoe that compares with the G270.
Please support this website. I believe everyone deserves to read quality, independent and factual articles – that’s why this website is open to all. Free press has never been so vital. I hope I can keep providing independent articles with your help. Any contribution, however big or small, is so valuable to help finance regular content. Please support me on Patreon HERE
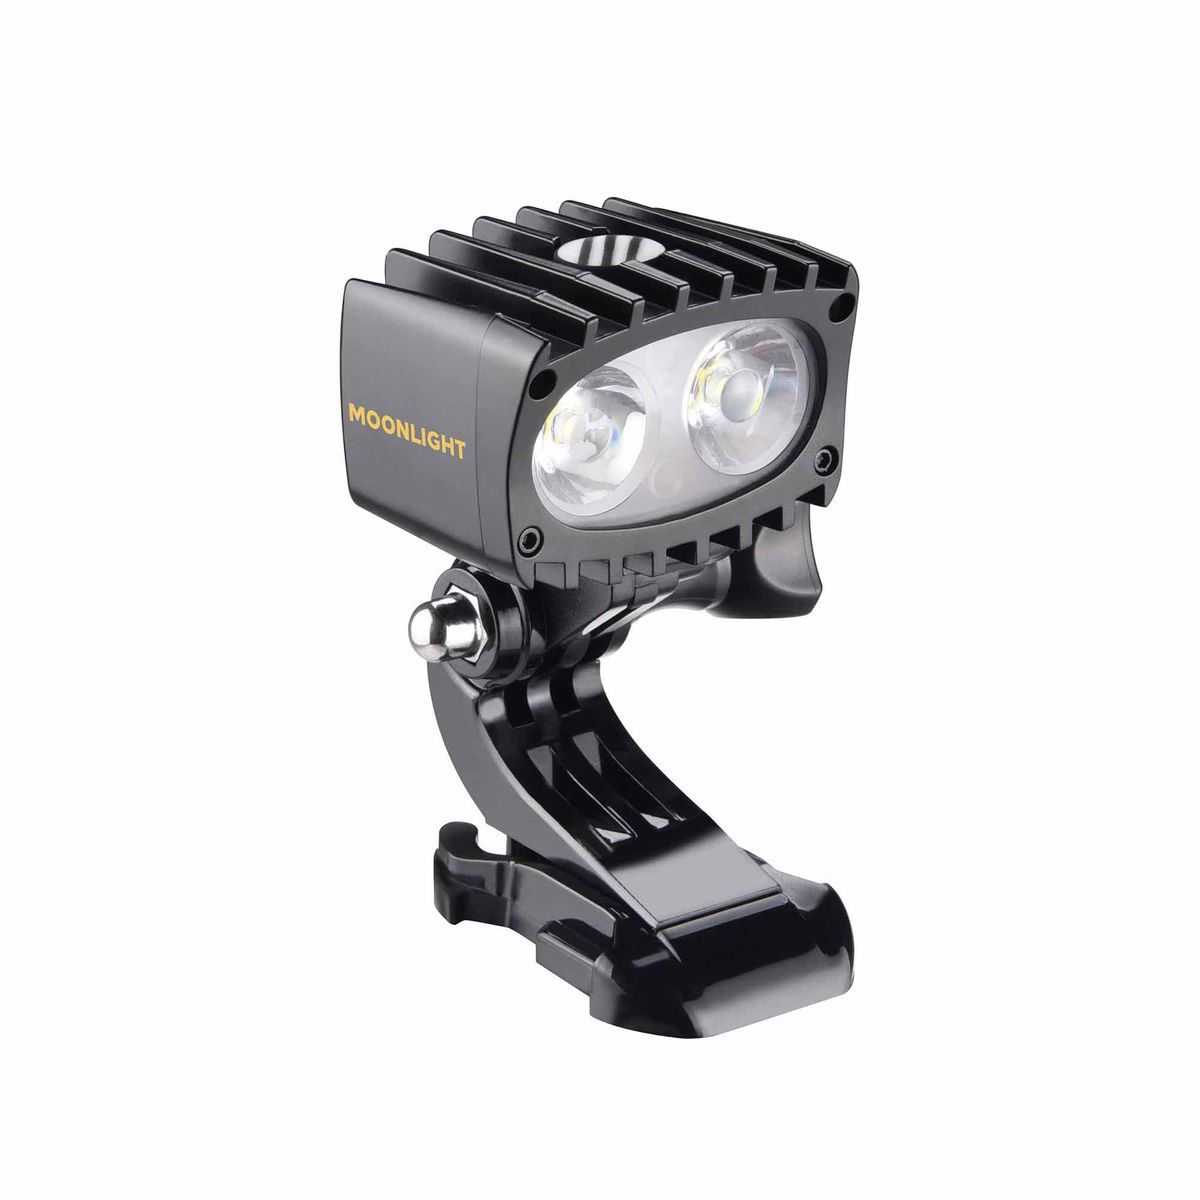
The tagline, ‘Darkness is not an excuse anymore’ most certainly rings true with the head torches from Norwegian brand, Moonlight Mountain Gear.
Based in Burtfjord, Northern Norway, Moonlight have a great opportunity to test and build head torches to survive the cold and relentless darkness of Norwegian winters. It’s with that in mind that the ‘Bright as Day’ (BAD) products were created.
Quite simply, the engineers wanted to ski at any time, regardless of conditions. They have products that provide 3200, 6000 and 12.000 lumen.
There is a head torch for everyone and the ability to interchange components for increased flexibility.
BAD 2000
I have recently been testing both the BAD700 and BAD2000 lumen products, for mountain, ultra and trail running, these two products work perfectly. The beefier and more powerful BAD 3200 is better suited to skiing, mountain biking and sports that are taken at a faster pace and when visibility and response time is crucial.
BAD 2000
The 2000 is a new product, updated from the previous 1800 lumen version. In addition to 200 extra lumens, electronics have been upgraded and the cooling system allows the torch to deliver a full 2000 for the battery life. Covering 15-30 degrees the torch will last 1.5 hours on full power, 3 hours on 50%, 6 hours on 25% and 20 hours at 5% all provided by a rechargeable Li-ion 2 cell 9600mAh 3.7v battery that has a life go 500 cycles. Charge time is 3.5 hours.
Lamp on GoPro attachment
One of the unique design USP’s is that the lamp head attachment system is compatible with GoPro QuickClip, therefore, as way of an example, you may have a GoPro attachment on a helmet for action filming, this attachment also takes the head lamp. Equally, head straps and other similar products from the GoPro range are compatible.
With an IP 67 waterproof rating, the head torch will function in heavy rain and humidity.
An LED inside the light housing indicates battery level, blue 80-100%, flashing blue 50-80%, red 30-50% and flashing red is less than 30%. When the torch reaches 10% or lower, the lamp head will flash three times and then drop to the lowest power setting. This is a feature that acts as a warning allowing you to reduce pace (for safety) and make adequate decisions so that you can return home OR change the battery with a spare.
Charging is via USB cable and the battery is USB C.
Interchangeable battery
The Moonlight batteries are interchangeable between all the lamp heads and importantly can be used on or off the head strap. A 1-meter extension cable is provided. This is really important in subzero temperatures.
Extension cable for off-head battery storage
The facility to store the battery inside a jacket and keeping it warm will ensure a longer life. Also, when running, the ability to use a heavier battery without it adding weight to the head area is a key feature. A spare battery in 999 Krone which equates to £80.00
The head torch in not cheap, 2299 Krone if £185.00.
In Use
I am not a fan of the headbands that come over the top of the head and around the head. However, if using the battery on the headband for the 2000, the middle strap is important to help distribute the weight and stop any movement. It’s a problem if you want to use a peaked cap but no issue if wearing a beanie, Buff or headband.
The weight (298g) is at the manageable end of comfort for a torch that provides such brightness. But as a preference, for running, I have preferred to store the battery in my run pack. It is much more comfortable, and it also means that I can adapt the headband and not use the elastic that goes over my head, just the strap that goes around.
Brightness and spread of light are superb. In all honesty, the 2000 lumen setting is not really required for running, it’s almost too bright. The only time I used at this power was on technical sections when I really needed to see what lay ahead, even then, with reduced pace, 50% power or less was more than adequate. You need to ask do you really need 2000 lumen head torch, if not, the BAD 700 is the way to go…
The 2000 is a brilliant light for fast trail runners who really need to see everything and react in a split second, but for me, it’s better suited to mountain bikers and skiers.
BAD 700
BAD 700
Keeping in mind that the BAD 700 is 1199 Krone (£100), a considerable £85.00 cheaper than the BAD 2000, you really need to ask yourself as runner, do I need more lumen than 700?
Personally speaking, I think not.
700 lumens really are very powerful on the trail. When one considers night running pace, 700 lumen power really illuminates the trail to show you everything that you need to see, and it allows you enough light to react and change direction.
All the features of the 2000 or in the 700 including GoPro compatibility, 15-30 degree light scattering, guaranteed light consistency and so on. Weighing in at 180g with battery (head lamp 40g) is 118g lighter than the 2000, that is significant when running!
As with the 2000, an LED inside the light housing indicates battery level, blue 80-100%, flashing blue 50-80%, red 30-50% and flashing red is less than 30%. When the torch reaches 10% or lower, the lamp head will flash three times and then drop to the lowest power setting. This is a feature that acts as a warning allowing you to reduce pace (for safety) and make adequate decisions so that you can return home OR change the battery with a spare.
One of the plus sides of the 700 is that it is compatible with other batteries in the Moonlight range. By way of example, you could purchase the 1800/2000 Im 3.7v battery (which powers the 2000) and use it with the 700 head. This would extend the full power autonomy from 1.5 hours to 4.5 hours and at the lowest setting, you would get a whopping 60 hours!
Like the 2000, the battery can be stored on or off the headband and a 1m extension cable is provided.
The flexibility with GoPro fittings is superb and allows multiple options for attaching and fixing.
Charging is via USB cable and the battery is USB C.
In Use
For running, the 700 is perfect for me and if the battery is mounted on the headband, preferable to the 2000. The weight balance is ideal when running, whereas, the 2000 battery on the head feels a little too heavy.
The beam is perfect and consistent which is extremely important and for most, 50% or 25% would be enough for most runs, this provides 3 to 6 hours of life. If you occasionally go to full beam, then you can estimate 2 to 5 hours.
A spare battery is 799 Krone which equates to £65 and this would be a good purchase so that you can alternate batteries or carry a spare on the trail.
Easy to use, consistent power and great durability make this a ‘go-to’ product that really withstands harsh weather.
Conclusions
The head torch market has a plethora of options out there and it’s extremely competitive. It’s possible to purchase budget products that kind of ‘do the job’ but one always feels a little compromised. There also products out there can adjust power automatically – I have yet to have one work correctly! Some connect to your phone via an app, others state a really long life only for you to find that burn time is a fraction of what is stated.
Moonlight is lacking in frills. They have great design, awesome products that does what the manufacturer says. They burn for the length of time expected and without losing brightness as the battery loses its power. The removable battery, extension cable, interchangeability and the GoPro mount flexibility make them an excellent choice.
The BAD 700 is the way to go for runners, however, some of you out there may well need that 2000 blast, only you will know that!
Although not cheap, you get what you pay for and one thing is for sure, they will last.
Please support this website. I believe everyone deserves to read quality, independent and factual articles – that’s why this website is open to all. Free press has never been so vital. I hope I can keep providing independent articles with your help. Any contribution, however big or small, is so valuable to help finance regular content. Please support me on Patreon HERE
Runner’s strive for the best of all worlds in one shoe – lightweight, feel for the ground, cushioning, support, lack of support, grip in mud, grip on rock, low drop, high drop, grip in the wet and the list goes on and on. The reality is, there are few run shoes that will be a ‘one stop’ package and this why so many variables exist.
When possible, we choose specific shoes for a specific task.
Boots are not something that a runner would usually look at unless going on a specific hike. Even then, if moving fast and light, a good durable run shoe is usually preferable.
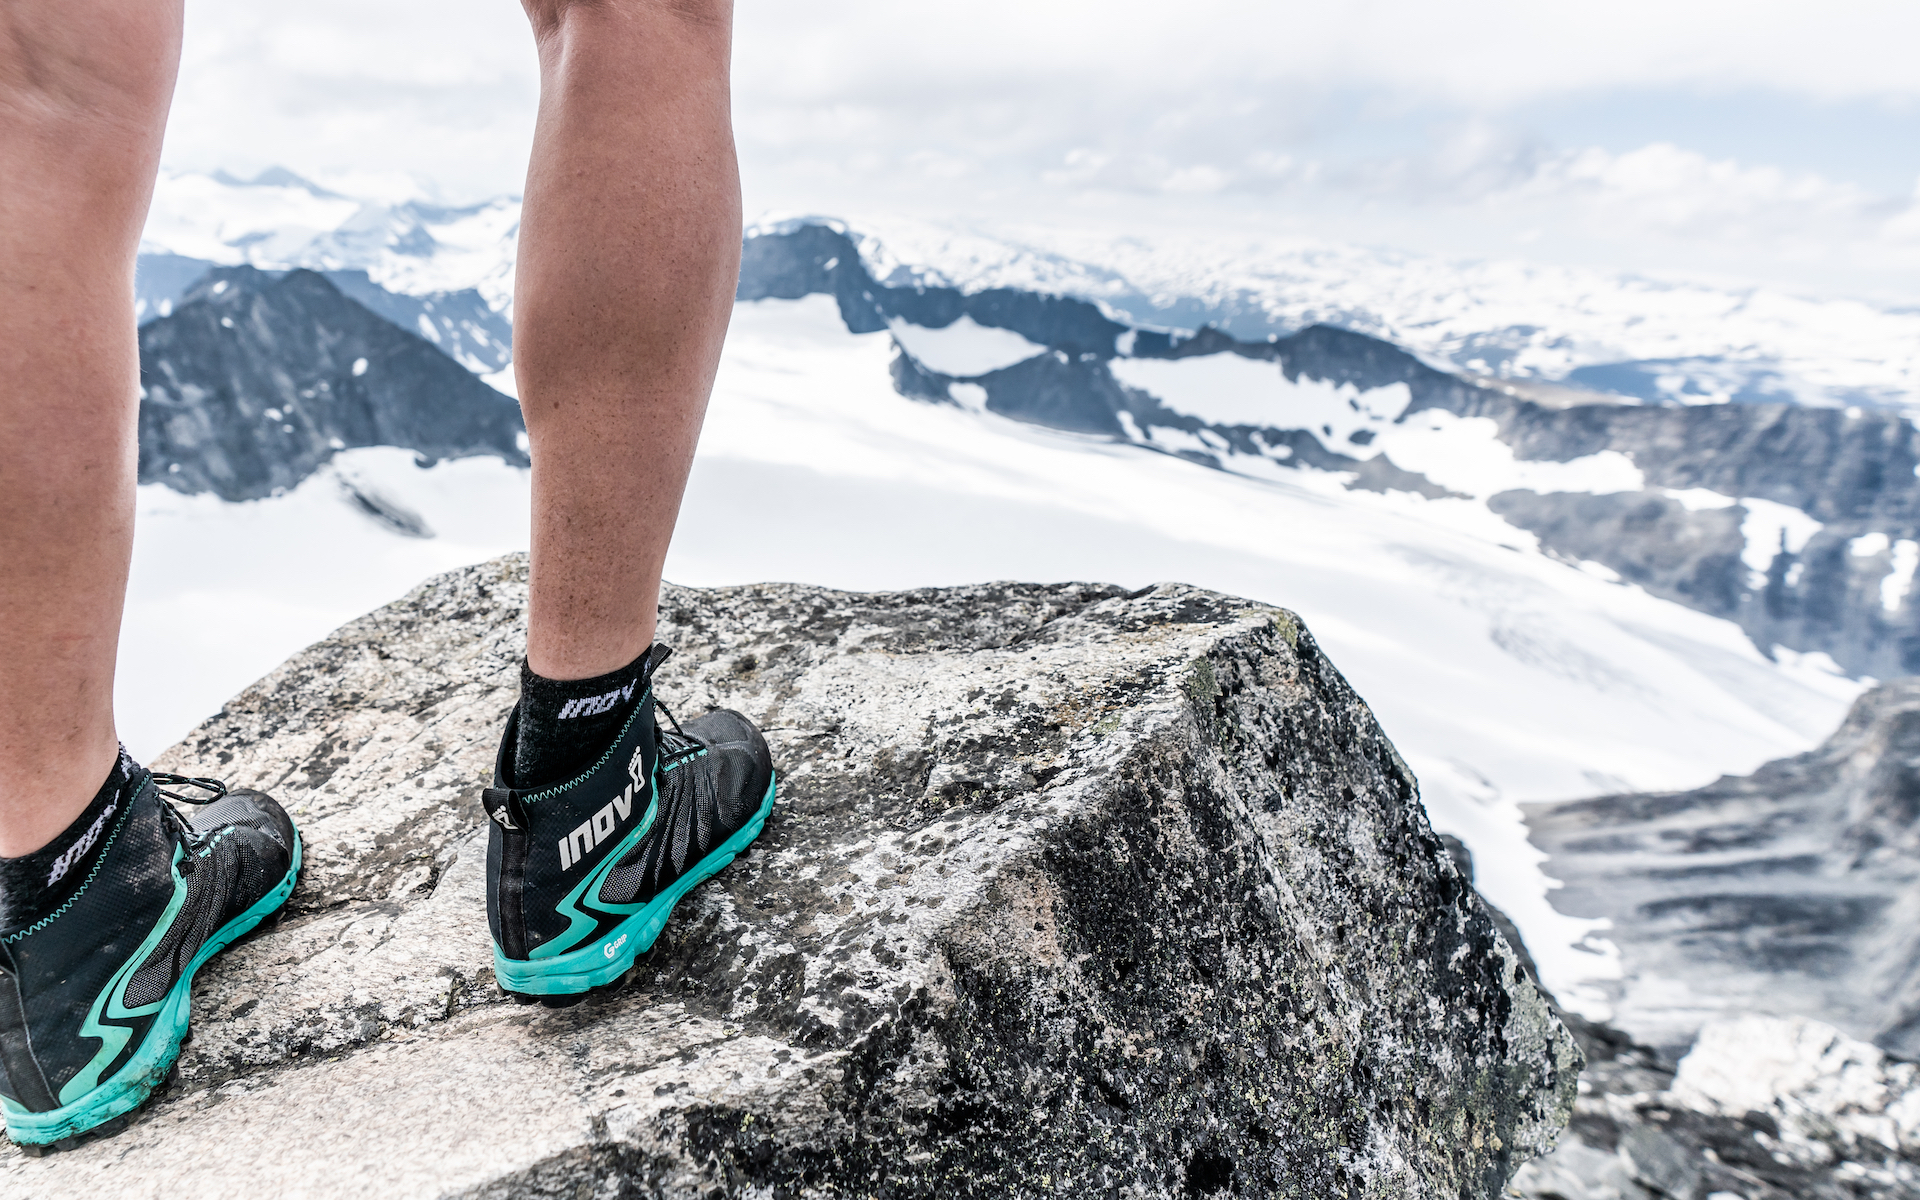
G370 boot at the summit of Galdhøpiggen, Norway.
In 2018, I was once again planning a fastpacking trek in the Himalayas but this time, my journey would take place in December. Previous trips had taken place in November and more often than not I had used the inov-8 Trail Talon which was perfect for long days. December in the Himalayas and I knew I would encounter snow and on occasion would need to use micro-crampons. I was reluctant, very reluctant, to use a boot, especially for long days… Too heavy, too cumbersome, too stiff and the list goes on.
I was introduced the Roclite 345 GTX with Graphene grip and the 325 GTX boot. These boots were a revelation providing all the feel, grip and upper of a conventional run shoe but with the addition of ankle support that was designed in a way that would facilitate running with very little compromise.
In 2019 and in 2020 I have been using the Roclite G370 for specific trips, by way of example, the Himalayas in November, Toubkal in Morocco (January) and the mountains of Norway for occasional trips when snow and tough conditions would challenge. A prime example being the highest summit of Norway, Galdhøppigen at 2469m with snow conditions. With 6mm studs, 9mm drop, 9/18mm cushioning front and rear and only weighing 388g for an EU44.5 (I went 0.5 size bigger than usual to allow for winter socks.) These have proven to be great boots when I needed more warmth, grip and comfort in extreme conditions without compromising a run shoe feel. They are highly recommended!
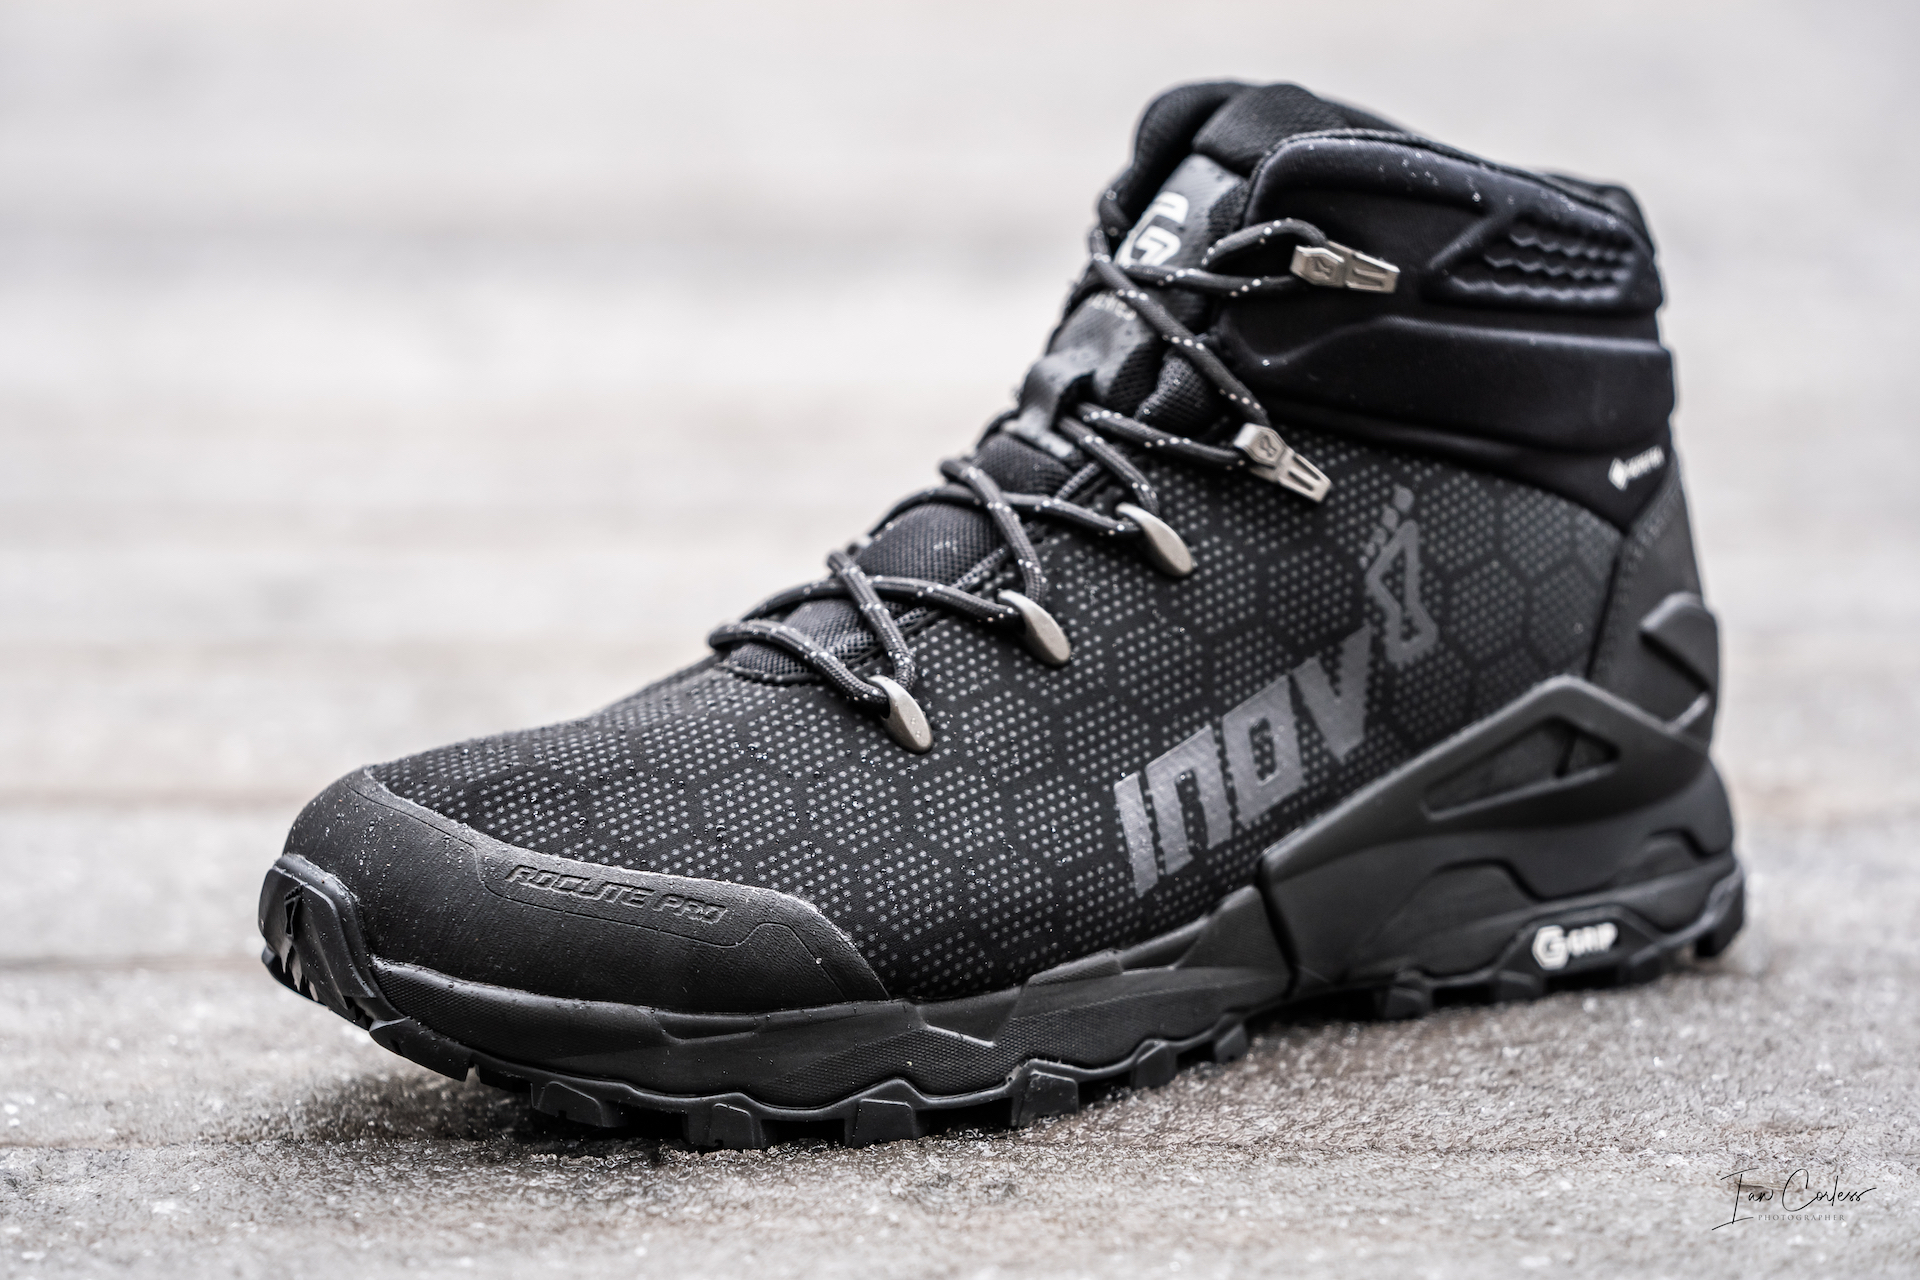
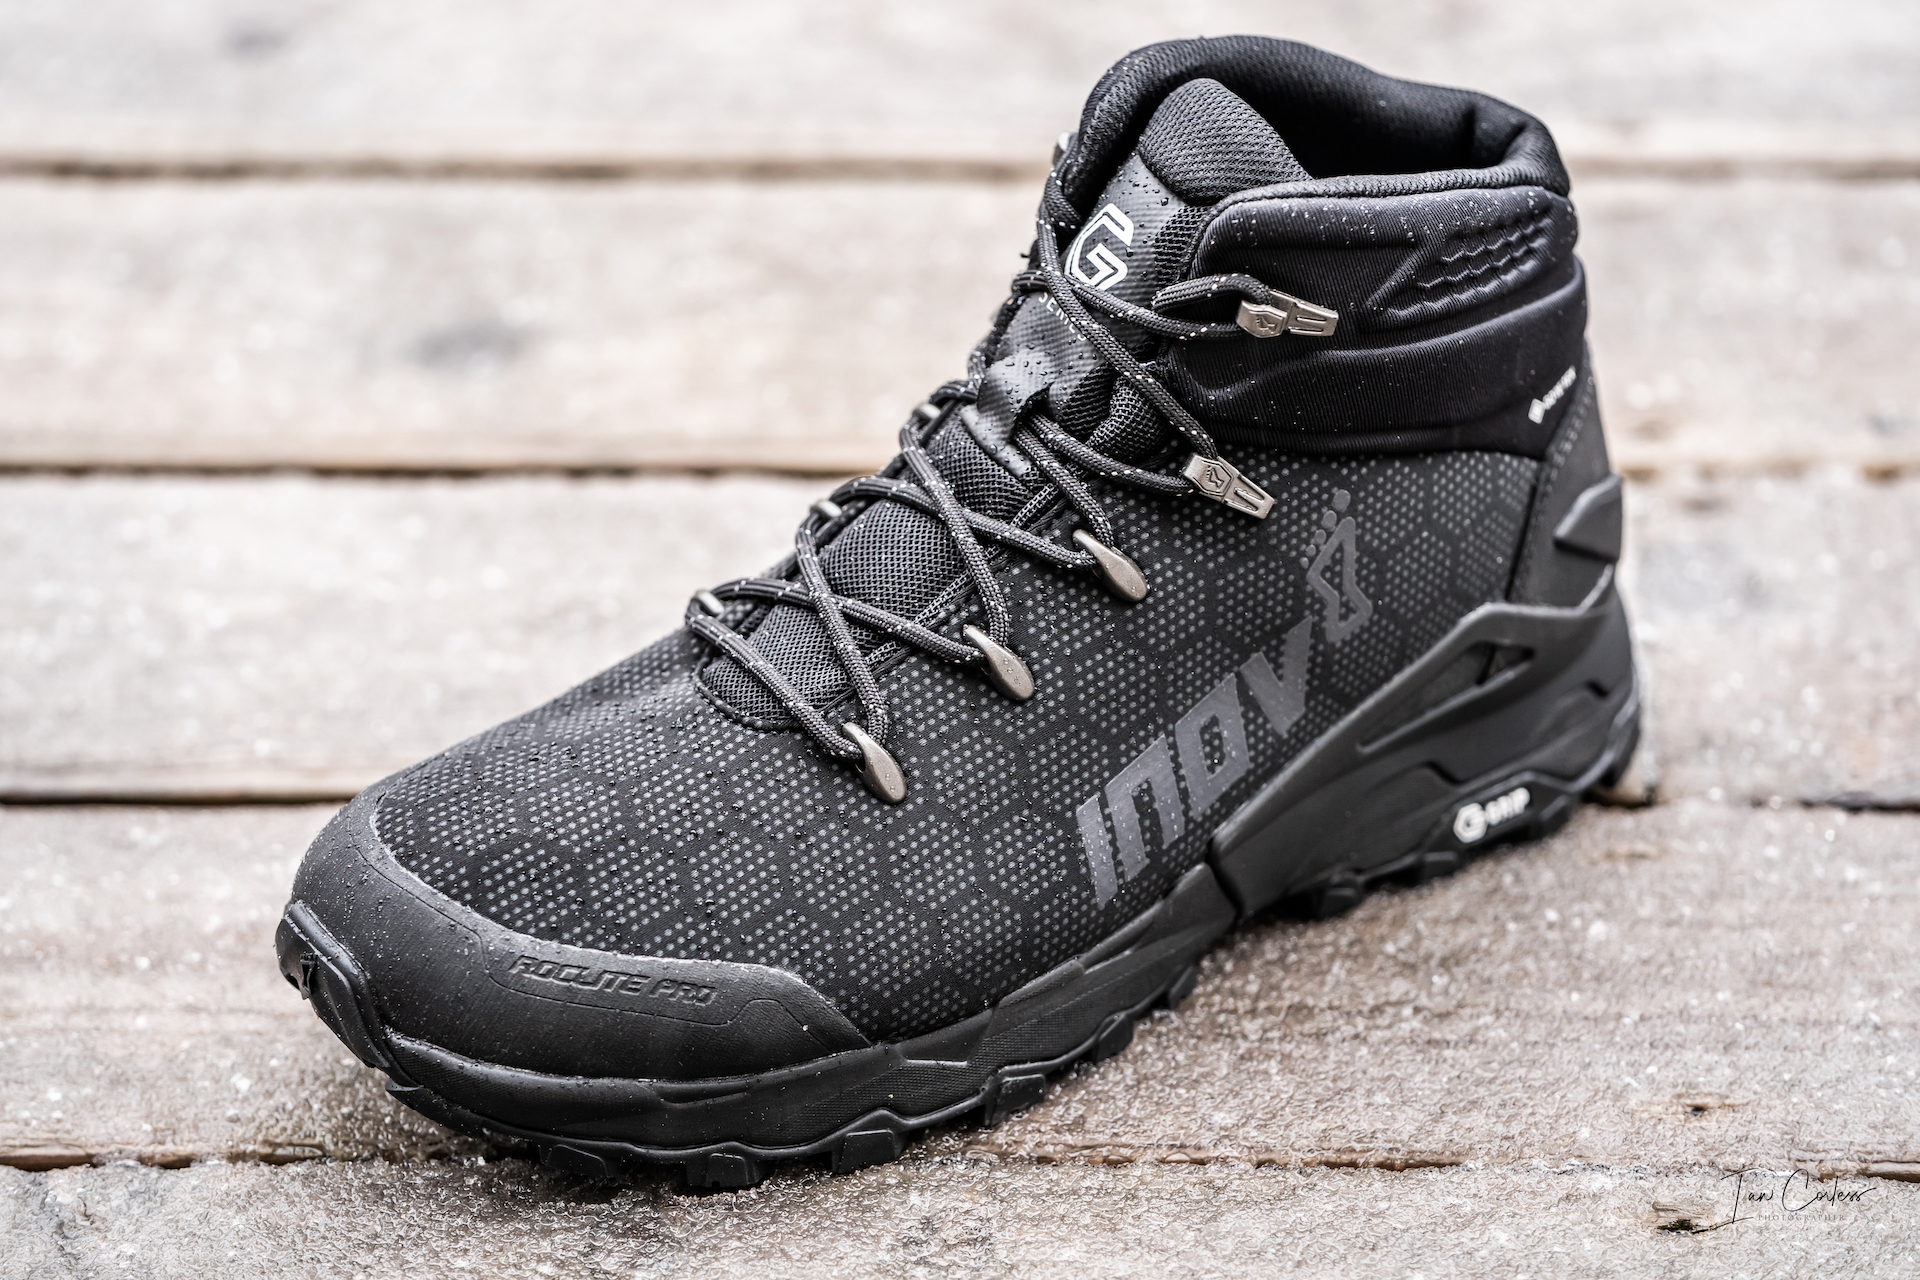
When I heard about the Roclite Pro G 400 I was immediately interested.
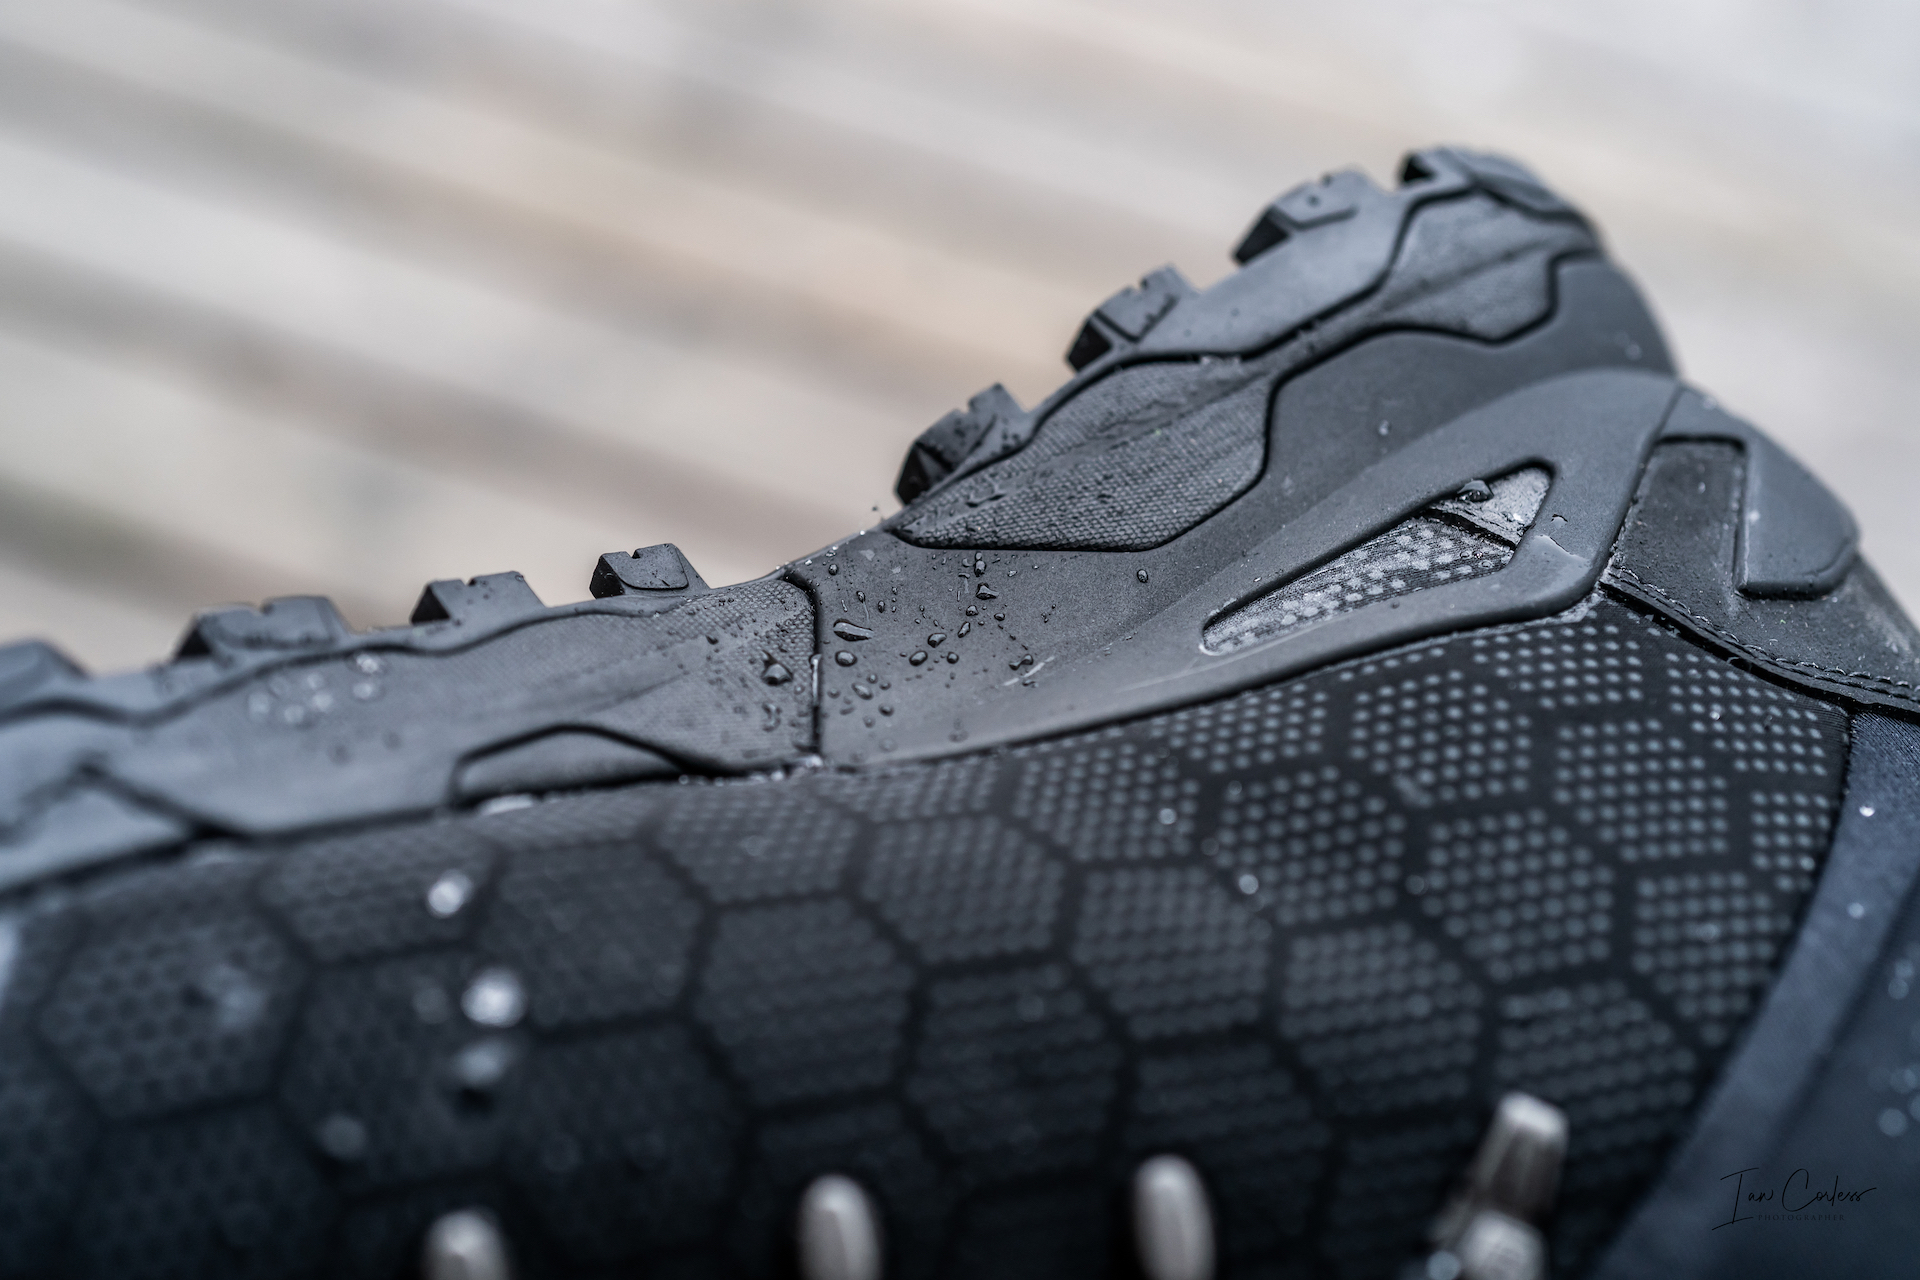
On first impressions this version of the Roclite does not look like any previous Roclite that has come before, the look and feel is completely different, especially in the stealth black look. Almost looks like a boot for the SAS or Special Forces.
Weighing in at 421g for an EU44 the boot is also more substantial than previous incarnations. But I need to clarify here that the new Roclite Pro G 400 is designed for a different purpose in my opinion. It is much more akin to a normal hiking boot but at a fraction of the weight.
The fit scale is 4 just like the Roclite G 370 listed above, however, I would disagree here. The G370 is more of a 3 fit and the new G 400 a 4. There is a distinct difference in feel between the two boots, the G400 most definitely allowing for more toe splay.
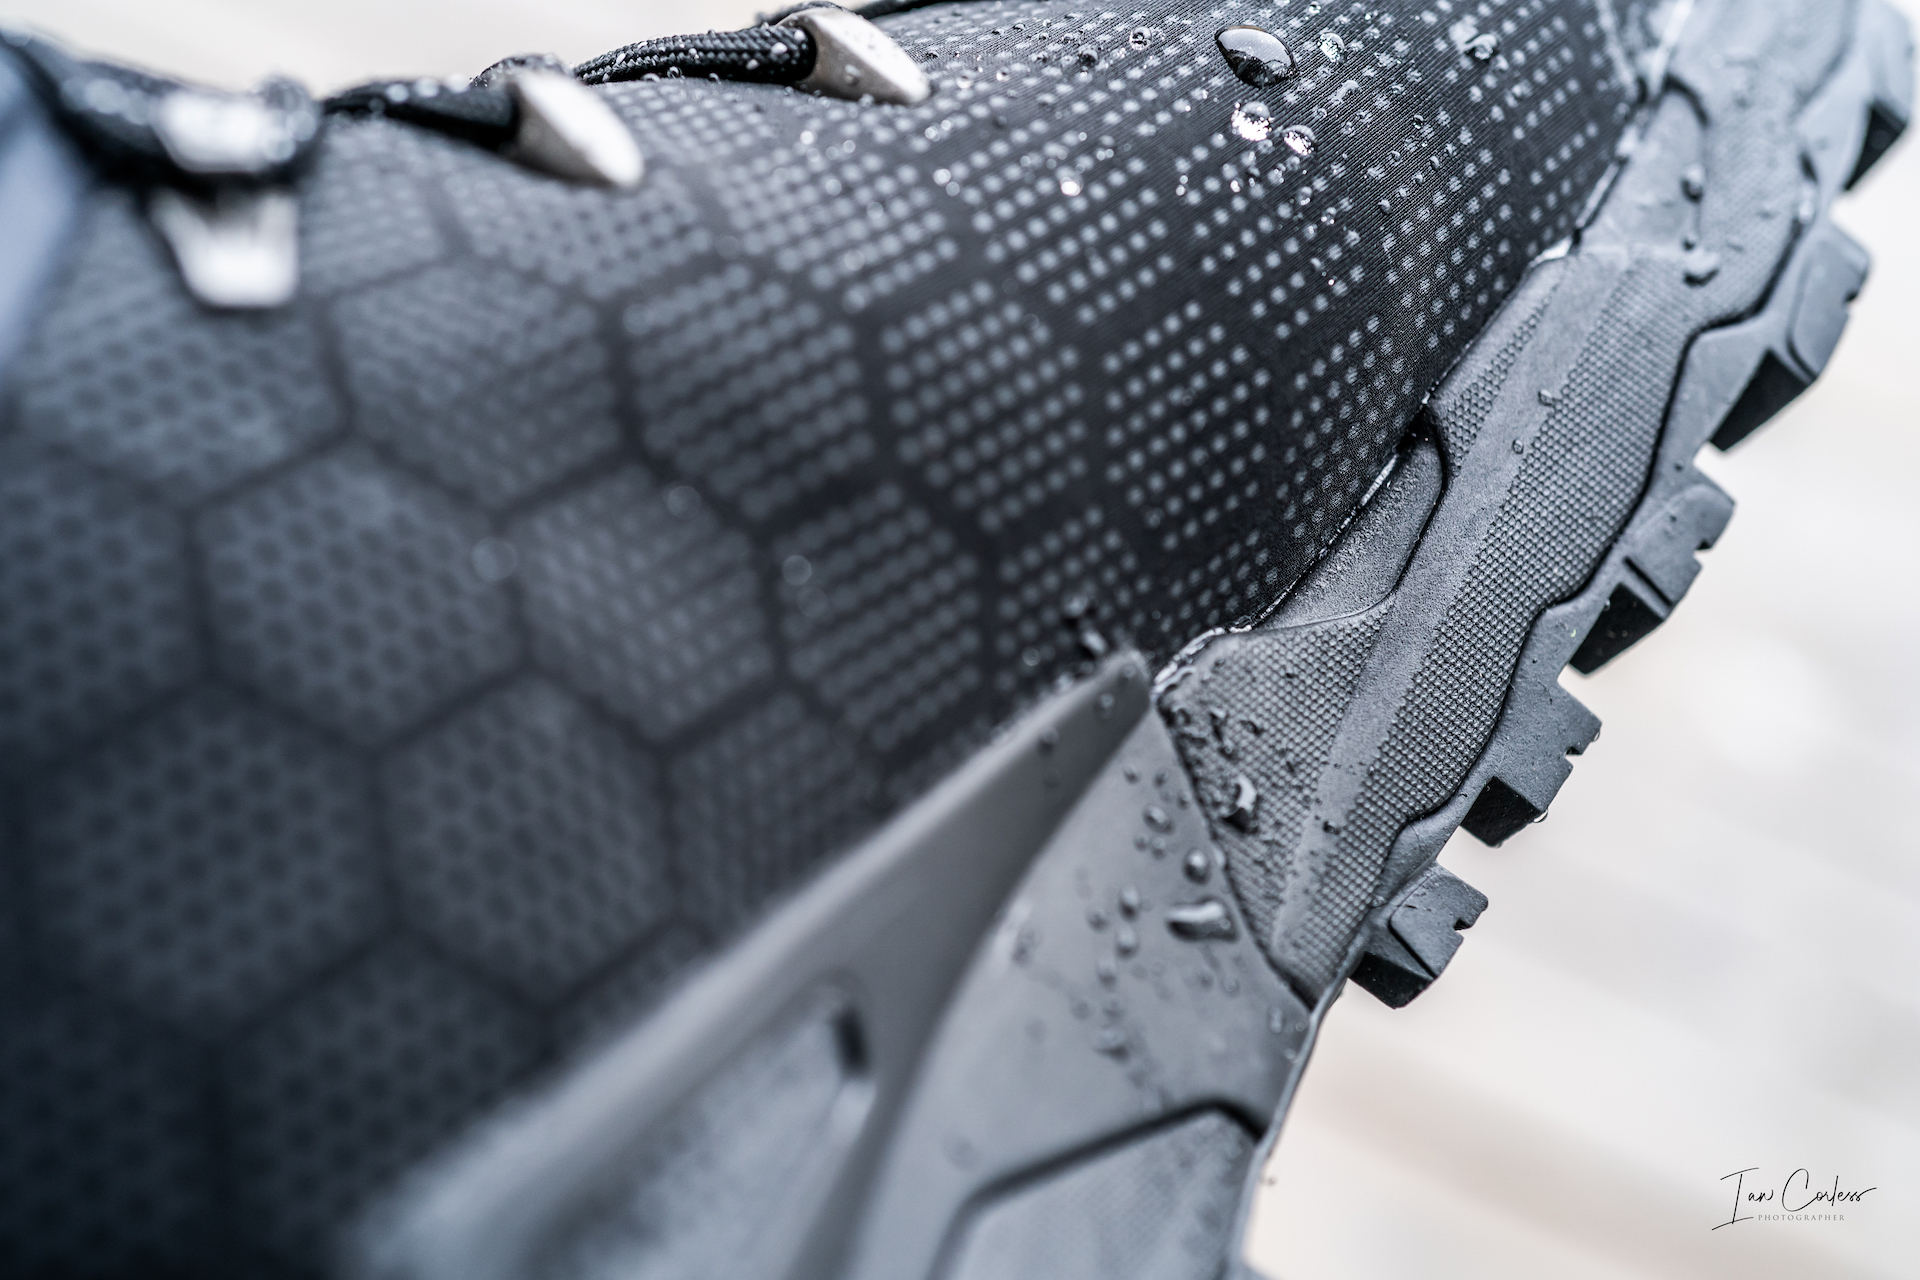
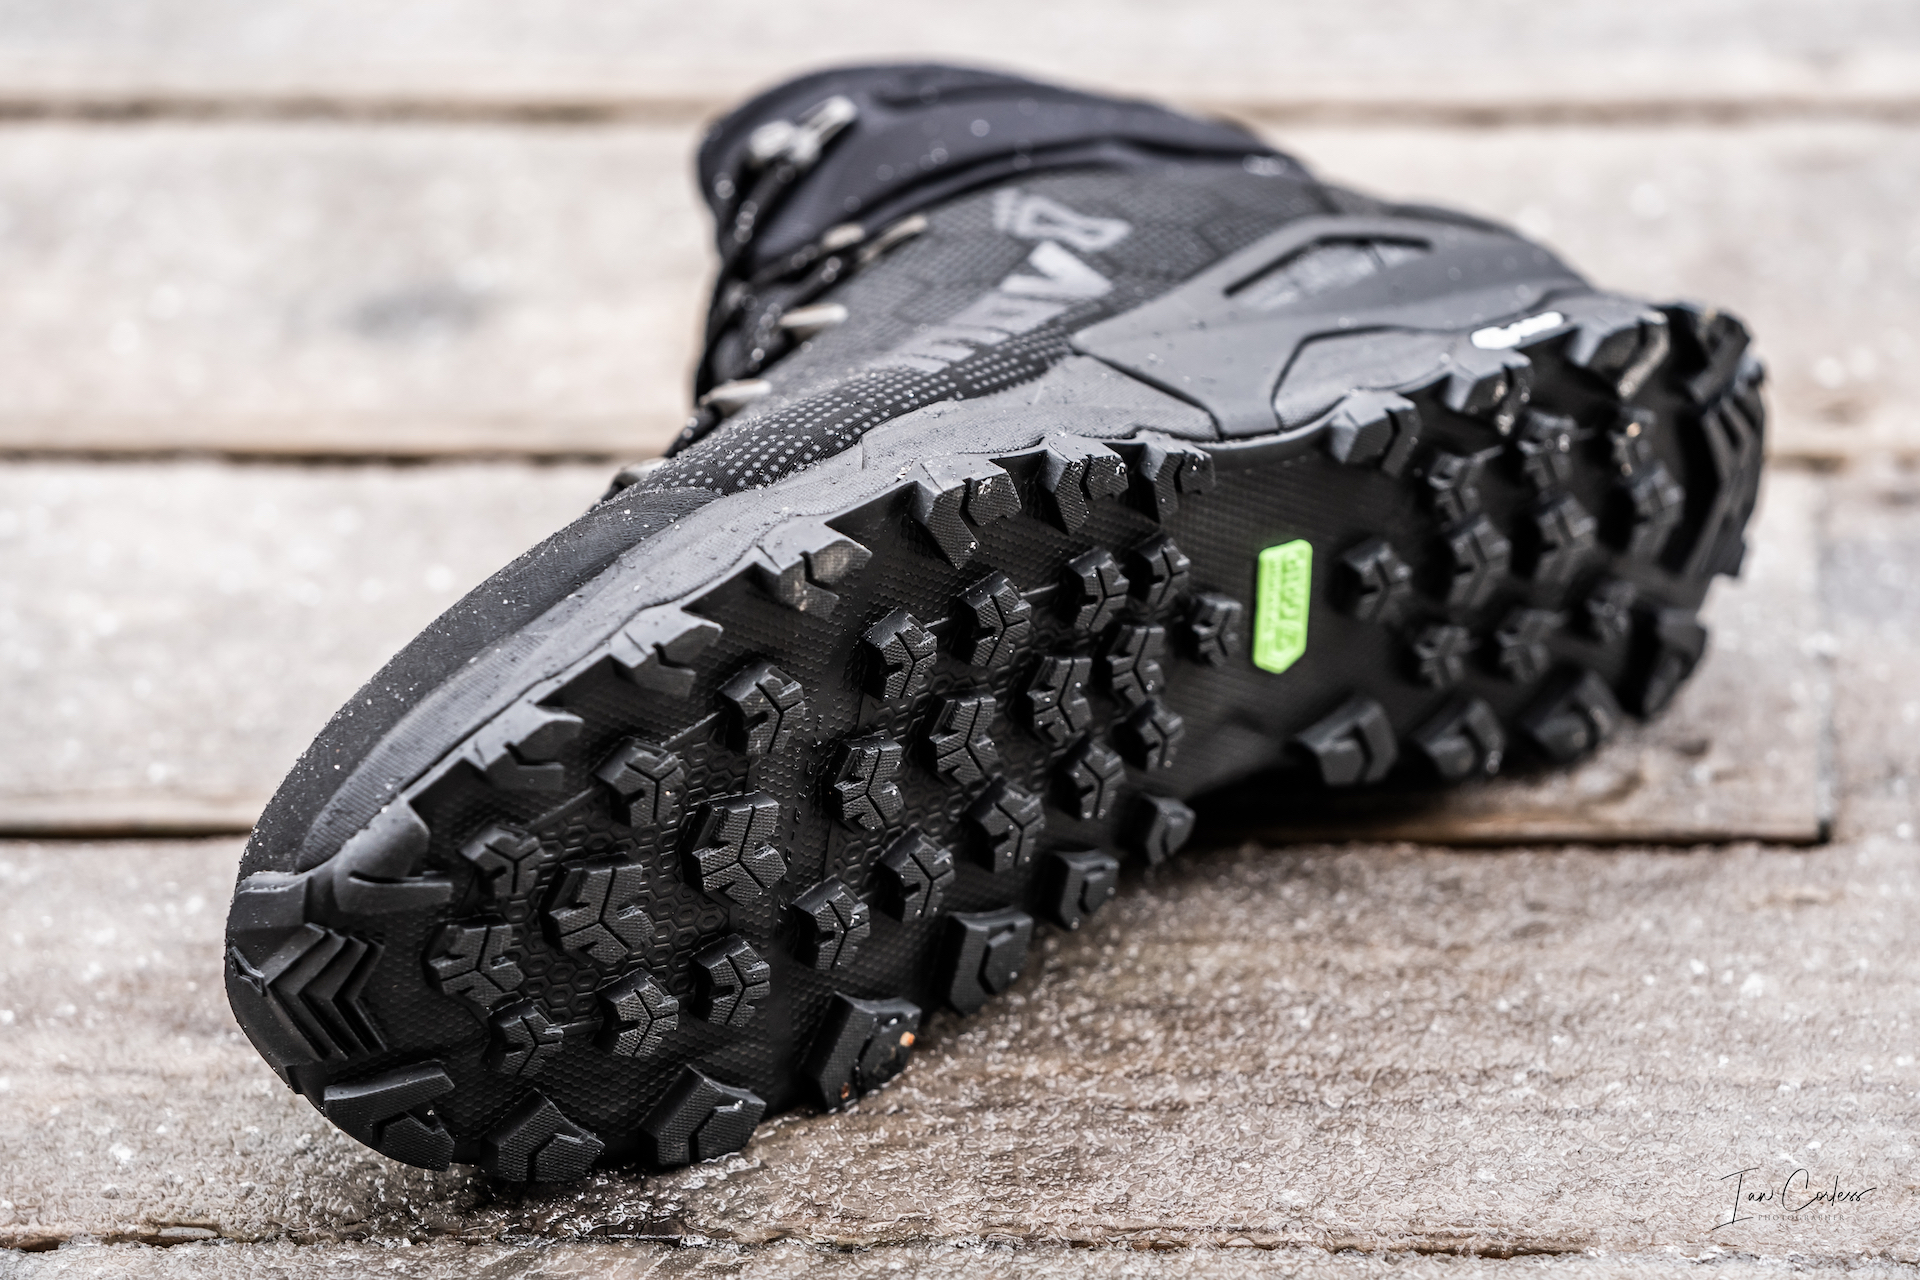
Drop is 8mm which is ideal for long days, the lugs are 6mm which provide great grip on a multitude of surfaces, especially with the addition of Graphene which extends outsole longevity. Cushioning is notably plush with 12mm at the from and 20mm at the rear.
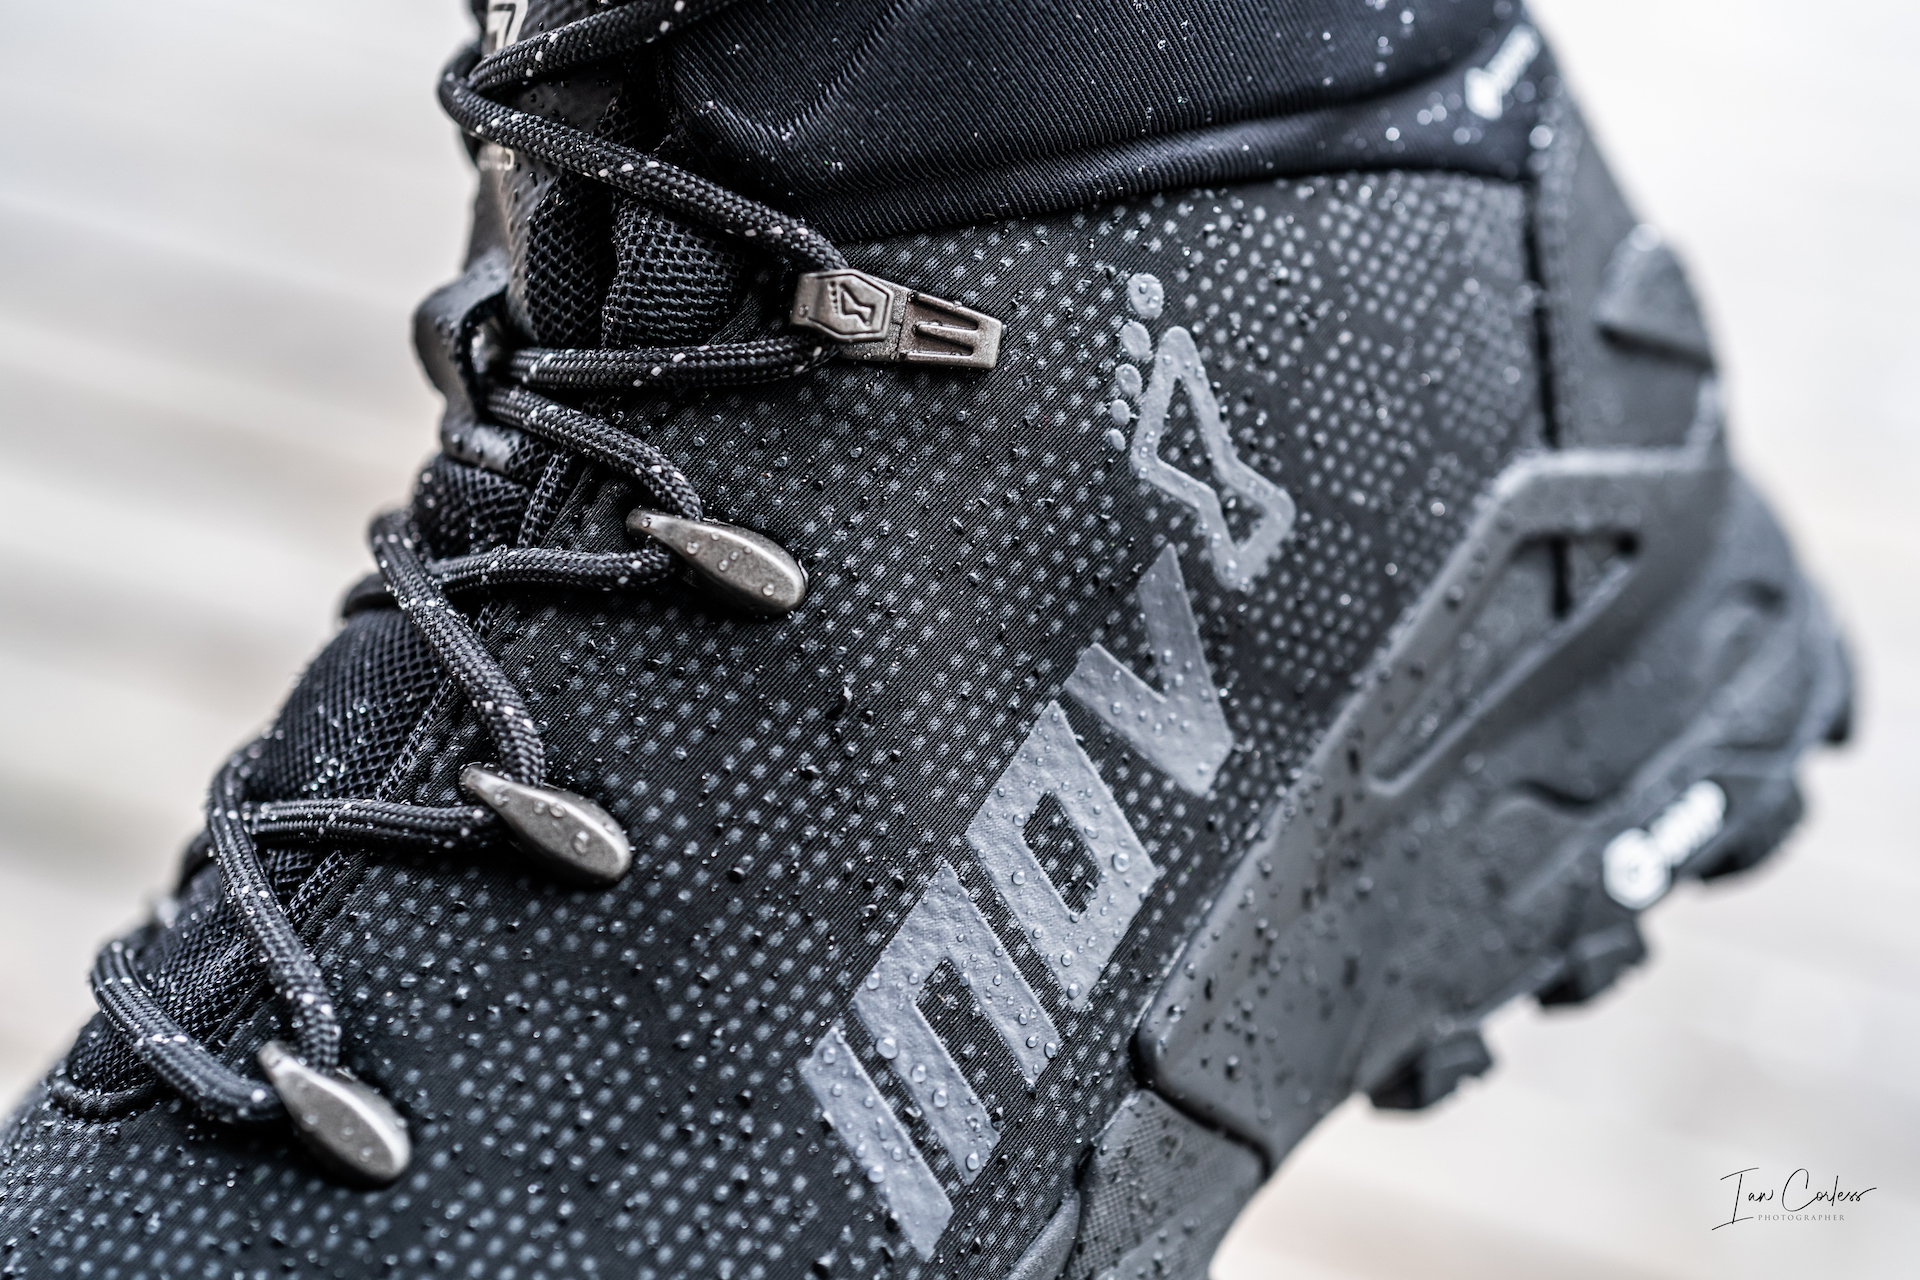
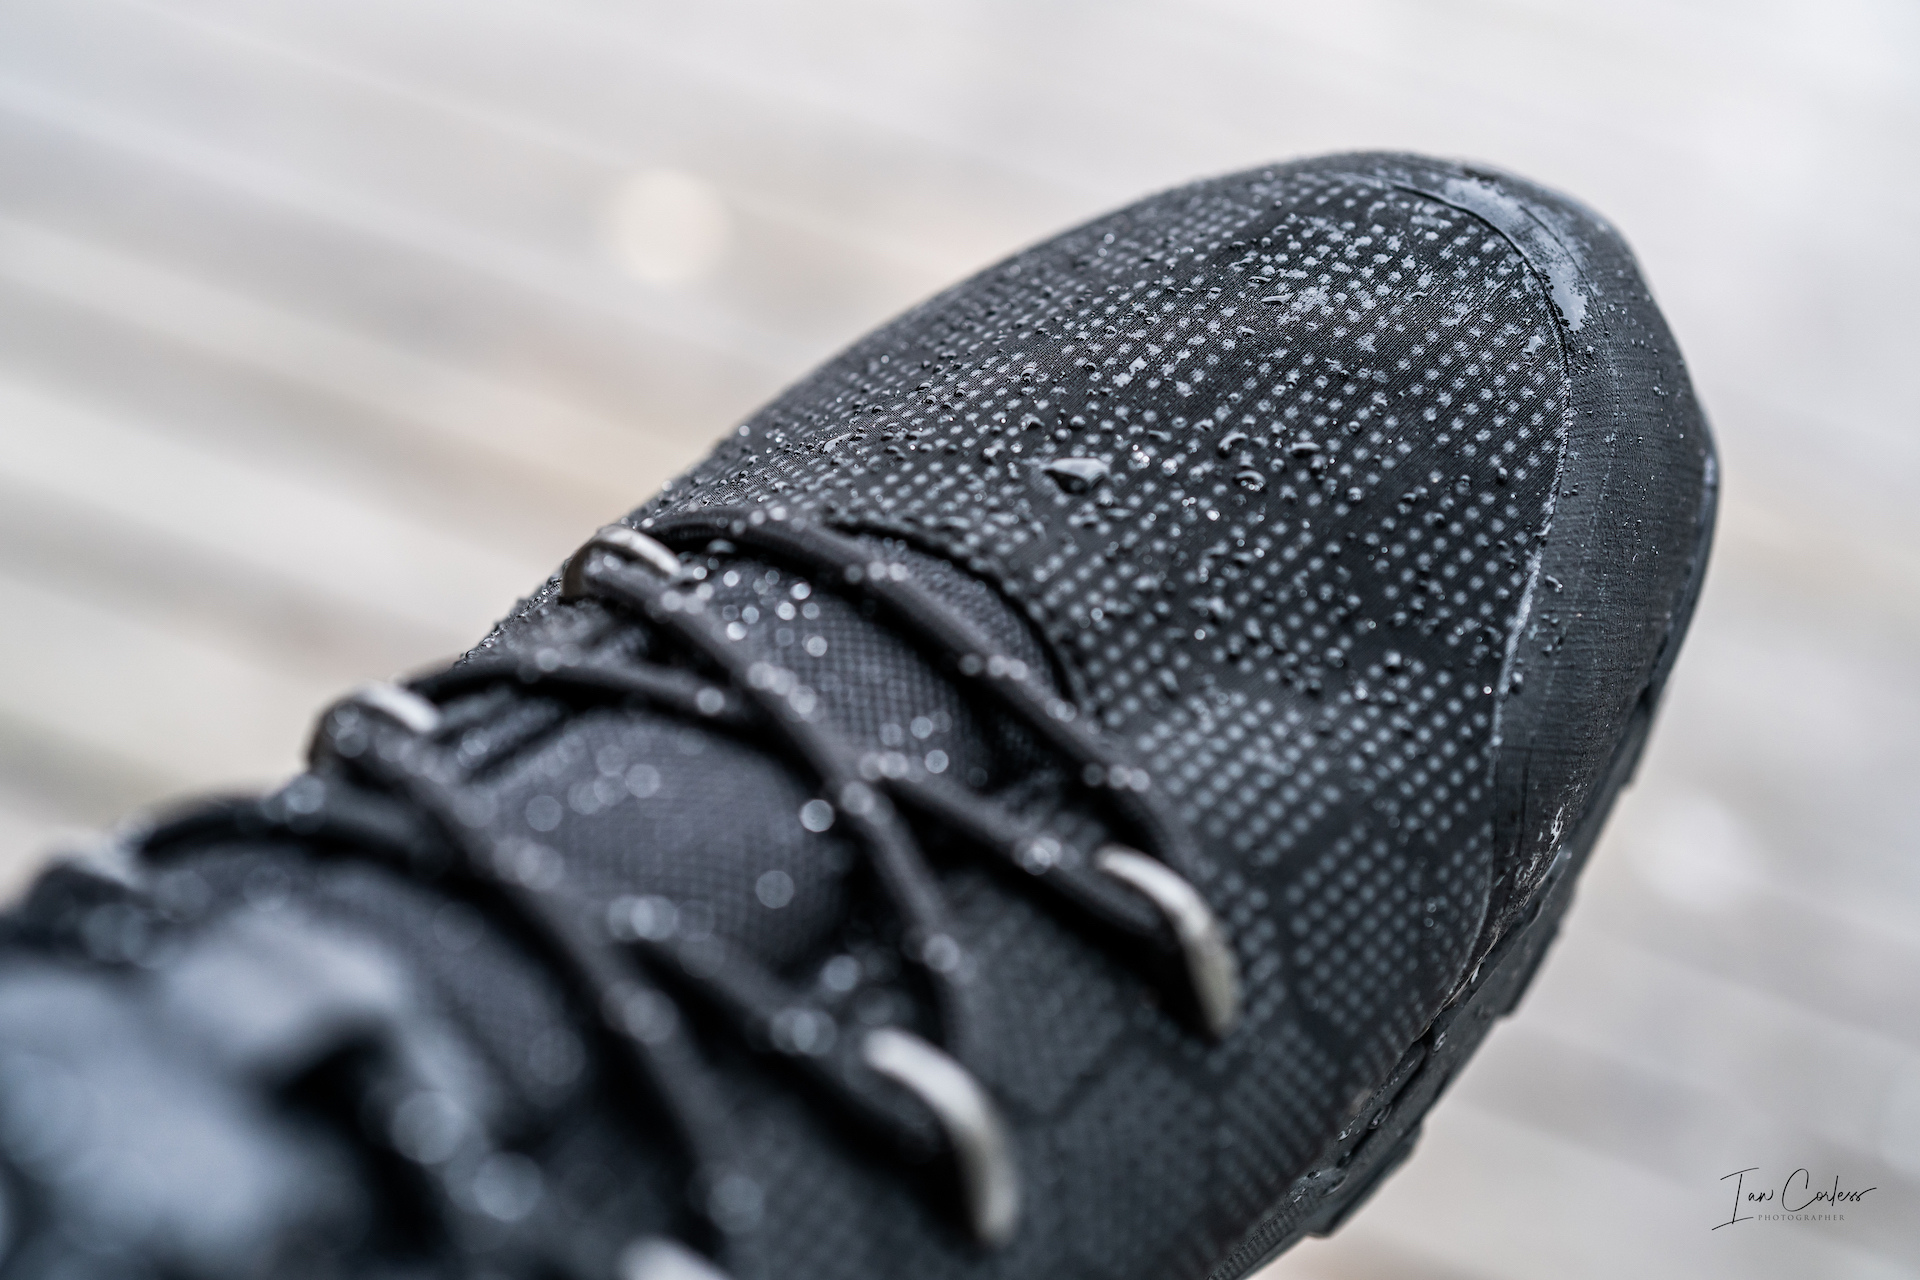
Like the G 370, the G 400 is Gore-Tex and this does a great job of protecting against the elements, especially wet, mud and snow. The weak point is always where the shoe stops and quite simply, if water or snow goes over the top of the shoe, you will get wet feet. This is where Gore-Tex can be a problem; there is no way for the water to escape! Therefore, a key recommendation, from experience, is to use Merino socks that manage to retain heat and warmth when wet. Use Nylon socks and you risk cold/ wet feet. Merino wicks sweat excellently too… Also, a risk with a Gore-Tex product as they are obviously warmer.
The upper uses Schoeller® ceramic-coated fabric which is an abrasion-proof, heat resistant fabric which sees ceramic particles – said to be as hard as diamonds – coated onto polymers for applications in the likes of protective, outdoor and military apparel. In simple terms, this fabric is incredibly durable to the wear and tear that one would encounter in extreme and harsh environments.
NOTABLE POINTS
There are many notable differences in comparison to the G370 and like I said previously, I see the two boots having different uses with some crossovers.
The G370 for me still feels like a run shoe. It laces up like a run shoe, feel for the ground is like a run shoe and the overall structure is more shoe like – there is less shoe if you know what I mean.
The G400 is considerably more robust in key areas:
The toe bumper is harder and more substantial.
The laces start higher up the shoe keeping the all-important flex area behind the metatarsals free.
The lace eyelets are solid/ robust metal with 5 on each side, the upper 2 have the inov-8 foot on, a nice touch!
The tongue is gusseted and maybe(?) a little more padded.
The heel protection is more substantial and padded.
Support for the heel area is considerably more reinforced and spreads down the left and right side of the shoe.
Cushioning is increased.
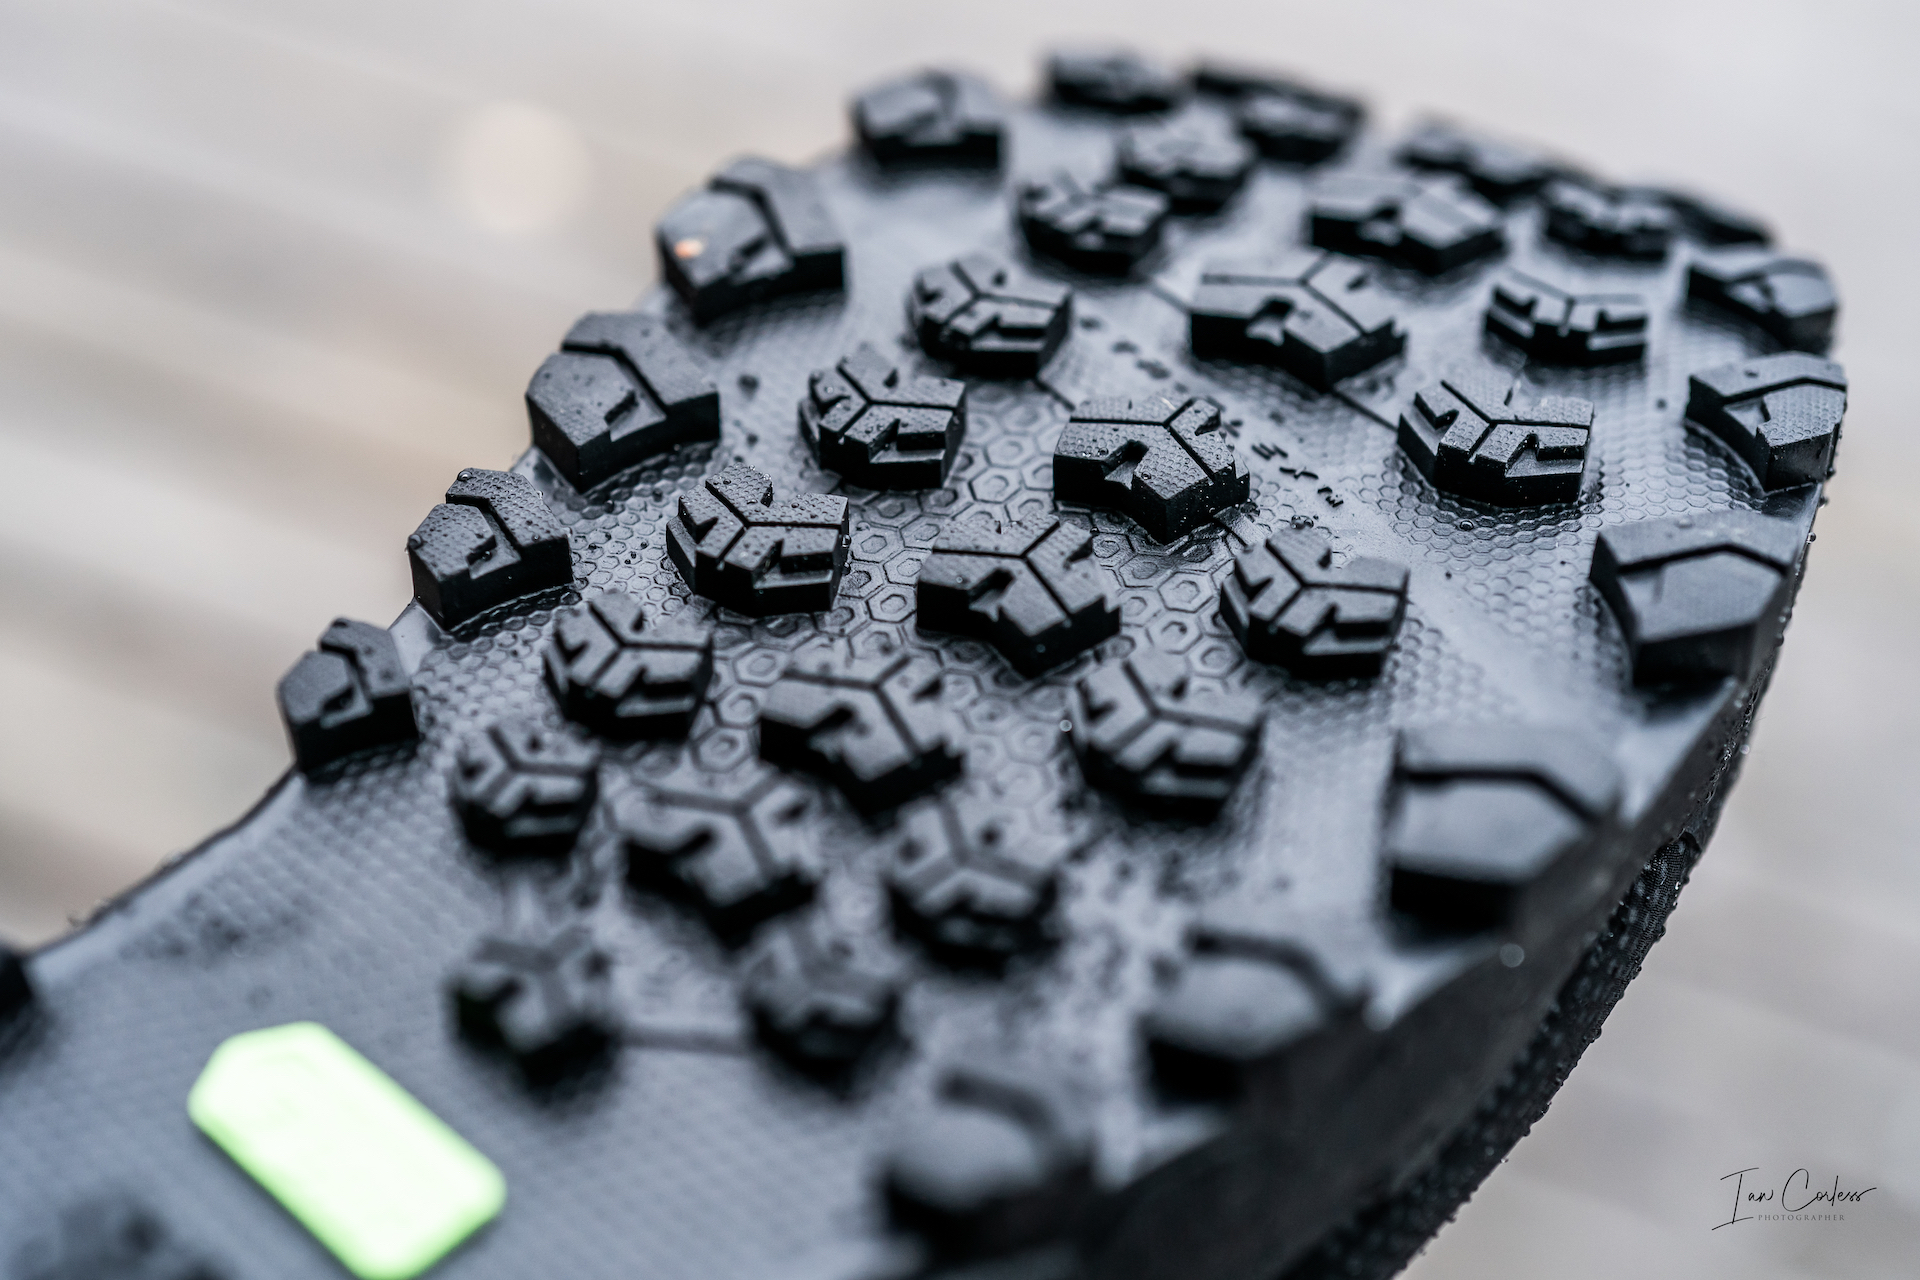
The outsole is completely different.
The G400 is a lightweight hiking boot that manages to combine all the great features of the previous models and then beef them up in a more robust package.
IN USE
The G400 works alongside one of the other Roclite boot models, be that the G 286, G 335, G 345 or the G 370 but does not replace them. Important to consider that the choice provided (G 286, G 335, G 345 or the G 370) all have different drops, fit, uppers and cushioning, so, that is also an important factor.
The G 400 is just a great all-round boot that is light enough for fast hiking, fastpacking, daily jaunts and day-to-day adventures. It manages to combine all the features and support of a boot double the weight. By way of example, I have a pair of lightweight Haglofs which are still over 100g heavier per shoe without the level of protection the G 400 offers.
I have been using the zero drop Terraultra G270 run shoe and although the outsole configuration is different, the grip is comparable with comprises coming in very sloppy mud – the lugs are just not aggressive enough for these conditions and I would not expect them to be. This outsole needs to perform on a multitude of surfaces, and it does that exceptionally well.
The cushioning is very notable and on a couple of long days this proved to be really welcome, especially with the 8mm drop.
The shoe has ‘Meta-Flex’ which is designed to allow the front of the shoe to bend behind the metatarsals for that all-important propulsive phase. In the G 370 this works really well with plenty of flex. The G 400 less so. The sole is much stiffer, and it is here that there is a notable difference between say the G370 and the G 400 and why the G 370 feels more like a run shoe and the G 400 like a boot.
Sliding one’s foot into the shoe, it feels plush and the room in the toe box is notable. The lacing is fixed for the first 3 eyelets and the top 2 are open allowing ease for tightening, loosening or different lacing configurations. With the laces pulled tight and adjusted around the ankle, the foothold is spot on and the padding is superb. The back of the shoe drops away slightly avoiding risk of irritation on the achilles.
The back end of the shoe is beefy with a great deal of support to help reduce ankle roll. This is really noticeable to the G370 which has minimal additional support. Again, this is the run shoe v boot comparison.
CONCLUSIONS
The G 400 is a really great boot that is absolutely ideal for long mountain days when you need all the support and features of a traditional boot but in a considerably lighter package. It has great grip, durable upper, great comfort and superb weight. It’s hard to find a fault, especially when one compares to the competition.
Despite all of the above, the G 400 would not replace my G 370’s which feel lighter, faster and more like a run shoe.
Quite simply, I am in the fortunate position to have both and I can gladly mix between the two.
So, if you can only buy one, which should you go for?
If you are primarily a runner looking for a durable winter solution for all elements that will allow you to still run and cover ground fast, then one of the G 286, G 335, G 345 or G 370 models will more than likely be preferable. Make sure you check cushioning, drop and other key features.
If you are a hiker or fastpacker who will do a little running, the G400 would be a better choice and serve you for a multitude of uses.
Ultimately, whichever way you go you will win. The inov-8 boots have worked well for me for the last 2-years and the new G 400 is working exceptionally well now alongside my G 370’s.
Please support this website. I believe everyone deserves to read quality, independent and factual articles – that’s why this website is open to all. Free press has never been so vital. I hope I can keep providing independent articles with your help. Any contribution, however big or small, is so valuable to help finance regular content. Please support me on Patreon HERE
In recent weeks, as restrictions on travel, social distancing and borders open, it has somehow felt that living in the times of a Pandemic is a little like toeing the line at Big’s Backyard Ultra. Instead of running loops around a yard, we wake up each morning for another loop of 24-hours not knowing where the finish line is and when it will come.
Covid-19 for us runners is a very unique ultramarathon.
In all honesty, I do believe that ultra-runners are somehow better adapted for the challenges that a Pandemic brings. Mental fortitude and resilience have come to the fore and when restrictions were really tough, runners rallied with running at home. Virtual suddenly became the next big thing. It filled a gap and brought people together from all over the world in a mutual coming together to enjoy a love of sport and community.
The impact on work has been huge for all and the consequences of this will continue on for months and years on personal levels and business. It’s a sad time.
But early on, I accepted that 2020 would be a wipe out. Being somewhat of an OCD character, this took a little time to adjust too. My year of work was planned out. The schedule was timetabled and suddenly, it was gone… What was full, soon became empty. I have felt my moods swing with positivity and at times I have wanted to put my head in my hands.
But quarantine and social distancing, in all honesty, was no big deal for me. I actually feel that I have social distanced most of my life and sport has only reaffirmed that.
Yes, I enjoy the company of friends. Yes, I enjoy a trail run with company. Yes, I enjoy a beer and a meal with others and yes, I have missed my family.
The summit os Slogen, Norway in July with Abelone.
But I am good alone, in isolation and finding my own footing. Time on the trail has always allowed me to switch off, think, contemplate, plan, work out problems, come up with solutions and form ideas.
When running with others, I am often asked, ‘Are you ok? You are quiet!’
‘I am perfect; I am just out of the office and soaking up the time,’ often my reply.
In recent months, or should I say for the whole of 2020 so far, I have immersed myself in a new life in Norway with my girlfriend, Abelone.
Little did we both know in February after being at The Coastal Challenge in Costa Rica that we would spend 24/7 for the coming months together. I laughed early on saying, ‘Well, this is one way to find out if this relationship will work!’
It has been the best thing to come from a Pandemic.
FREEDOM is something I always had being self-employed but the freedom to do ‘my’ adventures was dictated by travel and a hectic work schedule. Freedom often only really came in the middle of the year when I would block off some time in Summer and then December, which I would treat as sacred and my opportunity to explore and adventure.
2020 has seen my diary flipped with little or no work and constant adventure.
Here is Scandinavia, we were very lucky with Covid (exception coming from Sweden who handled things differently,) particularly in Norway, cases were low, death rates were low and although social distancing was required, our freedom was not impacted. In all honesty, many locals confirmed that the trails in Norway had never had so many people on them in March, April and May. No doubt helped by some amazing weather.
Scandinavians love the outdoor life and Covid only emphasized the need for space, outdoor adventure and exercise. A wonderful mental and physical prescription that all doctors should prescribe.
I am used to travelling when I like, eating in restaurants, meeting friends when I want, and I am used to being surrounded by people at a race. Some would say I was free.
But was I?
August is here and I am now looking back at social interactions in 2020 since March and lockdown.
I have seen no family.
I have seen 4 friends in Norway.
I have run on the trails with Abelone and one other person who we had to social distance with.
I have interacted with 3 members of Abelone’s family.
And that is it…
So, my freedom was and is still certainly impacted upon and I relish the opportunity to hug a friend, travel back to the UK and see my Mum and my son and equally embrace them like never before.
But no work has allowed me a freedom of time, not financial, to do what I want.
Adventure is on the doorstep for us all.
Now, here in Norway we have a pretty big doorstep. At a third larger than the UK, getting around Norway can take a while but with just 5.5 million people in contrast to 66 million, finding space and social distancing is no problem. Hardanger, Stranda, Romsdal, and Jotunheimen have all been on our list and even 1,2 or 3-day adventures from home have become regular.
Just yesterday, we ran 15km from home, wild camped in an isolated location and then ran 15km home.
I have always been a lone wolf with adventure. At best, I have shared an experience with just one or two others. I like my pace, my schedule and my itinerary and am somewhat inflexible, yes stubborn with changes and I do like to plan. I can see Abelone roll her eyes now…!
The escape of outdoor life has always provided me with an energy. I even got that with my work, often hiking out for hours on a trail to sit and wait, alone, for runners to come.
So, what am I saying?
The Pandemic is rubbish, for sure. Is it going away? I hope so, as soon as possible, but as I said at the beginning, currently we are all running loops at Big’s Backyard Ultra and nobody knows how many loops are to go and when the finishing will come.
One thing we do have, albeit at varying levels depending on where one lives in the world, is freedom to explore from home. So, embrace what you have and do not think or focus on what you do not have or what you cannot do.
It’s no surprise that FKT’s have never been more popular.
Many have said, ‘I cannot wait for life to return to normal!’ I agree to a certain extent, normal would be good… But then again, was normal good?
Will life ever be ‘normal’ again, or, are we looking at a new normal?
I don’t have answers.
But I will keep running the loops and enjoy the newfound freedom I have for now.
*****
Have you found freedom in 2020? I would love to know.
Please support this website. I believe everyone deserves to read quality, independent and factual articles – that’s why this website is open to all. Free press has never been so vital. I hope I can keep providing independent articles with your help. Any contribution, however big or small, is so valuable to help finance regular content. Please support me on Patreon HERE.
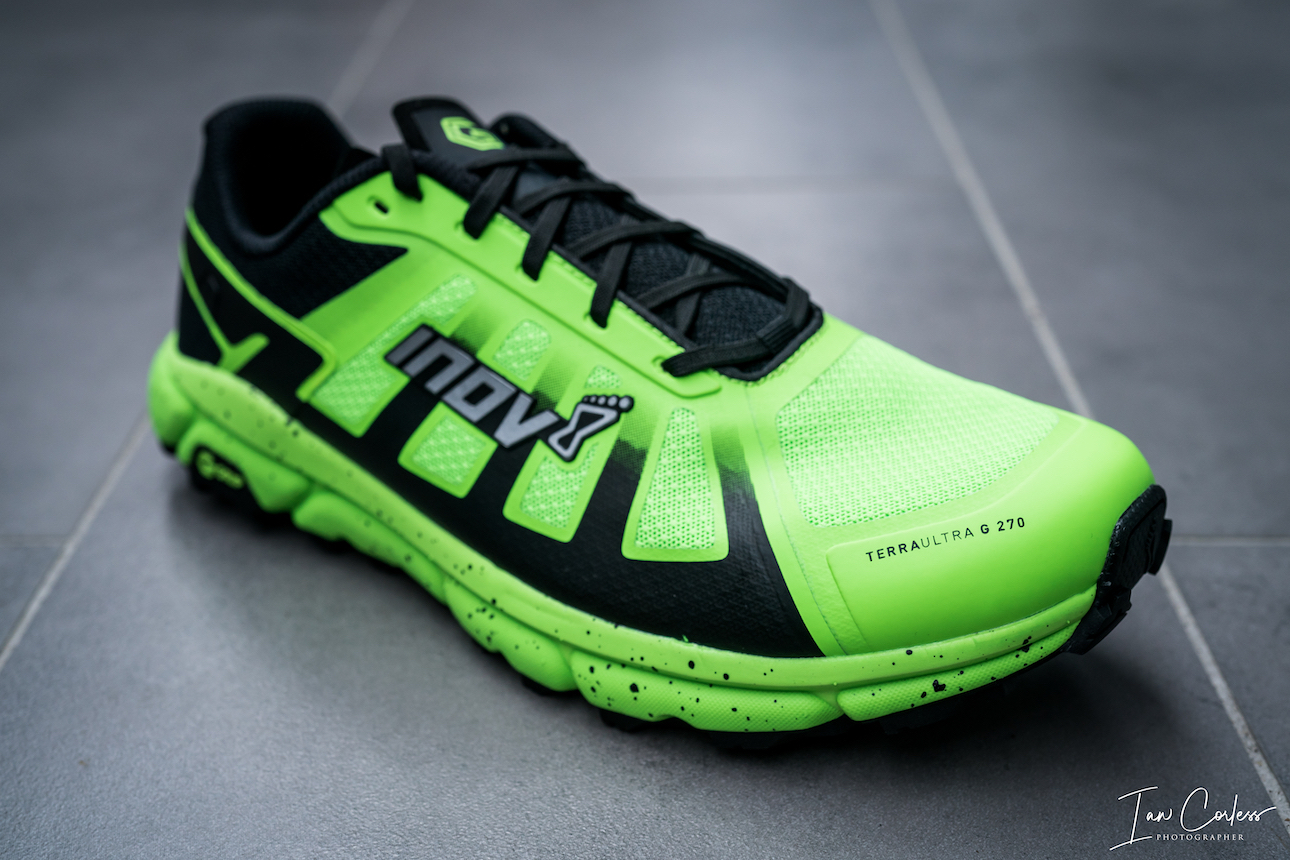
I first got a hold of the original TERRAULTRA 2-years ago, the G260. It was a groundbreaking shoe for inov-8 not only introducing a zero-drop shoe to the brands line-up but also paving the way for Graphene technology.
A great deal has happened in the past 2-years with Graphene appearing in more and more inov-8 shoes but interestingly no other zero drop shoes have been added to the line-up.
The TERRAULTRA G260 was warmly welcomed, particularly by any trail runner using Altra who now had a zero-drop alternative now available with a brand who really know how to make off-road shoes from a long history in the fells of the UK.
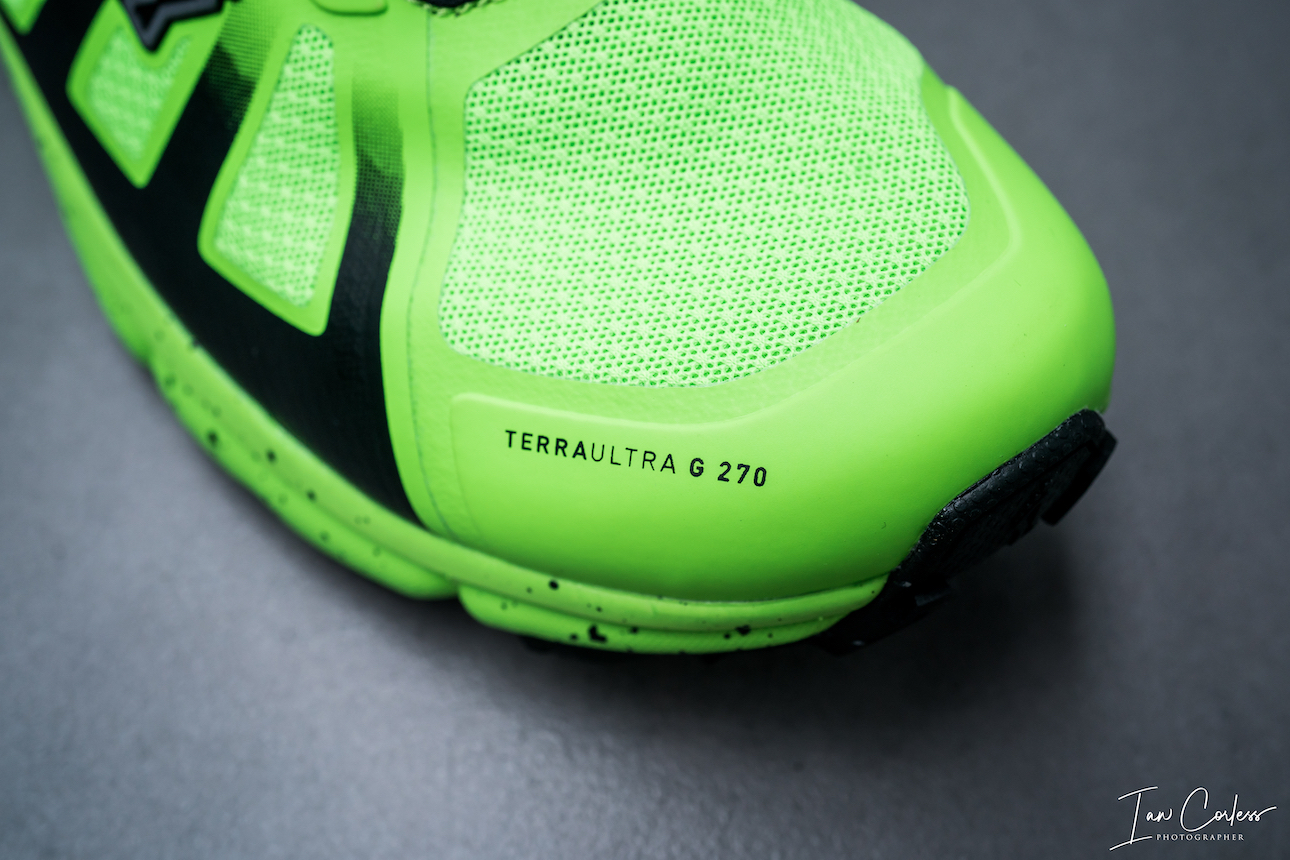
Now, the G260 has been updated and we welcome the TERRAULTRA G270.
On first glance, it could look like the same shoe. That green colour is somewhat distinctive! However, one does not need to look longer to see some immediate significant changes.
The upper, the lacing, the outsole and the cushioning all sort of look the same but they are not.
In the words on inov-8:
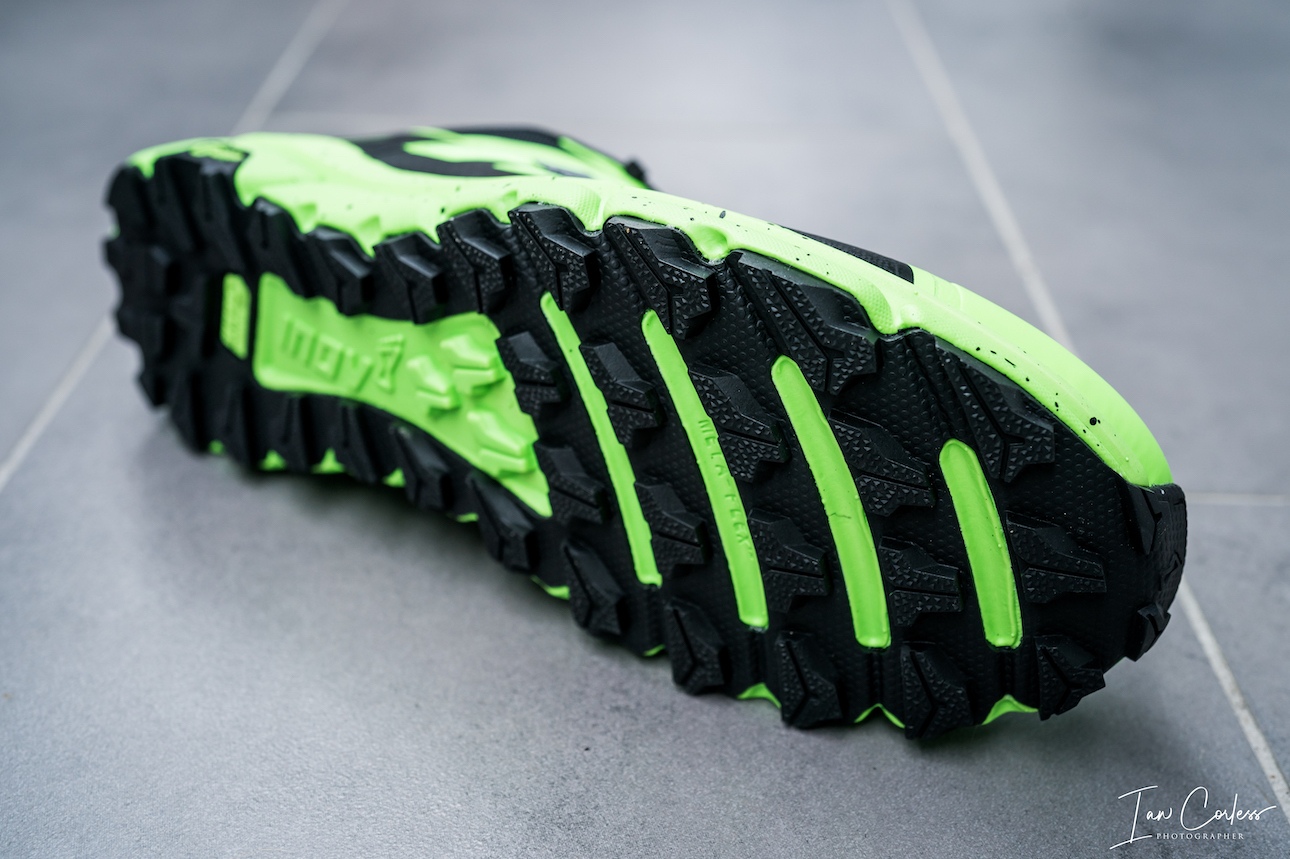
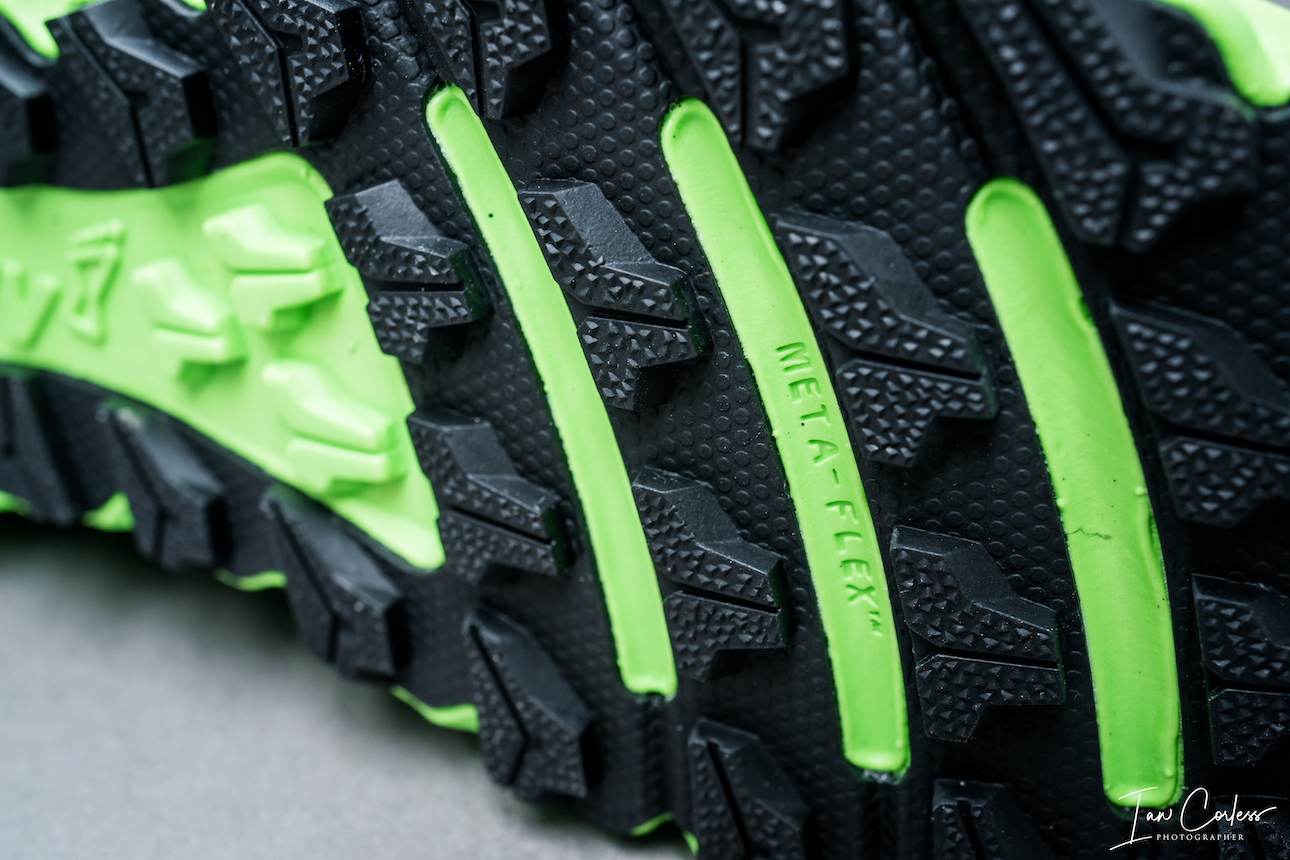
Graphene outsole has 4mm deep cleats all now armed with dispersion channels and rubber dimples to give better grip on wet and dry trails. Cleats are repositioned in key areas and flex grooves fine-tuned for agile sticky traction that lasts longer.
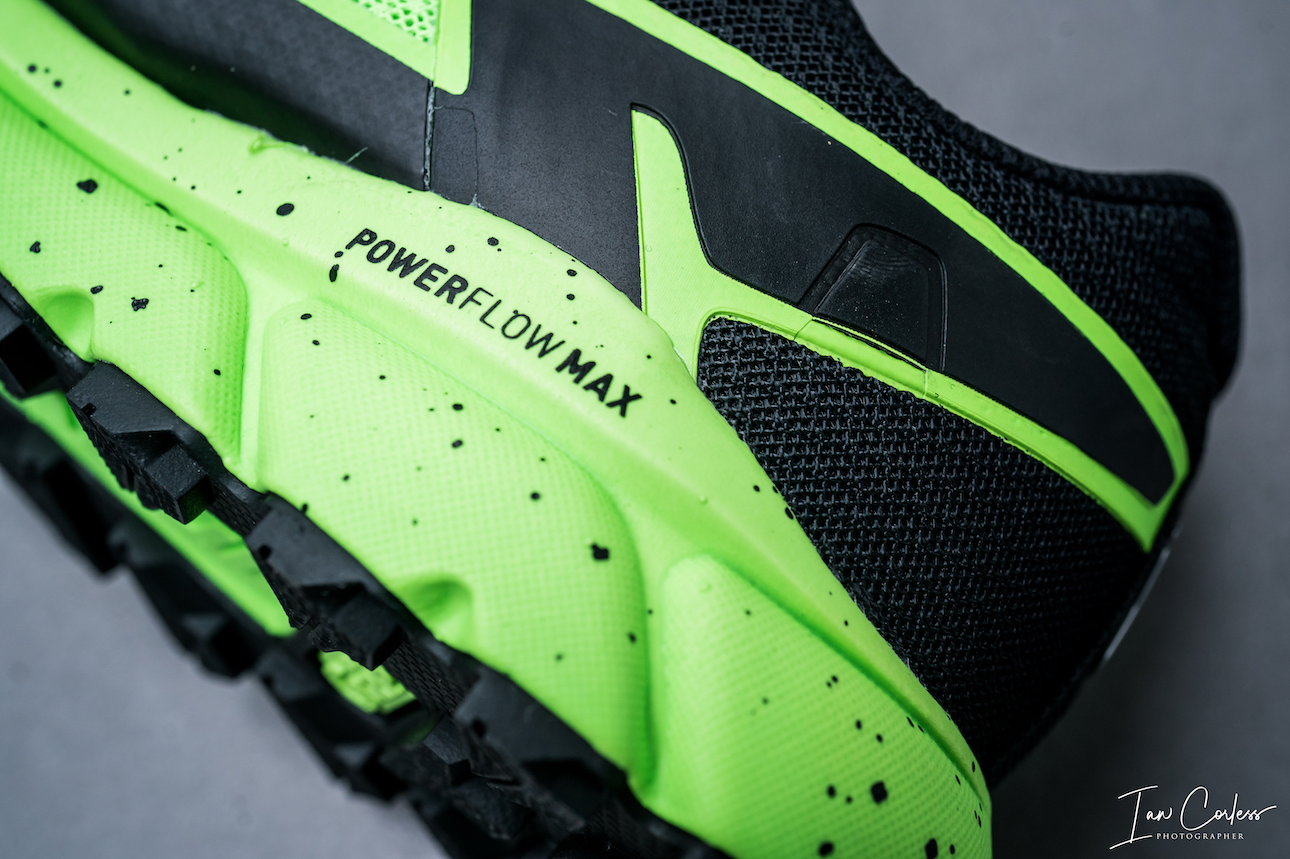
Cushioning is a new POWERFLOW MAX that has been increased by 3mm for a plush ride, improved cushioning and double the durability. A BOOMERANG insole apparently will increase energy return by 20 and 40% respectively over the previous model.
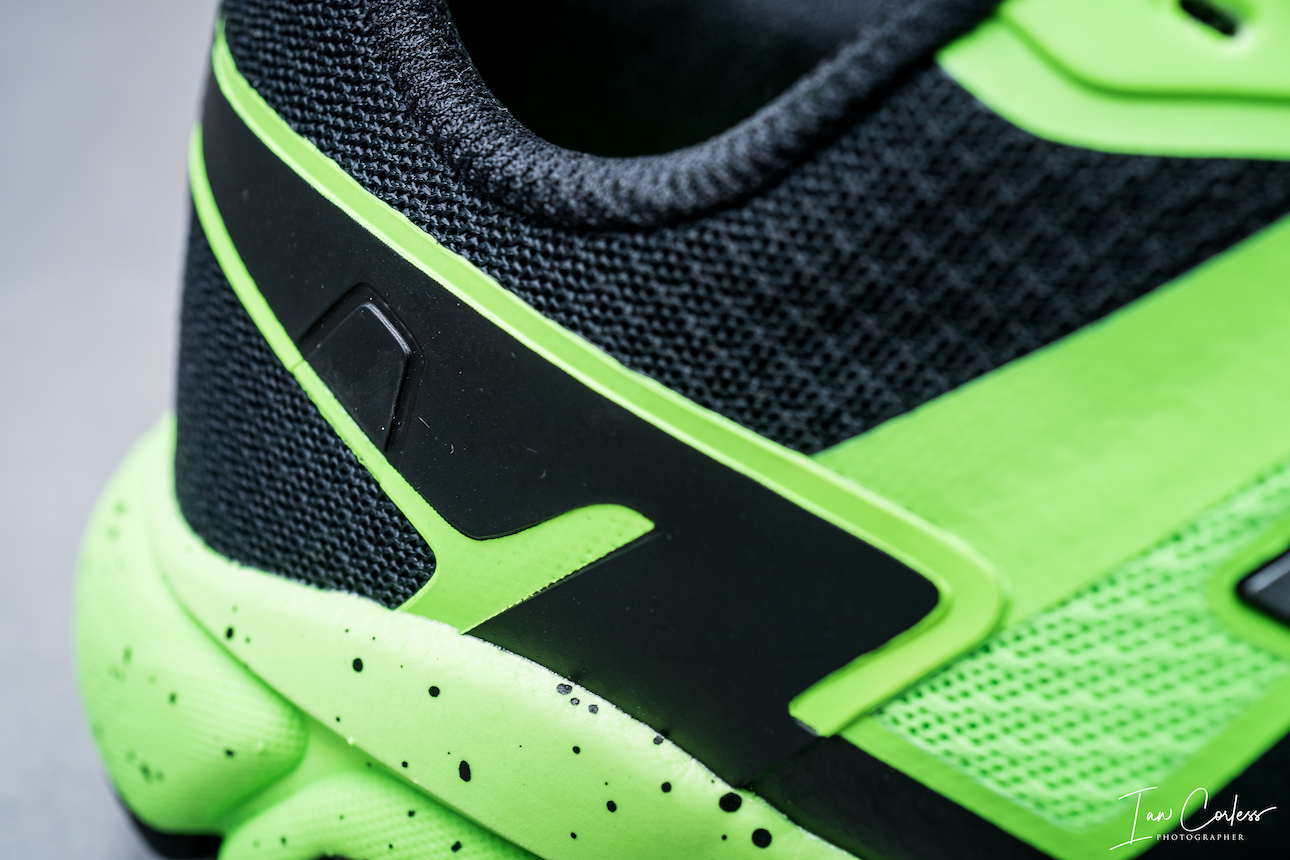
The upper has ADAPTERFIT which adjusts to the foot and the use of stronger materials will add to durability and protection.
The Shoe
With a fit scale of 5, this is as wide as you can go in an inov-8 shoe, So, toe splay and room at the front end comes no better.
Cushioning is 12mm front and rear providing a zero drop. Using POWERFLOW MAX.
The footbed is 6mm and the lug depth of the outsole is 4mm made of Graphene grip.
It G270 has the necessary points to attach a trail gaiter.
At 270g (UK8) the new TERRAULTRA is 10g heavier than the previous version.
Sizing is true to size BUT take into consideration the wider toe box, maybe (?) a half-size smaller would be better. I always use EU44/ UK9.5 and these were ideal for me.
FIRST IMPRESSIONS
The G270 is light and it’s clear to see some of the immediate improvements over the previous version. The lacing is flatter, the tongue is different, the upper is different, the toe box protection is increased, and the shoes have the flagship Graphene outsole that looks very different.
Zero drop is NOT for everyone, so, what makes the G270 great for some also make the G270 potentially unusable for others. This is not a negative comment, it’s just a heads-up to say, that if you have not used zero drop before, don’t be tempted to get the G270 and start racking miles up… You will almost certainly get sore Achilles, calf and potentially get injured. Like barefoot running, zero drop running needs to be learnt and the body needs to adapt. Typically, 6-months would be a good transition period. However, some zero-drop running (initially short periods) is great for improving run form, so, the G270 could be a nice new weapon in your shoe line-up?
If zero drop is your thing, then you will already have a big smile on your face.
Following on from the G260, the G270 has a wide toe box that echoes what brands like Altra have been doing for years. Toe splay is king and the G270 has loads of room for that. I had issues with the G260 in that I always felt I had too much room, the room at the front was made worse by the upper and lacing system not holding my foot how I wanted to compensate for the additional width, space and foot movement.
Slipping the G270 on I was initially worried, the space in the toe box was as much if not a little more than the previous version. However, as soon as I adjusted and tightened the laces, I immediately noticed significant changes. The tongue was a much better fit. The lacing was great improved, and I could really adjust the tension from top to bottom. The ADAPTERFIT pulled in holding my foot. Walking around immediately felt 100% better than the G260. My foot was being held reassuringly.
The upper is far more breathable that the G260.
The cushioning and bounce were notable and the outsole at this stage left me with many questions.
IN USE
The G260 was a little lifeless and felt flat. The G270 immediately felt different with a couple of miles on the road before hitting the trails. So, this was already a great improvement.
With META-FLEX at the front, the propulsive phase felt really good no doubt added to with the insole that inov-8 say increases energy return by 40%. I definitely felt some bounce, but 40% more?
The cushioning was noticeable, particularly over the G260 as was the zero drop. I use zero drop shoes occasionally, but always prefer 4/5mm for faster and more technical running and if going long, 8mm works perfect for me. So, considering the G270 is designed for long-distance running, zero drop would be a challenge for me.
The wide toe box still feels mega wide (too wide for me) BUT the lacing and ADAPTERFIT allowed me to compensate for the room at the front by tightening appropriately. However, I did fine once or twice I over-tightened the laces only having to stop and loosen them a little.
The transition from road to gravel trail was seamless and comfortable. The TERRAULTRA is an out and out ultra-shoe designed for trails that are more groomed, say Western States in the USA or UTMB in Europe. So hard packed single-track felt really good in the G270, equally rocky and stoney ground felt good.
Running up hill surprised me. The META-FLEX allowed for great flexibility and propulsion, but it was the outsole that really gripped. A massive improvement over the G260.
I have to say, I have not always been a fan with the addition of Graphene. At times, I felt it compromised the sticky outsoles and made them less grippy, albeit providing longer life. But on many occasions, for me particularly, grip is king and if it is compromised, I am not happy.
Here, in the G270 there was noticeable difference, and this was coming from just 4mm lugs.
The test of course would really come when I threw in some mud and wet rock.
Gladly, mud (loads of it) rocks, tree routes, climbs, descents, wooden planks, forests and yes, a little fire trail all make up my daily and local runs. So, throwing the G270 in the thick of things was easy to do. And yes, I was being unfair as I actively searched out and aimed for steep rocks with water on them and I aimed for every puddle and sloppy mud I could.
I was impressed.
At times, I would think to myself, almost wanting the G270 outsole to fail;
‘This will get them… wait for the slip!’
But the slip never came, especially on dry and wet rock. On a 3-hour run, as the minutes clicked by, I started to relax more and more and eventually stopped worrying and asking;
‘Will the G270 grip here?’
They did, at all times provide me with the grip I required.
Surprisingly, in really sloppy mud, I did not slip or move as I had expected. Partially due to the fact that I did apply the brakes a little and respect the conditions.
Technical trail is where the G270 shows some flaws. The wider toe box lacks precision, allows one’s toes to move and therefore I felt that there was just ‘too much’ shoe to navigate between rocks, roots, stones and a plethora of other obstacles. But of course, I am being unfair! The G270 is designed for less technical trails, long hours and all-day comfort – that they do really well!
The shoes are responsive and do work well when running fast. However, the wide toe box, zero drop and cushioning do make them feel a little like a saloon car… Plenty of room, comfy seats, and can get the miles done. But I craved a more performance car at times with more precision, tighter handling and a little more fire and daring, especially when coming of road, fire trails or single-track.
The cushioning was plush and considering it is only 12mm, it felt like more. Especially noticeable extra comfort over the 9mm G260 which also was a little hard and lifeless. One thing to note, I found on tree routes and some stones, I could feel them in the bottom of my foot, so protection from obstacles is minimal. The toe box though has a good bumper and that worked really well.
The heel box was noticeably secure on the flat and going uphill, I had little to no slippage.
SUMMARY
Damian Hall just ran 260-miles on the Pennine Way in the G270 and set a new FKT, so, that gives some indication of the intended use of this shoe. Having said that, the Pennine Way is not all single-track and wonderful cruising trail, so, the shoe can handle the rough stuff too.
I was impressed by how versatile the 4mm Graphene outsole worked. There has been some significant improvement over the G260 and in the Graphene outsole in general.
The upper, lacing and tongue now really hold the foot and that for me is essential, especially with such a wide toe box. The toe box is one of the key selling points of this shoe. It allows toe splay, plenty of room and flexibility for a foot to swell wider with accumulated miles.
The cushioning increased from 9mm (G260) to 12mm for the G270 is noticeable. More importantly, the G270 now has life, the G260 felt a little dead.
CONCLUSION
The G270 is a marked improvement over the G260, so, if you liked the previous model you are going to love the latest incarnation.
Zero drop and a wide toe box will be exactly what some people are looking for and they will have a big smile on their face. For me, and this of course is very personal, I can’t run in zero for hours and hours and I feel that the toe box is a little roomier than it needs to be.
So, imagine a Trail Talon 290 made like a TERRAULTRA G270 – slightly narrower toe box (4 fit) 8mm drop; 11mm and 19mm cushioning and this Graphene outsole – that would be a winning shoe IMO. (inov-8 take note)
The G270 is a winning shoe and all packaged perfectly for ultra-distance runner who needs grip, cushioning and comfort for the long-haul out on the trails. It would even make a great road shoe if required.
For multi-day adventures, such as Marathon des Sables, just like the Trail Talon, the G270 would be really excellent.
If technical trail and mud is your thing, this is not the best shoe for that, however, it can handle it remarkably well, so, if you only wanted one trail shoe (with zero drop) to do all, the G270 would be ideal. By contrast, if you wanted a one-stop trail shoe with 8mm drop, I recommend the Trail Talon 290.
Please support this website. I believe everyone deserves to read quality, independent and factual articles – that’s why this website is open to all. Free press has never been so vital. I hope I can keep providing independent articles with your help. Any contribution, however big or small, is so valuable to help finance regular content. Please support me on Patreon HERE.
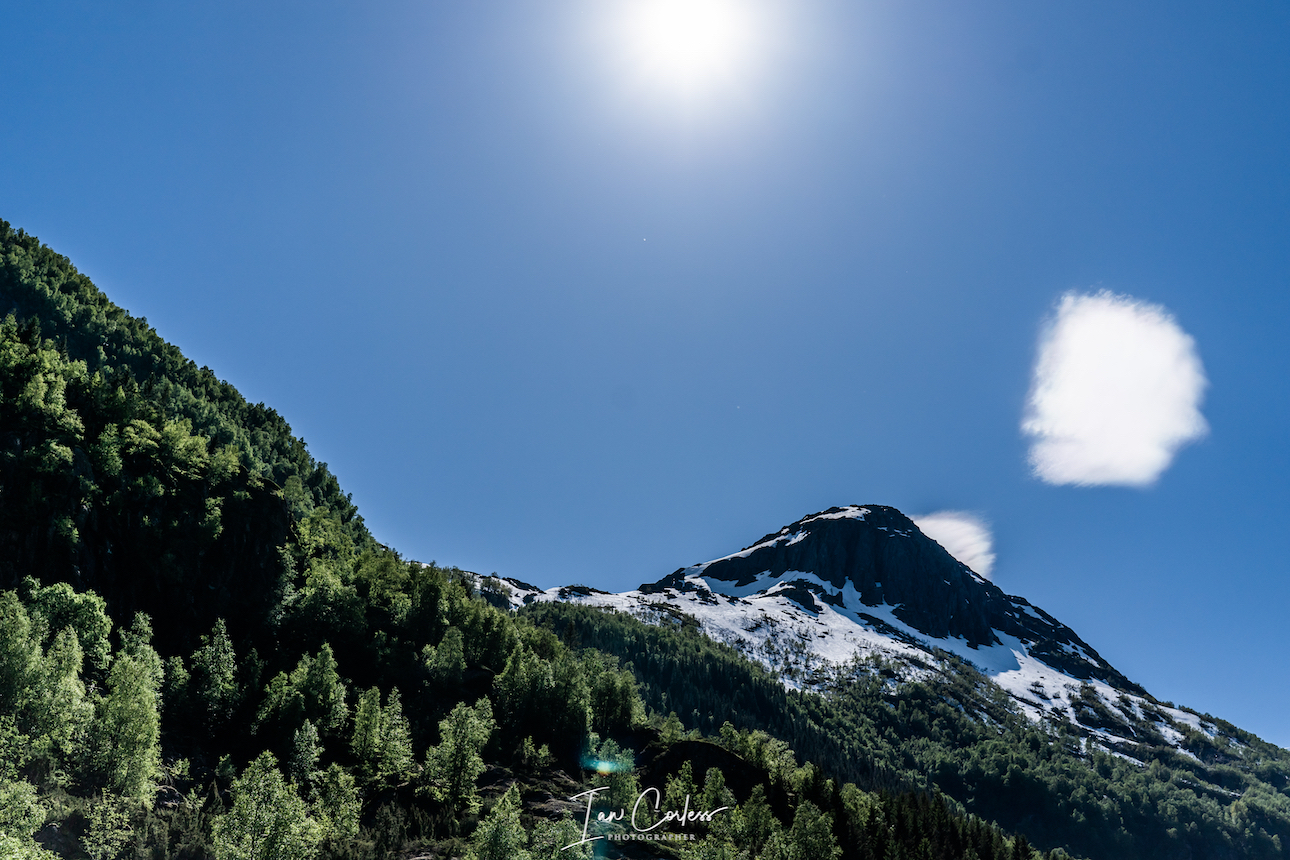
Norway has long been a desirable location for the mountain enthusiast. One only need to add the word ‘Norway’ to a Google search engine, and you will be rewarded with photos that make the jaw drop.
At roughly 33% bigger than the UK and 1/3rd the size of USA, one begins to understand the scale of this Scandinavian country and its 5.3 million inhabitants.
Just think about it, Norway is 33% bigger than the UK, but the UK has 66.6 million inhabitants…
Needless to say, outside of Oslo (681,000 pop), Bergen (271,000 pop) and other key locations such as Trondheim and Stavanger, open space and amazing landscape is available for all to explore.
In a series of articles and posts, we intend to introduce you to the magic of Norway.
Norway is the longest country in Europe and therefore, travelling anywhere is not a quick process. It has 60.000 miles of coastline, towering mountains and dramatic fjords. Remarkably it has 2-300 peaks over 2000m+, Galdhøpiggen the highest at 2469m closely followed by Glittertind at 2464m. There are over 1000 peaks over 1650m, so, if you love mountains, Norway should be at the top of the ‘to-do’ list!
We are starting our articles with HARDANGER which is easily accessible from Oslo or Bergen and although based in the south of Norway, it does not lack any of the drama or mind-blowing views that northern Norway offers in abundance.
The list will grow as we progress through Norway, but expect posts on:
Stavanger
Loen
Jotunheimen
Senja
Tromso
Lofoten Islands
Romsdal
Lyngen
Svalbard
And more…
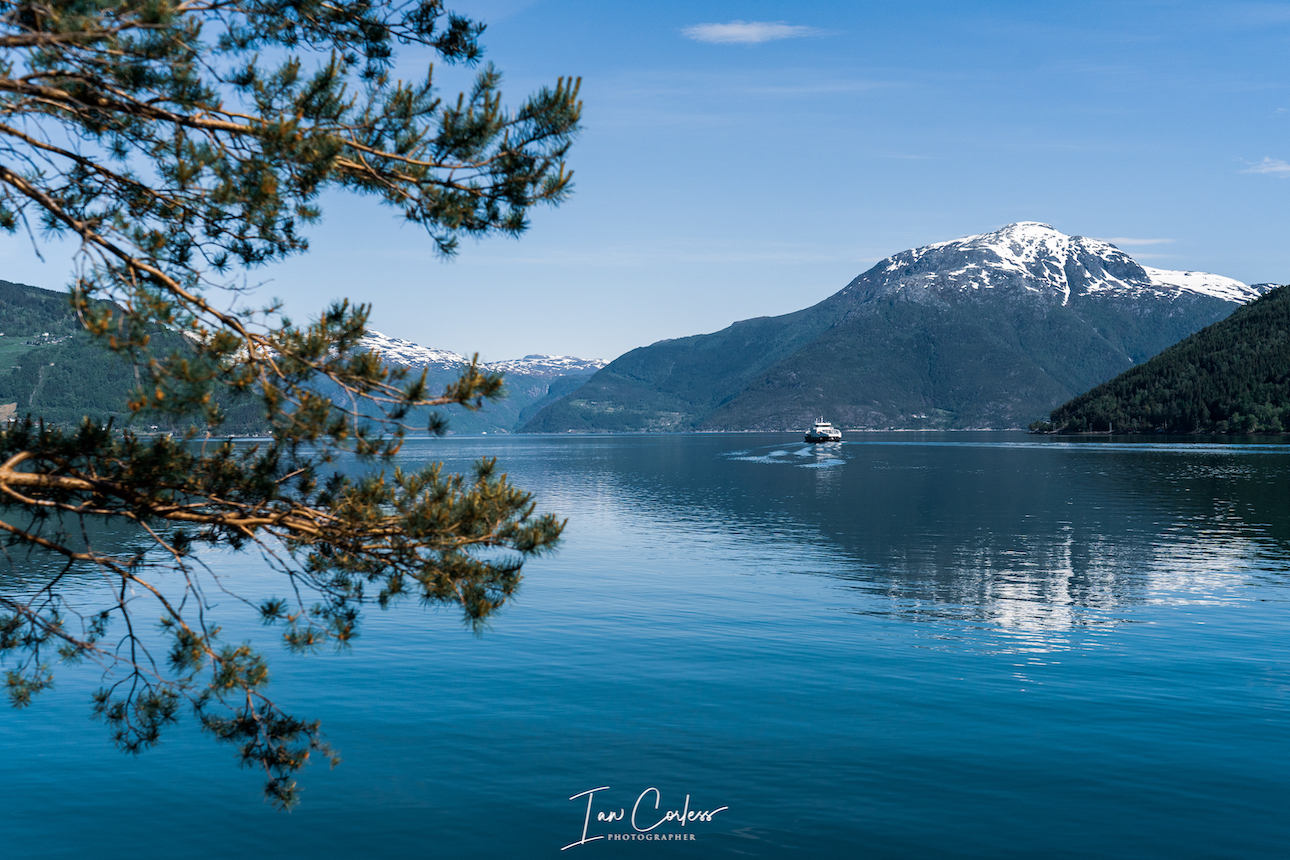
HARDANGER
The fjord (Hardangerfjord) resort of Kinsarvik will be used as an initial start point for adventures in the Hardanger area, by car, it is 2hrs 30min from Bergen and 5hrs from Oslo.
Located in the west of Norway, Hardanger is a traditional district with a great deal to offer in both summer and winter. For the purposes of this initial introduction, we are looking at a 4-5-day trip in June.
June provides a wonderful opportunity as the area transitions from winter to summer, if lucky, much of winter can remain and therefore you can gain the best of both worlds. It’s worth pointing out now, that winter conditions in Norway are harsh and you need to be prepared both physically, mentally and have the correct equipment to explore safely in this area. If any of the above have a question mark, look to travel and explore in July/ August when snow conditions will have disappeared.
Areas to explore:
Dronningstien aka The Queens Trail
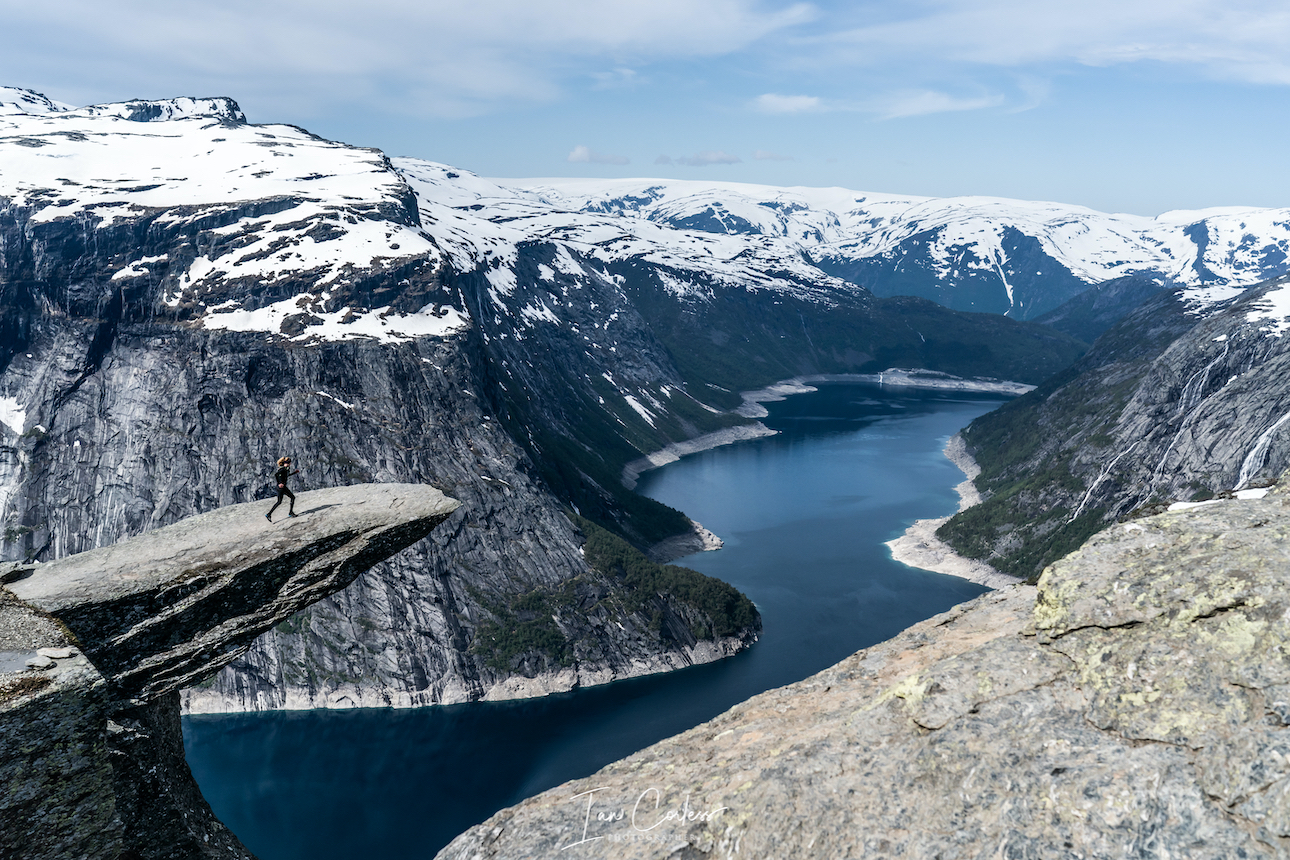
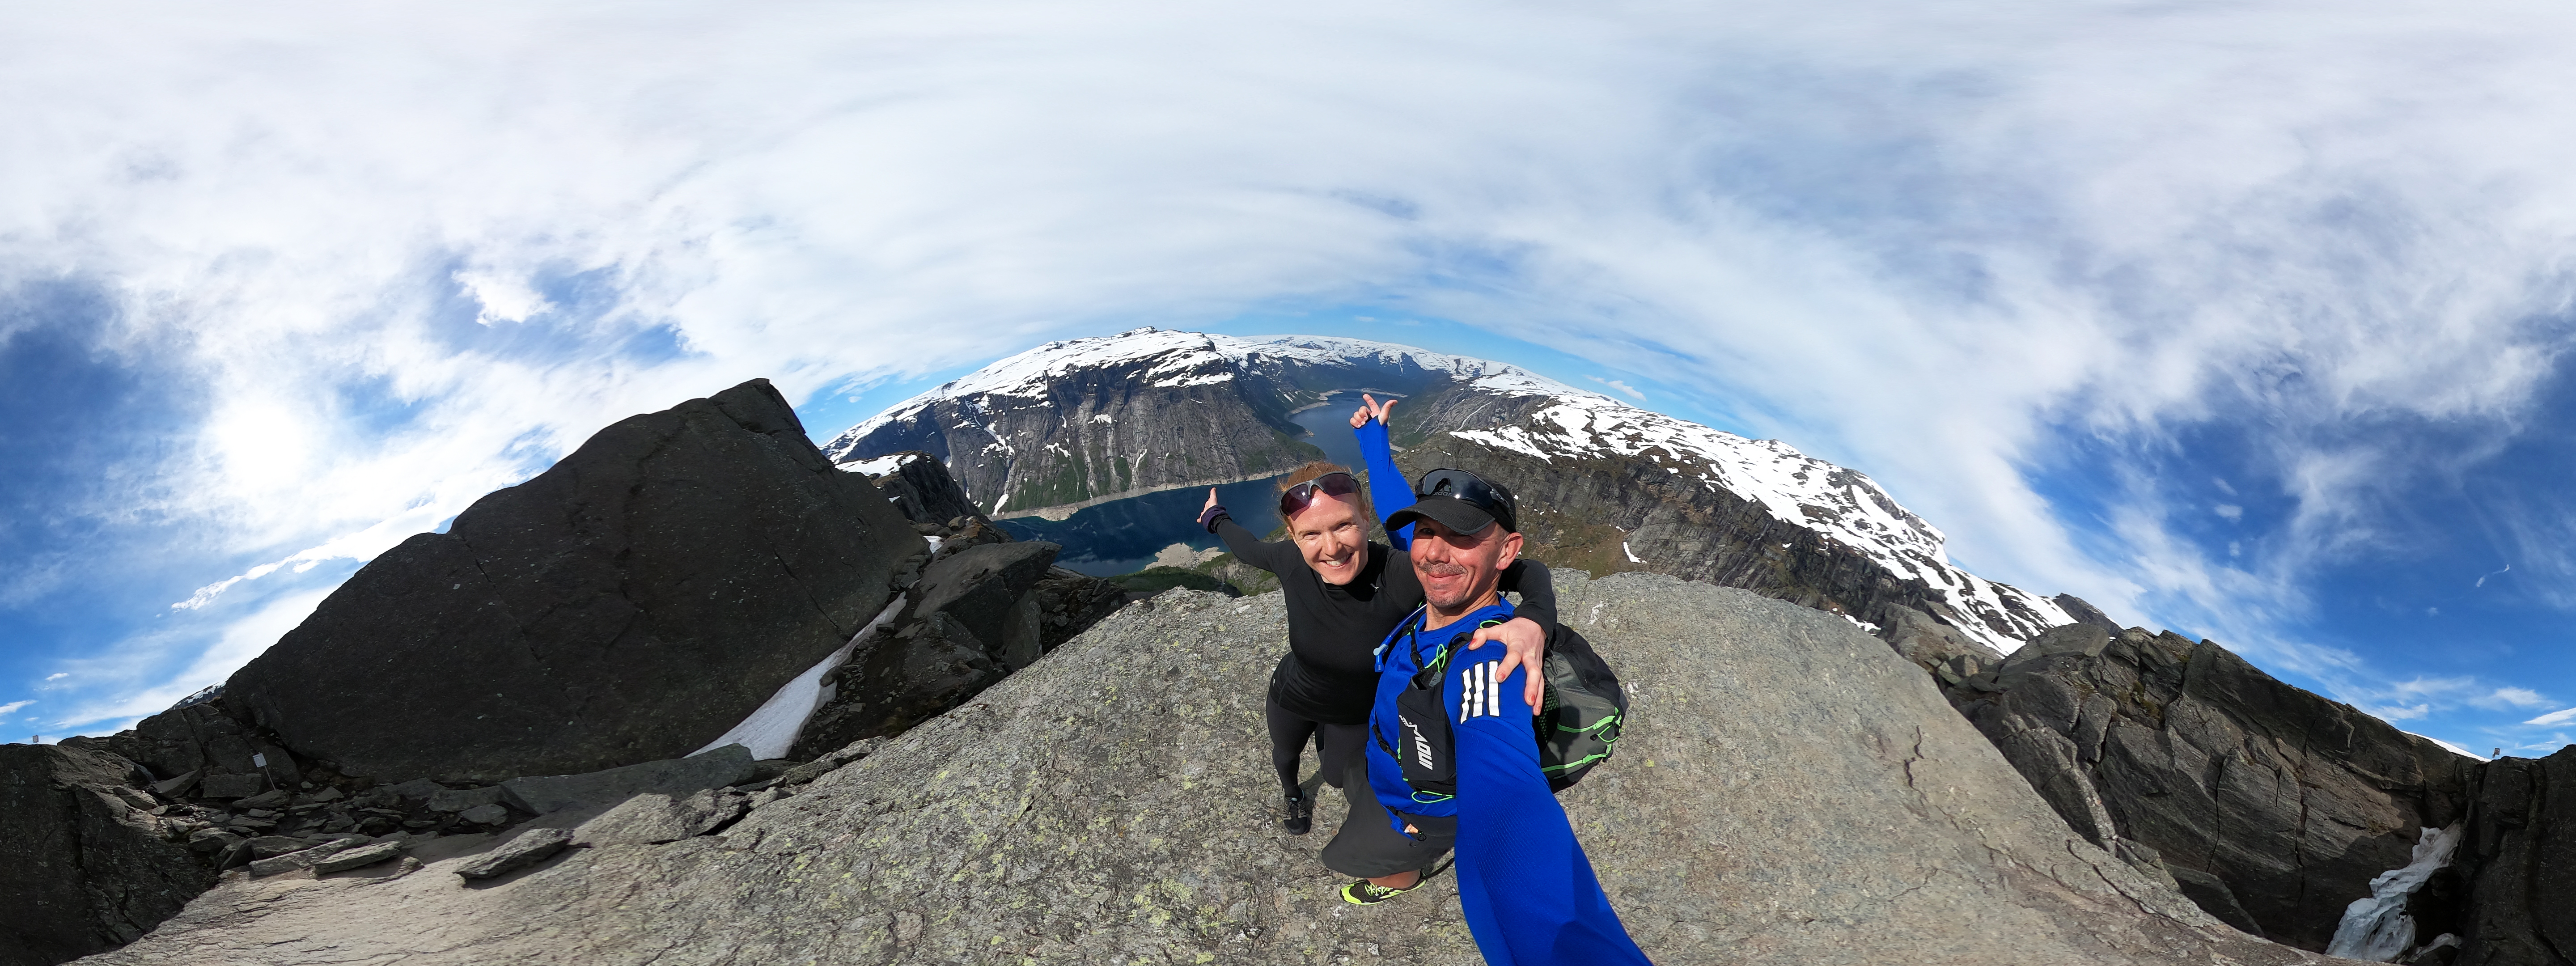
Trolltunga
Folgefonna Glacier via Buerbreen
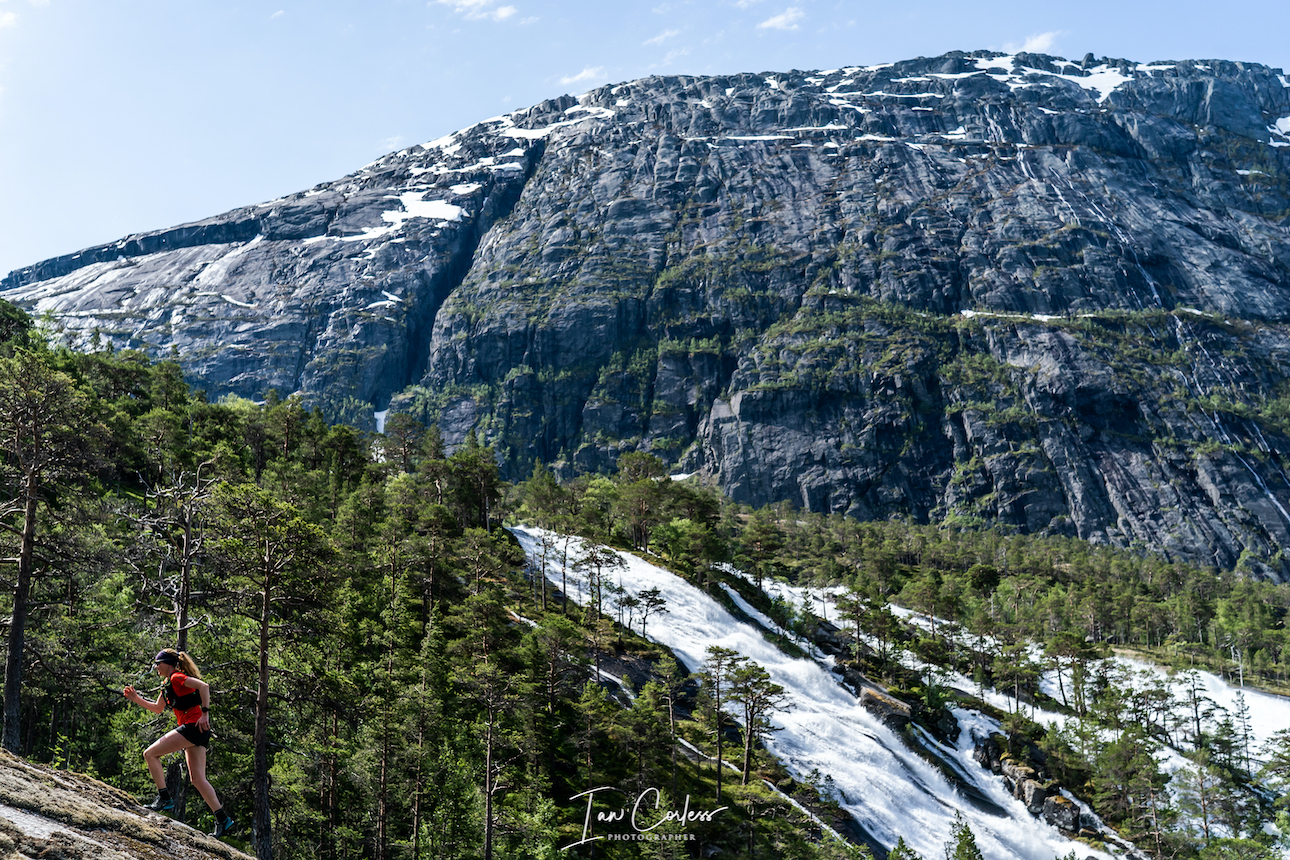
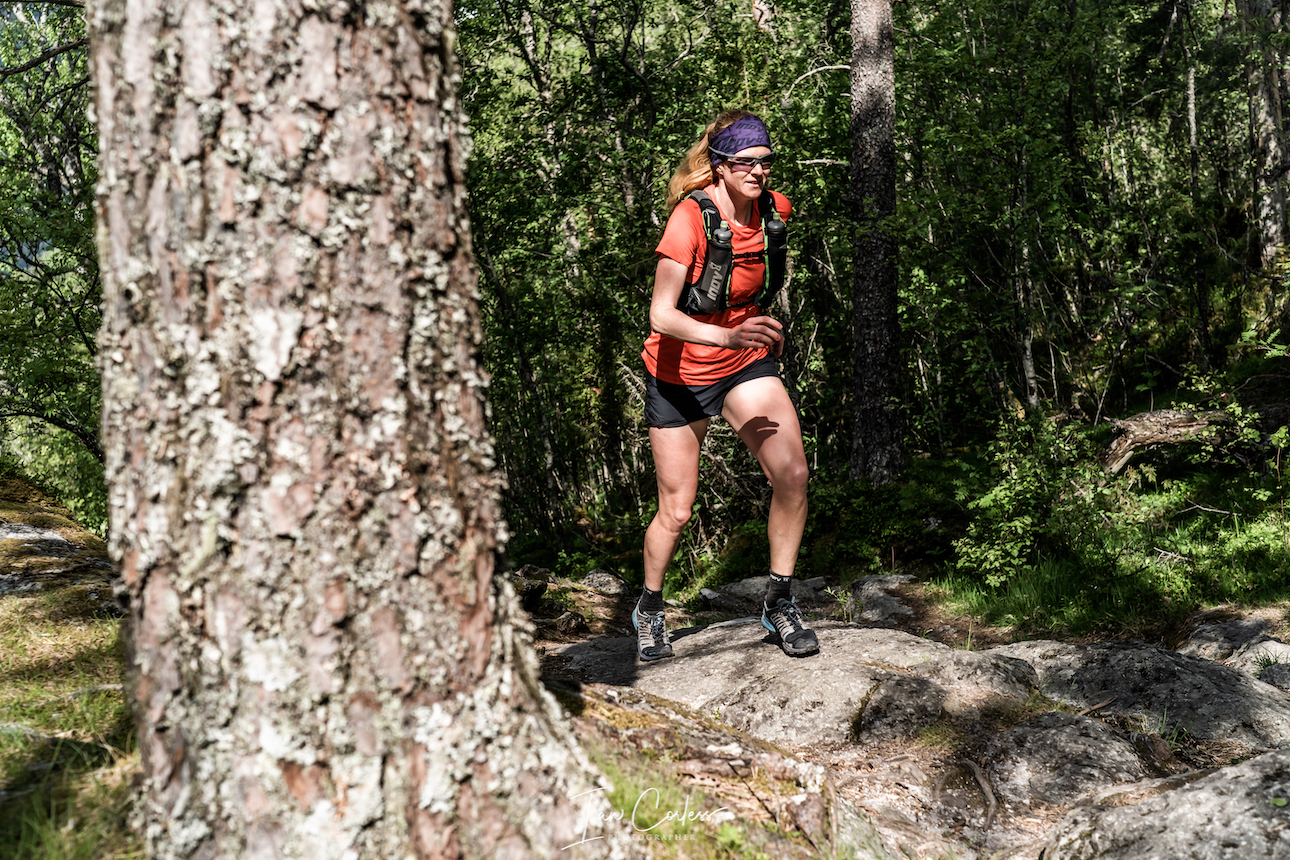
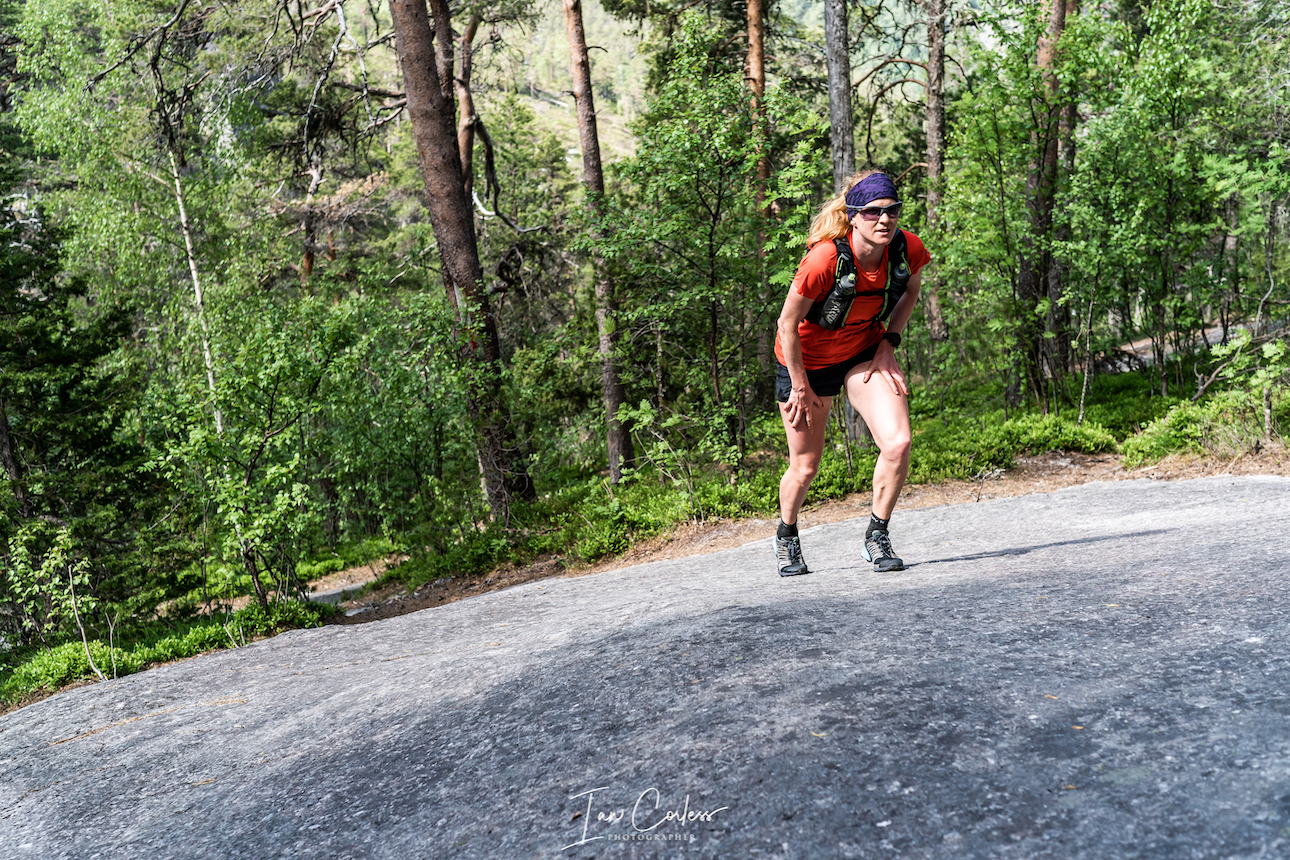
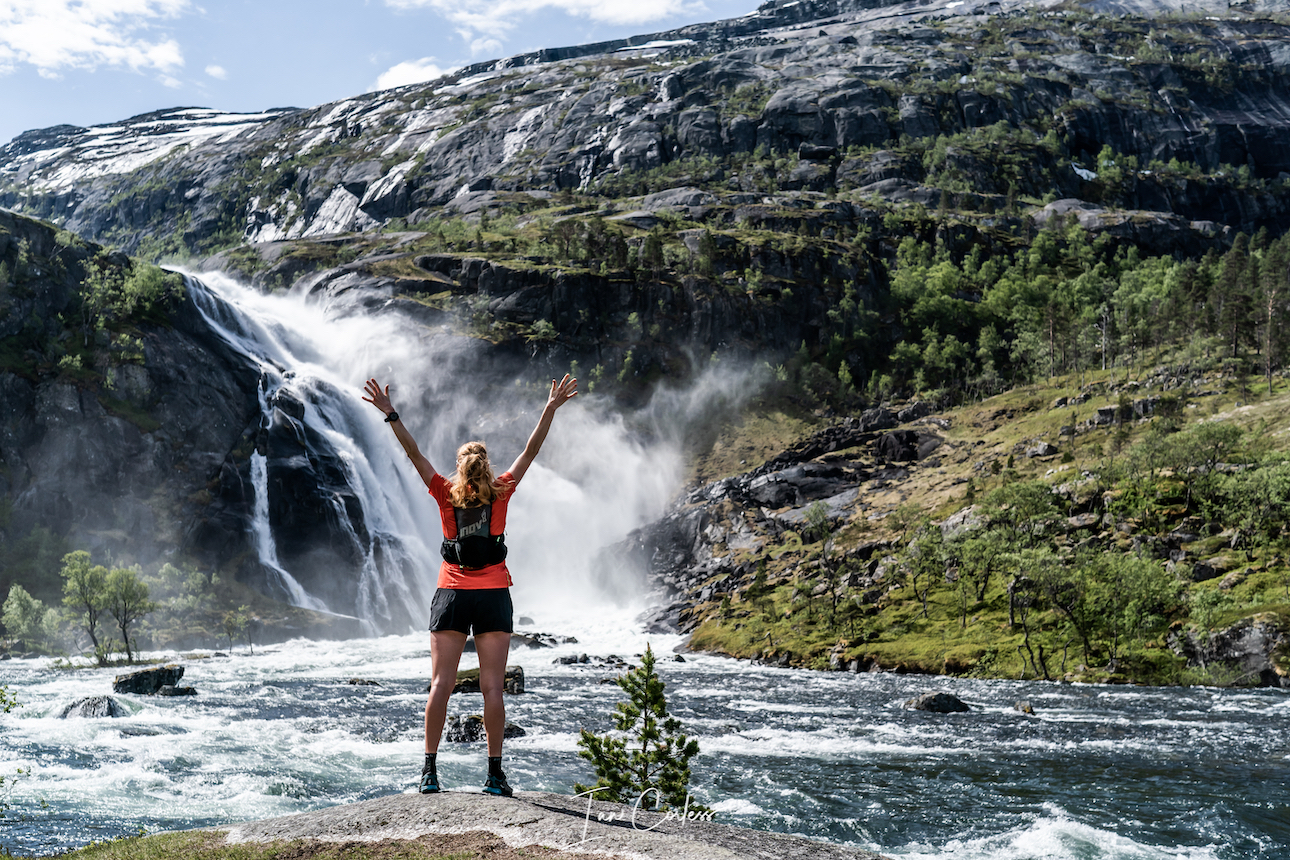
The waterfall route via Husedalen Valley
Climb Oksen
Other opportunities:
Kayak in one of the longest fjords in the world.
Via ferrata to Trolltunga.
Ice climb on the Folgefonna Glacier.
PRACTICALITIES
Norway is not a cheap place and therefore one needs to look at budget when exploring any area of the country. Flights, depending on the time of year will vary in price and car hire can be expensive. However, in many scenarios, a hire car allows one freedom to explore. Train services and public transport is good. We recommend a car to explore Hardanger.
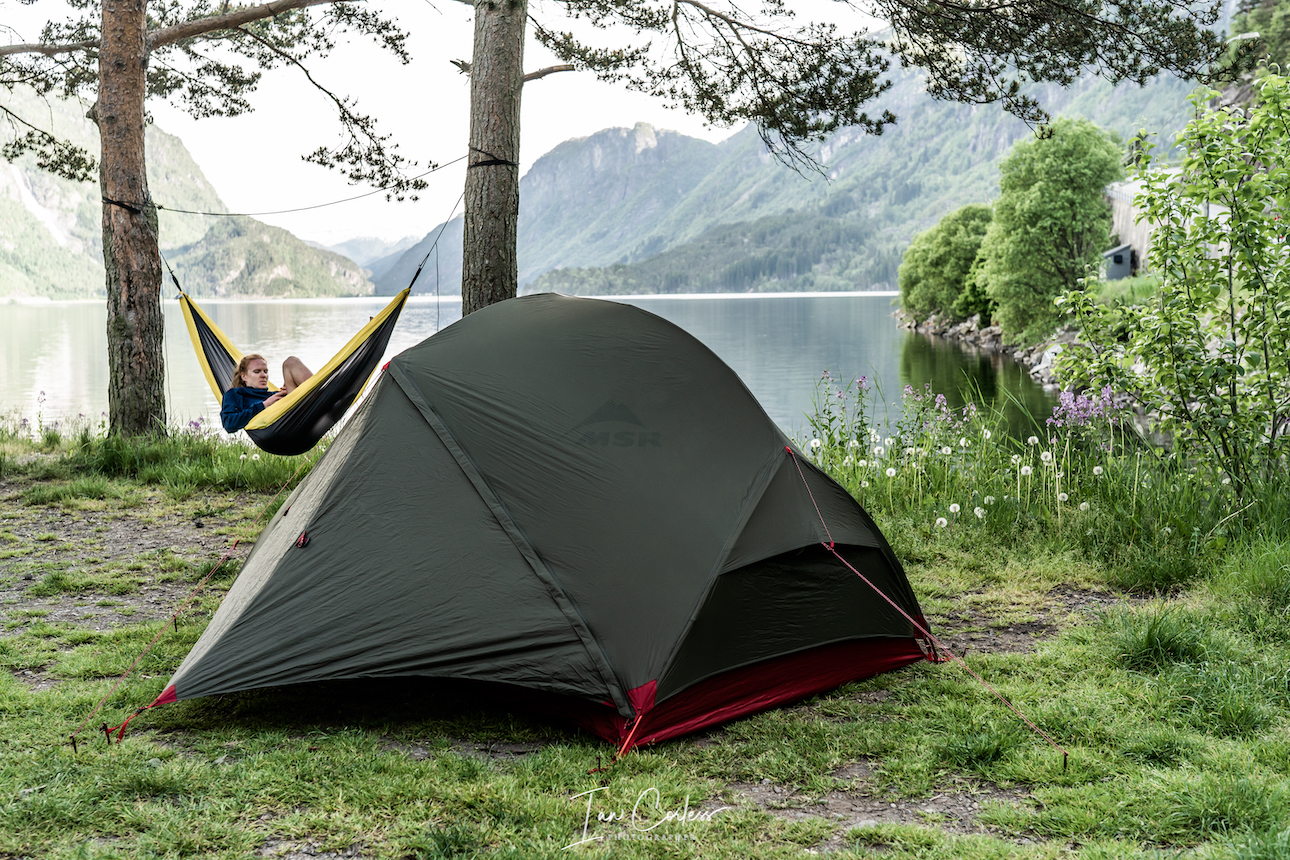
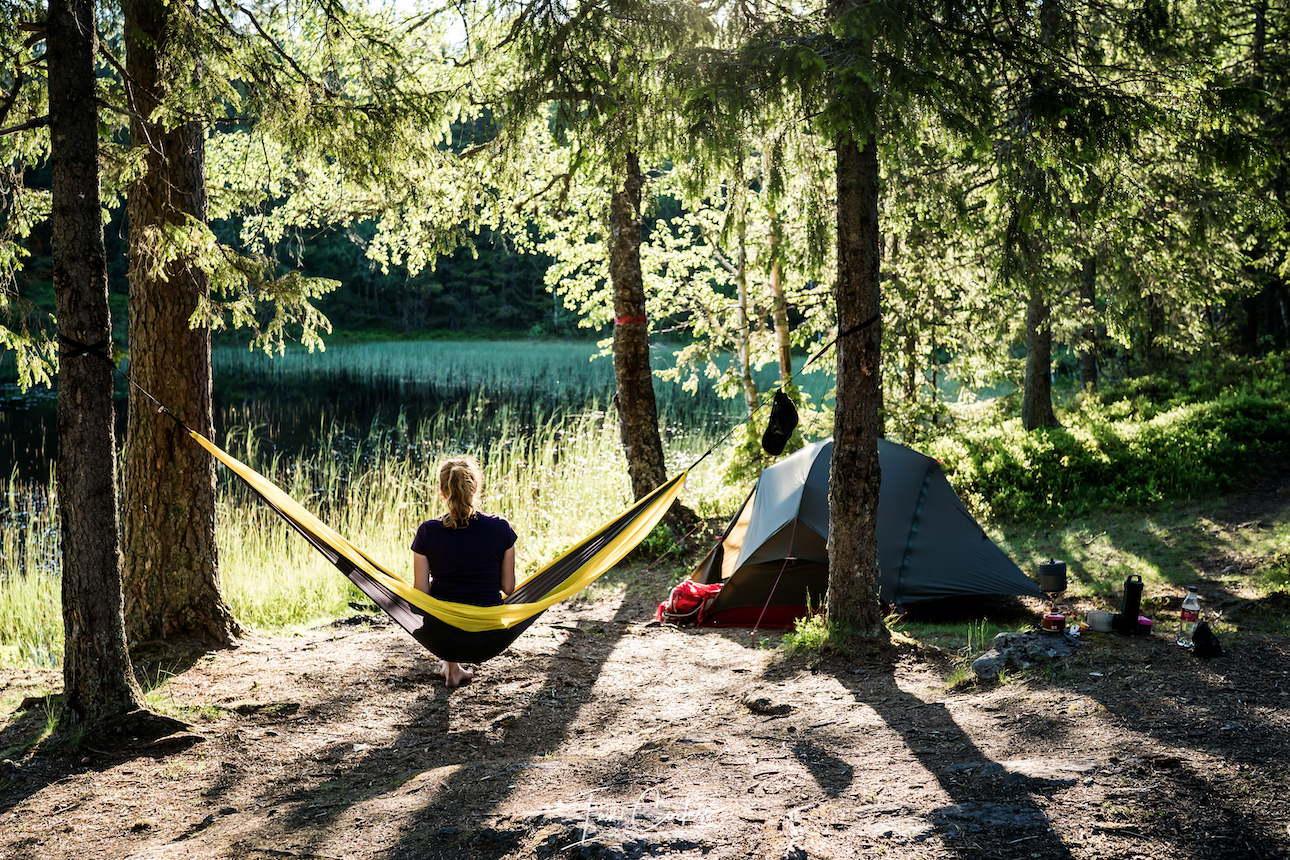
Camping is part of the outdoor life and there is nowhere better than Norway to sleep outside. Norway allows for wild camping, however, be careful, some areas, particularly Trolltunga have a camping exclusion zone.
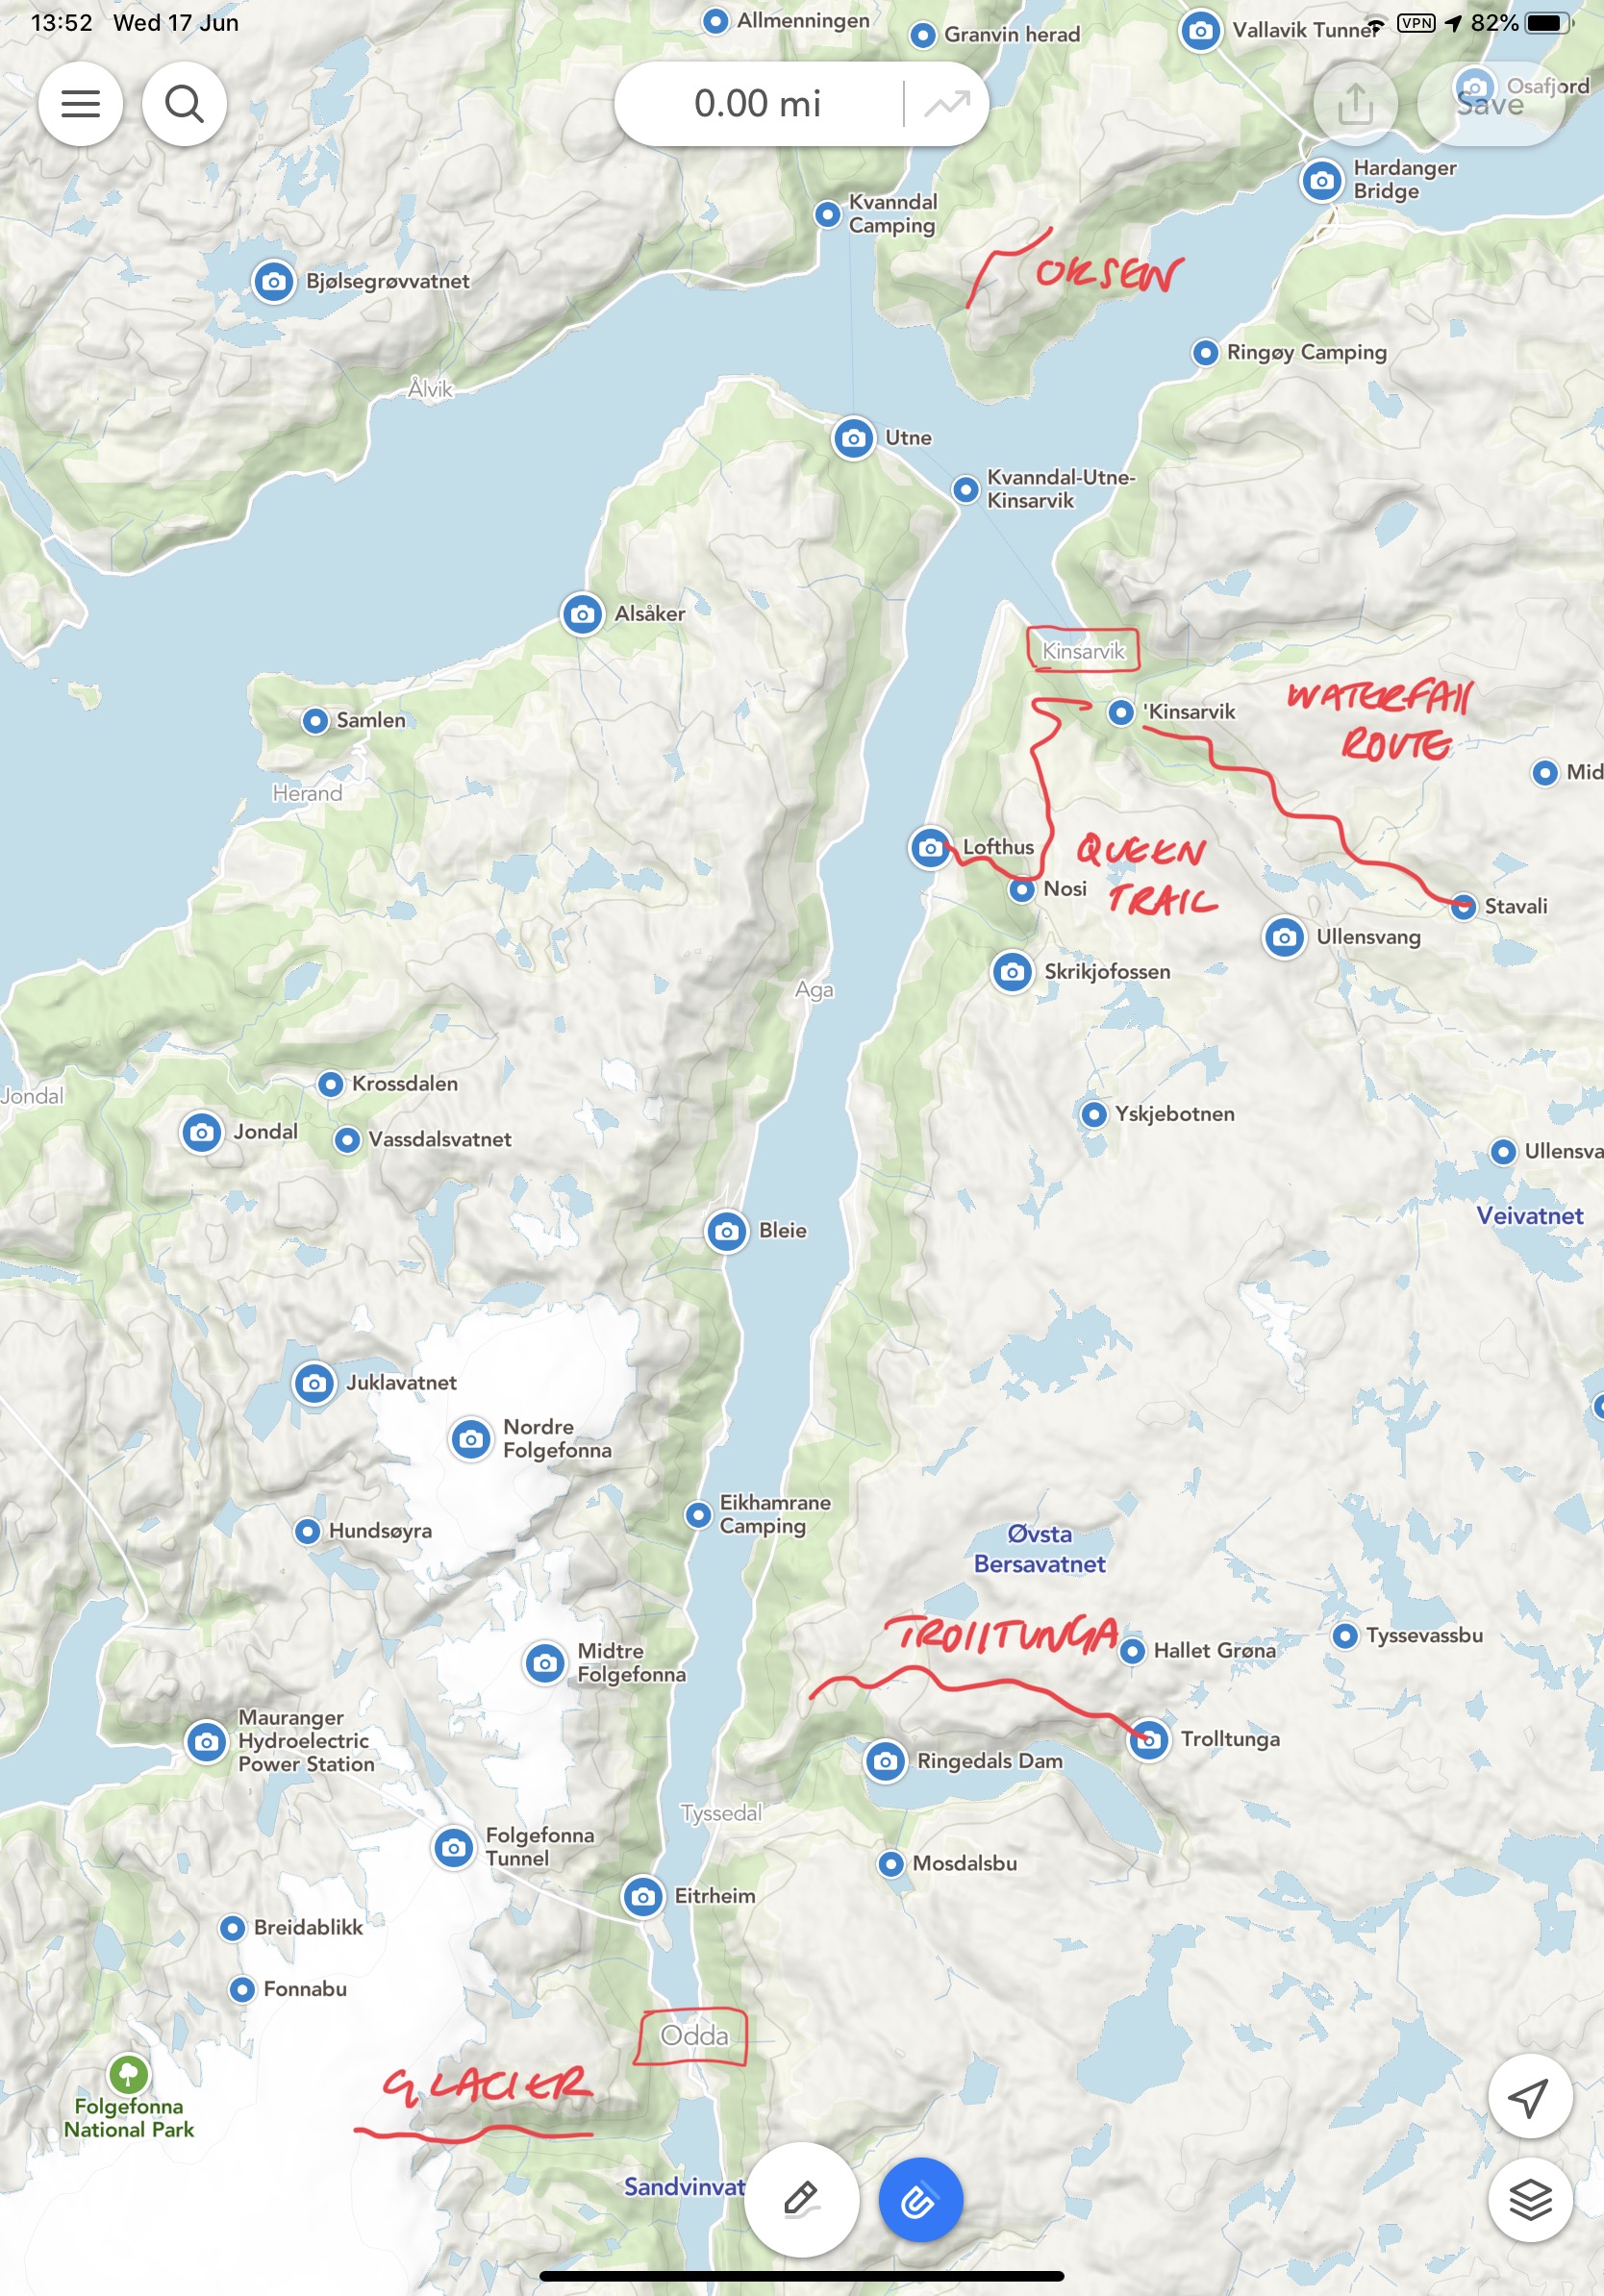
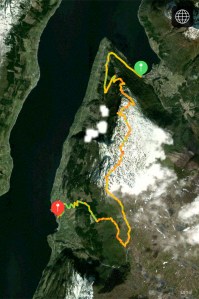
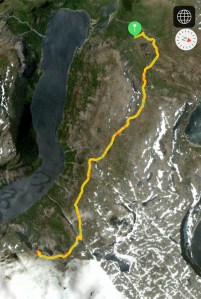
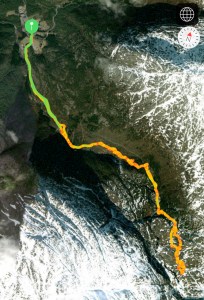
For the purposes of this mini trip, we used an official campsite and wild camped. Below I provide a map to show an overview of the routes and areas we explored.
Our itinerary was as follows:
Day 1 – Travel and overnight stop.
Day 2 – Dronningstien aka The Queen Trail
Day 3 – AM: Trolltunga – PM: Buerbreen Glacier
Day 4 – Waterfall route via Husedalen Valley
Day 5 – Oksen and travel home.
All of the above trails are not long and are all achievable in one day or less.
The Queen Trail is a longer route (20km) with mixed terrain on a point-to-point route.
Trolltunga is exposed and with snow (time of year dependent) – a more extreme challenge, particularly if one has limited snow experience.
Buerbreen Glacier is a short route but has plenty of vertical and technical terrain, expect fixed ropes, some snow and water crossing.
Husedalen Valley, the waterfall route is a great out and back with stunning views and at times, some testing terrain. Your feet will get wet!
Oksen is a straight up climb (1000m+) with some exposure, challenging terrain and the potential for snow/ glacier travel depending on the time of the year. It’s an out and back route.
Day 1 base was Kinsarvik. There is an official campsite, Kinsarvik Camping AS (here) which has cabins, space for motorhomes and tents. You are recommended to book any camping, especially in high season. Alternatively, you could wild camp close to Kinsarvik.
There is a Spar supermarket opposite the fjord, and this sells everything, including camping supplies. So, this is a great opportunity to stock up on any anything that you may require.
Our day 2 and day 3 base was an official campsite in Odda, called Odda Camping (here). This area due to its proximity to Trolltunga has potentially less options for wild camping, however, some options exist in Buer close by. It was a perfect location with a fjord as a backdrop, showers (20 Nok charge) and toilet facilities. At 250 krona per night (£20) it was a great option. Odda has a developed town with plenty of facilities, so, should you need anything, it will be available in the town.
Day 4 we wild camped below Oksen. There is nothing close by, so, be prepared with food etc.
Day 5 we wild camped on the way back to Oslo.
THE ROUTES
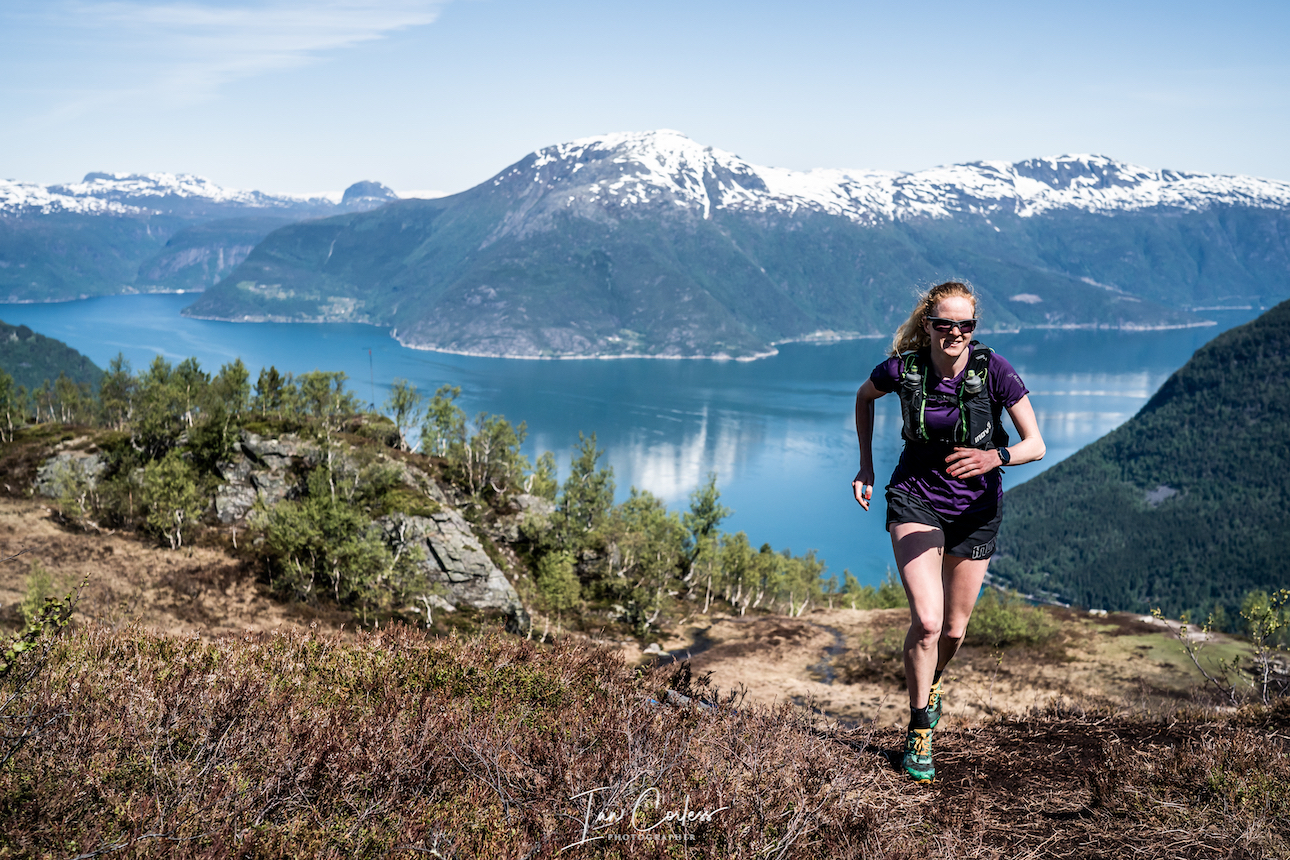
Dronningstien aka The Queens Trail
The trail is a point-to-point route between Kinsarvik and Lofthus. We recommend parking opposite the ESSO Petrol Station next to the fjord, parking is free.
The actual trail starts at Røte which is 4km up a road from route 13, very close to the ESSO petrol station. However, we recommend doing this on foot. Location is shown on the map below.
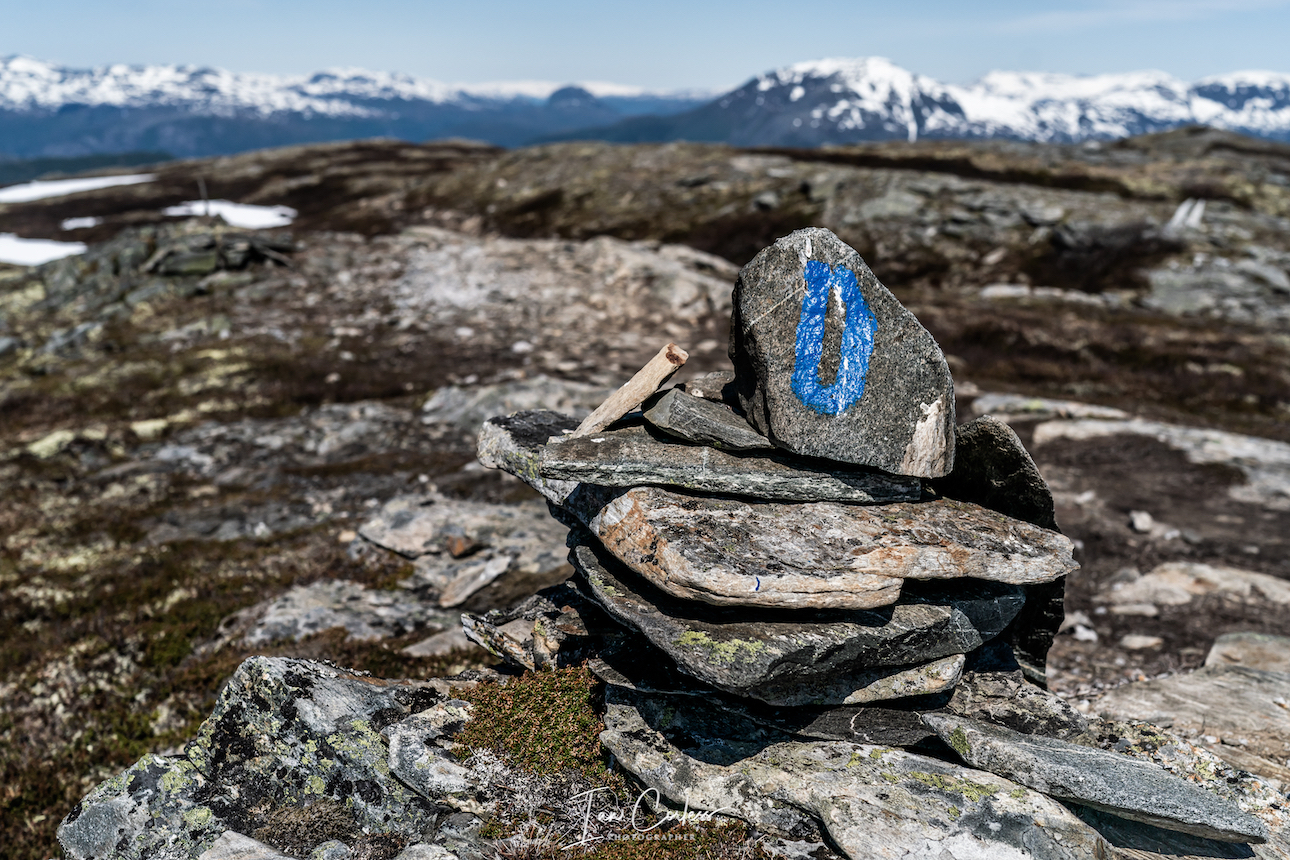
For the first 4km you will have no marking and then at Røte you will see blue a ‘D’ or blue spots. This is the route to follow.
The official route is 16km and is estimated to take 8-9 hours and is described as ‘long and demanding!’ For perspective, we did the route with an additional 4km, we had a great deal of snow and we constantly stopped for photos. Yes, we did run, and we completed in 4hrs 50min. We did not push the pace or go fast.
Recommendations are for July to September but in June you have the chance of snow, 2020 had a great deal of snow, far more than normal. For us, this was a real plus!
The early km’s are all climbing and uninspiring but there are some wonderful views. Once the ‘D’ starts, the route becomes trail and you continue to climb eventually breaking out of the tree line. The immediate views over Hardangerfjord are quite amazing and breath tanking. It did not take long to realise why this was a favourite route of HM Queen Sonja, hence, The Queen’s Trail name.
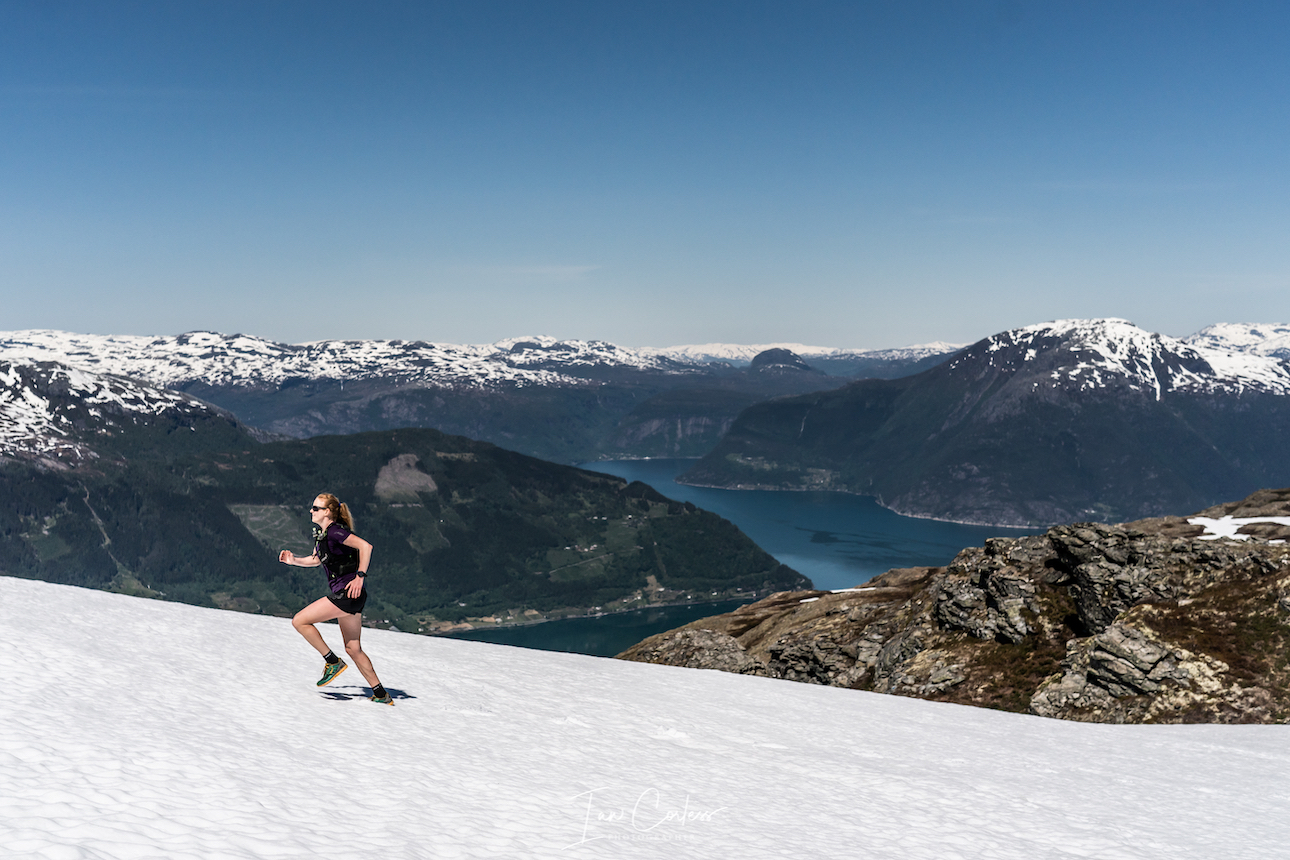
Once high, the terrain has some undulations, but it is mostly flat with all the climbing coming in the early km’s. You will see from the run route below that we had snow for all the high sections and some snow on the descent to Lofthus. We had amazing weather, blue skies and plenty of heat. You really need to be careful of snow bridges, snow holes and potential danger and hazards. Best practice is to follow existing footsteps and pay attention to markers. Some ‘D’ or blue markers will be missing because of the snow but navigation is not a problem.
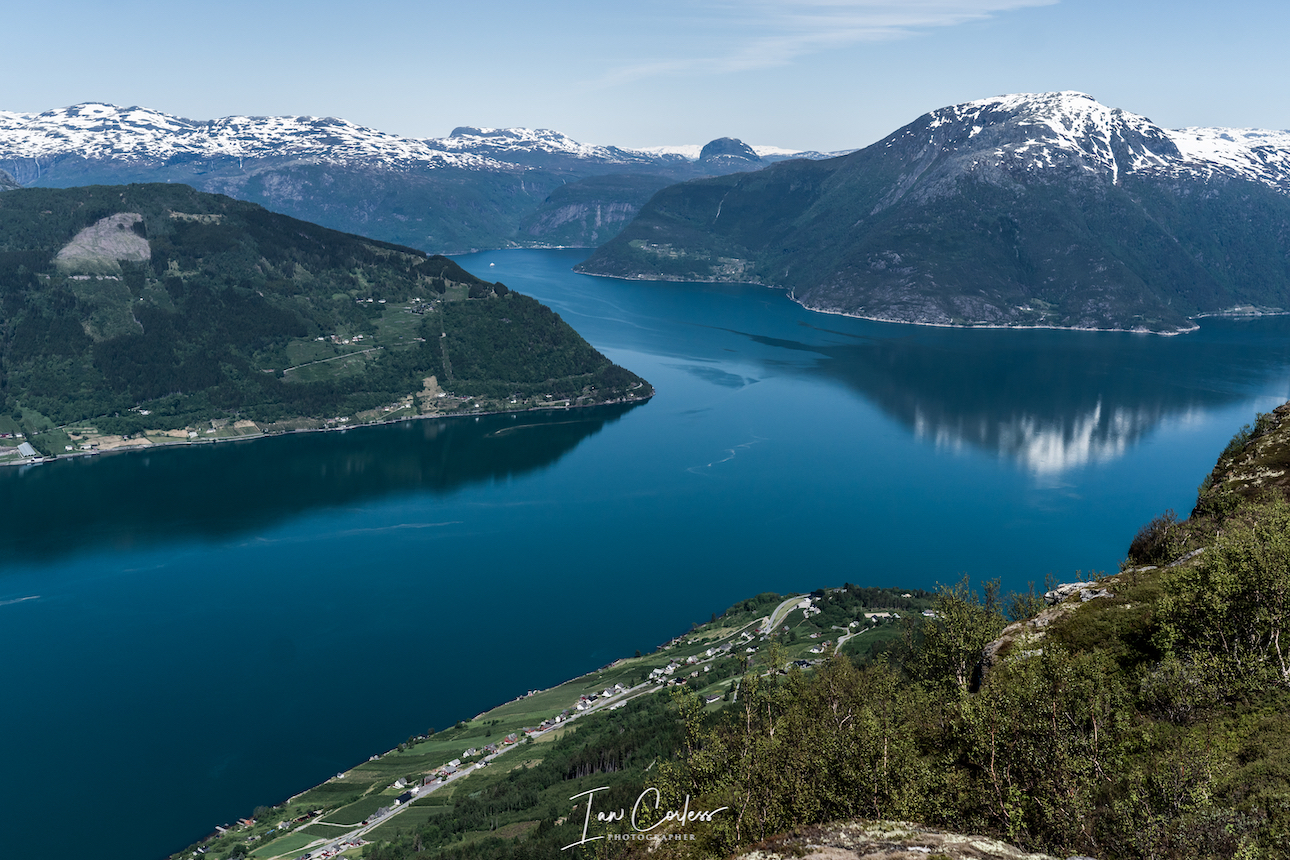
At all points, the Hardangerfjord is to your right and the views are stunning. On occasion you are brought to the edge of the plateau. Take time to stop, look over and soak up how incredible the vistas are.
You will find breathtaking views of the Sørfjord, Odda, the Folgefonna Glacier, Hardanger Bridge and Eidfjord. You can also see all the way over to Kvanndal and Utne, and along the fjord to Kinsarvik.
Water is available at several points via streams, waterfalls or melting snow. Take the opportunity to replenish bottles.
Before the highpoint of the route, there is a little climbing with some fixed rope, it’s nothing too scary or dramatic. Just use caution.
The high point is a square pile of stones (cairn) at 1107m which has a box on so that you can sign the book inside to confirm you were there.
From here, it is mostly descending all the way back to Lofthus. You will eventually switch from blue ‘D’ or dots to red ‘T.’ The descent is steep, winding, may have snow and includes the ‘Monk Steps.’ Open expansive trail eventually becomes tree covered.
Keep descending down. You will pass through a car park for those who wish to climb up from Lofthus. Keep descending and you will pass the famous orchards of this area, you will finally join the main road next to the fjord. The route is done!
A public bus back to Kinsarvik leaves from opposite Hotel Ullensvang. Please check on timings, but our information was 1551, 1810 and 2100hrs. There is a cafe/ shop called Kompaen that serves food and drinks should you need to replenish after a hard day on the trails before heading back. Make sure you taste some local apple juice or cider.
At Kinsarvik, we had a picnic by the fjord and then headed to Odda and Odda Camping. This would allow us an early start the following day for Trolltunga.
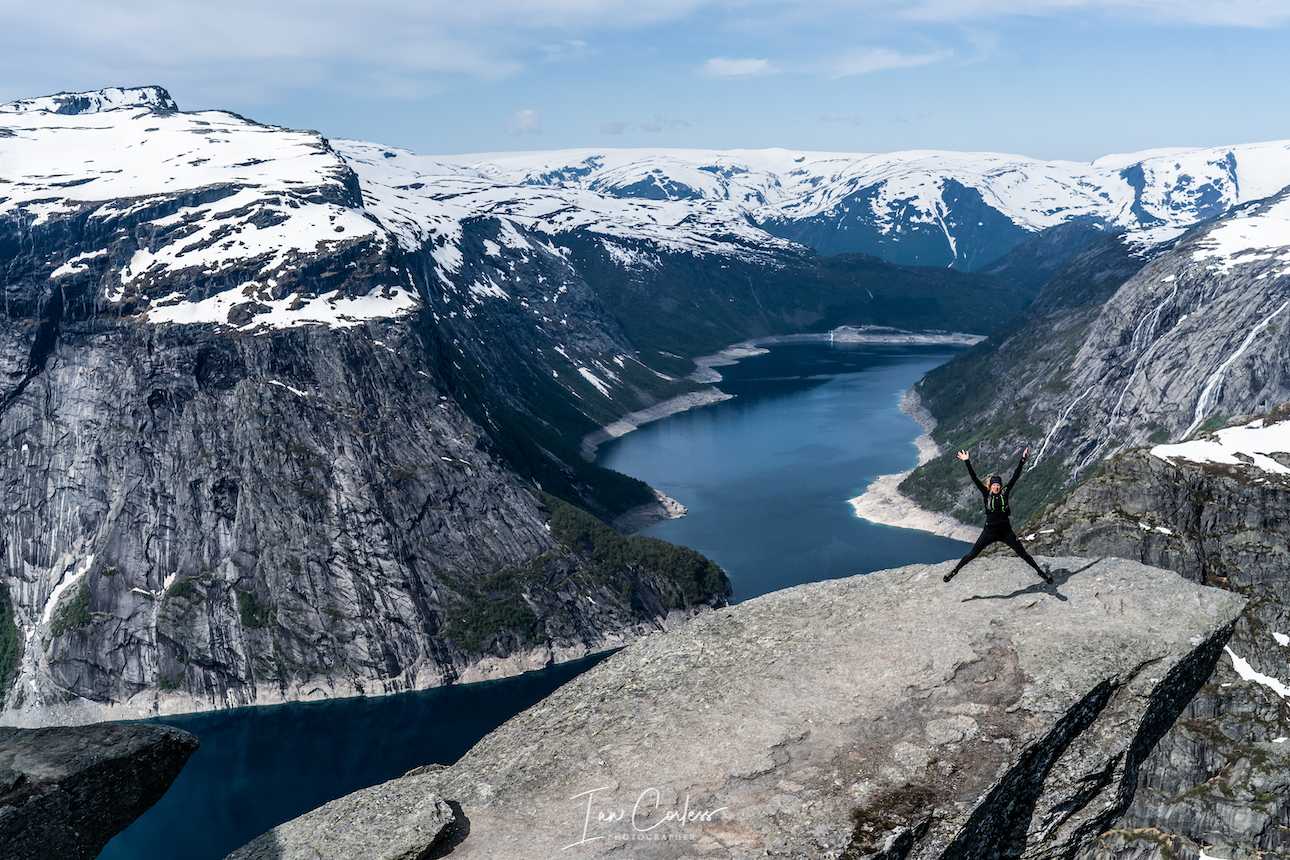
Trolltunga
The Trolltunga (Trolls Tongue) is an iconic route in Norway. Formed about 10,000 years ago by glacier erosion it is considered one of the most spectacular cliffs in Norway. From the side, it quite literally looks like a tongue balancing 700m above the Ringedalsvatnet lake.
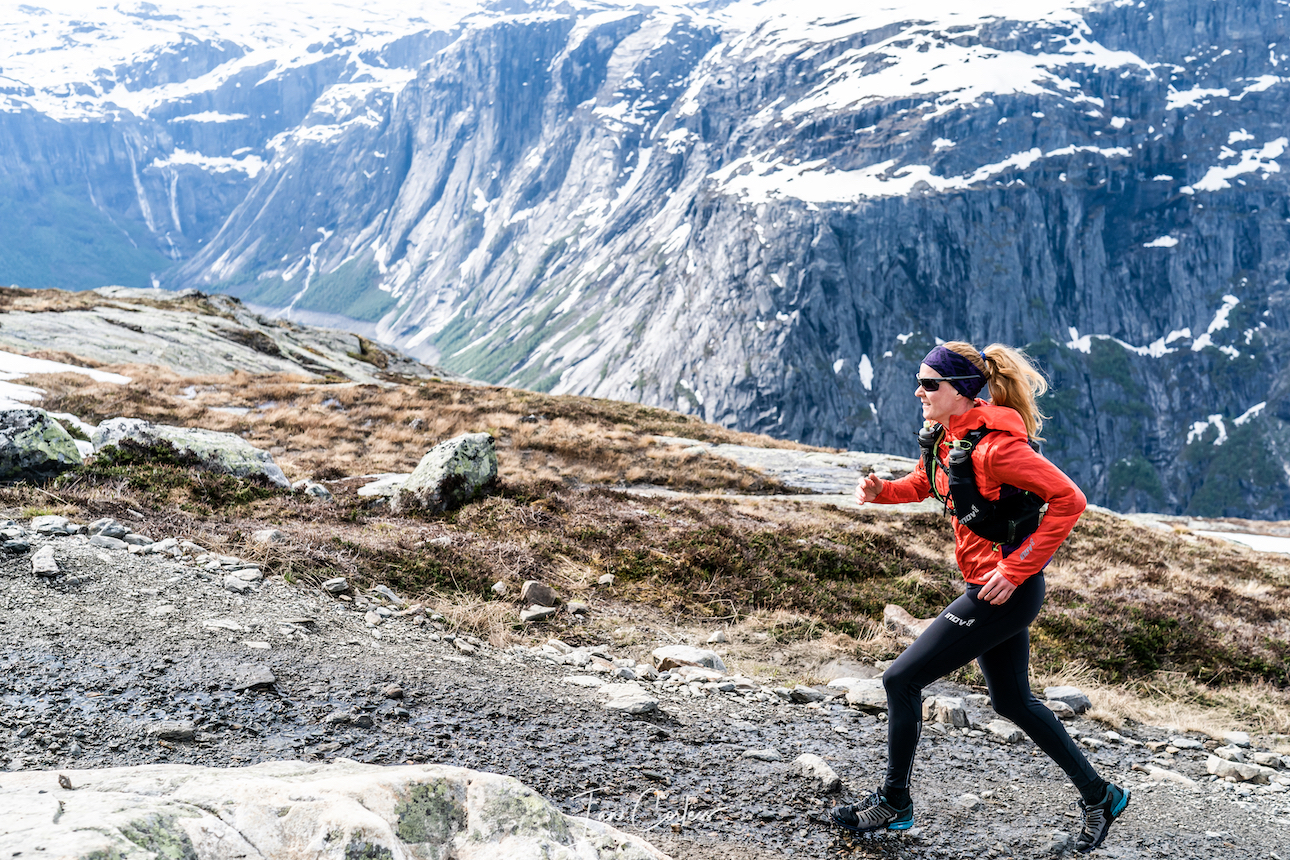
Considered as a ‘demanding’ route, the out-and-back can be estimated to take 8-12 hours and the typical season is June to September. Outside of this timing one must have a guide. This year, 2020, Norway has had a great deal of snow and unusually, this year’s route was pretty much 90% snow and we had strict instructions to adhere to the marked route.
Despite conditions, we found the route very runnable and the snow was perfect. We did the out-and-back in 4-hours, just under 5-hours with all the photo stops. And trust me, photo stops are compulsory!
For most, particularly with snow, this is a challenging route, mainly due to the 20km+ distance, elevation gain and at times, demanding terrain.
It is a very, very popular route and therefore is often extremely busy. However, Coronavirus greatly has impacted on tourists and visitors in 2020 and the normal busy trails were quiet.
There are three car parks with limited space, 30 cars at P3, 180 at P2 and 220 at P1, book in advance (here) and if possible stay at car park 3 (Mågelitopp.) This is closest to the trail head and costs 600 Nok (£50). Car park 2 is 500 Nok. Car parks open 0600 hrs. There are also shuttle buses from Odda/ Tyssedal to Skjeggedal and then Skjeggedal to Mågelitopp with a cost of appx 450 Nok. You may think these costs pricey, however, the money is used by the local community to cover the impact of tourism in the area.
Importantly, this is a high mountain route with highly changeable conditions. Go prepared with extra warm layers, gloves, hat, waterproofs, food and water. You can replenish water en-route from streams and waterfalls.
It is possible to start from Skjeggedal which adds 4.3km up and down to the route hiking (or you can get the shuttle) but we decided to miss this as we were adding the Glacier route to our afternoon.
Start early, if running, you have the potential to arrive at Trolltunga first and have great opportunities for photos. It has been known at busy periods to wait over an hour to get on the tongue for the ‘iconic’ photo. We actually started at 0800 and caught all the hikers ahead of us. We actually had at least 40-minutes at the tongue for photos and picnic before the next people arrived.
Skjeggedal to Mågelitopp is a steep tough climb and well-marked. From Mågelitopp, the start of the Trolltunga route is just below the car park, the route is clearly marked and relatively flat. It’s marshy to start with interspersed rocks. We had snow in these early sections, so, we were well aware that the whole route would be snow bound.
The first few km’s are arguably the toughest with 800m of vertical.
After the initial hard work, the trail rolls along, the snow conditions making our trip perfect. At all times, the views to your right are stunning with mountain vistas and the stunning Ringedalsvatnet lake.
For safety, there is a mountain outpost and two emergency huts/ shelters should you have a problem.
There is a twin waterfall, Tyssestrengene and Tyssehylen Lake to pass before arriving at Trolltunga.
The approach to Trolltunga is perfectly safe and not technical for an experienced outdoor person. However, if new to hiking and extreme environments, take a little time, move slowly and make sure of foot and hand holds. Hopefully, you may not have to wait for an opportunity to walk out on the tongue for your photo moment.
The return route is a reverse of the outward route.
Without snow, the route would be very different and in a personal opinion, less beautiful and dramatic. The snow added a real extra element to the journey, so, I would recommend attempting Trolltunga as early in June as possible.
Once back at the P3 car park we returned to our campsite for a relaxing lunch.
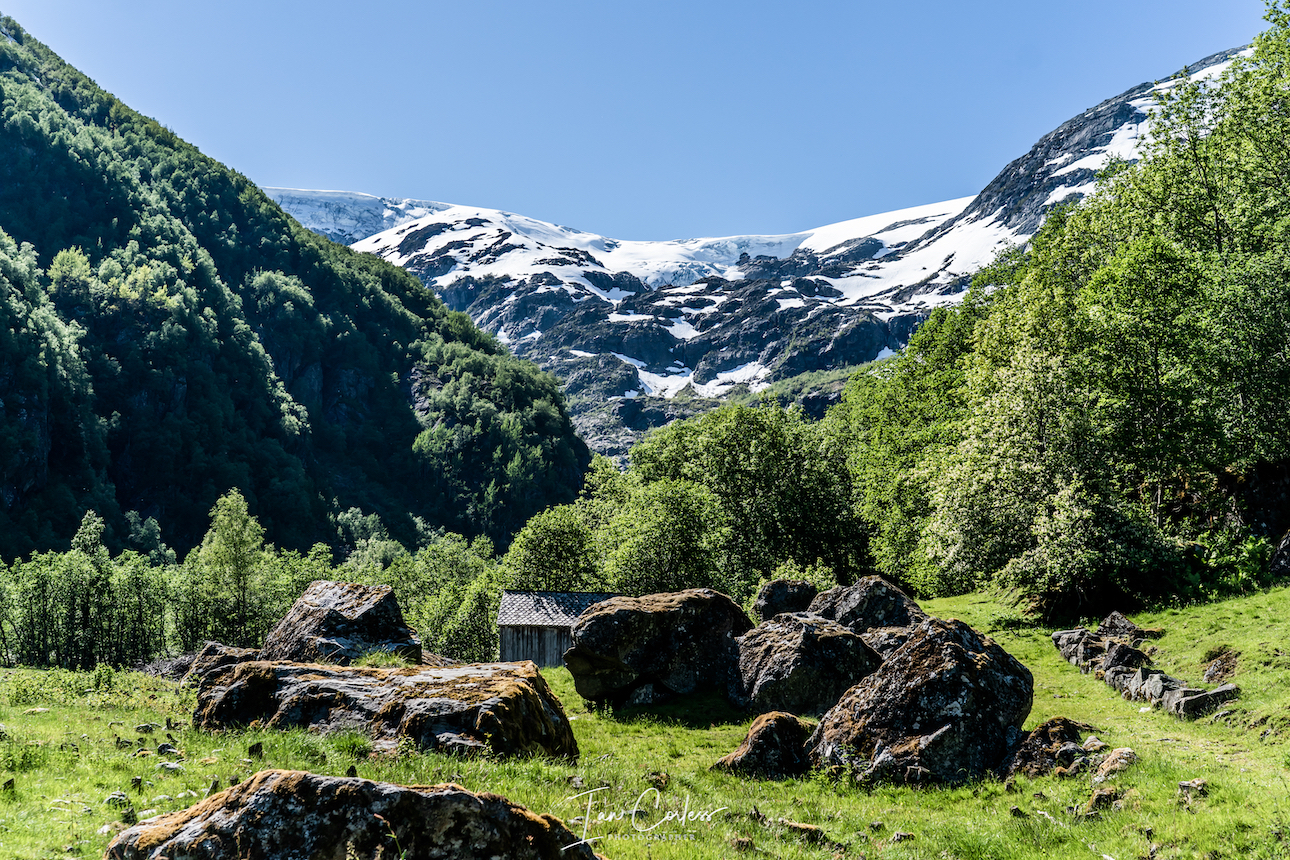
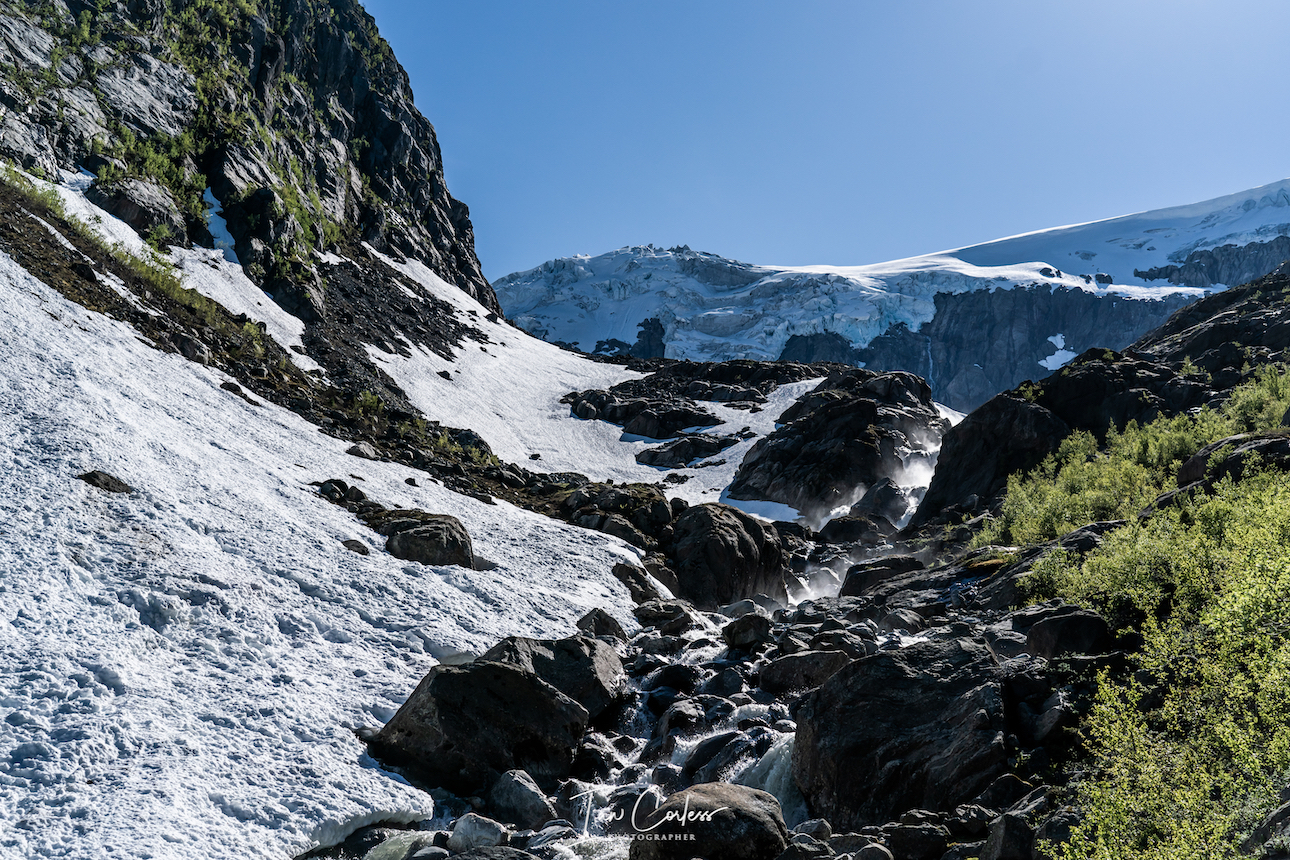
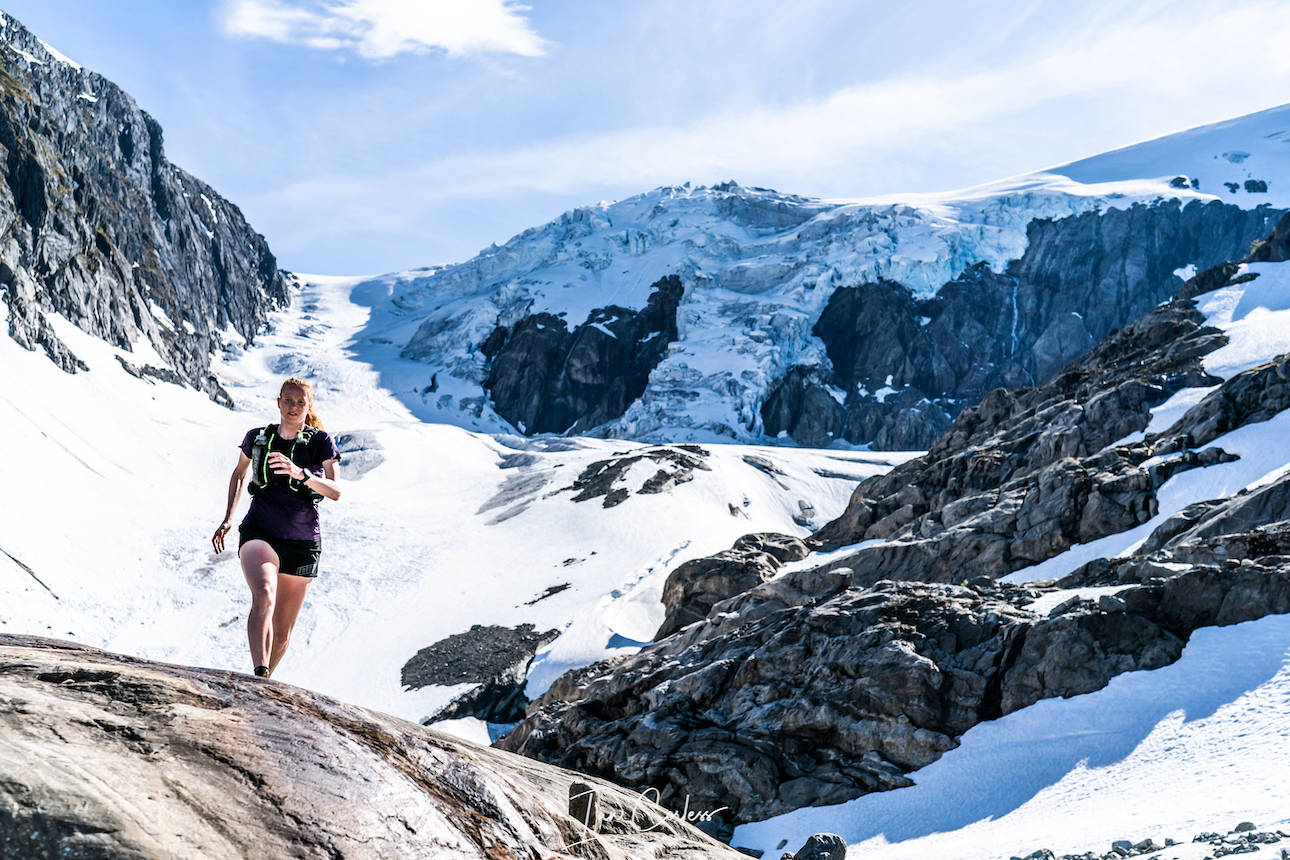
Buerbreen Glacier
The reason we chose P3 for Trolltunga was to allow us to do the out-and-back route to the Buerbreen Glacier which is a short drive from Odda.
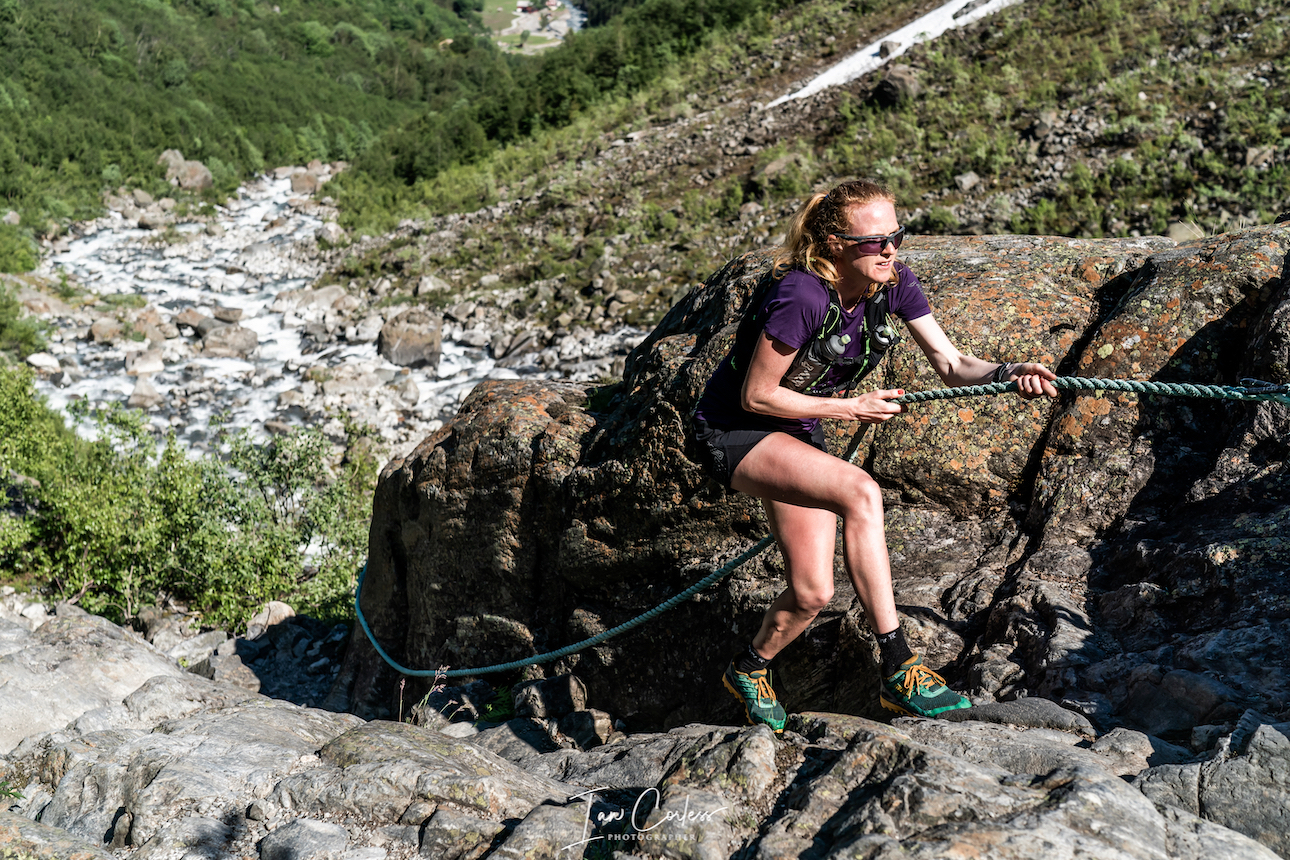
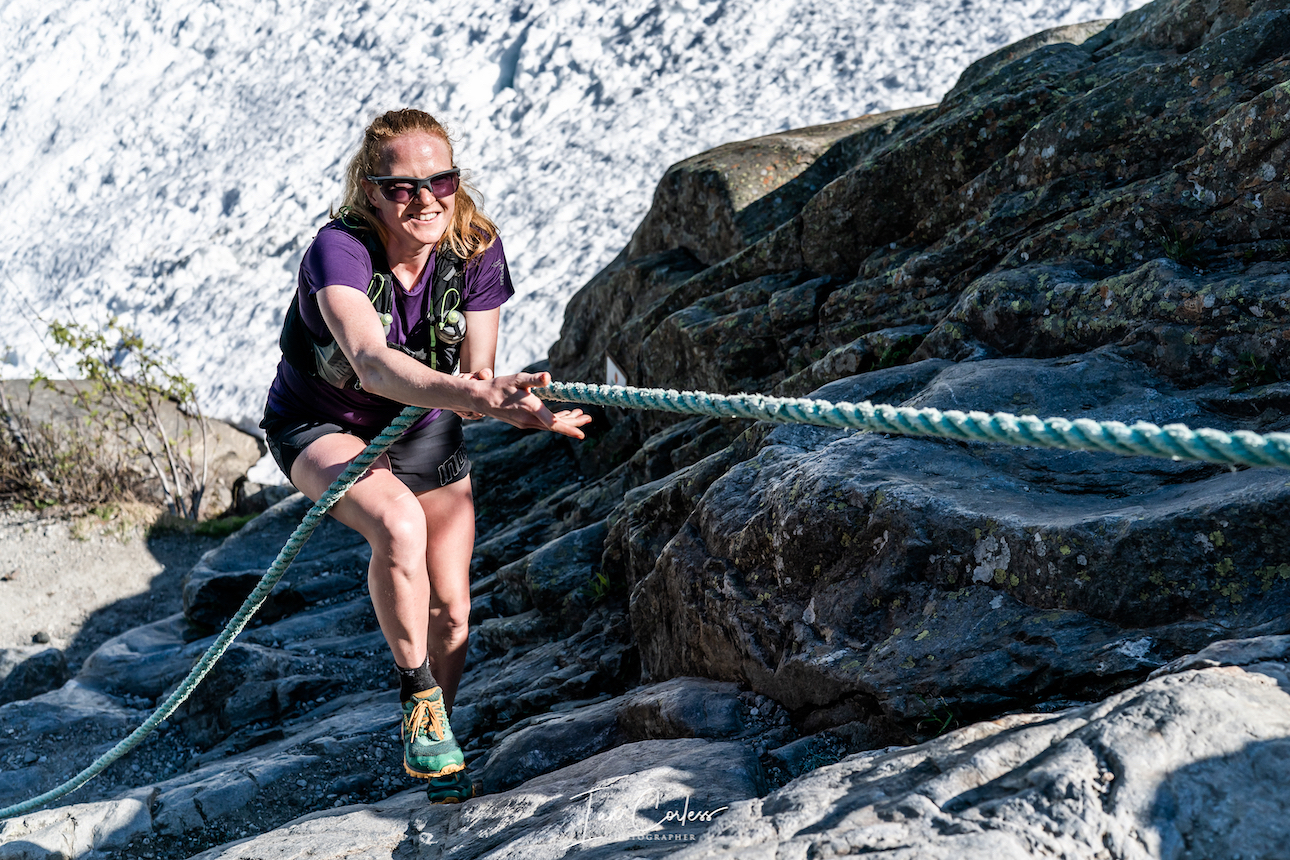
The route is less than 6km and has appx 450m of vertical gain, but the route has a great mix of some technical terrain, fixed rope, water crossings and snow if you are lucky.
Leaving Odda, you head to Buer and continue up the road to eventually arrive at a car park. Cost is 150 Nok.
A gravel road starts the route from a farm. There is a plethora of animals around to entertain.
Entering the forest, the trail winds upwards continually with very little flat trail. Expect wet feet and the need to use ropes to ascend rock sections. If conditions are wet, take care.
Keep looking back as the views are wonderful, countered by the dominant glacier ahead. The route up does have some challenges with fixed ropes.
Eventually the trail stops with the glacier ahead. Do not be tempted to veer off the route and explore on the glacier. Needless to say, this requires a different skill level, specialist equipment and knowledge of the glacier and its conditions.
The panorama and views at the glacier are magical.
You return via the way you came.
At under 6km, it’s a great addition to the more adventurous morning at Trolltunga. Don’t underestimate this little hike. It’s a wonderful trail and the views are magical.
We returned to Odda Campsite for a relaxing evening.
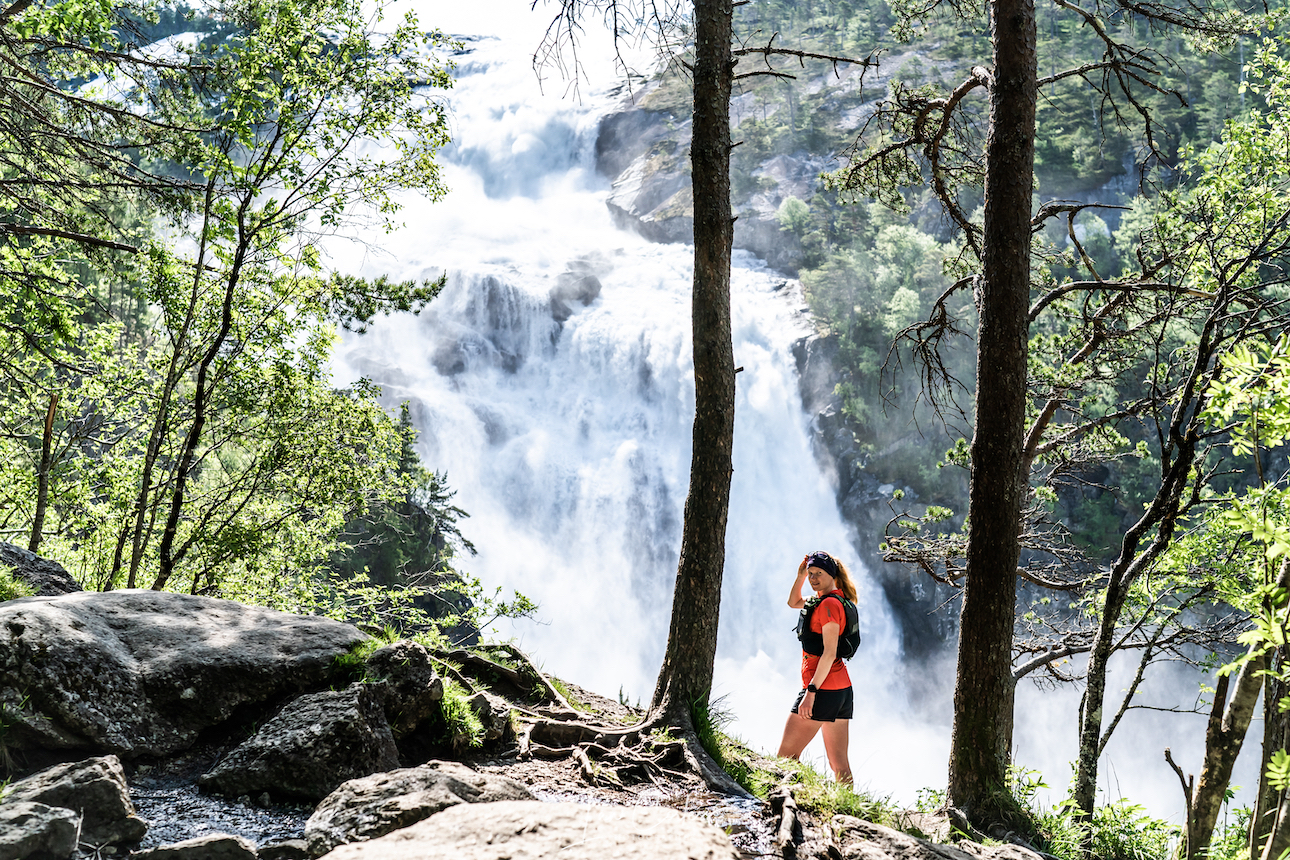
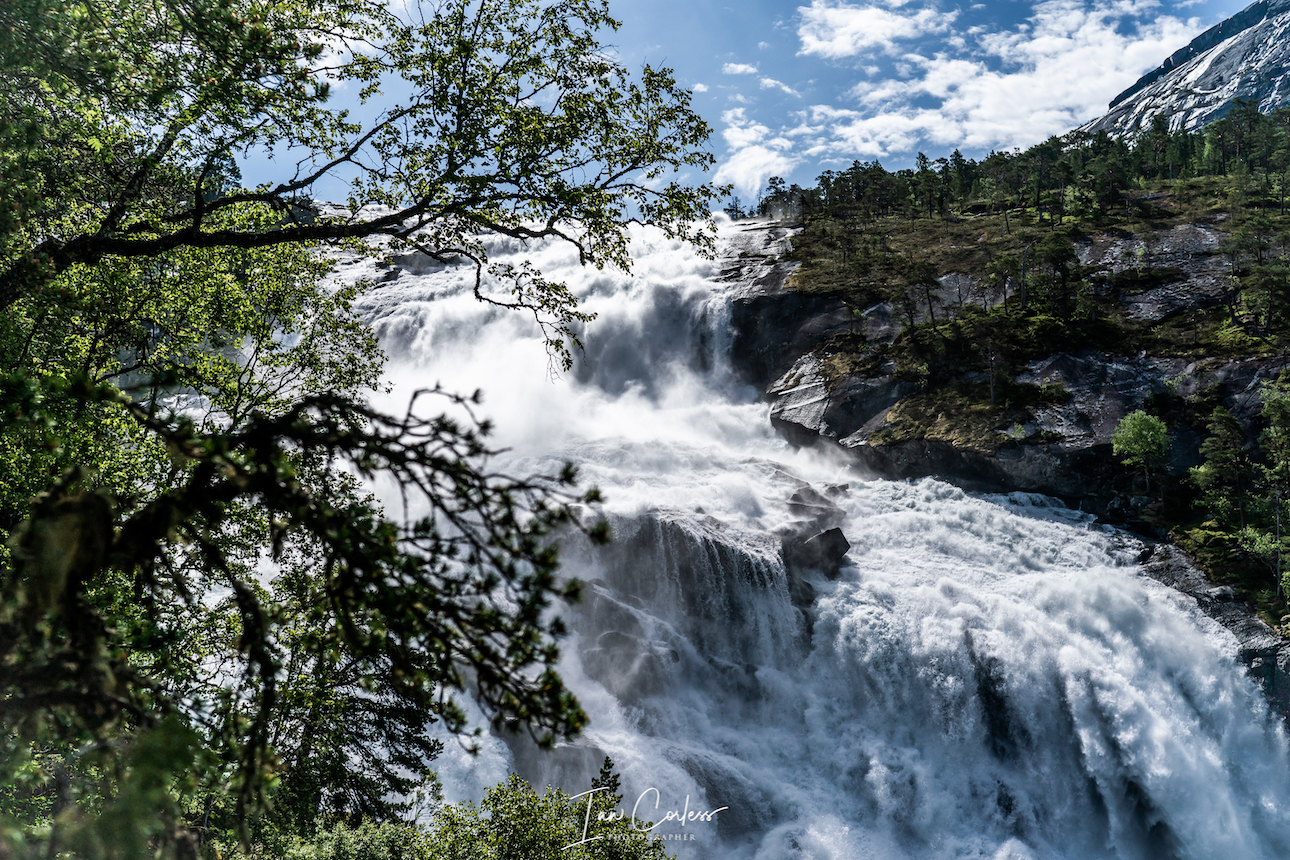
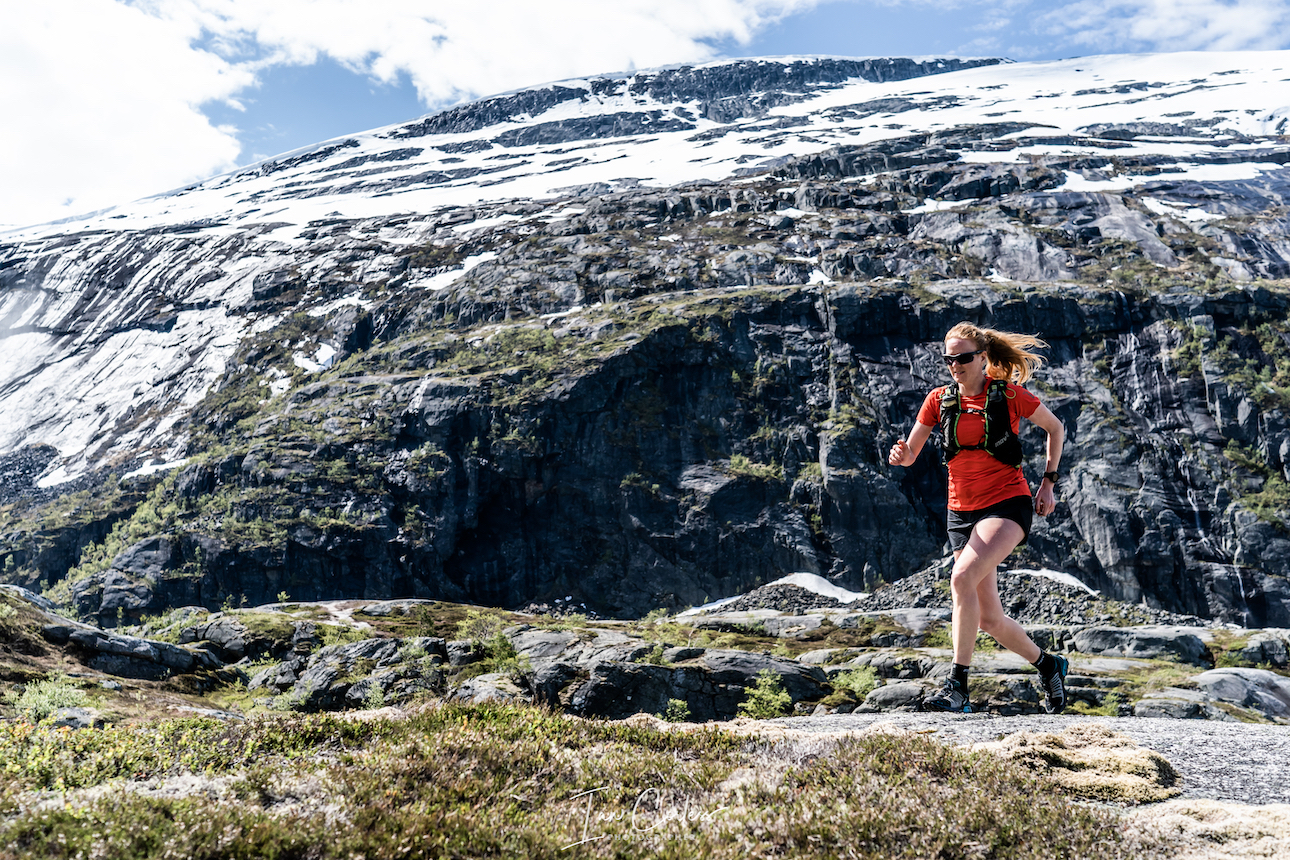
Husedalen Valley
This route was not on our original plan; however, we were advised by locals that Husedalen Valley in June is incredible due to the melting snow and the succession of waterfalls.
Leaving Kinsarvik head up Husavegen Road and continue until you arrive at a parking area on the left.
The route is 12km +/- out and back with 630m+. The initial km’s are gravel road, first waterfall is called Tveitafossen.
The gravel road forks, take the right trail. You climb steeply next to a pipeline before entering forest trail.
The second waterfall is already visible, Nyastølfossen.
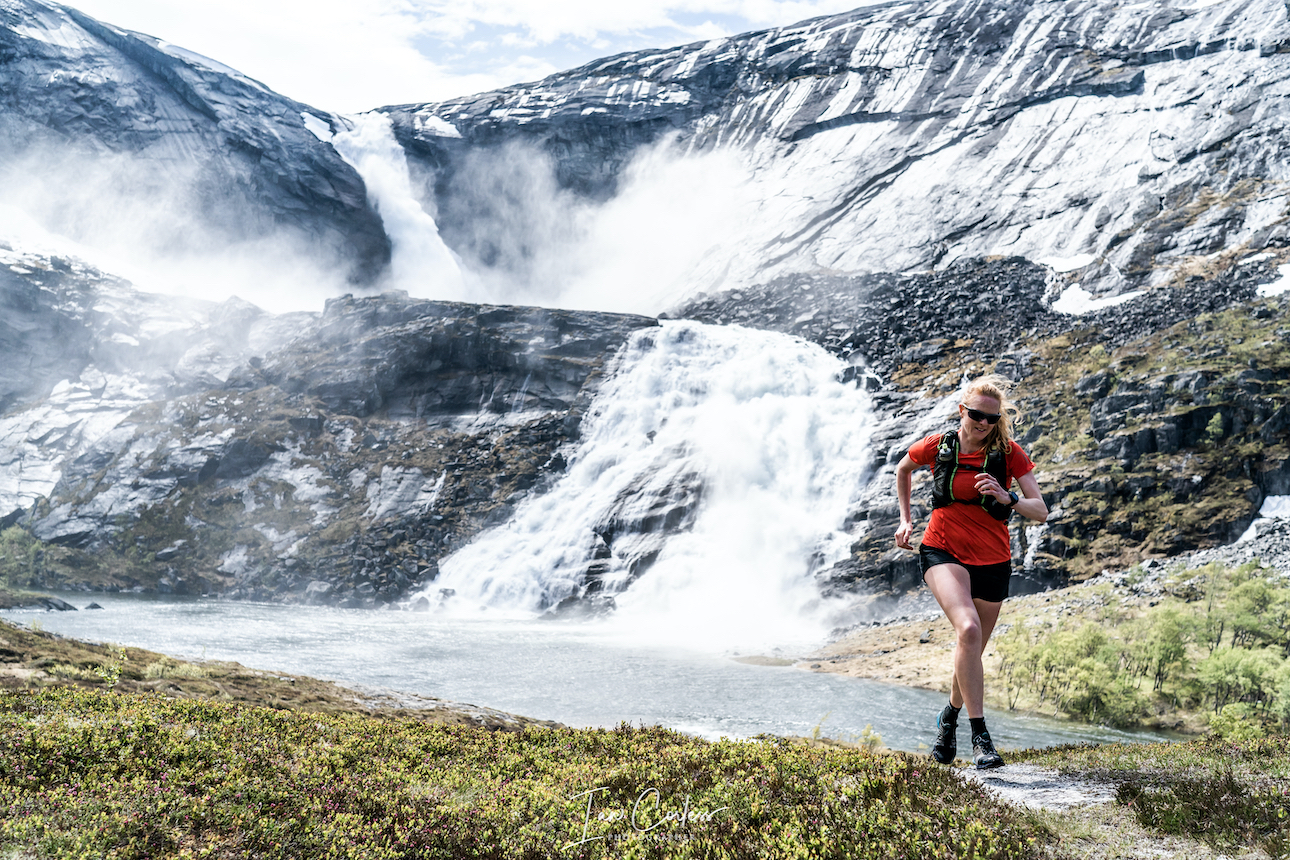
The views are incredible and the noise of the waterfall impressive. The trail rises steeply at times with some demanding trail. Nyastølfossen is hidden, peeping through the trees and then suddenly you get full views. Take time to stop, watch and take photos.
The third waterfall, Nykkjesøyfossen is located in a beautiful meadow. This is a popular wild camping spot with incredible views, so, keep this in mind. There is a small hut and also a public toilet here. The trail is easy to lose here but keep close to the water edge (on your right) and follow climbing and scrambling over the rocks. Eventually you will see the trail rise up.
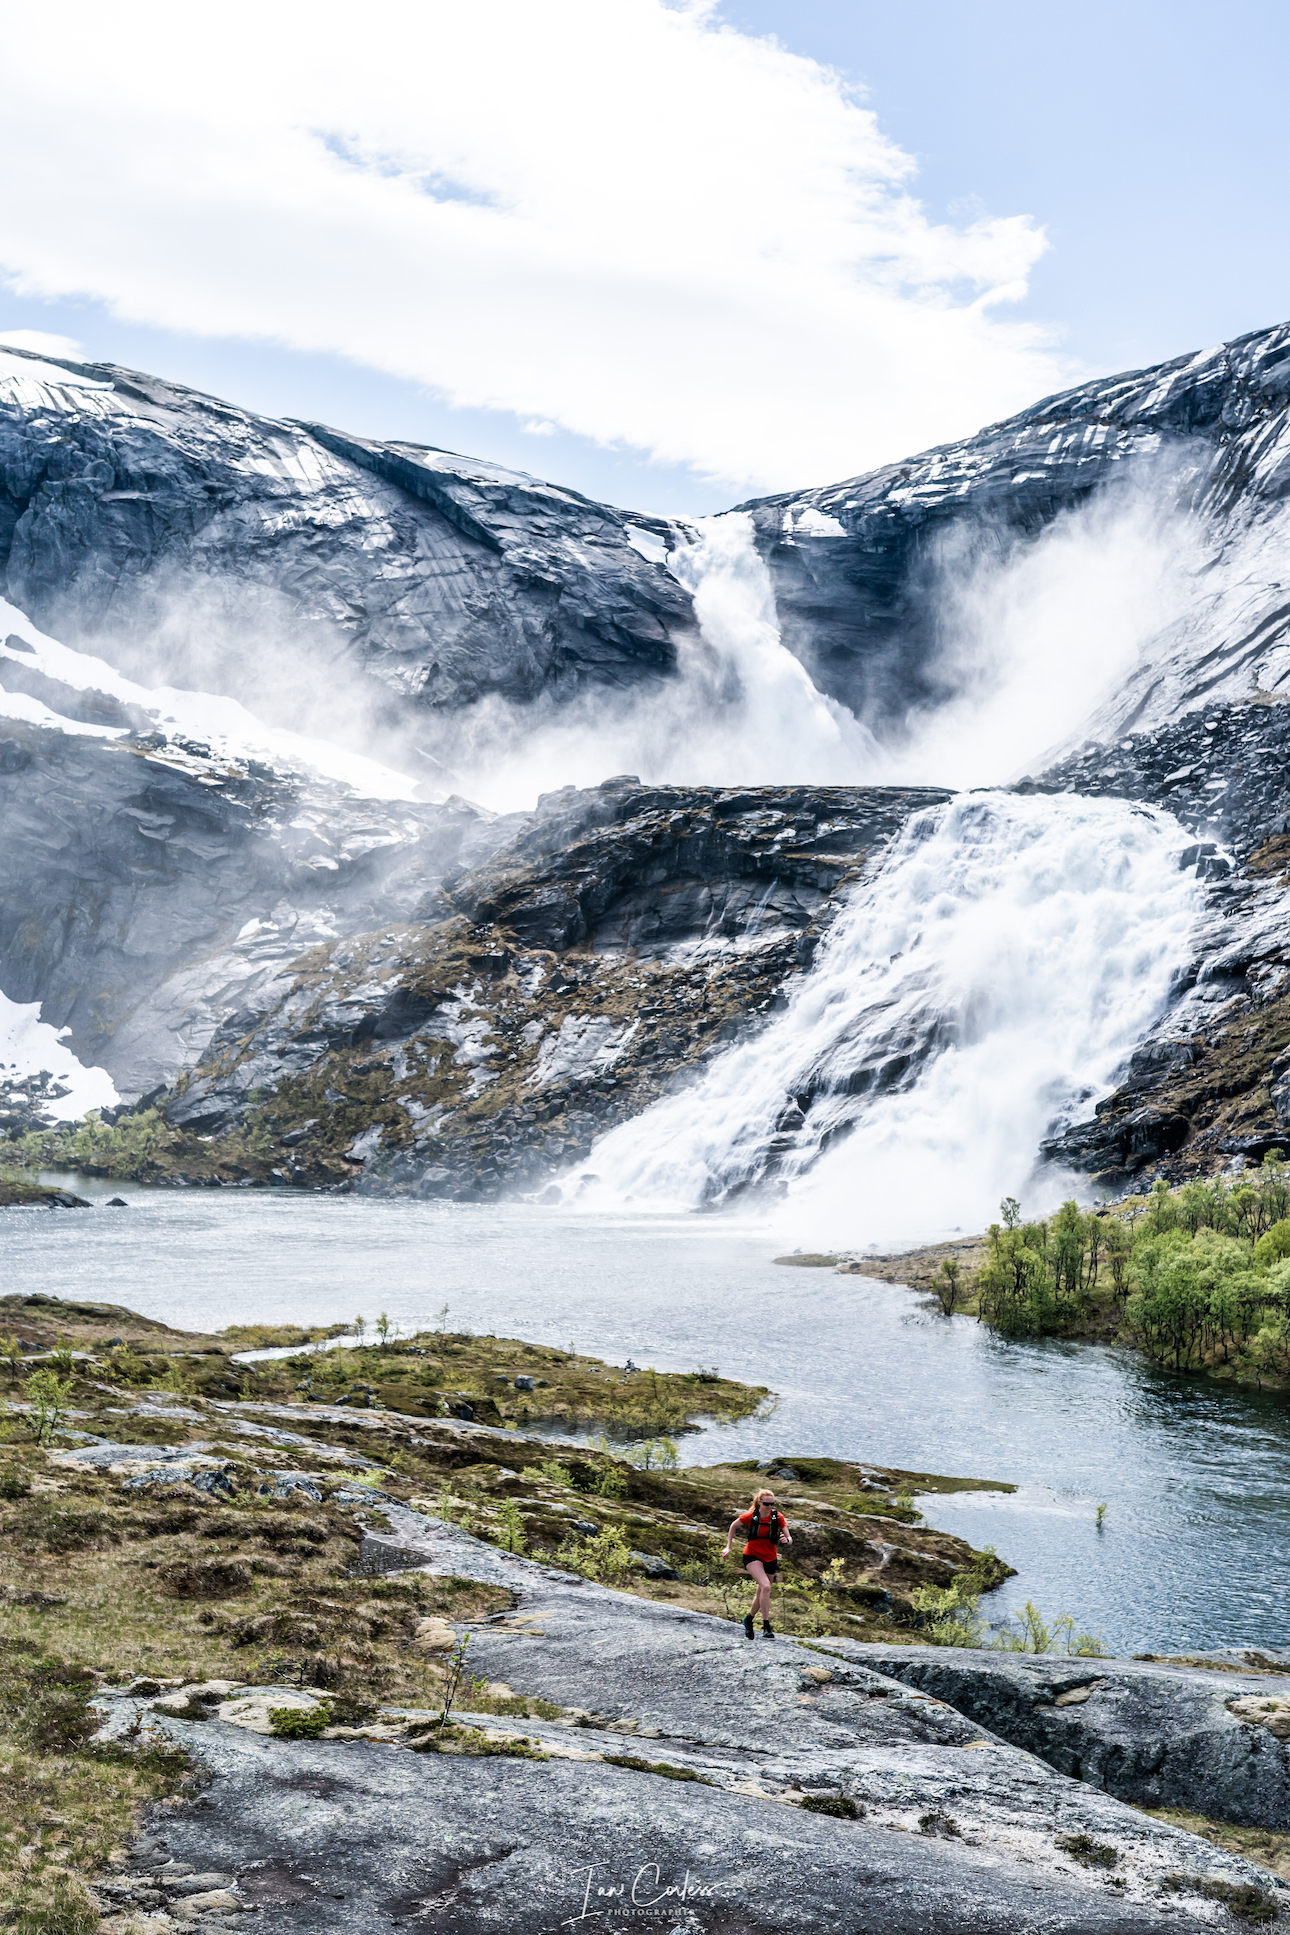
The trail goes up again through trees and heads towards the 4th and final waterfall, Søtefossen. At times it’s easy to lose the route but in all honesty, you cannot get lost, just head for the waterfall. Eventually you can go no further as the 4th raging torrent forces you to sit down and watch its beauty.
You return via the same route.
This route is often listed as demanding, as always, this depends on experience and fitness. Estimated to take 5-6 hours we did the route in 3h 25m with continuous photo stops.
On returning to the car, we returned to the fjord at Kinsarvik for a lunch break and then we travelled over to Oksen to wild camp.
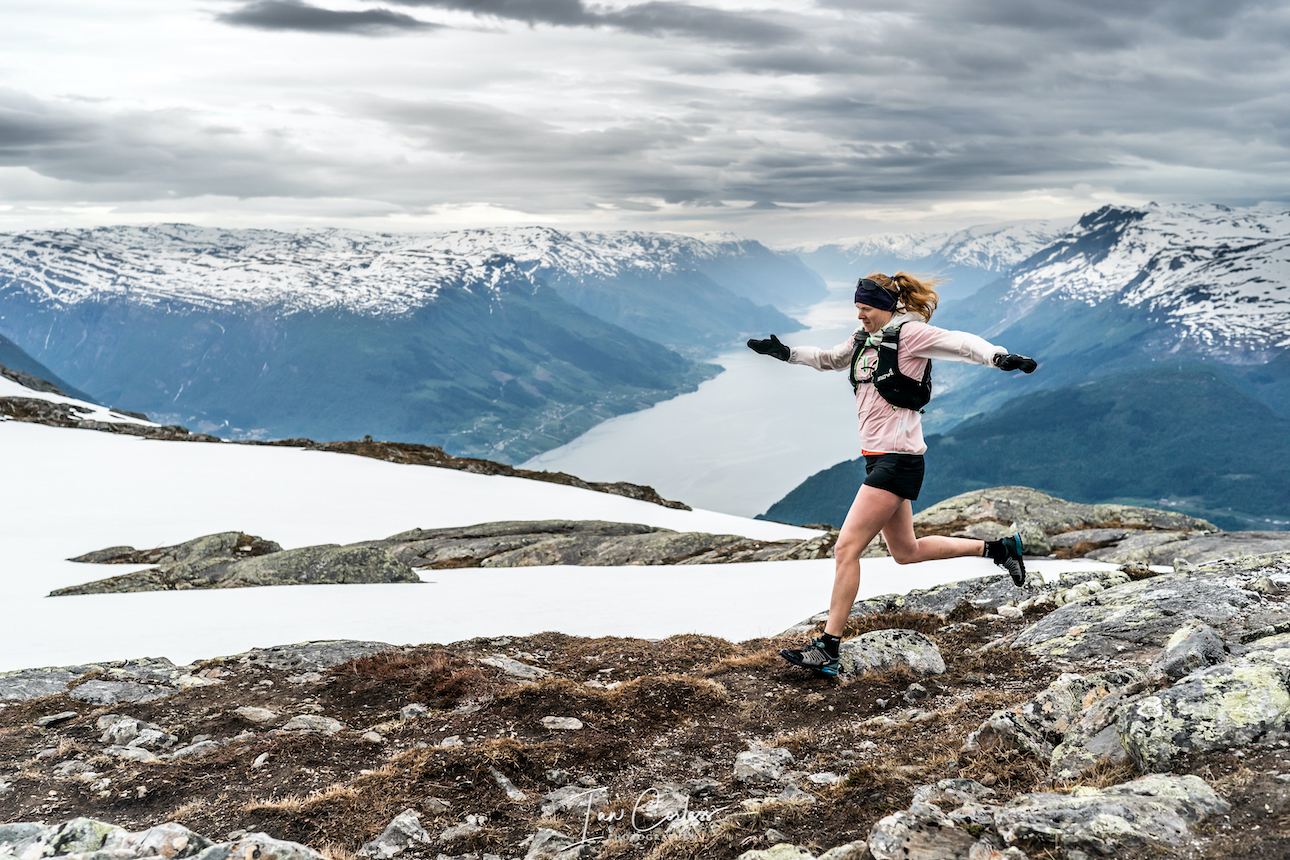
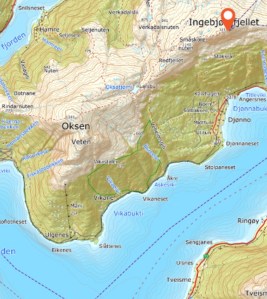
Oksen
The drive to Oksen takes you over the impressive Hardanger Bridge (toll payable 150 Nok) which is the longest suspension bridge in Norway at 1380m long.
Please note, once you have left Kinsarvik (or any other town for that matter) you will not pass any shops or supplies on the route to Oksen. It’s a narrow out-and-back road that passes close to the fjord and remote houses. Eventually you will drive up heading to ‘Tjoflot’ – continue along the winding road and eventually you will come to a dead end where parking is available. A fee is payable for parking.
Our suggestion is to arrive late afternoon or early evening and wild camp close to the car park or, start the climb of Oksen and after approximately 1-mile you will find a plateau with two huts, here is a good place to camp.
With either of the above options, you can start the climb of Oksen early the following morning ahead of other people arriving. We decided to camp near the car park as we wanted to do the whole climb in one go.
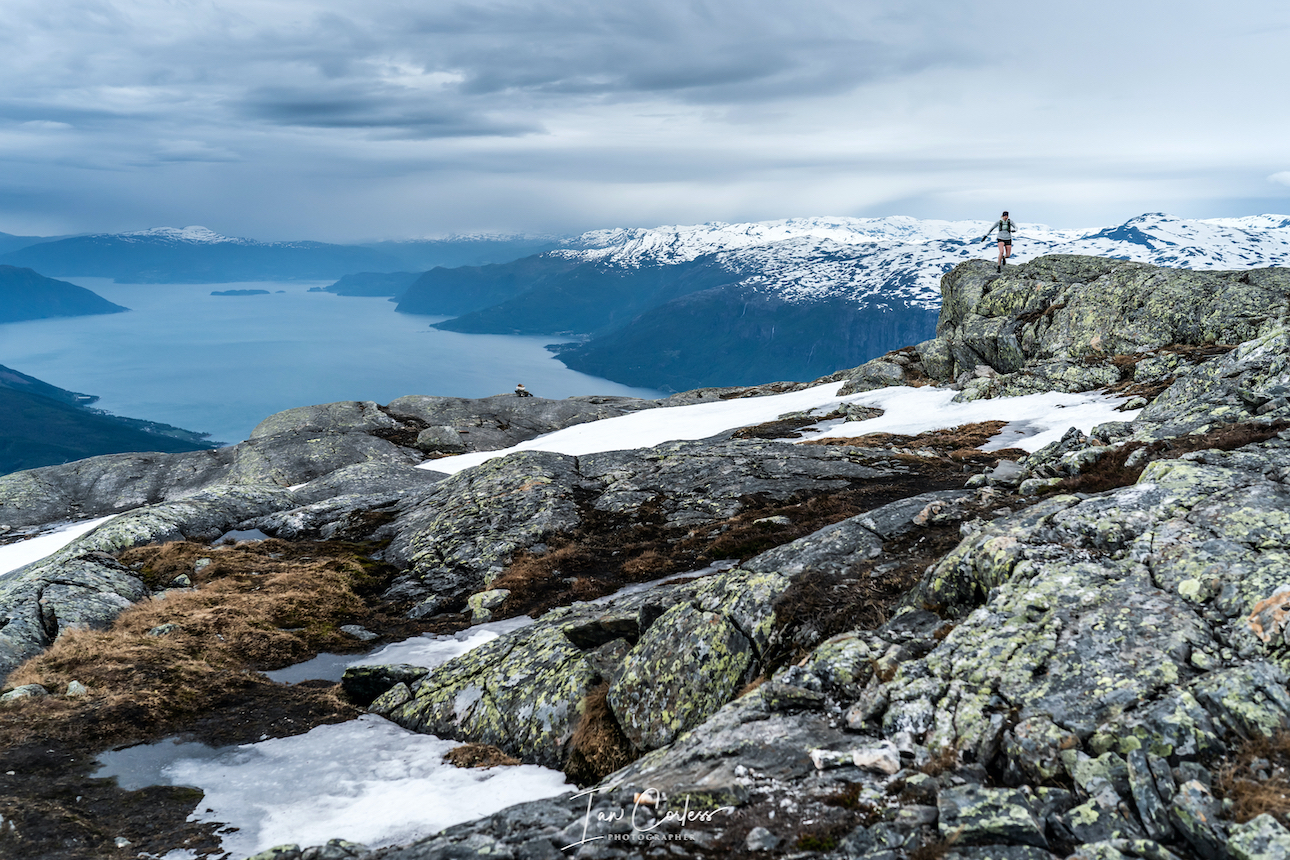
This route is very different to the previous day’s expeditions. It feels much more remote, exposed and has many similarities to a classic VK (vertical kilometer) route. You will climb just over 1000m+ in less than 5km to reach the summit.
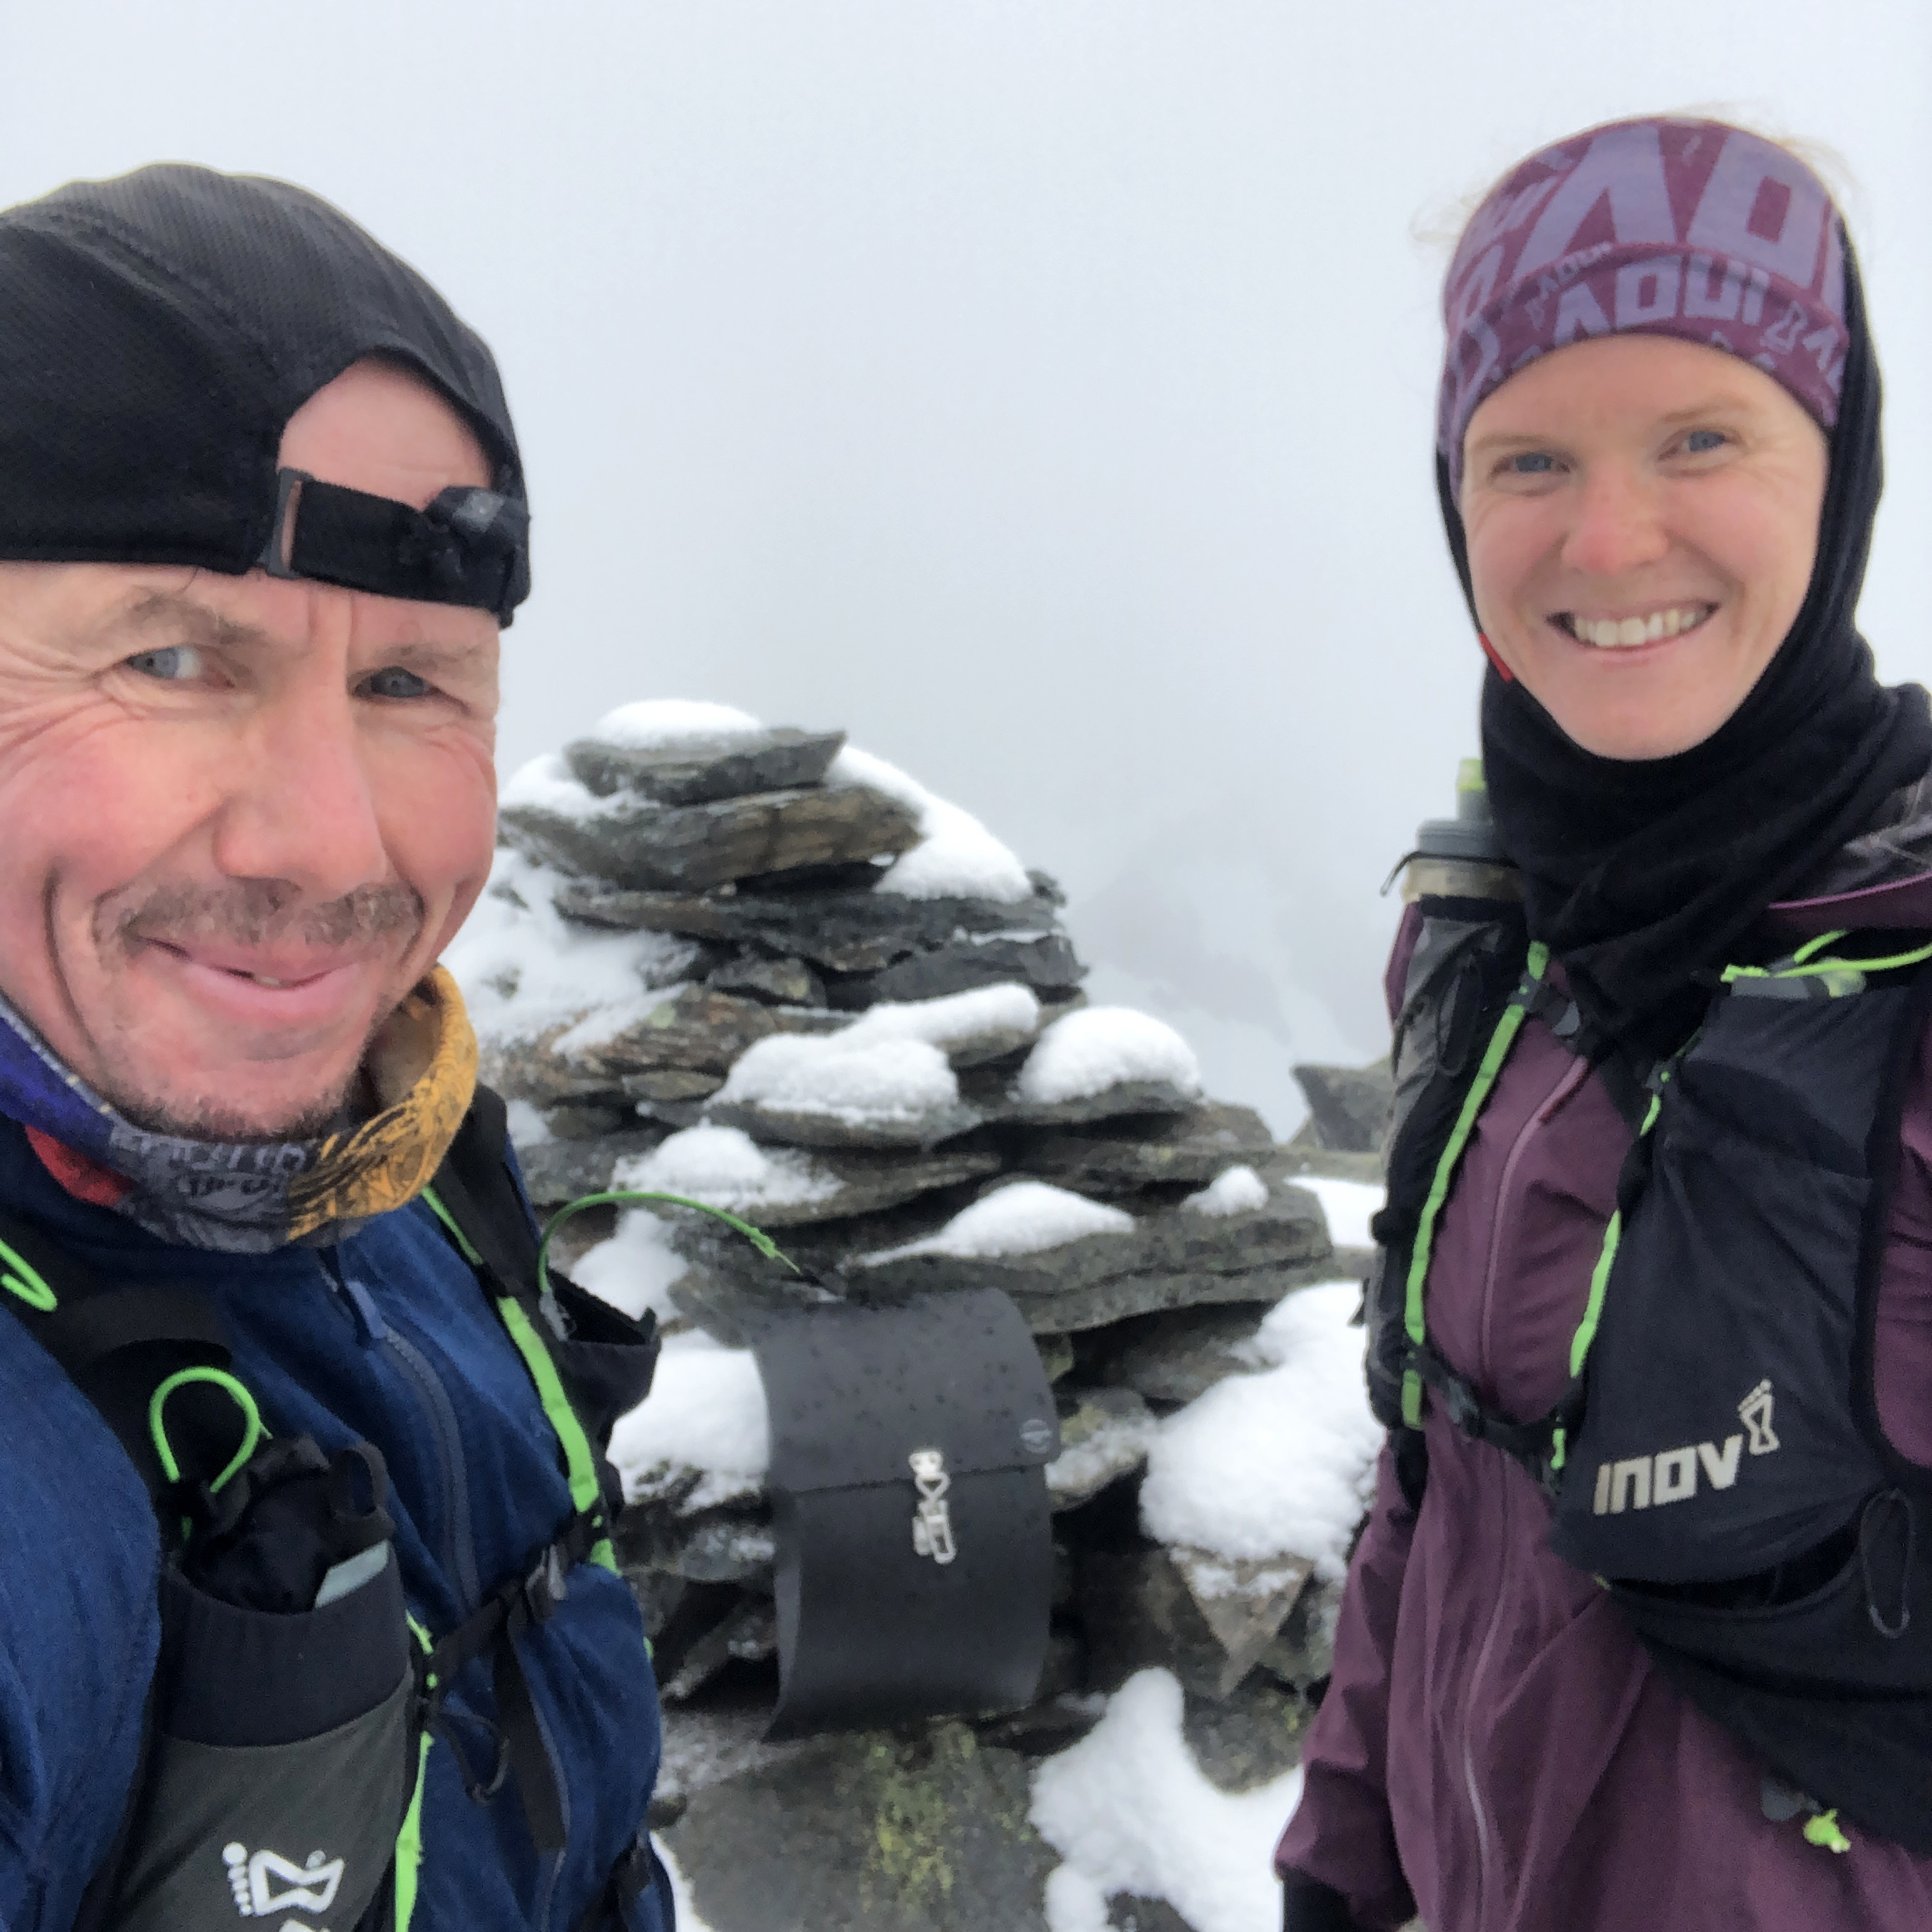
We had dry weather but cloud and strong winds. Like the rest of the Hardanger area, once above a certain height, we had snow all the way to the summit making the journey extra special.
The early climbing is through forest as the trail winds up. Once you reach the plateau where the two huts are, the trail is now open and wide. The route is well marked but be careful in snow sections, at times it’s better to deviate on to firm/ harder ground.
The whole route is steep and especially so between 400-600m+ and after 800M+ with the route flattening out towards the summit.
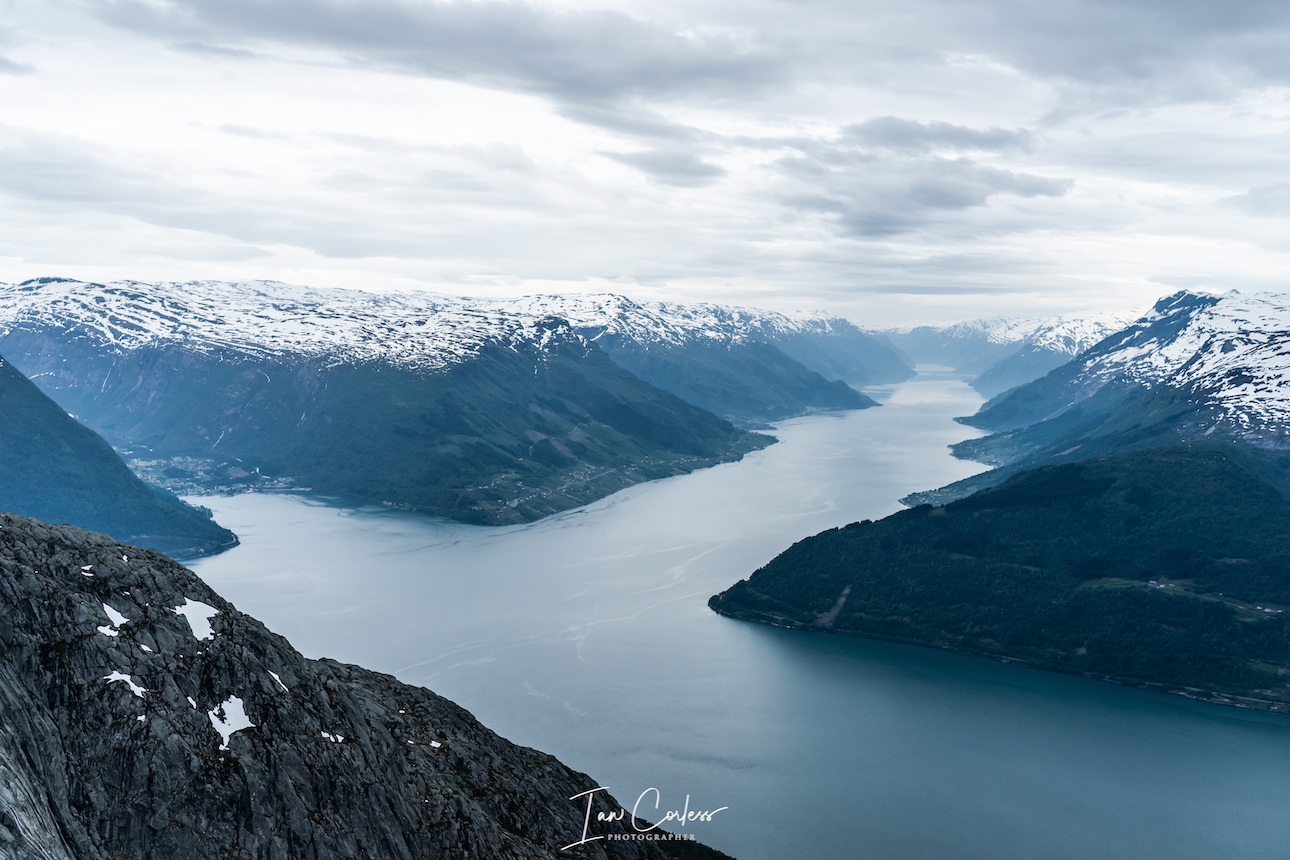
At all times the views are incredible and arguably the views of Hardangerfjord, Sørfjorden, Granvinsfjorden, Eidfjorden and Samlafjorden are the best in the region.
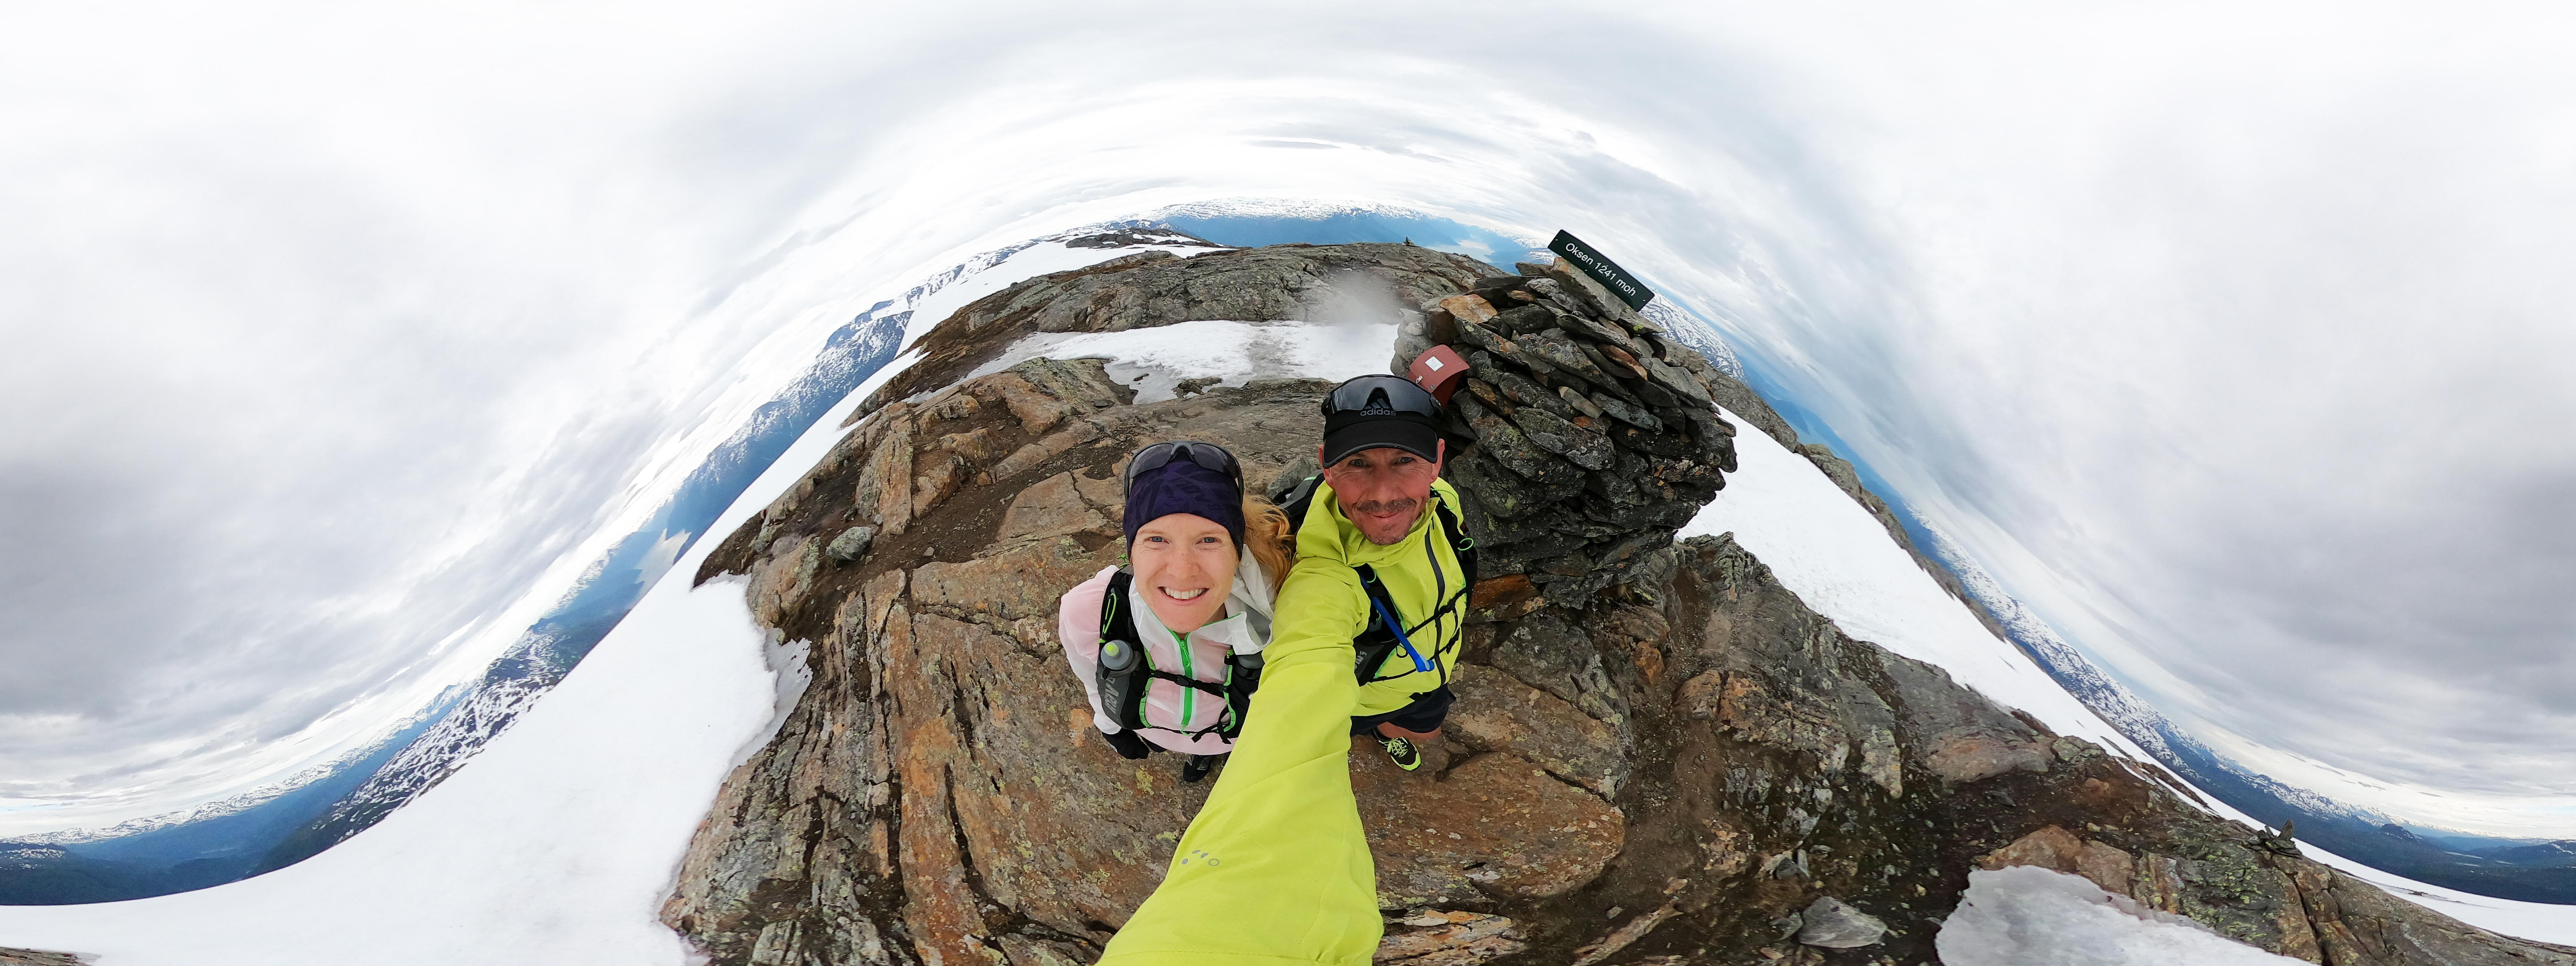
The summit is marked with a stone cairn signifying the altitude of 1241m.
Take time to explore the summit and look at the different views. There is a stunning vista of the suspension bridge too.
At the summit you have options to extend your route. This was our original plan; however, snow and weather conditions were very unpredictable, and we decided (correctly) not to take risks and continue.
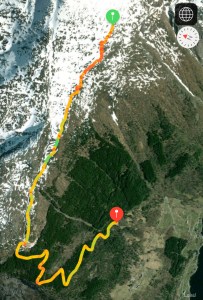
Had we had crampons and ice axe; we most certainly would have continued to Ingebjørgfjellet (passing Oksatjorni) which is signposted from the summit (5.4km away). The route is not marked, so, you need map and compass or a GPS. I use the ‘Footpath’ app on my iPhone which works excellently. Maps.me and ViewRanger are others to consider.
The return to the car is via the way you came, unfortunately, due to road access and a lack of public transport there is no other option. As an alternative, it is possible to climb Oksen from Hamre, however, you need to use a different road to access this area. The route up goes via Seljesete and Seljenuten.
The route is considered demanding with a time allowance of 7-hours. As mentioned previously, with good fitness and mountain experience it is perfectly feasible to do the route in under 3-hours even with plenty of photos.
We concluded our trip with a detour travelling back to Oslo. The weather was perfect, and we were not eager to return home when another night camping was possible. We called at Vøringfossen (here) which is an impressive waterfall towering 182m high.
We then continued to Ringericke and climbed up the Mørkonga gully to then camp high next to a lake for a final night.
RECOMMENDATIONS
Never underestimate the mountains and the environment in which you are exploring. June in particular is the start of the hiking season and as such, snow can be a factor on all of the above routes. This adds an additional potential for injury and problems. Particularly as the snow is melting and this can create snow holes, snow bridges and crevices. Do not take any risks and follow established routes and existing footprints.
Make sure you call in the Tourist Office in Kinsarvik and discuss your route options and take advice on current conditions and dangers.
It may be 30deg next to the fjord and glorious sunshine, but at the summit, it can be below zero, blowing a gale and torrential rain. You must take personal responsibility and be prepared for all conditions. At a minimum please take:
Suitable pack
Hat
Gloves
Warm insulated layer
Warm trousers
Waterproof jacket/ pants
Food for the duration of the hike and some contingency
1,5 ltrs of water (which can be replenished on all the routes via streams/ waterfalls)
Take water purification tablets as a just in case and consider a water purifier such as MSR TrailShot (here)
Map/ Compass
Charged mobile phone with a suitable App such as ‘Footpath’ (here)
Cash/ Card
Garmin InReach or similar
Plan your routes, be realistic on timings and always start early. One of the huge advantages of outdoor activity in Norway is daylight. In June, it is light at 0300 and goes dark after 2200 hrs.
CONCLUSION
Hardanger is a paradise.
Quite simply, if you do the route options above, not only will you see some of the most amazing views ever, you will be rewarded with wonderful challenging days that will provide you with a lifetime of memories.
Weather, as always, is key. We chose our weather window and traveled to the area knowing that we would be rewarded with great conditions.
Of course, if you are making a special trip to the area, you will need to take the weather you are given. Although it is great to have a plan, be prepared for that plan to change based on weather conditions and personal safety. We were desperate to travel to Ingebjørgfjellet after Oksen summit but made a sensible call and retreated.
The mountains and trails are going nowhere, always remember this!
The routes provided are achievable for all with enough allocated time based on individual experience and fitness.
Due to Covid-19, we experienced considerably quieter trails. On many occasions we were completely alone. Having spoken with locals and others, this is not normal! So, be prepared for more people when you venture to this area, especially Trolltunga.
For us, camping enhances the experience and brings you closer to the nature and environment. However, this is campervan heaven, and should you need a hotel, many are available.
Needless to say, we have picked highlights of the area and there is more to explore, but that will be another article!
This area would be fantastic for a Fastpacking trip, read here about equipment.
I am fortunate to have travelled the world, experienced mountains, summits and trails in iconic locations. Norway may not have any peaks/ summits that can compete with the Alps, Pyrenees or the Himalayas, but what it does have is the most incredible views.
I can honestly say, our mini trip to Hardanger is one of the most rewarding ever!
Special thanks to Abelone Lyng who was my partner in crime. Abe is the ‘muse’ in all the photos, the girl with a big smile and yes, these trails would have been a little less magic without her to enjoy the journey. She was also the inspiration for the trip and it is thanks to her we visited these amazing places.
Please support this website. I believe everyone deserves to read quality, independent and factual articles – that’s why this website is open to all. Free press has never been so vital. I hope I can keep providing independent articles with your help. Any contribution, however big or small, is so valuable to help finance regular content. Please support me on Patreon HERE.
Covid-19, lockdown, social distancing and so on has resulted in so many crazy and inventive ideas. Virtual running and racing have never been so popular as it has provided an opportunity to daily focus on a larger goal that one can undertake with others.
Race directors, runners, shops, stores, magazines and so on have created opportunities.
In Norway, Runners World NO have a series of events, ‘Trail Challenge,’ ‘100 Minutter,’ 5 Sommernattsløpet 5k,’ ‘Soomer Maraton,’ and ’Til Himmels Race.’ The latter translates, ‘To the Skies’ or ‘Sky is the Limit!’
Fueled by the challenge of gaining as much vertical meters as possible in one month, Elisabeth Borgersen and Abelone Lyng, both decided to set themselves a challenge within a challenge. How many meters could they gain in just one day!
Initial plans were to use a ski slope and gain permission/ access to use the chairlift down, therefore concentrating on vertical meters without the impact of running down. However, due to Covid-19 this was not possible.
“If we were going to do it, then we would have to run down too,” Lyng said in advance of the challenge. With a little research, they found a ski slope, pretty much void of snow, the ‘Wyllerløpa’ part of the ‘Wyller Express’ series of slopes.
‘The Wyllerstua’ has a car park and we have immediate access to the slope,’ said Lyng. ‘We plan to set up our own aid station and then we can go up and down as many times as we wish.’
On the map below, Lyng and Borgersen would use the route marked 11. With 300m vertical gain for each ascent, the distance would be approximately 1.3km up and 1.3km down.
May 21st had been set aside by Runners World as ‘the day’ to see who could gain the most vertical meters.
‘At 8848m, Everest is a logical and mind-blowing target to aim for, so, that is the dream goal. However, for me, I think Mont Blanc at 4810m or Mount Kilimanjaro at 5895m is more realistic,’ Lyng explained. ‘Elisabeth on the other hand has the potential to climb to the top of the world, albeit virtually!’
THE DAY
It was an early start to the day with the duo waking at 0300 and meeting at the Wyllerstua at 0400. Gladly, the day was already starting and the need for a head-torch was not required. One of the advantages of being in Norway.
At 0430 they were off, starting steady, the plan was to spend as much time together as possible, each pushing the other.
Calculations allowed for 2000m every 4 hours and therefore, a projected Tim for 9000m+ could be estimated at 18-hours.
It’s easy to get pre-occupied by the vertical gain and the lofty, albeit virtual, summit of Everest at 8848m. But what goes up, must come down, and the impact and stress of descending a 300m slope would almost certainly have a far greater physical impact than the vertical meters.
The early hours passed and soon they were taking the first of many breaks. Nothing too lengthy. Just an opportunity to consume calories, hydrate and then push on.
3300m+ was accumulated with relative ease in well under 8-hours and the challenge was starting to fall into place. Borgersen looked solid, powering up the climb but maybe more impressively, still running down the 300m/ 1.3km slope with what appeared to be relative ease.
Lyng was holding the pace but openly admitted, ‘Everything is fine, it just hurts everywhere in my body, but that’s part of the game.’
The height of Mont Blanc was achieved, and that milestone was rewarded with a smile. The duo continued to motivate each other, almost metronomic in the ascent but Borgersen always looking more at ease on the descent.
With 10-hours elapsed, Borgersen was resolute that today was the day to achieve Everest. She was hurting but it was easier to push on. The thought of coming back and trying again was too daunting. No stranger to long-distances and vertical gain, Borgersen has pedigree, she has completed TDS and the 90km Mont-Blanc placing 6thin both. She also placed 8th at MIUT.
For Lyng, she was in new territory, far exceeding any previous vertical gain for one day. A lover of the mountains, Lyng’s recent successes have come with multi-day racing, placing 4th at The Coastal Challenge in Costa Rica and winning, The Ice Ultra.
‘I was getting very tired and I was well aware that the ability to continue on for many more hours would result in injury. I therefore set the target of Mount Kilimanjaro at 5895m. But I also had a desire for 6000m.’
Lyng achieved Mount Kilimanjaro in 12 hours and then the 6000m mark in 12-hours 37-minutes with a total distance of 54km. Her day was done.
Borgersen once again arrived at the car park. It was close to 6pm. But there was no hesitation, just a brief chat and then an about turn to once again head upwards.
‘I have some work left to do, but if all goes well, I think I can be finished before 10pm.’
The evening passed and gladly, Borgersen’s husband arrived with pizza offering a welcome break, refuel and then the final push. Darkness was slowly starting to arrive as the goal was achieved after 77km’s.
‘I love to challenge myself to see what I am actually capable of. Going up and down the same 300m slope close to 18-hours (17h 40m) was for sure a big challenge. But to finally reach Everest, 8880m to be exact, I am pretty darn proud of that!’
2020 will be remembered by us all as an Annus horribilis due to the Covid-19 pandemic.
Amidst the gloom, the isolation, quarantine, the changes of routine, the loss of work, the disruption to life and the horrendous death toll, it is possible to still find reward and growth. It may come in the strangest of ways, one just needs to be creative.
Please support this website. I believe everyone deserves to read quality, independent and factual articles – that’s why this website is open to all. Free press has never been so vital. I hope I can keep providing independent articles with your help. Any contribution, however big or small, is so valuable to help finance regular content. Please support me on Patreon HERE.
Fans of inov-8 shoes may well be a little surprised by the new incarnation of the Trailroc 280.
It’s a bold shoe and dare I say, on first look, one may even mistake it for a Hoka One One shoe. The blue and yellow and color fade has that classic Hoka look and the cushioning really stands out.
I had to make sure that I definitely had an inov-8 shoe in my hand.
Die-hard inov-8 fans may well immediately dislike the new Trailroc – it’s a departure for the brand. But one should not be too hasty.
For those who like minimal, low drop, and aggressive outsoles, inov-8 still have a plethora of shoes to choose from. So, the new Trailroc 280 should be embraced as something new to try.
First Impressions
I like the look, bold color fade work well. The cushioning is the stand out and is built up and reinforced section around the rear. Heel box is well padded and has firm hold of the foot. The tongue is attached to the inside of the show with elastic on either side, I am a fan! The tongue is really padded, very plush. The upper is very breathable and there are reinforced overlays on the outside (left and right) to provide some structure to the upper and hold the foot.
Lacing is pretty standard and there are additional eyelets should you wish to lock-lace or similar. Toe box has reinforcement for protection, but I expected this to be more substantial for a shoe designed for rocky terrain. The toe box is on the narrow side so if you are a fan of the Trail Talon (here), for example, you may not like the Trailroc? Sizing is touch and go. I always use a UK9.5 in inov-8 and the Trailroc is definitely a little smaller than my other inov’s. It is marginal and I have had no problem using them… worth noting that they may feel smaller as the toe box is a little narrower, however, I always go for a thumb nail of space, and in these I am at ¾!
Outsole is the new Graphene and the grip is classic trail grip – not too aggressive. Graphene is slowly making its way to most inov shoes now and apparently it increases longevity by some 50% without a comprise on the grip characteristics.
The Shoe
Sliding the shoes on for the first time, several factors stood out.
I could feel the cushioning immediately.
The padded tongue is really plush.
The toe box felt on the narrow side.
Lacing the shoes up, the hold on my foot felt ‘so so!’ I have to say, and this comment comes now after weeks and weeks of using the Trailroc, I feel the upper lacks some rigidity to hold the foot. I have been using inov for years and something in the upper here is lacking for me. It’s particularly noticeable when the terrain is not flat, for example, when running off camber or when on rocks – my foot is moving inside the shoe! This is not because of lacing. I tried many lace configurations and I just couldn’t get the firm hold I like to make me feel reassured. It left me perplexed.
The toe box is on the narrower side. I need to clarify here that I love the Trail Talon and Parkclaw (here) but easily transition to ‘precision’ fit shoes, for example a Mudclaw (here). When running on muddy and technical terrain, I like my feet to be held firm and have confidence in the shoe. When running trail and longer miles I am happy for my toes to splay, providing the lacing holds my foot. The Trailroc left me feeling 50/50. There is nothing particularly unpleasant, but equally there was nothing sparkling going on.
I guess the main feature of the shoe is the added cushioning and that really is noticeable. It has a real bounce to it and comfort levels are high. So, those who are looking for a more cushioned trail shoe, this version of the Trailroc 280 will appeal. It’s a shoe that transitions from road to trail easily and that is a real plus for many.
The outsole does its job and works well. These are not shoes for muddy terrain. They are classic trail / rock shoes and the outsole works well on the latter both in the wet and the dry.
In Use
The cushioning of the Trailroc 280 is the selling factor along with the Graphene outsole. It is all packaged together in a great looking shoe. On road, the cushioning is apparent providing a plush feel and a definite bounce, so, for those who are looking for more comfort on longer runs will be happy. On trail, the cushioning is apparent, however, I did have less feel for the ground and ‘height’ from the ground was more noticeable in comparison to other inov-8 shoes.
When the trail became more challenging, as mentioned above, this is when I had issues. I just never felt my foot was held secure… It almost feels as the shoes are too big, but they are not! I really over tightened my laces and that did add to a more secure feel, but the level of tightness was not sustainable for longer runs – it just added to much pressure.
The outsole works on trail and rock well providing adequate grip when needed when conditions are wet or dry. It’s not an aggressive outsole, so, in mud you will slip and slide around.
There is a Meta-Flex in the outsole and so the propulsive phase feels dynamic but less dynamic than some other inov-8 shoes.
Drop is 2 arrows, so, 8mm. Makes sense for a shoe like this, I really feel this shoe is designed for an ultra-trail runner going longer distances. Cushioning is 20mm rear and 12mm at the front.
inov-8 very often make shoes for a very specific purpose and with this Trailroc 280 I feel that it is a shoe trying to do many things and as such does no one thing brilliantly, but if you are looking for an ‘all-purpose’ shoe that transitions from to road to trail, this may be for you!
Conclusion
The Trailroc 280 is not a bad shoe. Equally it is not a great shoe. This is the first time in a while I have not glowed about an inov-8 shoe. I have tried and tried to like this shoe and don’t get me wrong, if I had no other shoe to wear, I’d be happy in the 280. However, I have lots of options on footwear and the 280 has nothing that stands out that makes me want to grab it and go run. It’s cushioned, has 8mm drop, has a great outsole but has some failings for me.
Foothold and toe box are the two factors that leave a question mark. The toe box I can live with, it causes me no problems, it is just not ideal. The foothold though really is an issue and I hate the feel of my foot not being secure.