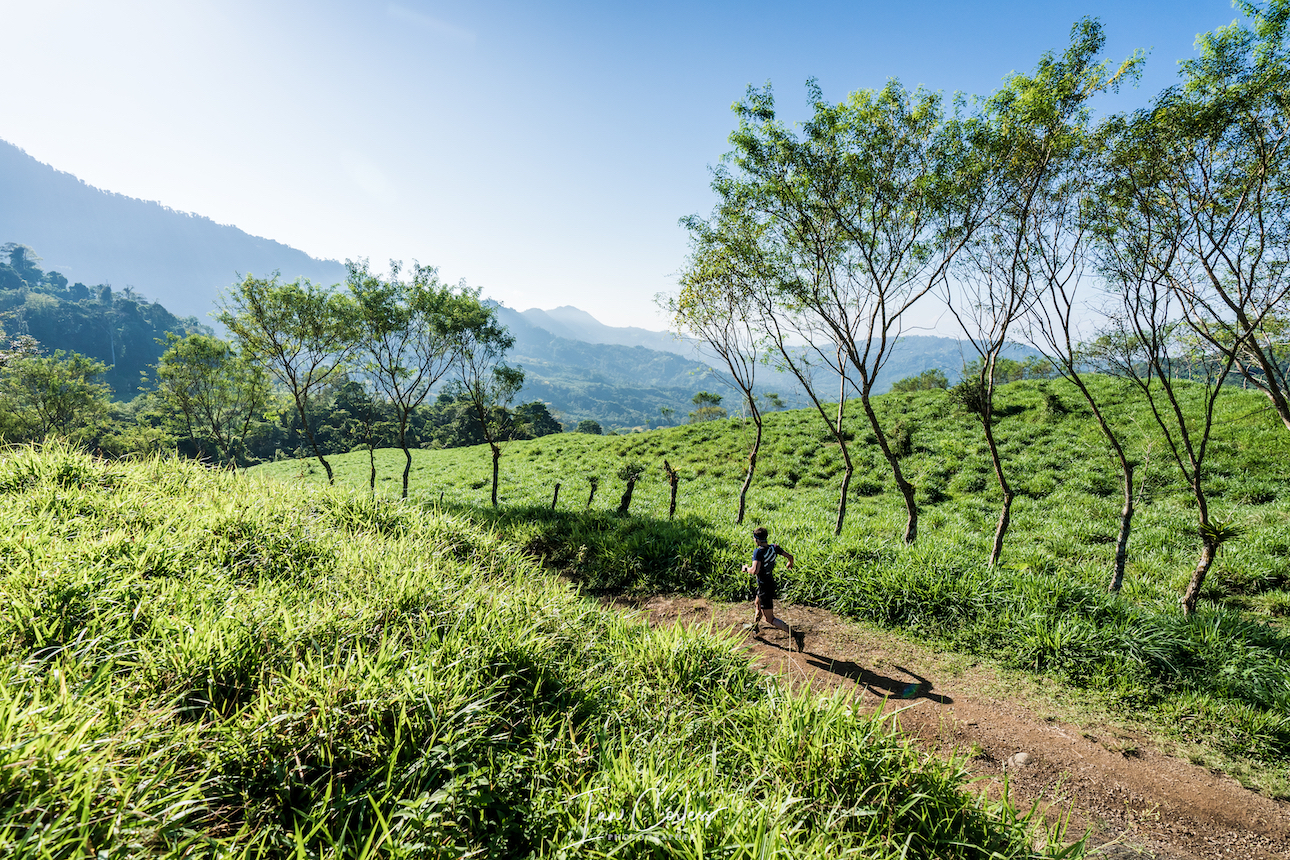
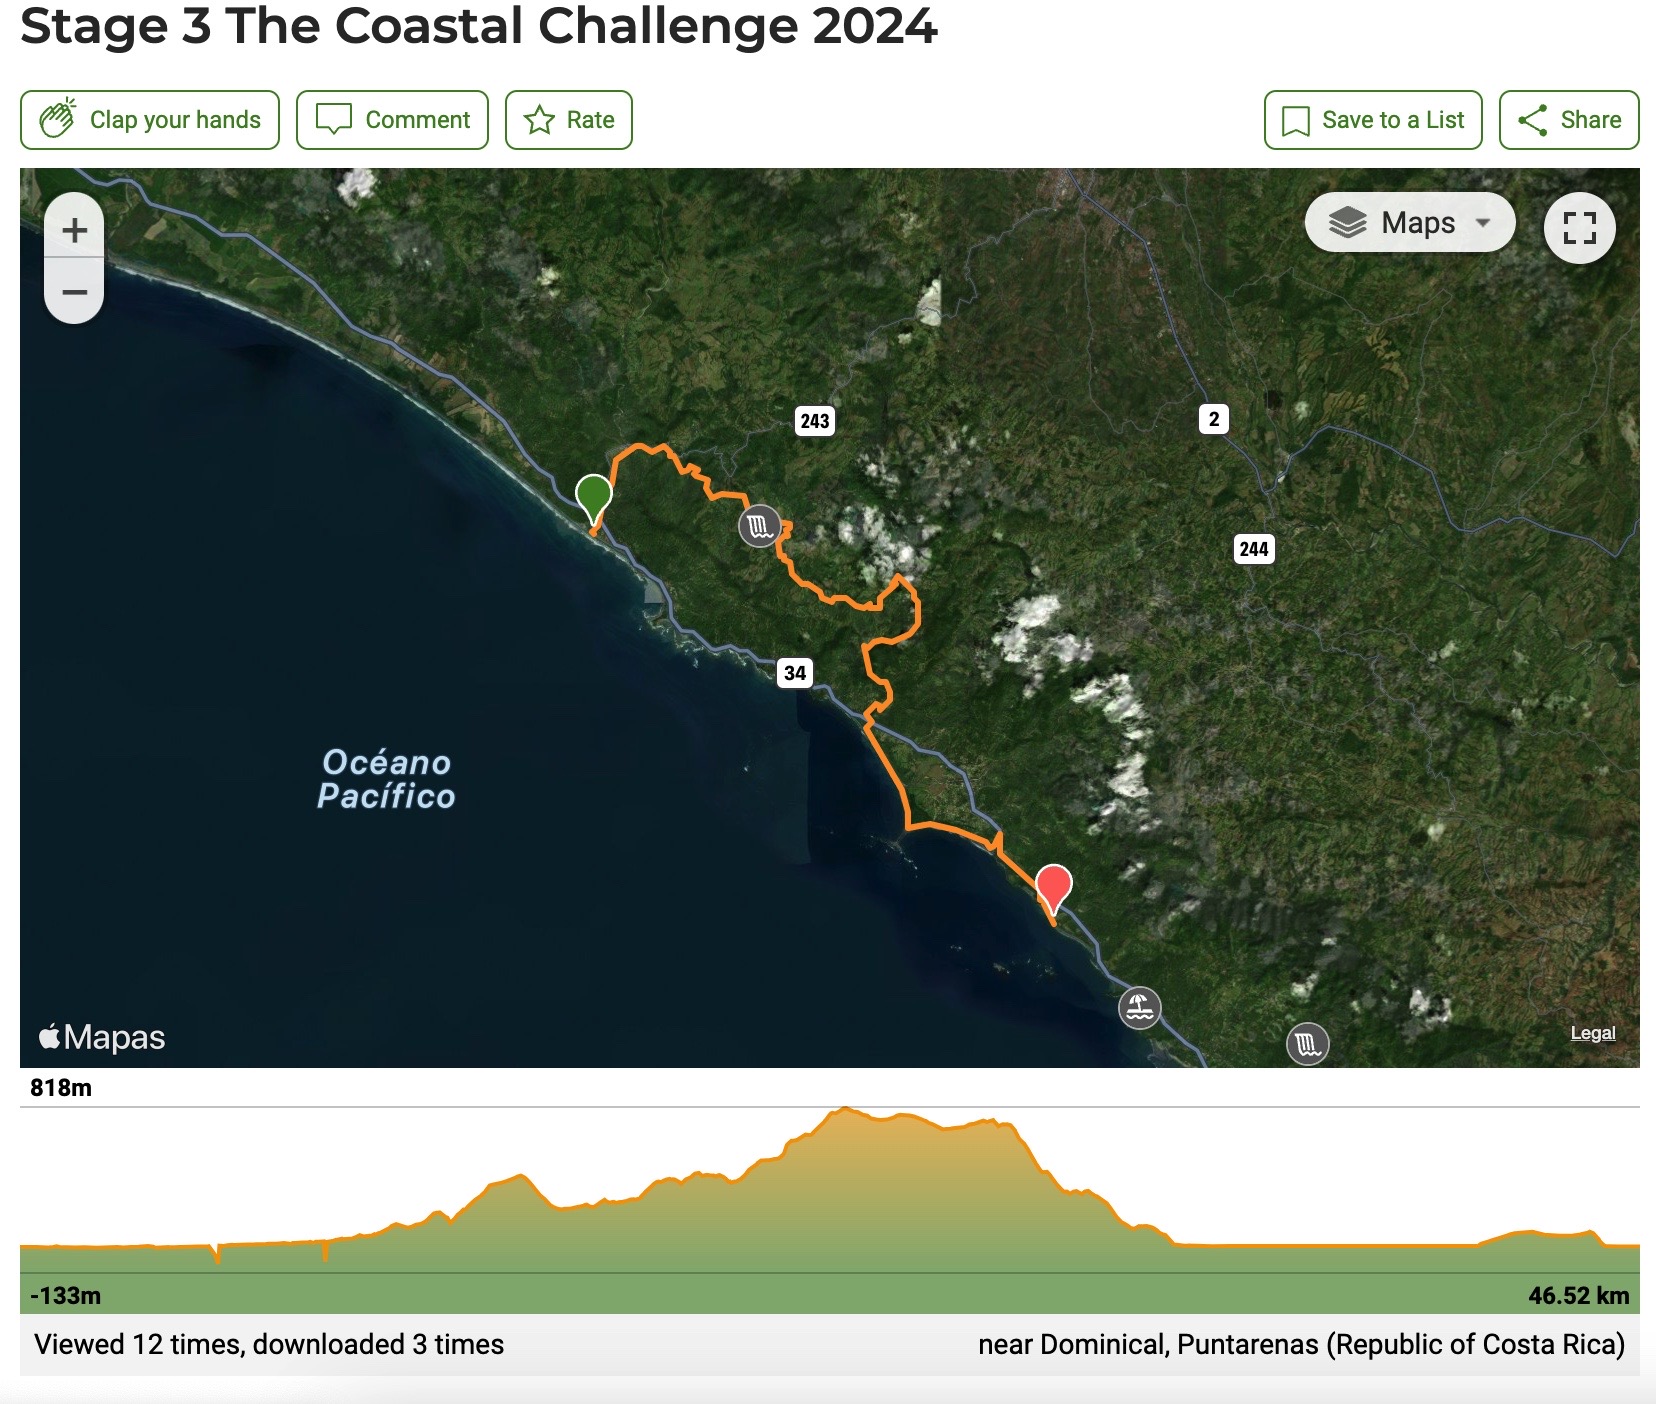
The surf beach of Dominical really provided a real Costa Rican feel for TCC yesterday, particularly the magical sunset that concluded the day.
Stage 3, from experience, is considered the hardest stage. The opening km’s through rocky riverbeds bring a technical and slow start to the day.
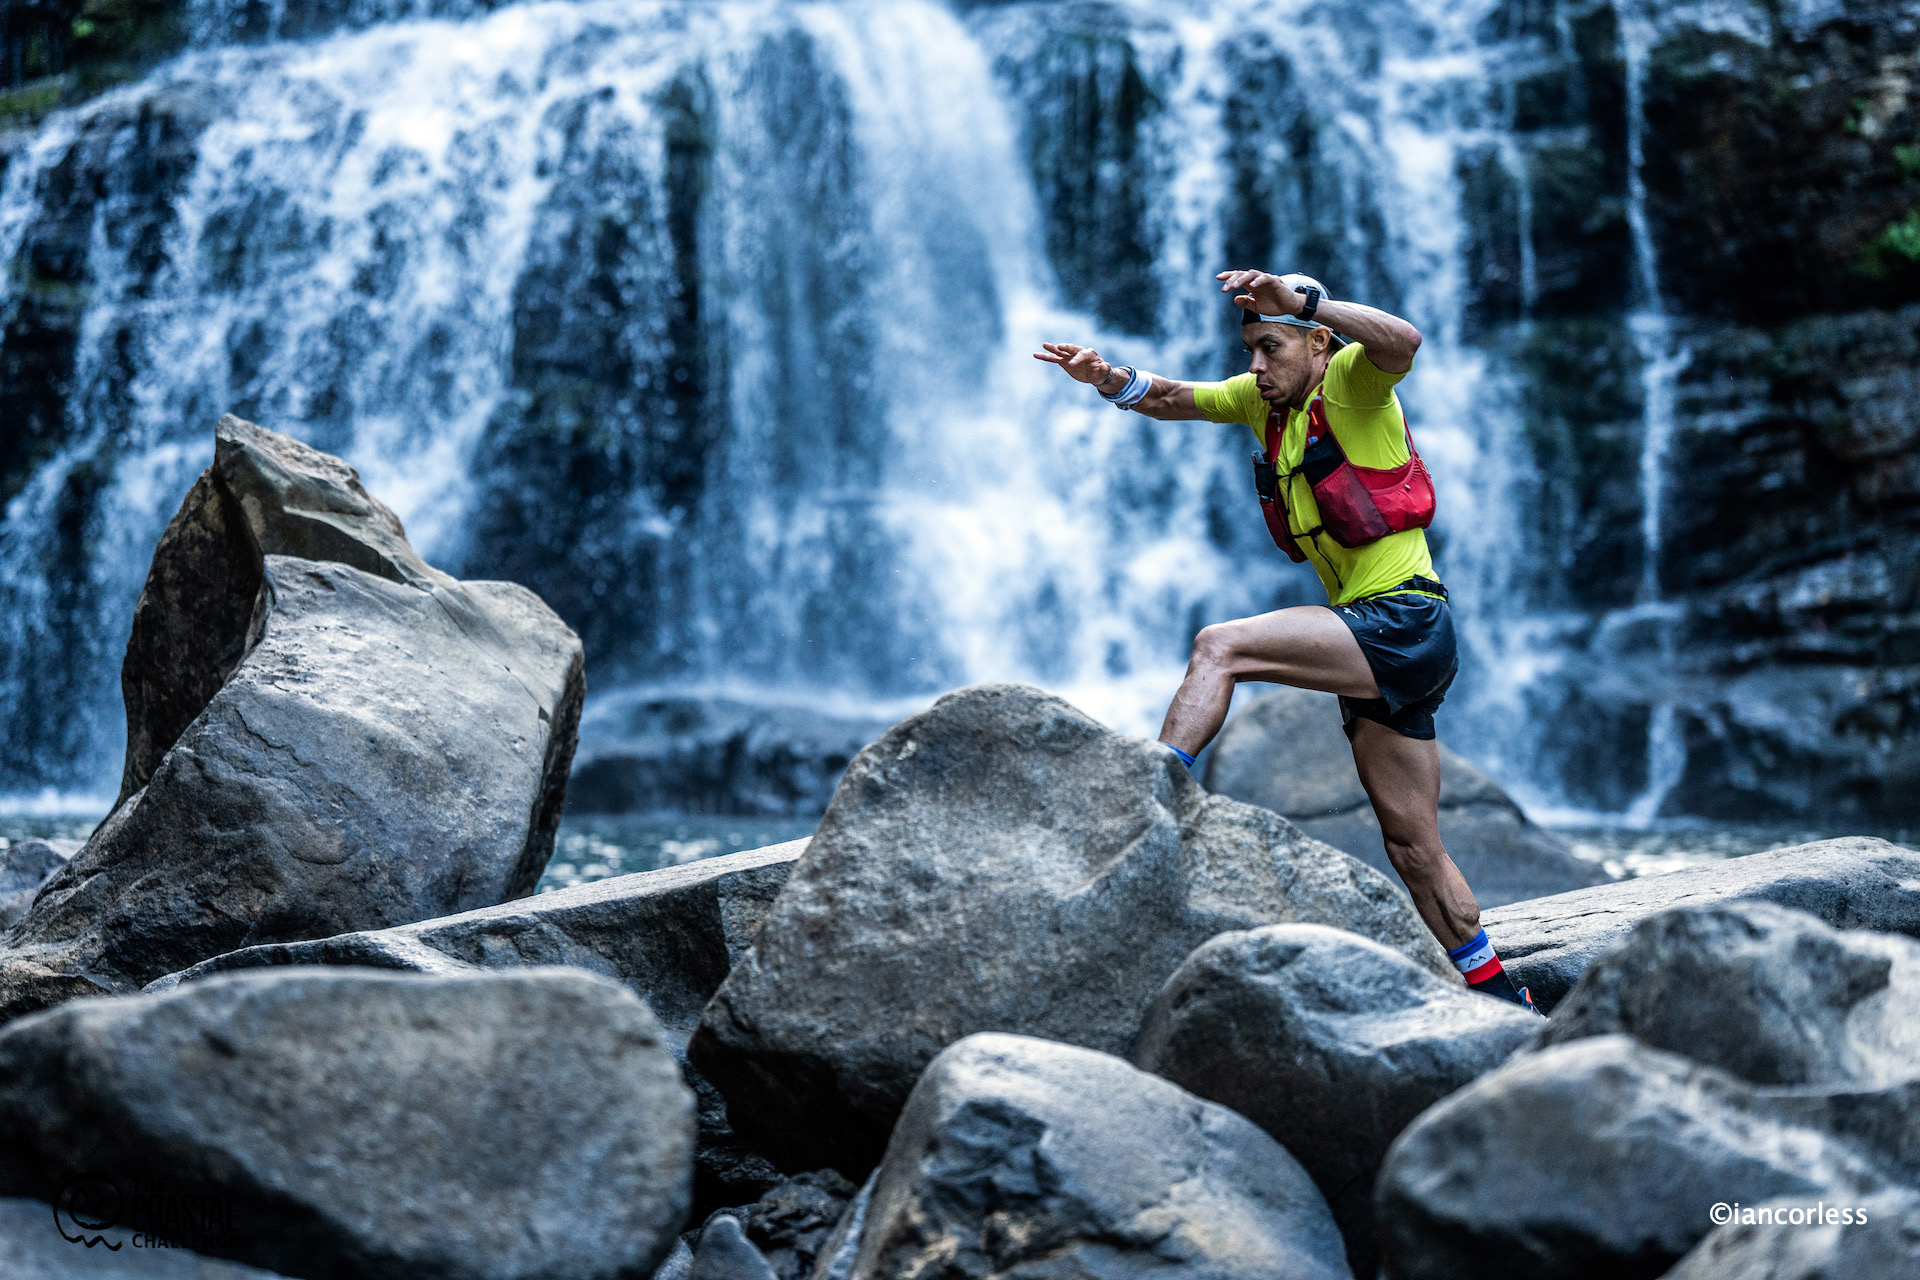
Calvo López at Nauyaca
The crossing of the iconic Nauyaca waterfall and steep climb out soon make the runner’s aware that as beautiful as this day may be, it is also brutal.
Finally climbing to the high point of the day, slowly but surely the race descends back to the coast with relentless long beach sections, no shade and the heat of the day to punish each and every runner.
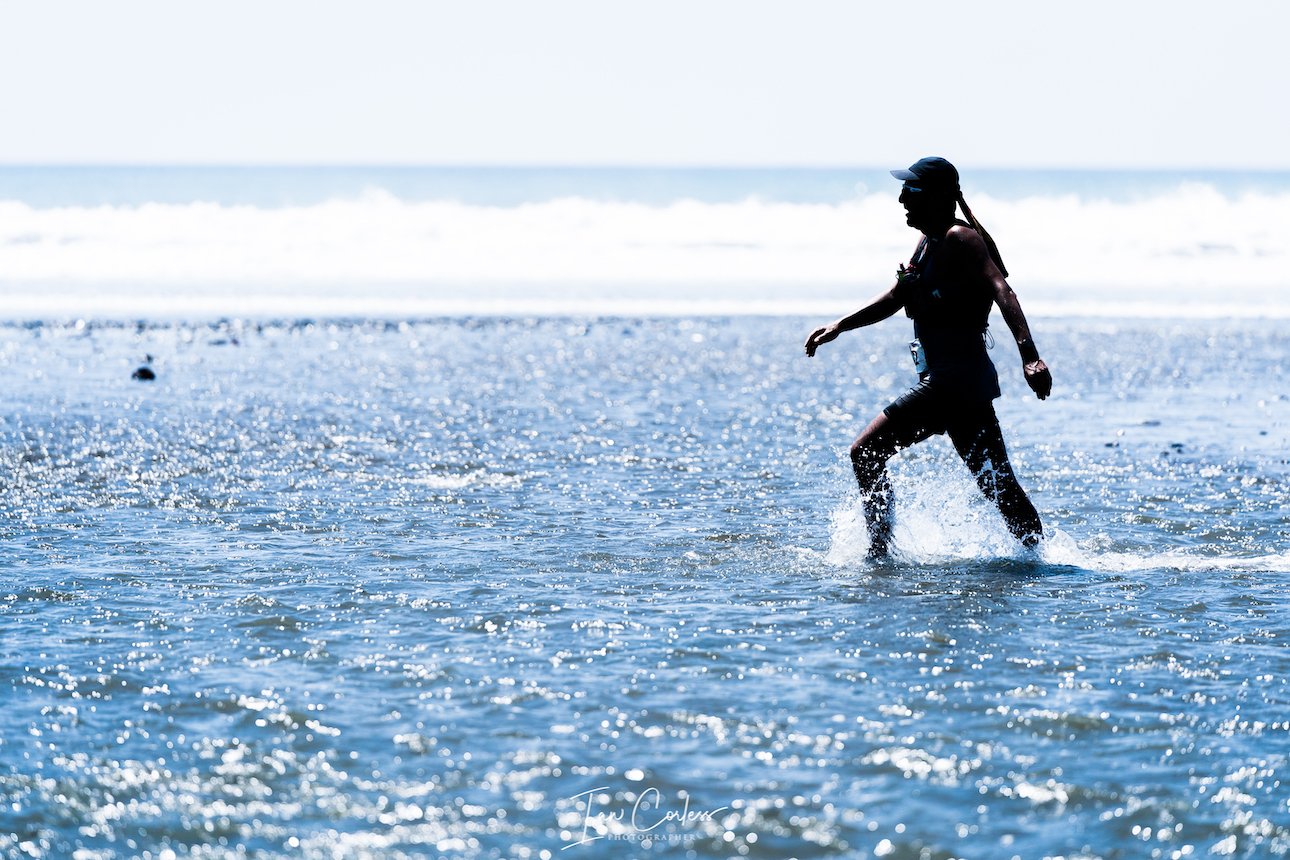
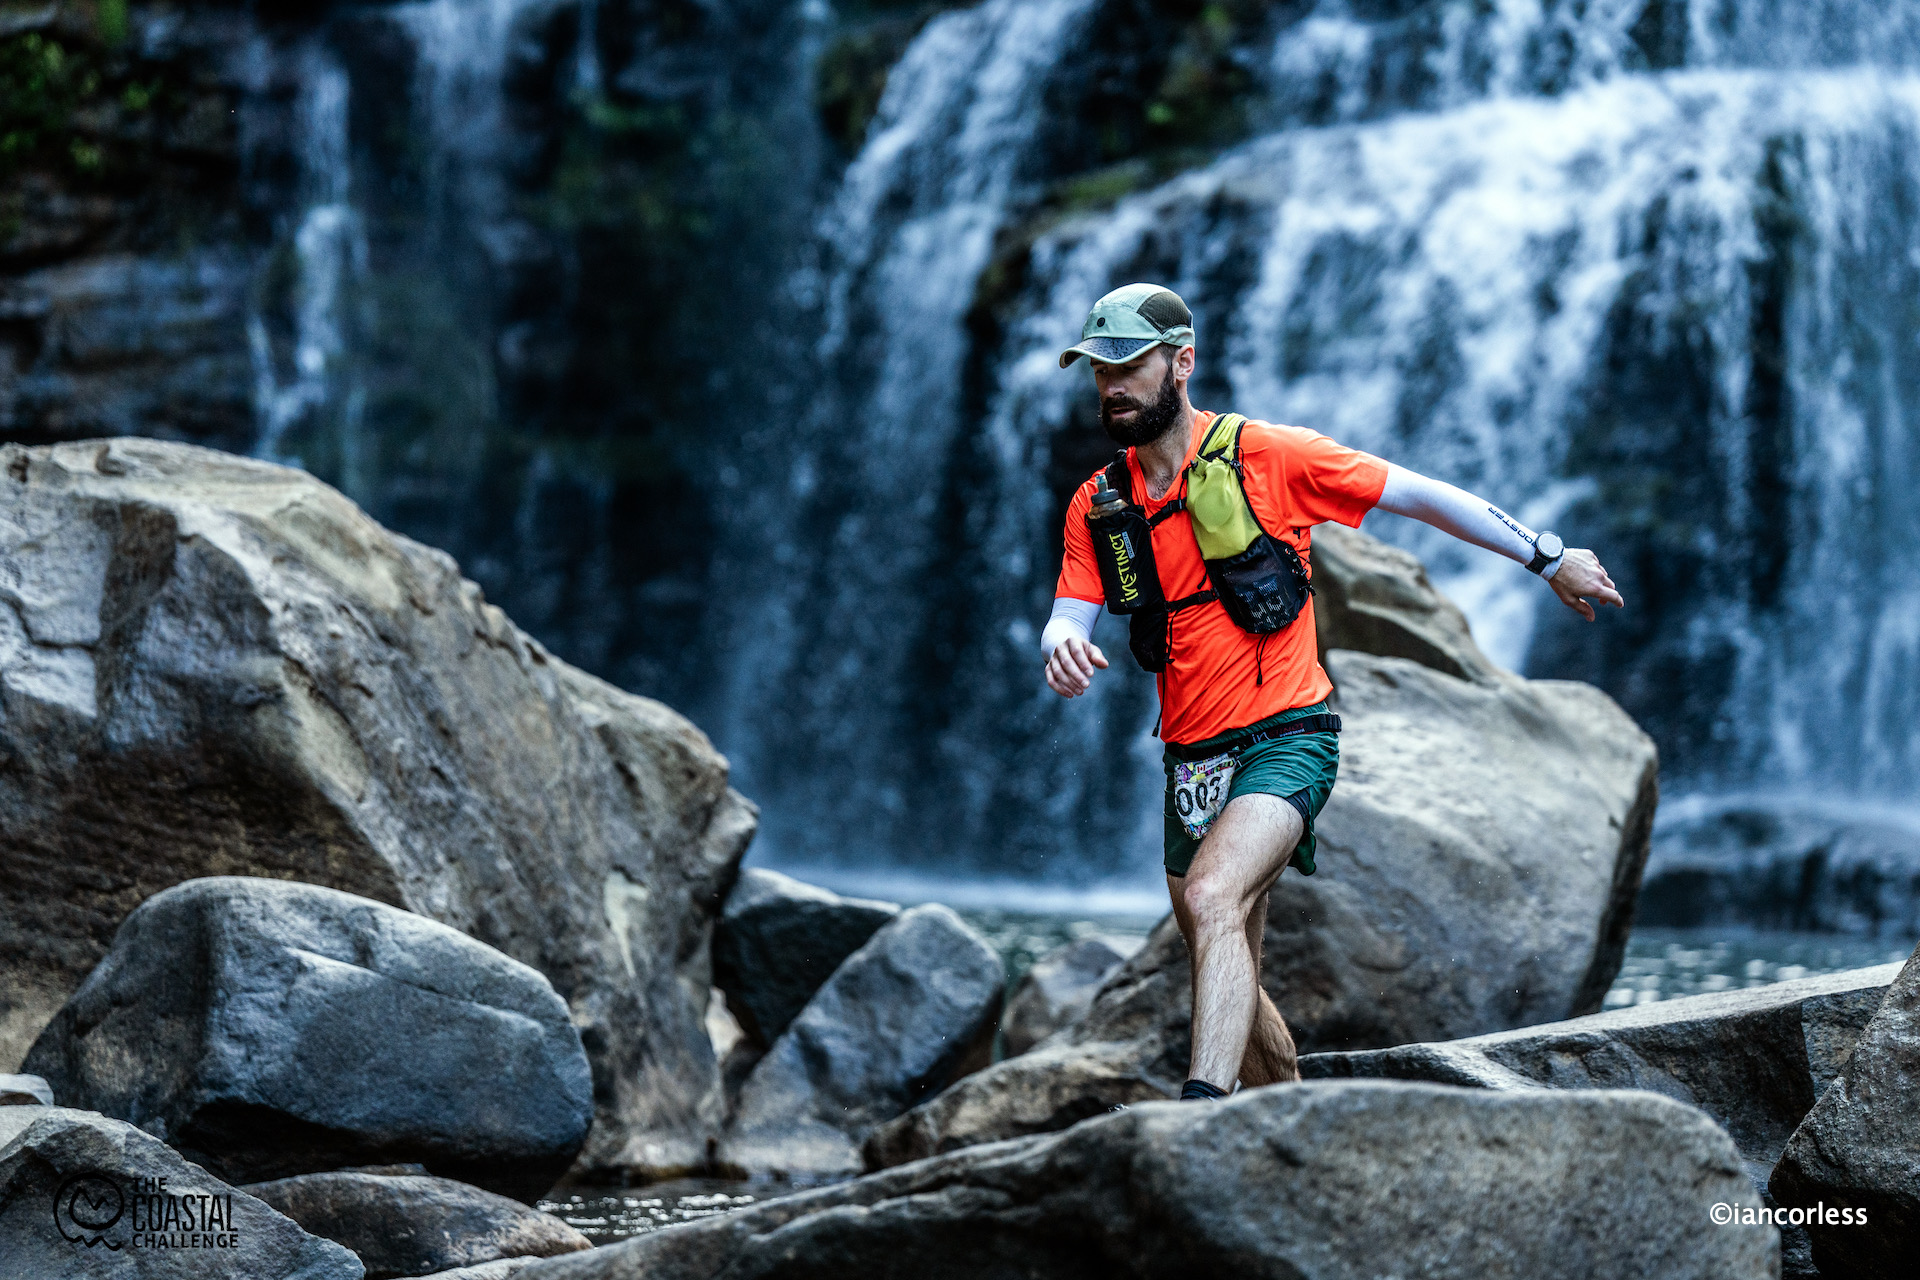
Jean-Francois
The day started slower than previous years with the top male runners lead by Calvo López and closely followed by Jean-Francois Cauchon and Cody Lind taking 30-minutes slower than anticipated. Apparently, the opening riverbed was very slippery. Cristofer Clemente Mora arrived and then gaps really opened.
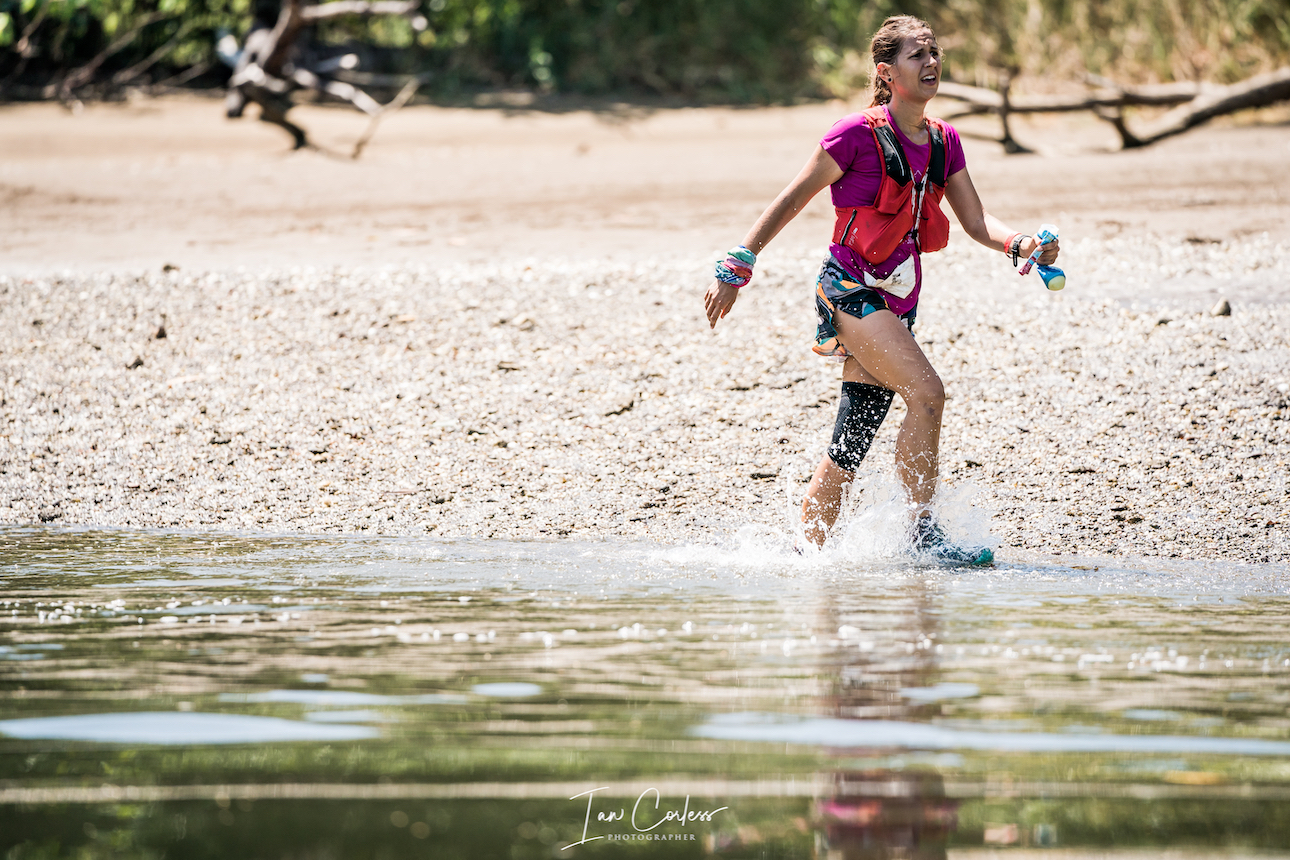
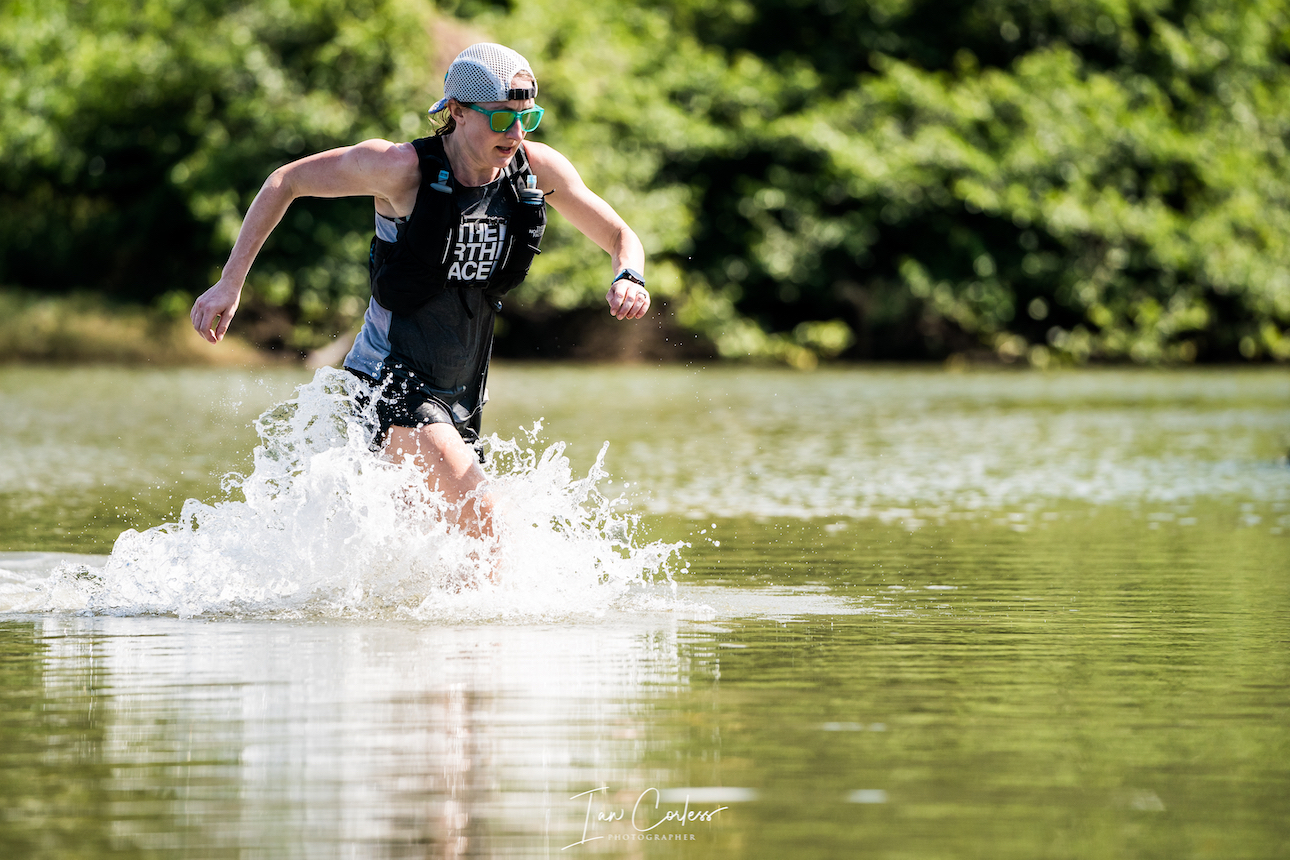
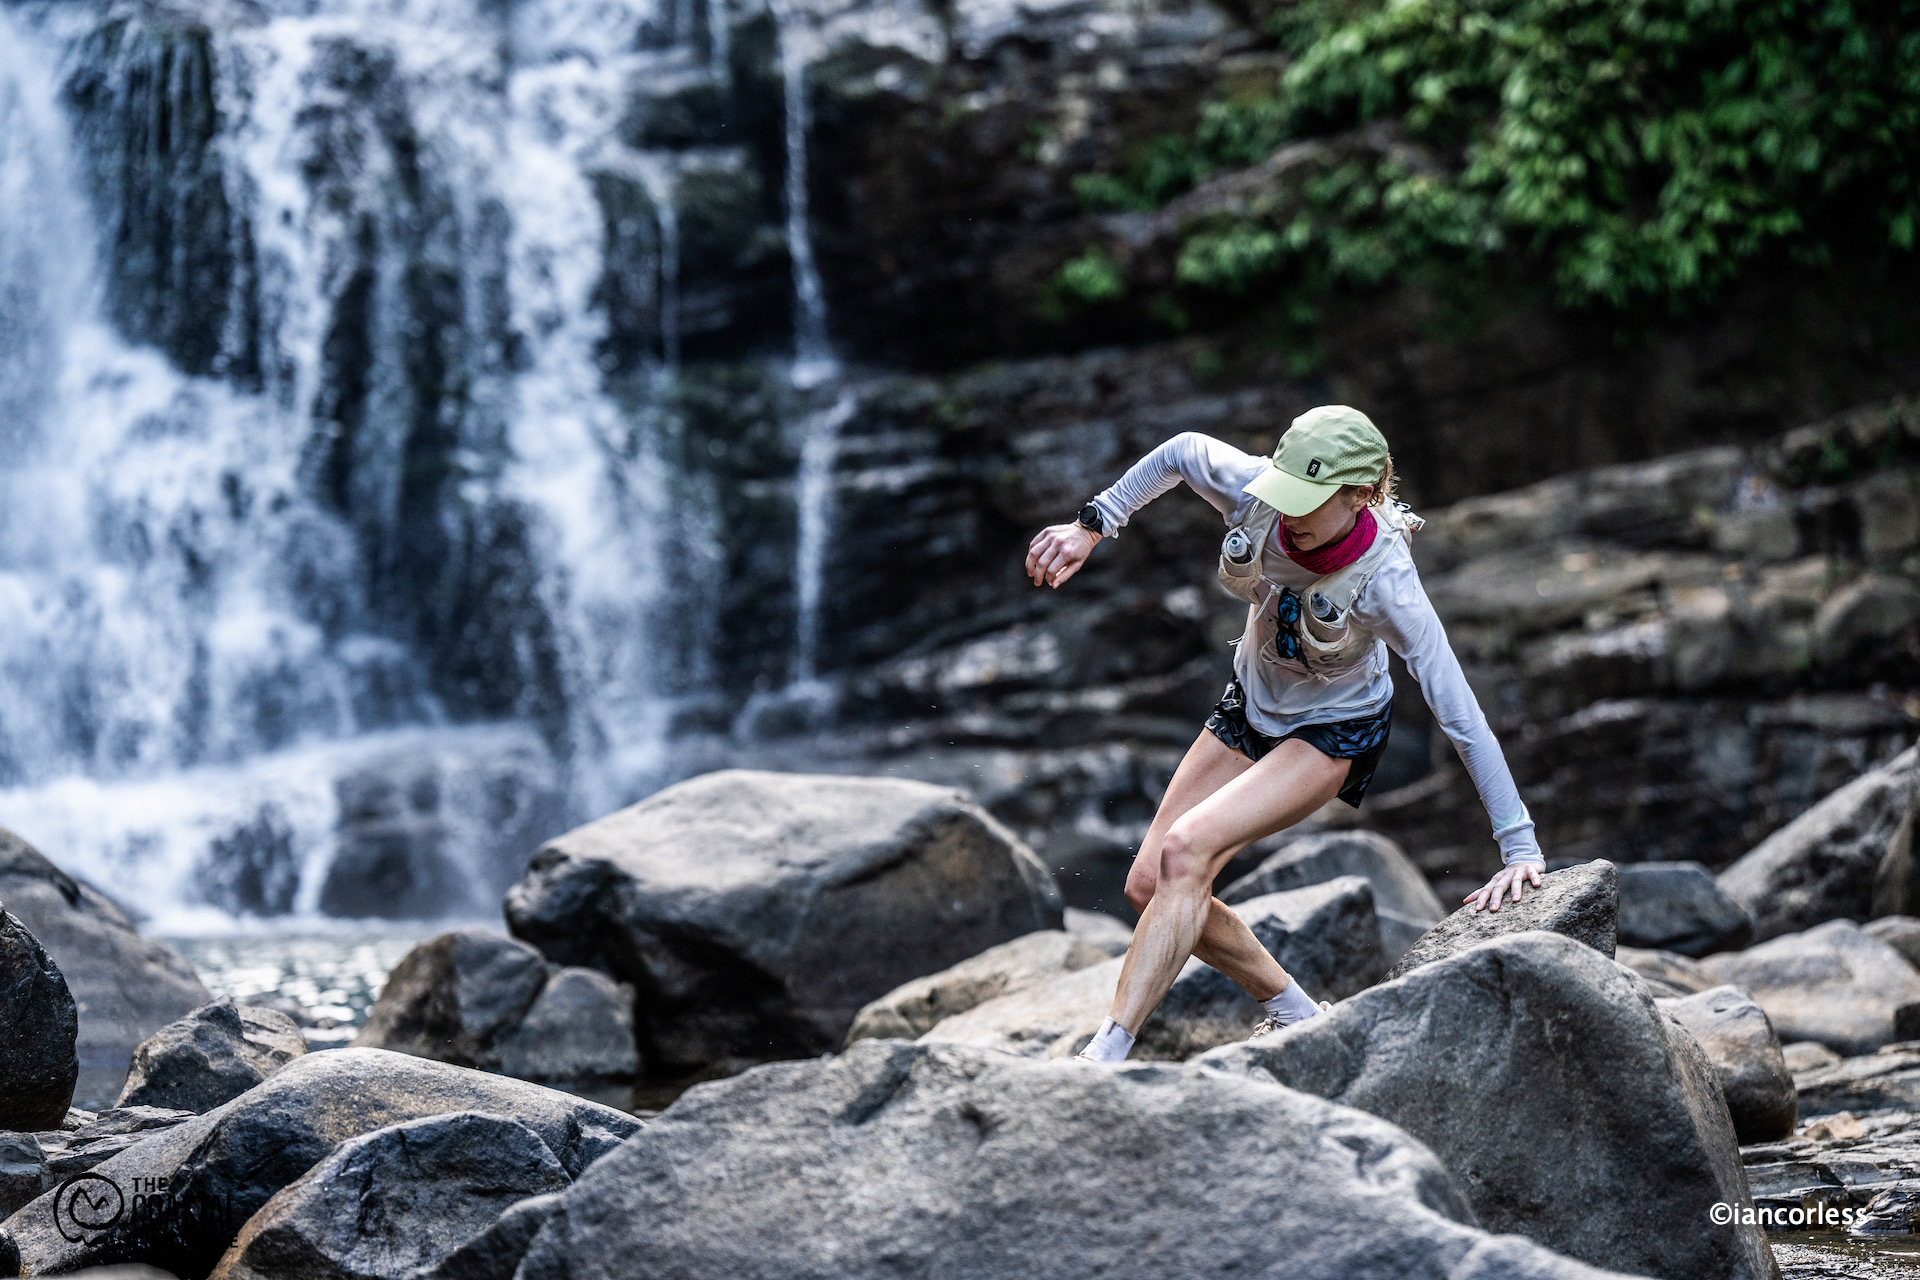
Katie Young
For the women, this opening stretch was ideal for Lina El Kott Helander to take back time, however, a fall on stage 2 has left the Swedish runner with either a badly sprained right arm or fracture. In true fighting spirit she ran the stage, however, using the right arm to scramble greatly inhibited her pace early on. Katie Young however, was first to arrive and looked to be in her element. Sanna El Kott Helander followed.
Sanna El Kott Helander
At 46km’s, the day was being respected and it was in the final stretches of beach that Jean-Francois pulled away from Cody. The gap wasn’t huge, but it was certainly a day for Jean-Francois to take some glory. In 3rd, the ever-present Carlos running a consistently strong race but Cristofer closed hard and snatched the 3rd place away from the Costa Rican.
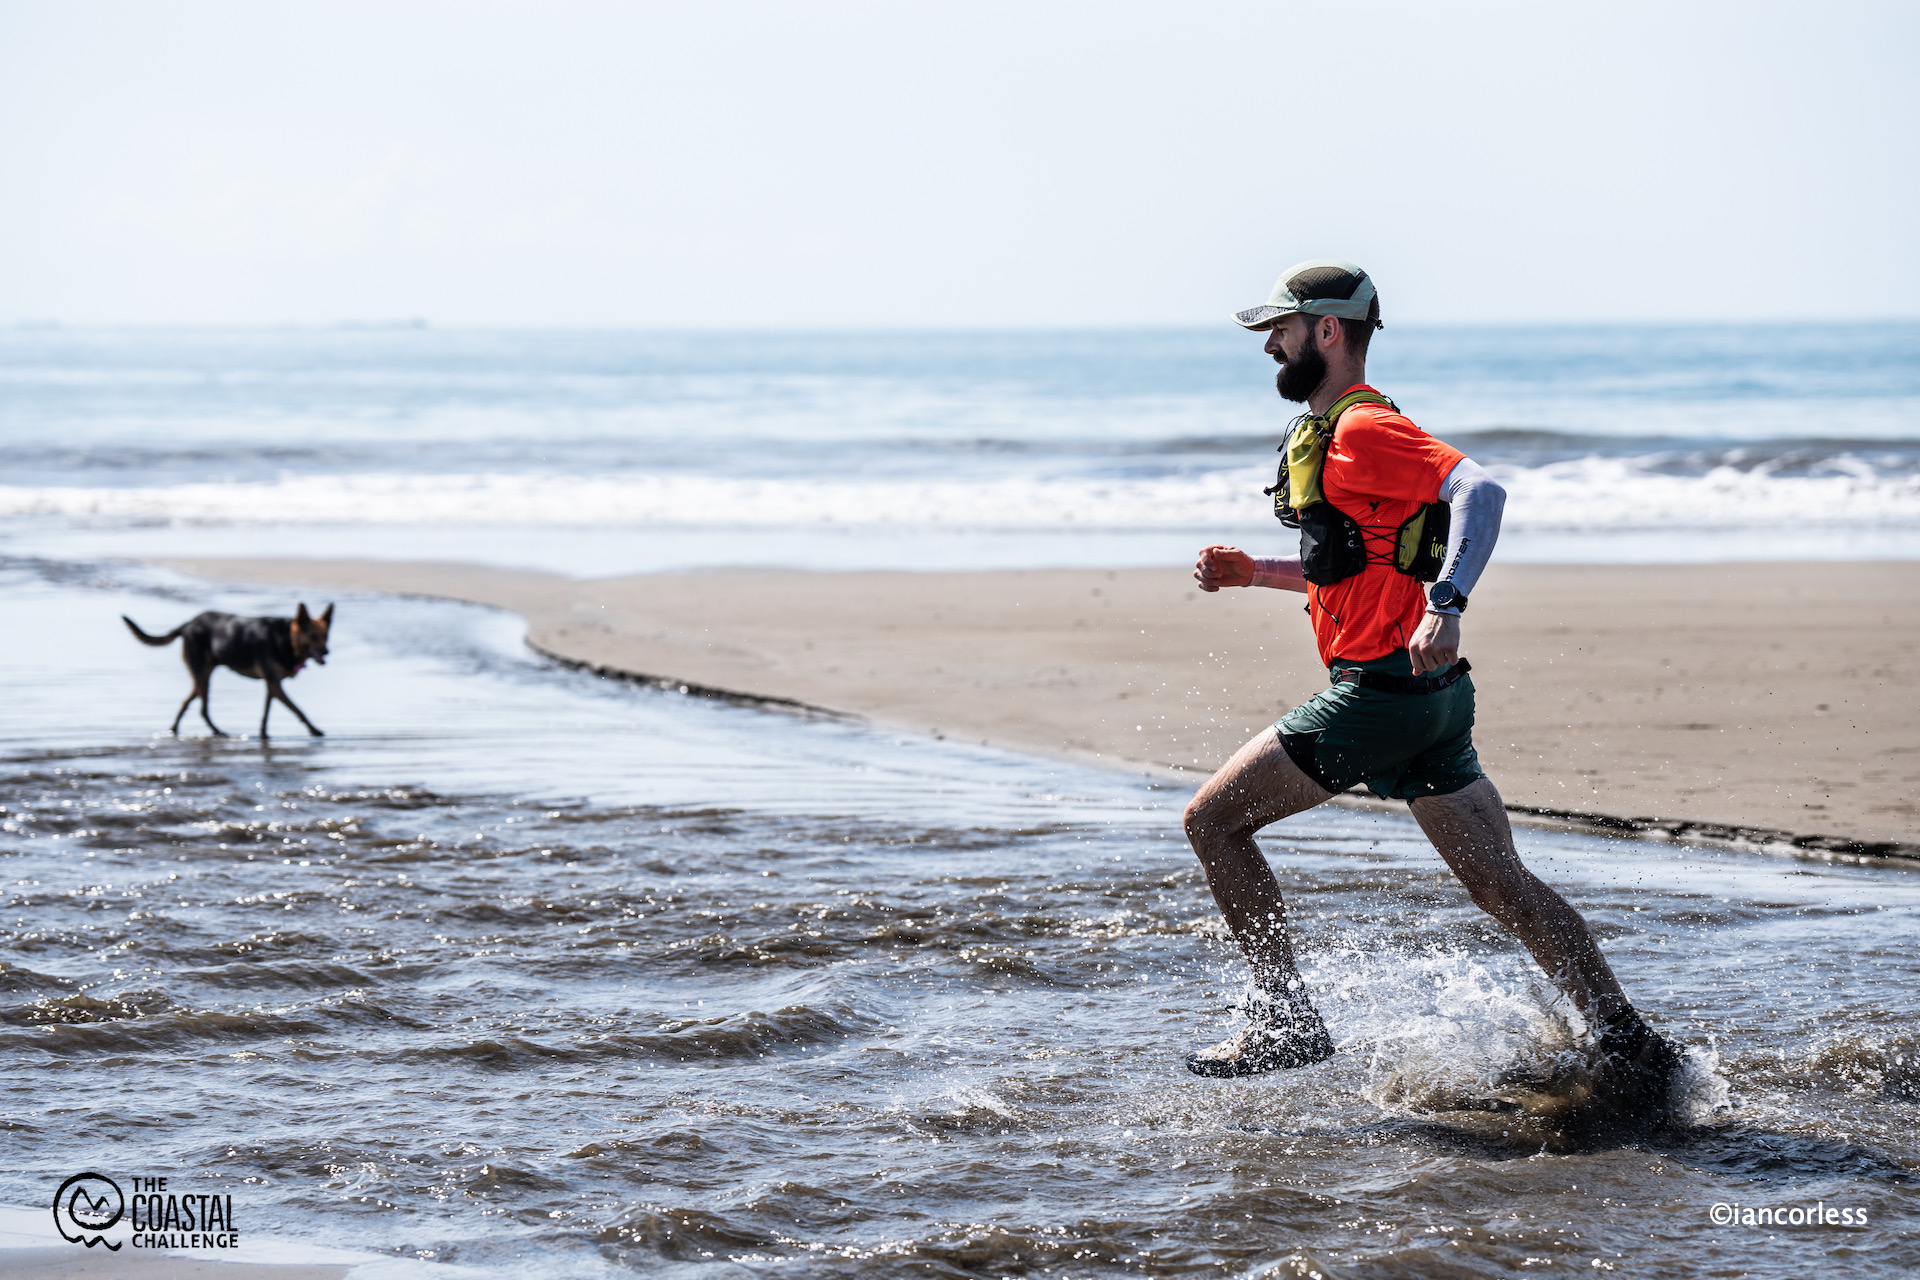
Jean-Francois
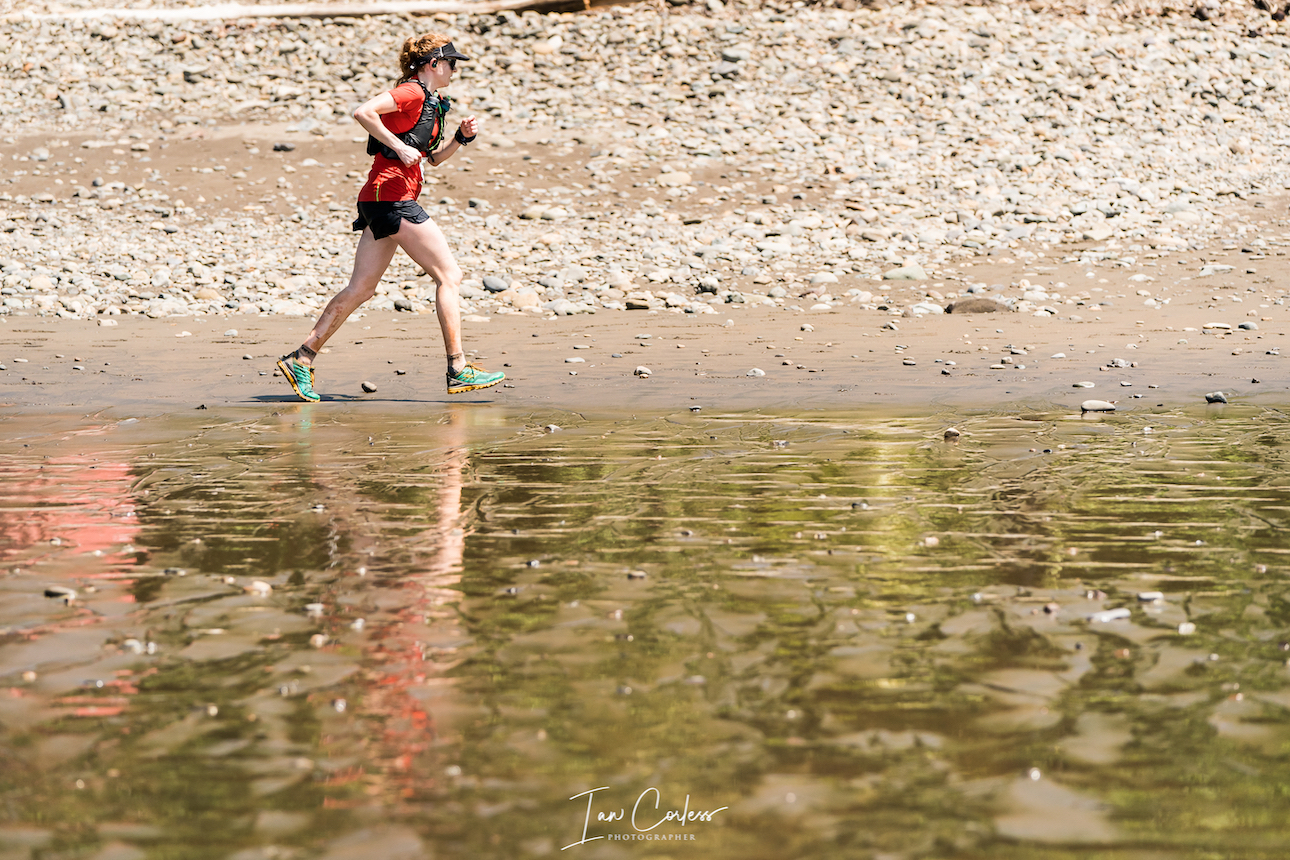
Katie Young was in her element on the beach and her smile and pace reflected that. She was unstoppable. Coming to TCC after a very successful top-10 at MDS in 2023, Katie was a favourite for the podium. However, this run, so far, is beyond her wildest expectations.
In 2nd, Marline Côté got a chance to shine with Sanna following. However, Lina, once allowed to run with the right arm not causing too much of a hinderance, started to close considerably in the closing stages. It was an exciting end to a tough day and she caught her twin sister to take 3rd.
Carbon shoes are a thing… There is no shortage of new shoes boasting a variation of a carbon plate that is designed to provide additional speed for in principal, less effort.
There are many arguments for and against and a plethora of recent world records confirms the current ‘new’ shoe design is bringing a performance enhancement.
I personally feel that any brand tries to make the new version of any product, better than the last. It’s called progression. We only need to look at the shoe that Roger Bannister used to break the 4-minute mile… Current milers are using very different shoes and running on very different surfaces to the cinder track of Bannister’s era.
But of course, a limit has to come (eventually) and gladly, I don’t have any say what or when that limit is. I do believe though; we are not there yet with the current carbon shoes.
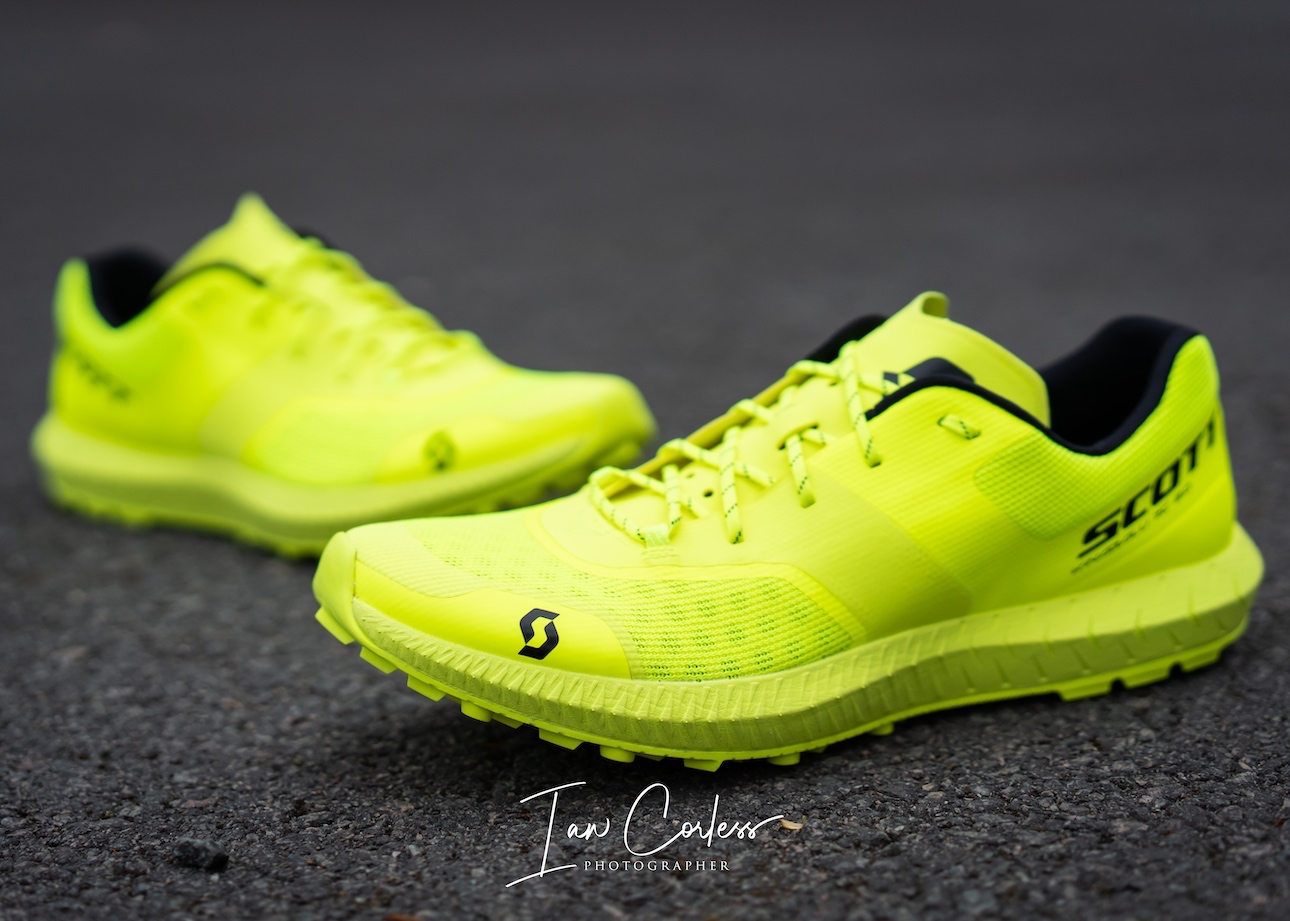
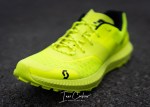
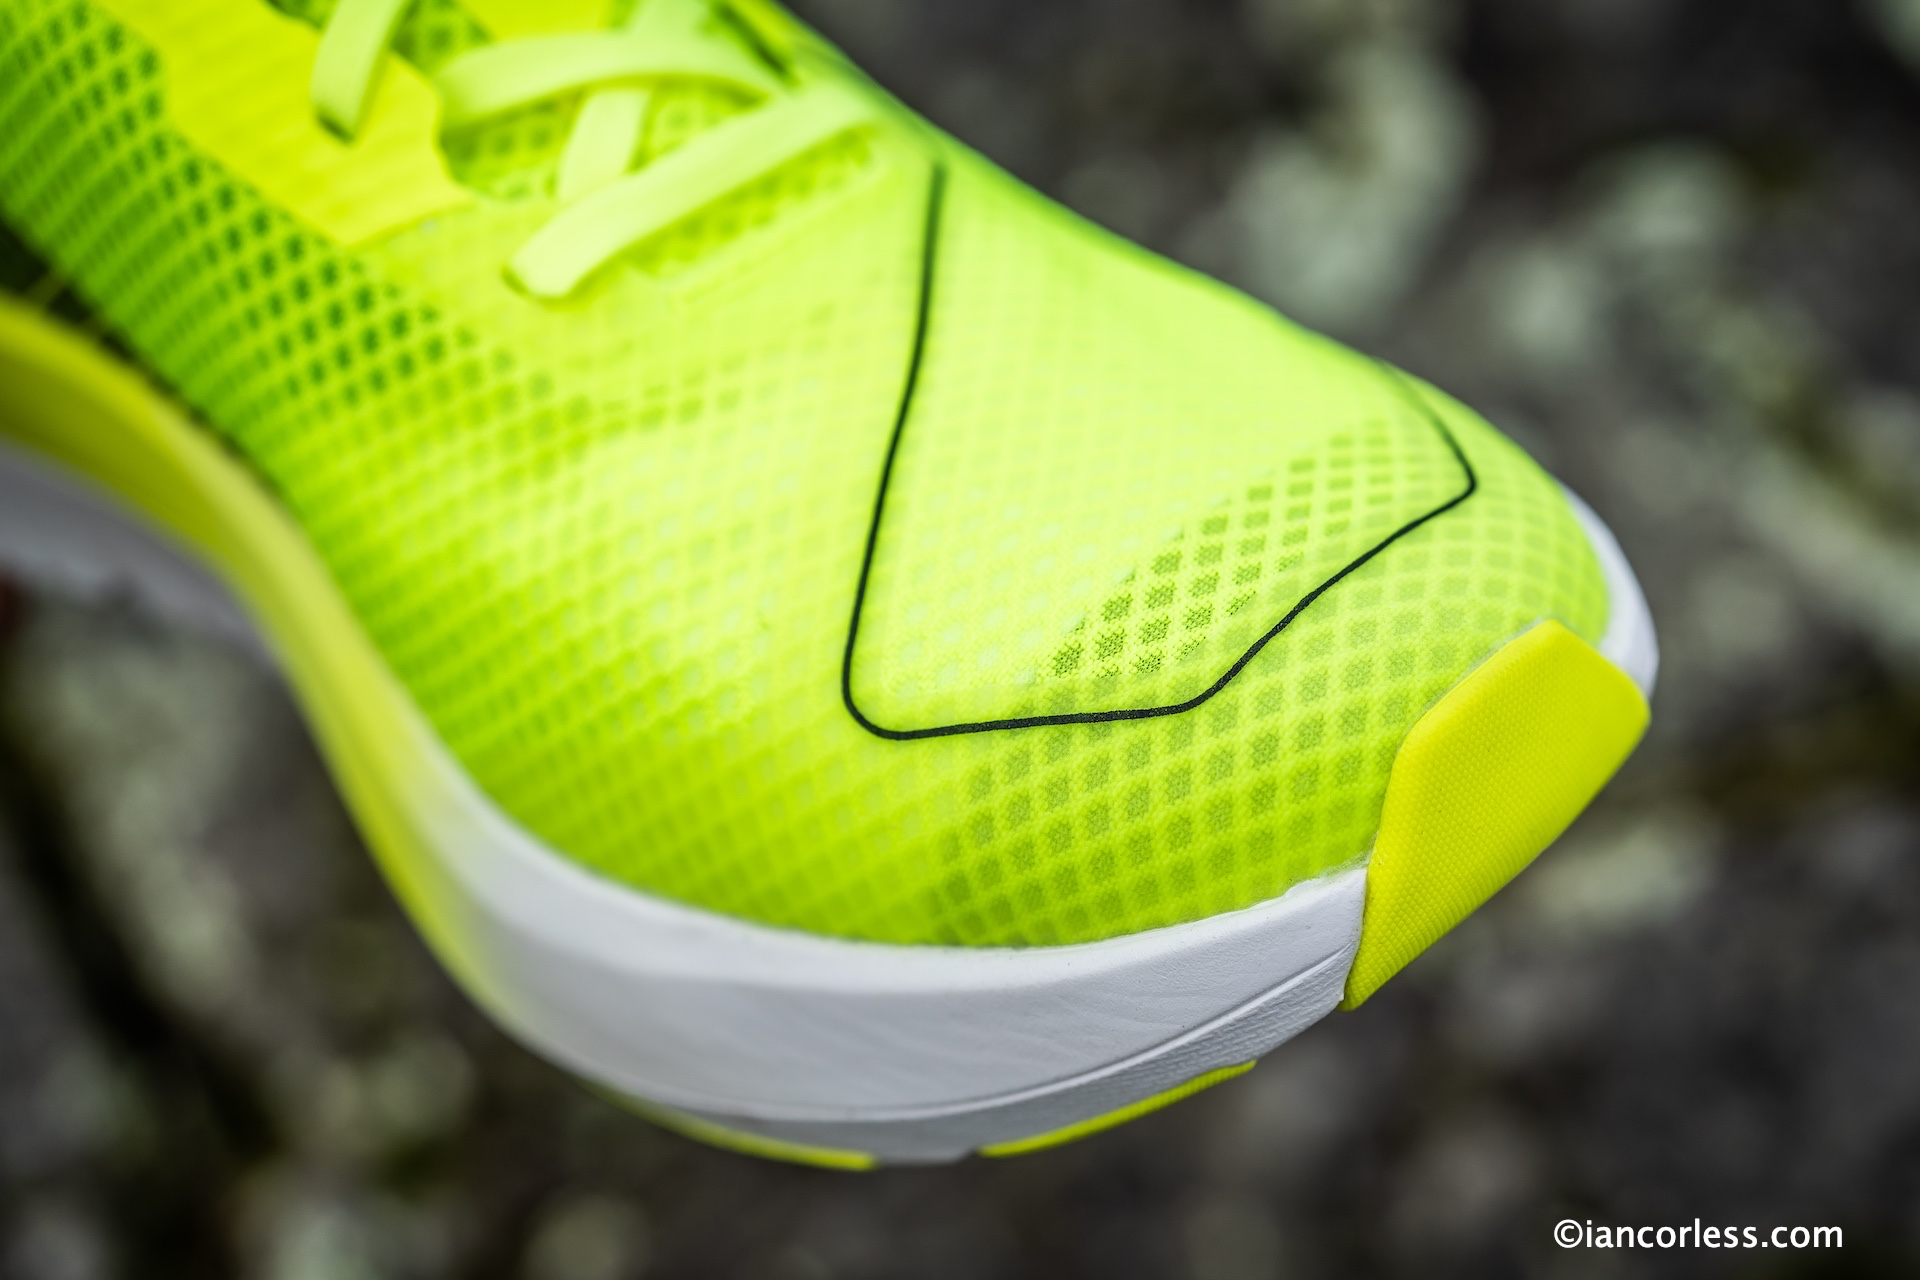
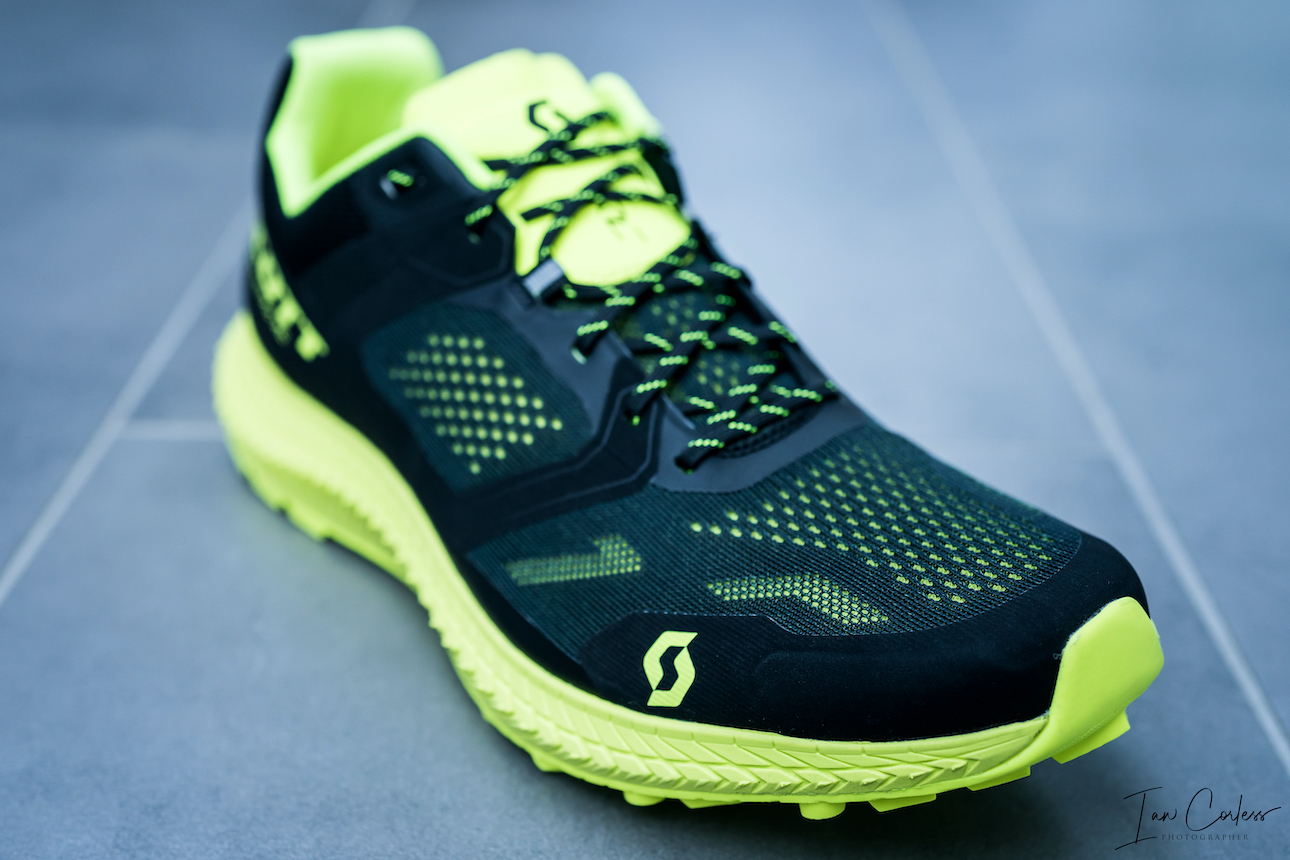
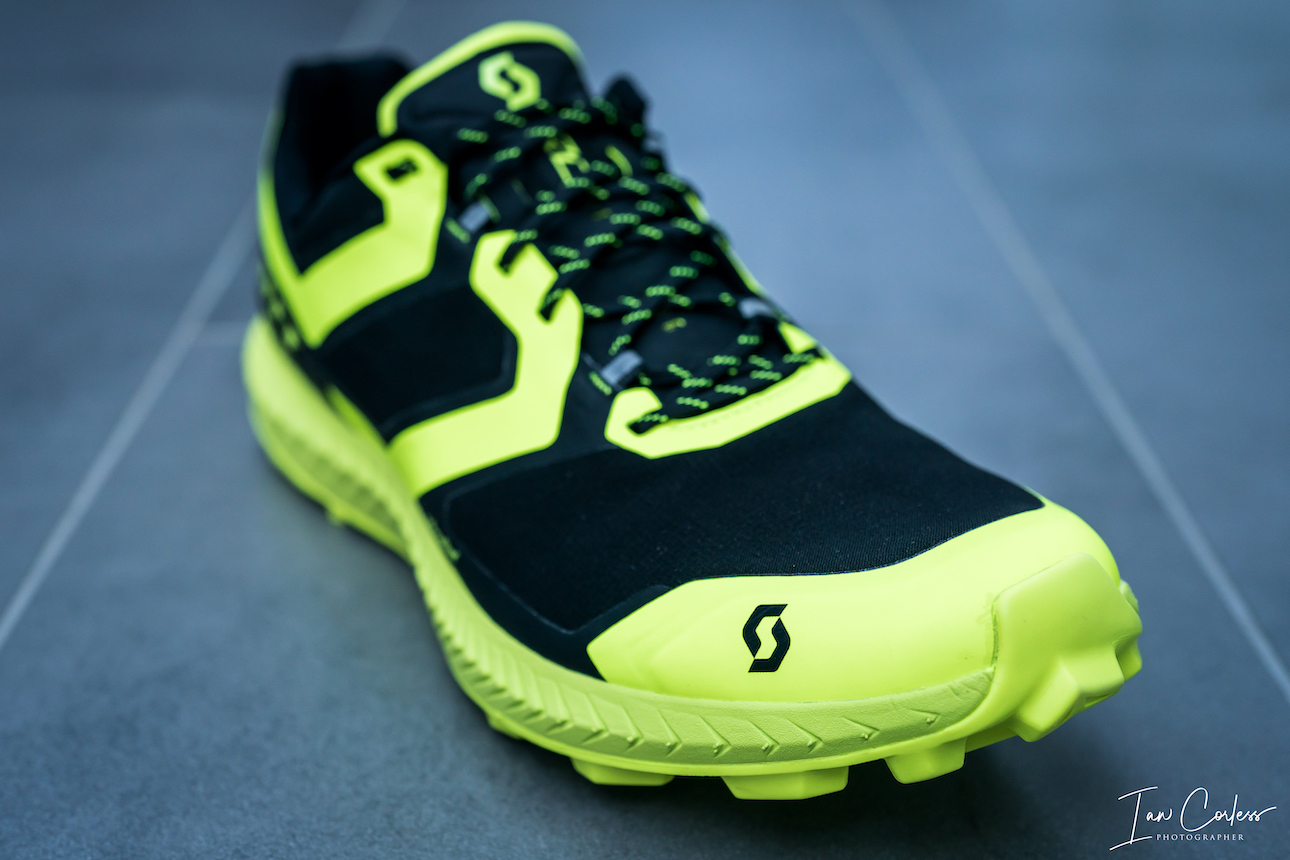
Scott have been making shoes for many years and this current incarnation has been a revelation. It’s a great looking shoe. The yellow is bold! It maybe looks heavy but it’s not, it is a super-light shoe that screams speed. The cushioning is substantial and Hoka One One like – This is a standard feature of carbon enhanced shoes across all brands.
Notably, the Scott has a very noticeable rocker that makes you want to lean and propel forward. This is even noticeable when standing still, you can almost feel off balance.
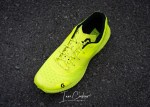
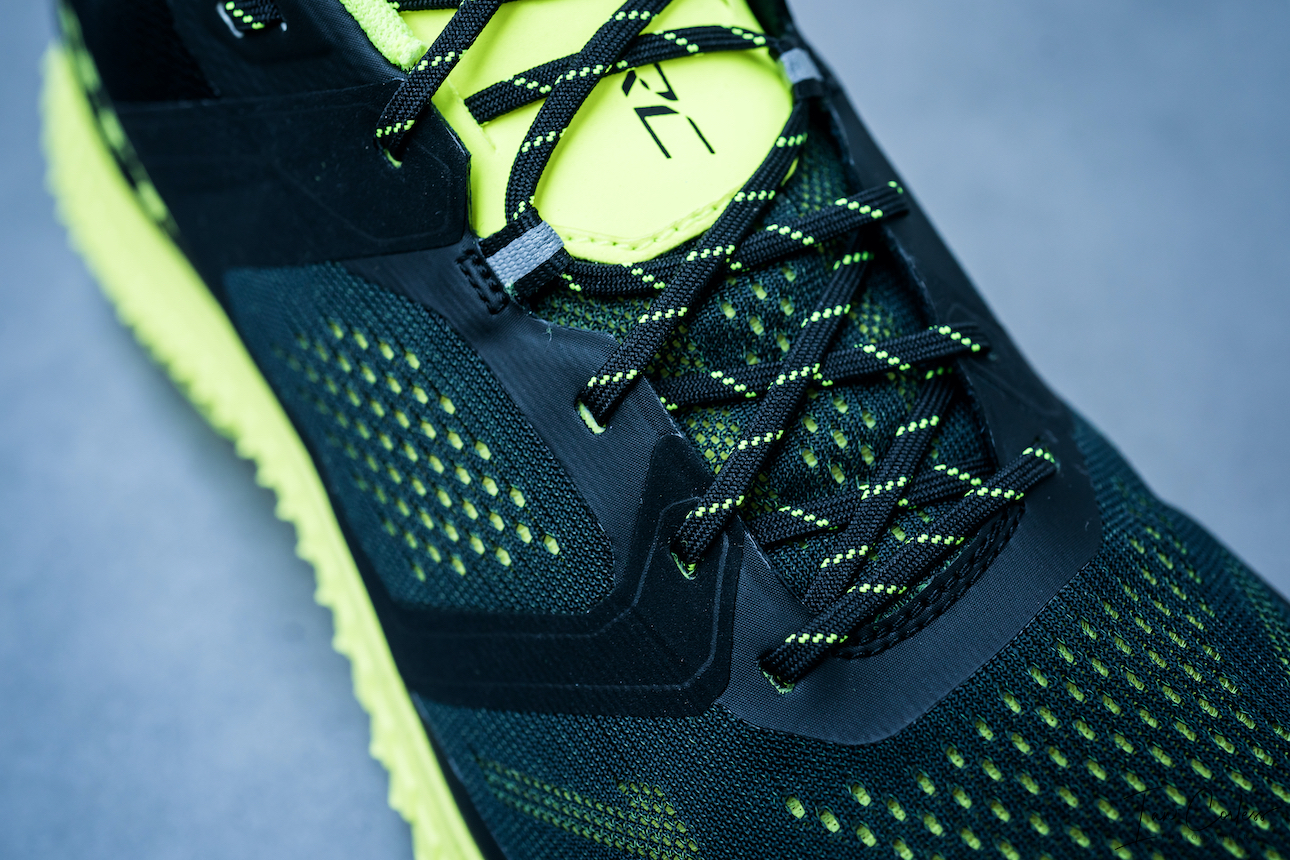
The upper is light, breathable and the lacing reassured providing an excellent hold of the foot.
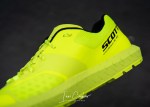
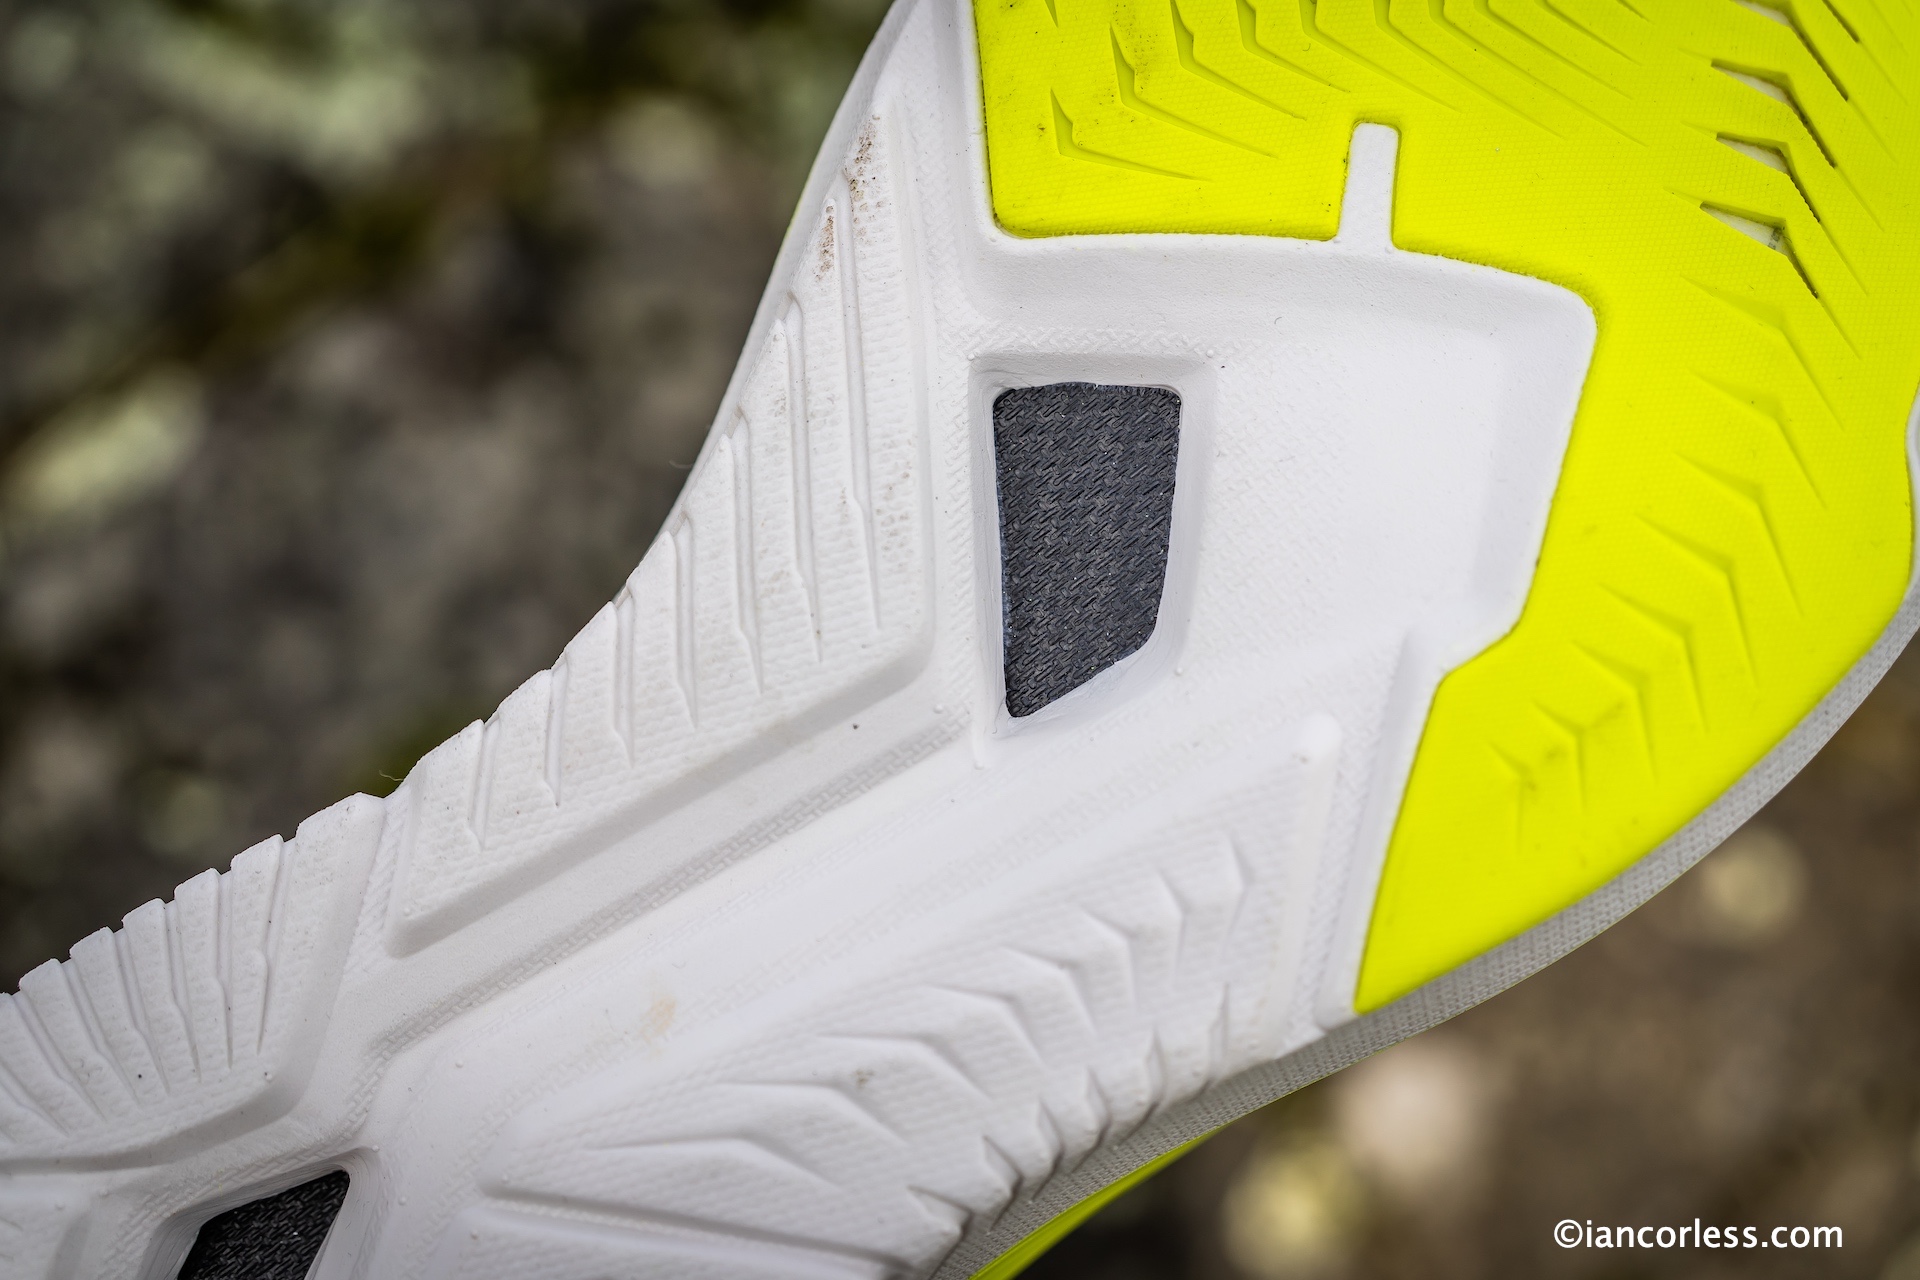
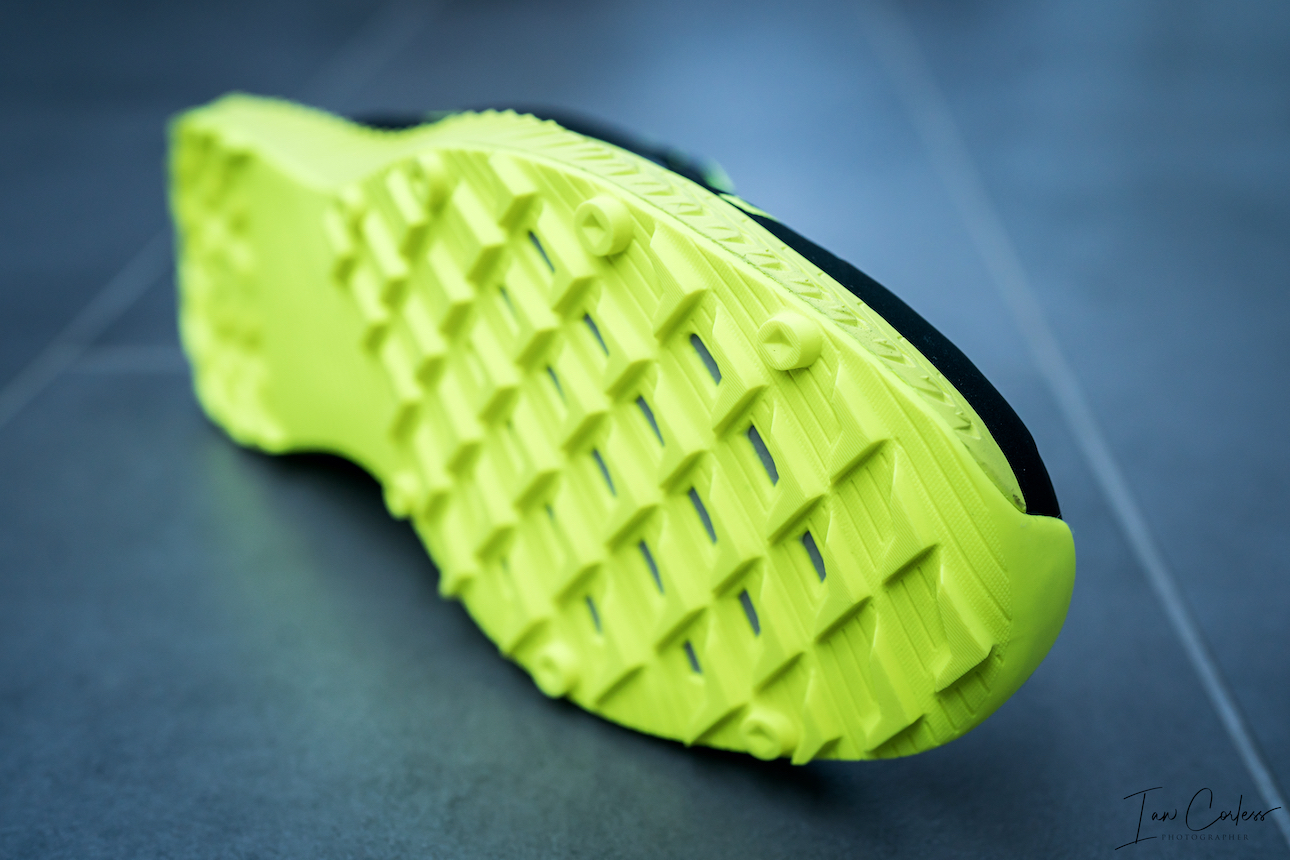
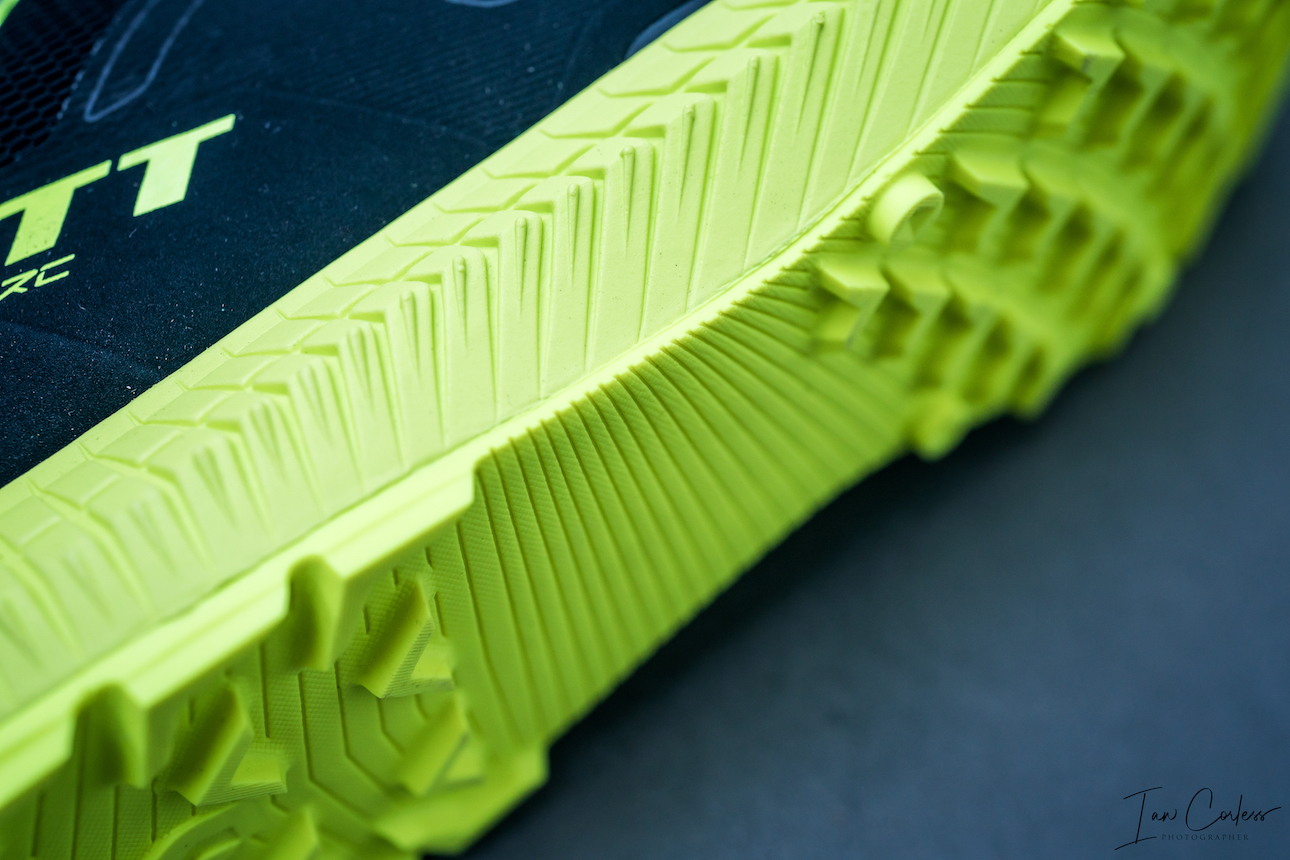
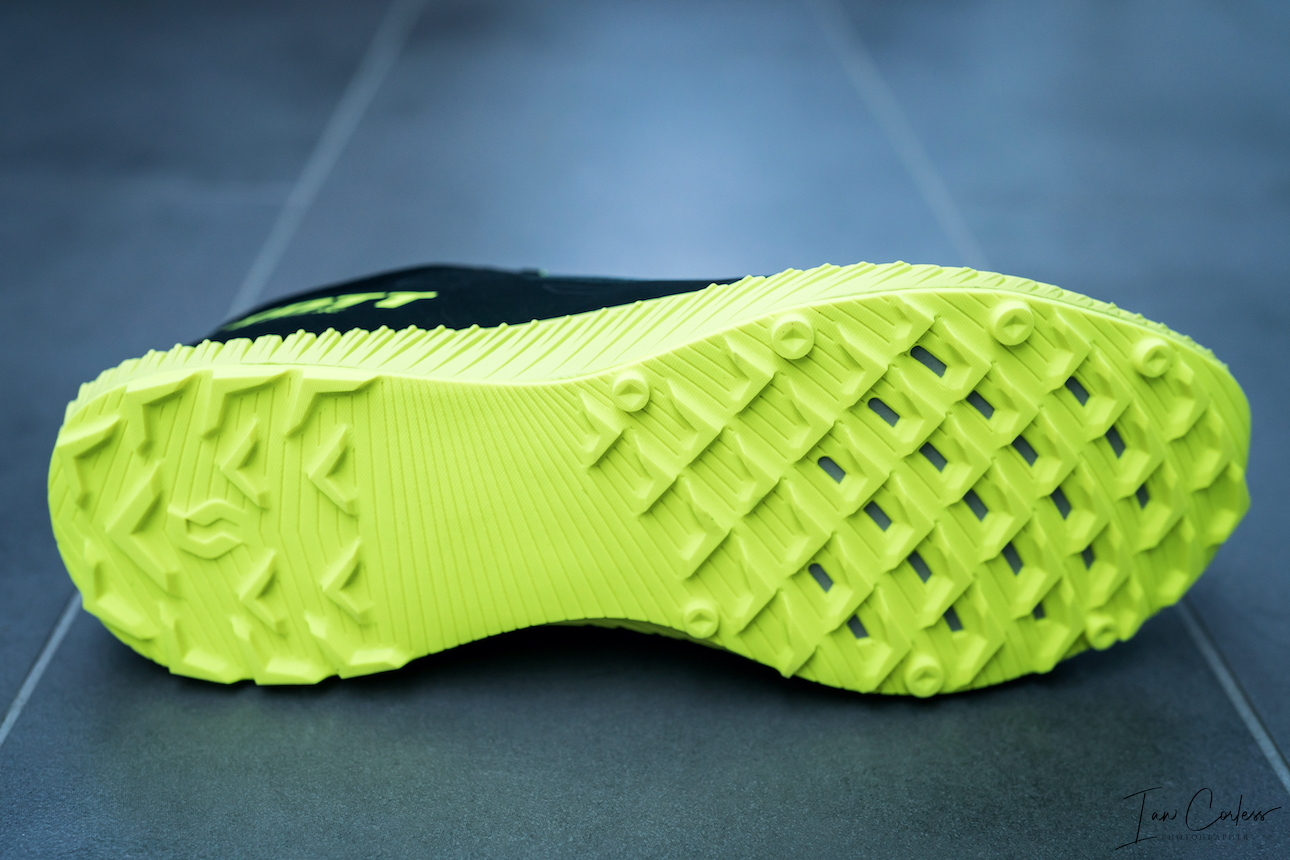
The outsole is designed for speed and provides grip when needed, but not so much grip that it slows the user down.
IN USE
I am not experienced in carbon shoes and in all honesty, I am probably beyond my best running days when a carbon shoe could make a difference. But, it’s easy to compare recent road runs over fixed distances when I have timed and monitored effort.
i decided that my first run would be a half marathon. I have a run that rolls along with hills, descents and some long and flat sections.
Lacing the shoes up I initially found that my foot was not as secure as I preferred, so I lock laced and tied them tight… Post-run I realised I had tied them too tight as it had caused some inflammation.
The opening km’s felt a little weird. The cushioning and stack height was extremely noticeable but not unpleasant. The rocker was VERY noticeable and without doubt it makes you want to roll forward and increase speed and cadence. The Scott makes you want to run fast and funnily enough, post-run, I felt the shoe made me want to run faster than I had the fitness for.
With 5km covered I was getting in to a rhythm and cadence. Noticeably, to reap any benefit from the shoe, you need to strike the ground hard. This enables the carbon to do its job and propel you forward. This shoe does not give you anything for free, you need to invest effort to reap the rewards.
I purposely did not look at my watch during that first run. I wanted to run on feel and go on perception. I felt good, the shoe felt as though it was giving me something I hadn’t experienced before. But there was a fatigue in the legs different to my normal runs. I put this down to the carbon and the need to strike the ground harder to gain extra propulsion. As my run came to a close, I was feeling worked but also quick. I was convinced I had run quicker than previous runs, in different shoes on the same route. With 21.1km covered I stopped my watch… I was 33 sec slower than my fastest time on the route! I was surprised, I was convinced I had gone quicker but the margin of plus and minus was minimal and of course well within parameters of testing.
Thinking about the run above, I gave it 12-hours before accessing. The Scott is a fast shoe and without doubt is a shoe that would result in faster times and PB’s. But they are not magic! They require adaptation, they require investment and I would say that they do require some change in run style.
They are not shoes for training runs, they are ideal for speed sessions, intervals, timed sessions and of course races. But before you toe the line for a key or important race, you need to have made adaptation and learned both physically and mentally how to get the best out of the shoe.
POST INITIAL RUN
The Scott have joined me on many a run but only when I have wanted to run faster. I find running slower difficult in them; the rocker is so prominent that it constantly wants you to roll forward, increase cadence and push the pace. Also the carbon, irrespective of all the cushioning, does give a harder ride at slower speeds. But, increase the speed and the carbon flexes with impact and propels you forward. This is when the Scott comes to life and like I said previously, if you have the fitness, the Scott will keep tempting you to run faster, and faster.
As I accumulate miles and adapt to the shoe, I will eventually go back to my 21.1km route and see if I can give the Scott’s the speed they deserve. I may even toe the start of a road race, but don’t count on it… Ultimately though, over the years, running for me has been less about looking at minutes per mile and considerably more about the journey and the adventure.
The Scott is all about speed, about getting the most from a run when it counts. So, if that is for you, I firmly believe that the Scott will provide you with what you are looking for. But don’t expect something for nothing, you need to invest in this shoe to make the most out of it!
Please support this website. I believe everyone deserves to read quality, independent and factual articles – that’s why this website is open to all. Free press has never been so vital. I hope I can keep providing independent articles with your help. Any contribution, however big or small, is so valuable to help finance regular content. Please support me on Patreon HERE.
I recently reviewed the new SCOTTSupertrac RC 2 (here) and I was excited. I had been using the original Supertrac as a regular shoe when going to the mountains, particularly when on technical terrain. Although I loved the shoe, there were just a couple of niggle points. Gladly those niggle points were removed in the RC 2 and I went on to say:
“The Supertrac RC 2 is a great shoe and for anyone who loved the original Supertrac RC, I think now they will have an even bigger smile on their face. For those who were tempted by the black and yellow shoes previously but decided that the toe box was too narrow, the cushioning compromised or the feel was a little flat, you should now go back and check these out. It’s rare I compare shoes to other brands and models, however, for those who have read my reviews, they will know that VJ Sport are my ‘go-to’ shoes for the mountains, be that the XTRM or MAXx models. Now, I firmly believe that Scott have a shoe that can compete.”
Several months on, the RC 2 has only got better and I am now looking to get another pair, I have really given my current pair some abuse. Gladly, I was able to share the workload on the RC 2 with the Kinabalu Ultra RC, also a new shoe.
I received the RC 2 and Kinabalu Ultra RC at the same time and on first impressions, it appeared they were the same shoe but with two major differences. The upper and outsole.
I was wrong.
Don’t get me wrong, there are great similarities between both shoes and it is fair to say, if you like the RC 2 then you will like the Kinabalu Ultra RC and vice versa.
So, what are the differences?
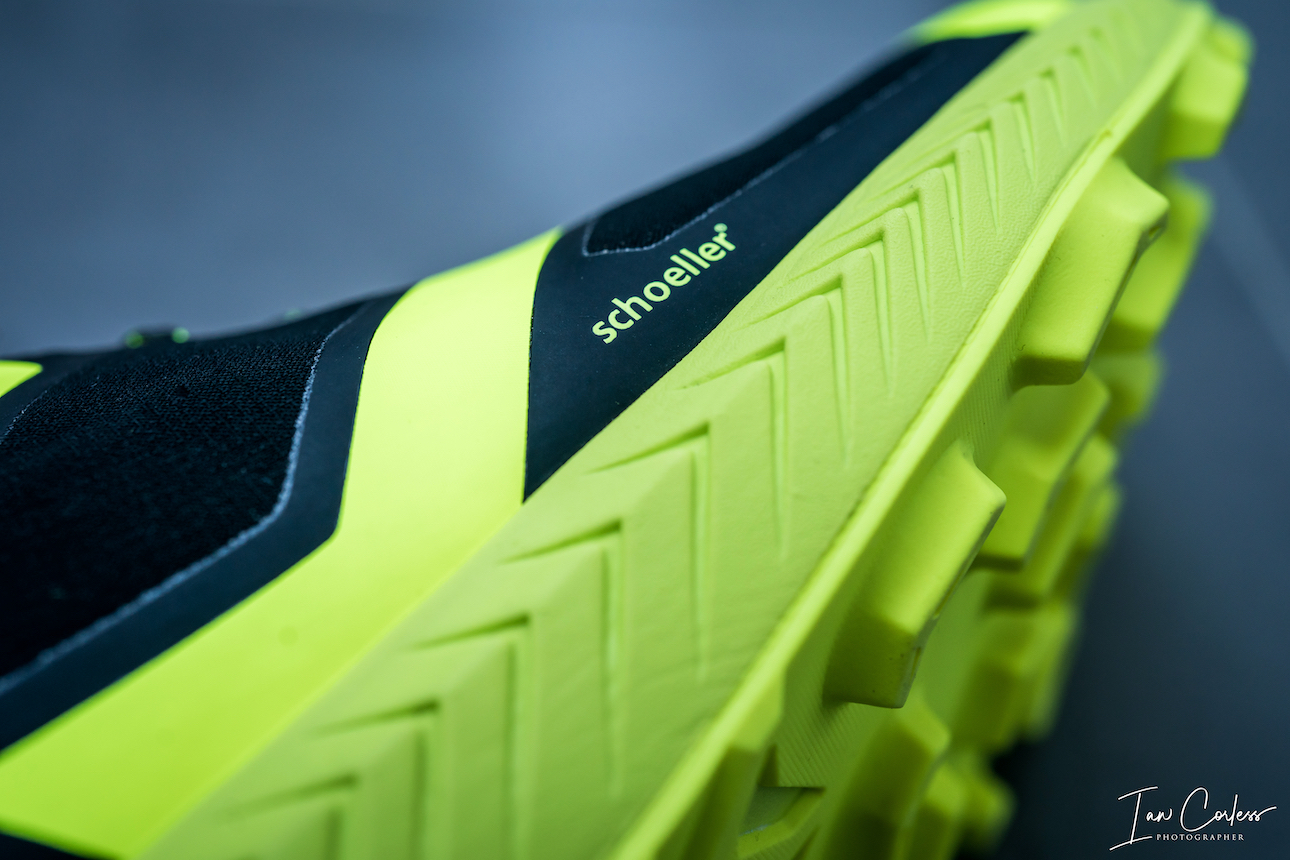
The RC 2 is designed for the mountains with an aggressive outsole using radial traction, a new and extremely durable upper by Schoeller called Coldblack® and a 3XDRY® material. Cushioning is 22.5mm at the rear and 17.5mm at the front providing a drop of 5mm. It’s a great shoe when you need grip and durability in tough terrain. But, if you were out for a long run and trail, the RC 2 would probably be too aggressive…
Step in the Kinabalu Ultra RC.
The RC badge connects the RC 2 and the Kinabalu Ultra RC and confirms a build quality and attention to detail. RC quite simply confirms that this is the ‘best’ that we have to offer.
I have used many Kinabalu shoes by SCOTT (HERE) in the past and I have liked them. If you have tried them, you may agree or disagree? However, whatever your experience of a Kinabalu you have had in the past, please forget it. This new incarnation has nothing to do with the previous incarnations, even the Kinabalu RC 2 (here).
The black and yellow look confirms the ‘new’ shoes pedigree and as stated, on first look, it appears very similar to the RC 2.
The upper is much more breathable on the Kinabalu Ultra RC with an ultra-mesh that allows yellow to show through and the outsole is very different with a less aggressive hybrid traction. Notably, to fulfilling the ‘ultra’ intentions of the shoe, cushioning is 29mm at the rear and 21mm at the front providing a more relaxed 8mm drop.
THE SHOE
Sizing is true to size but like the RC 2 model, I use an EU 44 which should be UK9.5, on the inside of the shoe it says UK9. So, just make sure on fit when purchasing.
Interestingly, there is only 2g difference in weight between the RC 2 and Kinabalu Ultra RC with both shows just under 300g for an EU44.
Foothold is really superb. When you slide your foot in the shoe, there is immediate comfort and hold. This comes from the engineered tongue which is amazingly comfortable, the lacing which can be really pulled tight to hold the foot secure and also the way the lace eyelets are placed. There is also the option to lock-lace or similar with the inclusion of an additional eyelet. The tongue does not have a sock-like fit which surprised me, however, after extended use (400km) I have had no issues at all, on the contrary. The upper, tongue and lacing configuration hold the foot wonderfully tight. Although the Kinabalu Ultra RC is not intended for technical terrain, the shoe handles it surprisingly well, especially when switching and changing direction, a credit to the upper, lacing and foothold.
The heel area is padded, snug and importantly when climbing does not allow for any slipping.
Notably, the toe box is wider allowing a little more toe splay. Toe protection is minimal echoing the shoes intention of non-technical trail.
Cushioning is notable. Kinetic foam, eRide midsole, rock plate and a racing footbed make these shoes wonderful for long runs. SCOTT have always used eRide (rocker) to help with technique and cadence.
The outsole is a classic trail grip that provides enough traction when running a variety of terrain, be that hard pack dirt, gravel or rock. In the middle of the outsole, grip is removed. There is an emphasis here that this is a shoe that tempts you to go faster.
IN USE
I firmly believe that SCOTT have pushed to a new level with the RC 2 and this new incarnation of the Kinabalu.
If I was only to purchase two shoes, the SCOTT’s would be high up on the list. They complement each other perfectly, the RC 2 for hard, tough, technical mountain days and the Kinabalu Ultra RC for less technical and challenging trail days.
Comfort level is high for 1-hour fast runs and day-long adventures. Feel for the ground is great. Cushioning has life and provides great energy return. The upper is breathable, light and durable.
The outsole performed as expected offering grip then required on rocks, tree roots and trail both in the dry and wet conditions. This is not a shoe for mud!
Despite the shoes intentions, they handle technical trail superbly well. This is a credit to the tongue and lacing; it really does hold the foot securely providing a reassuring hold that provides confidence.
The Kinabalu Ultra RC has wider toe box but it is not super wide. Depending on your needs, you’d have to try them on and see if they provide the room you require. In my opinion, they feel very similar to the RC 2 which is great for me, but I wonder with the ‘ultra’ intentions if the toe box could be a little wider?.
CONCLUSIONS
The Kinabalu Ultra RC is a great shoe for any trail run and I include more technical runs too. It is not for mud! Quite simply, in conjunction with the Supertrac RC 2, SCOTT have produced two shoes that cover a plethora of uses. Although the name ‘ultra’ suggests that this shoe is just for long runs, I would most definitely say no. It’s light, responsive and wonderful on 1-hour trail runs; they feel fast. When running longer, the added cushioning, rock plate and 8mm drop provides all-day comfort. I have over 400km in mine, the uppers are in great condition, the outsole is still good and the comfort level is as good, if not better than when I first used them 3-months ago (June 2020).
Please support this website. I believe everyone deserves to read quality, independent and factual articles – that’s why this website is open to all. Free press has never been so vital. I hope I can keep providing independent articles with your help. Any contribution, however big or small, is so valuable to help finance regular content. Please support me on Patreon HERE.
Scott have progressed year-on-year with the development of their trail running shoes. Notably, the interaction and feedback of their elite/ sponsored athletes have been instrumental in fine tweaking the range of shoes.
I have been fortunate to work with the brand as a photographer on multiple occasions, often photographing new shoes and apparel before they are released to the general public. It’s important to clarify here that when reviewing shoes/ apparel, I do so impartially.
I started using Scott in 2012, the original Kinabalu was a shoe I loved. Eight years on, the present day Kinabalu has little resemblance to the original, gladly, it has progressed and what was a good shoe years ago, is now, in my opinion, a top-quality trail shoe. Follow here for a review of the new Kinabalu Ultra RC which will be available in late July.
I first witnessed the Supertrac RC in 2016 and wrote a first impressions in November of that year, here.
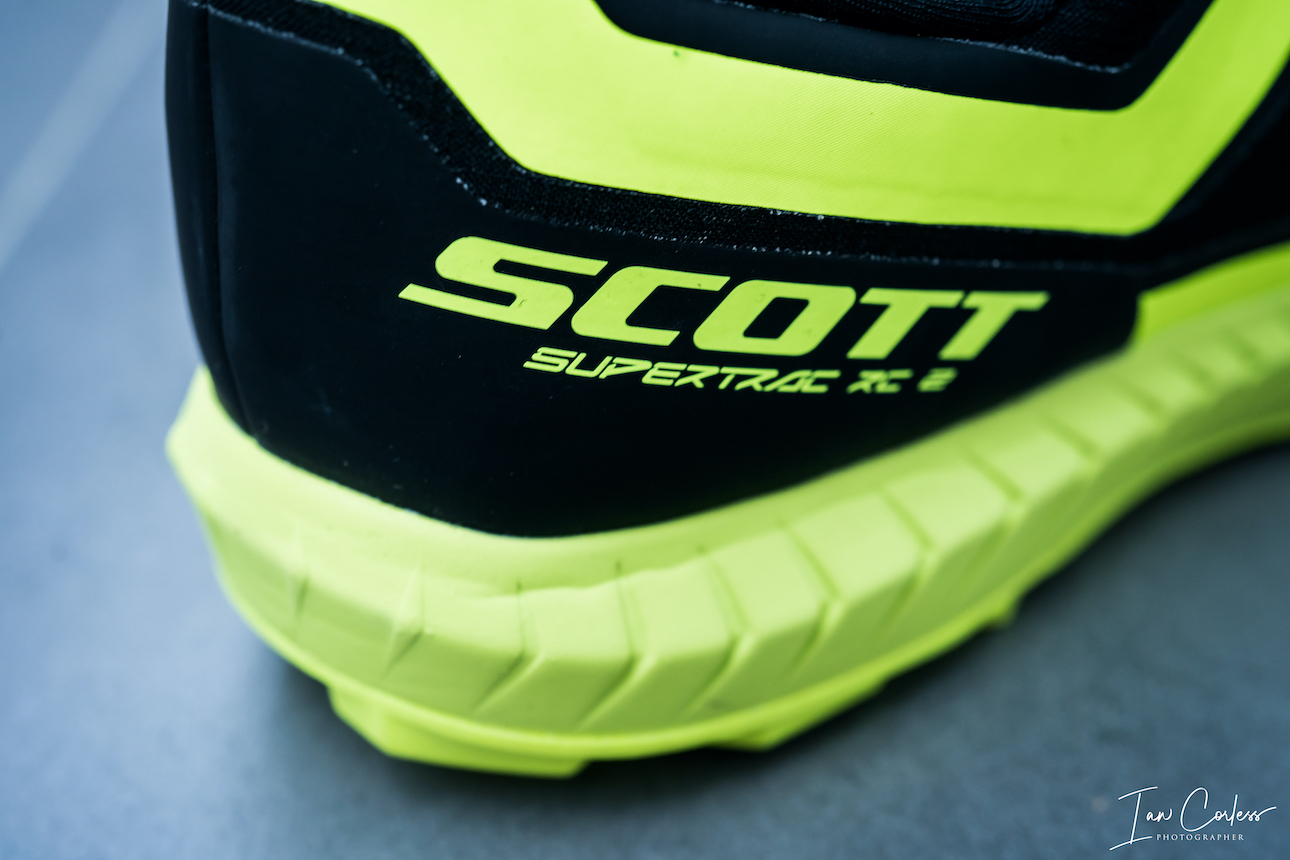
The black and yellow look then was striking and now, 4-years on, it is still striking and as such, Scott athletes, Scott apparel and Scott shoes are easily identifiable on the trail. It was a smart move by the brand.
As great as the original RC was (is) it was not the perfect shoe for me. I had some issues with how low the lacing came and in the propulsive face, I would some minor irritation. I also found the shoe a little lifeless. The cushioning did not give me the bounce I had hoped for. Despite these points, the shoe was an incredible performer in mountain terrain providing grip, a responsive feel and the seamless upper were all winners! It was designed for skyrunning.
When Scott asked me to test out the new Supertrac RC 2 I was excited. I was surprised, to be honest, that the new incarnation had been so long coming. I had great expectations and although hopeful that the look/ integrity of the original shoe had not been changed, I had hoped that I would feel a notable difference.
Out of the box, I was happy. Black and yellow and this new shoe looked like the Supertrac I know. It was a great start. Flipping the shoe over, the 6mm lugs of the original were there, but the arrangement was different with a noticeable gap in the midfoot. I also noticed that the toe box was wider. The upper had several bales hanging off it, ‘3XDRY’ and ‘coldblack,’ so, it was apparent that the shoe had had an overhaul.
As a note, the new Kinabalu Ultra RC is being released in July and this, along with the Supertrac RC 2 is significant. The two shoes are very similar, the exception coming with the outsole and a more breathable/ mesh upper on the Kinabalu. In simple terms, the Supertrac RC 2 is for mountain, mud and rough terrain. The Kinabalu Ultra RC is a trail shoe.
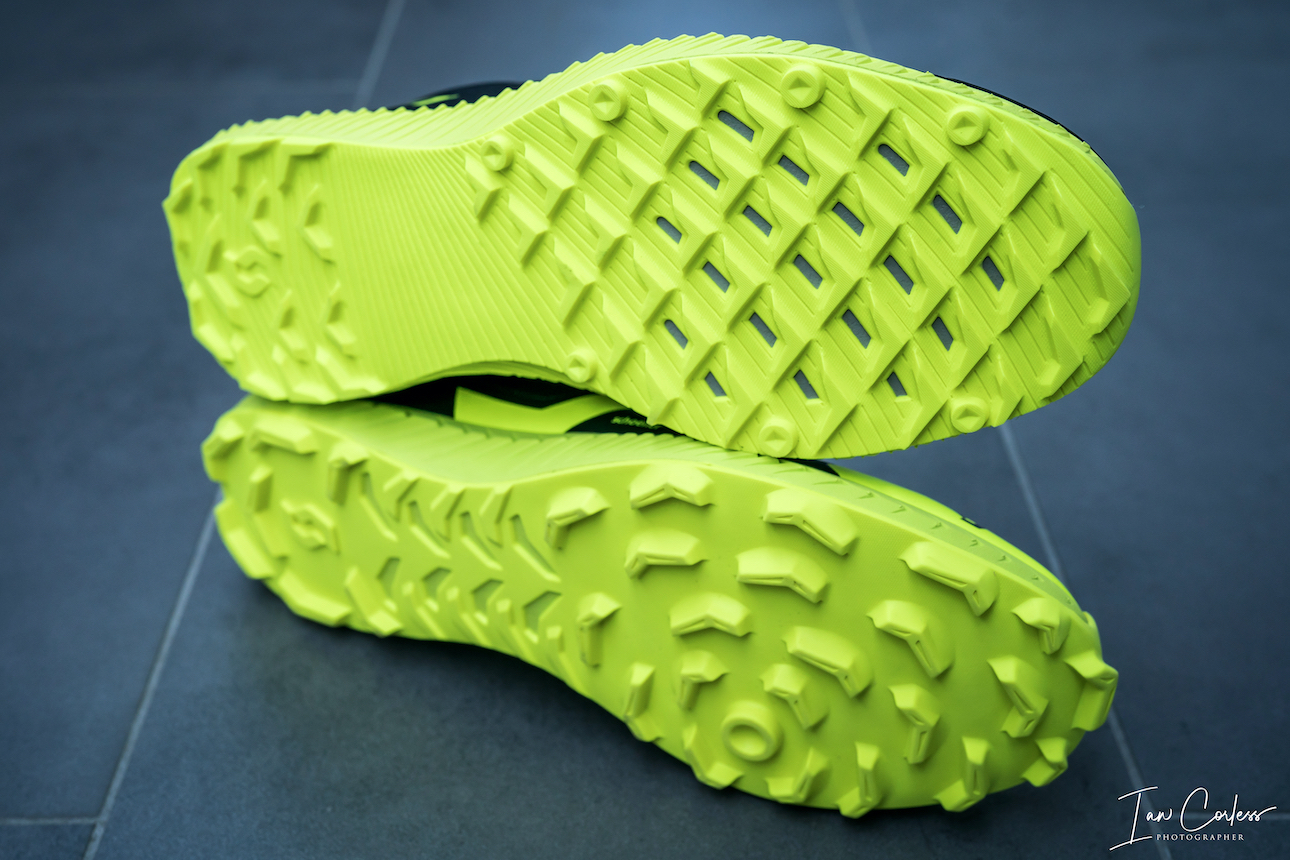
Supertrac RC 2 on the top and the Kinabalu Ultra RC below – the difference in upper is significant. But fit/ feel is very similar.
The Kinabalu Ultra RC on top is less aggressive.
THE SHOE
I use an EU44 (UK9.5) for all my test shoes and weirdly, the Supertrac RC 2 although an EU44 says UK9 inside? I was perplexed initially thinking that the shoe would be too small. It’s not. So, if purchasing, just be careful with sizing. I am not sure why there is a discrepancy between EU and UK size.
At 298g for an EU44, this is a lightweight, but not the lightest mountain shoe.
One of the great attributes of the original Supertrac was foothold and here in the Supertrac RC 2 that foothold is equaled and bettered. Surprisingly, there is still no sock-like fit but when you slide the shoe on, you don’t even think about it. The seamless upper, tongue and lacing configuration hold the foot wonderfully tight. So, on technical terrain, there are no worries of one’s foot moving inside the shoe.
Key changes come in the upper with SCHOELLER COLDBLACK® and 3XDRY® which provide more protection and comfort. I was initially worried that the upper looked unbreathable and therefore potentially making the shoe hot, not so. The SCHOELLER COLDBLACK® reduces heat buildup and increases wearing comfort. The 3XDRY® is water and stain resistant and from the inside, it absorbs and distributes moisture.
The heel area is padded, snug and importantly when climbing does not allow for any slipping.
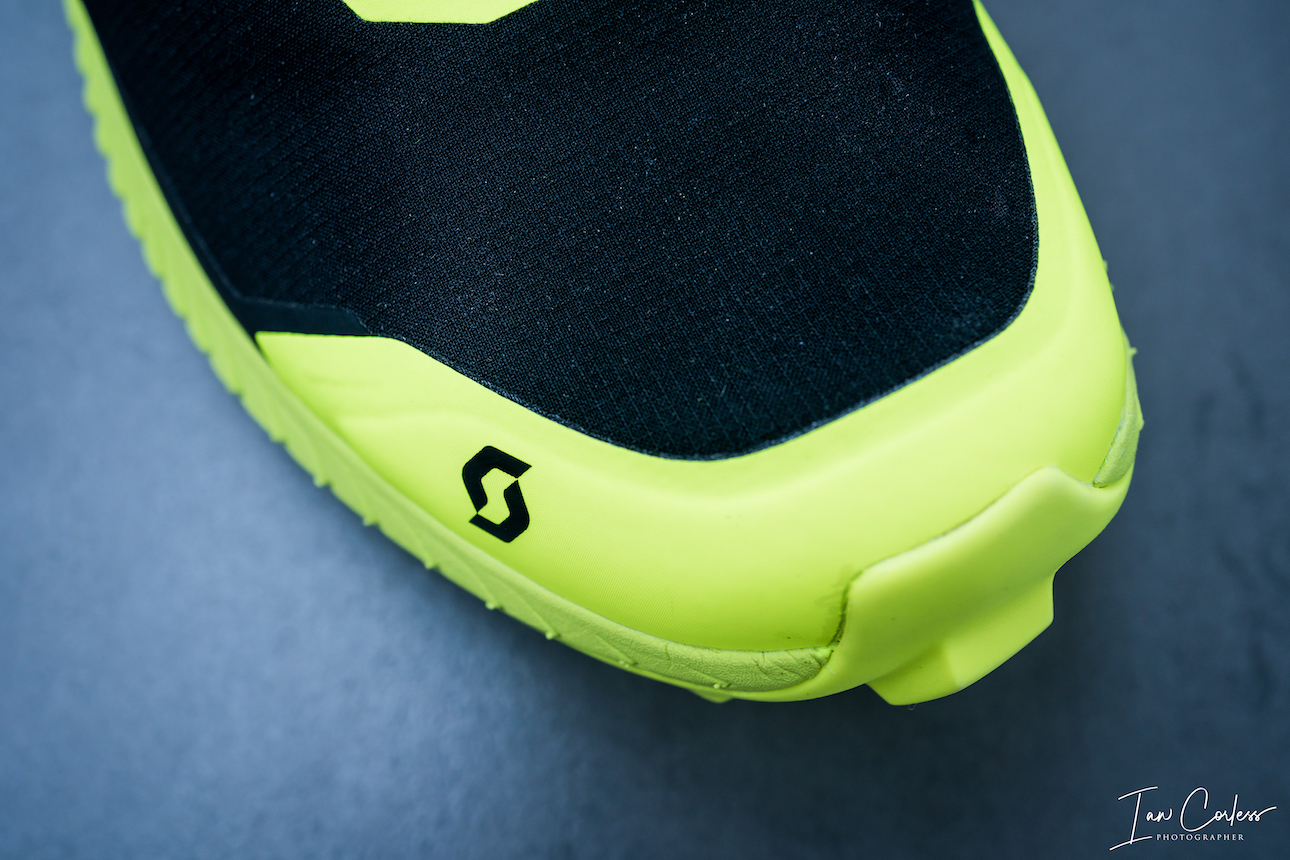
Notably, the toe box is wider allowing a little more toe splay than the original shoe and this is welcome. Toe protection is adequate and what is immediately noticeable is how the outsole rises up placing one lug almost on the toes – perfect for climbing.
Cushioning is notable. I found the original Supertrac lacking life and bounce, not here in the version 2 with the AEROfoam+. The bounce is notable even without running. The drop is 5mm.
Scott have always used eRide (rocker) to help with technique and cadence. In some models, it has been very noticeable. Here in the Supertrac RC 2 it is less noticeable, and the curvature is reduced.
The outsole has always been a selling point with ‘radial traction.’ The 6mm lugs fit the middle ground off aggressive, but not too aggressive and the lugs now have been spaced differently to help dispel mud and reduce clogging. Particularly noticeable in the middle of the outsole.
If you wanted a shoe just for mud, then a more aggressive outsole would be better. But the Supertrac RC 2 quite rightly wants to provide a great all-rounder that handles mud, technical terrain and can still be comfortable when cruising some single-track.
IN USE
This is Scott’s best shoe so far in my opinion. The changes they have made addressed all my minor niggles from the original Supertrac RC and they have packaged them in a version 2 that is magical to wear.
I have given mine a real battering and in the space of a couple of weeks managed to get well over 100km in them in the mountains of Norway. Mud, trail, rock, wet and dry, at all times the shoes were performing at the highest level.
From 3-hour faster runs to 7-hour+ adventures, at all times, the shoes were comfortable and secure.
In the previous Supertrac RC, I would only use them for shorter/ faster outings, the v2 is so much more cushioned that even on continually hard and rocky terrain, I had all day comfort.
The outsole performed as expected offering secure grip on rocks both in the dry and wet. I had one issue of slipping continuously on a particular type of rock, however, it became clear that the green slime over it was an issue for any shoe and not just the Scott. Confirmed by a run friend who was in a pair of inov-8.
In mud, I was happy with the grip knowing only too well that if I got in continuous sloppy and deep mud that grip would be compromised a little due to the 6mm lugs. But, the new spacing of the lugs did the job of expelling mud. This was perfect in guaranteeing a more consistent grip for all the time.
When on technical and demanding trail, you need a shoe that holds the foot so you can be 100% sure. Many brands call this ‘precision’ and often one of the downsides of a precision shoe/ fit is that the toe box will be narrower. The Supertrac RC 2 has a wider toe box and it is noticeable. I was therefore worried that some of that firm hold and reassurance may be lost. No! The lacing and fit are so good, that you can adjust and tweak making sure that you have 100% security. Even the insole grips one’s sock.
I ran through a great deal of wet/ muddy and boggy ground and here is maybe one downside of the shoe. I felt drainage was compromised. I always wear Merino socks and so therefore had no issues with cold feet, even when running through a great deal of snow. However, I do feel water retention was more noticeable.
CONCLUSIONS
The Supertrac RC 2 is a great shoe and for anyone who loved the original Supertrac RC, I think now they will have an even bigger smile on their face.
For those who were tempted by the black and yellow shoes previously but decided that the toe box was too narrow, the cushioning compromised, or the feel was a little flat, you should now go back and check these out.
It’s rare I compare shoes to other brands and models, however, for those who have read my reviews, they will know that VJ Sport are my ‘go-to’ shoes for the mountains, be that the XTRM or MAXx models. Now, I firmly believe that Scott have a shoe that can compete.
I have 98% of good things to say about the Scott Supertrac RC 2 and the only negative is the potential for retaining water… To clarify, it does not stay in the shoe, it does dissipate. It just dissipates slower than I would have liked.
Please support this website. I believe everyone deserves to read quality, independent and factual articles – that’s why this website is open to all. Free press has never been so vital. I hope I can keep providing independent articles with your help. Any contribution, however big or small, is so valuable to help finance regular content. Please support me on Patreon HERE.
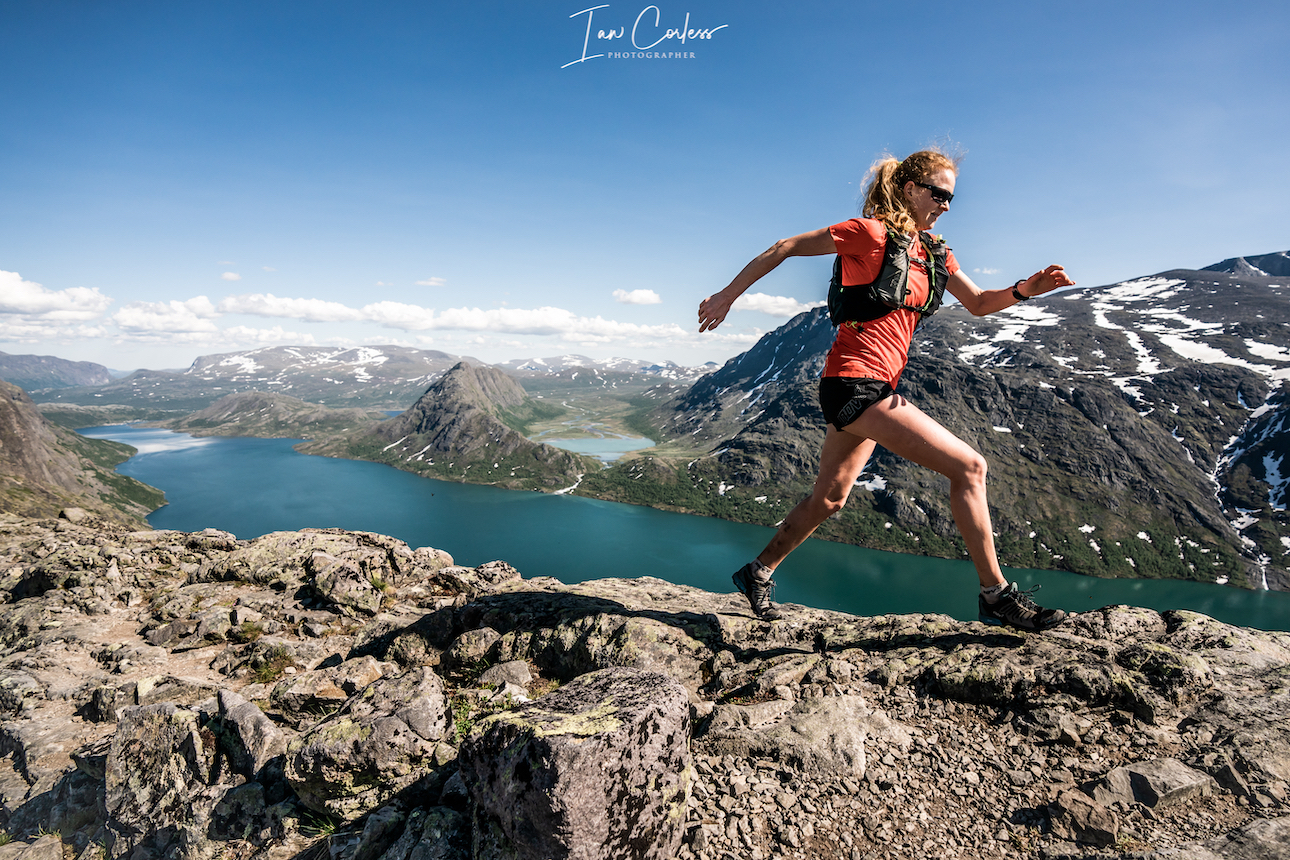
Norway has long been a desirable location for the mountain enthusiast. One only need to add the word ‘Norway’ to a Google search engine, and you will be rewarded with photos that make the jaw drop.
At roughly 33% bigger than the UK and 1/3rd the size of USA, one begins to understand the scale of this Scandinavian country and its 5.3 million inhabitants.
Just think about it, Norway is 33% bigger than the UK, but the UK has 66.6 million inhabitants…
Needless to say, outside of Oslo (681,000), Bergen (271,000) and other key locations such as Trondheim and Stavanger, open space and amazing landscape is available for all to explore.
In a series of articles and posts, we intend to introduce you to the magic of Norway.
Norway is the longest country in Europe and therefore, travelling anywhere is not a quick process. It has 60.000 miles of coastline, towering mountains and dramatic fjords. Remarkably it has 2-300 peaks over 2000m+, Galdhøpiggen the highest at 2469m closely followed by Glittertind at 2464m. There are over 1000 peaks over 1650m, so, if you love mountains, Norway should be at the top of the ‘to-do’ list!
We started our articles with HARDANGER which you can read HERE.
The list will grow as we progress through Norway, but expect posts on:
Stavanger
Senja
Tromso
Lofoten Islands
Romsdal
Lyngen
Svalbard
And more…
JOTUNHEIMEN
The ‘home of the giants’ contains the 29 highest mountains in Norway, and as such, it is a playground waiting to be explored. It has 250 peaks over 1900m! Established in 1980, Jotunheimen National Park covers more than 1,000 square kilometers of Sogn og Fjordane and Oppland counties. Reinder, elk, mink and wolverines live in the park and most certainly, in the more remote and quiet areas, it is possible to have a sighting.
In terms of distance and travel, the entry to the Jotunheimen region is roughly 4-hours of driving from Oslo or Bergen.
The area is vast with a multitude of possibilities and therefore, this article will be very much be a ‘part one’ to be followed up with additional posts as we explore more of the area.
It is a popular area and in the months of June, July, August and September, you can fully expect routes to be popular with hikers, climbers and tourists. July and August being the key months due to more stable weather. However, June is a wonderful month as snow can linger on many routes.
Any visitor to Jotunheimen, particularly on a first visit, will have the iconic Besseggen top of the list along with the highest peak in Norway, Galdhøpiggen at 2469m. We will include both of these here in this article and introduce you to other options: Knutshøe, Surtningssue and Besshø.
PRACTICALITIES
First and foremost, this is an introduction to Jotunheimen, and we hope that you will read this article, digest the information and then plan your own adventure.
Jotunheimen is expansive and in all honesty, best travelled on foot.
DNT – CABINS
Jotunheimen has a plethora of cabins (DNT) which link all the major trails and routes and certainly, the DNT option provides the easiest and most logical way to link routes for an amazing multi-day experience. There are 550 cabins in Norway looked after by The Norwegian Trekking Association. There are different cabins: staffed, self-service and no service.
Staffed – Staffed lodges serve breakfast and dinner. Many have showers and electricity, either from the power grid or from a local generator.
Self-Service – The self-service cabins are equipped with all that trekkers need for cooking and sleeping. Firewood, gas, kitchen utensils, table linen and bunks with blanks or duvets and pillows (hut sacks, also known as hut sleepers, are required!)
No service – No service cabins usually have the same equipment as self-service cabins, but they have no provisions. There also are a few simpler no-service cabins where you’ll need a sleeping bag and perhaps more equipment.
Use ut.nohere for what is available, there is also a very good phone app.
If you plan to use DNT it makes sense to become a member as you will save money, join here.
In nearly all cases, particularly in high-season and for popular routes, booking ahead (here) is a good idea. But rest assured, DNT will never turn you away, ‘…but everyone who comes to a cabin will have a place to sleep, either in a bunk or on a mattress on the floor.’ A 2020 price list is available here. A full board option is a great idea as you get a bed, 3-course dinner (always excellent), breakfast and a packed lunch. So, if moving from DNT to DNT you can really travel fast and light and make the most of the days. NOTE: You do not need a sleeping bag, just a sleeping bag liner – great for weight saving!
WILD CAMP
Jotunheimen is a paradise for wild camping, so, if you are on a budget, looking for a raw experience or want to fastpack, this is the place for you. In most cases, you can camp close to or at a DNT cabin. So, it can be possible to save on lodging and still eat at a DNT. Especially useful if venturing out for multi-days, that way you can really save on food weight.
Screenshot of DNT meal prices:
HOTEL
Hotels are in abundance in Jotunheimen and they provide an option to be used as a base or as stops as one travels around. They are great as a start and end to a holiday in this area, but not the best option if you really want to explore.
OVERVIEW
Bygdin is perfect entranceway to Jotunheimen and you could start the journey with a little luxury at the Bygdin Fjellhotell. It is also possible to wild camp in this area, even close to the hotel. Located at the end of Bygdin lake, it’s a perfect start point.
This fjord has a ferry which you can use to access Torfinnsbu or Eidsbugarden – both of these provide great start points for a fastpacking journey.
Fastpacking Journey:
Although not discussed in-depth this article, you could leave your car at Bygdin, take the ferry to Torfinnsbu then take the trail to Gjendebu. From here you could then head north via Storådalen, Urdadalen and then to Spiterstulen which is the gateway to Galdhøpiggen. You could then climb Galdhøpiggen and return to Spiterstulen. From here, proceed to Glittertinden, on to Glitterheim and then follow the trail down to Gjendesheim via Tjørnholtjørna and Russa. From Gjendesheim take the trail via Vargebakken and Valdrersflya to arrive back at Bygdin Fjord. GPX here.
From Gjendesheim you could take the ferry to Gjendebu (you were here on day 1 or 2 of the fastpack) and now follow the trail to Memurubu. At Memurubu you have several options? A great day out is to take the trail to Surtningssue summit heading out on the lower trail that passes Memurudalen. At the summit, return via the way you came and then the trail splits and you can return to Memurubu via different route (full details listed below). From Memurubu you can now take the Besseggen route (details below) to Gjendesheim.
Proposed Trip:
As mentioned, Jotunheimen has many options and while the above fastpacking route and option is probably the ‘ideal’ way to explore the area, we wanted to break options down into manageable junks.
Areas to explore:
Knutshøe
Galdhøpiggen
Surtningssue
Besseggen
Besshø
Schedule:
Day 1 – Travel and overnight at Bygdin area.
Day 2 – Knutshøe route and then drive to Spiterstulen (2 hours) to either wild camp or stay at the DNT hut.
Day 3 – Climb Galdhøpiggen and then drive to Gjendesheim to stay in the DNT or wild camp.
Day 4 – Take the first ferry from Gjendesheim to Memurubu. Pitch tent or check-in at DNT and then do the Surtningssue route. Overnight at Memurubu.
Day 5 – Besseggen ridge to Gjendesheim – You can send luggage/ tent on the ferry so that it will be at Gjendesheim when you arrive from the trek. Overnight in either DNT or wild camp.
Day 6 – You can either travel home OR add an extra day with the climb to Besshø and return to Gjendesheim for an additional overnight wild camp or DNT.
Day 7 – Travel
Please note:
Make sure you book the ferries in advance here. They get very busy, particularly the first one from Gjendesheim. If you have a car, you need to stay at the Reinsvangen ‘Long Stay’ car park (here,) make sure you pay for parking to cover the duration of your stay. A shuttle takes you to the ferry or you can walk, approximately 1.5 miles. When possible, book the DNT’s you require in advance.
THE ROUTES
Knutshøe
A short drive from Bygdin, Knutshøe is a great introduction to Jotunheimen. Many consider Knutshøe a more challenging route than Besseggen? However, it is very much considered the younger brother or sister.
The total route is approximately 12km taking an anti-clockwise loop. You reach a high point of 1517m and in total you will accumulate 700m +/- while covering the distance. It is rated as ‘difficult’ and without doubt, it does have some exposure. Depending on experience and speed, the route could take up to 6-hours. However, moving fast and light and combining running and hiking, it is easy to complete in well under 3-hours. All the difficulty is in the first half of the route when you climb up and then descend. Once down, you have a flat 6/7km valley to cross back to where you started. GPX here.
Access to the route is from the main road and there is a small parking area that can accommodate approximately 20 cars. It is possible to wild camp here too. Either way, arrive early and start the route as soon as possible.
Note! If raining, this is NOT a good route to take. There is a considerable amount of rock both up and down and it can become very slippery.
Leaving the car park, follow the trail and when at a fork, go right and head up the climb. The route requires scrambling, some climbing and at several points you will encounter steep drop-offs.
Depending on experience, you may find some areas of the route really rewarding or terrifying. It is not a very difficult route; however, it does demand respect and patience.
At all times, the views are spectacular and ahead of you, on the other side of the lake, you have Besseggen completely in view pulling you in.
At the summit, you have a wonderful 360 view and if timed correctly, you will be able to see the ferry boats going back and forth on the lake below.
The descent is rocky, challenging and requires patience. Make sure hand and foot holds are secure and take your time.
Rock eventually becomes trail and before you know it, you will be at the bottom and next to the Gjende river. It is now possible to get water if needed?
You now go left and follow the trail back. At times, it’s easy to lose the trail so be attentive, as a recommendation, stick with the tree line and not the river. Your feet will get wet, guaranteed!
Once back at the car, take time to rest, change clothes and then make the 2-hour journey to Spiterstulen. En-route, there are possibilities to stop and buy food/ supplies.
Galdhøpiggen
The drive to Spiterstulen brings you straight to the start point for Galdhøpiggen. Having the journey out of the way allows for good recovery in the evening and an early start the next day. As mentioned, you can stay at the DNT or wild camp in this area.
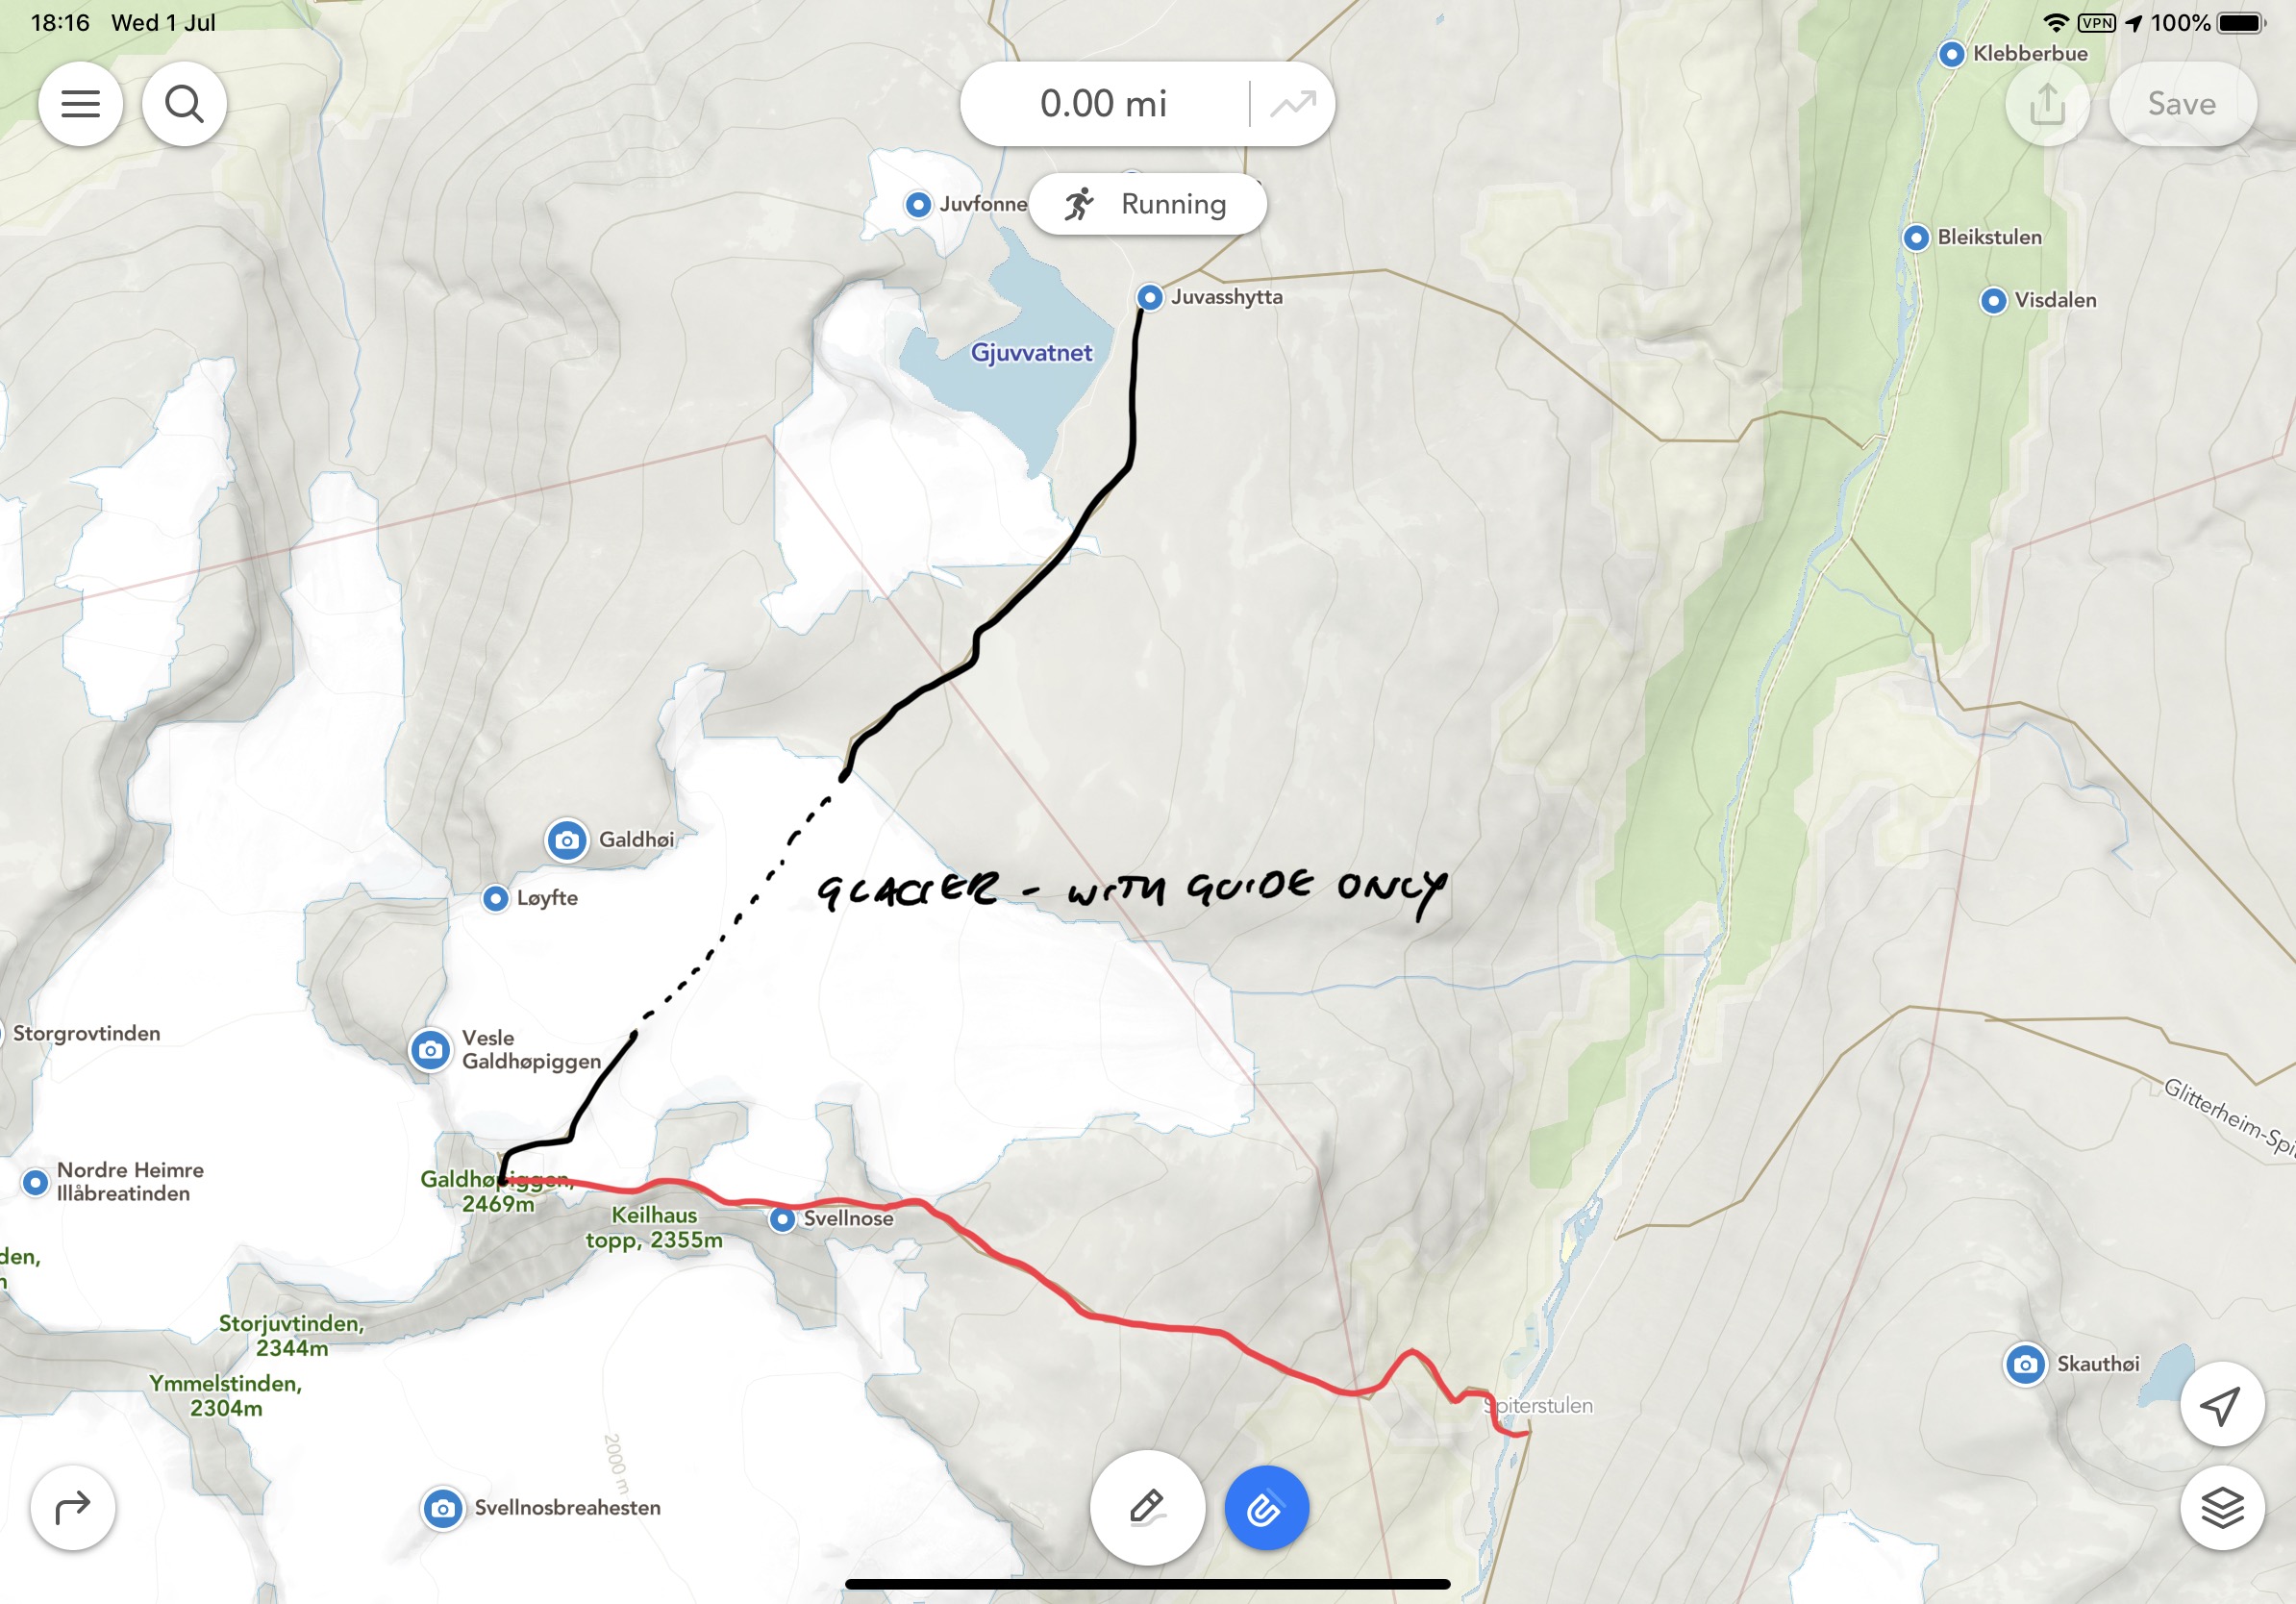
The highest peak in Norway (2469m) and Northern Europe is understandably a huge draw. For many, they take a guided trip leaving from Juvasshytta mountain lodge (1841m.) Guides take groups across the glacier. The glacier of course sounds appealing… However, it is an easy route with far too many people.
The route from Spiterstulen mountain lodge may not contain a glacier, but the 1400m vertical climb offers far more challenges. Especially if one travels in June as snow will still be present. The route is up and down is via a well-marked trail, GPX here.
Considered demanding, the route can take 8-hours plus, again, we completed the route in half the time.
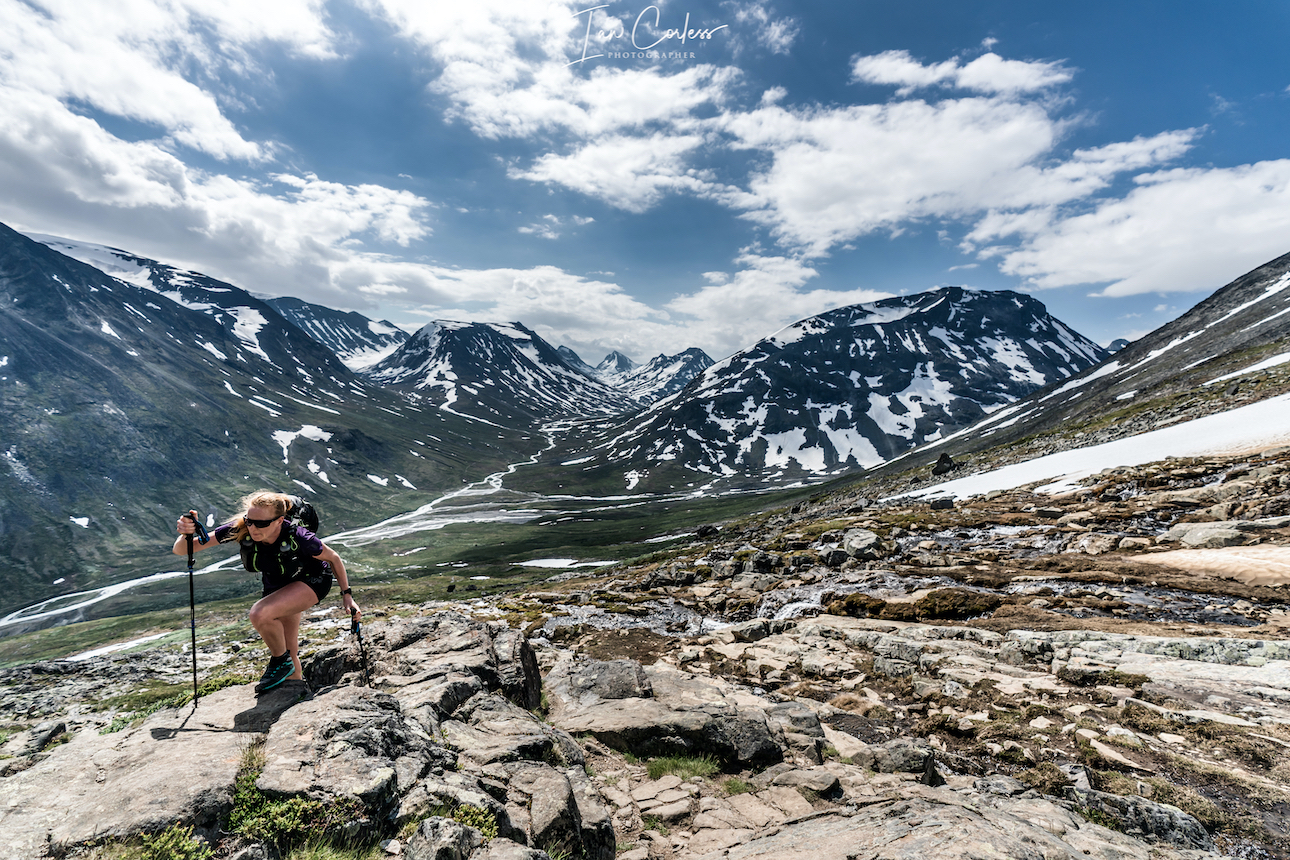
During the adventure, you will scale two peaks, totaling over 2,000 meters in height, Svellnose 2272m and Keilhaustopp 2355m! The terrain is tough and requires concentration at all times. Made up of rocks and boulders, for much of the time you are constantly piecing together a jigsaw puzzle to find the best route through. In wet weather, the route is very dangerous. Remember to follow the red “T”s that indicate the trail.
At times, you will cross snowfields and of course, stick to well used routes. Take no risks on the snow!
Several points can take you very close to the edge of the ridge. At all times be attentive, not too much of a problem in good weather, but in poor visibility you need to make sure of the route.
As you go up you feel several times that the summit is ahead only to reach a peak and then see several more in the distance. The final push becomes obvious as a hut is at the final summit and you will probably see a stream of people coming in from the right who have crossed the glacier.
At the summit the views are magnificent and well worth all the effort. An early start may well guarantee you some quiet time and space.
You descend via the way you came and in all honesty; due to the amount of rocks, it may well be more difficult to go down? Certainly, if you have tired or sore knees, you will feel every meter of the 1400m.
The route out and back is approximately 14km.
If you had an early start, you will be back by midday/ early afternoon and then you can take the 2-hour drive to Gjendesheim.
At Gjendesheim you can stay at the DNT or wild camp. This allows you a good night so that you can get the first ferry the next day.
Surtningssue
Make sure you have a place booked on the first ferry from Gjendesheim to Memurubu. This is typically 0745 arriving at 0805.
On arrival at Memurubu you can pitch your tent (got to cabin and pay) or go to the cabin and check-in for your booking. Note, the cabin here is not a DNT and we recommend you book here.
Once ready, you can then start the Surtningssue route. This, in our opinion, is a hidden gem and is often neglected as Besseggen takes all the glory.
At 24km long, it’s a great day out that offers many challenges and importantly, you will see hardly any other people. On our trip, we saw nobody.
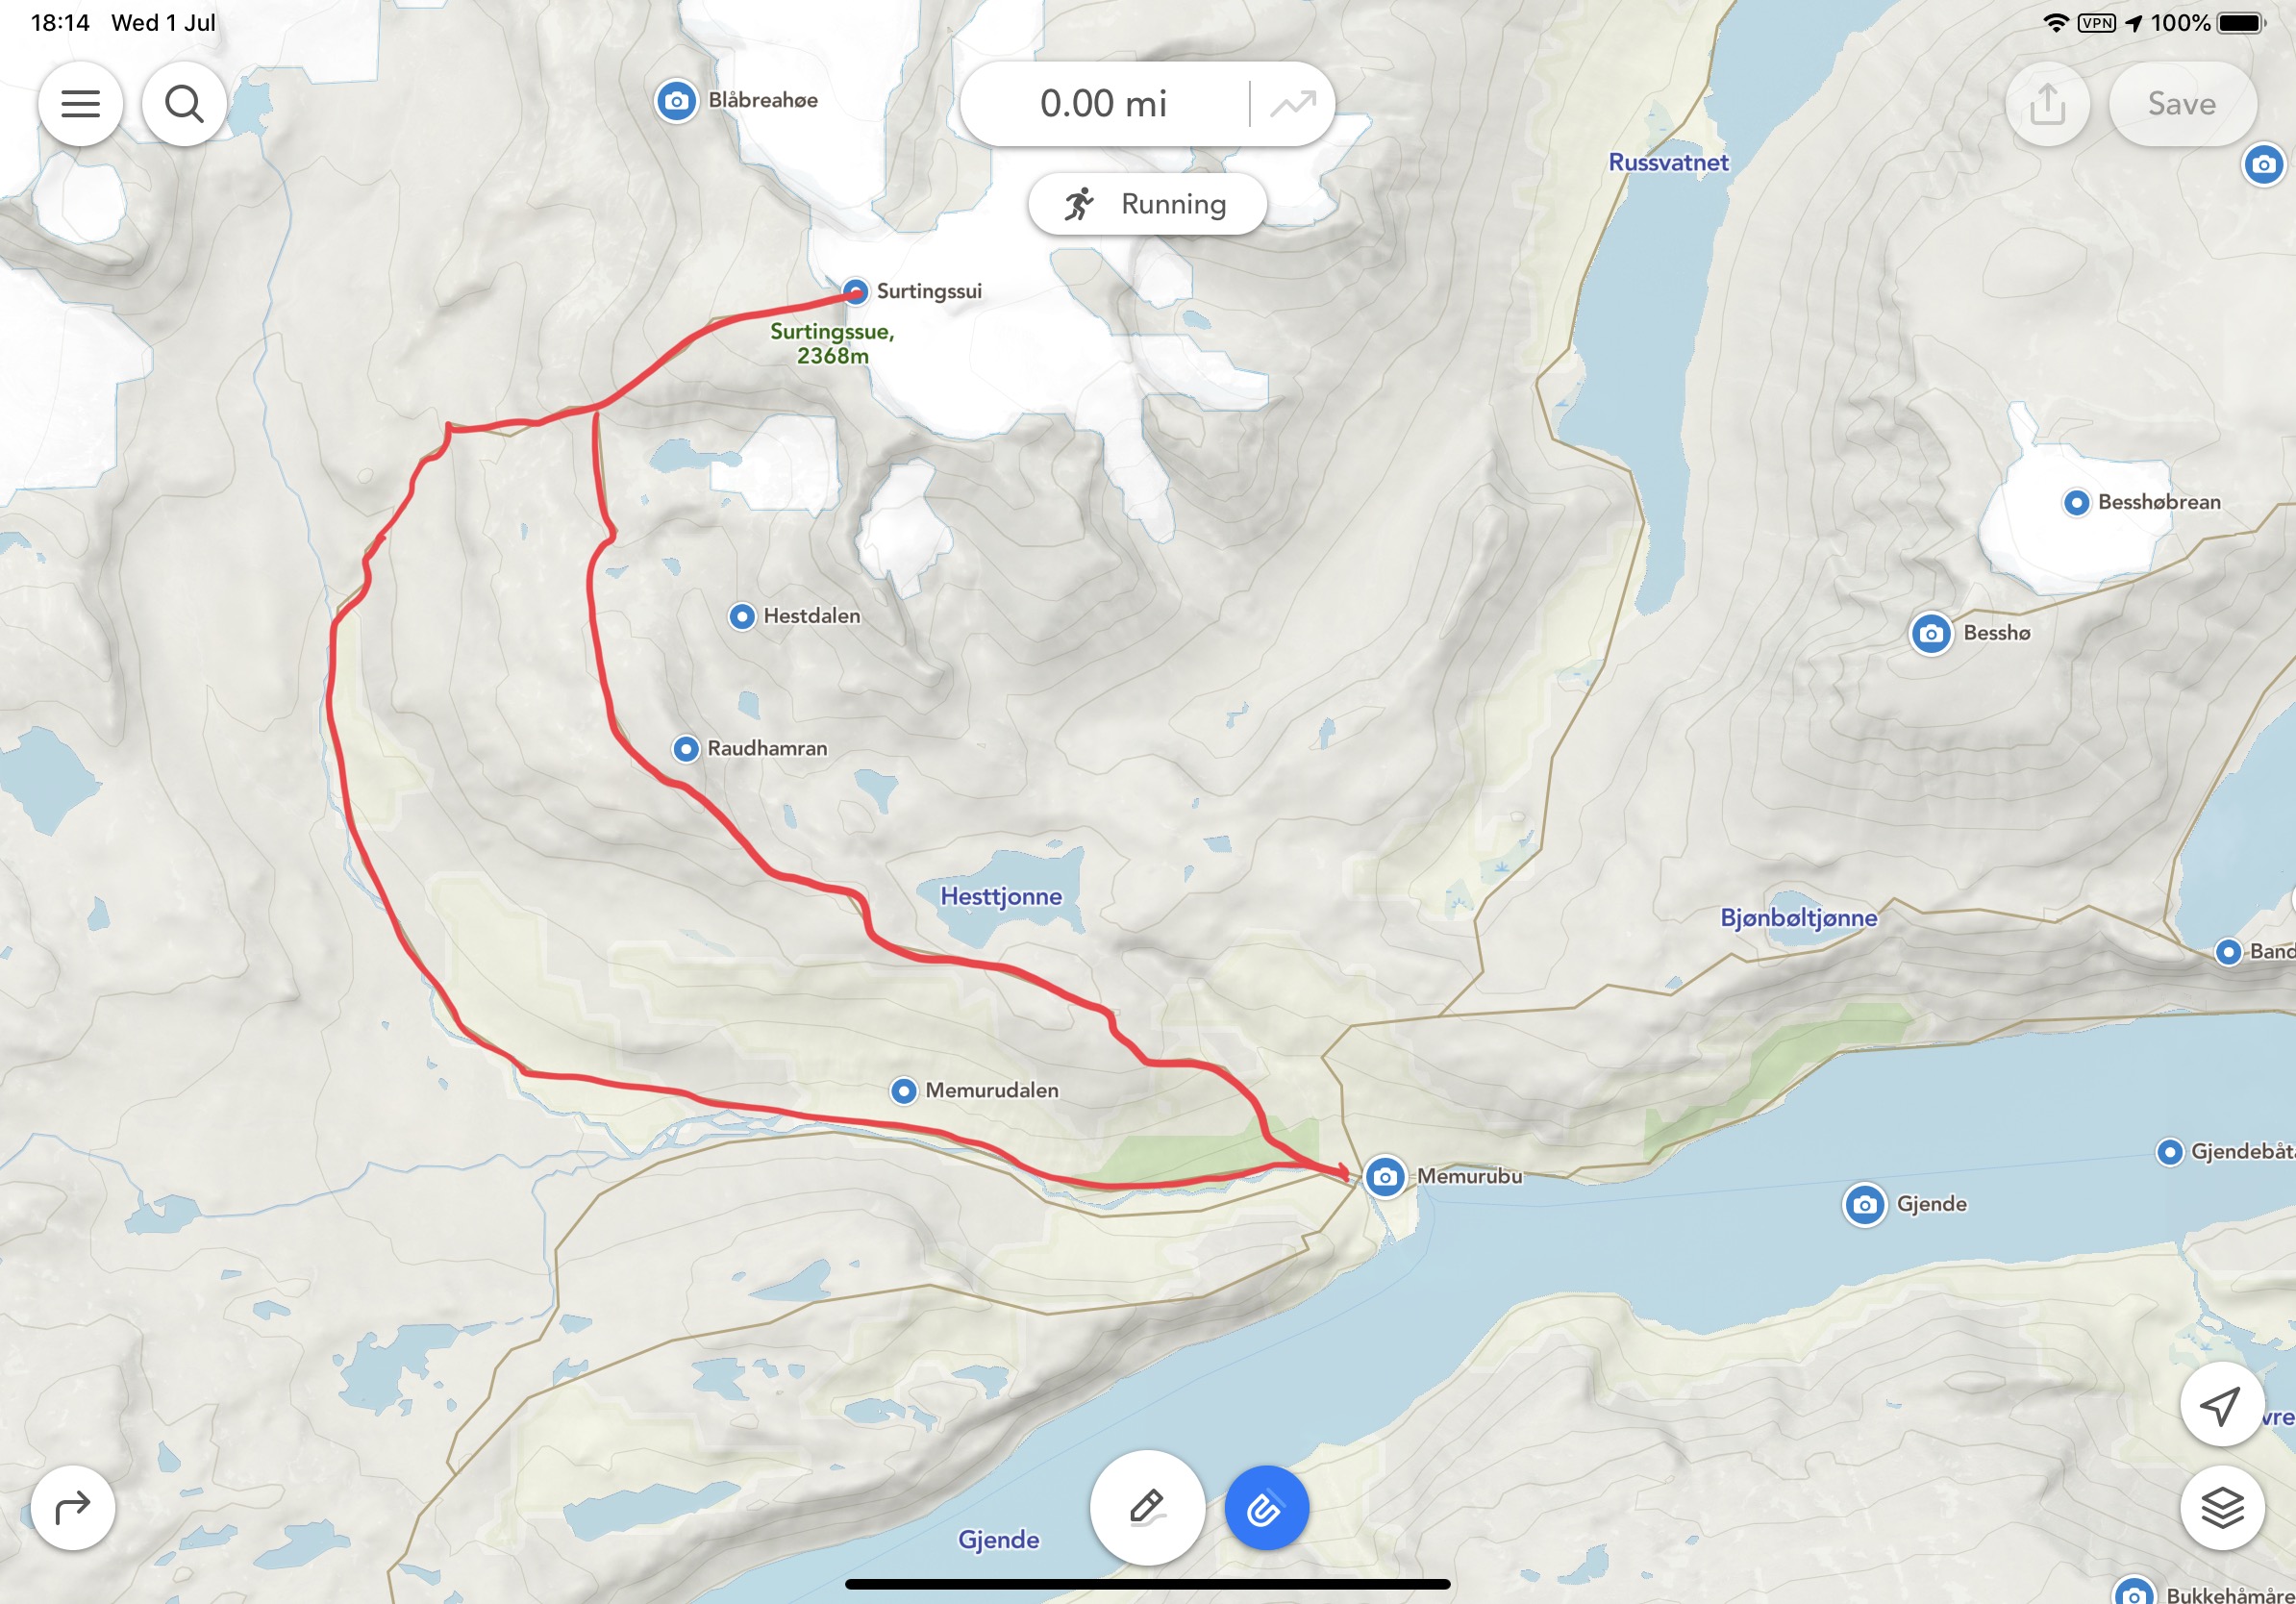
Leaving Memurubu the route is clearly marked. Make sure that you branch left when the opportunity arises. This will provide you with a clockwise route to the summit at 2368m and then back to Memurubu via a different route.
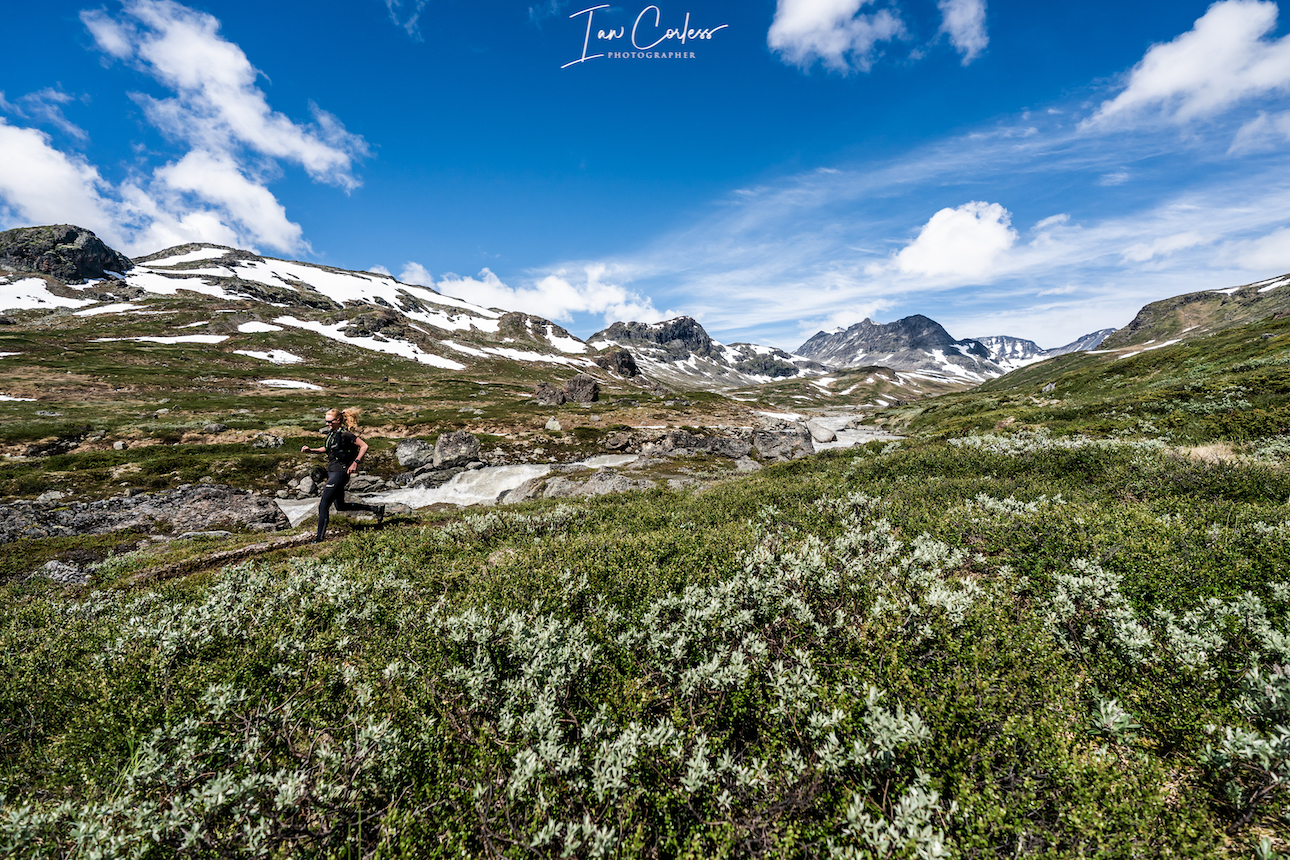
The first 8km’s are single-track trail that is very runnable. The views are stunning and only get better as you move up the trail. One advantage of experiencing the trail in June is lingering snow.
Once through the valley you start to head east. It is definitely worth having the GPX route (here) available either on a phone or watch so that you can stick with the route. Although marked, it has considerably less markings than other routes and often you are following stone cairns.
From 8/9km the route now winds up to the summit through rocks and boulders. Care is needed! At approximately 11km the trail will split with a very clear red sign showing a left and right option. This is where you go left to the summit. On your return, this is the place where you split and take the ‘other’ route back to Memurubu and therefore creating a loop.
The trail up is now steep with several false summits. You will finally see a stone hut that is open and available for shelter if required. The final push to the summit is approximately another 200m. For those in the know, they say the summit provides the greatest view and panorama of Jotunheimen.
It’s exposed at the top, airy, with plenty of potential hazards, so, take care.
The descent is via the same route until you reach the red marker. Now you veer left. Once again, the terrain is challenging as there are countless rocks and boulders.
For most of the way, the route is well marked until the final km’s. We lost the trail but could see Memurubu ahead and therefore self-navigated back to the cabin.
This route is a stunner. We felt alone and isolated. We saw nobody and encountered wild reindeer with their young.
Besseggen
Besseggen is a classic ridge that ‘must’ be done. Some Norwegian’s say that you cannot be Norwegian until you have done the route. It’s a point-to-point route, so, plan ahead and send any luggage/ tent with the ferry boat. They will have your luggage waiting for you after the trek at the ferry port in Gjendesheim.
At 14km long, with approximately 1100m of vertical gain it may not appear to be a too demanding route? However, many consider it is! Many take 8-hours to do the route and 10/12-hours is not unusual. GPX here.
For perspective, there is a mountain race that takes on the exact route and the course record is an unbelievable 1hr 15min 40sec by Thomas Bereket. Trust me, if you experience this 14km point-to-point, you will wonder (continuously) how is it possible to run this so quick? Kilian Jornet ran the race in 2016, along with Thorbjørn T. Ludvigsen, Kilian won in 1.17.54.
We completed the route in 3-hours 30-minutes and that was with many photo/ video stops.
The route is very, very popular and we therefore recommend you start early. One advantage of running and fast hiking is you soon catch anyone ahead and trust me, you want to be alone as much as possible to experience the trail and views.
All this who stay at the cabin or camp will start (usually) before 0800 and then the first boat arrives at 0805 releasing another wave of people.
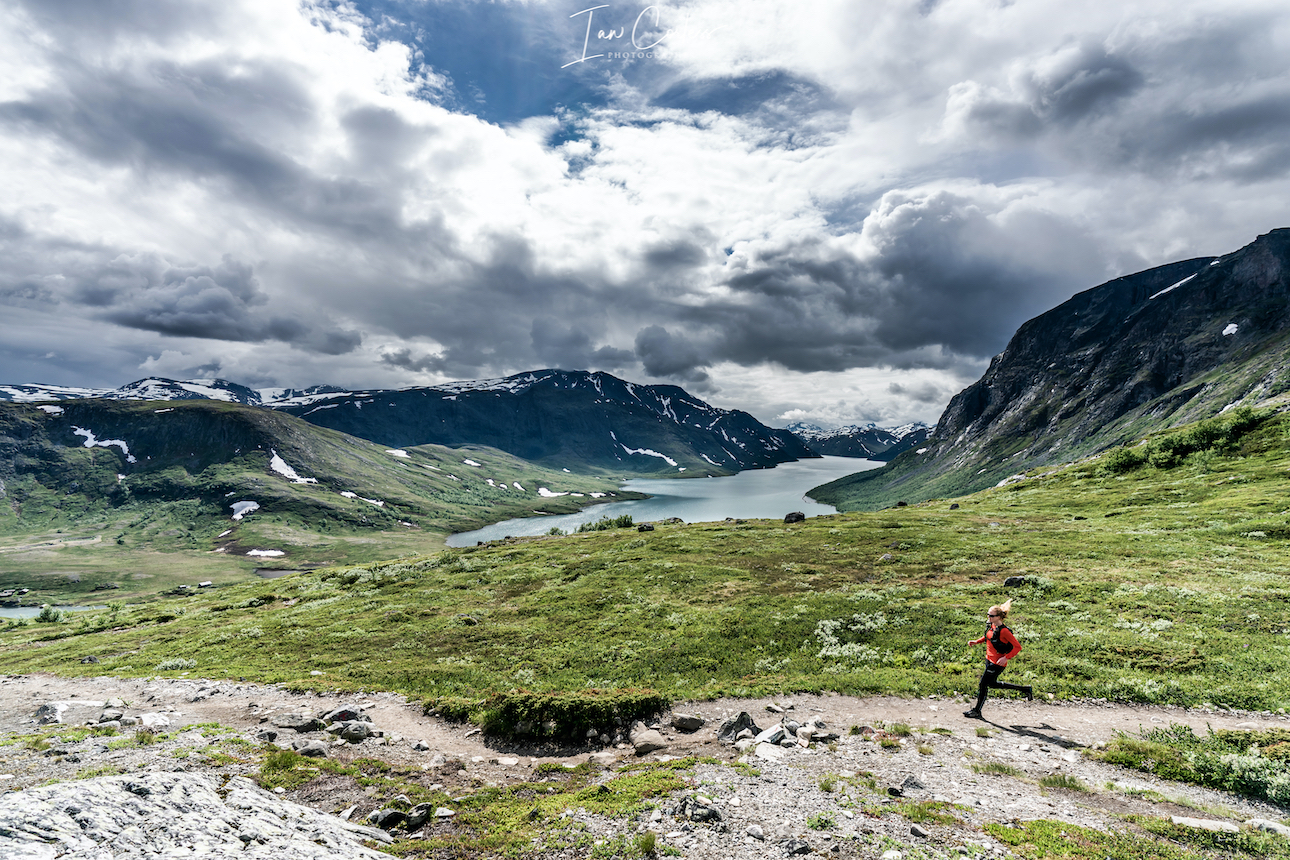
Characterized by the colourful emerald Gjende and deep blue Bessvatnet lakes, Besseggen ridge splits the landscape. It’s dramatic and bold and in wet weather, treacherous, so be careful!
Leaving Memurubu the trail immediately rises up and twists, mixing rock and single-track. It’s a fun trail and the first plateau already provides great views. You will pass Bjønbøltjønne lake, a good opportunity to get water if needed? Continuing up, eventually another plateau arrives and now you have a stunning view of the Besseggen ridge. It’s quite intimidating. To the right the Gjende lake and you will clearly see Knutshøe which looks fantastic.
The trail now drops, it is steep in places. Bessvatnet lake (1374m) is to your left and you walk along its edges with Besseggen looking down on you.
Bandet ridge is a significant point with approximately halfway covered and Besseggen the next challenge.
Rising 300m, Besseggen (in my opinion) is less intimidating when climbing, however, there is plenty of opportunity for exposure. It’s relatively steep but there are plenty of foot and hand holds. It’s worth stopping many times for photos. The views are remarkable.
The steepest section comes towards the end but does not last long and then you are on a plateau that gently and continually rises to Veslfjellet (1743m) which is the highest point.
The trail is now very flat and after about 1 kilometer you reach a trail junction. Follow that trail to the right down towards Gjendesheim. The route now twists and bends. Follow the markers and in here the trail is steepest with many rocks. Take care, they can be slippery, even in dry weather.
Gjendesheim ferry finally comes to view and then the final 1 or 2km is easy to the finish.
If you sent luggage with the boat, it will be available under the wooden shelter at the port. A shuttle bust will take you to the car park for the journey home.
Or, you may wish to wild camp or sleep at the cabin and the following day tackle Besshø.
Besshø
At 2258m, Besshø is 500m higher than Besseggen and it is a trail that sees little foot fall. In many respects, it is like Surtningssue and as such, it has a huge attraction.
From Gjendesheim it is an out-and-back route of 22km with 1300m +/-. It’s a route that could take 12-hours but if moving fast and light, sub 6-hours is perfectly achievable.
The route starts with the end of the Besseggen route but instead of turning left for Besseggen, you veer right in the direction of Russa/ Glitterheim.
Bessvatnet lake will appear on the left and eventually you will cross a small bridge in the eastern corner. Cross the river you will see two small cabins on the left, now follow the trailer 2 to 3 miles north on flat/ boggy trail. Besseggen will be on your left and at the far end of the lake is Bandet which you crossed just before climbing Besseggen.
Look out for the right turn that leads to Besshø summit. The climb is at times demanding and marked with stone cairns which often disappear. It’s easy to lose the route so it’s advisable to have a GPX available (route here). Depending on the time of year, you may need to cross snow fields – care needed. The route is very rocky and strewn with boulders of different sizes. Many are loose, so, caution is required. It’s a challenging route but visually stunning.
The return route is via the way you came.
RECOMMENDATIONS
Never underestimate the mountains and the environment in which you are exploring. June in particular is the start of the hiking season and as such, snow can be a factor on all of the above routes. This adds an additional potential for injury and problems. Particularly as the snow is melting and this can create snow holes, snow bridges and crevices. Do not take any risks and follow established routes and existing footprints.
It is definitely worth carry Micro-Crampons as a safety measure, particularly in June and September. Also, trekking poles are a great addition but not essential.
Make sure you check in with DNT cabins for all the routes and check conditions to make sure that you have no surprises.
Weather is crucial and many of the above routes would become very dangerous in wet weather. Rocks and boulders in Jotunheimen are everywhere, when wet, they can be treacherous. Boots are always recommended for hikers but if moving fast and light, top quality mountain running shoes are perfectly acceptable on experienced feet. I cannot emphasize enough that grip is essential! You need an outsole that works on wet and dry rock. Running shoes are very personal but recommendations are VJ Sport MAXx and XTRM, Scott Supertrac RC2 and inov-8 Roclite.
It may be 30deg next to the fjord and glorious sunshine, but at the summit, it can be below zero, blowing a gale and torrential rain. You must take personal responsibility and be prepared for all conditions. At a minimum please take:
Suitable pack
Hat
Gloves
Warm insulated layer
Warm trousers
Waterproof jacket/ pants
Food for the duration of the hike and some contingency
1,5 ltrs of water (which can be replenished on all the routes via streams/ waterfalls)
Take water purification tablets as a just in case and consider a water purifier such as MSR Trailshot (here)
Map/ Compass
Charged mobile phone with a suitable App such as ‘Footpath’ (here)
Cash/ Card
Garmin InReach or similar
Bivvy bag
Sunglasses
Sun cream
Plan your routes, be realistic on timings and always start early. One of the huge advantages of outdoor activity in Norway is daylight. In June, July, August it is light at 0300 and goes dark after 2200 hrs.
CONCLUSION
Jotunheimen is to mountain lovers, what Disney is to fair ride lovers.
It’s a playground of trails, routes, summits, views, experiences and wildlife all wonderfully interconnected with marked trails and DNT cabins.
This article is created as a gateway to the area knowing only too well that it will whet your appetite for other adventures.
As mentioned at the beginning, the best way to explore this area is by foot and we are sure that once you have followed our weeklong adventure above, you will already be planning to return and explore.
In comparison to our first Exploring Norway article on Hardanger, I would consider Jotunheimen a more challenging environment, so please consider experience and fitness when contemplating any of the above routes.
We cannot emphasize enough the role of weather and the impact it has on all of the above recommendations. The mountains will always be there, cancelling a planned route or turning back is acceptable and wise.
PERSONAL NOTE
Special thanks to Abelone Lyng who has extensive knowledge of Jotunheimen. Her experience was invaluable in planning routes and making a workable itinerary.
Please support this website. I believe everyone deserves to read quality, independent and factual articles – that’s why this website is open to all. Free press has never been so vital. I hope I can keep providing independent articles with your help. Any contribution, however big or small, is so valuable to help finance regular content. Please support me on Patreon HERE.
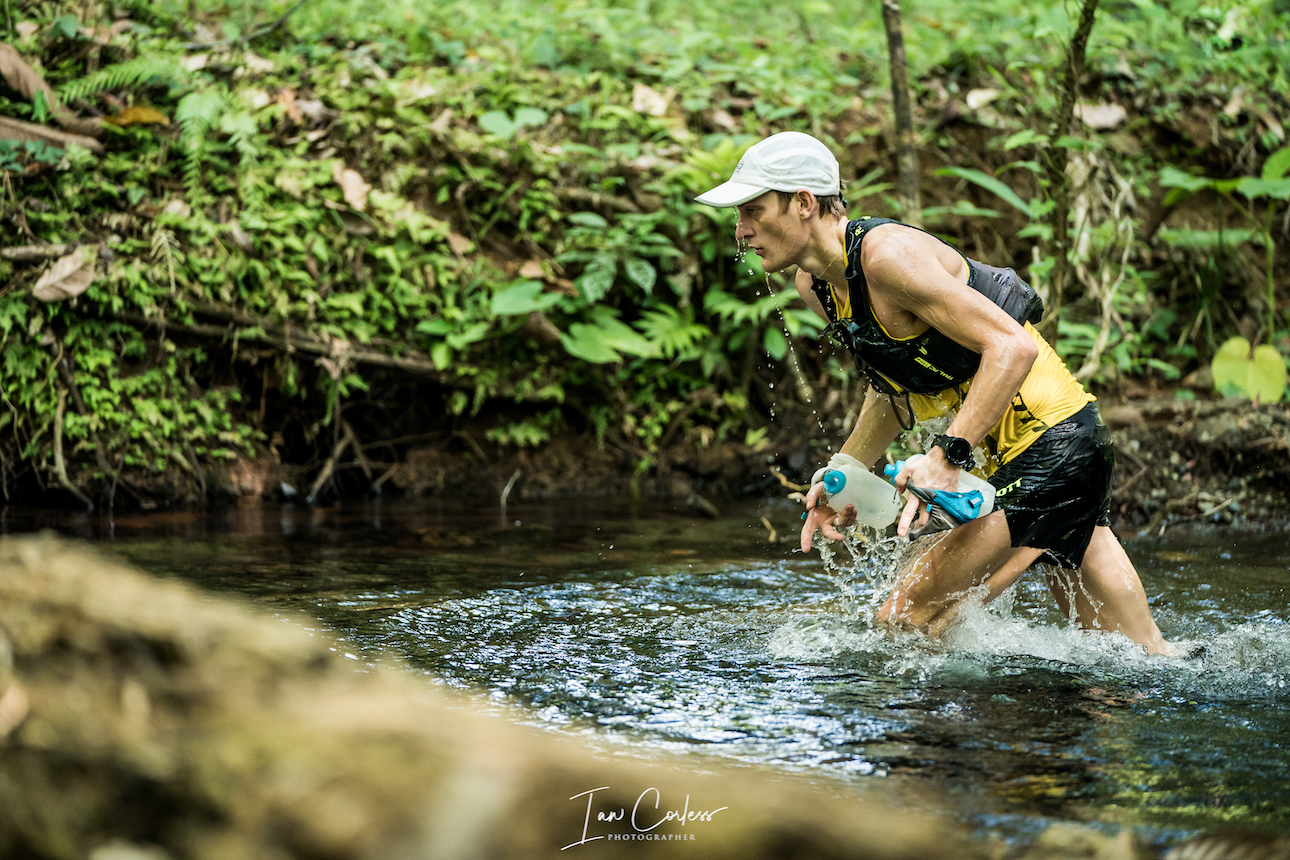
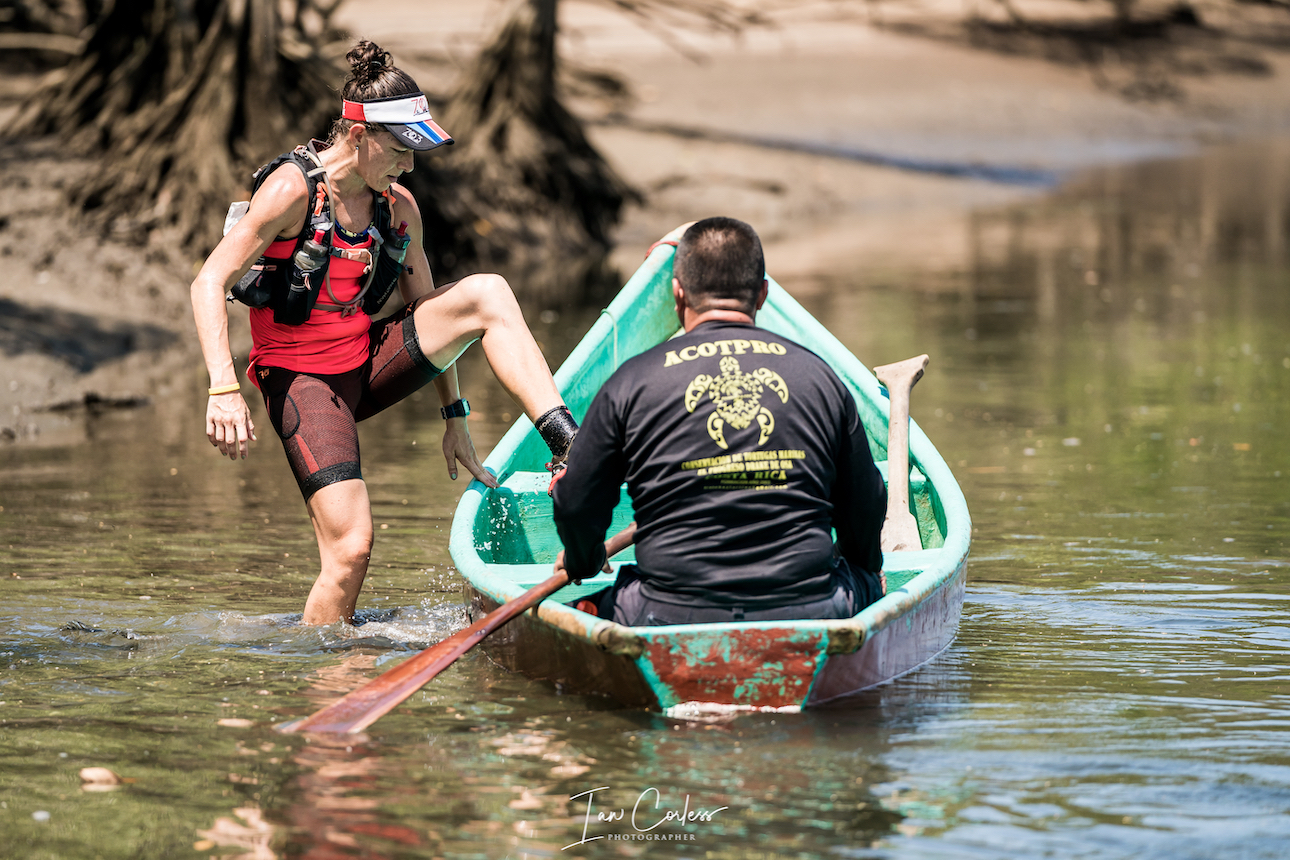
The Coastal Challenge, Costa Rica’s number one multi-day race moved to stage 5 and the longest day of the race at 47km. The stage is notorious for the endless fire roads, steep technical climbs and descents, the famous boat crossing and the hot beaches that lead to the line.
Departing camp at 0430, the runners are transported to Sierpe and they then take a barge across the river allowing the runners to start at 0615 heading for the stunning Drake Bay.
The early km’s are all about running on fire roads that sap the mind and legs, race leader, Cody Lind to the race to the competition and forged ahead solo, his intentions were clear, he was going to make sure he won the race from the front!
At CP2 he had a 6-minute lead on ErickAgüero and that was extended to a greater margin after crossing the estuary by boat.
“I am hurting!” He exclaimed but he pushed on with 9km to go and a potential TCC 2020 victory secured.
Shortly after the aid station he was sick, but post race he confirmed, “It was perfect, it released the bad feelings and I could run the final km’s to the line trouble free.” Cody crossed the line in 4:35:37
Agüero was giving it his all, but obviously trying to make sure he did not blow up and lose is hard fought for 2nd place. After the boat crossing he pushed to the line finishing in 4:53:55 and in the process, barring a disaster, confirming that Lind will win the 2020 The Coastal Challenge who has a lead of 18-minute and 46-seconds.
Andy Symonds ran a solid day and finished 3rd on the stage in 5:04:21but he had a tough day with the heat… As did most runners!
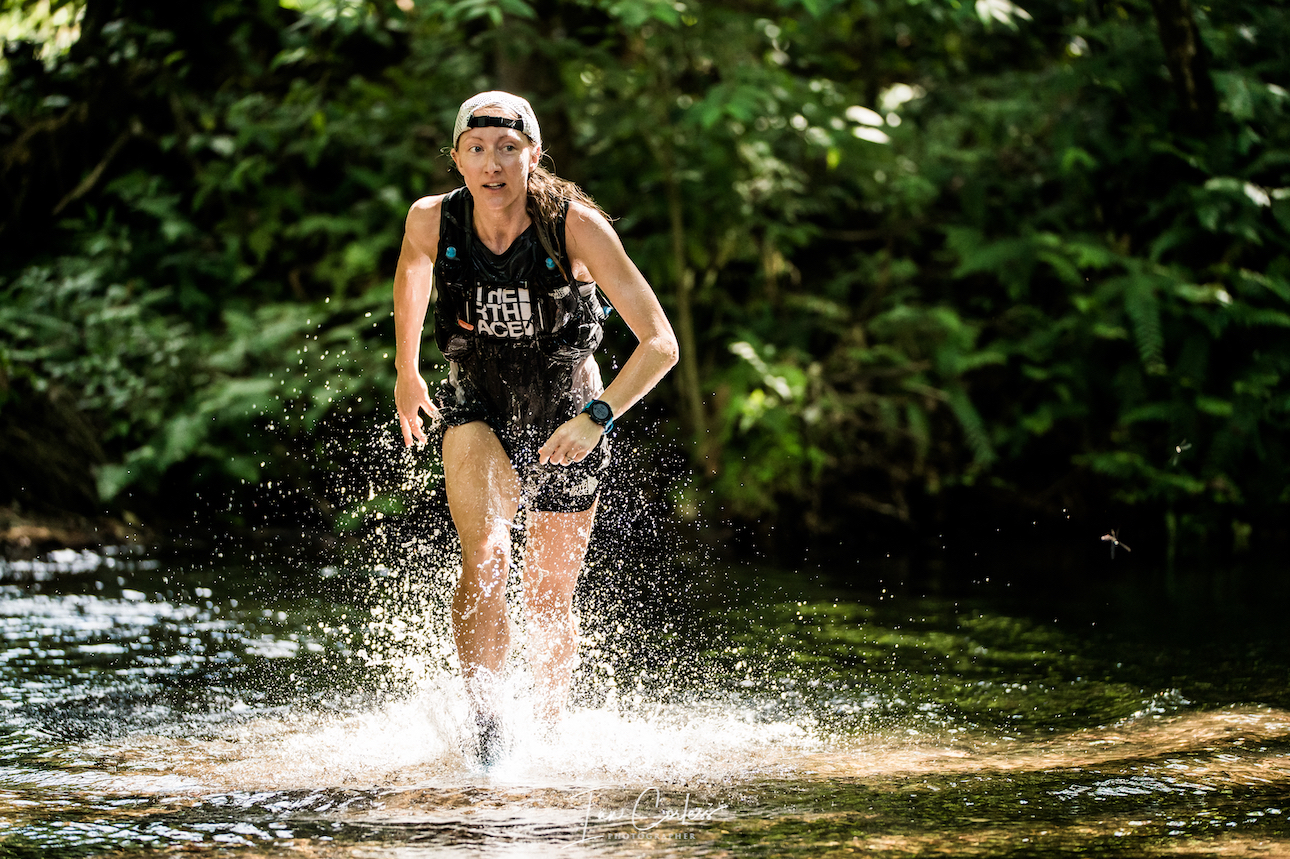
Kaytlyn Gerbin controlled the race from the front pushing as hard as required to win the stage but not at a pace that would risk a blow up and potential disaster. She looked calm, relaxed and happy throughout, her 6:02:52 securing a huge margin over the competition with just one day to go!
Ashton Keck Keck who ran a solid day 1 proved to be the revelation of the day running the fire roads hard and finishing just under 12-minutes behind Gerbin. Lying in 4th place, over 1-hour behind Abelone Lyng, the question mark was; how much time could she take back?
Abelone Lyng arrived at the water crossing in 3rd place and all looked good. However, the reality was far different. Suffering from severe stomach pains, Lyng struggled through the aid station, gritted her teeth and pushed to the line. “It was just terrible, I had pain in my stomach, my legs and my back. The heat was fine but I was just shutting down.” Lyng eventually would finish the stage in 5th (7:12:54) after walking pretty much all the last 9km and in the process allowing Keck Keck to close the gap on her 3rd GC to less than 9-minutes.
“At this stage I can’t think of tomorrow. I need to hydrate and eat,” said Lyng. “Today has wiped me out, I will finish tomorrow, even if I need to crawl!”
Natalia Lòpez Arrieta finished 3rd on the stage in 6:46:44 confirming her 2nd place on GC and Viviana Piedra Solano finished 4th in 6:53:43.
Stage 6 tomorrow is the victory loop starting and concluding in Drakes Bay over 23km.
Ranking:
Men:
Cody Lind 4:35:37
Eick Agüero 4:53:55
Andy Symonds 5:04:21
Women:
Kaytlyn Gerbin 5:08:29
Natalia López Arrieta 5:33:59
Vivian Piedra Solano 6:08:23
Overall:
Men:
Cody Lind 20:31:08
Erick Agüero 20:49:55
Andy Symonds 21:04:25
Women:
Kaytlyn Gerbin 25:04:47
Natalia López Arrieta 26:59:37
Abelone Lyng 30:11:46
Please support this website. I believe everyone deserves to read quality, independent and factual articles – that’s why this website is open to all. Free press has never been so vital. I hope I can keep providing independent articles with your help. Any contribution, however big or small, is so valuable to help finance regular content. Please support me on Patreon HERE.
The Coastal Challenge, Costa Rica’s number one multi-day race moved to stage 2 after the runners had a good nights sleep near the Savegre River in a purpose built campsite.
The heat of day 1 had taken its toll with runners retiring to sleep soon after dinner at 1900 hours. It was a hot night with little air and the 0330 wake up call came all too early for many. Breakfast at 0400 and then with the arrival of the sun, runners departed for 40.2km.
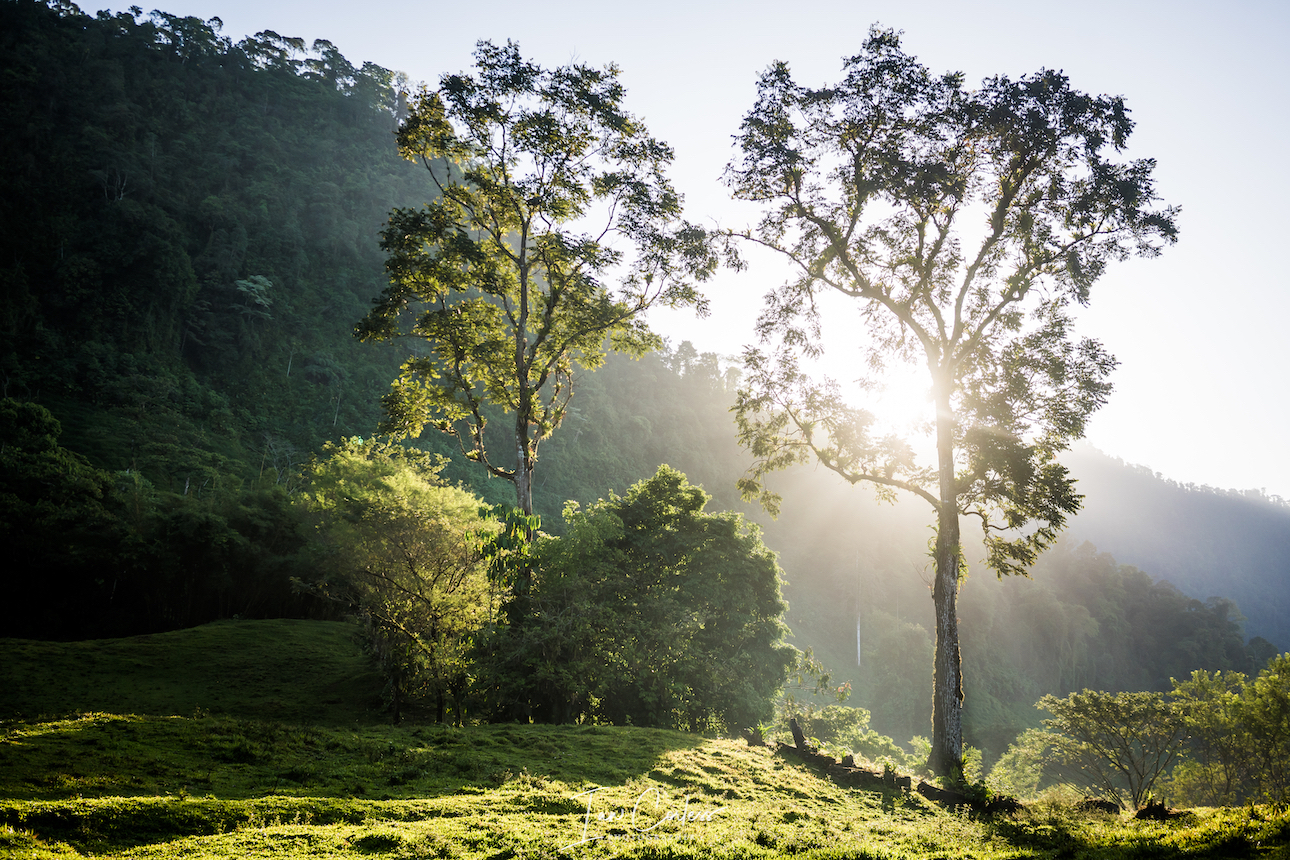
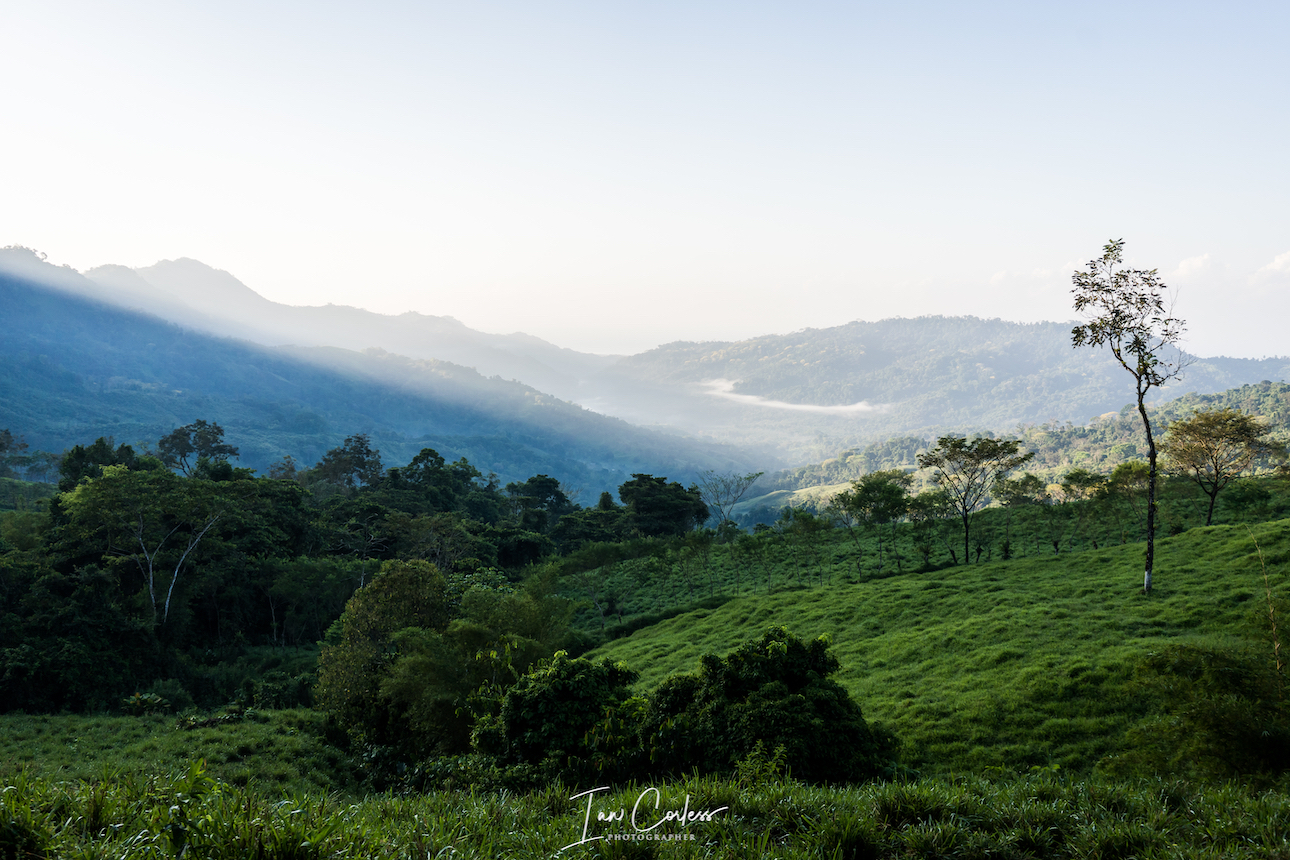
The early morning sun was magnificent and the Costa Rican landscape glowed as the rays illuminated the landscape.
The day started with almost a disaster with many of the top men, including all the top-4 contenders going off course with women leader, Kaytlyn Gerbin. They lost over 15-minutes and what followed was a hard chase into the long first climb of the day.
The men’s race came back together with race leader, Mauricio Mendez catching ErickAgüero who had initially gone wrong, realised his mistake early and turned back. Cody Lind and Andy Symonds chased with Scott Maguire running on his own further back.
For Kaytlyn, it was over 2-hours before she finally caught all the women, the 2nd placed woman on GC being Natalia López Arrieta.
With order resumed at the front, the race could continue as normal over a very tough course. Relentless fire road descents making the going hard both physically and mentally. Mendez finally made a move around CP3 and pulled away from Agüero while Lind and Symonds pursued together. They would stay this way all the way to the line. Maguire faded in the latter stages of the day as the heat and course took its toll, he finished 5th once again.
“I think I was a little too focussed and early on we went wrong… Crazy! We wasted at least 10-minutes. I was in a group and we all backtracked. It was 10km before I caught Erick with Scott. I was then running alone with Rick to CP3 and then I made a move. I was feeling good, my legs were tired and the heat did not seem as hot as day 1. I was really happy to get a 2nd stage victory, but I need to be smart for day 3, I know it will be tough, I have lots to learn!” – Mauricio Mendez
Once Gerbin had hold of the front of the race she extended the gap and her lead. She looked strong, focussed and relentless for the pursuit of the line and a stage 2 victory. Behind Arrieta once again ran strong for 2nd and Norway’s Abelone Lyng entered into a battle with TCC regular and past woman champion, Veronica Bravo. At the final two water crossings, Lyng lead Vero but the gap at best was only a minute. Lyng fought hard and finished 3rd ahead of Bravo’s 4th. Ashton Keck Keck who placed 3rd on tase 1 finished 6th in 5:32:21.
“Veronica caught me and she looked strong but on the final beach sections I pushed hard and caught her again,” said Lyng. “I wanted to be finished and Veronica was looking tired so I pushed hard. It was a tough race to finish a long day but I am happy with the result. I have been worried about the heat but my adaptation seems to have worked, it is very hot but I am feeling good, that makes me very happy.”
Ranking:
Men:
Mauricio Mendez 3:50:48 – Leader on GC
Erick Agüero 3:53:58
Andy Symonds/ Cody Lind 3:56:16
Women:
Kaytlyn Gerbin 4:33:17 – Leader on GC
Natalia López Arrieta 4:44:57
Abelone Lyng 5:12:20
Stage 3 of #TCC2020 will depart with sunrise once again, ahead 47.5km to Marino Ballena. The ‘Adventure’ category will run 12.7km starting from aid station 2.
Please support this website. I believe everyone deserves to read quality, independent and factual articles – that’s why this website is open to all. Free press has never been so vital. I hope I can keep providing independent articles with your help. Any contribution, however big or small, is so valuable to help finance regular content. Please support me on Patreon HERE.
Episode 176 of Talk Ultra brings you an interview with Andy Symonds about UTMB. We also talk with Shane Benzie from Running Reborn about Sub2. Speedgoat is back to co-host and we discuss The Warriors Ultra Run.
*****
Talk Ultra is now on Tunein – just another way to make the show available for those who prefer not to use iTunes – HERE You can download the Tunein APP HERE
Talk Ultra needs your help!
We have set up a Patreon page and we are offering some great benefits for Patrons… you can even join us on the show! This is the easiest way to support Talk Ultra and help us continue to create!
Many thanks to our Patrons who have helped via PATREON
On September 21st, over 30 ultrarunners, dressed in retro gang attire, travelled to New York City to participate in first-ever ‘The Warriors UltraRun’, an utterly unique race that stands to become one of the most unusual and unexpected events in the sport. Held in the middle of the night, this neon-drenched, 28-mile ultra took runners from the Bronx to Coney Island ̶ and through two subway stations ̶ recreating the escape route featured in the iconic 1979 cult film by Walter Hill. – https://thewarriorsultra.com
Please support Talk Ultra by becoming a Patron at www.patreon.com/talkultra and THANKS to all our Patrons who support us. Rand Haley and Simon Darmody get a mention on the show here for ‘Becoming 100k Runners’ with a high-tier Patronage.
The all new SCOTT Kinabalu RC 2.0 is built for SPEED.
Run faster on rolling trails, forests and parks with Its innovative traction design.
Hybrid Traction – Kinetic Foam – Internal Fit System
Get ya sunglasses out, the new SCOTT KINABALU RC 2.0 is here! Boy are these shoes bright. Of course, the colour will divide opinion, some will love the look, and some will hate, they well be a Marmite shoe, but ultimately for me, it’s only a colour. Any good trail shoe should be covered in mud in a couple of runs, and then the shoe really takes on character.
Scott since 2012 have really made huge progress with their run shoes, in particular, the biggest transformations have come in the last 4-years with the ever-changing development of the ‘Kinabalu’ shoe.
This development has also gone in line with the ‘Black and Yellow’ apparel look and the ‘Traction Matters’ tagline.
I have to say, the ‘look’ of Scott on the trail is one of the best in my opinion. It’s classy, desirable and completely identifiable – I see black and yellow, and I know it is Scott.
The latest addition the line-up is the SCOTT KINABALU RC 2.0.
It’s easy to see the development of ‘this’ model if one looks at the last 2-years of Scott’s shoe development. The ‘RC’ shoe concept has become hugely popular and I have to say, this latest incarnation really is a highlight.
The RC range is roughly broken down to four categories:
Mountain Speed
Mountain Ultra
Trail Speed
Road Speed
THE SHOE
Bold, brash and loud, Scott are making a statement here and quite simply, this shoe will be immediately identifiable on the trail. There is no hiding. If you are going to stand out like this, you better have the ‘goods’ to back up the looks. The SCOTT KINABALU RC 2.0 does not disappoint.
Scott have not always made the lightest shoes; this shoe is a welcome departure weighing 260g for a UK9.5. Sizing is true to size, to clarify, I always use UK9.5 and this should allow a thumb nail of space above my big toe – the RC 2.0 is perfect.
The toe box has room and allows toe splay without compromising foot hold, this is particularly noticeable when running technical trail.
The outsole has the now classic RC look which was specifically developed by Scott and their athletes. The outsole has lugs that designed for trail running be that on dirt trail, single-track, gravel, grass or rock in dry and wet conditions. However, the outsole is not aggressive enough for muddy conditions.
The upper is seamless and is noticeably a departure from other RC editions that Scott have produced. The upper is lighter with more breathability. There is reinforced section to add structure to the shoe and allow a firm hold. The toe box has a good bumper for rocky and gnarly conditions and will provide adequate protection in most scenarios. The heel box is cushioned, holds the foot well. The tongue is ‘free’ and does not have a sock-liner fit. That is a disappointment for me – Integrated tongues nearly always provide me with a much better feeling and more secure hold. Having said this, the RC 2.0 holds my foot really well. Lacing is pretty standard, nothing new here and no real surprises. The cushioning of the shoe is notable. I really feel comfort in these shoes without losing feel for the ground and the shoes have ‘life,’ something that was missing at times in previous Scott shoes. Drop is 3mm so designed for an efficient runner.
In a nutshell, this is Scott’s best shoe so far.
IN USE
The shoe has speed written all over it, but it is not at the expense of comfort. It’s a trail shoe that would work amazingly well on any run when conditions are not too muddy. The outsole has grip but it’s classic ‘trail grip’ and not UK mud grip – for example.
RC 2.0 will also be a fantastic mountain running shoe, especially in skyrunning (for example) when the transition from trail and rock is constant and of course, snow or ice may make an appearance.
One noticeable feature was how well the RC 2.0 feels on the road. It’s too early to say what impact on the outsole road running would have, but in regard to comfort, I had no issues. I am sure Scott would not recommend the RC 2.0 as a road running shoe, but ‘road sections’ can appear in any run, it’s good to know that comfort is there. The Kinetic Foam kicks in here.
There is little not to like about the RC 2.0 and for sure, I would say that past Scott RC users are going to love this shoe – it’s a lighter, faster, cushioned and more responsive shoe than previous incarnations. If you are a Salomon Sense fan and are looking for a change, I would immediately recommend trying out the Kinabalu RC 2.0. The Salomon and Scott have very different feels, but I draw comparisons. Notably, those who wanted to use a ‘Sense’ but found them too narrow will be pleased with the RC 2.0’s wider toe box.
Scott say, “We recommend it for any sort of speed workouts, fast running sessions, and non-technical mountain races up to marathon distance.”
HOW DO THEY FEEL
Well, light! That was my first reaction, particularly after testing and using previous Scott shoes. I was immediately impressed by the feel the shoes gave, even on a first run. I had a cushioned ride but still with a real feel for the ground. The grip is spot on in wet and dry conditions. I had no issues at all other than being caught on a very muddy steep hill after heavy rain, then, I was sliding all over the place. No surprise really as the lugs are just not long enough.
There are little negatives with the RC 2.0, but I did have two points of question. The lacing holes for me feel as though they could have been spaced better? I actually think an additional eyelet would have been beneficial. It’s a personal thing. Also, on my right foot I found that I constantly had a slight tight spot when I tied my laces. I tried many configurations and options but could not eradicate it? I didn’t have this with my left foot, so, I should add here that this maybe more to do with my right foot than the shoe. Just worth noting.
CONCLUSION
This is Scott’s best shoe so far in my opinion. I have seen and witnessed the evolution of ‘Kinabalu’ and ‘RC’ over the past years and although they always came close to greatness, there was always just a little missing. With the RC 2.0 the main points of:
Comfort
Lightness
Traction
Feel
Are all there and I can ask no more from a shoe.
This is a fast shoe and depending on the runner and ability, the RC 2.0 is great for a 5km blast, a classic technical skyrunning race or a trail race.
“We started 4 years ago up high in the mountains, designing shoes to move fast over technical terrain, and the Supertrac RC was born. Then we stayed on the same mountainous environment but to run at a slower pace and for much longer. The Supertrac Ultra RC was created to deliver more comfort, protection and cushioning than its older sister. This year, we’re coming down from our mountains with the same approach. Start with a shoe designed to make you tackle more rolling and hard packed trails at faster speed. Whether it’s on flatter terrain or for mountain running races where trails are often mixed with road, Sierre Zinal being the perfect illustration of that hybrid terrain, the Kinabalu RC 2.0 will deliver.”
It’s a really versatile shoe and one thing is for sure, with that flu yellow look, it’s going to be really easy to see who is using the Kinabalu RC 2.0 in 2019 and beyond!
Episode 158 of Talk Ultra and we bring you three interviews from the Monte Rosa Skymarathon – Emelie Forsberg talks about placing 3rd overall with Kilian Jornet and setting their FKT for women. Andy Symonds talks about partnering Tom Owens and Hillary Gerardi was one half of the ladies winning team, her partner was Holly Page. We also bring you a full and in-depth interview with Joe Grant about his unsupported Nolans 14 FKT record.
*****
Talk Ultra is now on Tunein- just another way to make the show available for those who prefer not to use iTunes – HERE You can download the Tunein APP HERE
Talk Ultra needs your help!
We have set up a Patreon page and we are offering some great benefits for Patrons… you can even join us on the show! This is the easiest way to support Talk Ultra and help us continue to create!
Many thanks to our Patrons who have helped via PATREON
Start with apology… we couldn’t get Magdalena Boulet for the show, but, we hope to have her on the next show.
WESTERN STATES
Well, Jim Walmsley finally did it and what a stunning and well deserved victory and course record. It took three attempts but finally the patience paid off and he nailed it to perfection. The un-stoppable Francois d’Haene placed 2nd – he is a class act but just didn’t have the speed of Walmsley. Mark Hammond was 3rd. 14:30:04 th new CR, 15:54 for 2nd and 16:08:59 for 3rd. Notably Ian Sharman 4th in 16:23 his 9th top-10 WSER finish.
Courney Dewaulter IS the lady of the moment – wow, she was our favorite and she fulfilled expectations. Kathy Gerbin was 2nd in 18:40:19. Huge shout out to Lucy Bartholomew, I have known this lady for many year’s and always knew that she would elevate herself yo a new level. Over the last three years she has grown, matured and become one seriously driven individual. Mark my words, she is a star of the future. Her time 18:59:45.
After 25 years, Skyrunning returned to its home following in the footsteps if Marino Giacometti’s pioneering days. The legendary race was re-created racing from Alagna, to the summit of Monte Rosa and back to the town of Alagna. It was an epic and monumental day in the mountains and for sure, it has once again illuminated a new spark in the pure essence and roots of Skyrunning.
*****
00:33:19 Interview with EMELIE FORSBERG
*****
01:11:08 Interview with ANDY SYMONDS
*****
01:42:53 Interview with HILLARY GERARDI
*****
MONT BLANC MARATHON
A week after Monte Rosa and Kilian goes and proves who really is the boss placing Marc Lauenstein and Stian Angermund Vik in 2nd and 3rd – It was a top quality line up! Kilian ran 3:54 ahead of 3:58 and 4:00.
Ruth Croft beat Ida Nilsson 4:37 to 4:39. In 3rd was Eli Gordon.
BUFF EPIC TRAIL 42km
Marc Pinsach was 1st ahead of Finlay Wild and Miguel Cabellro – 4:23, 4:29 and 4:33
Holly Page dominated the ladies race in 5:03 and of Oihana Azkorbebeitia in 5:27 with Mercedes Pila 3rd.
NOLANS 14
What a weekend for the 14ers, Alex Nichols set a supported record of 46:41 beating the previous best by Iker Karrera and Joe Grant set an unsupported record of 49:38
Importantly, go to iTunes and subscribe so that you automatically get our show when it’s released we are also available on Stitcher for iOS, Android and Web Player and now Tunein.
Please support Talk Ultra by becoming a Patron at www.patreon.com/talkultra and THANKS to all our Patrons who support us. Rand Haley and Simon Darmody get a mention on the show here for ‘Becoming 100k Runners’ with a high-tier Patronage.


 If you wanted a shoe just for mud, then a more aggressive outsole would be better. But the Supertrac RC 2 quite rightly wants to provide a great all-rounder that handles mud, technical terrain and can still be comfortable when cruising some single-track.


 Rock eventually becomes trail and before you know it, you will be at the bottom and next to the Gjende river. It is now possible to get water if needed?