I first got a hold of the original TERRAULTRA 2-years ago, the G260. It was a groundbreaking shoe for inov-8 not only introducing a zero-drop shoe to the brands line-up but also paving the way for Graphene technology.
A great deal has happened in the past 2-years with Graphene appearing in more and more inov-8 shoes but interestingly no other zero drop shoes have been added to the line-up.
The TERRAULTRA G260 was warmly welcomed, particularly by any trail runner using Altra who now had a zero-drop alternative now available with a brand who really know how to make off-road shoes from a long history in the fells of the UK.
Now, the G260 has been updated and we welcome the TERRAULTRA G270.
On first glance, it could look like the same shoe. That green colour is somewhat distinctive! However, one does not need to look longer to see some immediate significant changes.
The upper, the lacing, the outsole and the cushioning all sort of look the same but they are not.
In the words on inov-8:
Graphene outsole has 4mm deep cleats all now armed with dispersion channels and rubber dimples to give better grip on wet and dry trails. Cleats are repositioned in key areas and flex grooves fine-tuned for agile sticky traction that lasts longer.
Cushioning is a new POWERFLOW MAX that has been increased by 3mm for a plush ride, improved cushioning and double the durability. A BOOMERANG insole apparently will increase energy return by 20 and 40% respectively over the previous model.
The upper has ADAPTERFIT which adjusts to the foot and the use of stronger materials will add to durability and protection.
The Shoe
With a fit scale of 5, this is as wide as you can go in an inov-8 shoe, So, toe splay and room at the front end comes no better.
Cushioning is 12mm front and rear providing a zero drop. Using POWERFLOW MAX.
The footbed is 6mm and the lug depth of the outsole is 4mm made of Graphene grip.
It G270 has the necessary points to attach a trail gaiter.
At 270g (UK8) the new TERRAULTRA is 10g heavier than the previous version.
Sizing is true to size BUT take into consideration the wider toe box, maybe (?) a half-size smaller would be better. I always use EU44/ UK9.5 and these were ideal for me.
FIRST IMPRESSIONS
The G270 is light and it’s clear to see some of the immediate improvements over the previous version. The lacing is flatter, the tongue is different, the upper is different, the toe box protection is increased, and the shoes have the flagship Graphene outsole that looks very different.
Zero drop is NOT for everyone, so, what makes the G270 great for some also make the G270 potentially unusable for others. This is not a negative comment, it’s just a heads-up to say, that if you have not used zero drop before, don’t be tempted to get the G270 and start racking miles up… You will almost certainly get sore Achilles, calf and potentially get injured. Like barefoot running, zero drop running needs to be learnt and the body needs to adapt. Typically, 6-months would be a good transition period. However, some zero-drop running (initially short periods) is great for improving run form, so, the G270 could be a nice new weapon in your shoe line-up?
If zero drop is your thing, then you will already have a big smile on your face.
Following on from the G260, the G270 has a wide toe box that echoes what brands like Altra have been doing for years. Toe splay is king and the G270 has loads of room for that. I had issues with the G260 in that I always felt I had too much room, the room at the front was made worse by the upper and lacing system not holding my foot how I wanted to compensate for the additional width, space and foot movement.
Slipping the G270 on I was initially worried, the space in the toe box was as much if not a little more than the previous version. However, as soon as I adjusted and tightened the laces, I immediately noticed significant changes. The tongue was a much better fit. The lacing was great improved, and I could really adjust the tension from top to bottom. The ADAPTERFIT pulled in holding my foot. Walking around immediately felt 100% better than the G260. My foot was being held reassuringly.
The upper is far more breathable that the G260.
The cushioning and bounce were notable and the outsole at this stage left me with many questions.
IN USE
The G260 was a little lifeless and felt flat. The G270 immediately felt different with a couple of miles on the road before hitting the trails. So, this was already a great improvement.
With META-FLEX at the front, the propulsive phase felt really good no doubt added to with the insole that inov-8 say increases energy return by 40%. I definitely felt some bounce, but 40% more?
The cushioning was noticeable, particularly over the G260 as was the zero drop. I use zero drop shoes occasionally, but always prefer 4/5mm for faster and more technical running and if going long, 8mm works perfect for me. So, considering the G270 is designed for long-distance running, zero drop would be a challenge for me.
The wide toe box still feels mega wide (too wide for me) BUT the lacing and ADAPTERFIT allowed me to compensate for the room at the front by tightening appropriately. However, I did fine once or twice I over-tightened the laces only having to stop and loosen them a little.
The transition from road to gravel trail was seamless and comfortable. The TERRAULTRA is an out and out ultra-shoe designed for trails that are more groomed, say Western States in the USA or UTMB in Europe. So hard packed single-track felt really good in the G270, equally rocky and stoney ground felt good.
Running up hill surprised me. The META-FLEX allowed for great flexibility and propulsion, but it was the outsole that really gripped. A massive improvement over the G260.
I have to say, I have not always been a fan with the addition of Graphene. At times, I felt it compromised the sticky outsoles and made them less grippy, albeit providing longer life. But on many occasions, for me particularly, grip is king and if it is compromised, I am not happy.
Here, in the G270 there was noticeable difference, and this was coming from just 4mm lugs.
The test of course would really come when I threw in some mud and wet rock.
Gladly, mud (loads of it) rocks, tree routes, climbs, descents, wooden planks, forests and yes, a little fire trail all make up my daily and local runs. So, throwing the G270 in the thick of things was easy to do. And yes, I was being unfair as I actively searched out and aimed for steep rocks with water on them and I aimed for every puddle and sloppy mud I could.
I was impressed.
At times, I would think to myself, almost wanting the G270 outsole to fail;
‘This will get them… wait for the slip!’
But the slip never came, especially on dry and wet rock. On a 3-hour run, as the minutes clicked by, I started to relax more and more and eventually stopped worrying and asking;
‘Will the G270 grip here?’
They did, at all times provide me with the grip I required.
Surprisingly, in really sloppy mud, I did not slip or move as I had expected. Partially due to the fact that I did apply the brakes a little and respect the conditions.
Technical trail is where the G270 shows some flaws. The wider toe box lacks precision, allows one’s toes to move and therefore I felt that there was just ‘too much’ shoe to navigate between rocks, roots, stones and a plethora of other obstacles. But of course, I am being unfair! The G270 is designed for less technical trails, long hours and all-day comfort – that they do really well!
The shoes are responsive and do work well when running fast. However, the wide toe box, zero drop and cushioning do make them feel a little like a saloon car… Plenty of room, comfy seats, and can get the miles done. But I craved a more performance car at times with more precision, tighter handling and a little more fire and daring, especially when coming of road, fire trails or single-track.
The cushioning was plush and considering it is only 12mm, it felt like more. Especially noticeable extra comfort over the 9mm G260 which also was a little hard and lifeless. One thing to note, I found on tree routes and some stones, I could feel them in the bottom of my foot, so protection from obstacles is minimal. The toe box though has a good bumper and that worked really well.
The heel box was noticeably secure on the flat and going uphill, I had little to no slippage.
SUMMARY
Damian Hall just ran 260-miles on the Pennine Way in the G270 and set a new FKT, so, that gives some indication of the intended use of this shoe. Having said that, the Pennine Way is not all single-track and wonderful cruising trail, so, the shoe can handle the rough stuff too.
I was impressed by how versatile the 4mm Graphene outsole worked. There has been some significant improvement over the G260 and in the Graphene outsole in general.
The upper, lacing and tongue now really hold the foot and that for me is essential, especially with such a wide toe box. The toe box is one of the key selling points of this shoe. It allows toe splay, plenty of room and flexibility for a foot to swell wider with accumulated miles.
The cushioning increased from 9mm (G260) to 12mm for the G270 is noticeable. More importantly, the G270 now has life, the G260 felt a little dead.
CONCLUSION
The G270 is a marked improvement over the G260, so, if you liked the previous model you are going to love the latest incarnation.
Zero drop and a wide toe box will be exactly what some people are looking for and they will have a big smile on their face. For me, and this of course is very personal, I can’t run in zero for hours and hours and I feel that the toe box is a little roomier than it needs to be.
So, imagine a Trail Talon 290 made like a TERRAULTRA G270 – slightly narrower toe box (4 fit) 8mm drop; 11mm and 19mm cushioning and this Graphene outsole – that would be a winning shoe IMO. (inov-8 take note)
The G270 is a winning shoe and all packaged perfectly for ultra-distance runner who needs grip, cushioning and comfort for the long-haul out on the trails. It would even make a great road shoe if required.
For multi-day adventures, such as Marathon des Sables, just like the Trail Talon, the G270 would be really excellent.
If technical trail and mud is your thing, this is not the best shoe for that, however, it can handle it remarkably well, so, if you only wanted one trail shoe (with zero drop) to do all, the G270 would be ideal. By contrast, if you wanted a one-stop trail shoe with 8mm drop, I recommend the Trail Talon 290.
Please support this website. I believe everyone deserves to read quality, independent and factual articles – that’s why this website is open to all. Free press has never been so vital. I hope I can keep providing independent articles with your help. Any contribution, however big or small, is so valuable to help finance regular content. Please support me on Patreon HERE.
Fastpacking is all the rage at the moment. Runners and hikers all over the world are heading off for mini or extended multi-day adventures in a semi of fully self-sufficient manner.
I wrote an intro to Fastpacking HERE and then followed up with a more in-depth approach to Fastpacking Light HERE.
Due to requests, I have now put a video together talking through my pack and the items I use. I did forget to mention take a map and compass, so, add that to the list!
Hope you find the information useful and I know you will have your own tricks and weight saving secrets, so, let me know what they are….
Need help with packing? Lighterpack is great tool for collating information and monitoring weight. HERE is mine based on contents in the video article.
You can view them below.
In summary, pack with food for 1-day and night inc 600ml water with tent, summer sleeping bag, sleeping mat and additional warm layers 4362g.
Please support this website. I believe everyone deserves to read quality, independent and factual articles – that’s why this website is open to all. Free press has never been so vital. I hope I can keep providing independent articles with your help. Any contribution, however big or small, is so valuable to help finance regular content. Please support me on Patreon HERE.
Robust, solid, great looking, aggressive outsole, Fitlock, good lacing, toe protection, red and black and the iRock 3 follows on from the iRock 2 with another winning shoe.
Quite simply, VJ Sport make the best outsole for trail and mountain running of any shoes I have used. They are what I compare all other shoes to, and still, several years on from testing the original iRock, no shoes have come close to giving the grip of a VJ.
The IRock was followed with the XTRM (review HERE) and then the MAXx (review HERE). Quite simply, when you line the iRock, XTRM and MAXx you have three shoes that cover all the needs from soft, sloppy and muddy trails to the harder, longer, more rocky trails of a longer trail and ultra-race. Be it fell running, skyrunning or ultra-trail, VJ have with the iRock, XTRM and the MAXx the perfect shoes for each terrain.
IROCK3
The IROCK 3 is a precision fit shoe with a narrow toe box. They are designed to hold and compress the foot so that there is no movement when running. Think of them as ballet shoes. You squeeze your feet in, benefit from the precision and hold when running and when done, you take your foot out and let it relax again. Of course, for some, they IROCK will just be too narrow. VJ list the fit as a 2. For comparison, the XTRM is a 2 maybe 3? and the MAXx a 4.
14mm cushioning at the rear and 8mm at the front gives a 6mm drop.
The outsole (Superior Contact -kumipohja) is the hero of the shoe with 6mm lugs of super grippy butyl that works like a dream in wet or dry conditions.
Weighing 240g (UK8) the shoes are like Formula 1 cars for the trails and as such, they are not a shoe for everyday outings.
The upper is bullet proof with a mixture of DuPont Kevlar and Nylon and the other notable element of the VJ shoe, be that IROCK, XTRM or MAXx is the Fitlock which holds the foot like no other shoe. In addition there are overlays stitched on to add additional support.
Toe box is reinforced with a solid bumper. The heel area is minimally padded but fits like a glove and holds the foot secure.
Lacing is very secure, and the tongue is reinforced and made of a very durable and flexible material.
Solid build, aggressive outsole and great looks. This is a shoe for shorter outings, racing or training, when grip is paramount, especially in soft-ground and snow. It’s a favourite for orienteers, skyrunning and OCR.
IN USE
So, what is different from the IROCK 2?
Improved toe protection, lighter Fitlock system and improved laces.
The IROCK3 is not a jack of all trades, this shoe has a specific purpose.
I wrote about the IROCK 2 – “The easiest way to explain this is by looking at say, Formula 1. You wouldn’t go to Monaco Grand Prix and race in an MPV car, a saloon car or a bus, you’d have a very specific vehicle, low to the ground with incredible speed and awesome agility with incredible grip. The IROCK2 is the Formula 1 for fell and mountain running.”
That stands true today and why VJ made the XTRM and MAXx to offer more comfort and less aggressive grip.
Road is not a friend of the IROCK, or should I say, the outsole. Too much road between trails will wear that soft rubber down quickly, so, it is best avoided as much as possible.
Needless to say, VJ’s hashtag of #bestgripontheplanet is not a lie. VJ really do offer the best grip and the IROCK is flawless in soft ground, on rocky trails and in the mountains. It makes no difference if wet or dry, they just grip like no other shoe. In mud, particularly soft mud, they dig in like football boots offering the best grip I have encountered.
Fit is precision. Once laced up and tightened. You feel the Fitlock hold the middle of the foot, add support to the arch and when switching direction on the trail, there are no question marks or doubts. The IROCK holds the foot rock solid.
At the front, the toe box is precision, but it is not super, super tight. I can happily run in the IROCK for multiple hours in comfort.
Feel for the ground is excellent and of course, the cushioning is relatively minimal keeping that all important contact with the surface so that one can respond to the terrain. Worth noting, this shoe is designed for soft ground, so, much of the cushioning can actually come from the ground that you are running on too.
In many respects, I am surprised the IROCK is 6mm drop. It works for me and I am happy, however, for a shoe designed to be fast and low, I am surprised it is not 4mm?
The fit is neutral and true to size. I am a EU44 and the IROCK is perfect in that size.
On the trail I feel the Fitlock and heel box working together holding the foot, be that in soft mud or running up rocks. The grip is superb.
Slabs of wet rock even covered in water do not make me question if the IROCK will be secure. I just run as normal and let the outsole do the work.
The combination of durability, fit, cushioning, precision and unmatched grip confirms what I said in 2017 about the IROCK 2, they are the best fell/ mountain and short distance skyrunning shoes out there!
Mud, rock, fell in wet or dry conditions, the IROCK 3 is the most complete mountain shoe I have used over shorter distances.
SUMMARY
VJ Sport have been making secret weapons for the orienteering world for many years, but now the secret is out.
VJ are now seen at OCR races, Skyrunning, fell races and with the addition of the MAXx, we are even seeing them at ultra-trail.
If grip, foothold, precision and light weight are priorities for soft, muddy and wet ground, the IROCK 3 is for you!
Please support this website. I believe everyone deserves to read quality, independent and factual articles – that’s why this website is open to all. Free press has never been so vital. I hope I can keep providing independent articles with your help. Any contribution, however big or small, is so valuable to help finance regular content. Please support me on Patreon HERE.
Better wind and weather protection than a bivvy bag, the Nemo Hornet 1P is an ultralight double-wall tent that only weighs 731g. Ideal for solo fastpacking or bikepacking!
Sized for one person, the Hornet 1P will fit two people, yes it will be snug, but two people definitely can sleep with compromised comfort in this tent.
Supplied with a single Y shaped pole (DAC poles) of supreme quality alloy, connection to the inner tent is made at three points, two on the corners of the top (head) end and one in the middle of the bottom (foot) end of the tent.
While these three arms are enough to hold up the inner tent in free standing scenario, you still need to stake out the four corners of the inner tent to stretch it out and make the full living space.
Top tip: Make sure you stake at least one corner first, especially in wind, before inserting the poles.
The head end of the tent connects with a ‘ball and socket’ (called Jake’s foot`) connection which is a clever design, the foot end is a simple metal protected hole. At the top of the tent, Nemo use a ‘Flybar’ which creates additional headspace with minimal weight.
The inner uses ’No-See-Um-Mesh’ on the sides for privacy. On the upper the mesh is black, so, for those warm and barmy nights when you can pitch inner only, lie back and gaze at the stars in comfort.
Join our Multi-Day Training Camp in Lanzarote HERE
A mesh pocket on the inner, near the door is ideal for wallet, glasses, phone or other essential items. One overhead pocket is designed for a headlamp and it uses a white semi-translucent fabric that diffuses light to create a soft lighting. Of all the solo tents I have looked at and used, headroom is excellent and sitting up relaxing or cooking is a pleasure. It is a roomy solo tent and will accommodate two for a cozy night!
There is one door, which opens into a vestibule providing excellent room and space to store your pack, extra gear and space to cook. The inner can also (optionally) connect to the fly on both sides of the tent to increase inner space. Ventilation is good due to the fly sitting high off the floor. A high bathtub protects from cold.
The rain fly is nylon ripstop 10D Sil (1200mm,) it is lightweight as one would expect and provides good privacy. The fly connects to the four staked corners of the inner tent and requires two additional tent pegs for the front vestibule and on the other side, the Hornet 1P is clever in reducing clutter and maximising tent pegs for dual use.
A central door zipper is protected against rain with a storm flap. Both the inner and outer door roll back and are secured with simple fastening systems.
Extra guylines are provided to secure the tent which secure to webbing loops that are attached to the tent. In windy weather, most definitely use them.
CONCLUSION
I am really impressed with the NEMO Hornet 1P. It’s a clever design, spacious, has loads of headroom and comfortable living space and all in a compact and lightweight package.
When weight and small volume are a priority, the Hornet comes highly recommended, especially for extended multi-day adventures. We can all compromise comfort for a night or two, but for extended trips, the Hornet’s living space and storage is a real plus.
Easy to set up, the Hornet is a real winner. However, it’s not perfect. The fly sits high off the ground which is great for ventilation and air flow, however, in bad weather, it will allow increased air flow and the tent is most certainly not as warm as others.
The fly and inner are just over 500g. That is incredible for a tent that offers this much living space. The pole system is simple and quick. The tent pegs provided are far too heavy for a tent of this nature and I can only assume that Nemo provide them because they are cheaper and that helps keep the cost down to the consumer. When you purchase the tent, make sure you get some lightweight tent pegs too.
731g for a solo tent is excellent and the NEMO Hornet 1P comes highly recommended.
*****
“For those looking for an ultralight shelter with greater volume, Hornet™ offers the ultimate in livability and comfort. Top shelf fabrics and a minimal pole structure shave every ounce possible, while our latest updates and new patent-pending Flybar™ volumizing clip add even more room without adding any weight.” – Nemo
Please support this website. I believe everyone deserves to read quality, independent and factual articles – that’s why this website is open to all. Free press has never been so vital. I hope I can keep providing independent articles with your help. Any contribution, however big or small, is so valuable to help finance regular content. Please support me on Patreon HERE.
Episode 192 – Has a great an interview with Kim Collison on his Lakeland 24hr FKT
*****
Talk Ultra is now on Tunein – just another way to make the show available for those who prefer not to use iTunes – HERE You can download the Tunein APP HERE
Talk Ultra needs your help!
We have set up a Patreon page and we are offering some great benefits for Patrons… you can even join us on the show! This is the easiest way to support Talk Ultra and help us continue to create!
Many thanks to our Patrons who have helped via PATREON
Asif Amirat in the UK is creating a stir with his 100-marathons in 100-days. Many have been questioning his runs and becoming very vocal on social media. I have reached out to Asif for an interview. At first he was cooperative, however, after I asked several probing questions, he blocked me on Facebook, Instagram and Twitter.
*****
RACES THAT WILL HAPPEN (tbc)
Montreux Trail Running Festival – Switzerland
Speedgoat 50k – USA
Fjallmaraton – Sweden
Rondane 100 – Norway
Pyrenees Stage Run – Spain (now postponed to 2021)
Marathon des Sables – Morocco
*****
INTERVIEW : KIM COLLISON
*****
Please listen to the INTERVIEWS – please follow the show
Hosted on ANCHOR (HERE) the INTERVIEWS will also be available to listen on many other players, including SPOTIFY (HERE).
TALK ULTRA podcast will be released as normal providing you long shows as it has always done with ideally two shows per month. The back catalogue will be released randomly via the INTERVIEWS and not chronologically.
Importantly, go to iTunes and subscribe so that you automatically get our show when it’s released we are also available on Stitcher for iOS, Android and Web Player and now Tunein. We are also on Spotify too.
Our web page at www.iancorless.com has all our links and back catalogue.
Please support Talk Ultra by becoming a Patron at www.patreon.com/talkultra and THANKS to all our Patrons who support us. Rand Haley and Simon Darmody get a mention on the show here for ‘Becoming 100k Runners’ with a high-tier Patronage.
My recent article on Fastpacking (here) gained a great deal of attention. In many respects, I am not surprised, I think mini or extended semi or selfi-sufficient journeys are extremely popular and only on the increase.
The above post was in-depth and provided an overview of options that are available to make a fastpack trip effective. In some cases, coffee being a prime example, I did not go with the lightest possibilities available. The main reason for that? Comfort usually comes with a little more weight.
After a recent fastpack trip (just one-night wild camping,) I posted a photo of my pack contents and it created some interest as the weight was 5.4kg including pack, food, water, tent and all my essential items.
I received countless messages for more information, so, here goes. A detailed breakdown and description of the items and why I use them or more importantly, why I take them! Gladly, some of the items I do not need to use but need to have, just in case.
Below is a video, in-depth, where I discuss all the items listed below.
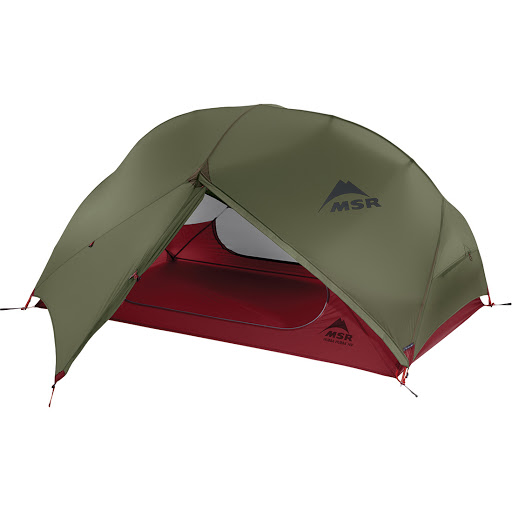
My go to tent is a MSR Hubba Hubba NX tent (here) which is 1600g which is 2-person tent. It has loads of space both in width and height, it has two access doors with room to store pack, shoes and an area to cook in if required. It is free-standing, can be pitched inner or outer only. Split between 2-people, it is 800g each.
Current favourite solo tent is the Nemo Hornet 1P (review HERE) which has loads of space and comfort and all coming in at 731g.
NEMO Hornet 1P
If I was solo fastpacking and wanted the lightest and smallest possible, I would change the tent to a Nordisk Lofoten 1 LW (here) which is arguably the lightest and smallest packing tent in the world (still with comfort and stability) weighing just 490g and is the size of a bottle of water, 11cm x 22cm. It’s a two-layer tent which still provides an area for gear storage, with a height of just 70cm, sitting space is compromised. However, if fast, light are priorities, this takes some beating. Also, you can use the 2-man inner inside the same fly-sheet, with obviously less storage option.
Do you need a 12-week and/ or 24-week Multi-Day Training Plan perfect for a multi-day adventure or a race like Marathon des Sables? They are designed to provide you with a structured weekly plan culminating in a target event.
View a sample week HEREfrom the 12-week plan. Purchase HERE. (£14.50 pw)
View a sample week HERE from the 24-week plan. Purchase HERE. (£12 pw)
Wearing:
I don’t add the clothes I am wearing to my overall fastpack weight, but it is worth looking at options and variables. I was surprised when comparing run shorts how weights varied. For example, I had shorts with an inner (like cycling shorts,) they weighed 157g, considerably heavier than my RAB Skyline.
RAB Skyline shorts – 96g
RAB Skyline Tee – 84g
Smartwool socks – 45g
Hat – 45g
Glasses – 30g
Buff – 36g
Scott Supertrac RC2 shoes – 290g
Pack:
inov-8 25ltr fastpack 619g – This is actually a prototype pack, specifically made for athletes on the inov-8 team. It’s a really great pack, one of the best I have used. It has a vest like fit, waist belt, comfortable strapping and loads of extra mesh pockets that make it a joy to use. I have recently encouraged inov-8 to bring this to production.
Pack Contents:
Rab Phantom Pull-on 90g – One of the lightest and smallest waterproof shells I have used.
RAB Phantom
Patagonia Micro Puff Vest (synthetic with ripstop Pertex Quantum) 162g – Synthetic filling but weight and small packing just like down. The perfect compromise. This warms the body and core and saves weight over a jacket. Obviously, you need to asses conditions, a jacket may be better. If so, I use a RAB Kaon which weighs 260g.
Patagonia Micro Puff Vest
RAB Hat 34g
RAB Gloves 60g
Icebreaker 175 leggings 140g – Merino providing warmth on the trail (if required) and warmth when stopping for the day and sleeping.
Icebreaker 175 top 150g
RAB Mythic Ultra 360 sleeping bag 606g – State of the art sleeping bag with groundbreaking technology. Two versions are available, and this is the warmer one. The Mythic Ultra 180 provides a saving of 200g (weight 400g) and is perfect for warmer weather fastpack and/ or warm sleepers.
RAB Mythic Ultra 360 sleeping bag
MSR Pocket Rocket Stove Kit 280g – Small, compact, lightweight and the gas canister can be stored inside. Perfect minimalist solution.
MSR Pocket Rocket Stove Kit
MSR Trailshot 140g – A small and lightweight water filter system that guarantees water that one can drink and cook with.
MSR Trailshot
Katadyn BeFree Water Filter bottle (0.6L) 59g – This is a 600ml soft-flask with water filter inside. It allows for minimal weight and the ability to get water anywhere on the trail and drink on the go.
Katadyn BeFree Water Filter bottle
MSR Mugmate Coffee/ Tea Filter 30g – An ingenious small coffee/ tea filter that provides a lightweight solution for the coffee addict. Just pop it into a cup!
MSR Mugmate
Gas canister 113g
Bivvy bag 151g – Great back up for added warmth should something unplanned happen.
Bivvy bag
Headtorch 46g – The Petzl e+LITE is one of the smallest and lightest around. Perfect when camping to provide light for reading and cooking. However, if you need light to run/ walk this is not the best option.
Petzl e+LITE
Garmin InReach mini 114g – I take this on all adventures. Ideal back-up and safety with an emergency button.
Garmin InReach mini
Mattress 300g* – Klymit V Ultralite SL (here) is full length, small pack size and very comfortable. *Photo is not the Klymit.
Pillow 50g – You can always use a dry bag with clothes inside as an alternative?
First Aid 101g – Simple system by Lifesystems in a waterproof bag.
Dry Bag 68g – I use a 30ltr and use it is a liner for the pack. I find it easier to push everything in one place.
Sea to Summit spoon 12g – Sea to Summit with a long handle designed so that you can eat out of dehydrated food packs.
GoalZero Flip10 charger 75g – Good enough for one, maybe two phone charges.
Food:
Firepot dehydrated meal 158g (per meal) – Dehydrated medals are a go-to solution for a meal when on the trail. Firepot have good calories, great taste and a good selection available.
Water 600g – This is the weight of water in the 600ml soft-flask.
Camera: (obviously optional)
Sony A9 with 35mm f2.8 pancake lens 800g – I am a photographer, so, this is my serious luxury item and it comes with a weight penalty.
GoPro Max 231g
SUMMARY
Travelling light is great fun. It allows you to move faster with less strain. However, it is essential you travel light for the conditions. Too light and you may well get in trouble. So be careful and attentive. Light does not mean you will be uncomfortable, but you must accept a compromise comes from being minimal.
In Scandinavia, Kvikk Lunsj is an ‘essential’ for the trail. The chocolate consists of four rectangular wafers covered in milk chocolate, with thinner layers of chocolate between the wafers in order to break the chocolate into pieces easier. The chocolate has been advertised as a “hiking chocolate”, and it is often associated with skiing trips in Norwegian culture. Freia began printing the well-known Fjellvettreglene (Norwegian: the mountain code) on the inside of the packaging.
There is much relevance to the points below and a great reminder for all.
1. Plan your trip and inform others about the route you have selected. Plan your trip based on the group’s abilities, and always include alternative options. Obtain current information about the area and the weather conditions. Listen to the advice of seasoned mountaineers where possible. Ensure you have sufficient knowledge and practical skills to complete this trip. Respect the natural environment. Plan ahead and do not leave any litter behind you. Arrange meeting points during the trip that don’t require mobile coverage or accurate timing. Is your planning sufficient to guarantee an enjoyable trip no matter what?
2. Adapt the planned routes according to ability and conditions. Assess the conditions continuously and adjust your plans accordingly. Respect the weather! Travelling with others is safer and means you will have someone to share your experiences with. If you’re travelling alone, exercise caution. Do not embark on a long trip without sufficient experience. You must be able to take care of yourself as well as the others in your group. Be considerate of other hikers. Make sure you have read The Right of Access and its requirements. Make sure your group maintains an open and direct line of communication at all times. Can you complete the trip under these conditions and with this group?
3. Pay attention to the weather and the avalanche warnings. Always check the weather forecast and avalanche warnings to see what impact they have on the area. Follow the advice and choose a gentler terrain when conditions are too demanding. Check the conditions on yr.no, storm.no and varsom.no. Monitor the development of the weather and avalanche conditions along the way. Bear in mind that plans may need to be adjusted.
4. Be prepared for bad weather and frost, even on short trips. Dress appropriately for the weather, and the terrain. Remember that the weather changes quickly in the mountains. Bring extra clothing, and the equipment your route and terrain requires. Extra food and drink can help save lives, if the trip takes longer than planned or you have to wait for help. Is your group equipped to deal with a sudden change in weather?
5. Bring the necessary equipment so you can help yourself and others. In the winter, you need a windsack/bivvy sack, sleeping pad, sleeping bag and a shovel so that you can spend the night outdoors if you have to. A windsack can save lives. Bring a high-visibility vest or a headlight, that will make it easier to find you if necessary. Bring a first aid kit so you can help yourself and others. Always use a transmitter/receiver and have an avalanche probe and a shovel if you are traveling in avalanche prone terrain. Pack smart! Packing lists for different tours can be found at ut.no. Mobile phones can be a useful tool but remember that they do not work in all situations and areas. If an accident occurs, alert the police at 112, go for help or try to notify someone with other means. Are you able to take care of yourself and help others?
6. Choose safe routes. Recognize avalanche terrain and unsafe ice. Take an active decision to avoid terrain that is prone to avalanches and plan your route well. Be aware that avalanches can start in drops higher than five meters and steeper than 30 degrees. Even if you walk in flat terrain, you can trigger an avalanche on the mountainside above you. An avalanche dropout zone can be three times the height of the drop. Avoid terrain traps, such as narrow gorges. Consider what will happen if there is an avalanche. Be aware that a cornice can break off when you walk on a mountain ridge. Be aware of ice conditions when you walk on regulated lakes and rivers. Can an avalanche happen where I plan to go? What will the consequence be?
7. Use a map and a compass. Always know where you are. A map and compass are an essential basic equipment that always work. Pay attention to the map even when hiking on a marked trail. Knowing where you are on the map, makes for a better hiking experience. GPS and other electronic aids are helpful, but make sure you have extra batteries. Do you know where you are?
8. Don’t be ashamed to turn around. Evaluate your route continuously and if conditions are becoming difficult, choose your best alternative long before you or group members become exhausted. Have the circumstances changed? Should you turn around? Is anyone in your group have problems completing the route? Should the group turn around? Enjoy the hike for its own sake and remember that there will be other opportunities if it is too challenging today.
9. Conserve your energy and seek shelter if necessary. Adjust your hiking speed to the weakest member of the group, and make sure that everyone can keep up. Remember to eat and drink frequently. When you exert yourself, your body needs more fluids than you may feel you need. Don’t wait until you are exhausted before you seek shelter. Strong winds will tire you out quickly. Use your windsack or dig a snow cave before it’s too late. Are you able to get back to your base? Do you know where the nearest shelter is?
Please support this website. I believe everyone deserves to read quality, independent and factual articles – that’s why this website is open to all. Free press has never been so vital. I hope I can keep providing independent articles with your help. Any contribution, however big or small, is so valuable to help finance regular content. Please support me on Patreon HERE.
Episode 191 – Marathon des Sables discussion with Steve Diederich who co-hosts and Dr Jodie Moss tells us how to prepare for the heat!
*****
Talk Ultra is now on Tunein – just another way to make the show available for those who prefer not to use iTunes – HERE You can download the Tunein APP HERE
Talk Ultra needs your help!
We have set up a Patreon page and we are offering some great benefits for Patrons… you can even join us on the show! This is the easiest way to support Talk Ultra and help us continue to create!
Many thanks to our Patrons who have helped via PATREON
Asif Amirat in the UK is creating a stir with his 100-marathons in 100-days. Many have been questioning his runs and becoming very vocal on social media. I have reached out to Asif for an interview.
RACES THAT WILL HAPPEN (tbc)
Montreux Trail Running Festival – Switzerland
Speedgoat 50k – USA
Fjallmaraton – Sweden
Rondane 100 – Norway
Pyrenees Stage Run – Spain
Marathon des Sables – Morocco
*****
INTERVIEW : DR JODIE MOSS
*****
Please listen to the INTERVIEWS – please follow the show
Hosted on ANCHOR (HERE) the INTERVIEWS will also be available to listen on many other players, including SPOTIFY (HERE).
TALK ULTRA podcast will be released as normal providing you long shows as it has always done with ideally two shows per month. The back catalogue will be released randomly via the INTERVIEWS and not chronologically.
Please support Talk Ultra by becoming a Patron at www.patreon.com/talkultra and THANKS to all our Patrons who support us. Rand Haley and Simon Darmody get a mention on the show here for ‘Becoming 100k Runners’ with a high-tier Patronage.
Scott have progressed year-on-year with the development of their trail running shoes. Notably, the interaction and feedback of their elite/ sponsored athletes have been instrumental in fine tweaking the range of shoes.
I have been fortunate to work with the brand as a photographer on multiple occasions, often photographing new shoes and apparel before they are released to the general public. It’s important to clarify here that when reviewing shoes/ apparel, I do so impartially.
I started using Scott in 2012, the original Kinabalu was a shoe I loved. Eight years on, the present day Kinabalu has little resemblance to the original, gladly, it has progressed and what was a good shoe years ago, is now, in my opinion, a top-quality trail shoe. Follow here for a review of the new Kinabalu Ultra RC which will be available in late July.
I first witnessed the Supertrac RC in 2016 and wrote a first impressions in November of that year, here.
The black and yellow look then was striking and now, 4-years on, it is still striking and as such, Scott athletes, Scott apparel and Scott shoes are easily identifiable on the trail. It was a smart move by the brand.
As great as the original RC was (is) it was not the perfect shoe for me. I had some issues with how low the lacing came and in the propulsive face, I would some minor irritation. I also found the shoe a little lifeless. The cushioning did not give me the bounce I had hoped for. Despite these points, the shoe was an incredible performer in mountain terrain providing grip, a responsive feel and the seamless upper were all winners! It was designed for skyrunning.
When Scott asked me to test out the new Supertrac RC 2 I was excited. I was surprised, to be honest, that the new incarnation had been so long coming. I had great expectations and although hopeful that the look/ integrity of the original shoe had not been changed, I had hoped that I would feel a notable difference.
Out of the box, I was happy. Black and yellow and this new shoe looked like the Supertrac I know. It was a great start. Flipping the shoe over, the 6mm lugs of the original were there, but the arrangement was different with a noticeable gap in the midfoot. I also noticed that the toe box was wider. The upper had several bales hanging off it, ‘3XDRY’ and ‘coldblack,’ so, it was apparent that the shoe had had an overhaul.
As a note, the new Kinabalu Ultra RC is being released in July and this, along with the Supertrac RC 2 is significant. The two shoes are very similar, the exception coming with the outsole and a more breathable/ mesh upper on the Kinabalu. In simple terms, the Supertrac RC 2 is for mountain, mud and rough terrain. The Kinabalu Ultra RC is a trail shoe.
Supertrac RC 2 on the top and the Kinabalu Ultra RC below – the difference in upper is significant. But fit/ feel is very similar.
The Kinabalu Ultra RC on top is less aggressive.
THE SHOE
I use an EU44 (UK9.5) for all my test shoes and weirdly, the Supertrac RC 2 although an EU44 says UK9 inside? I was perplexed initially thinking that the shoe would be too small. It’s not. So, if purchasing, just be careful with sizing. I am not sure why there is a discrepancy between EU and UK size.
At 298g for an EU44, this is a lightweight, but not the lightest mountain shoe.
One of the great attributes of the original Supertrac was foothold and here in the Supertrac RC 2 that foothold is equaled and bettered. Surprisingly, there is still no sock-like fit but when you slide the shoe on, you don’t even think about it. The seamless upper, tongue and lacing configuration hold the foot wonderfully tight. So, on technical terrain, there are no worries of one’s foot moving inside the shoe.
Key changes come in the upper with SCHOELLER COLDBLACK® and 3XDRY® which provide more protection and comfort. I was initially worried that the upper looked unbreathable and therefore potentially making the shoe hot, not so. The SCHOELLER COLDBLACK® reduces heat buildup and increases wearing comfort. The 3XDRY® is water and stain resistant and from the inside, it absorbs and distributes moisture.
The heel area is padded, snug and importantly when climbing does not allow for any slipping.
Notably, the toe box is wider allowing a little more toe splay than the original shoe and this is welcome. Toe protection is adequate and what is immediately noticeable is how the outsole rises up placing one lug almost on the toes – perfect for climbing.
Cushioning is notable. I found the original Supertrac lacking life and bounce, not here in the version 2 with the AEROfoam+. The bounce is notable even without running. The drop is 5mm.
Scott have always used eRide (rocker) to help with technique and cadence. In some models, it has been very noticeable. Here in the Supertrac RC 2 it is less noticeable, and the curvature is reduced.
The outsole has always been a selling point with ‘radial traction.’ The 6mm lugs fit the middle ground off aggressive, but not too aggressive and the lugs now have been spaced differently to help dispel mud and reduce clogging. Particularly noticeable in the middle of the outsole.
If you wanted a shoe just for mud, then a more aggressive outsole would be better. But the Supertrac RC 2 quite rightly wants to provide a great all-rounder that handles mud, technical terrain and can still be comfortable when cruising some single-track.
IN USE
This is Scott’s best shoe so far in my opinion. The changes they have made addressed all my minor niggles from the original Supertrac RC and they have packaged them in a version 2 that is magical to wear.
I have given mine a real battering and in the space of a couple of weeks managed to get well over 100km in them in the mountains of Norway. Mud, trail, rock, wet and dry, at all times the shoes were performing at the highest level.
From 3-hour faster runs to 7-hour+ adventures, at all times, the shoes were comfortable and secure.
In the previous Supertrac RC, I would only use them for shorter/ faster outings, the v2 is so much more cushioned that even on continually hard and rocky terrain, I had all day comfort.
The outsole performed as expected offering secure grip on rocks both in the dry and wet. I had one issue of slipping continuously on a particular type of rock, however, it became clear that the green slime over it was an issue for any shoe and not just the Scott. Confirmed by a run friend who was in a pair of inov-8.
In mud, I was happy with the grip knowing only too well that if I got in continuous sloppy and deep mud that grip would be compromised a little due to the 6mm lugs. But, the new spacing of the lugs did the job of expelling mud. This was perfect in guaranteeing a more consistent grip for all the time.
When on technical and demanding trail, you need a shoe that holds the foot so you can be 100% sure. Many brands call this ‘precision’ and often one of the downsides of a precision shoe/ fit is that the toe box will be narrower. The Supertrac RC 2 has a wider toe box and it is noticeable. I was therefore worried that some of that firm hold and reassurance may be lost. No! The lacing and fit are so good, that you can adjust and tweak making sure that you have 100% security. Even the insole grips one’s sock.
I ran through a great deal of wet/ muddy and boggy ground and here is maybe one downside of the shoe. I felt drainage was compromised. I always wear Merino socks and so therefore had no issues with cold feet, even when running through a great deal of snow. However, I do feel water retention was more noticeable.
CONCLUSIONS
The Supertrac RC 2 is a great shoe and for anyone who loved the original Supertrac RC, I think now they will have an even bigger smile on their face.
For those who were tempted by the black and yellow shoes previously but decided that the toe box was too narrow, the cushioning compromised, or the feel was a little flat, you should now go back and check these out.
It’s rare I compare shoes to other brands and models, however, for those who have read my reviews, they will know that VJ Sport are my ‘go-to’ shoes for the mountains, be that the XTRM or MAXx models. Now, I firmly believe that Scott have a shoe that can compete.
I have 98% of good things to say about the Scott Supertrac RC 2 and the only negative is the potential for retaining water… To clarify, it does not stay in the shoe, it does dissipate. It just dissipates slower than I would have liked.
Please support this website. I believe everyone deserves to read quality, independent and factual articles – that’s why this website is open to all. Free press has never been so vital. I hope I can keep providing independent articles with your help. Any contribution, however big or small, is so valuable to help finance regular content. Please support me on Patreon HERE.
Norway has long been a desirable location for the mountain enthusiast. One only need to add the word ‘Norway’ to a Google search engine, and you will be rewarded with photos that make the jaw drop.
At roughly 33% bigger than the UK and 1/3rd the size of USA, one begins to understand the scale of this Scandinavian country and its 5.3 million inhabitants.
Just think about it, Norway is 33% bigger than the UK, but the UK has 66.6 million inhabitants…
Needless to say, outside of Oslo (681,000), Bergen (271,000) and other key locations such as Trondheim and Stavanger, open space and amazing landscape is available for all to explore.
In a series of articles and posts, we intend to introduce you to the magic of Norway.
Norway is the longest country in Europe and therefore, travelling anywhere is not a quick process. It has 60.000 miles of coastline, towering mountains and dramatic fjords. Remarkably it has 2-300 peaks over 2000m+, Galdhøpiggen the highest at 2469m closely followed by Glittertind at 2464m. There are over 1000 peaks over 1650m, so, if you love mountains, Norway should be at the top of the ‘to-do’ list!
We started our articles with HARDANGER which you can read HERE.
The list will grow as we progress through Norway, but expect posts on:
Stavanger
Senja
Tromso
Lofoten Islands
Romsdal
Lyngen
Svalbard
And more…
JOTUNHEIMEN
The ‘home of the giants’ contains the 29 highest mountains in Norway, and as such, it is a playground waiting to be explored. It has 250 peaks over 1900m! Established in 1980, Jotunheimen National Park covers more than 1,000 square kilometers of Sogn og Fjordane and Oppland counties. Reinder, elk, mink and wolverines live in the park and most certainly, in the more remote and quiet areas, it is possible to have a sighting.
In terms of distance and travel, the entry to the Jotunheimen region is roughly 4-hours of driving from Oslo or Bergen.
The area is vast with a multitude of possibilities and therefore, this article will be very much be a ‘part one’ to be followed up with additional posts as we explore more of the area.
It is a popular area and in the months of June, July, August and September, you can fully expect routes to be popular with hikers, climbers and tourists. July and August being the key months due to more stable weather. However, June is a wonderful month as snow can linger on many routes.
Any visitor to Jotunheimen, particularly on a first visit, will have the iconic Besseggen top of the list along with the highest peak in Norway, Galdhøpiggen at 2469m. We will include both of these here in this article and introduce you to other options: Knutshøe, Surtningssue and Besshø.
PRACTICALITIES
First and foremost, this is an introduction to Jotunheimen, and we hope that you will read this article, digest the information and then plan your own adventure.
Jotunheimen is expansive and in all honesty, best travelled on foot.
DNT – CABINS
Jotunheimen has a plethora of cabins (DNT) which link all the major trails and routes and certainly, the DNT option provides the easiest and most logical way to link routes for an amazing multi-day experience. There are 550 cabins in Norway looked after by The Norwegian Trekking Association. There are different cabins: staffed, self-service and no service.
Staffed – Staffed lodges serve breakfast and dinner. Many have showers and electricity, either from the power grid or from a local generator.
Self-Service – The self-service cabins are equipped with all that trekkers need for cooking and sleeping. Firewood, gas, kitchen utensils, table linen and bunks with blanks or duvets and pillows (hut sacks, also known as hut sleepers, are required!)
No service – No service cabins usually have the same equipment as self-service cabins, but they have no provisions. There also are a few simpler no-service cabins where you’ll need a sleeping bag and perhaps more equipment.
Use ut.nohere for what is available, there is also a very good phone app.
If you plan to use DNT it makes sense to become a member as you will save money, join here.
In nearly all cases, particularly in high-season and for popular routes, booking ahead (here) is a good idea. But rest assured, DNT will never turn you away, ‘…but everyone who comes to a cabin will have a place to sleep, either in a bunk or on a mattress on the floor.’ A 2020 price list is available here. A full board option is a great idea as you get a bed, 3-course dinner (always excellent), breakfast and a packed lunch. So, if moving from DNT to DNT you can really travel fast and light and make the most of the days. NOTE: You do not need a sleeping bag, just a sleeping bag liner – great for weight saving!
WILD CAMP
Jotunheimen is a paradise for wild camping, so, if you are on a budget, looking for a raw experience or want to fastpack, this is the place for you. In most cases, you can camp close to or at a DNT cabin. So, it can be possible to save on lodging and still eat at a DNT. Especially useful if venturing out for multi-days, that way you can really save on food weight.
Screenshot of DNT meal prices:
HOTEL
Hotels are in abundance in Jotunheimen and they provide an option to be used as a base or as stops as one travels around. They are great as a start and end to a holiday in this area, but not the best option if you really want to explore.
OVERVIEW
Bygdin is perfect entranceway to Jotunheimen and you could start the journey with a little luxury at the Bygdin Fjellhotell. It is also possible to wild camp in this area, even close to the hotel. Located at the end of Bygdin lake, it’s a perfect start point.
This fjord has a ferry which you can use to access Torfinnsbu or Eidsbugarden – both of these provide great start points for a fastpacking journey.
Fastpacking Journey:
Although not discussed in-depth this article, you could leave your car at Bygdin, take the ferry to Torfinnsbu then take the trail to Gjendebu. From here you could then head north via Storådalen, Urdadalen and then to Spiterstulen which is the gateway to Galdhøpiggen. You could then climb Galdhøpiggen and return to Spiterstulen. From here, proceed to Glittertinden, on to Glitterheim and then follow the trail down to Gjendesheim via Tjørnholtjørna and Russa. From Gjendesheim take the trail via Vargebakken and Valdrersflya to arrive back at Bygdin Fjord. GPX here.
From Gjendesheim you could take the ferry to Gjendebu (you were here on day 1 or 2 of the fastpack) and now follow the trail to Memurubu. At Memurubu you have several options? A great day out is to take the trail to Surtningssue summit heading out on the lower trail that passes Memurudalen. At the summit, return via the way you came and then the trail splits and you can return to Memurubu via different route (full details listed below). From Memurubu you can now take the Besseggen route (details below) to Gjendesheim.
Proposed Trip:
As mentioned, Jotunheimen has many options and while the above fastpacking route and option is probably the ‘ideal’ way to explore the area, we wanted to break options down into manageable junks.
Areas to explore:
Knutshøe
Galdhøpiggen
Surtningssue
Besseggen
Besshø
Schedule:
Day 1 – Travel and overnight at Bygdin area.
Day 2 – Knutshøe route and then drive to Spiterstulen (2 hours) to either wild camp or stay at the DNT hut.
Day 3 – Climb Galdhøpiggen and then drive to Gjendesheim to stay in the DNT or wild camp.
Day 4 – Take the first ferry from Gjendesheim to Memurubu. Pitch tent or check-in at DNT and then do the Surtningssue route. Overnight at Memurubu.
Day 5 – Besseggen ridge to Gjendesheim – You can send luggage/ tent on the ferry so that it will be at Gjendesheim when you arrive from the trek. Overnight in either DNT or wild camp.
Day 6 – You can either travel home OR add an extra day with the climb to Besshø and return to Gjendesheim for an additional overnight wild camp or DNT.
Day 7 – Travel
Please note:
Make sure you book the ferries in advance here. They get very busy, particularly the first one from Gjendesheim. If you have a car, you need to stay at the Reinsvangen ‘Long Stay’ car park (here,) make sure you pay for parking to cover the duration of your stay. A shuttle takes you to the ferry or you can walk, approximately 1.5 miles. When possible, book the DNT’s you require in advance.
THE ROUTES
Knutshøe
A short drive from Bygdin, Knutshøe is a great introduction to Jotunheimen. Many consider Knutshøe a more challenging route than Besseggen? However, it is very much considered the younger brother or sister.
The total route is approximately 12km taking an anti-clockwise loop. You reach a high point of 1517m and in total you will accumulate 700m +/- while covering the distance. It is rated as ‘difficult’ and without doubt, it does have some exposure. Depending on experience and speed, the route could take up to 6-hours. However, moving fast and light and combining running and hiking, it is easy to complete in well under 3-hours. All the difficulty is in the first half of the route when you climb up and then descend. Once down, you have a flat 6/7km valley to cross back to where you started. GPX here.
Access to the route is from the main road and there is a small parking area that can accommodate approximately 20 cars. It is possible to wild camp here too. Either way, arrive early and start the route as soon as possible.
Note! If raining, this is NOT a good route to take. There is a considerable amount of rock both up and down and it can become very slippery.
Leaving the car park, follow the trail and when at a fork, go right and head up the climb. The route requires scrambling, some climbing and at several points you will encounter steep drop-offs.
Depending on experience, you may find some areas of the route really rewarding or terrifying. It is not a very difficult route; however, it does demand respect and patience.
At all times, the views are spectacular and ahead of you, on the other side of the lake, you have Besseggen completely in view pulling you in.
At the summit, you have a wonderful 360 view and if timed correctly, you will be able to see the ferry boats going back and forth on the lake below.
The descent is rocky, challenging and requires patience. Make sure hand and foot holds are secure and take your time.
Rock eventually becomes trail and before you know it, you will be at the bottom and next to the Gjende river. It is now possible to get water if needed?
You now go left and follow the trail back. At times, it’s easy to lose the trail so be attentive, as a recommendation, stick with the tree line and not the river. Your feet will get wet, guaranteed!
Once back at the car, take time to rest, change clothes and then make the 2-hour journey to Spiterstulen. En-route, there are possibilities to stop and buy food/ supplies.
Galdhøpiggen
The drive to Spiterstulen brings you straight to the start point for Galdhøpiggen. Having the journey out of the way allows for good recovery in the evening and an early start the next day. As mentioned, you can stay at the DNT or wild camp in this area.
The highest peak in Norway (2469m) and Northern Europe is understandably a huge draw. For many, they take a guided trip leaving from Juvasshytta mountain lodge (1841m.) Guides take groups across the glacier. The glacier of course sounds appealing… However, it is an easy route with far too many people.
The route from Spiterstulen mountain lodge may not contain a glacier, but the 1400m vertical climb offers far more challenges. Especially if one travels in June as snow will still be present. The route is up and down is via a well-marked trail, GPX here.
Considered demanding, the route can take 8-hours plus, again, we completed the route in half the time.
During the adventure, you will scale two peaks, totaling over 2,000 meters in height, Svellnose 2272m and Keilhaustopp 2355m! The terrain is tough and requires concentration at all times. Made up of rocks and boulders, for much of the time you are constantly piecing together a jigsaw puzzle to find the best route through. In wet weather, the route is very dangerous. Remember to follow the red “T”s that indicate the trail.
At times, you will cross snowfields and of course, stick to well used routes. Take no risks on the snow!
Several points can take you very close to the edge of the ridge. At all times be attentive, not too much of a problem in good weather, but in poor visibility you need to make sure of the route.
As you go up you feel several times that the summit is ahead only to reach a peak and then see several more in the distance. The final push becomes obvious as a hut is at the final summit and you will probably see a stream of people coming in from the right who have crossed the glacier.
At the summit the views are magnificent and well worth all the effort. An early start may well guarantee you some quiet time and space.
You descend via the way you came and in all honesty; due to the amount of rocks, it may well be more difficult to go down? Certainly, if you have tired or sore knees, you will feel every meter of the 1400m.
The route out and back is approximately 14km.
If you had an early start, you will be back by midday/ early afternoon and then you can take the 2-hour drive to Gjendesheim.
At Gjendesheim you can stay at the DNT or wild camp. This allows you a good night so that you can get the first ferry the next day.
Surtningssue
Make sure you have a place booked on the first ferry from Gjendesheim to Memurubu. This is typically 0745 arriving at 0805.
On arrival at Memurubu you can pitch your tent (got to cabin and pay) or go to the cabin and check-in for your booking. Note, the cabin here is not a DNT and we recommend you book here.
Once ready, you can then start the Surtningssue route. This, in our opinion, is a hidden gem and is often neglected as Besseggen takes all the glory.
At 24km long, it’s a great day out that offers many challenges and importantly, you will see hardly any other people. On our trip, we saw nobody.
Leaving Memurubu the route is clearly marked. Make sure that you branch left when the opportunity arises. This will provide you with a clockwise route to the summit at 2368m and then back to Memurubu via a different route.
The first 8km’s are single-track trail that is very runnable. The views are stunning and only get better as you move up the trail. One advantage of experiencing the trail in June is lingering snow.
Once through the valley you start to head east. It is definitely worth having the GPX route (here) available either on a phone or watch so that you can stick with the route. Although marked, it has considerably less markings than other routes and often you are following stone cairns.
From 8/9km the route now winds up to the summit through rocks and boulders. Care is needed! At approximately 11km the trail will split with a very clear red sign showing a left and right option. This is where you go left to the summit. On your return, this is the place where you split and take the ‘other’ route back to Memurubu and therefore creating a loop.
The trail up is now steep with several false summits. You will finally see a stone hut that is open and available for shelter if required. The final push to the summit is approximately another 200m. For those in the know, they say the summit provides the greatest view and panorama of Jotunheimen.
It’s exposed at the top, airy, with plenty of potential hazards, so, take care.
The descent is via the same route until you reach the red marker. Now you veer left. Once again, the terrain is challenging as there are countless rocks and boulders.
For most of the way, the route is well marked until the final km’s. We lost the trail but could see Memurubu ahead and therefore self-navigated back to the cabin.
This route is a stunner. We felt alone and isolated. We saw nobody and encountered wild reindeer with their young.
Besseggen
Besseggen is a classic ridge that ‘must’ be done. Some Norwegian’s say that you cannot be Norwegian until you have done the route. It’s a point-to-point route, so, plan ahead and send any luggage/ tent with the ferry boat. They will have your luggage waiting for you after the trek at the ferry port in Gjendesheim.
At 14km long, with approximately 1100m of vertical gain it may not appear to be a too demanding route? However, many consider it is! Many take 8-hours to do the route and 10/12-hours is not unusual. GPX here.
For perspective, there is a mountain race that takes on the exact route and the course record is an unbelievable 1hr 15min 40sec by Thomas Bereket. Trust me, if you experience this 14km point-to-point, you will wonder (continuously) how is it possible to run this so quick? Kilian Jornet ran the race in 2016, along with Thorbjørn T. Ludvigsen, Kilian won in 1.17.54.
We completed the route in 3-hours 30-minutes and that was with many photo/ video stops.
The route is very, very popular and we therefore recommend you start early. One advantage of running and fast hiking is you soon catch anyone ahead and trust me, you want to be alone as much as possible to experience the trail and views.
All this who stay at the cabin or camp will start (usually) before 0800 and then the first boat arrives at 0805 releasing another wave of people.
Characterized by the colourful emerald Gjende and deep blue Bessvatnet lakes, Besseggen ridge splits the landscape. It’s dramatic and bold and in wet weather, treacherous, so be careful!
Leaving Memurubu the trail immediately rises up and twists, mixing rock and single-track. It’s a fun trail and the first plateau already provides great views. You will pass Bjønbøltjønne lake, a good opportunity to get water if needed? Continuing up, eventually another plateau arrives and now you have a stunning view of the Besseggen ridge. It’s quite intimidating. To the right the Gjende lake and you will clearly see Knutshøe which looks fantastic.
The trail now drops, it is steep in places. Bessvatnet lake (1374m) is to your left and you walk along its edges with Besseggen looking down on you.
Bandet ridge is a significant point with approximately halfway covered and Besseggen the next challenge.
Rising 300m, Besseggen (in my opinion) is less intimidating when climbing, however, there is plenty of opportunity for exposure. It’s relatively steep but there are plenty of foot and hand holds. It’s worth stopping many times for photos. The views are remarkable.
The steepest section comes towards the end but does not last long and then you are on a plateau that gently and continually rises to Veslfjellet (1743m) which is the highest point.
The trail is now very flat and after about 1 kilometer you reach a trail junction. Follow that trail to the right down towards Gjendesheim. The route now twists and bends. Follow the markers and in here the trail is steepest with many rocks. Take care, they can be slippery, even in dry weather.
Gjendesheim ferry finally comes to view and then the final 1 or 2km is easy to the finish.
If you sent luggage with the boat, it will be available under the wooden shelter at the port. A shuttle bust will take you to the car park for the journey home.
Or, you may wish to wild camp or sleep at the cabin and the following day tackle Besshø.
Besshø
At 2258m, Besshø is 500m higher than Besseggen and it is a trail that sees little foot fall. In many respects, it is like Surtningssue and as such, it has a huge attraction.
From Gjendesheim it is an out-and-back route of 22km with 1300m +/-. It’s a route that could take 12-hours but if moving fast and light, sub 6-hours is perfectly achievable.
The route starts with the end of the Besseggen route but instead of turning left for Besseggen, you veer right in the direction of Russa/ Glitterheim.
Bessvatnet lake will appear on the left and eventually you will cross a small bridge in the eastern corner. Cross the river you will see two small cabins on the left, now follow the trailer 2 to 3 miles north on flat/ boggy trail. Besseggen will be on your left and at the far end of the lake is Bandet which you crossed just before climbing Besseggen.
Look out for the right turn that leads to Besshø summit. The climb is at times demanding and marked with stone cairns which often disappear. It’s easy to lose the route so it’s advisable to have a GPX available (route here). Depending on the time of year, you may need to cross snow fields – care needed. The route is very rocky and strewn with boulders of different sizes. Many are loose, so, caution is required. It’s a challenging route but visually stunning.
The return route is via the way you came.
RECOMMENDATIONS
Never underestimate the mountains and the environment in which you are exploring. June in particular is the start of the hiking season and as such, snow can be a factor on all of the above routes. This adds an additional potential for injury and problems. Particularly as the snow is melting and this can create snow holes, snow bridges and crevices. Do not take any risks and follow established routes and existing footprints.
It is definitely worth carry Micro-Crampons as a safety measure, particularly in June and September. Also, trekking poles are a great addition but not essential.
Make sure you check in with DNT cabins for all the routes and check conditions to make sure that you have no surprises.
Weather is crucial and many of the above routes would become very dangerous in wet weather. Rocks and boulders in Jotunheimen are everywhere, when wet, they can be treacherous. Boots are always recommended for hikers but if moving fast and light, top quality mountain running shoes are perfectly acceptable on experienced feet. I cannot emphasize enough that grip is essential! You need an outsole that works on wet and dry rock. Running shoes are very personal but recommendations are VJ Sport MAXx and XTRM, Scott Supertrac RC2 and inov-8 Roclite.
It may be 30deg next to the fjord and glorious sunshine, but at the summit, it can be below zero, blowing a gale and torrential rain. You must take personal responsibility and be prepared for all conditions. At a minimum please take:
Suitable pack
Hat
Gloves
Warm insulated layer
Warm trousers
Waterproof jacket/ pants
Food for the duration of the hike and some contingency
1,5 ltrs of water (which can be replenished on all the routes via streams/ waterfalls)
Take water purification tablets as a just in case and consider a water purifier such as MSR Trailshot (here)
Map/ Compass
Charged mobile phone with a suitable App such as ‘Footpath’ (here)
Cash/ Card
Garmin InReach or similar
Bivvy bag
Sunglasses
Sun cream
Plan your routes, be realistic on timings and always start early. One of the huge advantages of outdoor activity in Norway is daylight. In June, July, August it is light at 0300 and goes dark after 2200 hrs.
CONCLUSION
Jotunheimen is to mountain lovers, what Disney is to fair ride lovers.
It’s a playground of trails, routes, summits, views, experiences and wildlife all wonderfully interconnected with marked trails and DNT cabins.
This article is created as a gateway to the area knowing only too well that it will whet your appetite for other adventures.
As mentioned at the beginning, the best way to explore this area is by foot and we are sure that once you have followed our weeklong adventure above, you will already be planning to return and explore.
In comparison to our first Exploring Norway article on Hardanger, I would consider Jotunheimen a more challenging environment, so please consider experience and fitness when contemplating any of the above routes.
We cannot emphasize enough the role of weather and the impact it has on all of the above recommendations. The mountains will always be there, cancelling a planned route or turning back is acceptable and wise.
PERSONAL NOTE
Special thanks to Abelone Lyng who has extensive knowledge of Jotunheimen. Her experience was invaluable in planning routes and making a workable itinerary.
Please support this website. I believe everyone deserves to read quality, independent and factual articles – that’s why this website is open to all. Free press has never been so vital. I hope I can keep providing independent articles with your help. Any contribution, however big or small, is so valuable to help finance regular content. Please support me on Patreon HERE.


 If you wanted a shoe just for mud, then a more aggressive outsole would be better. But the Supertrac RC 2 quite rightly wants to provide a great all-rounder that handles mud, technical terrain and can still be comfortable when cruising some single-track.


 Rock eventually becomes trail and before you know it, you will be at the bottom and next to the Gjende river. It is now possible to get water if needed?


