VJ ULTRA 3 – SHOE REVIEW

Photo by Ian Corless

In a world of the big shoe brands, think adidas, Brooks, Asics, Nike and of course, the list goes on. I love the fact that, without doubt, the best trail and mountain running shoes come from a small Finnish brand, VJ SPORT.

It’s a bold statement huh? But, if you have been reading shoe reviews on this website for many years, you will know, that I have a love for VJ shoes.

I am not going to write an article here about the brand, its history and do a PR job for them, I honestly don’t feel I need to. I feel safe in the knowledge that if anyone purchases a pair of VJ’s based on one of my reviews, they very quickly agree with me. Over the years I have received countless messages in the vein of, ‘I had no idea about this brand until I read your review and now I have theses shoes, it’s a game changer, the fit and in particular, the outsole are amazing!’

Photo by Ian Corless

With a strong history and foundation in Orienteering, VJ made a name for itself in Scandinavia as the ‘go-to’ shoe. Jon Albon (yes, the TNF athlete) helped shift the awareness to a worldwide platform with his success in OCR using the iRock shoes and then in the world of trail, ultra and skyrunning with the XTRM, MAXx and the ULTRA.

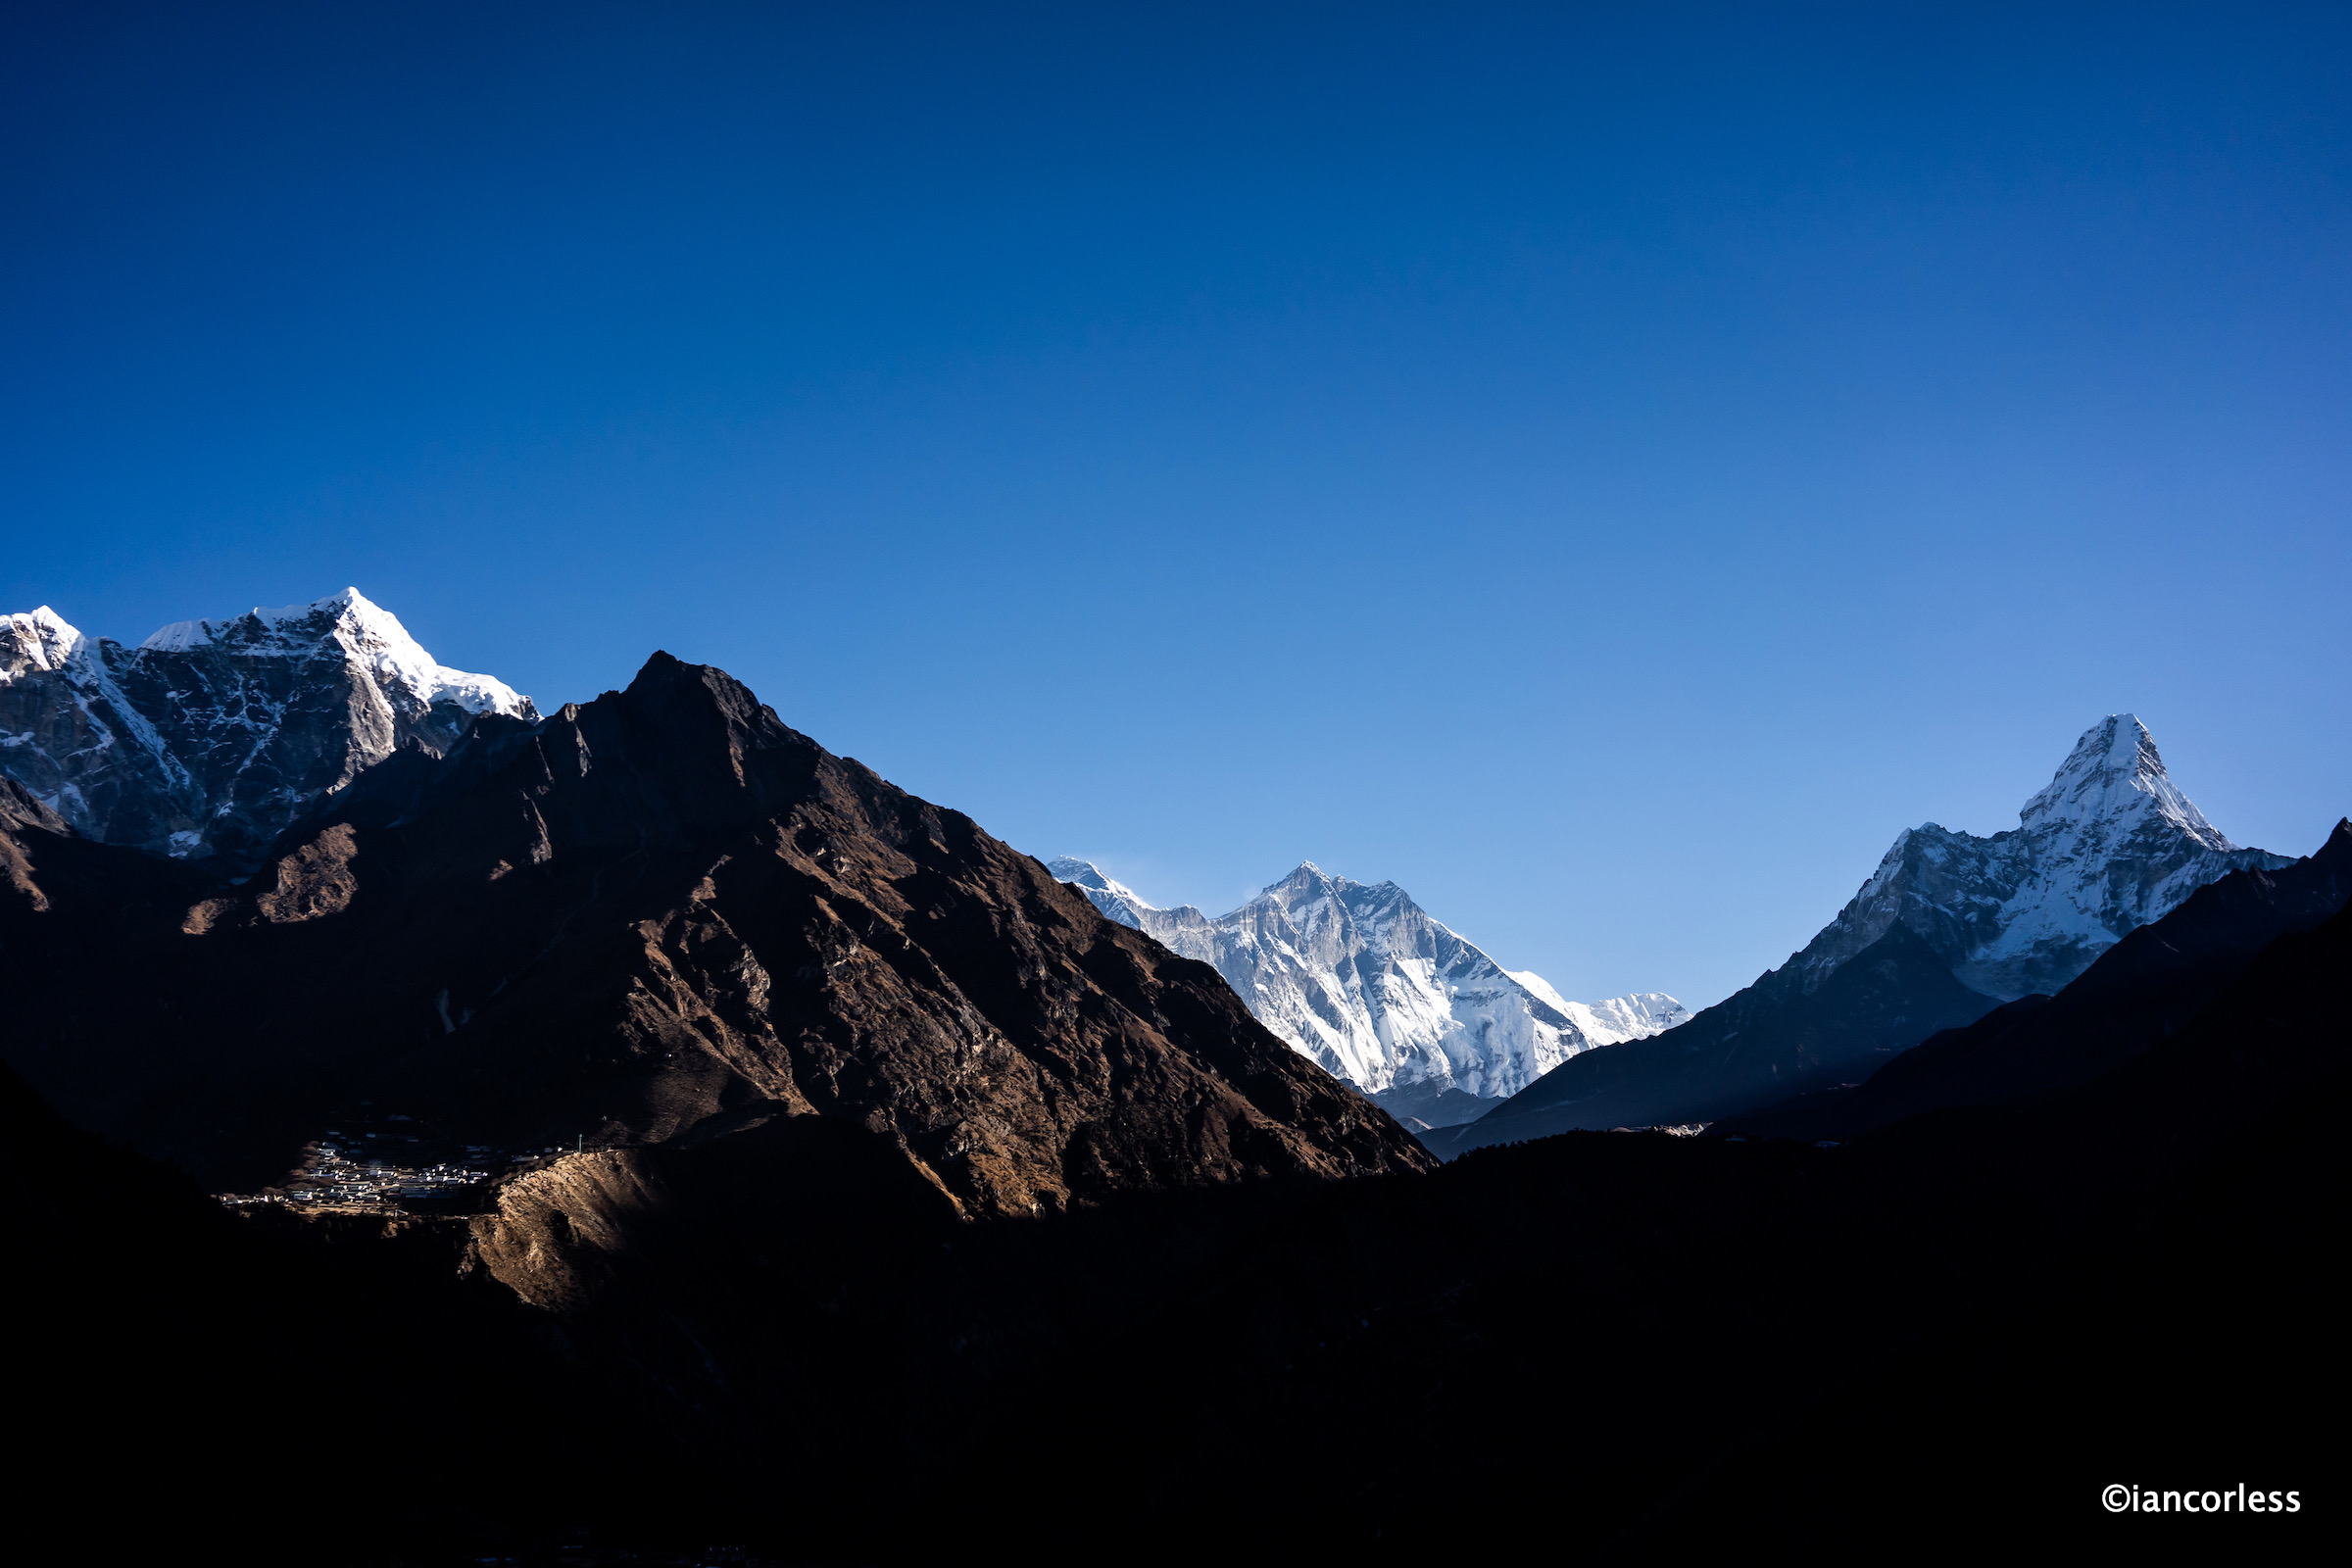
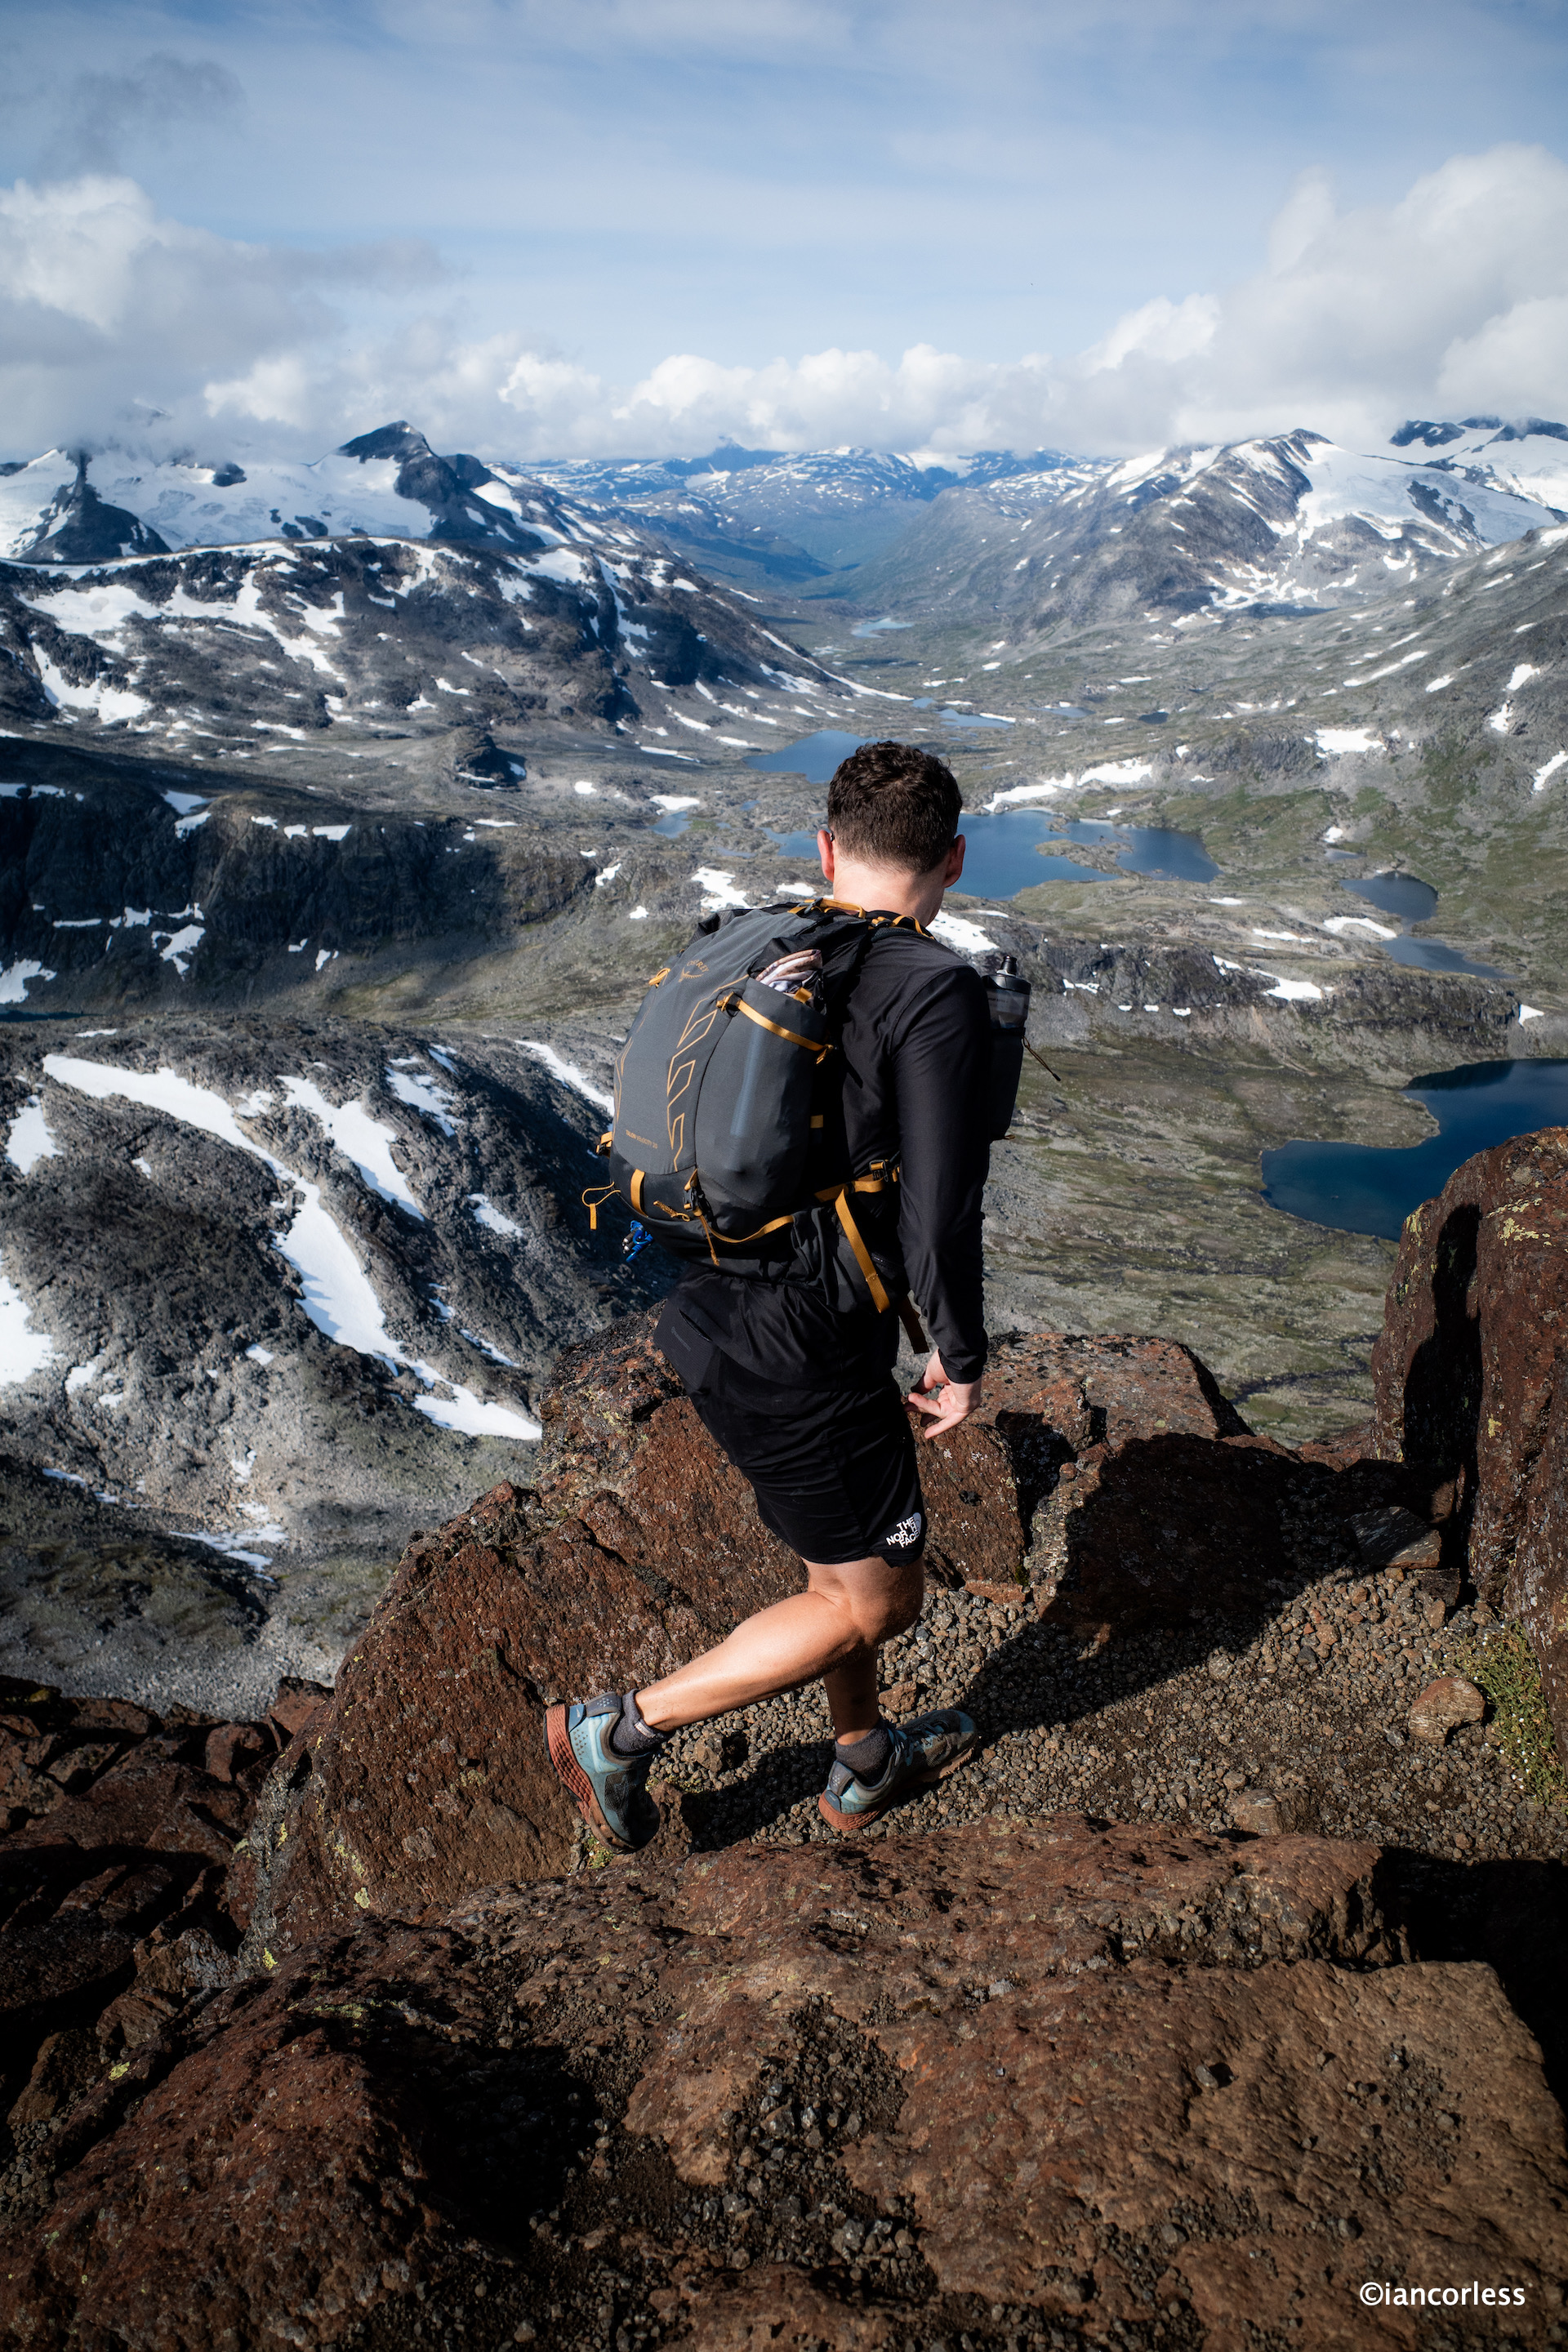
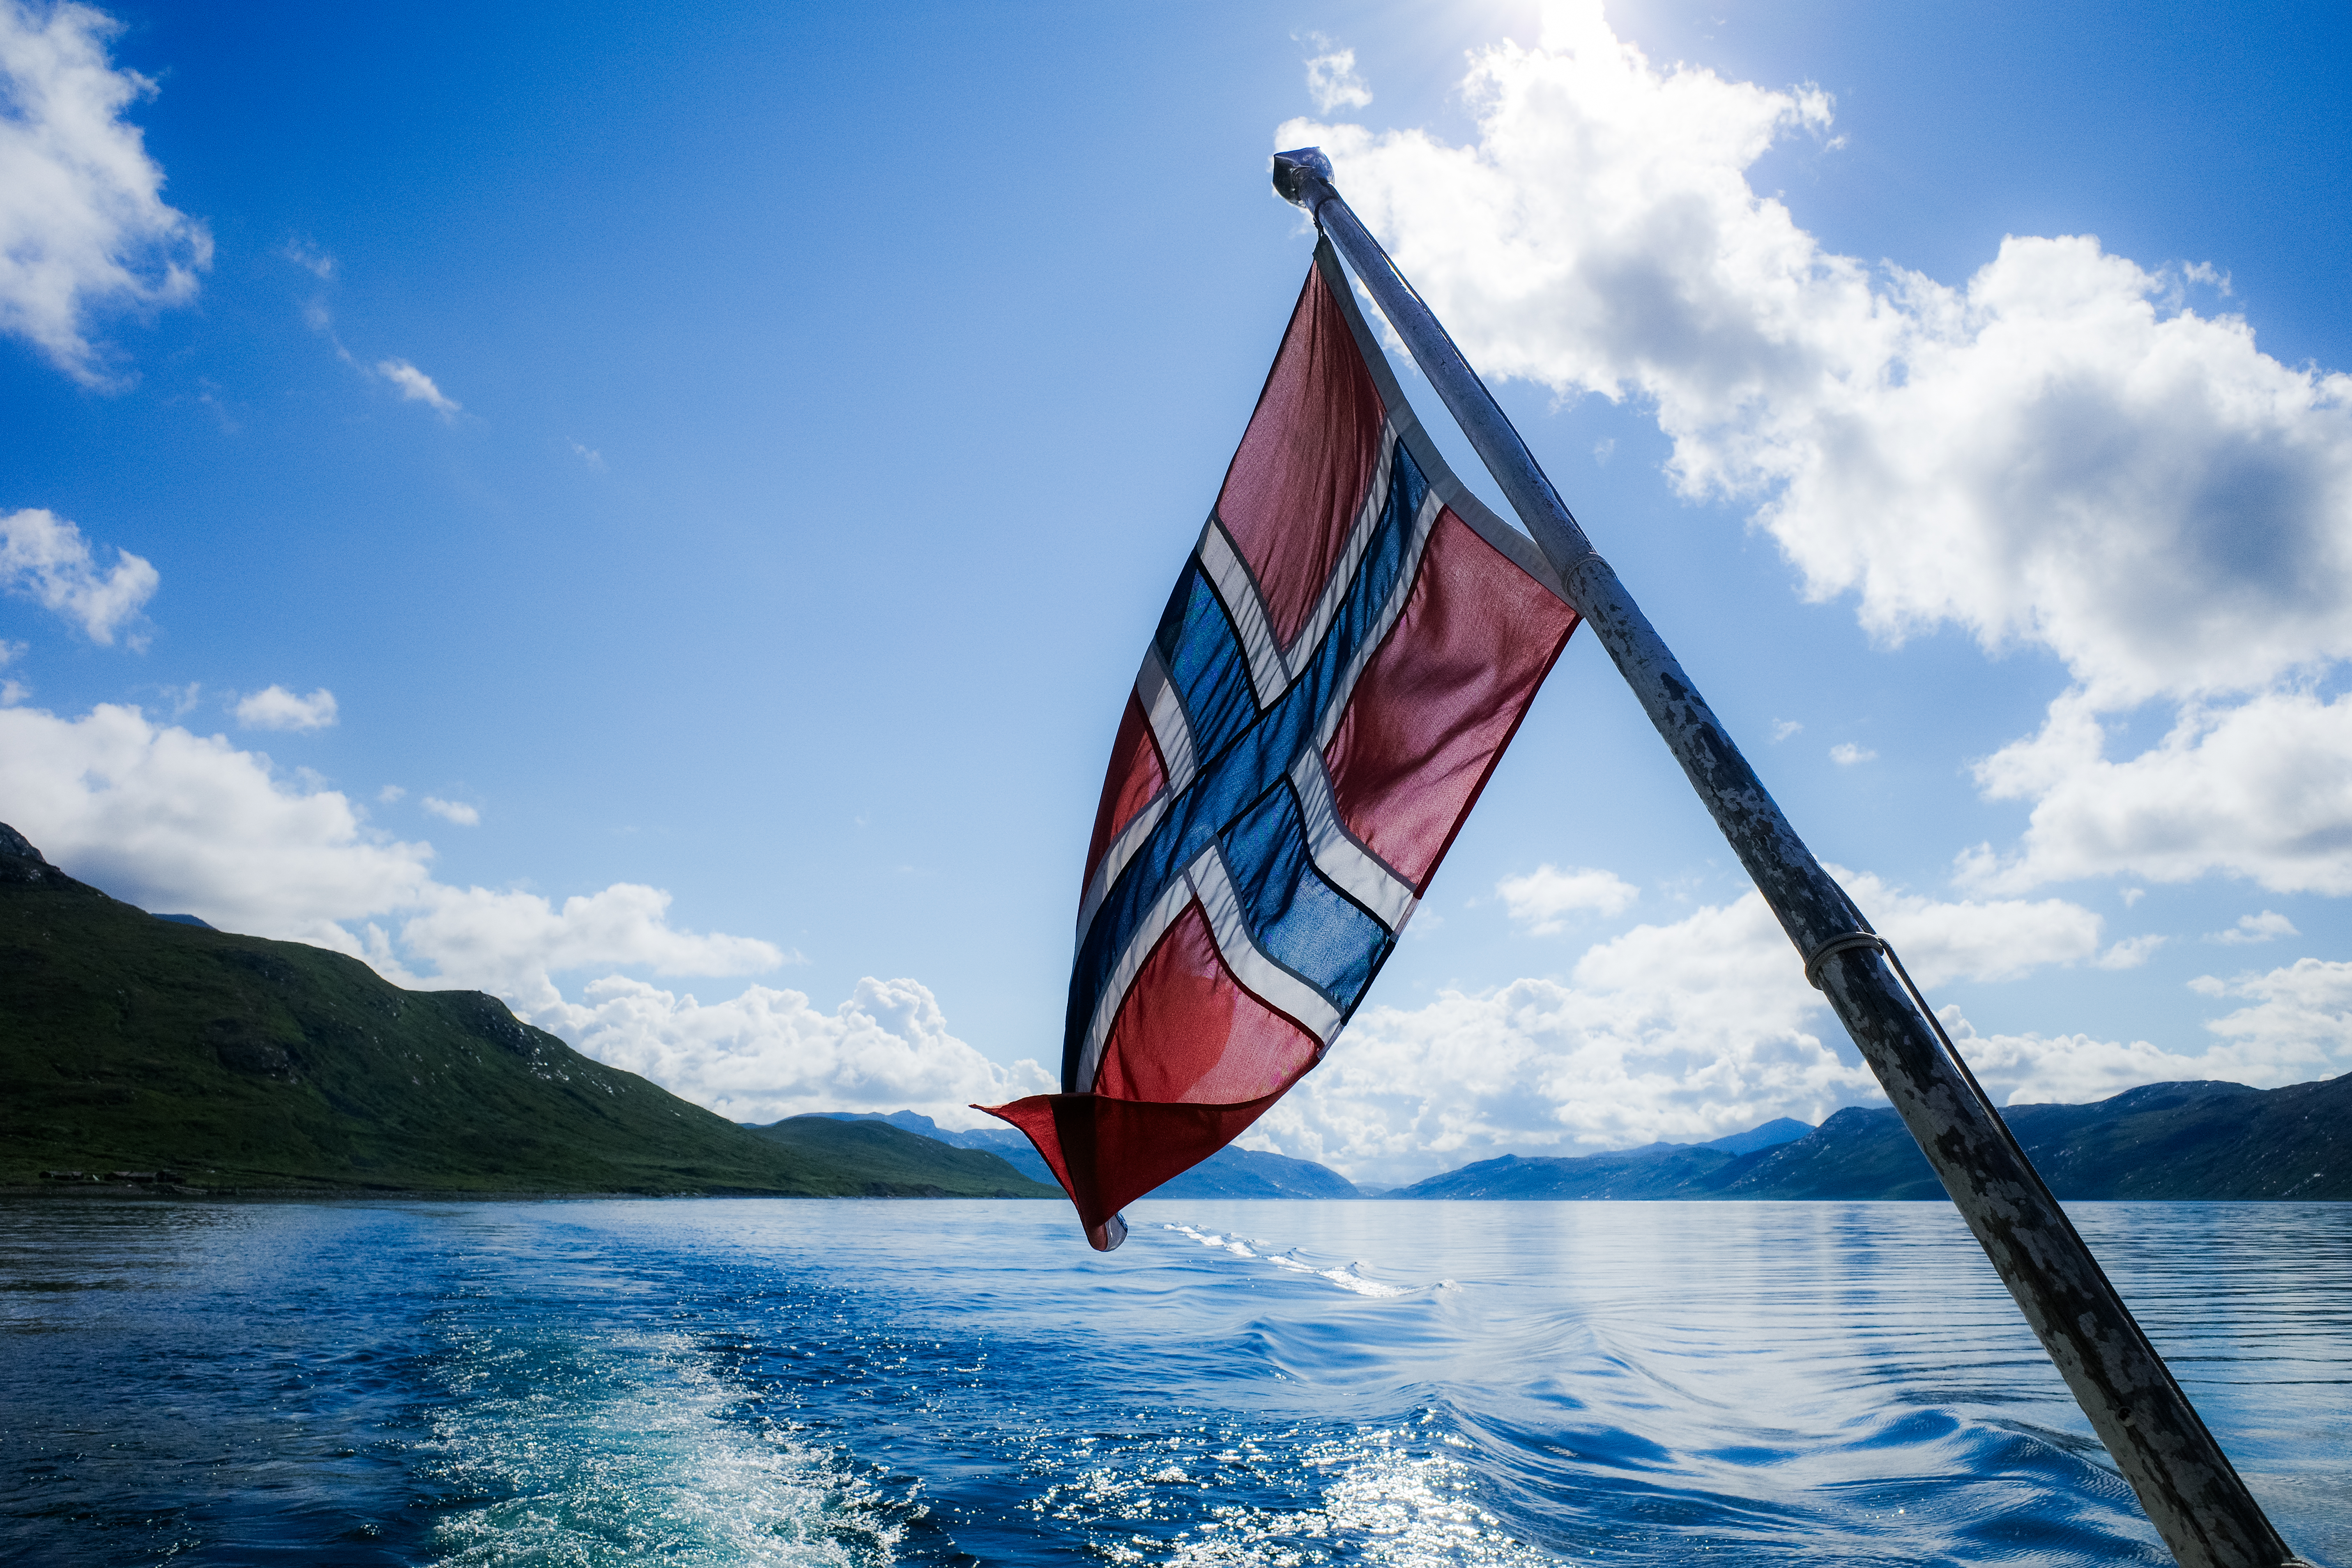
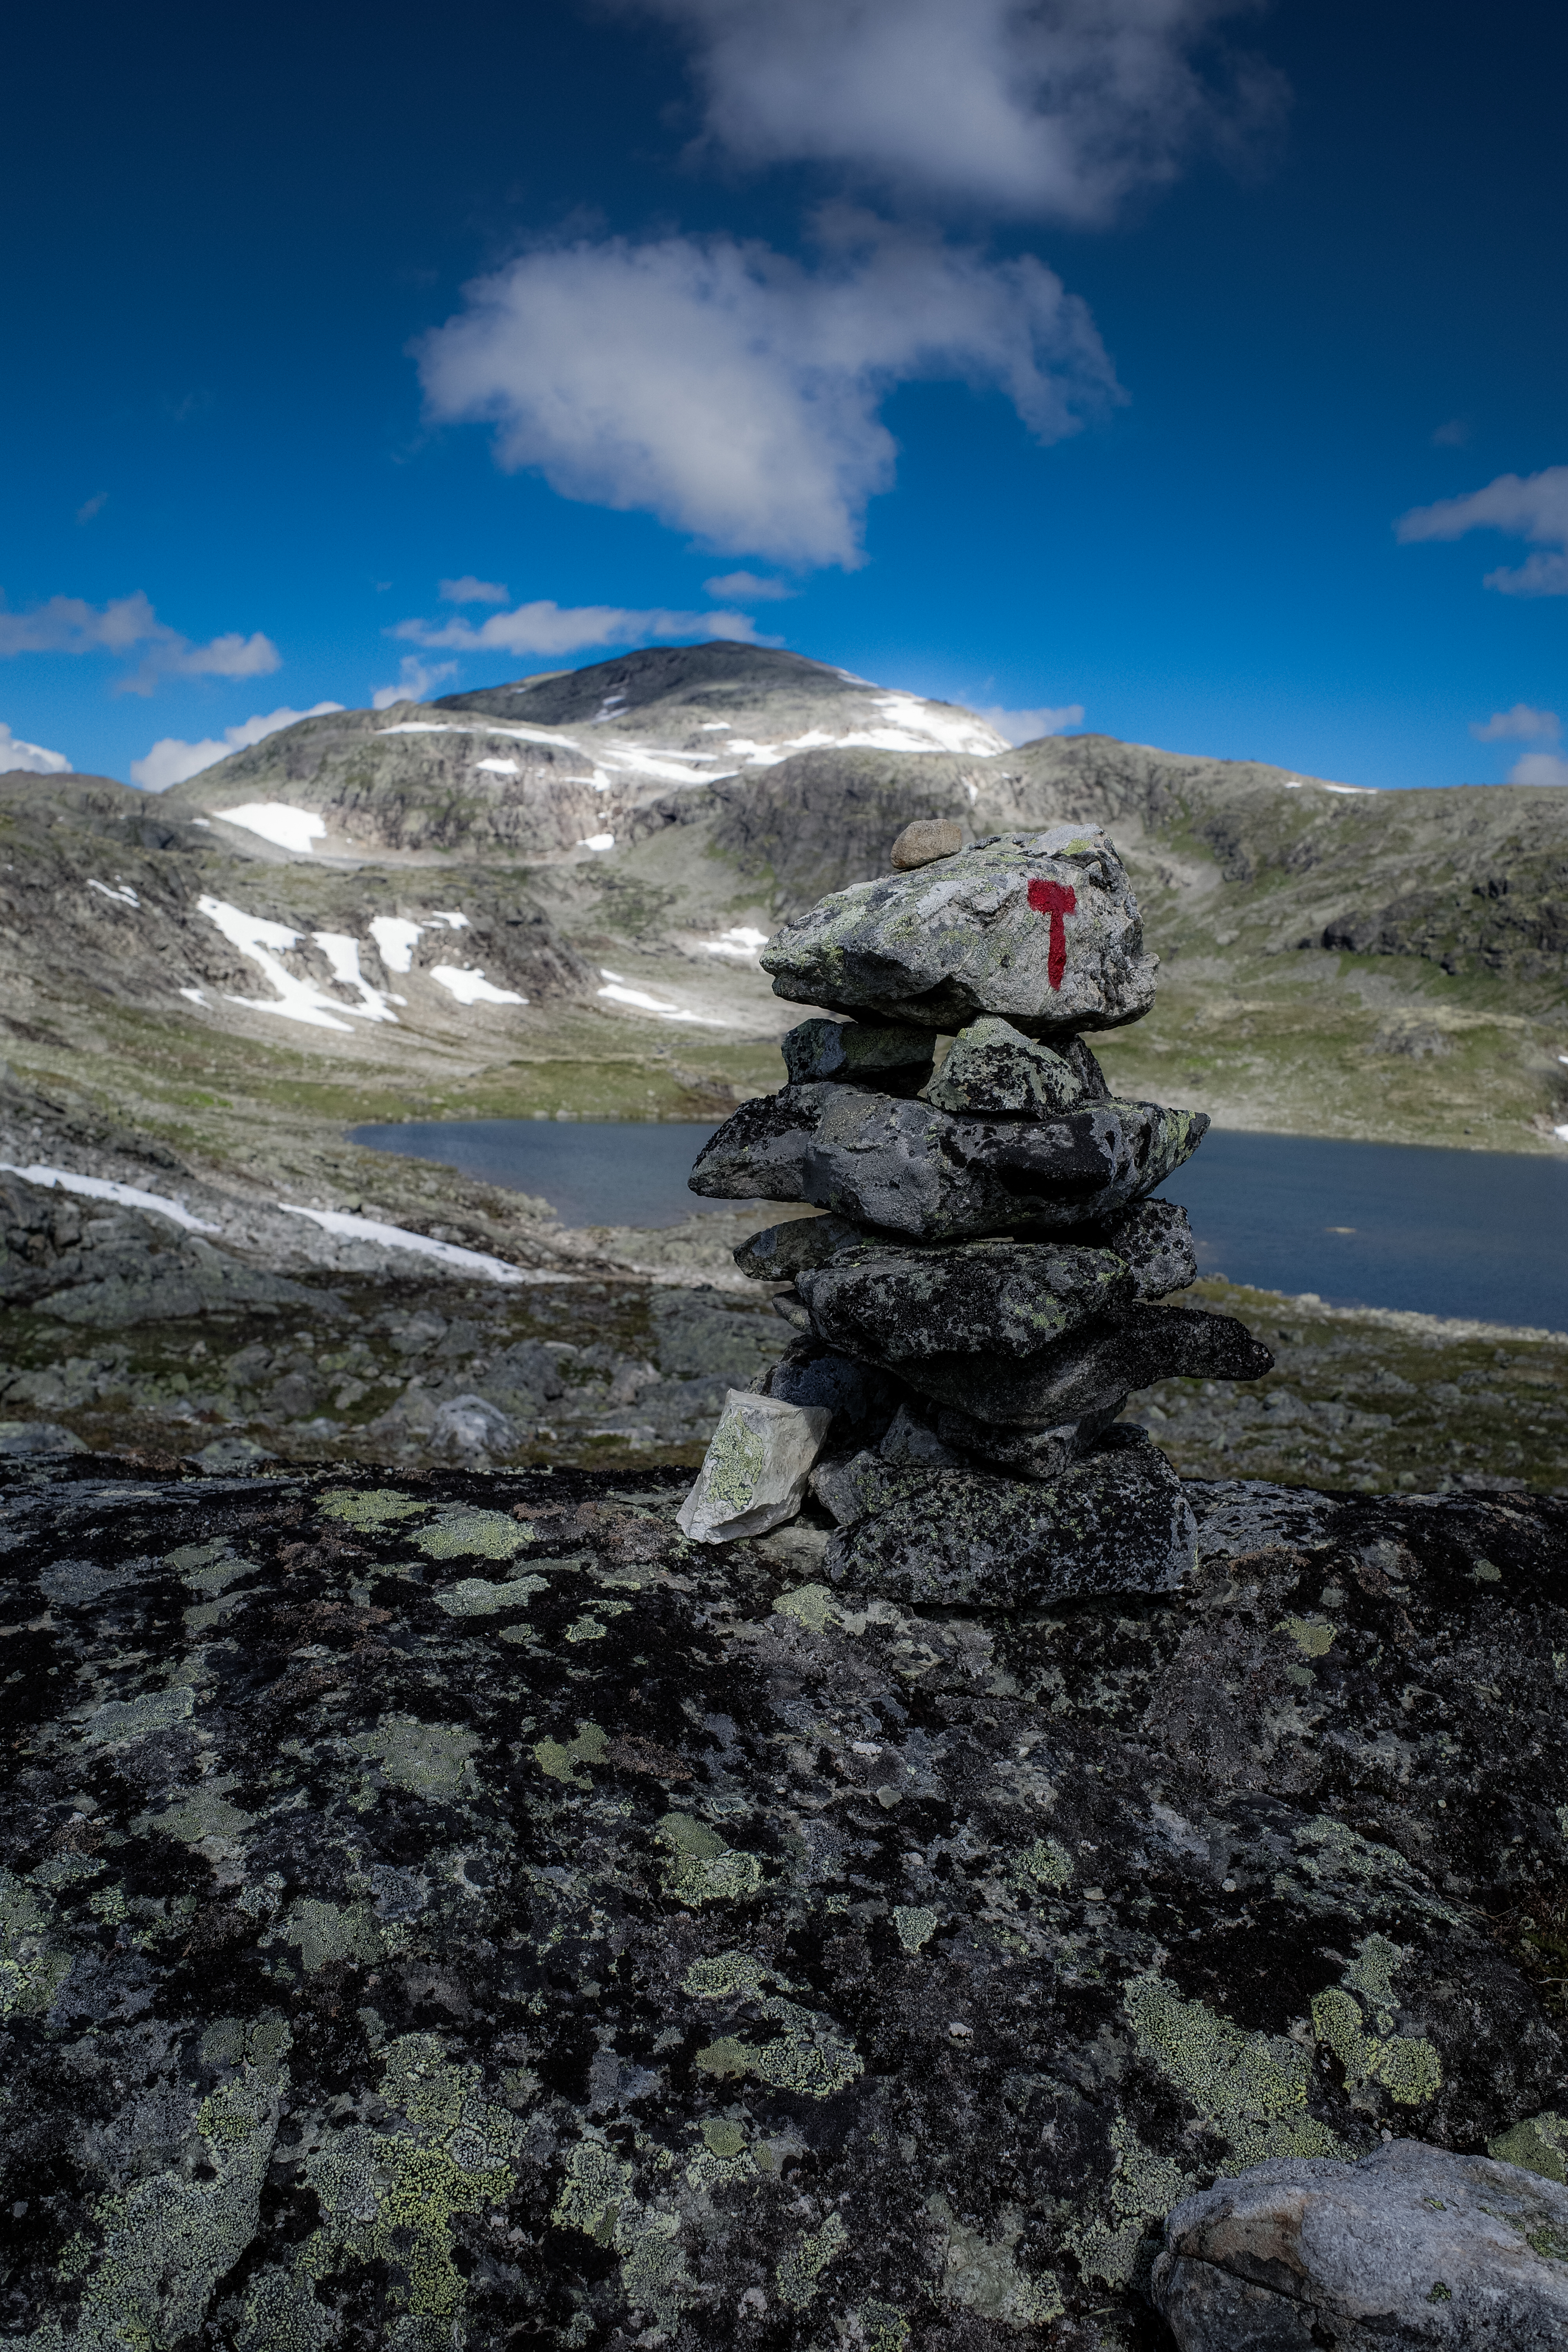
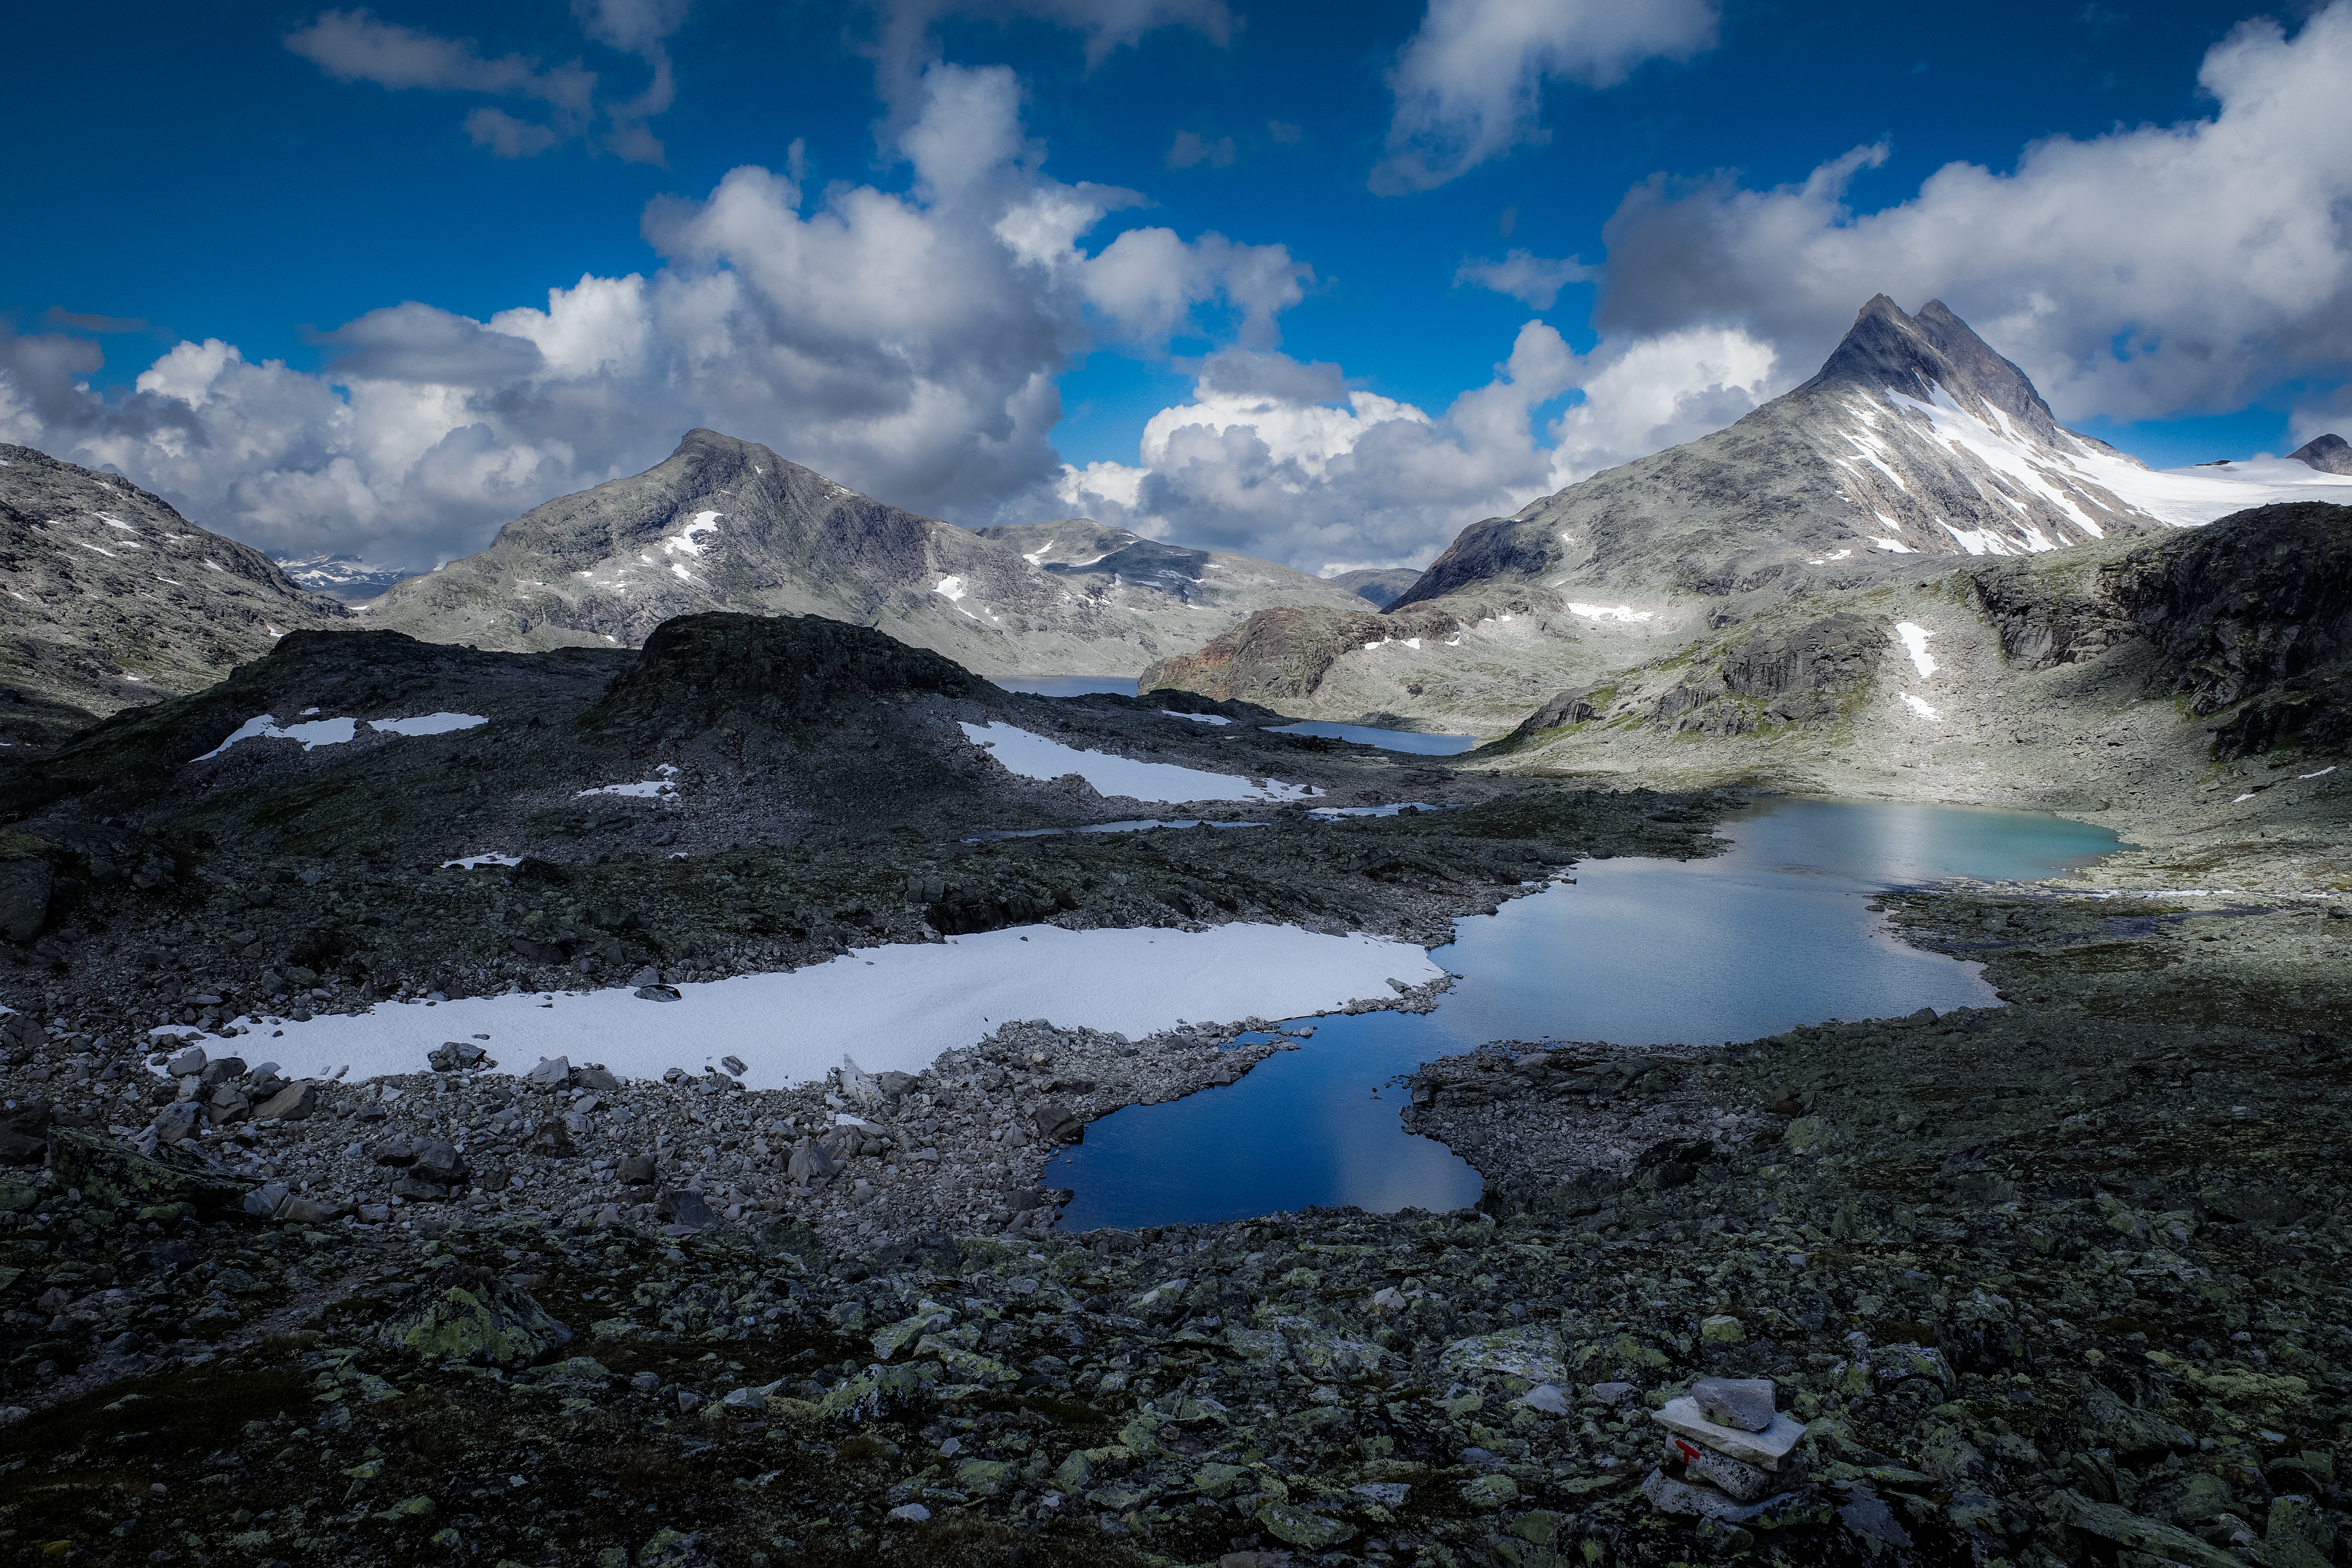
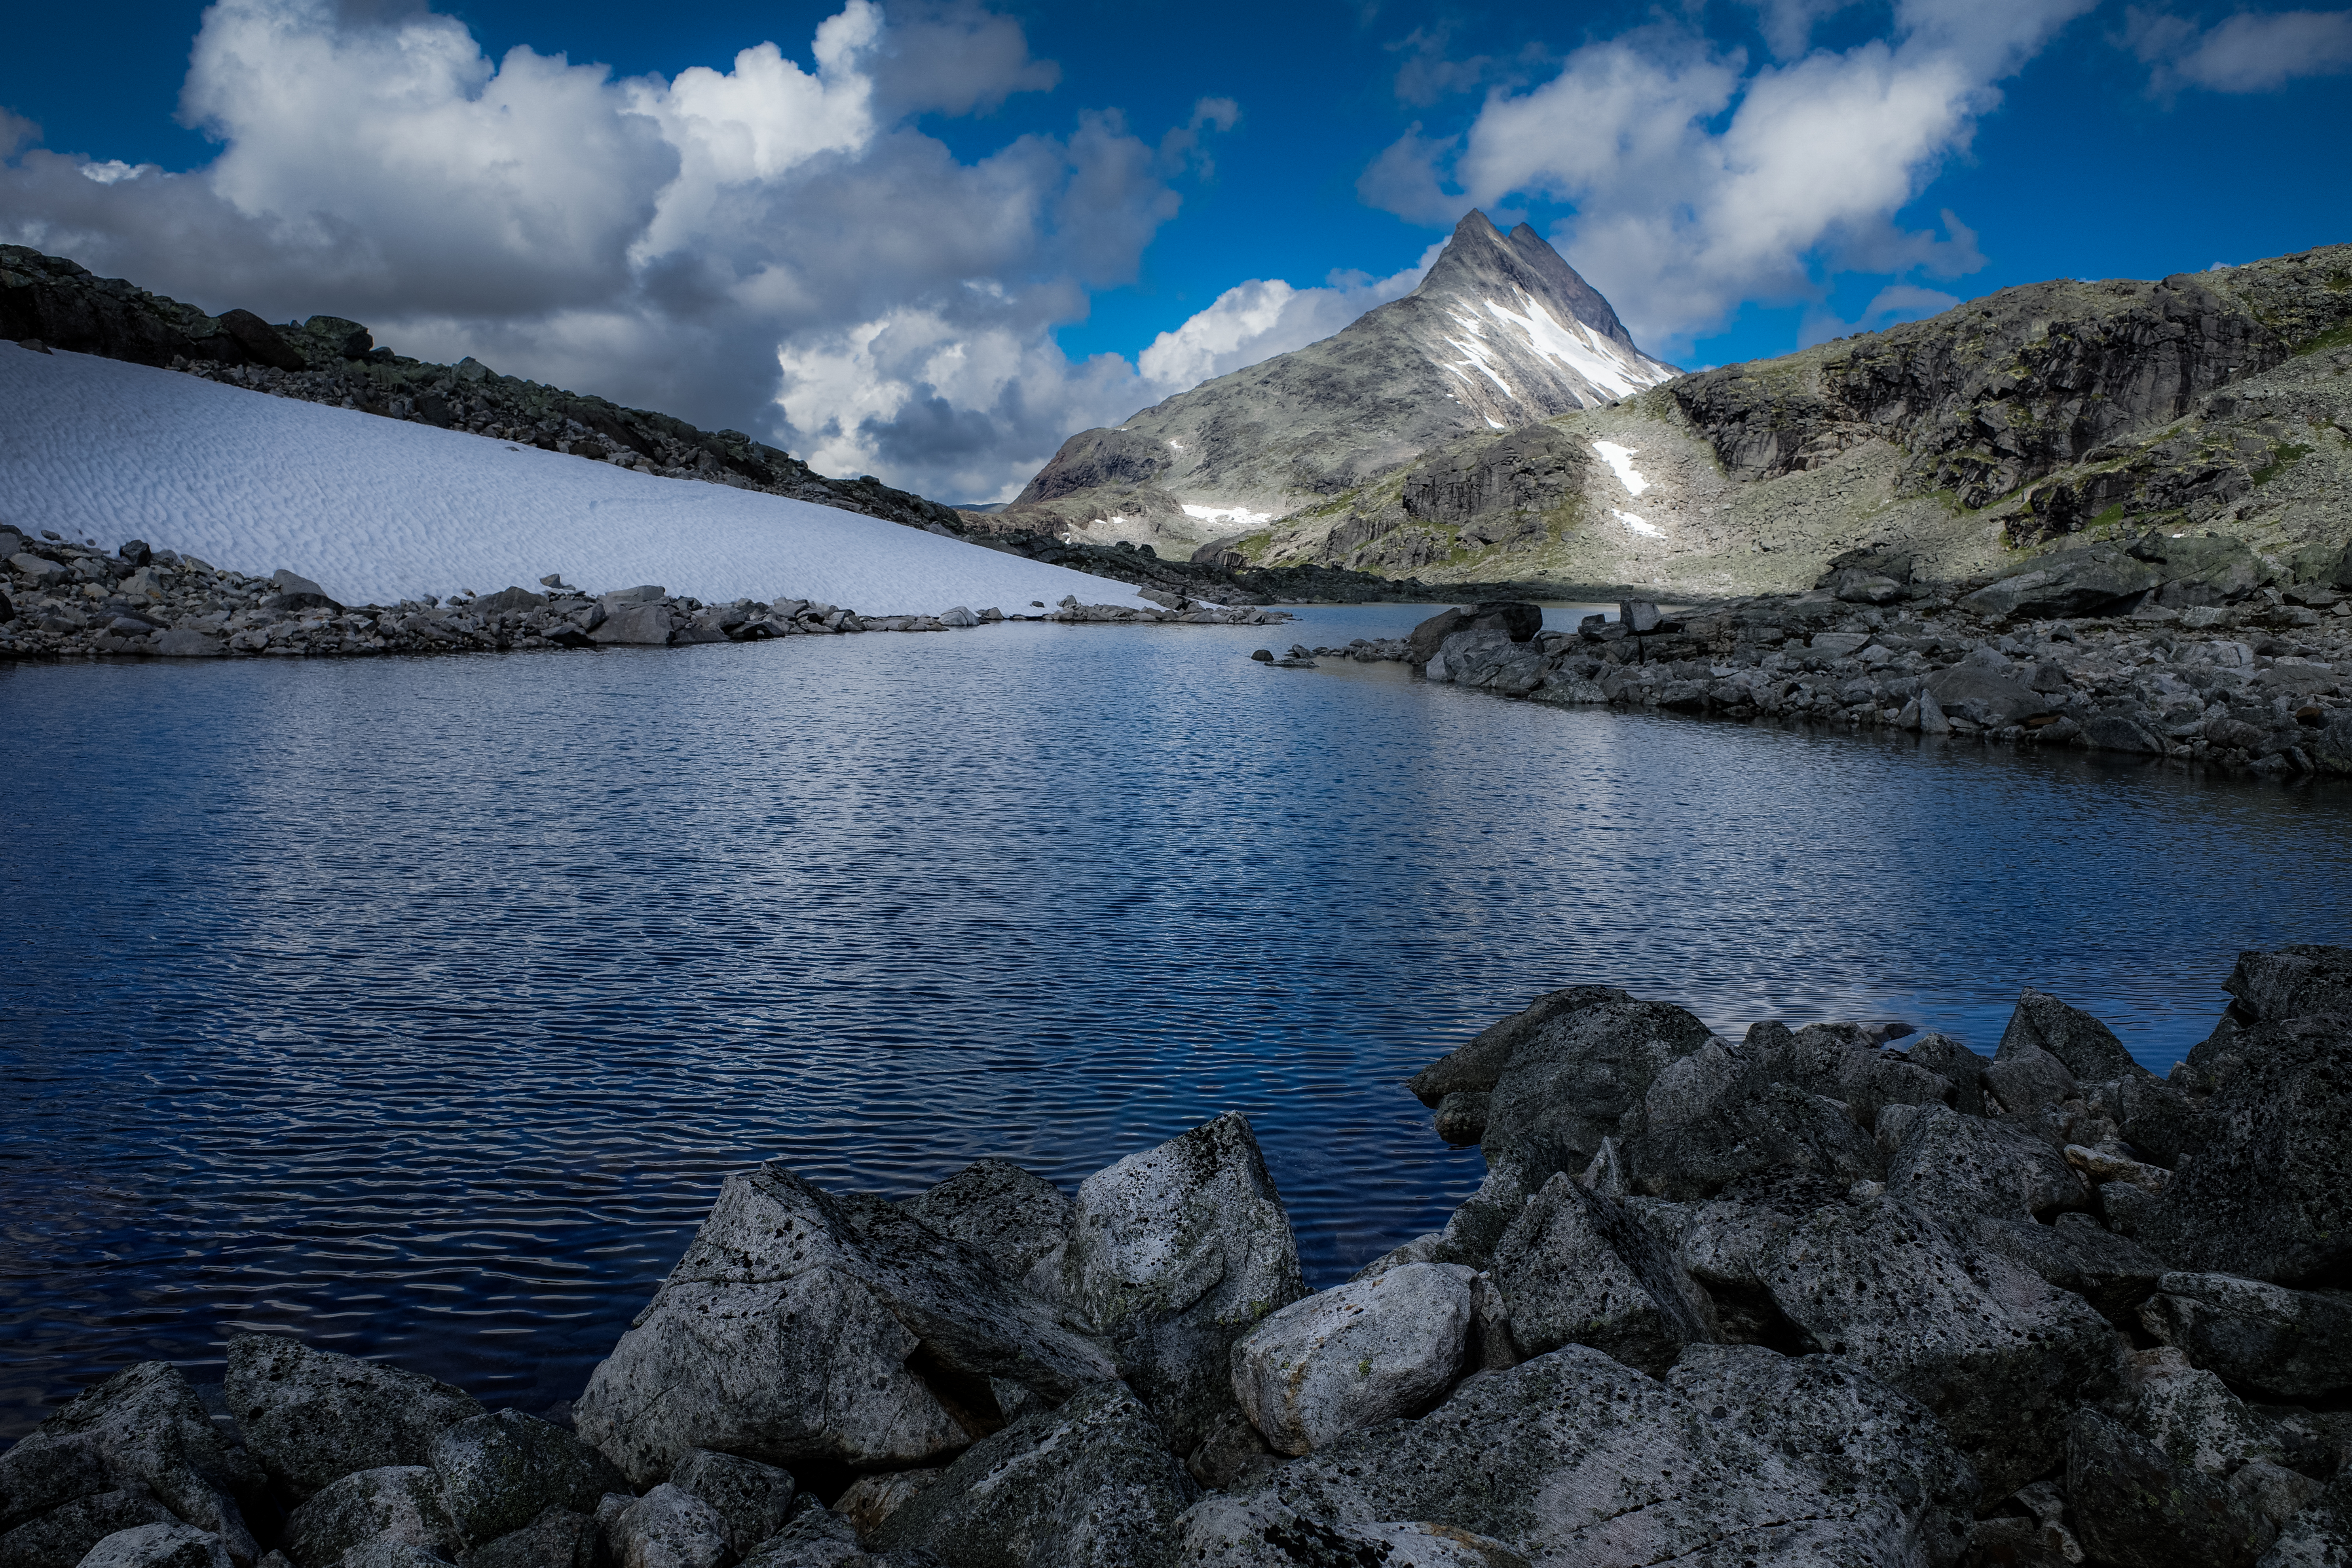
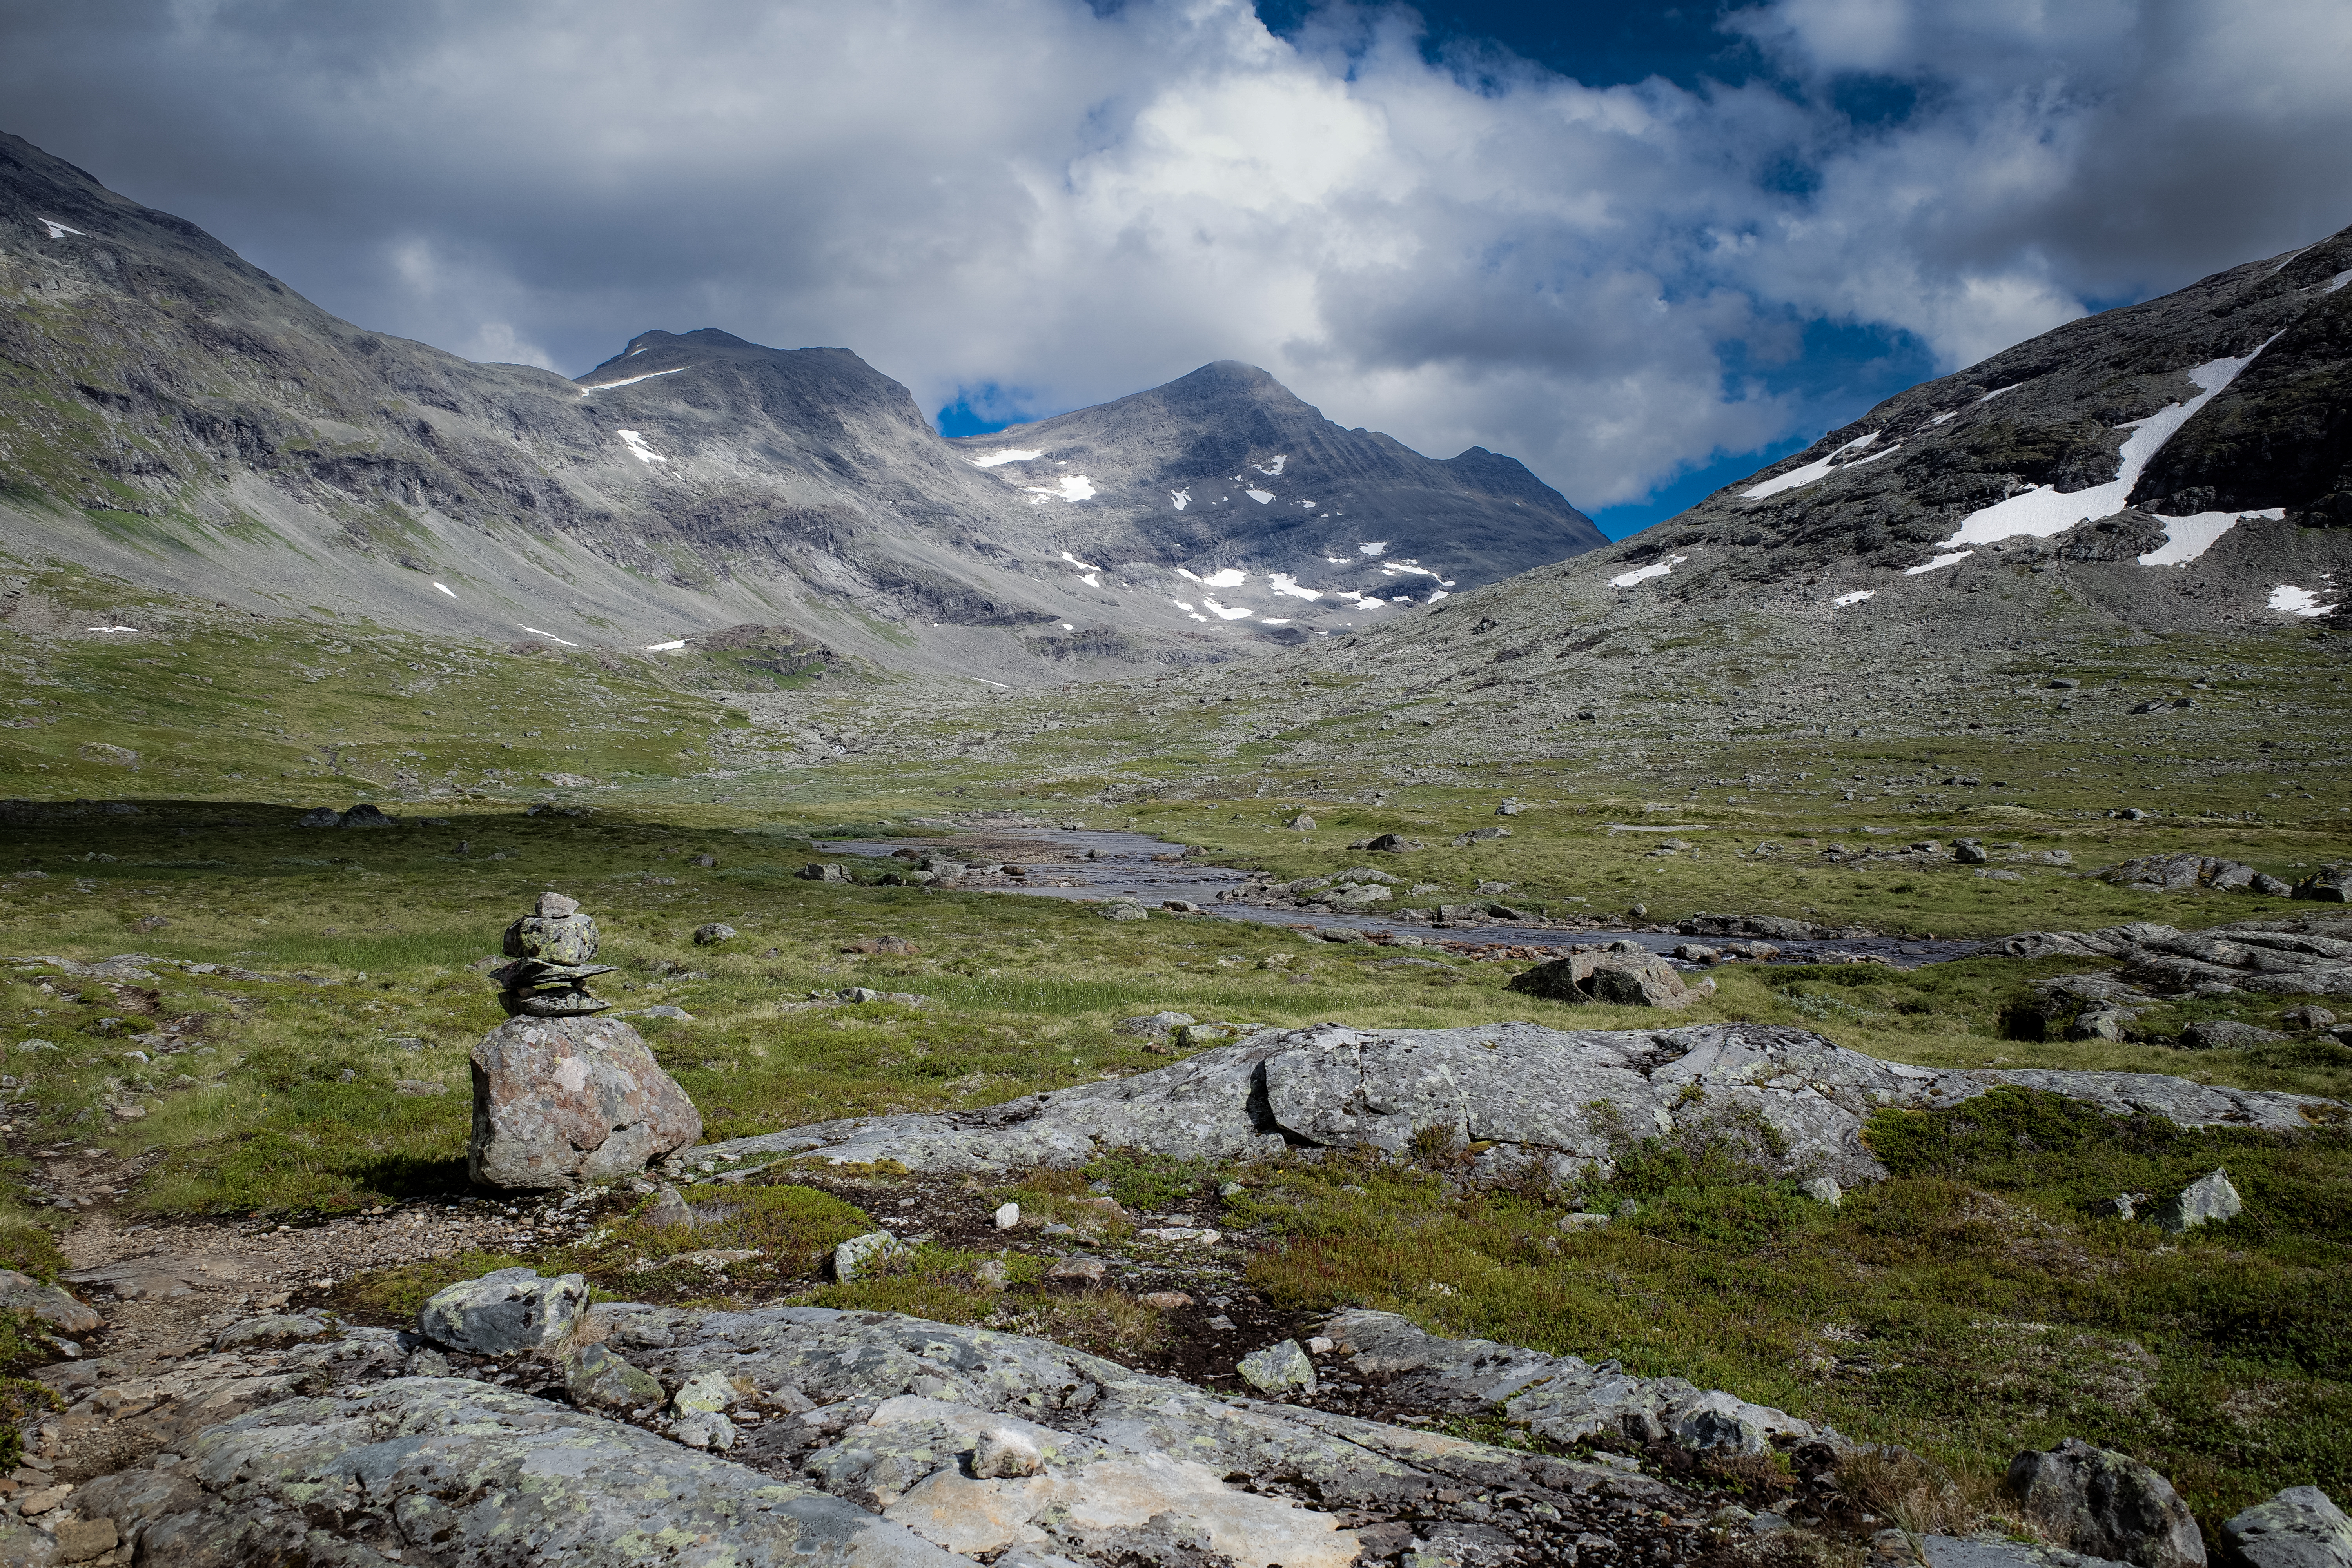
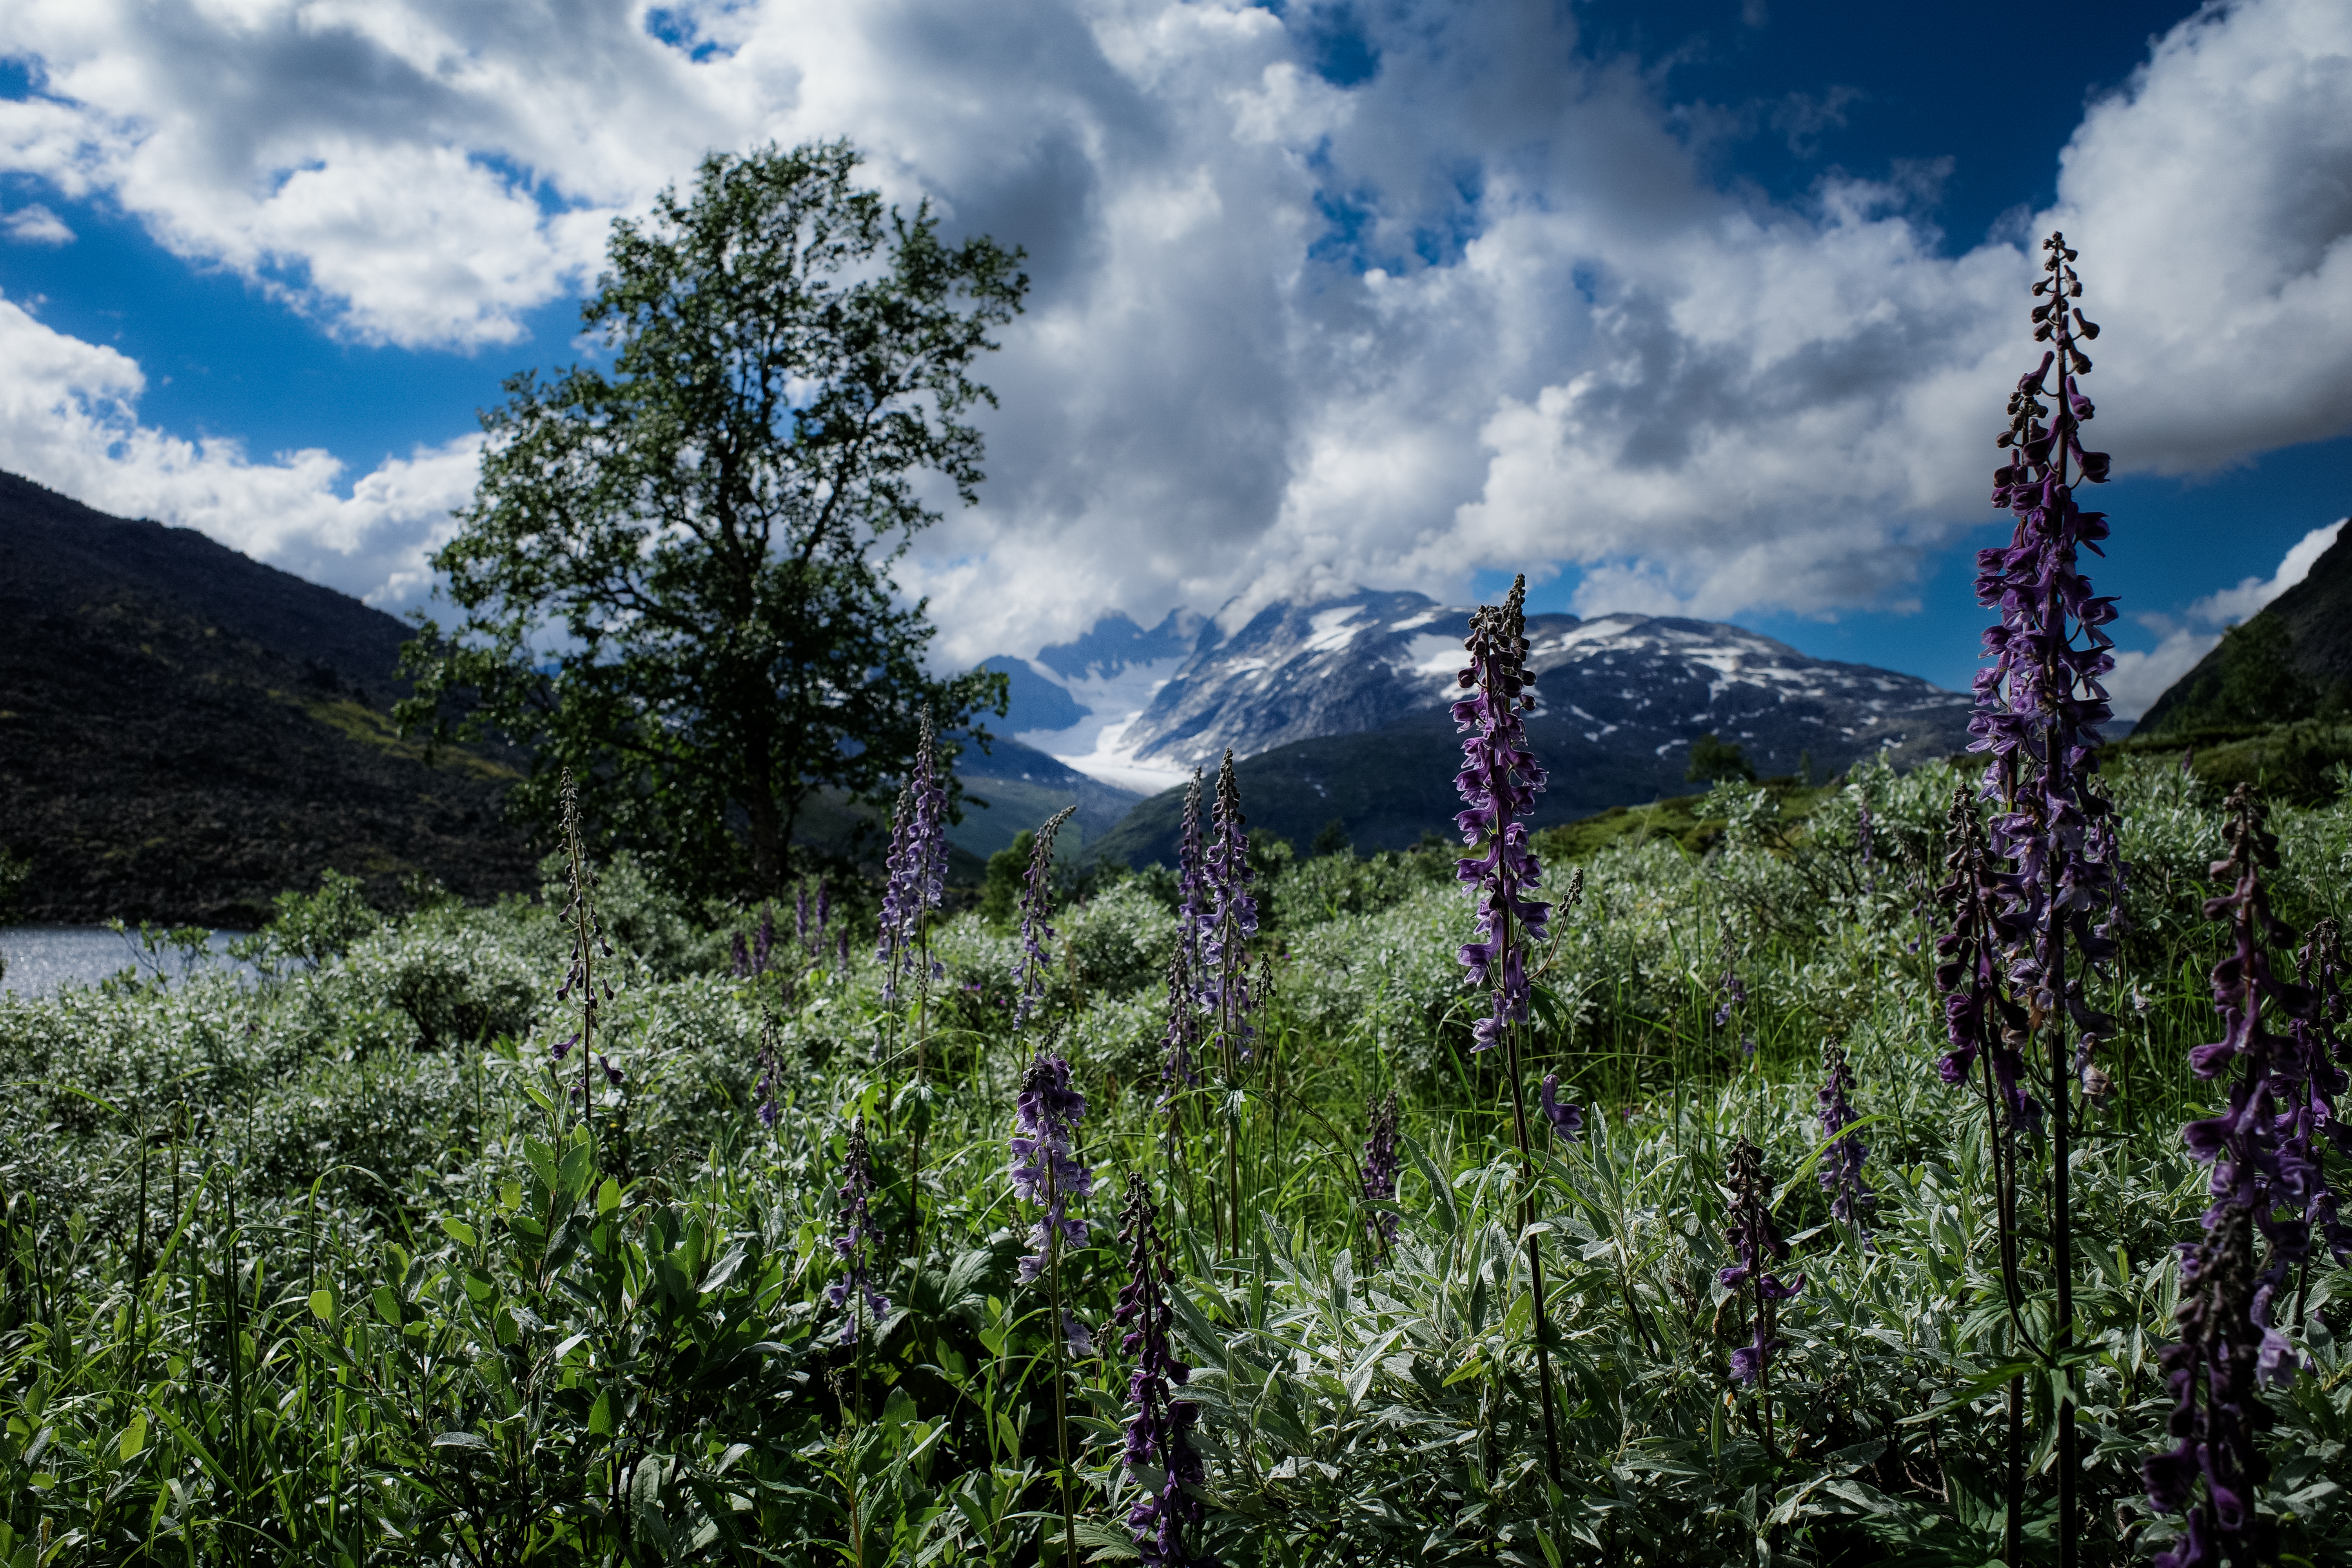
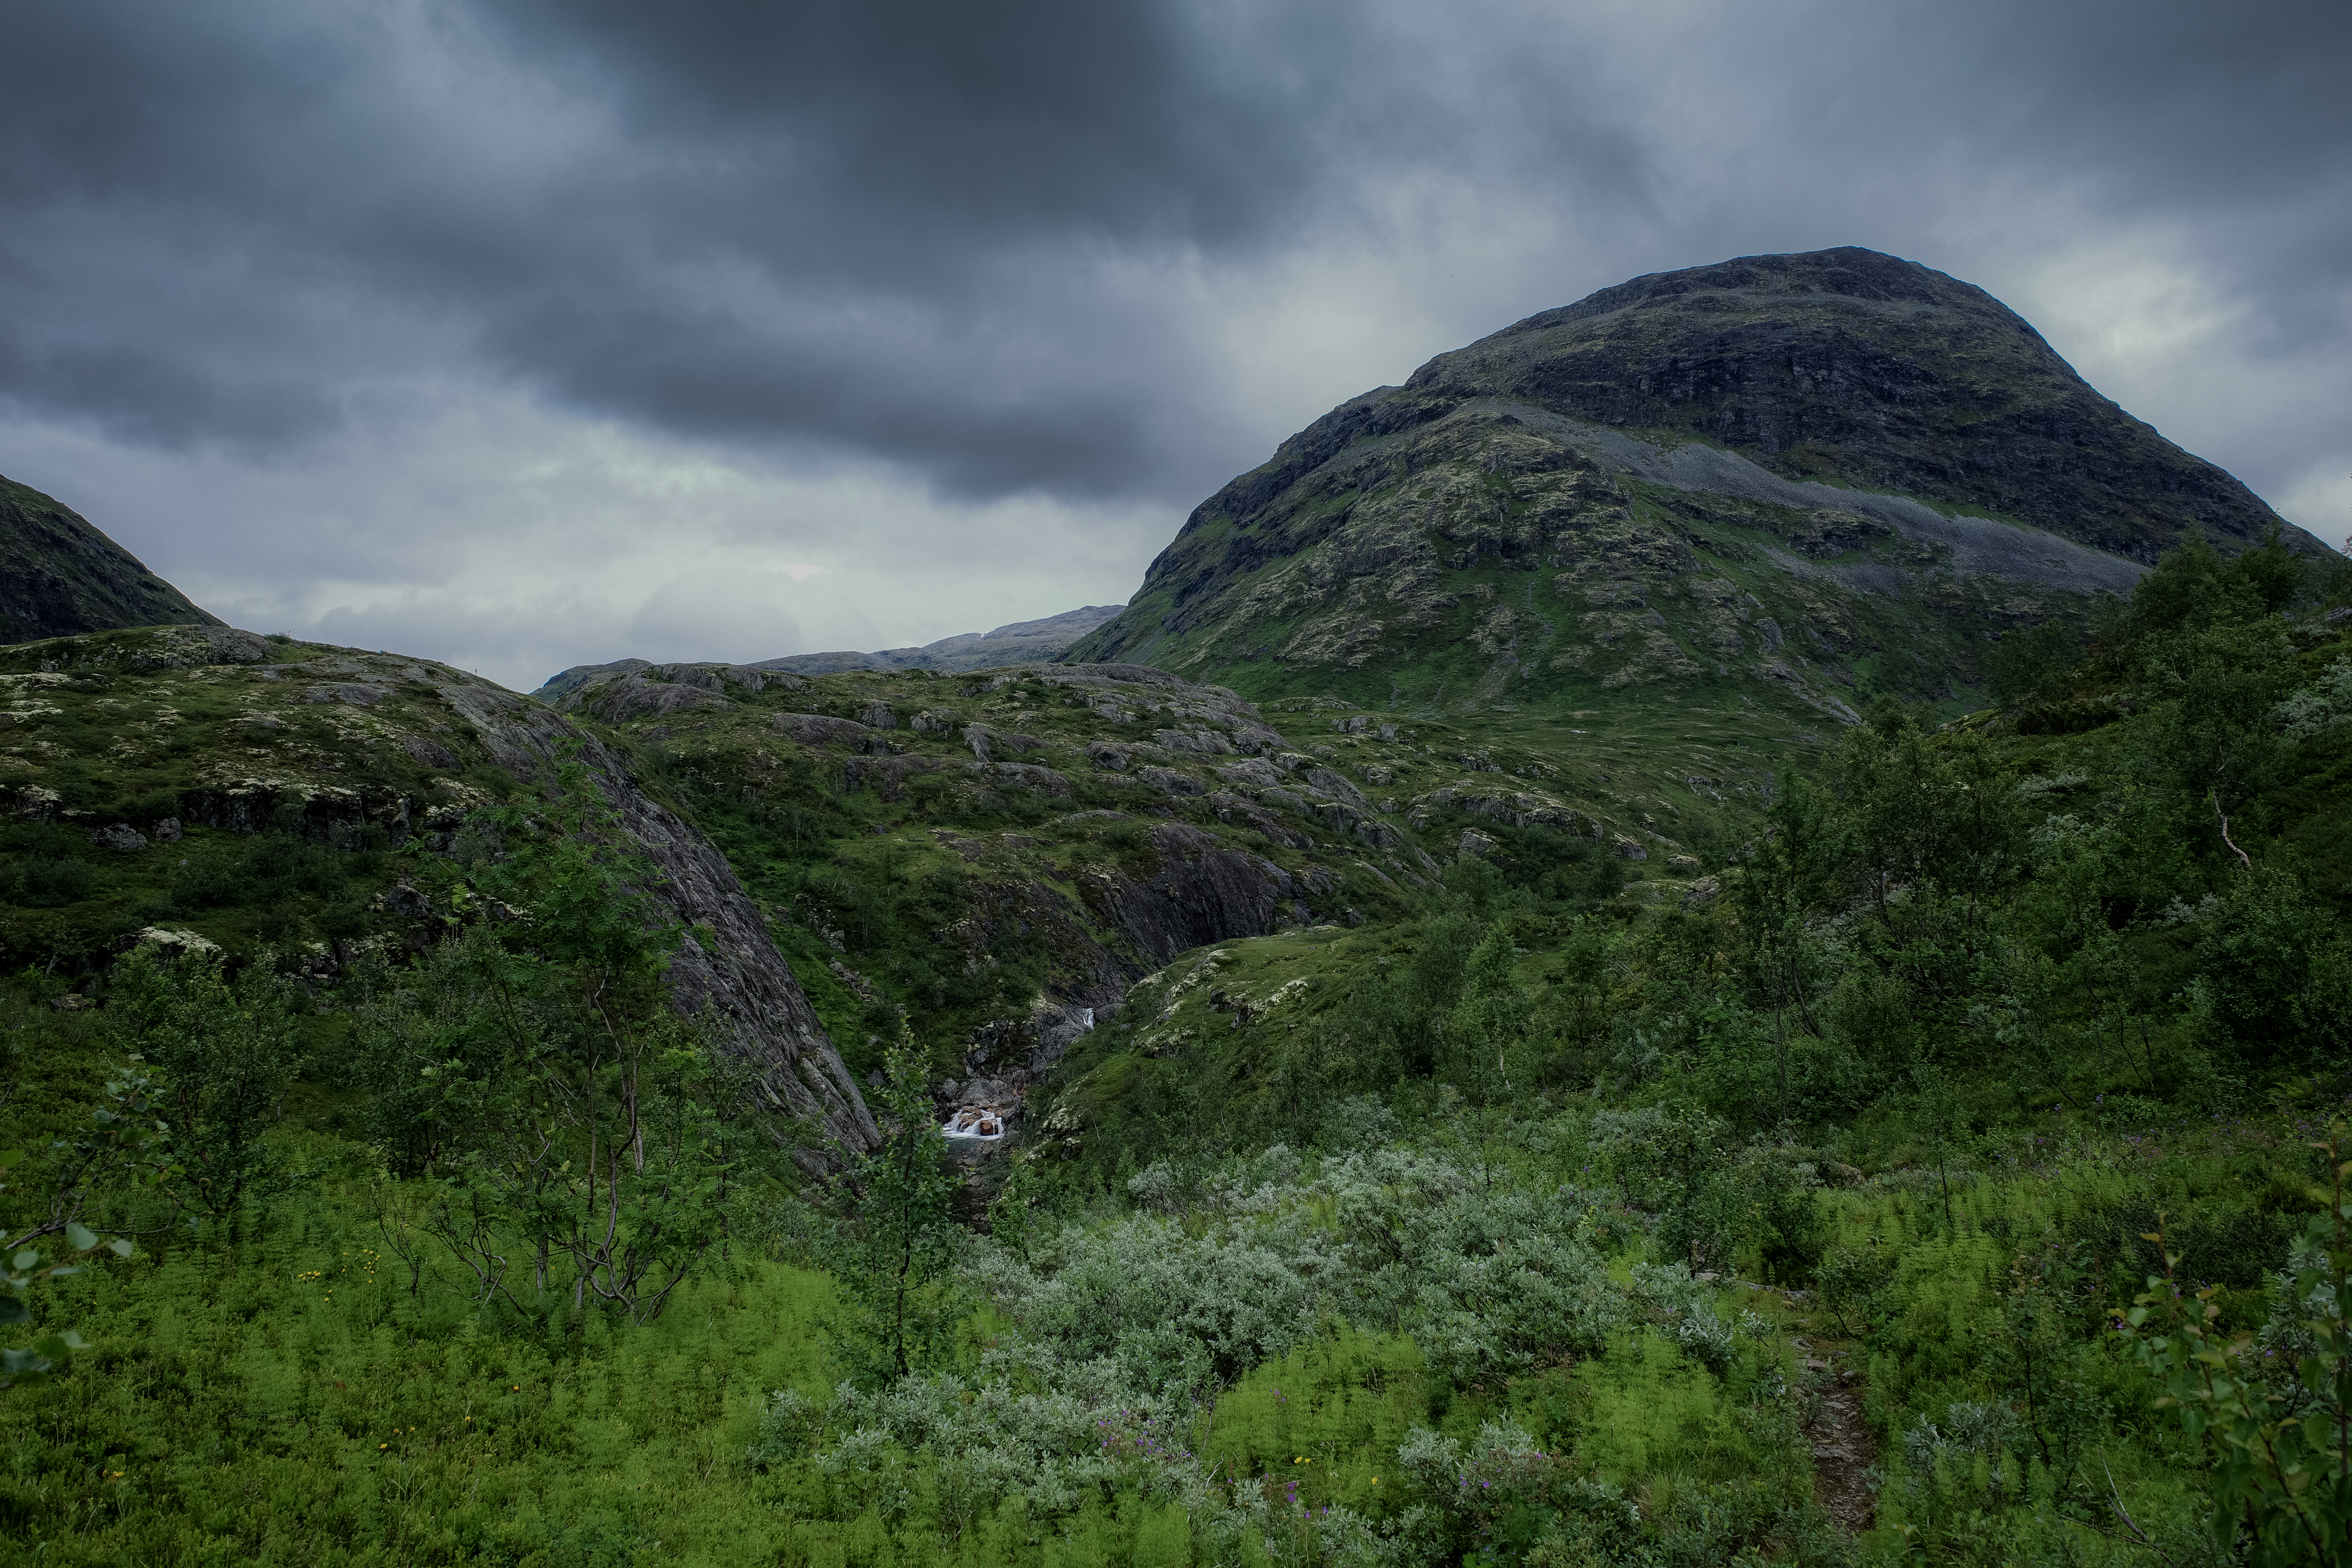
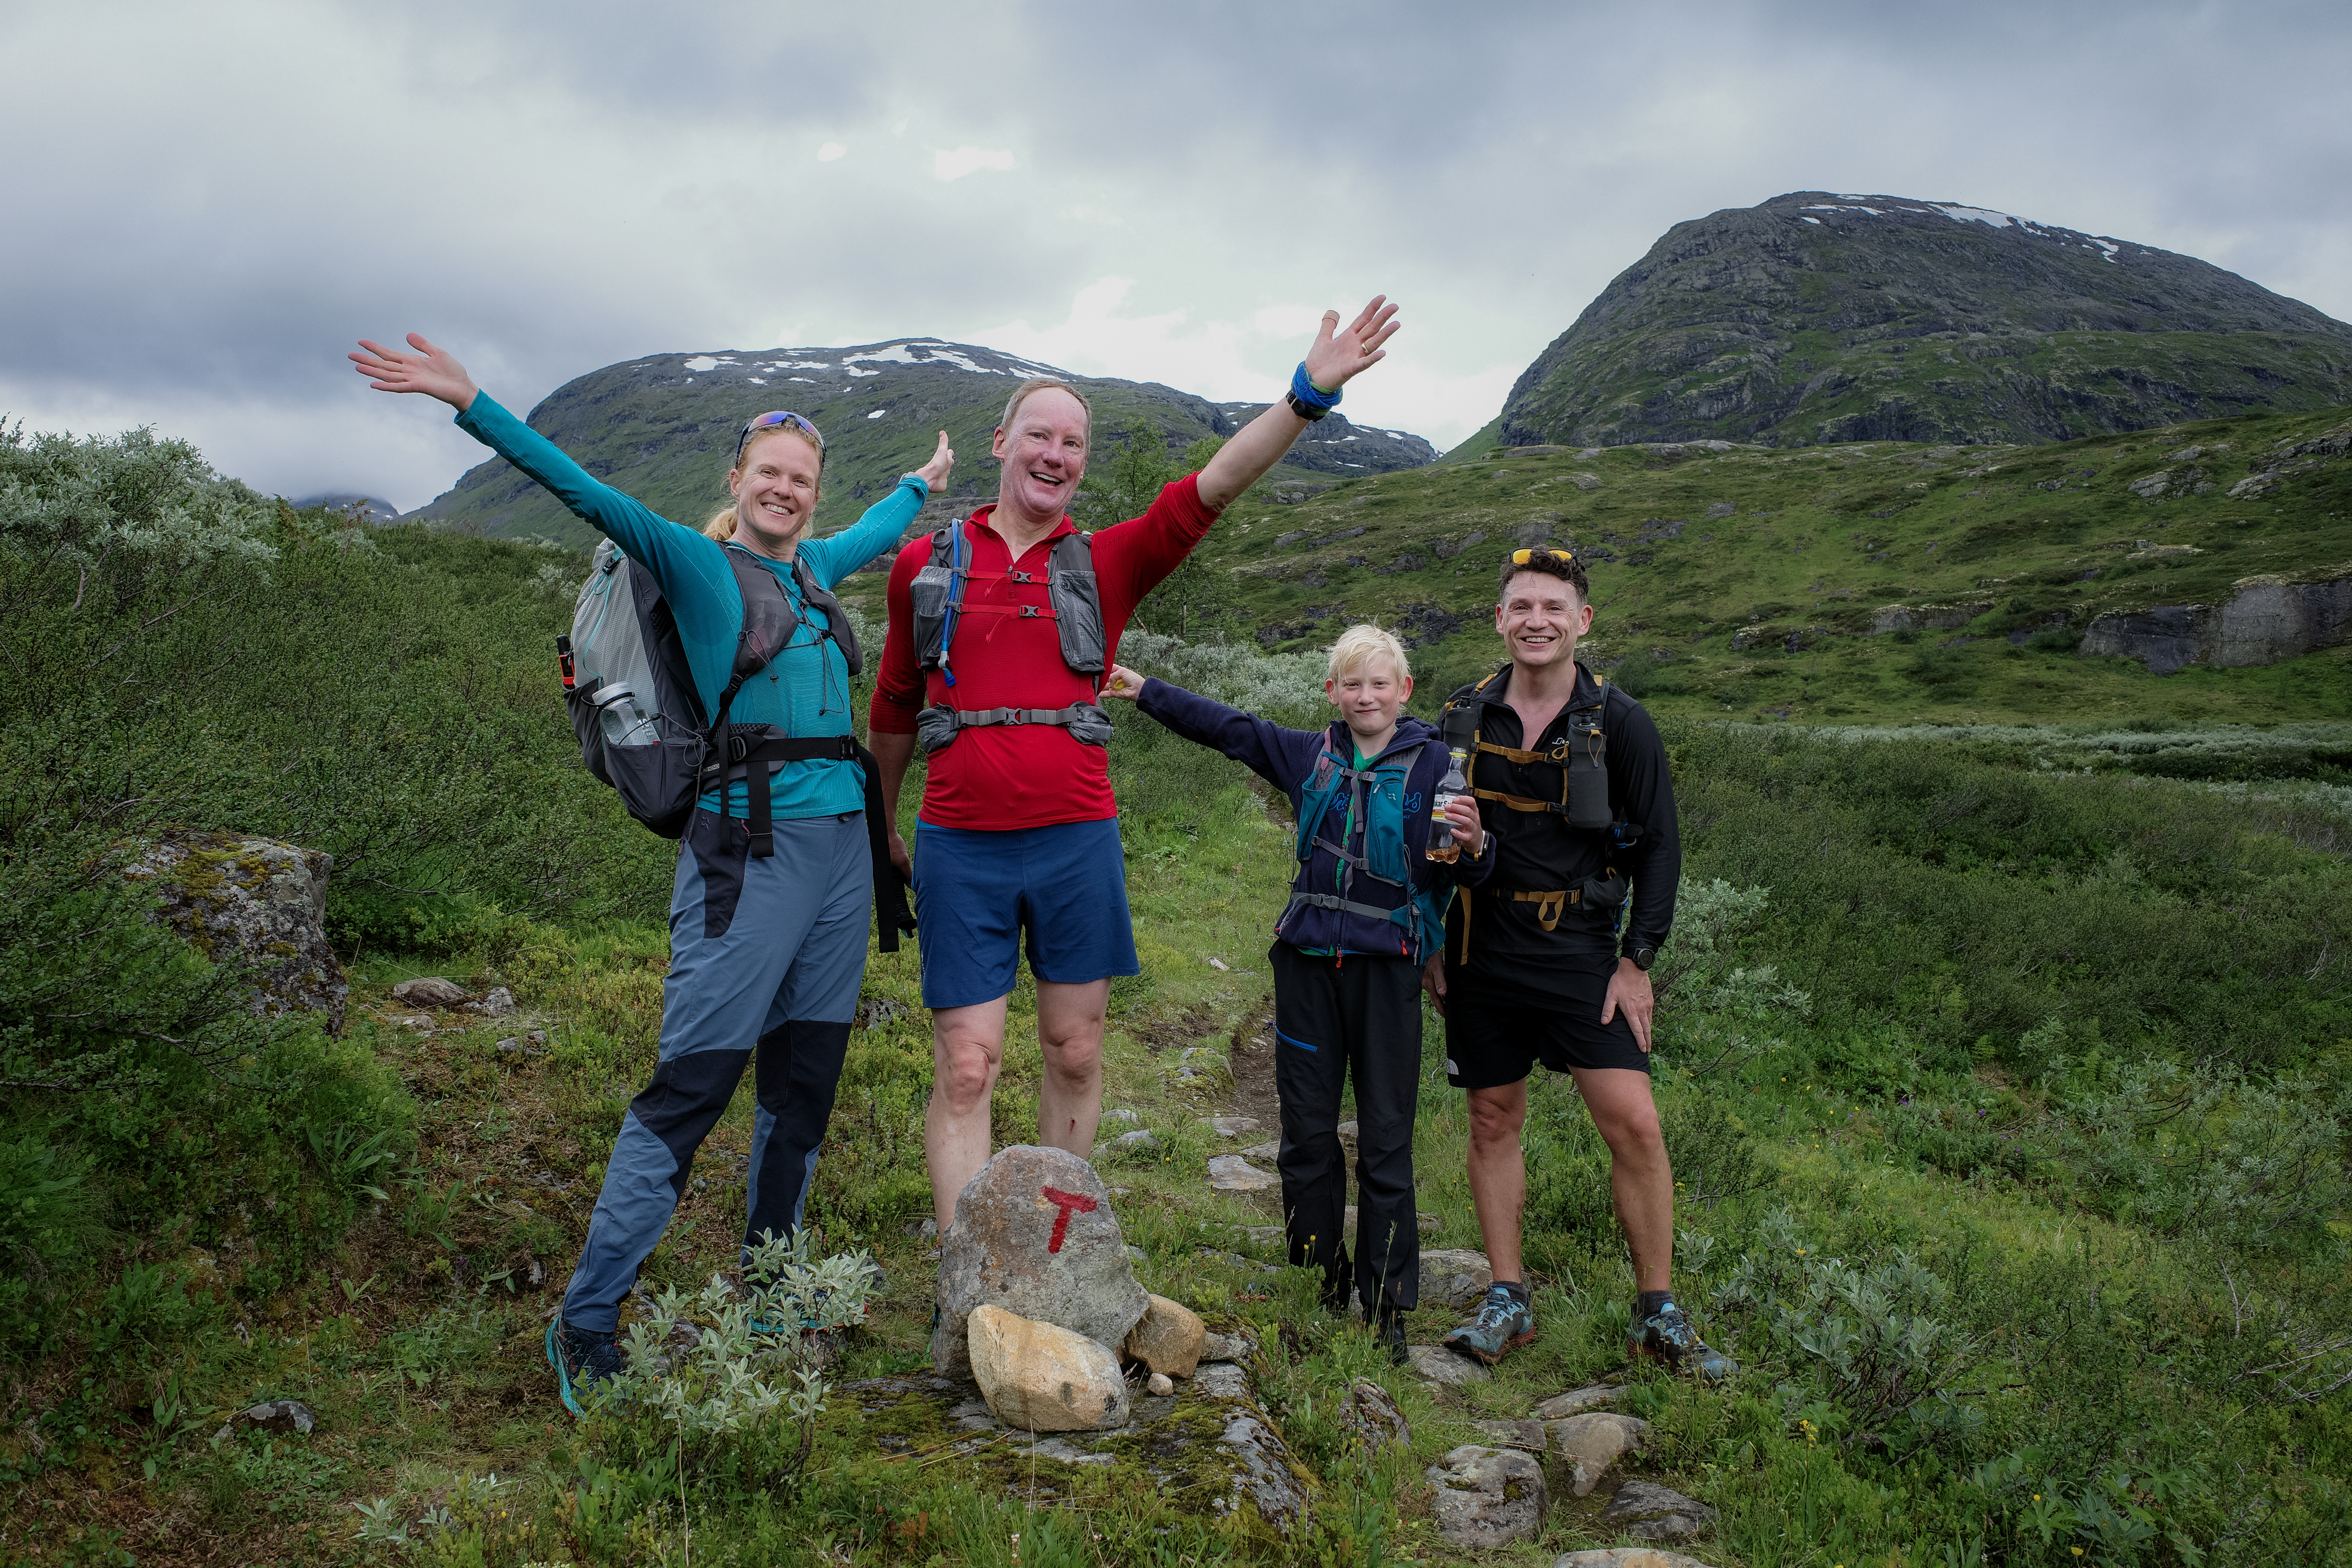
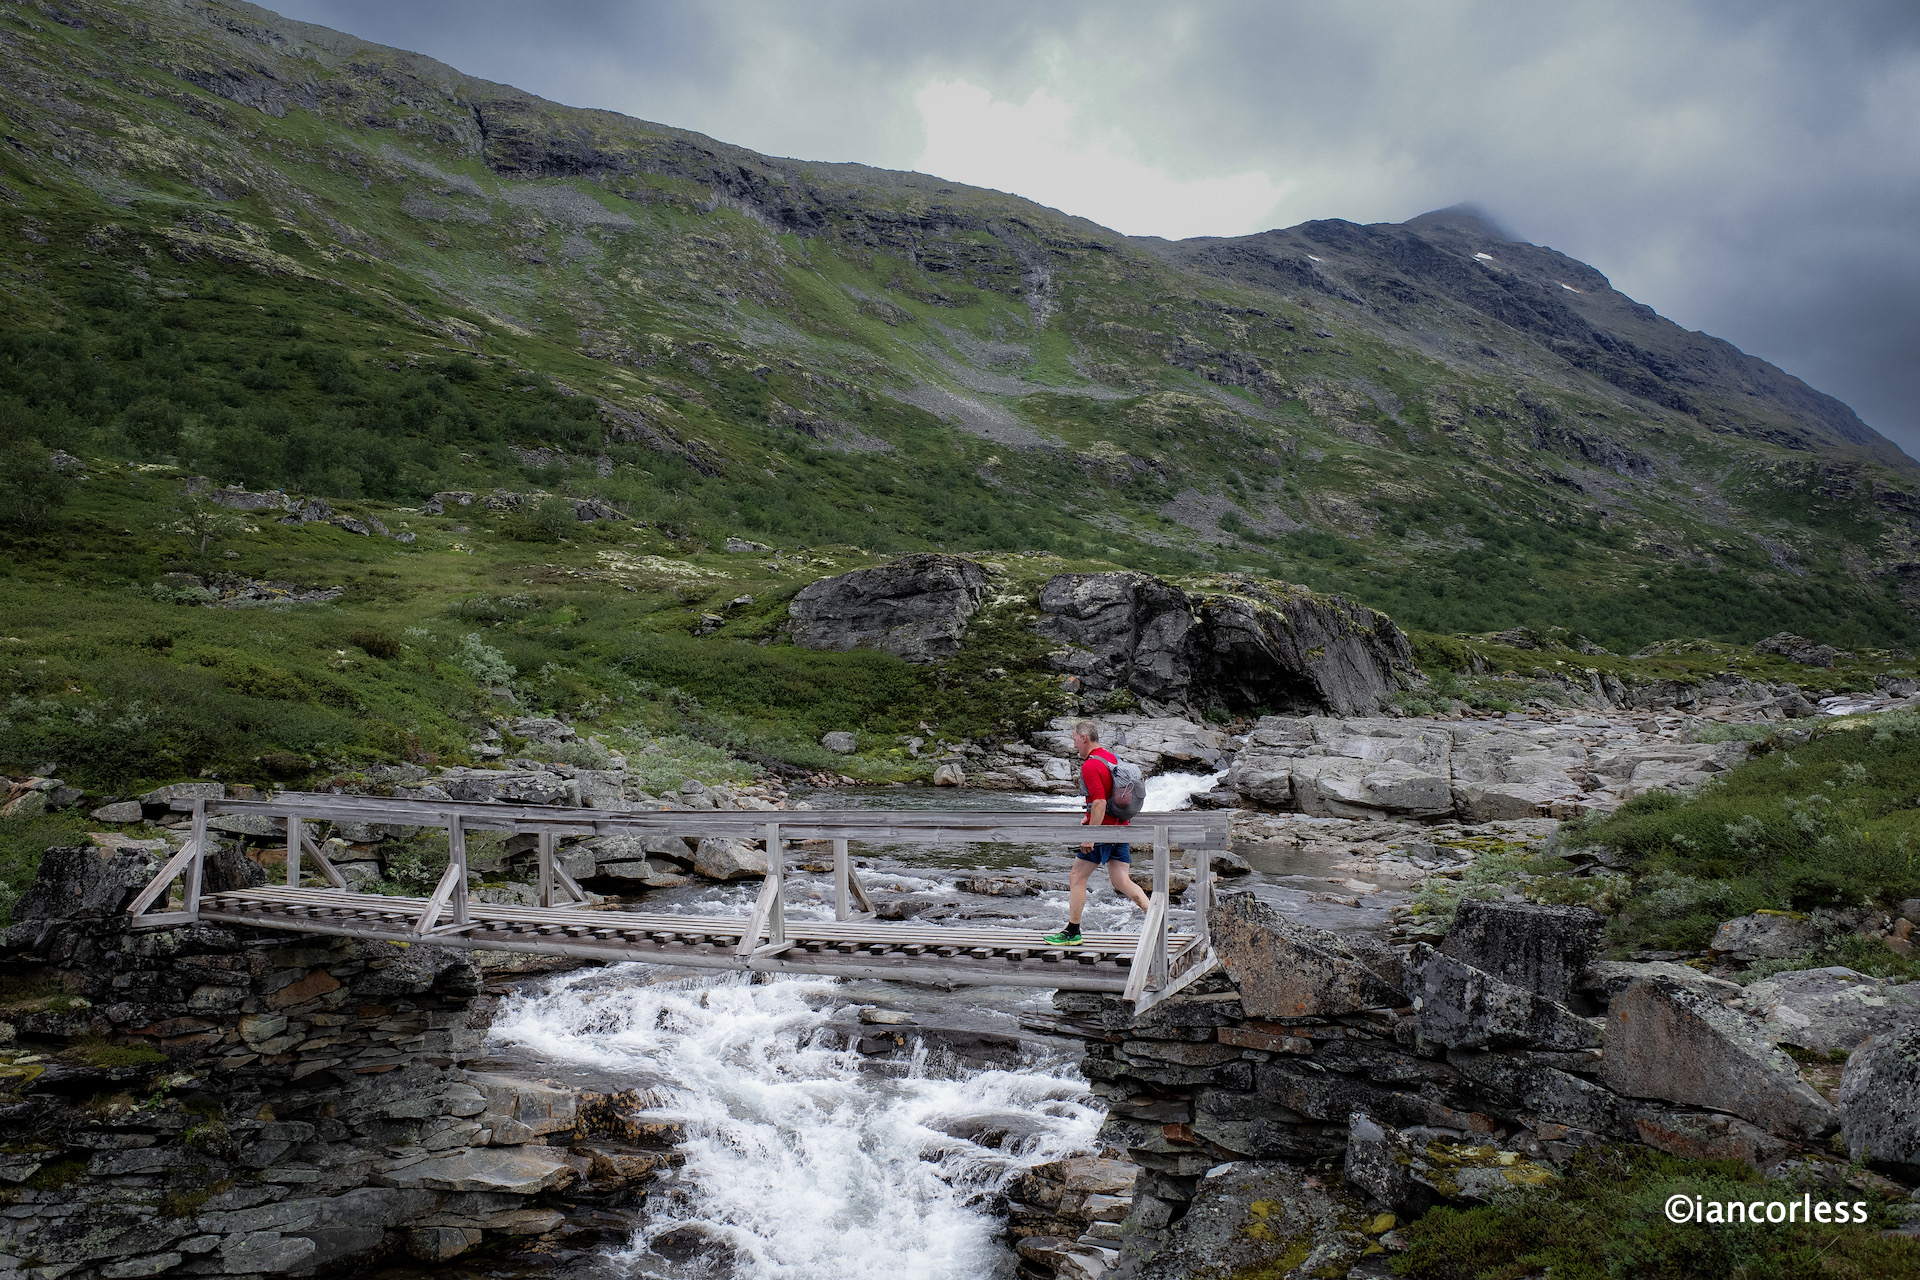
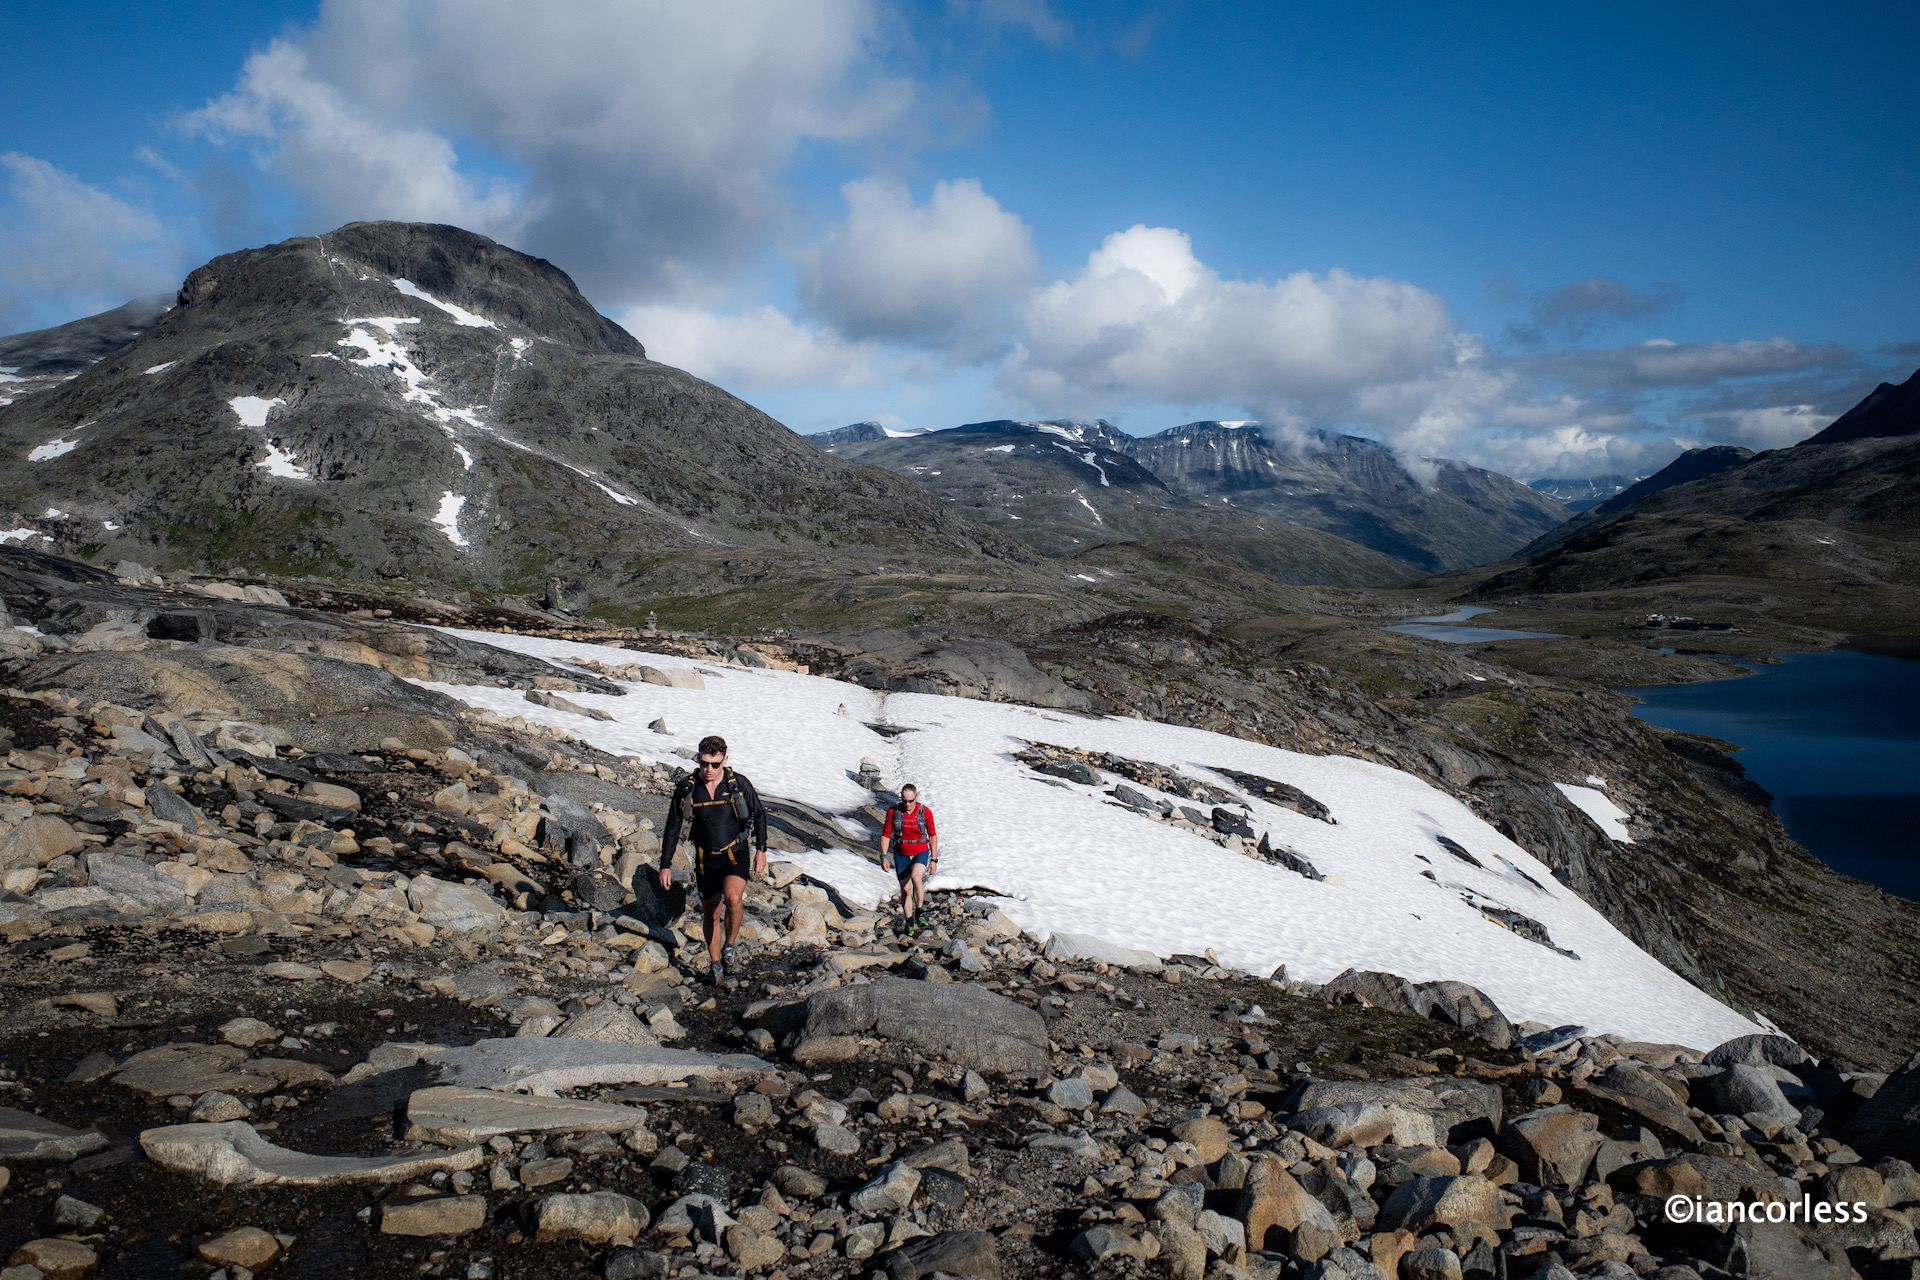
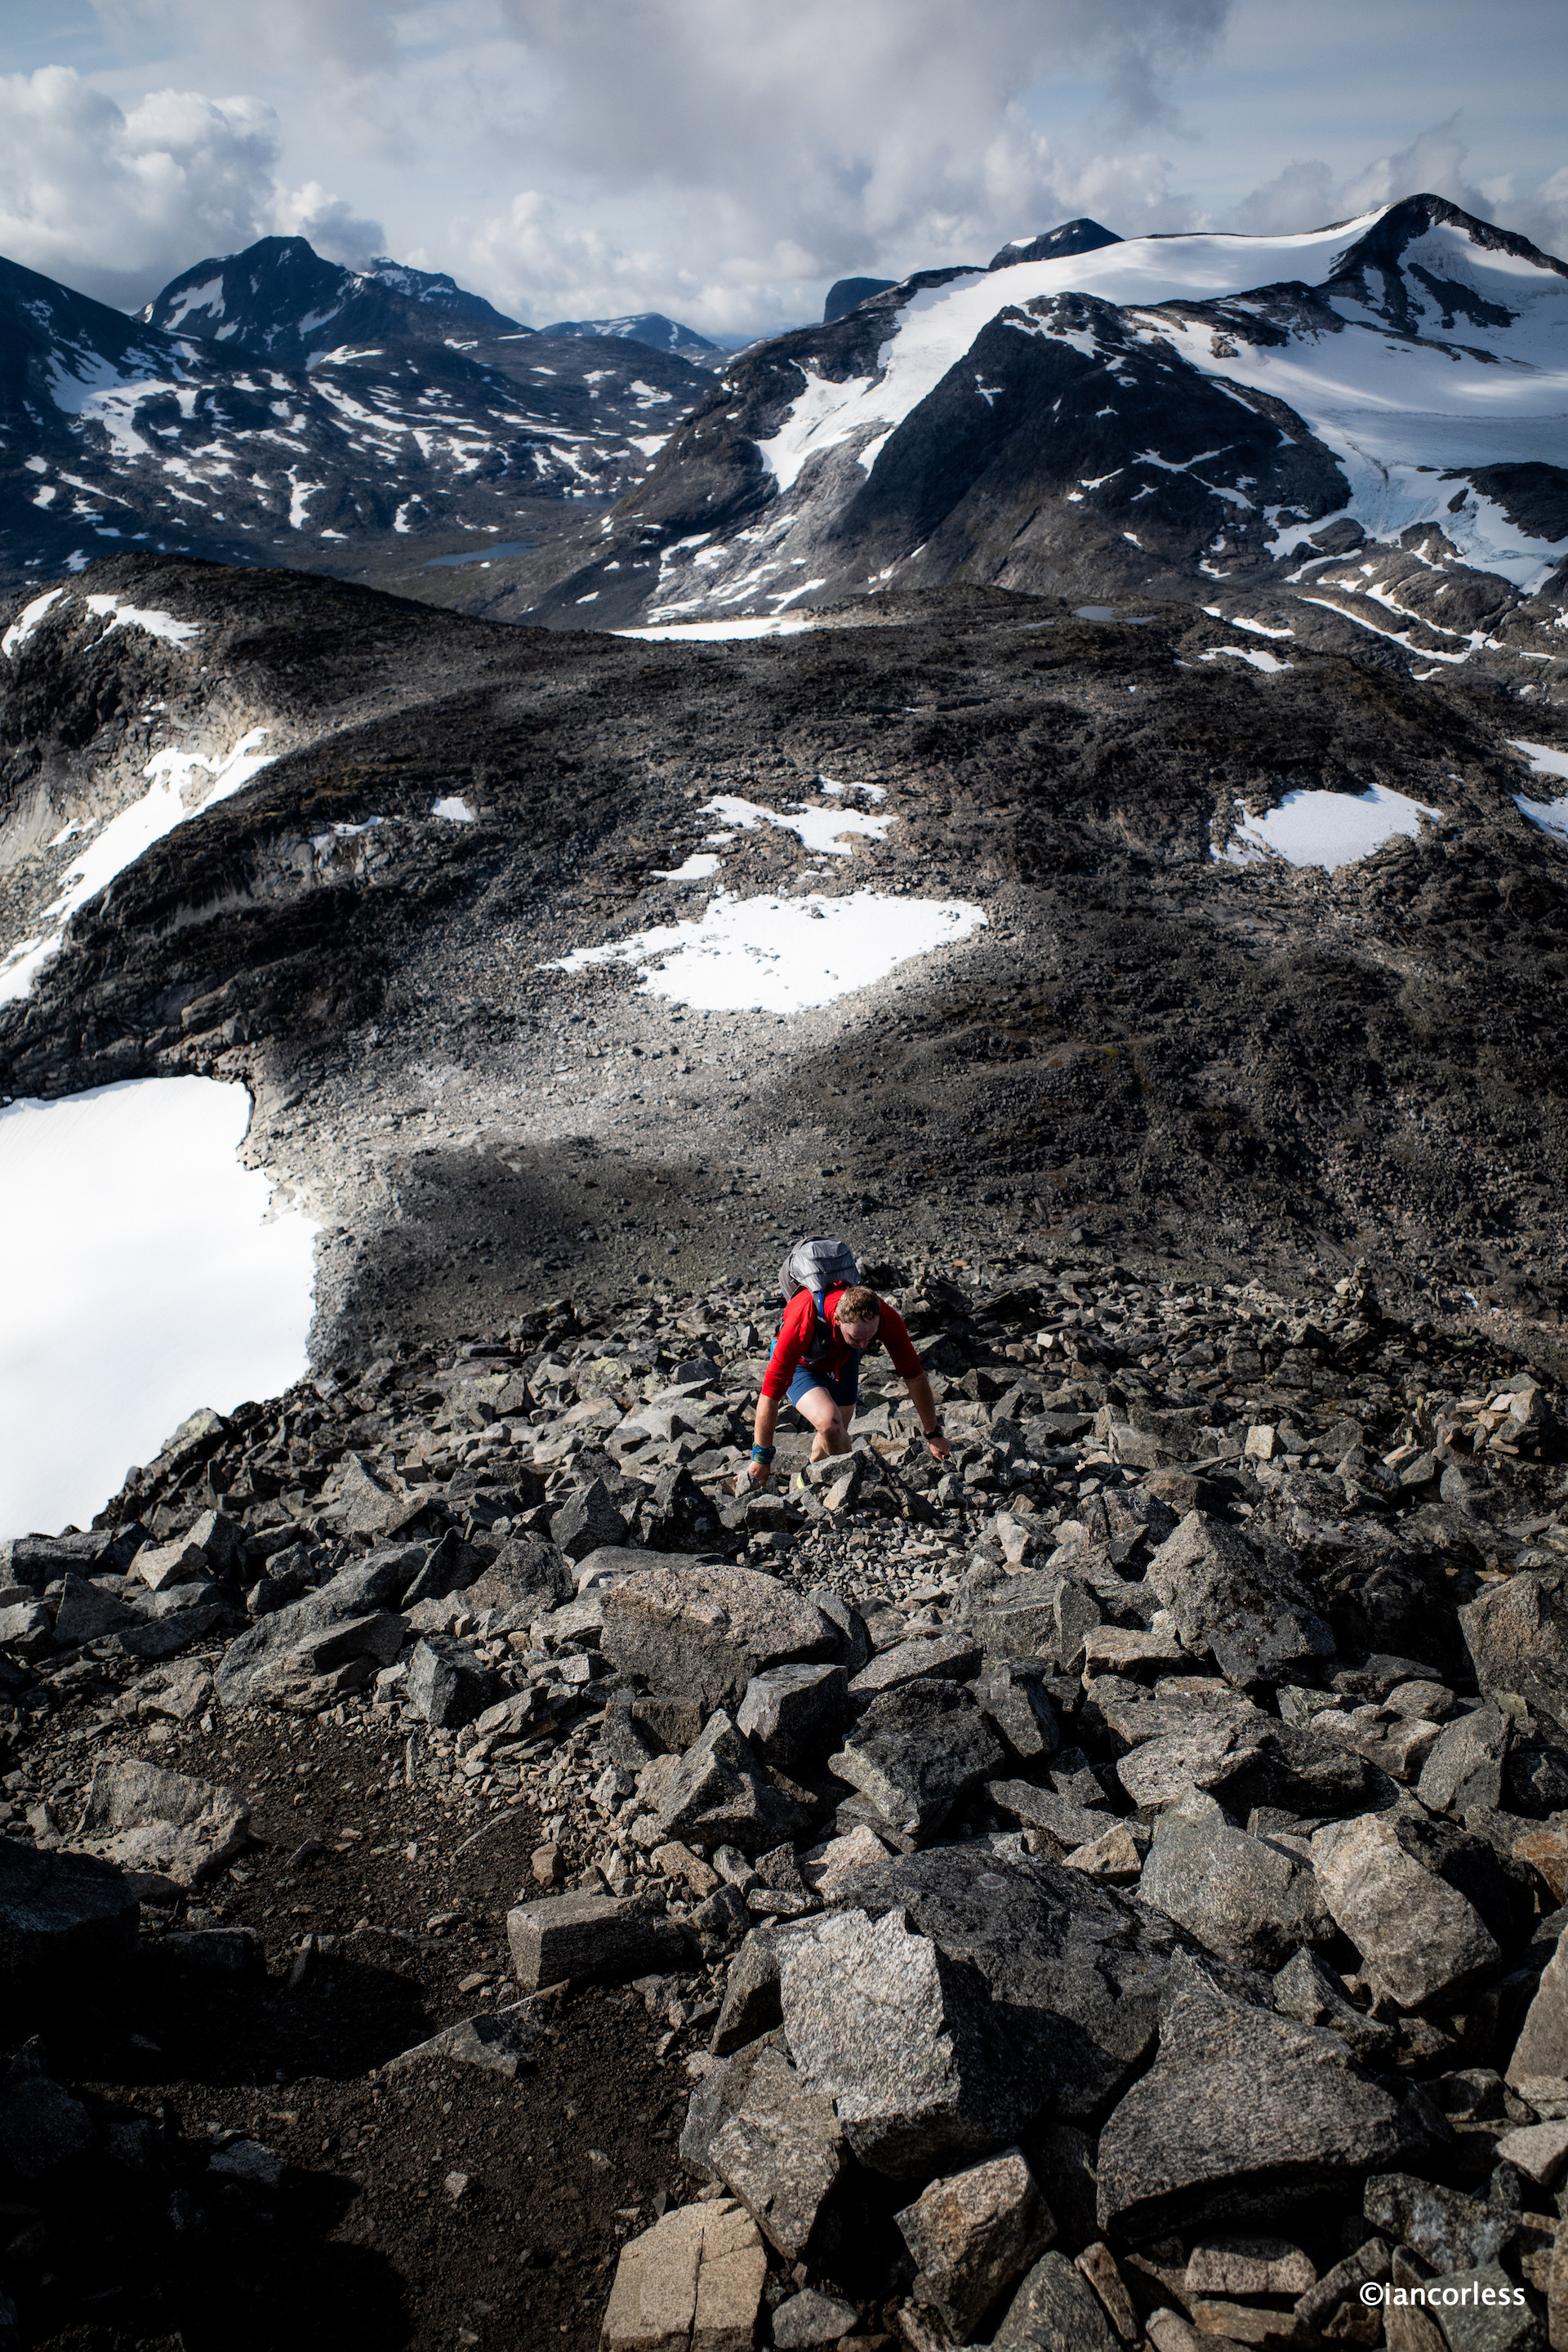
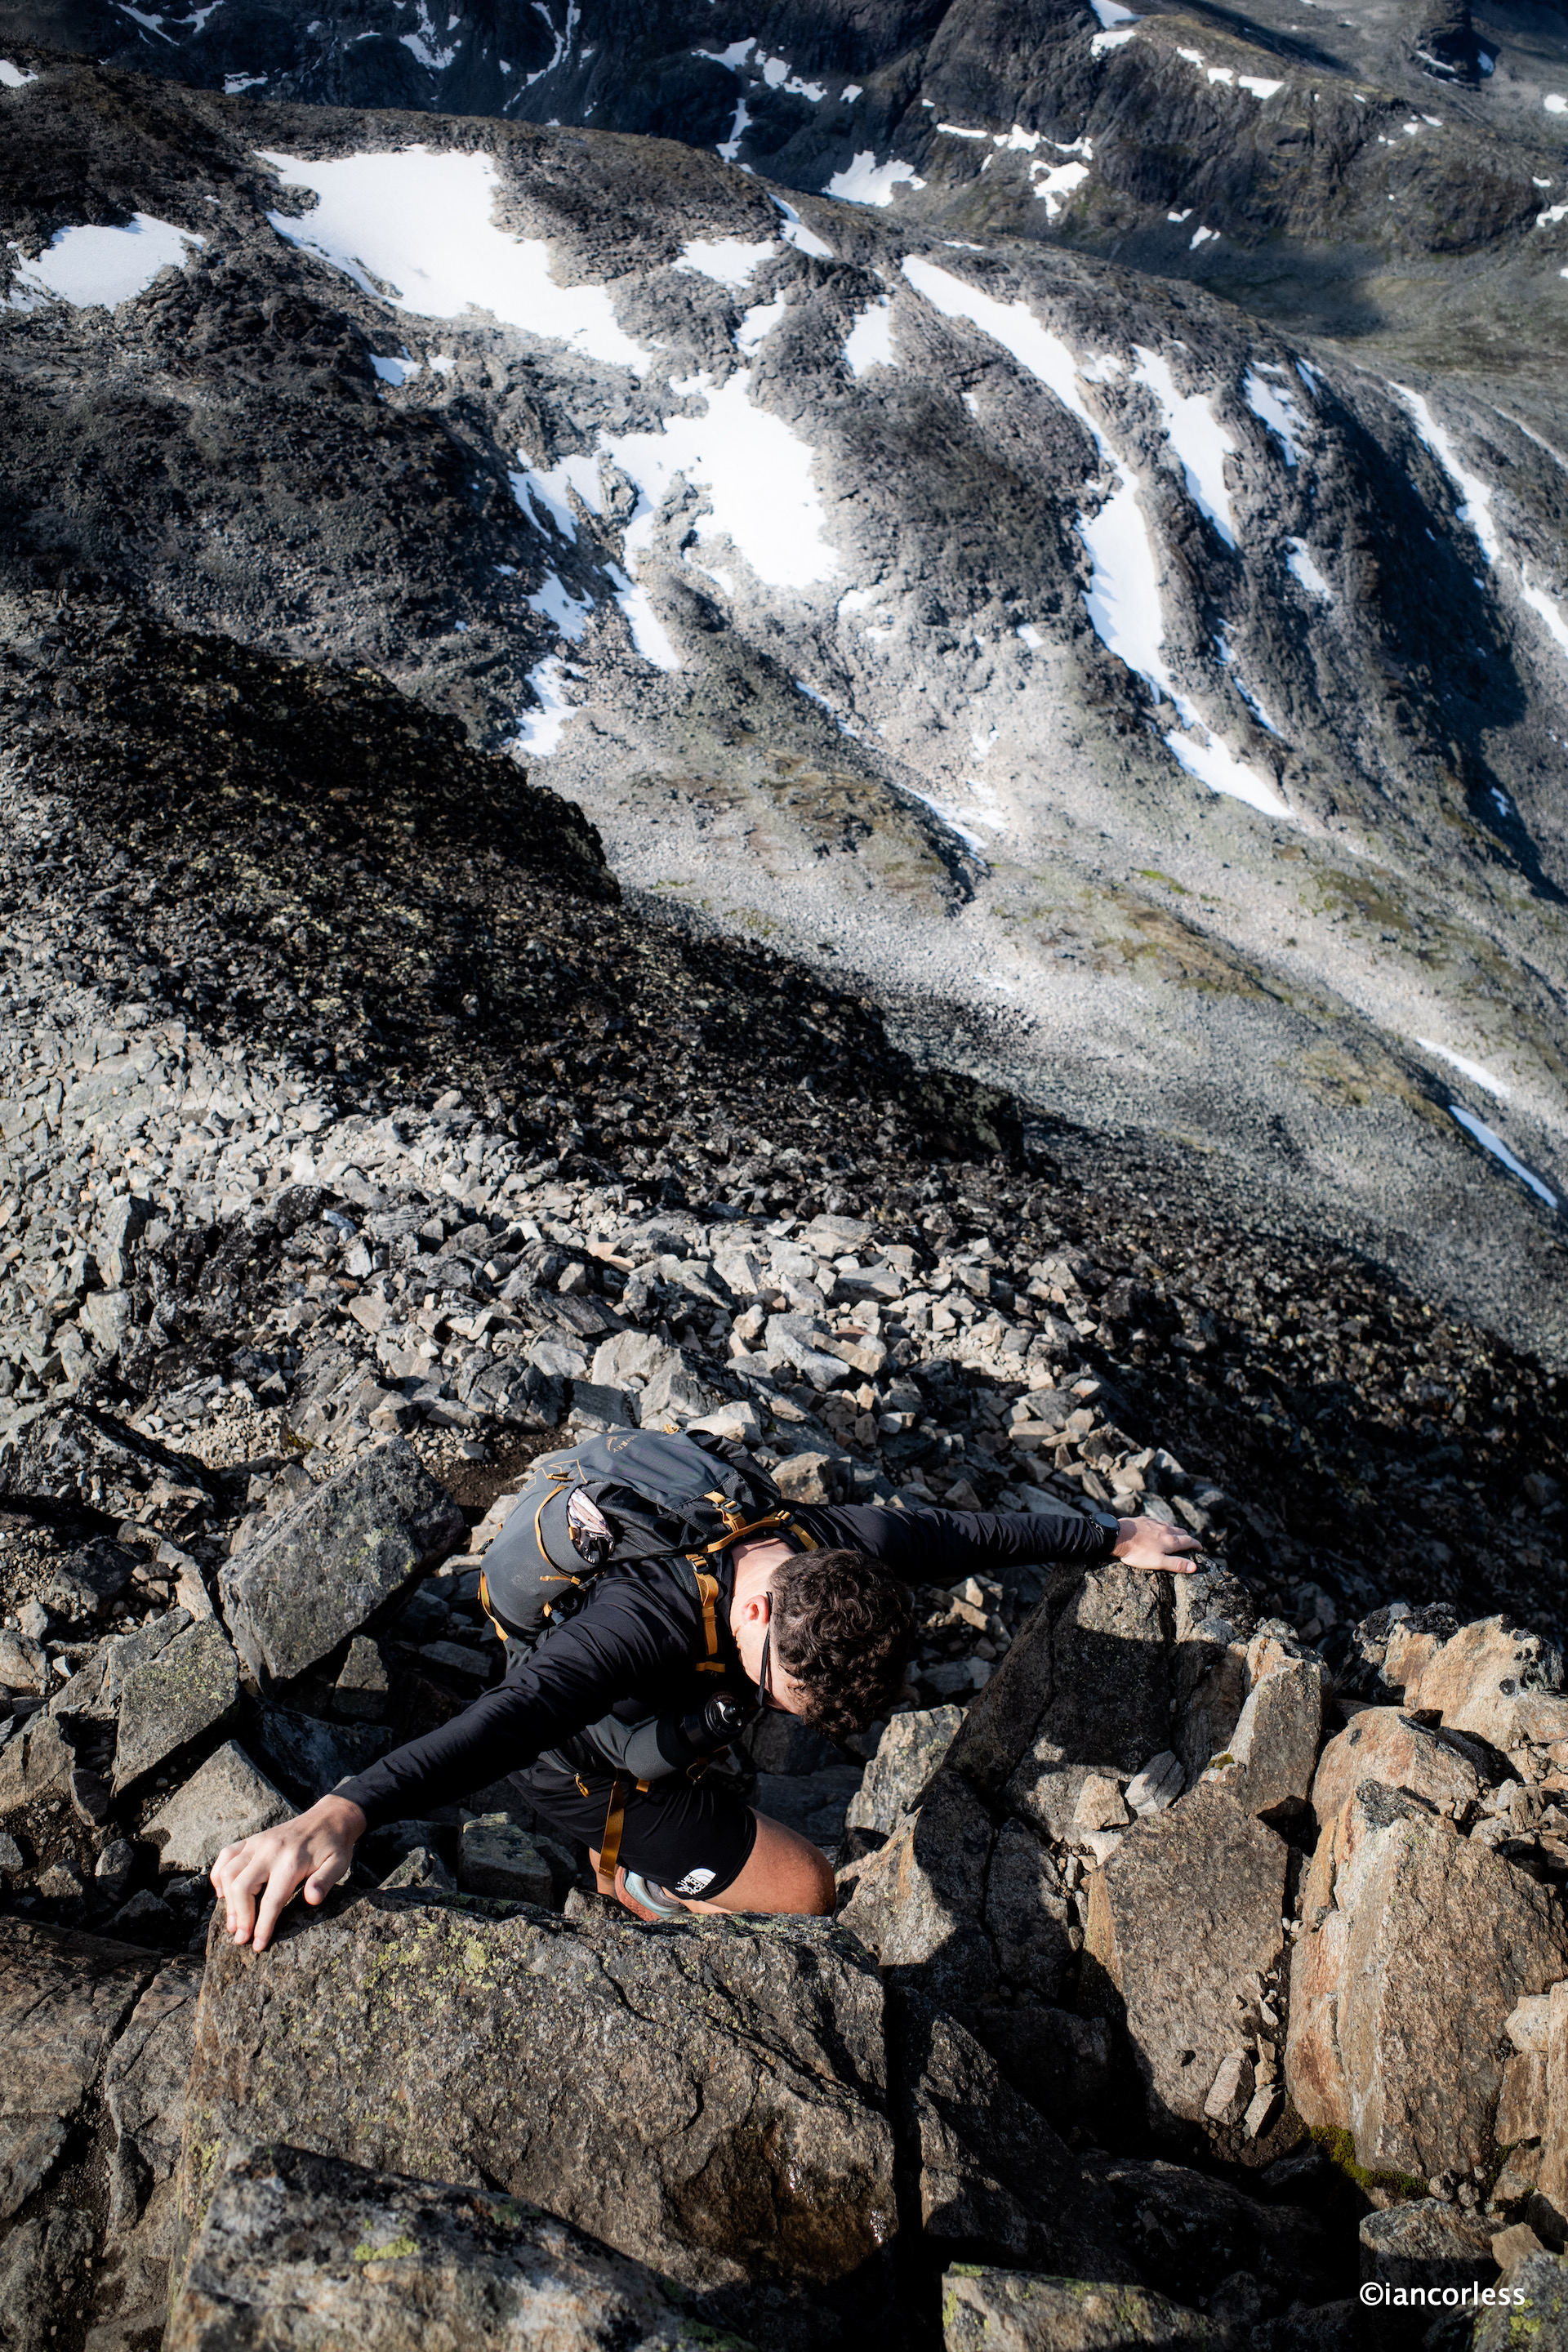
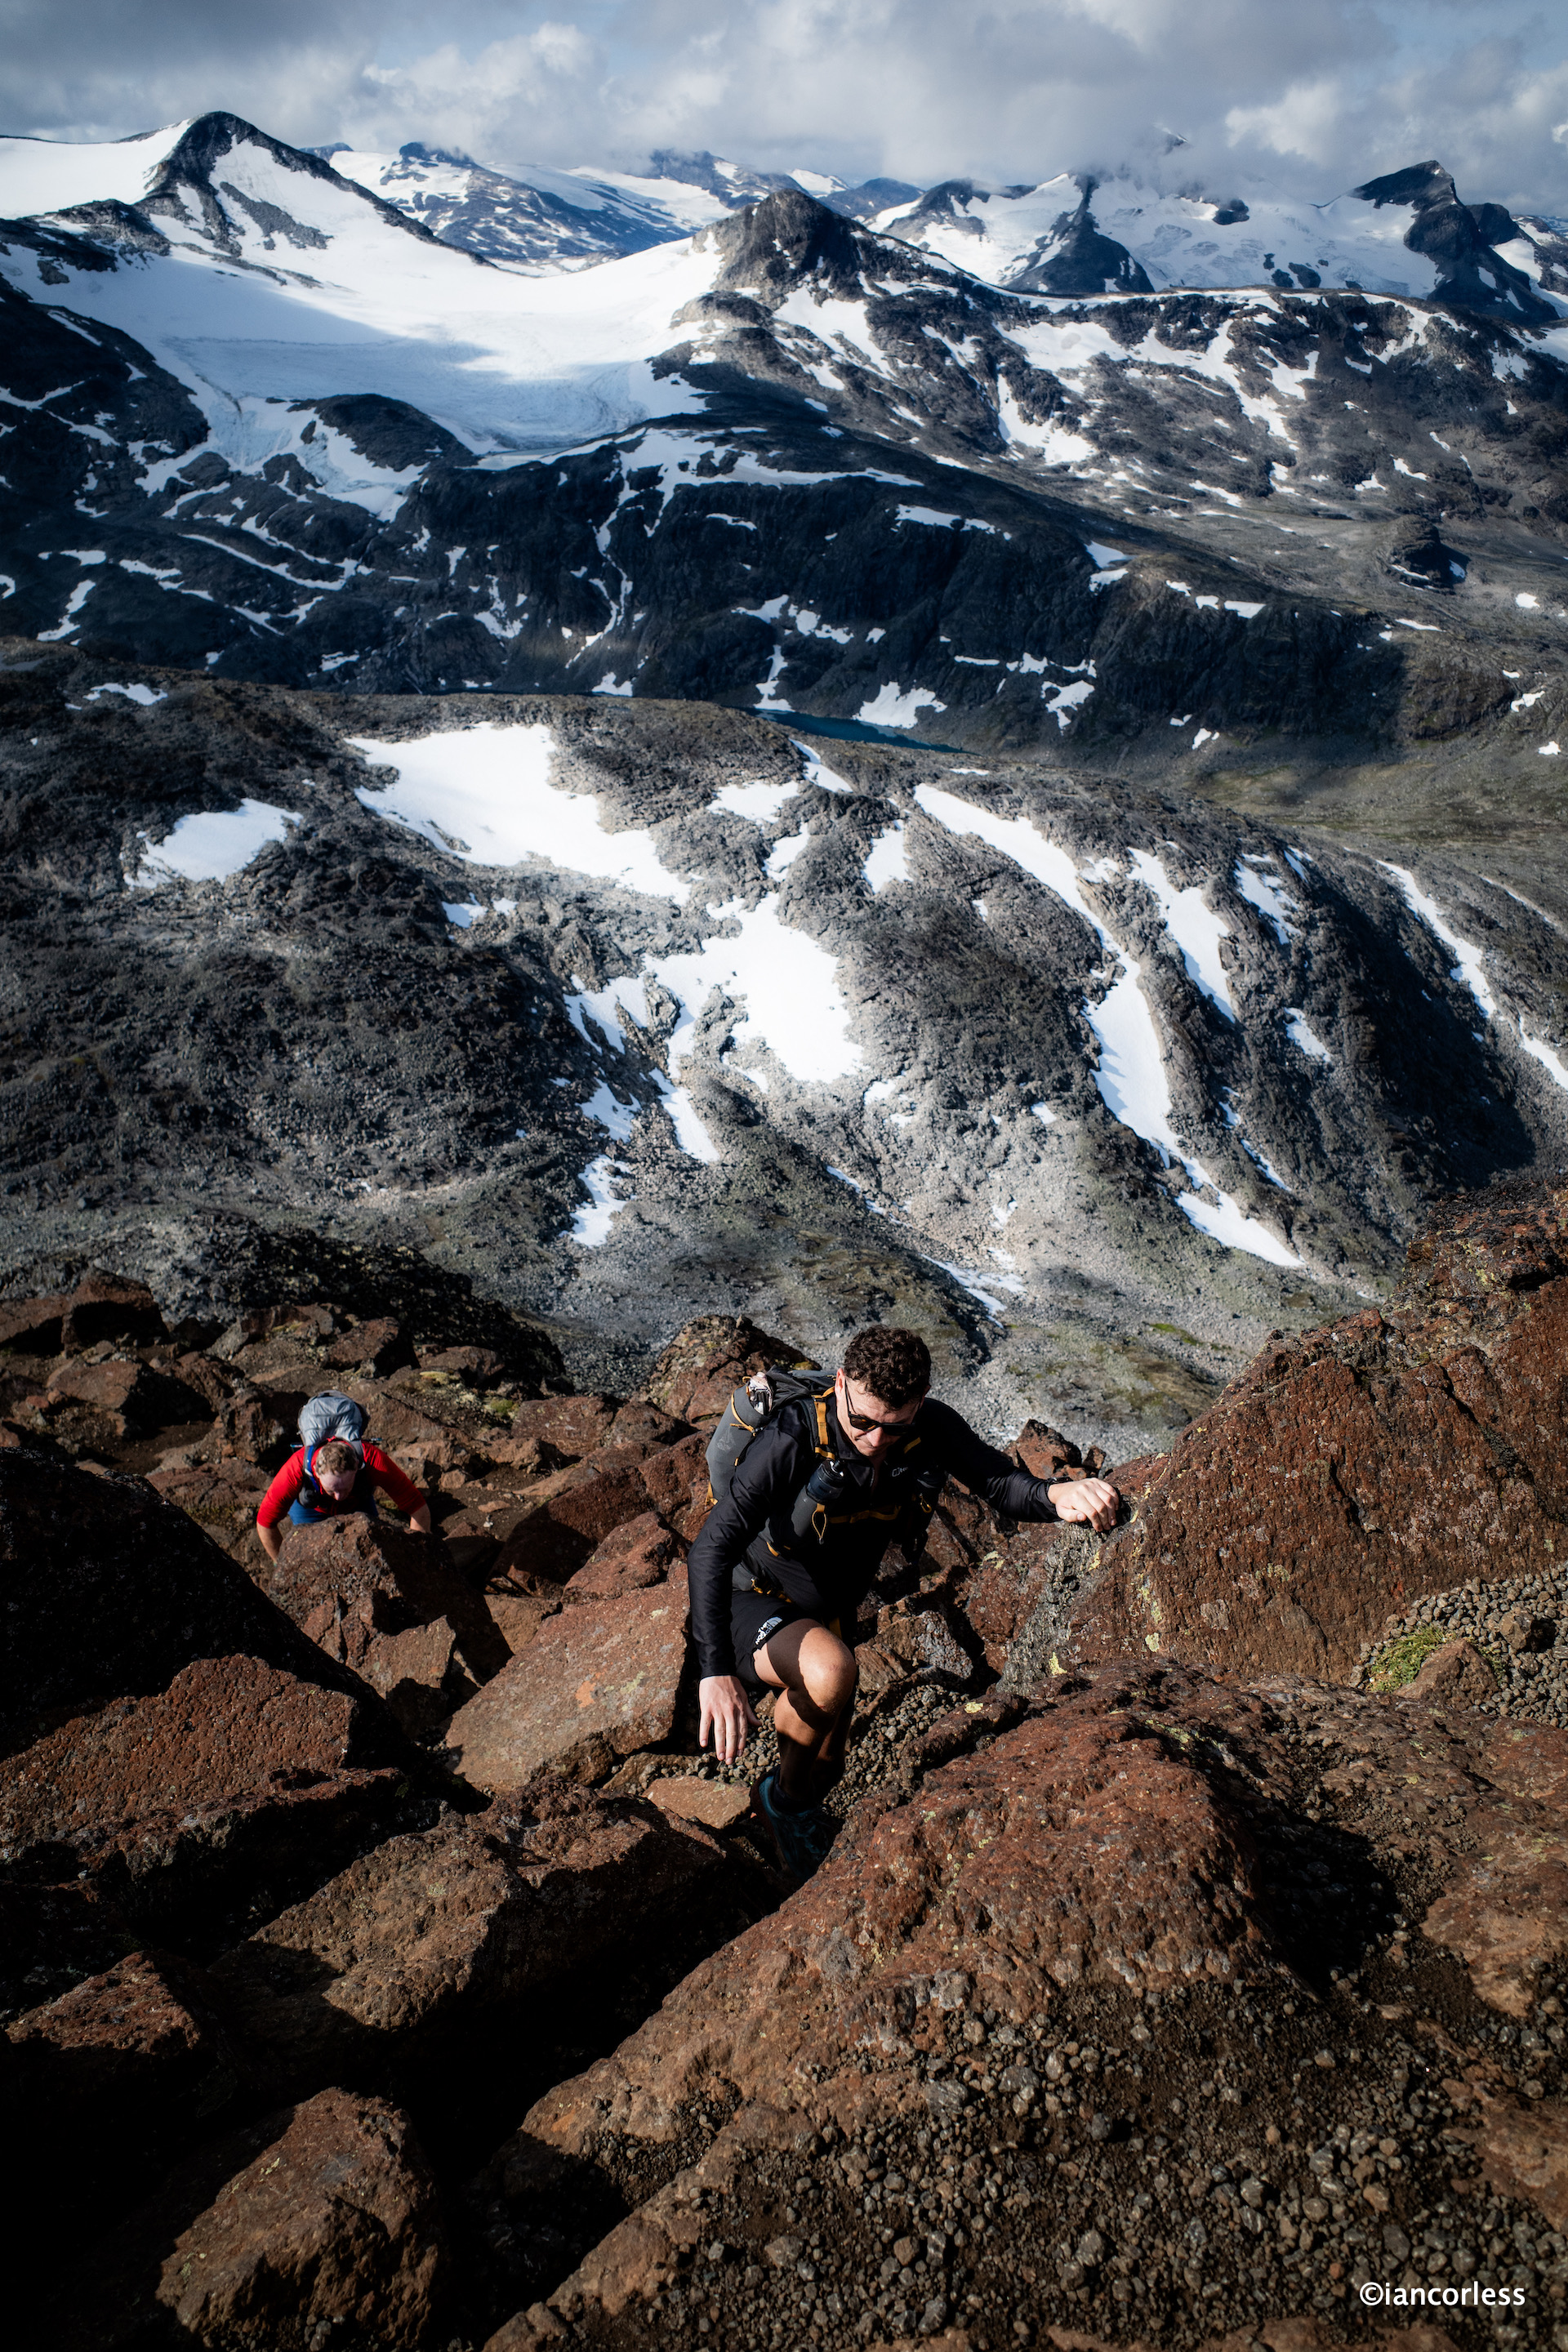
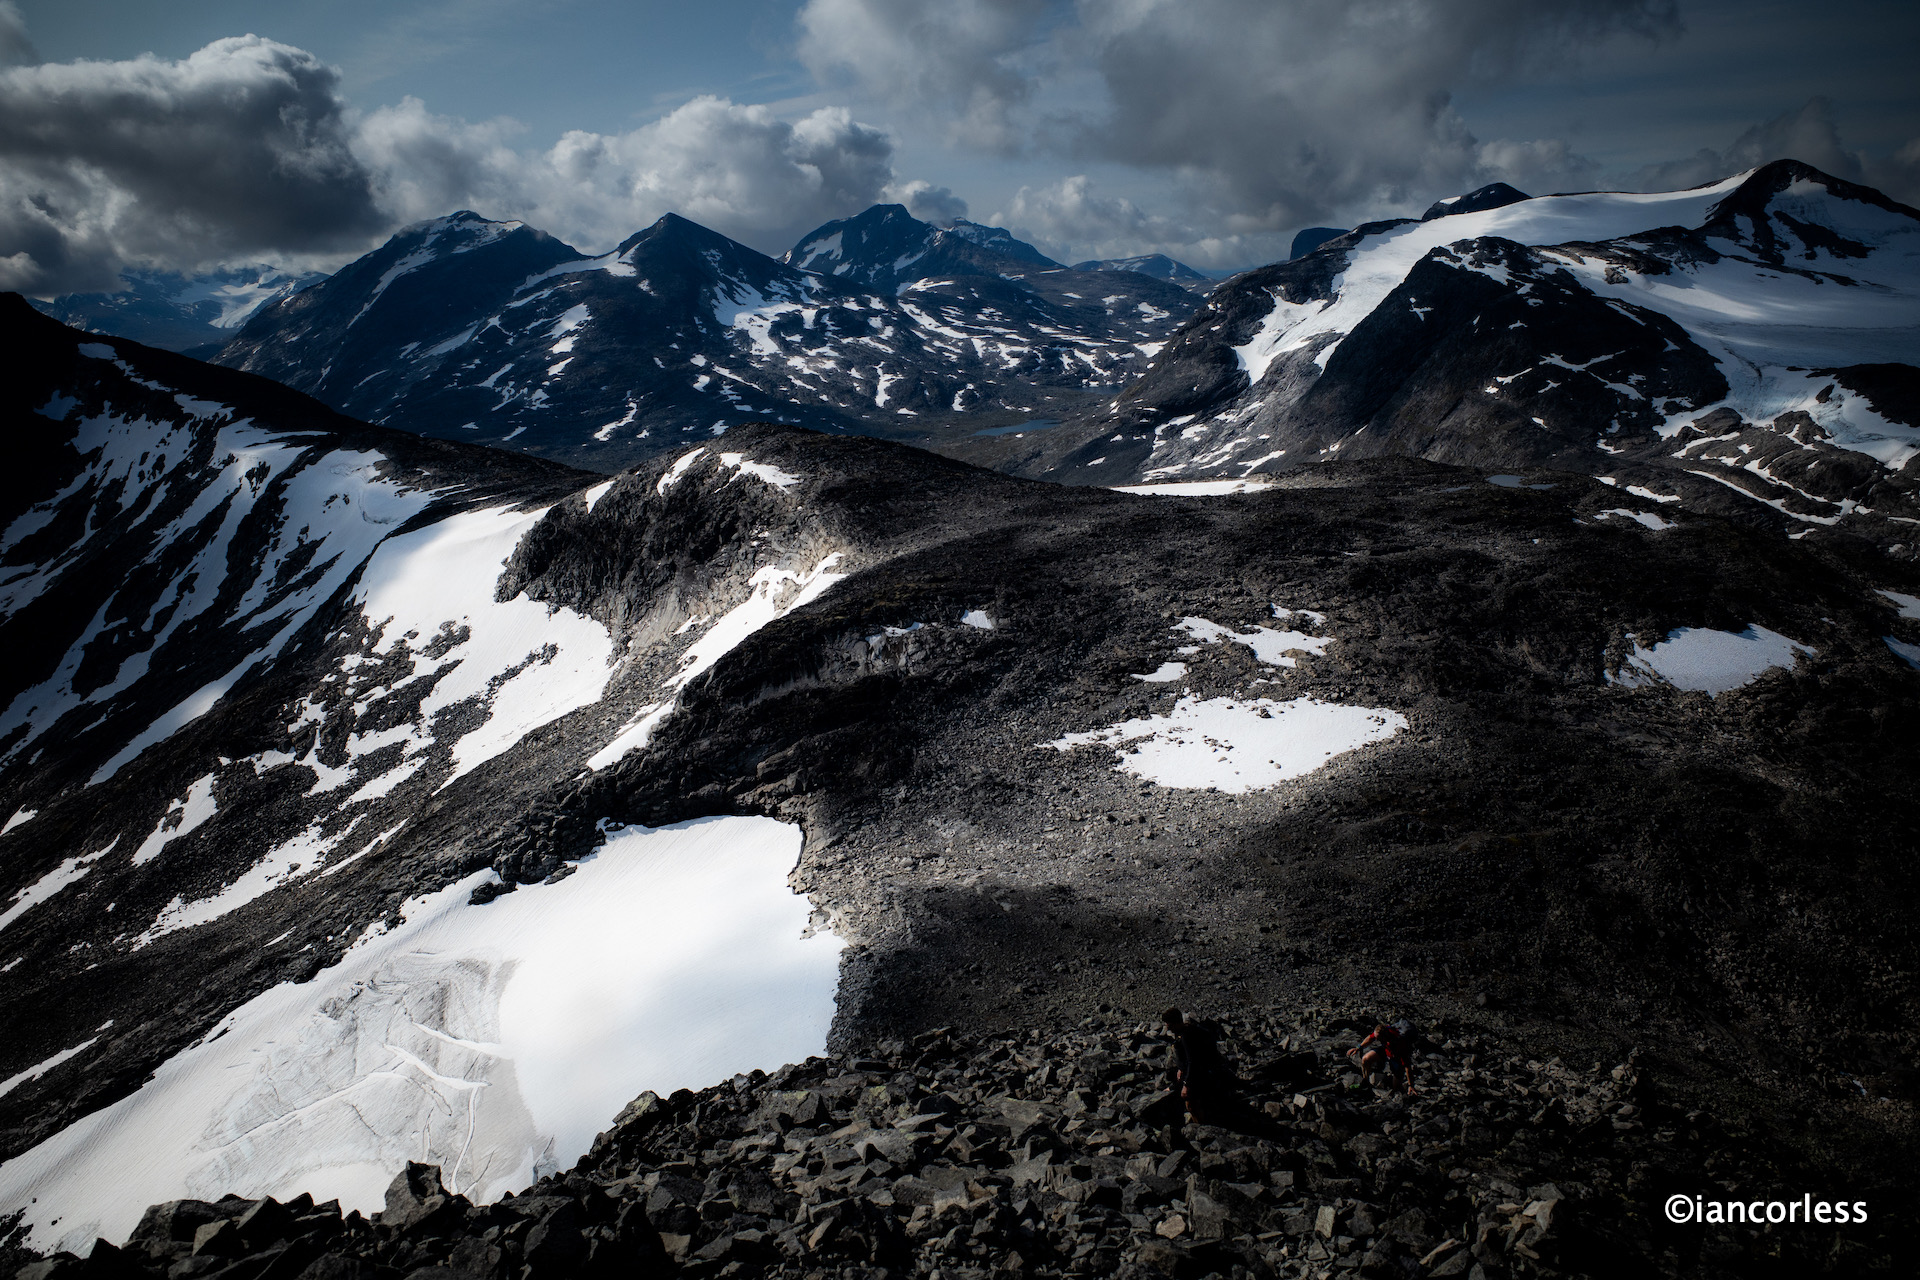
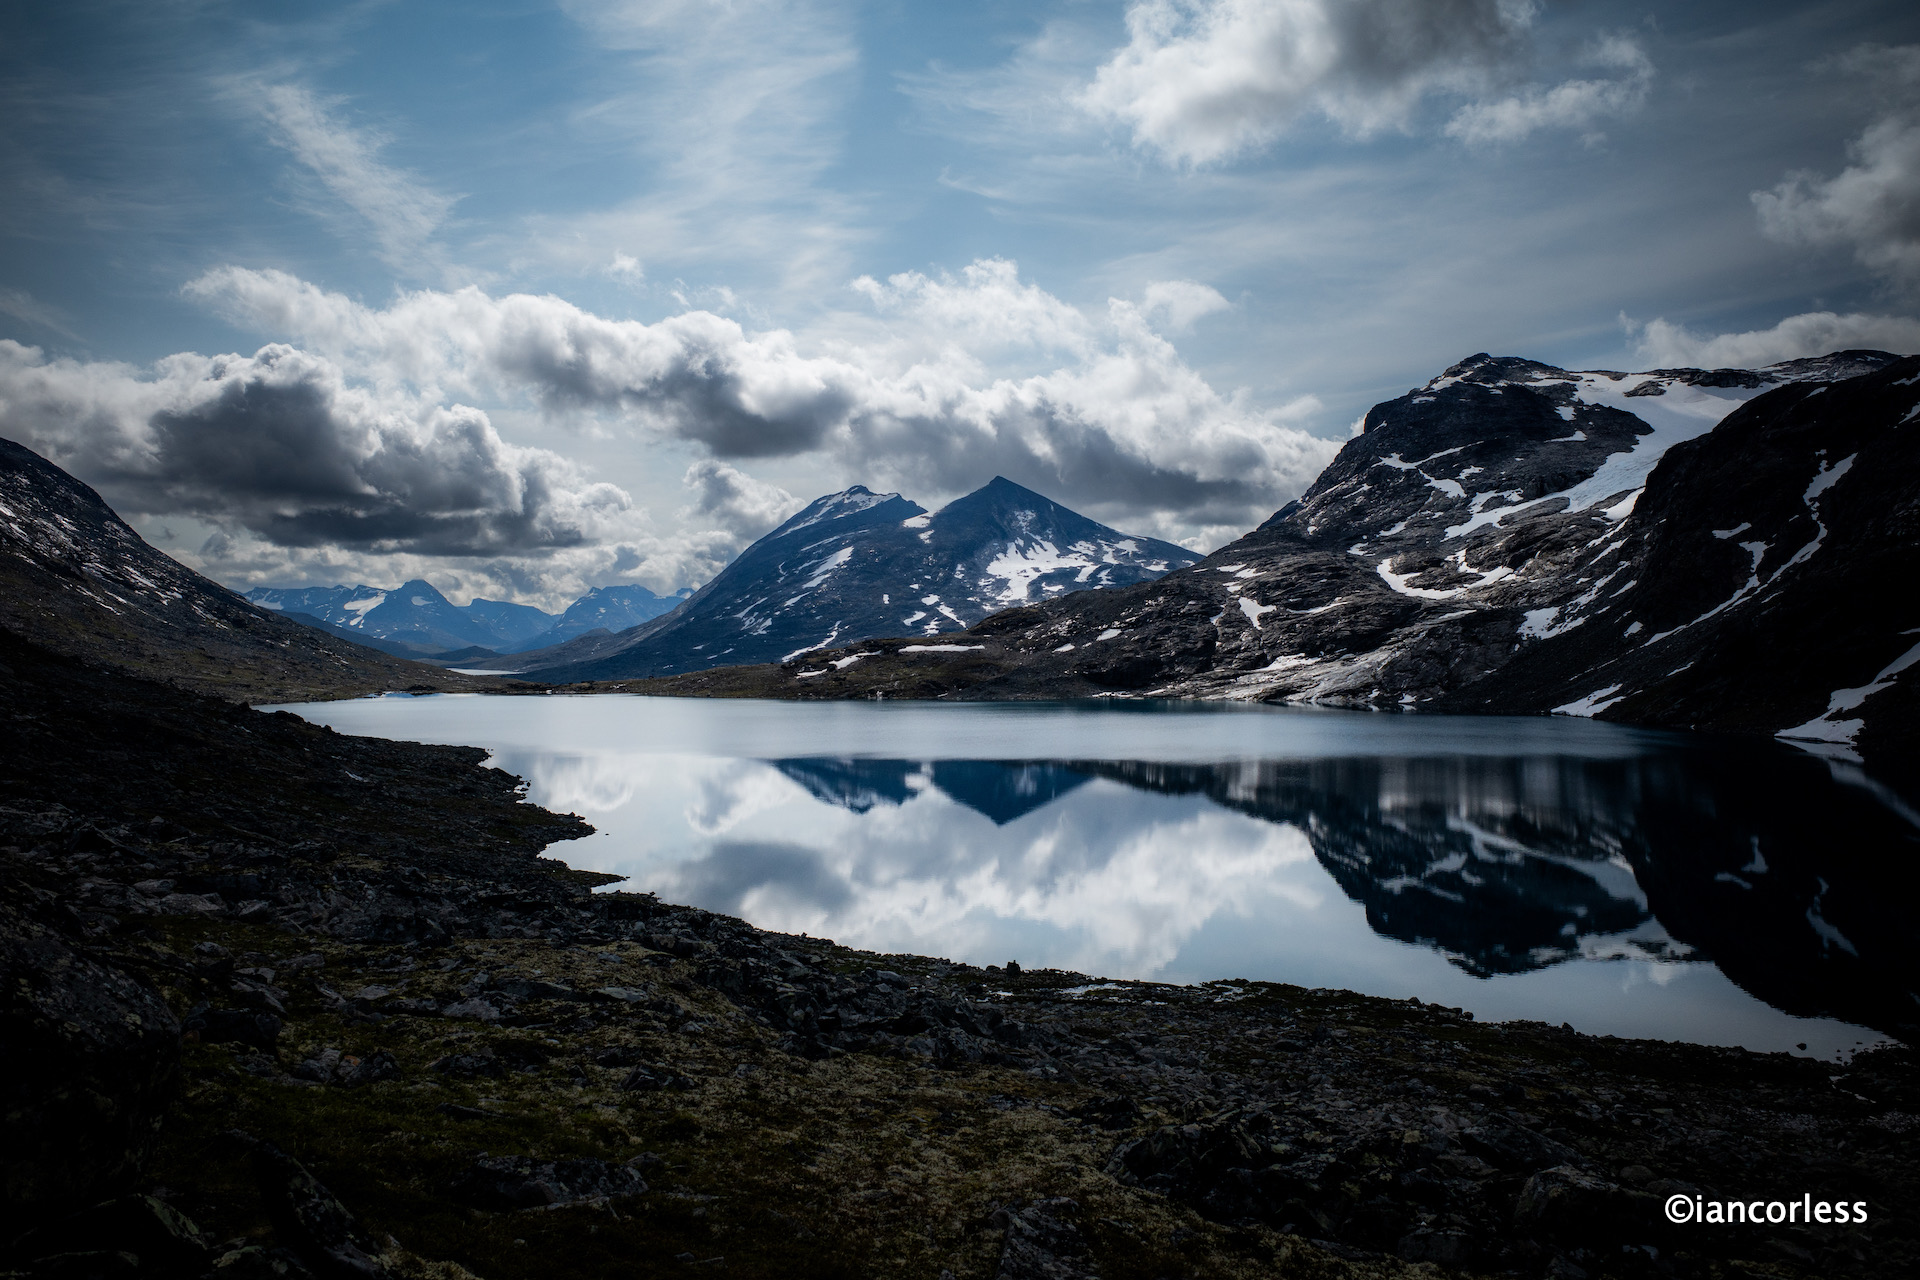
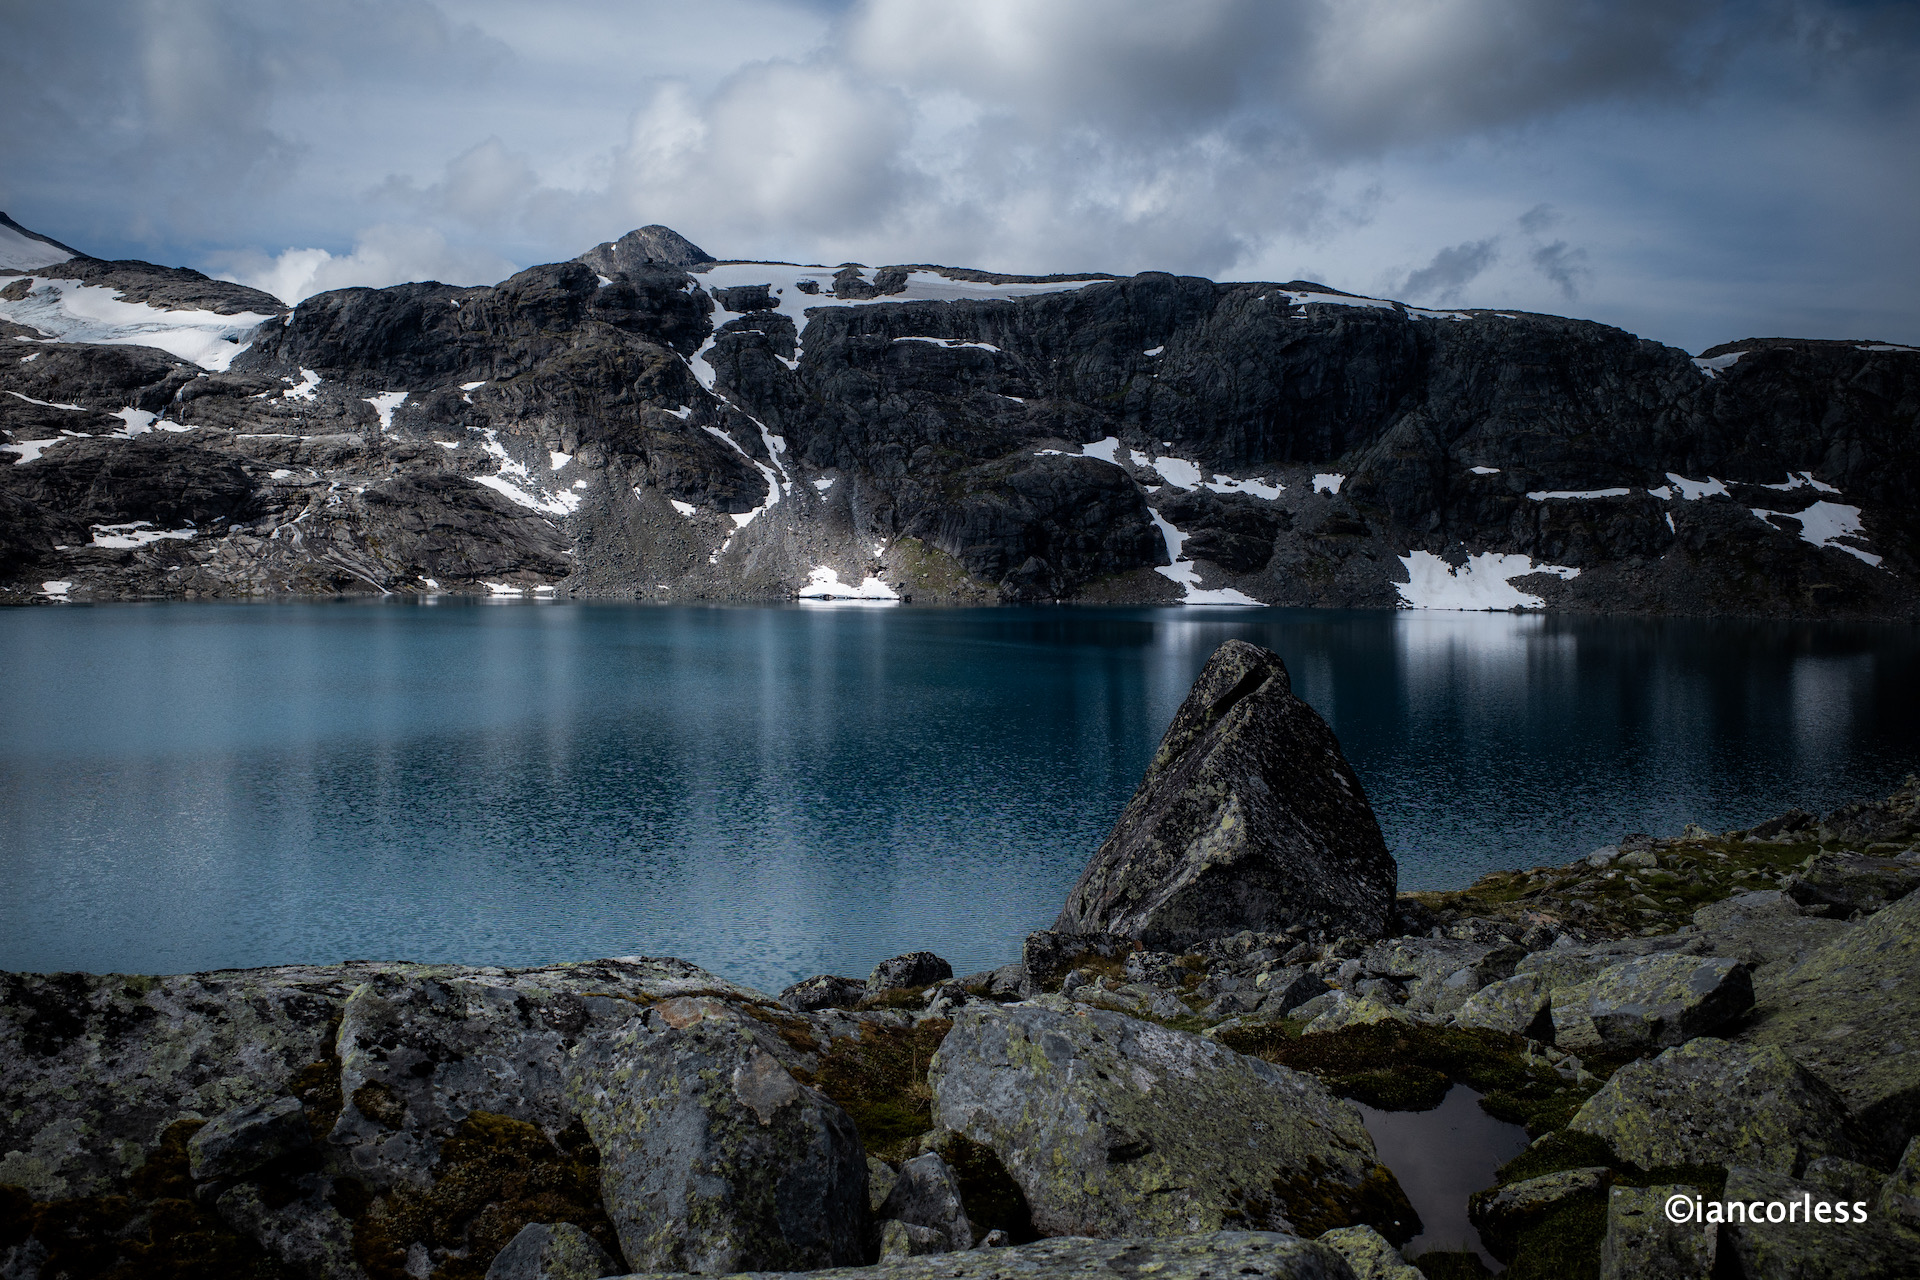
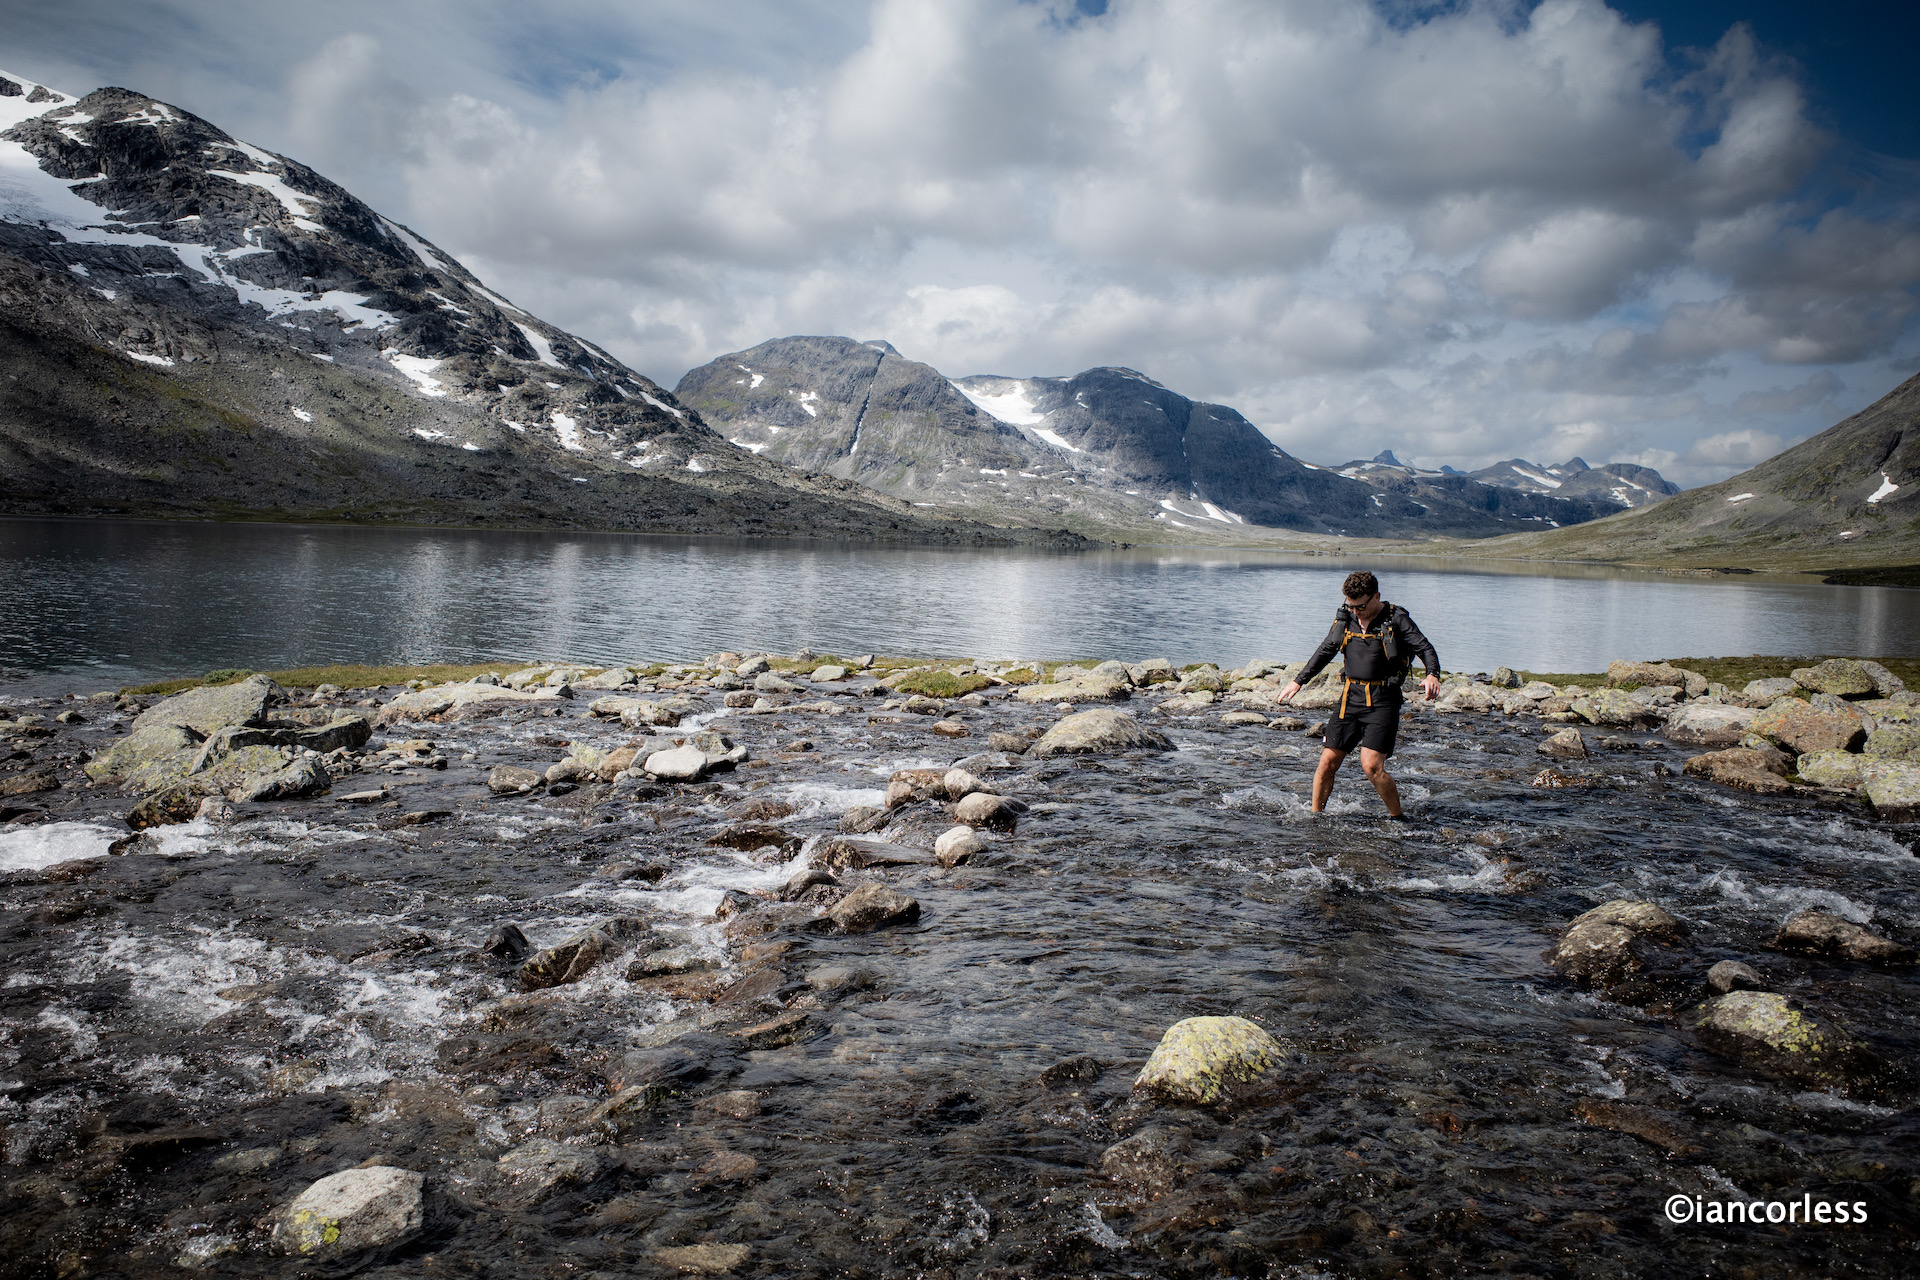
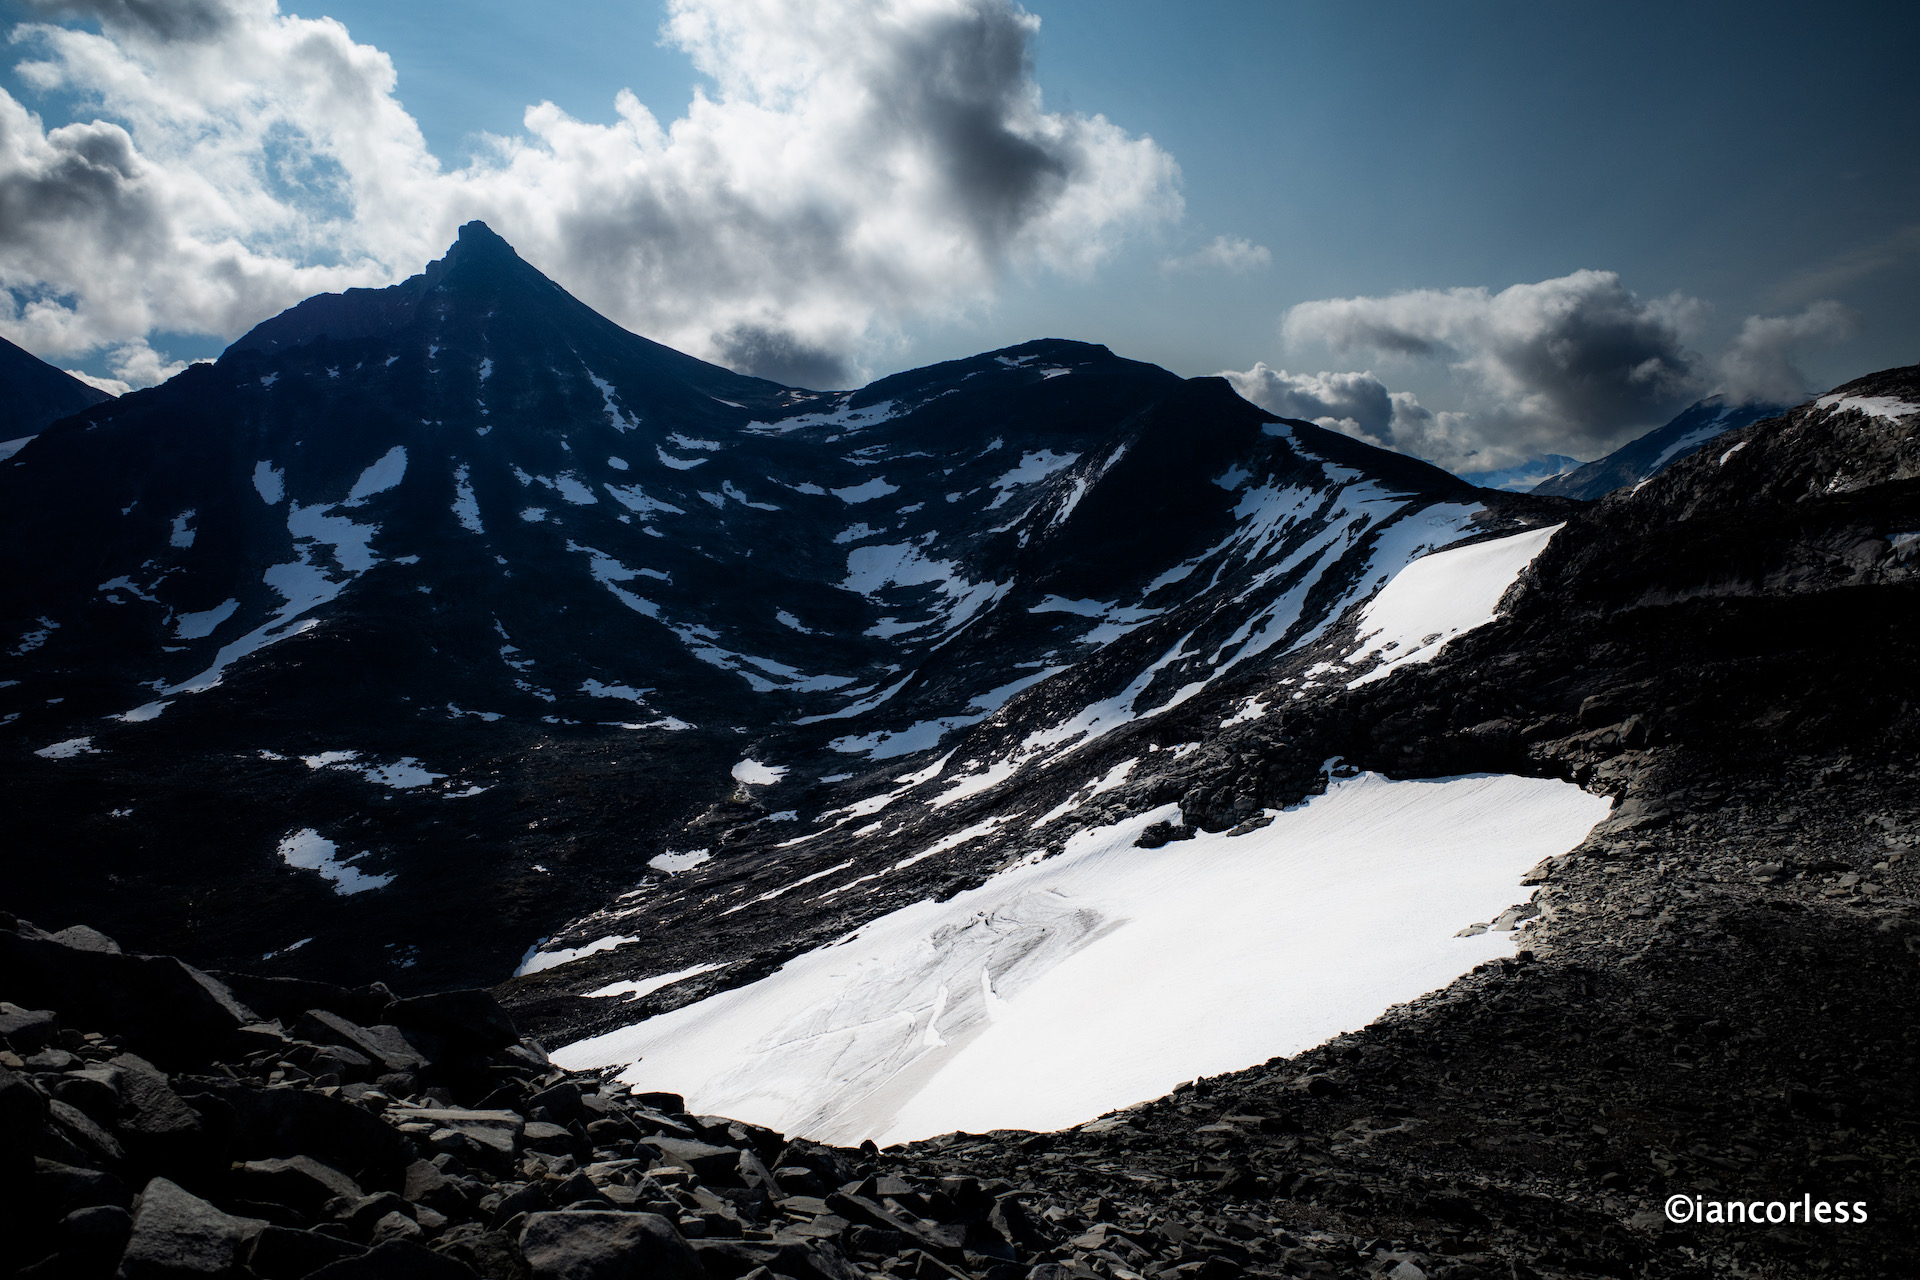
In all honesty, despite huge growth, huge success and repeated accolades around the world for having ‘the best grip on the planet,’ VJ are still a niche brand and a secret weapon. I honestly believe, that in technical, mountain, rocky, and slippery terrain, a runner with VJ shoes has a distinct advantage that may well make a difference between gaining a podium place or not. This is especially rings true, here, in my home of Norway, where the mountain terrain is harsh, slippery and very demanding.

Photo by Ian Corless

With all the above in mind, VJ keep their shoe line up simple for trail/ mountain and Ultra:

  • iRock4 – Mega grip, precision feel, for intense mud when grip is a priority. The 8mm lugs are like claws.
  • Spark – Minimal race shoe with 5mm lugs, 11mm/16mm cushioning.
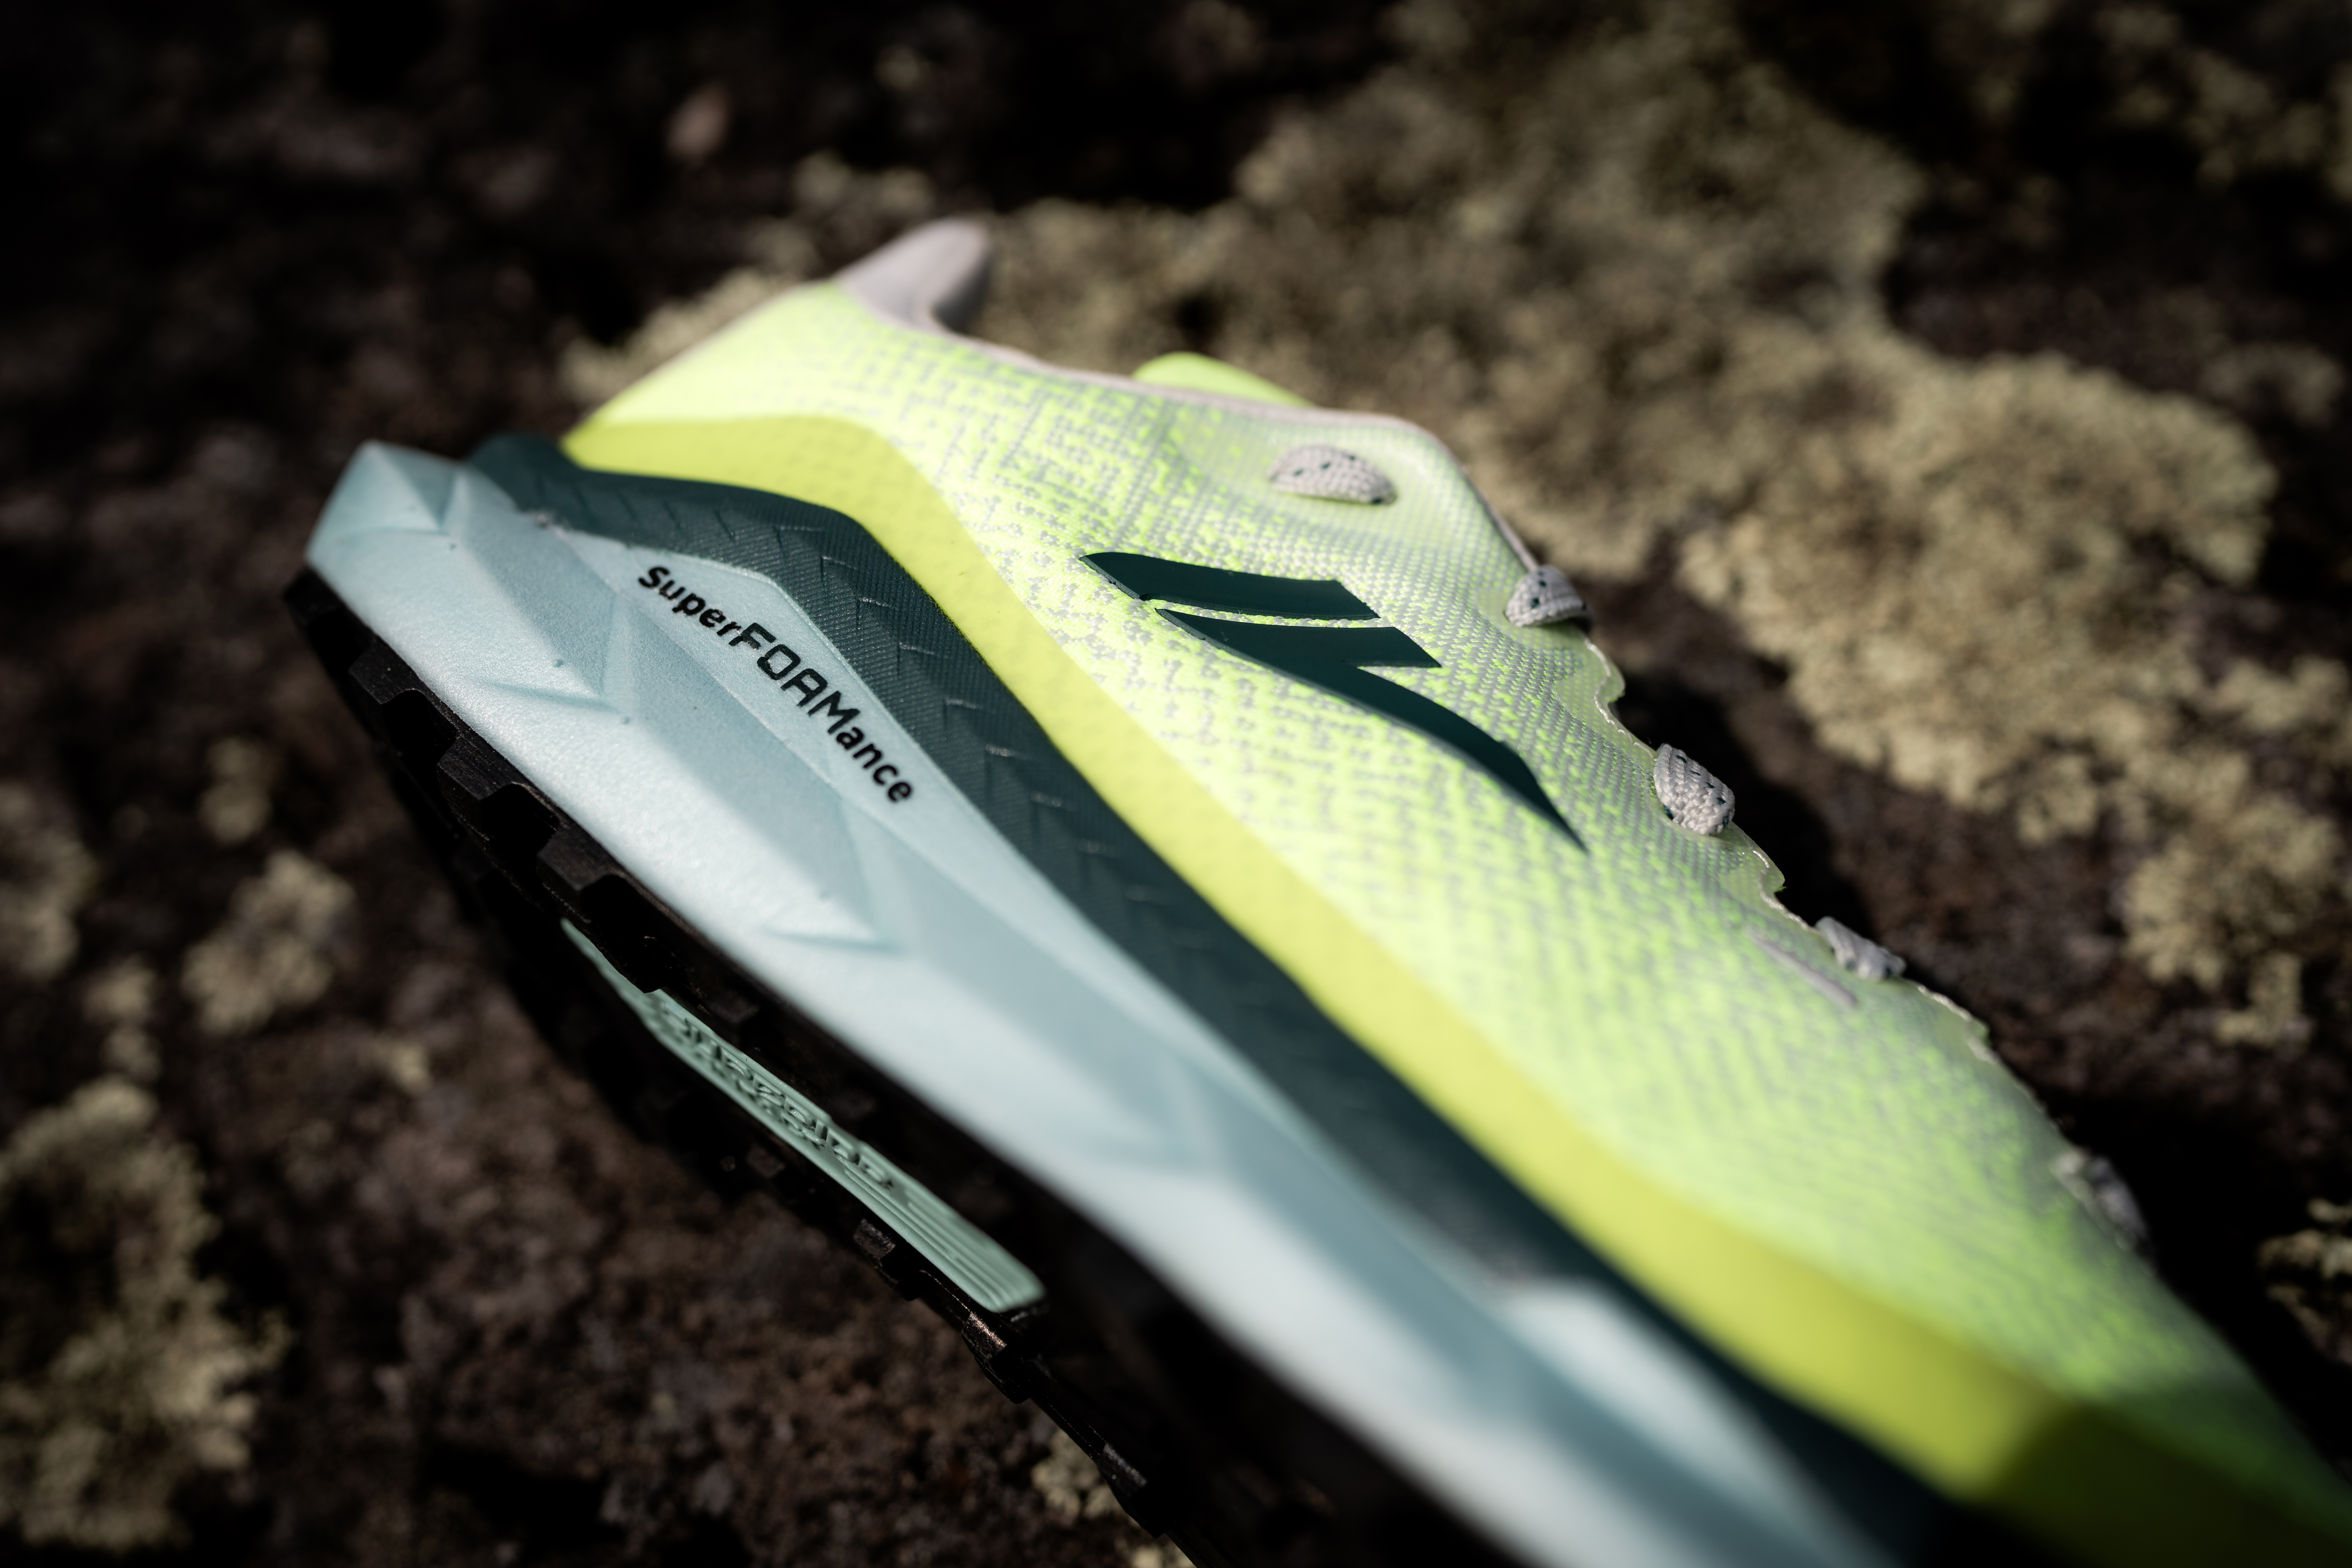
  • Lightspeed – Fast and light, a racing trail shoe with the ‘new’ SuperFOAMance cushioning at 23/29mm and 3.5mm lugs.
  • XTRM2 – A fast mountain shoe for short to middle distance with 6mm lugs and 10/14mm cushioning.
  • MAXx2 – Cushioning and grip with a lower profile, ideal for the mountains. With the ‘new’ SuperFOAMance cushioning at 25/31mm and 4mm lugs.
  • Ultra 3 – As the name suggests, a long distance shoe with cushioning. With the ‘new’ SuperFOAMance cushioning at 30/38mm and 4.5mm lugs.
  • Flow – A new shoe for all terrain which I have yet to test. 25/35mm and 4.5mm lugs.

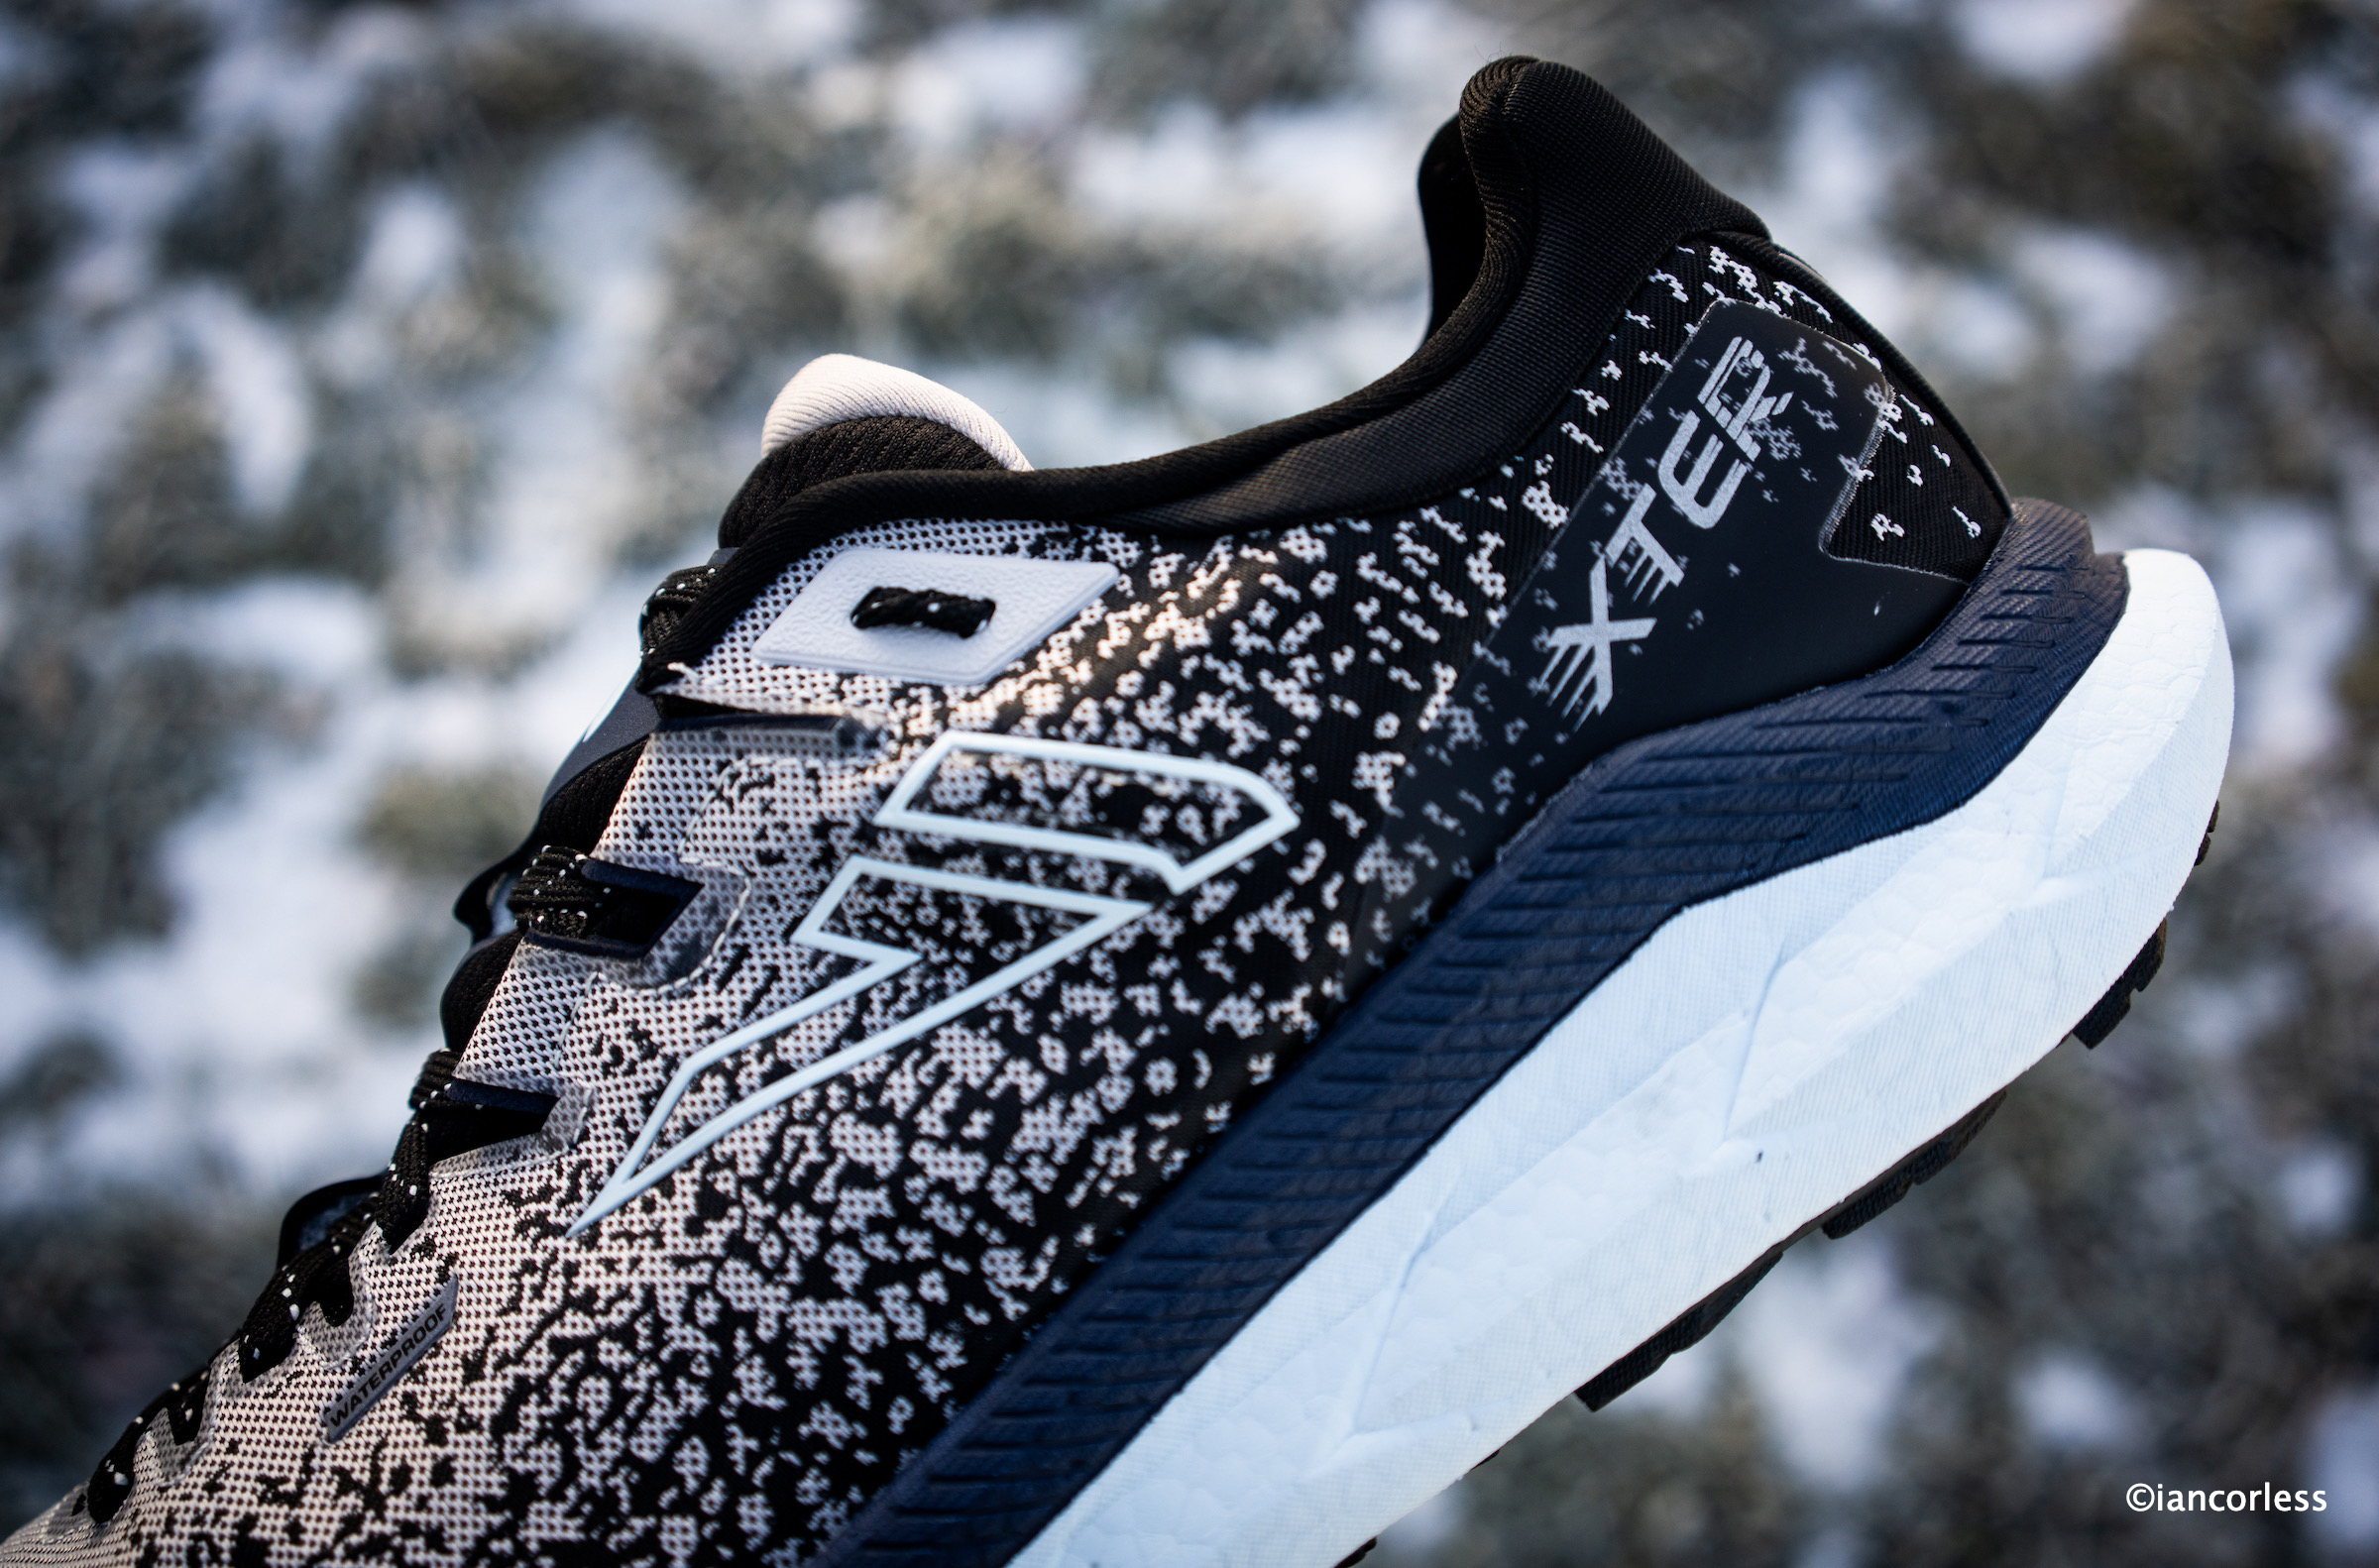
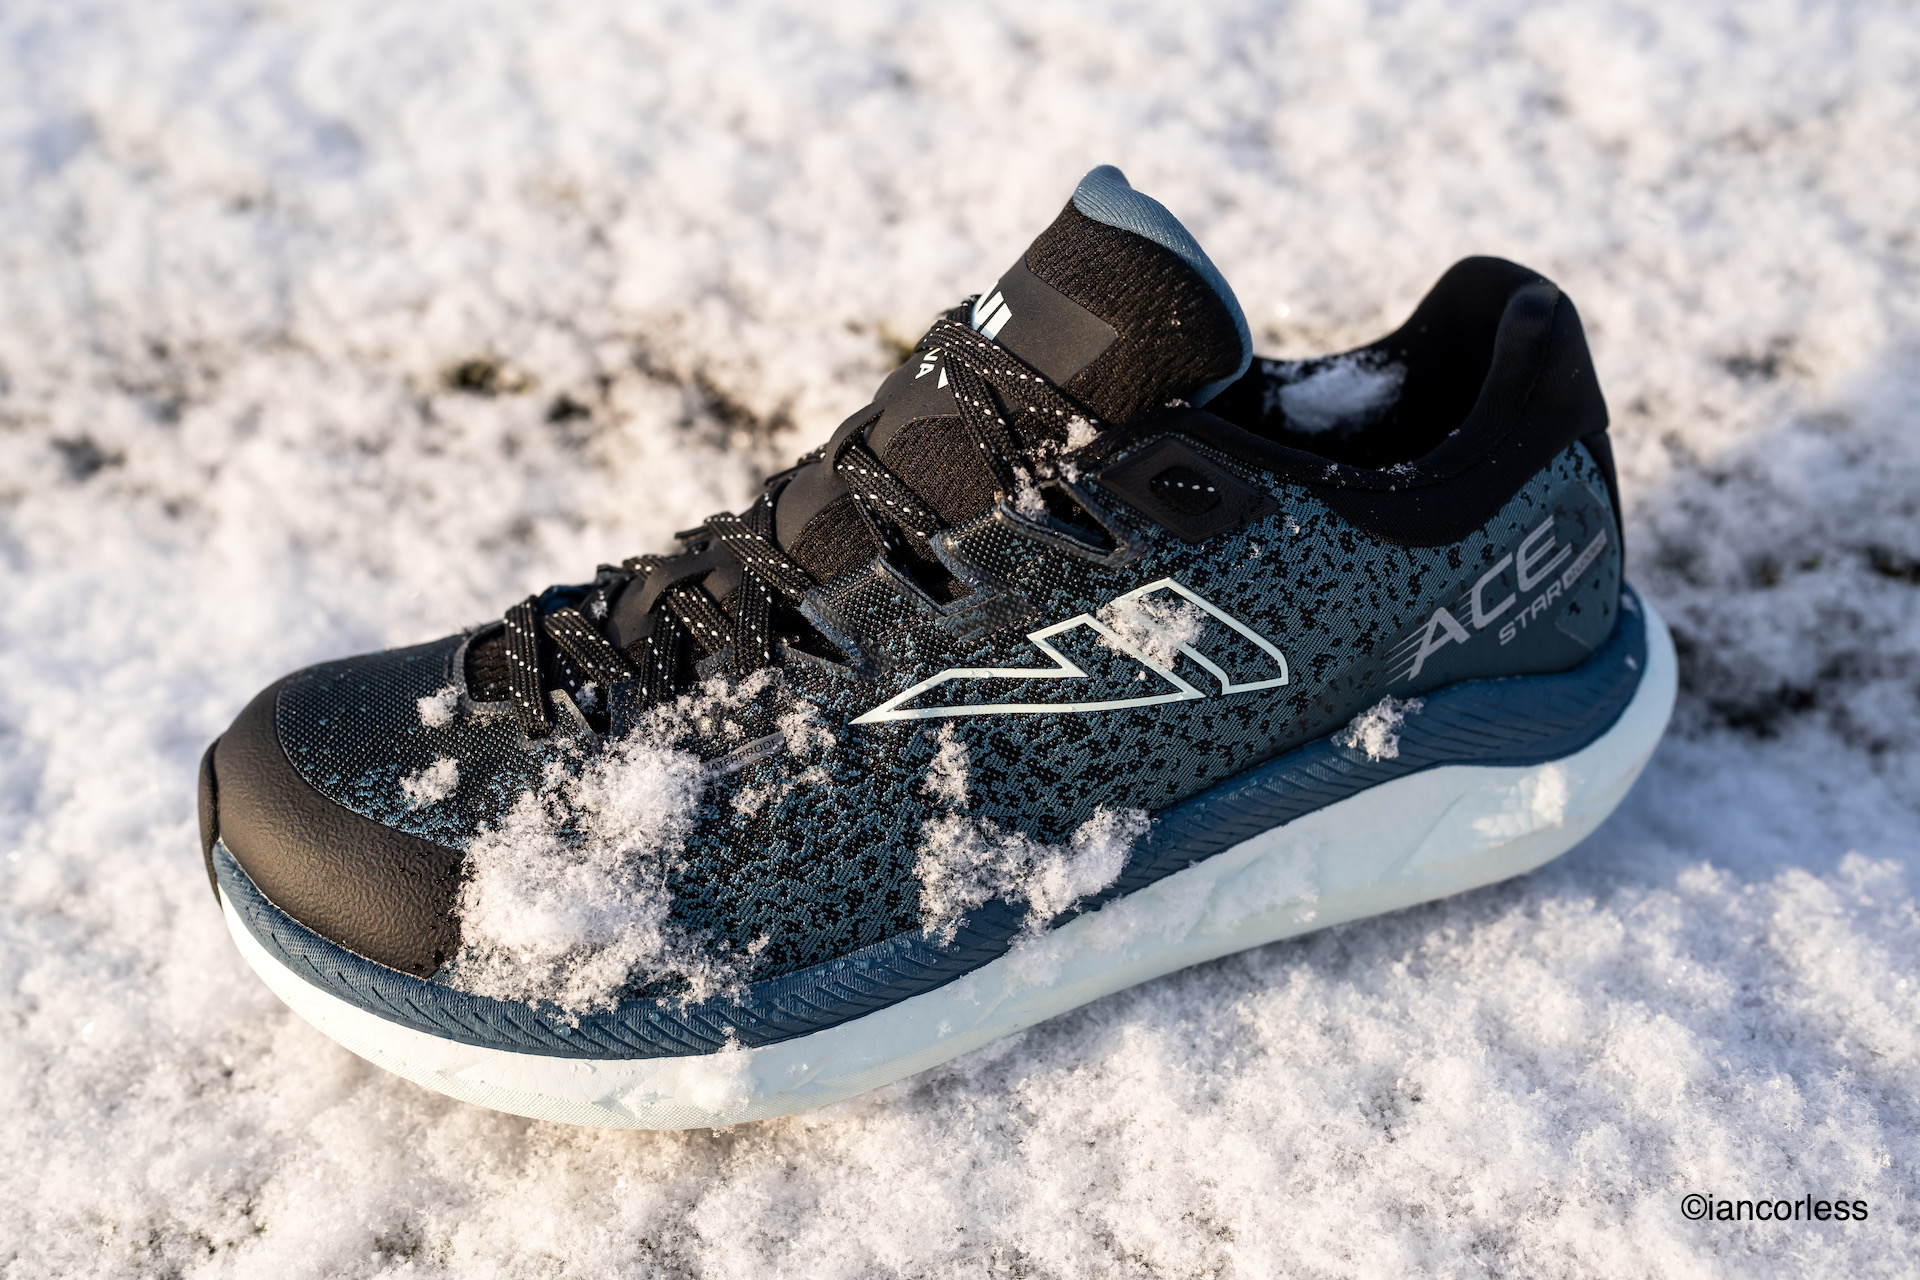
In addition to the above there is a winter shoe, the XTER that is also available with spikes, called the ACE, for ice and snow. There are countless spike/ winter models HERE.

VJ ULTRA 3

Photo by Ian Corless

This is not the first ultra shoe for VJ, on the contrary, they released the ULTRA and the ULTRA2. Both of these shoes I have run in and tested over the past few years. They both had all the perfect VJ characteristics, namely, amazing grip and incredible foothold with Fitlock. However, for me, the cushioning never felt ‘bouncy,’ and this always shifted me to use the MAXx.

In 2023, VJ released a winter shoe called the ACE, this shoe was a spiked shoe for snow/ ice etc. It was a complete game changer! The shape of the shoe was completely different, the toe box was wide and expansive (just like ALTRA) to allow the toes to move and keep warm during winter conditions. In addition, the ACE had new cushioning called SuperFOAMance. I said in my 2023 review, and I quote, ‘I want this shoe without studs for dry trail running.’

Well, I gave that feedback to VJ and they listened, the VJ ULTRA 3 comes from the ACE development.

However, I need to mess up this and segway to the LIGHTSPEED and MAXx2. Between the ACE and the release of the ULTRA 3, we had the Lightspeed and MAXx2 launches. Again, two amazing game changers for VJ. The LIGHTSPEED is a super fast and responsive trail racing shoe, think the Golden Trail Series. The MAXx2 (think skyrunning) builds on everything that was great in the original MAXx but takes it one step further. Both these new shoes had the SuperFOAMance cushioning, which, for me, it is incredible. I have done big mountain days in Spain, Italy and Norway in the MAXx2, always great comfort, great foot hold and of course, amazing grip. The MAXx2 is for me, without doubt, the best mountain running shoe out there. I just can’t wait for VJ to bring the cushioning to the XTRM too so when I need a more aggressive outsole, I have the option and the same cushioning.

Photo by Ian Corless

So, here we are with the VJ ULTRA 3.

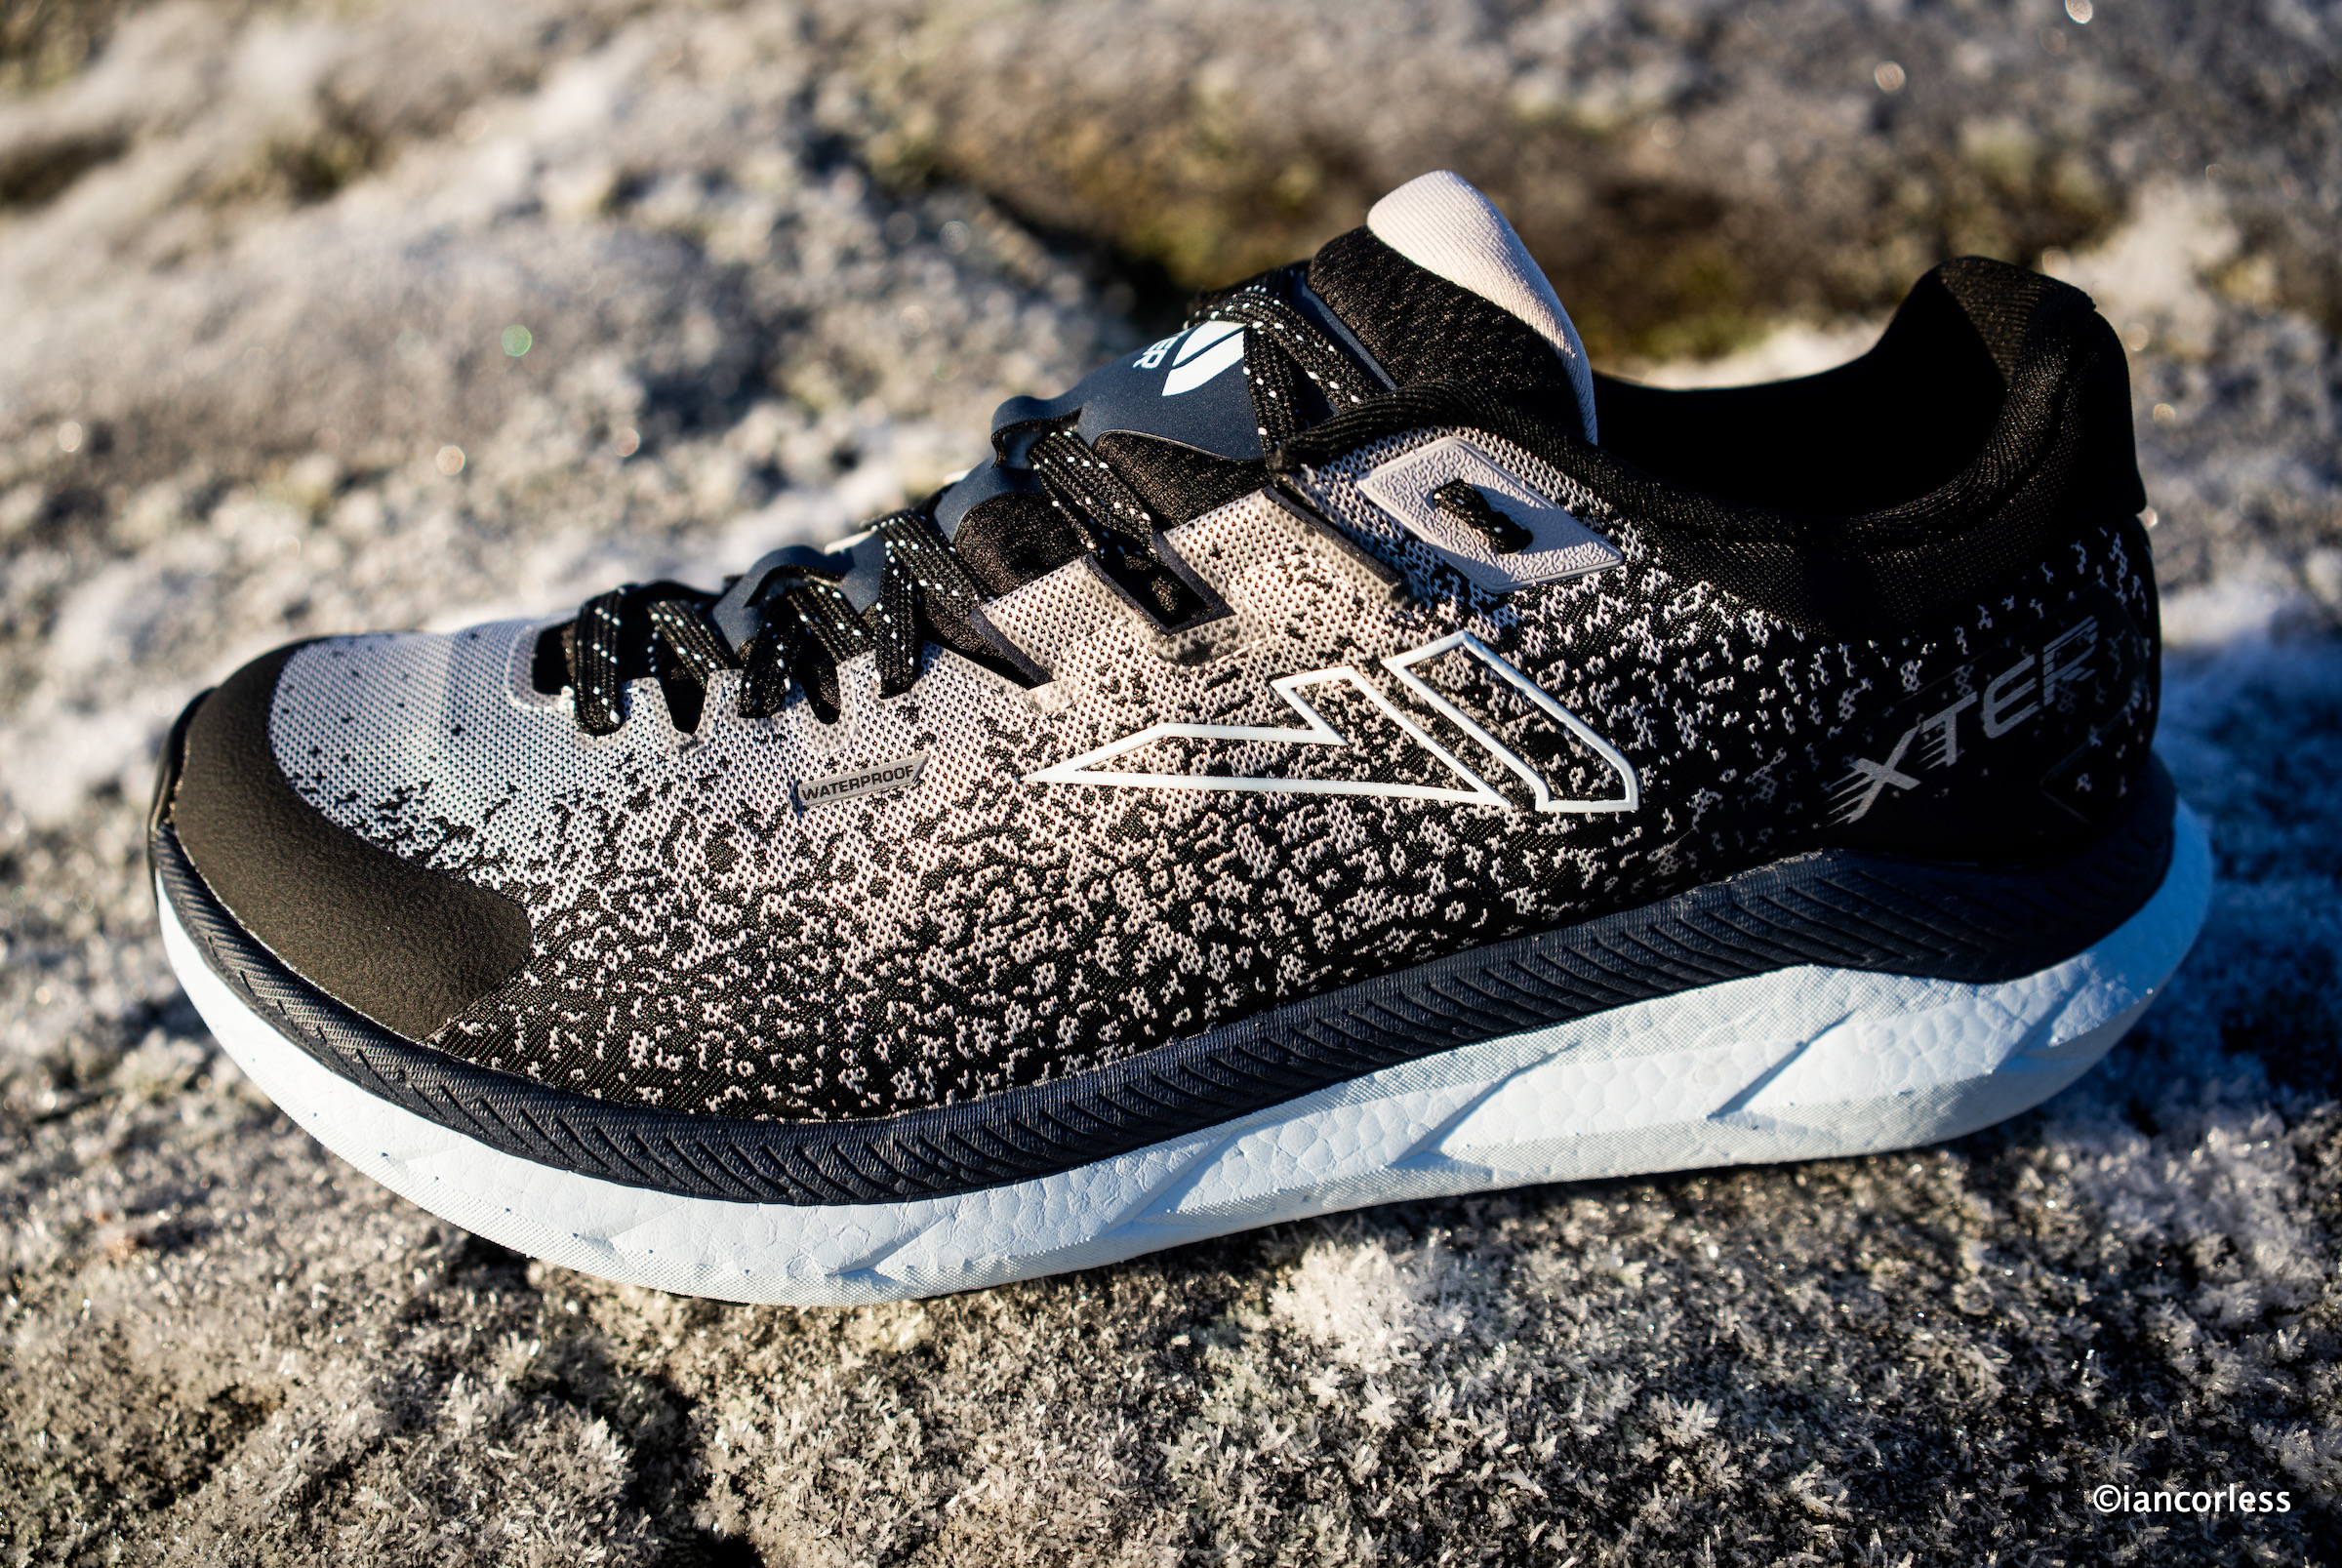
The ULTRA 3 has what I loved in the ACE and the MAXx2 and has given me a shoe that merges these two shoes into a product designed for long, big, ultra days in the mountains and on trails.

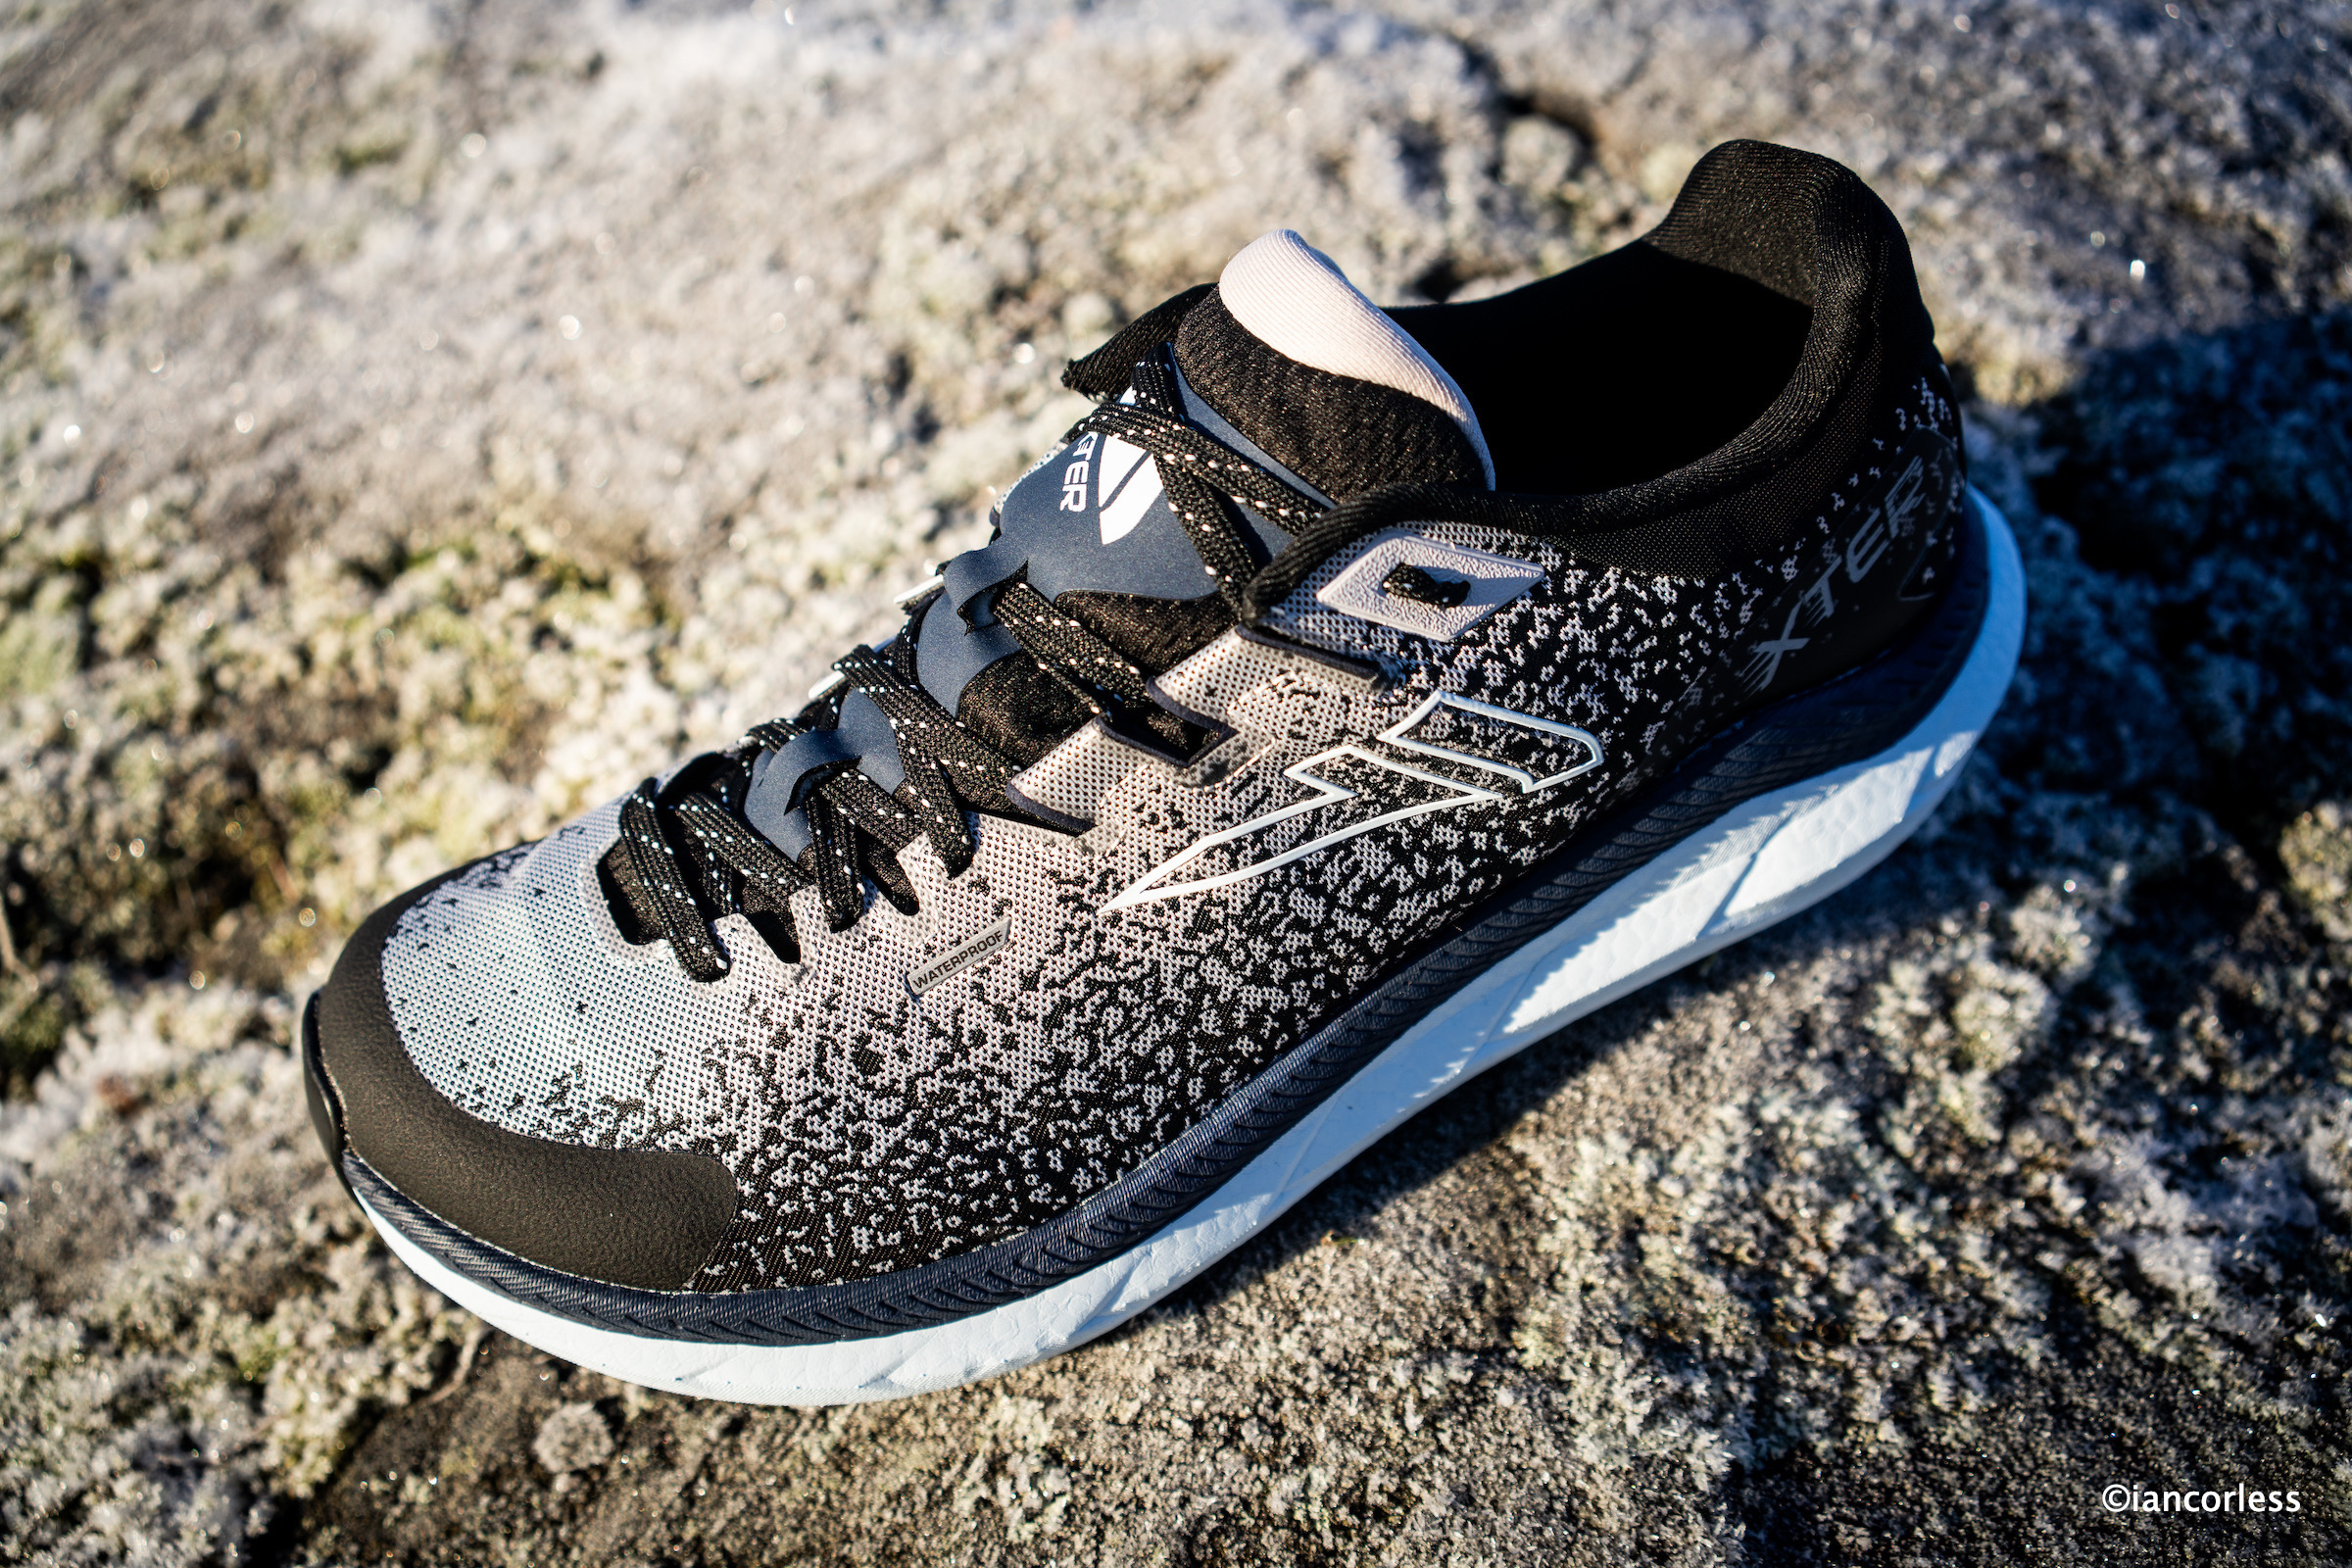
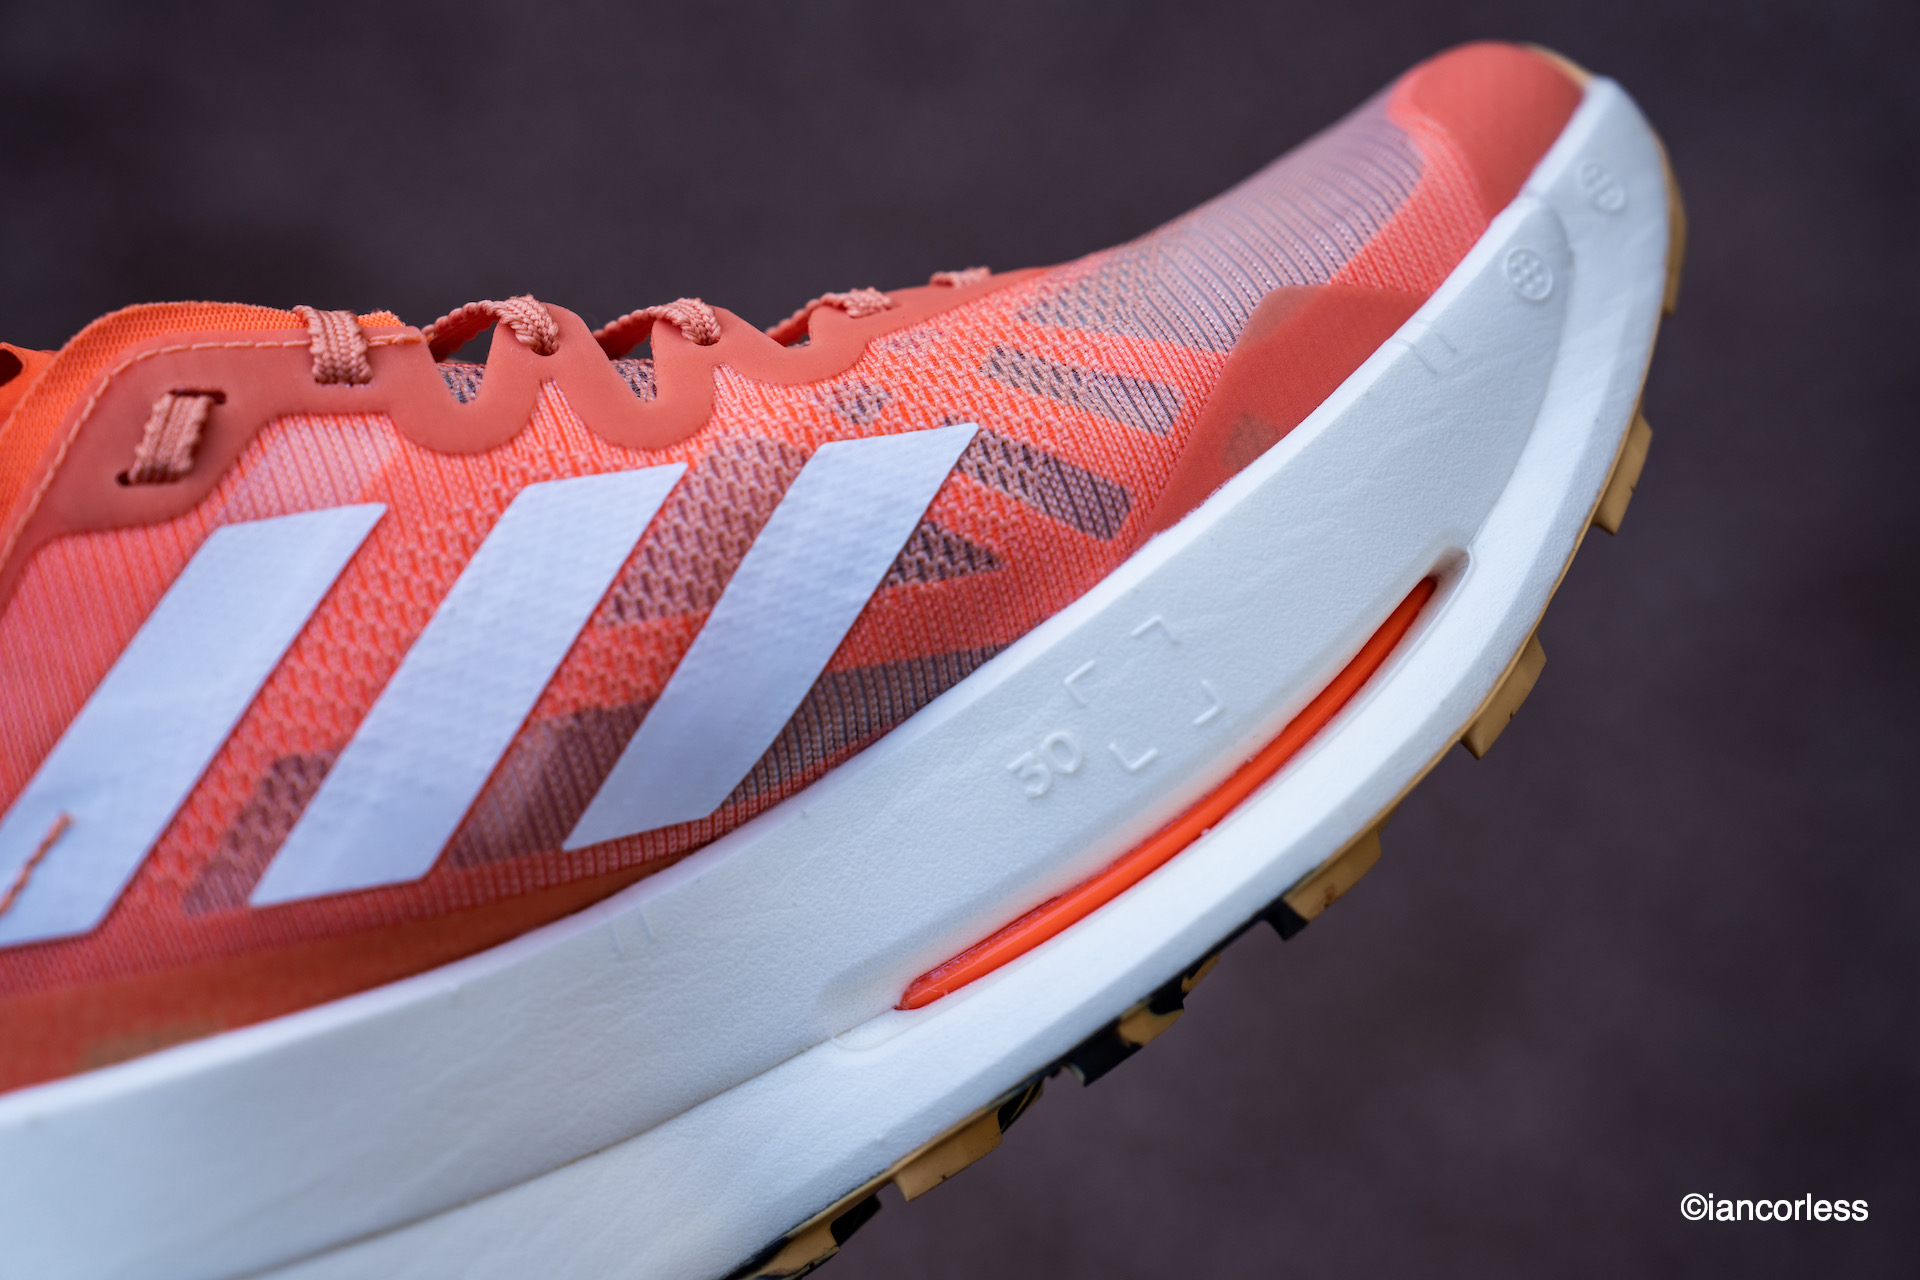
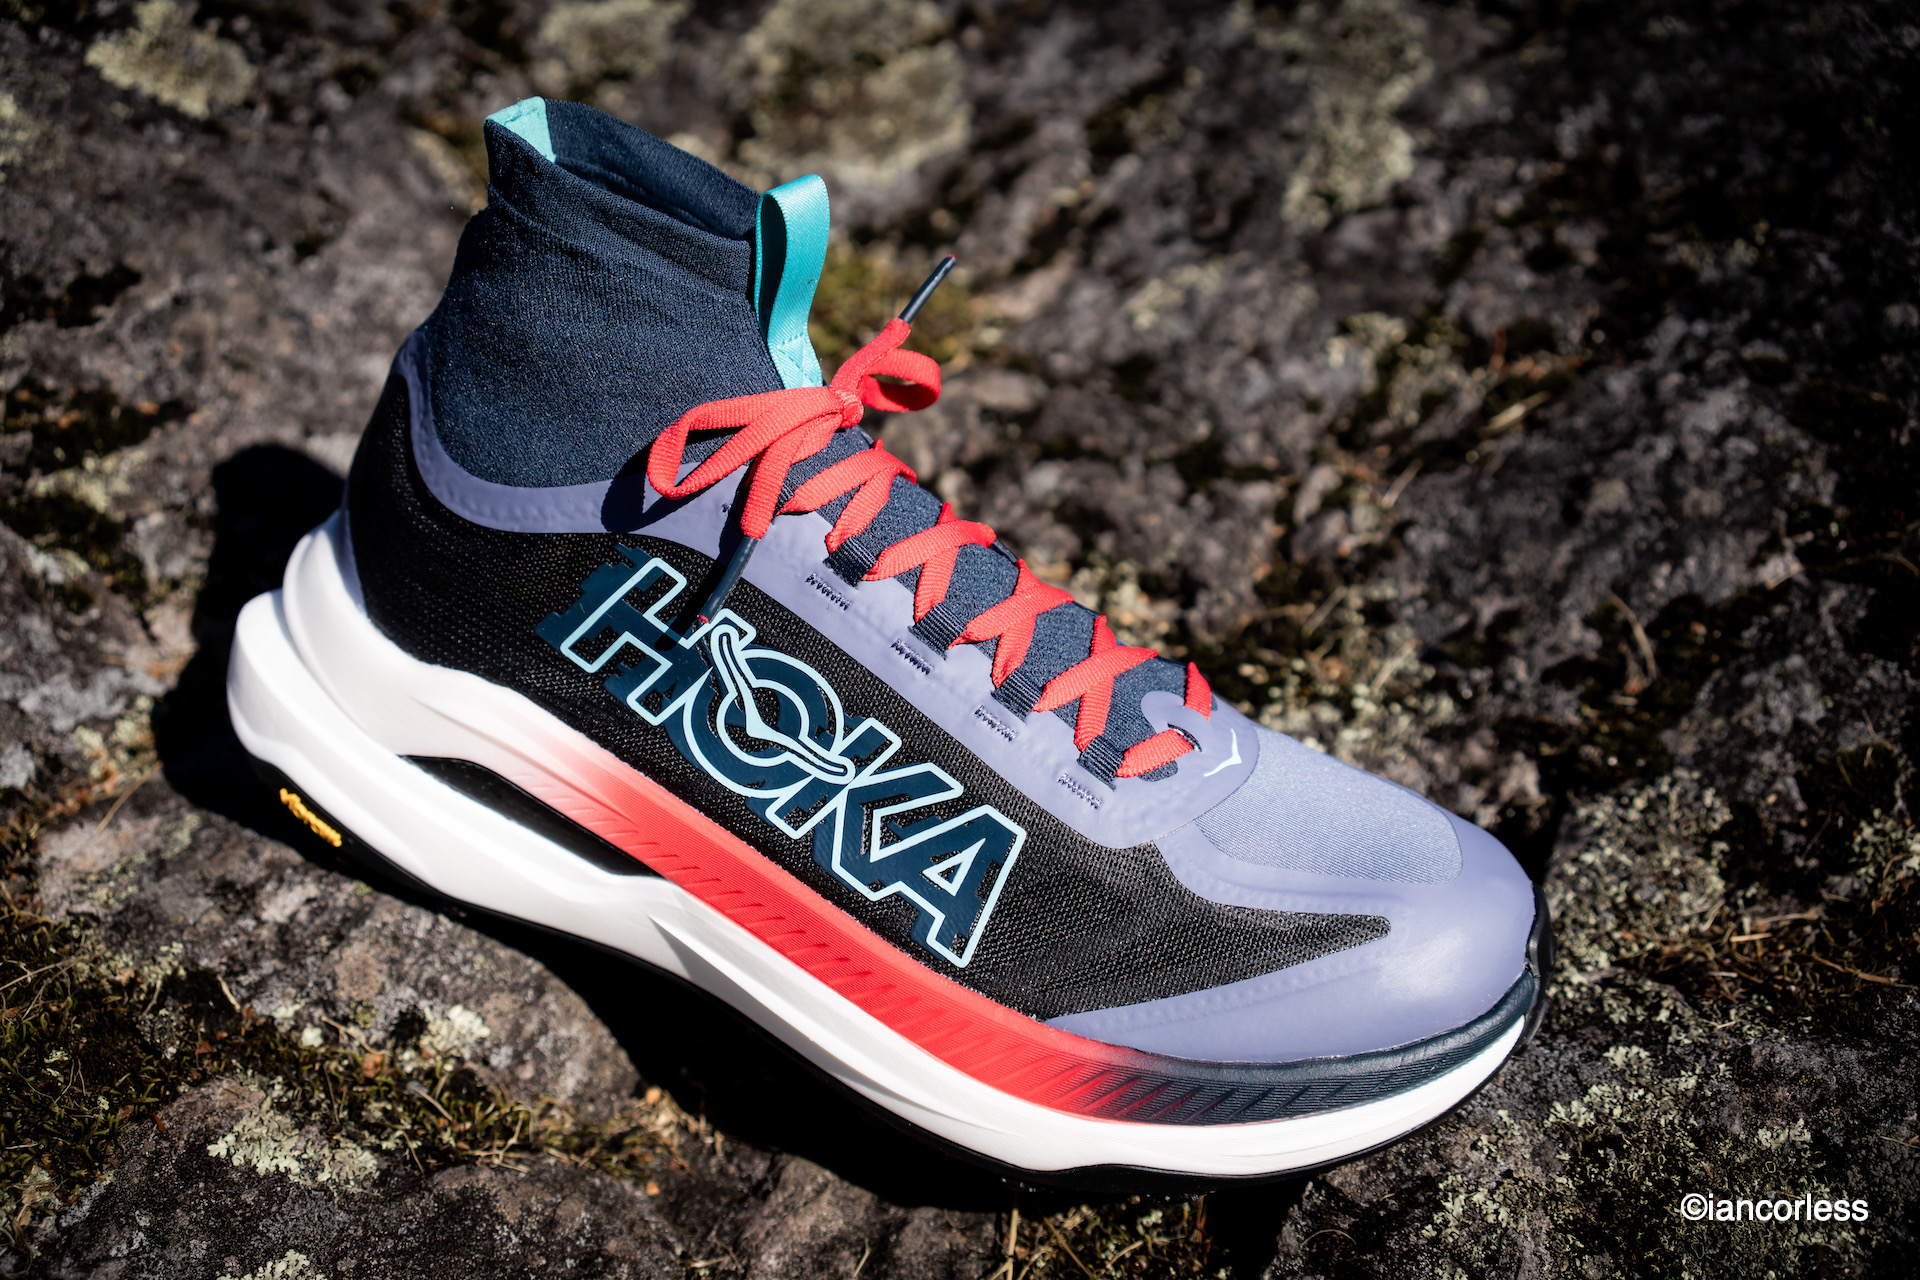
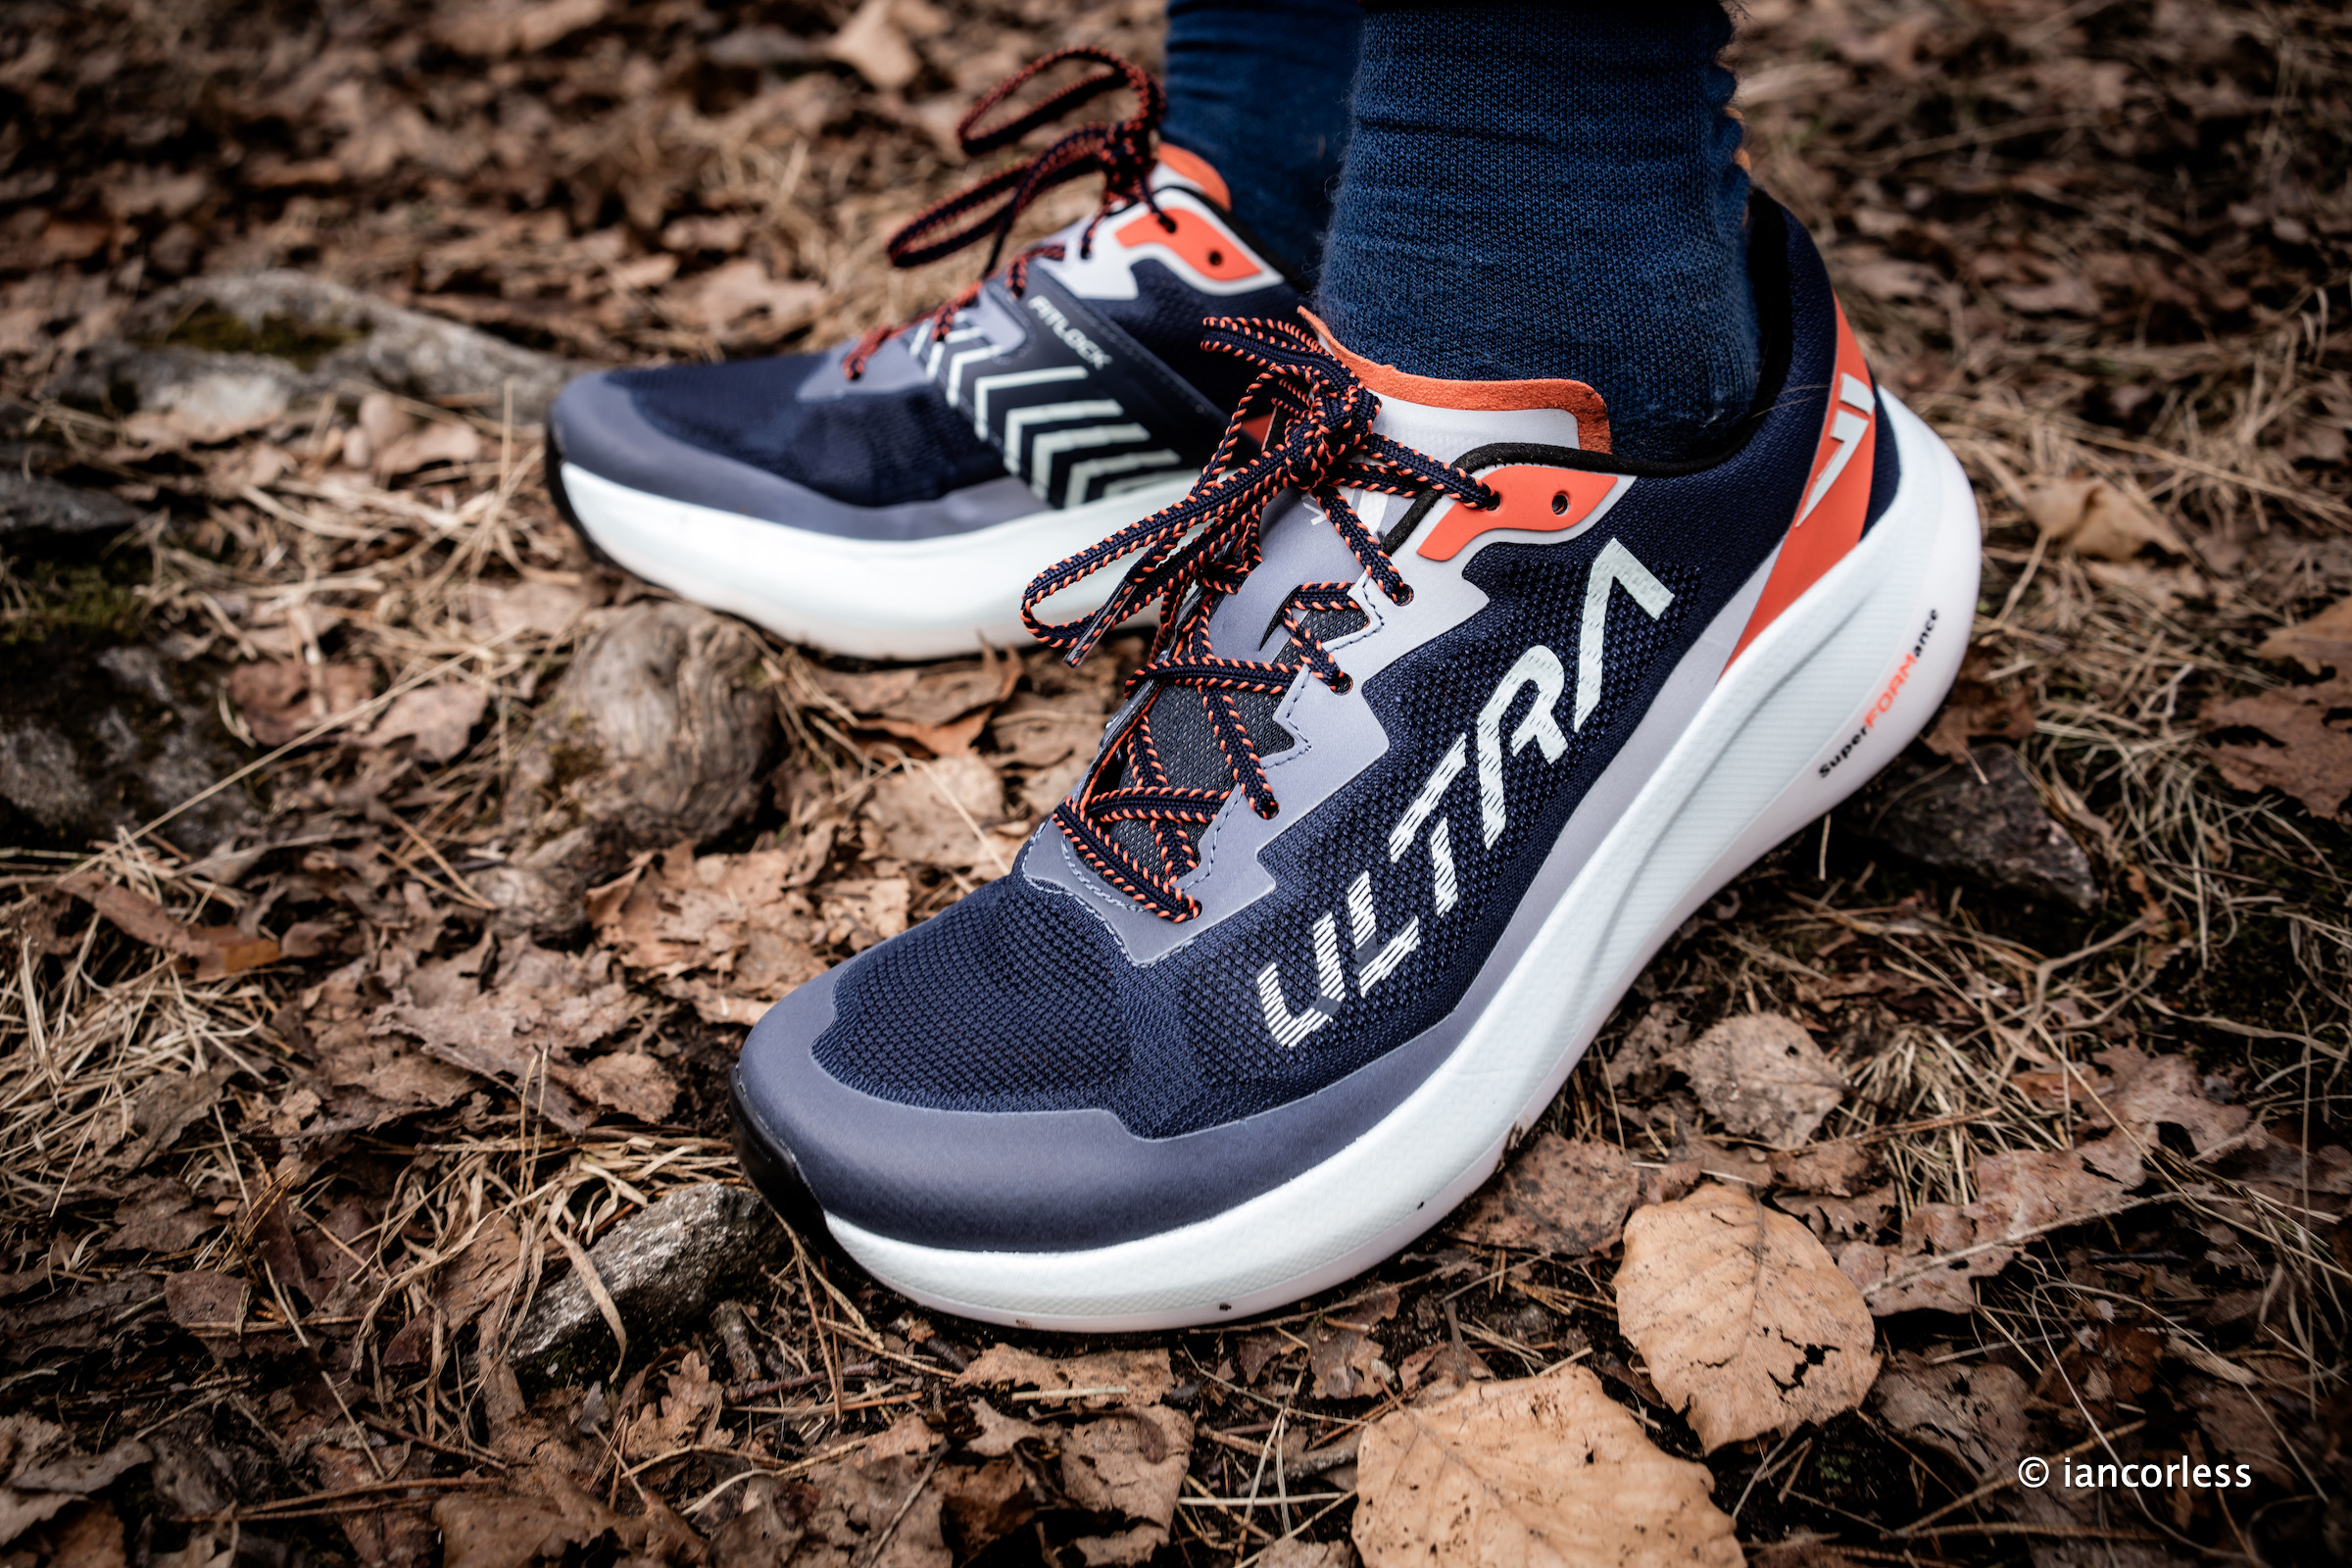
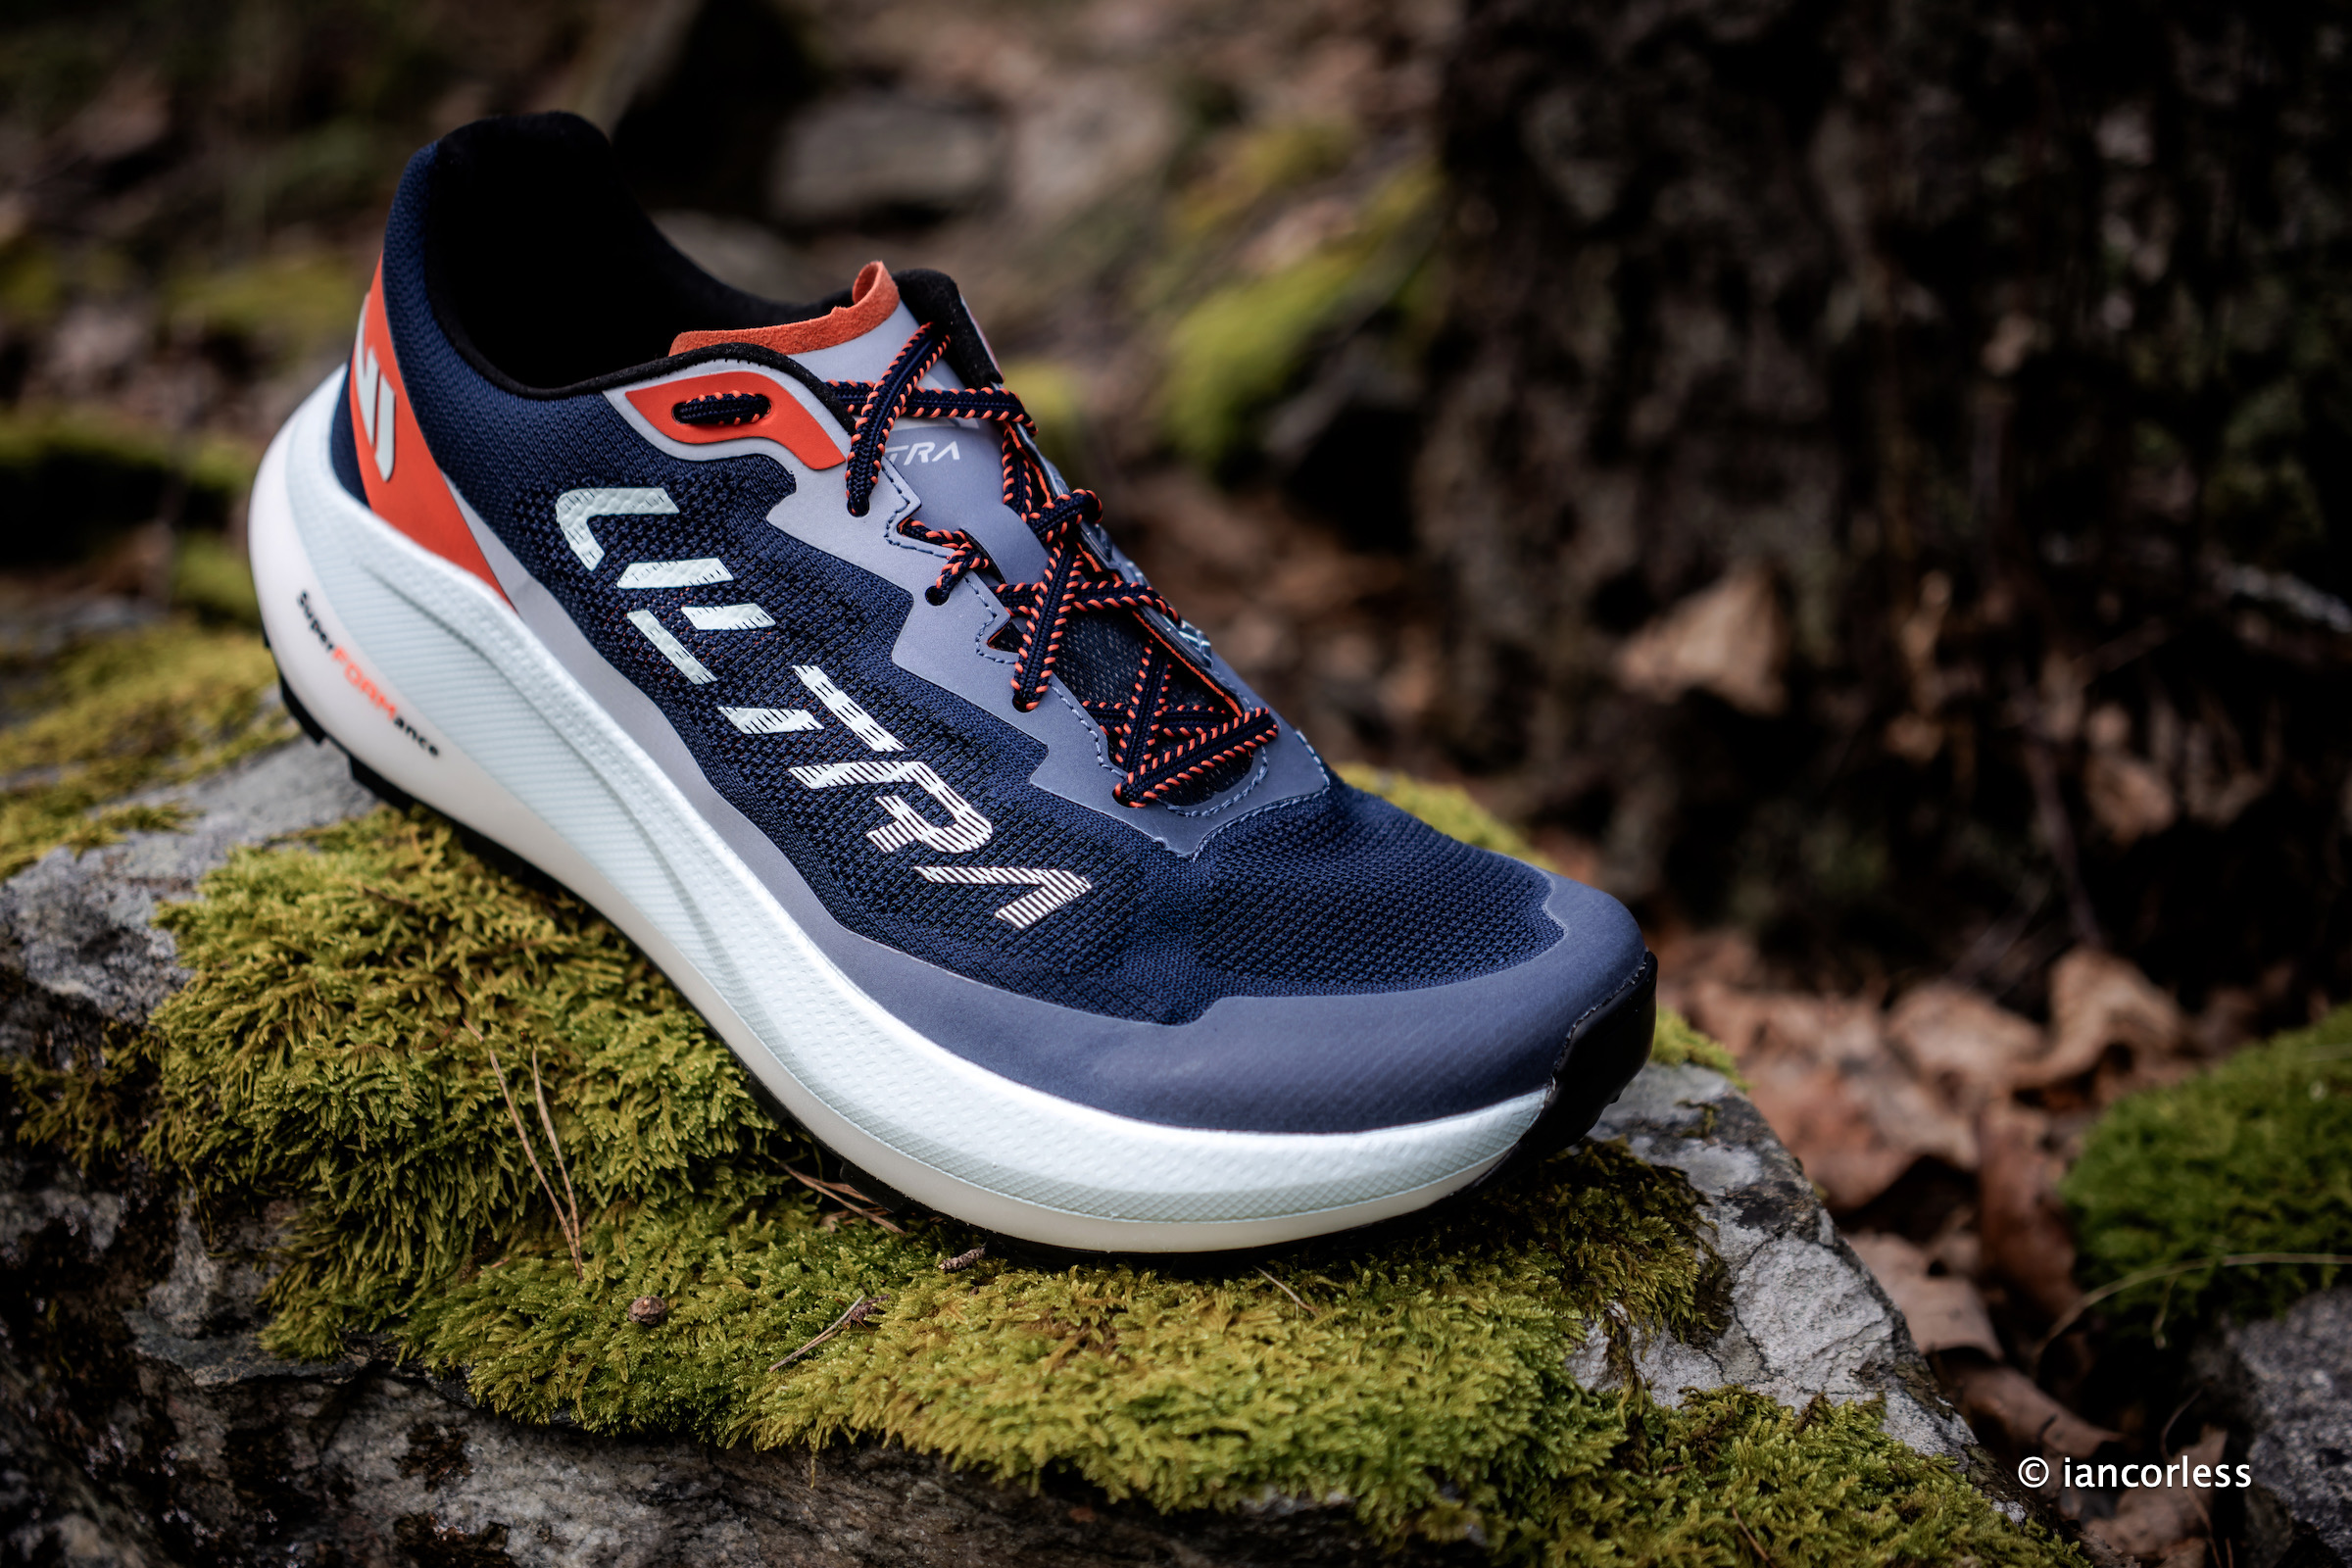
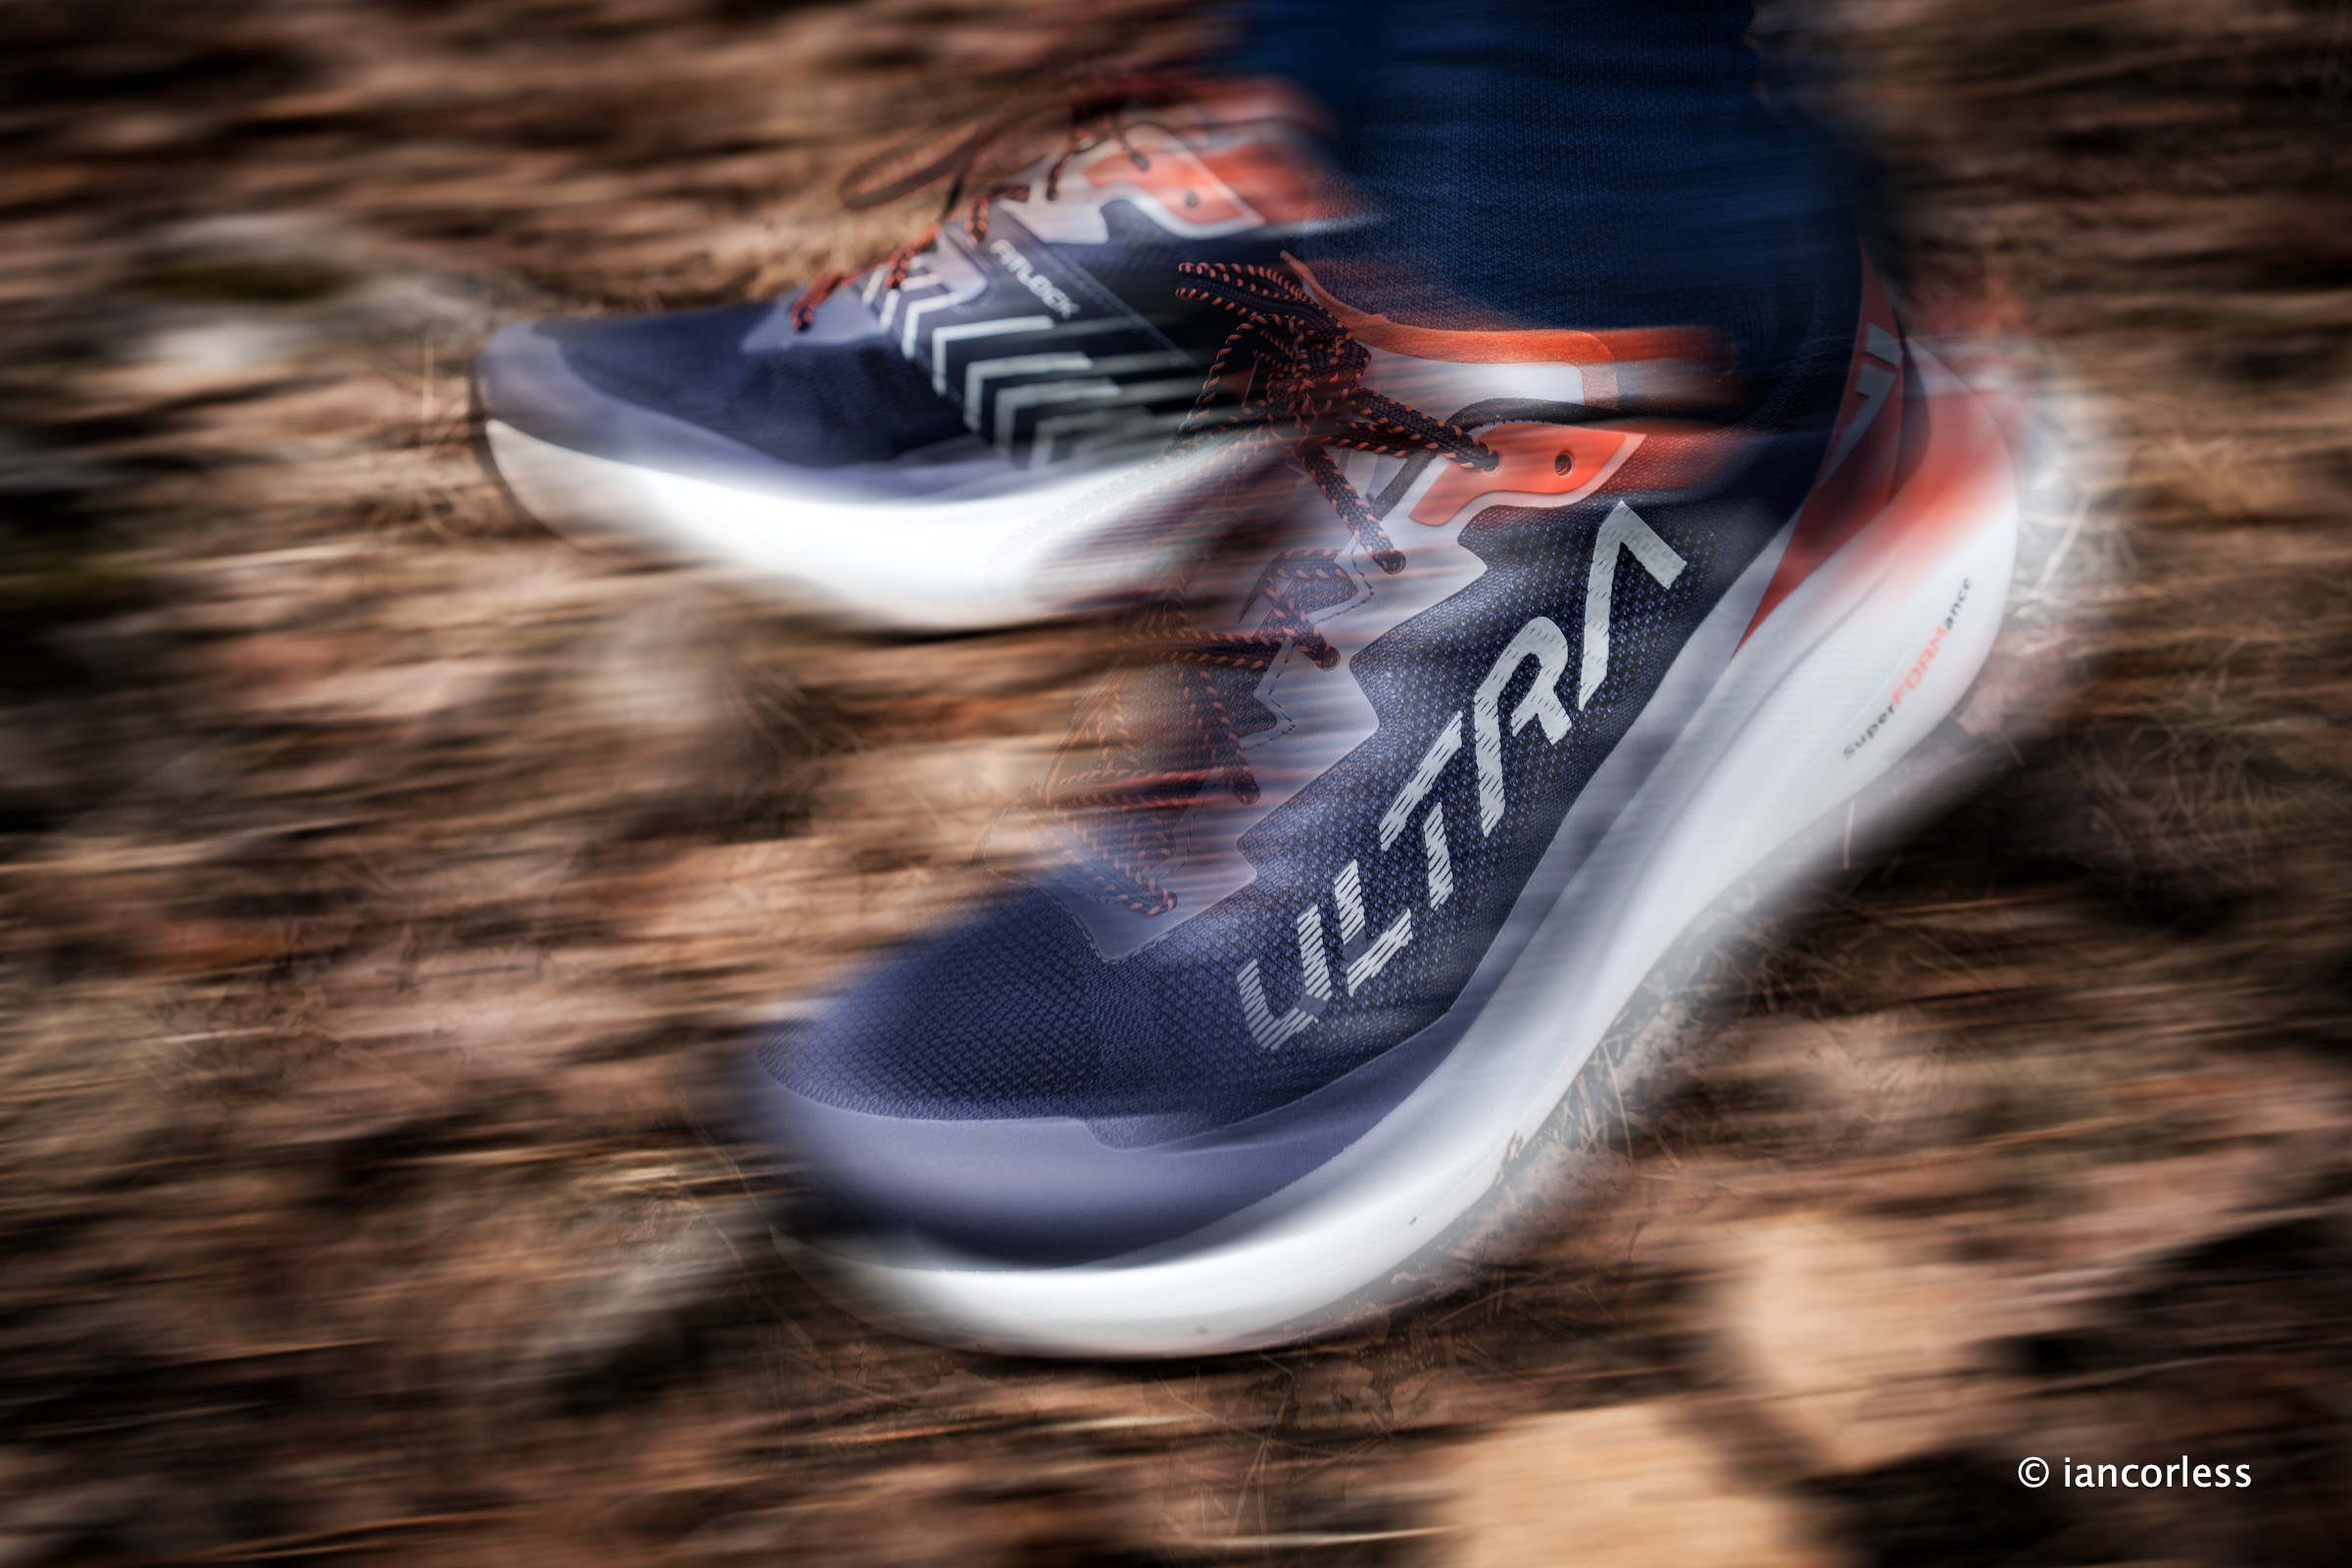
The ULTRA 3 is the most cushioned shoe VJ have made, 30mm at the front, 38mm at the rear and an 8mm drop puts this shoe in an area that all the other big brands are dominating – think Hoka.

So, why would VJ try to penetrate this market?

Quite simply, they are offering a shoe that the other brands do not offer… They are bringing their unique USP’s of foot hold and grip, adding cushioning and providing a very specific mountain/ ultra shoe.

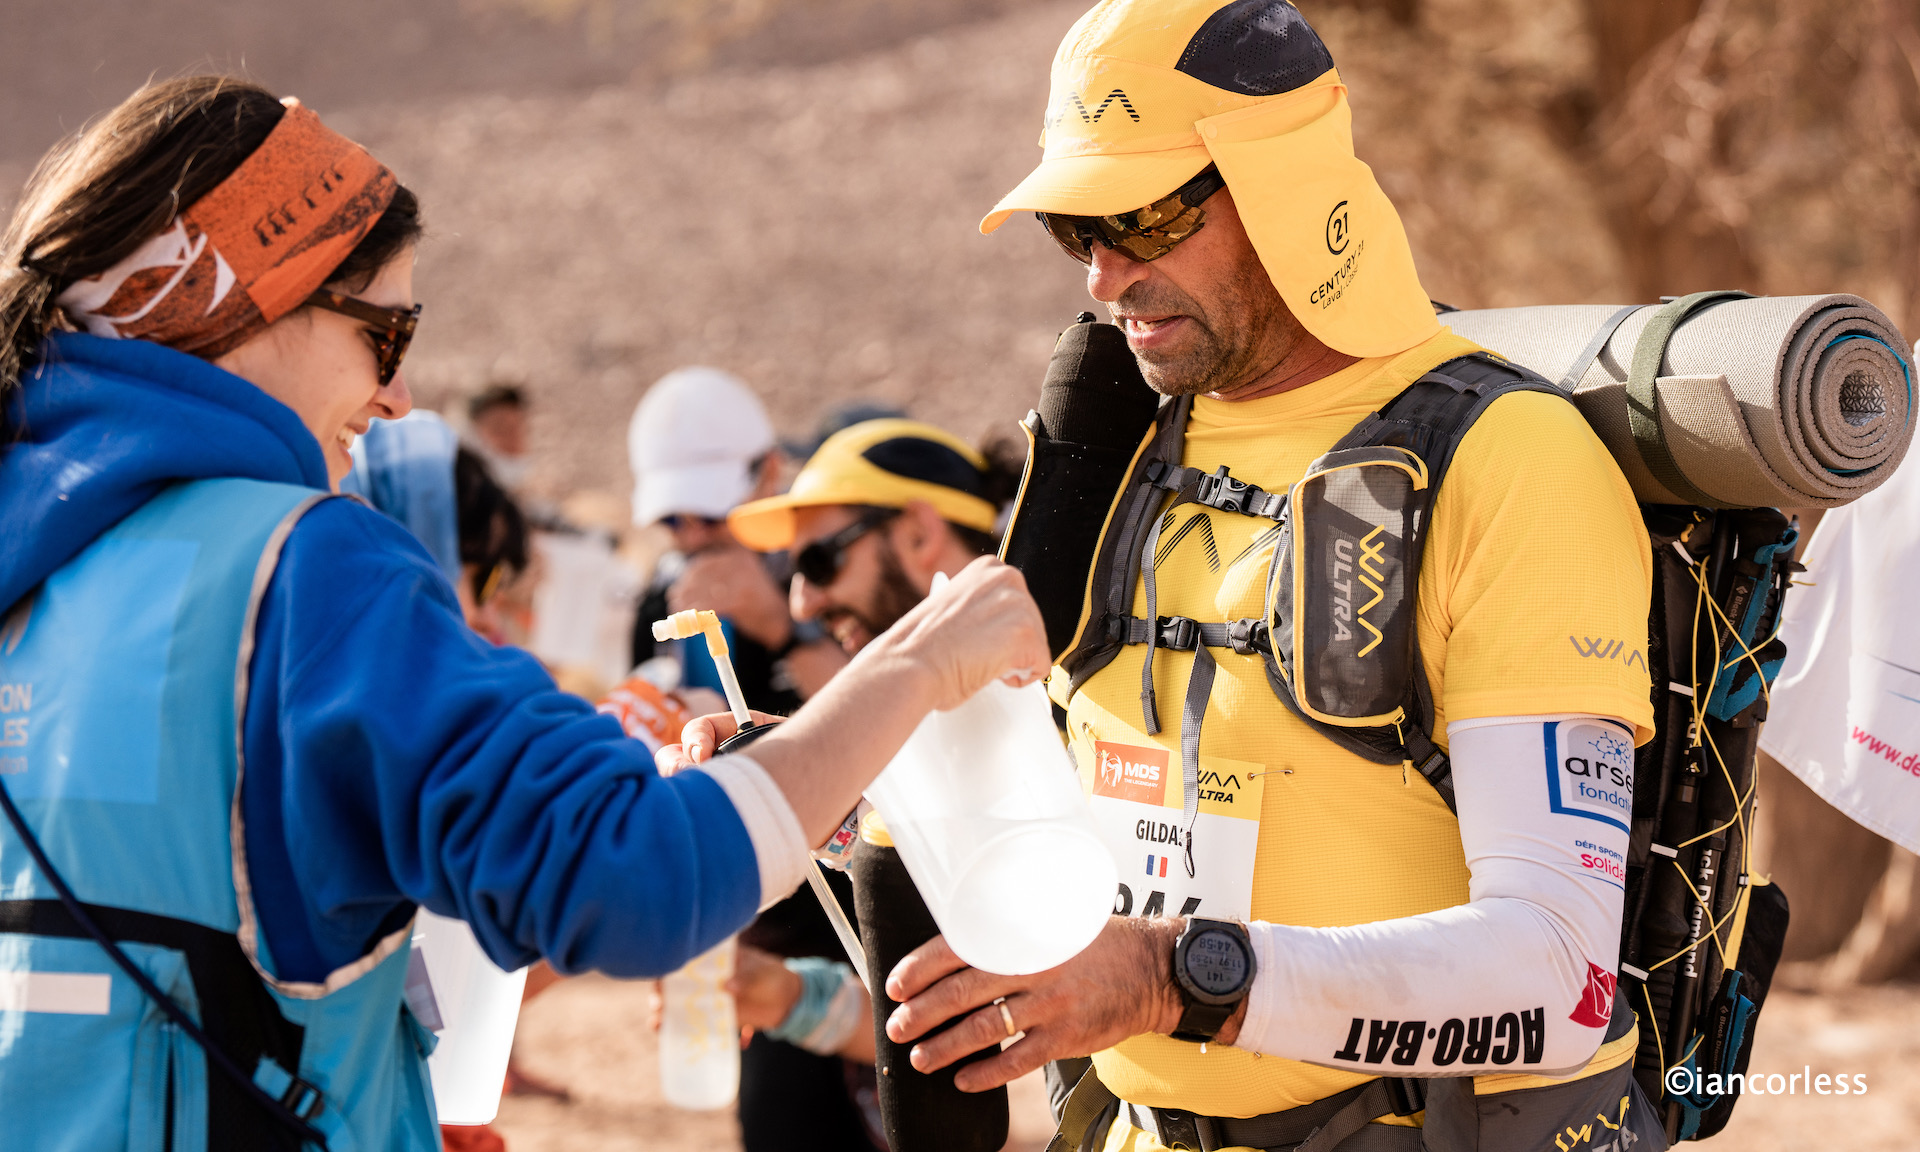
The ULTRA 3 was tested at the 2024 UTMB on the feet of Juuso Simpanen, he placed 19th.

Photo by Ian Corless

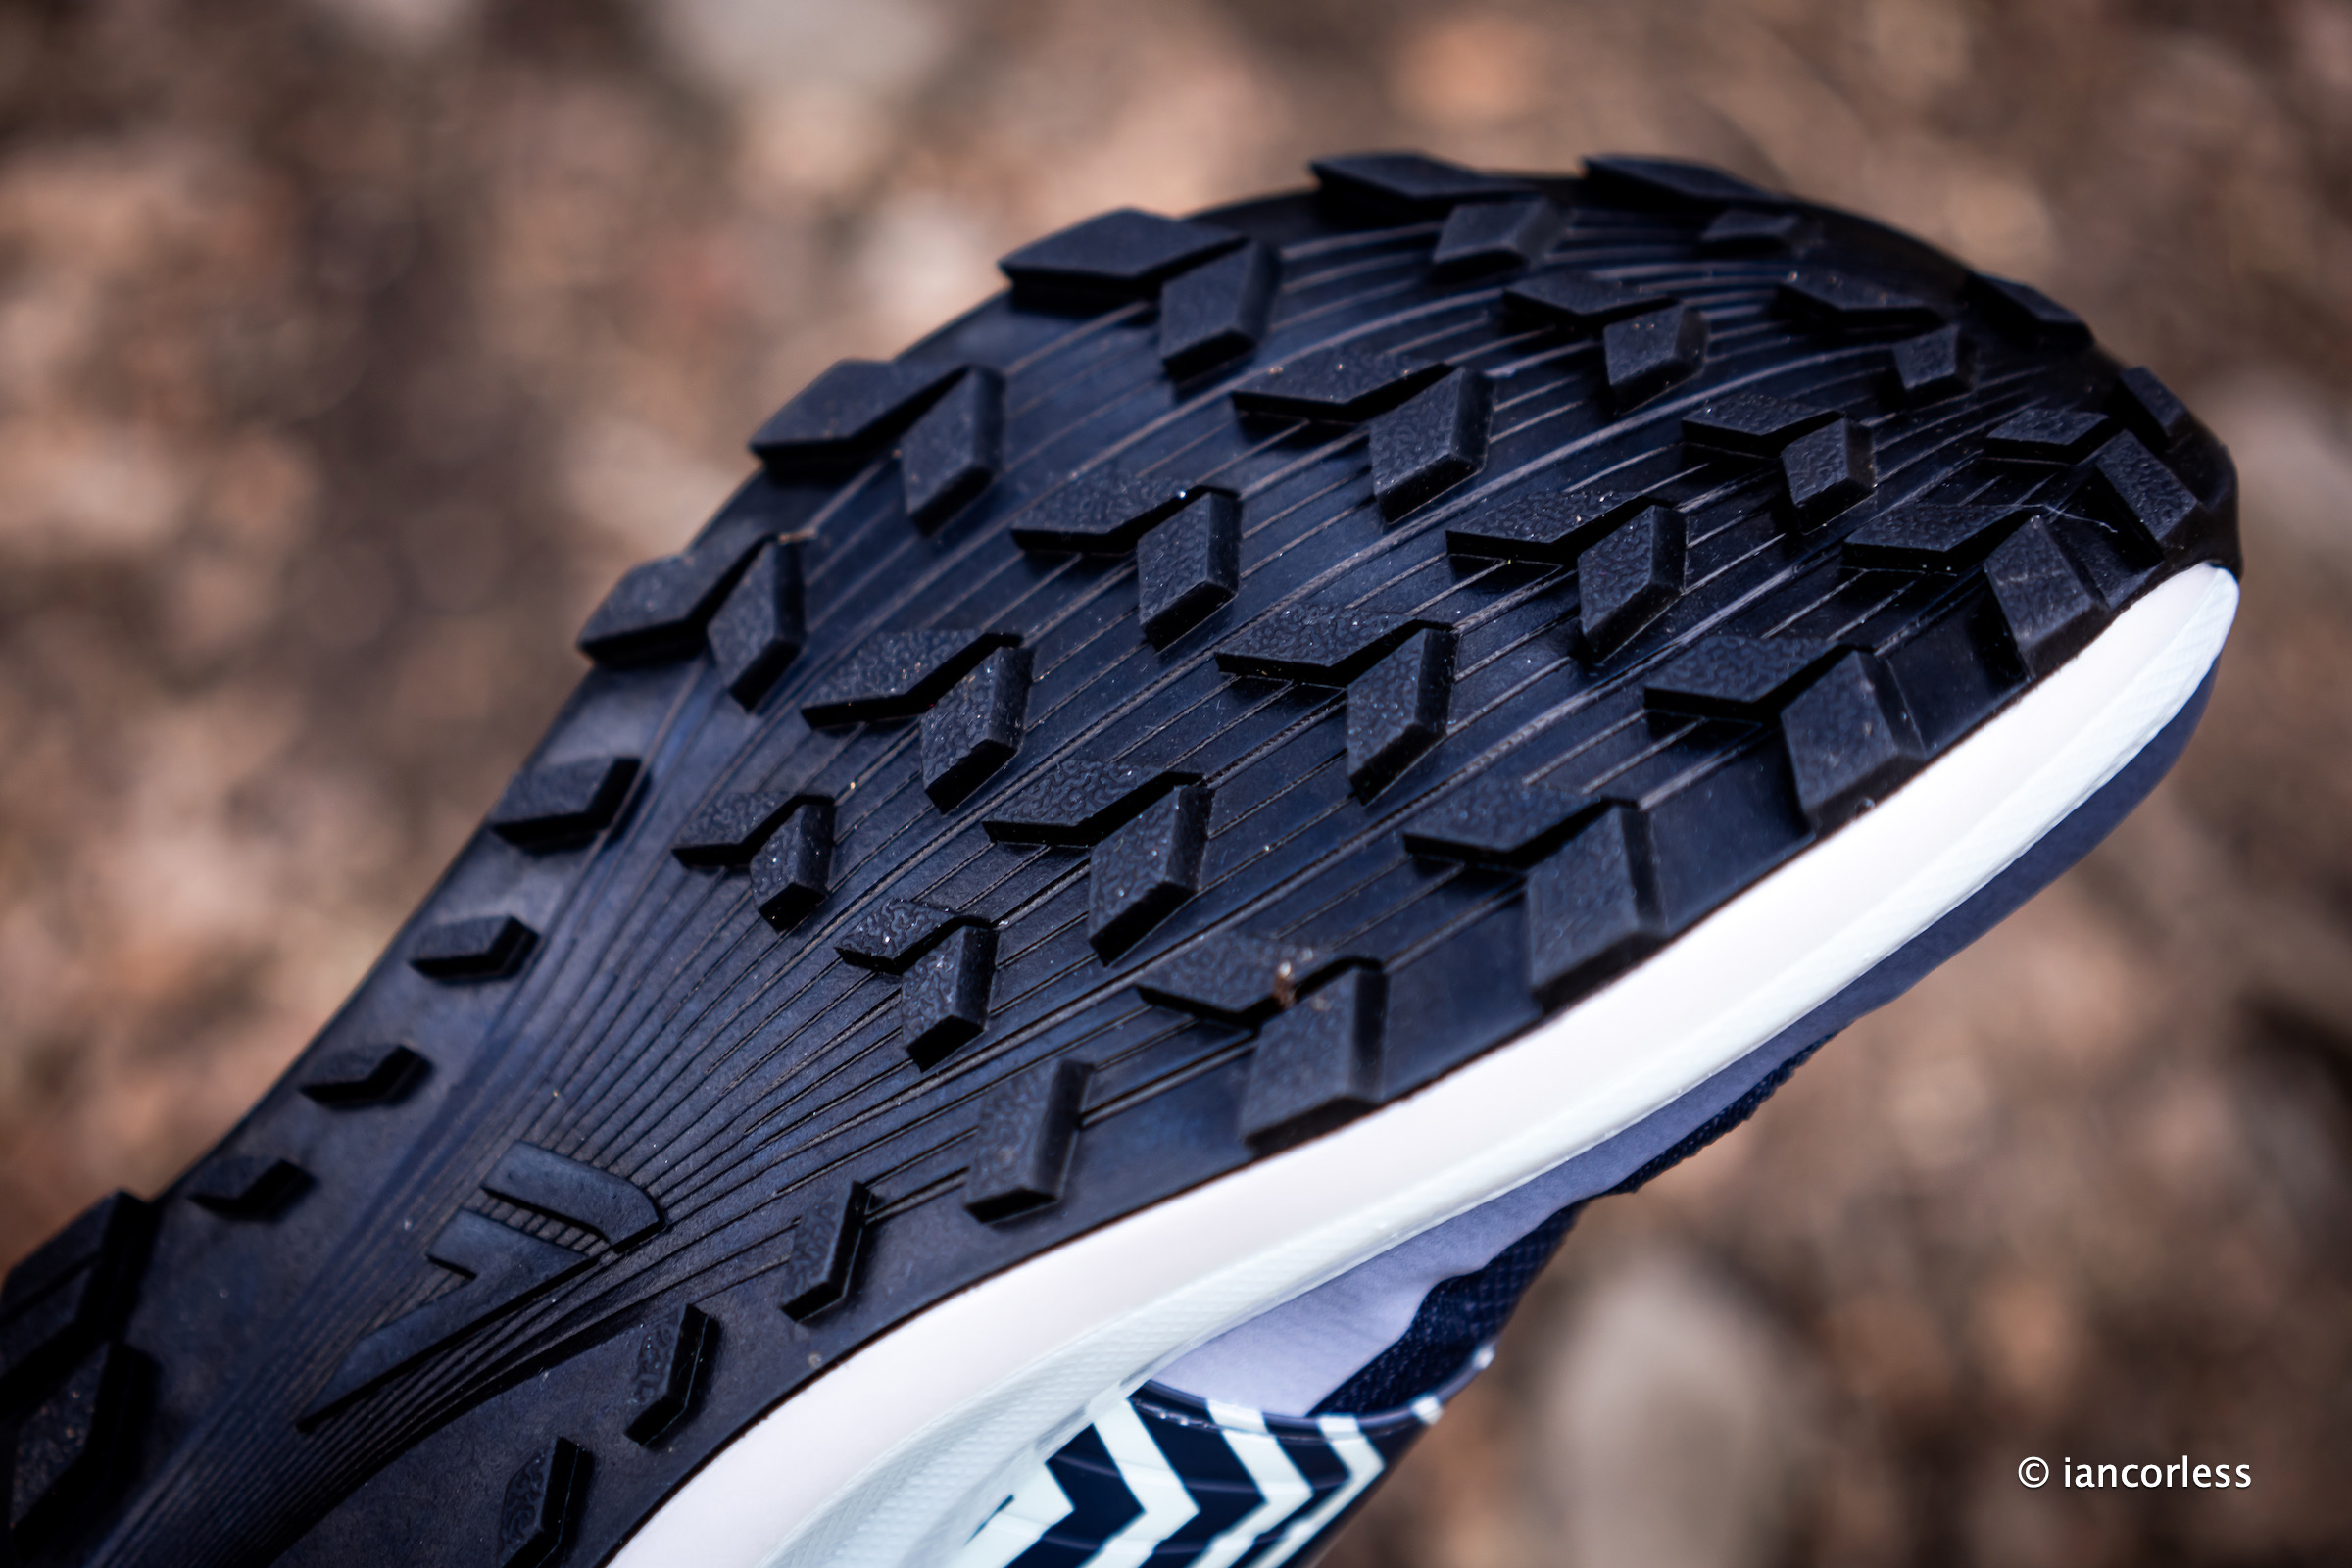
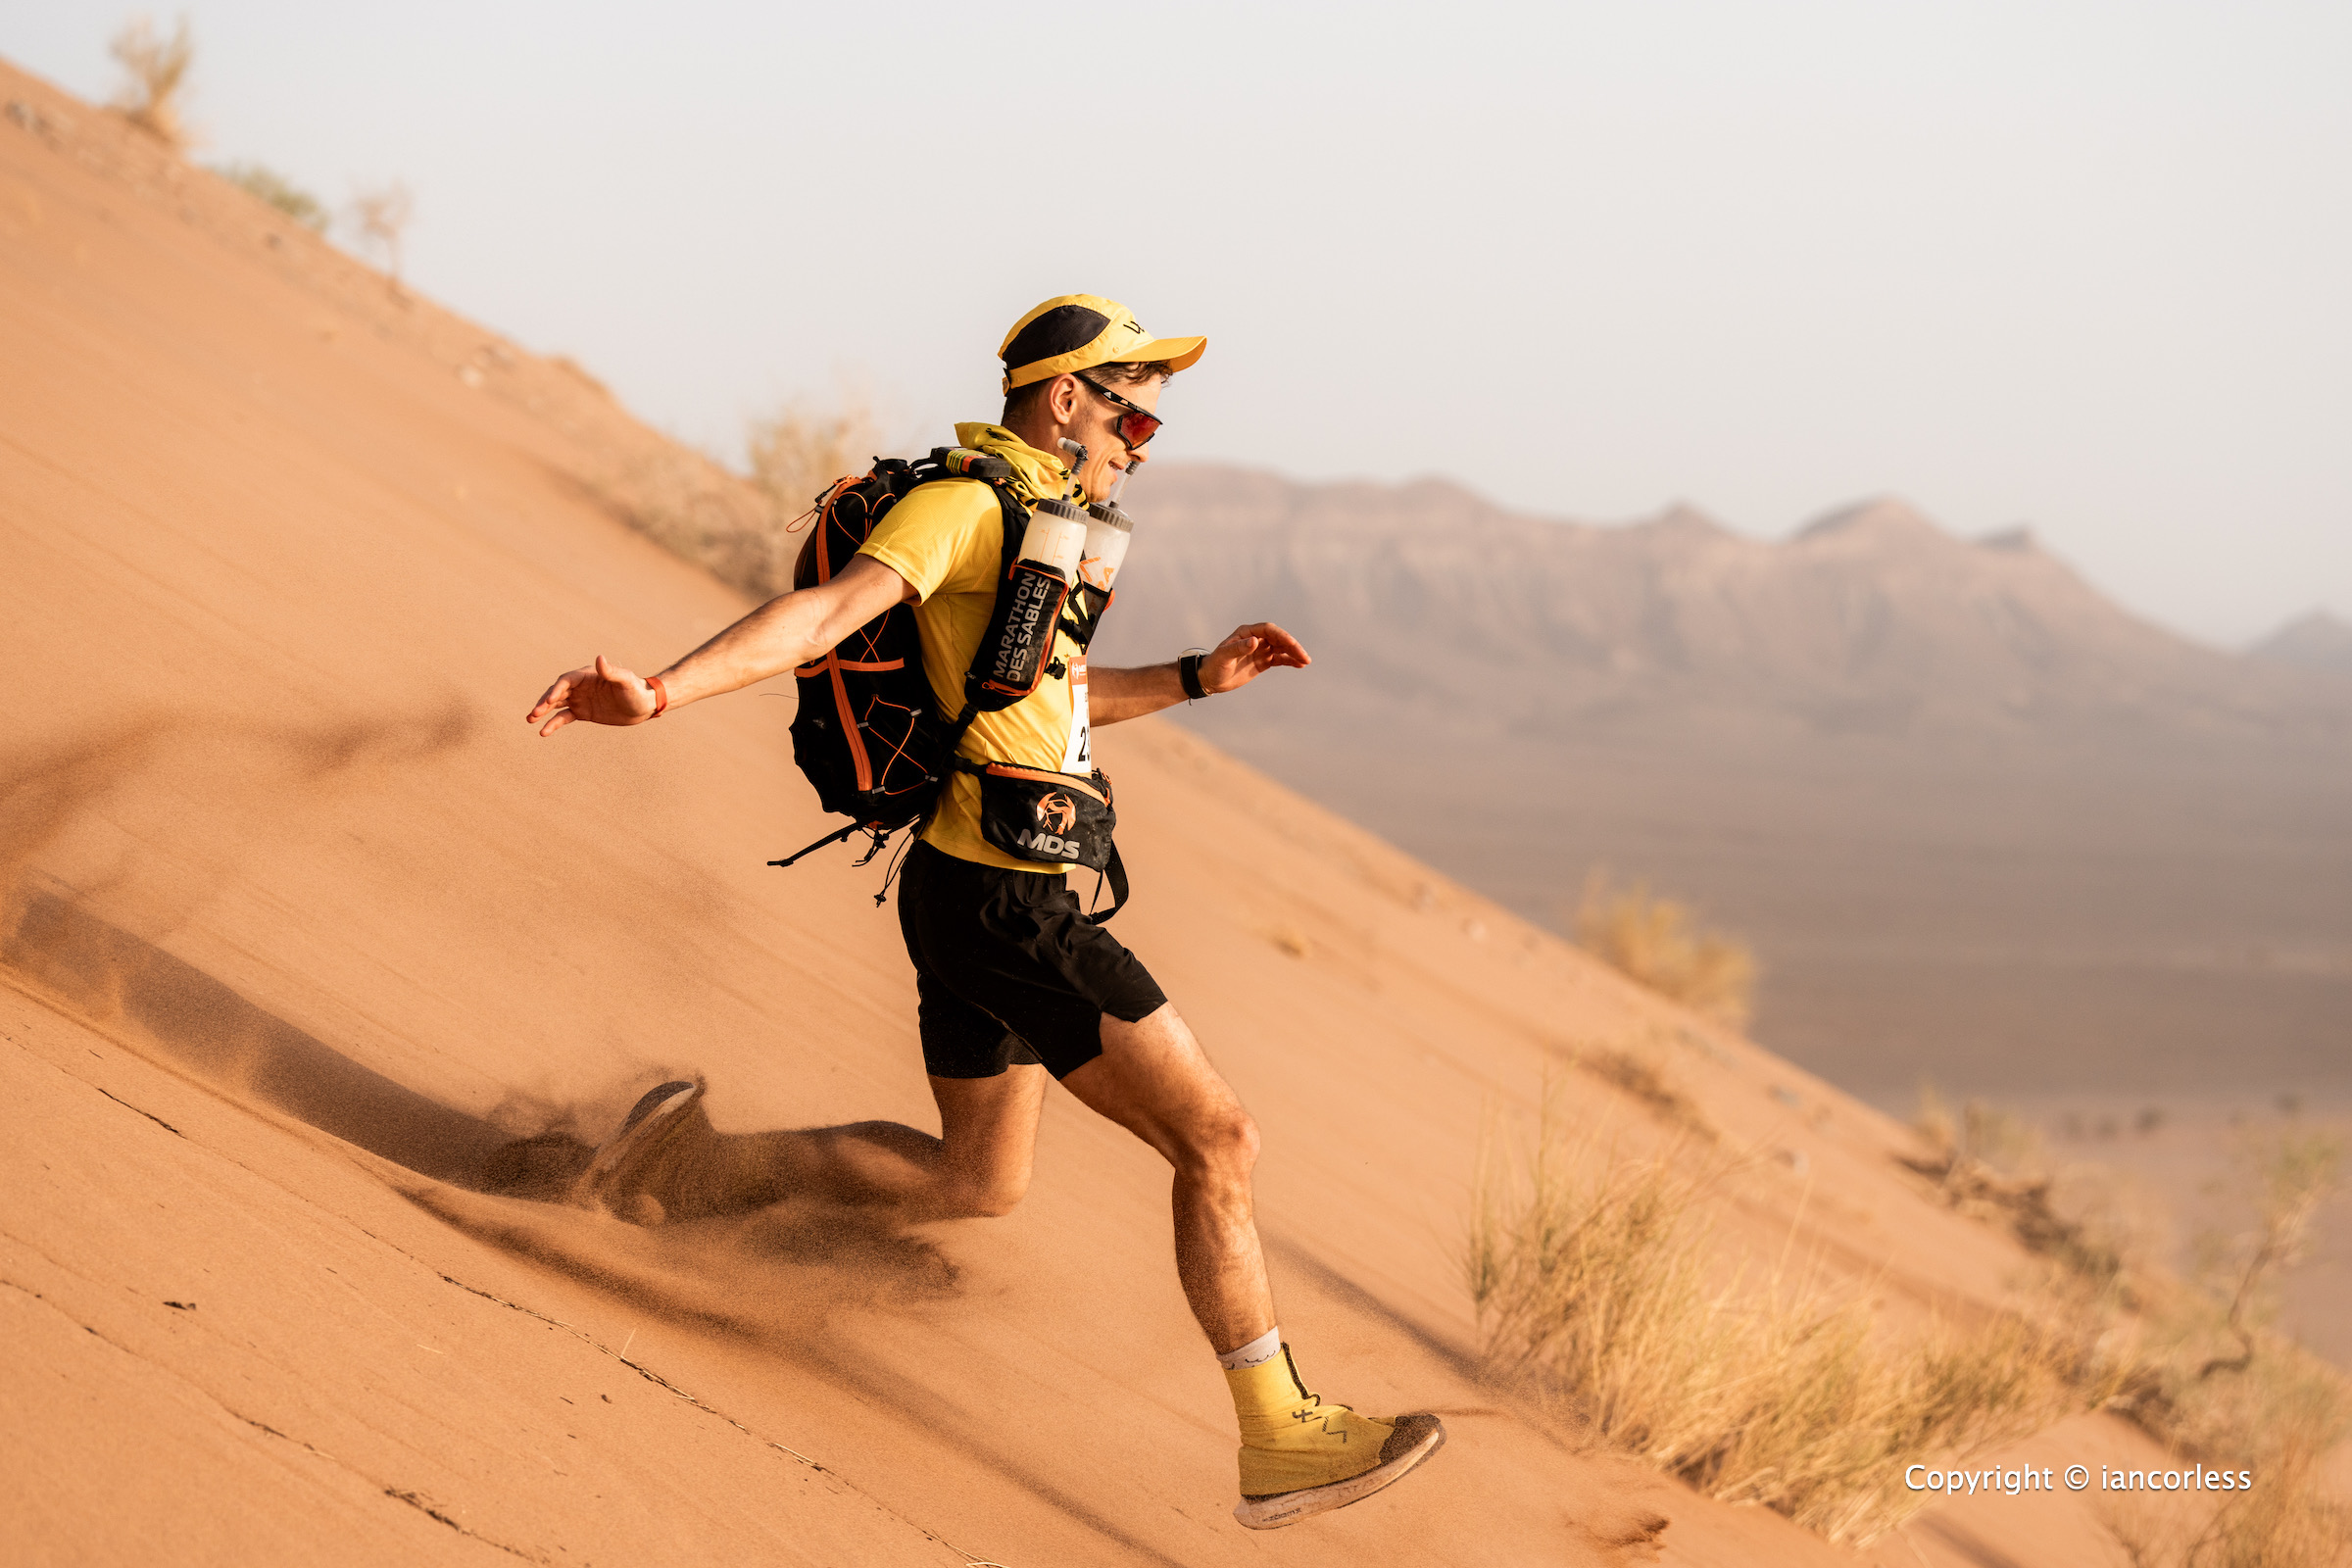
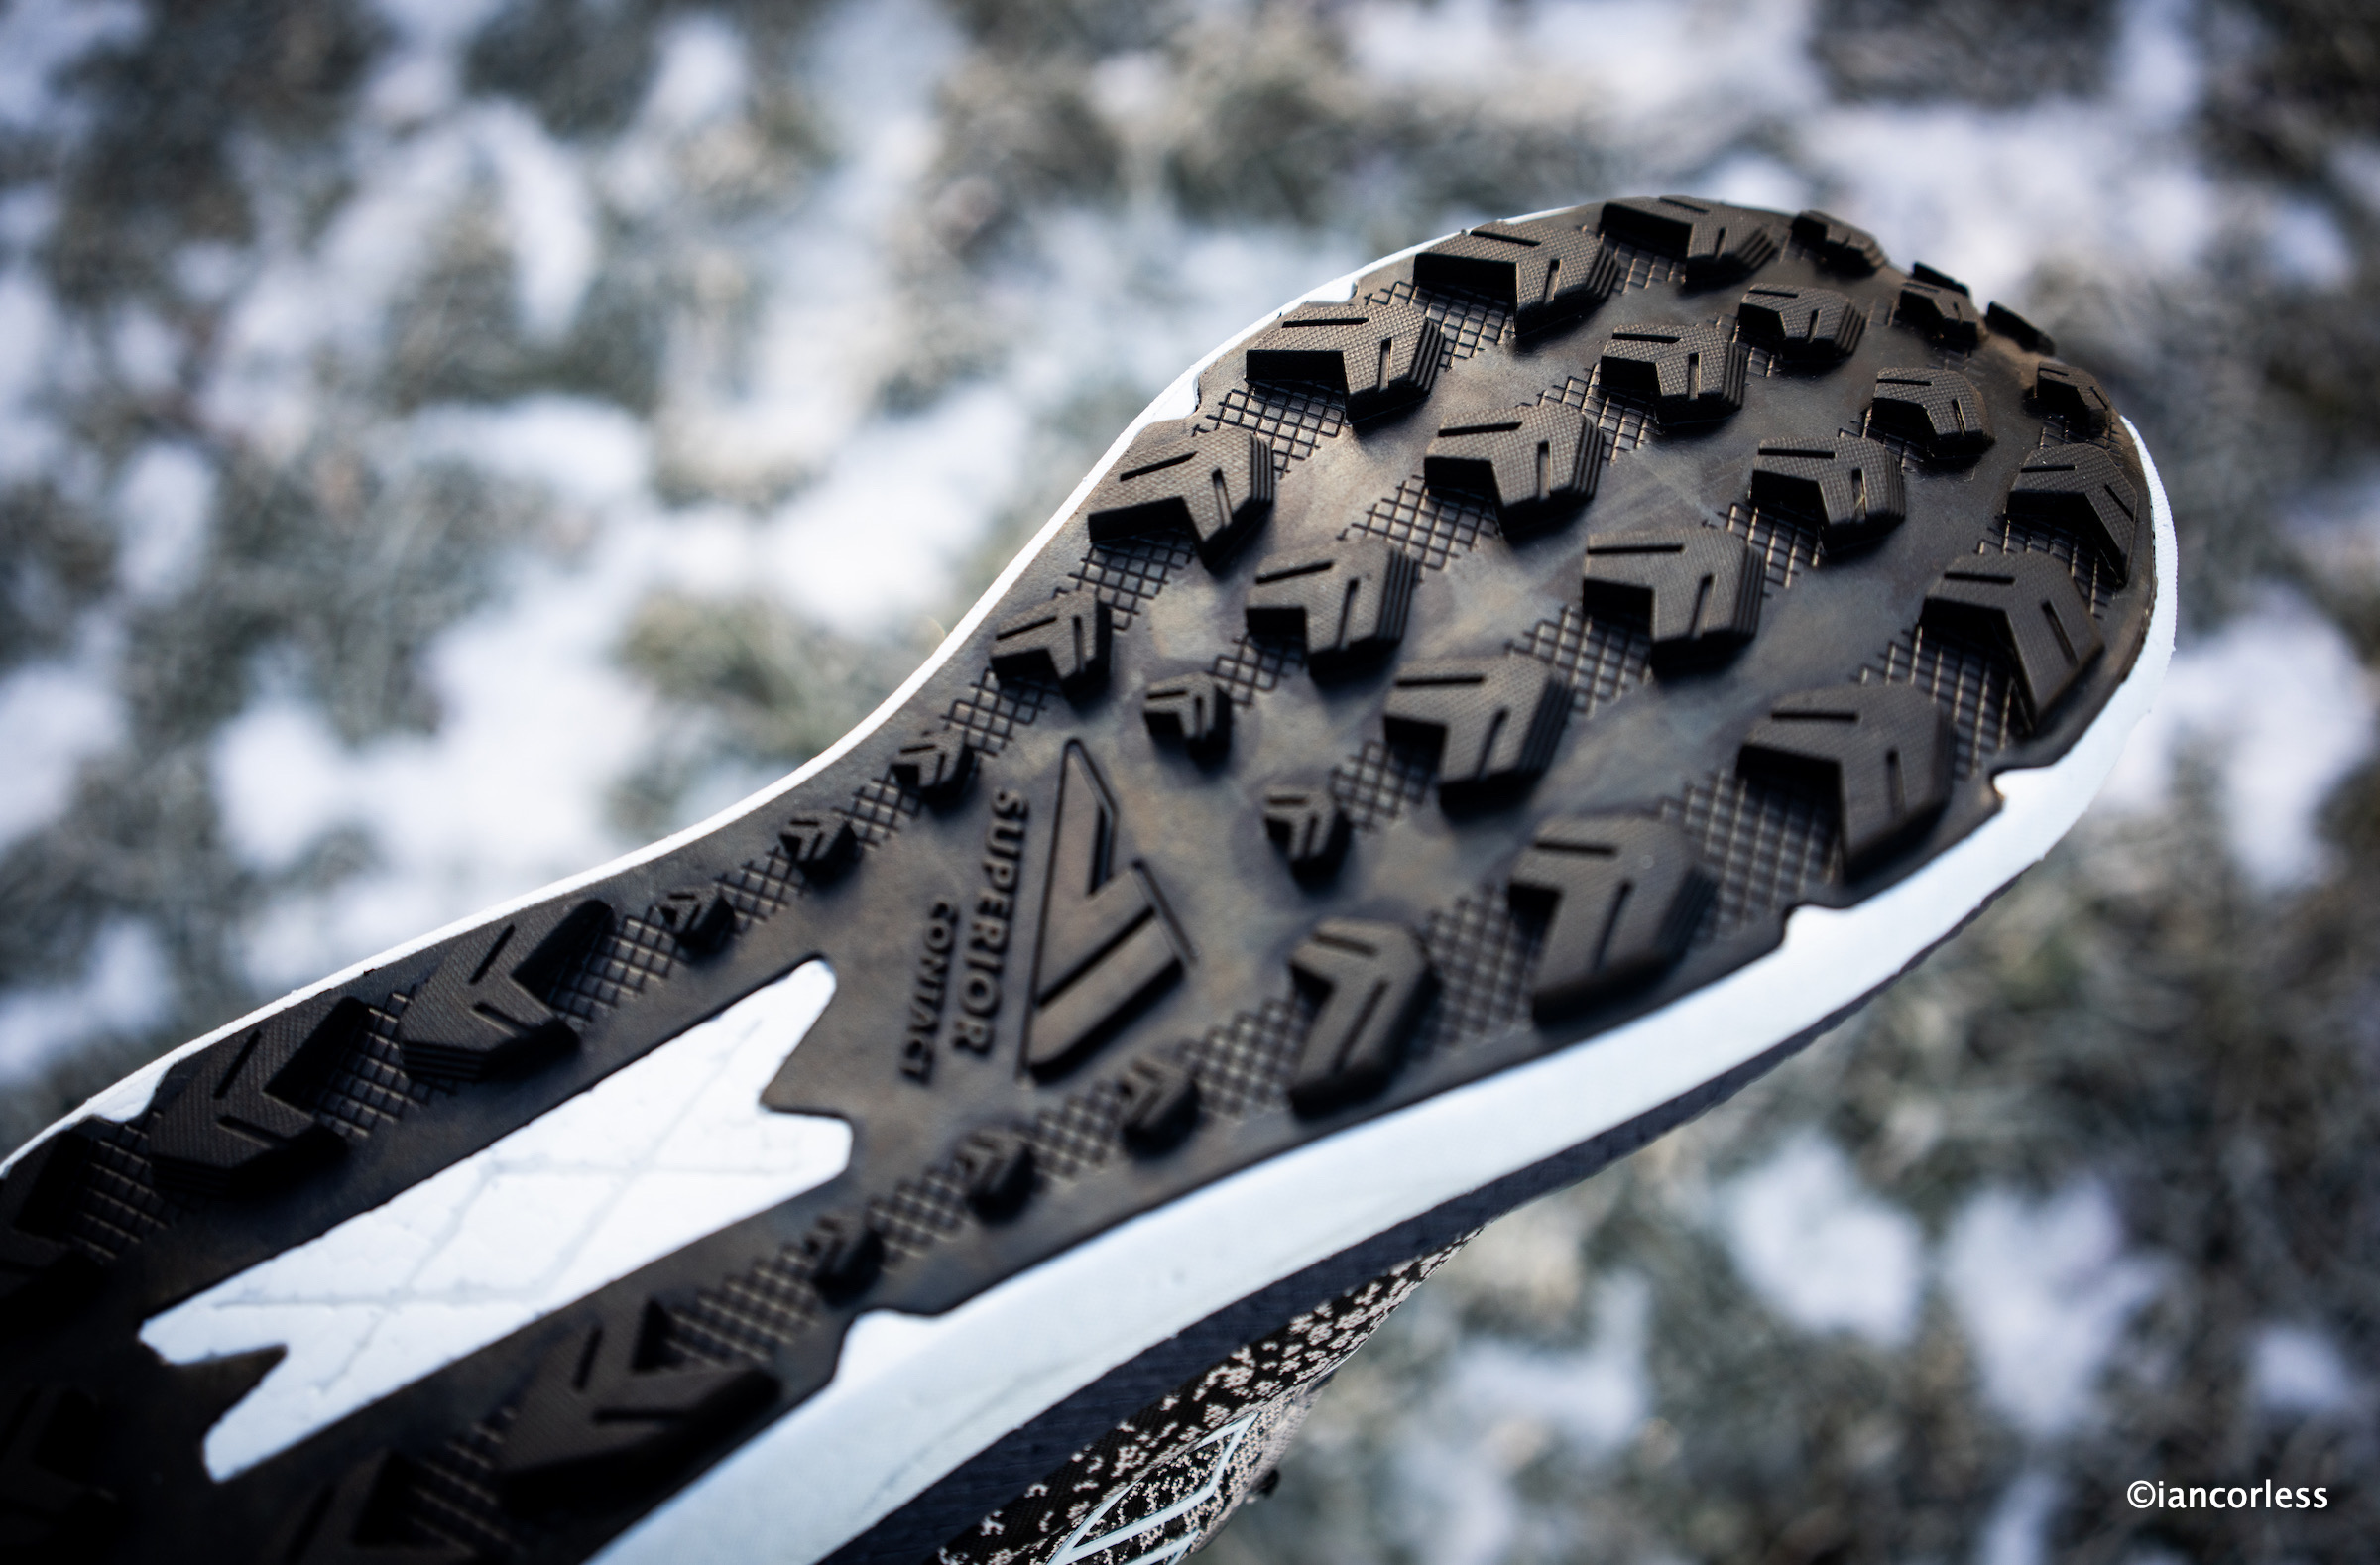
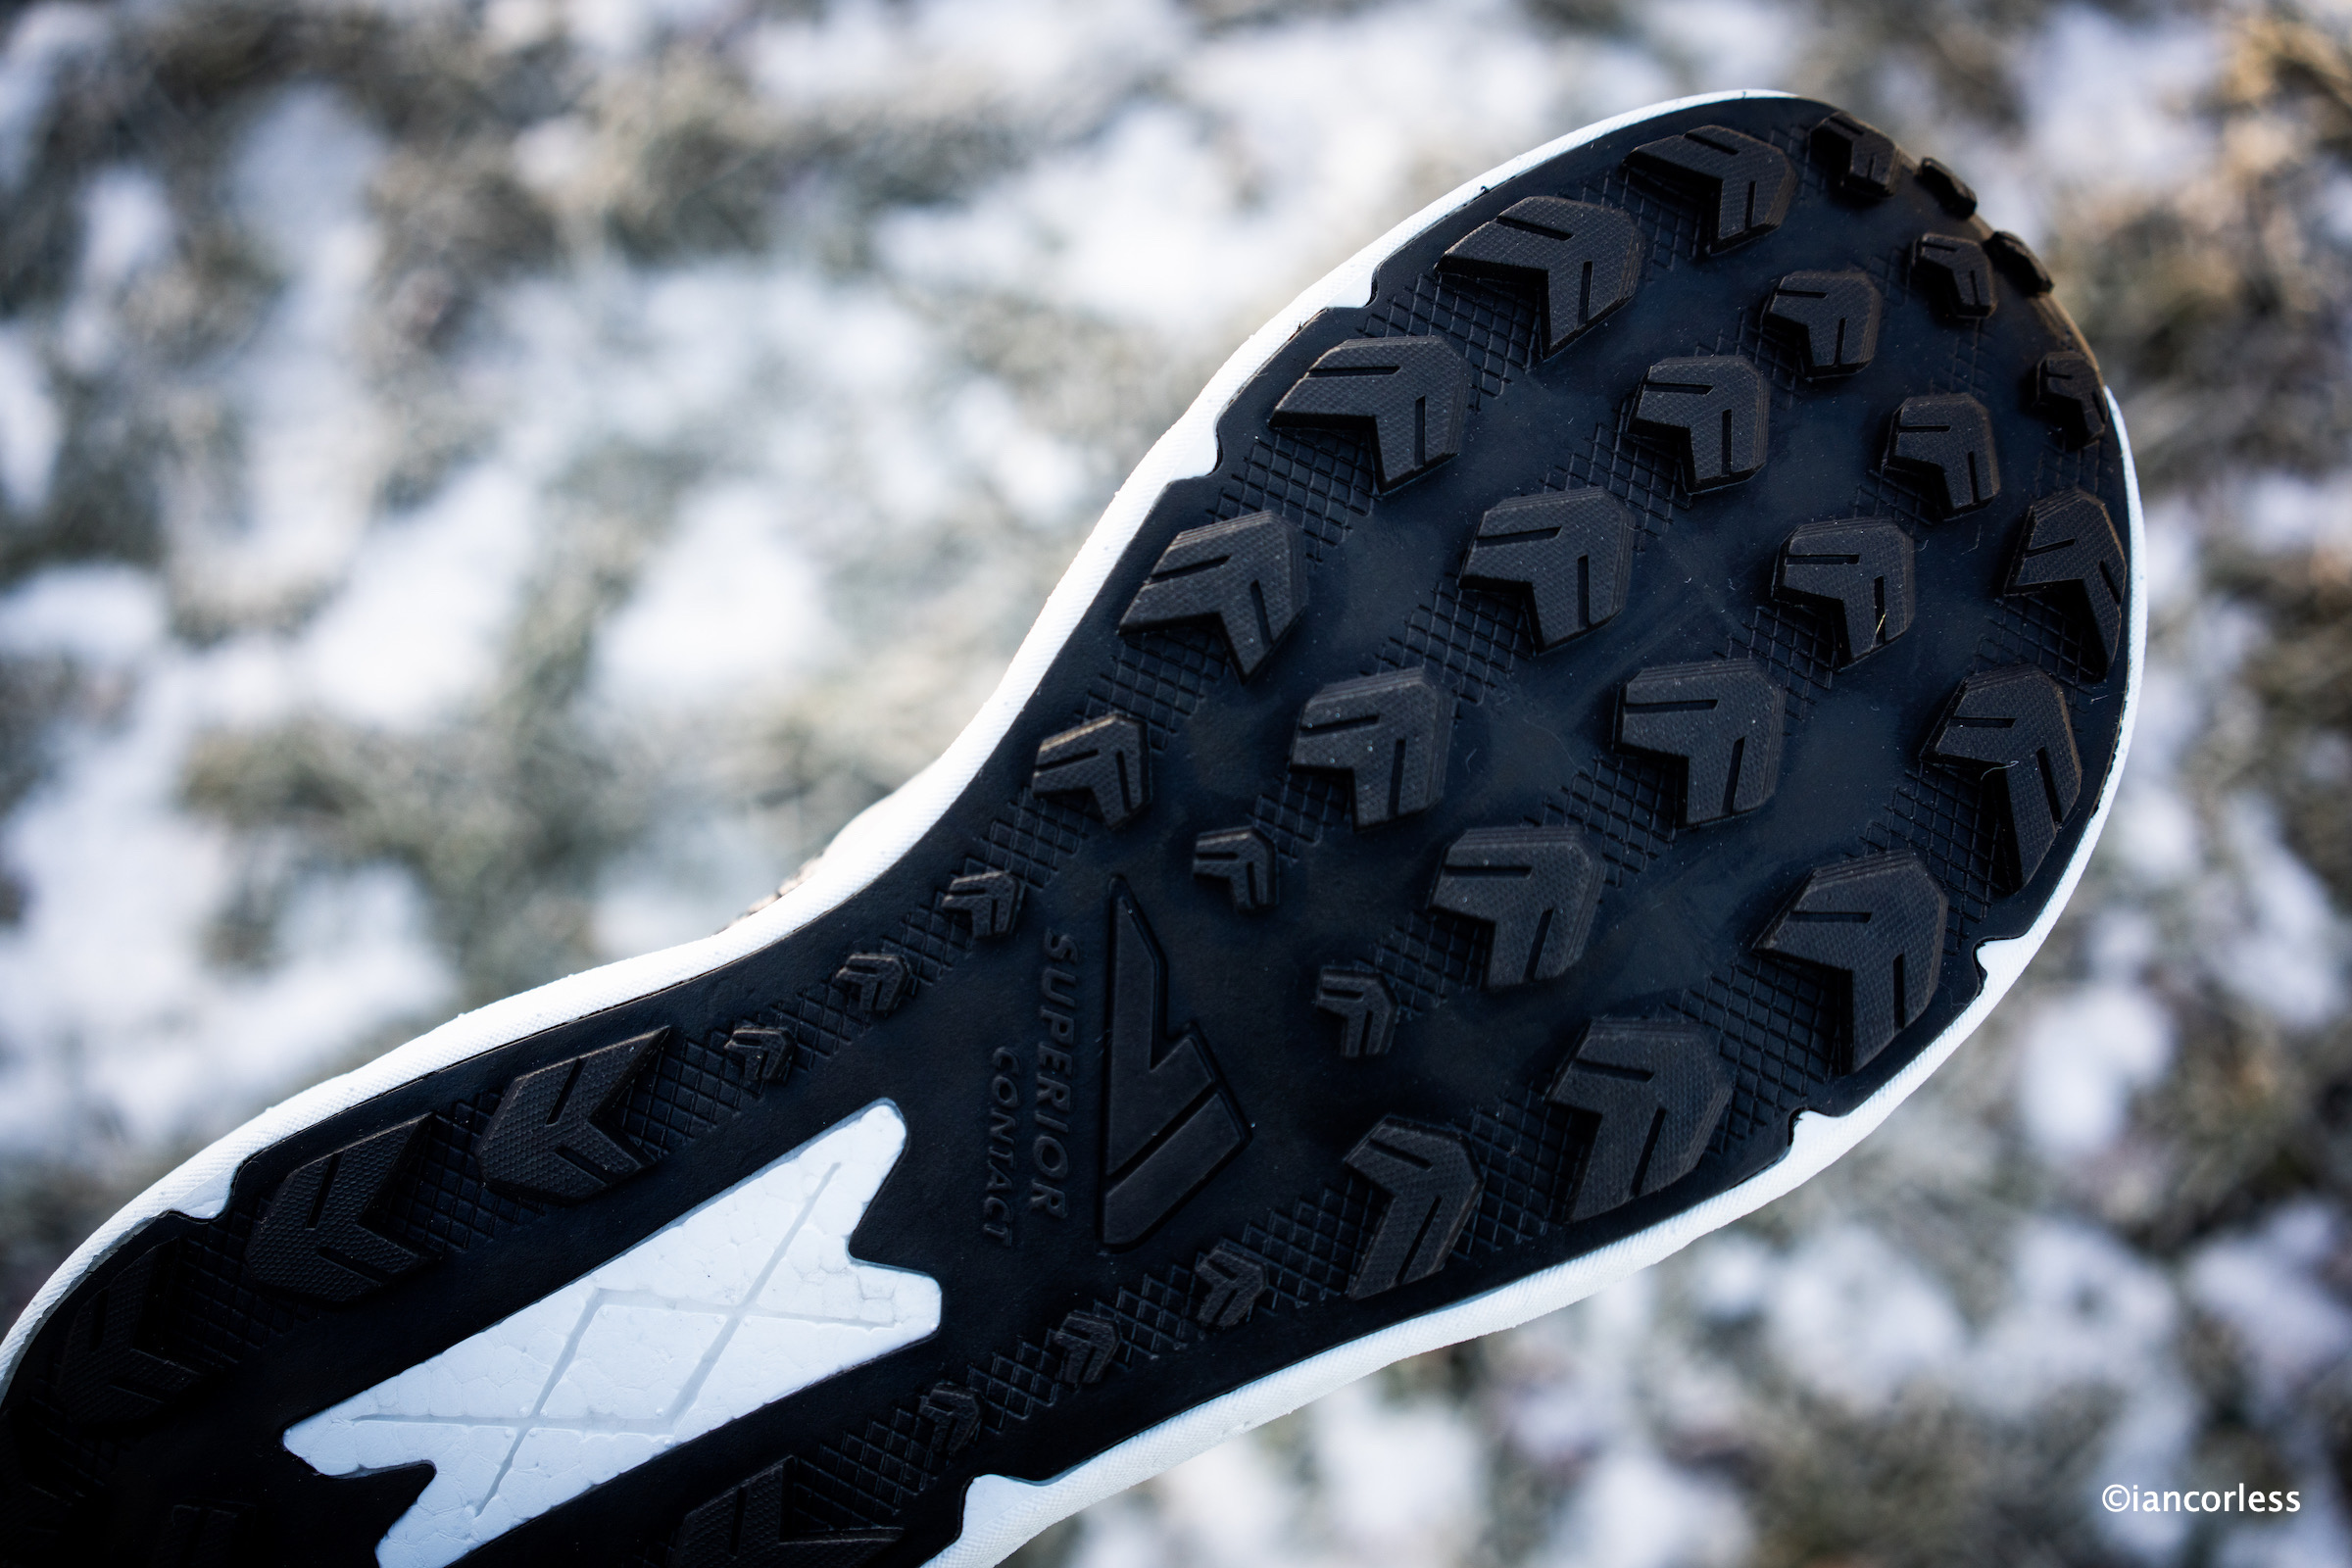
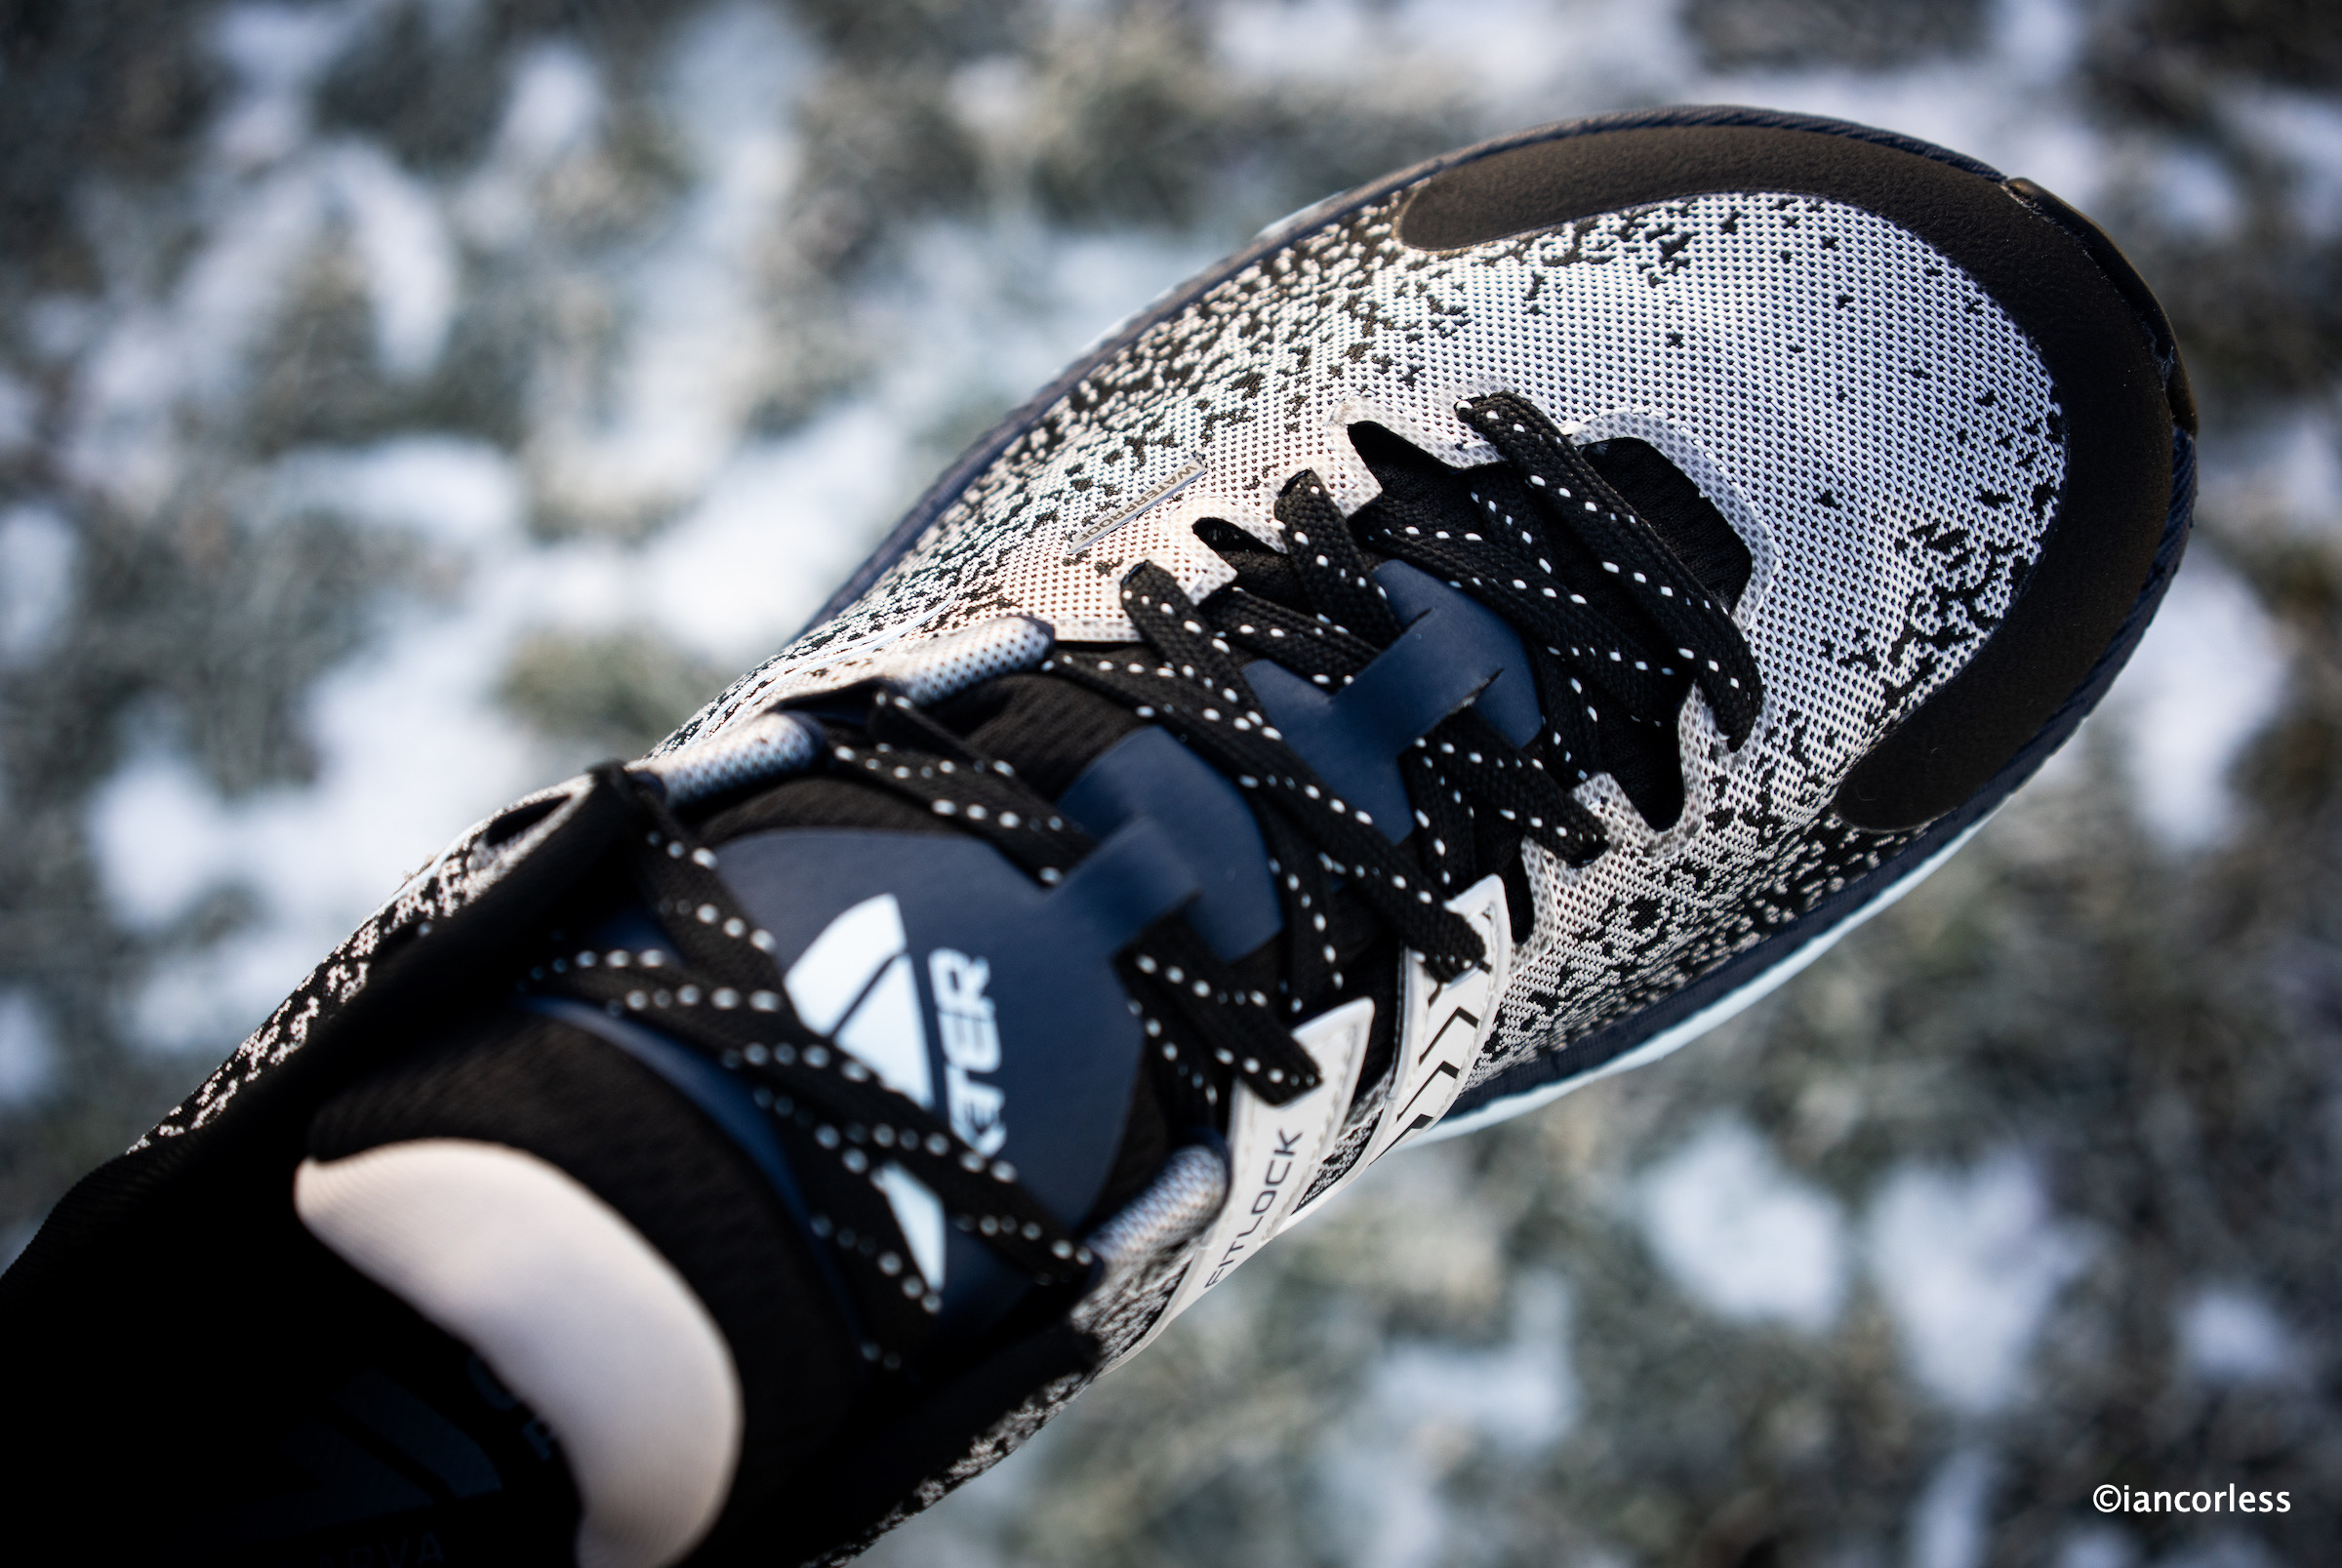
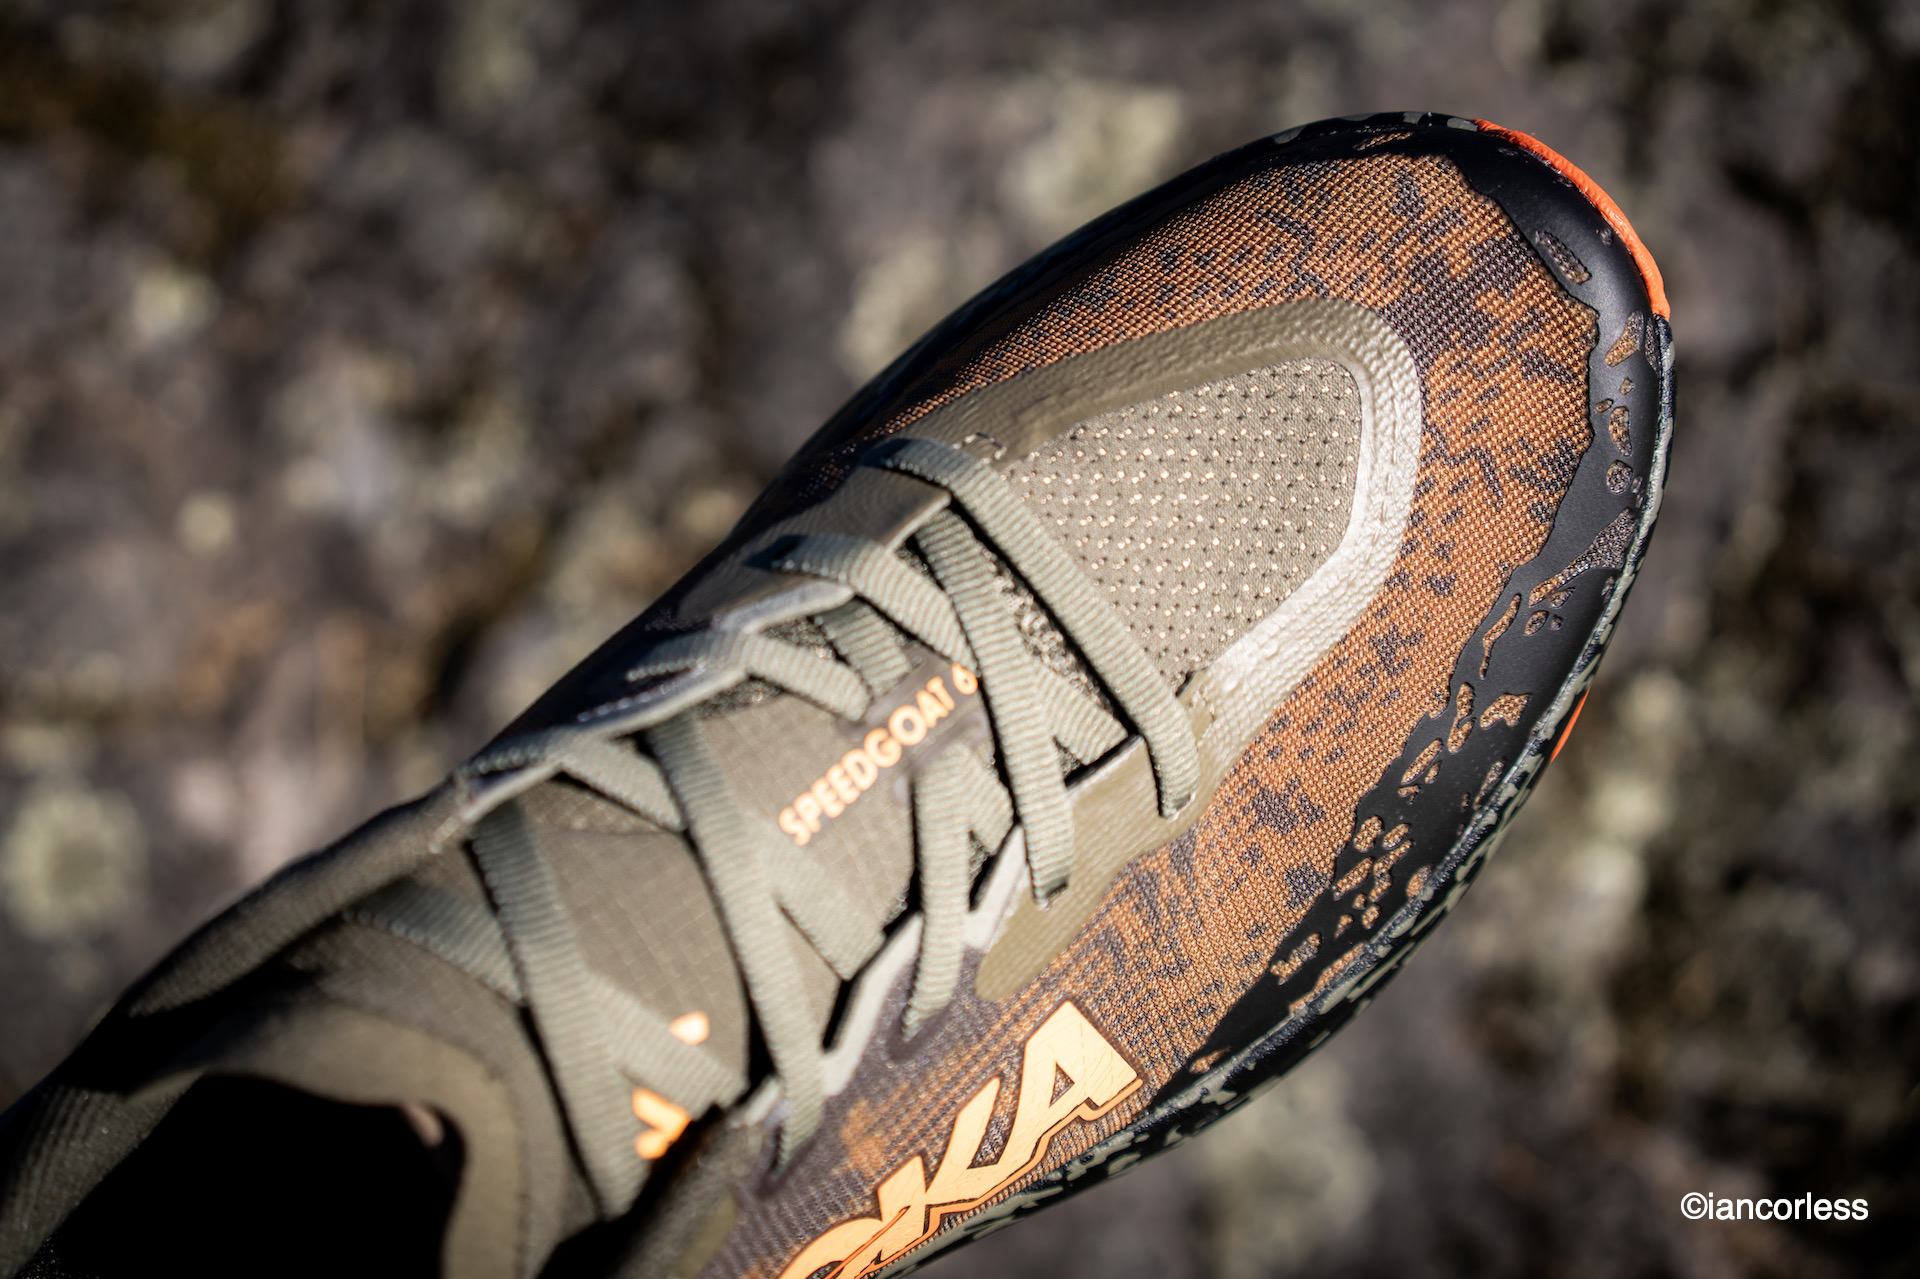
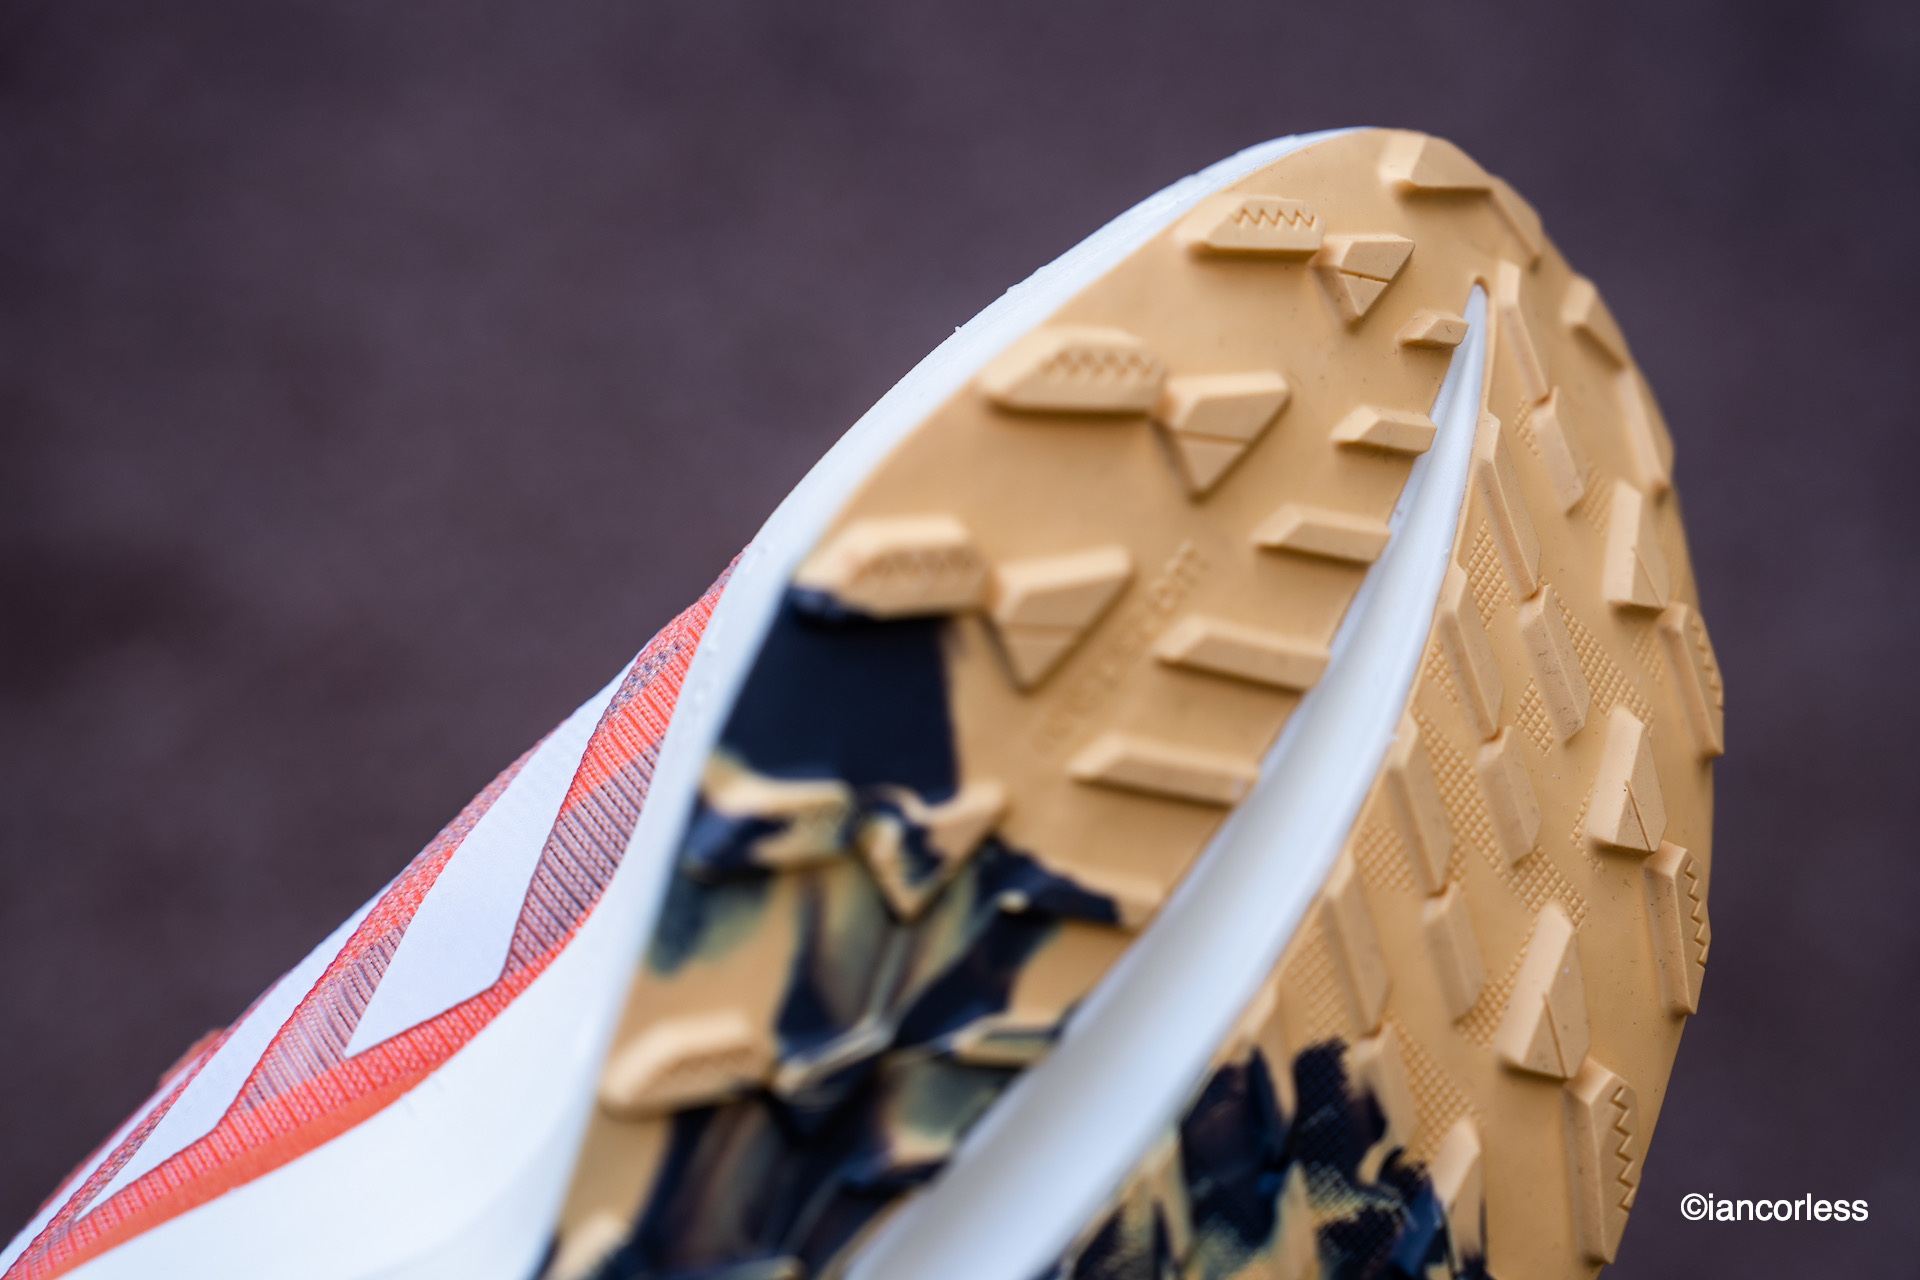
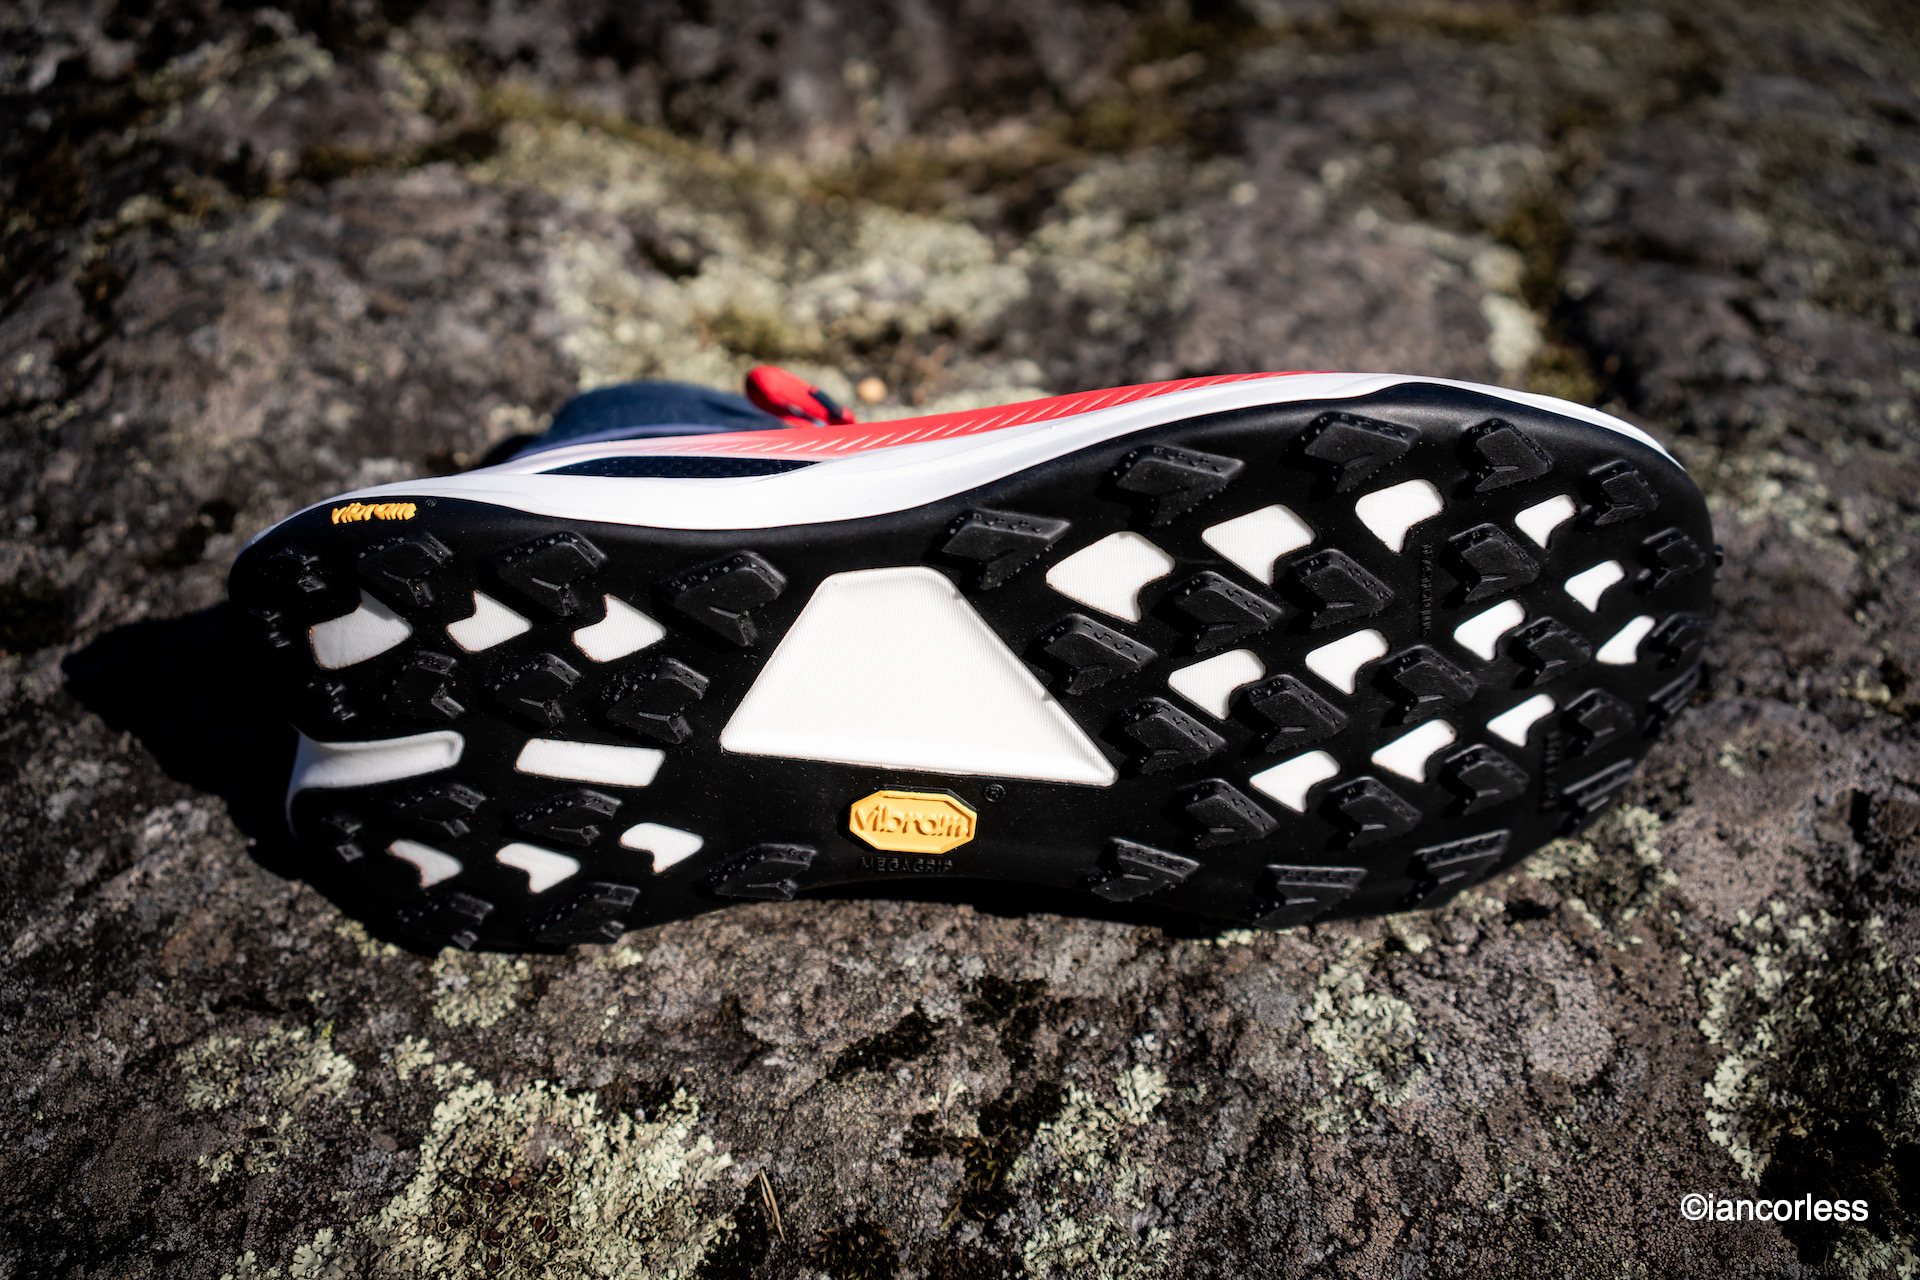
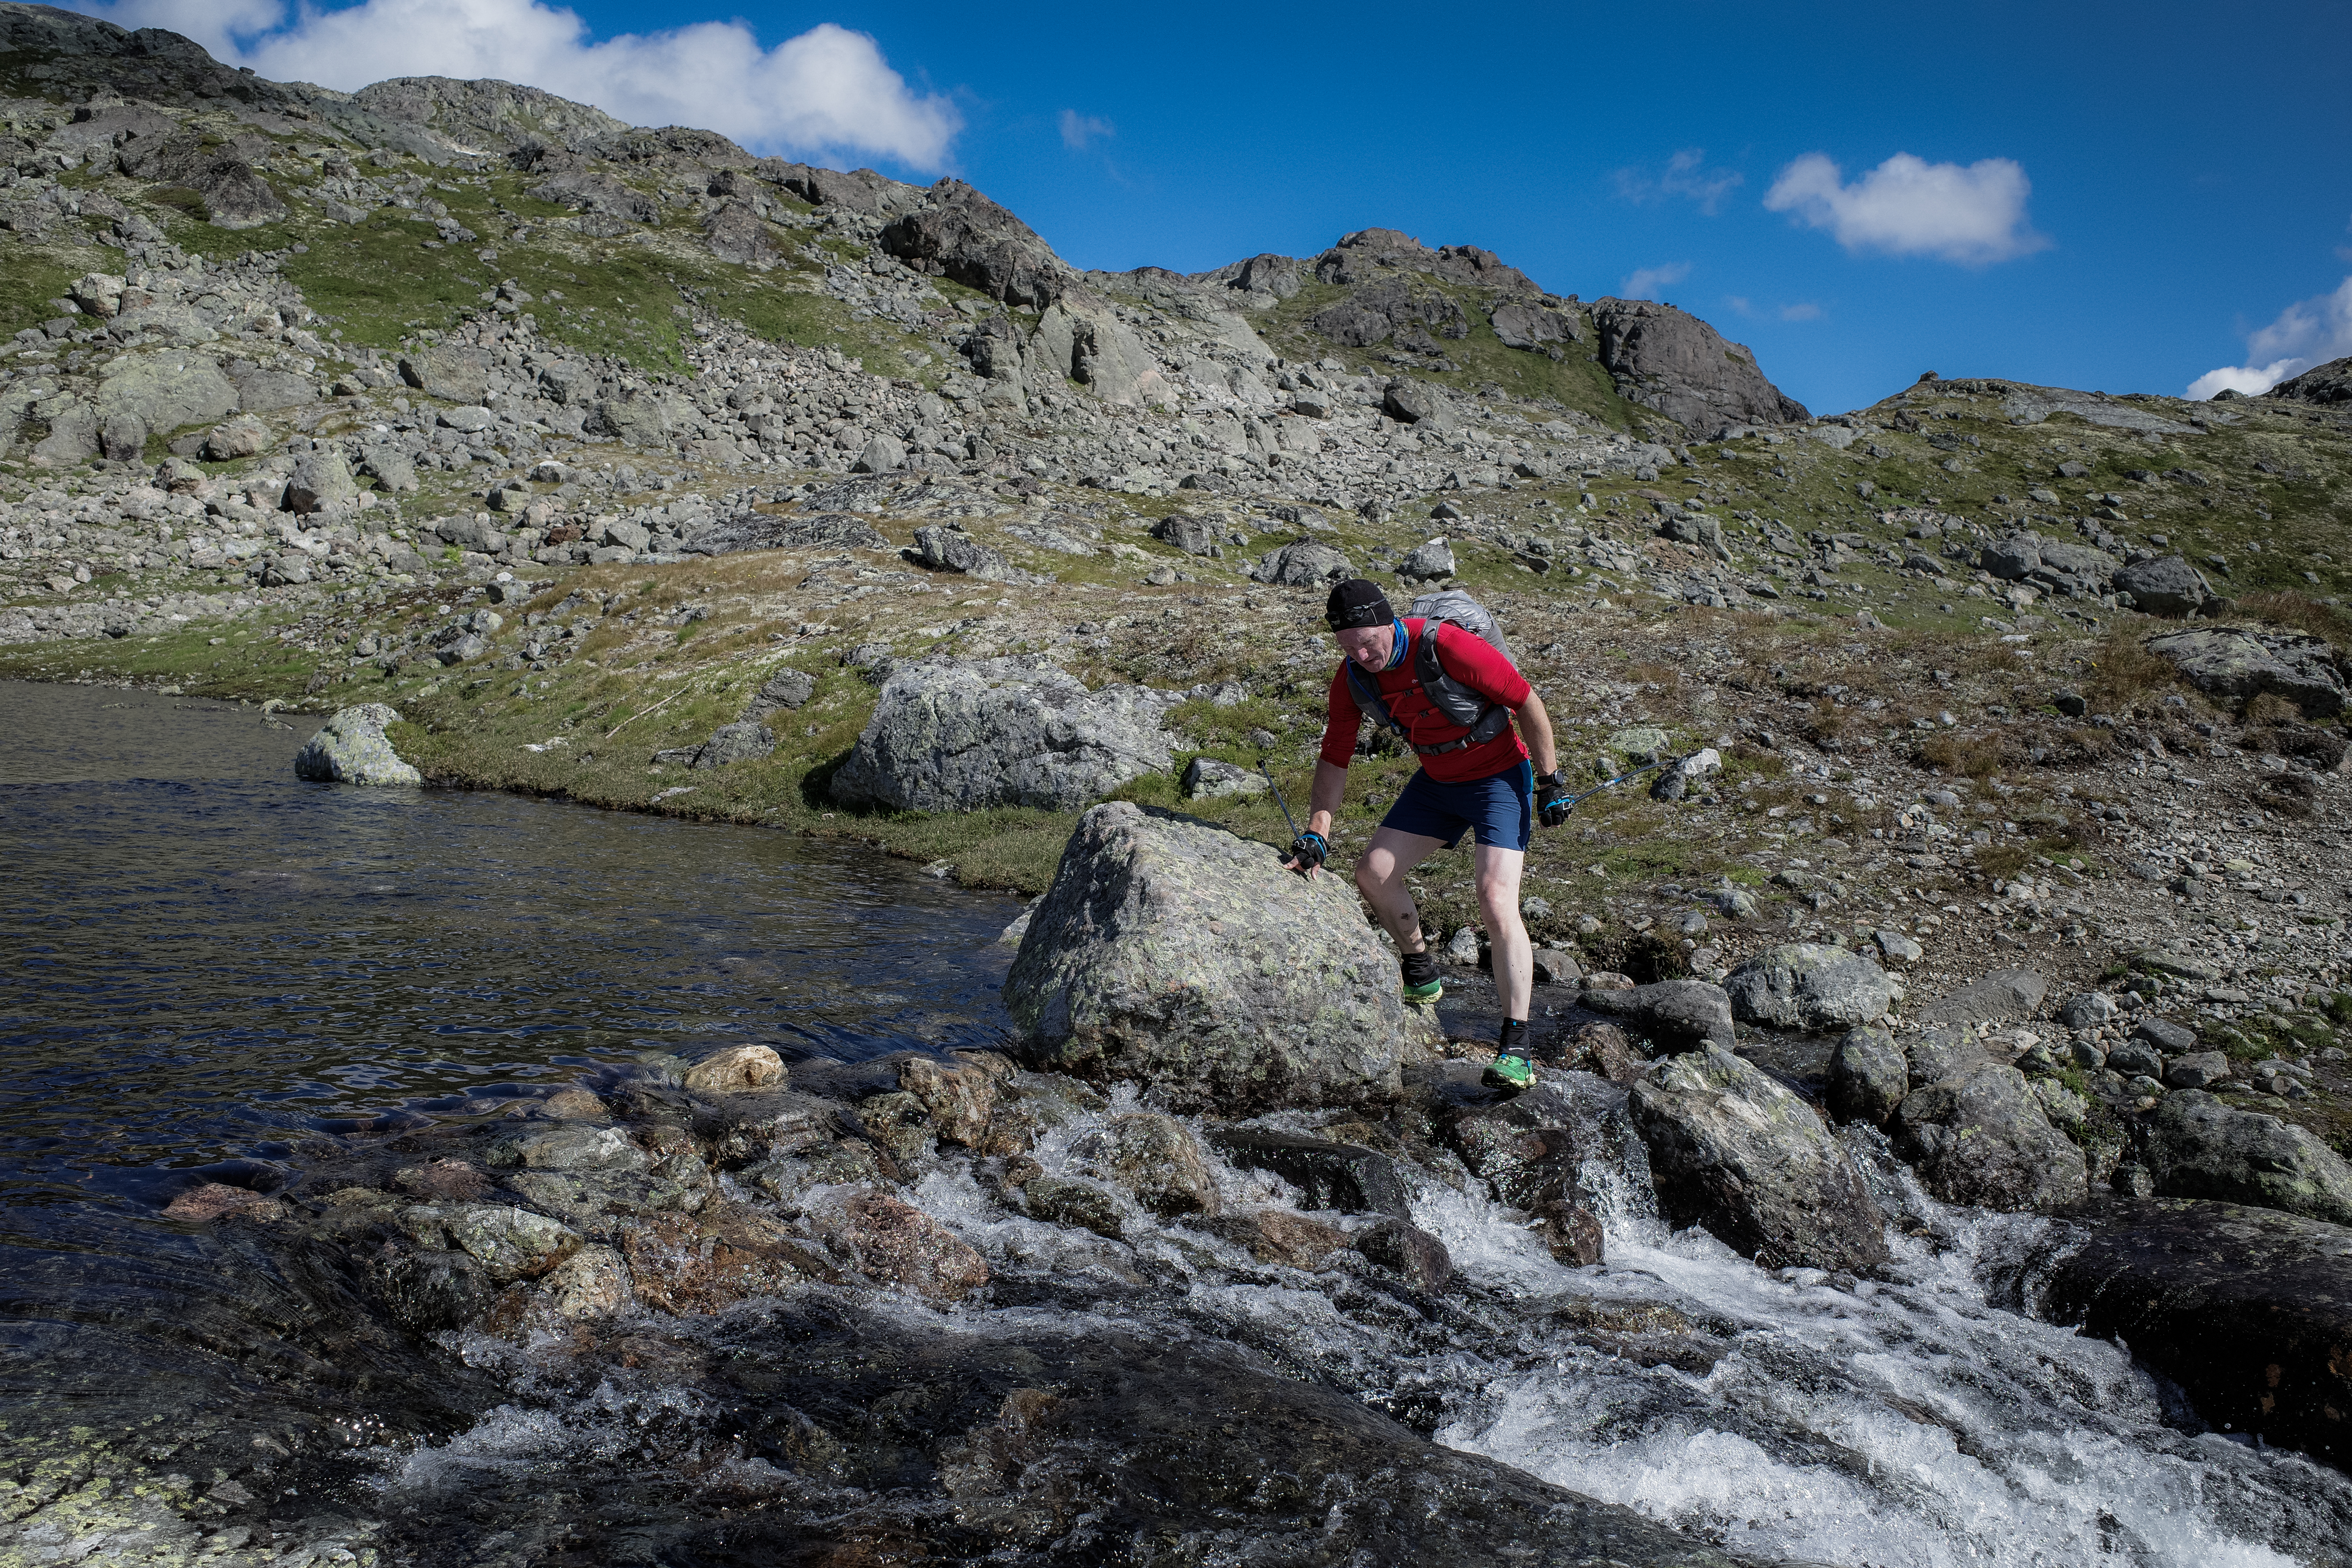
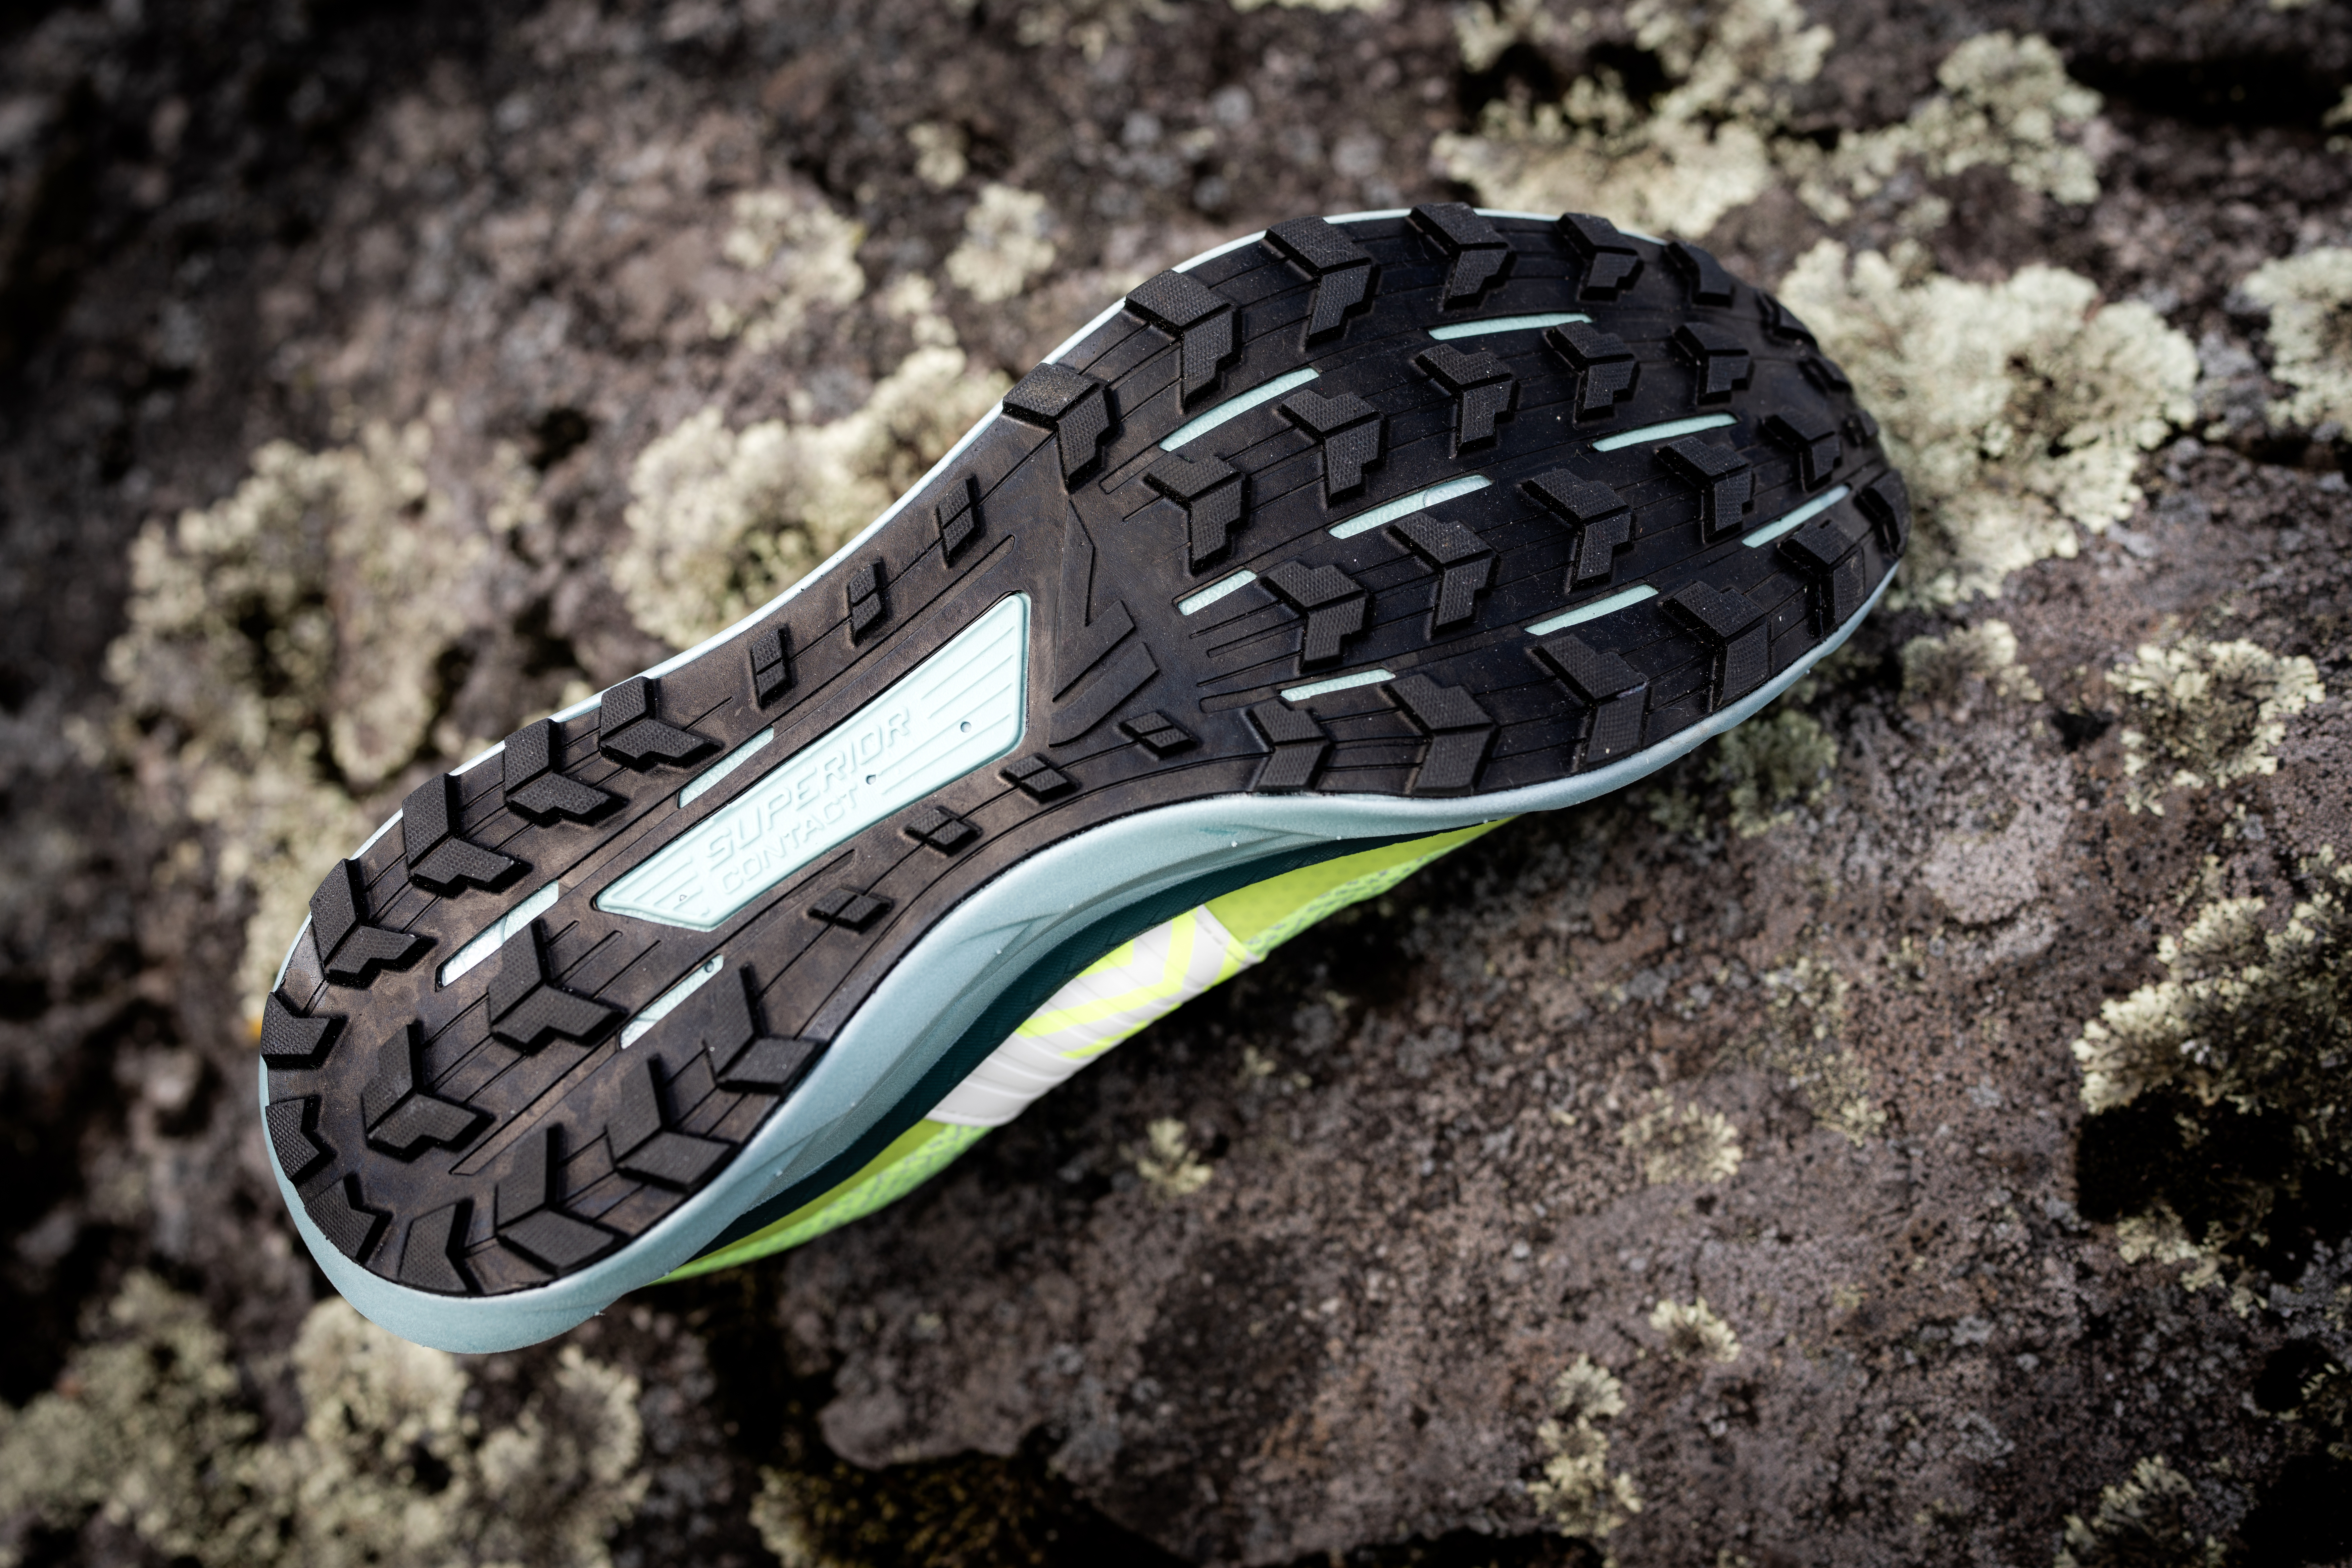
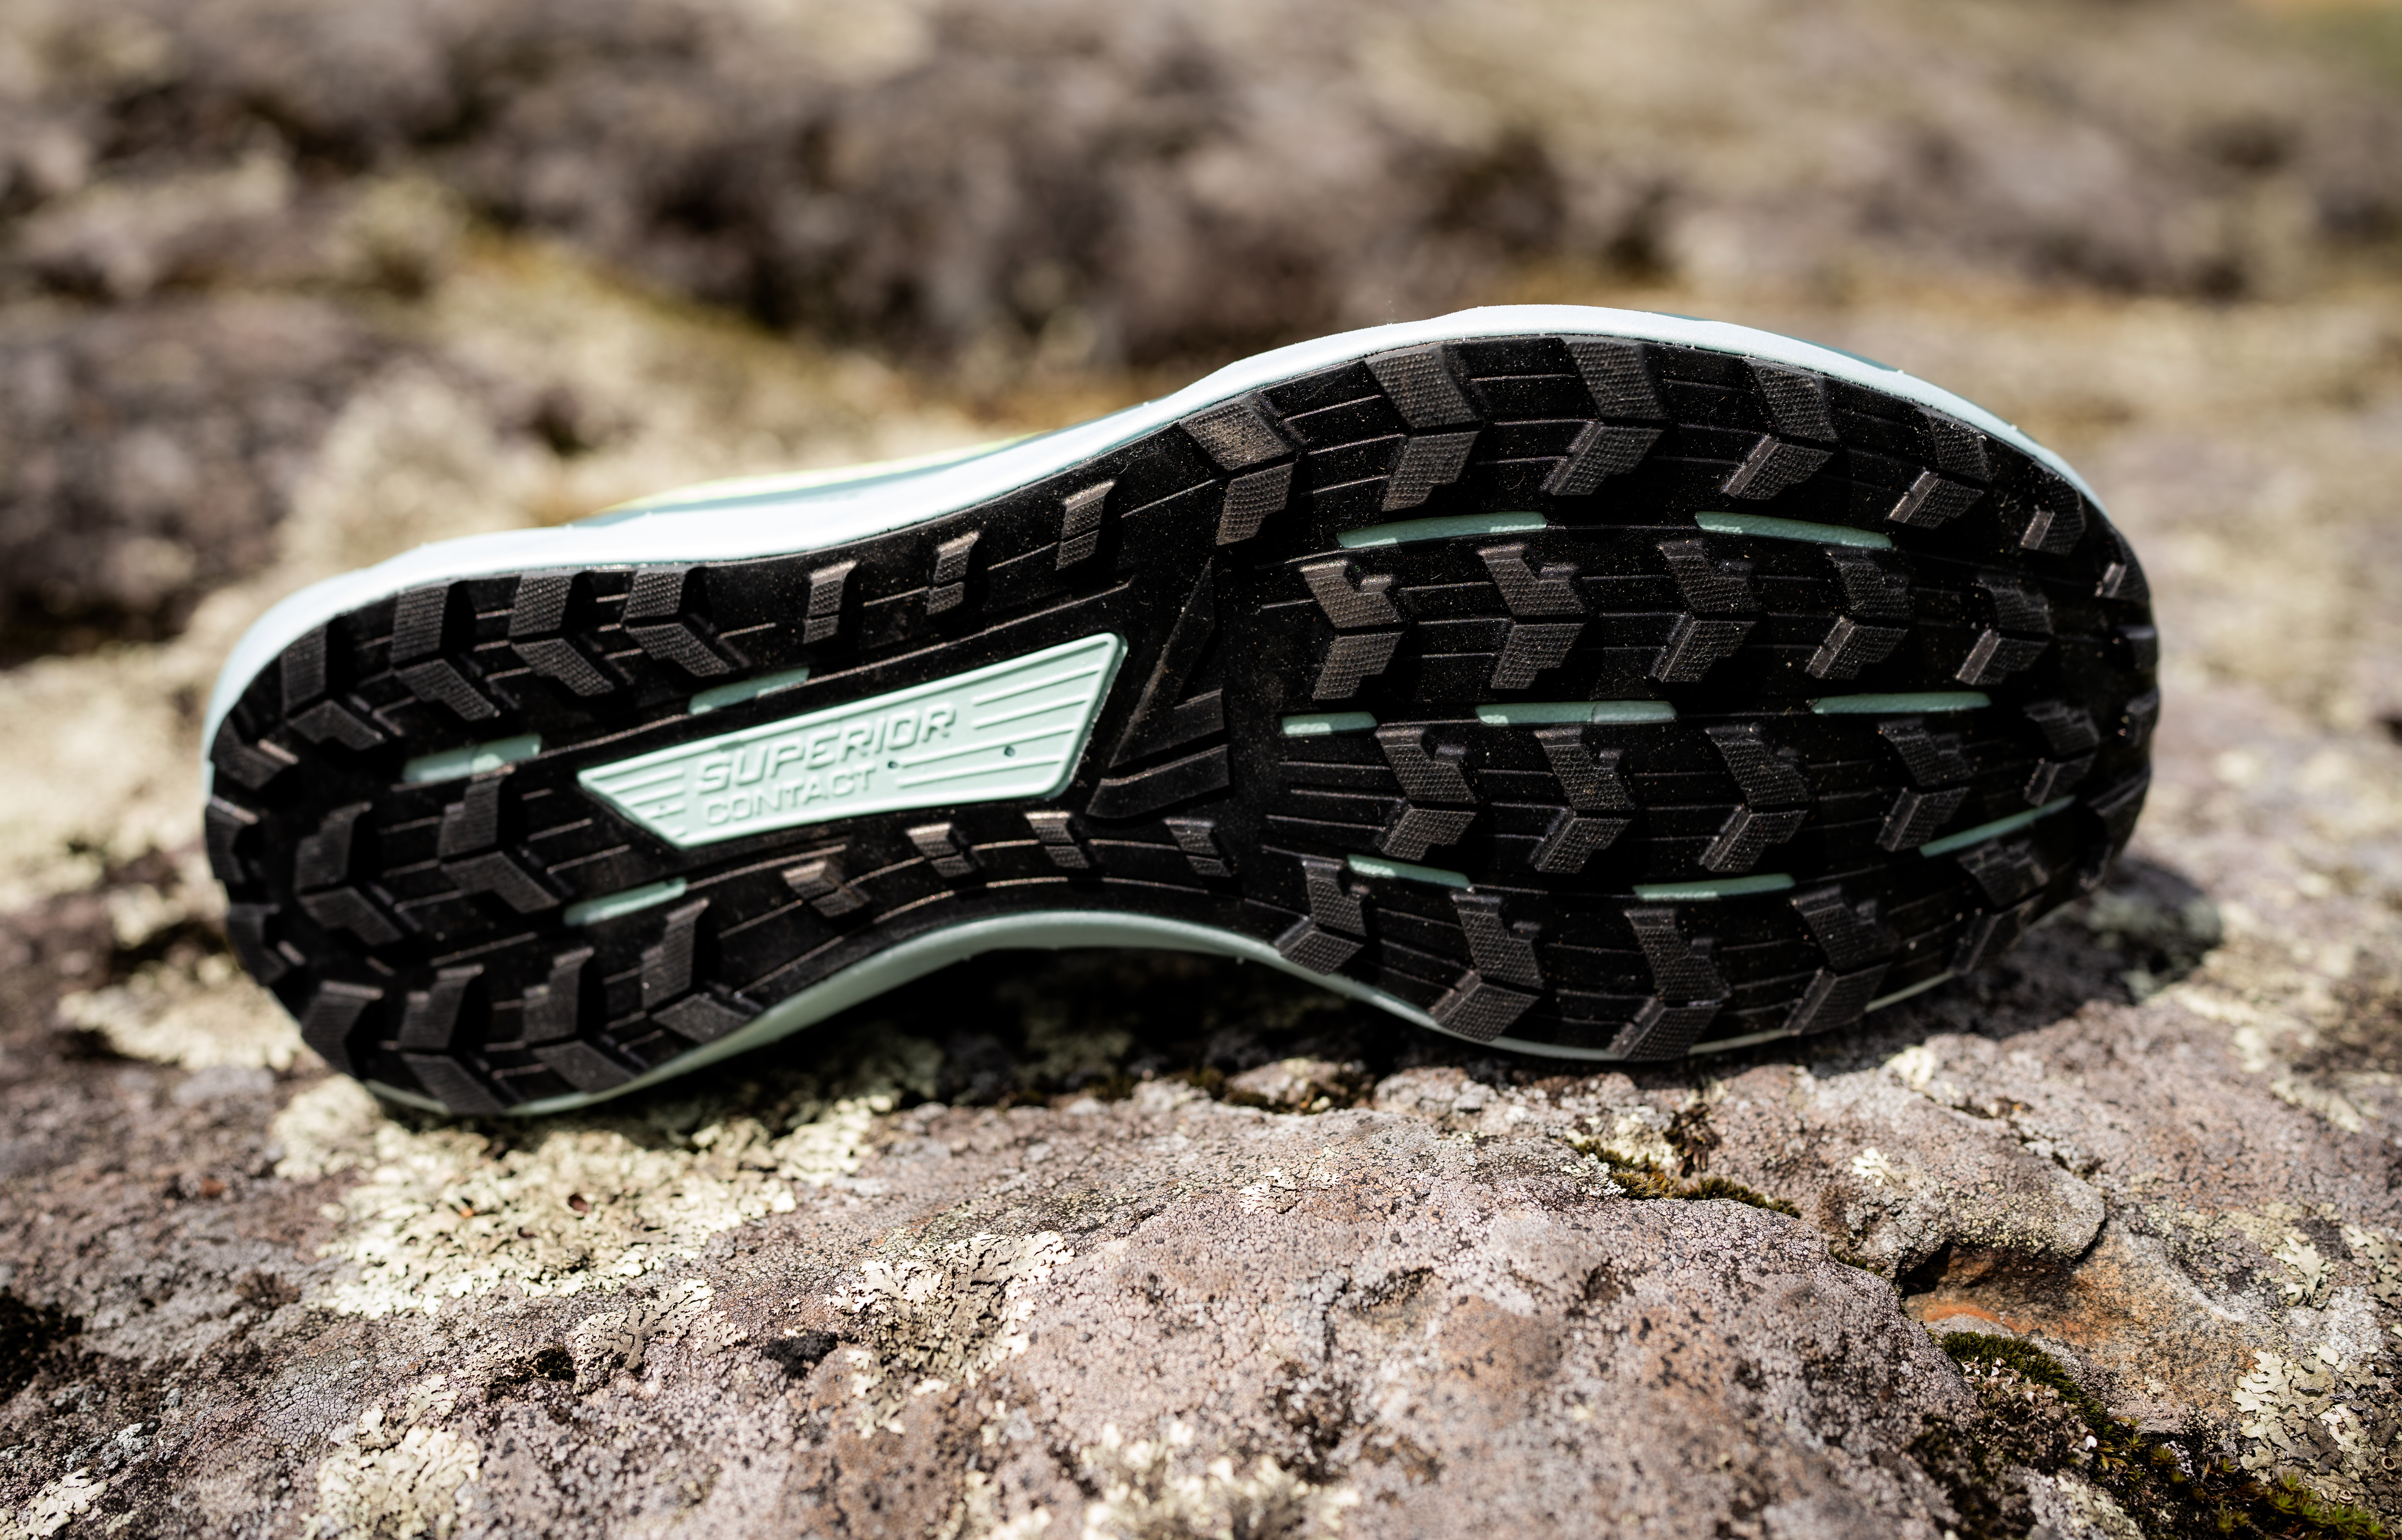
The 4.5mm lugs make the shoe ideal for trail and mountains, especially when encountering wet and slippery rock. The Superior Contact outsole featured on every VJ shoe is the best on the market – no other shoe or brand has the grip of VJ.

Photo by Ian Corless

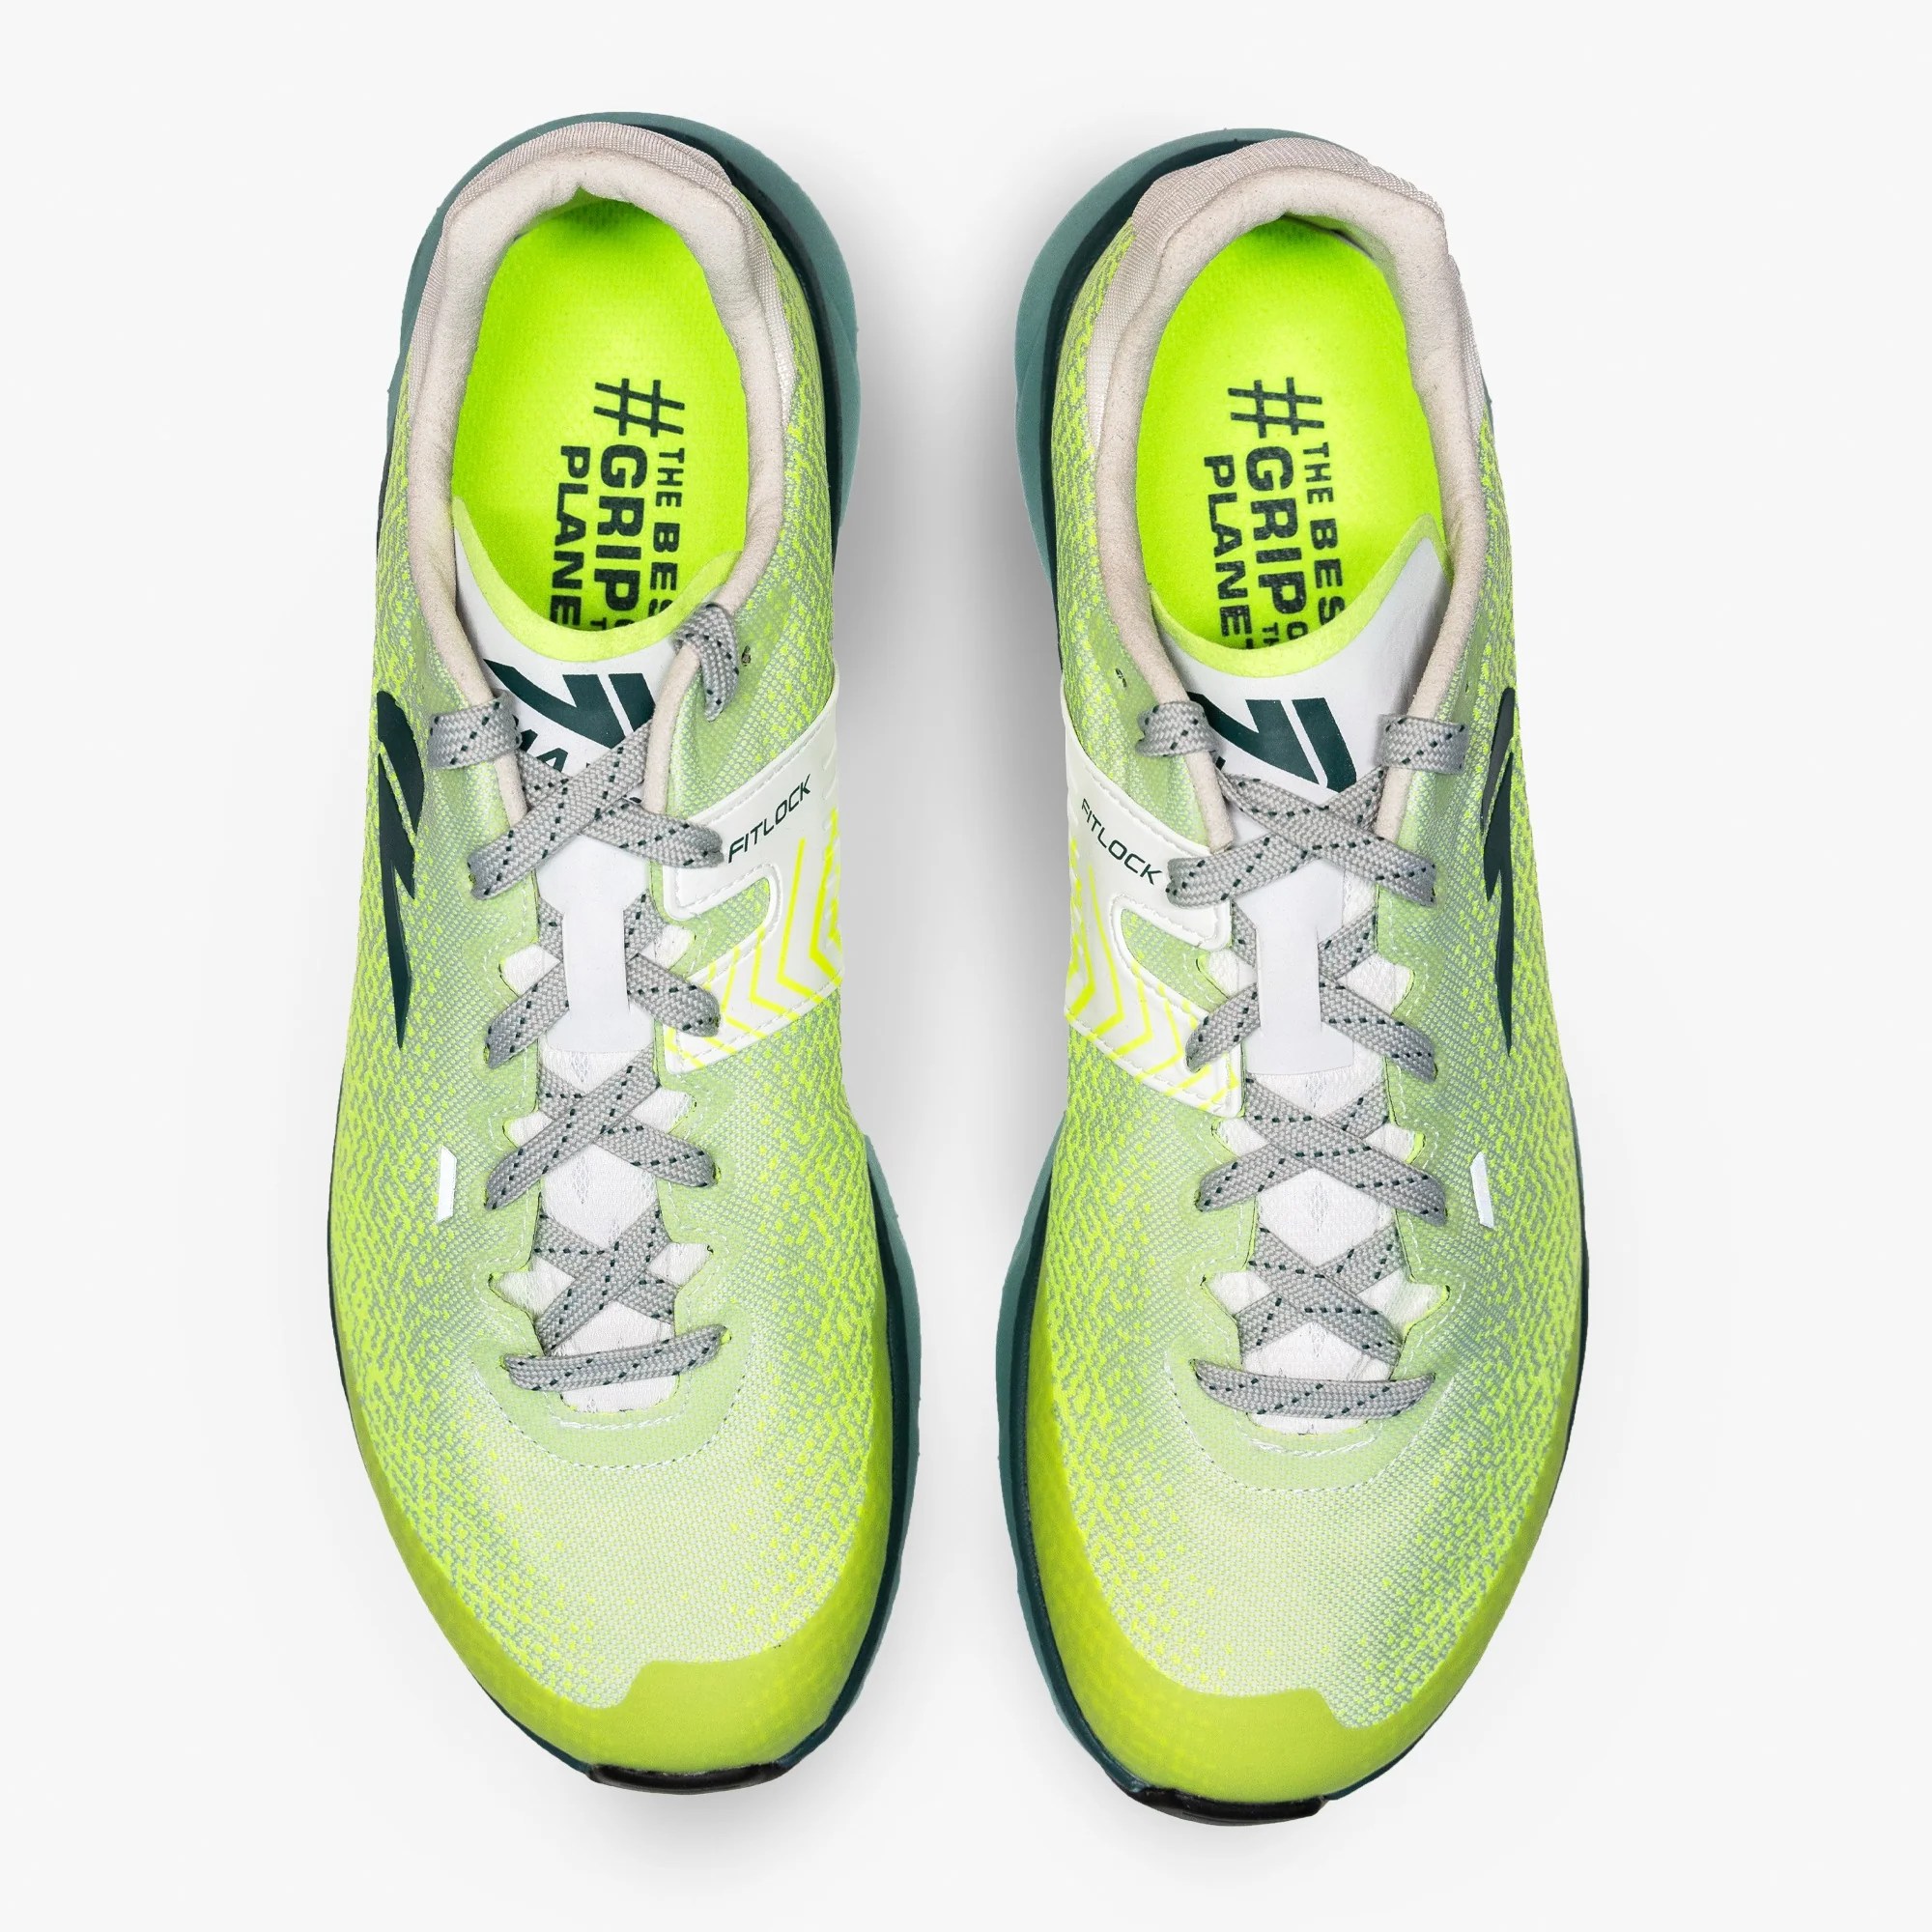
The toe box is wider, a ‘4’ on the VJ fit scale, 5 being the widest.

Photo by Ian Corless

The SuperFOAMance cushioning is a game changer, it has elevated the VJ shoes to a different feel and responsiveness that was not there previously. That is not to say that there was anyting wrong with the MAXx or Ultra 2, that is reflected in that these shoes are still available to purchase. However, the new cushioning, for me, has given the MAXx2 and the ULTRA 3 the ability to ‘always’ use these shoes. Previously, I would think about my run and the terrain and decide what was the best shoe, the SuperFOAMance has eradicated that problem.

So, when would I use the ULTRA 3 and when would I use the MAXx2?

It’s a good question and one I find easy to answer. If I am heading out for a trail run be that in the mountains or say, in the forest, the ULTRA 3 would be my choice. The cushioning help smooths out the trails, provides comfort and despite the extra stack height, I have no worries over stability. Should I go to the mountains, with far more challenging and technical terrain, the MAXx2 is my choice. The caveat with both the ULTRA 3 and MAXx2 is neither of them will offer super grip in mud, this when the XTRM is the option and why (please VJ) I hope they release an XTRM with MAXx2 cushioning and XTRM outsole.

THE SHOE

Next level cushioning without losing the core basics that make VJ shoes special, basically, great foot hold and an awesome outsole.

On first appearance, the ULTRA 3 looks rather bulky and heavy. They are not heavy at all, my UK10 weigh under 290g.

Drop is 8mm, perfect for a long distance ultra shoe and the cushioning is 30mm at the front, 38mm at the rear and the fit is slightly small, so, if you are usually a UK9, I would recommend a UK9.5 etc. As is always the case, you need to try on and make sure of the fit for yourself.

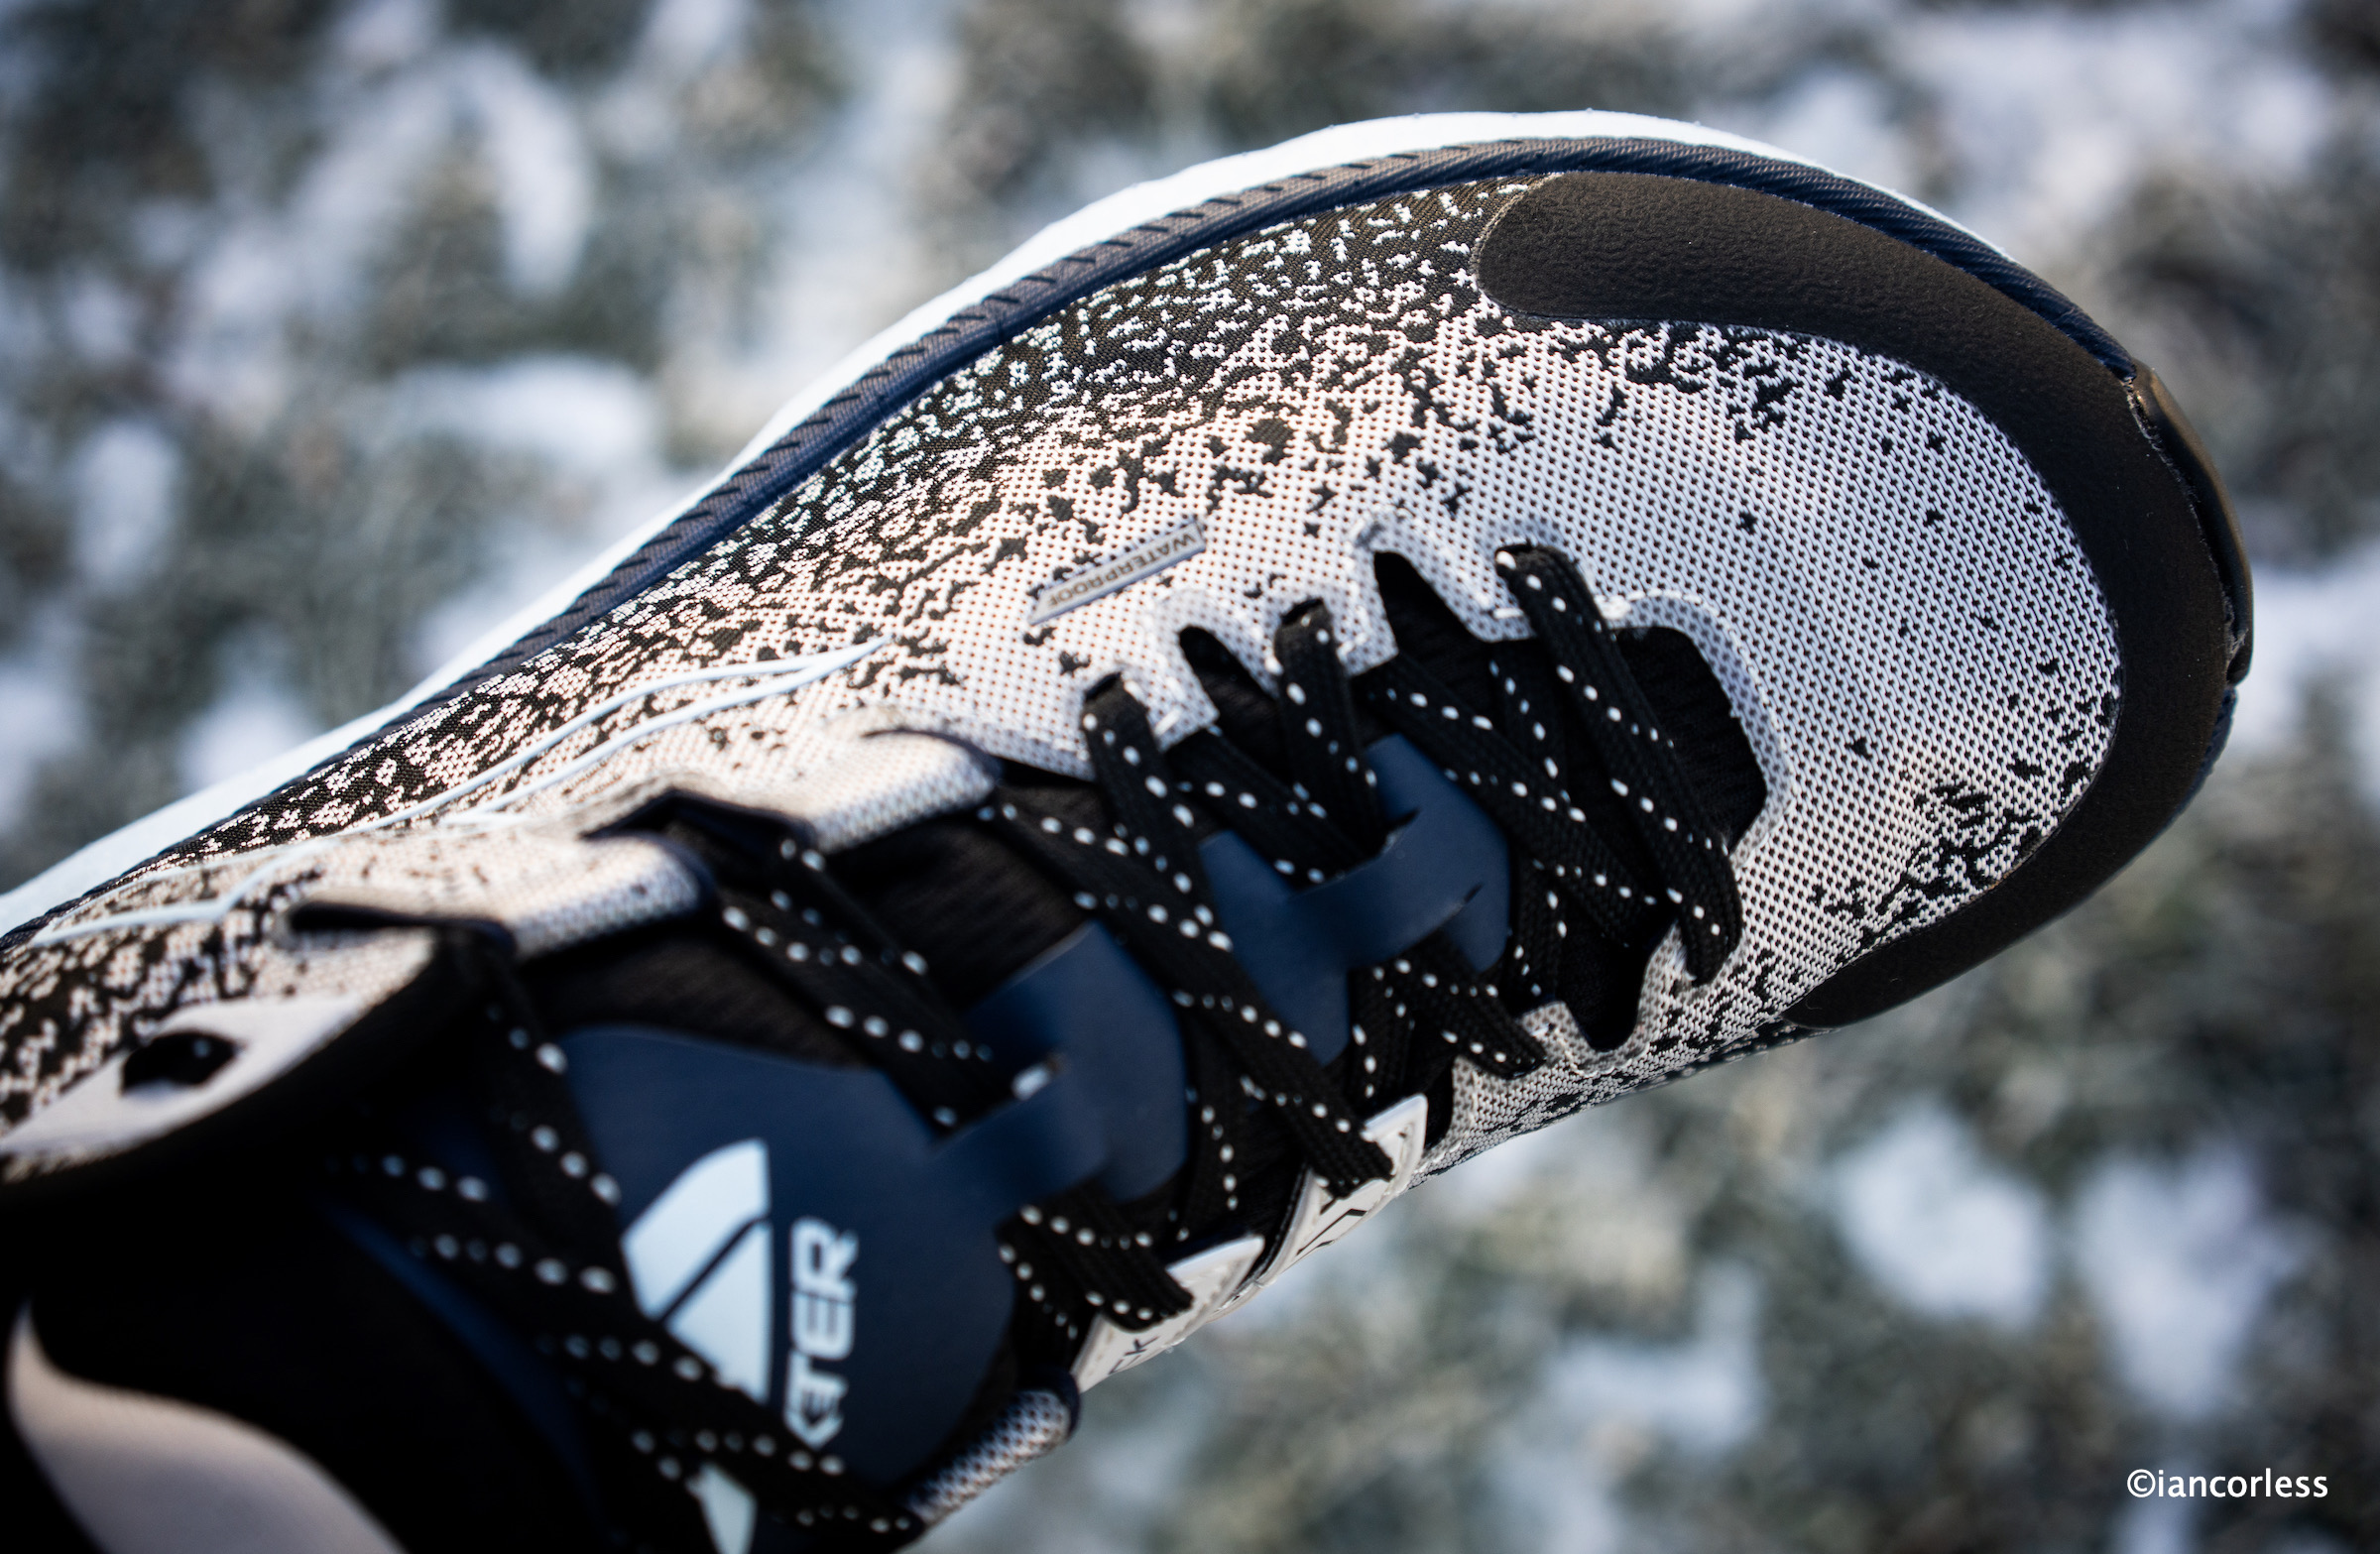
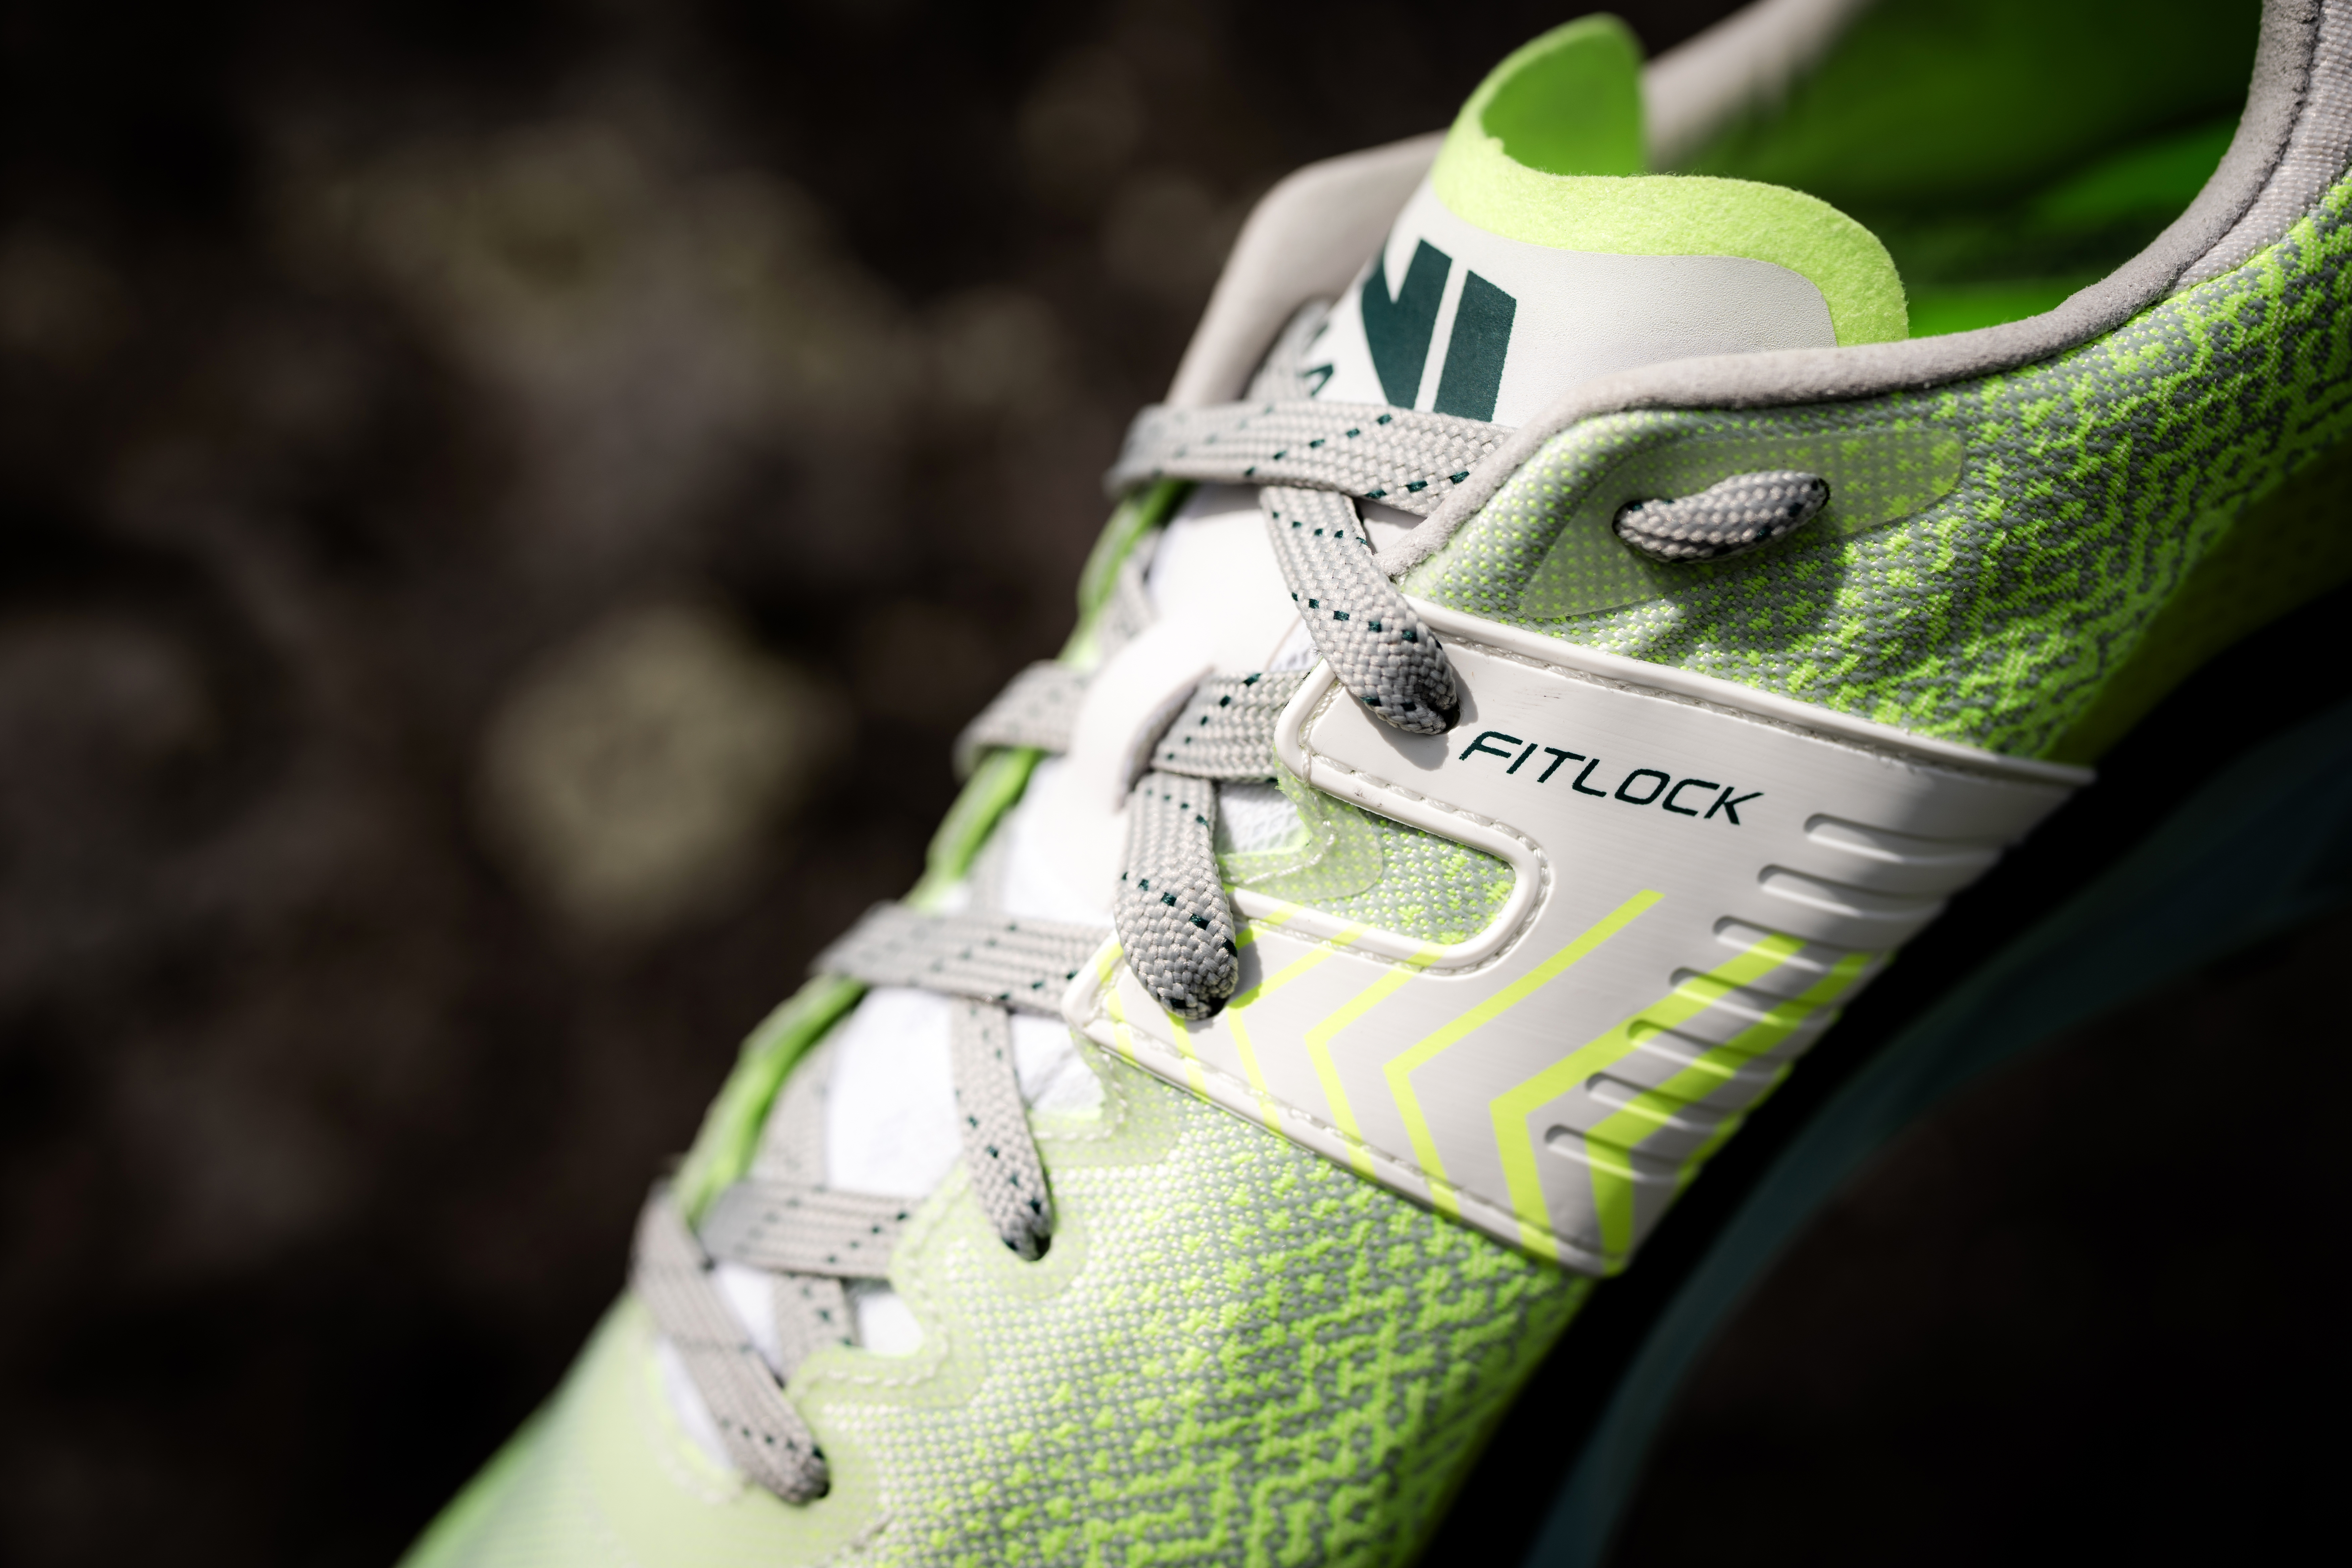
I have found with VJ shoes I always lock lace. I did my first run in the ULTRA 3 without lock lacing and the second with lock lacing, I prefer to lock lace. Just a heads-up as I feel you should try both options to see what works for you!

Photo by Ian Corless

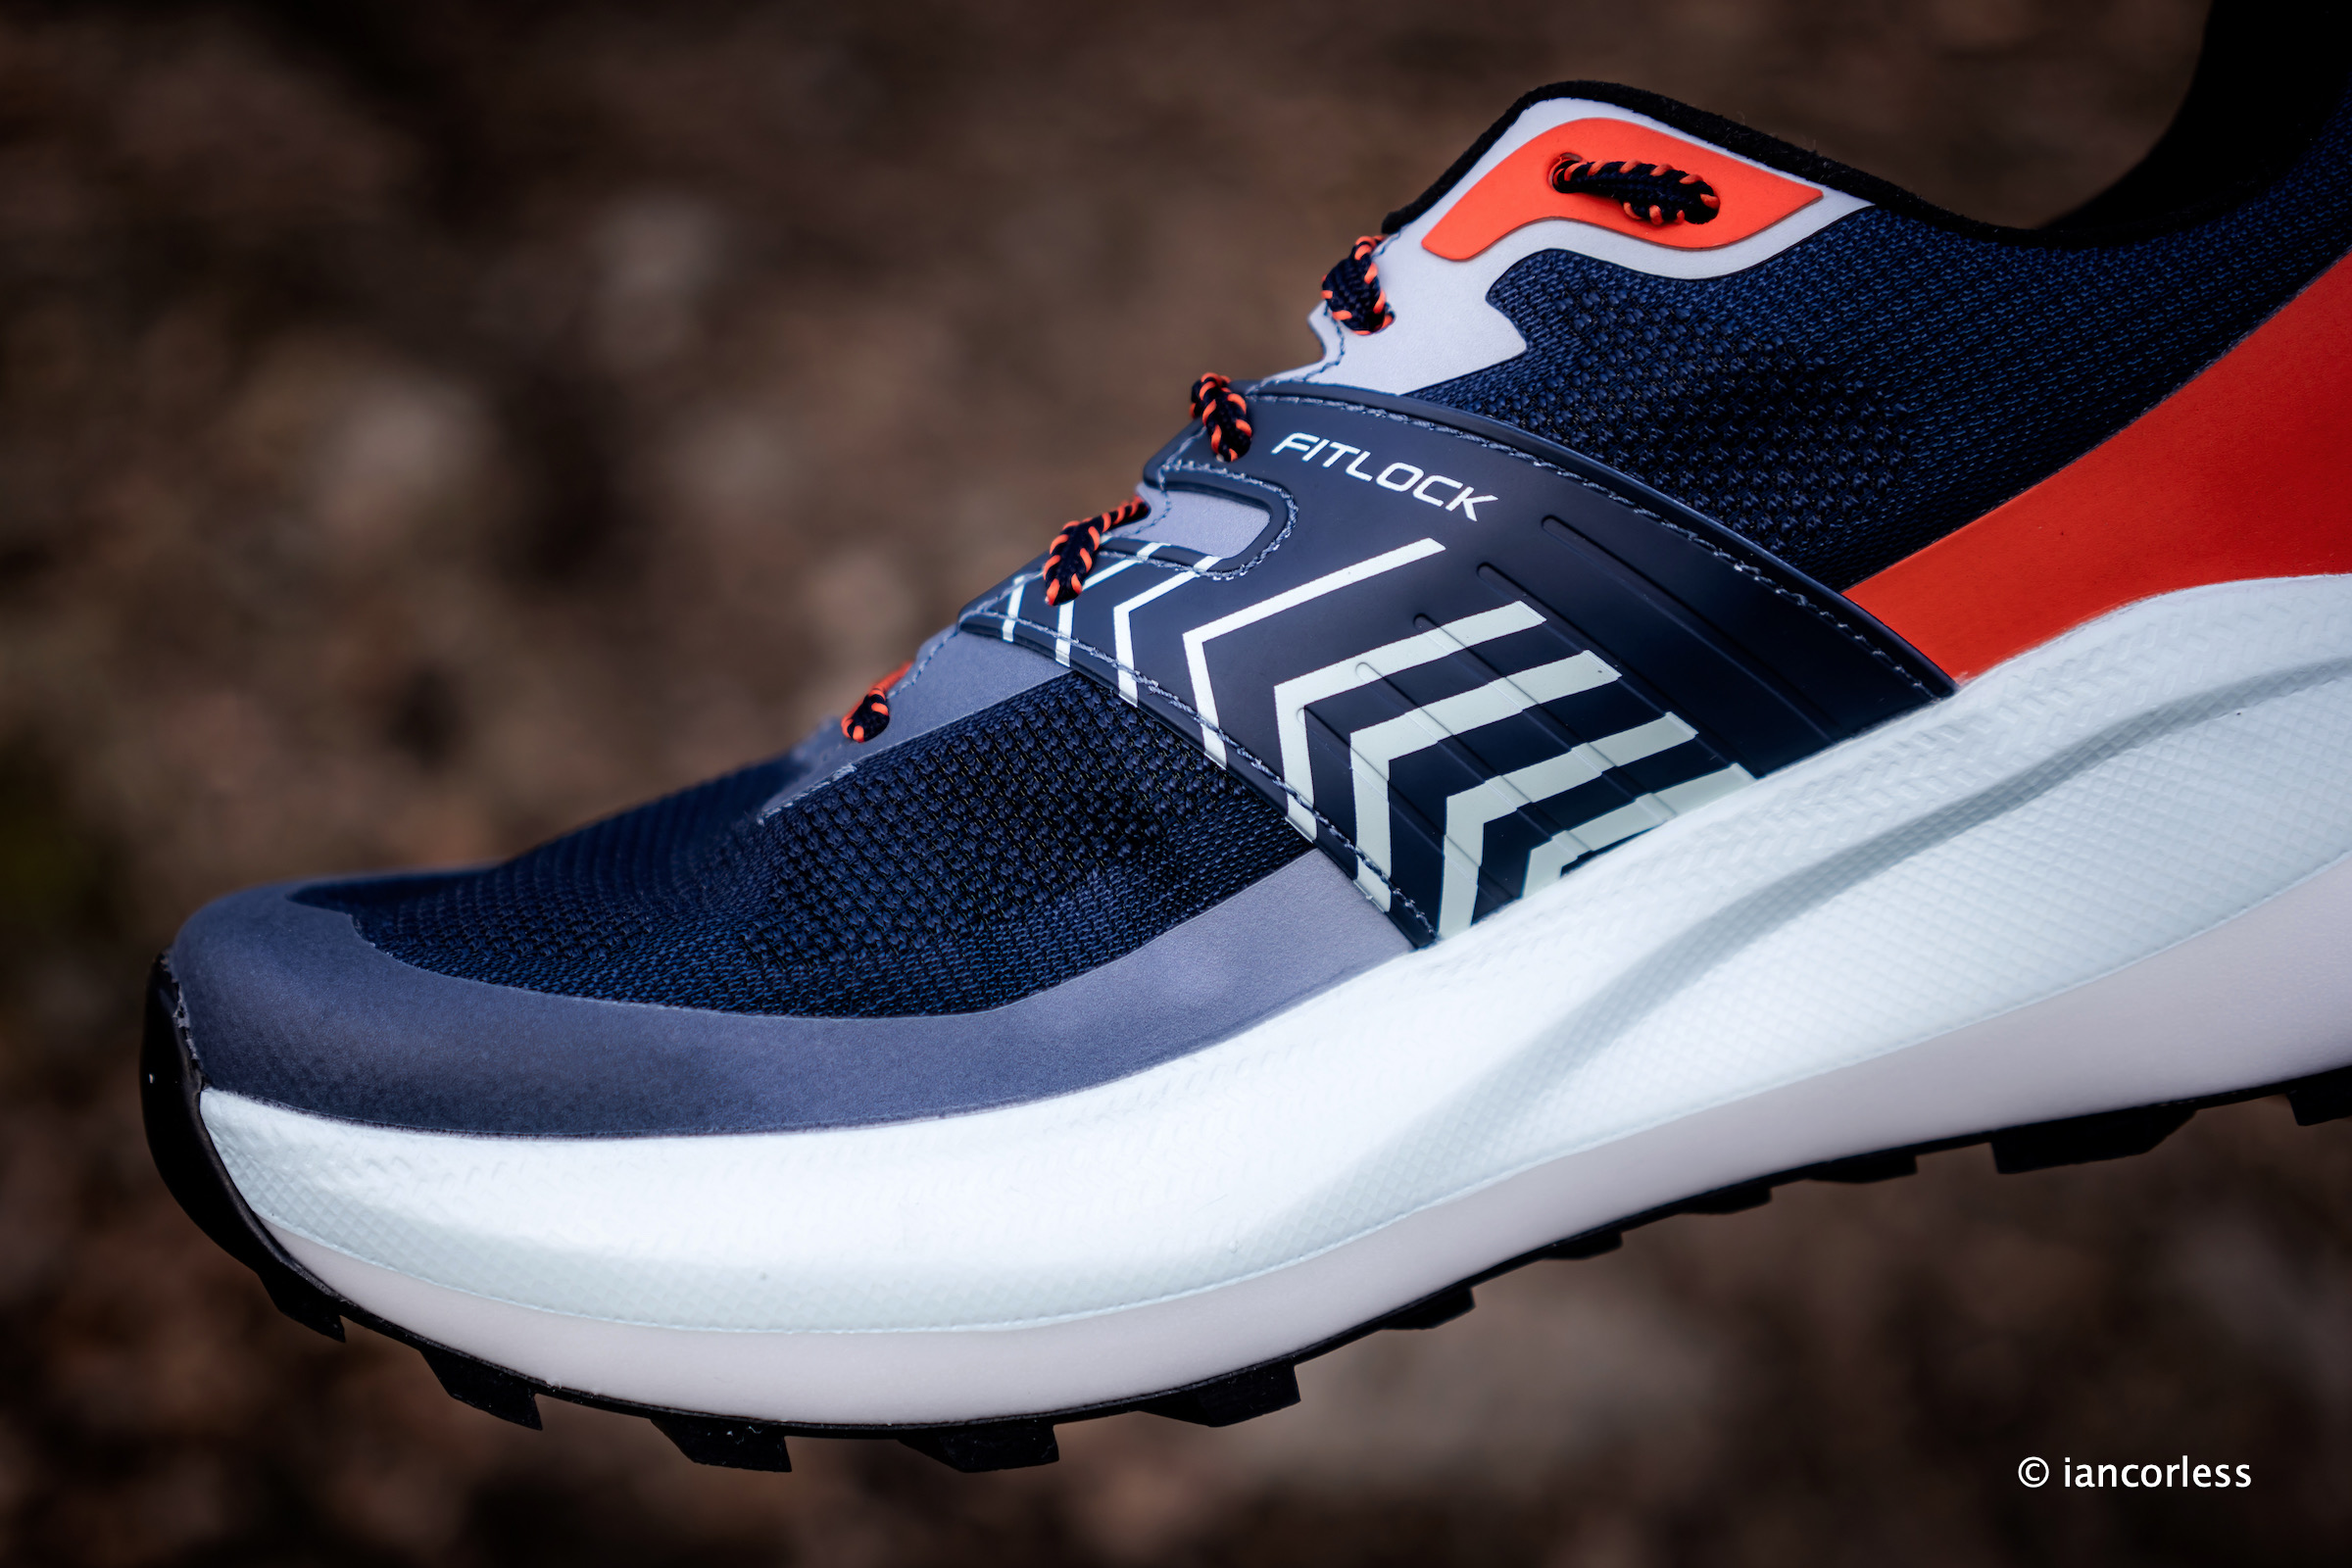
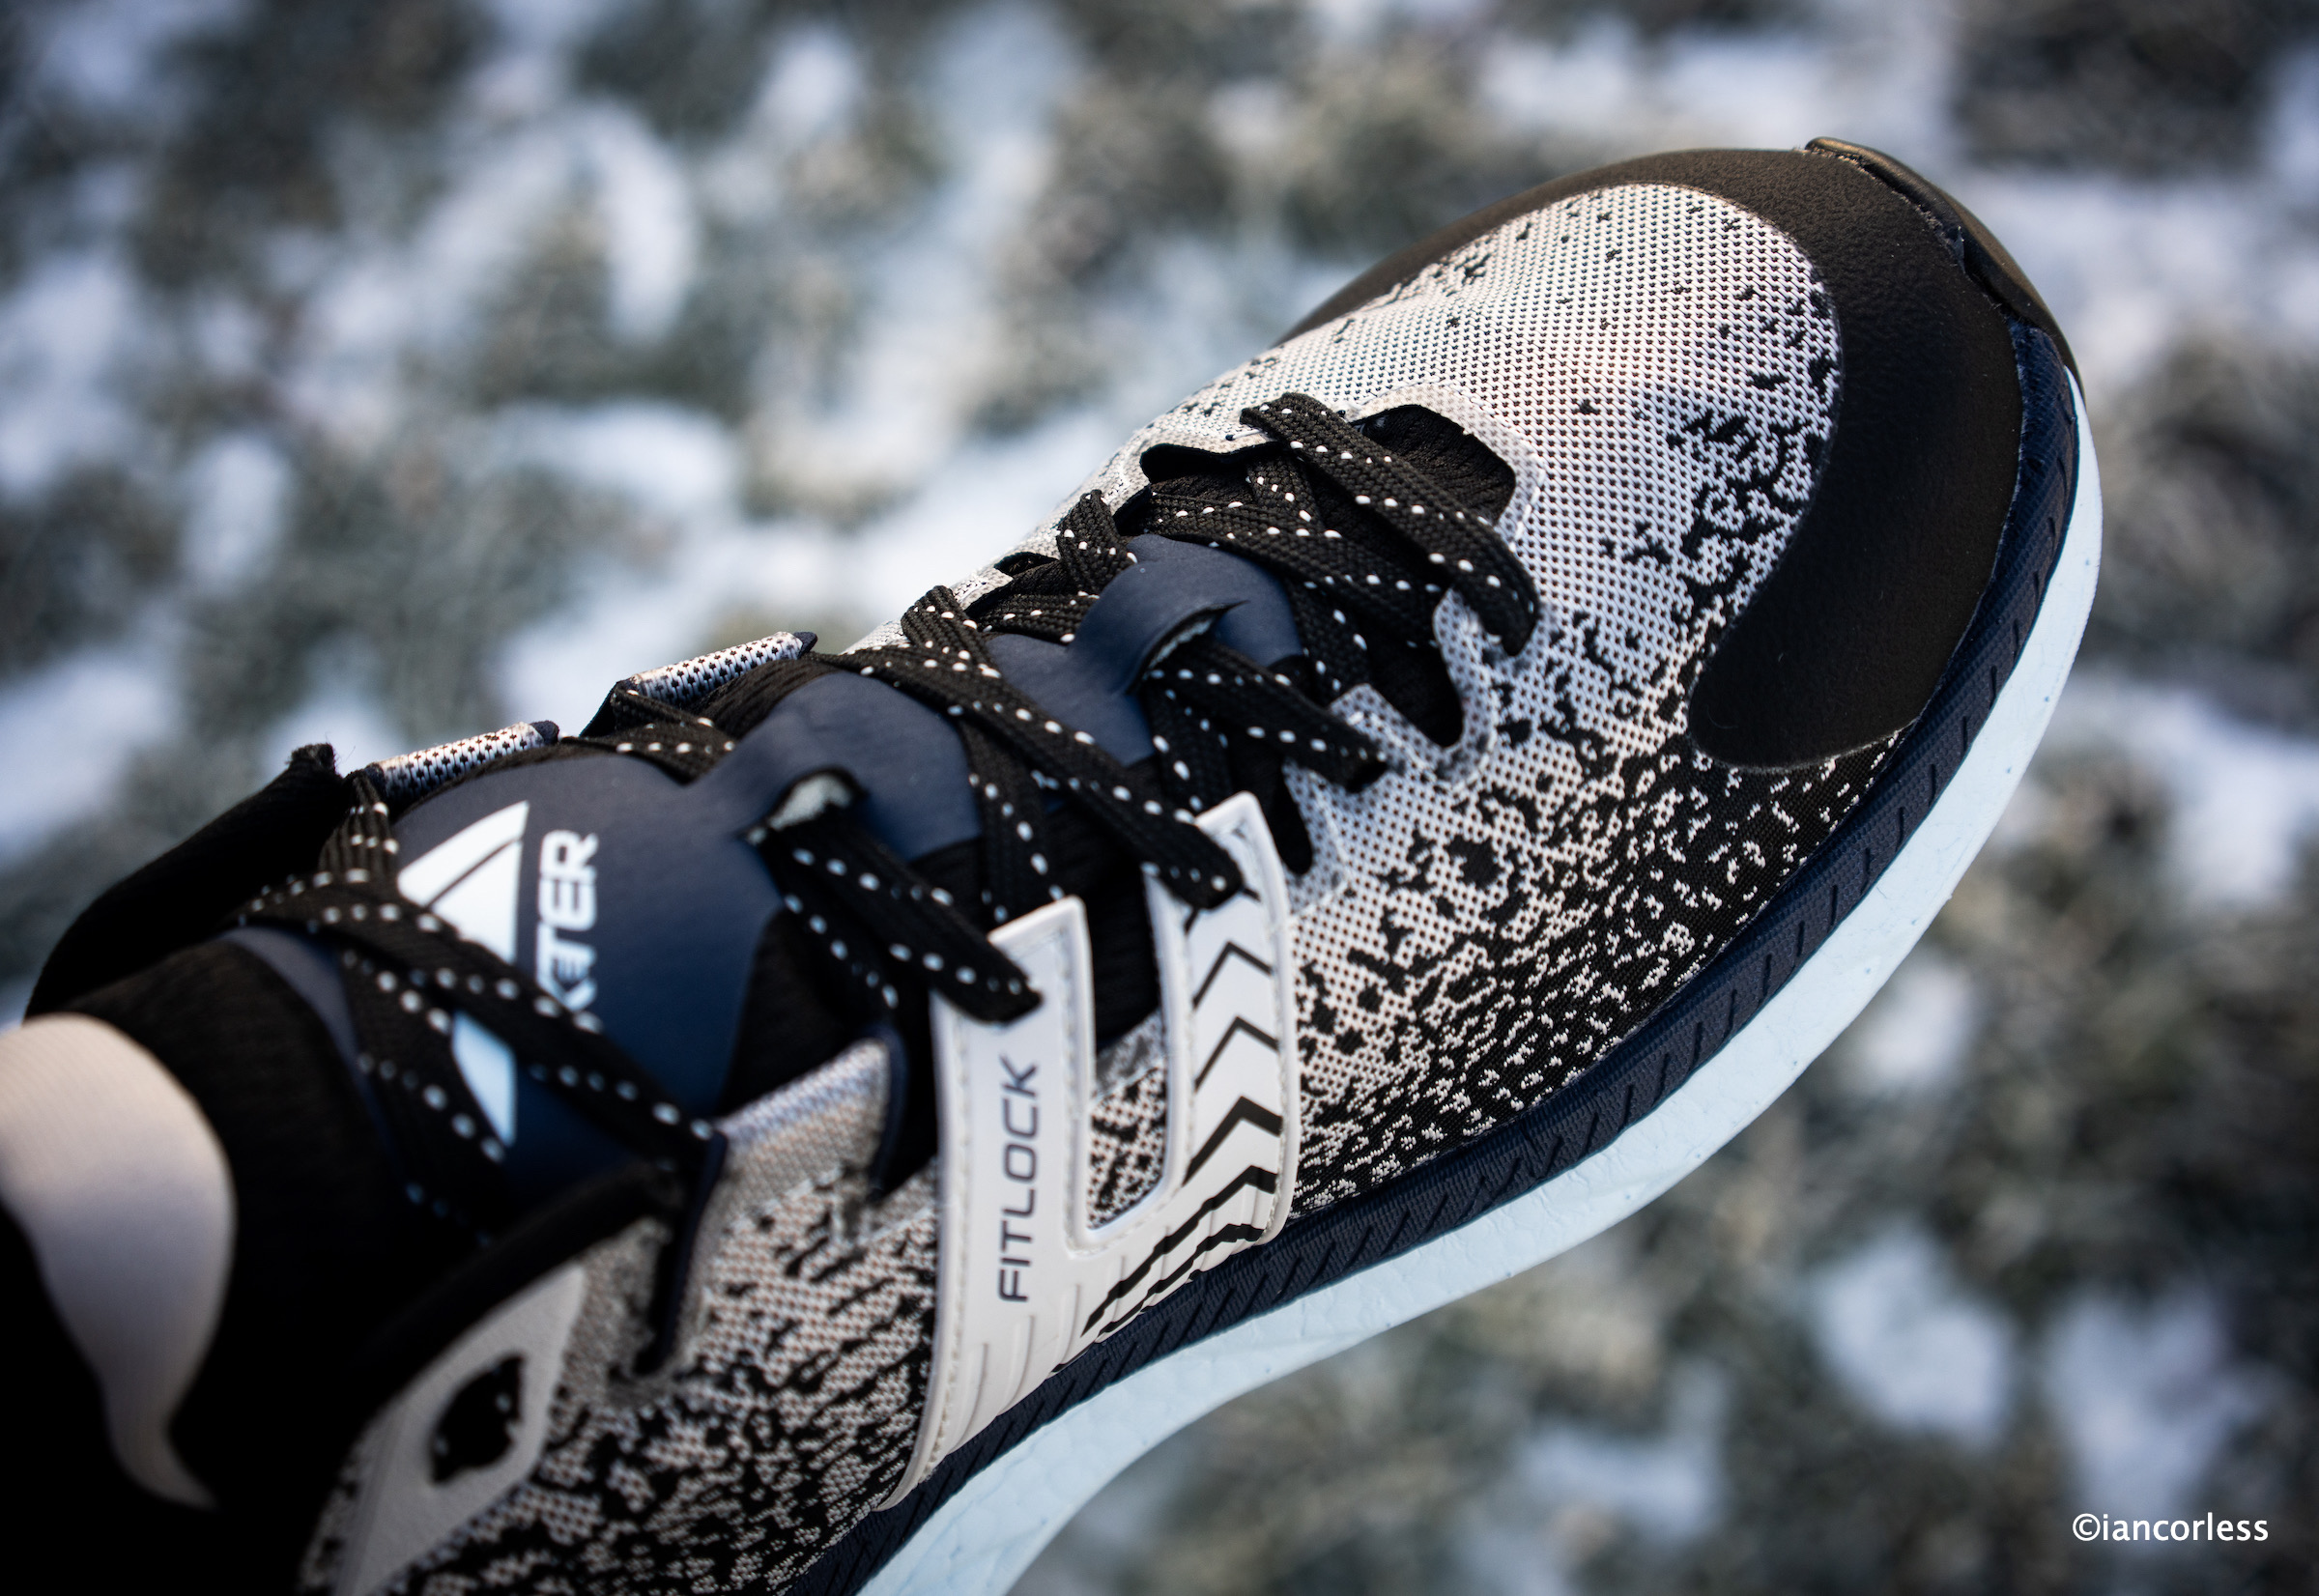
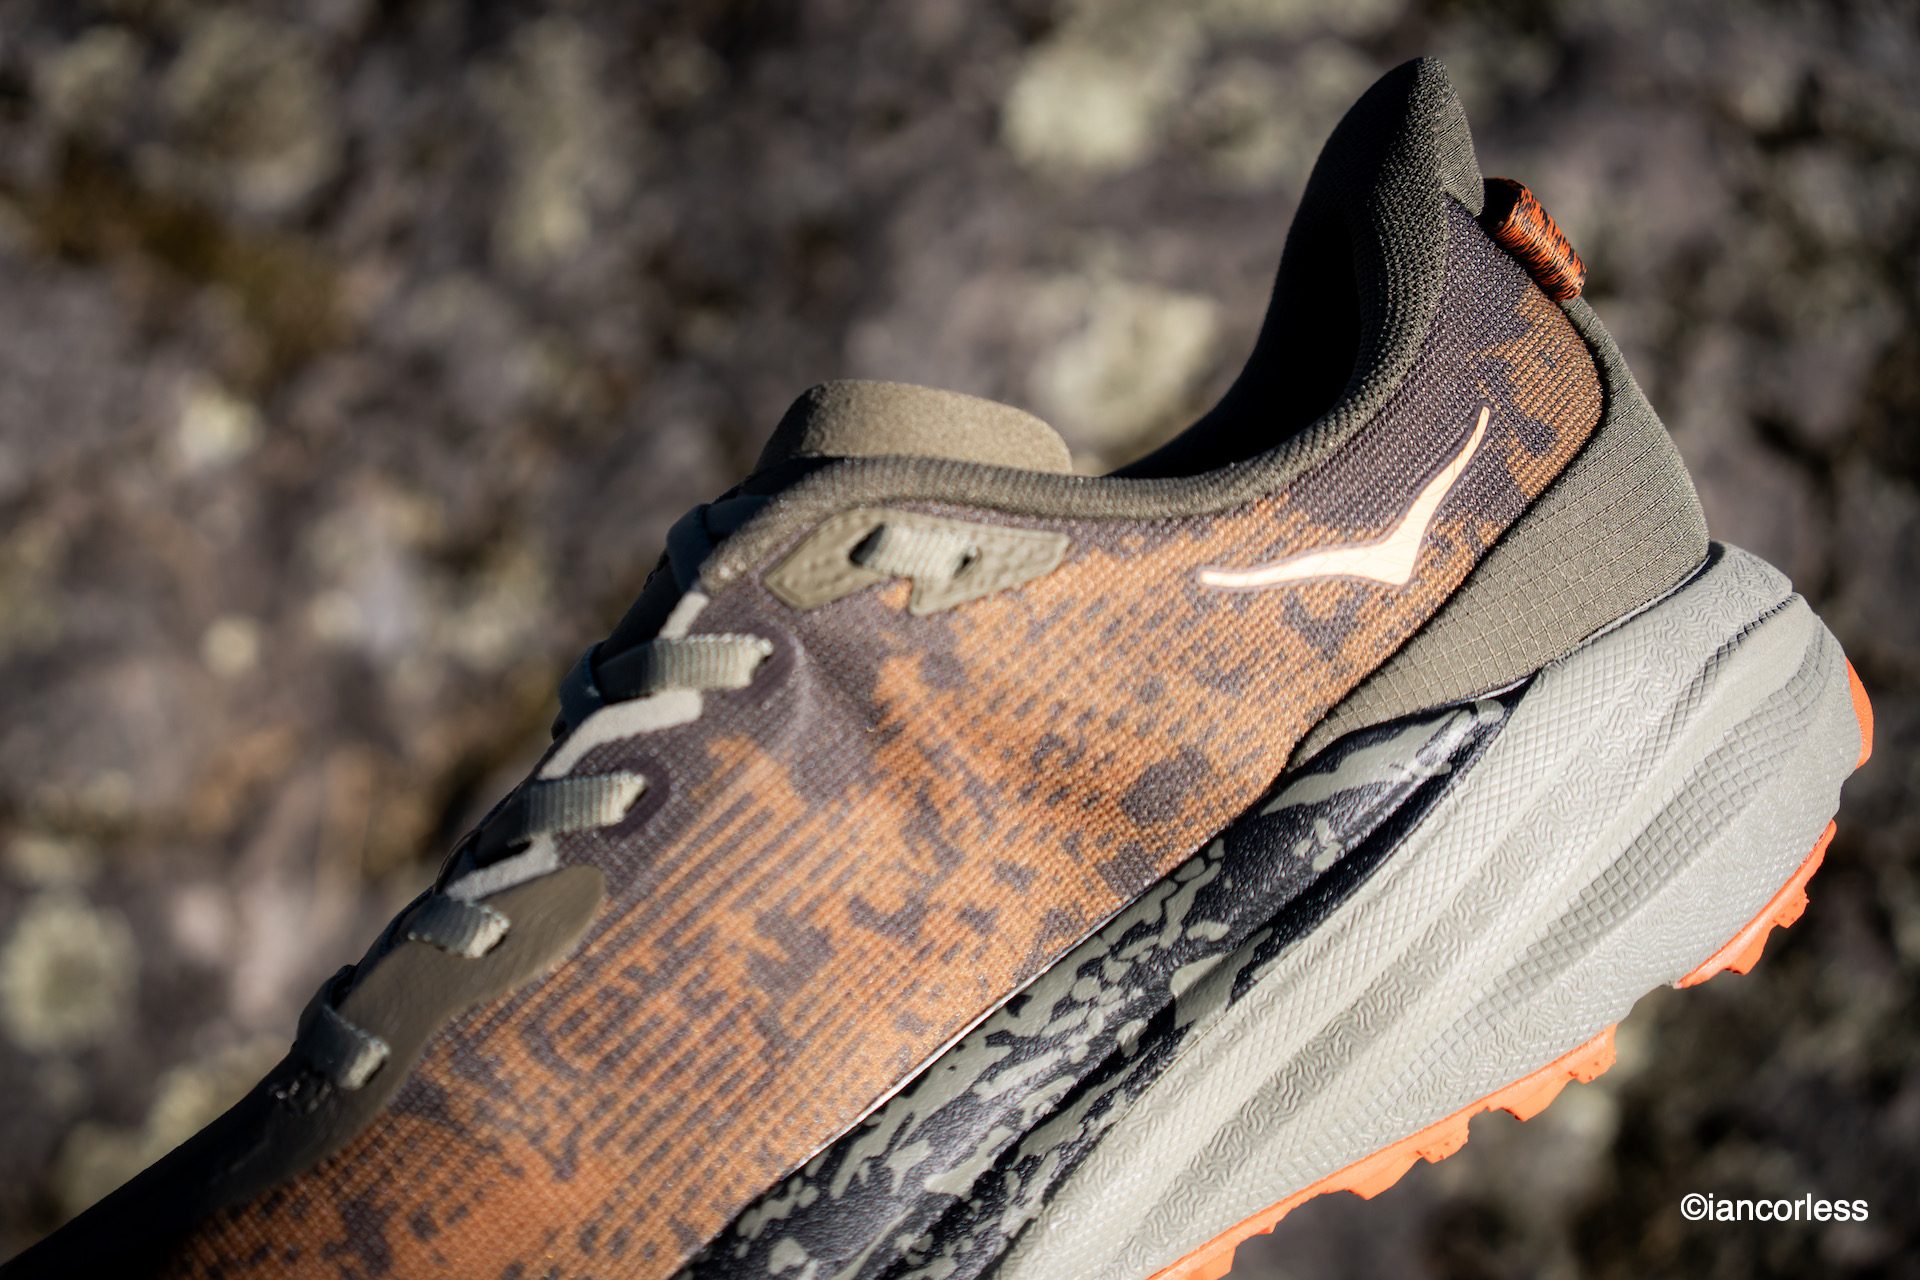
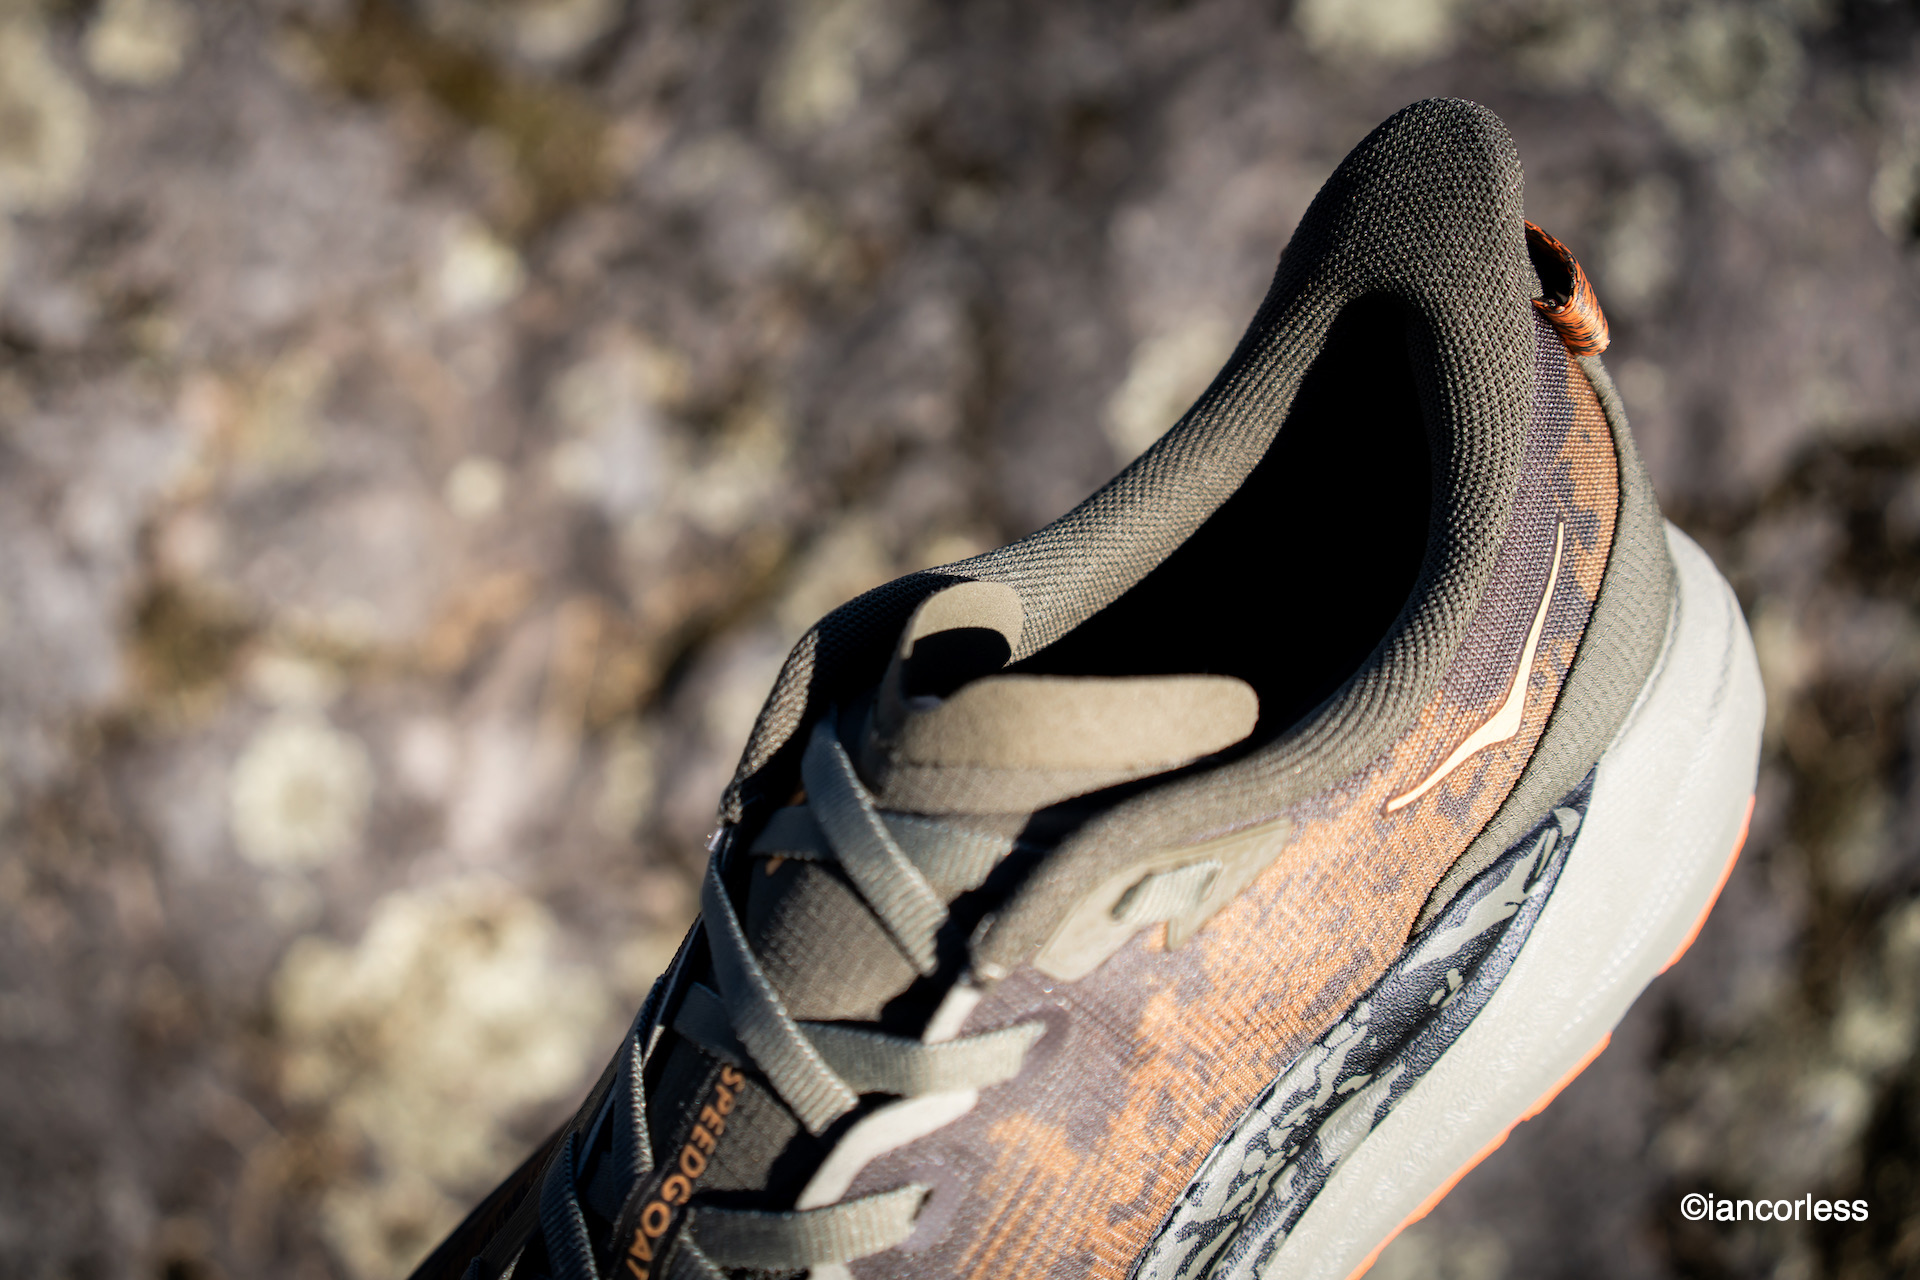
One of the key selling points of any VJ is how the shoe holds the foot, this comes from Fitlock which, when the laces are tightened and adjusted correctly, holds the foot perfectly, especially noticeable when on technical and demanding trail.

Photo by Ian Corless

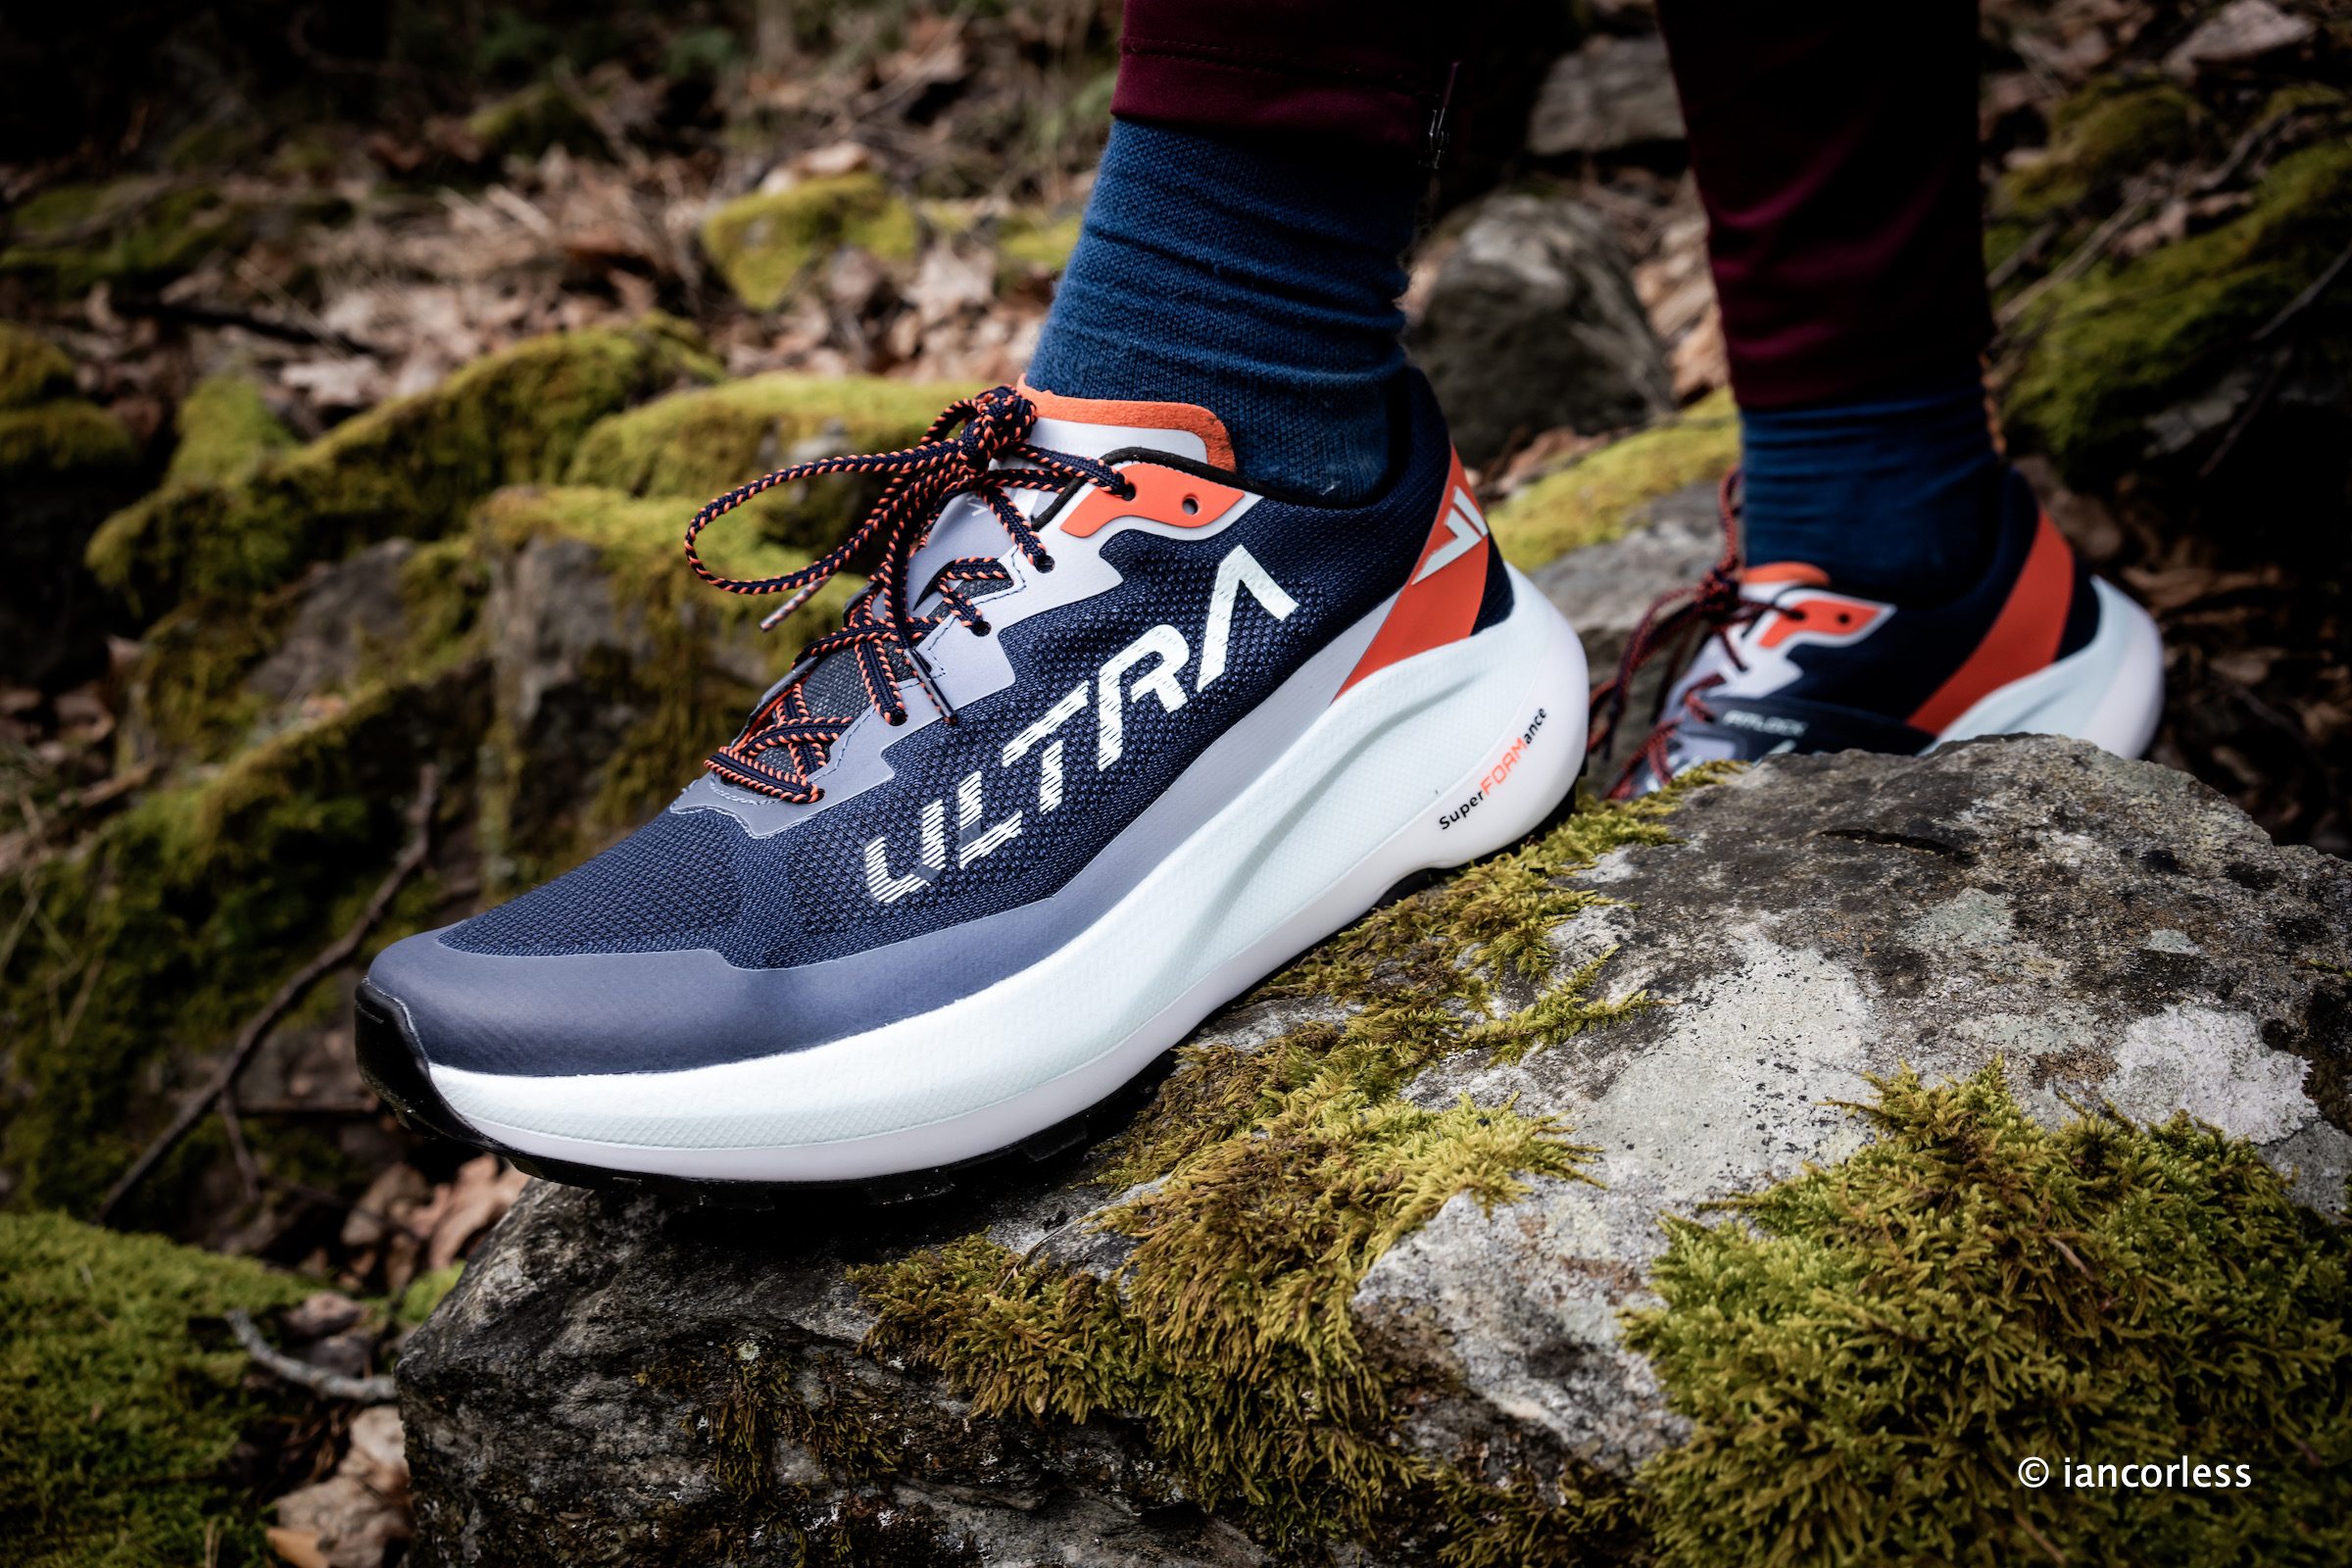
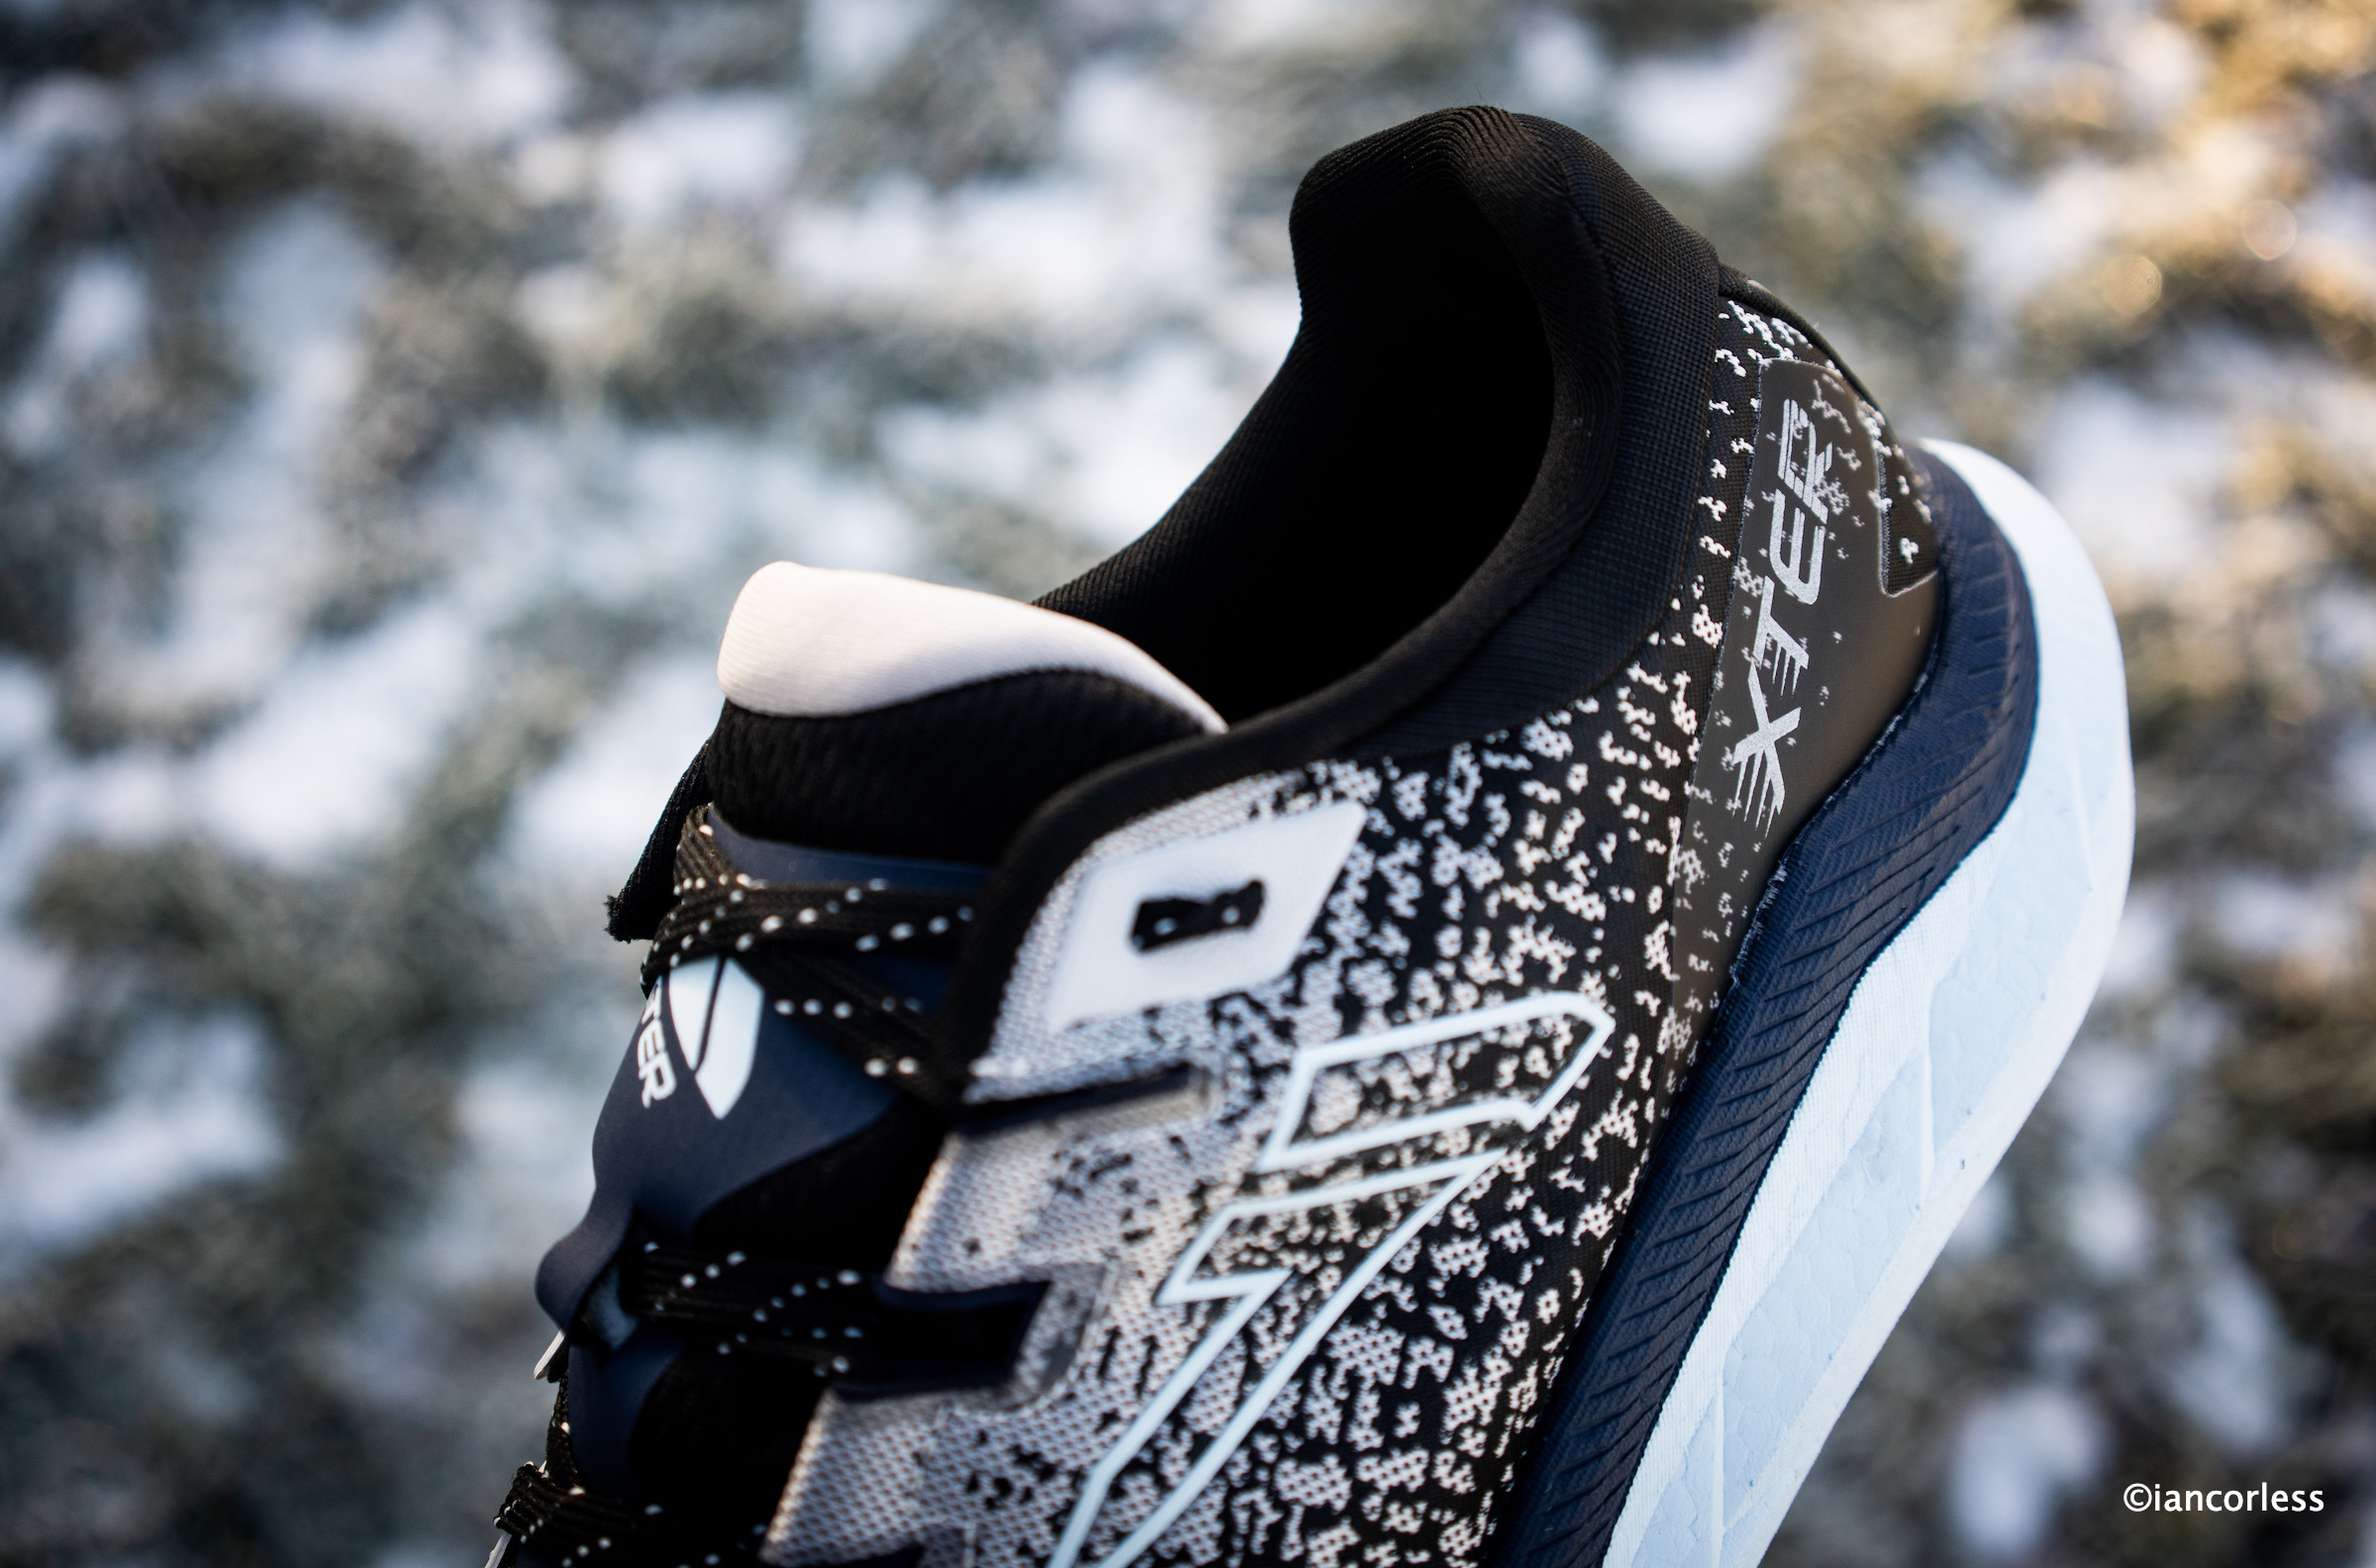
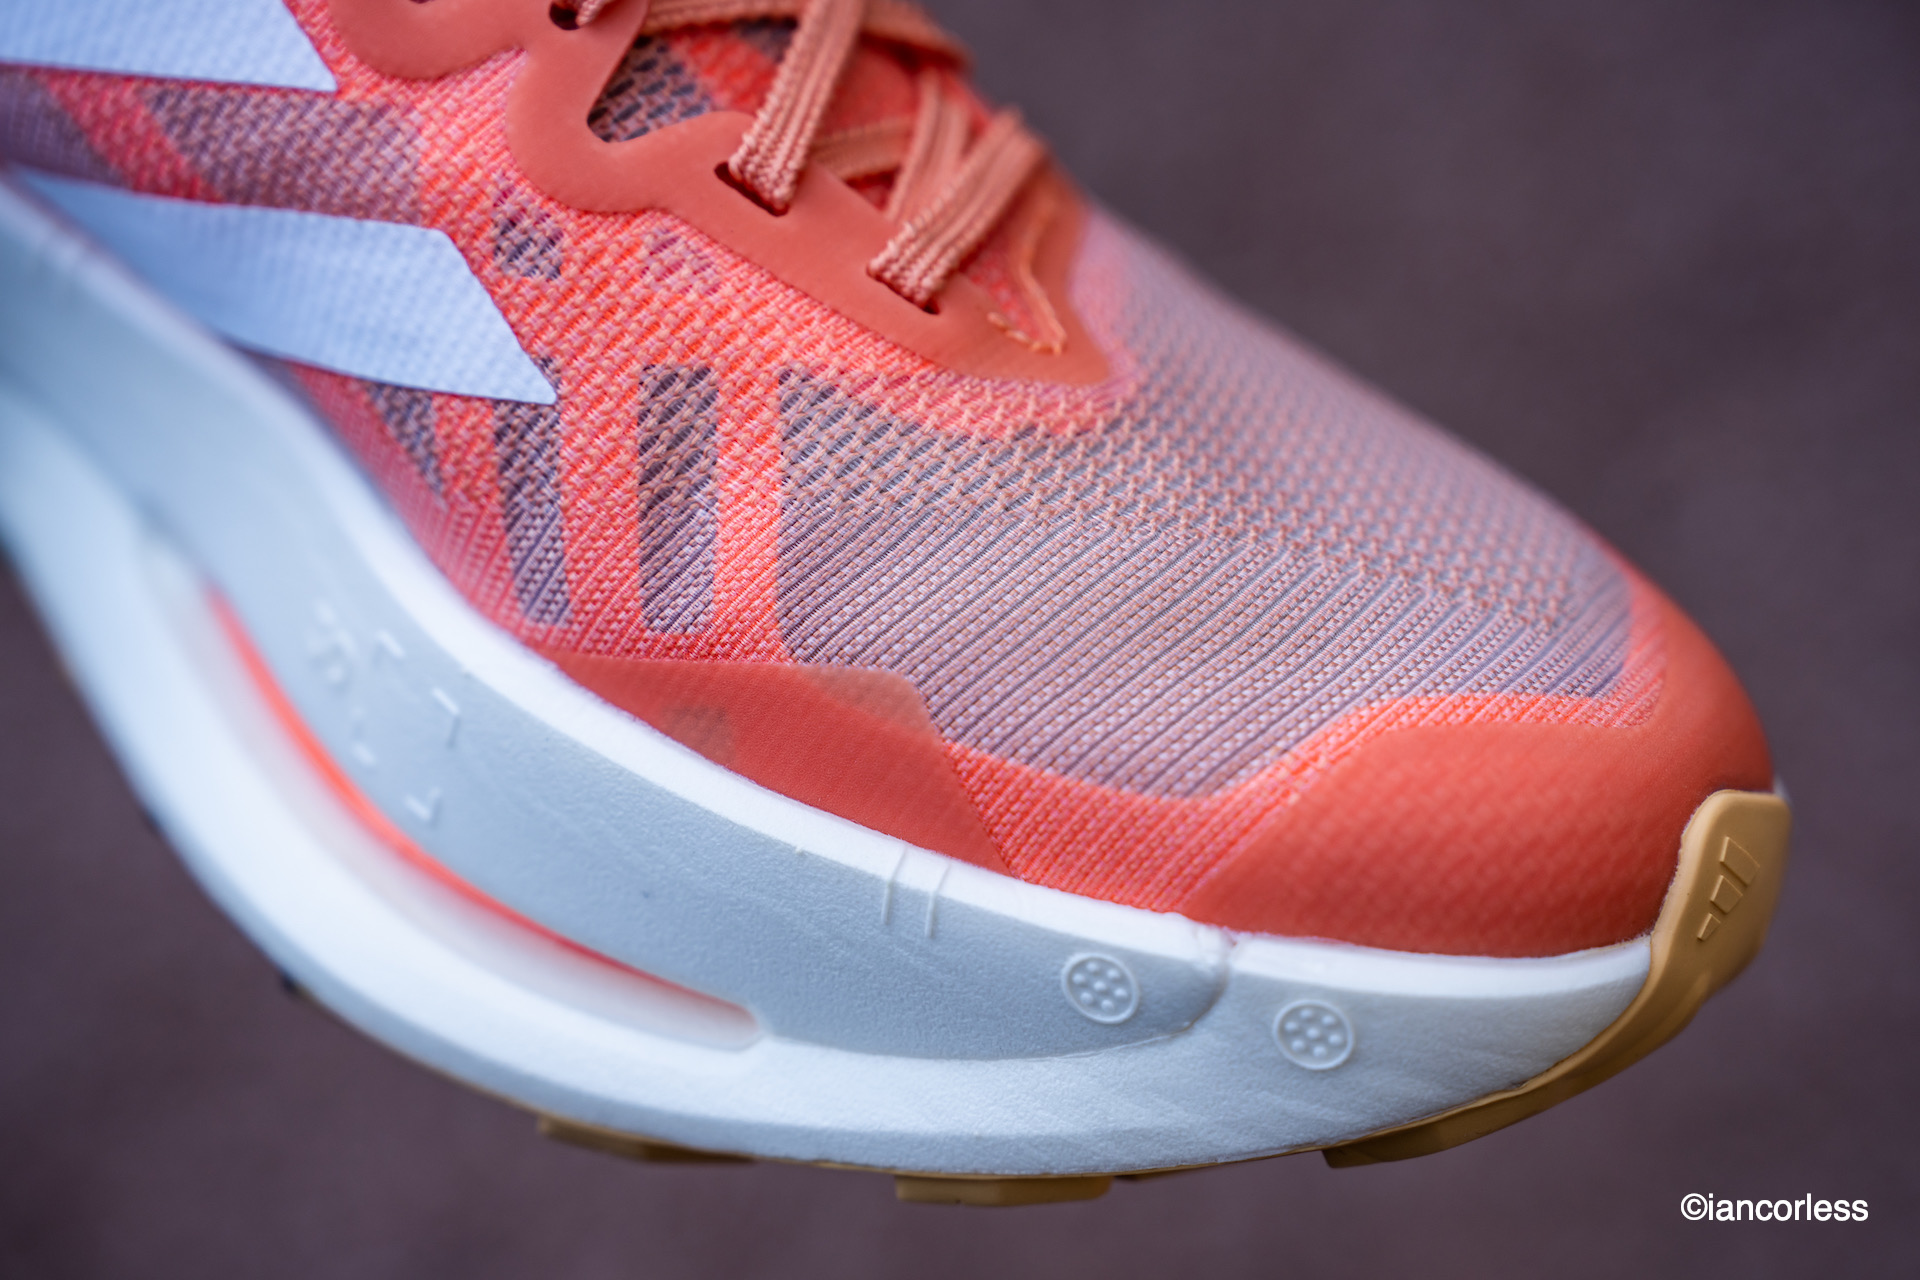
The upper is in one piece made of multi zone woven mesh with varying density. They are breathable but equally, in colder weather, they are not too cold. There is excellent protection at the front with a great toe bumper.

The rear collar is where a noticeable change has been made from the ACE winter shoe. The ACE was well padded and very comfortable. Here, the rear collar is lightly padded with a slight raised section inside to stop heel slippage. On the MAXx2 I initially had an issue with the right side of the heel cup being a little high which irritated my ankle bone, that is present here in the ULTRA 3. I have found that after a few runs this softens and becomes no problem. On my first run in the ULTRA 3 I got a hot spot at the rear – I never get blisters! So, this rang an immediate alarm bell. However, I changed socks for my 2nd run and then had no issues, so, sock choice may well be an important consideration.

The tongue is thin. But I have had no issues with any tension, hot spots or pain.

The toe box is, for VJ, wide and this will be a game changer for many people who have found VJ too narrow in the past. It allows great toe splay and comfort without losing a precision feel when required.

Cushioning is a breakthrough for VJ. As I found on the ACE, the SuperFOAMance was something very special, here in the ULTRA 3, it takes the shoe to another level of comfort without being squidgy or losing ground feel.

There is a rock plate which in many ways has three purposes: It protects the foot. It helps protect the cushioning. It also provides some torsional rigidity (a little like a plated shoe) without having the downsides of a carbon plate or similar.

Photo by Ian Corless

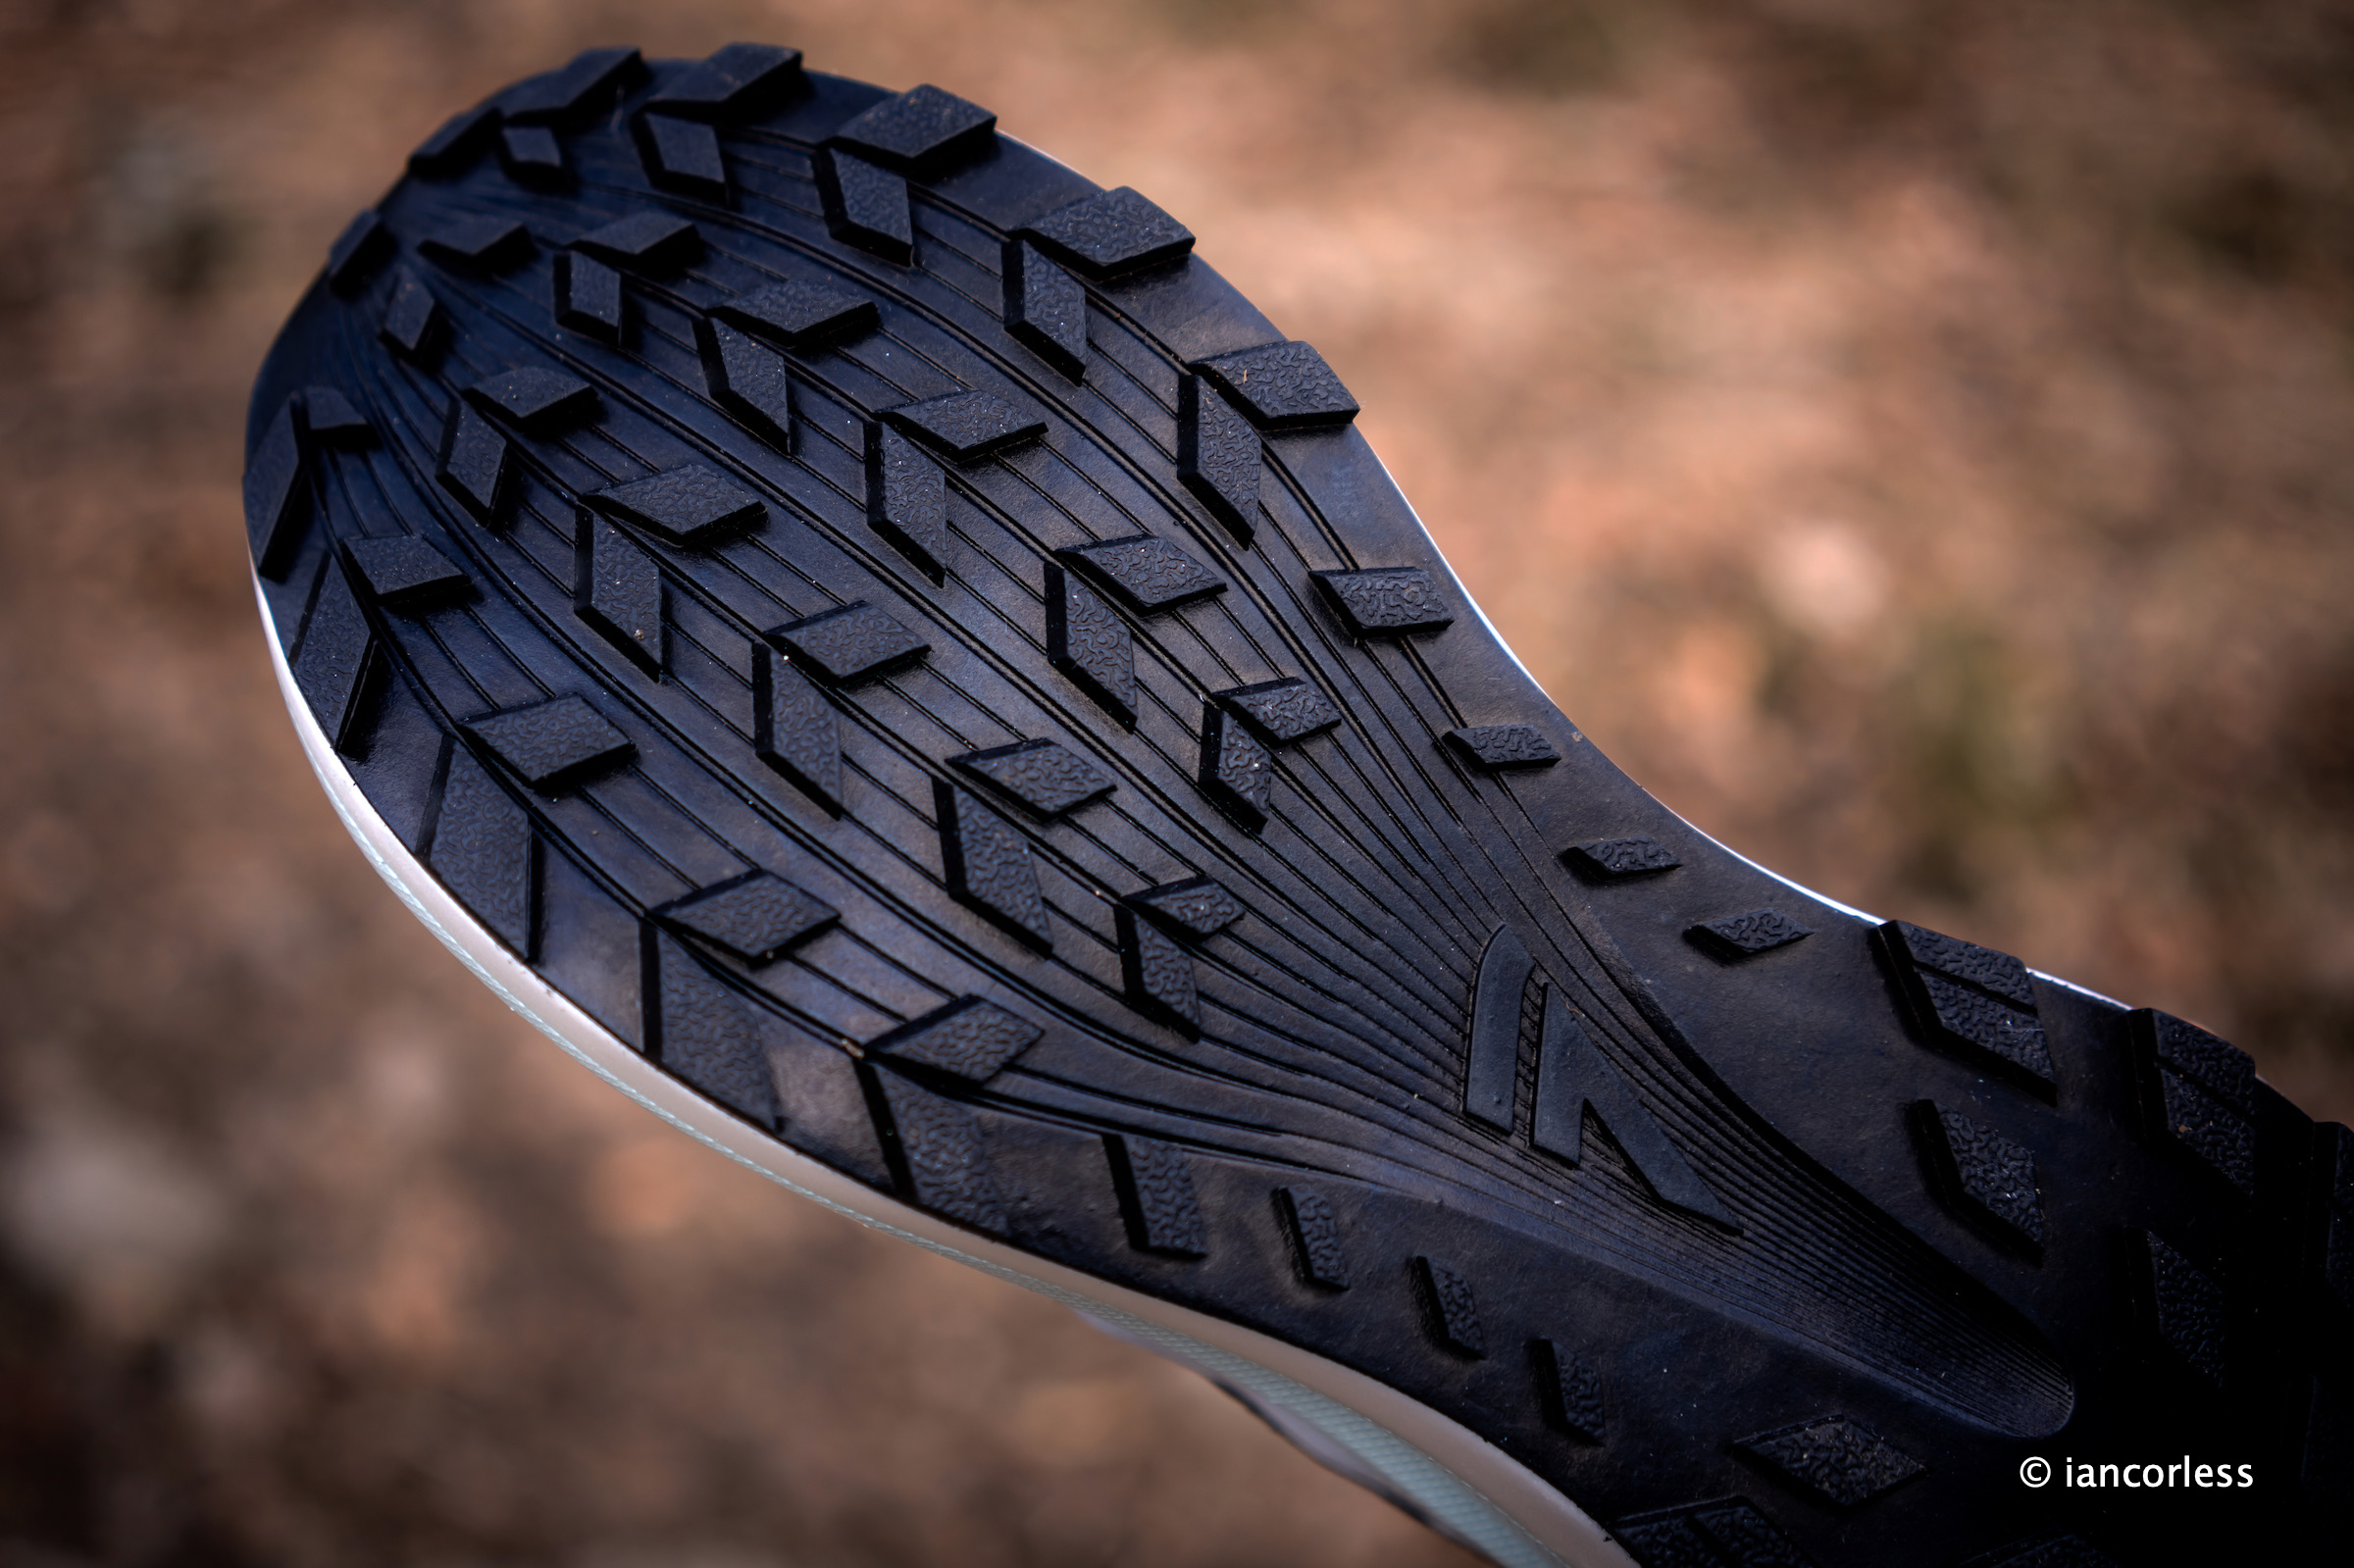
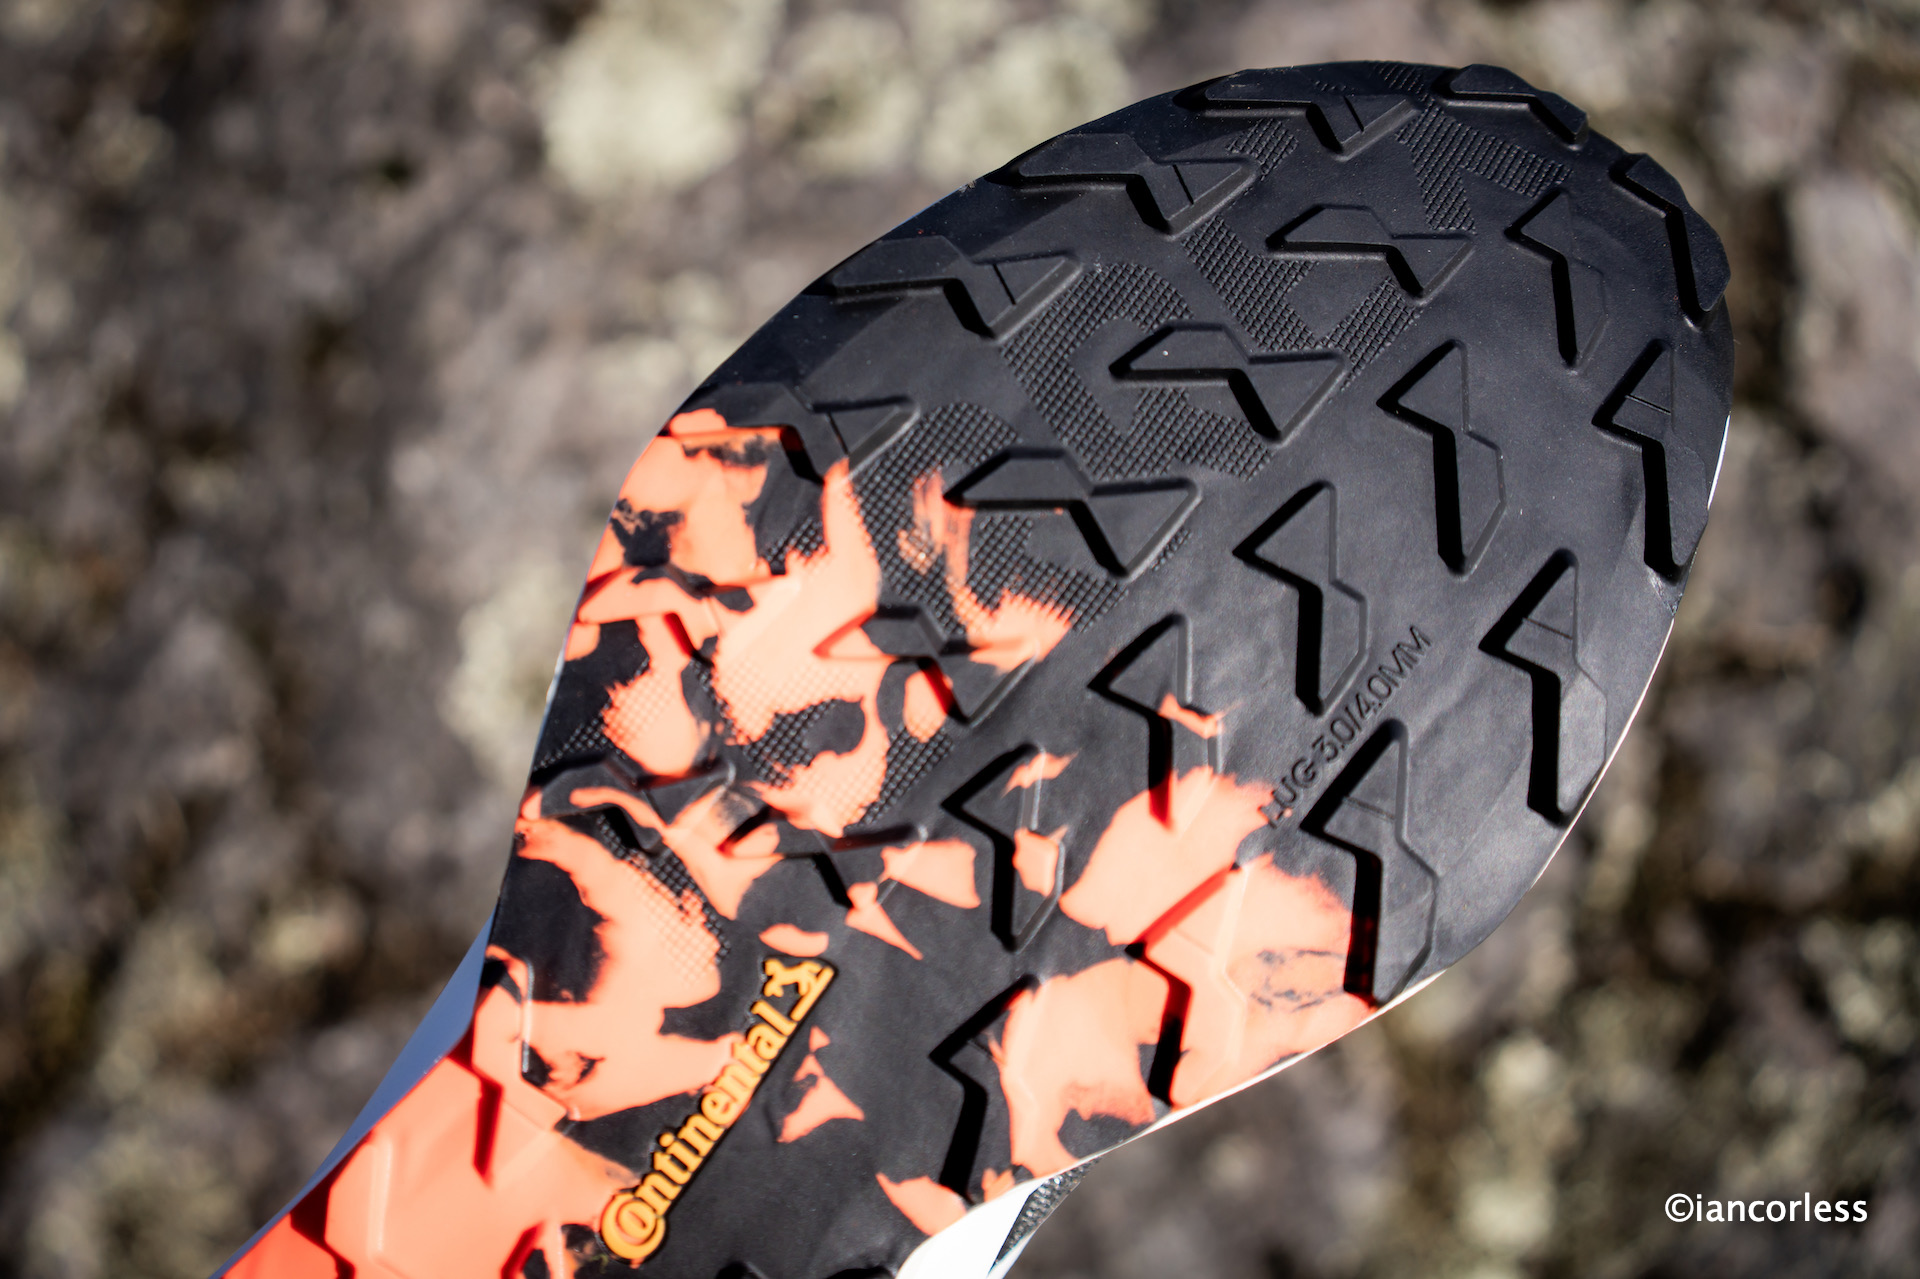
Outsole, it is easy, best grip on the planet. Nothing grips like the VJ butyl outsole. The 4.5mm lugs are maybe a surprise? Would I prefer 5mm or even 6mm? Yes! but maybe the 4.5mm is the best choice for a shoe to manage ‘all’ surfaces. Ultimately, the foot print is wide, front, middle and rear making contact with the ground superb. VJ also realise that if you increase stack height, you need to increase footprint size for stability. A lesson that adidas Terrex need to learn with there woefully unstable Terrex Agravic Speed Ultra which is on technical terrain dangerous IMO.

IN USE

Photo by Ian Corless

After three runs, I had to tweak certain elements to make the ULTRA 3 perfect for me. Firstly, I lock laced. I changed socks to Injinji. I tweaked the lace tension for the comfort/ feel I prefer.

One I had the three items above dialled, the ULTRA 3 became perfect.

The cushioning is a game changer for VJ but it sits in its own place. Two current outstanding shoes I love, the Hoka Tecton X3 and the La Sportiva Prodigio Pro both have lively, bouncy cushioning. The ULTRA 3 is not like this. It’s more controlled and therefore, I prefer the ULTRA 3 in more mountainous and technical terrain. I find there is more precision and reassurance. Any roll from the additional stack height is balanced and controlled, this also comes from the amazing Fitlock.

Photo by Ian Corless

Grip is the best, and I say that with complete confidence. I would compromise cushioning and comfort for VJ grip. I have done this in the past, for example, using the MAXx for really big mountain days when I knew I needed grip due to wet rock or similar. Now, the ULTRA 3 gives me the cushioning and comfort with grip.

CONCLUSION

Photo by Ian Corless

The ULTRA 3 is a game changer for VJ. This shoe will now make VJ grip available for longer races such as those in the UTMB calendar or similar. I do feel the ULTRA 3 slots in the more mountain ultra terrain than just ultra trail. There is a durability, a strength, a build quality to the ULTRA 3 that says, ‘I am here to take a battering and protect you!’ One thing is for sure, if you are looking for a shoe with cushioning, grip and comfort, the ULTRA 3 should be at the top of your list.

Photo by Ian Corless

Follow Ian Corless

Instagram – @iancorlessphotography

Twitter – @talkultra

facebook.com/iancorlessphotography

Web – www.iancorless.com

Web – www.iancorlessphotography.com

Countdown to MDS The Legendary 2025 – Five

You are in the final 2-weeks for MDS The Legendary.

With this in mind, we follow up the conference calls that took place on Friday March 21st with a summary.

First and foremost, the conference calls were recorded and you can view them on YouTube, the english version is as below.

SUMMARY NOTES AND KEY POINTS

The adventure will be here soon, do not worry, keep calm, 80% of you are first time participants.

Here we will go over the key information about the race.

Logistics

Passport – keep it handy and make sure you don’t forget it! Make sure you have at leat 6 months validity.

Wear race clothing for travel including shoes and gaiters.

Take RACE PACK with all contents as carry-on luggage, this includes the food. The only items you must check-in are poles and knife/ scissors etc.

MDS admin send you a procedure via newsletter in case your checked bag gets lost.

There will also be a pre-race shop at bivouac if needed, this will not have an exhaustive amount of equipment, but it may help in an emergency.

What happens when you land in Marrakech?

At the airport as you exit, after baggage collection, there will be a welcome area on April 2 and 3rd look out for the MDS team wearing orange and blue gilets.

Board your bus

Bus schedule:

  • KENZI ROSE: April 2 & 3 – 7:00 AM
  • RAK AIRPORT: April 2 & 3 – 10:00 AM
  • RAK AIRPORT: April 2 & 3 – 12:00 PM

The drive to Ouarzazate is approximately 4-hour ride + mid-way break MDS will provide a snack. If you have special dietary needs, you should have submitted that on our website. You’re welcome to bring your own snack if that makes you feel more comfortable.

Drop-off at hotels in Ouarzazate – all buses stop at all hotels:

  • El Baraka
  • La Perle du Sud
  • Berbère Palace
  • Karam Palace

You’ll spend 1 or 2 nights there depending on your booking. Our staff will be present in the main hotels in Ouarzazate if you need anything.

April 4

Transfer to the bivouac

Meet at 7:30 AM in Ouarzazate to board the bus from either:

  • Karam Palace
  • Berbère Palace

6-hour transfer

1 break during the ride, lunch pack will be provided BUT I recommend you purchase items in Ourarzazate to take with you, remember dta 1 and day 2 in bivouac is self-sufficient.

REMEMBER you are self-sufficient with food BEFORE the race starts. So, you need to take adequate food, snacks etc. There is no restriction here as you carry this in your luggage.

➤ Arrival at the bivouac with your suitcase and all your gear


➤ You’ll be assigned an 8-person tent – tent numbers will be shared next week


➤ Arrival briefing


➤ Sleep

IMPORTANT – You have luggage with you this night, a great opportunity to fine tune what you will take when racing. If it is cold, you can pack extra layers. If hot, you can maybe take less.

April 5

Technical checks stay in your bivouac tent and a member of the MDS team will come to your tent and tell you when to go. Expect this to take approximately 1-hour.

You will drop your luggage at the technical check. you will not see or have access to luggage until AFTER the race when you return to Ouarzazate.

Rest in camp and prepare for the race.

April 6–12

Race Stages You’ll discover the stage details in the roadbook, given to you when boarding the bus on April 4.

The long stage will be the 4th stage.

The race will be 250km’s over 6-stage / 7-days.

A typical stage:

Early starts so you will be getting ready in the dark.

Checkpoints every 10km (+/-) with unlimited water

We recommend carrying an extra soft flask for flexibility – but remember, you carry it!

Each CP has shaded rest zones

Orange-vest staff to help if needed for any medical issue

Cold water available to cool your neck (bring a neck gaiter!)

Feminine hygiene products available at bivouacs and on course

Minimum pace is 3.5 km/h – no stress, go at your own rhythm.

End of the stage: You can refill your bottles + get a 5L water bottle to last to CP 1 the following day.

EQUIPMENT

Review the list of mandatory equipment

First night at the bivouac: Good opportunity to test how cold it gets.

Bring a proper sleeping bag,

Have with you warm layers, light down jacket, etc.

Sleeping mat is highly recommended

Make sure you have tried and tested shoes with gaiters

Foot care – trim your toenails before the race – not too short, not too long. A pedicure can be a good idea.

Bring socks you’re used to, and maybe a spare pair.

Foot care during the race:

  • Clean and let your feet breathe after each stage.
  • If you feel a blister or small injury, go see the medics immediately – don’t wait!

Rain?


Keep a rain jacket and a rain cover for your bag in your WAA pack – just in case.

Protect yourself from the sun: Hat, sunscreen, sunglasses – don’t neglect anything!

Clothing: Test your gear beforehand to avoid surprises One race outfit + one bivouac outfit is enough

Fire starter bricks – available in the pre-race shopMENT

MDS EQUIPMENT via WAA HERE

Food & Nutrition

Before the race: Food for the evening of April 4 and the full day on April 5 – whatever you like.

During the race: Plan 7 days of food: breakfast, lunch, dinner. For the last stage, only breakfast + snacks for the stage are needed. A lunch pack will be given on the return bus.

So, you need roughly 20 meals, totalling around 12,000 to 14,000 calories minimum.

Strategy – Test your meals and drinks in advance!
Don’t bring 3 or 4 of the same meal unless you’re sure you like it.

Backpack weight
It adds up quickly – aim to be as close to the minimum 6.5kg as possible. This does NOT include water.

Medical Advice Hygiene rules:

  • Never drink tap water.
  • Don’t share bottles or cups.
  • Avoid raw vegetables at hotels or elsewhere.
  • Stick to cooked food before and after the race.
  • Your digestive system will be sensitive.
  • Heat and stress can also cause minor digestive issues.
  • Don’t panic – mild diarrhea is often just your body adjusting (and it might even make you lighter!).
  • Limit physical contact at the bivouac.
  • Wash hands frequently – especially before eating or after using the toilet.
  • Use hand sanitizer often.

Tips for a safe race:

  • No self-medication If you feel unwell, don’t self-medicate.
  • Avoid NSAIDs like ibuprofen, Voltaren, etc. – they can cause serious complications during intense effort.
  • Talk to the medics instead.
  • No COMPEED® for blisters They melt into your skin in the desert heat and make treatment harder.
  • Hydration Drink according to thirst – don’t over hydrate.
  • Drink two diluted bouillon cubes per race day.
  • MDS do not provide salt tablets as they’re not recommended.
  • Treat pain early The earlier, the better – avoid complications.
  • Listen to your body Fatigue, dizziness, pain – speak to an Orange Vest!
  • Medical Form
One week before the MDS Legendary, you’ll receive a medical questionnaire from: no-reply@logicoss.net. Filling it out is mandatory to help the medical team take care of you during the event.

Race Tracking

  • Friends and family can follow you on the MDS website
  • Live tracking page
  • Live webcam
  • EMOTION BOXES
  • Satellite phone
  • There will be some connection spots – but we recommend disconnecting and enjoying the moment.

Final stretch:

Stop training. If possible get some heat acclimation – sauna, heat chamber, hot yoga etc

Don’t stress.

Once you’re in Morocco, we take care of everything.

Enjoy it!

Any questions? Call us.

A full recap will be emailed to you next week with all these details.

Follow Ian Corless

Instagram – @iancorlessphotography

Twitter – @talkultra

facebook.com/iancorlessphotography

Web – www.iancorless.com

Web – www.iancorlessphotography.com

Everest Trail Race 2025 – Sign up for the adventure of a lifetime

©iancorless

Everest Trail Race 2025, 10th to 22nd November

Nepal, the magic of Nepal. If you haven’t experienced it, you need to experience it! If you have experienced it before, you already know that you need to experience it again.

The ETREverest Trail Race, provides an opportunity to immerse yourself, to experience on foot, a journey through the heart of this magical place. The race takes place over 6-stages, a total of 170km’s with a combined elevation gain/ loss of 26,000m. A self-propelled adventure through the Himalayas reaching a maximum altitude of 4104m.

SIGN UP FOR ETR 2025 HERE

Official Everest Trail Race website here

©iancorless

Now in its 11th year, ETR, taking place November 10th to 22nd, has become a bucket list adventure for those looking to combine travel, tourism and adventure in a package designed to provide the maximum return on the shortest amount of time.

#ETR2025

©iancorless

While the 170km, 6-stage adventure is at the heart of the ETR, the journey begins with days before and after in Kathmandu.

Views like this, mind-blowing ©iancorless

The noise, the bustle, the chaos of Kathmandu, it needs to be experienced. It’s a cacophony of explosive elements. The transfer from the airport to the hotel gives an indication of what is to come.

Briefing and race protocols ©iancorless

Before the admin protocols begin, a day of leisure in and around Kathmandu allows for key visits to the Monkey Temple and Patan. It’s always a shock to the senses, an assault of noise and colour and yes, poverty and hardship.

Monkey temple ©iancorless
Local colour in Kathmandu ©iancorless

The Nepali people have hard and tough lives, and in Kathmandu you get to fully appreciate the highs and lows of this. One thing is for sure though, you will soon fall in love with the Nepali people, they are the salt of the earth.

©iancorless

The following day, the journey to camp 1 begins, a bus drive from the noise and bustle of the city to the wild remote landscape of the Himalayas. The views for ever changing, you get to see the variety that this region brings before arriving at camp, tent allocation and a first night under canvas. The next day, the adventure begins with stage 1.

Runner’s sleep in two person tents ©iancorless
The view at the start of stage 1 ©iancorless

The following 6 days takes you on a journey of both physical and mental as you leave the remote and wild farmlands heading toward the majestic beasts of Lhotse, Ama Dablam, Nuptse and of course, Everest.

©iancorless

The early stages avoid the classic trekking routes as the participants make their way towards Lukla. Remote, isolated and free from tourism, stages 1-4 show the ‘real’ Nepal, the difficulty of life here and the harshness of weather and land. Days are warm, nights are cold.

The summit of stage 2 and epic views ©iancorless

Traveling in a semi self-sufficient manner, participants carry all they need for the journey – sleeping bag and clothes. The race organization provides a place to sleep, breakfast and dinner and en-route, there are sporadic aid stations to provide essential calories and replenish water.

The tough climb to start stage 2 ©iancorless

The final section of stage 4 passes underneath Lukla and now, the ETR enters one of the key trekking areas of the Khumbu region.

View from the sky ©iancorless

Stage 5 provides a magical journey passing through Namche Bazaar, up and onwards to the eventual finish line at Tengboche Monastery, the backdrop of the key Himalayan peaks making this, arguably, the greatest finish line on the world. Ama Dablam to the right, Everest in the middle, finish lines get no better than this.

Many bridges link the route ©iancorless

Stage 6 returns to Lukla, the ETR finish line and a night in a lodge. The following day, a return flight to Manthali and then bus back to Kathmandu and hot showers, hotel luxury and a night in a real bed with crisp white sheets.

The following day is free, allowing for relaxation, recovery and of course, a compulsory trip in to Tamil to by souvenirs before the final night awards and gala dinner.

The Everest Trail Race is a special race, one that introduces participants to a very magical place with the safety, back up and organization to make sure the journey is a special one.

The end of stage 4 ©iancorless

Due to the nature of the challenge, an understanding and comfort with mountain terrain is required, in addition, this is a race that takes place at altitude and reaches a high point of over 4000m. Do not underestimate the difficulty this terrain and altitude brings. Daily distances, on paper, may seem very short and achievable, but they are a challenge. But hey, that is why we sign up for these things, no? If it was easy, anyone would do it.

More than running, a journey and adventure shared ©iancorless

Price:

  • Transcontinental flights Barcelona/ Kathmandu / Barcelona and transfer to the Hotel.
  • Domestic Flights. Manthali/Lukla/Manthali and transfer to the hotel.
  • 4 nights hotel in Kathmandu 4 * (according to local tourist category) with breakfast, double occupancy.
  • Overnight in lodge (hostel) during the trek in full board. Not beverages included.
  • Dinner the second night in a hotel in Kathmandu. Not beverages included.
  • Dinner and awards party. Not beverages included.
  • Allowances and staff insurance.
  • Trekking permit.
  • Entry into the National Park

SIGN UP FOR ETR 2025 HERE

Official Everest Trail Race website here

©iancorless

Follow Ian Corless

Instagram – @iancorlessphotography

Twitter – @talkultra

facebook.com/iancorlessphotography

Web – www.iancorless.com

Web – www.iancorlessphotography.com

VJ XTER Shoe Review

One year ago I was writing a review about the new addition to the VJ Sport shoe line-up, the VJ SARVA ACE.

This was a new departure for VJ. Of course, the shoe had the trademark VJ USP’s, amazing butyl outsole and fitlock foot hold. As a specific winter shoe, it also had the excellent star studded winter studs for reassuring grip on ice.

However, the new additions were extremely notable. Firstly a wide, foot-shaped toe box, very wide by VJ standards that would allow space for the toes to move and therefore aid keeping feet warmer in sub zero temperatures. Secondly, new cushioning called PerFOAMance. Thirdly, a one piece waterproof upper.

I wrote at the time that this was without doubt the most comfortable and best studded winter shoe I have tried. That still stands today.

Notably I said, Light-weight, cushioned, wider fit, great foothold and superb comfort, the VJ Sarva ACE takes the previous VJ SARVA shoes to a new level. This shoe is so comfortable, I have already emailed VJ asking for this shoe to be made without studs. It would be a perfect shoe to run alongside the ULTRA, especially with the wider toe box.

Well, VJ listened and they have now released the VJ XTER.

The XTER is quite simply the ACE without winter studs. With 40mm cushioning at the rear, 32mm at the front and an 8mm drop, the XTER is a dream shoe. The butyl outsole with 5mm lugs gives incredible grip on all terrain and better than normal outsole grip even on ice. Note, this is NOT an ice running shoe, you need the ACE for that.

The XTER is all about comfort and slipping them on they had all the great feelings from the ACE, notably is the space up at the front and the cushioning. These shoes feel incredible. So good that VJ need to make this shoe without a waterproof upper for all-season use. I have no doubt that this shoe would be my day-to-day trail shoe choice in spring and summer if it had no waterproof upper.

The success of the ACE and perFOAMance cushioning also made it’s way to the new MAXx2 which for me is THE best mountain running shoe in the market. The combination of features, grip, fitlock and cushioning make this a stunning shoe. However, it’s a more precision fit shoe, so, an XTER version would fulfil many requests for a ‘wider’ VJ shoe for the mountains.

KEY FEATURES

Those who have used VJ before will know how amazing the foothold is from FITLOCK, a feature on all VJ shoes. It provides a tight and secure feel and offers support and stability. It makes the shoes feel like part of the foot. This is probably even more noticeable here in the XTER with the wider toe box. The hold and feel are superb.

VJ’s SCR (Superior Contact Rubber) is the best on any terrain, be that wet or dry. The tagline for VJ is #bestgripontheplanet and that is justified. No other trail/ mountain shoe matches the outsole of VJ. 5 mm studs provide grip in all conditions, but also allow you to enjoy running on easier trails.

The upper is seamless, lightweight and waterproof with added durability. This has been tried and tested in my ACE which are now 1-year old and still look like new. You may be thinking that you do not need a waterproof upper, maybe think again. For sure, there are some downsides to a waterproof shoe, especially if you get water inside as it cannot escape. However, if you are running in extreme cold, snow and ice, a waterproof upper with good merino wool socks makes a huge difference for foot warmth.

The wide toe box is foot-shaped and to draw comparisons, it is very much in the mold of Altra or Topo. It’s very much of a departure for VJ as nearly all their shoes have a more precise/ precision fit. It’s extremely comfortable and allows excellent toe splay. As I said, love to see the XTER develop in a non-waterproof version.

SUMMARY

The added cushioning is a highlight for me, and they are ideal for longer outings, particularly when running on harder / frozen trails. The comfort level is high, not something that is usual for winter shoes. The wider toe box only adds to this package. Toes are able to move allowing for increased blood flow and therefore warmth, also helped by the waterproof upper. The wider footprint also adds to a more stable footprint on snow. Butyl outsole is amazing and sets the bar for other shoes to match. The ACE had one issue, hold in the heel area was not ideal, that has now been addressed. The XTER comes highly recommended.

Instagram – @iancorlessphotography

Twitter – @talkultra

facebook.com/iancorlessphotography

Web – www.iancorless.com

Web – www.iancorlessphotography.com

Lofoten Stage Run 2025 – Experience the most magical place in Norway

The inaugural 2024 Lofoten Stage Run paved the way for what is Norway’s premiere multi-stage running event. Taking place over 6-days (4-days running,) the LSR event was inspired by the 170km solo event taking place under the umbrella of events titled The Arctic Triple – ski mountaineering, trail running and triathlon.

2025 will see the 2nd edition take place and once again two distance options will be available, 170km ‘Expedition‘ and the 100km ‘Adventure‘ run.

Expedition 170km – enter here

Journey the length of Lofoten in 4-stages

The full 170km single-stage race broken down into 4-stages.

Adventure 100km – enter here

A shorter, more manageable highlight journey.

While 100km may seen extremely manageable over 4-days, one must take into account the challenging terrain the race takes place over and the vertical climb and descent. This is not an easy option.

There is no better way to fully immerse oneself and experience that magic that Lofoten offers by moving under ones own power, running or walking. Lofoten is considered one of the most desireable places to visit in the world.

The Lofoten Stage Run has the added bonus of taking participants to hidden places, often only experienced by the most adventurous tourist.

After a tough day on the trails, each stage concludes with a typical Norwegian Hytte experience with excellent local cuisine, a shower and of course a comfy bed. Participants luggage is transported each day, so, while running, you can travel lighter and faster. 

The Lofoten Stage Run is designed to be a running holiday, however, do not be fooled, those cozy and comfortable evenings are worked for. The terrain and weather in Lofoten is challenging; a mixture of all terrains and elements that can bring for many, the ultimate challenge.

THE EXPERIENCE

Taking place during week 22, participants need to be in Svolvær on May 27th for a transfer to Reine and a stay at Reine Rorbuer. Located in the western part of Lofoten, at the entrance to the Reinefjord, lies the stunning fishing village, considered one of the most beautiful in Norway.

Wednesday, stage 1, starts with a boat trip from Reine to Kjerkfjorden. The route ahead, 39km’s for 170km race and 20km for the 100km. The opening 10km’s a real challenge with tough climbs, technical terrain, snow sections and soft/ boggy ground. Kvalvik beach offers some opportunity for flat terrain before a steep climb and eventually a descent to Fredvang and checkpoint. Here the 20km distance stops. A road section leads to Nesland for the 170km runner’s and the final technical trail sections before arriving in the picture postcard, Nusfjord and the Nusfjord Arctic Resort– a tough day!

Stage 2 at 34km’s (17km for the 100km starting at Napp) concludes at  Lofoten Rorbuutleie another amazing location surrounded by sea and mountains. The early route to Napp bringing many a challenge, technical trails and mild hands-on scrambling sections before sweeping single-track with stunning views. Road gives way to coastal trail and another road section before arriving at Lilleeidetholmen marina, the buildings are located with water on both sides and direct access to quays and floating docks.

Stage 3 for 170km Expedition runner’s is the long day, covering 52km’s with arguably the most ‘runnable’ terrain of the whole week. For the 100km it is also a long day at 35km starting at Rolvsfjorden.. Technical aspects are reduced and much of the route is single-track interspersed with some road. The finish at Brustranda Fjordcamping once again offering a wonderful Norwegian hytte experience of cabin surrounded by water and mountains.

Stage 4, the final day at 45km’s brings some of the most technical terrain of the whole Lofoten Stage Run experience, especially the climb to Jordtinden and the ridge that follows with some exposure form an ‘airy’ single-track, snow fields and at times, challenging terrain. The final peak of Tjeldbergtinden a final challenge before the run in to Svovær and the conclusion of four magical days. For the 100km runner’s they cover the last 21km starting at Kleppstad, and yes, they get to experience Jordtinden, the ridge and the final summit of Tjeldbergtinden – it is the highlight section of the whole Lofoten Stage Run.

After the race, a meal at the event hotel, Thon Hotel Lofoten, where the focus is some of the best local food from the area. A perfect evening to share new and old stories with your new friends and relive the magic of Lofoten and the Lofoten Stage Run.

THE RUN

170km or 100km, one thing is for sure, running in Lofoten is tough and challenging. Terrain constantly switches from demanding and technical sections to easy flowing single-track. Experience, excellent endurance and an ability to handle technical and challenging terrain is required for those who sign up for the 170km.

The same requirements apply for the 100km distance, however, the shorter distance does allow for a considerably slower pace and more walking. Rest assured, the 100km is not an ‘easy’ option, it is a real Norwegian mountain experience, especially the 21km on the last day.

The Lofoten Stage Run is all about enjoyment and experiencing the best of Norway, not only its magical terrain but its hytte and food.

It is no coincidence that this is called a run and not a race, the ultimate relaxed trail running experience that brings so much more than just running. Traveling point-to-point, on foot, experiencing the magnificence of Norway. Stunning trails, majestic mountains, resplendent views, and all during the endless daytime of the midnight sun. It gets no better!

Experience Lofoten.

Experience the Arctic Circle.

Experience the midnight sun.

Experience the majesty and beauty of Norway under your own power.

Instagram – @iancorlessphotography

Twitter – @talkultra

facebook.com/iancorlessphotography

Web – www.iancorless.com

Web – www.iancorlessphotography.com

Hoka Speedgoat 6 Shoe Review

©iancorless

The Hoka Speedgoat needs no introduction, it is arguably, the best selling trail shoe throughout the world. It’s much loved and universally proclaimed as a great trail running shoe.

I personally was late to the Speedgoat party with version 4, followed by version 5 and now version 6. The Speedgoat 5 reached a critical point for Hoka with very mixed reviews:

  • There were concerns about the midsole compressing and lacking durability, 
  • The upper had less durability.
  • The fit and size for some was off.
  • The outsole was wearing too quickly.

I personally enjoyed the Speedgoat 5. I found the combination of features absolutely fine, the upper fine which was flexible and allowed for a good fit, I did need to lock lace though.  The outsole ideal and importantly, the stack height a more reasonable 33/29 which offered good stability with a 4mm drop.

©iancorless

Most certainly, Hoka listened to the feedback. They had to if they wanted to retain the loyal fan base, especially with many other brands releasing shoes that could not only provide competition, but even beat the Speedgoat, the Merrell Agility Peak 5 a prime example.

With the release of the Speedgoat 6, the shoe very quickly received universal acclaim with quotes such as, ‘The King is Back!’ And, ‘Speedgoat is still the GOAT.’

What is new?

  • Cushioning is new CMEVA foam with increase stack, 40mm at the rear and 35mm at the front and 5mm drop, 38/33 for women). 
  • The cushioning is lighter and more responsive.
  • The outsole is Vibram Megagrip Traction lugs with 5mm depth and new orientation.
  • A new more durable upper that is Matryx like with no stretch and with an inner cage.

Hoka say, “We’re offering an updated underfoot experience that provides a more responsive ride with less weight. You’ll find updates to the overall construction, including a breathable woven upper, lighter, more responsive midsole compound, internal chassis, dynamic vamp, and plusher, dual-gusset tongue.” 

With neutral stability, balanced cushioning all built around a wide footprint, the Speedgoat 6 is a great trail all-rounder. It is designed to provide protective cushion while maintaining a responsive toe-off for when you want to go faster.

©iancorless

If you place a 5 and a 6 next to each other, they are noticeably different.

  • The toe box is a different shape with different protection.
  • The lacing is different and comes down lower on the 5.
  • The heel area is different.

IN USE

©iancorless

I personally found a considerable difference when putting on the 6 and lacing them up. I immediately preferred the feel of the 5. I lock-laced (as I do on the 5) and the fit/ feel improved.

The lacing does not go as low down the shoe on the 6 and this made me feel less secure at the front, probably not helped due to the fact that the 6 has been given extra width over the 5.

©iancorless

The cushioning is without doubt stiffer and firmer in the 6. The 5 feels bouncy and plush but not squidgy. The 6 almost feels hard by comparison, somewhat unexpected when you consider the extra stack height.

©iancorless

I have to say, my first run I was not loving the shoe. I was constantly thinking, give me the 5 back. However, with 10km in the shoe, the 6 started to feel more at home on my feet and as the km’s passed, that improved. So, I would certainly say although they are good to go straight out of the box, a good run or couple of runs will help them. Ultimately, there is no special life here. They are solid, reliable, good for the long haul, but there is a lack of excitement, especially if you compare to the Merrell Agility Peak 5 and the VJ MAXx2.

©iancorless

There is more structure and hold coming from the new internal support chassis, this is without doubt required with the extra stack. I never had a real issue in the 5 unless on very technical terrain, but here in the 6, the 40/35 cushioning is notably different. Currently, my favourite Hoka is the Tecton X3 which has the same level of stack height as the Speedgoat 6, but for me, has considerably better feel. It’s not that I don’t like the 6, there just doesn’t feel anything special going on and ironically, I prefer the feel of the Speedgoat 5 which is counter to what Hoka say I should feel and also counter to the general Speedgoat feedback from all the fans.

The tongue of the Speedgoat 5 and 6 is not long enough making lacing and particularly lock-lacing an awkward affair and not always comfortable. This really needs addressing.

©iancorless

The outsole with 5mm lugs is solid on most trails. With a new configurtation and the Traction lug, it works well. There ic a comprise with a great deal of mud and I am still never confident on wet rock.

CONCLUSION

©iancorless

The Speedgoat 6 is a solid trail shoe that will only continue to confirm the shoes legendary status within the trail world. Speedgoat lovers will continue to love this shoe. But, if you are new to Speedgoat and comparing against other like-for-like shoes, would the Speedgoat win out? 

For me no. However, it does depend on what shoes you are comparing the Speedgoat with… If it was the adidas Terrex Agravic Speed, the Hoka Speedgoat 6 is a clear winner. However, comparing against a Merrell Agility Peak 5 or a VJ MAXx2, then, for me, I would choose the Merrell for trail runs and the VJ for mountain and technical runs.

Follow on:

Instagram – @iancorlessphotography

Twitter – @talkultra

facebook.com/iancorlessphotography

Web – www.iancorless.com

Web – www.iancorlessphotography.com

Image sales –www.iancorless.photoshelter.com

adidas Terrex Agravic Speed Review

Terrex Agravic Speed ©iancorless

The adidas Terrex Agravic Speed is the little brother of the super shoe, adidas Terrex Agravic Speed Ultra.

The shoes look similar when seen side-by-side but there are very obvious differences: less cushioning, not plate, less rocker and in my opinion, I love the black colorway with Terrex in bold white, a hint of orange provides some colour excitement.

©iancorless

Much of the big brother shoe is present, seamless overlays, Lightstrike and Lightsrike Pro cushioning and a Continental outsole.

©iancorless

The cushioning is notably different with 30mm at the rear and 22mm at the front with the same drop of 8mm.

©iancorless

The adidas Terrex Agravic Speed Ultra is a super shoe that runs fast on slick trails and is a beast for those looking for speed and the fitness to maximise the super shoe potential.

This Terrex Agravic Speed is a shoe for all and in all honesty, is a much better choice for most people looking for a trail shoe, whereas, by contrast, the Terrex Agravic Speed Ultra is only for a select few.

Too narrow in the middle and rear ©iancorless

Despite the lower stack height, the shoe still suffers terrible stability issues on technical trail. I was really hoping that this would be less of an issue, and in all fairness, in comparison to the big brother, it is more stable, however, it is nowhere near stable enough. It’s only just a trail shoe, select the trails you run on carefully is my advice. There is a rocker, but it is nowhere near as pronounced as the Terrex Agravic Speed Ultra and the need to forefoot strike is less.

©iancorless

Light with a neutral fit, the upper is almost see through and very breathable. The toe box is wide and allows good toe splay. The heel area is minimal and while comfortable for me, it’s an area to be wary of. Sizing is again frustrating, you need to try them on! A gusseted tongue gives a lovely foot hold and reassurance.

©iancorless

The cushioning is well balanced, soft without being squidgy and the responsiveness and propulsion is excellent. With softer foam at the bottom; Lightstrike Pro. Firmer Lightstrike on the top, this combination does add more stability but the footprint is too narrow in the middle and rear – ankle breaking warning given! When Runnning, the rocker does kick in and helps increase cadence and propulsion, but unlike the Terrex Agravic Speed Ultra, you feel more in control and able to reign the shoe in and run at a more comfortable pace. This is probably due to the considerably less stack height and the lack of any plate. Walking too is better, not ideal, but better.

Continental outsole is good, again though, the lugs (3 and 4mm) are minimal and reduce the potential for it to be a real trail shoe. However, the grip is better than the Terrex Agravic Speed Ultra.

©iancorless

This shoe is arguably an update from my favourite adidas shoe, the Speed Ultra. However, with his level of stack height, there are no similarities really. It really is a subdued version of the Terrex Agravic Speed Ultra and as such, it would make a good training shoe if using the bigger brother for racing. It feels like a road shoe.

There is a great deal of positives with this shoe and as I have said previously, for most people, this is a considerably better shoe choice than the Terrex Agravic Speed Ultra.

However, there are lots of negatives.

  • adidas really need to sort there sizing out. There is no consistency.
  • They also need to understand that when a shoe is called Terrex, that means it’s a trail shoe and not an updated road shoe… The shoes need to be fit for purpose.
  • The ankle collar, for some, will be an issue.
  • The tongue needs more padding.
  • The footprint is woefully too narrow in the middle and the rear. Again, they are a stability nightmare, nowhere near as bad as the Terrex Agravic Speed Ultra, but it’s not great.
  • The outsole, again, is not aggressive enough. It’s like adidas want to make a road shoe that can just about go off-road, remain fast, but forget any technical and challenging terrain. I consider a 4mm lug a minimum, and this shoe would benefit from 5/ 6mm. But having said that, adidas would need to address the stability issues too.
©iancorless

Ultimately, the Terrex Agravic Speed is a good looking shoe that is ideal for faster trail running on slick or groomed trails. I have used this far more than its bigger brother as they are much more of an ‘all-rounder!’

The potential of the shoe is limited. It’s woefully unstable on technical trail, the outsole is not aggressive enough for anything other than slick trail and there are foothold issues.

So, this is a road to trail shoe, or a trail to road shoe. It’s the type of shoe that is ideal for someone who has loads of road experience and is venturing onto trail for the first time. But don’t get me wrong, there is a nice bounce, feel and propulsion to these shoes.

But, there are a great deal of shoes out there now that are a better option than the Terrex Agravic Speed. The Terrex Agravic Speed Ultra can come highly recommended as it is a super shoe that for the right person, they will reap the rewards that this shoe can offer. Here, the Terrex Agravic Speed is just another shoe with nothing unique or special to bring to the trail market. My advice would be take a look at the VJ MAXx2, this brings something special.

©iancorless

Follow on:

Instagram – @iancorlessphotography

Twitter – @talkultra

facebook.com/iancorlessphotography

Web – www.iancorless.com

Web – www.iancorlessphotography.com

Image sales –www.iancorless.photoshelter.com

adidas Terrex Agravic Speed Ultra Review

©iancorless

The adidas Terrex Agravic Speed Ultra shoe was one of the most anticipated trail shoe releases of 2024. Let’s be honest, this shoe was a long time coming…. We had seen early versions of the shoe on the podiums of Transgrancanaria, MIUT, Transvulcania, Western States, UTMB and more. There was a soft launch of the shoe at UTMB 2023 that only whet the appetite of runner’s even more, however, it was the spring of 2024 before the shoe became commercially available.

adidas did a great job of building the anticipation and it is fair to say, that until the release of this new shoe, adidas were not really considered a contender in the trail market. This new incarnation most definitely changed things and I have seen the shoes on countless runner’s feet, in countless races, all over the world in 2024.

I have been testing the Terrex Agravic Speed Ultra shoes for a year. I picked up my first pair in August 2023 and I have been through two pairs in the last twelve months.

The previous ‘Speed Ultra’ shoe is my personal favourite adidas shoe, it was developed with the input of Tom Evans and was the shoe the helped Tom place third at his first Western States. This new incarnation has nothing to do with the one that has gone before, the only connection, sadly, is the use of the Speed Ultra name. So, if you liked the first shoe, there is no guarantee you will like this new one! They are like chalk and cheese.

Serious cushioning and rocker ©iancorless

A whopping 42mm of cushioning at the rear, 34mm at the front gives an 8mm drop. The shoe has Energy Rods and an extremely curved rocker. The outsole is Continental rubber with 2.5/ 3mm lugs. The cushioning is Lightstrike Pro. The upper is extremely light and breathable with overlays for durability and a gusseted tongue provides foot hold and support. Sizing is hit and miss, so, I recommend trying this shoe on before purchasing to ascertain what size is correct for you.

The shoe has the ‘Terrex’ branding, which means trail running, but it feels like an adapted road shoe, if you are familiar with the Adizero range, there are similarities.

The shoe is promoted as ‘Our fastest trail running shoe yet.’ And in all honesty, it’s hard to argue with this based on the results of the adidas Terrex team in the last two to three years, and just recently, once again, we saw this shoe on the podium of Transvulcania, OCC and the CCC.

But is this shoe for you?

I must be honest here, it is definitely NOT for me. I have tested and tried to adapt wanting to really like this shoe, but I just don’t get on with it. It’s light, it has an incredible propulsion phase and it’s very fast. But…

If you go on any trail with just minor technicality, the shoe is horrendously unstable. Quite simply, it’s too high and the outsole footprint is not wide enough, especially in the middle and rear. This causes the shoe to twist left and right; they are an ankle injury waiting to happen.

The rocker is so pronounced, that walking is unpleasant. Of course, it is maybe fair to say, this is not a shoe to be walking in! But any shoe that has the ultra-tag in it’s name, will almost certainly mean that walking will be required at some point, maybe with the exception of the top athletes, for example, the adidas Terrex team!

So, is this shoe for you?

The answer is yes! If you are fast, have great running form (forefoot striking) and are training or racing on fast, single-track trails with little or no technicality. Go buy them.

However, if you are an average trail runner like me, looking for a comfortable and durable shoe that will see you through many training days or ultra races, with and without technicality, then no. This is not a shoe for you!

Just as the Nike Alphafly for road running will not make me Kipchoge, the Terrex Agravic Speed Ultra will not make me Tom Evans. The shoe may well be state of the art and fast, but they need a fast athlete inside the shoe, otherwise, they are actually more of a liability.

IN USE

This is a premium trail shoe from adidas, years of development and with a string of results from the Terrex team that makes you desire to rush out, get your own pair and run like Ruth Croft or Tom Evans and set PR’s, CR’s and top the podium of the races that you enter.

No matter how good the shoe, 99.9% of us just don’t have the Ruth or Tom natural ability to bring the best out of a super shoe like this.

Peba energy rods visible in the midsole ©iancorless

This is a fast shoe, four pronged Peba Energy Rods are encapsulated between a Lightstrike Pro midsole. An extreme rocker and 42/34mm cushioning make this a beast to be unleashed. It’s a Ferrari for trail running on non-technical trail.

It is bold in looks, so much so, even the three stripes are subtle with TERREX in striking in white. There is no mention of adidas!

When you put the shoe on, you immediately feel the height and sadly, you also feel the instability. I am going to scream this again and again, the ‘footprint’ is not wide enough for the stack height of the shoe.

©iancorless

The foot hold from the gusseted tongue is very good and the sawtooth laces work well. However, the tongue lacks padding and when the laces are tied tight, there is pressure on the navicular bone. The heel cup is minimal but holds well. The toe box is wide and expansive which only makes the middle and the rear of the shoe feel very narrow. The rocker is immediately noticeable, you rock while standing still. If you are NOT a forefoot runner, forget this shoe. If you are a heel striker, you may as well leave this review now!

  1. Seamless overlays
  2. Lightstrike Pro
  3. Energy rods
  4. Dynamic rocker
  5. Continental outsole
©iancorless

The combination of rocker, rods, cushioning and amazing propulsive phase make this shoe fly. As soon as you build cadence, the shoes start to propel you forward asking you to go faster and faster. I quite simply cannot keep up with the shoe. This is a positive if you have the fitness, speed and run form to do this.

©iancorless

Uphill and climbing, the shoes work exceptionally well. Downhill not so. The instability really comes to the fore and they just feel scary and unstable.

The shoes zip along and are nimble, lightweight and quick on slick trails, gravel roads and single-track.

Too narrow in the middle and rear result in instability ©iancorless

Encounter rocks, tree routes, uneven terrain and the ride becomes worryingly unstable with constant twisting and rocking. They are not good on anything technical. The Energy Rods work like fingers, so much better than a single plate (also seen in Hoka Tecton X2 and the new X3) as it allows more adaptability and flexibility on trail, but here it doesn’t work due to the stack height and narrow footprint.

Minimal lugs ©iancorless

Continental rubber for the outsole is good with excellent grip, however, with 2.5/3mm lugs, this is only ‘just’ a trail shoe. But I guess that is the point! This shoe is meant to be fast for a Western States type of course where ‘grip’ is not really required. They are not for tough, technical and challenging mountain terrain.

Forefoot running required for this shoe ©iancorless

Ultimately, don’t be fooled by the performances of the adidas Terrex team, they are superb athletes with the speed, great run form and ability to really make the Terrex Agravic Speed Ultra shine. If you are running slower, trying to walk or just out for an easy run, these shoes are clunky and awkward.

The shoe also requires adaptation. Early runs will work muscles in a different way, particularly calf and glutes. If you get these shoes, adapt over time and distance adding a day off with another shoe between runs until you feel adapted.

CONCLUSION

©iancorless

I this a bad shoe? Absolutely not, it is state of the art and the results of the adIdas Terrex team endorse that. A fast shoe for slick trail and on the right feet a real joy.

Sadly though, most of us are not fast, don’t have great run form and this shoe will not only be a waste of money, but ultimately may well result in in a worse performance and maybe injury, especially if trying to run on technical terrain.

The Terrex Agravic Speed Ultra is quite simply not for me!

Terrex Agravic Speed ©iancorless
©iancorless

However, should you wish to pursue an adidas shoe, the Terrex Agravic Speed (review to follow) with 34mm/ 26mm cushioning and no Energy Rods may well be a better consideration. I have used this shoe considerably more than the big brother Terrex Agravic Speed Ultra with better sensations and run feel. Sadly though, despite the reduced stack height, it is still worryingly unstable on technical ground.

Hoka Tecton X3 ©iancorless
©iancorless

Finally, if a super shoe is what you require, the Hoka Tecton X3 is a revelation. Hoka understand that if you increase stack height, you must also increase the platform on which this increased height sits. The Tecton X3 has a superbly wide base at front, middle and especially the rear with a great Vibram outsole. In addition, the two parallel carbon rods have now been developed with ‘wings’ that come up the sides of the shoe providing a considerably more stable platform. This is how a cushioned, plated super shoe should feel. Yes, it’s a super light and responsive shoe and while the adidas requires a top athlete and great running form to bring out the best of the shoe, the Hoka does not. The Hoka is superb when running fast but equally at home when running slower or walking. A full review HERE.

Follow on:

Instagram – @iancorlessphotography

Twitter – @talkultra

facebook.com/iancorlessphotography

Web – www.iancorless.com

Web – www.iancorlessphotography.com

Image sales –www.iancorless.photoshelter.com

Home of the Giants 2024 Summary

The view from Kyrkja

Home of the Giants 2024 has just come to a conclusion. And what a week it has been.

This trip came about through personal adventure in the Jotunheimen mountains of Norway and the desire to share and showcase this magical playground.

Baz at the summit of Kyrkja

What is Home of the Giants?

A multi-day adventure, 6-days in total, through a magical and challenging landscape. Unlike a race, this journey was created as a finely balanced exclusive trip for up to just 12 participants. A challenge at a more relaxed pace, taking in an amazing route whilst moving light in a semi self-sufficient mode using DNT cabins for overnight accommodation.

Lake Bygdin

Based around the concept of stage races, Home of the Giants is about moving lighter and therefore faster with a minimum amount of equipment without compromising safety. All we needed could be carried in a small pack weighing approximately 3kg (plus liquid).

It is important to emphasize that Norway can have spring, summer and winter in one day. Never underestimate the challenge of the environment. It is all well and good being light IF you can move fast. You also need to consider the ‘what if’ scenario and should you become slow or a worst case scenario, injured and waiting help/ rescue. At a minimum you MUST have merino top and bottom, warm insulating layer (down or PrimaLoft) waterproof jacket and pants, hat, gloves and a bivy bag. I also strongly recommend a product such as Garmin InReach. Much of Jotunheimen has no phone connection, an InReach with emergency SOS button, for me, should be mandatory.

You can see an example of my pack below and the details are as follows:

  • Camelbak Octane Pack 600g
  • adidas hat 32g
  • adidas gloves Infinitum 52g
  • Hestra waterproof gloves 53g
  • adidas gloves 41g
  • Devold merino base top 193g
  • Devold merino base bottom 166g
  • Buff 43g
  • Haglofs down jacket 163g
  • adidas waterproof pant 125g
  • adidas Gore-Tex jacket 272g
  • Rab bivvy bag 110g
  • Underwear 98g
  • Gels 81g (for emergency)
  • Silk liner 126g
  • Blindfold/ earplugs 22g
  • Earphones 44g
  • Ricoh GRIII camera 251g (a luxury)
  • Sunglasses 18g
  • Bottles x2 90g
  • Katadyn water filter 52g
  • Toiletries 196g
  • Power supply 138g
  • Phone 136g
  • Garmin InReach 108g
  • Leki poles 250g

3379g 

Staying at DNT staffed cabins provides the best of both worlds, they provide a bed for the night, dinner, breakfast, a packed lunch and they have additional facilities such as relaxation areas, showers and a bar. It’s the ultimate way to travel light in the mountains. Beds are in dorms or private rooms that depending on the cabin can be solo, double, triple, quadruple or five plus. Most DNT’s have a rule that irrespective of if you arrive and there are no beds, you will not be turned away, so, rest assured, a safe haven is always available.

OUR JOURNEY

Day 1 – Oslo to Bygdin

We departed Oslo bus terminal at 0830 Monday for a direct trip to Bygdin Fjellhotel. The journey taking 4-hours with a 15-minute break ideal for a midday arrival. The weather was grim with torrential rain for most of the way. It was an ominous start and constant glancing at weather apps confirmed that our week ahead would have mixed weather. It’s Norway after all!

Synshorn summit

Arrival at Bygdin was seamless and after a break at 1500 we departed in the rain to take in the summit of Synshorn (1464m) which is a great introduction to Norwegian mountain terrain. The plan was initially to just summit and return, a 75-minute journey at a steady pace. However, the weather, although still wet, was not cold and after long travel, we all decided to continue for a back-up and planned 12km route. We followed the ridge north to Heimre Fagerdalshøe (1510 m above sea level) with a great view over Bygdin to Falketind. We then continued in the direction of Synsbekk and connected to the ’T’ marked trail that would bring us back to Bygdisheim and the lake for a short gravel road section back to the hotel.

Day 1 loop

It was a great intro to the week and then we could enjoy the benefits of Bygdin Fjellhotel – a warm shower, sauna and a lovely traditional Norwegian dinner.

Day 2 – Bygdin – Eisbugarden – Skogadalbøen

M/B Bitihorn

It was a casual start to the day with a hearty breakfast and then meeting the M/B Bitihorn boat at 0900 for a transfer the length of Bygdin lake (stopping at Torfinnsbu) and then continuing to Eidsbugarden.

Lake Gjende
Torfinsbu self-service DNT

By 1100 we were ready for our first full day, Eidsbugarden to the remote Skogadalbøen DNT cabin. The route is considered very demanding due to the nature of the terrain. It’s very important when looking at routes in Norway that you never focus too much on the distance but more the time it will take to cover the distance. Depending on the time of year, this route can have a great deal of snow, so, be careful and do research in advance. For us, we had several snow fields to cross and all were in good condition.

Eisbugarden to Skogadalbøen
DNT mark the routes with red Ts

Our weather was glorious, blue skies, white fluffy clouds and amazing views.

Plenty of water crossings

A short road section and a right turn and we were already climbing through saturated and boggy ground to Sløtafjellet. Then the rocks and boulders started.

Beautiful but hard terrain

This route has a ‘reputation’ for the rocky terrain and hence the difficulty rating. It’s hard to move fast! The route climbs up passing lakes and at all times you are surrounded by stunning snow-covered peaks – magical.

sign posts help keep you on track

Arriving at Kvitevatnet lake you keep to the left and at the end climb up towards Uradalsvatnet lake, againkeepin to the left.

Lakes, rocks, snow and mountains. Perfect!

Passing through Uradalen the route eventually reaches its high point and then the descent starts through more ‘runnable’ terrain towards Skogadalsbøen.

The terrain became ‘easier’ towards the end of the day.
And more vegetation.

Of course, there is a kick in the tail with more rocks and very closed in and dense single-track with lots of mud. We covered 24.5km, 670m+ in 4h 55m. Geoff and Baz were pretty tired at the end, and I think it’s fair to say that Baz had seen and experienced enough rocks and boulders to last a lifetime. My reply was always, 1this is Norway, this is Jotunheimen!’

A nice sight after a long day

My girlfriend, Abelone, had initially planned to join Home of the Giants. Our intention, two groups of 4/5-people. However, in the buildup to the event we had 6-people cancel – not ideal. These cancellations caused many logistical problems and of course, there was never any risk of cancelling, but it did mean that Abelone was not needed to guide a group. However, she was on holiday with her son Håkon (10) and after summiting Fannaråki they joined us at Skogadalbøen DNT.

As usual, we had an amazing three course dinner, a lovely evening of banter and then a good night’s sleep.

Day 3 – Skogadalbøen to Leirvassbu

Day 3 with a moody start.
Skogadalbøen to Leirvassbu

Skogadalbøen to Leirvassbu is in comparison to the previous day, an easy route. Even though UT.NO describe it as a ‘very demanding summer route.’ Håkon had decided he enjoyed the group dynamic so much he wanted to also do the 19km route. He and Abelone got underway and some 30-minutes later we started.

Passing them early in the trail we had a group photo and pushed on. Today was a running day, albeit steady and relaxed. Geoff and Baz had big smiles; I think they almost considered it a rest day after what had been experienced the day before.

Green valleys surrounded by mountains

The ground constantly wet and boggy, the weather was overcast and cloudy with occasional light drizzle.

Many water crossings

Passing through Storutladlen and onwards to Gravdalen it was a great feeling day. The views and landscape ever changing. After passing Gravdalsdammen, we soon joined an undulating gravel road that took us to Leirvassbu DNT.

Leirvassbu DNT

On the approach, Kyrkja (2032m) was to our right, shrouded in mist and clag. Today was not the day to attempt the summit. After 19.68km, 811m of vert we finished in 3h 34m. Abelone and Håkon arrived a couple of hours later, Håkon sprinting ahead with a smile. What a joy to see. Geoff and Baz were blown away by Håkon’s speed, enthusiasm and commitment. 

Entertainment by Håkon

Early finish and we could then rest, relax, enjoy the Leirvassbu DNT and prepare for the following day. Leirvassbu DNT is a large and modern cabin with no dorms, a large bar area and an excellent restaurant. A stunning location surrounded by mountains, a great place for staying more than one night as there is lots to explore. It has road access, so, it can be accessed by private car or bus, worth knowing just in case you need a contingency escape option.

DNT dinner always a highlight

The weather forecast for the following was good and it was therefore decided we would summit Kyrkja first and then continue to Gjendebu. Abelone and Håkon would miss the summit go straight to Gjendebu and therefore miss out on the 2 to 3h detour.

Day 4 – Leirvassbu to Gjendebu via Kyrkja

Kyrkja

The weather gods did not disappoint. It was a stunning day and a perfect morning to climb Kyrkja.

Leirvassbu to Gjendebu via Kyrkja
The early slopes to Kyrkja, Leirvassbu on the right

Abelone and Håkon left just before us they made their way to Gjendebu, we soon caught them, passed and then we started the climb to the summit. The early slopes mix trail, rock and snow crossing with boulders everywhere.

And up we go

Once at the base of Kyrkja, the climb really starts and it’s a hands-on scramble to the summit. Cairns are placed regularly and at times the route is obvious. Other times, the route is vaguer.

Good hand and feet placement important.

There are several sections with more exposure when sound had-holds, and secure foot-placing is essential. It’s not a difficult scramble but as with all these things, going at a calm and steady pace reaps rewards.

Slow and steady

Geoff certainly felt pushed here. He is not too happy at heights, but he pushed on, listened to to best route options and before he knew it, he was with Baz at the summit.

Job done!

The 360 views here are quite magnificent. What goes up must come down and depending on your ability, head for heights and skill level, the downward route can be harder than the climb.

Coming down easier than going up?

All three of us were soon at the bottom and re-tracing back on the trail to Leirvassbu and then at Høgvaglen we turned left and started to follow the red Ts on the route to Gjendebu.

Øvre Høgvagltjønnen

The route now is more runnable mixing rocky terrain, water crossing, fjell, single-track and of course mud.

Passing three key lakes, Øvre Høgvagltjønnen, Nedre Høgvagltjønnen and Langvatnet we were soon descending next to Hellerfossen waterfall and then passing through Storåddalen.

Make sure you follow the correct Ts

The trails now were saturated and muddy and considerably greener than what we had experienced earlier in the day. There was also plenty of cows.

You never have dry feet!

Before we knew it, we were running into Gjendebu after a stunning day of 25.69km, 741m of vert and 4h 42m on the clock. Baz and Geoff jumped in the lake, I got the beer in.

Day done.

Sitting in the sun, I wondered where Abelone and Håkon where? I had absolutely expected them to be here before us BUT there had been a chance that we may, have caught them in the last km or so… Apparently, Håkon was on a mission to beat us, and he ran the final 3km! What an effort by him, incredible. We had expected them to take 6-hours, and they had taken 5, bravo!

Gjendebu is a wonderful DNT and the oldest. It’s wonderfully traditional and recently refurbished. Comfort level is high, service superb and food excellent.

Day 5 – Gjendebu to Gjendesheim via Bukkelægret, Memurubu and Besseggen

The view from the iconic Besseggen Ridge

Leg 1 Gjendebu to Memurubu

Gjendebu to Gjendesheim

I took no photos for this day, the weather was too bad, so, enjoy the image above of a considerably better day with Abelone.

Our longest day ahead and the weather forecast was rain all day. We were committed with our route BUT as always, sense and forward thinking was key. Our route was a two-day route, Gjendebu to Memurubu one day and then Memurubu to Gjendesheim day two. To do the whole lot in one day does require a fast and light approach.

The first leg is 11km and at Memurubu we had the option to pick up the boat to our finish, should conditions deteriorate.

The early km’s follow a single-track rocky and muddy trail next to Gjende lake. After 4km you turn left and then steeply climb. This section, Bukkelægret, is renowned as being difficult, especially in bad weather due to the gradient, slippery rock and the multiple chain sections. UT.NO say, ‘Chains and railings in exposed places. NB: Do not go outside the marked path! It is the only possible decrease. It is better to walk in the opposite direction if you are afraid of heights or choose the longer route around Storådalen.’

The route up was fine and although the rain was constant, we were all warm and enjoying the climb.

Once at the top I made a silly navigation error. I turned right following a trail that leads towards Kjuklingen. Within less than a km I knew I was wrong. I stopped, took a moment and then Baz, Geoff and I backtracked. While running I looked to the right and could see the trail up the other side of the mountain and eventually, we picked back up the red T’s and we were back on track. A frustrating mistake but these things happen!

Travelling northeast into Lågtunga, between Grunnevatnet and Sjugurdtinntjønne and down over Sjugurdtinden. We had a stunning moment when we were confronted by a large male Reindeer. We dropped to a walk and approached slowly. At the time I expressed how unusual it was to see one alone. But, as we crested the summit, a herd of maybe 20-30 reindeer were visible, what a sight!

The final descent to Memurubu is steep, rocky and slippery – care is needed, especially in torrential rain.

At Memurubu we entered the cabin and took an ‘aid station’ break of warm coffee and buns. I changed base-layer to a dry merino top and prepared for the next section.

We had had rain all day so far, but it had been pleasant in type 2 kind of way. Baz and Geoff decided to wear tights, I stayed in shorts. The option to pull out and take the ferry was not really an option, we were committed to the task.

Leg 2 Memurubu to Gjendesheim

The climb out of Gjendebu is steep and I soon removed my jacket, there was a hint of better weather coming and I loudly said, ‘it is clearing up!’ Famous last words…

The jacket soon came back on, and the rain increased. I was now on my second set of gloves, good old Raynauds in the hands brutal in bad weather.

This route is one of the most popular in Norway. Many take the early boat to Memurubu from Gjendesheim and then return via Besseggen, an average time taking 7-hours. On a good day there are many, many people. Today, hardly anyone.

The terrain is hilly and rocky as we headed to the foot of Besshøe and then on to Bjørnbøltjønne, the highest point on the route before heading down to the southern end of Bessvatnet.

Now we were at Besseggen, the steep climb ahead of us and Geoff loudly saying, ‘Are we going up there…!’

I reassured him it was not as bad as it looked. However, the steep rock face has an extra challenge in the rain. We stared the climb and soon came across a group of teenagers frozen on the mountain unable to proceed. They were questioning the decision to come this way, and they asked Geoff what time the last boat was at Memurubu! Unfortunately, they would not make the last boat if they backtracked, however, the cabin would look after them.

Ahead I heard screaming and crying. It got louder as I climbed only to find a mother trying to climb with a young girl who was beyond terrified. I offered help but it was refused. ‘We will be fine; she is just very anxious and scared.’ No shit I thought to myself. As I climbed up, I saw her husband and another child. They had back-up help but I stopped multiple times to make sure that I was not leaving a potentially disastrous situation.

Geoff and Baz were making good headway, every 5 to 10m I would stop and make sure their line was good.

The 350 meter climb up to the top cairn on Veslfjellet 1743m soon passed and now the weather was wild.

Wind was raging in from the right, the rain was torrential and the visibility poor.

We regrouped and I clearly expressed that we NEEDED to move. It was no stopping and all running now down the, at times, steep and rocky descent to Gjendesheim.

This was without doubt the hardest hour of the whole week and clearly demonstrated how Norway, as beautiful as it is, can turn wild and violent.

Soon we were on the final stone steps that lead to the DNT and lake Gjende.

We were absolutely soaked and exhilarated with the day. It was true Norwegian mountain day, and we had completed the whole 26.1km with 1800m vertical in 6h 30m on what was a very tough and slow day.

All three of showered for a good 15-minutes. A cold beer followed quickly and before we knew it, we had another wonderful 3-course meal with Reindeer as the main course.

The evening was chilled and relaxed. We had a short concert of traditional music, and we discussed the completed adventure.

My offer for a following morning run was very quickly turned down.

A good sleep and the following day we departed at 1400 for a direct bus to Oslo and onward travel.

What a stunning week!

Thoughts and Summary

He got the T shirt 🙂

For me, there is no better way to travel through the mountains of Norway than by cabin-to-cabin. What the DNT offer is a five-star service and it really is a privilege to have this available. A shower, a bed, hot meals and a drying room for apparel and shoes is stunning.

Few people travel fast and light, they prefer to move at a slower pace with loads of equipment and take long stops and plenty of sight-seeing.

However, fast and light allows for a faster pace, the option to cover more distance and ultimately, more relaxation times in the cabins.

You do need to be experienced and prepared to move in this way.

Magical

In sunny and beautiful weather, fast and light is easy. In bad weather you need to be prepared, constantly making judgement calls and adjusting speed so as to ensure you are safe. Our final day a prime example.

We were well prepared and all three of us had the right and correct equipment for the planned adventure. The option to change a base layer at Memurubu for me was spot on, as was the decision for Baz and Geoff to move out of shorts and into tights. Despite the torrential rain, wind and colder temperatures, all three of us still had emergency layers of insulated jacket, waterproof pants and a bivvy bag available in our packs.

We all brought poles and on day 1 we used them a great deal, less so after. Geoff broke a pole on day 1 which was frustrating. However, when finished, Geoff said he would not bring poles next time. I understand his thought process, but, the additional weight of just over 200g is an excellent security blanket if moving slower or picking up an injury. Just learn how to use pols before.

The full route

Due to the nature of the DNT layout, sometimes we were not in the main building, and we all wished we had brought some very light flip-flops. I am now searching the internet for the lightest and most practical.

Good shoes are essential and normally I would never say YOU MUST get these shoes, but VJ Sport shoes and the amazing Butyl outsole are the only run shoes that can be relied on for Norwegian rock, especially when wet. Geoff and I wore VJ, me in the MAXx2 and Geoff in the Ultra. Gaz wore Altra and he had no grip – it compromised his enjoyment.

Norwegians have a saying, there is no bad weather, just bad equipment. It’s very true. We had mixed weather for our trip and in all honesty, it made the trip better. I never took my camera out on the last day as the weather was so bad, but I absolutely loved the challenge of making that route in bad conditions. Just a shame Geoff and Baz did not get to see those iconic Besseggen views down the lake and the surrounding area.

Finally, if you are interested in joining us in July 2025 for a similar journey, please get in touch. We will have 8-places available.

Jotunheimen, one of the best places in the world.

Follow on:

Instagram – @iancorlessphotography

Twitter – @talkultra

facebook.com/iancorlessphotography

Web – www.iancorless.com

Web – www.iancorlessphotography.com

Image sales –www.iancorless.photoshelter.com

VJ SPORT MAXx2 SHOE REVIEW

A new VJ Sport shoe is always something to get excited about. Earlier this year I received two new shoes, a double whammy from VJ.

The MAXx2 and the Lightspeed are two new departures for the brand and I have to say, these are two very exciting developments.

VJ Ace ©iancorless

In 2023, I received the VJ Sarva Ace – a winter studded shoe. This shoe was a revelation based on a much wider toe box and incredible ‘new’ cushioning. Review HERE. At the time, I fed back to VJ that without the spikes this would make a great new ULTRA shoe in the VJ line-up.

Well, the MAXx2 and Lightspeed take this cushioning and what we have are two performance shoes that need to be worn to be believed.

Today, we look at the MAXx2.

THE SHOE

If you read my shoe reviews, you will know I am a huge VJ Sport fan. To me, they have not made a bad shoe and gladly, they are not always tweaking or re-inventing shoes. The original MAXx I have used for many years and in all honesty, it has been my go-to mountain running shoe. The combination of foot hold from Fitlock and the amazing outsole make them unbeatable when grip and control is priority. The only downside to the MAXx was the lack of cushioning for longer runs. With 12mm cushioning at the front, 18mm at the rear and 4mm studs, they are a great shoe for up to 50km in rocky, muddy and mountainous terrain.

The MAXx2 takes all that was great in the MAXx and brings some key changes and features:

  • 25mm and 31mm cushioning
  • SuperFOAMance midsole
  • Rock plate

These new features elevate this shoe to a new beast and it has now become my favourite trail shoe. They are quite simply, superb!

The upper is seamless, breathable and durable. The outsole, for those that know VJ still offers the best grip on the planet with 4mm Butyl rubber studs – no other shoe brand has an outsole that can compete with VJ. The unique FITLOCK gives superb foot hold which guarantees security and precision on technical and demanding terrain.

I could conclude here and say this is is the best mountain/ off-road shoe available on the market.

IN USE

This is a versatile shoe and where the previous MAXx had some limitations in regard to distance and time on feet, the MAXx2 dispels that and for me, this is now an all day mountain/ off-road shoe with supreme comfort. 

The revelation is the new SuperFOAMance midsole (25/31mm) which I knew was superb the moment I tried the winter Ace shoe. The original MAXx had Poron cushion integrated into the heel and forefoot midsole, the new SuperFOAMance is a huge improvement. It manages to give everything that I need and want in a shoe, especially when running on more technical trails. I have great ground feel, great flexibility, precision and there is a delicate balance with torsional rigidity and comfort. The rock-late balances enough protection without adding weight or restricting flexibility. The propulsive phase is superb. And a drop of 6mm is a perfect sweet spot between 4mm and 8mm.

The toe box has been given more space, a ‘4’ on the VJ scale. The balance of a wider toe box and still a precious feel is a delicate balance, but VJ have done it. There is extra room and more toe splay without a sloppy feel.

The upper is not as breathable as other brands and there is a simple reason for this. This shoe is designed for use in harsh environments and VJ know only too well, if you make an upper too minimal it just won’t last. This upper is one piece, so, there is no stitching to cause abrasion – a winner. There is a TPU bumper that goes around the bottom of the upper providing extra protection and durability. FITLOCK has always been a winner and here, once again, this is a key feature of the shoe providing the ultimate foot hold. There is also extra eyelets so you can lock-lace if required.

The outsole is superb, as with all VJ shoes. Here 4mm lugs make this shoe a perfect all-rounder for drier/ non-technical trails and more demanding mountain trails that will have mud, rock and more importantly, wet rocks. No other shoe grips like VJ. The outsole is classic chevron in design with grip the full-length of the shoe. There is nothing more to say, best outsole there is!

The shoe sizes a little large, so, be careful when purchasing. With a wider fit at the front, you may wish to size down. I am typically a UK10 and I have a UK9.5 which weighs 263g.

CONCLUSION

This is VJ’s best shoe and one that is a perfect one-stop solution. The MAXx2 is an all-rounder and typically that would mean that it does all things ok, but no one thing well. Not so here, the combination of elements – cushioning, rock-plate, outsole, Fitlock, fit and comfort make this a superb one-stop trail shoe that excels for all day comfort.

VJ have always had a reputation for making shoes that are very specific, think of the iRock with 6mm lugs and less cushioning designed for grip in soft-ground, or the XTRM2 which has 6mm lugs and more cushioning. Here in the MAXx2 we have a middle ground that should you only ever own one pair of VJ’s, the MAXx2 should be the one to buy.

VJ Sport LINK

Follow on:

Instagram – @iancorlessphotography

Twitter – @talkultra

facebook.com/iancorlessphotography

Web – www.iancorless.com

Web – www.iancorlessphotography.com

Image sales –www.iancorless.photoshelter.com