Everest Trail Race #ETR2014 – Travel to Jiri

©iancorless.com_Nepal2014-8376

Departing in five 16-seater mini buses, participants of the Everest Trail Race made the long, twisty and at times stressful journey from Kathmandu to Jiri for the start of the 2014 edition. It’s a rollercoaster journey up single -rack roads, a frenetic and constant beeping of horns and a multitude of bends that would leave the most hardened rollercoaster freak with a turning tummy.

Our lunch stop at Karidunga was a welcome break from the journey. While runners found a space and enjoyed the view of the Himalayas, off into the distance I walked looking for some local colour. You never have to go far, Ladies working in fields, men weaving basket wear and children playing; all have wonderful smiles.

They seem to embrace tourists and actually seem to enjoy the process of having a photo taken. Off course it’s all the more appealing if they receive a ‘token’ for their efforts…

Weathered faces show the lines from years of toil from harvesting crops. Children have round faces, wonderful colour and piercing eyes and a cheeky smile. In all honesty, I could photograph these people all day. They fascinate me.

Back on the buss the toing and froing continued and finally our arrival at Jiri came. We had been on the road 8-hours and the glow of our yellow TNF tents glowing as the day began to loose its light was more than a welcome sight.

Water collection, tent allocation and final preparations underway for tomorrows race day. A mug of hot tea warms as the departing of the sun takes the heat away and the temperature slowly drops… little by little venturing to zero and then suddenly it drops below. ‘Don’t worry’ Pasang Sherpa says, ‘it will only be -3 tonight.’


Day 1 commences at 0900 Thursday 13th November.

ETR Stg1

Jiri (1850m) to Bhandar (2050m) – 21.5km 3795m+

The stage has two summits, one at 2400m and the high point of the day at Deurali Pass 2700m before descending to the finish at Bhandar.

Day 2 Preview:

ETR Stg2

ETR Stg2 Profile


Lion King aims for the Sky – AJ Calitz

Image ©redbull

Image ©redbull

 AJ Calitz lines up for the high-intensity Red Bull LionHeart event and just one week later will toe the line at the ultra-distance Salomon SkyRun.The two races will require a particular change in gears particularly as Calitz is attempting to stand on the podium at both events. 

Two years ago Calitz set the pace at the inaugural Red Bull LionHeart, a 4, 4-kilometre duel from the base of Cape Town’s Lion’s Head peak to the top and back down again. Rather than a mass start, the race pits runners against each other in a head-to-head duel. Contenders run again and again, knocking out rivals on their climb up the ranks. Last year Calitz defended his title and beat Thabang Madiba by a mere 11 seconds to claim his second LionHeart title – and setting a new course record (26:46) at the same time.

Calitz has been training on Lion’s Head in preparation for this year’s event, which takes place on Saturday 15 November. When asked how he aims to pull back more seconds from his previous record runs, Calitz replies, “It is always possible to go faster; I am a lot faster on the downs this year”. 

He finds the stretch of jeep track to be the hardest section of the course. “Coming down from the top is quite a rush!” he adds.

Calitz is back for the third time. Aside from defending his crown, he is attracted to the race because of its man-on-man heat setup. “Whoever is prepared to hurt the most will win,” he says.

AJ Calitz at Zegama-Aizkorri

AJ Calitz at Zegama-Aizkorri

A week later Calitz transitions physically – and mentally – from the fast-paced action of LionHeart to the 100-kilometre mountain race, Salomon SkyRun. He has been out in the Witteberg mountains, familiarising himself with the route and the terrain.

“Yes, it helps a lot to be familiar with the course; route knowledge is 60% of the race at this event. To be fair, with racing at altitude and living at sea level I have to manage my expectations.”

Last year the race was cut short due to bad weather. Howling wind, torrential ice-rain and fog brought dangerous conditions to the mountains and Calitz, who was chasing race leader Iain Don-Wauchope, was nearly hypothermic and he withdrew from the race. He learned from this experience.

“Last year was rough,” he says of his first experience at SkyRun. “I learned that I should start slower because it is a long day out. Also, I have to focus on navigation, pacing and nutrition from the start.”

Links:

Red Bull LionHeart website (www.redbulllionheart.com).

The Salomon SkyRun (www.skyrun.co.za) starts before sunrise on Saturday, 22 November 2014 from the town of Lady Grey in the Eastern Cape.  The most up-to-date content during the race will appear on the event organiser’s Facebook page (Pure Adventures).

Everest Trail Race #ETR2014 – Kathmandu

©iancorless.com_Nepal2014-8112

An incredible day exploring the sights, sounds, colours and meeting the people of Kathmandu. What an incredible place.

Located at the top of a hill, our day started with a visit to Swayambhunath (affectionately known as the Monkey Temple).

Swayambhunath (Devanagari: स्वयम्भूनाथ स्तुप; sometimes romanized Swoyambhunath) is an ancient religious complex atop a hill in the Kathmandu Valley, west of Kathmandu city. The Tibetan name for the site means ‘Sublime Trees’ (Wylie:Phags.pa Shing.kun), for the many varieties of trees found on the hill. However, Shing.kun may be a corruption of the local Nepal Bhasa name for the complex, Singgu, meaning ‘self-sprung’. For the Buddhist Newars in whose mythological history and origin myth as well as day-to-day religious practice, Swayambhunath occupies a central position, it is probably the most sacred among Buddhist pilgrimage sites. For Tibetans and followers of Tibetan Buddhism, it is second only to Boudhanath.

The Swayambhunath complex consists of a stupa, a variety of shrines and temples, some dating back to the Licchavi period. A Tibetan monastery, museum and library are more recent additions. The stupa has Buddha’s eyes and eyebrows painted on. Between them, the number one (in Devanagari script) is painted in the fashion of a nose. There are also shops, restaurants and hostels. The site has two access points: a long stairway with 365 steps, leading directly to the main platform of the temple, which is from the top of the hill to the east; and a car road around the hill from the south leading to the southwest entrance. The first sight on reaching the top of the stairway is the Vajra. Tsultrim Allione describes the experience:

We were breathless and sweating as we stumbled up the last steep steps and practically fell upon the biggest vajra (thunder-bolt scepter) that I have ever seen. Behind this vajra was the vast, round, white dome of the stupa, like a full solid skirt, at the top of which were two giant Buddha eyes wisely looking out over the peaceful valley which was just beginning to come alive.[2]

Much of Swayambhunath’s iconography comes from the Vajrayana tradition of Newar Buddhism. However, the complex is also an important site for Buddhists of many schools, and is also revered by Hindus.

From Swayambhunath we took a short bus ride and then walked around the vibrant streets of Kathmandu. It’s a cacophany of noise mixed with people, cars and colour. The people are warm, welcoming, happy and friendly despite obvious poverty that is on display no matter where you look.

Kathmandu (Nepali: काठमाडौं [kɑʈʰmɑɳɖu]; Nepal Bhasa: येँ देय्‌) is the capital and largest municipality of Nepal. It is the only city of Nepal with the administrative status of Mahanagarpalika (Metropolitan City), as compared to Up-Mahanagarpalika (Sub-Metropolitan City) or Nagarpalika (Municipality). Kathmandu is the core of Nepal’s largest urban agglomeration located in the Kathmandu valley consisting of Lalitpur, Kirtipur, Madhyapur Thimi, Bhaktapur and a number of smaller communities. Kathmandu is also known informally as “KTM” or the “tri-city”. According to the 2011 census, Kathmandu has a population of close to 1 million people. The municipal area is 50.67 square kilometres (19.56 sq mi)  and has a population density of 3000per km² and 17000 per km square in city.

The city stands at an elevation of approximately 1,400 metres (4,600 ft) in the bowl-shaped Kathmandu Valley of central Nepal.[6] It is surrounded by four major mountains: Shivapuri, Phulchoki, Nagarjun, and Chandragiri. Kathmandu Valley is part of three districts (Kathmandu, Lalitpur, and Bhaktapur), has the highest population density in the country, and is home to about a twelfth of Nepal’s population.

Historically, the Kathmandu Valley and adjoining areas were known as Nepal Mandala. Until the 15th century, Bhaktapur was its capital when two other capitals, Kathmandu and Lalitpur, were established. During the Rana and Shah eras, British historians called the valley itself “Nepal Proper”. Today, Kathmandu is not only the capital of the Federal Democratic Republic of Nepal, but also the headquarters of the Bagmati Zone and the Central Development Region of Nepal.

Kathmandu is the gateway to tourism in Nepal. It is also the hub of the country’s economy. It has the most advanced infrastructure of any urban area in Nepal, and its economy is focused on tourism, which accounted for 3.8% of Nepal’s GDP in 1995–96. Tourism in Kathmandu declined thereafter during a period of political unrest, but since then has improved. In 2013, Kathmandu was ranked third among the top 10 travel destinations on the rise in the world by TripAdvisor, and ranked first in Asia.

The city has a rich history, spanning nearly 2000 years, as inferred from inscriptions found in the valley. Religious and cultural festivities form a major part of the lives of people residing in Kathmandu. Most of Kathmandu’s people follow Hinduism and many others follow Buddhism. There are people of other religious beliefs as well, giving Kathmandu a cosmopolitan culture. Nepali is the most commonly spoken language in the city. English is understood by Kathmandu’s educated residents. Content ©wikipedia

Tomorrow, Tuesday 12th is an early start as we all leave Kathmandu and head to Jiri for an overnight camp and then the race starts Wednesday.

Stage 1 – Preview

ETR Stg1

ETR Stg1 Profile

Km 0. Departure from campsite with initial direction 150o. Follow main pathway that crosses Bhandar. At the end of the village, cross the wooden covered bridge, turn left immediately and followmainpathwayparalleltotheriver (maintaineddescenttillKm3,7).

Km 1,04. Take footpath on the right and go down crossing several times the main pathway. Km 3,7 (1.523 m). Turn right crossing the bridge (maintained ascent till Km 9,8).

Km 9,8. Arrival to the pass that leads to the Golla village (Gompa). Take the footpath on the left that leads to the village exit and to the CP2.

Km 10 CP2 . Come out following the path on the right. Terrain combining flat sections and slight ups and downs till Km 12.

Km 12. Take the detour on the left and follow the marked path. Maintained climbing inside the forest till Km 13,5 where we reach a hill with flags. Follow marked pathway inside the forest.

Km 16,9 (3625 m.). Find a clearing and enter again the forest with direction 170o. Follow marked pathway.

Km17. Anewclearing. Initialdirection150otillenteragaintheforest.

Km17,5(3.772m.).Comeout oftheforest.Followmarkedpathandturnleftafterfewmeters to start climb to the Pike Peak (4.065 m). Follow marked path. We will identify the summit because of the prayer flags.

Km 19,5 CP3. Reach the Pike Peak summit. Go down the marked path till a Many Wall (3.989 m). Take marked path on the left. Go down along a technical zone. CAUTION!.

Km 21,5. (3.950 m). Clearing. Turn left and go on till pass with Mani Wall (3.500 m). Km 23,7 (3.783 m). Pass by a group of 3 chorten and follow pathway. Km26,5(3.265m).Turnleft crossingtheriver.Followmarks.Km 28. Taktur.

STAGE ARRIVAL.

KATHMANDU IMAGES:


CYCLING for RUNNERS – Article 4 Winter Cycling

Cycling for Runners HEADER2

If you are living in Europe we won’t need to tell you that winter has arrived. Temperatures are dropping, the days are shorter, road conditions are unpredictable at times and the urge to get out and do anything (particularly cycling) can be diminished.

Don’t be disheartened though. Remember we are using cycling as a way to enhance our running and at this stage we are very much using cycling as active recovery or a method of maintain fitness while injured.

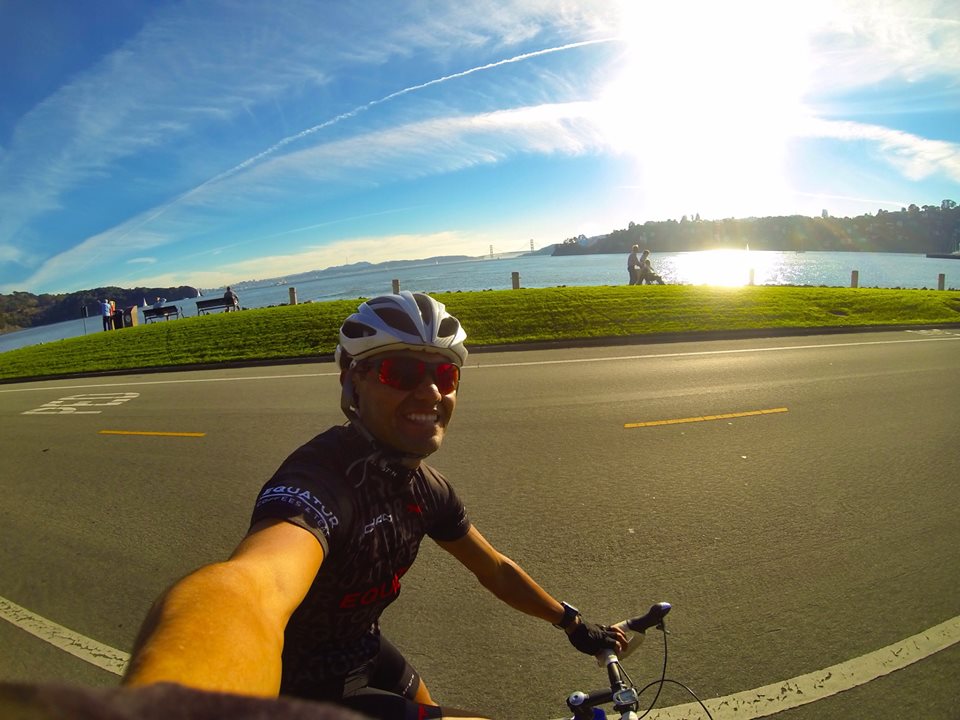
We all get injured at some point in our running. Salomon athlete, Jorge Maravilla posted this just the other day:

“I’m guilty of constantly thriving for the runners high, but lately my body has denied me. Despite an unwelcomed setback, today I found joy on two wheels.”

Jorge Maravilla

We keep saying this, but cycling is just great all around exercise. Jorge is lucky… he seems to have some nice weather in San Francisco. If we Europeans wish to continue cycling in winter we have two options:

  • Purchase some great all-weather clothing.
  • Go indoors.

Both options above are valid and we combine both in our training.

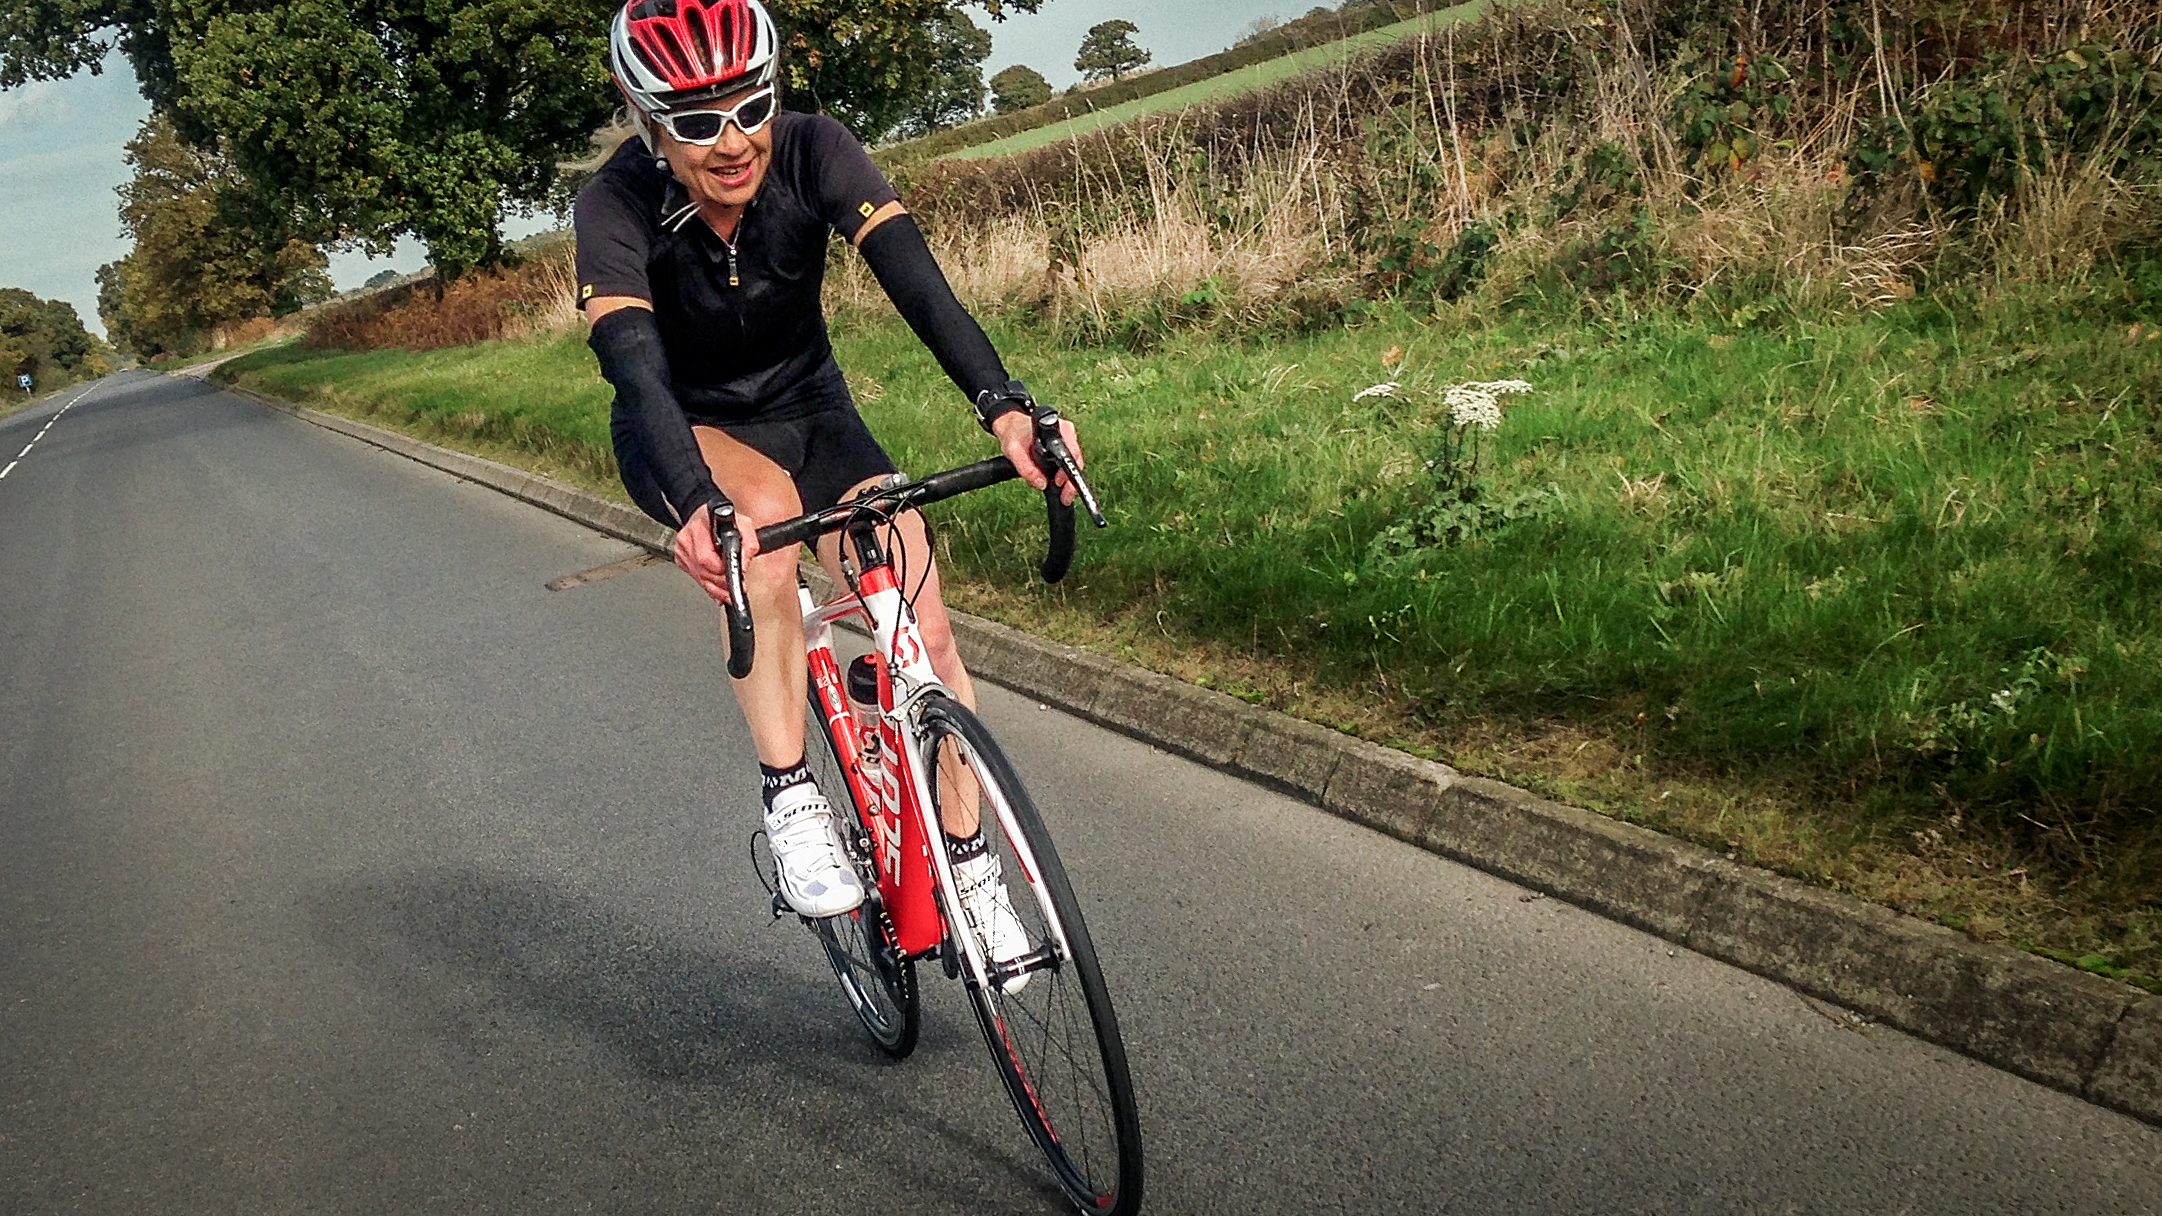
Cycling outdoors in winter

The old saying, ‘there is no such thing as bad weather; just bad clothing’ really is applicable for cycling outdoors in winter. However, let’s get one thing straight, no all singing and all dancing Gore-Tex this or Gore-Tex that will protect you from ice on the road and dangerous conditions. Our first tip is assess conditions and be sensible… if in doubt, stay indoors.

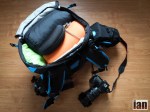
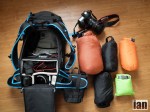
Essential kit for winter cycling:

  • Hat ideally with ear covers that will fit under your helmet
  • Buff or seamless neckwear product for around your neck
  • Glasses
  • Merino base layer
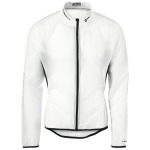
  • Long-sleeve jacket with a windproof chest panel
  • Gloves – depending on conditions you may well need options. For example: a Merino liner glove with thicker warmer/ windproof glove for cold and icy winds. Alternatively you may well need a glove that performs in wet conditions.
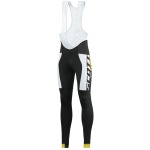
  • Long tights – we recommend those with in-built braces as they provide added protection around the kidneys. Also consider tights with foot loops. These loops will stop them riding up. Tights are available with or without at seat pad. We purchase without seat pad so we can wear our normal cycling shots underneath.
  • Merino socks or similar
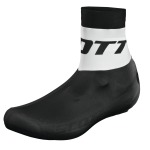
  • Shoe covers to help block out the wind, rain and colder temperatures
  • Waterproof jacket that can fold up

If you have all of the above you are set for winter cycling. Remember, cycling in winter is much colder than running primarily due to the wind chill. Don’t skimp on layers. In particular, your hands and feet are the most vulnerable areas.

We recommend cycling at all times (even in the day) with a flashing small led light at the front of your bike and a flashing red at the rear. It just adds a little more presence on the road and makes you more visible. It goes without saying that if you are heading out at night, use the best front and rear lights you can afford.

Eye contact is a key element of cycling, especially in winter. When approaching junctions or any areas where cars can impede and impact on your travel, look for eye contact. Lock in on them. Stare at them and acknowledge that they have seen you.

As we mentioned in article 3, when cycling use light gears and aim for 90-cadence. Remember, we are using cycling to either extend aerobic activity or as an alternative to a recovery run at this stage. As we progress with our articles we will discuss how to adapt your cycling sessions so that they can become specific in extended your fitness and/ or building strength.


Cycling indoors in winter

Lets face it, heading outdoors in the cold and potentially wet conditions on a bicycle is not something that you may not wish to do. It’s understandable. It’s not for all of us, especially if your runs are wet, muddy and cold. Step in indoor cycling.

We love indoor cycling…

We know; it’s the equivalent of running on a treadmill. However, just like a treadmill, indoor cycling can provide you with a very controlled and specific environment.

  • Focused and quality sessions
  • Improved cycling technique
  • Time efficiency
  • Accurate testing

Our first hot tip is don’t use the bikes at your local gym unless you have no other option… why?

Well, gym bikes are just so far removed from your ‘own’ bike. Remember in our first couple of articles how we emphasized how important it is to get the correct bike, the correct fit, the correct saddle and so on… why would you then go the gym, get on a generic bike and then disregard everything you have strived to get right.

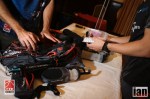
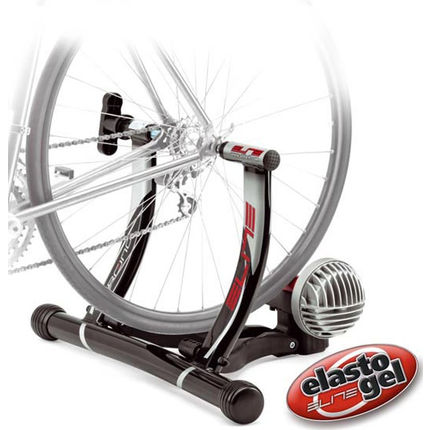
The way forward is to purchase a ‘Turbo Trainer.’

elite crono fluid

Many styles of turbo trainer exist and you can pay as little or as much as your budget allows. We would recommend a middle of the road trainer costing in the region of £100-150 to be the best of both worlds. We also recommend a ‘fluid-resistance’ trainer as you use your bicycle gears to create more or less resistance. For clarification, ‘magnet-resistance’ units often work by adding a lever to the handlebars and you then add/ reduce resistance by moving the lever. We not keen on these though as the resistance seems to be linear and the feel is nothing like riding on the road.

One more feature that we think is worth mentioning is a spring- loaded resistance unit. Indoor trainers can really impact on the longevity of a tyre; a spring-loaded unit will provide a longer life.

How do they work?

A turbo trainer usually consists of an ‘A’ frame and a metal drum. Quite simply, you attach the rear of your bicycle to the frame and place the rear wheel on the drum. This drum provides resistance to the rear wheel and creates a similar sensation to riding on the road. You can add more or less resistance to make sessions as hard or as easy as you require. Tip: The front of your bicycle will feel as though it’s pointing downhill due to the added height of the turbo trainer. Therefore raise your front wheel to make your bicycle level. You can use anything to do this but many companies now sell specific products to do the job for you.

Hints ‘n’ tips

Image copyright - highergearchicago.com

Image copyright – highergearchicago.com

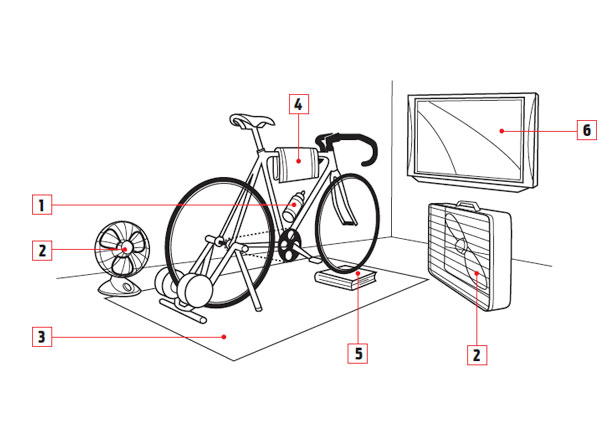
  • Use a piece of old carpet or purchase a turbo training matt so that you provide some protection between you, your bicycle and the floor. This is really important if you are using a room in your home. (3)
  • Have some towels handy to protect your bike and to use to mop sweat from your face (4)
  • Use a fan to cool you down (2)
  • Have water available (1)
  • Raise the front wheel (5)
  • Always use the same tyre pressure and resistance on the rear wheel. This will make sessions controllable and comparable.
  • Use a HRM such as a Suunto Ambit and/ or rear wheel cadence counter
  • Use music or a dvd to provide stimulus. We personally create music playlists based on the session we are doing… rocking out on your indoor trainer to AC/DC makes speed and interval work easy! (6)

Indoor cycling generates plenty of heat and even when cycling easy, you will still sweat. Be prepared.

For the first month of indoor cycling you can apply the principles as laid out in Article 3 of Cycling for Runners – keep gearing light and easy, aim for a 90-cadence and use a HRM to ensure that you are not working harder than you should be. Double what would have been your run time; so, if you were doing a 30-minute easy run, do a 60-min easy cycle.

 *****

In article 5 of CYCLING for RUNNERS we will discuss spicing up your outdoor and indoor cycling sessions with one session for outdoors and one session for indoors and how to combine this with your recovery sessions.

Enjoy the seasons, enjoy the change in the weather and importantly use cycling to enhance your running.

Be safe…!

Join us on STRAVA

TIS-Strava-Logo-big-square-600x340-e1354741369637

Thanks to SCOTT SPORTS and SUUNTO for the support and backing

PrintSuunto_logo [ConveWHITE_rted]

Check out SCOTT HERE

Check out SUUNTO HERE

CYCLING for RUNNERS PAGE HERE

Cycling for Runners Logo

Packing for Nepal and Everest Trail Race

©iancorless.com_Nepal2014-0463238

Packing for Nepal…

If you are like me, packing and deciding on kit is harder than doing an event sometimes. This is magnified in an event like the Everest Trail Race when I need to cover the same ground as participants, be self sufficient AND carry all my camera equipment.

It has taken me a long time to tweak and get this right. I am still not sure I am 100% but I am close.

I have been asked many times what do I take, how do I do it and what are my hints ‘n’ tips are? So as I pack for Nepal it seemed to make sense to document this and provide a little insight.

From the start I want to express many thanks to The North Face, Montane and Suunto for the support on making these trips possible. I couldn’t do it without help.

MONTANE-2

To start with I use a F-Stop camera rucksack. F-Stop are without doubt the ‘dogs bolx’ when it comes to combining cameras and equipment for tough long days on any terrain. Unlike other camera bags, these packs work just as well as any top quality hiking or run pack but with the addition of providing a safe and functional home for my gear. They use ICU‘s that are possible to purchase in different sizes so you can have exactly the camera storage you need allowing you to customise ‘free’ space for essential kit. I usa the LOKA UL which is a lighter version of the classic LOKA.

©iancorless.com_Nepal2014-0393231

The above picture shows my LOKA UL with a small pro ICU. Inside the ICU I have the following:

  • Canon 6D with 70-200mm F4
  • Canon 50mm F1.8
  • Canon 17-40mm F4
  • Flash
  • Remote flash triggers

On the waist belt I have a camera holder that will take my 2nd Canon 6D with a 24-105mm F4 lens.

The above set up allows me to have immediate access and quick access to another camera and accessories as required.

A huge plus of the F-Stop is the storage and comfort capacity.

The above photo asol shows a selection EXPED dry bags with all my equipment for a week on the trail. These bags are great as you can colour code, they come in different sizes and of course they keep everything dry!

Here it is in the pack:

©iancorless.com_Nepal2014-0373229

So what am I taking? Take a breath….

  • Montane Direct Ascent 800 down sleeping bag – see HERE
  • PHD Minimus Down pants – see HERE
  • PHD Minimus Down Socks – see HERE
  • TNF Victory hooded jacket – see HERE
  • TNF Thermoball gilet – see HERE
  • TNF – GTD tights – see HERE
  • TNF GTD shirt – see HERE
  • TNF GTD shorts – see HERE
  • Ice Breaker Merino wool base layer
  • Smartwool Merino socks
  • TNF Ultra Trail shoes (not shown) HERE

Essentials:

  • TNF Gloves Red Point HERE and eTip HERE
  • TNF Neckwear HERE and Hat HERE
  • TNF Balaclava HERE
  • Leki ‘Stick’ walking poles (not shown) HERE
  • Suunto Ambit 3 Peak HERE

©iancorless.com_Nepal2014-0413233

I am not sure on the overall weight. To be honest, if it was just the clothing and sleeping bag I would be travelling very very light indeed. The cameras add some serious weight but once in or on the pack the whole package is very workable and comfortable.

©iancorless.com_Nepal2014-0443236


I will be posting daily from Nepal as and when connections allow. Everything will be posted on this website, Facebook and Twitter.

Nick Clark counts down to Salomon SkyRun

Nick Clark

Nick Clark is one of the most respected 100-mile runners in the world. He is known for being tough and getting the job done! Born in the UK he moved to the US way back and started notching up a list of stunning ultra results that dates back to 2006.

He placed 4th at Western States and won Wasatch 100 in 2010. In 2011, ‘Clarky’ did an impressive double of placing 3rd at Western States and then 3rd at Hardrock 100 just 2-weeks later.

For many though, Nick elevated his profile in 2013 when he went head-to-head with Ian Sharman in the Grand Slam of ultra running. In an epic battle, the two US based Brits traded blows in one of the most exciting moments in our sport. Sharman came out on top but only just… Clark has often joked that after he won the last race, Wasatch he was the Grand Slam record holder in 2013 until Sharman finished. It takes some doing just completing four 100-mile races but to place 6th at Western States, 3rd at Vermont, 2nd at Leadville and then win Wasatch blows my mind!

Clark started 2014 with The Coastal Challenge in Costa Rica, his first multi-day race… he went on to say it was one of the toughest races he has done. At UTMF he placed 10th and recently he placed 5th at Run Rabbit Run. The only blip this year came at Western States when he toughed out a 47th place… a real bad day at the office!

And now the Salomon SkyRun in South Africa looms. I caught up with Nick to find out about his expectation are for what will be a tough day out in the Drakensberg mountains.

How have the last couple of months been from a racing perspective?

Up and down, I guess. I had a terrible run at Western States this year – I think I was burned out on the race – then came back and had a much better run at the Run Rabbit Run 100 in September, filling me with a good level of confidence for the SkyRun.

How’s training going; have you been training specifically for South Africa?

As noted above, I’m just looking to get into the mountains and to get into remote, steep terrain with some navigational elements thrown in. Off trail and steep is the mantra.

Maybe you have been brushing up on your navigation and looking at some maps?

I’m forever looking at maps dreaming up fun routes in the mountains. It is for this reason that I’m so excited about Sky Run.

Are you intimidated by the navigation element of the SkyRun?

Absolutely not. It adds a unique and seriously fun, in my opinion, element to racing in the mountains.

The course sounds extreme, particularly if the weather turns. Have you researched the course?

Not in depth, but I will. I plan to be as prepared as I possibly can be for this event.

A strong local contingent will be toeing the line… Iain Don Wauchope, AJ Calitz and so on… do you know much about them?

No, but thanks for the heads up. I’ll seek these guys out and assuming I can keep up, probably slot in behind for much of the course. Working together with friends in the mountains is one of the best parts about hitting remote routes.

Michael De Haast has put up a great price purse should somebody post a great time, is that an incentive for you?

Ask me halfway through the route. I have no idea how stout that time really is. If I’m on schedule through halfway and feeling strong, then I’ll definitely be motivated to go after it. If not, then I’ll just continue to enjoy the primary reason for being in South Africa: enjoying a new mountain range and culture.

Have you been to SA before?

First time. I am seriously excited. I’m really looking forward to connecting with the South African running community, eating some local delicacies, and getting stuck into those Witteberg Mountains.

The South Africa Sky Run provides a truly unique opportunity to race in a remote and scenic mountain location. For me the best part about the event is the navigational aspect. Having no markers to follow means that I’ll need to be in tune with the topography and hyper-conscious of my location in relation to that topography. In my experience, the navigational piece really helps to connect with the particular location I am traveling through, which in turn adds a level of appreciation for the terrain that you just don’t get if you’re racing head down through a landscape. I look forward to bringing home a beautiful mental picture of the Witteberg Mountains to share with friends and family.


The Salomon SkyRun takes place on November 22nd and you can view the official website HERE.

The Witteberg is a South African mountain range just off the south-west corner of Lesotho. The range, which rises to 2408 metres, stretches for about 60km from Lundin’s Nek in the east to Lady Grey in the west. The range lends its name to the Witteberg Series, the uppermost fossiliferous sequence of the Cape System of sedimentary rocks in South Africa. The race starts in the town of Lady Grey which is famous for its annual Nativity Play and its quaint houses and incredible scenery. Discover the wonder of Balloch cave along the route with it bushman art and idyllic setting nestled between some of the highest peaks in the Witteberg.

The Witteberg range is one of the most picturesque places in South Africa with some distinctive peaks like Avoca and Halston Peaks dominating the skyline.

The Terrain:

The Salomon SkyRun is true mountain running with a variety of terrain from hiking paths that lead you up to the tower, some jeep track is a welcome relief from the majority of the terrain which is on the mountain side as this is a self-supported and self-navigation the route choice is very much in the hands of the individual competitors. Once you have left the town of Lady Grey behind the beauty and remoteness of these mountains soon engulfs you and it is not uncommon to run for the entire race without seeing much civilization around you except those involved in the race.

The fauna and flora is incredible and there are over 650 plant and 80 animal species know to habitat the mountains of the Witteberg.

Ian Corless: El fotógrafo de Skyrunning

corredordemontana.com

I am very honoured and flattered to be interviewed by corredordemontana.com in an article titled  – Ian Corless: El fotógrafo de Skyrunning.

You can read the full interview in Spanish HERE

For my English speaking friends and followers. Here is a transcript in English.

*****

Tells us about how you got involved with Skyrunning reporting

I was invited to Transvulcania La Palma in 2012. The ISF (International Skyrunning Federation) invited media specialists from all over the world to witness what turned out to be a turning point for Skyrunning. It was a key moment. World-class athletes travelled from all over the world and in doing so created what turned out to be a classic race. It elevated Skyrunning to a new level and certainly placed Transvulcania on the ‘to do’ list of many runners.


How long have you been at it now?

I started to work with the ISF as a media partner after Transvulcania in 2012. I went to Zegama-Aizkorri and then followed this by attending many (but not all) Skyrunner® World Series events in 2012. In 2013 I attended most races on the calendar. As you know, the Skyrunner® World Series is made up of five races in each of the categories – VK, SKY and ULTRA. In 2014 I continued this format working on pretty much the whole calendar with the exception of the two races in the USA.


What exactly do you do? Does it take up all your time or do you combine your Skyrunning photography with other jobs? 

I work freelance in the world of ultra, mountain and trail running. I work on many other projects and not just Skyrunning. For example in 2014 I worked on The Coastal Challenge in Costa Rica, Marathon des Sables in Morocco and this month I go to Nepal for Everest Trail Race and then South Africa for the Salomon SkyRun. I have a very busy calendar and at my last count, I will have worked on thirty-one races in 2014. Depending on what my clients require will very much depend on what services I provide, however, it usually consists of writing and photography to help promote a race and provide feedback for the ultra, trail and mountain running community worldwide. In addition to all this, I have my podcast, Talk Ultra which is available every two weeks for free on iTunes and via my website.


Your opinion of the state of Skyrunning in 2014 and how things might develop next season

Skyrunning has grown incredibly over the past few years. We have all witnessed the boom! The vision of Lauri van Houten and Marino Giacometti is certainly coming to fruition. They had a vision of what Skyrunning may be… risks taken in 2012 at Transvulcania have paid off. However, many forget that Skyrunning dates back to 1989 when Giacometti first ascended the Monte Rosa. I most definitely believe they were ahead of the time. We are all just catching up… I also believe that Kilian Jornet has been an incredible vehicle for the sport, His rise and dominance has coincided with the growth in Skyrunning.

You will notice that the 2015 Skyrunning calendar has recently been announced and we see some changes. In addition the Skyrunner® World Series we now have the Continental Series. This shows how the sport is growing and how the ISF needs to appeal to a worldwide audience. It’s very exciting.


Any amazing anecdotes to tell from last season?

I am very fortunate to spend a great deal of time working with, photographing and talking to some of the best athletes in the world. I truly feel blessed. I have so many great memories and moments. If I had to pick one surreal moment, I think back to Matterhorn Ultraks. Kilian Jornet didn’t run the race but decided to take photographs and support his Salomon teammates. I had climbed just over 1000m vertical to get to a location that would allow me to photograph runners as they came to me with the Matterhorn in the background. I waited for hours, photographed all the front-runners and I was about to make my way down the long descent to make my way to the finish when I received a text from Kilian asking:

‘Are you making your way down?’

I replied, ‘yes!’

‘I will wait for you,’ Kilian said.

I added my cameras to my large pack (it weighs about 10-12kg) and then I made my way to the long and technical descent. After 10-minutes or so, I saw Kilian waiting. We then ran all the way down to the finish… it was ridiculous. I was following the best mountain runner and definitely the best downhill runner in the world with a huge pack and trying to keep up. However, Kilian was extremely kind and ran well within himself. I however was at my limit! But to follow and see his ability first hand was a highlight of the year.


Do you plan to be present at all ISF race events next season?

The calendar for 2015 is larger as we now have the World Series and the Continental Series, so, it will not be possible to attend all events. However, I will hopefully attending as many as possible and following the series as it unfolds.


How do the logistics work out when you travel to new race locations & have to discover where you need to be for your photos?

It is all about preparation. I usually arrive at a race venue two days before the race. I do my research. I look at maps, talk to staff and race officials and then I plan where I want to be to capture the best images. Longer races are easier as they allow me more flexibility. By contrast, a race like Limone Extreme is just over 2-hours from start to the first finisher, so you need to be 100% prepared. A real plus is that I am able to fulfill my passions for the sport in photography, words and podcasting but also get some exercise. I usually have to climb or hike to many of the locations I work from. Occasionally we are spoilt with a helicopter but that does not happen very often! Trofeo Kima is a perfect example where myself and other photographers/ cameramen are transported all over the course by helicopter. Kima or me is still a favourite race, it is so extreme and visually stunning.


Do you always find the right place to get decent pictures at races? Does it ever not quite work out?

Yes, I always ensure that I am in the correct place. That is my job. However, I may not always get ‘the’ image I want. It is what is so great about our sport and what I do. Nothing is guaranteed and I work on adrenaline to help me maximize my potential.


Tell us about your unfortunate “incident” at the Transvulcania 2014.

2014 has been an interesting year with a couple of incidents that I hope don’t happen again…

In May at Transvulcania La Palma I had photographed the race start and then I was making my way to the mountains to a location I had found to photograph the front-runners. On the coastal road I felt my car twitch and then I lost control. I veered to the right and lost control. A huge concrete block stopped me going over the edge. I was not going too fast but the car was completely written off. I jumped out of the car with no personal damage. I was so lucky! My first priority was that I needed to get to the mountains…

Later in the year I had a second incident. I was in Barcelona transferring to go to a race in Catalonia. I was at a restaurant and I had ALL my camera equipment and computer stolen. It was horrendous as you can imagine. My whole life in my bag: gone! It was a pretty tough two weeks that followed and my insurance only covered two thirds of the cost of all the stolen items. However, I managed to replace everything.

******

CYCLING for RUNNERS – Girl What Cycles (2)

WOBBLES WOBBLES WOBBLES

At first I was afraid

I was petrified

And I grew strong

And I learned how to get along

and so you’re back

Did you think I’d crumble

Did you think I’d lay down and die

Oh no, not I

I will survive

But now I hold my head up high

and you see me

somebody new

– Gloria Gaynor

 ©iancorless.com_cyclingforrunners-4115

Well …….THAT was epic! Back on the bike. I must say the once yearly training sessions in Lanzarote are maybe not sufficient to make me feel at home on a bike.

Now, a couple of vital tips for the novice cyclist or not so novice cyclist who is going to use cycling as cross training.

First and foremost if you are lucky enough to go out on your initial cycling rides with an ex-elite cyclist:

  • Use the opportunity to benefit from his experience to take in all the useful tips about how to handle your gears (of course you need to first find out where they are). This means you will maximize your energy and hopefully be sticking to an ideal cadence of 90 rpm.
  • Draft as much as you can behind him so you can concentrate on mastering the technical aspects of your bike and less on maintaining speed.
  • IGNORE and pretend not to notice that he can take his hands off the handlebars and put on his wind-stopper jacket or hold the iphone and take snaps of you pedaling like a mad woman all without losing his balance. This requires decades of training where the bike eventually becomes an extension of the cyclist’s body. You will NOT get to this level but the objective is to benefit from what cycling offers in terms of cross-training – i.e. a weight-bearing cardio-vascular work-out and not all these impressive balancing acts.

The first ride is all about getting to know your bike and cycling kit better and not catering any ambitions with regards to average speed. This means:

  • Playing around with the gears – knowing when to get on the “big ring” and the “small ring”. You need to maintain a regular cadence and so be attentive to the course – the up-hills and down-hills as well as the direction of the wind.
  • Being aware of the dangers of traffic. Obviously you should ideally be cycling on country roads with reduced traffic but for most of us this means cycling through urban traffic before we can access these roads. Initially this is a little daunting especially since you’re trying to master your new bike.
  • Learning how to maintain balance and being able to grab hold of your water bottle or wipe a snotty nose without wobbling.
  • Learning to use clip-less pedals effectively. These might take a little getting used to but it is important to practice clipping and unclipping. At the beginning novice riders tend to unclip too much as the idea of suddenly having to break at a junction, traffic lights, cross-roads, circle, accident or congestion and losing your balance and falling still clipped to the bicycle is something we wish to avoid at all costs. Yet here again it is all about anticipating the aforementioned and using the gears effectively to get into an easier gear so you just need to slow down without unclipping.
  • Working on pedaling technique so you don’t acquire bad habits from the beginning. Use the “wiping dog shit” technique. Literally imagine you are wiping dog-shit from your shoes by dropping your heel at the bottom of the pedal stroke.
  • Enjoying the experience and not being traumatized by it so you can’t wait for your next ride! This is a hard one – after my third ride I was beating myself up because I was flying on long flat stretches of uncongested road and riding at a pathetic snail’s pace on the smallest gear up short little steep hills, spinning but not covering distance. Again this is all about experience – the more you go out, the more energy-efficient you will become. Believe in yourself and remind yourself that being perched on top of a bike is for most people a totally unnatural thing and that you will get there ………eventually. Positive thinking also helps!

My personal tip to make your first rides easier:

  • Keep all your cycling kit in one place. Don’t mix it with your run kit. There is sooooo much more to take with you, the list is endless and before you know it you are out the door and you’ve forgotten something.

Remember:

  • Helmet (don’t laugh – this is the last item I almost forgot)
  • Energy bars – yep, when you spend all that nervous energy these are a welcome treat and booster.
  • Proper wind-proof gloves as from now – remember there’s the wind-chill factor to contend with in cycling.
  • A filled water bottle.
  • Your sports watch if you use one on the “cycling” settings – I use a Suunto Ambit 2.
  • Proper sun-glasses for cycling NOT running – Cycling glasses cover the eyes more and protect.
  • Spare cash – when you cycle you cover more distance than when you run and you never know if you need it.
  • A proper wind-proof jacket
  • All the kit to fix a puncture – we’ll come to the nitty-gritty of this later.
  • Two pairs of socks if haven’t invested in shoe covers yet.

And last of all:

  • LOTS of positive energy and a smile

follow me on Twitter @girwhatcycles

riding_a_bicycle_311140


Join us on STRAVA

TIS-Strava-Logo-big-square-600x340-e1354741369637

Thanks to SCOTT SPORTS and SUUNTO for the support and backing

Print

Check out SCOTT HERE

Suunto_logo [ConveWHITE_rted]

Check out SUUNTO HERE

inov-8 BareGrip 200 Review by Ty Draney


Baregrip

There are minimal shoes, and there are barefoot shoes. Runningwarehouse.com describes the Inov-8 Bare-Grip 200 as; “a near-barefoot shoe for trail runners seeking unrelenting traction, with no cushioning and a firm ride.”

 Shoe review by respected ultra athlete TY DRANEY (Patagonia)

©iancorless.com.IMG_7689Transvulcania14

I have been wearing minimal shoes for years, eschewing trail shoes for flats because I enjoyed the lighter weight and most of the time here in the west I run on dry trails. I wasn’t completely unfamiliar with inov-8 having spent some time in their X-talon models when they first came out. The BareGrip 200 as it turns out is a completely different animal. They look a lot like a football boot. When I wore them they usually elicited two different responses-“What are you wearing?” and “Wow. Cool shoes.”

Baregrip2

The first thing I noticed was how light and flexible they are. There is absolutely no support or structure, none of the traditional EVA for cushion. The thin rubber twists and stretches as far (or farther) than your foot can. Luckily the lugs supply a big of lift and some give to extend the range of this shoe. I found that I could run as far as 10k before my feet felt too fatigued or beat up. The added flexibility was great running uphill, but running rocky downhill caused me to slow down considerably to keep from hurting my feet.

screenshot_114

The upper is also study and flexible. After nearly a hundred miles in the shoe, there is absolutely no wear or snags. The tight weave has a downside. I found that the shoe didn’t drain particularly well after being fully submerged. There are light overlays extending from the outsole to the laces that supply structure to the shoe. They are medium, to narrow in width and have a solid toe bumper for its weight. I found the heel cup particularly comfortable on my bony heels. It has “just enough” structure to keep the heel firmly planted in the shoe, even on steep uphill slopes.

screenshot_115

The Bare-grip has outstanding traction. A wet fall has provided ample opportunity to take these shoes on a variety of muddy trails. I was pleasantly surprised how well they shed the mud and helped me keep my footing, and again, the lugs provided a little cushion to help extend their range. I am looking forward to using these as a winter shoe when the rocks are covered with snow and I need the extra traction.

This is not a shoe for everyone. The barefoot feel and zero mm drop automatically excludes many runners. It does however do what it was designed for very well, “give natural feel, maximum grip, and proprioception.” (inov-8.com) I see this shoe as a great vertical-k-type shoe in adverse conditions or for racing muddy fells where there are few rocks.

Specs:

screenshot_116

Check out inov-8 HERE

Check out Ty Draney HERE

Talk Ultra Bumper Stickers – Now Available!

Talk Ultra Bumper Sticker3

I have been asked many times for a TALK ULTRA Bumper Sticker

Now is your chance to show your support for the show!

Two options are available, rectangular and oval.

Oval

Cost per sticker is £5.00 plus postage

If you would like one, please specify your preference on the form below and if your postage is UK or outside the UK.

We will invoice you via Paypal and delivery will be in December.

Thanks for your support!

← Back

Thank you for your response. ✨

Warning
Warning
Warning
Warning
Warning
Warning
Warning

Warning.