inov-8 X-TALON 212 Review

©iancorless.com_inov8_212-7294

If Wolverine™ were going to go running on the trails, he would pair up his incredible hands (and blades) with a pair of X-Talon 212’s.

Irrespective of what type of running you do; road, trail, mountain, fell or even treadmill, the X-Talon 212 has that distinctive look that not only sets it apart from the competition but also makes one take a second look and ask the question, “is that a run shoe or a football boot?”

It’s a winning shoe that combines minimal weight, low drop, stability and awesome grip for when conditions are muddy, boggy, slippery or basically just downright awful.

I doubt that inov-8 needs an introduction but let’s have a recap just in case.

©iancorless.com.IMG_5365

The company is just 11-years old and the creation of South African, Wayne Edy. You can sum up inov-8’s growth in just one quote from Wayne, “I’m not a follower, I never will be. I like to carve a new way. I thrive to innovate.”

inov-8 shoes are all about being at one with the terrain and in the UK they have become the ‘go to’ shoe when you need grip.

inov-8 say, “We believe in natural running. Natural running involves taking running back to its most innate form, letting nothing alter the natural biomechanics of the foot and body. Natural running relies on the strength of the runner’s feet and legs rather than the cushioning or support of a shoe. The foot controls the shoe, not the other way around.”

inov-8 were very much at the forefront of minimalist running and right from the off the offered a very structured and methodical approach to getting ‘lower’ to the ground.

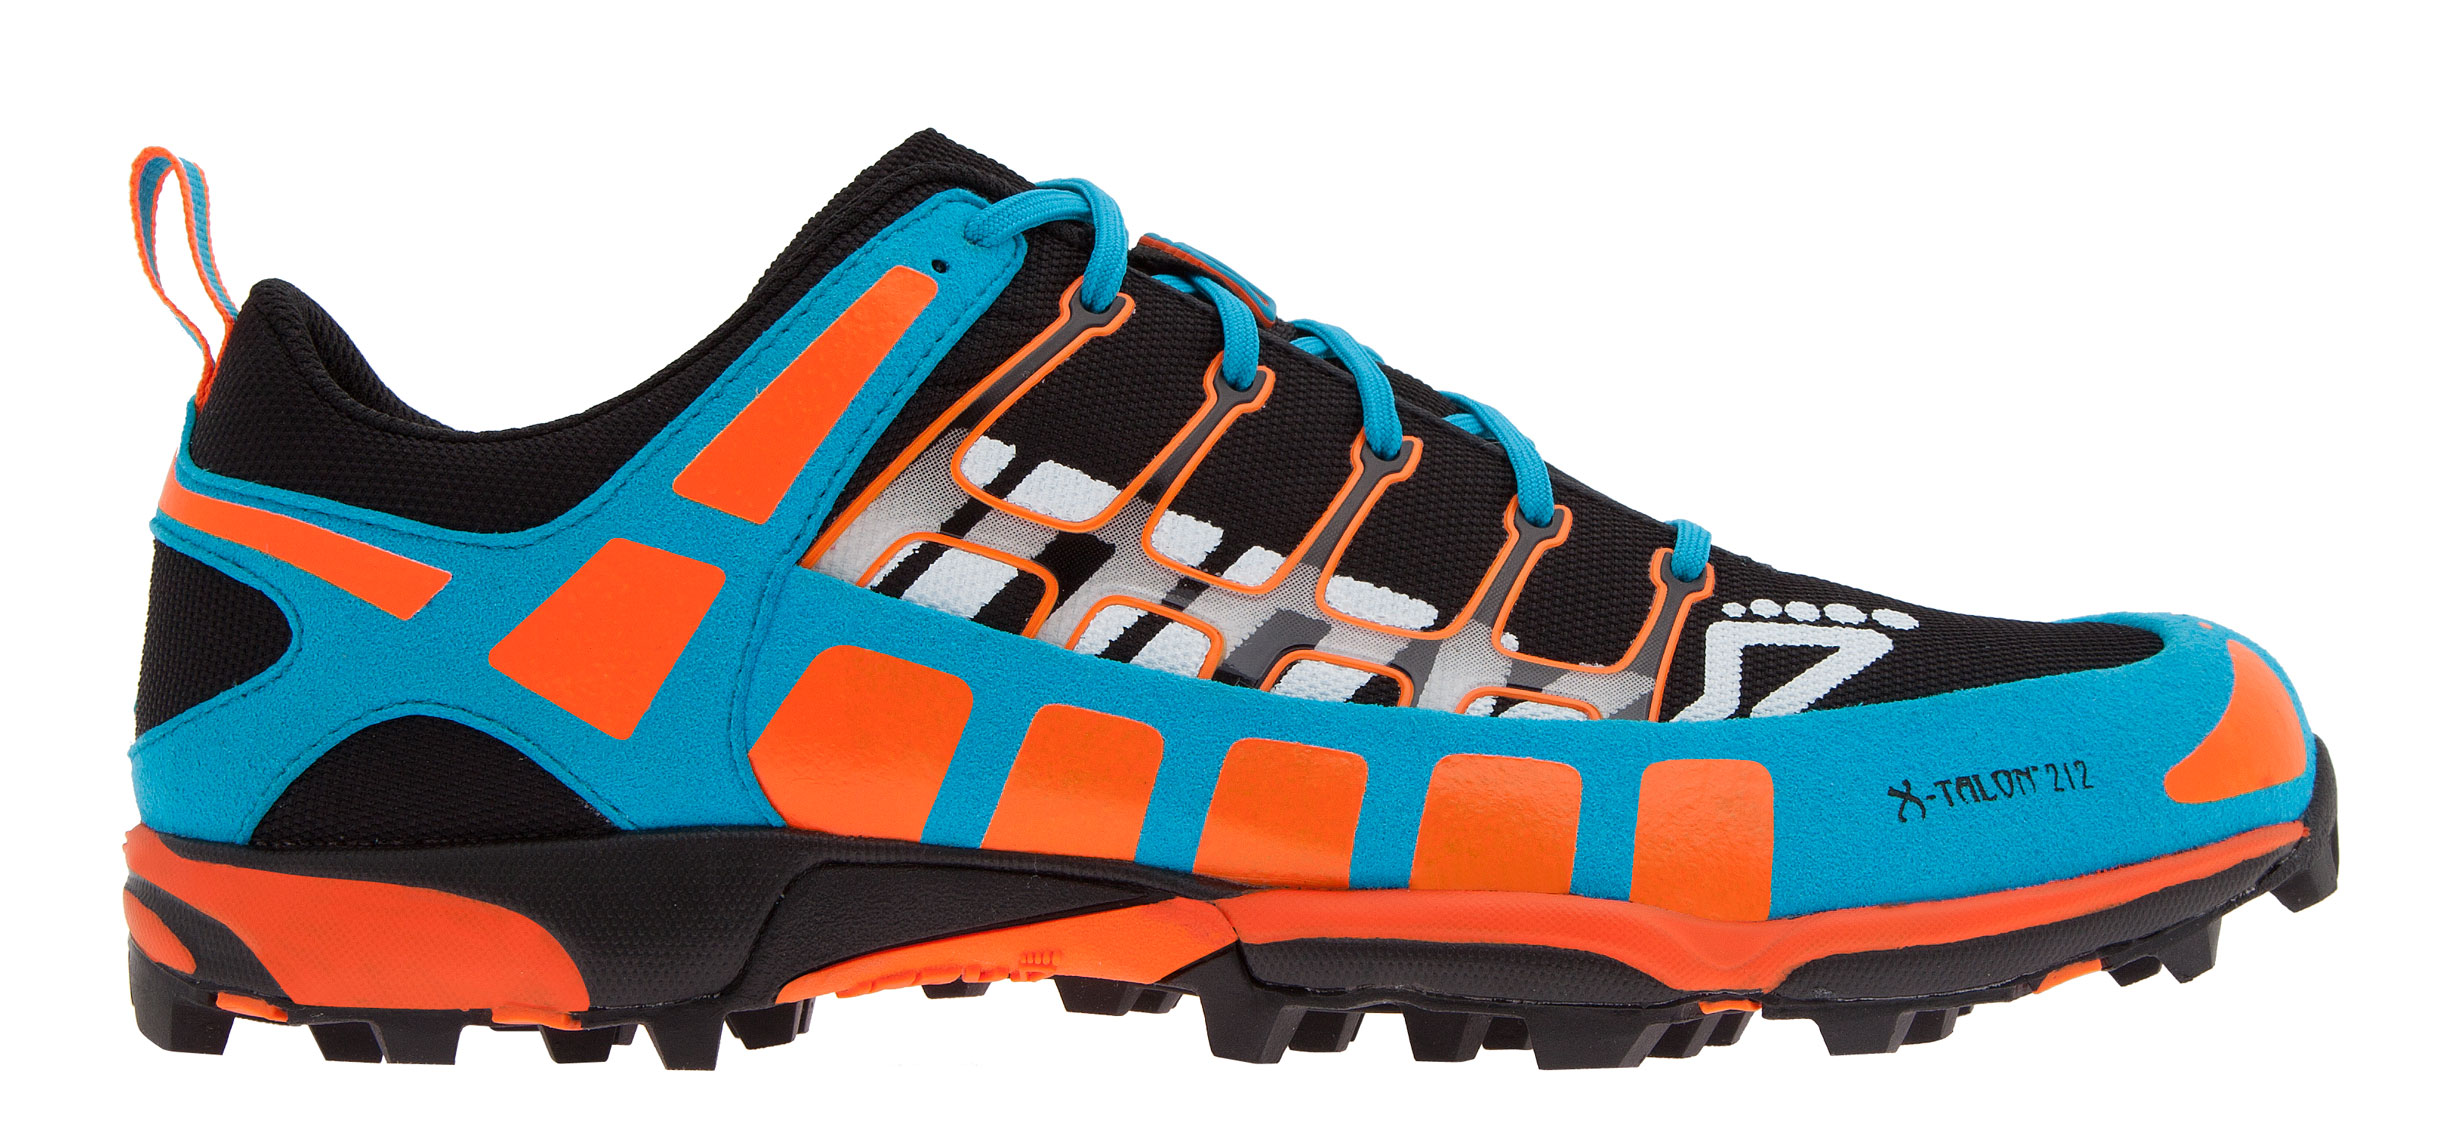
This system was a series of arrows (on the rear of the shoe) that signified the shoes drop in 3mm increments: 3 arrows = 9mm, 2 arrows = 6mm and so on. This arrow system informed runners immediately of what drop a shoe was and importantly allowed runners to make an informed and structured progression to get lower (if required). The shoe naming was also quite innovative. You had the model of shoe, for example: Trailroc, Roclite or X-Talon and then a number afterwards, so, in this scenario X-Talon 212. The ‘212’ refers to the weight of the shoe in grams.

Lightweight, minimal and functional, inov-8 have pioneered running shoes for trail, rock, fell or mountain and in simple terms have endeavoured to keep runners low to the ground (with grip) via a plethora of shoe models providing a selection of drops, cushioning and grip. The recent addition of the Race Ultra 290 (Review HERE) is a prime example of how the company are looking at the growing ultra market and the need for a more cushioned shoe but still with a low drop (6mm) and a flatter outsole for extended hours running.

2015 will see many new additions to the already expansive range. (*see below)

X-TALON 212

©iancorless.com.IMG_5434

Firstly, big news! The X-Talon is now available in a standard fit in addition to the normal precision fit. This is important news for many a runner who would have loved to use the 212 but found the tight and narrow fit of the precision just too tight for their Hobbit like feet.

As mentioned previously, the 212 may well be one of the flagship shoes in the inov-8 range and you can expect to see the shoe in Trail, Mountain, Fell, Orienteering, Cross Country, Obstacle and Skyrunning races all over the world.

The 212 is an out and out off road shoe and as the name suggests, the grip is Talon like.

The Shoe 

x-talon-212-side

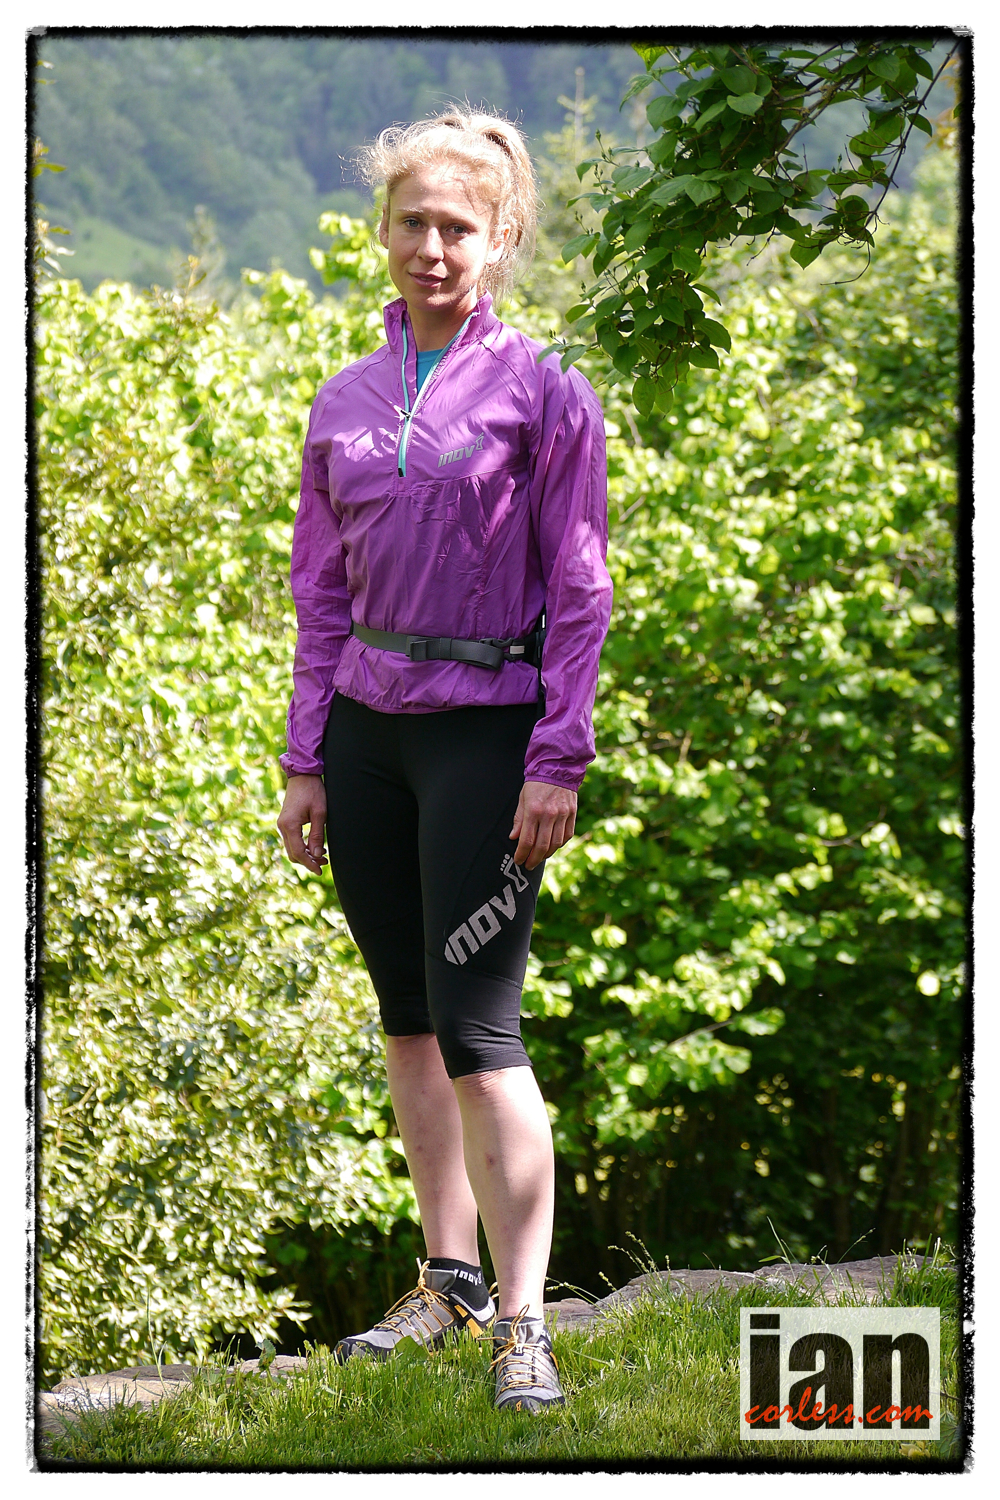
I used the standard fit in my normal shoe size UK9.5 so it would be fair to say that the 212 is true to size. However, even though this shoe is standard fit it still fits super close in the toe box, you almost certainly would want to try this shoe on before purchasing. Please remember that the 212 are an out-and-out off road and soft ground shoe, so it is important that your foot has minimal movement within the shoe. This is why the shoe was originally designed in precision fit only. A close fitting shoe is ideal when climbing, descending or contouring when on soft or uneven ground. The lacing system allows you to pull the shoe tight to your foot and cradle it offering more support. Spend a little time tweaking the lacing and you will be rewarded with a wonderful close and natural contact to the ground.

©iancorless.com_inov8_212-7305

First off, the shoe is super flexible. You can bend it anyway, fold it in half and the shoe does not resist. The shoe upper is tough and quite thick and I have heard criticism saying the upper is too thick! Of course this all comes down to personal preference but if you are bombing up and down wet and muddy terrain everyday, you need an upper that can withstand that sort of abuse… I have had my 212’s for 6-months (probably 3-runs a week) and I have well and truly abused them without failure. That’s a plus in my book.

©iancorless.com.IMG_4481

The shoe has Meta-Flex™ and Meta-Cradle ™, which provide a flex groove and upper webbing support at the metatarsal heads. In all honesty I am not fully sure what that means but if that means good flex and support then I agree.

INO540_400_2

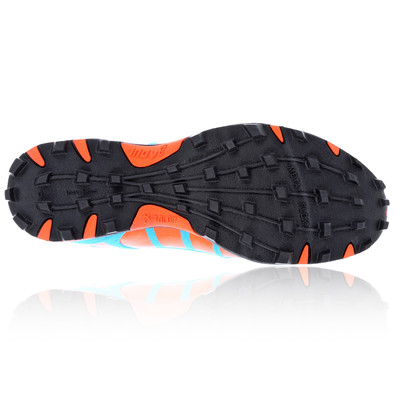
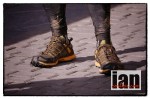
The sole of the 212 looks like a football boot with a series of spaced out rubber nodules that are made of soft ‘sticky’ compound rubber as one would see on some climbing shoes. What makes this shoe work so well off road is the fact that the grip is spaced out and this therefore stops soft ground filling and clogging up the grip of the shoe. The soft rubber works really well on rocks, gravel and other dry surfaces and should the rocks become wet, grip is still highly impressive allowing you to run with confidence. One downside of the soft rubber is that if you go on the road it will wear down. This is not a criticism of the shoe. It’s basically just a heads up to warn against excessive road use. I should point out that my everyday run requires at least a couple of miles on road or pavement to get to the trail and yes, my sole has started to show wear and tear but that is after 6-months of regular use.

©iancorless.com_inov8_212-7314

Cushioning is minimal and the drop (2 arrows) is 6mm; this provides a great contact for the trail beneath your feet. Ironically, the shoe feels very comfortable on hard trail and even road. I would say it feels surprisingly cushioned despite its minimal looks. inov-8 do not use a rock plate to protect your foot against small and/ or sharp objects and therefore you can sometimes feel these objects when running.

Th front of the shoe has a rubber bumper but toe protection is minimal. The rear of the shoe holds the foot well and if you have the right size shoe and the laces adjusted correctly, you have have little or no movement when running.

IN USE

Pros

The 212 are all about gaining grip on soft and boggy ground. If you use the shoe in these conditions you will be over the moon by the grip, feel and security offered. The upper is durable and the lacing perfect. The addition of a standard fit in addition to the long established precision fit now ensures that you can have comfort despite your shoe size or width. The combination of these elements makes the 212 my ‘go to’ shoe for anything that resembles fell running or soft ground running (including snow.) I have used the shoe for 6-months, accumulated 100’s of hilly miles and the shoes have performed perfectly. They have also been my preferred shoes when running Vertical Kilometres™ particularly when the terrain has been grassy and steep. The low drop allows great feel for the terrain below and although relatively minimalist from a cushioning perspective, they do offer great comfort for runs of 2 to 3-hours. This comfort is extended if the ground remains soft and boggy.

Cons

It’s a very specific shoe for a very specific use and therefore this would be an ‘addition’ to your shoe collection. It’s almost unfair to say this is a con but for some, they want a wonder shoe that does ‘all things,’ the 212 is NOT that shoe.

The lack of a rock plate does mean that you can feel small and sharp objects occasionally.

The shoe is very flexible with minimal cushioning and therefore one would need to be attentive to how long one runs in them. Of course this is very personal to the user… one person may find 60-mins enough, another 3-hours. Certainly, the more you use them, the more time you will be able to spend in them.

Specs

  • Weight 212g
  • Upper Synthetic, TPU
  • Lining Mesh
  • Drop 6mm (2 arrows)
  • Sole X-Talon (Sticky)
  • Midsole Injected eva
  • Fit Precision and now Standard

Conclusion

The X-Talon 212 really is a top quality shoe with a very specific use. If you are looking for a shoe to do several types of running (road and trail), the 212 is not for you. However, if you are looking for grip on off road terrain then you would be hard pressed to find a shoe that does the job better than the 212. The addition of a standard fit to the long established precision fit should mean that if you have tried the 212 in the past and found them too narrow, they may very well fit you now! Both models are unisex.

Note

X-Talon-190-side-1_13

If you prefer a more minimalist shoe with lower drop, inov-8 make the X-Talon 190, which has 3mm drop, a stripped back upper and the same talon like grip.

*New for 2015

X-talon-200-Blk-Red-Yel-1-15-1024x490

inov-8 are strengthening the  X_TALON off-road running shoe range (212 & 190) with the addition of the new X-TALON 200. Available in early 2015, the shoe looks set to be a huge hit with off-trail runners and obstacle racers.

Navigation 101: Intermediate Navigation – Beyond the Basics by Mountain Run

Mountain Run

This is a second article in a trio of interviews with Ian Corless, about Navigation for Ultra Runners & more. Read article one HERE

all content ©mountainrun

In the first interview we covered the Basics of Navigation, this encompassed maps, compasses, setting your map & how to set a bearing.

The second interview was moving into intermediate navigation & it consisted of the following information & techniques:

  1. Declination/Magnetic Variation
  2. Grid Numbers/Plotting a Grid Reference
  3. Back Bearings
  4. Re-Orienting/Re-locating
  5. Thumbing the Map
  6. Hand-railing
  7. Catching Features
  8. Aiming Off

So lets start with:

1) Magnetic Declination or Magnetic Variation: 

There are 3 points at which north is seen. 1) True North, 2) Grid North & 3) Magnetic North. We are concerned with Grid North & Magnetic North.

Grid North is what is detailed on a map, its where the North/South grid lines show us the direction of north, according to the grid lines printed on the map. This is almost the same as True North, so we will group True North & Grid North the same. These are fixed points & do not move.

Magnetic North is what your compass needle points towards, being magnetised & this is not a fixed point, it moves over time. Magnetic North is explained as so:

“The North Magnetic Pole is the point on the surface of Earth‘s Northern Hemisphere at which the planet’s magnetic field points vertically downwards (in other words, if a magnetic compass needle is allowed to rotate about a horizontal axis, it will point straight down). There is only one location where this occurs, near (but distinct from) the Geographic North Pole and the Geomagnetic North Pole.

The North Magnetic Pole moves over time due to magnetic changes in the Earth’s core.[1] In 2001, it was determined by the Geological Survey of Canada to lie near Ellesmere Island in northern Canada at 81.3°N 110.8°W. It was situated at 83.1°N 117.8°W in 2005. In 2009, while still situated within the Canadian Arctic territorial claim at 84.9°N 131.0°W,[2] it was moving toward Russia at between 34 and 37 miles (55 and 60 km) per year.[3] As of 2012, the pole is projected to have moved beyond the Canadian Arctic territorial claim to 85.9°N 147.0°W.[2]

Because we have a variance between True North & Magnetic North, we therefore need to use something called the Magnetic Variation. This is described as follows: 

“Magnetic declination or variation is the angle on the horizontal plane between magnetic north (the direction the north end of a compass needle points, corresponding to the direction of the Earth’s magnetic field lines) and true north (the direction along a meridian towards the geographic North Pole). This angle varies depending on position on the Earth’s surface, and changes over time.”

It is also explained more formally, Bowditch defines variation as “the angle between the magnetic and geographic meridians at any place, expressed in degrees and minutes east or west to indicate the direction of magnetic north from true north. The angle between magnetic and grid meridians is called grid magnetic angle, grid variation.

Magnetic_North_Pole_Positions

Depending on which country you reside in will then depend on what the Magnetic Variation actually is. For example, if you live in the UK then the Magnetic North is 1.5 degree’s at the start of 2014 west of True North. The reason it is west is that we sit to the east of the Agonic Line or line of Zero Declination where Mag North & True North are the same. There are several points where this occurs around the world. Its a bit technical, but all you need to remember is that the Mag Variation is printed on all maps in the UK to advise what the Mag Variation is at what ever year the map was printed.

IGRF_2000_magnetic_declination

In order to correct your bearing to take into account the Mag Variation, you must adjust the compass 1.5 degrees east of the bearing you have taken, or more easily remembered, add 1.5 degrees on to your compass bearing you have just taken from the map. To make life even more confusing, the Mag Variation in 2015 is 0, therefore Mag Variation need not be corrected for that year, so it is almost not worth making this correction for the next year & certainly if your navigation is broken down into small legs. It really only comes into play right now, if you are travelling over large expanses of land, without any catching features, hand rails etc.

Transversely, if you are using the Mag Variation, remember when making a sighted bearing, whilst relocations, you might want to subtract 1.5 degree’s off your bearing in order to get an accurate bearing when you place the compass on the map. It all depends how accurate you need the bearing to be? Are you looking at a mountain summit? If so, is your bearing really that accurate anyway.

So Mag Variation in the UK is not really necessary right now.

If you are in Europe or other parts of the world like the US, then your Mag Declination/Variation will be different. It should be on the map you are using, if not consult a website like Wiki for more information.

North & South of the Equator. 

If you buy your compass in the northern hemisphere, then it is not set to work in the southern hemisphere & visa versa. Silva produce 3 types of compasses to work in 3 different magnetic zones. The best piece of advise is if you are traveling, then buy a compass for use in the zone which you are traveling. Best to contact a company like Silva to get the right compass.

Can I set the declination on a compass, so I can forget about the Mag Variation? 

Yes is the answer, but they don’t come at a small price. Most compasses, of reasonable value, like Silva 2NL-360 Explorer will have a Declination Scale on the bevel base plate, this can be used for quick adjustment. If you want to set the mag declination, then you need to purchase a compass capable of doing this, like the Silva 15T-360/6400 Green military compass. Its not really necessary for general use, especially in the UK right now.

Ok, so the confusing Mag Declination/Variation is done. Use at will, just remember to check on the country you are in as to what the variation is & apply it if necessary. Its list on the map you have in your hand, or at least the one you will be using.

2) Grid Numbers & Plotting a Grid Reference

Grid numbers are applied to the grid lines. These are a squared matrix applied to the whole country to divide it into different sections. They are laid out to make squares 100k by 100k, these squares are then broken down to have a further matrix applied giving squares of 1km by 1km. These are the lines/squares printed on your map. The lines running from east to west are numbered from south to north, these are the ‘northings’, the lines running from north to south are numbers west to east, these are called the ‘eastings’. A grid reference is made up of these printed numbers.

northings-eastings

So on the image pictured to the left, we have Eastings along the bottom & Northings running up the side. In order to find a certain grid we need 4 of these numbers. This a 4 figure GR.

We are always given the Eastings first & the Northings second.  A 4 figure GR would read as 17 45

Once we understand this we can move to a 6 figure GR. This is done by breaking down each of the squares into a further 10 divisions on either scale, making 100 squares inside the existing square and will allow us to pin point a location to within a 100m square on the ground. A 6 figure GR would be something like 175 454.

This can be taken into a further pin point of 10m squares by using the same logic & so on.

A roamer on your compass can be of great help here to pin point 6 figure GR’s.

Not following? Book on a course….

3) Back Bearings. 

Very useful in either re-locating yourself or using a feature to make sure you are looking at what you think your looking at. A back bearing is taken by using a sighting of an identifiable feature, be it a path, summit, building or  large reentrant & applying it to the map. This can help you do one of 2 things. 1 – re-locate yourself on a line feature (its hard to relocate with this technique exactly, but it can help your judgement or give you a rough location) or 2 – help you to make sure the feature you are looking at is the same one you are looking at on the map.

Remember that when taking a back bearing, you might need to subtract the Mag Variation to make sure its correct. 

compassatpeak

To take a back bearing, line the direction of travel arrow at the front of your compass with the feature, make it as exact as possible. Then swivel the rotating bevel so that you line the red end of the needle in the red house/shed, remember the Red in Shed. This is now your bearing set. Next put the compass on the map & line the front side up with the feature you think you are looking at, and move the compass until your orienting lines on the base plate match with the N/S Grid Lines on the map. You should now be able to locate yourself somewhere along the side of the compass.

A back bearing works best if you are already located on a line feature, as this bearing will then cross the line feature at some point, giving you a rough location of where you are on that line feature.

4) Re-Orienting/Re-Locating.

A very necessary skill, used to either make sure you are where you think you are, or as it sounds, to actually re-locate. Once you are adept at this skill, it should be used throughout the day, as you progress through your race or just through the mountains to keep a check on your position, but of course if you are thumbing the map, then it will be a whole lot quicker & easier. When you’re really good at it you will re-locate whilst on the move.

Clients on a recent OMM Mountain Skills Day relocating on Place Fell, Eastern Lakes

©iancorless.com.IMG_5128GL3D_Day1

How to do it: 

Use everything at your disposal. This means look for all the identifiable features you can see, summits, paths, streams, woods, walls, buildings, ruins, sheepfolds etc. Orientate your map, if it is not already! Now match the features on your map to the ground, or visa versa. If your still not sure, then use a back bearing by locating a summit or other feature & take a bearing from it by following what was discussed above.

If you are not on a line feature you will then need to start really assessing the contours & because you have studied your contours well at home, you have a good handle on how to interpret what you are looking at to the features/contours on the ground. Are you in a reentrant, or is there one close by. Is the valley in the right place in front of you in relation to the map.

Re-Location requires lots of practice, the more you do, the better you will get until you can re-orientate whilst on the move.

5) Thumbing the map. 

Thumbing the map with compass in hand.

©iancorless.com_IMG_5329Marmot24_2014_

A very simple, but very useful technique. Once you start to get a handle on navigation, map reading & compass work you will be able to fold your map smaller, so not needing so much of it in view. The smaller you can have your map folded, the easier it is to thumb the map. By doing this we mean, fold your map in half, half again and so on until you have a manageable size to hold in your hand. Obviously make sure you can see the area you are in. Now, knowing where you are on the map, put your thumb over this location. Having the map oriented correctly in your hand is very important. As you walk/run along your chosen courses/bearing, you simply move you thumb small increments to keep up to date with your progress.

Why is this useful? 

Because you need to be able to locate your rough position on the map at a split second or whilst on the move. When you want to check your surroundings against the map, just pull it up to have a look & your thumb will be placed near to where you are, you can then re-locate very quickly & keep a track of your progress from map to land or the other way round. This is how you will learn to re-locate whilst on the move!

6) Hand-railing. 

It is as it sounds, using a handrail to help you on your way as you travel across the land. So what is a handrail? It a feature on the map that allows you to use it as a hand-rail. It is always a line feature & can be as simple as a path, or as obscure as a blind ridge line (by blind I mean rounded & not obvious). Once you have established the handrail is going in the direction of travel you want you can walk/run along it until you need to make your next decision.

Examples of Hand Rails

Handrails

How do you know when to stop? Use the next technique, a catching feature….

7) Catching Features. 

A catching feature again is as it sounds, its a feature that catches you. It can be designed to wake the brain up to say your nearly at your destination, next direction change or just as a marker to what is coming next. You can have as many catching features as you like along your chosen course. Don’t pick too many though, as it will be hard to remember. Try to limit them as wake up calls, or direction changes, but you can still use them as markers to track your progress.

Plenty of Catching Features in the image below: 

Catching-Features_edited-2

A catching feature might be a wall corner, building, junction in a path or river or a crag that you are moving past. Used in conjunction with thumbing the map & hard rails, you can see that you can really track your progress as you move forwards.

8) Aiming Off. 

The last technique in our intermediate navigational skill set. We use aiming off to catch a line feature, that we may then use as our next bearing setter or as a handrail until we reach the next catching feature.

To aim off we use a bearing slightly off to the side of the line feature we are heading for. This can be either left or right, but it need to be obvious, otherwise you might miss it.

Aiming Of below so you don’t miss the control, best practice in foul weather!

Aiming-Off_edited_edited-1

Lets say your travelling across open ground south to north, there is a tarn in front of you running from west to east & you want to catch this feature, but keep moving past it. The weather is in and visibility isn’t what you want it to be. You want to pass the tarn to the east, so you need it to be on the western side of you. How will you know you have passed it, if you can’t see so well due to mist? The tarn might be 500 m long, west to east. By aiming off, rather than passing the tarn on a bearing and checking it off as you go, you are better aiming off your bearing slightly to the west & hitting the tarn, this then gives you an identifiable feature to break up your leg & confirm you are where you think you are. You can then take your next bearing to the location you want to reach, using the techniques of handrails, catching features & possibly aiming off again.

Get these skills dialled in good weather & you can now be ready to head out in to the open fell in inclement weather. Get them dialled in bad weather & your getting ready to head out at night.

Still not got it? 

Are you interested in an UltraTrail Nav Day or a Mountain Marathon Skills Day?

Send us your details here:

Go back

Your message has been sent

Warning
Warning
Warning
Warning

Warning.


Rab Mountain Marathon 2014 Preview

rab_logo_horizontal

The 8th Rab Mountain Marathon™ will be held on the 27th and 28th September 2014. The Rab Mountain Marathon™ is a two-day fell running and navigation challenge for solos and pairs with an overnight camp.

©iancorless.com.IMG_5949GL3D_Day1


The Rab Mountain Marathon kicks off this weekend at 0830. Two days of navigation and running will unfold in the English Lakes using the popular score format.

Now in it’s 8th year, the Rab Mountain Marathon has become an iconic race that has visited many stunning locations, the Cheviot Hills, Derwent Fells, Snowdonia, Howgills and this year it once again returns to the English Lakes.

©iancorless.com.IMG_5641GL3D_Day1

Taking on challenging mountain terrain, participants need to be competent and confident at moving fast over tough terrain. As usual, the is the UK and runners will need to be prepared for the worst despite a recent spell of really good weather in the UK.

As one would expect, the Rab Mountain Marathon will take place over rough, steep and technical mountain terrain. Many sections of the course will be isolated and if bad weather comes in, everyone needs to be prepared.

©iancorless.com.IMG_5731GL3D_Day1The race format is ‘score’ as this tests navigation skills and avoids snakes of runners going from point-to-point. A rolling start window of 2-hours will spread the runners out and electronic timing is used to track the runners. As normal, different class options are available (including walking) and it’s possible to participate as a solo or team of two.

It’s hard to highlight some standout competitors for 2014. If I were to place a bet on the top Long Score competitors it would be between Adam Stirk and Andrew Higgins (who are a pair) and Stewart Bellamy (solo). Adam and Andrew finished 3rd last year behind Steve Birkinshaw (1st in 2013) and Alex Pilkington (2nd in 2013) both of whom are not taking part this year. They were also 2nd at the Highlander in 2013.

Stewart Bellamy is a strong runner and whilst he may not have featured in the results of recent mountain marathons, he did win the GL3D in 2013.

©iancorless.com.IMG_5177GL3D_Day1

The Rab Mountain Marathon’s approach is designed to be relaxed and less formal and structured than that of the OMM, which will take place next month.

Shane Ohly, race director for Ourea Events says, ‘But hey the Rab isn’t really about the elite runners and there is some super generous support from Rab who are providing vouchers to the value of about £10,000 for 1st, 2nd and 3rd across a huge range of categories. Check them out here: HERE

At registration on the Friday evening or Saturday morning, competitors can view a Master Map of the competition area which will give a full overview of the event area being used plus provide details of any out of bounds areas, map corrections etcetera. The event Master Map will not be over-printed with any control points.

So there you have it… two days of navigational fun in the English Lakes. It’s possible to follow a live stream HERE and a free APP has been created. Details HERE

Apps can be downloaded here:

iOShttp://bit.ly/1wwcbDKAndroidhttp://bit.ly/1AUZNhj

Ourea_Events_Logo(600)

Race Website HERE

Rab Apparel HERE

Rab Twitter HERE

Steve Birkinshaw attempts the 511km – ‘The Wainwrights’

Steve Birkinshaw

Steve Birkinshaw, winner of The Dragon’s Back and countless other events is currently attempting, ‘The Wainwrights.’ 

*IMPORTANT UPDATE

Friday, 20 June 2014

New Wainwright Record for Steve Birkinshaw

Steve Birkinshaw sets a new record of 6 days and 13 hours (almost exactly) for the 518km Wainwright round of 214 Lake District summits. He runs into Keswick town centre with his posse of about 100 support runners with a jubilant crowd of supporters cheer him on. ©http://stevebirkinshaw-wainwright2014.blogspot.co.uk

Starting on June 14th, Steve will attempt to cover all 214 tops on foot in one complete circuit. The journey is estimated at 511-km’s with a total elevation gain of 36,000m +/-.

The Wainwrights are named after Alfred Wainwright (1907-1991) who became famous for his books known as ‘Wainwright Guides’ that illustrated the Lakeland Fells in 7-volumes. They are the standard reference work for the 214 fells of the English Lake District.

Wainwright was born in Lancashire and started his passion for the Lake District at the age of 23-years. Work on his pictoral guides started in 1952 and the project took 13-years to complete. Apparently, Wainwright would create 1-page per evening.

Between 2005-2009 all the guides were updated to acknowledge changes within the fells. One key change was the inclusion of photography on the covers to replace the original drawings by Wainwright.

The Wainwrights

214 fells which range in height from 985ft to 3120ft.  There are over 500 summits above 1,000ft in the Lake District, 171 of them are above 2,000ft. These higher fells have been categorised as Hewitts and Nuttalls, some of them, together with lower fells, are classed as Marilyns; which list they appear in depends on their prominence, i.e. relative height.  These lists are subject to change as re-surveying takes place.  The list of Wainwrights is a definitive one and can never alter as it not dependent on the above criteria.  It is not clear why Wainwright chose these fells for inclusion in his guides but it is probable that he just liked the appearance of them when viewed from the valleys. ©wainwrightroutes.co.uk

The current record by fell running legend, Joss Naylor stands at 7-days and 1-hour and 25-minutes.

Steve says on his website, ‘Hopefully I can get close to or beat this time, but there are so many things that can go wrong over this sort of distance that I have no idea what will happen and how fast I can go. All I can do is have a go and see how long it takes.’

This run will also be for charity. Steve’s says, ‘this is because my younger sister, Hilary, was diagnosed with MS about 10 years ago. It is hard seeing someone who has always been physically active having to be pushed round in a wheelchair, but Hilary is always positive when you see her and currently the condition seems to be fairly stable.’

Donate HERE

The Attempt

Steve provides a a great overview and talk through in this You Tube clip:

screenshot_386

Follow Steve LIVE HERE

  • Route Map available HERE
  • Timing chart for all 214-tops HERE
  • Timings for CP’s HERE


screenshot_385

Who is Steve Birkinshaw?

Steve Birkinshaw – Veteran Mountain Runner

Steve is a veteran mountain runner who has been participating in outdoor events since a very young age and is entering the Dragon’s Back race as a Berghaus sponsored athlete.

Steve balances a work and family life with competing at an elite level in some of the toughest races in the running calendar.

Here are just some of Steve’s successes:

• 7 times winner of KIMM/OMM elite

• Winner of elite at the following mountain marathons: Saunders, Mourne, Lowe Alpine, Rab and Arctic

• Winner Lakeland 100 (UTLD) – 105 mile trail race

• 2 times winner British Adventure Racing Champs

• 7th World Adventure Racing Champs

• Winner Hebridean Challenge

• British 35+ Orienteering Champion

• British Night Orienteering Champion

• Bob Graham Round (17:09) 6th fastest

• Charlie Ramsay round (21:02) 6th fastest -fastest solo round

• Paddy Buckley round (20:27) 5th fastest

• Adidas Terrex Adventure Race winner

Content ©Berghaus

©iancorless.com.©iancorless.com.P1100682

******

If you like the content on this website you can support us by making a donation

one-off funding with gofundme

gofundme

or funding via Patreon

donate

Great Lakeland 3 Day ™ Day 3

©iancorless.com.IMG_6370GL3D_Day3

The final day of the Great Lakeland 3 Day ™ was very much a victory lap as runners finished of the final leg of a 3-day triangular route, navigating via a selection of trigs to arrive back at Pooley Bridge where they had all started 3-days earlier.

The damp, misty and wet conditions of the previous day faded away with the arrival of dawn. Although the day would remain overcast for the majority, the occasional glimpse of sun would appear when the clouds decided to break.

Although a shorter day, a great deal of challenges would confront the Elite, A, B and C categories. The great success of the GL3D is the appeal and flexibility for each participant to race at a different level on different days if required. Shane Ohly said, ‘We are a small but adventurous three-day mountain marathon with a relaxed and friendly atmosphere that attracts both runners and long-distance walkers.’

The race has been an incredible success and the addition of the C course has made the 2014 edition even more appealing providing a tough and challenging adventure for walkers. Rather than complex navigation, the emphasis is on long mountain journeys, spectacular scenery and enjoying an amazing mountain experience.

Brilliantly organized, great fun, tough, a real challenge… are all words and comments that could be heard as participants departed from the race base at Pooley Bridge.

I am sure many will be back in 2015.


Overall Results: 

Elite:

Jim Mann 16:30:28

Chris Warner 18:29:57

Robert Hicks 19:08:56

1st lady: Kerstin Rosenqvist 21:39:15

A

Simon Harper 17:38:38

Jim Trueman 18:24:30

Matt Puxon 18:54:21

1st lady: Sally Ann Spencer 19:59:13

B

Alexander Beaven 12:37:40

David Nevill 13:10:03

Nick Gallivan 13:45:42

1st lady: Christine Waller 16:34:26

C

Stephen Burt 11:49:56

Jacqueline Cooper 12:59:25

Martin & Nicola Kirkman 13:00:20

Ourea Events HERE

OureaEventsLogo(500x500-cropped) copy

Great Lakeland 3 Day™ HERE

all images ©iancorless.com – all rights reserved

Ricky Lightfoot wins 60th 3 Peaks Race

 ©Mick Kenyon / Racing Snakes

©Mick Kenyon / Racing Snakes

After a number of attempts at glory and a second place finish in 2009, Salomon International runner Ricky Lightfoot eventually added one of fell running ‘monuments’ to his growing list of big wins, as he stormed to victory at the 60th 3 Peaks Race.

Matt Ward, PR for the Salomon Trail Team provides an insight into a classic race.

Understated as ever the Salomon International runner stated:

“I wasn’t expecting much at the 3 Peaks, I thought it would be a good hard training run in preparation for the Maxi Race in Annecy which is in May, I felt I was in good enough shape to get a top 10 finish and I’d have been happy to run somewhere between 3.00-3.10.”

As it turned out his winning time of 2:53:16 was the third fastest time in the last 15 years, and this effort was underlined by second-placer Tom Owens who said:

“Ricky had a very strong run and I was impressed with his finishing time – given the running conditions were not fast with the recent rain which made the course very muddy and then there were the strong winds.”
A compliment indeed from the 2011 winner. Ricky explains how the race unravelled:
“After a troublesome start to 2014 with injuries I hardly imagined that I’d get a chance to have a crack at the 3 Peaks Race this year, but after a late entry I’m happy to say I took the chance and ran it. I was always doubtful that I’d get an entry so late so trained as normal up until Wednesday when I found out I had been given an one, that gave me Thursday and Friday to recover for the race the following day.
“We arrived in Horton on the morning of the race and the weather was pretty horrid, the clag was down and there was shower after shower. I was told that the course would be pretty wet and muddy today and as there was a few other events on the same day the paths would be well trodden. We picked our numbers up and changed, I managed to get a little run up the road to warm up in-between showers and it was almost time to gather on the start. I don’t know where time goes before the race!”
“Another quality field had assembled for the 60th 3 Peaks Race with only 1 or 2 Internationals this year. We toed the start line and the race got under way, I decided to push the pace from the start and led out of the field and onto the road, Salomon GB Team mate Tom Owens followed and we worked together on our way up to Pen Y Ghent, as we approached the summit I began to feel the effects of the fast start and lack of running fast in general, Tom pulled away and I was passed by Thor Ludvigson with Rob Jebb just on my heels as we dibbed the first summit.”
“The run off was wet and the clag was down, I managed to catch Thor and kept Tom in my sights as we reached the path where other runners were coming up (thanks for the shouts). I managed to catch Tom and again we pushed on over to High Birkwith, I felt as though I was hanging on at this point which was a bit worrying but I thought I’d start to fade from the pace around the hour mark.”
“I stuck to Tom along the road and we reached Ribblehead together, Tom stopped to grab his bottle and lost a few seconds while I moved on and picked a Kinetica Gel up off friend Jackie Winn further along the track where Tom caught me again. We could see that we had a gap to 3rd place which was good as we knew Jebby would claw some time back climbing up to Whernside. We reached the top in 1.42 which from previous peaks races I’d ran knew that we were running quick given the underfoot conditions.”
“Tom pulled a few seconds on the Whernside descent but I managed to catch him on the run over to Hill Inn, I took another Kinetica Gel from Jackie at this point as we only had one more summit to climb, Ingleborough. This section seemed to fly by, we reached the bottom of the steep climb with Tom only slightly ahead. Half way up I felt as though a had a little something left so pushed a little harder to the summit, I was surprised to move away from Tom and reach Ingleborough with an advantage. Could I really win the 3 Peaks?”
“I was always conscious of Tom as he’s one of the best descenders around, off the summit I pushed to see whether I could grab a few more seconds, at this point I found myself moving away. There was a strong head wind which made the going feel really slow. I reached Sulber Nick and the finger post which I’d remembered from previous years and took one last glance to see if anyone was catching. At this point I knew there wasn’t far to the finish, looking at my Suunto I knew today it was going to be a PB so pushed a little harder on the run in, I crossed the line in 2.53.16.”
“I’m over the moon at winning my first 3 Peaks Race as it has come so unexpected! Once again the 3 Peaks Race put on an excellent event and is up there with some of the best races around. Thanks to the Jackie Winn, the marshalls and spectators, the shouts of encouragement really do help!”
 ©Mick Kenyon / Racing Snakes

©Mick Kenyon / Racing Snakes

Former winner Owens was also satisfied with his day, especially given his injury issues of 2013, he commented:

“I missed the 3 peaks in 2013 through injury so was delighted to be back at this classic race & knew that I was in pretty good shape. Ricky and myself worked together for much of the race and it was relaxing to be running with a team mate, the pace felt good and we were pulling away from the other runners.
“I was always conscious of the quality of the chasing runners and their ability to make up time- especially Jebby with his climbing ability & pedigree at this race.
“Ricky and I were together through Hill Inn and this is where the race really kicks in -especially this year as the 2nd half of the race was into head winds. On the lower slopes of Ingleborough I still felt okay and started to get away from Ricky on the step sections over the boggy ground but Ricky kept pulling me back! we were also together up the steep section on Ingleborough.
“I had a bad energy blip and Ricky pushed on getting some time on me to the top of Ingleborough. I tried to stay calm and recover as it’s a long slog of a descent to the finish & it is possible to real folk in. I started to descend hard. It was a particularly strong head wind and muddy conditions and try as I might I wasn’t closing the gap! in the end Ricky was pulling away! I took a small tumble which made me cramp and slowed further, so second place it was.”
“Ricky was telling me he’s had injury issues this year but this result shows he’s still in great shape & his ultra running in 2013 has certainly made him resilient. I hope he has a cracking 2014 season.”
“I thought I had a pretty good run and was pleased with the way I was feeling for most of the race – it was certainly exciting to be at the sharp end. Although having won this race once before it’s hard to be happy with second place now! Perhaps I should have started off more conservatively? I also faffed around at the drinking stops finding my water bottles which seemed to zap momentum & I had to work hard to get back…..regardless it’s still very early in the season so onwards and upwards!”
Behind Ricky and Tom, Rob Jebb finished a very strong third, just under 3 hours.
In his first trip the UK for the 3 Peaks race Salomon International’s Thor Ludvigsen finished a highly creditable 6th, and has vowed to return to the event after thoroughly enjoying his day ‘fell running’ and his weekend in Yorkshire!
For further information on any aspect of the Salomon Trail Team and Salomon Avenir athletes, products and racing activity, please contact team PR manager Matt Ward on +44(0)7515558670 or email matt@runcomm.co.uk

Thule 4 Peaks Mountain Challenge – South Africa

_DSC4892

The 11th THULE 4 Peaks Mountain Challenge in Association with SALOMON takes place on the weekend of the 23rd / 25th August 2013. The 24km mountain run is through the beautiful and challenging Witteberg mountain range near Ficksburg in the Eastern Free State.  Last year saw the introduction of the ‘Pyramid Challenge’ where athletes have the chance to take on the ‘beast’ 40 % gradient vertical ascent  and descent of the first pyramid at Moolmashoek Nature Reserve. The THULE 4 Peaks Mountain Challenge provides a weekend festival of Free State hospitality and an introduction to ‘mountain-running’ where both the accomplished trail runners and weekend warriors get to challenge themselves.  The hospitality is rooted in the management of the Moolmanshoek Guest Lodge and the beautiful private nature reserve serves as HQ for the weekend activities.

Moolmanshoek Private Nature Reserve is situated 360km from Johannesburg and 230km from Bloemfontein and the unique scenery with mountain peaks such as Visierskerf, the highest in the Witteberg mountain range, provides a perfect venue to run, to explore and to challenge yourself against the elements. The 24km mountain run is a great introduction to the ultimate running challenge – mountain -running, with the 24km distance being the equivalent of a road ultra-marathon.   The THULE 4 Peaks Mountain Challenge is an un-supported off road run, the concept derived from British ‘fell running’ whereby runners will conquer slopes to then enjoy superb vistas that the Witteberg mountain range ridgelines provide.  The course is not marked but follows a circular route starting at 1460m, with a total vertical ascent over the race of 1420m to the highest point at 2312m.  The concept of mountain running is one of expedition and adventure, where crossing the finish line is about conquering the elements, navigating your way through the rough terrain the course provides and feeling a sense of achivement not matched by any traditional running event. Participants must be totally self sustainable carrying their own fluids and nutrition for the entire race.  The top competitors usually complete the race in 3 hours or less with some runners taking up to 9 hours, the cut off, to receive the revered Four Peaks medal.

The weekend see’s the main event, the THULE 4 Peaks Mountain Challenge kicking off at 6am on Saturday the 24th.  Entries received already include Salomon runners such as Thabang Madiba, Ryno Griesel, Jock Green and Matt Kretzmann against the local knowledge of multiple winner Isaac Mazibuko . In the ladies race we expect to see Salomon’s Jackie Moore racing with Takalani Ndandani and Megan Mackensie. This front pack of runners will be followed by the weekend warriors challenging themselves to the next level of running – building some bravery for ‘the ultimate’ the Salomon Skyrun hosted in November each year. After Saturday’s nights festivities, we kick off  Sunday morning with the Red Bull Pyramid Challenge which will see runners tackle a net altitude gain of 850m over 3km ascent and descent of the first pyramid.

More details from: HERE

screenshot_320

Terry Conway pre race interview Ronda dels Cims 2013

Terry Conway at Cavalls del Vent copyright iancorless.com

Terry Conway at Cavalls del Vent copyright iancorless.com

Lakeland 100 winner and course record holder, Terry Conway speaks to Ian ahead of the 2013 Ronda dels Cims. This will be Terry’s biggest race challenge yet. A race over 100 miles with altitude gain over 12,000m is not something that is easy to prepare for while living in the UK. However, Terry has paced his home in the English Lakes and has trained hard to prepare himself for the challenge ahead.

YouTube HERE

Links:


Zegama – a chilled and relaxed Friday

A selection of images in and around the town of Zegama. This race is a beautiful mountain race with a history. As runners arrive ahead of tomorrows registration day, the locals join in for the build up to Sunday’s race.

Sarah Ridgeway Zegama pre race interview

Sarah Ridgeway Inov-8 copyright Ian Corless

Sarah Ridgeway Inov-8 copyright Ian Corless

Sarah Ridgeway needs no introduction to the ‘Zegama’ experience. She raced here in 2012 and placed 6th overall. She loves Zegama and she feels very privileged not only to be back racing at Zegama again but also to be part of the Inov-8 International Skyrunning Team.

Last years race was cold, wet and we had snow. Sarah hopes she gets similar conditions this year… one of the advantages of being a fell and mountain runner in the UK!

YouTube HERE

Links: