Fastpacking LIGHT – A Guide

My recent article on Fastpacking (here) gained a great deal of attention. In many respects, I am not surprised, I think mini or extended semi or selfi-sufficient journeys are extremely popular and only on the increase.

The above post was in-depth and provided an overview of options that are available to make a fastpack trip effective. In some cases, coffee being a prime example, I did not go with the lightest possibilities available. The main reason for that? Comfort usually comes with a little more weight.

After a recent fastpack trip (just one-night wild camping,) I posted a photo of my pack contents and it created some interest as the weight was 5.4kg including pack, food, water, tent and all my essential items.

I received countless messages for more information, so, here goes. A detailed breakdown and description of the items and why I use them or more importantly, why I take them! Gladly, some of the items I do not need to use but need to have, just in case.

Below is a video, in-depth, where I discuss all the items listed below.

Tent:

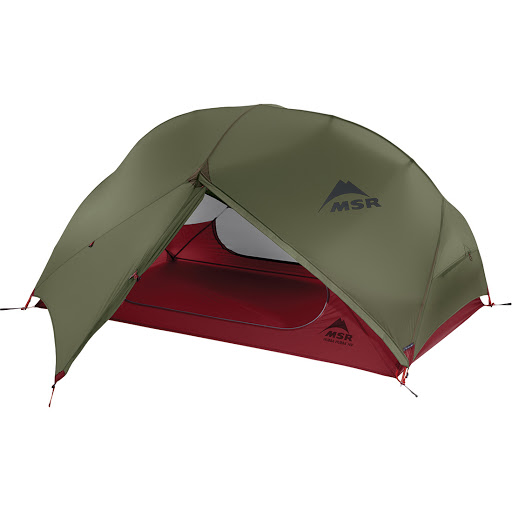
©Earl Harper – MSR Hubba Hubba NX Tent

My go to tent is a MSR Hubba Hubba NX tent (here) which is 1600g which is 2-person tent. It has loads of space both in width and height, it has two access doors with room to store pack, shoes and an area to cook in if required. It is free-standing, can be pitched inner or outer only. Split between 2-people, it is 800g each.

Current favourite solo tent is the Nemo Hornet 1P (review HERE) which has loads of space and comfort and all coming in at 731g.

NEMO Hornet 1P

If I was solo fastpacking and wanted the lightest and smallest possible, I would change the tent to a Nordisk Lofoten 1 LW (here) which is arguably the lightest and smallest packing tent in the world (still with comfort and stability) weighing just 490g and is the size of a bottle of water, 11cm x 22cm. It’s a two-layer tent which still provides an area for gear storage, with a height of just 70cm, sitting space is compromised. However, if fast, light are priorities, this takes some beating. Also, you can use the 2-man inner inside the same fly-sheet, with obviously less storage option.

Do you need a 12-week and/ or 24-week Multi-Day Training Plan perfect for a multi-day adventure or a race like Marathon des Sables? They are designed to provide you with a structured weekly plan culminating in a target event.

View a sample week HERE from the 12-week planPurchase HERE. (£14.50 pw)

View a sample week HERE from the 24-week planPurchase HERE. (£12 pw)

Wearing:

I don’t add the clothes I am wearing to my overall fastpack weight, but it is worth looking at options and variables. I was surprised when comparing run shorts how weights varied. For example, I had shorts with an inner (like cycling shorts,) they weighed 157g, considerably heavier than my RAB Skyline.

RAB Skyline shorts – 96g 

RAB Skyline Tee – 84g

Smartwool socks – 45g

Hat – 45g

Glasses – 30g 

Buff – 36g 

Scott Supertrac RC2 shoes – 290g

Pack:

inov-8 25ltr fastpack 619g – This is actually a prototype pack, specifically made for athletes on the inov-8 team. It’s a really great pack, one of the best I have used. It has a vest like fit, waist belt, comfortable strapping and loads of extra mesh pockets that make it a joy to use. I have recently encouraged inov-8 to bring this to production. 

Pack Contents:

Rab Phantom Pull-on 90g – One of the lightest and smallest waterproof shells I have used.

RAB Phantom

Patagonia Micro Puff Vest (synthetic with ripstop Pertex Quantum) 162g – Synthetic filling but weight and small packing just like down. The perfect compromise. This warms the body and core and saves weight over a jacket. Obviously, you need to asses conditions, a jacket may be better. If so, I use a RAB Kaon which weighs 260g.

Patagonia Micro Puff Vest

RAB Hat 34g 

RAB Gloves 60g

Icebreaker 175 leggings 140g – Merino providing warmth on the trail (if required) and warmth when stopping for the day and sleeping.

Icebreaker 175 top 150g

RAB Mythic Ultra 360 sleeping bag 606g – State of the art sleeping bag with groundbreaking technology. Two versions are available, and this is the warmer one. The Mythic Ultra 180 provides a saving of 200g (weight 400g) and is perfect for warmer weather fastpack and/ or warm sleepers.

RAB Mythic Ultra 360 sleeping bag

 MSR Pocket Rocket Stove Kit 280g – Small, compact, lightweight and the gas canister can be stored inside. Perfect minimalist solution.

MSR Pocket Rocket Stove Kit

 MSR Trailshot 140g – A small and lightweight water filter system that guarantees water that one can drink and cook with.

MSR Trailshot

Katadyn BeFree Water Filter bottle (0.6L) 59g – This is a 600ml soft-flask with water filter inside. It allows for minimal weight and the ability to get water anywhere on the trail and drink on the go.

Katadyn BeFree Water Filter bottle

MSR Mugmate Coffee/ Tea Filter 30g – An ingenious small coffee/ tea filter that provides a lightweight solution for the coffee addict. Just pop it into a cup!

MSR Mugmate

Gas canister 113g 

Bivvy bag 151g – Great back up for added warmth should something unplanned happen.

Bivvy bag

Headtorch 46g – The Petzl e+LITE is one of the smallest and lightest around. Perfect when camping to provide light for reading and cooking. However, if you need light to run/ walk this is not the best option.

Petzl e+LITE

Garmin InReach mini 114g – I take this on all adventures. Ideal back-up and safety with an emergency button.

Garmin InReach mini

Mattress 300g* – Klymit V Ultralite SL (here) is full length, small pack size and very comfortable. *Photo is not the Klymit.

 Pillow 50g – You can always use a dry bag with clothes inside as an alternative?

First Aid 101g – Simple system by Lifesystems in a waterproof bag.

Dry Bag 68g – I use a 30ltr and use it is a liner for the pack. I find it easier to push everything in one place.

Sea to Summit spoon 12g – Sea to Summit with a long handle designed so that you can eat out of dehydrated food packs.

GoalZero Flip10 charger 75g – Good enough for one, maybe two phone charges.

Food: 

Firepot dehydrated meal 158g (per meal) – Dehydrated medals are a go-to solution for a meal when on the trail. Firepot have good calories, great taste and a good selection available.

Coffee 130g – Essential.

Snacks 300g – Bars/ nuts/ wine gums etc and importantly, *Kvikk Lunsj.

Water 600g – This is the weight of water in the 600ml soft-flask.

Camera: (obviously optional)

Sony A9 with 35mm f2.8 pancake lens 800g – I am a photographer, so, this is my serious luxury item and it comes with a weight penalty.

GoPro Max 231g

SUMMARY

Travelling light is great fun. It allows you to move faster with less strain. However, it is essential you travel light for the conditions. Too light and you may well get in trouble. So be careful and attentive. Light does not mean you will be uncomfortable, but you must accept a compromise comes from being minimal.

DOWNLOAD KIT LIST HERE

Of interest:

In Scandinavia, Kvikk Lunsj is an ‘essential’ for the trail. The chocolate consists of four rectangular wafers covered in milk chocolate, with thinner layers of chocolate between the wafers in order to break the chocolate into pieces easier. The chocolate has been advertised as a “hiking chocolate”, and it is often associated with skiing trips in Norwegian culture. Freia began printing the well-known Fjellvettreglene (Norwegian: the mountain code) on the inside of the packaging.

 There is much relevance to the points below and a great reminder for all.

1. Plan your trip and inform others about the route you have selected. Plan your trip based on the groups abilities, and always include alternative options. Obtain current information about the area and the weather conditions. Listen to the advice of seasoned mountaineers where possible. Ensure you have sufficient knowledge and practical skills to complete this trip. Respect the natural environment. Plan ahead and do not leave any litter behind you. Arrange meeting points during the trip that dont require mobile coverage or accurate timing. Is your planning sufficient to guarantee an enjoyable trip no matter what?

2. Adapt the planned routes according to ability and conditions. Assess the conditions continuously and adjust your plans accordingly. Respect the weather! Travelling with others is safer and means you will have someone to share your experiences with. If youre travelling alone, exercise caution. Do not embark on a long trip without sufficient experience. You must be able to take care of yourself as well as the others in your group. Be considerate of other hikers. Make sure you have read The Right of Access and its requirements. Make sure your group maintains an open and direct line of communication at all times. Can you complete the trip under these conditions and with this group?

3. Pay attention to the weather and the avalanche warnings. Always check the weather forecast and avalanche warnings to see what impact they have on the area. Follow the advice and choose a gentler terrain when conditions are too demanding. Check the conditions on yr.no, storm.no and varsom.no. Monitor the development of the weather and avalanche conditions along the way. Bear in mind that plans may need to be adjusted.

4. Be prepared for bad weather and frost, even on short trips. Dress appropriately for the weather, and the terrain. Remember that the weather changes quickly in the mountains. Bring extra clothing, and the equipment your route and terrain requires. Extra food and drink can help save lives, if the trip takes longer than planned or you have to wait for help. Is your group equipped to deal with a sudden change in weather?

5. Bring the necessary equipment so you can help yourself and others. In the winter, you need a windsack/bivvy sack, sleeping pad, sleeping bag and a shovel so that you can spend the night outdoors if you have to. A windsack can save lives. Bring a high-visibility vest or a headlight, that will make it easier to find you if necessary. Bring a first aid kit so you can help yourself and others. Always use a transmitter/receiver and have an avalanche probe and a shovel if you are traveling in avalanche prone terrain. Pack smart! Packing lists for different tours can be found at ut.no. Mobile phones can be a useful tool but remember that they do not work in all situations and areas. If an accident occurs, alert the police at 112, go for help or try to notify someone with other means. Are you able to take care of yourself and help others?

6. Choose safe routes. Recognize avalanche terrain and unsafe ice. Take an active decision to avoid terrain that is prone to avalanches and plan your route well. Be aware that avalanches can start in drops higher than five meters and steeper than 30 degrees. Even if you walk in flat terrain, you can trigger an avalanche on the mountainside above you. An avalanche dropout zone can be three times the height of the drop. Avoid terrain traps, such as narrow gorges. Consider what will happen if there is an avalanche. Be aware that a cornice can break off when you walk on a mountain ridge. Be aware of ice conditions when you walk on regulated lakes and rivers. Can an avalanche happen where I plan to go? What will the consequence be?

7. Use a map and a compass. Always know where you are. A map and compass are an essential basic equipment that always work. Pay attention to the map even when hiking on a marked trail. Knowing where you are on the map, makes for a better hiking experience. GPS and other electronic aids are helpful, but make sure you have extra batteries. Do you know where you are?

8. Dont be ashamed to turn around. Evaluate your route continuously and if conditions are becoming difficult, choose your best alternative long before you or group members become exhausted. Have the circumstances changed? Should you turn around? Is anyone in your group have problems completing the route? Should the group turn around? Enjoy the hike for its own sake and remember that there will be other opportunities if it is too challenging today.

9. Conserve your energy and seek shelter if necessary. Adjust your hiking speed to the weakest member of the group, and make sure that everyone can keep up. Remember to eat and drink frequently. When you exert yourself, your body needs more fluids than you may feel you need. Dont wait until you are exhausted before you seek shelter. Strong winds will tire you out quickly. Use your windsack or dig a snow cave before its too late. Are you able to get back to your base? Do you know where the nearest shelter is?

Please support this website. I believe everyone deserves to read quality, independent and factual articles – that’s why this website is open to all. Free press has never been so vital. I hope I can keep providing independent articles with your help. Any contribution, however big or small, is so valuable to help finance regular content. Please support me on Patreon HERE.

Continue reading

FASTPACKING – A Guide.

Runner’s and particularly ultra-runners have this wonderful ability to cover distance under their own power with very little needs or requirements. Some water, some food, a warm jacket and waterproofs and adventure awaits.

However, you can only go so far without the eventual need to return home.

Fastpacking manages to encompass the world of backpacking and running to create a different adventure, fast and light! Backpackers tend to carry a plethora of equipment and move at a slower pace, happy to adventure for days and weeks at a leisurely pace.

Fastpackers, arguably are runners or hikers looking for the need to travel for multiple day’s but still cover good distances and not be excessively slowed down by weight and excess equipment. The crux though is often the balance of weight and one’s ability to still run/ fast hike.

“Fastpacking isn’t for every outing though. Sometimes you want to take it easy, set up camp, and enjoy a particular area. That’s when backpacking shines. Sometimes you just want to crush through a workout. That’s when you want to go for a really fast run.” Says Simoni, adding that he opts for Fastpacking, “when I want to tag multiple mountain summits in an area at one time, without needing to take multiple trips. If you’re squeezed for time, Fastpacking can really help maximize an adventure. I find it very rewarding to cover so much distance with minimal gear.” – Justin Simioni via La Sportiva

One could arguably say that races like Marathon des Sables, which is 35-years old in 2020, have paved the way for Fastpacking bringing a ‘fast and light’ scenario to a race format allowing participants to cover 250km’s in a self-sufficient manner.

However, Fastpacking has been around for many, many years. Long before MDS, and long before the term Fastpacking. But in recent years, the sport has developed into something else, no doubt boosted by the growth and popularities of FKT’s and lighter, more functional equipment.

It’s important to clarify, that Fastpacking is what you make it. Personally, I enjoy a lighter pack, moving fast (but not running) and being self-sufficient. This allows me to carry a little more weight, travel for longer, enjoy the process and still cover over a marathon per day. You though may prefer to be more minimalist, look at micro/ mini adventures of 2-4 days and aim to run for much of the way. There are no rules to the speed or distance you go.

It’s also important to consider many other factors that come into place:

  • Location and environment – There is a big difference to Fastpacking in Nepal to say the Alps.
  • Time of year – Winter conditions require more equipment and more specific equipment.
  • Weather conditions – Check weather and be prepared.
  • Access to water – Streams, rivers and lakes
  • Access to external help – If you are going remote, be responsible and plan accordingly.

It’s easy to see from the above, there is no one definitive kit list, but there are crossovers that apply to both.

Route Plan

Plan the route in advance, understand the terrain and understand what possibilities exist to obtain water. Importantly, carry a system that will ensure that you can drink water that is available from any source.  Work out how long a planned route will take and then plan for contingency should something go wrong. Note that vertical ascent, descent and technical terrain will require moving slower. It’s not unusual to sometimes only cover 2km’s in 1-hour. Make sure you inform family or a friend of your planned trip, start day and end day. That way you have a backup and someone checking out for you. It may sound alarmist, but should something happen, you may well not be able to call for help. Contact and research with local authorities and ascertain current conditions on the trails and be aware of any restrictions.

Do you need a 12-week and/ or 24-week Multi-Day Training Plan perfect for a multi-day adventure or a race like Marathon des Sables? They are designed to provide you with a structured weekly plan culminating in a target event.

View a sample week HERE from the 12-week planPurchase HERE. (£14.50 pw)

View a sample week HERE from the 24-week planPurchase HERE. (£12 pw)

The Pack

Typically, a Fastpacker will look for something between 20 and 40 liters. For summer and short adventures, it is possible to go lighter and smaller. In winter, one will need more equipment that is often heavier and bulkier. Quite simply, the heavier the pack, the harder it is to run. So, if the plan is to run as much as possible, you need to go as minimal as possible whilst keeping safe. Make sure when testing and trying a pack that you add weight and understand how it feels when moving. Many brands are now producing packs specifically for Fastpacking. Personally, I like my pack to have a waist belt as this helps distribute the load and make the pack more secure. I would say that a minimum pack weight will be 6.5kg (14.3lbs) with water. Where possible, you would not want a pack to exceed 10kg (22lbs).

Packs with considering:

  • Montane Trailblazer 30ltr HERE
  • Ultimate Direction Fastpack 25 HERE
  • OMM Phantom 25 HERE
  • Six Moon Designs Flight 30 HERE
  • UltrAspire Epic XT HERE (this is a smaller pack)

Tent / Tarp/ Hammock

On a personal level, I would always go with a tent as I personally feel that it will offer more flexibility, especially if one shops in a clever way. My go to tent is an MSR Hubba Hubba NX (1/ 2 and 3 person versions available).

Things to look for in a tent:

  • Weight
  • Flexibility
  • How many season use?
  • Space

For example, the above MSR is a free-standing tent, so, it can be pitched inner only. If you know you are Fastpacking in ‘guaranteed’ good warm weather, you could travel without the fly sheet and basically sleep in a lightweight and bug proof shelter. Equally, if you know that you are fast packing in a bug free (mosquito) environment, you could leave the inner at home and just travel with the flysheet. This then provides a secure waterproof shelter, and, in this scenario, it acts just like a tarp but with more protection.

Tents to consider (2 person):

  • Big Agnes Fly Creek HV2 here
  • MSR Carbon Reflex 2 here
  • Nemo Hornet here
  • Nordisk Lofoten 2 ULW here
  • Terra Nova Solar Photon here
  • Marmot superalloy 2P here

Tarps offer a light solution that can be used with trekking poles and if one is going very minimal and fast, they provide a very simple answer for overnight protection. It all comes down to comfort and what one is prepared to accept as ‘comfort’ whilst Fastpacking. Big Agnes make the Onyx which comes in at under 200g. A Tarp is a compromise if you will have bugs such as mosquitos whilst on your adventure.

Hammocks are also an option providing one has trees to secure against. But if you add a bug net and tarp, in my opinion, a tent is a much better option. But a hammock can be a great addition to any Fastpacking kit, I use an Amazonas (here)

Sleeping Bag

A sleeping bag is essential for any adventure but firstly you need to ask some very specific questions before purchasing. I would say that ideally, one potentially could need several sleeping bags based on time of year and weather conditions. Remember, that any sleeping bag can be made warmer with layers. Add a hat, gloves and down jacket, suddenly the sleeping bag is considerably warmer.

Read an in-depth article HERE.

Down is by far the lightest and smallest packing size, however, down cannot get wet! So, if you think you will encounter damp and wet conditions, you should consider a bag with a synthetic filling. Weight and pack size are important and with sleeping bags, the more you pay, usually, the lighter and smaller it will be.

Be careful on the ‘comfort’ rating of the sleeping bag.

  • Upper limit – the highest temperature the average male can expect to have a comfortable night’s sleep at without too much sweating.
  • *Comfort – the temperature at which the average adult woman can expect to have a comfortable sleep. *This is the ideal for most people choosing
  • Lower limit – the temperature at which the average adult male can expect to have a good night’s sleep in a curled position.
  • Extreme – the lowest temperature at which the average adult woman can survive. This rating comes with caution and additional consideration should be given if you plan to sleep in temperatures this low.

Recommendations:

  • PHD – Make sleeping bags and jackets to order, I am a long time fan here
  • Yeti – Passion One and Passion Three are a good start point here
  • Rab – The new Mythic Ultra is a personal favourite, available in 180 and 360 here
  • OMM -The Mountain Raid 160 is a great bag if you need synthetic filling here
  • Sea to Summit – The ‘Spark’ range have been getting rave reviews here
  • Western Mountaineering – here

Sleeping Matt

The minimalist Fastpacker will go with no matt or a very simple and small pad that provides just enough coverage for one’s hip if sleeping on one’s side. Personally, a good night’s sleep is essential, and a good/ light matt is an essential element to a fast and light kit.

Also, one should consider that in winter/ snow conditions, a matt will be essential for insulation.

Another consideration is potential problems from a puncture. Many inflatable matts become super light by using extremely light material. Be careful when using and make sure any potential sharp objects are removed before sitting or sleeping!

Matts very considerably but a personal favourite is the Klymit V Ultralite slim which offers full length body comfort all for 316g. It also packs very small. There are lighter matts and I list them below:

  • Thermarest NeoAir Uberlite 158g
  • Klymit Inertia X 258g
  • Nemo Insulated Short 278g
  • Sea to Summit Ultralight 294g
  • Exped AirMat HL 304g

Ultimately, the matt you choose may come down to a tradeoff between price/ packing size and weight. Be careful, some matts can be noisy when you move. Ok of going solo but really irritating if you are in close proximity of someone else.

Cooking System

For me, the MSR PocketRocket Deluxe (here) or 2 (here) kit is perfect. It has all one needs in a very small pack size and weight. I use the PocketRocket 2 kit that allows me to place a gas canister inside the 278g kit + a 4oz canister.

Another consideration would be JETBOIL Micromo Cooking System (here) which is the lightest system they do and if you just need to boil water, this is perfect!

Food

Dehydrated food is probably the most obvious option here and there are many varieties on the market. They are a one-stop option that requires water to hydrate and if you wish to be extremely minimal, some options exist that do not require hot or boiling water. A personal favourite is Lyo (here) and Real Turmat (here) – It may sound crazy but they both make foods that I would consider eating when not fast packing. They also do Vegan and Vegetarian options.

Check out Chicken Tikka Masala, Nettle Curry, Penne alla Bolognese and if Vegan, Organic Chilli and Barley Risotto. Breakfasts such as Mexican Scrambled Eggs and Organic Millet Porridge.

For any adventure, I work on a breakfast and a dinner and then carry snacks for during the day, this can be energy bars or if on a long Fastpack, I will even consider carrying another main dehydrated meal. Typical weights are 132g with approx 600 cals.

Other options to look at for dehydrated food are:

Coffee

For me, Fastpacking is fun and adventure. I am not looking for FKT’s and therefore I do allow myself one or two luxuries. Coffee for me is an essential part of any trip and I mean good coffee. I could just take some coffee sachets and have a combined weight of grams.

No! For me, I take fresh ground coffee in a sealed tub and I use one of two coffee presses.

Aeropress here or Espro here

The Espro is my favourite as it acts as a flask/ drinking canister too. But it does come at a weight and size cost.

I fully appreciate that if going fast and light, the above is a complete no, no! But for me, that smell of fresh coffee each morning is worth it.

Water

You are going to be self-sufficient for multiple days, so, you need to find water and plan to obtain water from the route you will take. You can use purification tablets, I take the MSR TrailShot pocket sized filter (here) which meets U.S. EPA drinking water standards* and NSF protocol P231 for removal of bacteria (99.9999%), protozoa (99.9%), and particulates.

Clothing

Clothing requirements depend on the time of the year, the weather you will encounter and the duration of the Fastpack. Needless to say, one has to accept that changing clothes, taking a shower and feeling wonderfully fresh daily is not what Fastpacking is about. Layering clothing is essential to allow for fluctuations in temperature. Do your research, check weather forecasts and plan accordingly. The above photo is my equipment for a Fastpack in Nepal. Make sure you have a ‘Drybag’ to make sure all contents of the pack are protected from the weather, Sea to Summit (here) for example.

A good start point is as follows:

  • Short sleeve T
  • Long sleeve shirt
  • Shorts
  • Underwear x2?
  • Socks x2?
  • Hat with peak
  • Warm hat
  • Gloves
  • Merino base layer, top and bottom – I use Icebreaker here
  • Lightweight waterproof jacket – I use RAB Charge here
  • Lightweight down/ Primaloft jacket – I use RAB Kaon here
  • Buff
  • Bivvy bag

The above, for most, would be a start point and based on where and when Fastpacking, you could maybe add or takeaway certain items.

If going to more extreme and cold environments, the demand on clothing and what one takes will increase. I wrote an article on Fastpacking in Nepal (here) and this is a worthwhile read. Please note in Nepal, one can use tea rooms, so, one saves on tent/ tarp weight immediately if required.

Tracker/ Beacon

I use a Garmin InReach Mini (here) and it is superb. Small, light, has SOS button and allows for 2-way messaging anywhere in the world. I do not go on any adventure without it now. In conjunction with a mobile phone and associated App, functions become easier to use. Subscription services can be changed monthly and therefore one can add or takeaway facilities as required.

Another option to consider is a SPOT device.

Essential Extras:

  • Water purification
  • Toilet paper/ wet wipes
  • Hand sanitizer
  • First-aid kit
  • Sunscreen
  • Bug repellent
  • Headlamp and batteries
  • Lighter/ matches
  • Whistle
  • Map
  • Compass
  • Earphones

Optional Extras:

Trekking poles – to be honest, for most of my Fastpacks, poles are an essential and especially if one is using a Tarp or similar.

Battery pack for recharging.

Conclusion

Fastpacking for me, is one of the most pleasurable ways to travel by foot. The ability to cover distance, usually in a point-to-point way under ones own power and being self-sufficient is extremely rewarding. You can move as fast or as slow as you like, take as long as you wish and fully immerse yourself in the surroundings and environment.

Please support this website. I believe everyone deserves to read quality, independent and factual articles – that’s why this website is open to all. Free press has never been so vital. I hope I can keep providing independent articles with your help. Any contribution, however big or small, is so valuable to help finance regular content. Please support me on Patreon HERE.

Follow on:

Instagram – @iancorlessphotography

Twitter – @talkultra

facebook.com/iancorlessphotography

Web – www.iancorless.com

Web – www.iancorlessphotography.com

Image sales –www.iancorless.photoshelter.com