The beautiful island and people of La Palma have had their share of troubles, the impact of coronavirus, forest fires and of course the devastating volcanic eruption.
Nestled away, a hidden gem, the island was unknown (relatively) until a summit in 2012, ‘Less Cloud, More Sky’ – the idea of Lauri van Houten, Marino Giacometti (International Skyrunning Federation) in conjunction with Julio Carbera on the island; La Palma was elevated to a ‘go to’ place, particularly for runners.
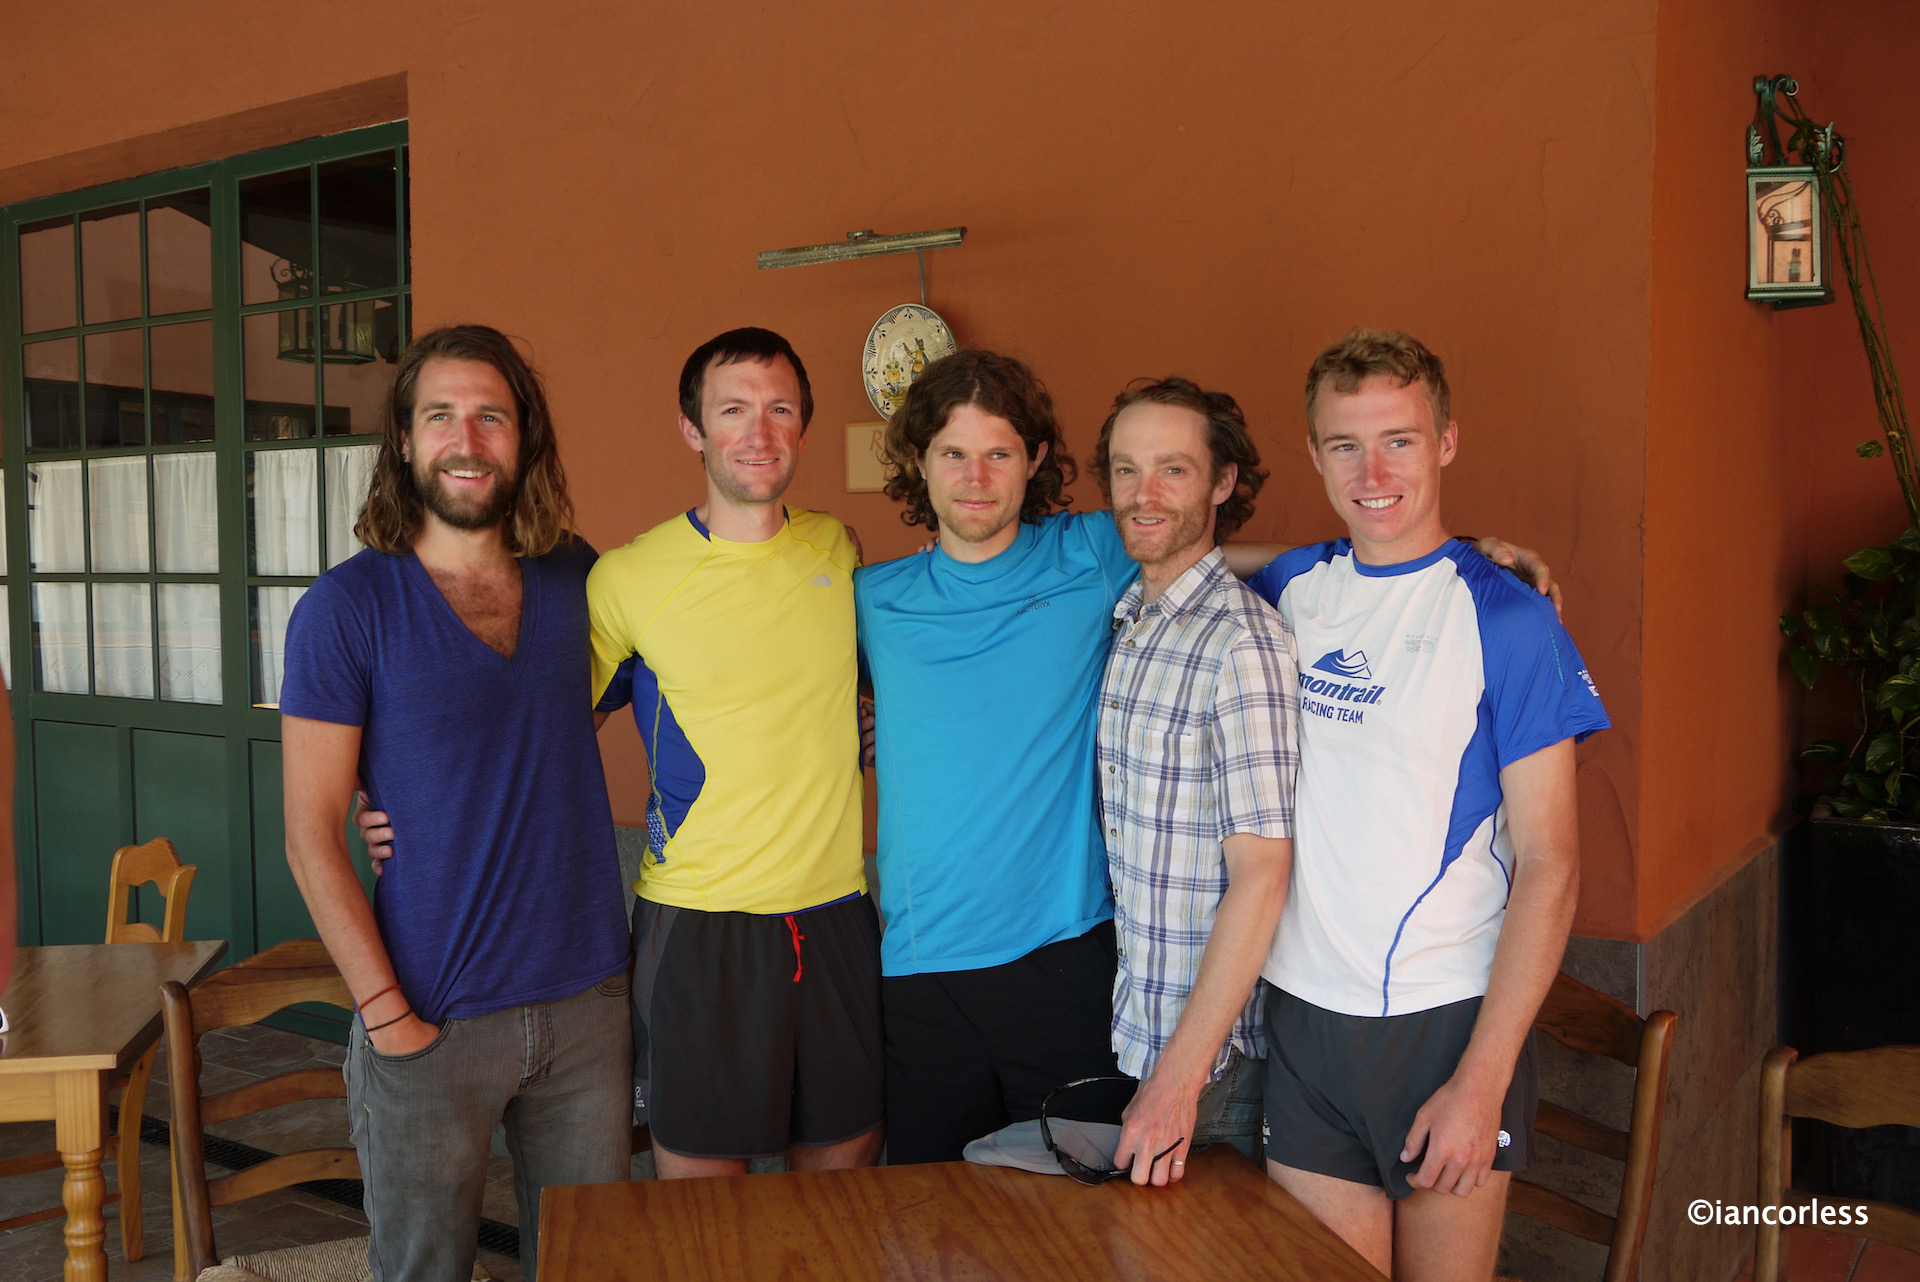
Kilian Jornet, Luis Alberto Hernando, Marco De Gasperi, Max King, Dakota Jones, Anton Krupicka, Sebastian Chaigneau, Francois D’Haene, Anna Frost, Nikki Kimball and he worlds best runners assembled on the island to discuss the future of skyrunning and discuss the future of the sport.
They also participated in the 2012 event and the stage was set for it to become one of, if not THE events of the year.
2012, victory went to ‘young money,’ Dakota Jones with Andy Symonds and Kilian Jornet 2nd and 3rd. For the women, Anna Frost dominated ahead of Nuria Picas and Nikki Kimball.
2012 – Anton Krupicka, Mike Wolfe, Joe Grant, Geoff Roes and Dakota Jones
2013, Kilian Jornet, Luis Alberto Hernando and Sage Canaday made 1,2 and 3 and for the women, Emelie Forsberg burst on to the scene ahead of Nuria Picas and Uxue Fraile.
2014 Luis Alberto Hernando finally beat Kilian Jornet and once again, Sage Canaday placed 3rd. Frosty (Anna Frost) returned to the top of the podium, this time with a course record 08:10:41 ahead of Maite Maiora and Uxue Fraile.
2015, Luis Alberto Hernando did the double followed by Dani Garcia and Blake Hose. For perspective, the top-10 reads today, in 2023, as a who’s who of trail running: Dakota Jones, 4th, Zach Miller 5th, Dimitrios Theodorakakos 6th, Cristofer Clemente 7th, Pablo Villa 8th, Julien Coudert 9th and Aurélien Dunand-Pallaz 10th. Emelie Forsberg once again topped the women’s podium with Anna Comet and Myriam Guillot placing 2nd and 3rd.
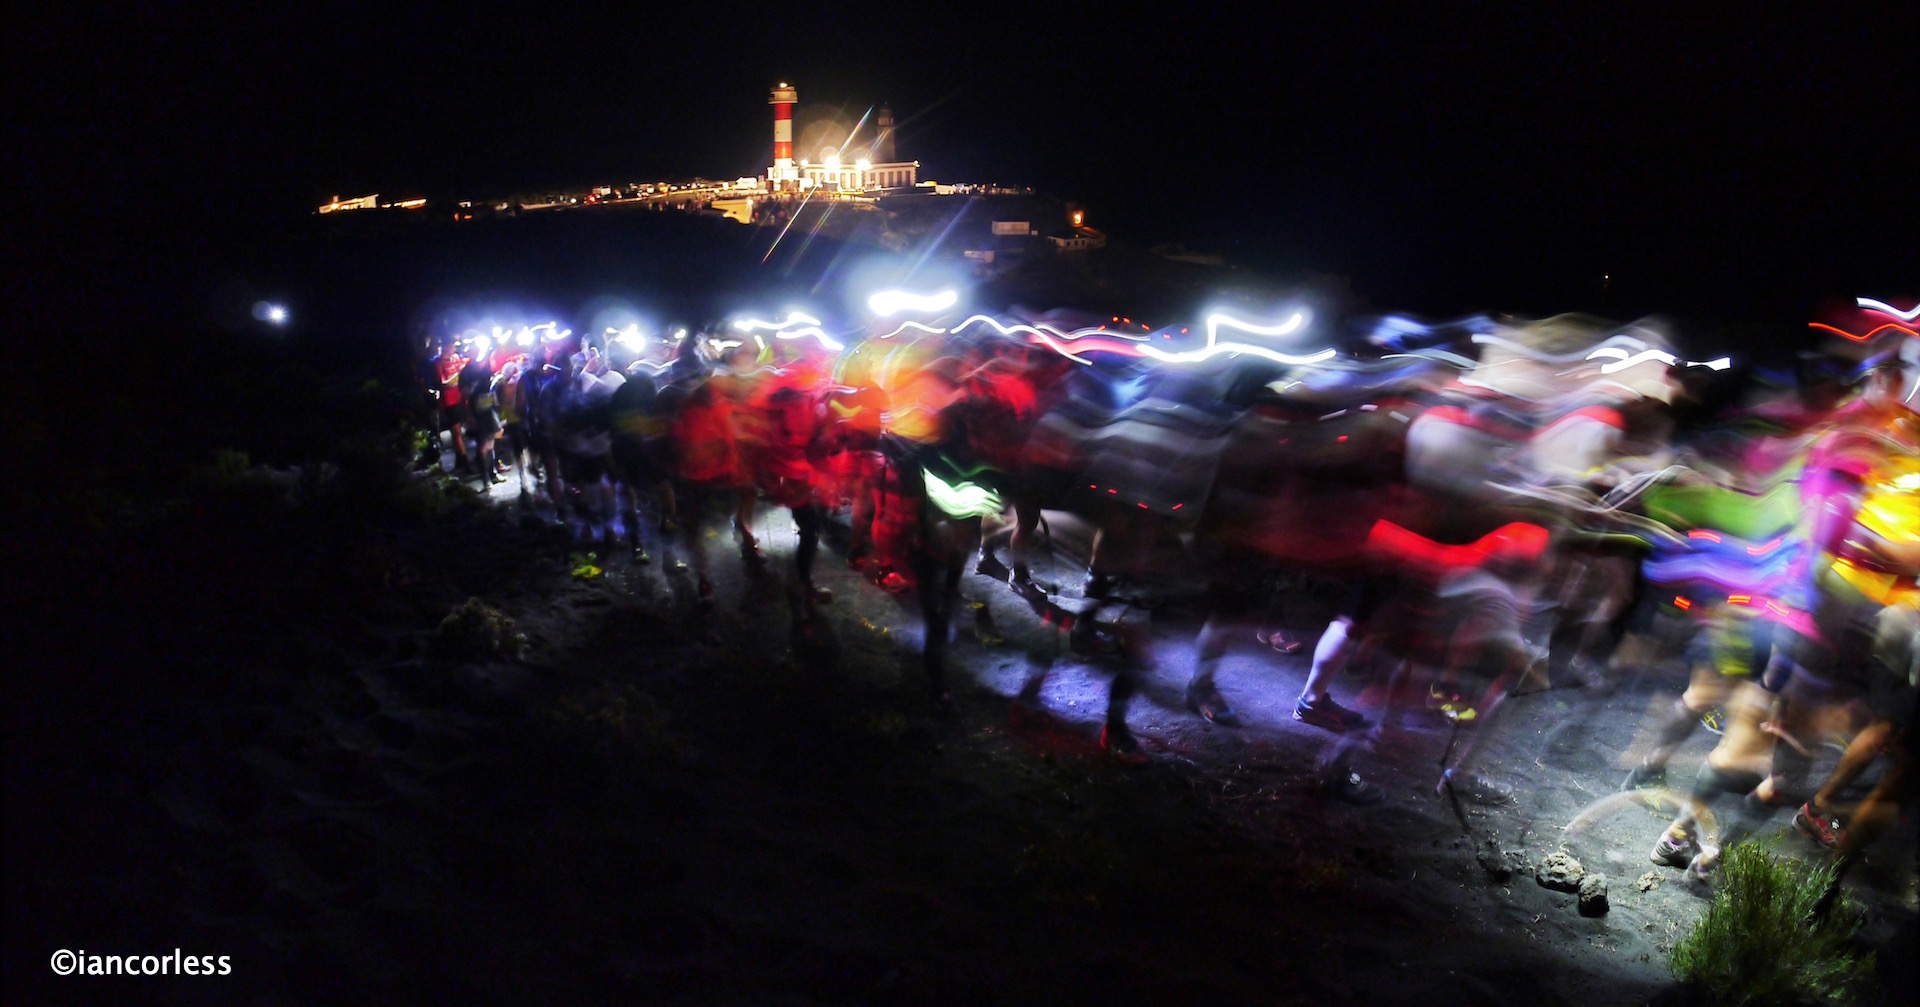
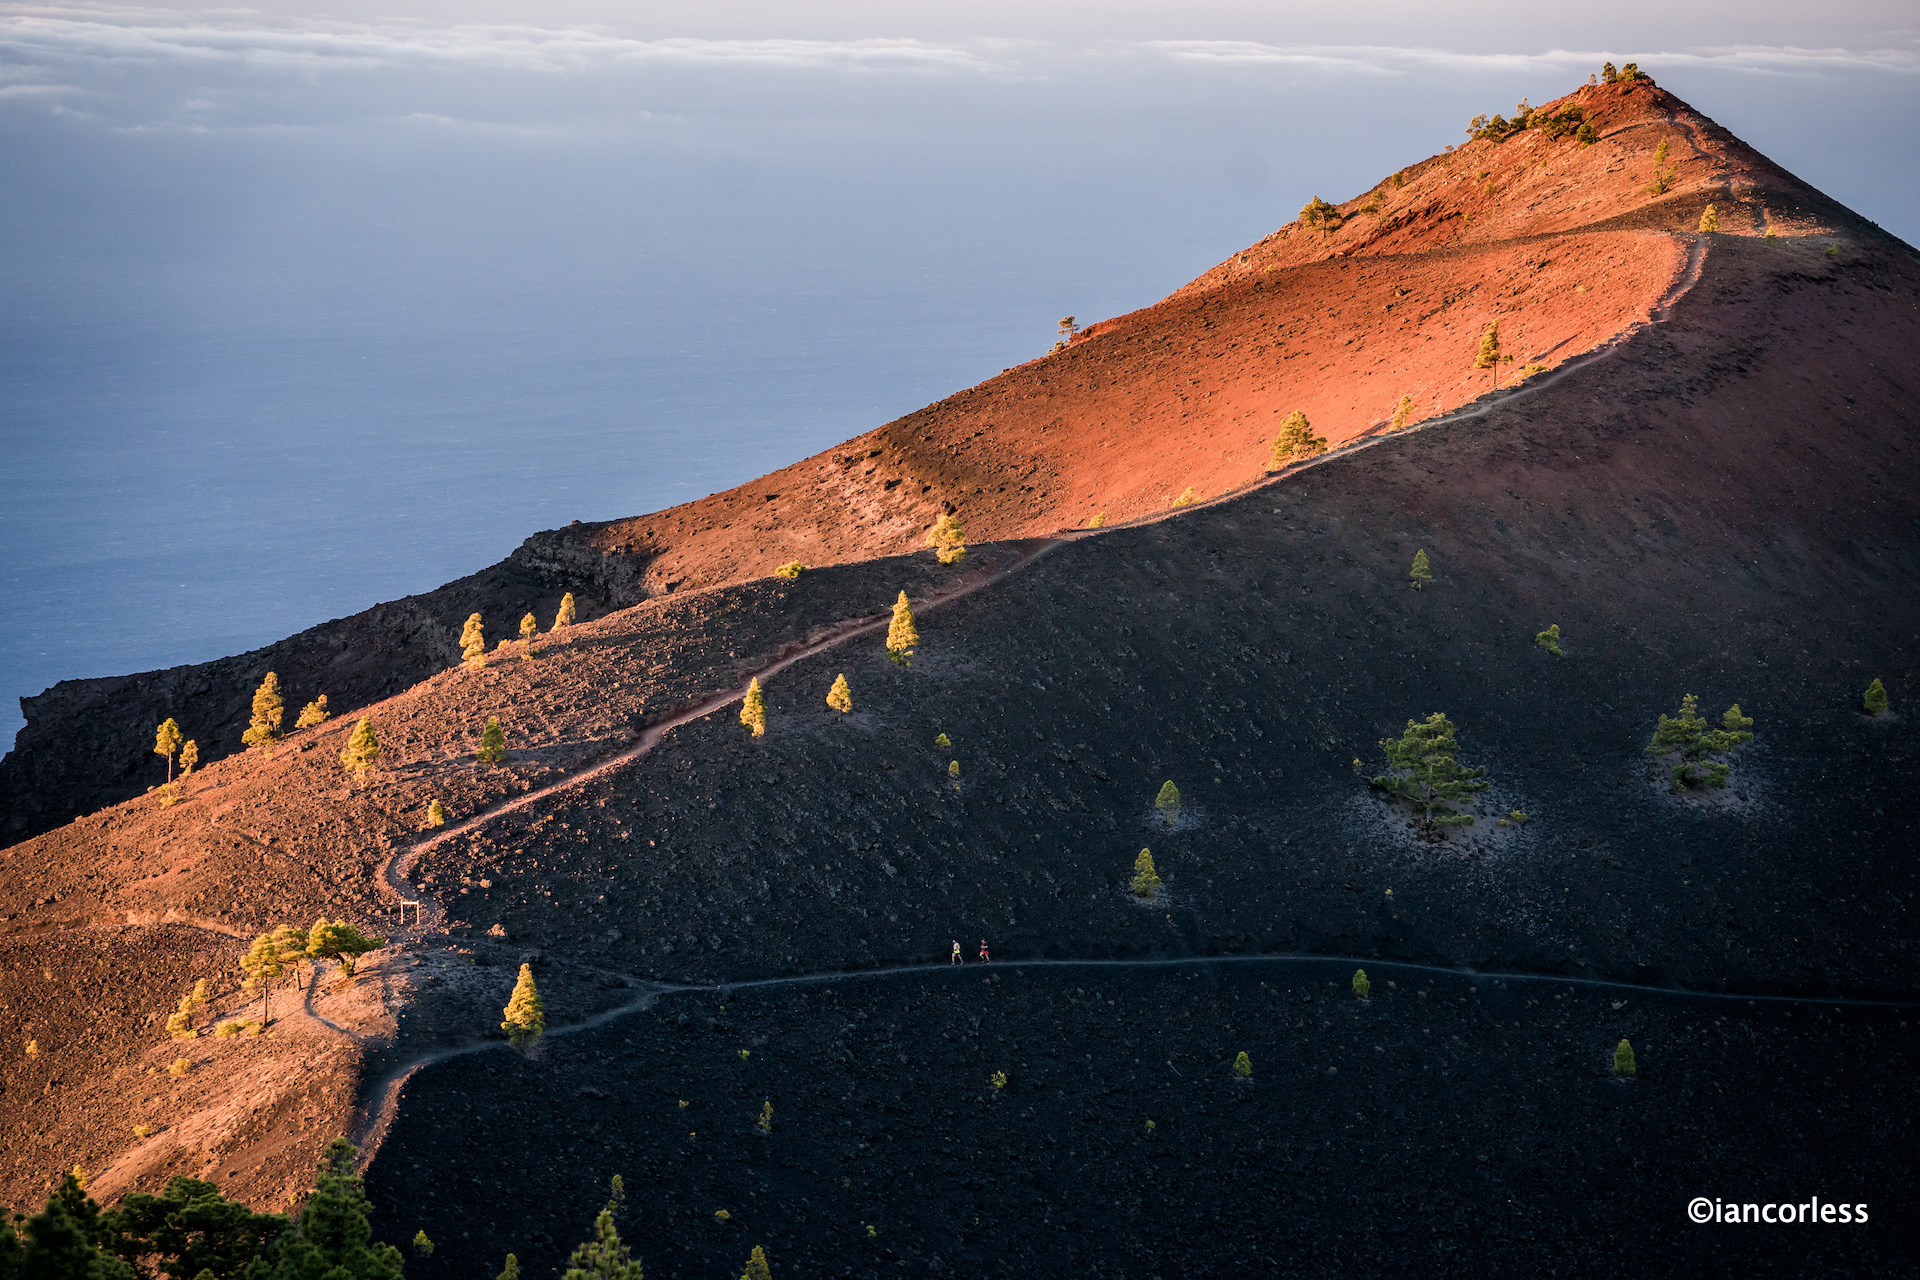
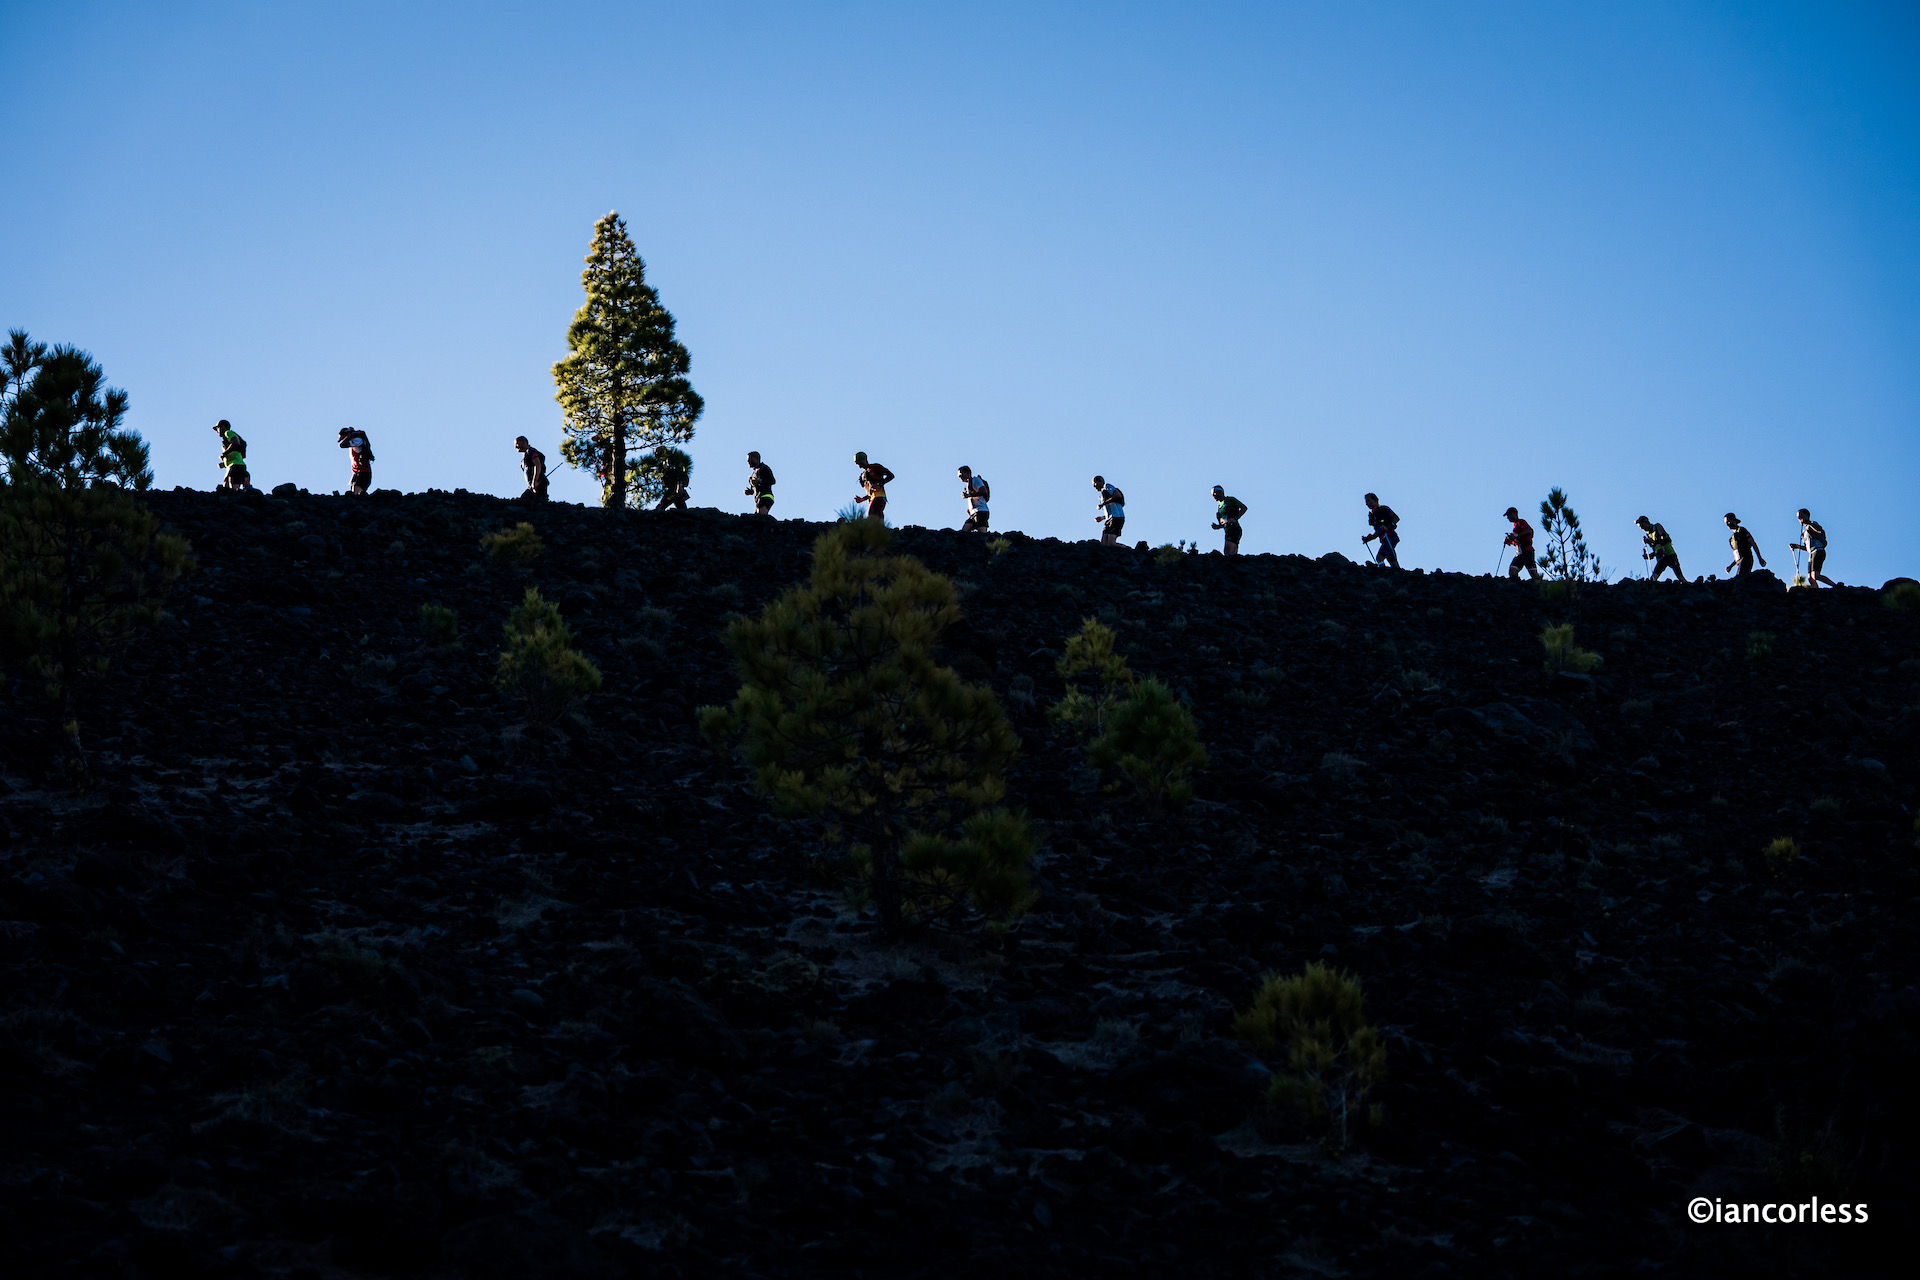
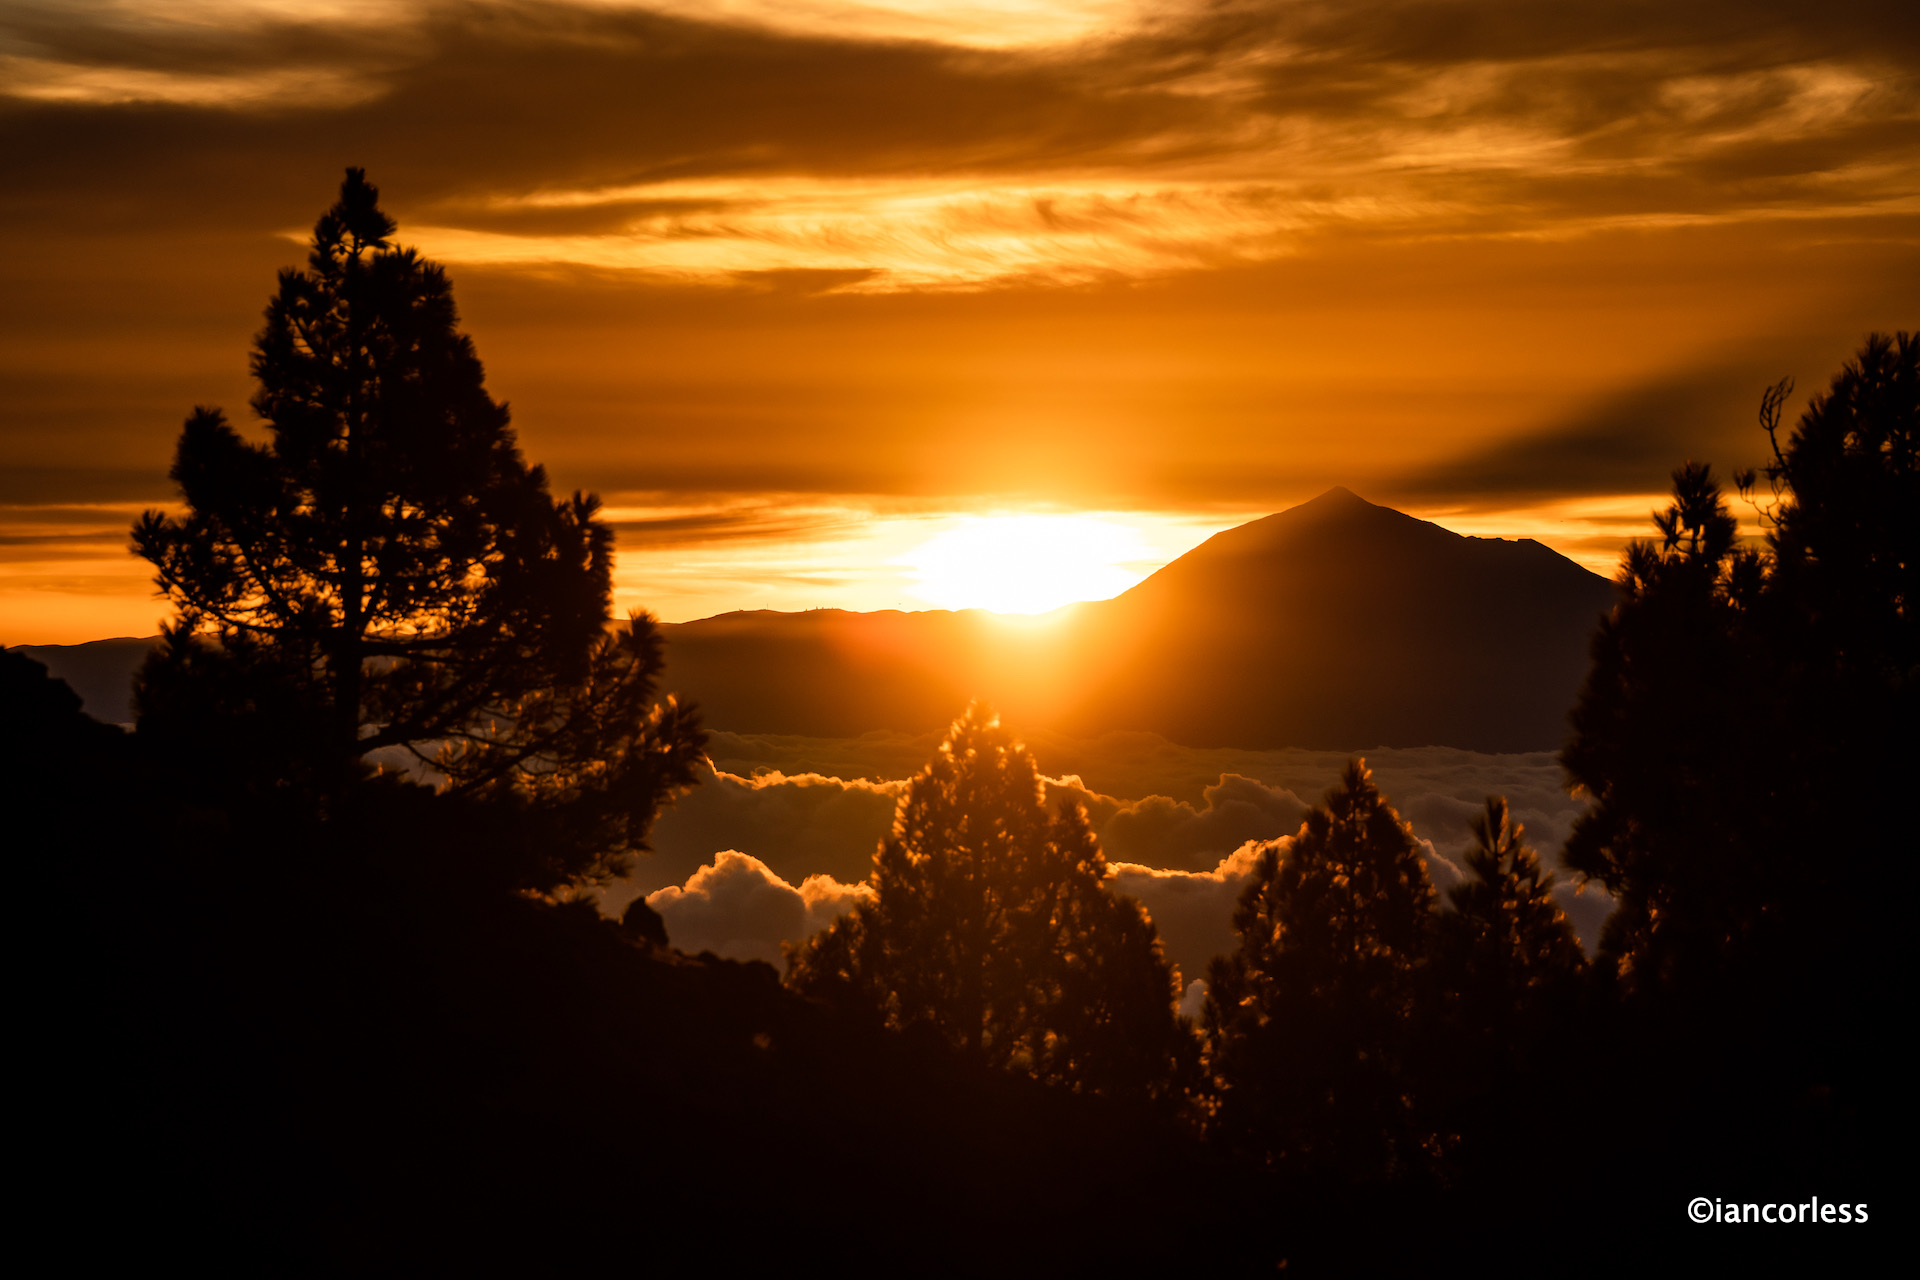
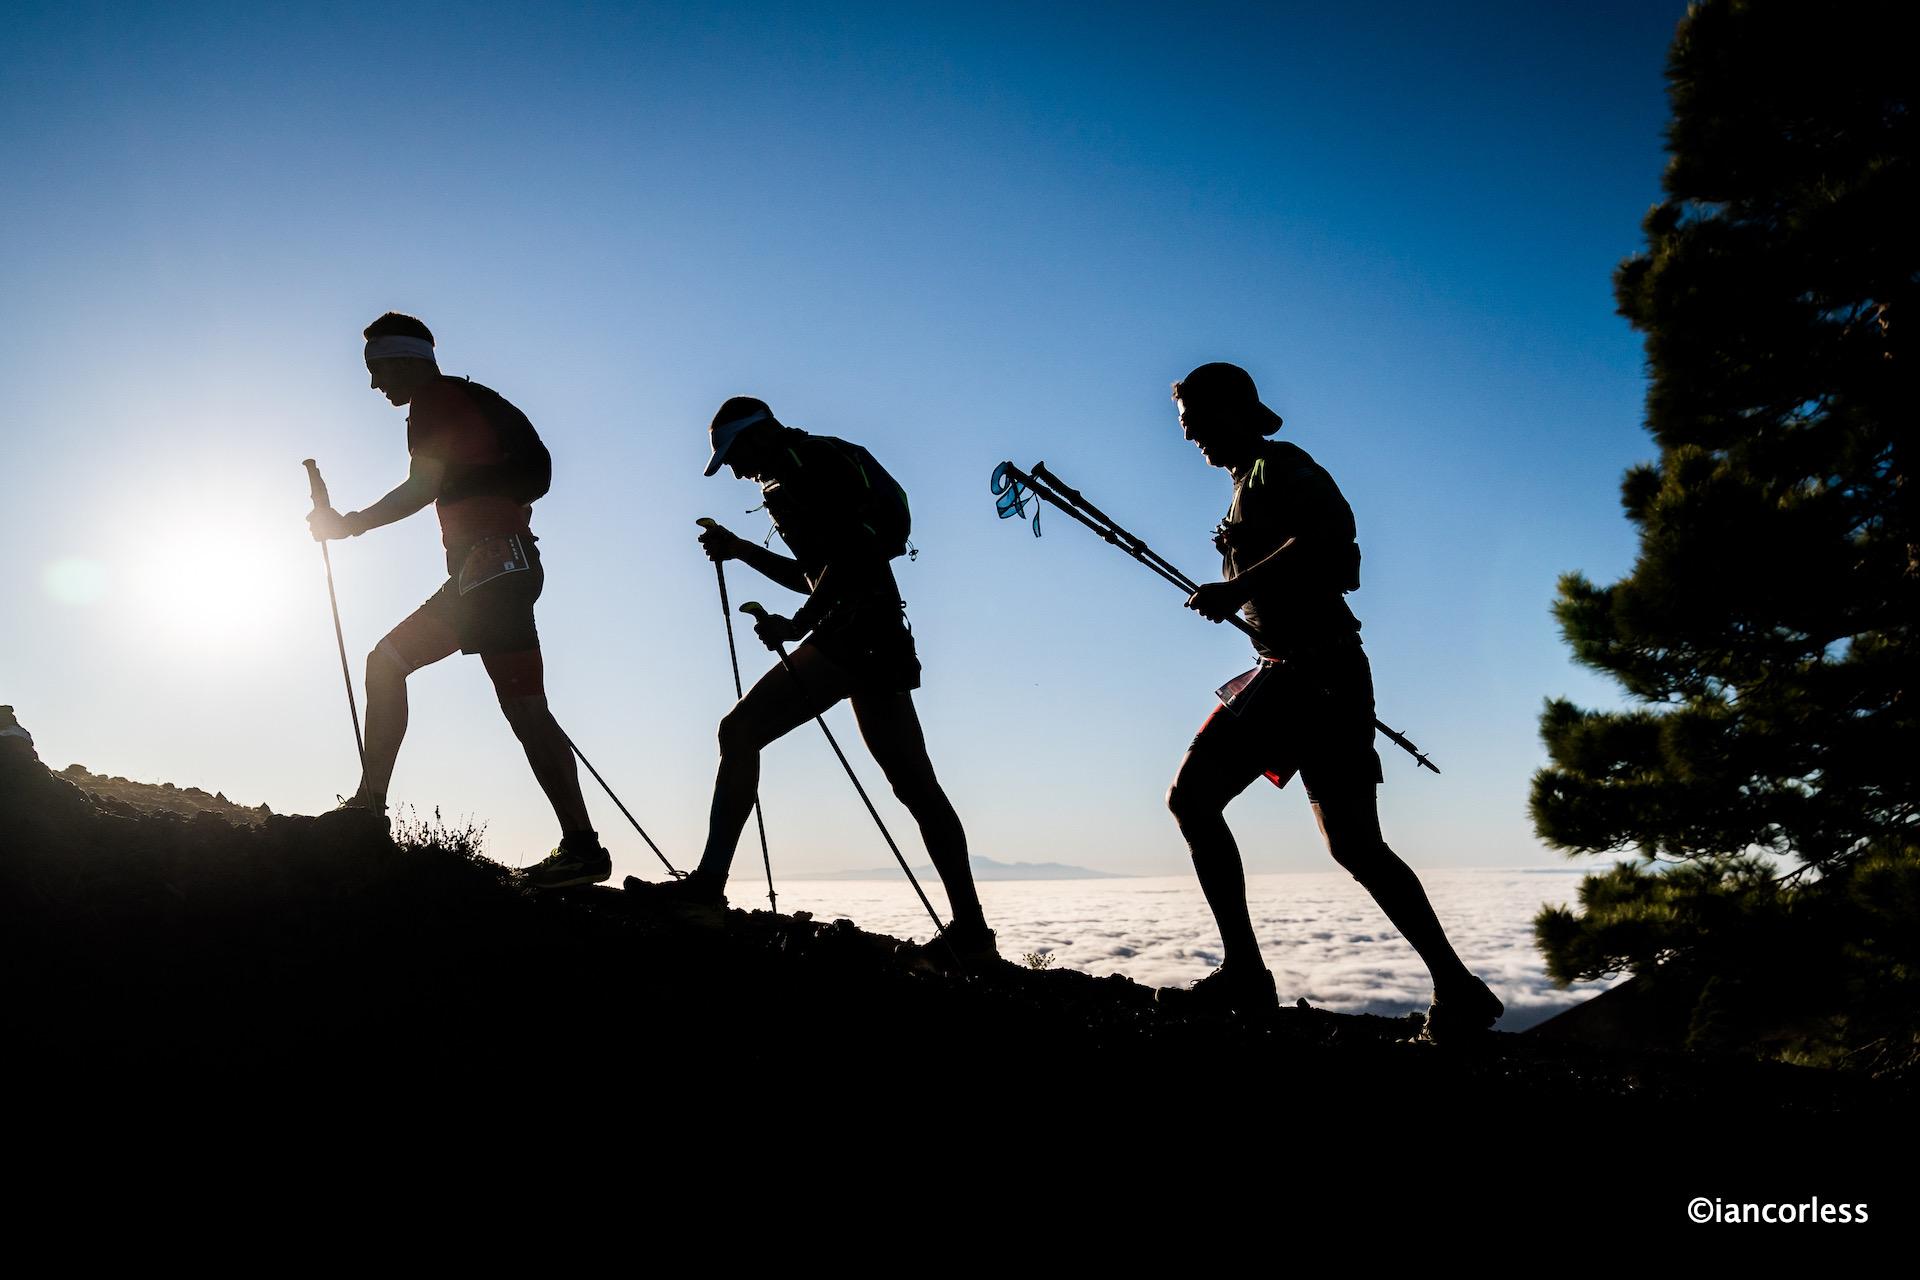
Quite simply, Transvulcania was the bomb.! The stunning route, the sea, to summit and back to sea route personified the essence of skyrunning and the views while running, mind-blowing. Few forget the sunrise in the volcano section on race day.
Having travelled all over this island many, many times and having known routes and trails like the back of my hand, the devastation post the volcano was hard to see. What had been familiar was no longer familiar. Houses gone, homes destroyed, and roads eradicated from the landscape.
Emerging from difficult times, La Palma and it’s people needed a boost.
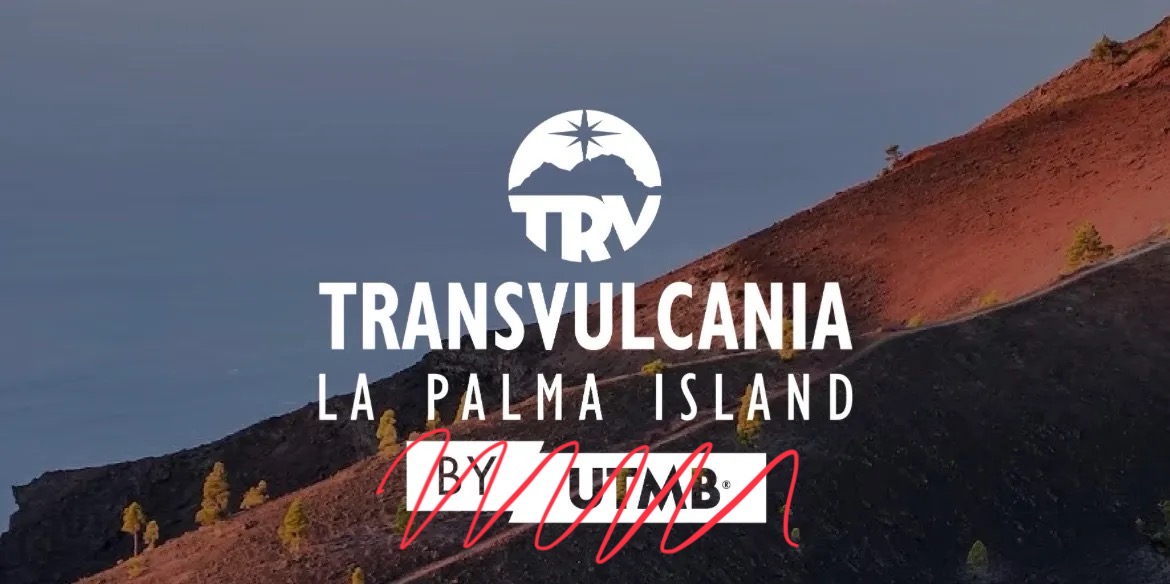
In February 2022, Transvulcania joined the ‘by UTMB’ and to many, the move did not make sense. The heritage and growth through skyrunning disappeared along with the website and the record of the races history.
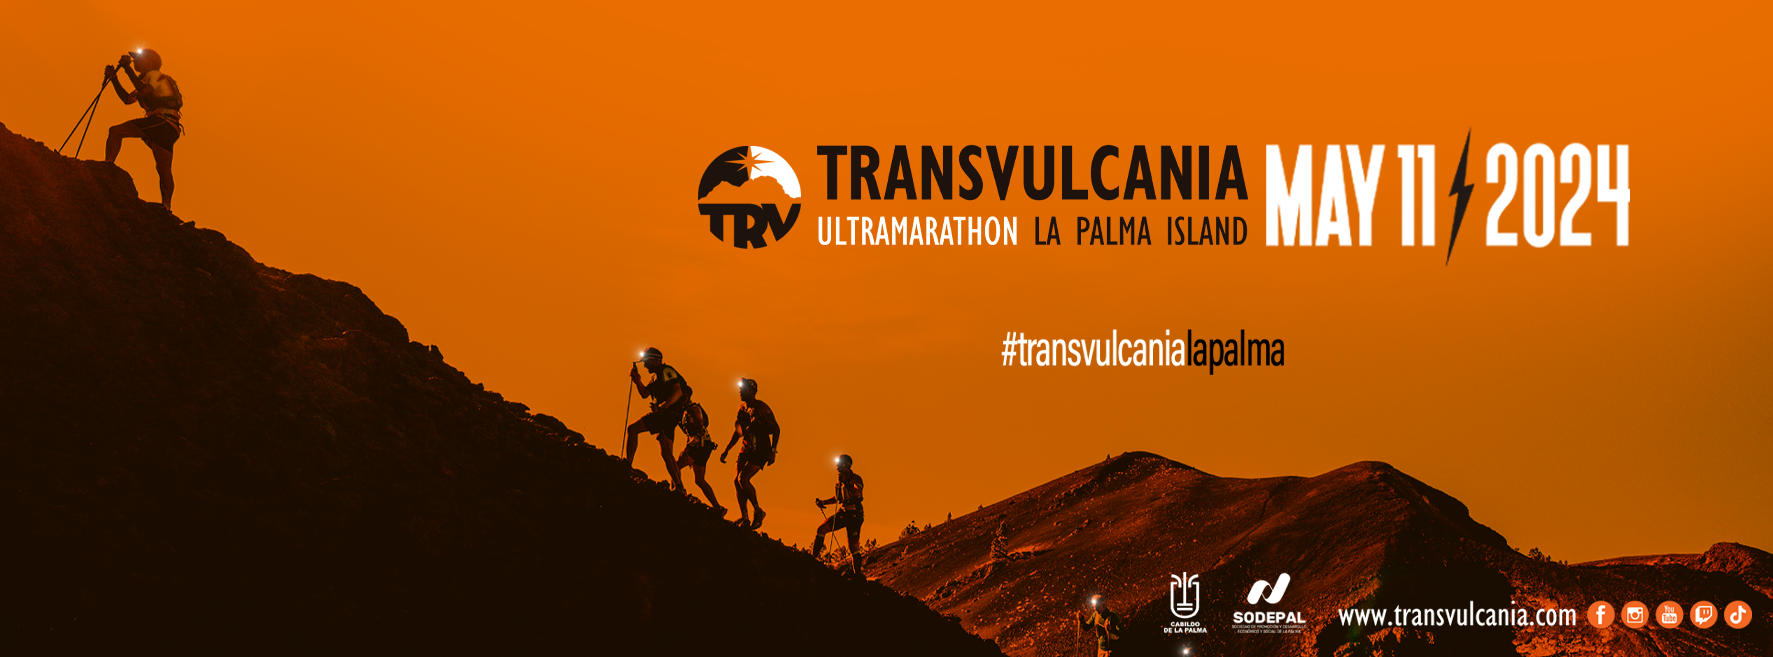
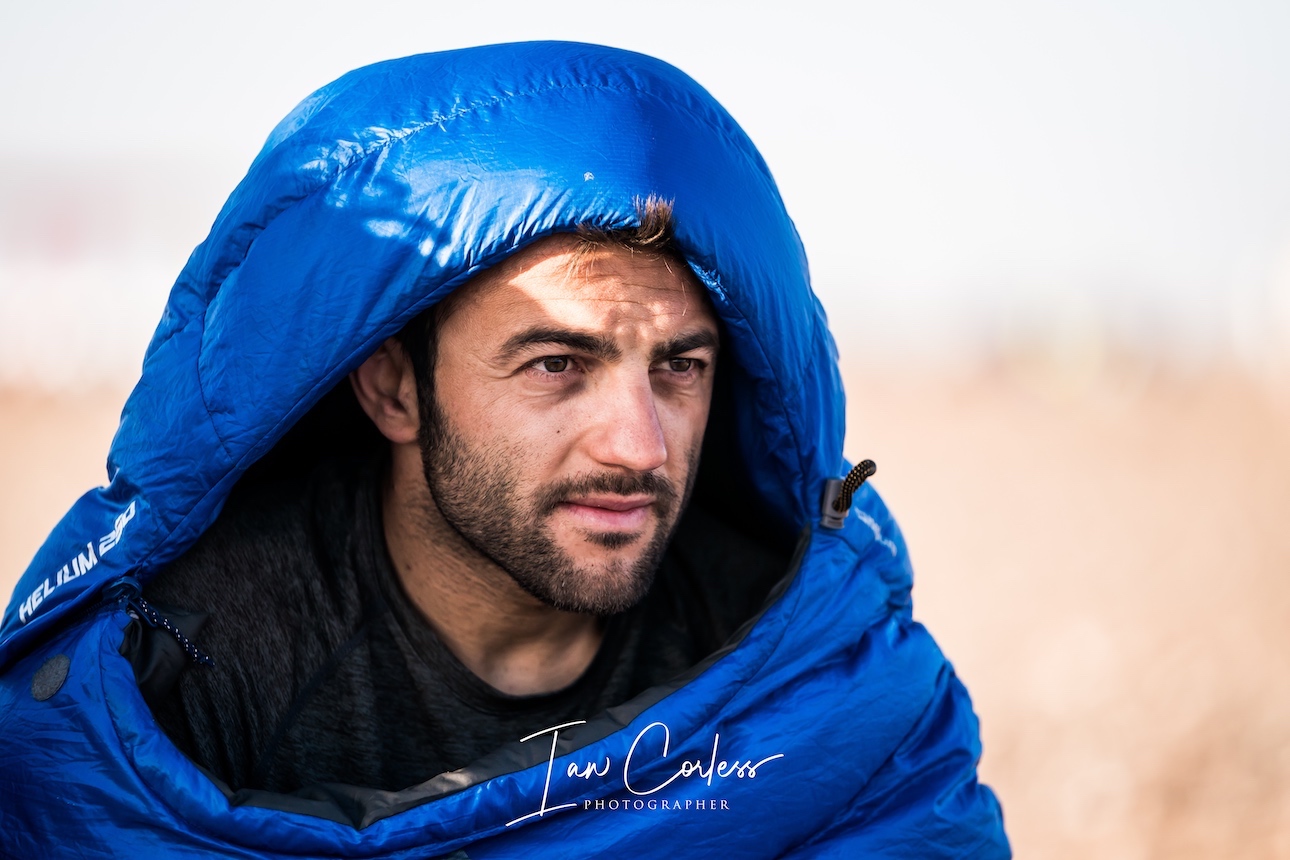
Celebrating its 12th edition, the first since 2019, Transvulcania hoped to return stronger than ever; a poignant edition following the troubles of the 2021 volcano. Petter Engdahl and Abby Hall were crowned champions.
Despite the razzamatazz, despite the buzz, despite the incredible finish line atmosphere, the event never matched the 2012 to 2019 heyday.
27th September 2023.
An official announcement is made and in the words of President Sergio Rodriguez, Transvulcania will aim to “recover its essence.”
In the mountain, ultra and trail world, the progression of ‘by UTMB’ has become overwhelming for many, at the time of writing, there are 39 events worldwide. The ‘by UTMB’ brand has shown growth in our sport, it has provided opportunities and incentives and has helped elevate trail running on a global level.
But…
For Transvulcania and the people of La Palma, a return to its roots has produced a cheer of acceptance. One quote stands out, “No one like us, the inhabitants of the island of La Palma, to decide how we want our competition for excellence to be,”
It’s a clear statement that the growth and pressure of ‘by UTMB’ is not welcome in certain places.
Taken from a release on Transvulcania social media (translation by Google):
In this sense, the president of the First Corporation, Sergio Rodriguez, stresses that the project will be reconfigured “to regain its essence”. “We wanted a jewel like the Transvulcania to regain its splendor, to be palm trees again. That’s why we support public and local management, but with a global perspective. “No one like us, the inhabitants of the island of La Palma, to decide how we want our competition for excellence to be,” explains.
And it is that, Rodríguez understands, the Transvulcania, “from its early years, it was a revulsive for companies, and unfortunately in the latest editions it lost a lot of strength.” “We set ourselves as the goal of taking it to the highest level, although without giving up what made us feel like a symbol of our territory. “We pursue that in the streets, weeks before, a festive atmosphere is breathed again; that awakens enthusiasm between locals and foreigners,” adds the island leader.
I’m very happy with this decision, I have performed the test before and after with the UTMB in the middle and there is no color, before it was a spectacle in every way: organization, treatment with the runner and palm trees as always generous and delivered. Congratulations on the decision made and the great career it is.
Bring back that Transvulcania of yesteryear.. It will be a matter of returning to the beautiful island and its people. The real protagonists of this great race that fell in love and hooked everyone who ran it.. 2024, signed up to try and get that 6th Palmera ultraMarathon, for me.. the best in the whole world!!
Choosing a sleeping bag for an adventure can be tedious, especially when the costs are so high. Never fear, this article will answer all the questions you may have re a sleeping bag for a multi-day desert/summer adventure or similar.
First and foremost I recommend you read THIS in-depth article on ‘How to Choose a Sleeping Bag for an Adventure.’
In this article, I will look at three down filled sleeping bags:
Down as a higher warmth-to-weight ratio than synthetic fill. In simple terms, a down bag can achieve the same warmth (or be warmer) than a synthetic bag for less weight. A key consideration when weight is crucial.
Is down warmer? If synthetic insulation was the same weight as the down, down nearly always will be warmer. Down traps warm air, while synthetic fibers pack densely to reduce heat loss. Both offer great warmth, especially when you use high quality products.
Is down always best? No, not always. Down cannot get wet. If it does, the feathers clump together, and all insulating power is lost. Synthetic retains heat, even when wet. So, if you are using a sleeping bag in a wet and humid environment, synthetic will probably be the best choice… BUT, many brands now do hydrophobic down which is treated to be efficient in wet conditions.
Size is extremely important in any adventure and quite simply down compresses considerably more than synthetic.
Cost is always a key consideration and typically, down will be more expensive than synthetic.
SLEEPING BAG KEY QUESTIONS
First and foremost, consider several key things before choosing a bag.
Where are you going?
Will it be dry and what are the risks of rain?
Do I sleep cold or warm?
Am I tall or small (sleeping bag length is crucial for comfort)?
Do I have wide shoulders?
Do I need a zip, if so, half zip or full zip?
How light does it need to be?
What temperatures can I expect at night?
Quite simply, a sleeping bag needs to be as light as possible without compromising the above if you are carrying it.
Also consider that it is often a wise choice to choose a sleeping bag that has less warmth and lower weight if you are also carrying top/ bottom base layers and a down jacket. These clothing items can be used to layer and add warmth.
Layering adds warmth
WEIGHTS AND PRICE
Rab Mythic Ultra 180 retails at £550.00 and weighs 400g (900 fill down)
Sea to Summit SP1 Retails at £260.00 and weighs 350g (850 fill down)
PHD Minimus K Retails at £484.00 and weighs 330g (this bag has no zip but has 1000 fill down)
The Mythic Ultra utilizes breakthrough technology with TILT (Thermo Ionic Lining) which in simple terms works a little like a space blanket offering exceptional warmth. The down is hydrophobic treated and therefore can be used in wet/ damp conditions. It is offered in regular and long. It has a ⅛ zip by YKK on the left, an excellent hood with baffles and is provided with a dry bag and a drawstring storage bag.
The SP1 is tiny and provided in a zipper storage bag and a small compression sack is provided. Using ‘ultra-dry’ 850 fill down, the bag has excellent water repellent property and warmth. It has a YKK zipper, available in regular and long with excellent hood and baffles.
PHD are unique in that they make all the products in their factory in the UK. Therefore, it is possible to purchase any bag ‘off-the-shelf’ as a standard product OR you can order and have a product custom made. For example, you can specify, no zip, half zip or full zip. You can ask for wider shoulders, longer length, warmer toe box and so on. All of this comes at a price, so if bespoke is for you, PHD is the place to go. You can see options HERE.
The Minimus bag has a Drishell outer, no zip, standard length, standard width and 900 fill. Should you require the bag a different length, the price varies, short is no extra charge, long adds 8% and extra-long adds 14%. Equally, if you require extra width, slim is no extra charge, wide is plus 11% and extra-wide adds 20%. Need a zip? Short is £25 extra and full is £41.00 extra.
Quite simply, PHD are the Tesla of the sleeping bag world. Great comfort, weight and warmth. It has a mesh bag for storage and comes with a nylon stuff sack*
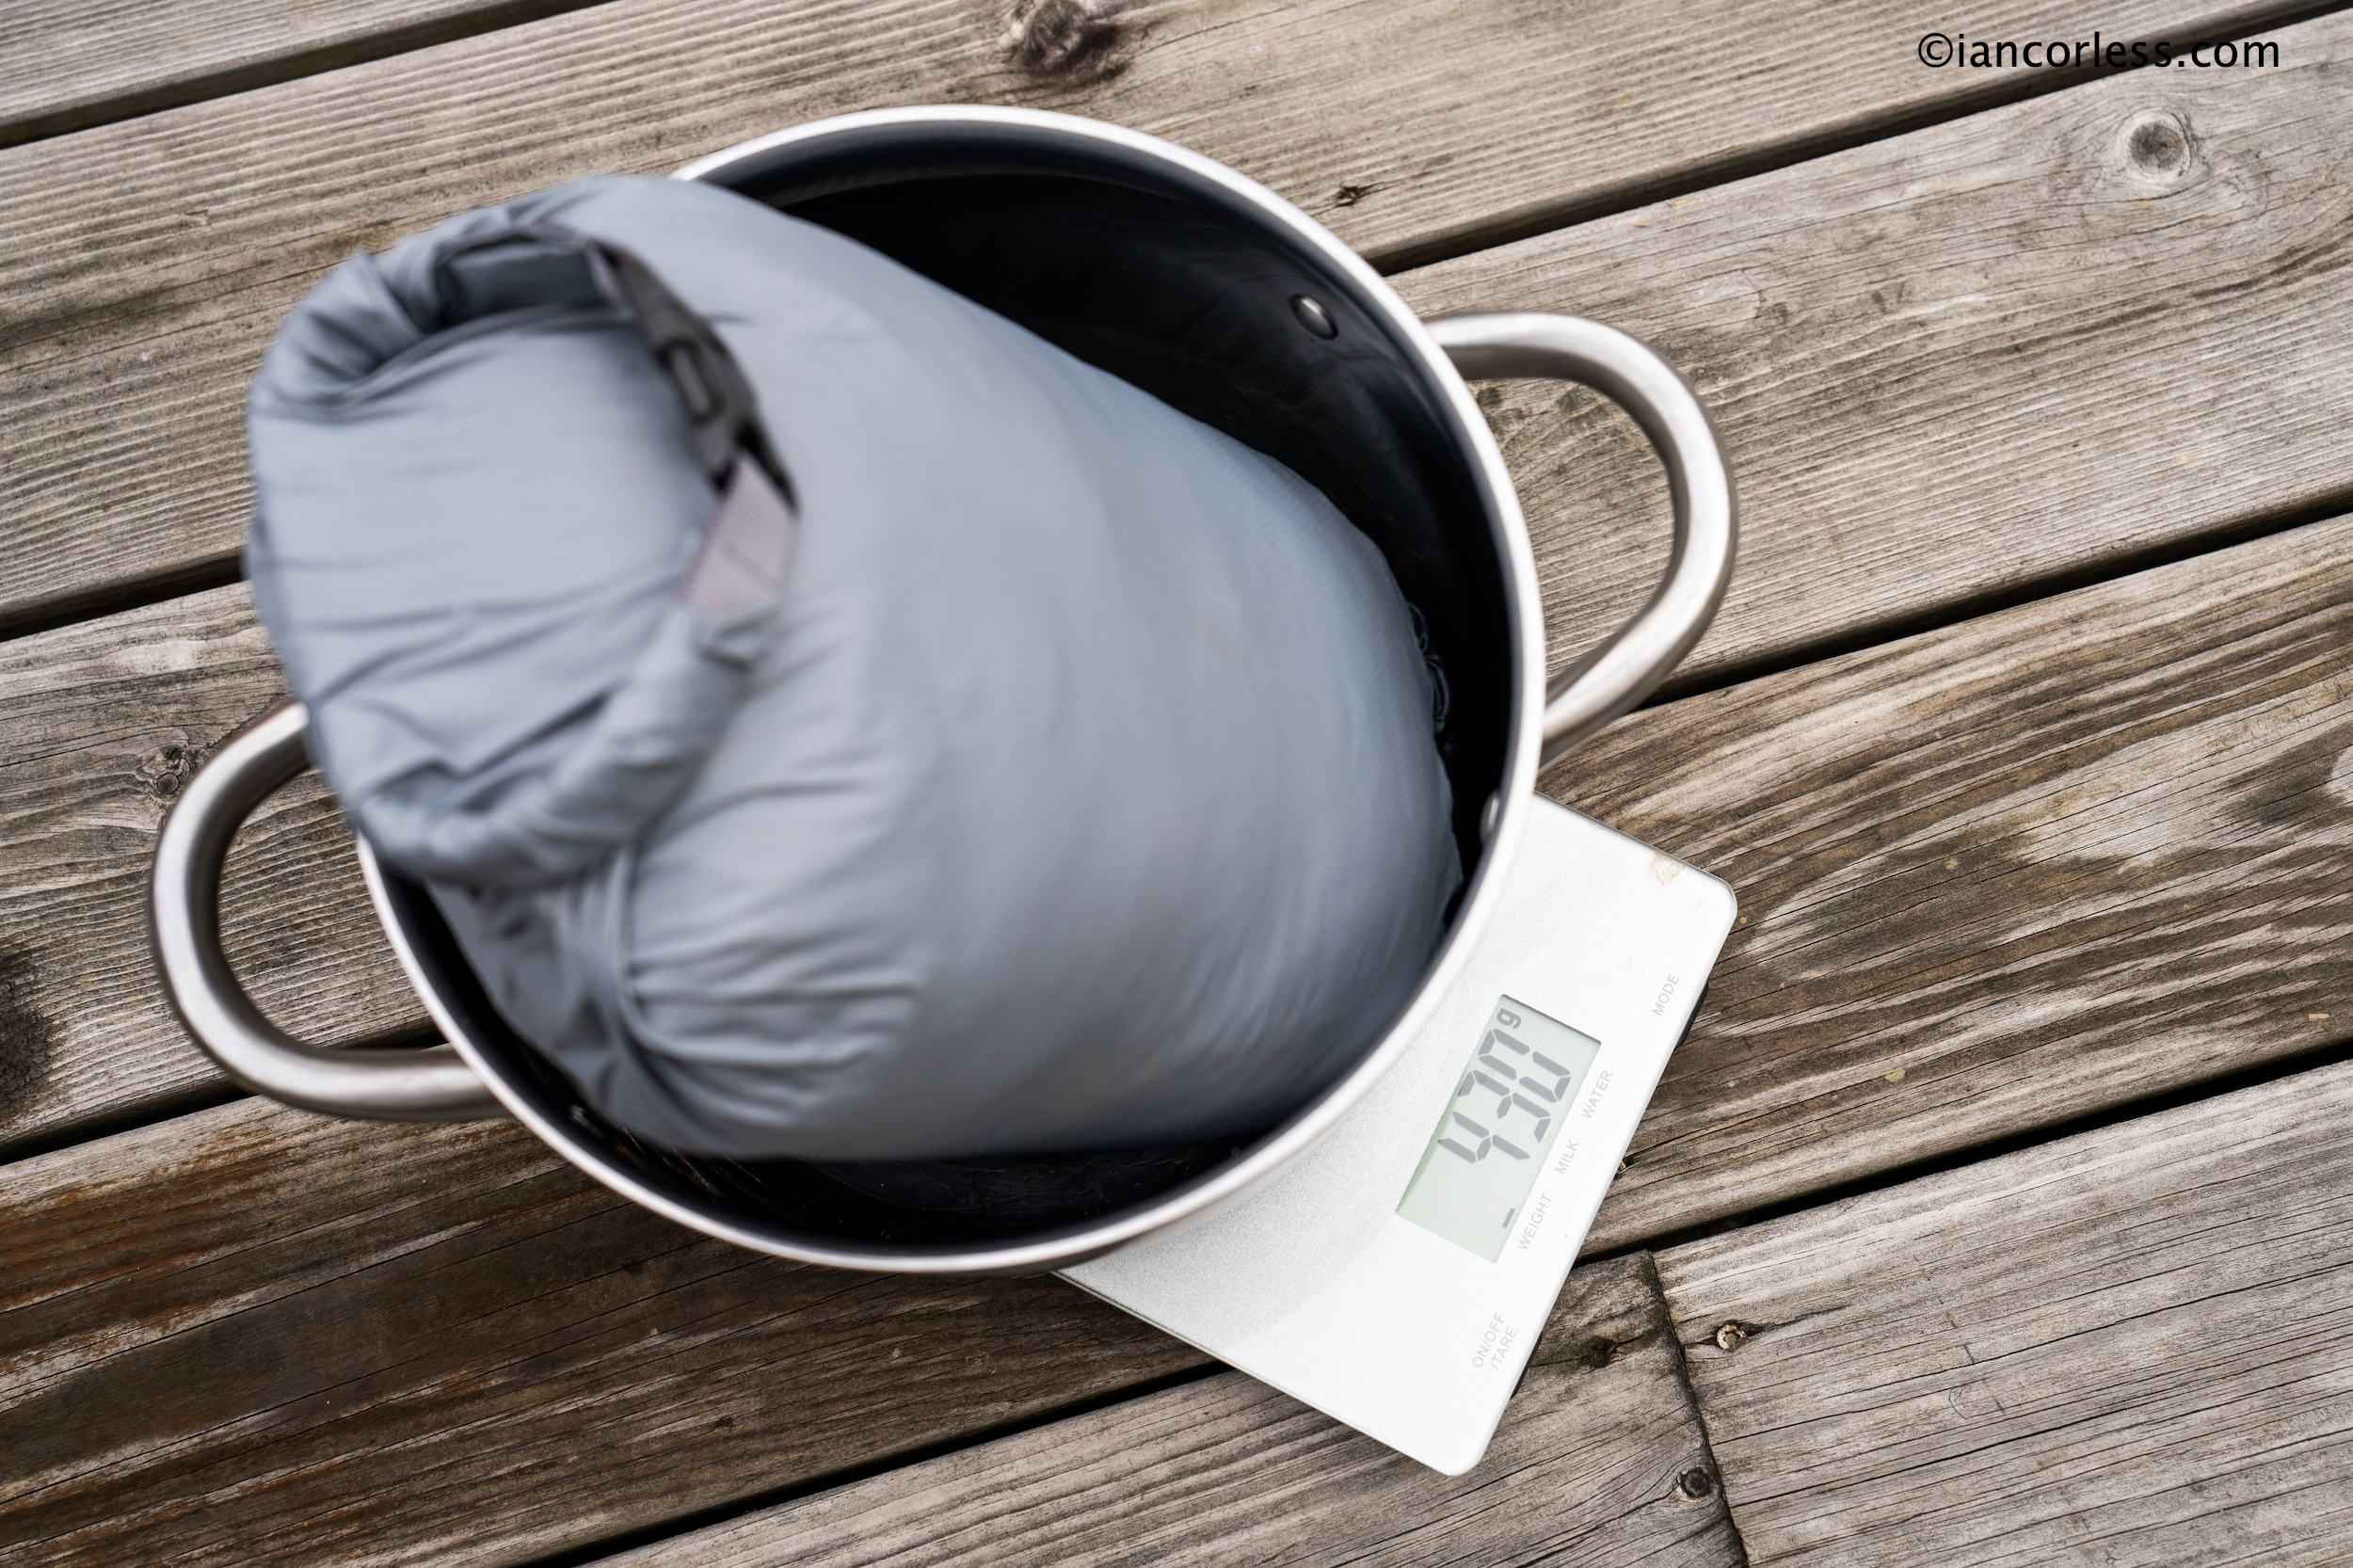
First and foremost, weight is a key consideration, and these three bags are so close in weight, it is hard to say one is better than the other. The Sea to Summit wins though, a full 100g lighter than the PHD.
On my scales:
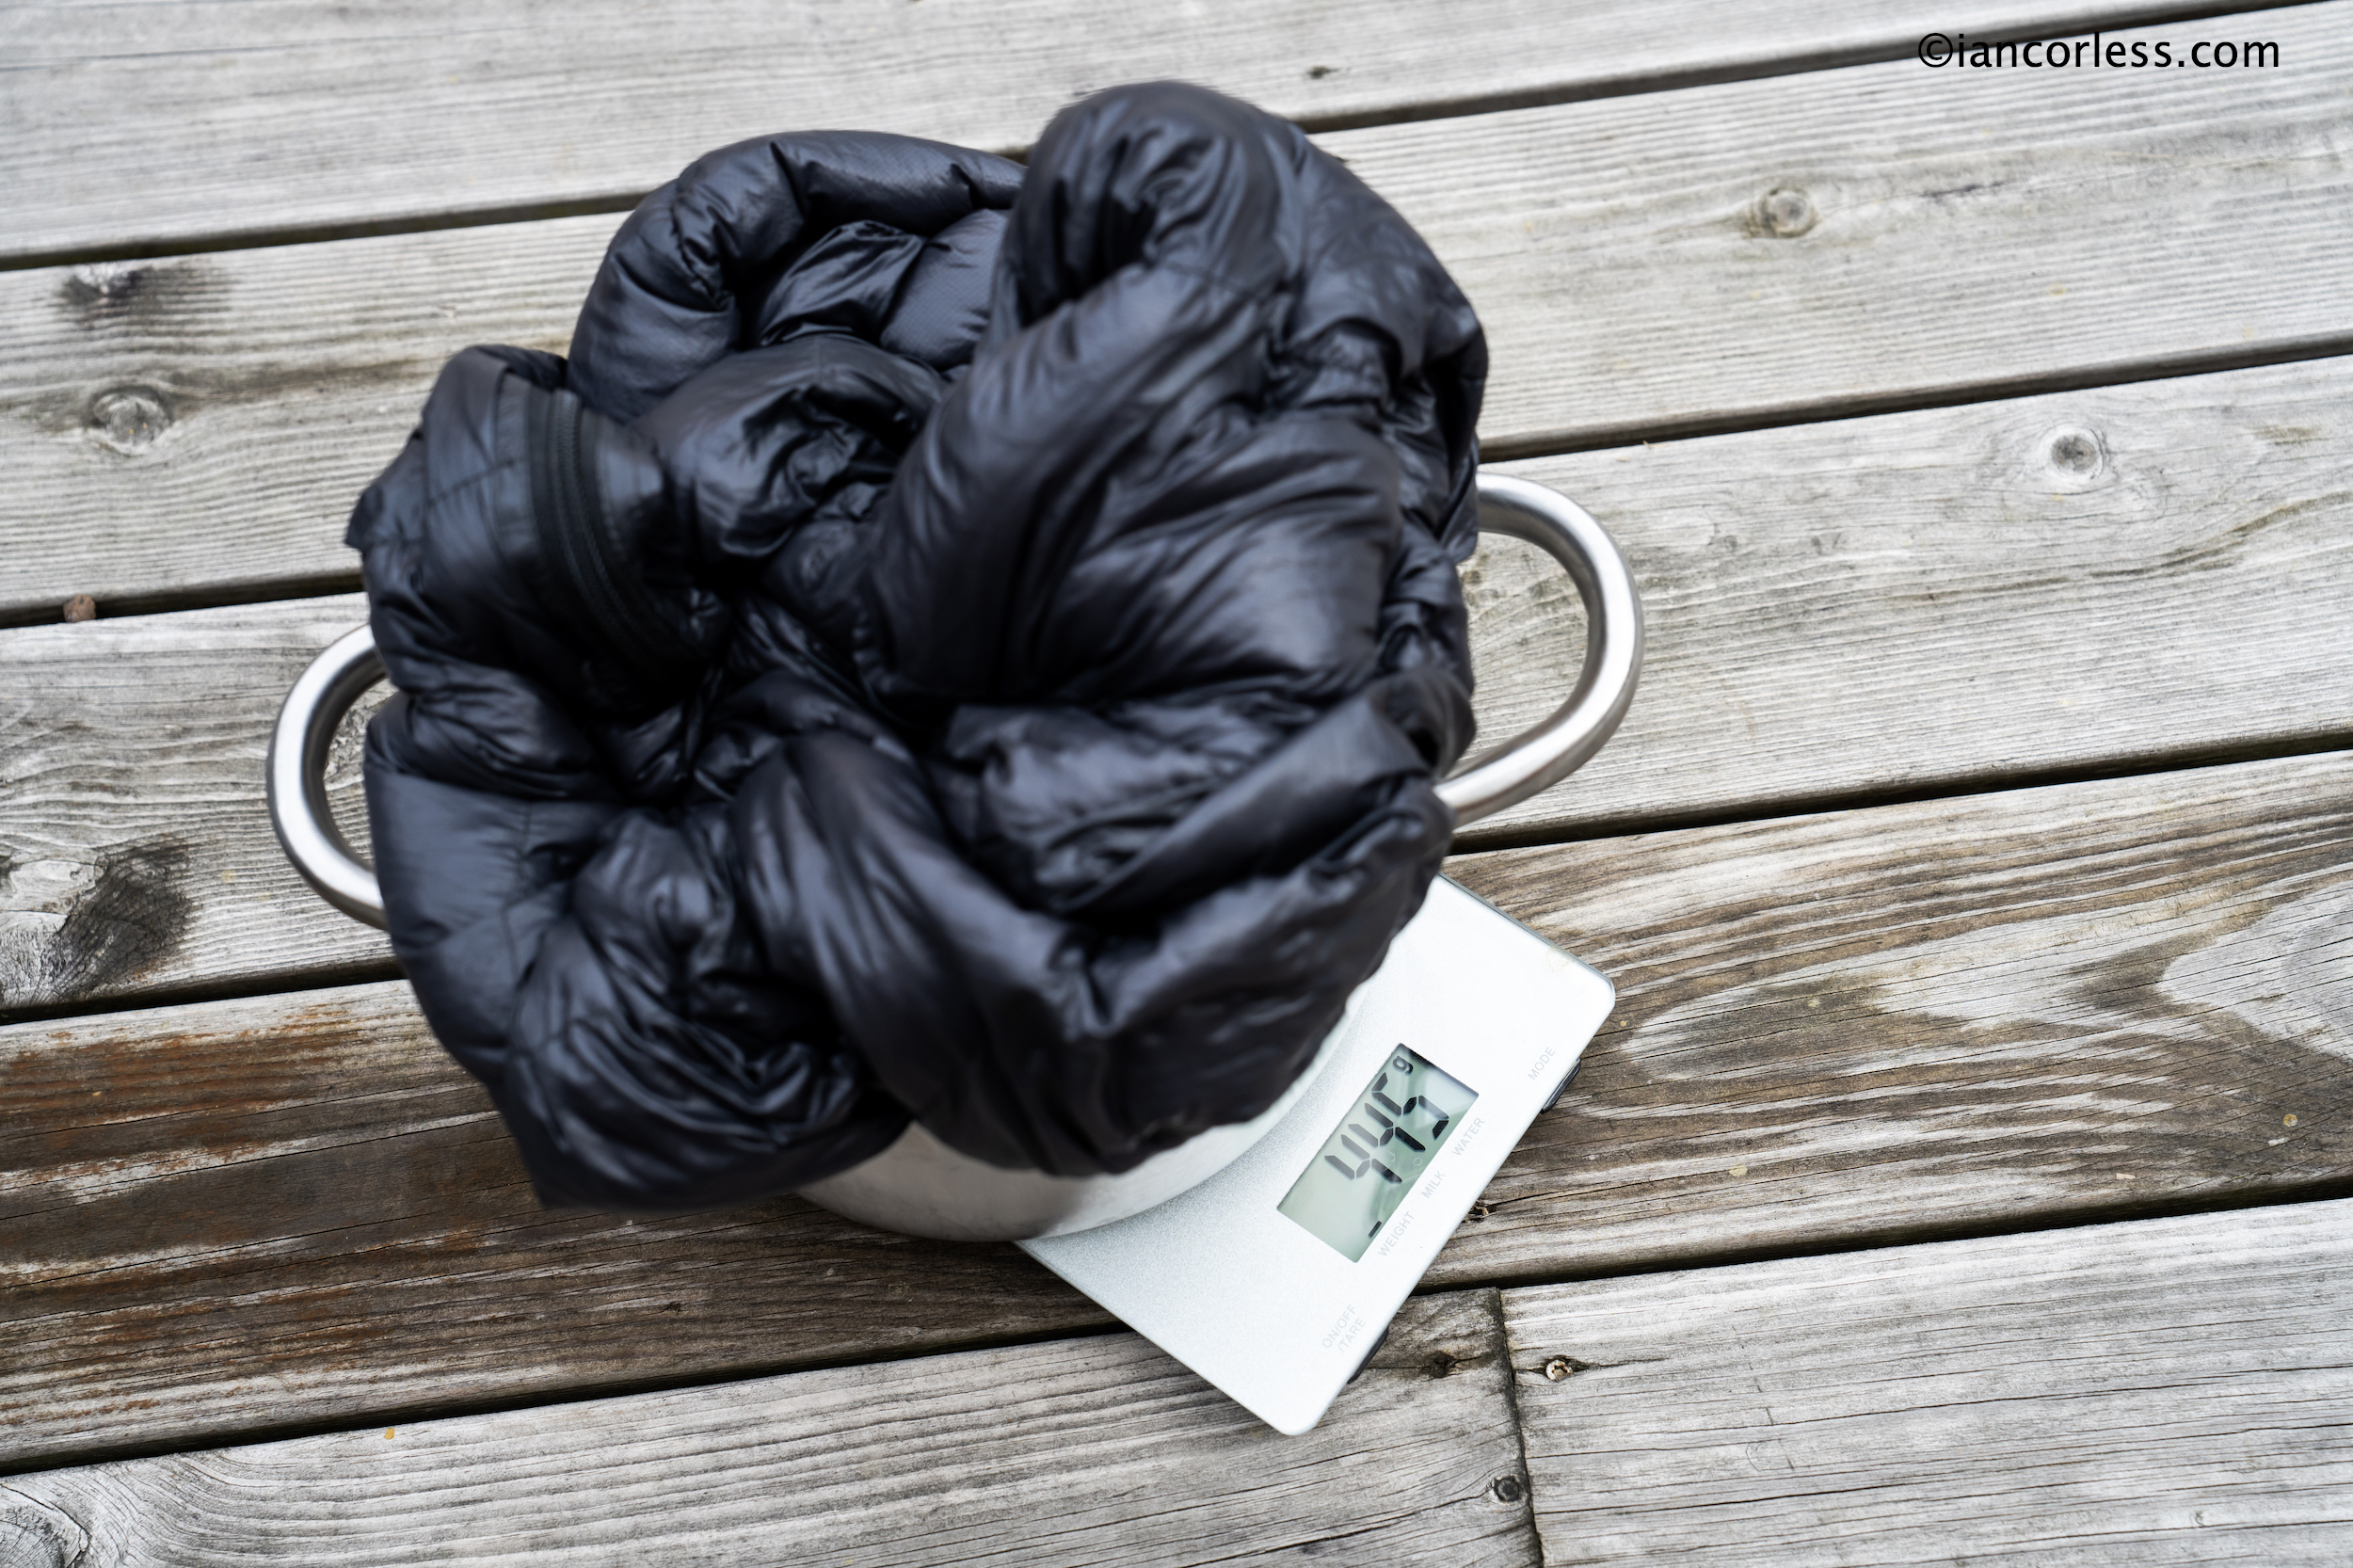
Rab 397g Rab has a tiny eighth zip.
Sea to Summit 344g *Sea to Summit a half zip.
PHD 445g **The PHD has a full-length zip.
When one considers the PHD has a full zip, the weight is impressive. A full zip offers more flexibility and on a hot night, the bag can be used more like a blanket. Not an option with the other two.
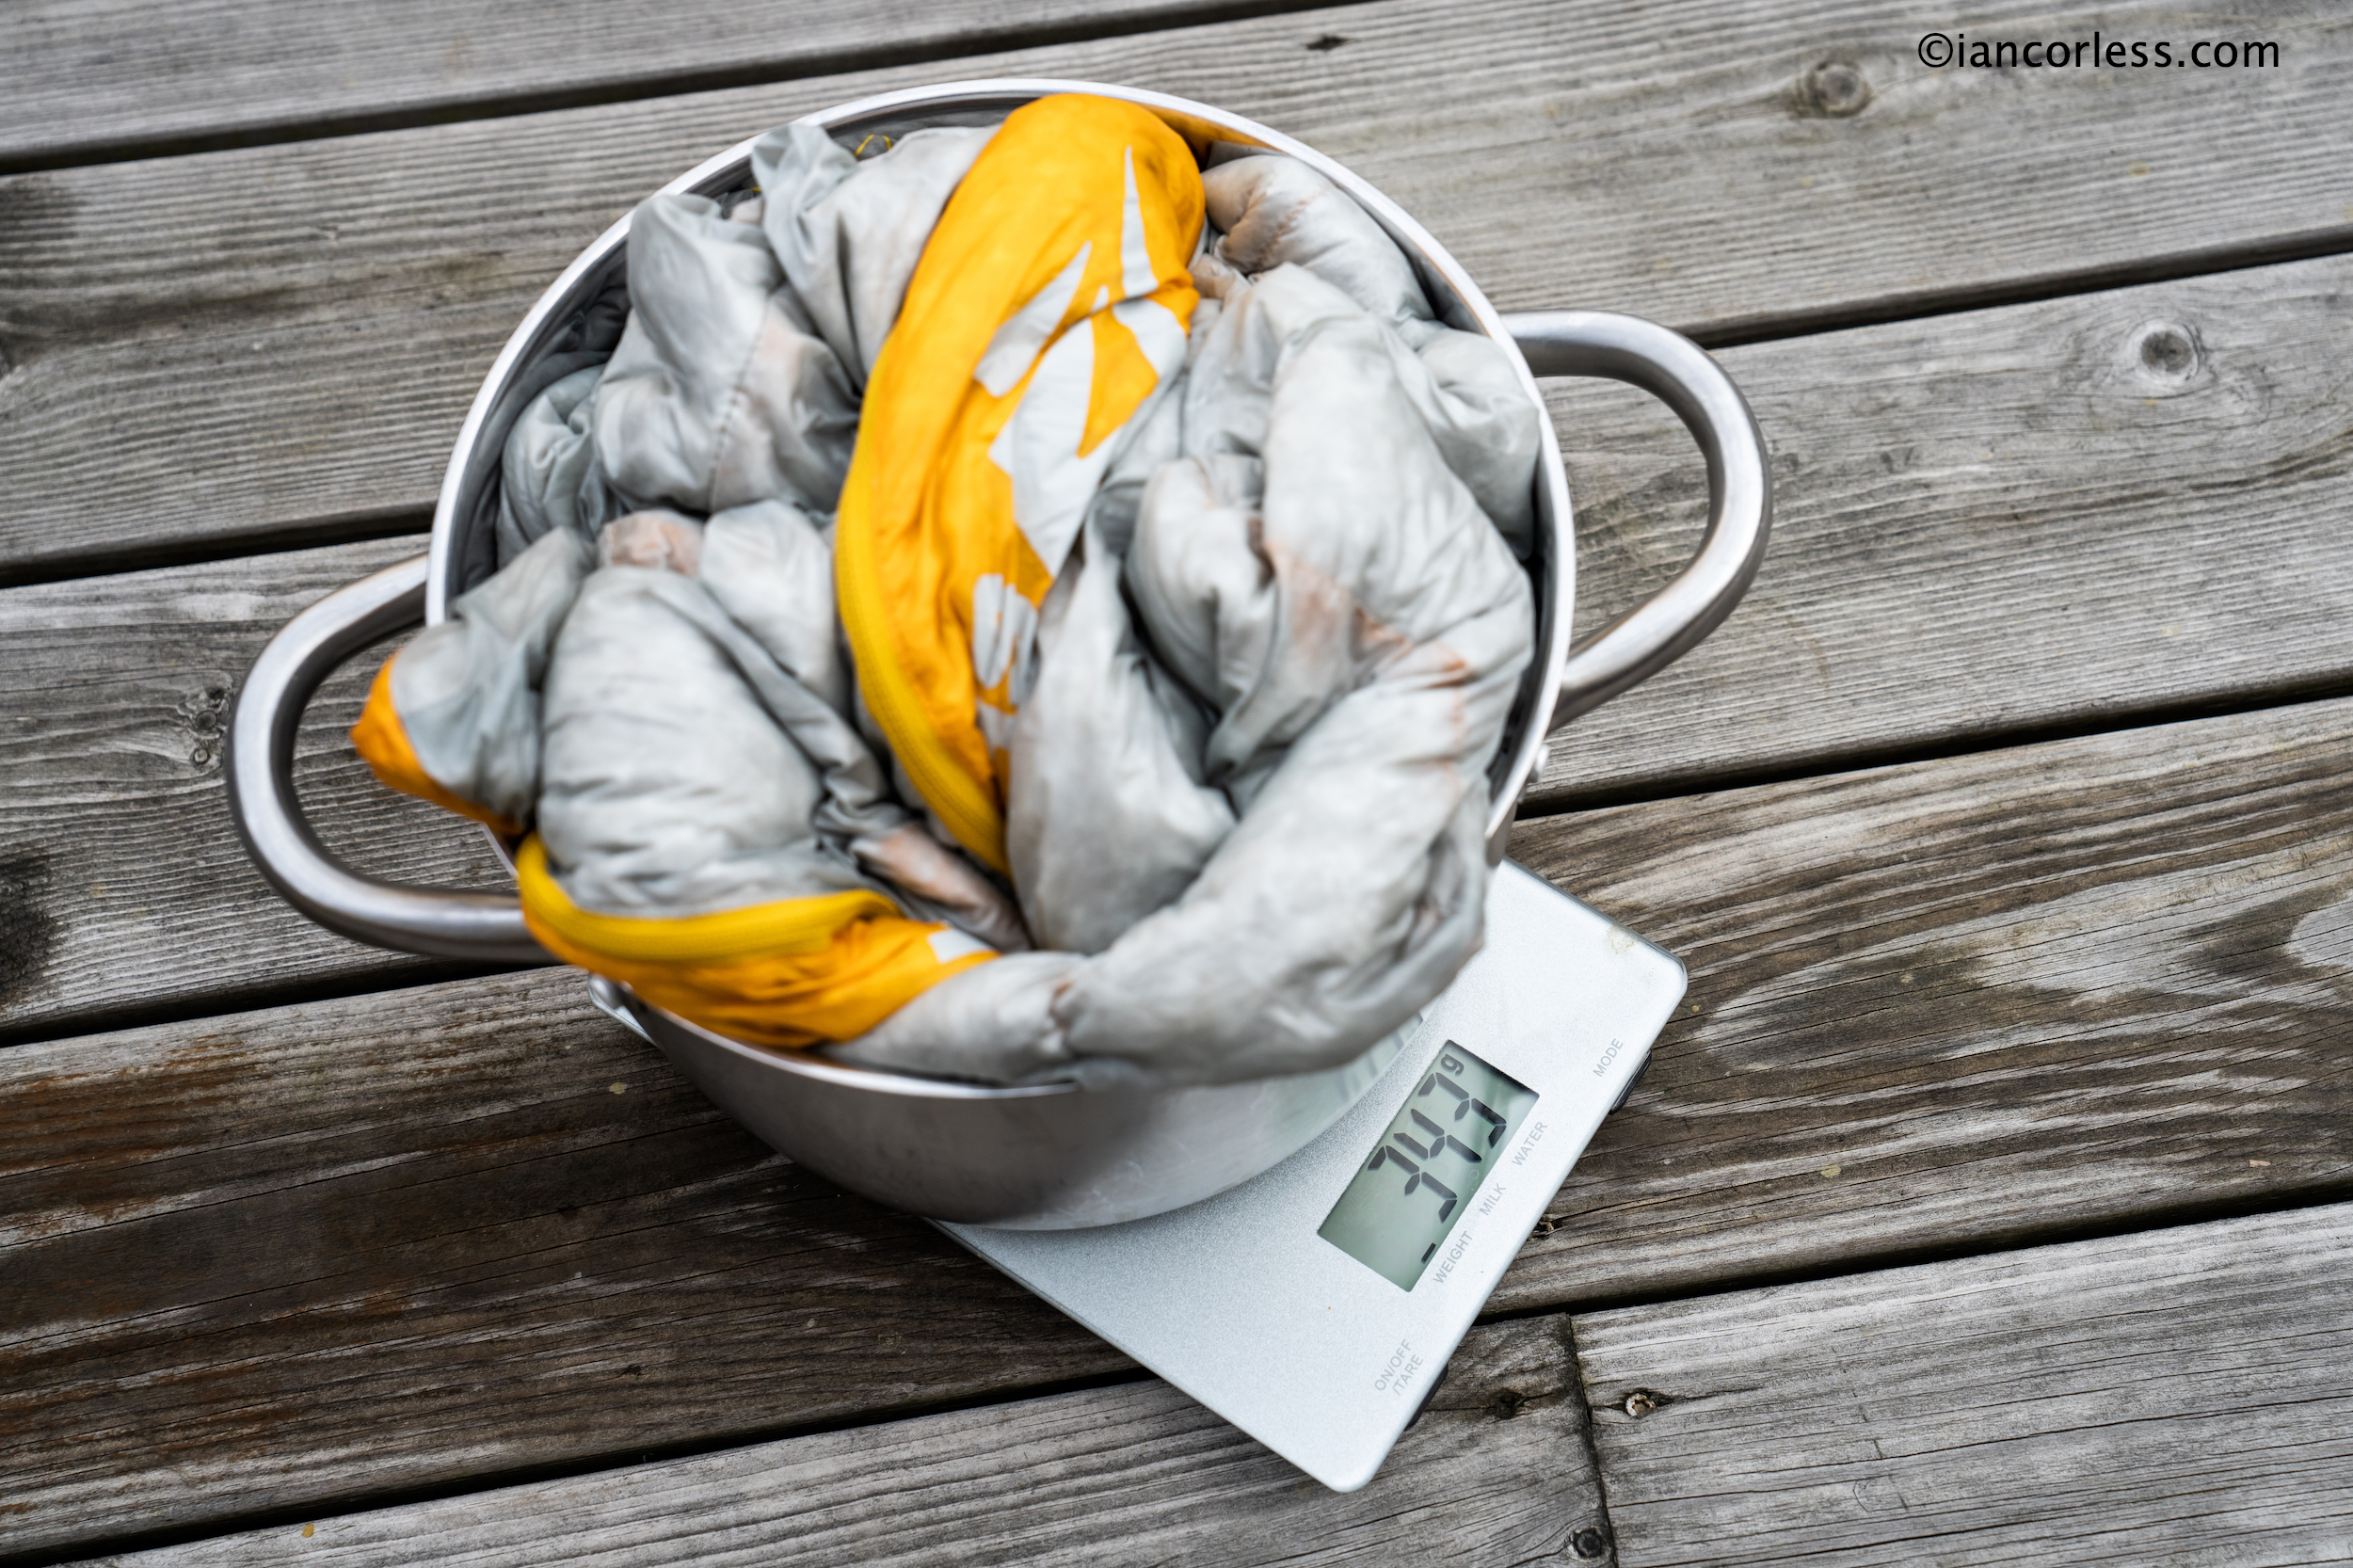
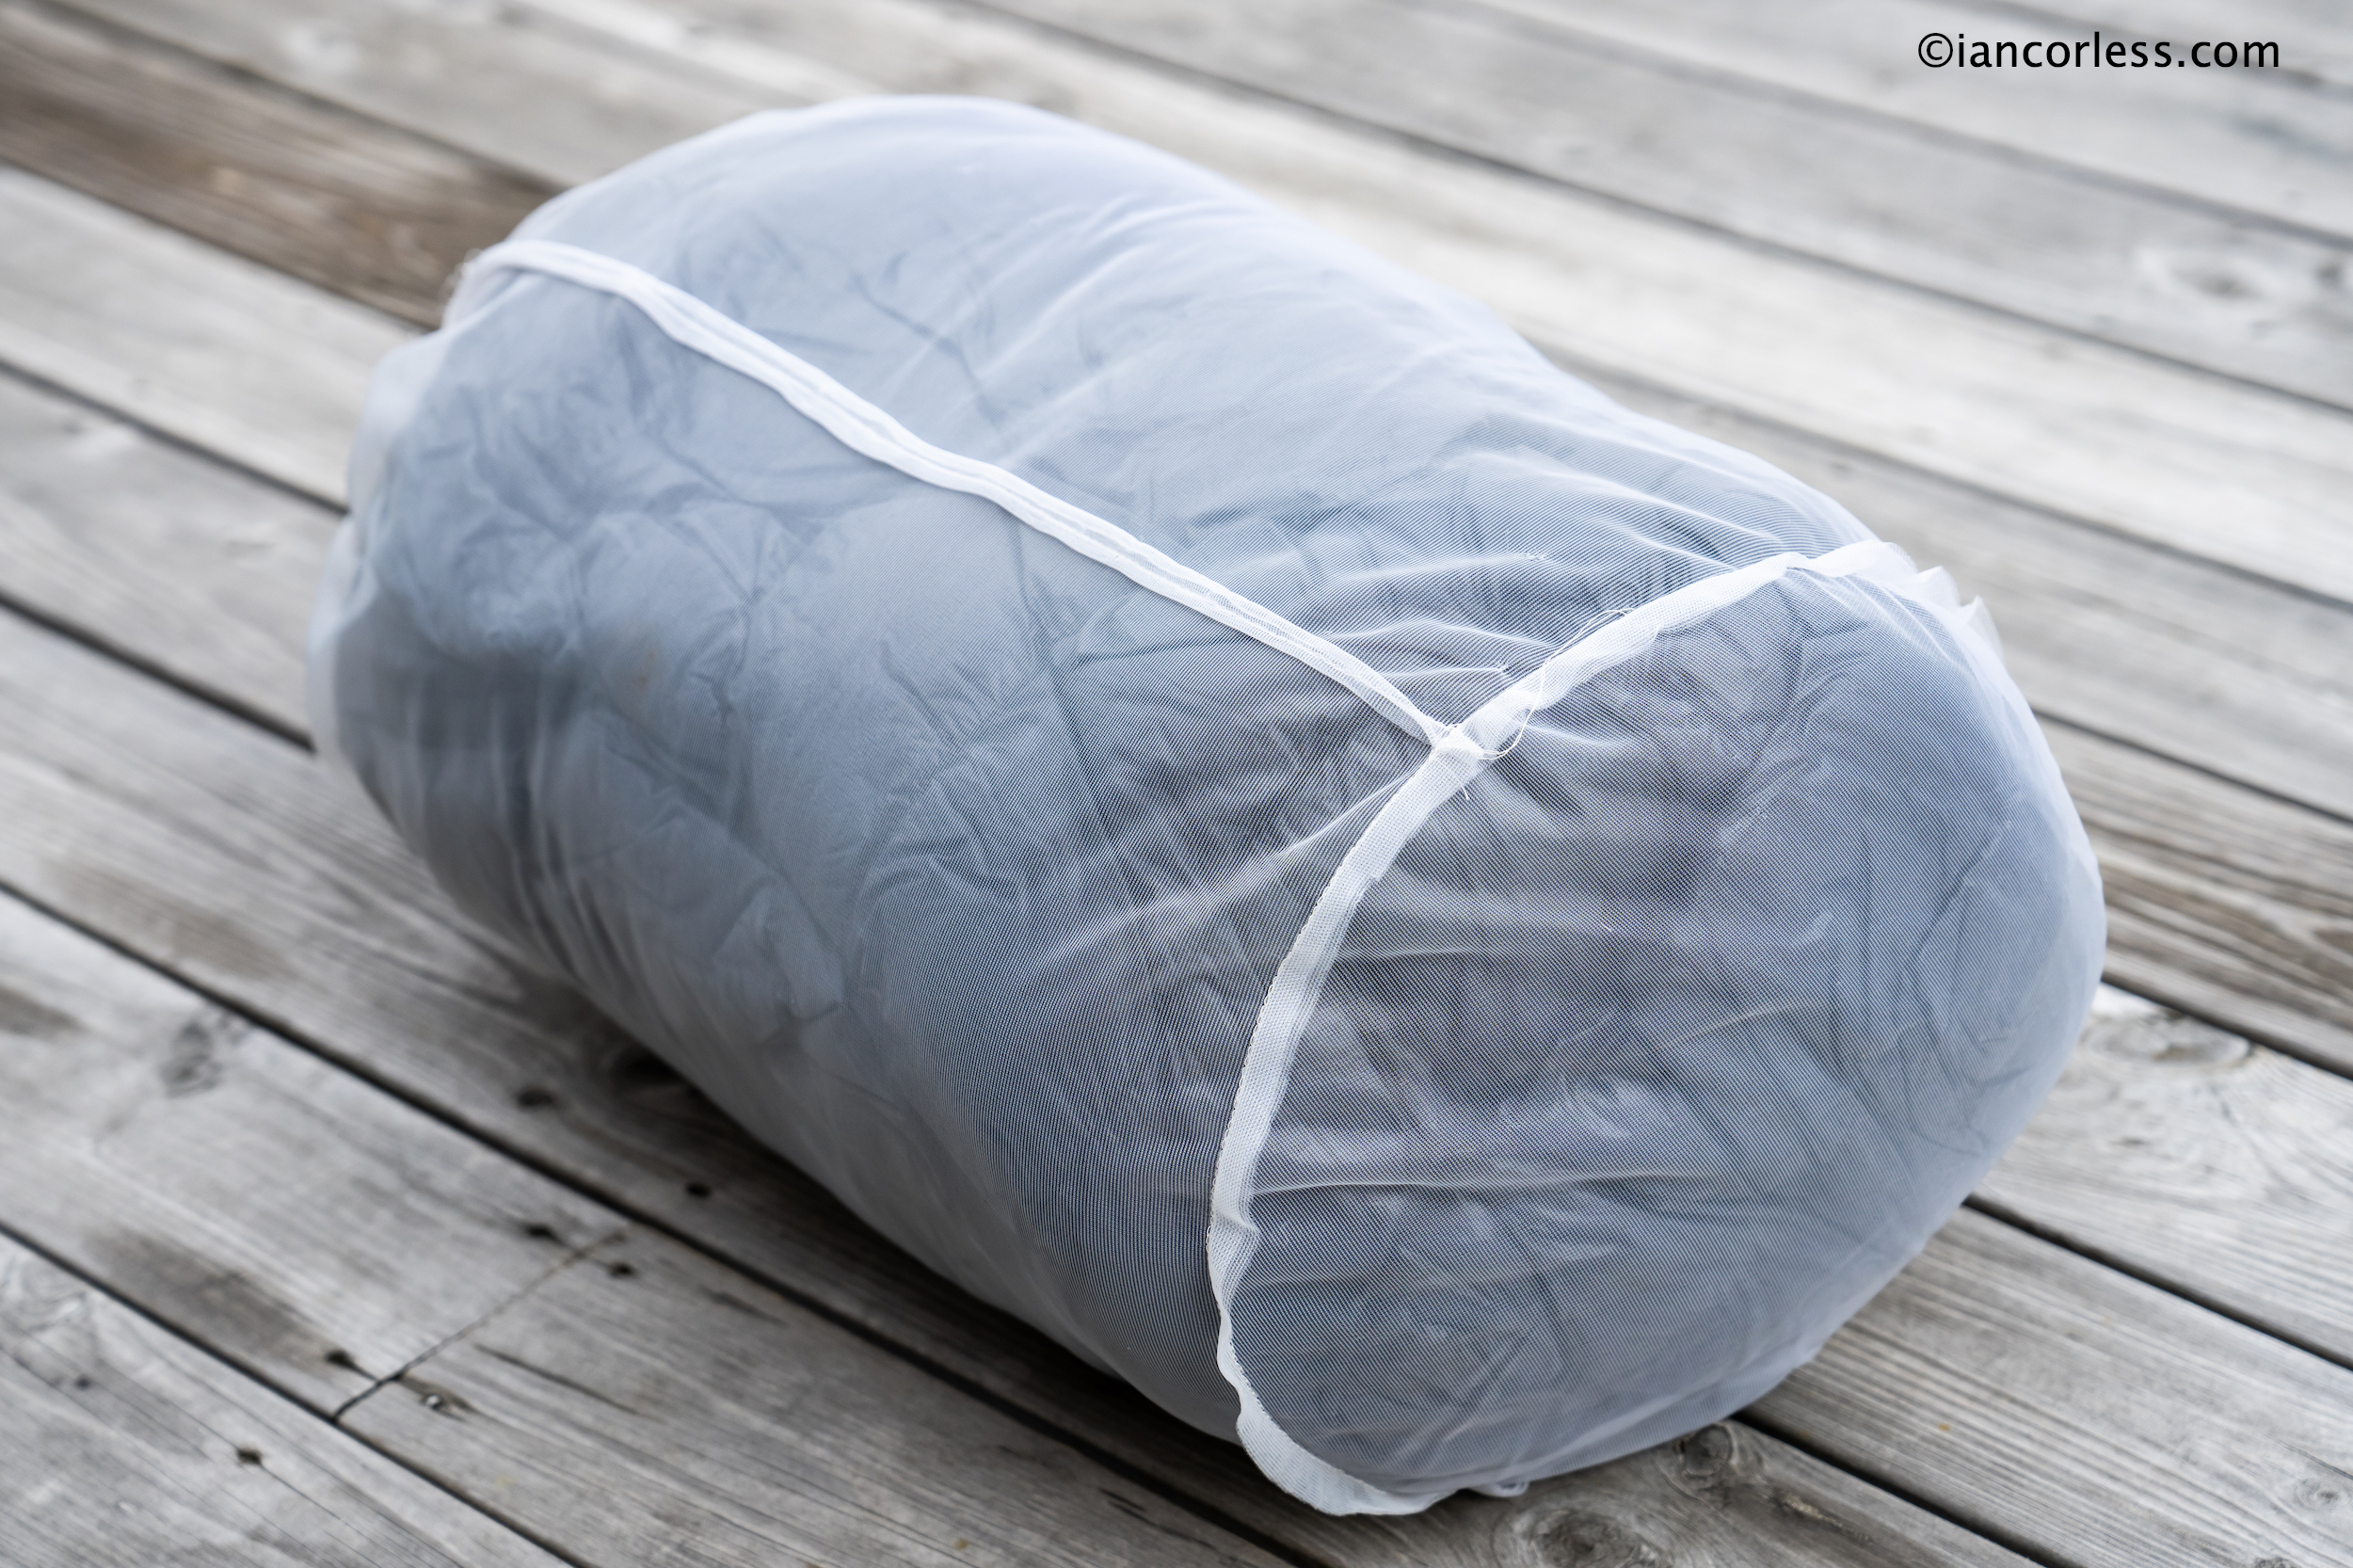
Size can be as crucial as weight and the Sea to Summit is a standout packing to an incredibly small size with the compression sack provided – 38g.
The Rab is supplied with a dry bag and I should point out it would be possible to use a smaller bag and compress the Mythic Ultra 180 smaller – 34g
For the PHD I used a generic 4L dry bag – 31g
It’s worth noting though, often when fast packing, it’s better not to store the sleeping bag in a storage bag as it makes for an odd, sausage like shape that does not utilise the space available.
WARMTH
Remember, a sleeping mat is an essential accessory not only for comfort but warmth. I recommend a Sea to Summit ultra light.
The three bags are very similar in weight, fill and design. However, each brand describes their bags warmth differently. The Comfort Rating indicates the minimum temperature where an individual can sleep in a relaxed position and get a good night’s sleep.
Rab – Sleep limit 0 deg
Sea to Summit – 9 deg comfort
PHD – 5 deg typical.
Based on the above if we take Rab 0 deg minimum rating, Sea to Summits 9 deg comfort and PHD’s 5 deg typical rating, it’s fair to assume that all are good for around 5 deg as a good sleeping temperature. In theory, the Sea to Summit should be the one that ‘may’ struggle at 5 deg but that is not the reality after testing. It is a warm bag and certainly trades blows the Rab and PHD. All three perform exceptionally well at 5 degrees or above.
The Limit of Comfort Rating is the temperature range where an individual sleeping in a curled position and fighting against the cold can still sleep through the night – 0 degrees would apply here. I had several summer nights with temperatures dropping and all three bags performed exceptionally well with the addition of Merino top and bottom layers, a pair of socks and the use of a Buff or hat.
COMFORT and FEEL
All three bags win out on feel and comfort. Each have their own attributes. The PHD wins on full comfort as it has a full zip. The Rab though has the best hood of all three bags and a superb baffle to keep out drafts. The SP1 has a half zip, good hood and no baffle.
All are silky smooth to the touch and comfortable.
The Rab with black outer, silver logos and silver TILT lining feels and looks premium. Equally, the SP1 has a superb look of grey/ yellow and excellent logos/ branding. The PHD is a no fuss bag. If the other too are Tesla and Porsche, the PHD is a Land Rover but you know it will get the job done.
VALUE FOR MONEY
These are three excellent sleeping bags offering the best option in their class. Quite simply, you cannot go wrong with any of them. They have all been used and tested in similar environments, conditions and temperatures whilst camping. However, when looking at weight, pack size, warmth and price, we have a clear winner.
The standout is the Sea to Summit SP1 which offers an unbeatable package of low-weight, small packing size, incredible warmth, and a low price. It is half the price of the competition and does not compromise on any features. It’s a winner. More info HERE.
The Rab is a great bag, which offers a little more warmth, larger pack size and just a fraction more weight. The black colour is a plus for me and the hood/ baffles are the best of the three. The zip is of no real use and for me I would prefer either no zip to save on weight or prefer the additional weight and half a zip that offers more practical use. The treated down offers incredible flexibility and certainly if I planned on using one bag for different conditions and environments, the Mythic Ultra 180 would be a great choice. More info HERE.
PHD are always a winner, and they make incredible products. But ‘off-the-shelf’ it’s difficult to justify the cost in comparison to the excellent Sea to Summit SP1. However, long, tall, short, wide, large, small, zip or no zip, PHD will make a bag just for you and it will be perfect. That comes at a price though and it will be arguably, the best sleeping bag you have ever had. More info HERE
All running, particularly in the mountains, remote areas and particularly if going ‘solo’ brings an element of danger that must be managed. Winter and extreme conditions do increase risks and I discussed this in an in-depth article on Winter Running HERE
Following on from the article, I have had many questions to elaborate on the pack and the equipment I would use for day-to-day adventures and then how I would expand that equipment list for more adventurous and specific trips.
Firstly, understand yourself and your level of experience. I write about this in the article above, but it is worth emphasizing that no two people are the same. The ethos of ‘fast and light’ is great if you can go fast… BUT and this is a big BUT, what happens if you can’t go fast? What happens if you fall, are immobilized, waiting for help or a rescue?
Imagine a scene, stuck on a mountain side, you have broken your leg. You were moving fast and so were warm. But now you are still, the temperature is dropping well below zero and you are unable to move or generate heat. It’s a disaster waiting to happen, and THIS is the scenario you MUST think off when packing for an adventure.
I have a simple attitude of it’s better to carry it and not needed it.
Weather can change in minutes at any time of the year, especially in a mountain environment. However, in winter the changes are often far more extreme, Hypothermia can hit in minutes and it is deadly.
Preparation is key and assessing what ‘may’ happen on any adventure or run is crucially important to make sure that a day or multiple day’s activity remains safe.
The equipment list below are my personal choices, and I must stress here that I have tested many variables and brands to come up with the list below. Importantly, there is most definitely multiple ways and solutions to any problem, so, while my list below could be seen a perfect shopping list, it’s also fun to find out what works for you.
YOU AND WHAT YOU WEAR
What you wear for a run/ adventure should come as second nature, but it can often be a real dilemma understanding how to balance the layers so that you don’t overheat or equally, get too cold.
Personally, I find the most difficult temperatures around 0 to +5 degrees C (32-49 Fahrenheit.) It’s cold enough to make you feel chilled (often will feel damp too) but within 15-minutes of running you feel warm.
inov-8 ambassador, Abelone Lyng
The starting point for me is a merino wool base layer, it naturally helps regulate body temperature, remains warm when wet, transports sweat away from the body, and is very good in regard to odors. Icebreaker is my product of choice and they have a simple system of 150/175/200 and 260 products, the higher the number, the thicker and warmer the product. I personally find 150 ideal, especially for running and active sports.
My jacket will balance warmth, breathability and protection from the wind, Haglöfs L.I.M Hybrid Hood manages to balance all these elements in a really lightweight package. It can even be worn directly against the skin. The inov-8 Technical Mid Hoodie is also a good choice.
Leg wear will depend on the weather and arguably I would potentially look at 3 scenarios. On milder winter days hovering around 0C I would use my standard inov-8 run tights. 0 to -10C I would use a thicker winter tight, potentially with wind block panels on the front by Swix. Below -10 and I would use Icebreaker 150 merino underneath the thicker Swix tights.
Keeping feet warm is essential in winter and again, based on weather, temperature and conditions. I will go with one of three scenarios: Merino wool, neoprene socks or Sealskinz. My default is neoprene as it works well in most conditions. It’s not unusual to wear two pairs of socks in winter, say a merino liner and thicker over sock or a merino liner inside Sealskinz, keep this in mind when getting winter run shoes, you may need a half-size larger shoe?
Hands, like feet, need to be warm. I use Icebreaker liners, with either inov-8 Extreme Thermo Mitt which is incredibly warm.
I wear a Buff or similar product around my neck, and I use a Haglöfs Fanatic hat which manages to be always warm, but not too warm!
Shoes will depend on conditions but for me, once winter arrives, I usually require a winter shoe with studs to provide grip, particularly in ice. The VJ Xero 5 works exceptionally well. Of course, in most scenarios you could use your favourite trail shoes and carry micro crampons which you can add and remove as required. However, if you know you will be in snow/ ice all day, a specific winter shoe provides a much more enjoyable experience.
Finally glasses with a specific winter lens are often essential to protect from cold air, snow and reflected brightness from snow. I use Oakley Radar.
THE PACK
Black Diamond Distance 15is a somewhat unique pack that manages to appeal to trail runners and alpinist/ climbers who have discovered that all important link-up of sports coming together for unique adventures and/or fastpacking. These adventures tend to entail a bit of easy climbing, some scrambling, some fell running and some walking – or just about whatever you can string together.
Black Diamond Distance 15 balances running and alpinism perfectly.
A hybrid between running and climbing pack, the Distance 15 fits snug to your body and is stable with minimal bounce. The main compartment of the pack includes a quick draw-string main opening which Black Diamond say is waterproof – it is not! Please use a waterproof bag inside like those provided by Sea to Summit. A zippered security pocket inside is ideal for a wallet and there is a stretch mesh divider that will hold a bladder, or it can be used for storing nylon or dyneema.
Elasticated compression straps either side of the main bag are ideal for reducing the volume of the pack and keeping everything tight together and they can be used to secure a pair of ice axes that also have specific storage at the bottom of the back and security buckles that pass through the ice axe head. Integrated into the main compartment (on each side) are ‘Quiver Sleeves’ for Black Diamond Z-folding walking poles. The front of the pack has a vest fit with two adjustable straps and two 4-way stretch zippered pockets and four front stretch pockets that will hold soft flasks, snacks or any other essential ‘on-the-go’ items.
IN THE PACK
Icebreaker 150 top and bottom
Spare base layer, top and bottom – These would be duplicates of the Icebreaker 150 as worn.
Spare socks – Merino run sock.
Jacket
Mid layer/ insulation – In winter, I will already be wearing a mid-layer, either the Haglöfs or inov-8 as mentioned above. My additional insulation would be down and the Haglöfs Essensis an incredible all season product. It has warmth, very low weight and first-class goose down with 800 CUIN filling that it is DWR treated – the filling stays dry for up to 10,000 minutes with exposure to wet conditions.
Barrier shorts
*Barrier Shorts – Haglöfs make an excellent, light and packable barrier short for the extreme cold.
Haglöfs Gore-Tex Paclite
Waterproof jacket – The inov-8 Ultrashell Pro is an excellent very lightweight waterproof jacket but in winter I will usually take a heavier duty Gore-Tex Paclite L.I.M jacket by Haglöfs.
inov-8 Trailpant
Waterproof pants – inov-8 Trailpant waterproof and breathable designed for really cold, wet conditions.
Icebreaker liner gloves
Liner gloves – I would carry an additional pair of Icebreaker merino as mention above.
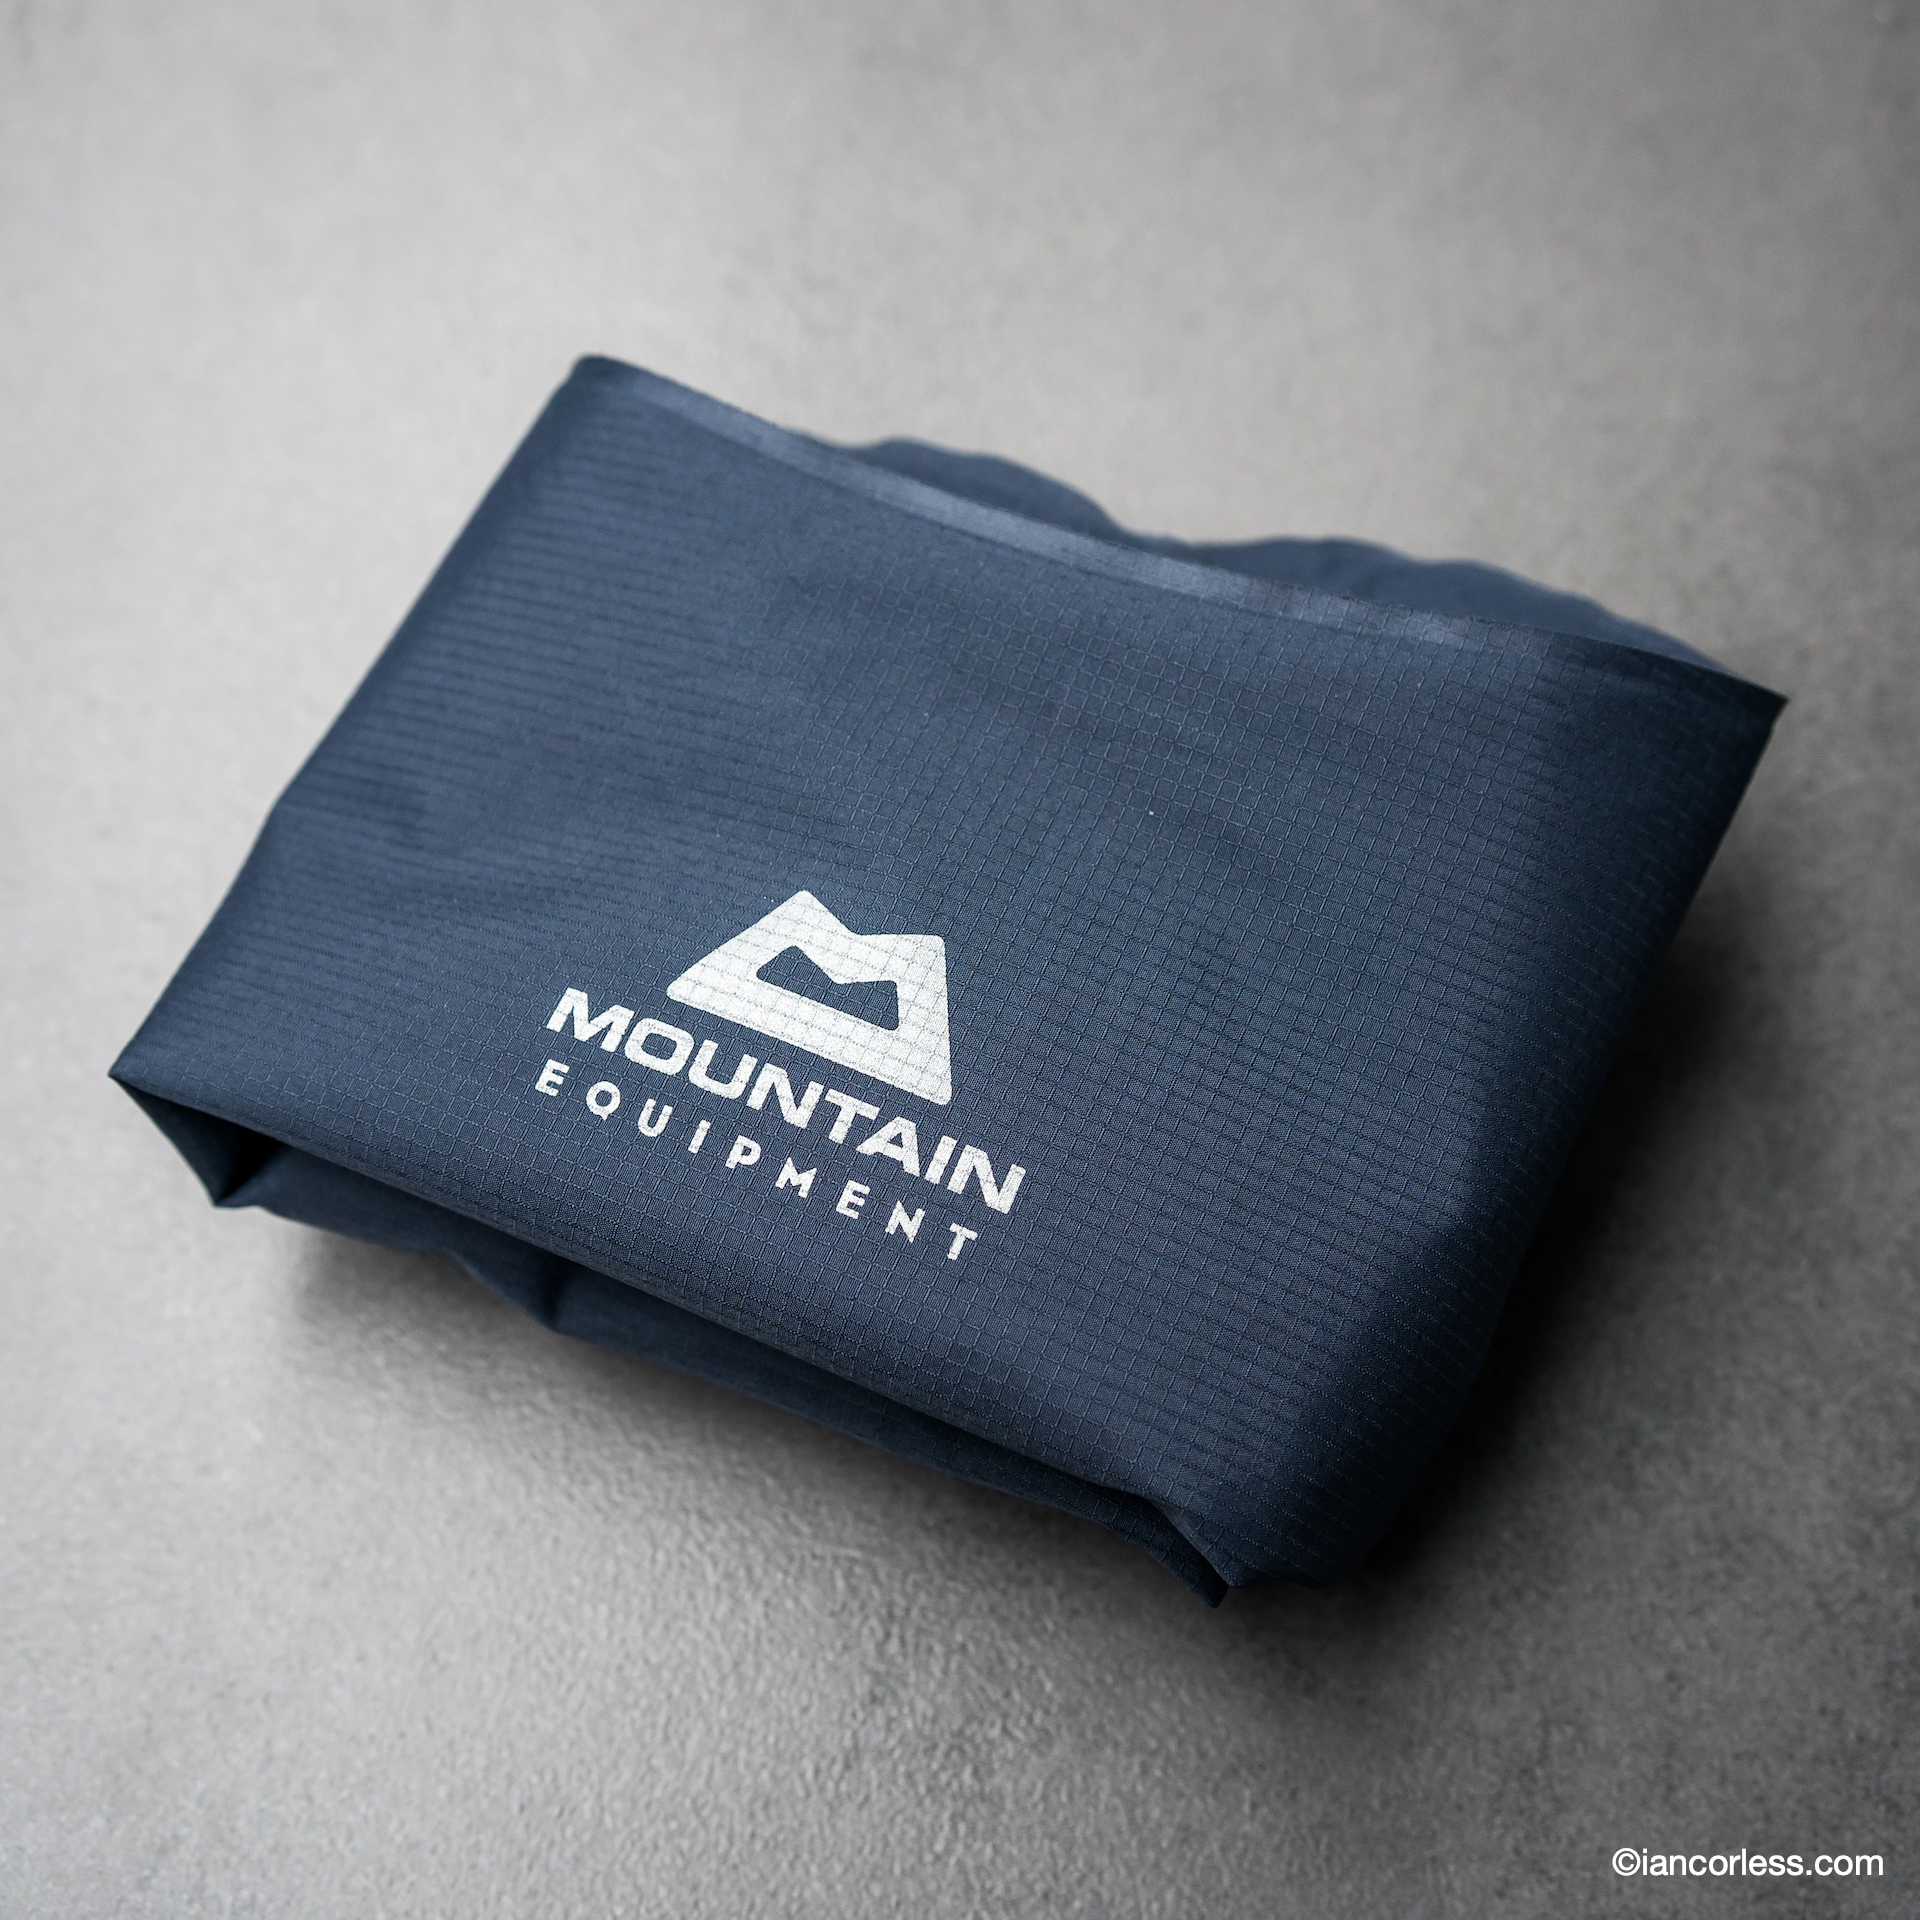
Sentinel by Mountain Equipment
Black Diamond waterproof over mitt
Outer gloves – I would typically carry two outer gloves as I suffer with cold hands, a warm Sentinel mitt by Mountain Equipment and a waterproof over mitt by Black Diamond.
Hat – Spare hat as above.
Buff – Spare as above.
Food and hydration – In winter, a main issue can be frozen bottles, so I carry one or two small Thermos flasks with coffee, sweet tea or hot chocolate. It can make a big difference to have this option. For snacks I will use energy bars, Kvikk Lunsj or similar. Always a good idea to plan a cafe stop on longer runs too!
Phone – I use an iPhone and I make sure I have mapping software such as Footpath and what3words for emergency use.
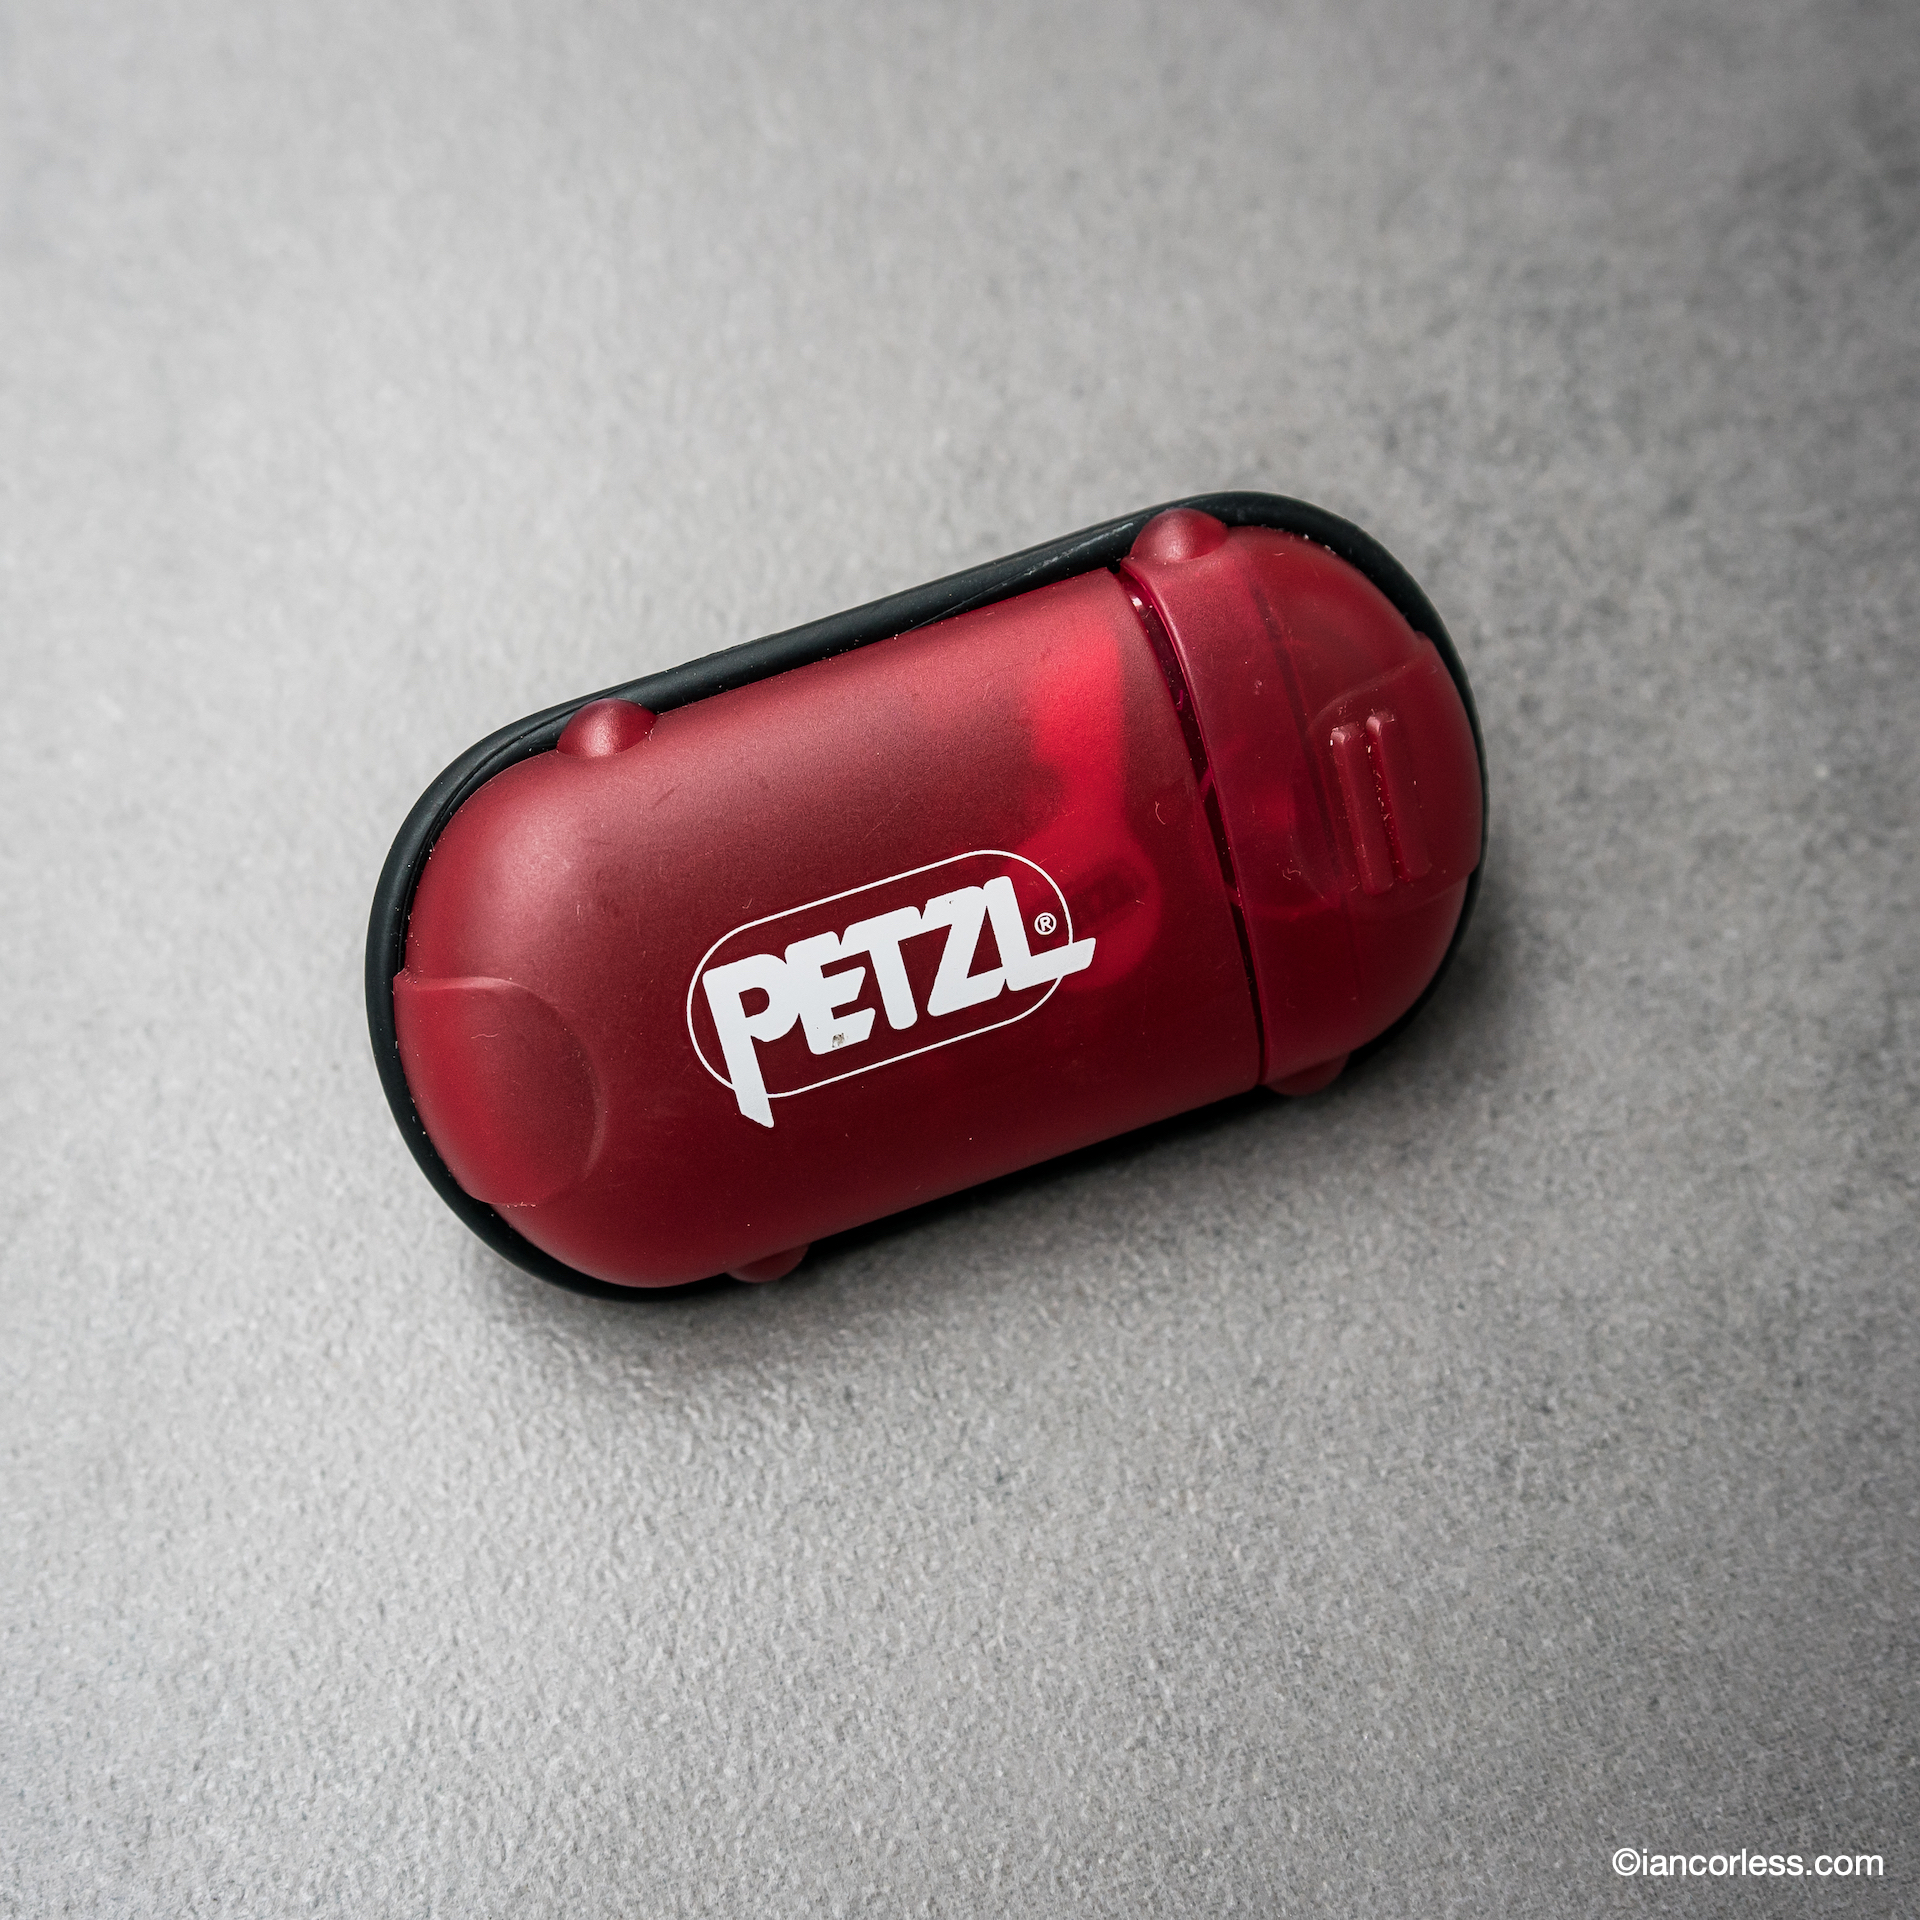
Petzl e-lite
Silva Trail Runner Free
Headtorch – A simple Petzl e-lite as a ‘just-in-case’ for all runs but if running at night I use a Silva.
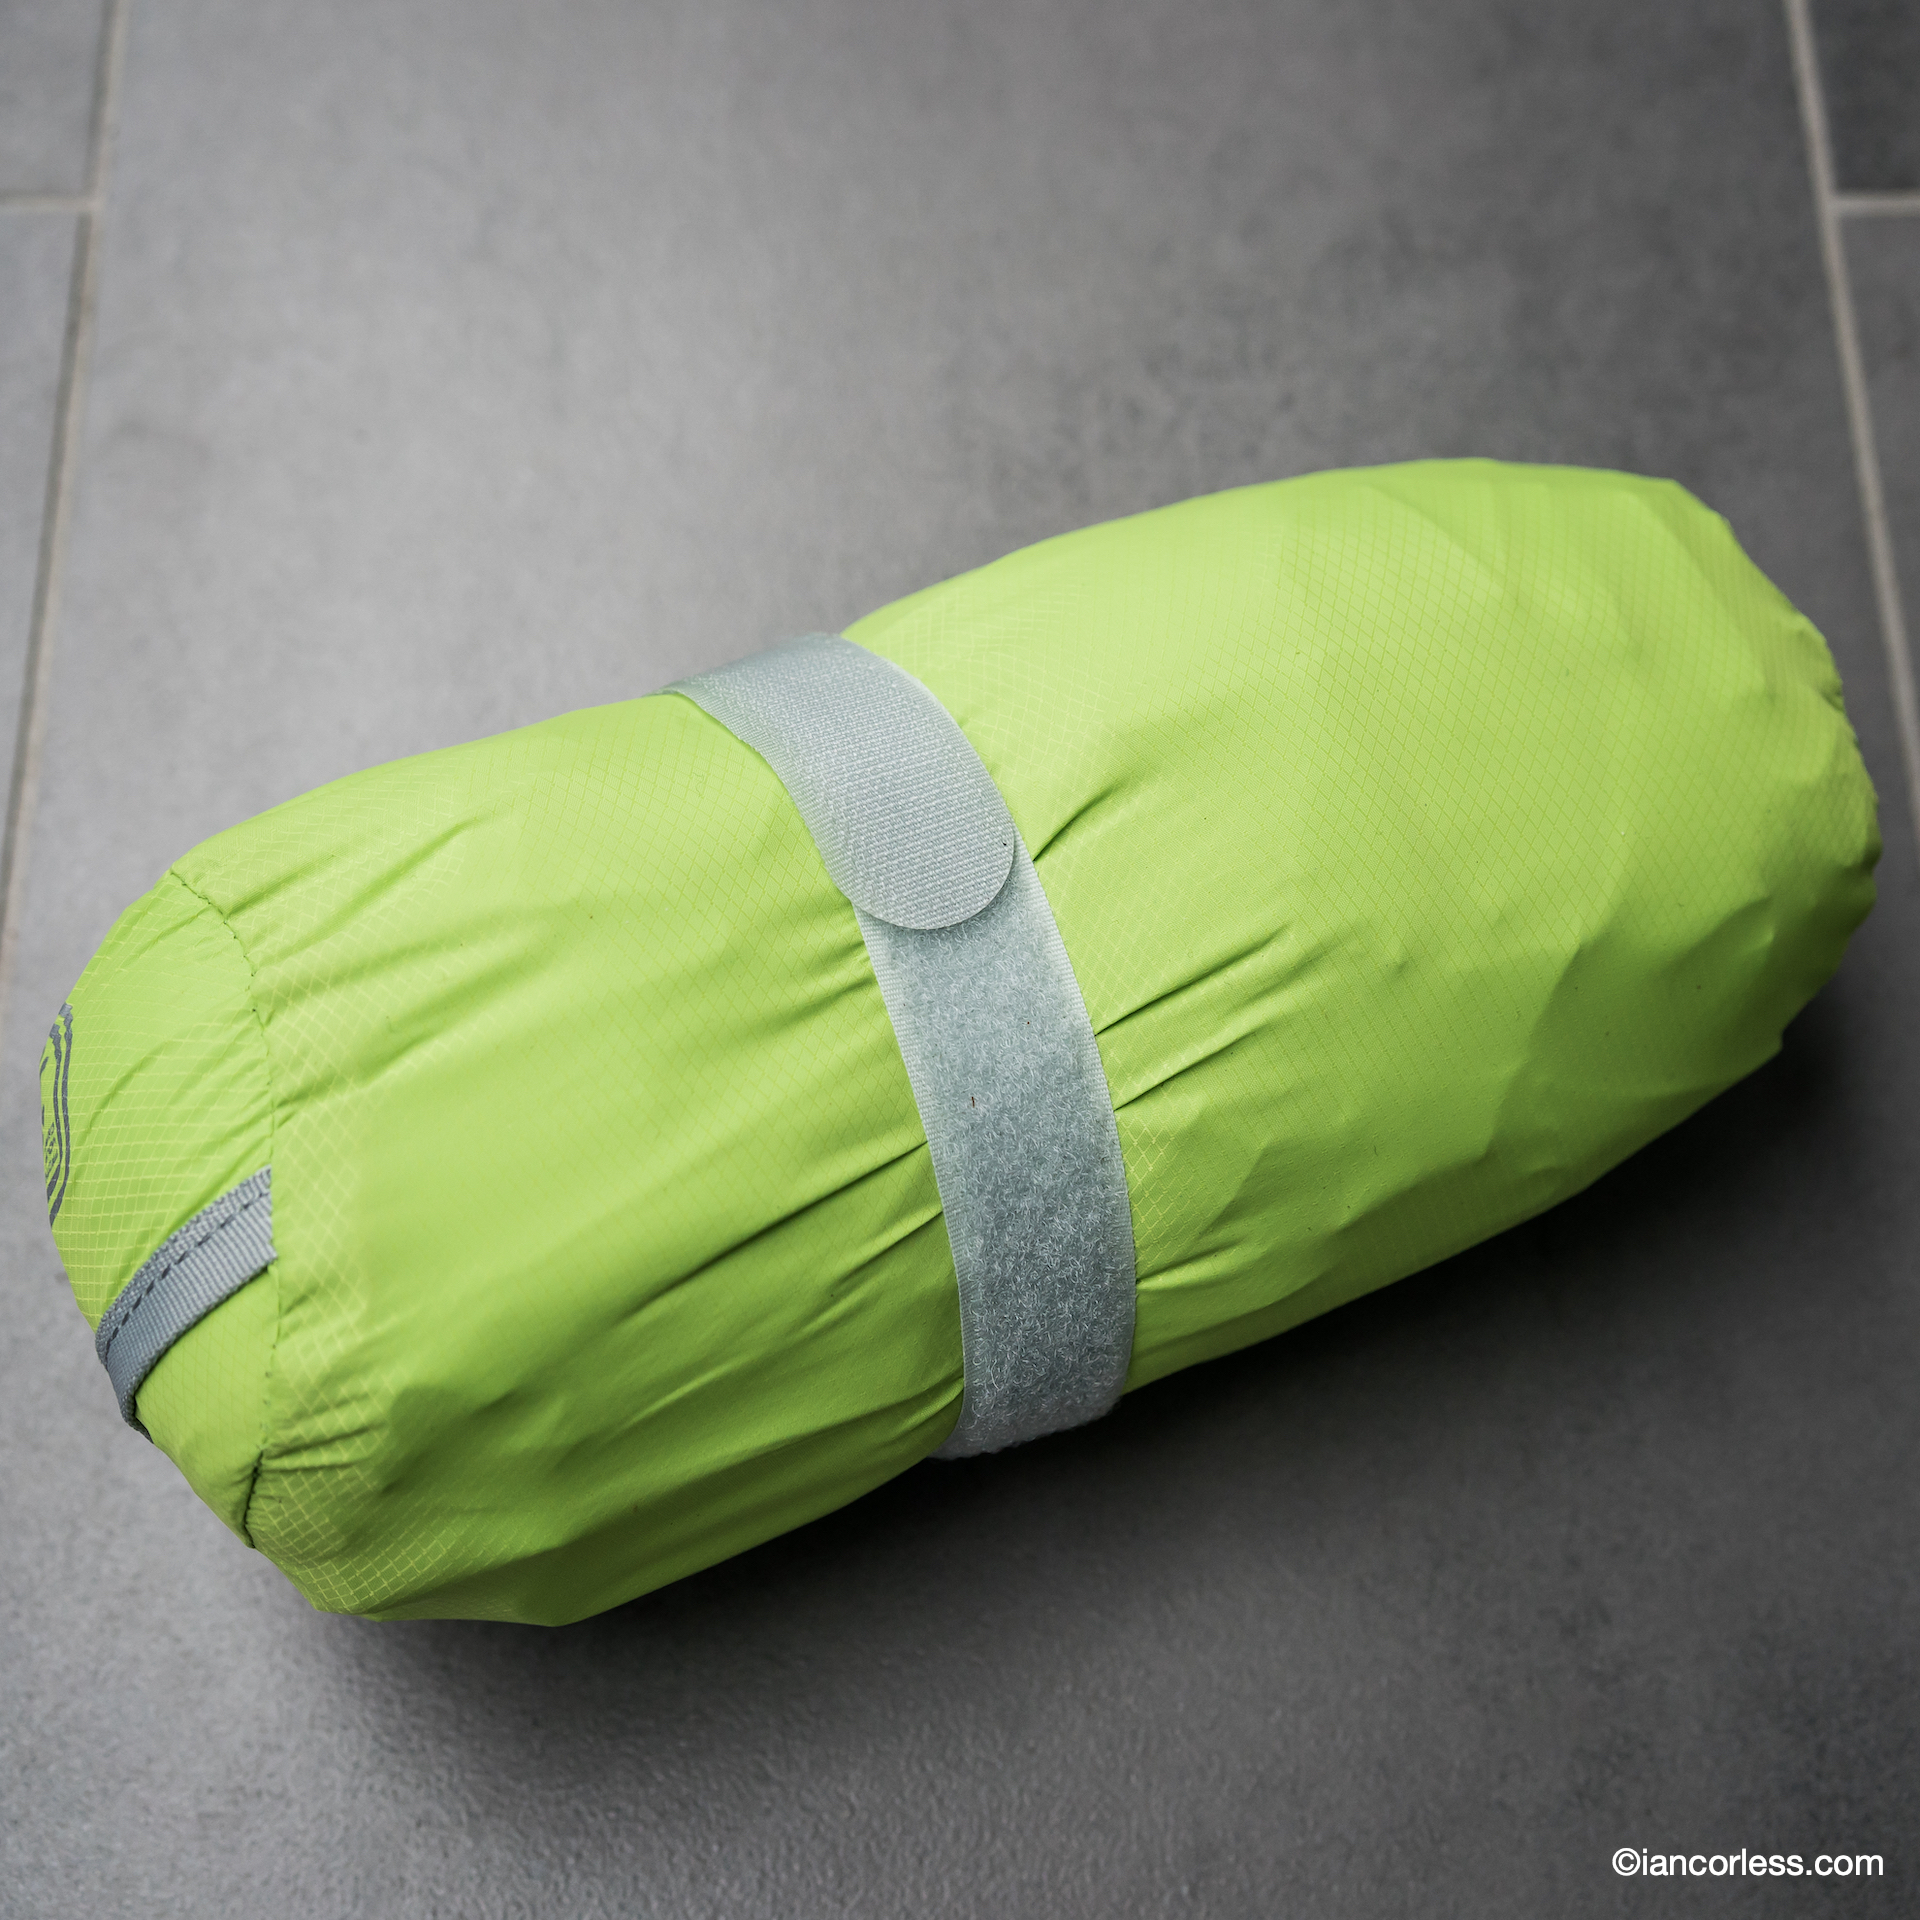
Waterproof liner bag – (maybe 2 depending on needs) – Sea to Summitmake excellent lightweight bags to make sure all spare clothes etc remain dry.
Survival bivi
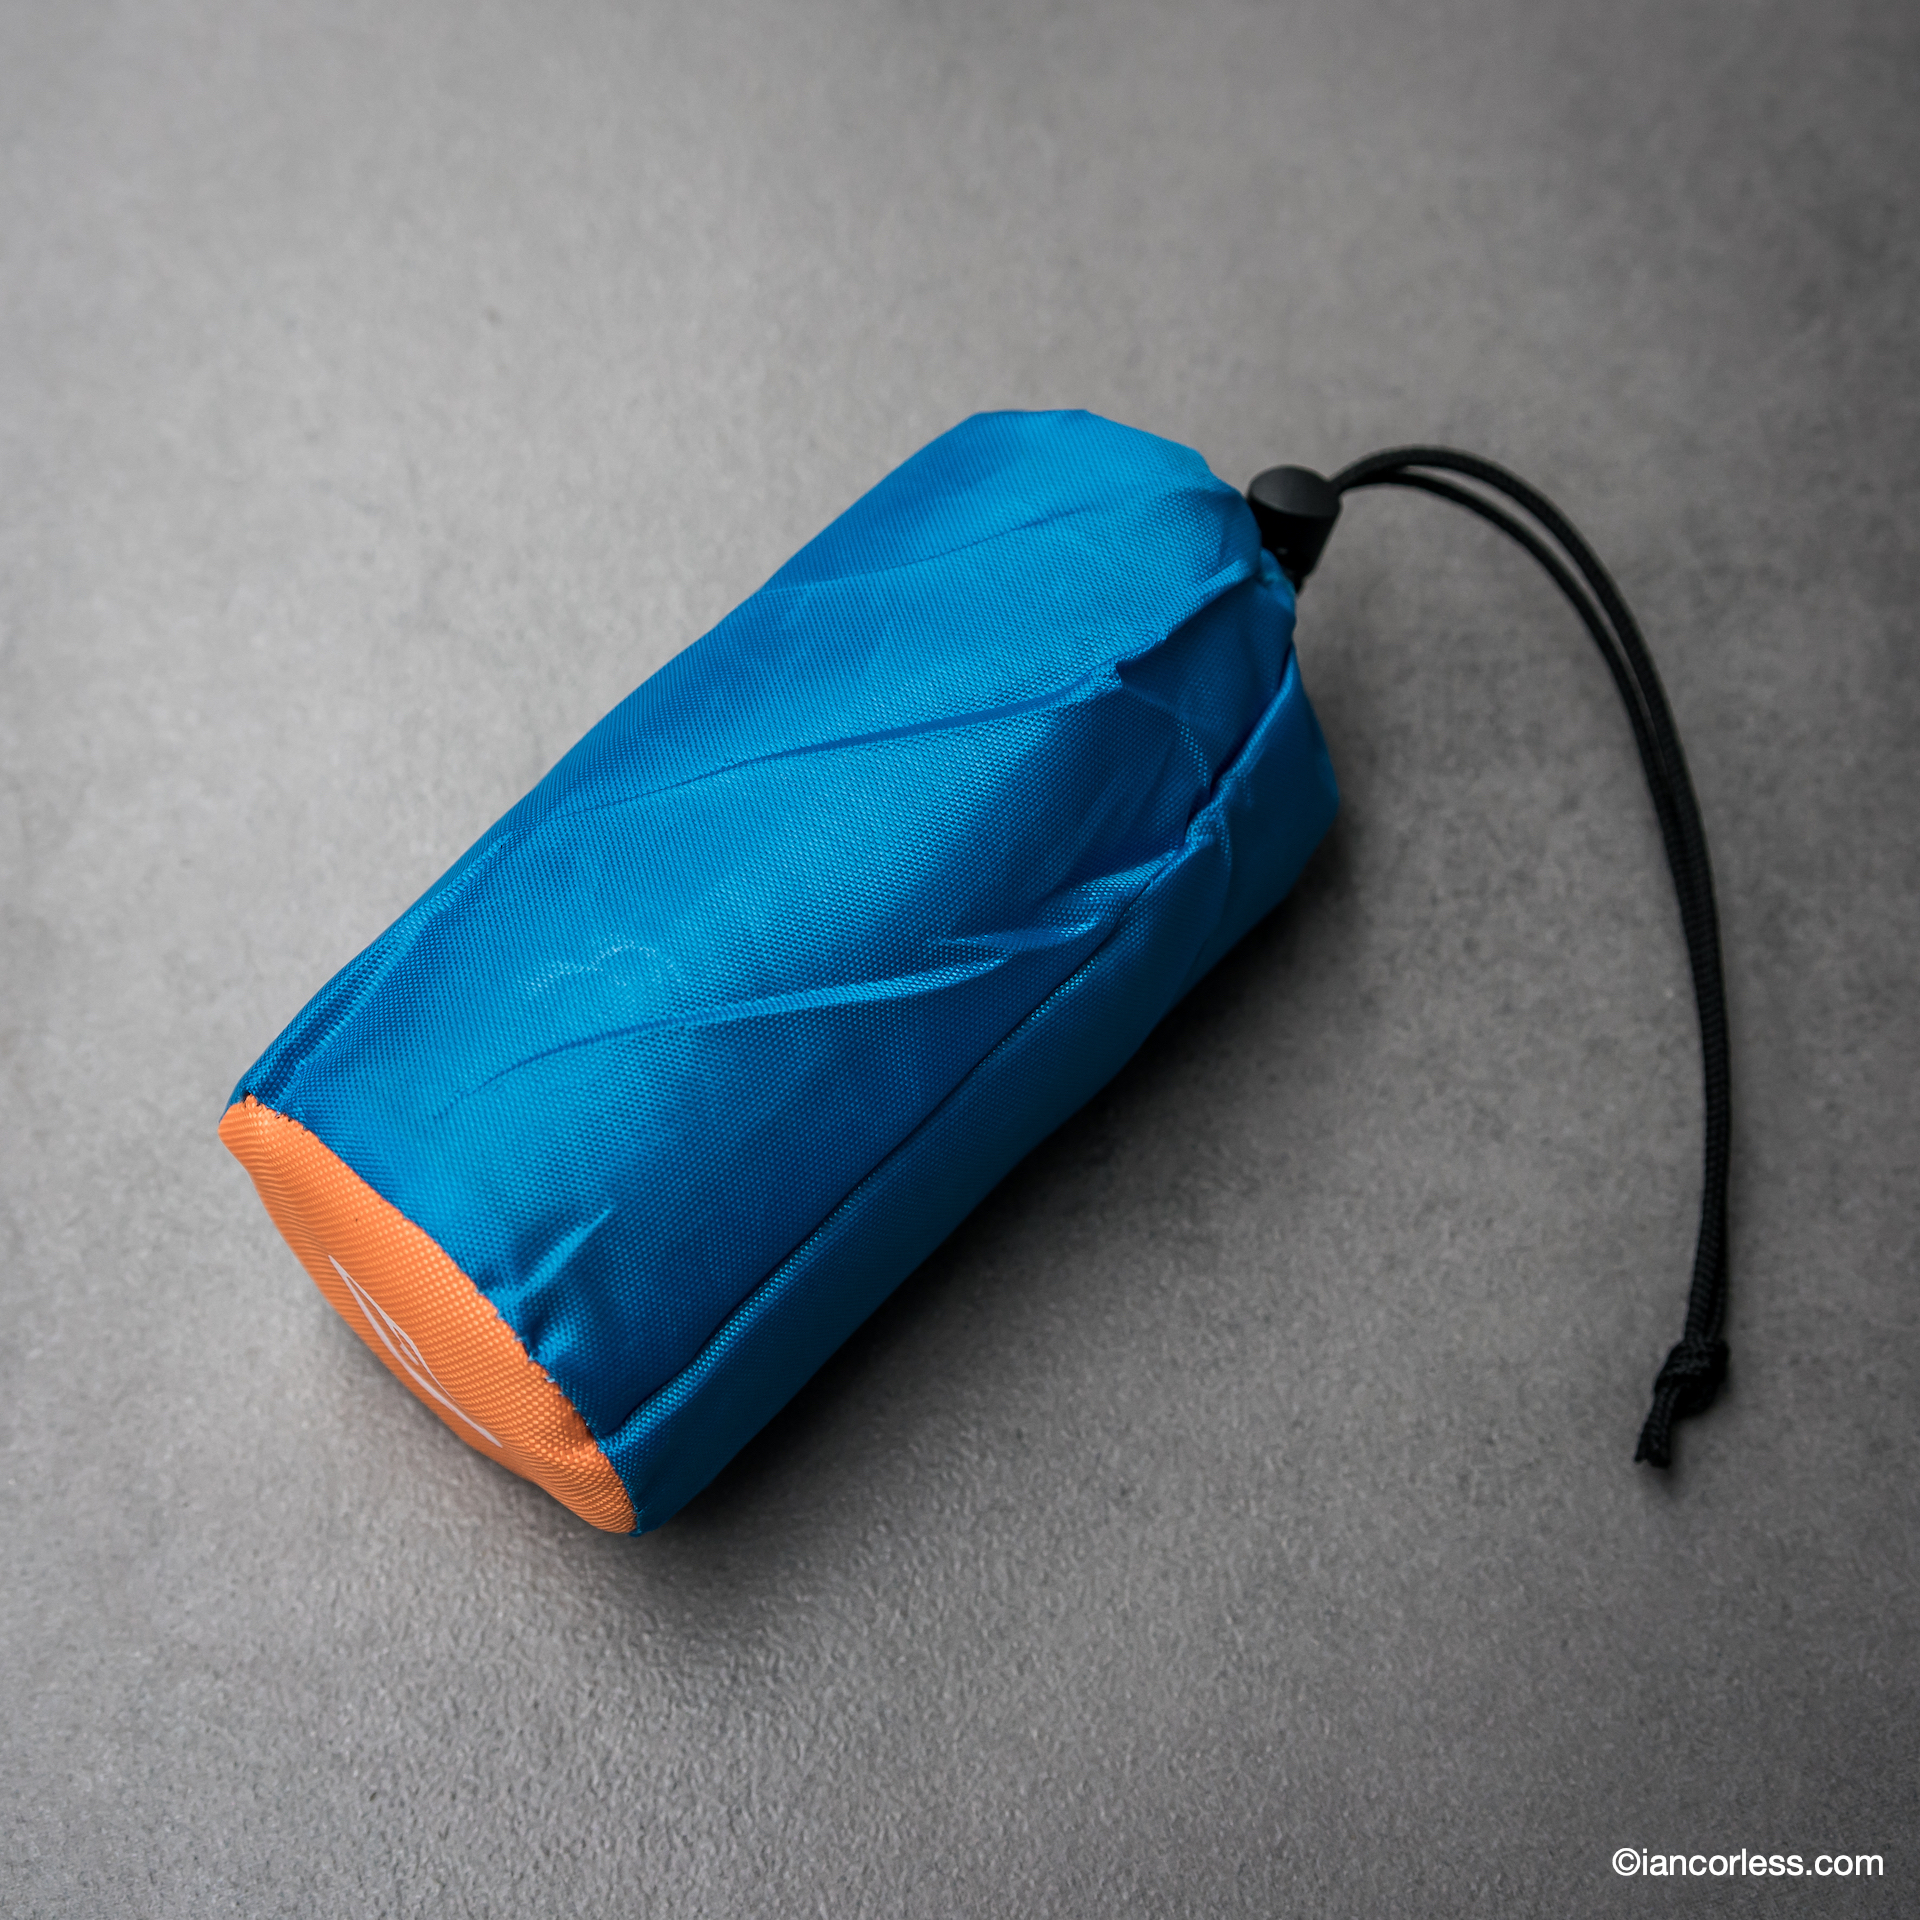
Bivvi – Terra Nova Survival bivi that is fully waterproof, breathable and has a simple drawcord closure. It packs away into a small stuff sack.
Hand and feet heat pads
Heat pads – An essential back-up for hands and feet by Nevercold or similar.
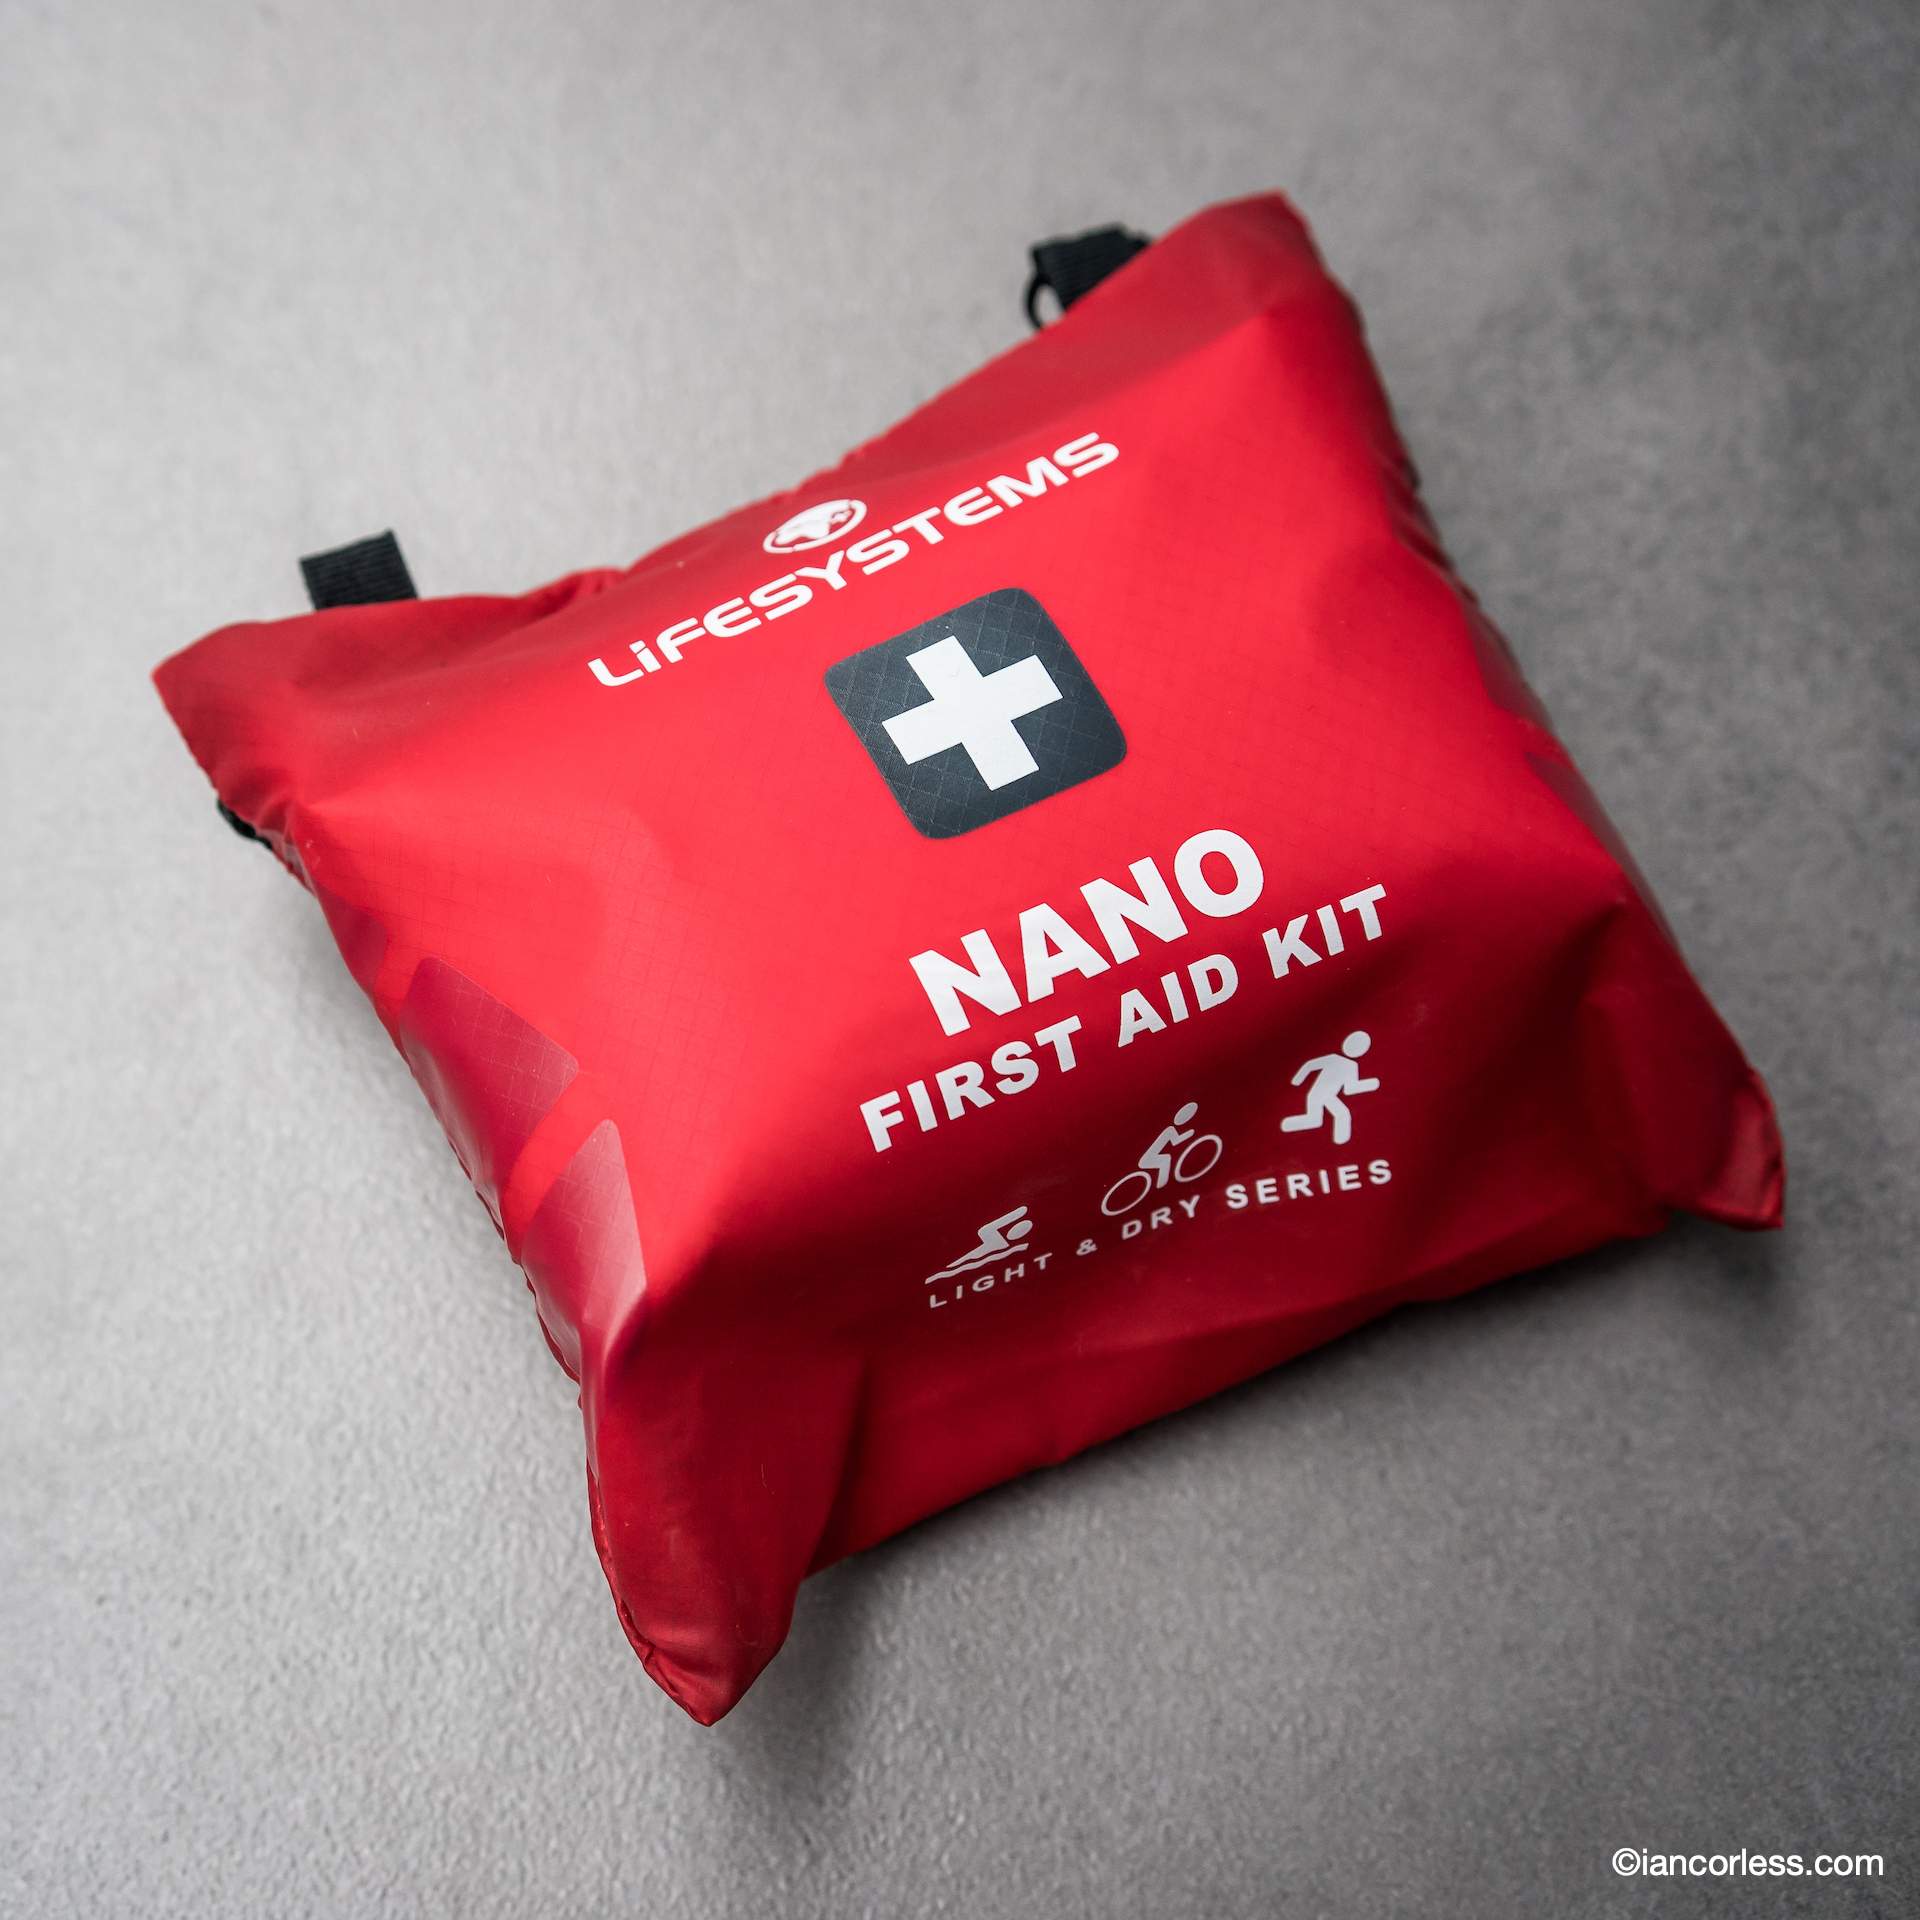
First aid – Lifesystems small emergency kit in waterproof protection.
Additional power.
Batteries/ Battery pack – Modern tech doesn’t last long in extreme cold so carrying a back-up battery can be a good idea, Goal Zero make good products.
*Hand Ice Studs – Isvidda Isdubb If you are running on the ice, it is important that you use ice hand studs both for your own and others’ safety. (These are often sold for those ice fishing.)
All items with * are only applicable based on the adventure, the type of terrain, weather conditions and personal experience. The inReach is a wonderful security blanket that is arguably ideal for any run/ adventure but if you have a phone (with power) at least you have one emergency back-up. However, phones don’t always have reception.
Running across a frozen lake, Norway.
LIGHTERPACK is a great online tool that helps you manage equipment and keep track of pack weight and contents, HEREis an example of what is listed above.
SUMMARY
Winter adventures are incredible and exhilarating. On a personal level, I find them more challenging and exciting than many Spring/ Summer trips due to the added complexity. However, that complexity can prove to be fatal.
Don’t compromise in winter. Be prepared.
The above list of equipment is designed to show you what is possible and how to make weight as minimal as possible without losing efficacy of the items. You could go away and purchase this list of items and you’d have all you need for winter running.
However, if you are like me, looking around, testing items and comparing is part of the fun… It’s actually what I have been doing for years, that is how this list came about.
So, do the research, make sure you not only have what you need for an adventure but make sure you have all the extras needed should a situation arise leaving you vulnerable.
Please support this website. I believe everyone deserves to read quality, independent and factual articles – that’s why this website is open to all. Free press has never been so vital. I hope I can keep providing independent articles with your help. Any contribution, however big or small, is so valuable to help finance regular content. Please support me on Patreon HERE.
A good nights sleep is essential when racing a multi-day adventure if out fastpacking. Without sleep, our ability to recover is compromised and eventually, sleep deprivation will impact on performance, mental strength and even one’s appetite.
Carrying a sleeping mat is essential, however, the weight of the mat is crucial. In most scenarios, we want the lightest possible that is suitable for the conditions that we are running and also provides excellent comfort.
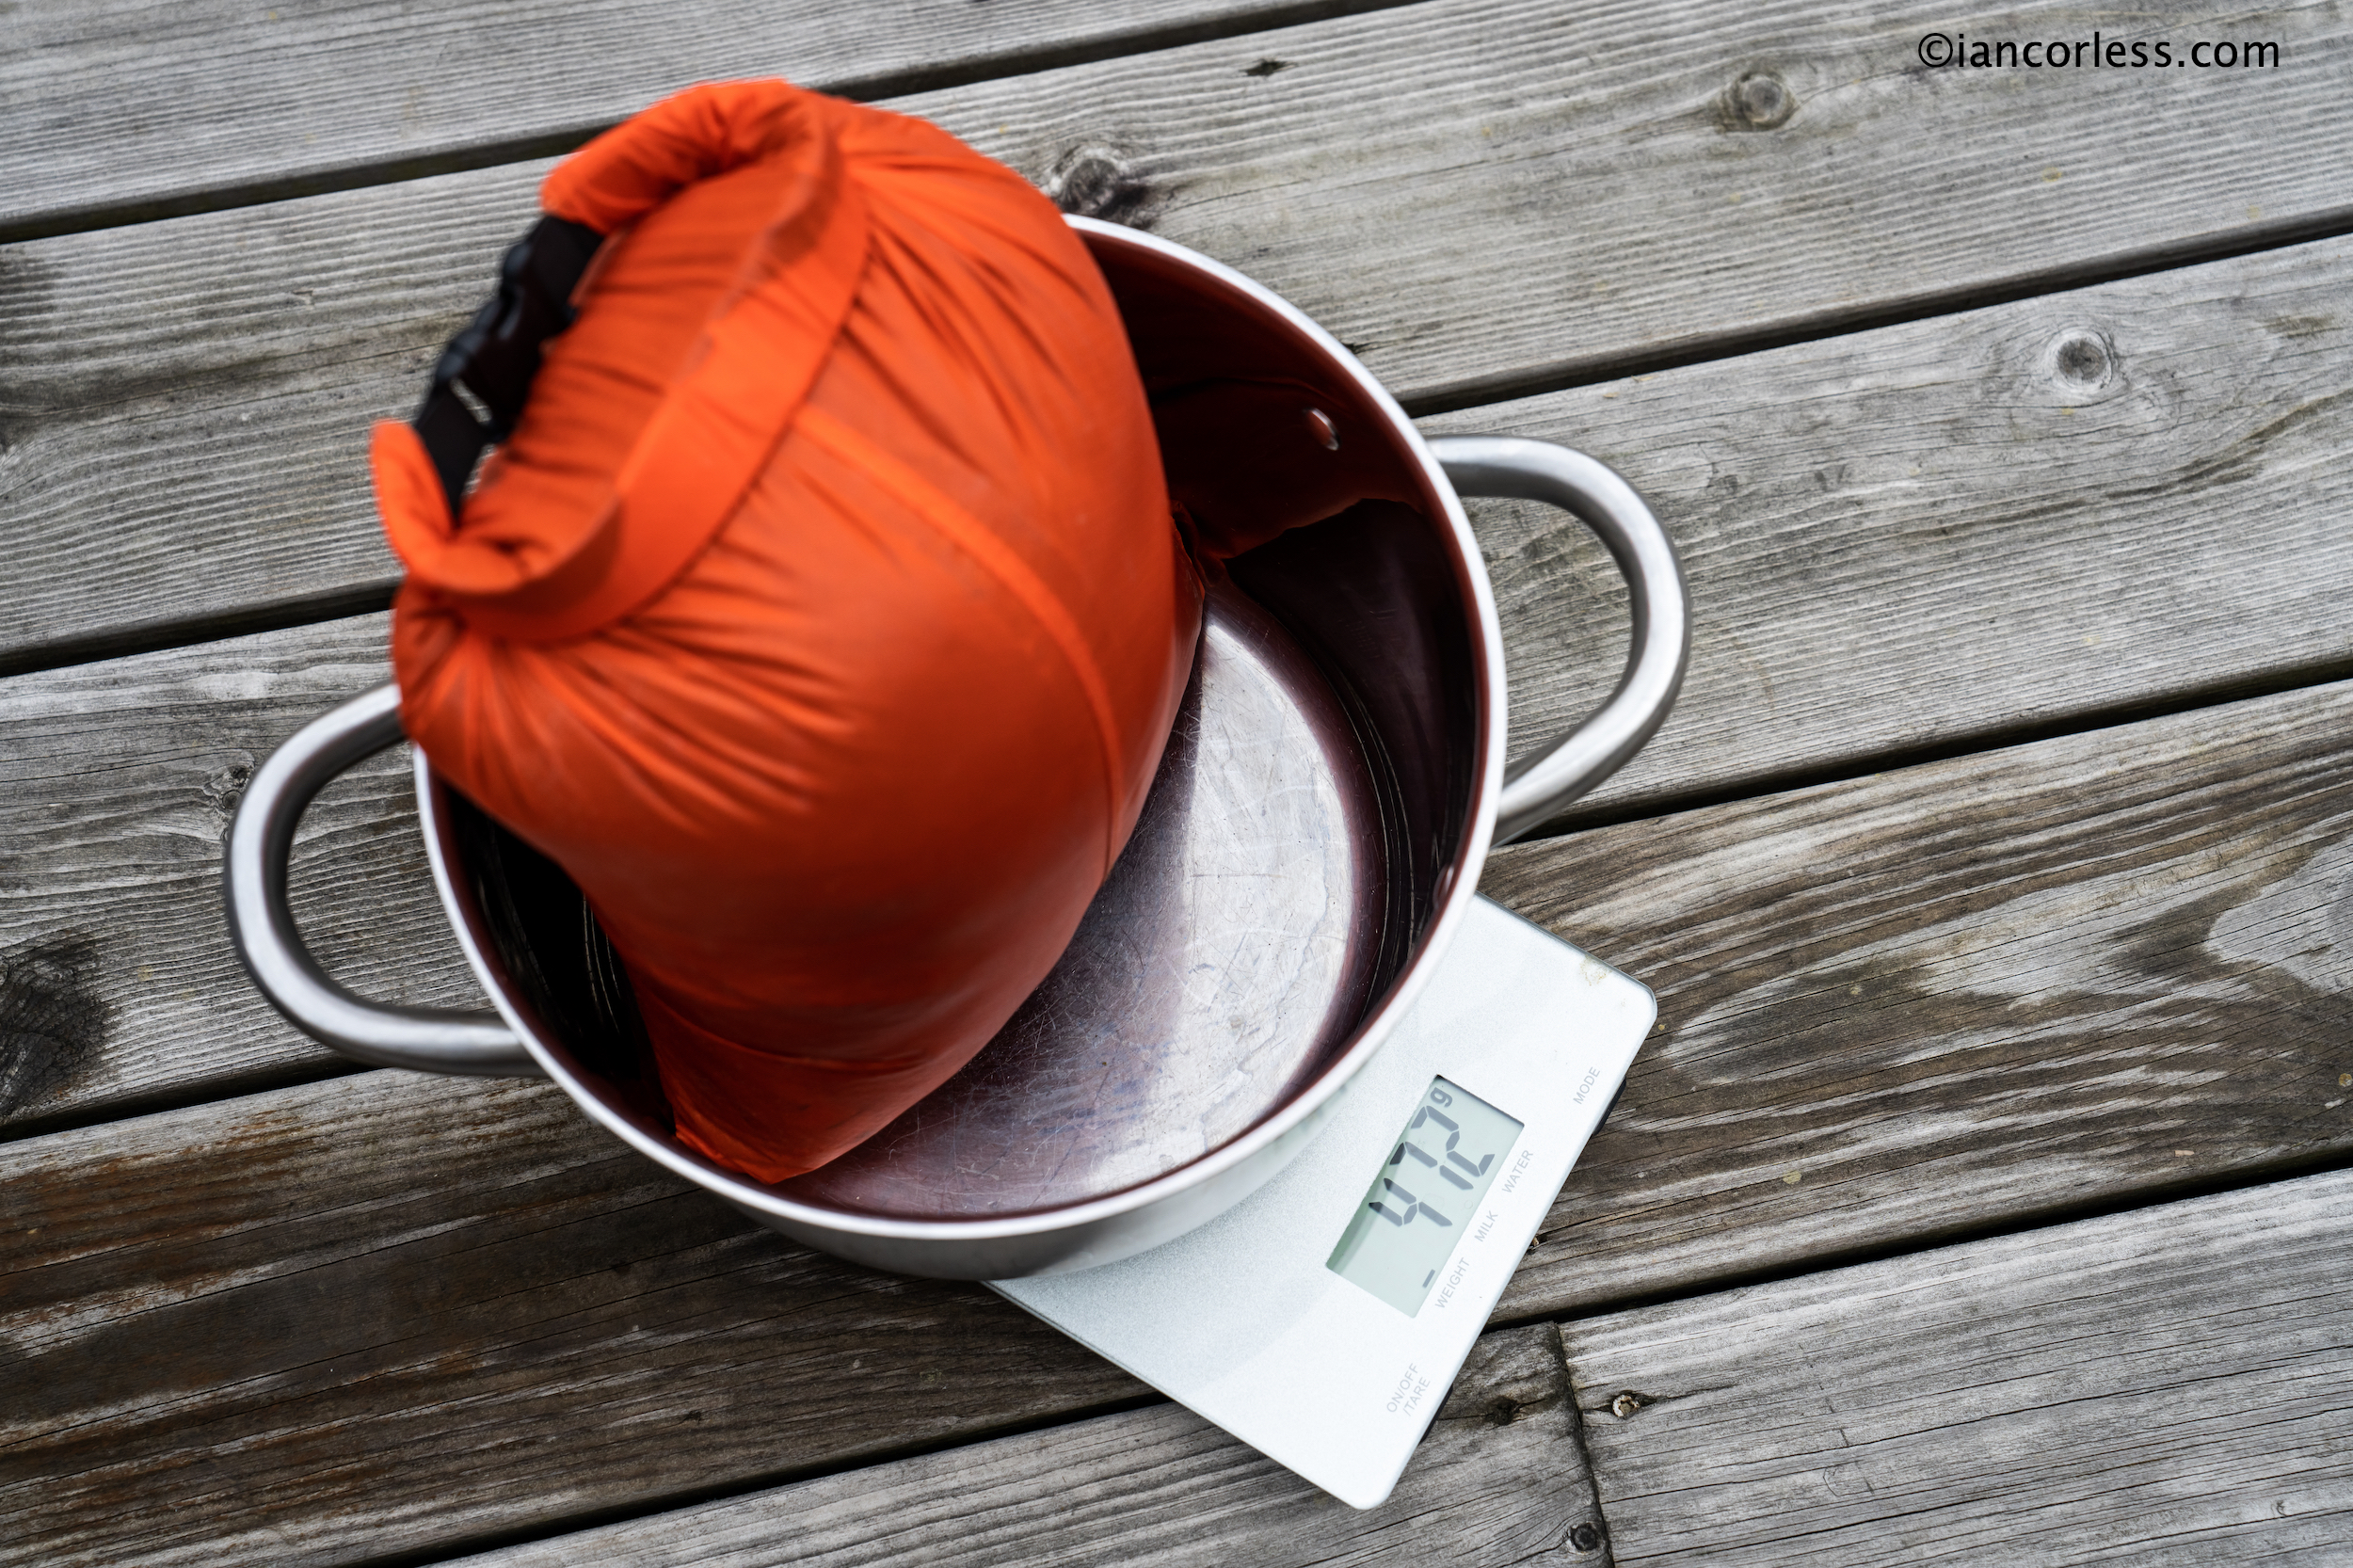
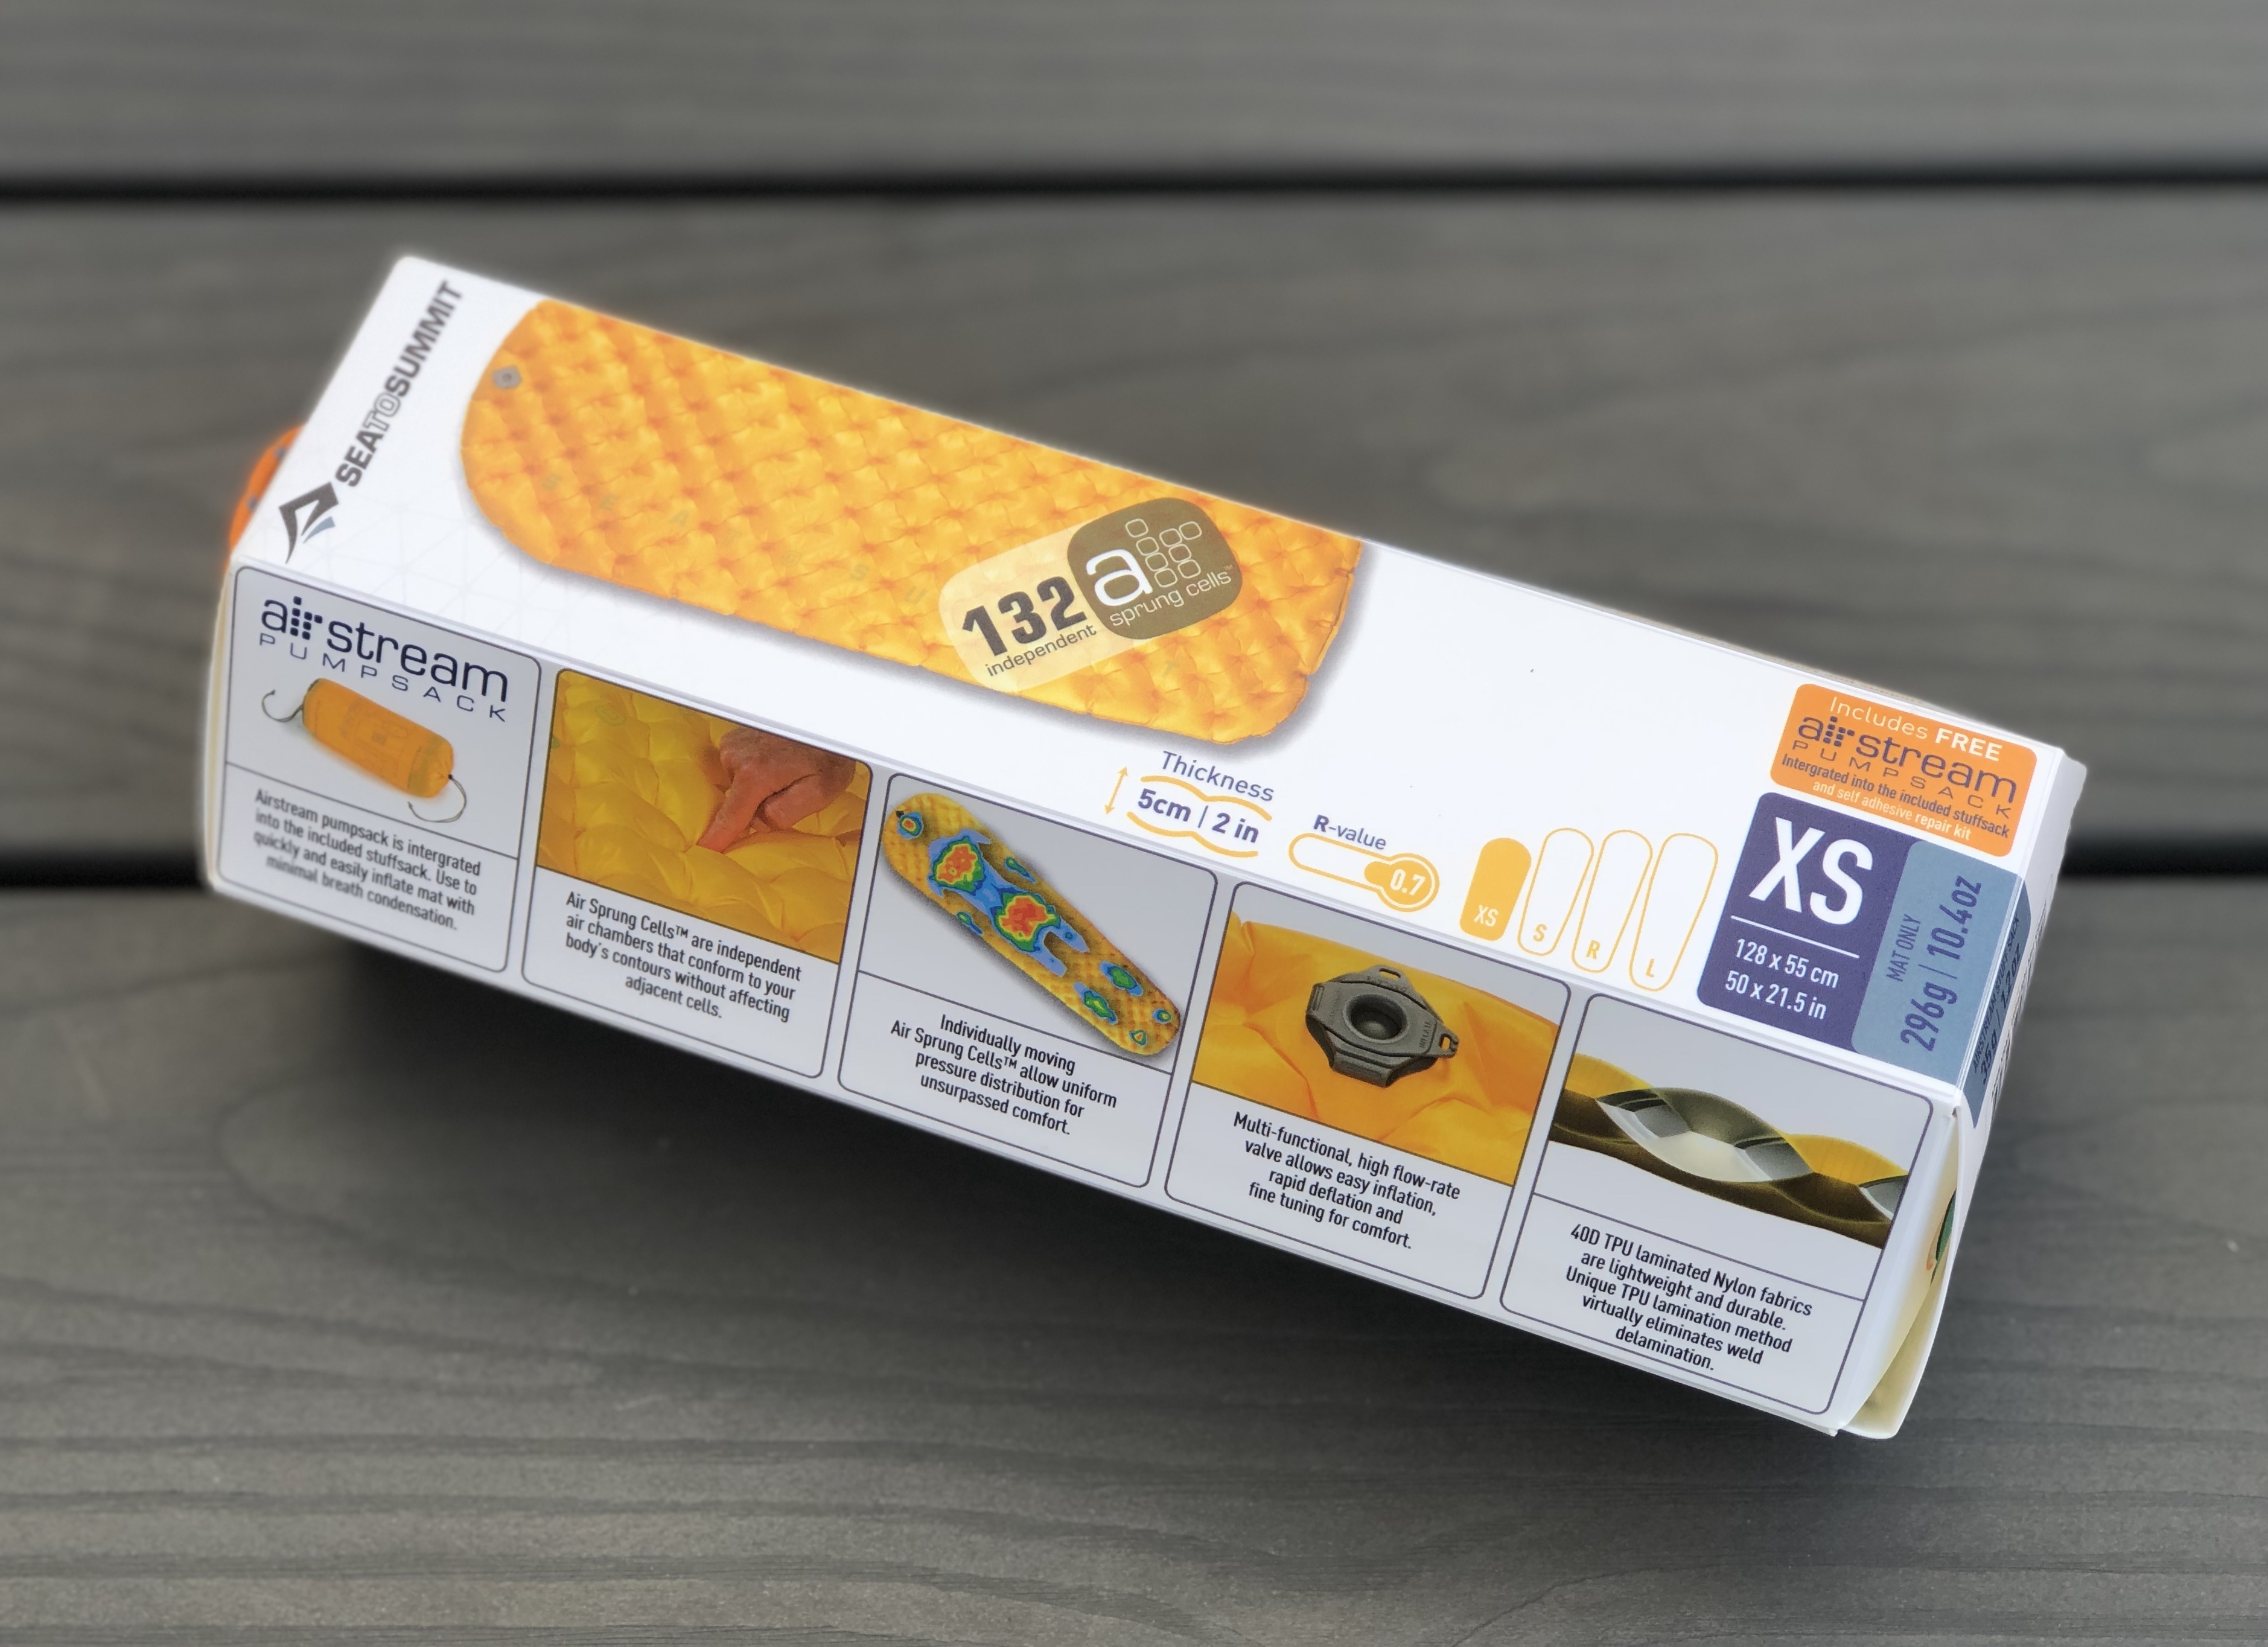
There are many options available on the market and recently I have been testing the Sea To Summit Ultra Light Mat (extra small) which has impressed me in several key areas:
Easy to inflate and default.
Small pack size.
Very lightweight.
Extremely comfortable.
Durable.
Finding a sleeping mat that provides this level of comfort in such a small pack size and weight has been a revelation. I was initially concerned that an extra small mat would be too small… Not the case, this mat has exceeded my expectations.
Under 300g in weight made with 400 TPU Nylon, the mat is durable and hardy to all conditions. The 132 Air Sprung Cells react as one would hope to body weight and provide a supremely comfortable night. In simple terms, the cells don not flatten out under hipbones or shoulders.The addition of a stuff sack and an Air Stream is a nice touch but comes with an additional weight penalty of 40-45g.
Please support this website. I believe everyone deserves to read quality, independent and factual articles – that’s why this website is open to all. Free press has never been so vital. I hope I can keep providing independent articles with your help. Any contribution, however big or small, is so valuable to help finance regular content. Please support me on Patreon HERE.
My recent article on Fastpacking (here) gained a great deal of attention. In many respects, I am not surprised, I think mini or extended semi or selfi-sufficient journeys are extremely popular and only on the increase.
The above post was in-depth and provided an overview of options that are available to make a fastpack trip effective. In some cases, coffee being a prime example, I did not go with the lightest possibilities available. The main reason for that? Comfort usually comes with a little more weight.
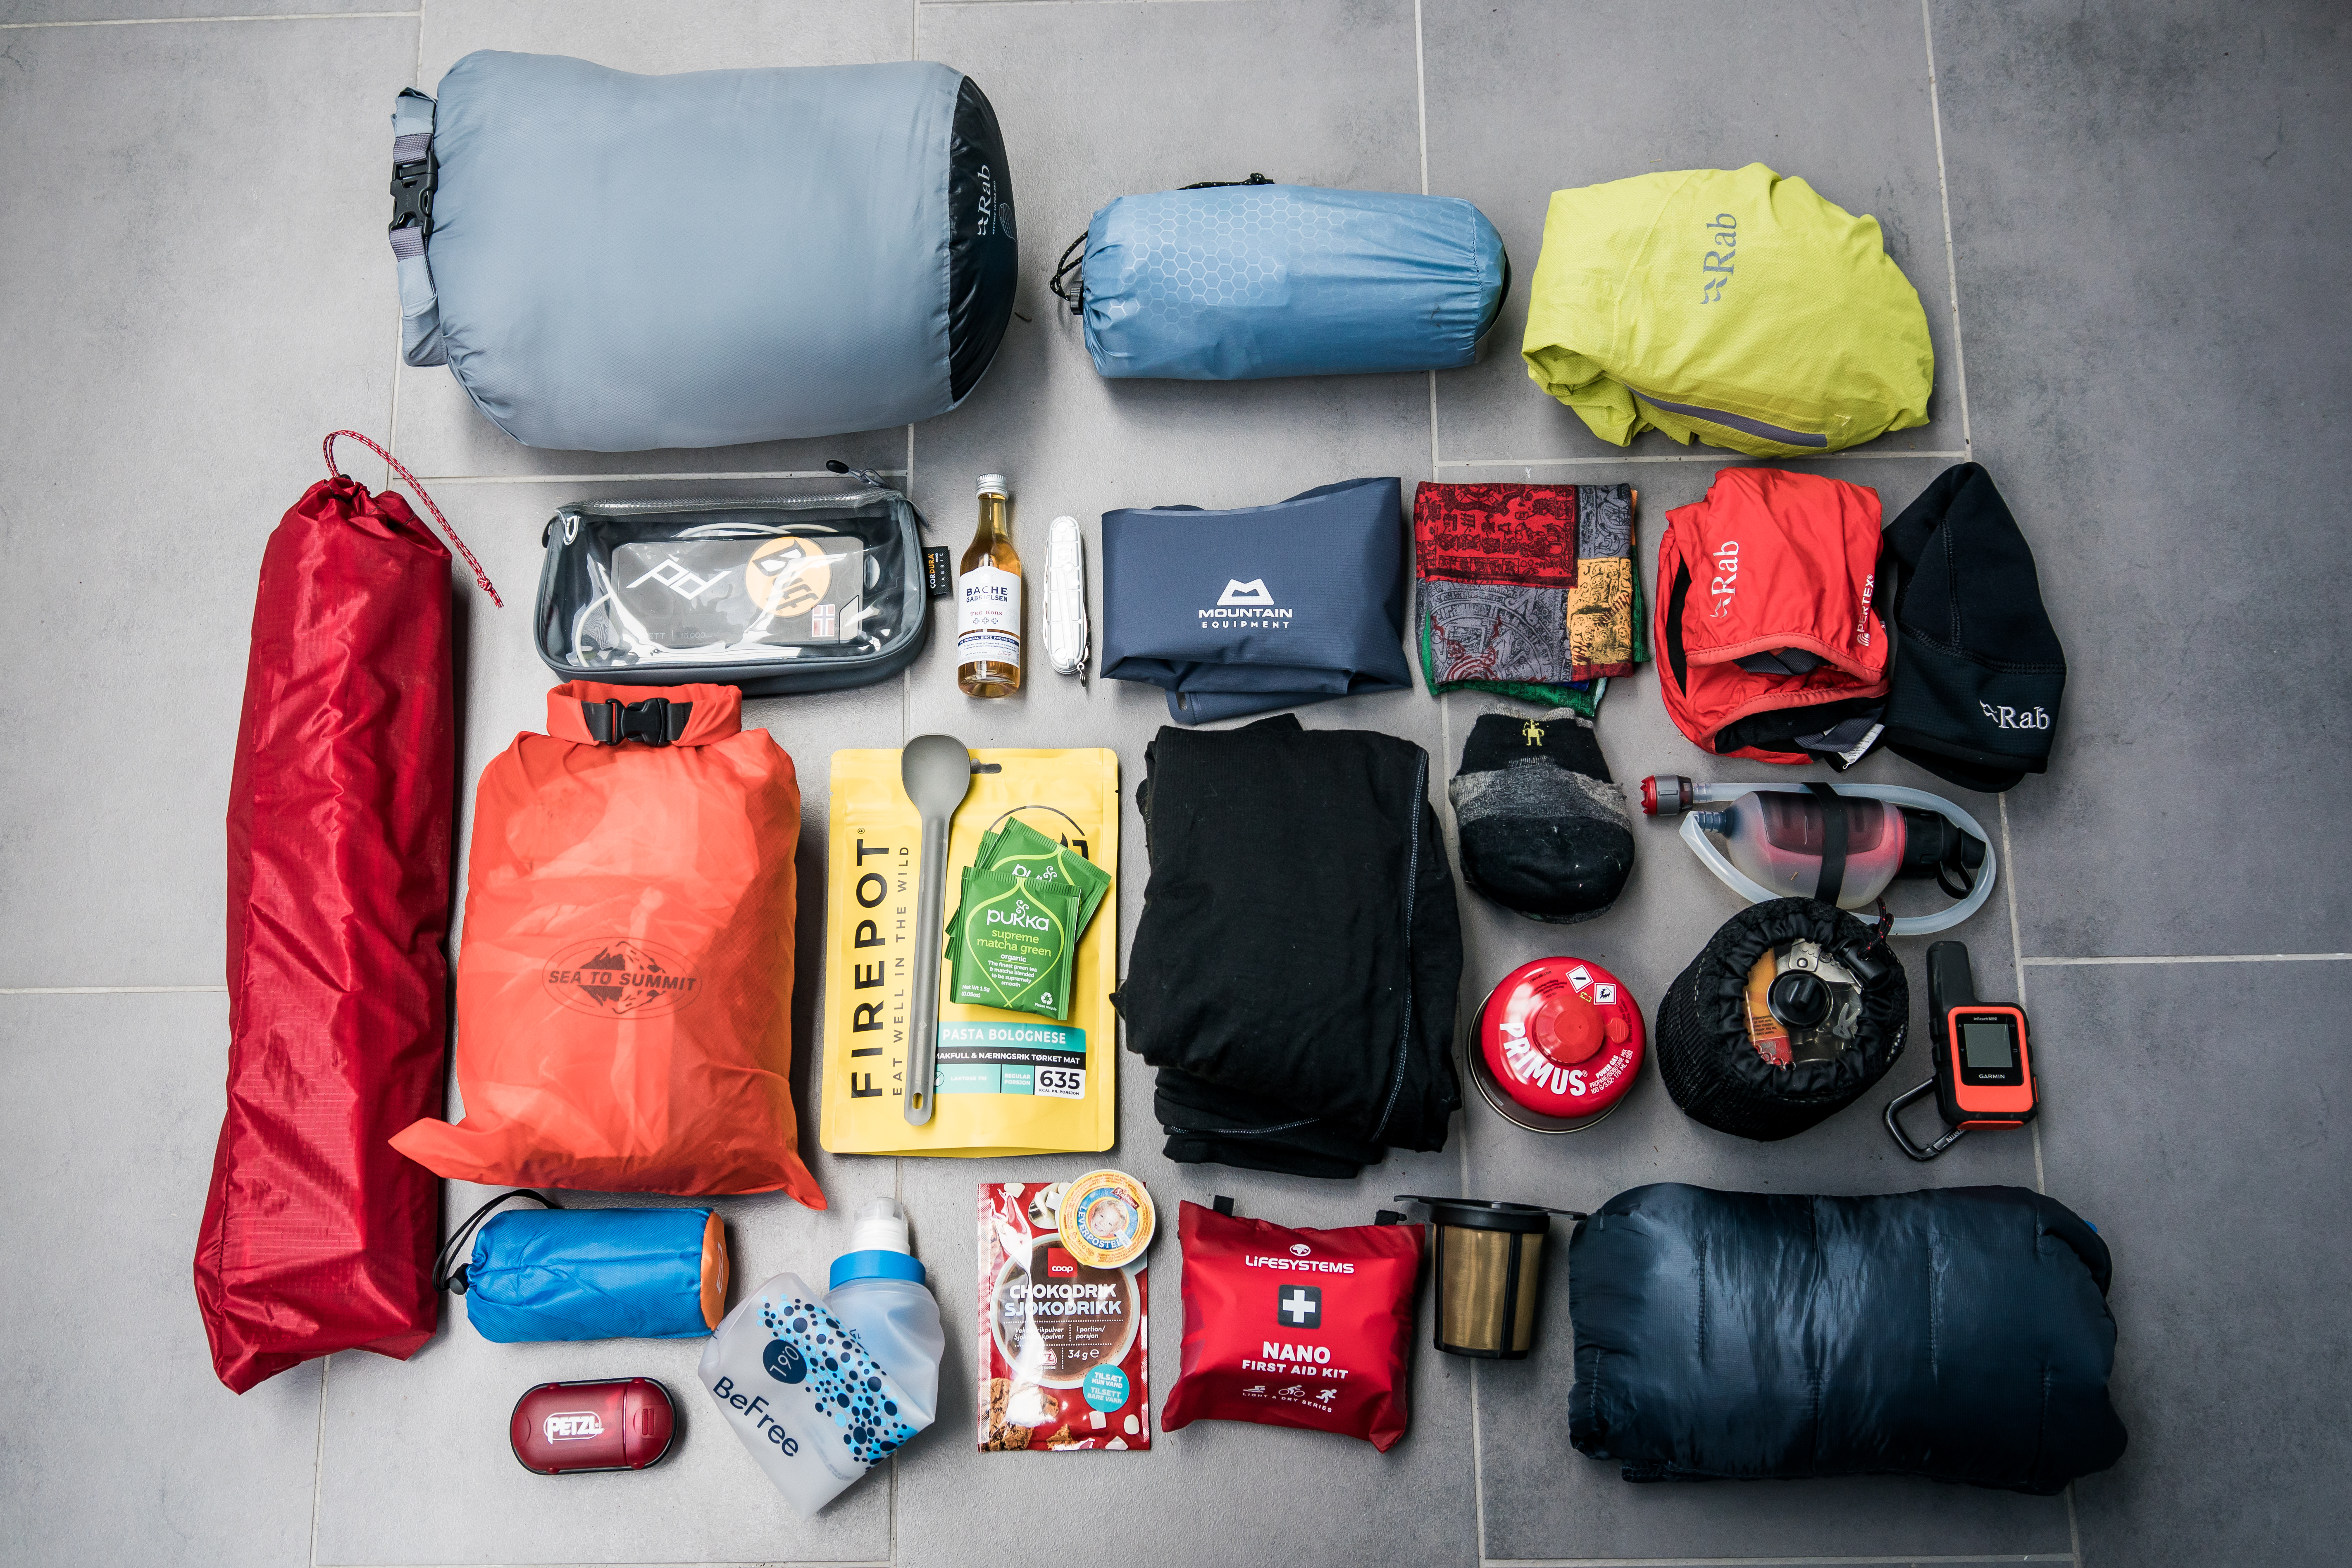
After a recent fastpack trip (just one-night wild camping,) I posted a photo of my pack contents and it created some interest as the weight was 5.4kg including pack, food, water, tent and all my essential items.
I received countless messages for more information, so, here goes. A detailed breakdown and description of the items and why I use them or more importantly, why I take them! Gladly, some of the items I do not need to use but need to have, just in case.
Below is a video, in-depth, where I discuss all the items listed below.
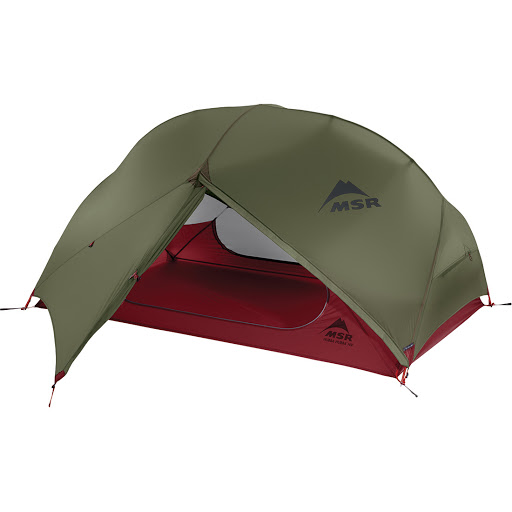
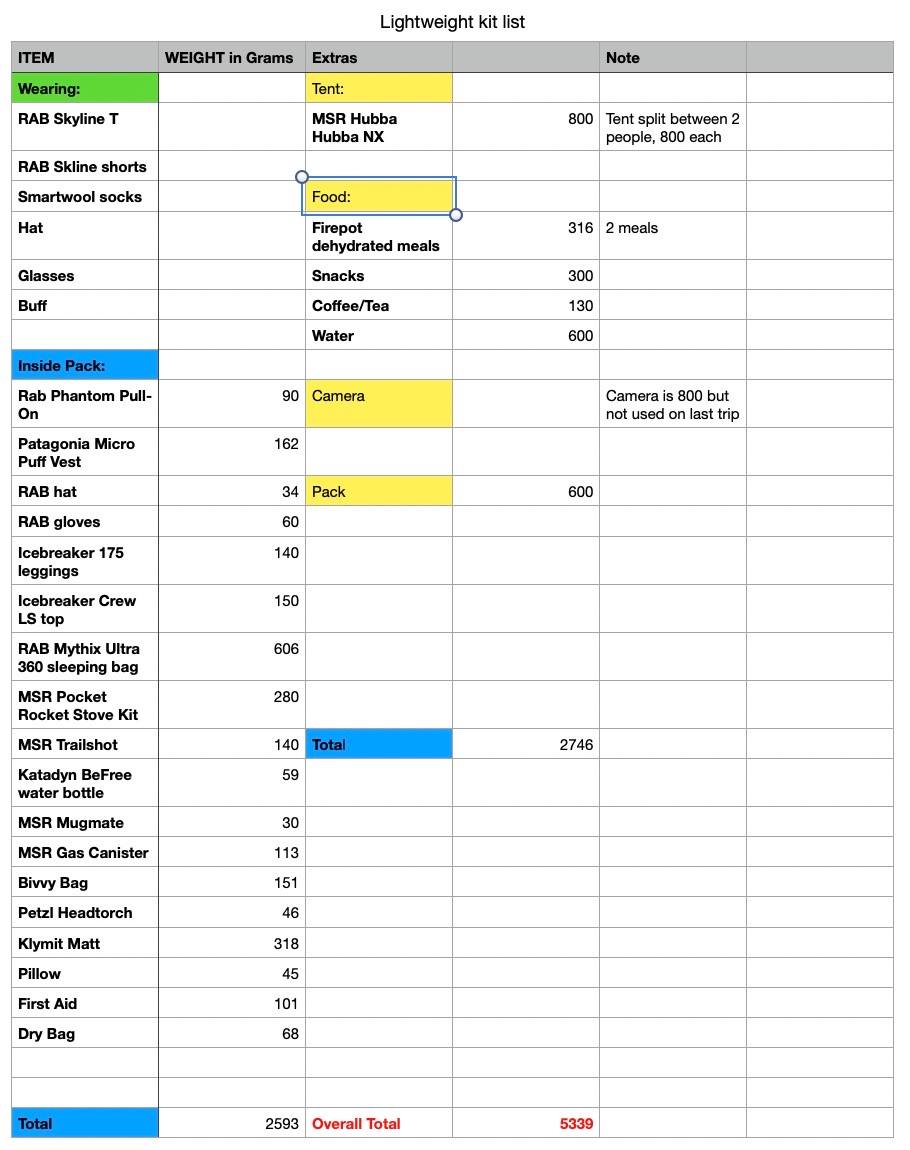
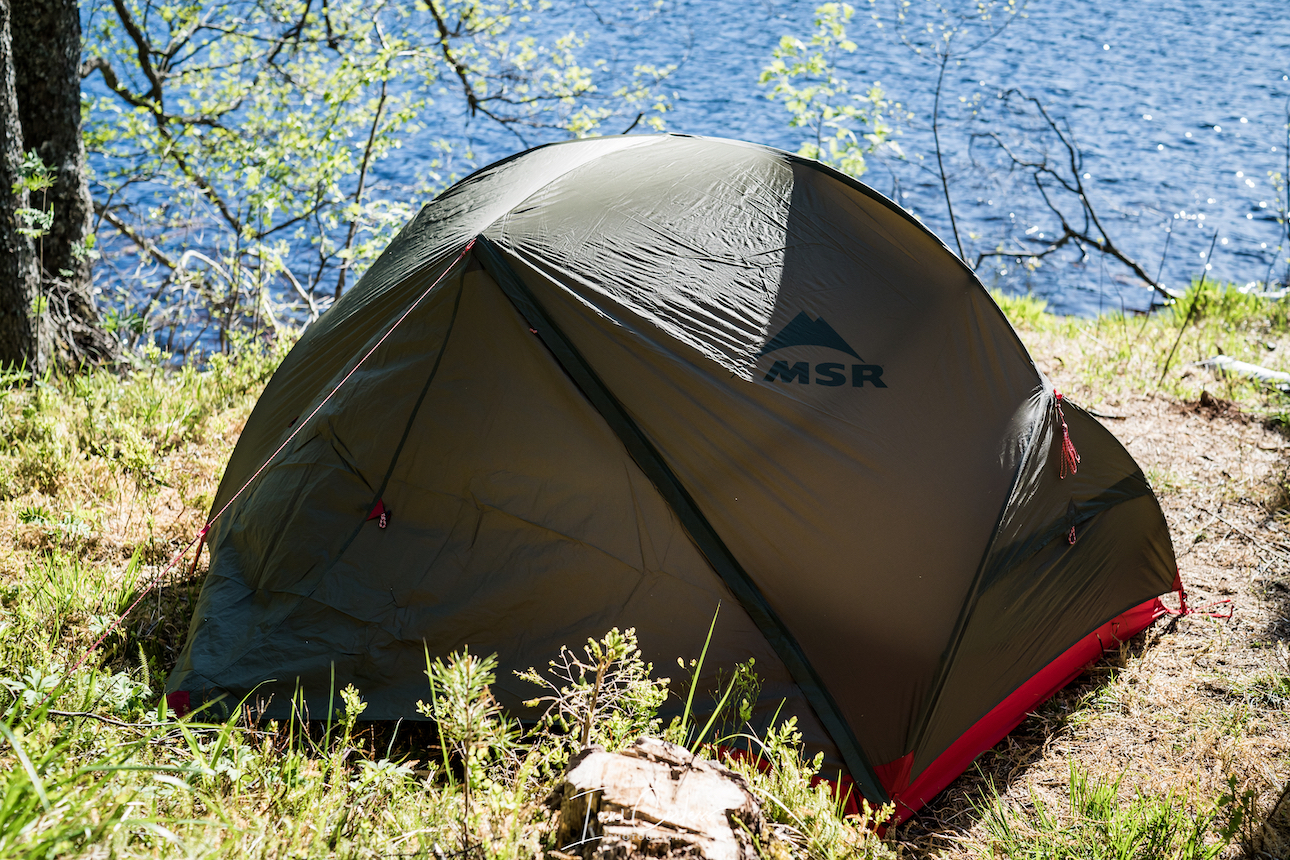
My go to tent is a MSR Hubba Hubba NX tent (here) which is 1600g which is 2-person tent. It has loads of space both in width and height, it has two access doors with room to store pack, shoes and an area to cook in if required. It is free-standing, can be pitched inner or outer only. Split between 2-people, it is 800g each.
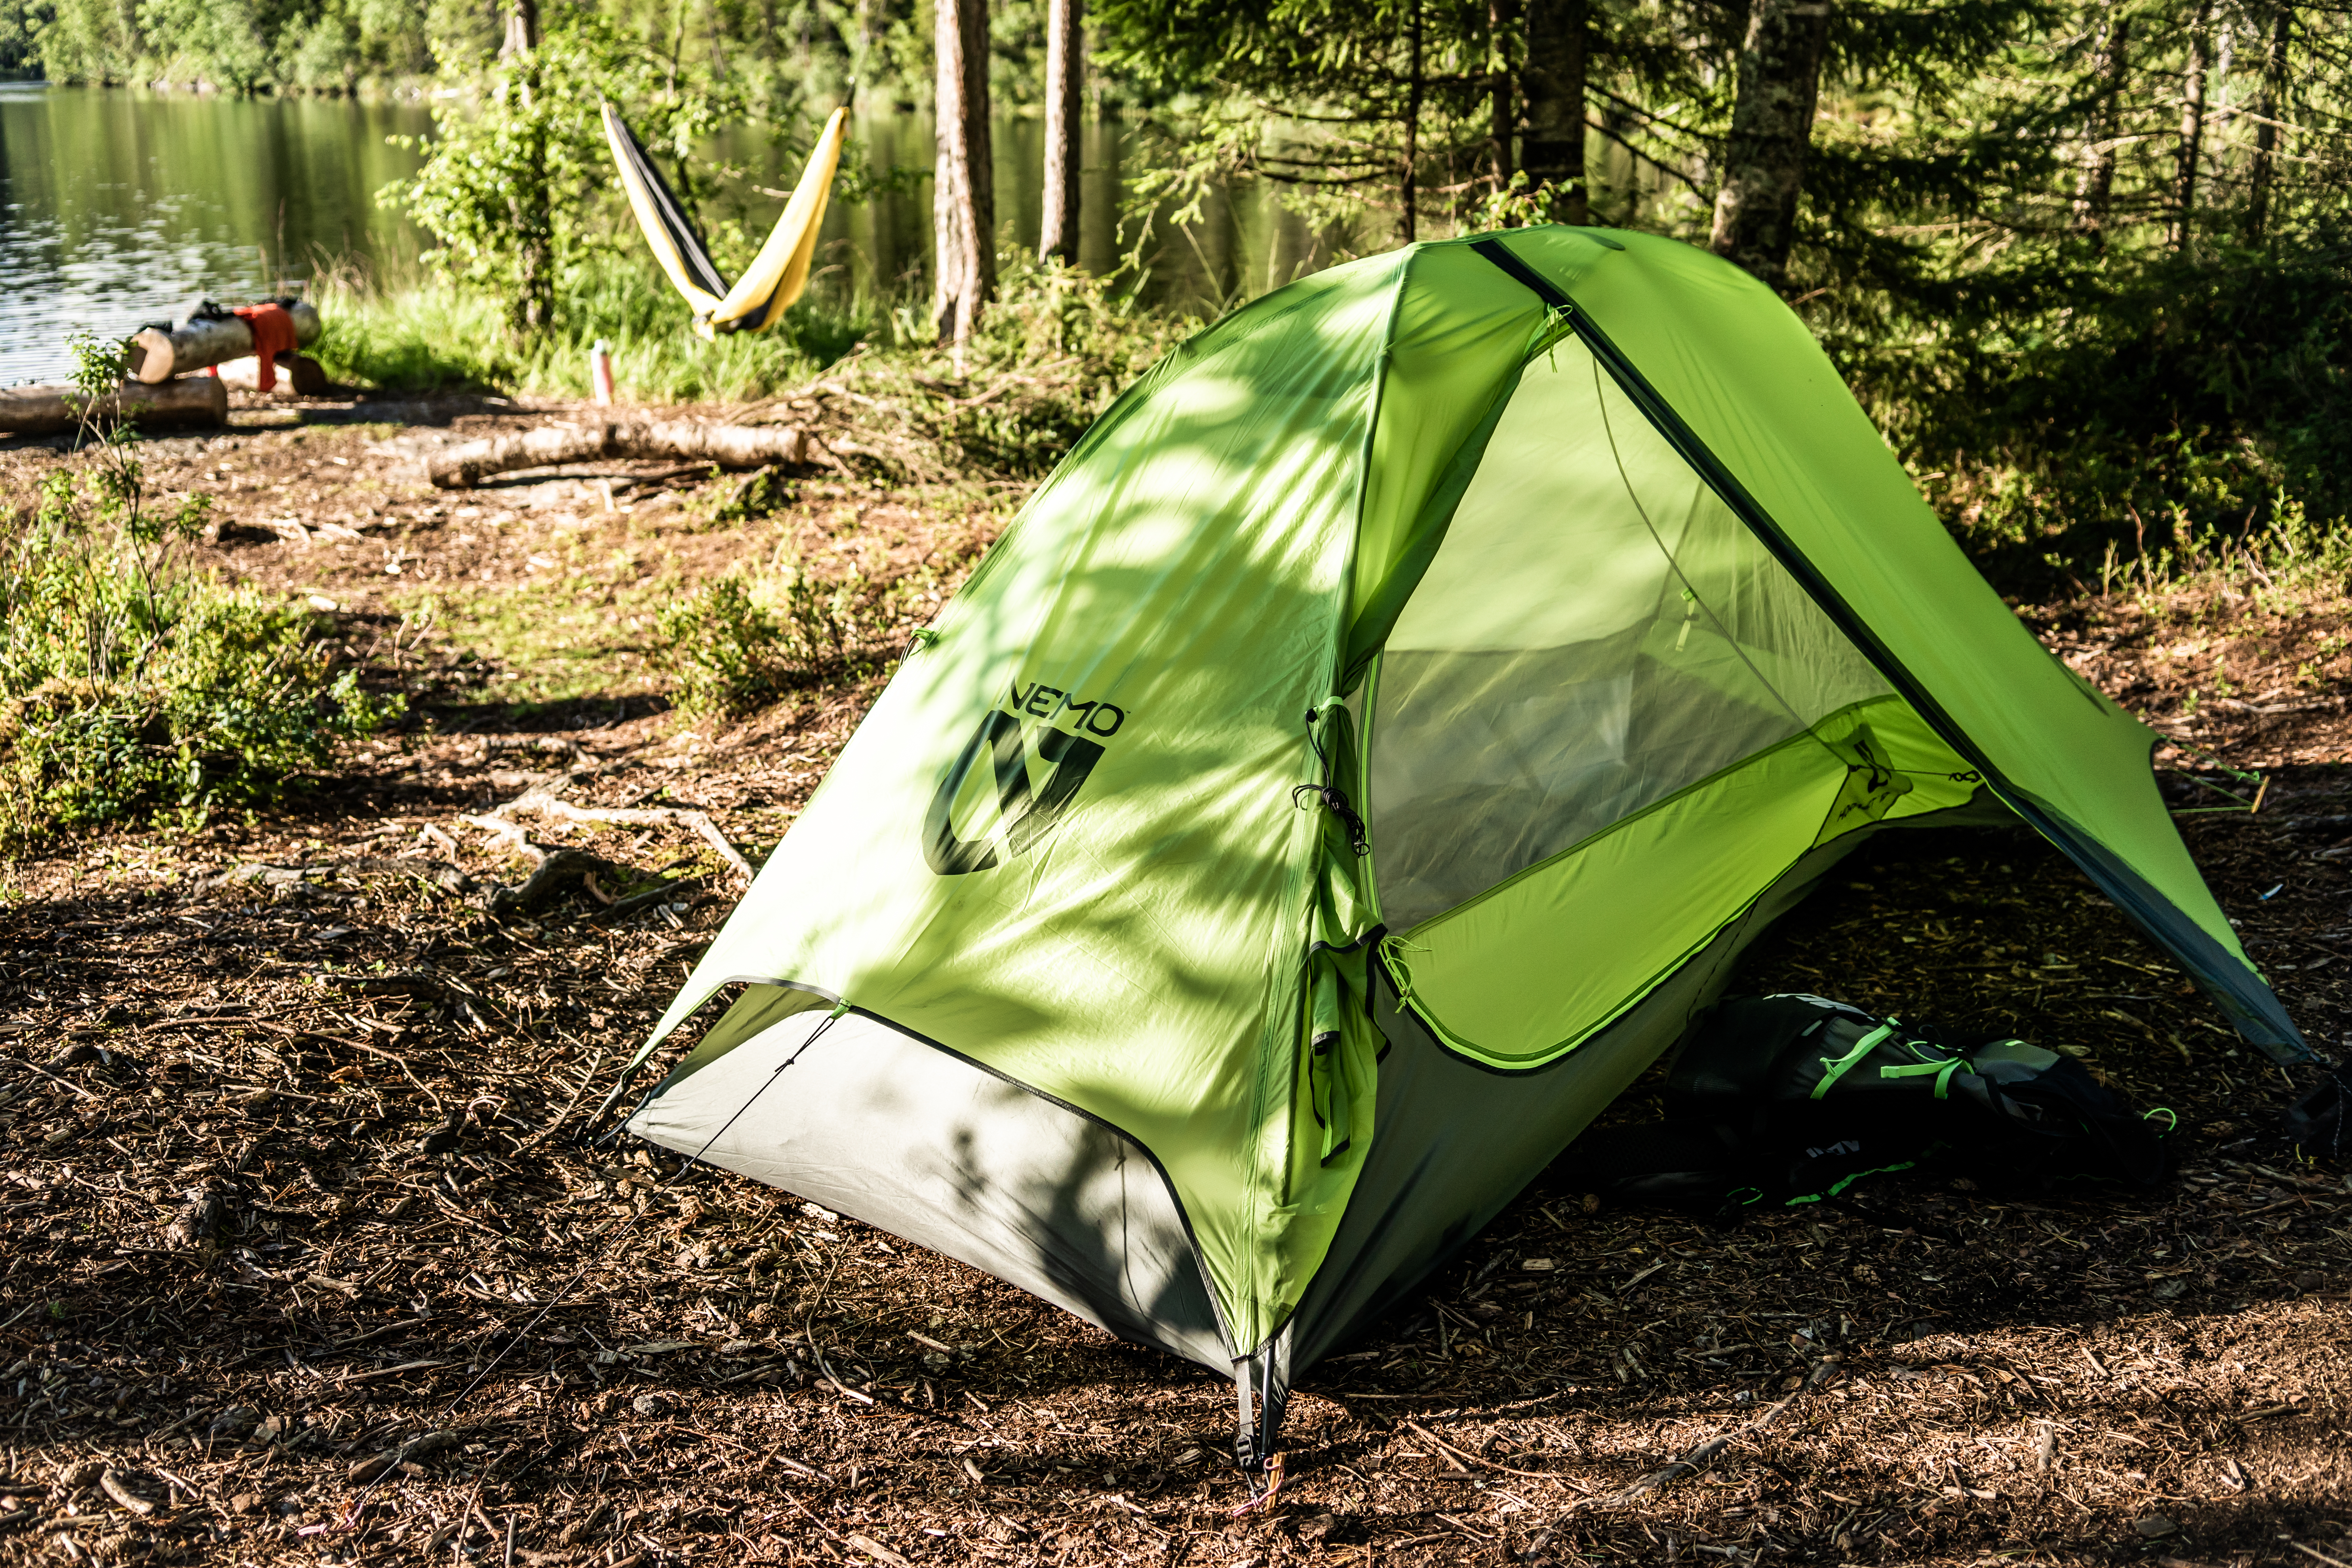
Current favourite solo tent is the Nemo Hornet 1P (review HERE) which has loads of space and comfort and all coming in at 731g.
NEMO Hornet 1P
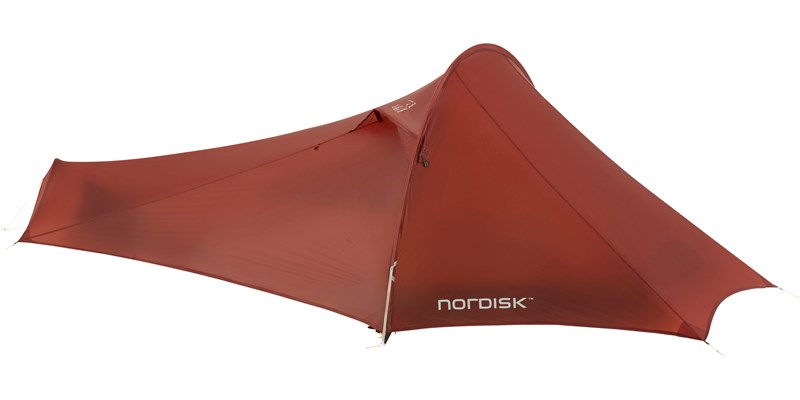
If I was solo fastpacking and wanted the lightest and smallest possible, I would change the tent to a Nordisk Lofoten 1 LW (here) which is arguably the lightest and smallest packing tent in the world (still with comfort and stability) weighing just 490g and is the size of a bottle of water, 11cm x 22cm. It’s a two-layer tent which still provides an area for gear storage, with a height of just 70cm, sitting space is compromised. However, if fast, light are priorities, this takes some beating. Also, you can use the 2-man inner inside the same fly-sheet, with obviously less storage option.
Do you need a 12-week and/ or 24-week Multi-Day Training Plan perfect for a multi-day adventure or a race like Marathon des Sables? They are designed to provide you with a structured weekly plan culminating in a target event.
View a sample week HEREfrom the 12-week plan. Purchase HERE. (£14.50 pw)
View a sample week HERE from the 24-week plan. Purchase HERE. (£12 pw)
Wearing:
I don’t add the clothes I am wearing to my overall fastpack weight, but it is worth looking at options and variables. I was surprised when comparing run shorts how weights varied. For example, I had shorts with an inner (like cycling shorts,) they weighed 157g, considerably heavier than my RAB Skyline.
RAB Skyline shorts – 96g
RAB Skyline Tee – 84g
Smartwool socks – 45g
Hat – 45g
Glasses – 30g
Buff – 36g
Scott Supertrac RC2 shoes – 290g
Pack:
inov-8 25ltr fastpack 619g – This is actually a prototype pack, specifically made for athletes on the inov-8 team. It’s a really great pack, one of the best I have used. It has a vest like fit, waist belt, comfortable strapping and loads of extra mesh pockets that make it a joy to use. I have recently encouraged inov-8 to bring this to production.
Pack Contents:
Rab Phantom Pull-on 90g – One of the lightest and smallest waterproof shells I have used.
RAB Phantom
Patagonia Micro Puff Vest (synthetic with ripstop Pertex Quantum) 162g – Synthetic filling but weight and small packing just like down. The perfect compromise. This warms the body and core and saves weight over a jacket. Obviously, you need to asses conditions, a jacket may be better. If so, I use a RAB Kaon which weighs 260g.
Patagonia Micro Puff Vest
RAB Hat 34g
RAB Gloves 60g
Icebreaker 175 leggings 140g – Merino providing warmth on the trail (if required) and warmth when stopping for the day and sleeping.
Icebreaker 175 top 150g
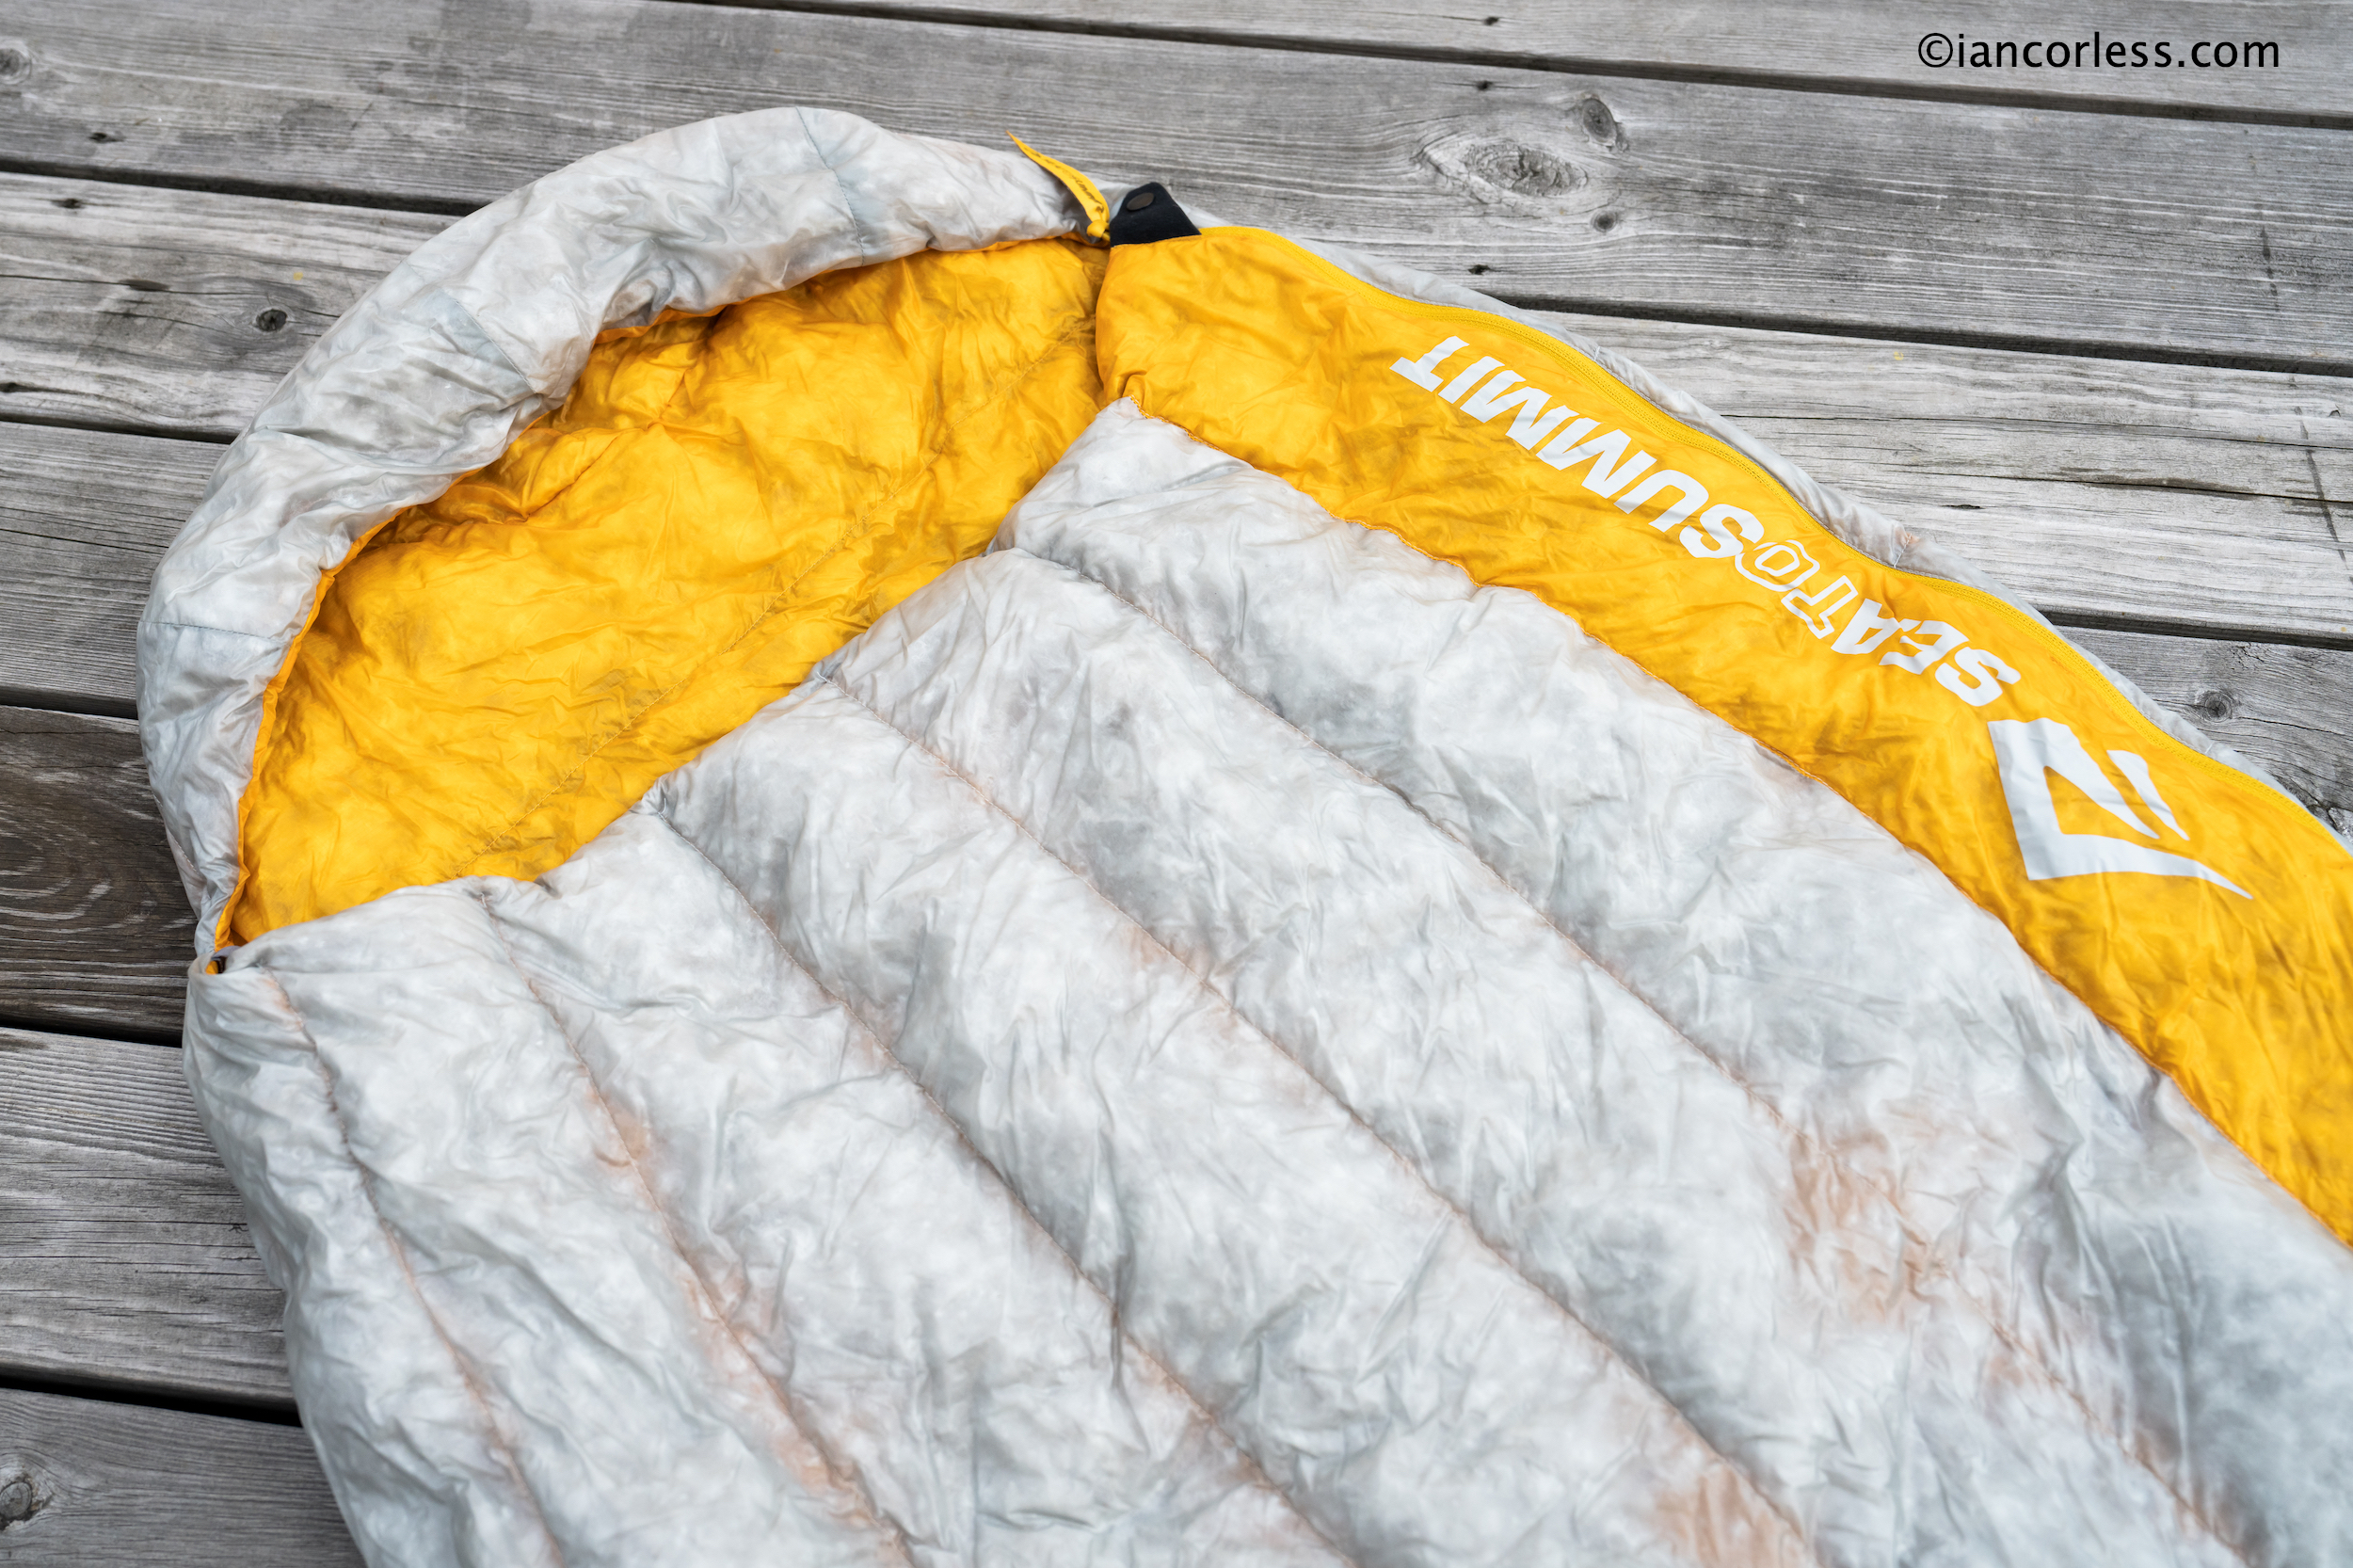
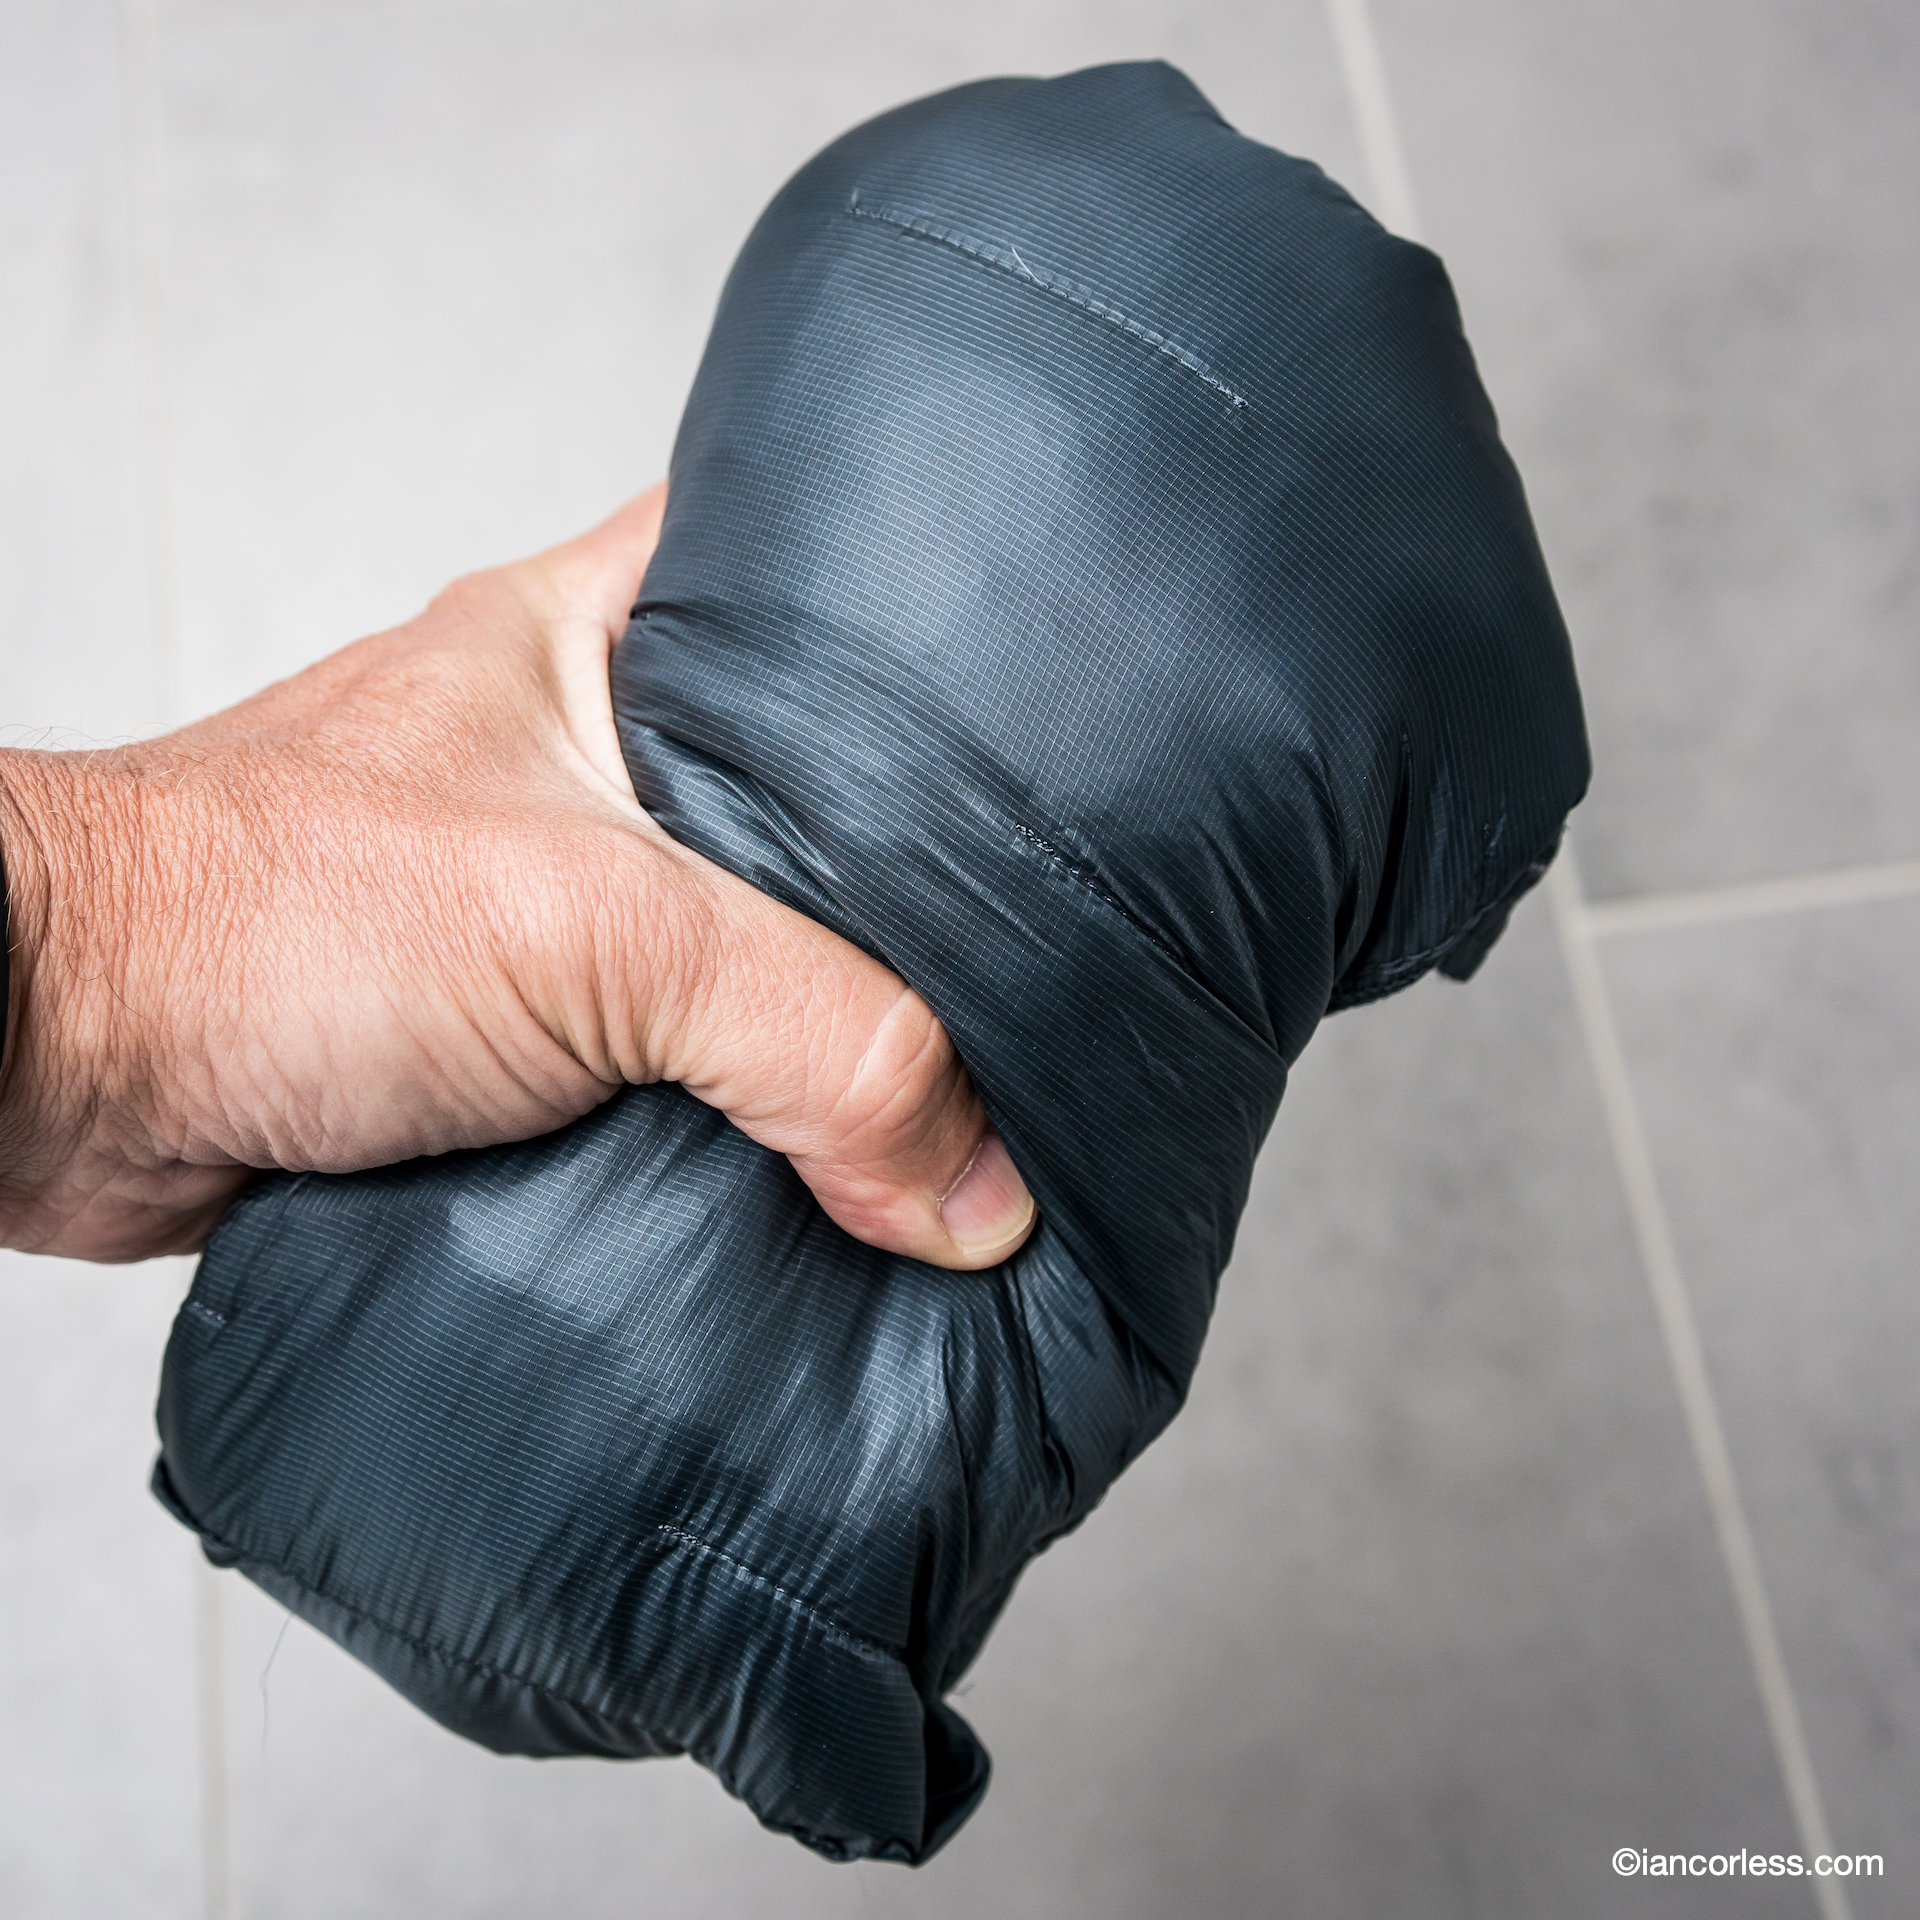
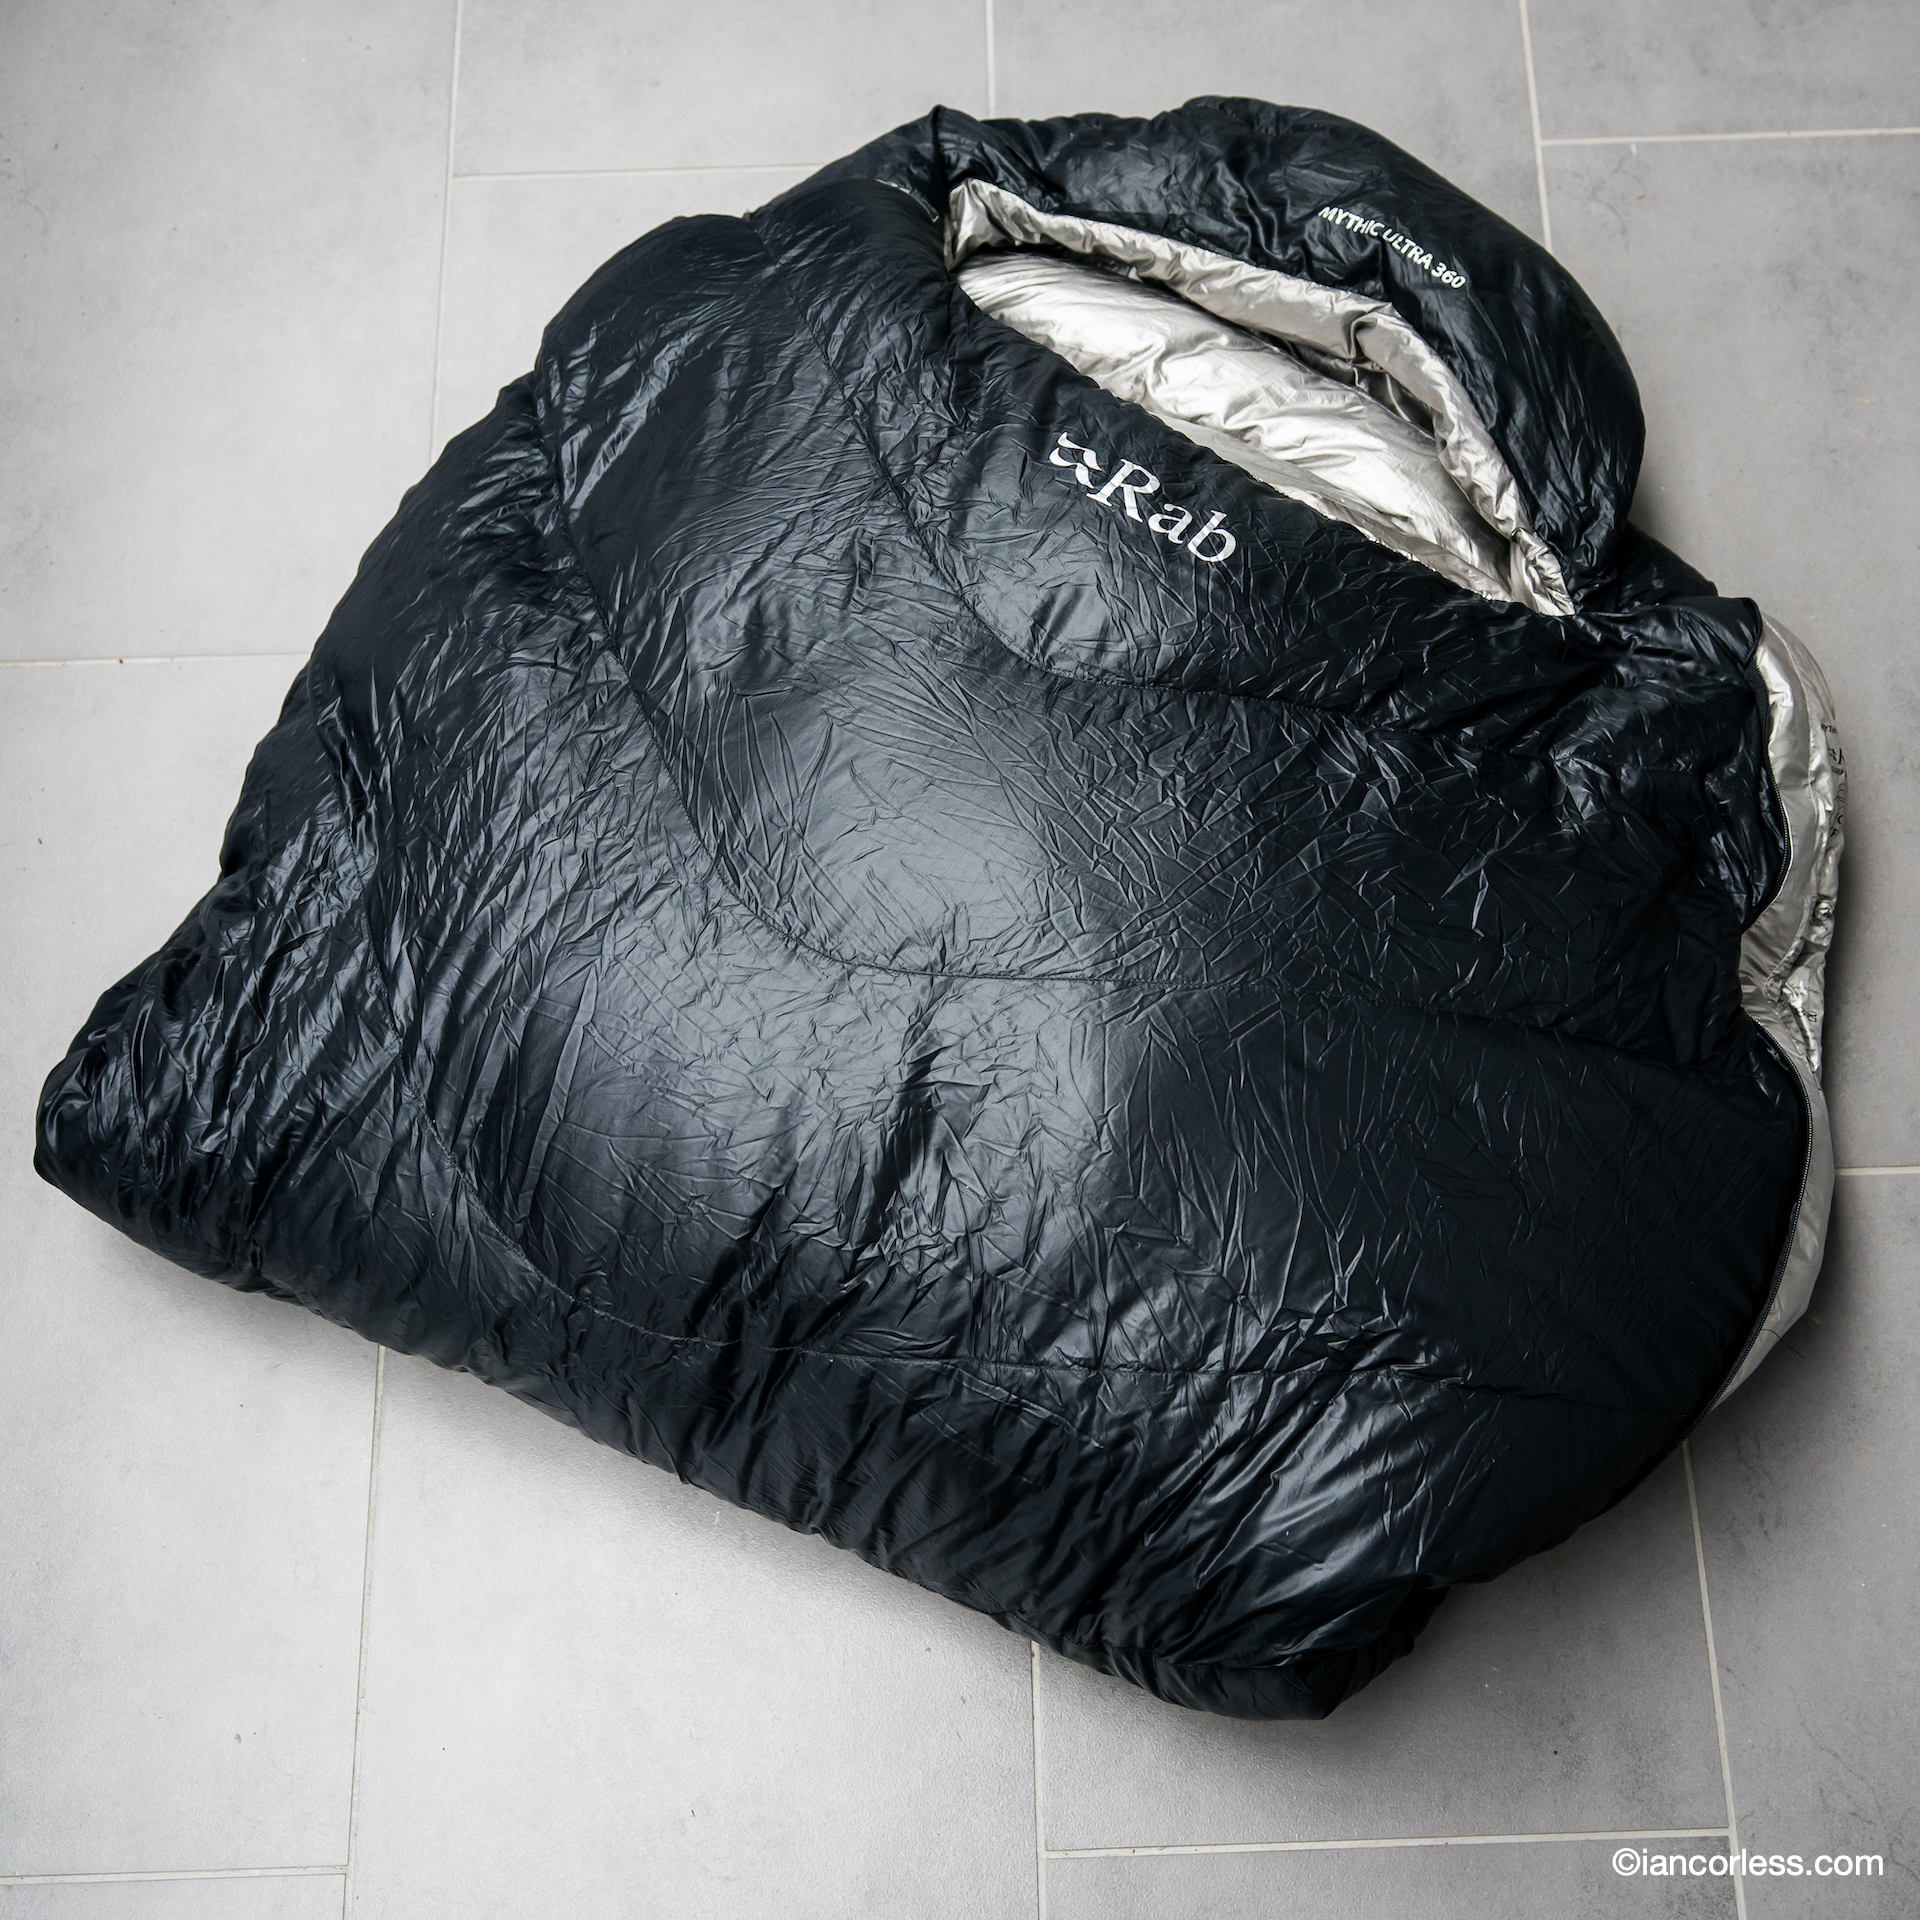
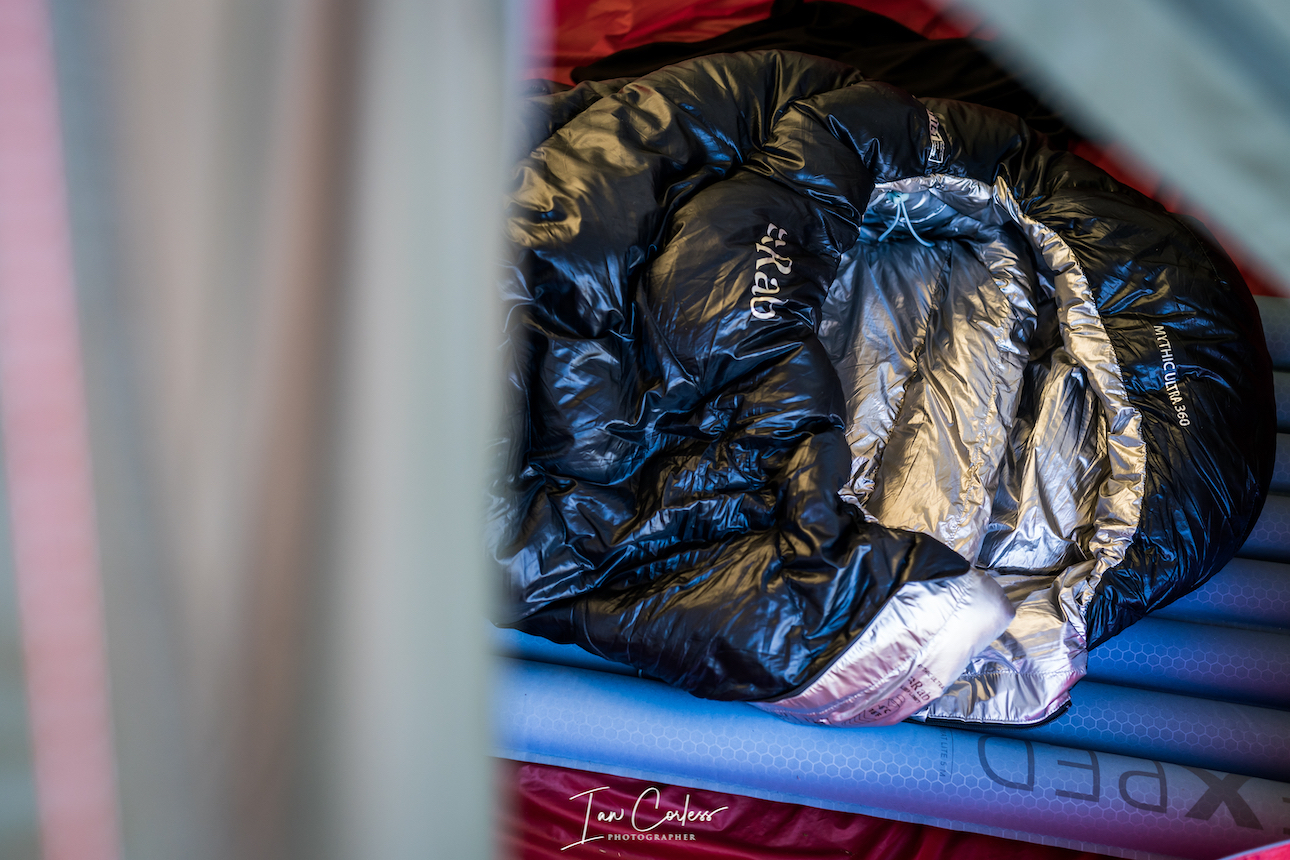
RAB Mythic Ultra 360 sleeping bag 606g – State of the art sleeping bag with groundbreaking technology. Two versions are available, and this is the warmer one. The Mythic Ultra 180 provides a saving of 200g (weight 400g) and is perfect for warmer weather fastpack and/ or warm sleepers.
RAB Mythic Ultra 360 sleeping bag
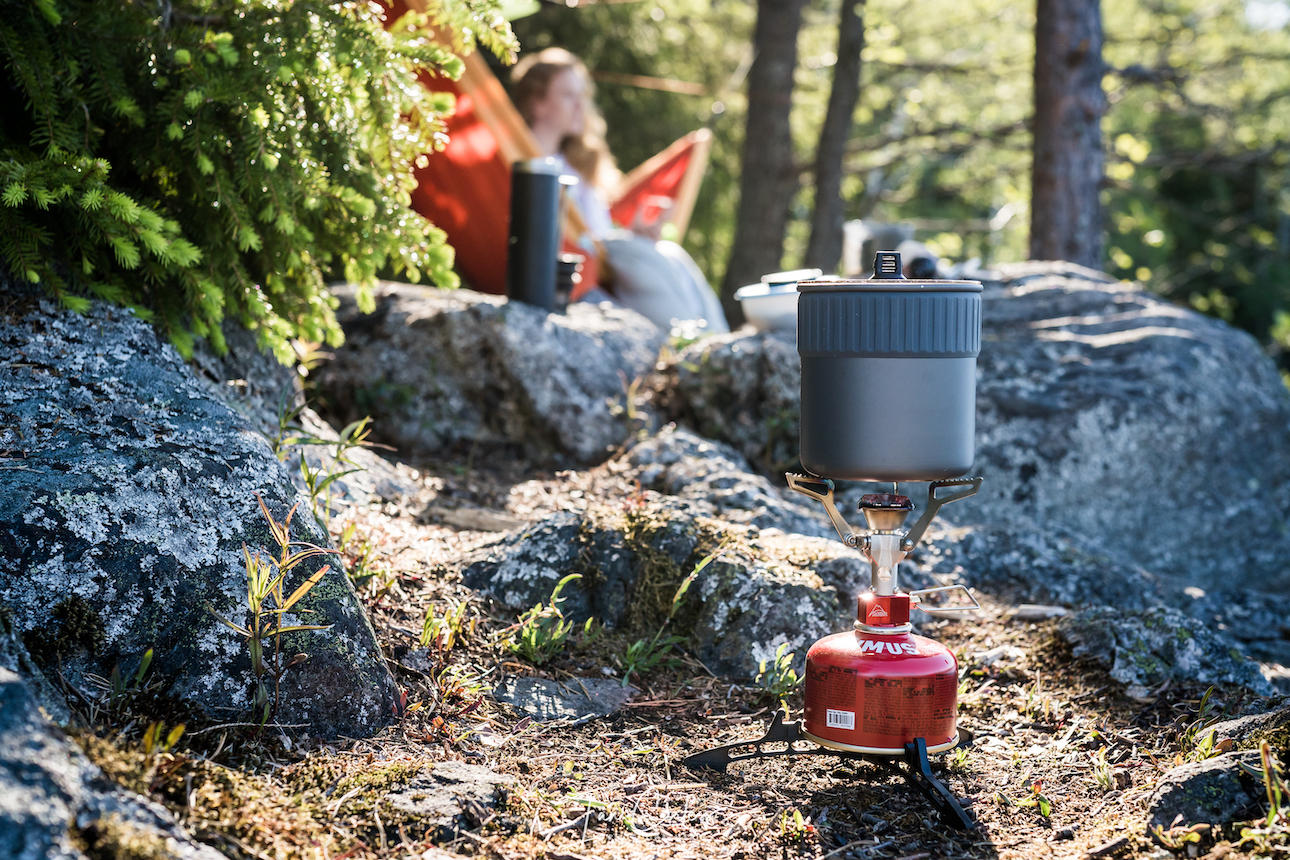
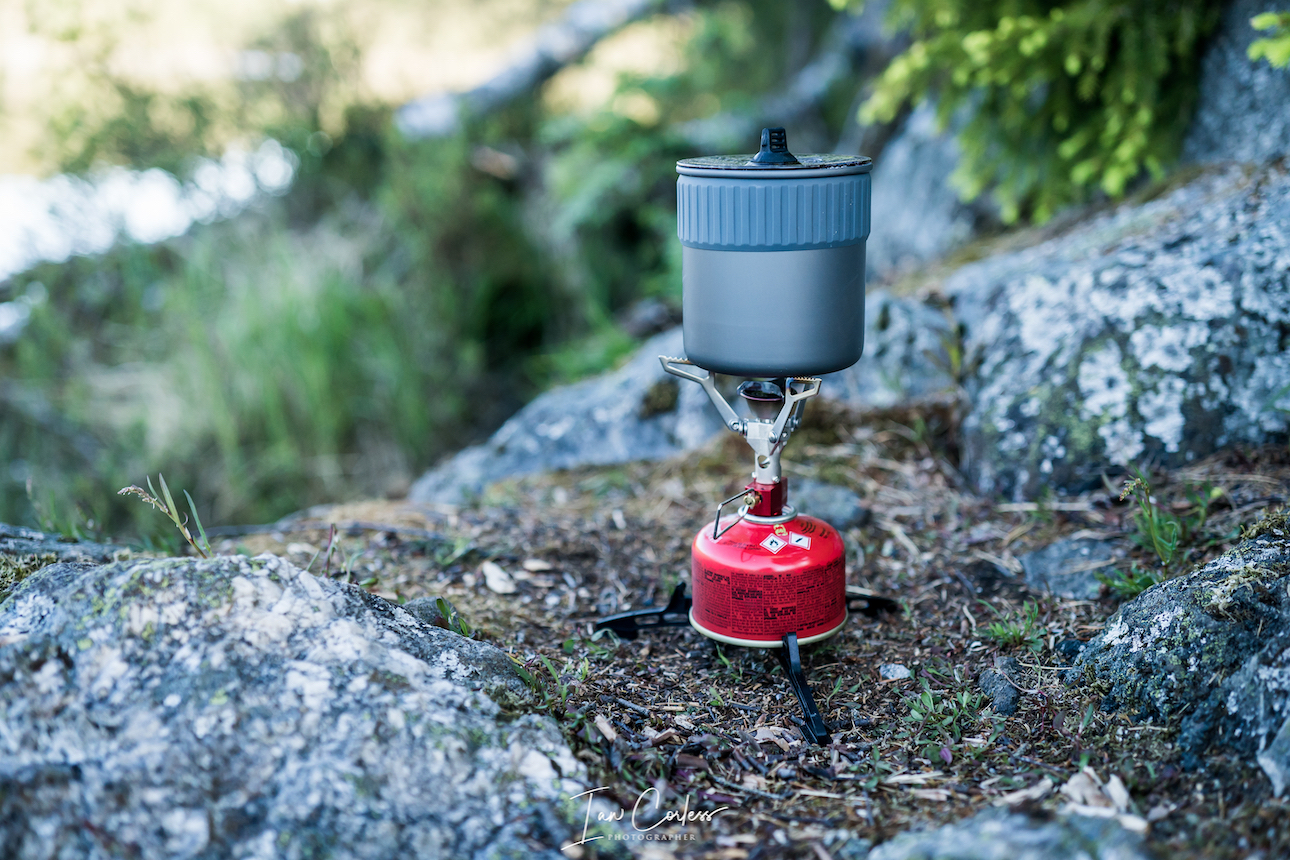
MSR Pocket Rocket Stove Kit 280g – Small, compact, lightweight and the gas canister can be stored inside. Perfect minimalist solution.
MSR Pocket Rocket Stove Kit
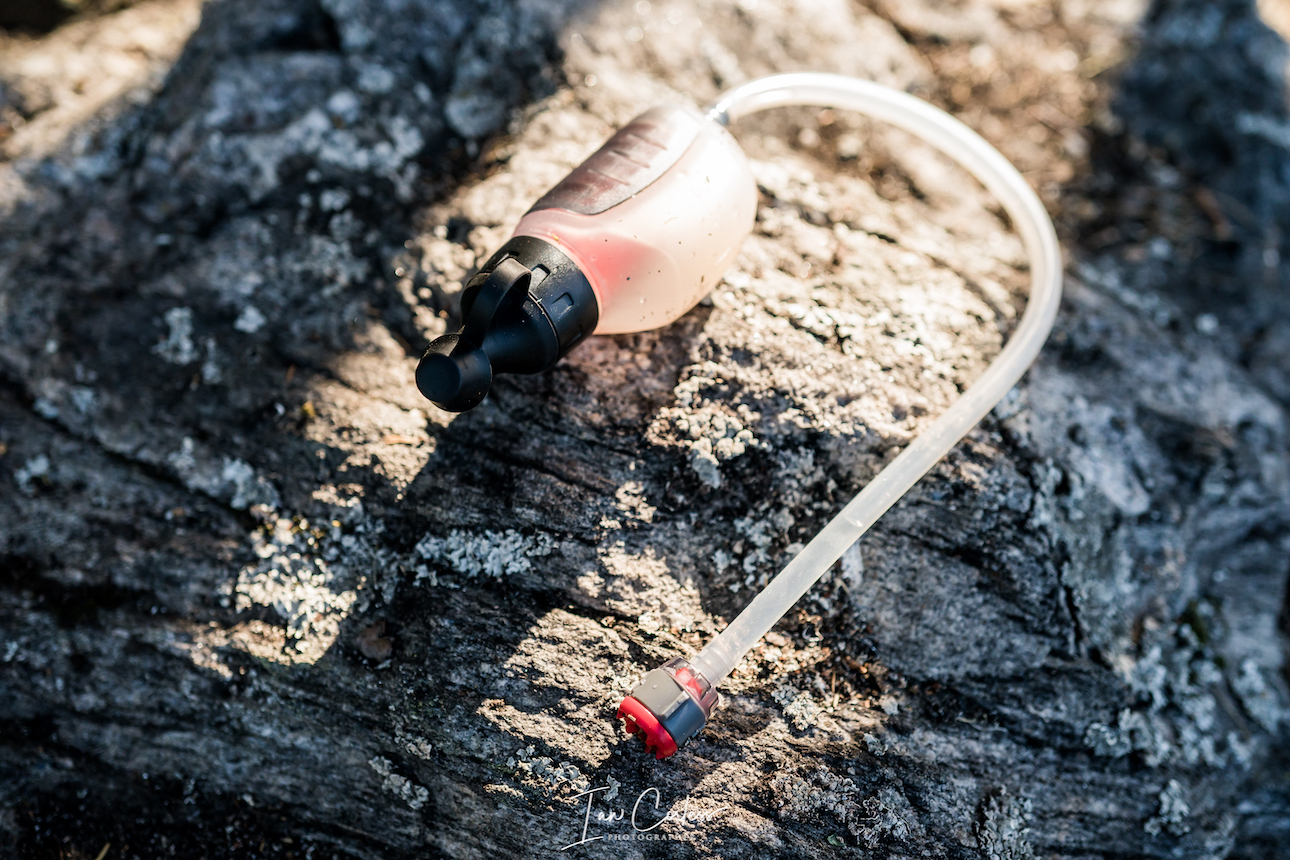
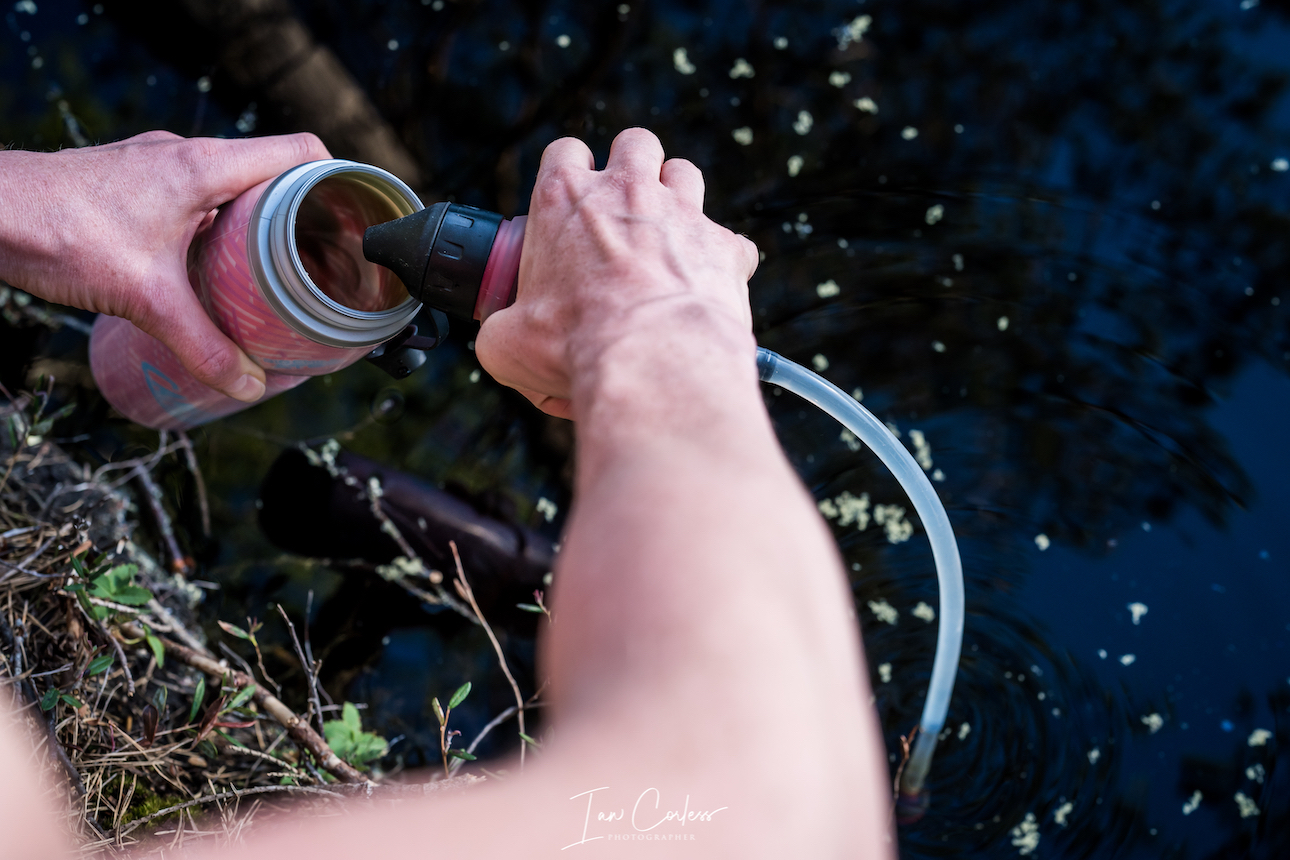
MSR Trailshot 140g – A small and lightweight water filter system that guarantees water that one can drink and cook with.
MSR Trailshot
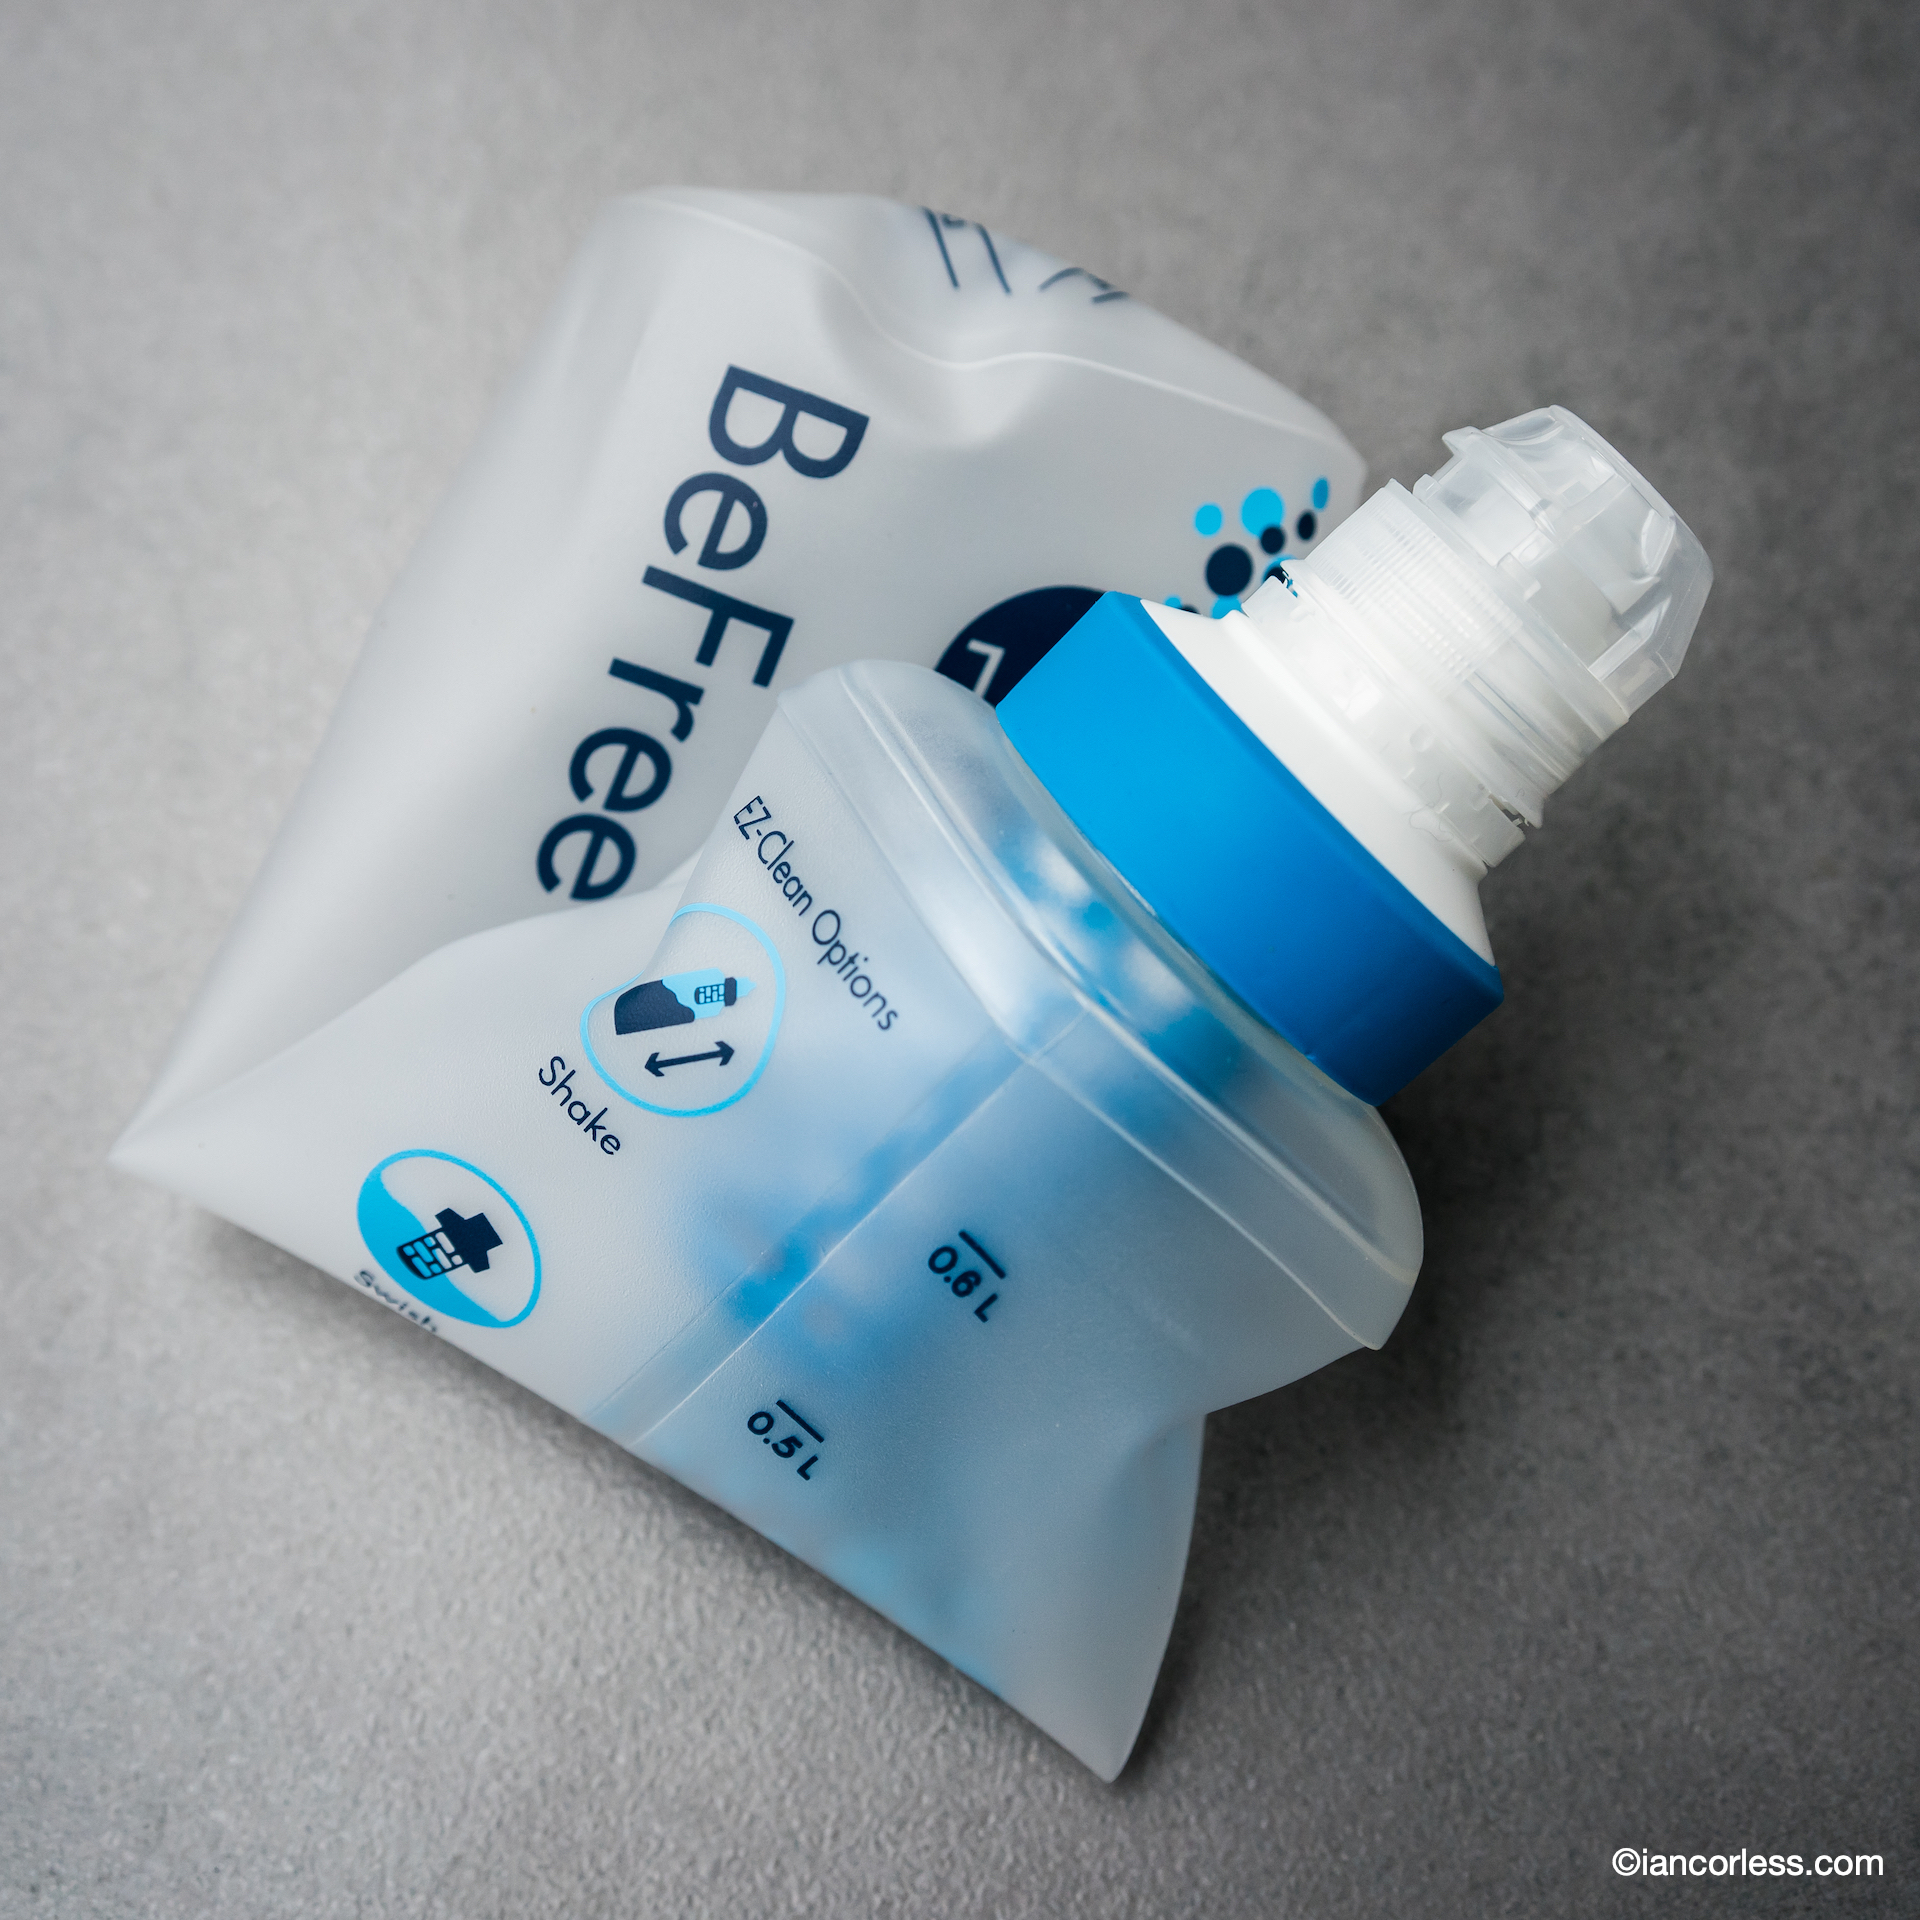
Katadyn BeFree Water Filter bottle (0.6L) 59g – This is a 600ml soft-flask with water filter inside. It allows for minimal weight and the ability to get water anywhere on the trail and drink on the go.
Katadyn BeFree Water Filter bottle
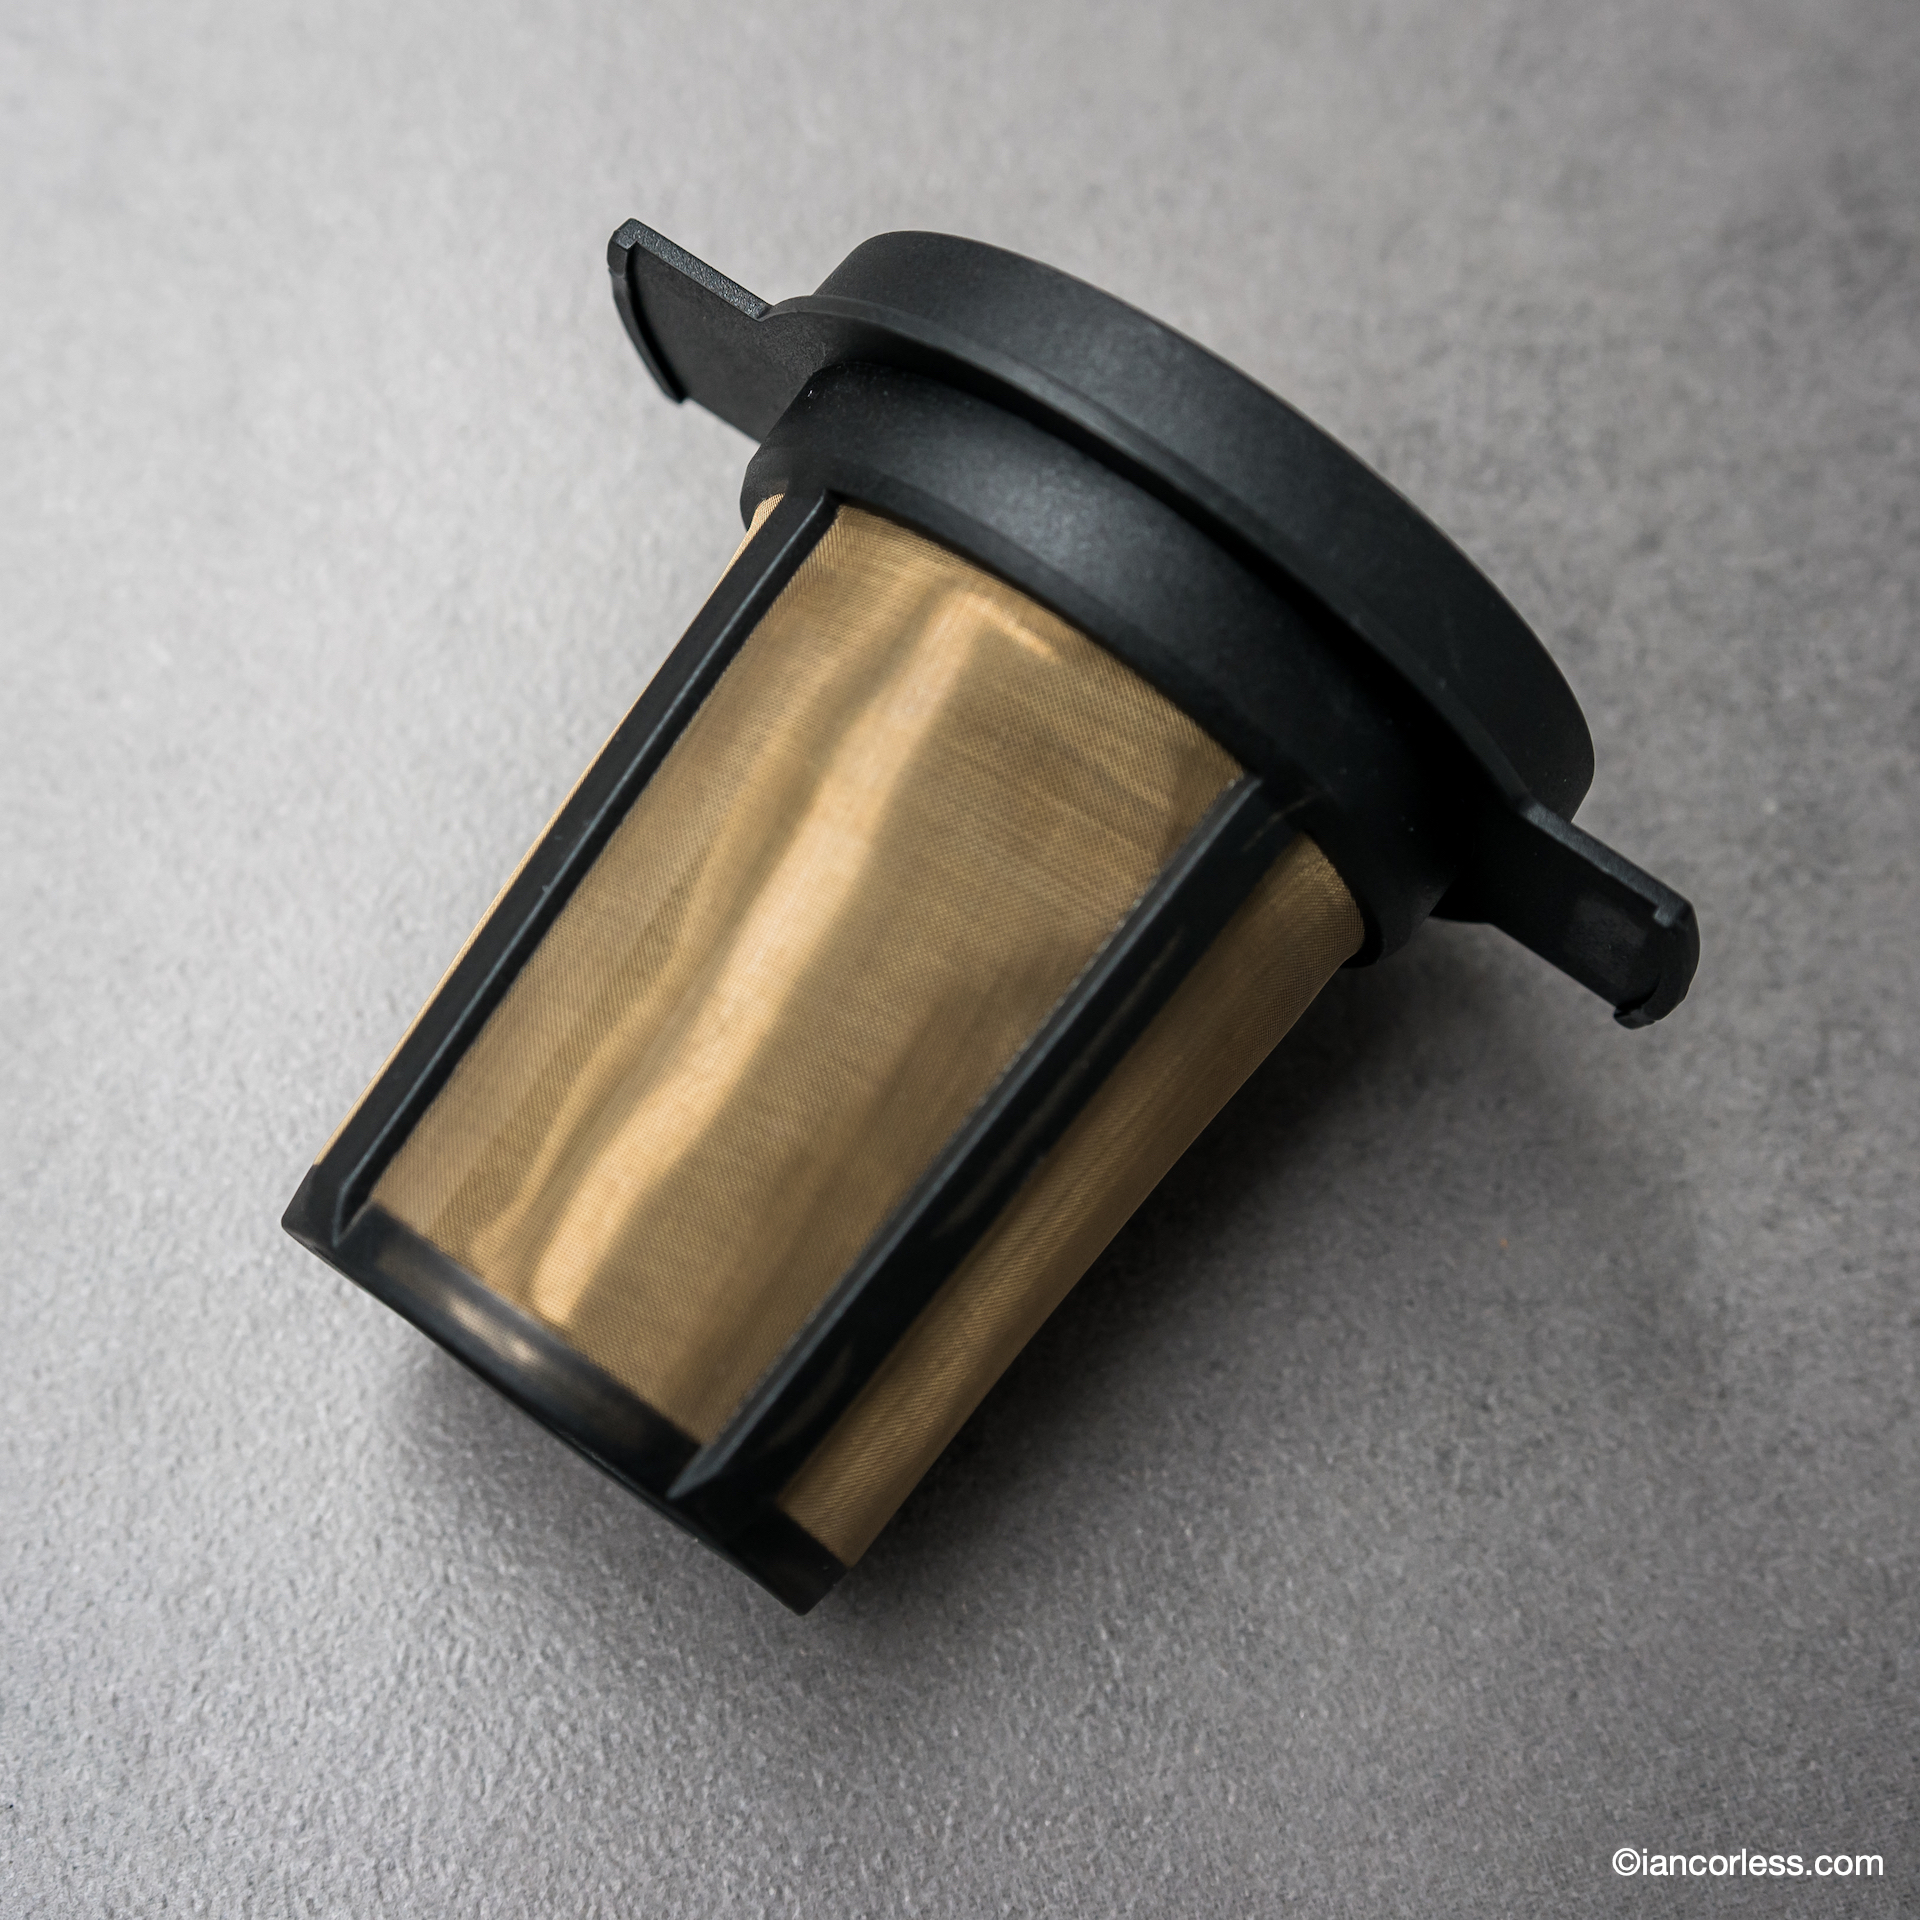
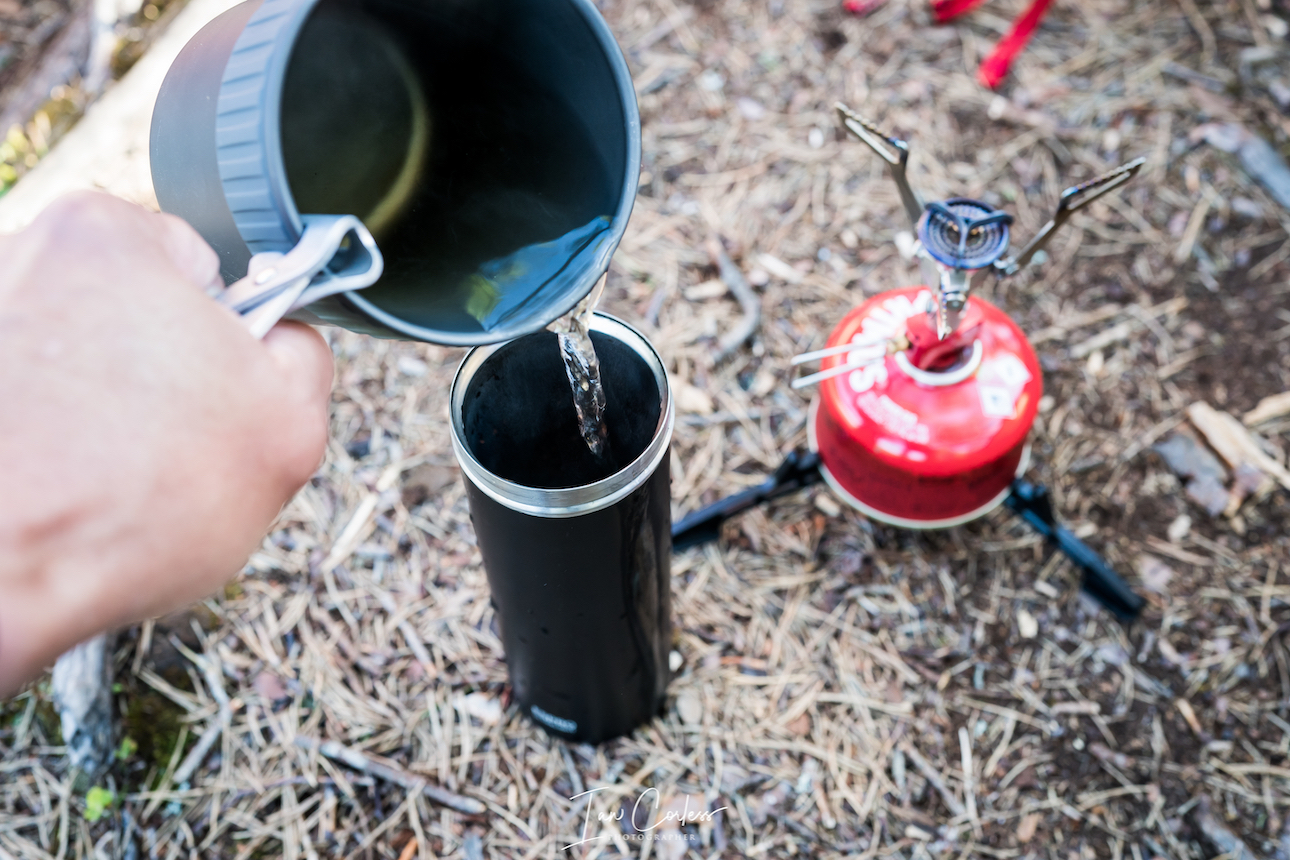
MSR Mugmate Coffee/ Tea Filter 30g – An ingenious small coffee/ tea filter that provides a lightweight solution for the coffee addict. Just pop it into a cup!
MSR Mugmate
Gas canister 113g
Bivvy bag 151g – Great back up for added warmth should something unplanned happen.
Bivvy bag
Headtorch 46g – The Petzl e+LITE is one of the smallest and lightest around. Perfect when camping to provide light for reading and cooking. However, if you need light to run/ walk this is not the best option.
Petzl e+LITE
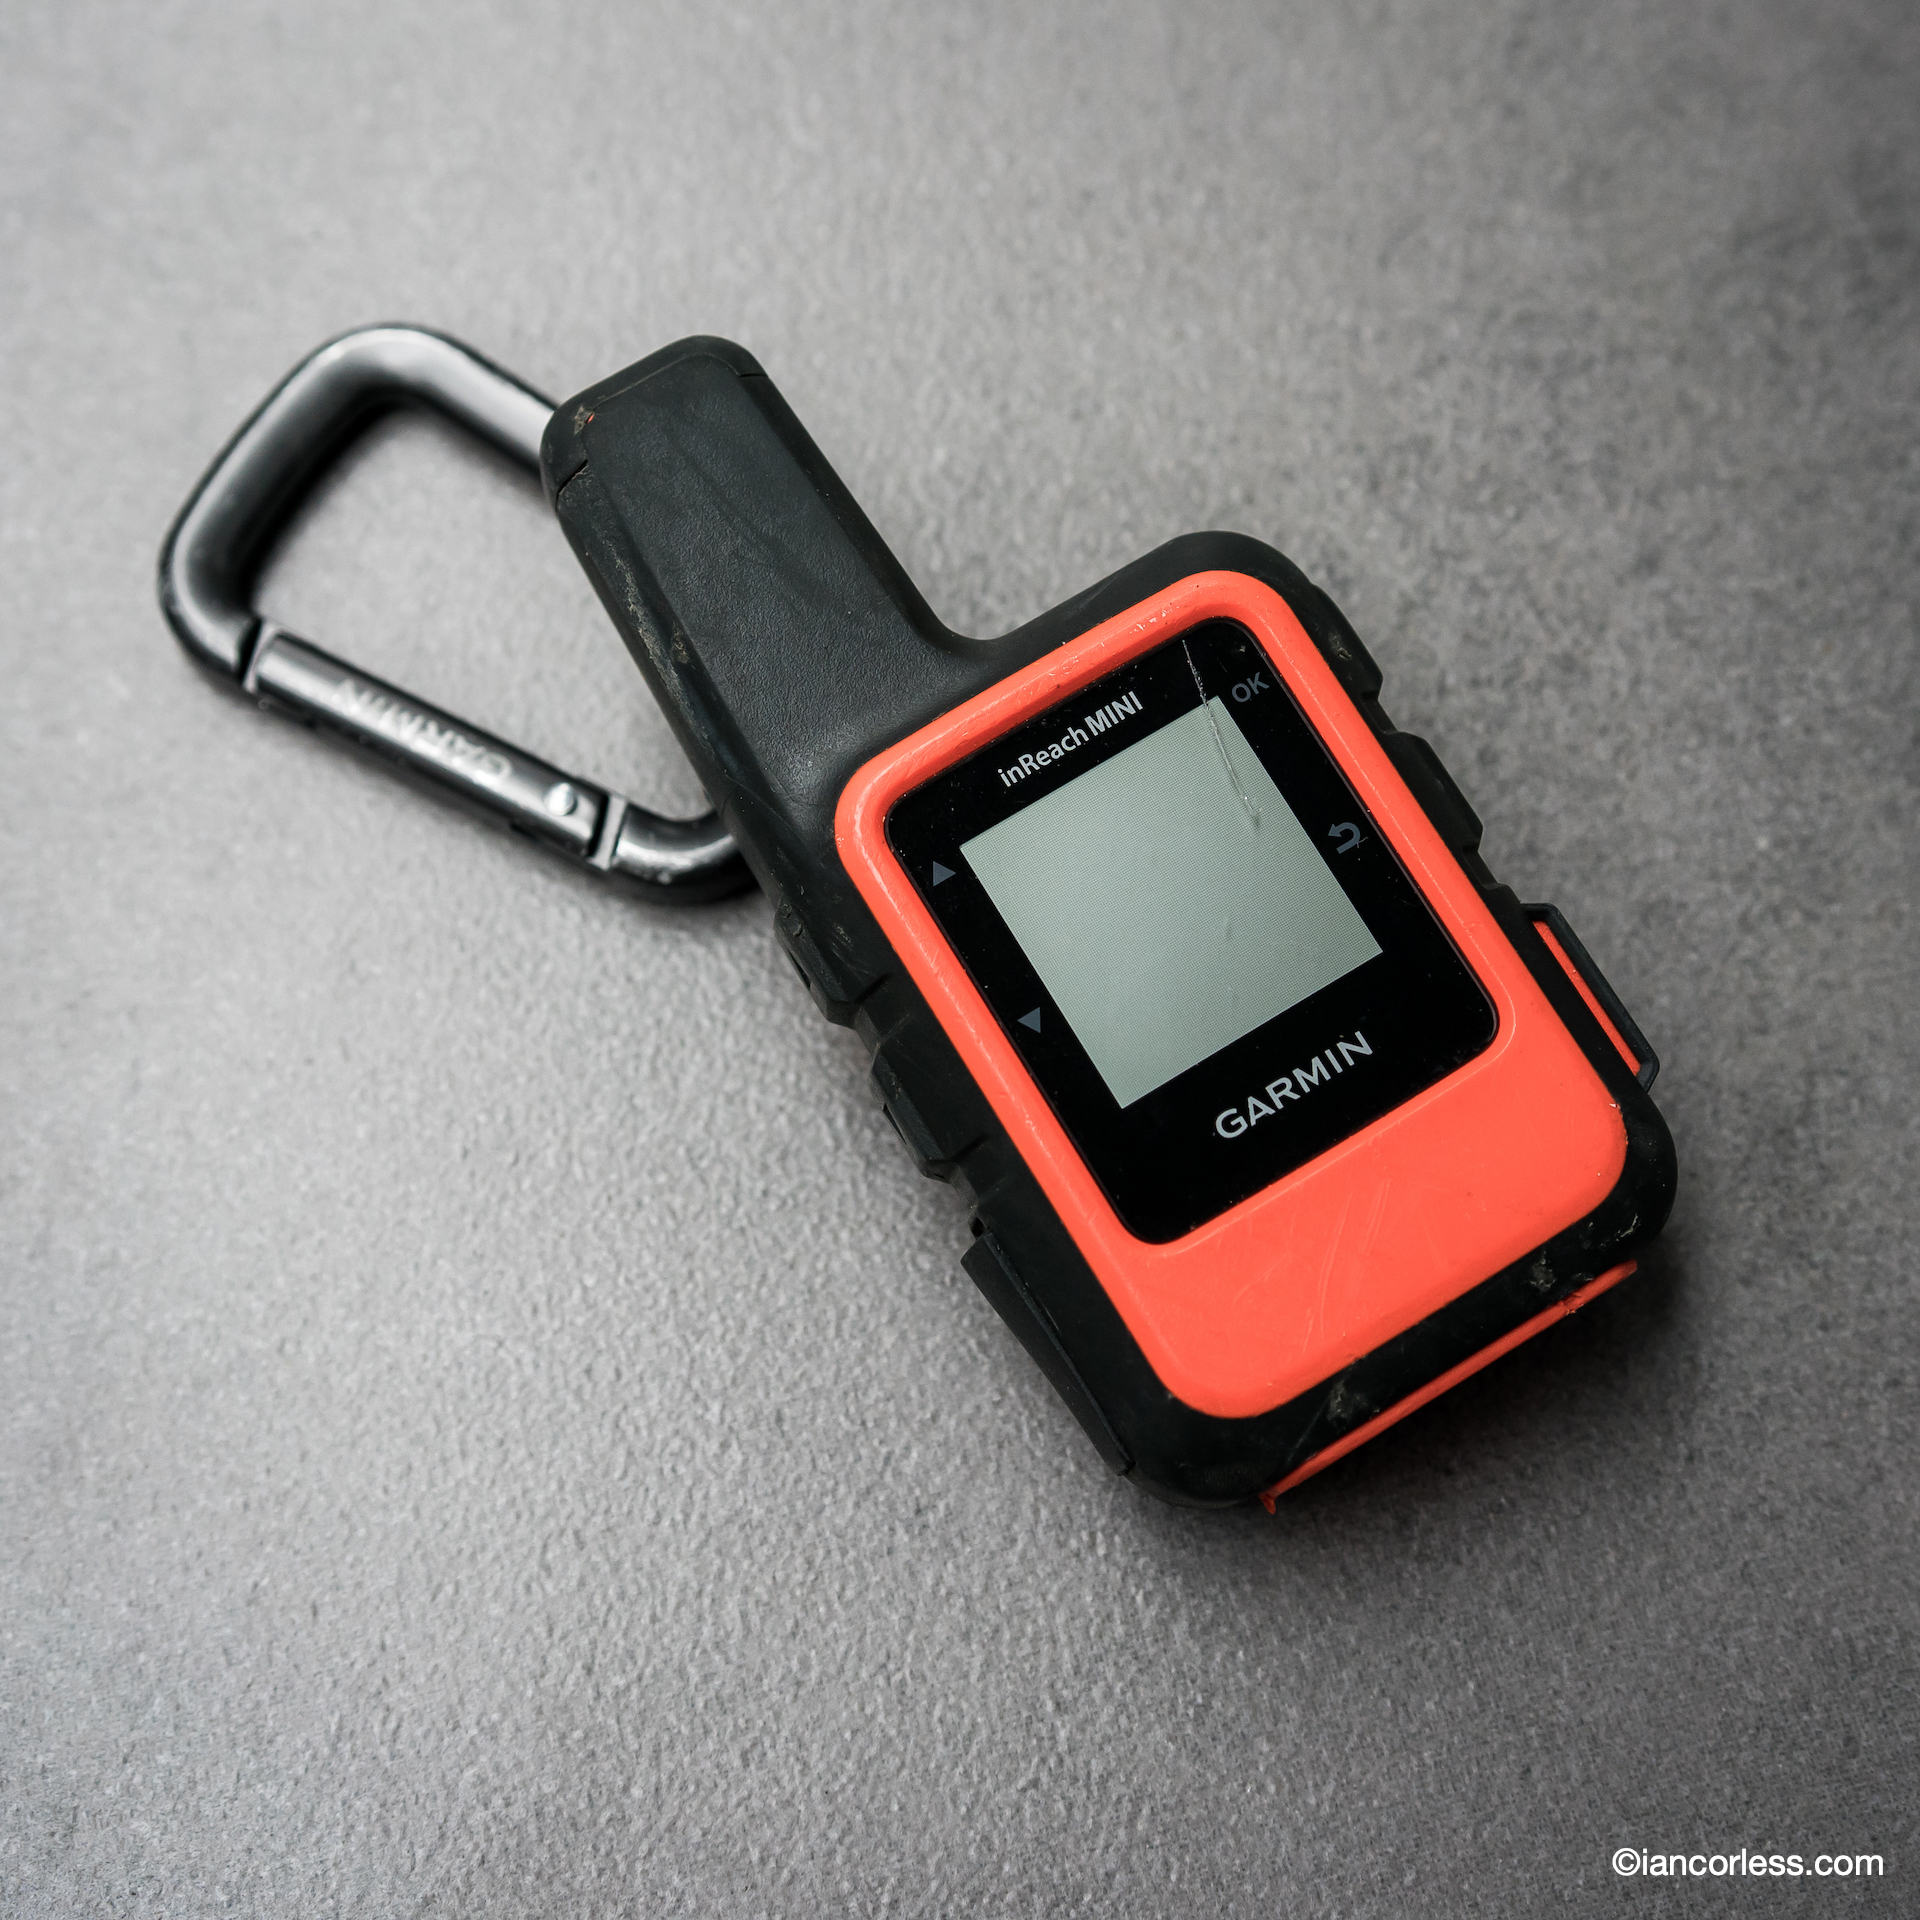
Garmin InReach mini 114g – I take this on all adventures. Ideal back-up and safety with an emergency button.
Garmin InReach mini
Mattress 300g* – Klymit V Ultralite SL (here) is full length, small pack size and very comfortable. *Photo is not the Klymit.
Pillow 50g – You can always use a dry bag with clothes inside as an alternative?
First Aid 101g – Simple system by Lifesystems in a waterproof bag.
Dry Bag 68g – I use a 30ltr and use it is a liner for the pack. I find it easier to push everything in one place.
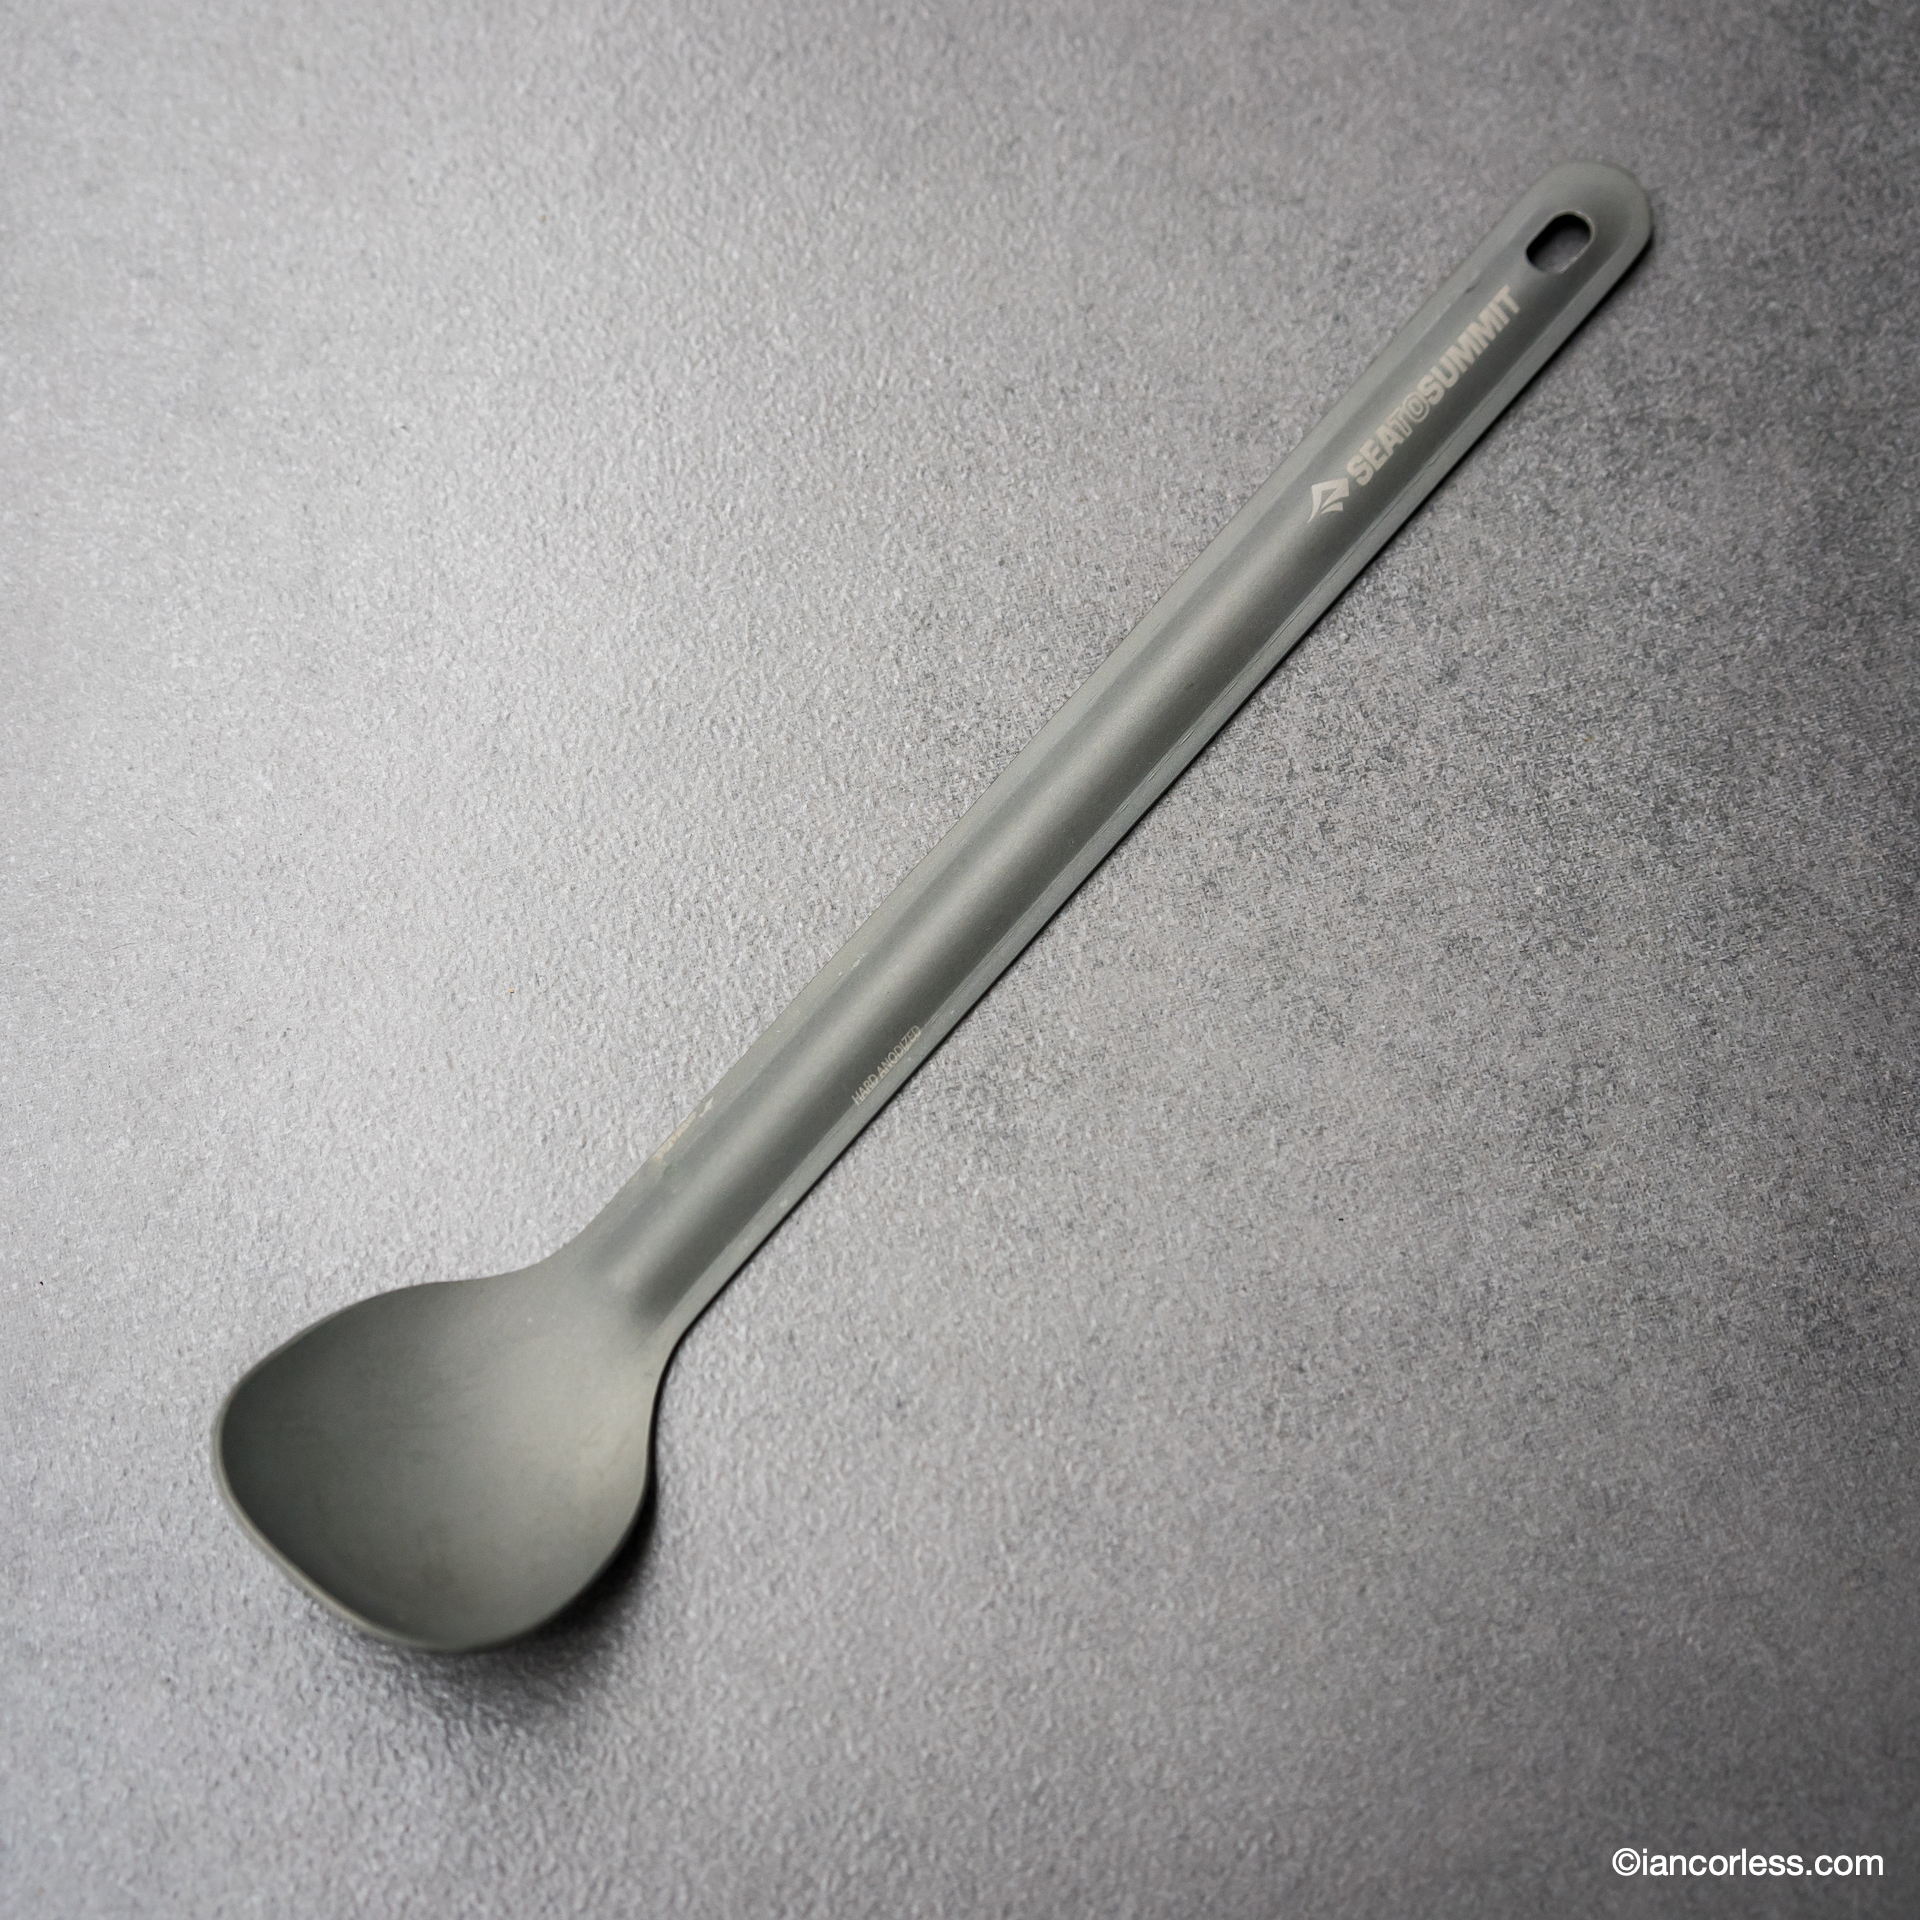
Sea to Summit spoon 12g – Sea to Summit with a long handle designed so that you can eat out of dehydrated food packs.
GoalZero Flip10 charger 75g – Good enough for one, maybe two phone charges.
Food:
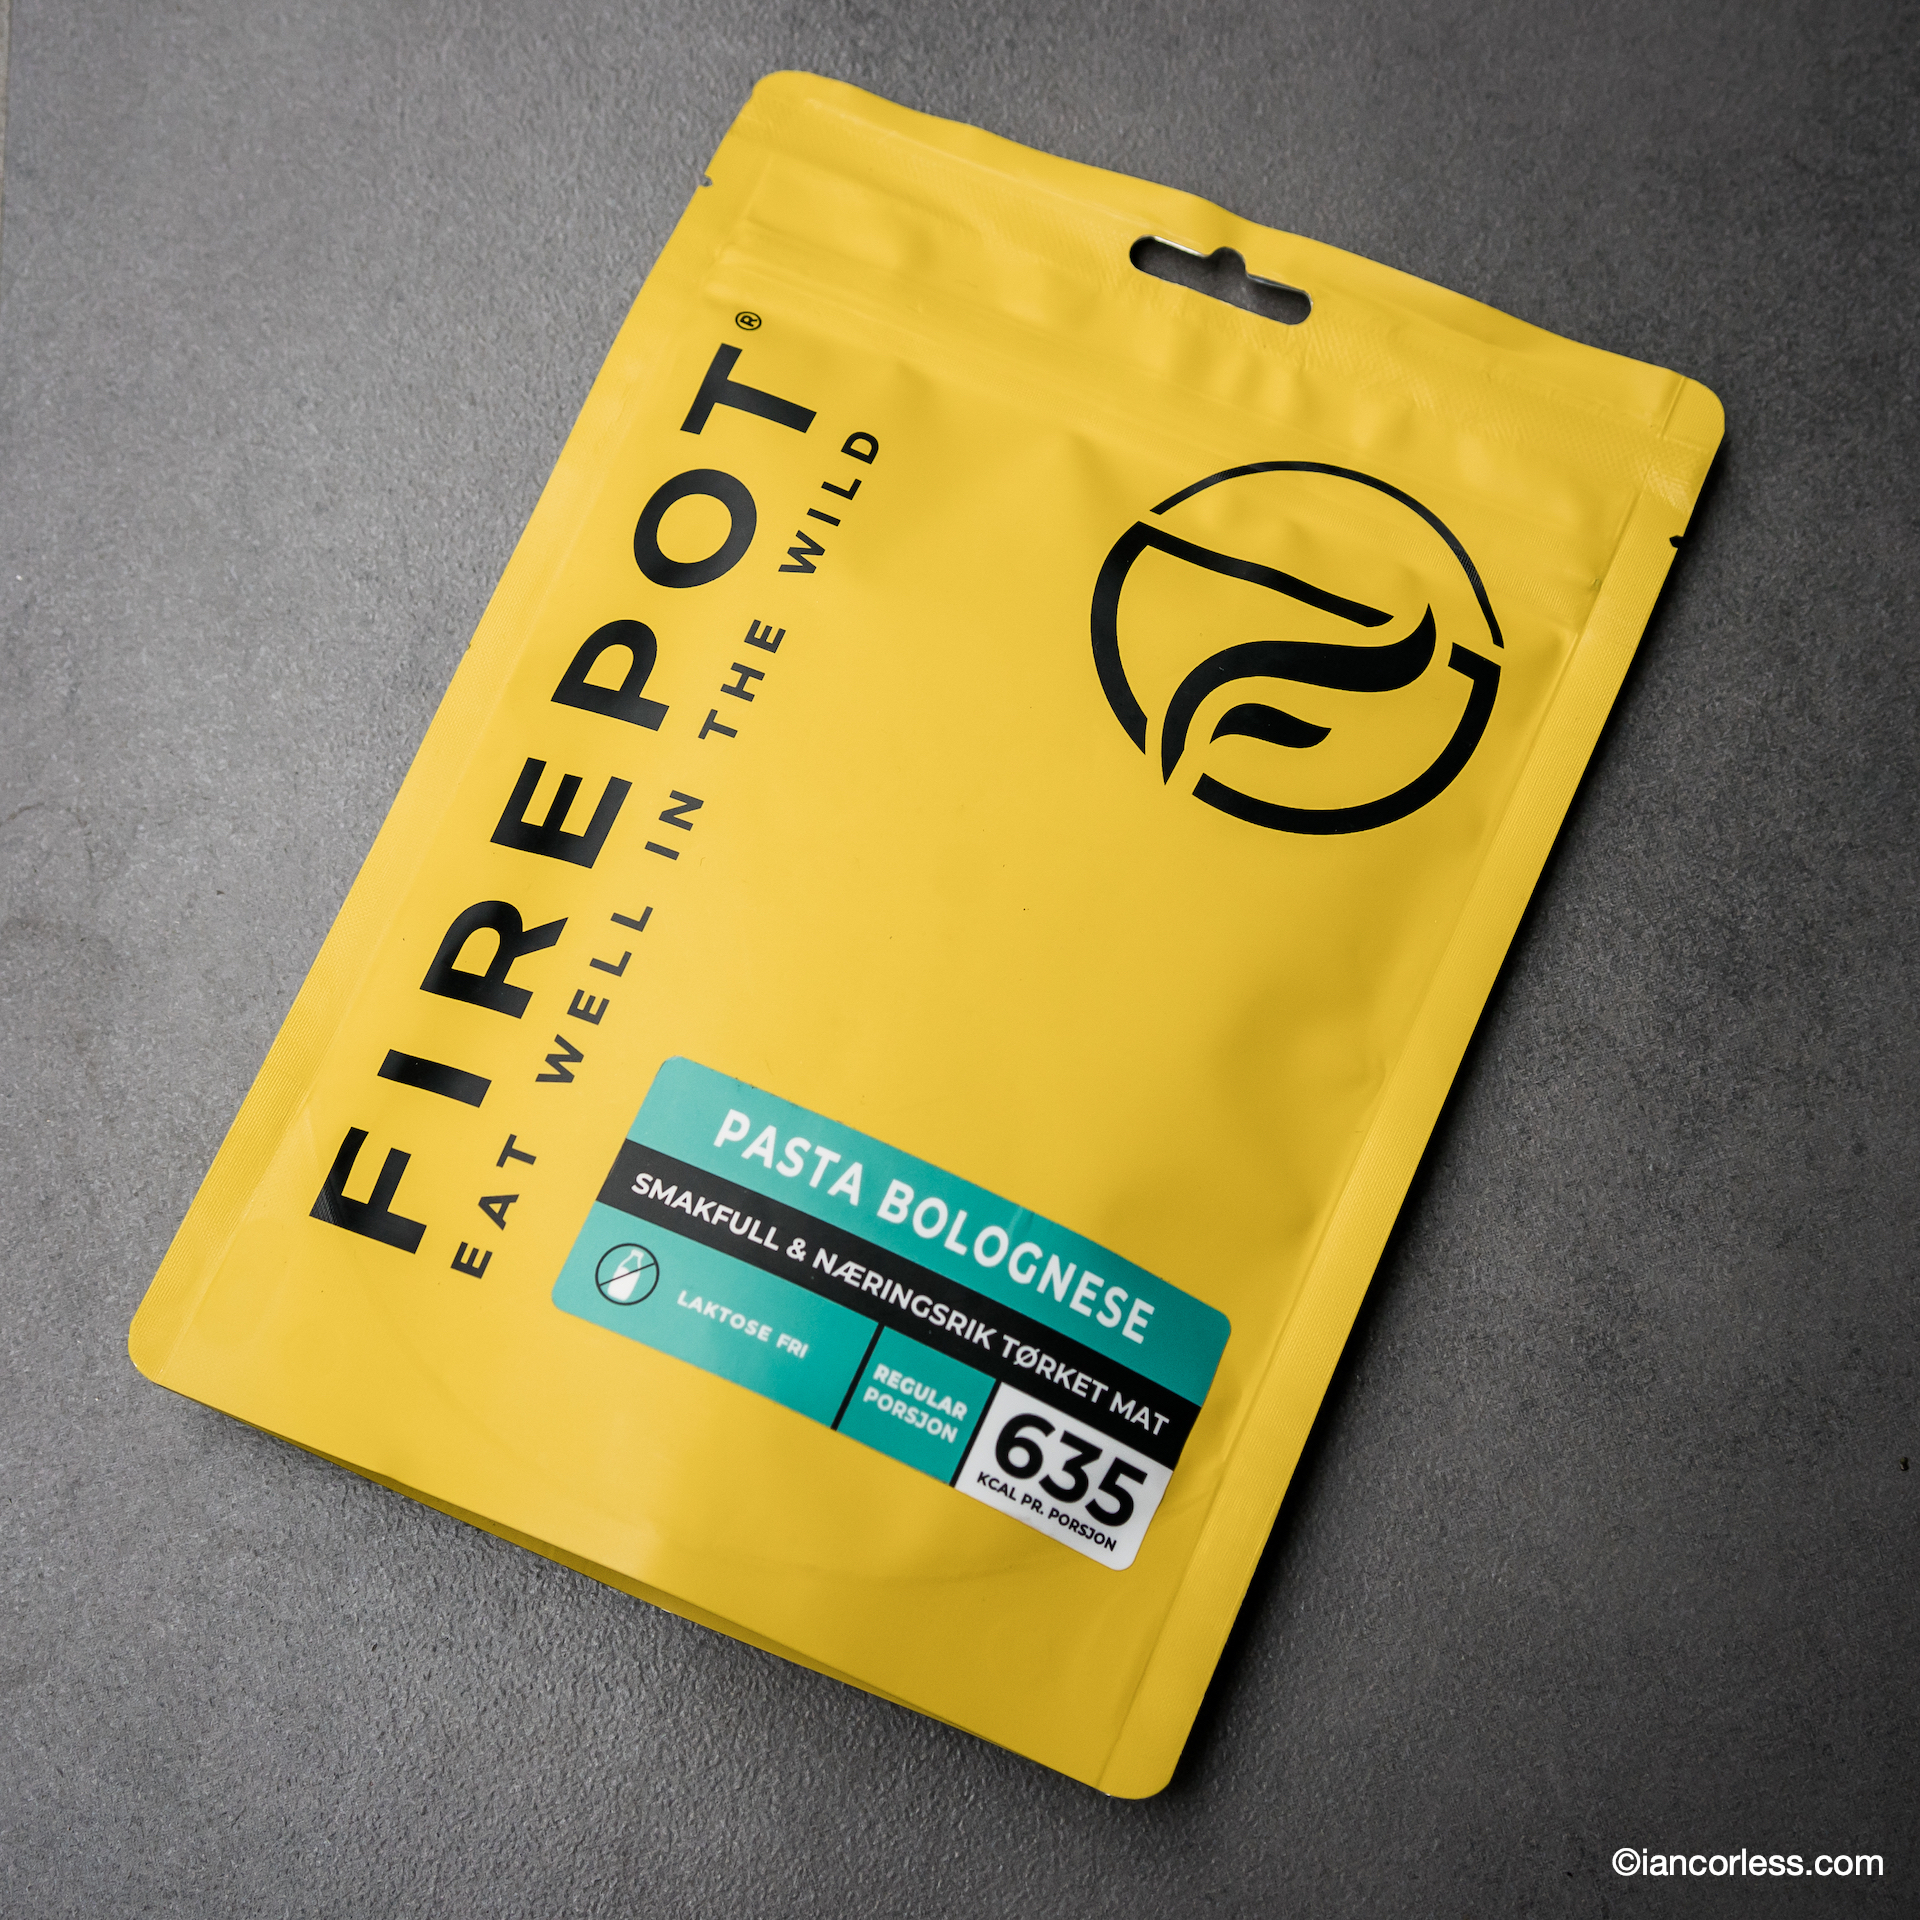
Firepot dehydrated meal 158g (per meal) – Dehydrated medals are a go-to solution for a meal when on the trail. Firepot have good calories, great taste and a good selection available.
Water 600g – This is the weight of water in the 600ml soft-flask.
Camera: (obviously optional)
Sony A9 with 35mm f2.8 pancake lens 800g – I am a photographer, so, this is my serious luxury item and it comes with a weight penalty.
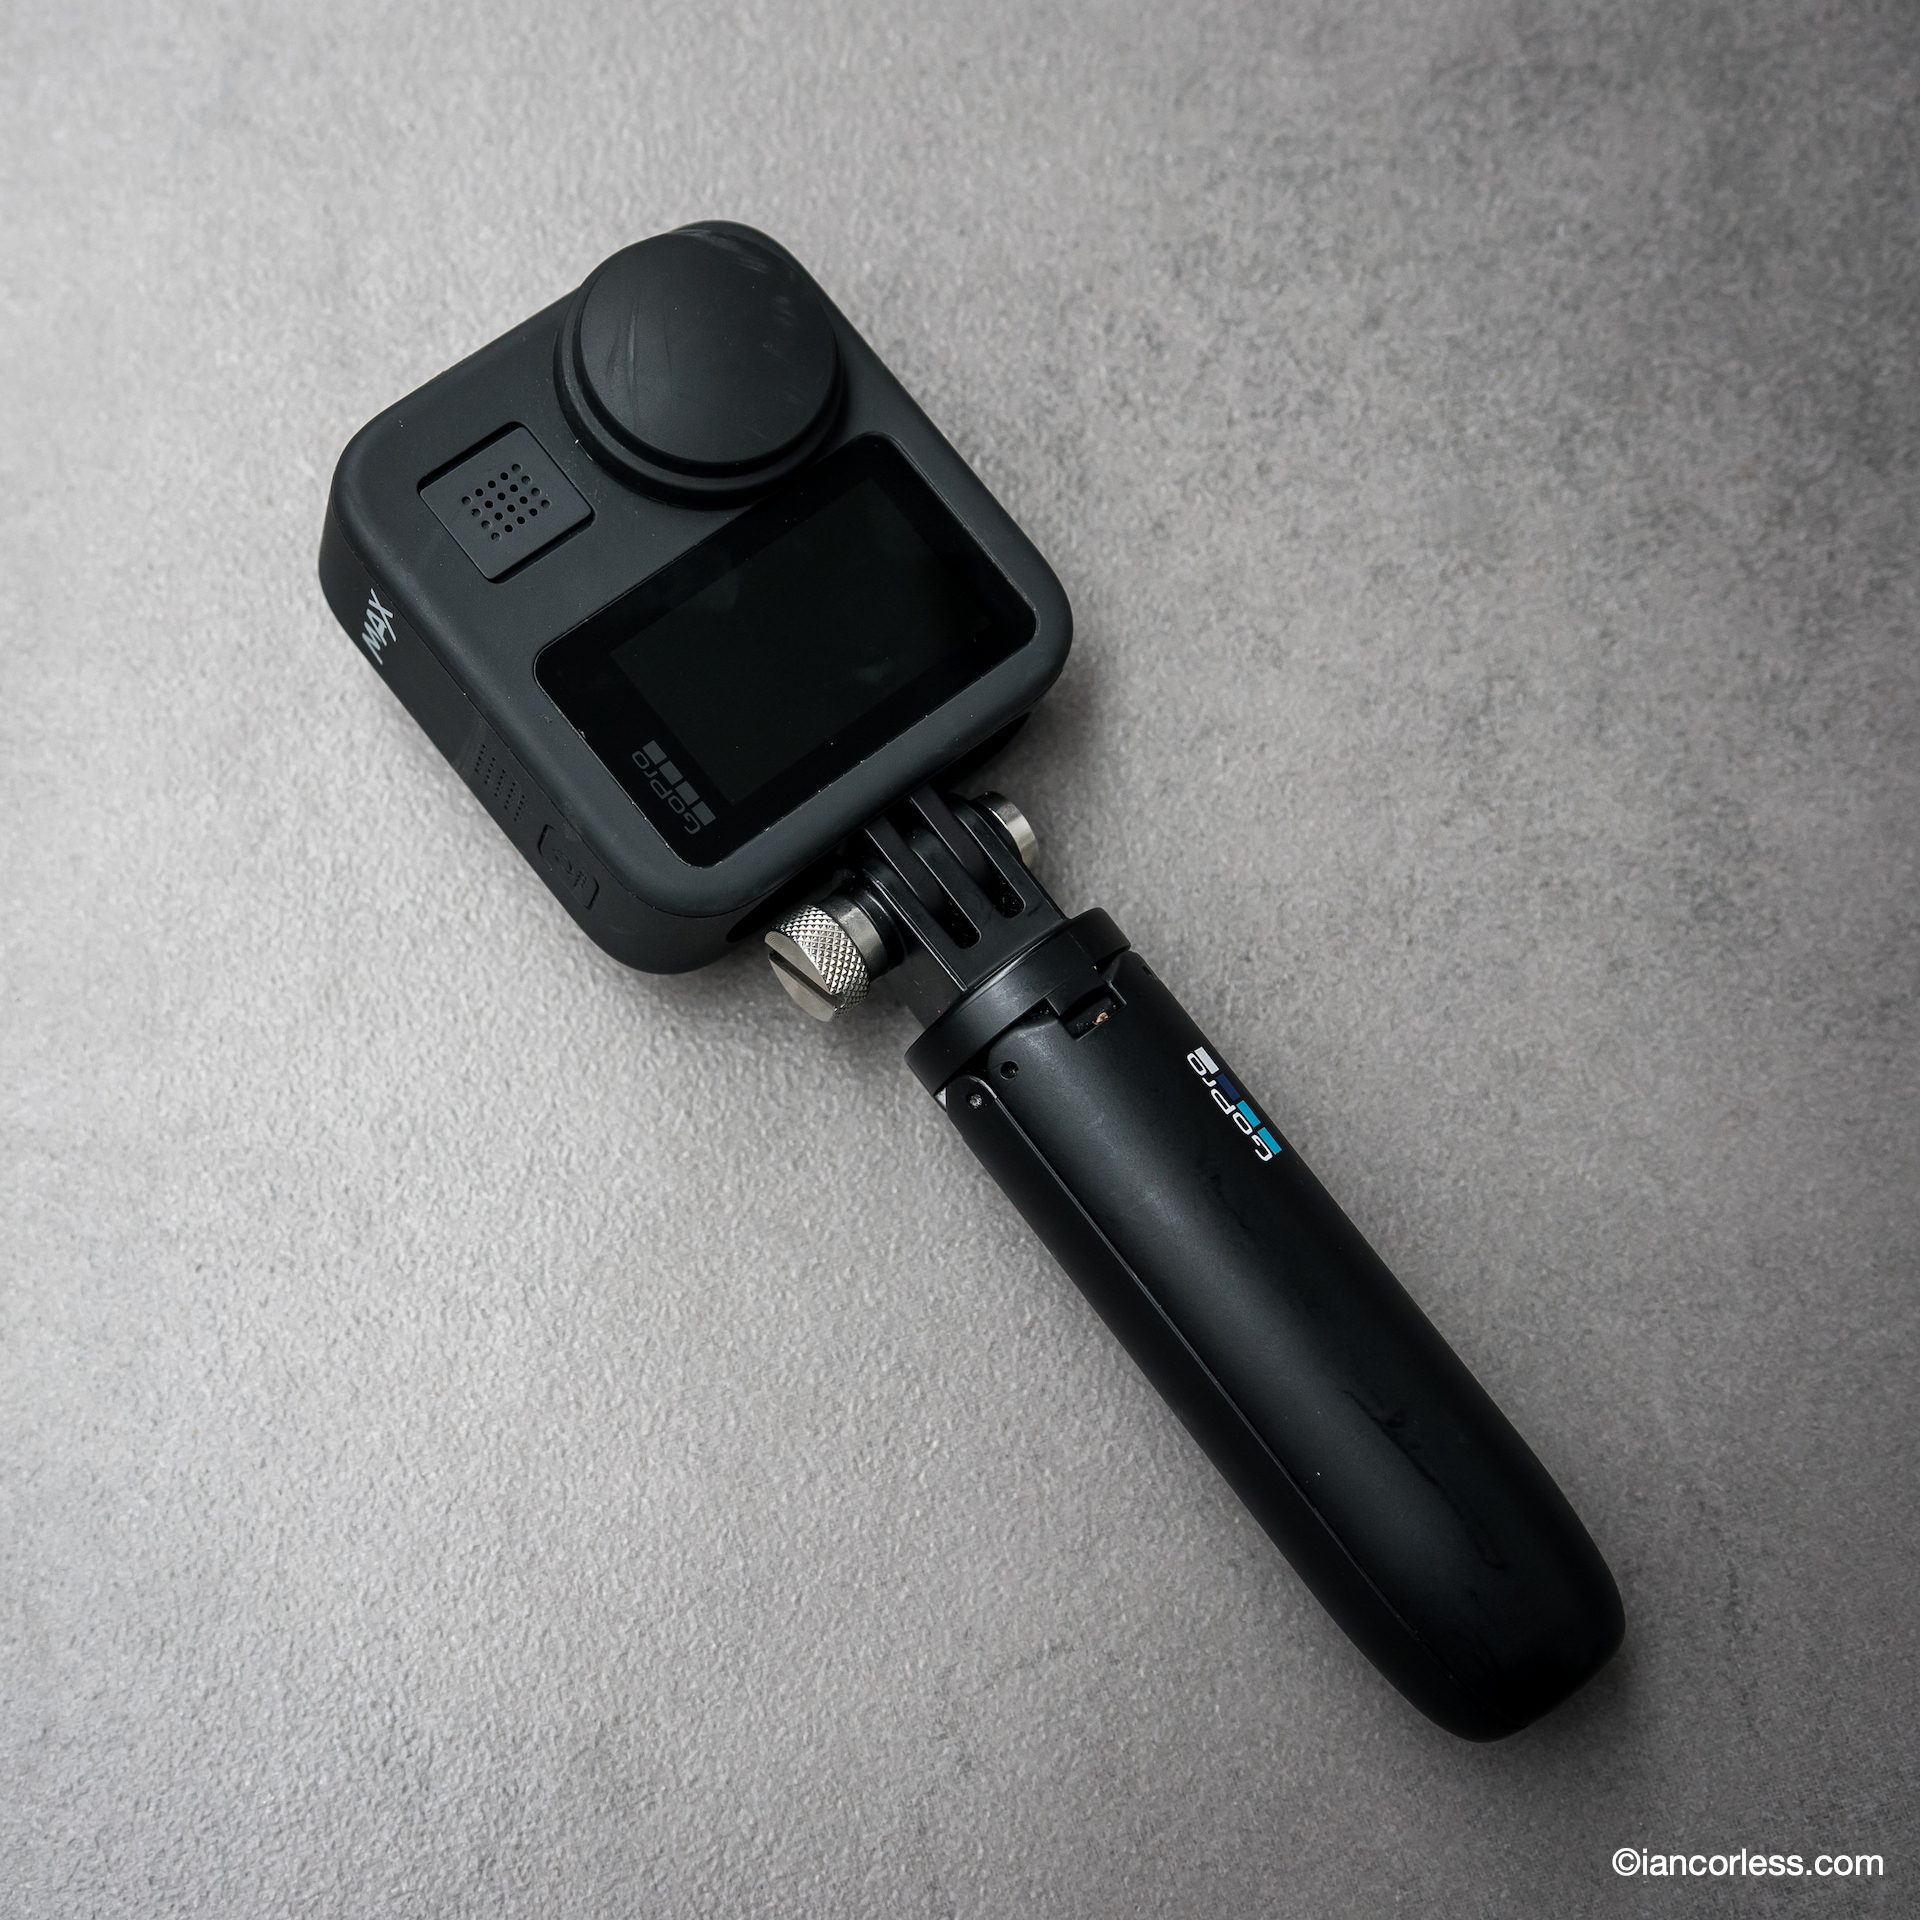
GoPro Max 231g
SUMMARY
Travelling light is great fun. It allows you to move faster with less strain. However, it is essential you travel light for the conditions. Too light and you may well get in trouble. So be careful and attentive. Light does not mean you will be uncomfortable, but you must accept a compromise comes from being minimal.
In Scandinavia, Kvikk Lunsj is an ‘essential’ for the trail. The chocolate consists of four rectangular wafers covered in milk chocolate, with thinner layers of chocolate between the wafers in order to break the chocolate into pieces easier. The chocolate has been advertised as a “hiking chocolate”, and it is often associated with skiing trips in Norwegian culture. Freia began printing the well-known Fjellvettreglene (Norwegian: the mountain code) on the inside of the packaging.
There is much relevance to the points below and a great reminder for all.
1. Plan your trip and inform others about the route you have selected. Plan your trip based on the group’s abilities, and always include alternative options. Obtain current information about the area and the weather conditions. Listen to the advice of seasoned mountaineers where possible. Ensure you have sufficient knowledge and practical skills to complete this trip. Respect the natural environment. Plan ahead and do not leave any litter behind you. Arrange meeting points during the trip that don’t require mobile coverage or accurate timing. Is your planning sufficient to guarantee an enjoyable trip no matter what?
2. Adapt the planned routes according to ability and conditions. Assess the conditions continuously and adjust your plans accordingly. Respect the weather! Travelling with others is safer and means you will have someone to share your experiences with. If you’re travelling alone, exercise caution. Do not embark on a long trip without sufficient experience. You must be able to take care of yourself as well as the others in your group. Be considerate of other hikers. Make sure you have read The Right of Access and its requirements. Make sure your group maintains an open and direct line of communication at all times. Can you complete the trip under these conditions and with this group?
3. Pay attention to the weather and the avalanche warnings. Always check the weather forecast and avalanche warnings to see what impact they have on the area. Follow the advice and choose a gentler terrain when conditions are too demanding. Check the conditions on yr.no, storm.no and varsom.no. Monitor the development of the weather and avalanche conditions along the way. Bear in mind that plans may need to be adjusted.
4. Be prepared for bad weather and frost, even on short trips. Dress appropriately for the weather, and the terrain. Remember that the weather changes quickly in the mountains. Bring extra clothing, and the equipment your route and terrain requires. Extra food and drink can help save lives, if the trip takes longer than planned or you have to wait for help. Is your group equipped to deal with a sudden change in weather?
5. Bring the necessary equipment so you can help yourself and others. In the winter, you need a windsack/bivvy sack, sleeping pad, sleeping bag and a shovel so that you can spend the night outdoors if you have to. A windsack can save lives. Bring a high-visibility vest or a headlight, that will make it easier to find you if necessary. Bring a first aid kit so you can help yourself and others. Always use a transmitter/receiver and have an avalanche probe and a shovel if you are traveling in avalanche prone terrain. Pack smart! Packing lists for different tours can be found at ut.no. Mobile phones can be a useful tool but remember that they do not work in all situations and areas. If an accident occurs, alert the police at 112, go for help or try to notify someone with other means. Are you able to take care of yourself and help others?
6. Choose safe routes. Recognize avalanche terrain and unsafe ice. Take an active decision to avoid terrain that is prone to avalanches and plan your route well. Be aware that avalanches can start in drops higher than five meters and steeper than 30 degrees. Even if you walk in flat terrain, you can trigger an avalanche on the mountainside above you. An avalanche dropout zone can be three times the height of the drop. Avoid terrain traps, such as narrow gorges. Consider what will happen if there is an avalanche. Be aware that a cornice can break off when you walk on a mountain ridge. Be aware of ice conditions when you walk on regulated lakes and rivers. Can an avalanche happen where I plan to go? What will the consequence be?
7. Use a map and a compass. Always know where you are. A map and compass are an essential basic equipment that always work. Pay attention to the map even when hiking on a marked trail. Knowing where you are on the map, makes for a better hiking experience. GPS and other electronic aids are helpful, but make sure you have extra batteries. Do you know where you are?
8. Don’t be ashamed to turn around. Evaluate your route continuously and if conditions are becoming difficult, choose your best alternative long before you or group members become exhausted. Have the circumstances changed? Should you turn around? Is anyone in your group have problems completing the route? Should the group turn around? Enjoy the hike for its own sake and remember that there will be other opportunities if it is too challenging today.
9. Conserve your energy and seek shelter if necessary. Adjust your hiking speed to the weakest member of the group, and make sure that everyone can keep up. Remember to eat and drink frequently. When you exert yourself, your body needs more fluids than you may feel you need. Don’t wait until you are exhausted before you seek shelter. Strong winds will tire you out quickly. Use your windsack or dig a snow cave before it’s too late. Are you able to get back to your base? Do you know where the nearest shelter is?
Please support this website. I believe everyone deserves to read quality, independent and factual articles – that’s why this website is open to all. Free press has never been so vital. I hope I can keep providing independent articles with your help. Any contribution, however big or small, is so valuable to help finance regular content. Please support me on Patreon HERE.
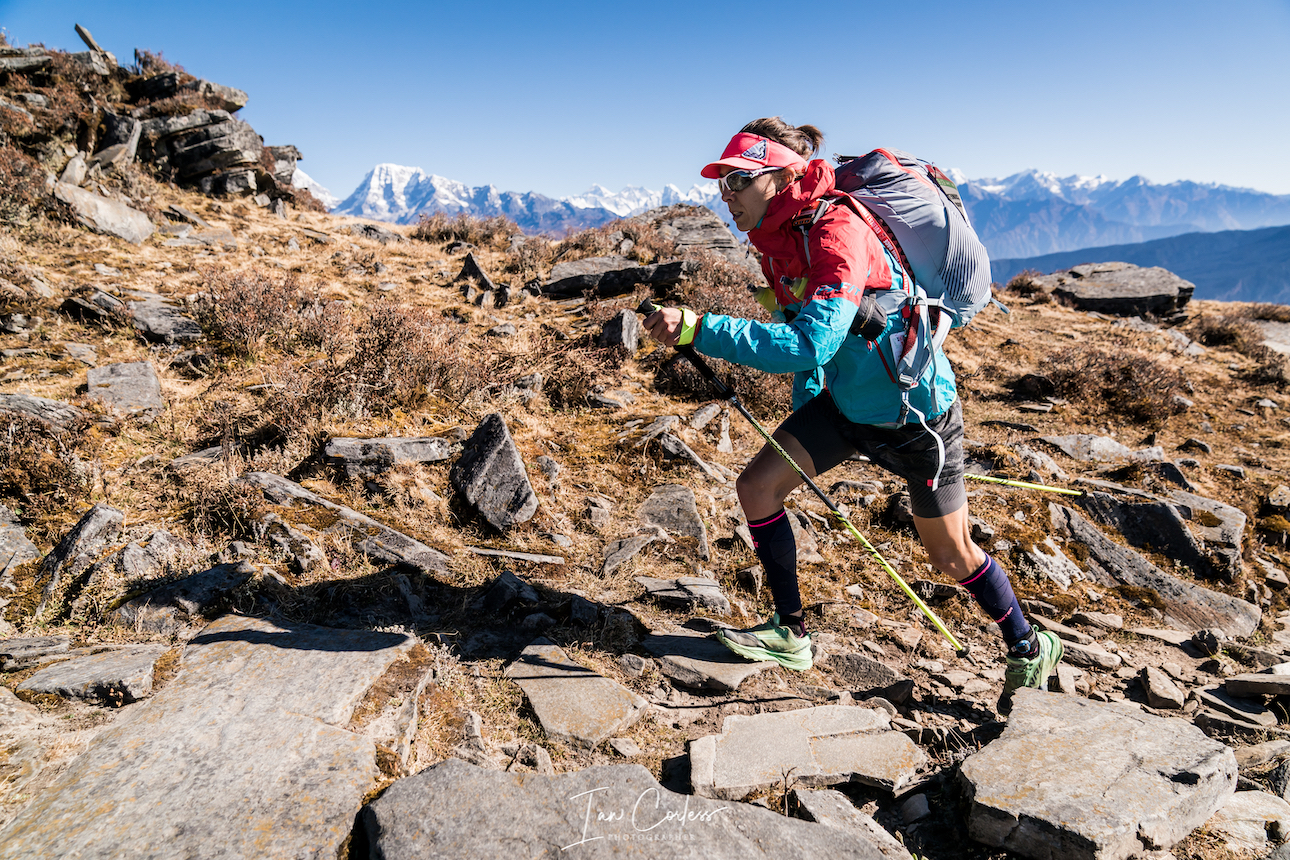
Runner’s and particularly ultra-runners have this wonderful ability to cover distance under their own power with very little needs or requirements. Some water, some food, a warm jacket and waterproofs and adventure awaits.
However, you can only go so far without the eventual need to return home.
Fastpacking manages to encompass the world of backpacking and running to create a different adventure, fast and light! Backpackers tend to carry a plethora of equipment and move at a slower pace, happy to adventure for days and weeks at a leisurely pace.
Fastpackers, arguably are runners or hikers looking for the need to travel for multiple day’s but still cover good distances and not be excessively slowed down by weight and excess equipment. The crux though is often the balance of weight and one’s ability to still run/ fast hike.
“Fastpacking isn’t for every outing though. Sometimes you want to take it easy, set up camp, and enjoy a particular area. That’s when backpacking shines. Sometimes you just want to crush through a workout. That’s when you want to go for a really fast run.” Says Simoni, adding that he opts for Fastpacking, “when I want to tag multiple mountain summits in an area at one time, without needing to take multiple trips. If you’re squeezed for time, Fastpacking can really help maximize an adventure. I find it very rewarding to cover so much distance with minimal gear.” – Justin Simioni via La Sportiva
One could arguably say that races like Marathon des Sables, which is 35-years old in 2020, have paved the way for Fastpacking bringing a ‘fast and light’ scenario to a race format allowing participants to cover 250km’s in a self-sufficient manner.
However, Fastpacking has been around for many, many years. Long before MDS, and long before the term Fastpacking. But in recent years, the sport has developed into something else, no doubt boosted by the growth and popularities of FKT’s and lighter, more functional equipment.
It’s important to clarify, that Fastpacking is what you make it. Personally, I enjoy a lighter pack, moving fast (but not running) and being self-sufficient. This allows me to carry a little more weight, travel for longer, enjoy the process and still cover over a marathon per day. You though may prefer to be more minimalist, look at micro/ mini adventures of 2-4 days and aim to run for much of the way. There are no rules to the speed or distance you go.
It’s also important to consider many other factors that come into place:
Location and environment – There is a big difference to Fastpacking in Nepal to say the Alps.
Time of year – Winter conditions require more equipment and more specific equipment.
Weather conditions – Check weather and be prepared.
Access to water – Streams, rivers and lakes
Access to external help – If you are going remote, be responsible and plan accordingly.
It’s easy to see from the above, there is no one definitive kit list, but there are crossovers that apply to both.
Route Plan
Plan the route in advance, understand the terrain and understand what possibilities exist to obtain water. Importantly, carry a system that will ensure that you can drink water that is available from any source. Work out how long a planned route will take and then plan for contingency should something go wrong. Note that vertical ascent, descent and technical terrain will require moving slower. It’s not unusual to sometimes only cover 2km’s in 1-hour. Make sure you inform family or a friend of your planned trip, start day and end day. That way you have a backup and someone checking out for you. It may sound alarmist, but should something happen, you may well not be able to call for help. Contact and research with local authorities and ascertain current conditions on the trails and be aware of any restrictions.
Do you need a 12-week and/ or 24-week Multi-Day Training Plan perfect for a multi-day adventure or a race like Marathon des Sables? They are designed to provide you with a structured weekly plan culminating in a target event.
View a sample week HEREfrom the 12-week plan. Purchase HERE. (£14.50 pw)
View a sample week HERE from the 24-week plan. Purchase HERE. (£12 pw)
The Pack
Typically, a Fastpacker will look for something between 20 and 40 liters. For summer and short adventures, it is possible to go lighter and smaller. In winter, one will need more equipment that is often heavier and bulkier. Quite simply, the heavier the pack, the harder it is to run. So, if the plan is to run as much as possible, you need to go as minimal as possible whilst keeping safe. Make sure when testing and trying a pack that you add weight and understand how it feels when moving. Many brands are now producing packs specifically for Fastpacking. Personally, I like my pack to have a waist belt as this helps distribute the load and make the pack more secure. I would say that a minimum pack weight will be 6.5kg (14.3lbs) with water. Where possible, you would not want a pack to exceed 10kg (22lbs).
On a personal level, I would always go with a tent as I personally feel that it will offer more flexibility, especially if one shops in a clever way. My go to tent is an MSR Hubba Hubba NX (1/ 2 and 3 person versions available).
Things to look for in a tent:
Weight
Flexibility
How many season use?
Space
For example, the above MSR is a free-standing tent, so, it can be pitched inner only. If you know you are Fastpacking in ‘guaranteed’ good warm weather, you could travel without the fly sheet and basically sleep in a lightweight and bug proof shelter. Equally, if you know that you are fast packing in a bug free (mosquito) environment, you could leave the inner at home and just travel with the flysheet. This then provides a secure waterproof shelter, and, in this scenario, it acts just like a tarp but with more protection.
Tarps offer a light solution that can be used with trekking poles and if one is going very minimal and fast, they provide a very simple answer for overnight protection. It all comes down to comfort and what one is prepared to accept as ‘comfort’ whilst Fastpacking. Big Agnes make the Onyx which comes in at under 200g. A Tarp is a compromise if you will have bugs such as mosquitos whilst on your adventure.
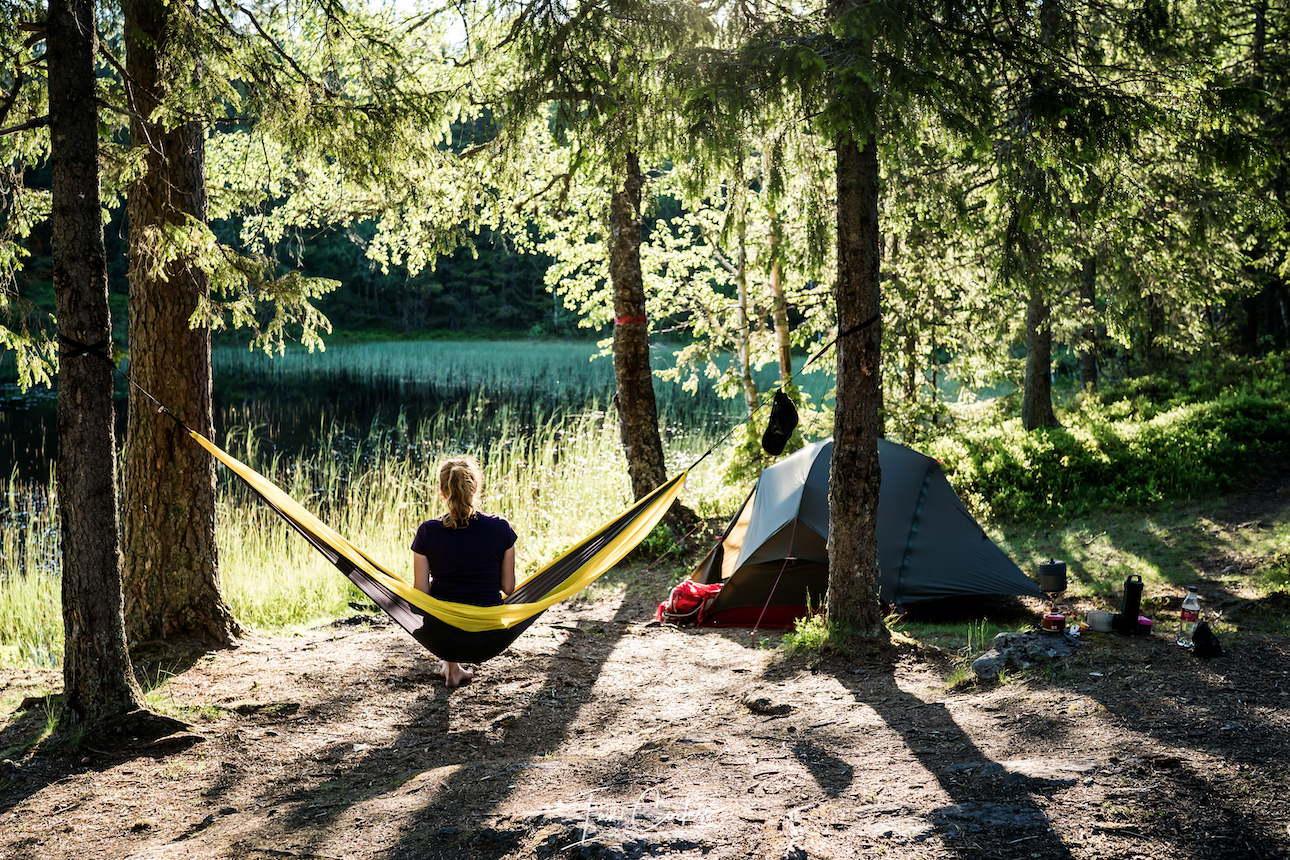
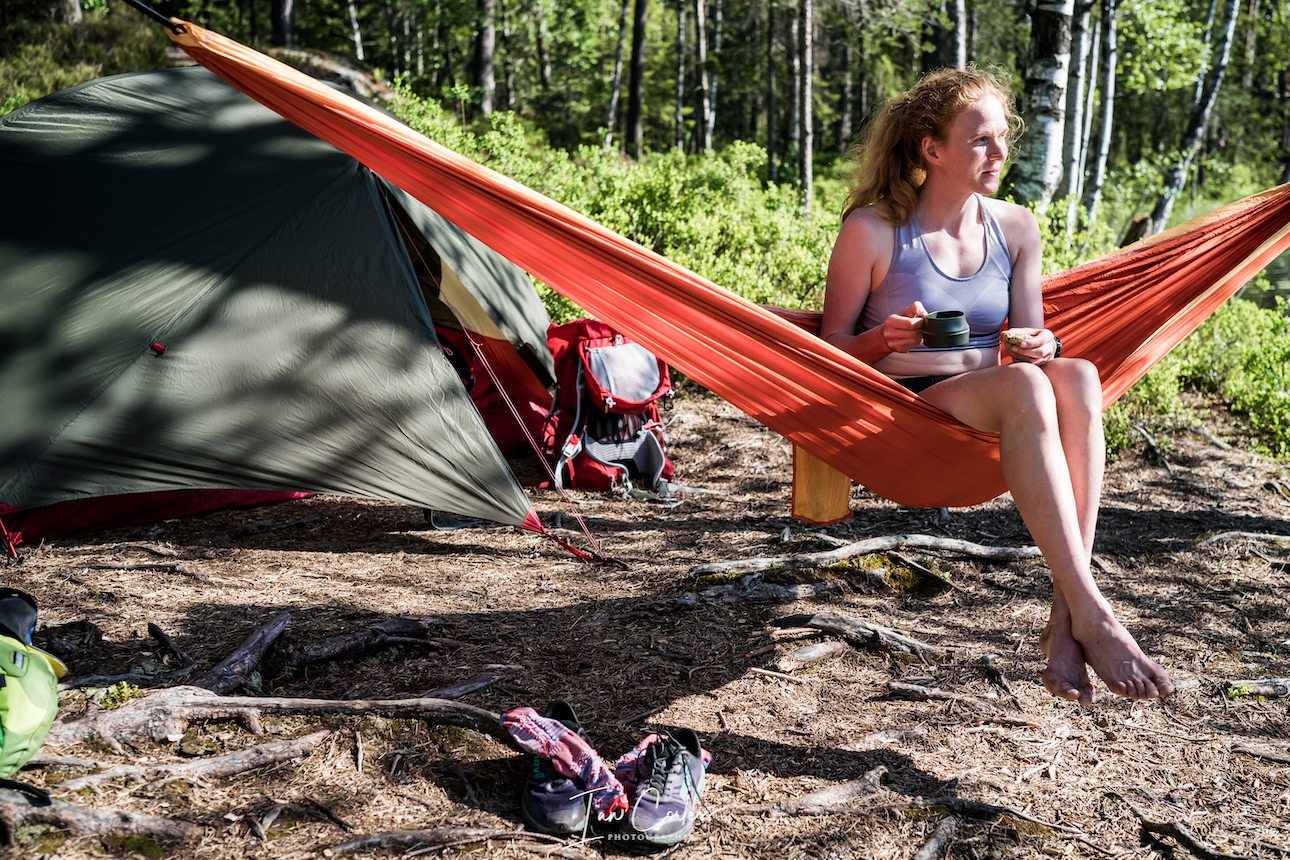
Hammocks are also an option providing one has trees to secure against. But if you add a bug net and tarp, in my opinion, a tent is a much better option. But a hammock can be a great addition to any Fastpacking kit, I use an Amazonas (here)
Sleeping Bag
A sleeping bag is essential for any adventure but firstly you need to ask some very specific questions before purchasing. I would say that ideally, one potentially could need several sleeping bags based on time of year and weather conditions. Remember, that any sleeping bag can be made warmer with layers. Add a hat, gloves and down jacket, suddenly the sleeping bag is considerably warmer.
Down is by far the lightest and smallest packing size, however, down cannot get wet! So, if you think you will encounter damp and wet conditions, you should consider a bag with a synthetic filling. Weight and pack size are important and with sleeping bags, the more you pay, usually, the lighter and smaller it will be.
Be careful on the ‘comfort’ rating of the sleeping bag.
Upper limit – the highest temperature the average male can expect to have a comfortable night’s sleep at without too much sweating.
*Comfort – the temperature at which the average adult woman can expect to have a comfortable sleep. *This is the ideal for most people choosing
Lower limit – the temperature at which the average adult male can expect to have a good night’s sleep in a curled position.
Extreme – the lowest temperature at which the average adult woman can survive. This rating comes with caution and additional consideration should be given if you plan to sleep in temperatures this low.
Recommendations:
PHD – Make sleeping bags and jackets to order, I am a long time fan here
Yeti – Passion One and Passion Three are a good start point here
Rab – The new Mythic Ultra is a personal favourite, available in 180 and 360 here
OMM -The Mountain Raid 160 is a great bag if you need synthetic filling here
Sea to Summit – The ‘Spark’ range have been getting rave reviews here
The minimalist Fastpacker will go with no matt or a very simple and small pad that provides just enough coverage for one’s hip if sleeping on one’s side. Personally, a good night’s sleep is essential, and a good/ light matt is an essential element to a fast and light kit.
Also, one should consider that in winter/ snow conditions, a matt will be essential for insulation.
Another consideration is potential problems from a puncture. Many inflatable matts become super light by using extremely light material. Be careful when using and make sure any potential sharp objects are removed before sitting or sleeping!
Matts very considerably but a personal favourite is the Klymit V Ultralite slim which offers full length body comfort all for 316g. It also packs very small. There are lighter matts and I list them below:
Thermarest NeoAir Uberlite 158g
Klymit Inertia X 258g
Nemo Insulated Short 278g
Sea to Summit Ultralight 294g
Exped AirMat HL 304g
Ultimately, the matt you choose may come down to a tradeoff between price/ packing size and weight. Be careful, some matts can be noisy when you move. Ok of going solo but really irritating if you are in close proximity of someone else.
Cooking System
For me, the MSR PocketRocket Deluxe (here) or 2 (here) kit is perfect. It has all one needs in a very small pack size and weight. I use the PocketRocket 2 kit that allows me to place a gas canister inside the 278g kit + a 4oz canister.
Another consideration would be JETBOIL Micromo Cooking System (here) which is the lightest system they do and if you just need to boil water, this is perfect!
Food
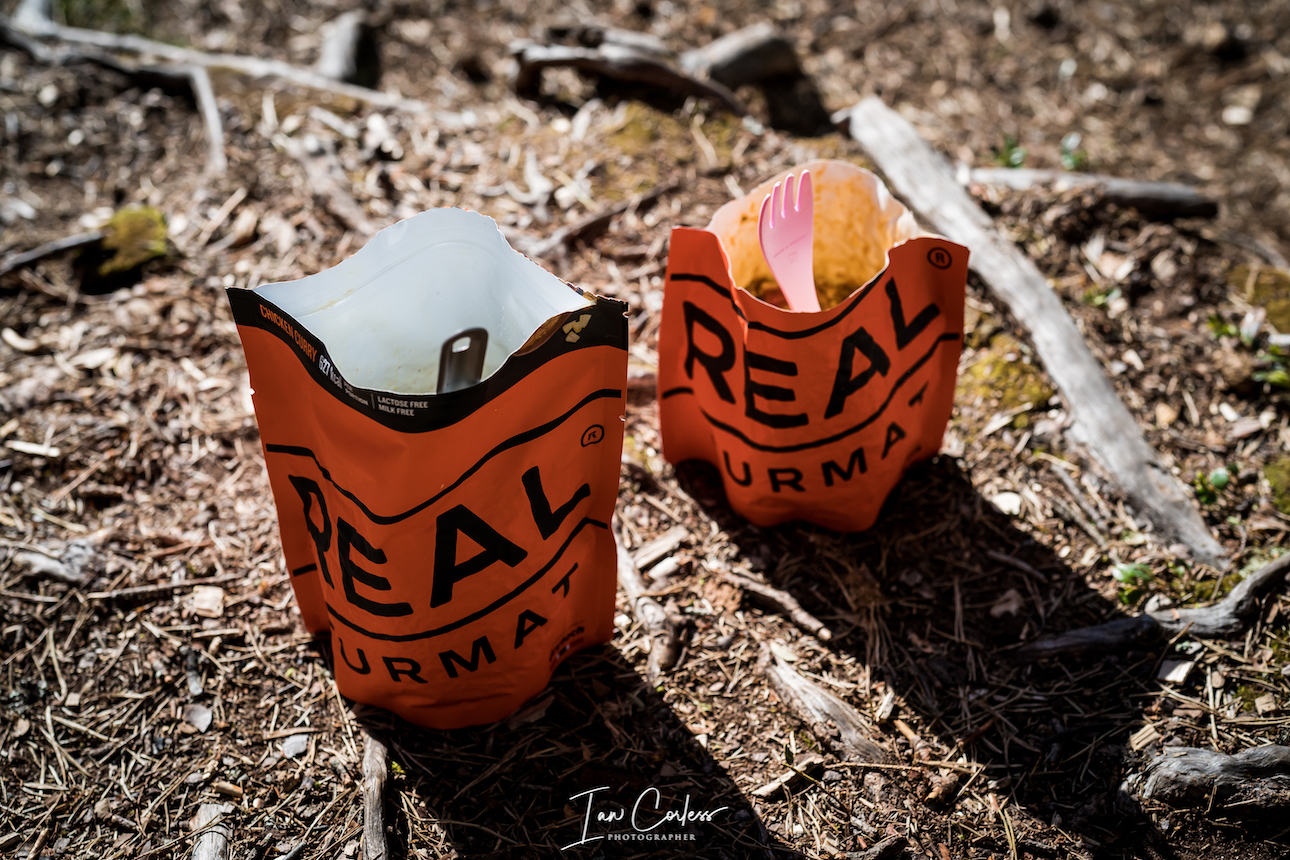
Dehydrated food is probably the most obvious option here and there are many varieties on the market. They are a one-stop option that requires water to hydrate and if you wish to be extremely minimal, some options exist that do not require hot or boiling water. A personal favourite is Lyo (here) and Real Turmat (here) – It may sound crazy but they both make foods that I would consider eating when not fast packing. They also do Vegan and Vegetarian options.
Check out Chicken Tikka Masala, Nettle Curry, Penne alla Bolognese and if Vegan, Organic Chilli and Barley Risotto. Breakfasts such as Mexican Scrambled Eggs and Organic Millet Porridge.
For any adventure, I work on a breakfast and a dinner and then carry snacks for during the day, this can be energy bars or if on a long Fastpack, I will even consider carrying another main dehydrated meal. Typical weights are 132g with approx 600 cals.
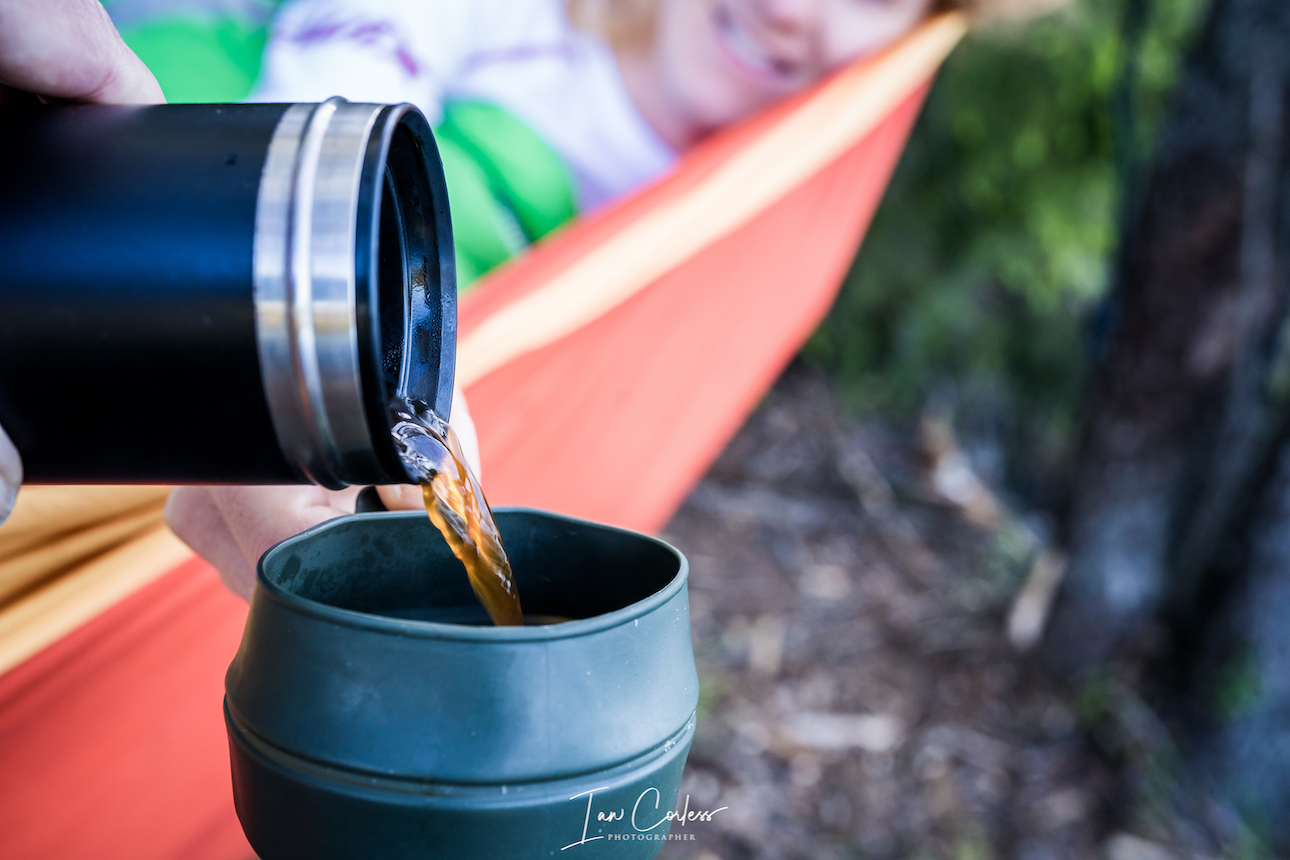
For me, Fastpacking is fun and adventure. I am not looking for FKT’s and therefore I do allow myself one or two luxuries. Coffee for me is an essential part of any trip and I mean good coffee. I could just take some coffee sachets and have a combined weight of grams.
No! For me, I take fresh ground coffee in a sealed tub and I use one of two coffee presses.
The Espro is my favourite as it acts as a flask/ drinking canister too. But it does come at a weight and size cost.
I fully appreciate that if going fast and light, the above is a complete no, no! But for me, that smell of fresh coffee each morning is worth it.
Water
You are going to be self-sufficient for multiple days, so, you need to find water and plan to obtain water from the route you will take. You can use purification tablets, I take the MSR TrailShot pocket sized filter (here) which meets U.S. EPA drinking water standards* and NSF protocol P231 for removal of bacteria (99.9999%), protozoa (99.9%), and particulates.
Clothing
Clothing requirements depend on the time of the year, the weather you will encounter and the duration of the Fastpack. Needless to say, one has to accept that changing clothes, taking a shower and feeling wonderfully fresh daily is not what Fastpacking is about. Layering clothing is essential to allow for fluctuations in temperature. Do your research, check weather forecasts and plan accordingly. The above photo is my equipment for a Fastpack in Nepal. Make sure you have a ‘Drybag’ to make sure all contents of the pack are protected from the weather, Sea to Summit (here) for example.
A good start point is as follows:
Short sleeve T
Long sleeve shirt
Shorts
Underwear x2?
Socks x2?
Hat with peak
Warm hat
Gloves
Merino base layer, top and bottom – I use Icebreaker here
Lightweight waterproof jacket – I use RAB Charge here
Lightweight down/ Primaloft jacket – I use RAB Kaon here
Buff
Bivvy bag
The above, for most, would be a start point and based on where and when Fastpacking, you could maybe add or takeaway certain items.
If going to more extreme and cold environments, the demand on clothing and what one takes will increase. I wrote an article on Fastpacking in Nepal (here) and this is a worthwhile read. Please note in Nepal, one can use tea rooms, so, one saves on tent/ tarp weight immediately if required.
Tracker/ Beacon
I use a Garmin InReach Mini (here) and it is superb. Small, light, has SOS button and allows for 2-way messaging anywhere in the world. I do not go on any adventure without it now. In conjunction with a mobile phone and associated App, functions become easier to use. Subscription services can be changed monthly and therefore one can add or takeaway facilities as required.
Another option to consider is a SPOT device.
Essential Extras:
Water purification
Toilet paper/ wet wipes
Hand sanitizer
First-aid kit
Sunscreen
Bug repellent
Headlamp and batteries
Lighter/ matches
Whistle
Map
Compass
Earphones
Optional Extras:
Trekking poles – to be honest, for most of my Fastpacks, poles are an essential and especially if one is using a Tarp or similar.
Battery pack for recharging.
Conclusion
Fastpacking for me, is one of the most pleasurable ways to travel by foot. The ability to cover distance, usually in a point-to-point way under ones own power and being self-sufficient is extremely rewarding. You can move as fast or as slow as you like, take as long as you wish and fully immerse yourself in the surroundings and environment.
Please support this website. I believe everyone deserves to read quality, independent and factual articles – that’s why this website is open to all. Free press has never been so vital. I hope I can keep providing independent articles with your help. Any contribution, however big or small, is so valuable to help finance regular content. Please support me on Patreon HERE.
If you are going on an adventure, taking part in a multi-day race or basically going on a one night jolly in the wilds somewhere, a sleeping bag is going to be an essential item.
Choosing a sleeping bag one would think is easy… Go to a shop, find one that fits into your budget, purchase and use.
The reality is, the above is far from the truth.
Need Coaching or a Training Plan? Information HERE
ASK INITIAL QUESTIONS
A good sleeping bag is not cheap and going cheap is most certainly not a good idea. So, from the off, accept that you will need to dedicate a good portion of your hard earned cash.
One sleeping bag will not work in all situations, however, if one is clever, one can make a sleeping bag adapt to other situations and therefore it is possible to increase the range of use and temperatures that a sleeping bag will work in.
Sleeping bags mainly use two fillings: Down or synthetic such as Primaloft.
Down: Is lighter and the weight to warmth ratio is higher. It packs smaller and can be compressed to a very tiny package if required. Down however cannot get wet. If it gets wet it all sticks together and will offer no warmth at all. Down is expensive and one should make sure that if purchasing down that it is ethically sourced.
Primaloft: A synthetic product, it is heavier and packs larger than down. It’s a cheaper product than down and importantly it can get wet and still retains warmth.
The first questions one should ask are:
Am I using the sleeping bag in a dry or wet climate?
Is the weight of the bag really important. Normally the answer here is, if you are carrying it, yes, the weight is important.
Do I need the sleeping bag to pack as small as possible?
Do I need the bag to work in one or more situations? Another way of looking at this is, do I need to compromise on points 1-3 to get value for money.
Ask some personal questions:
Do I sleep warm?
Do I like to be warm and if not warm, am I miserable?
Am I prepared to be a little cold to be as light as possible?
Do I need a full-length zip, half-zip or am I happy to have no zip?
Consider other factors:
If you are tall, wide, have big shoulders etcetera, etcetera then some sleeping bags will just not work for you as they will be too small.
If you are small/ petite an off-the-shelf sleeping bag actually could be too big for you, this is not a huge problem, but if you wanted the bag to be as small and light as possible, you could go custom made.
Sleeping bags have a ‘Comfort Rating’ as follows:
Upper limit – the highest temperature the average male can expect to have a comfortable night’s sleep at without too much sweating.
*Comfort – the temperature at which the average adult woman can expect to have a comfortable sleep. *This is the ideal for most people choosing
Lower limit – the temperature at which the average adult male can expect to have a good night’s sleep in a curled position.
Extreme – the lowest temperature at which the average adult woman can survive. This rating comes with caution and additional consideration should be given if you plan to sleep in temperatures this low.
Layering:
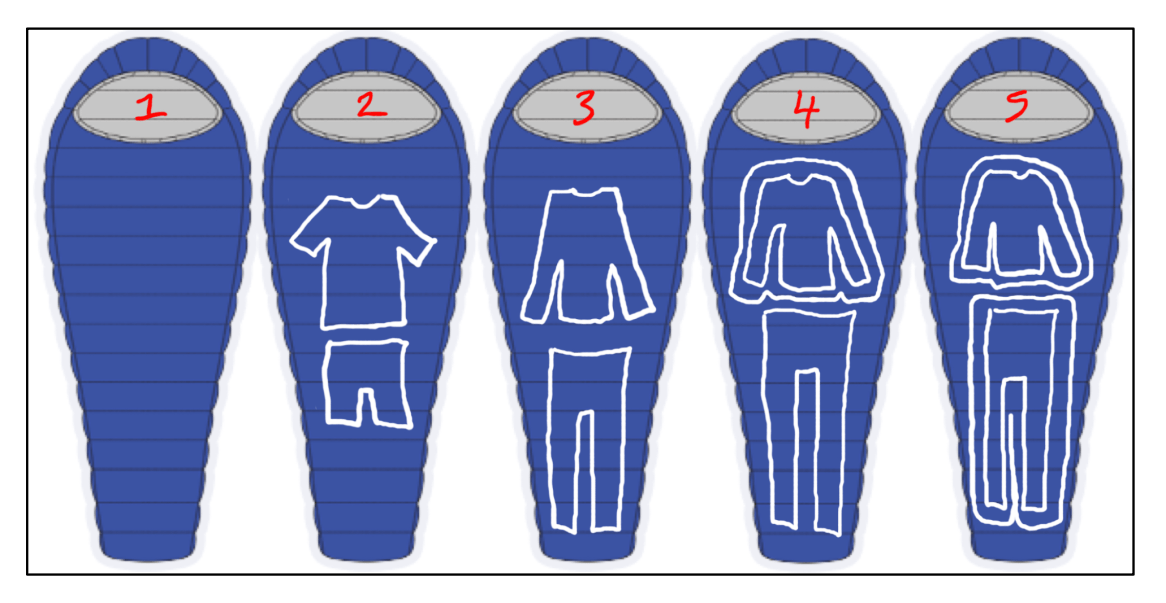
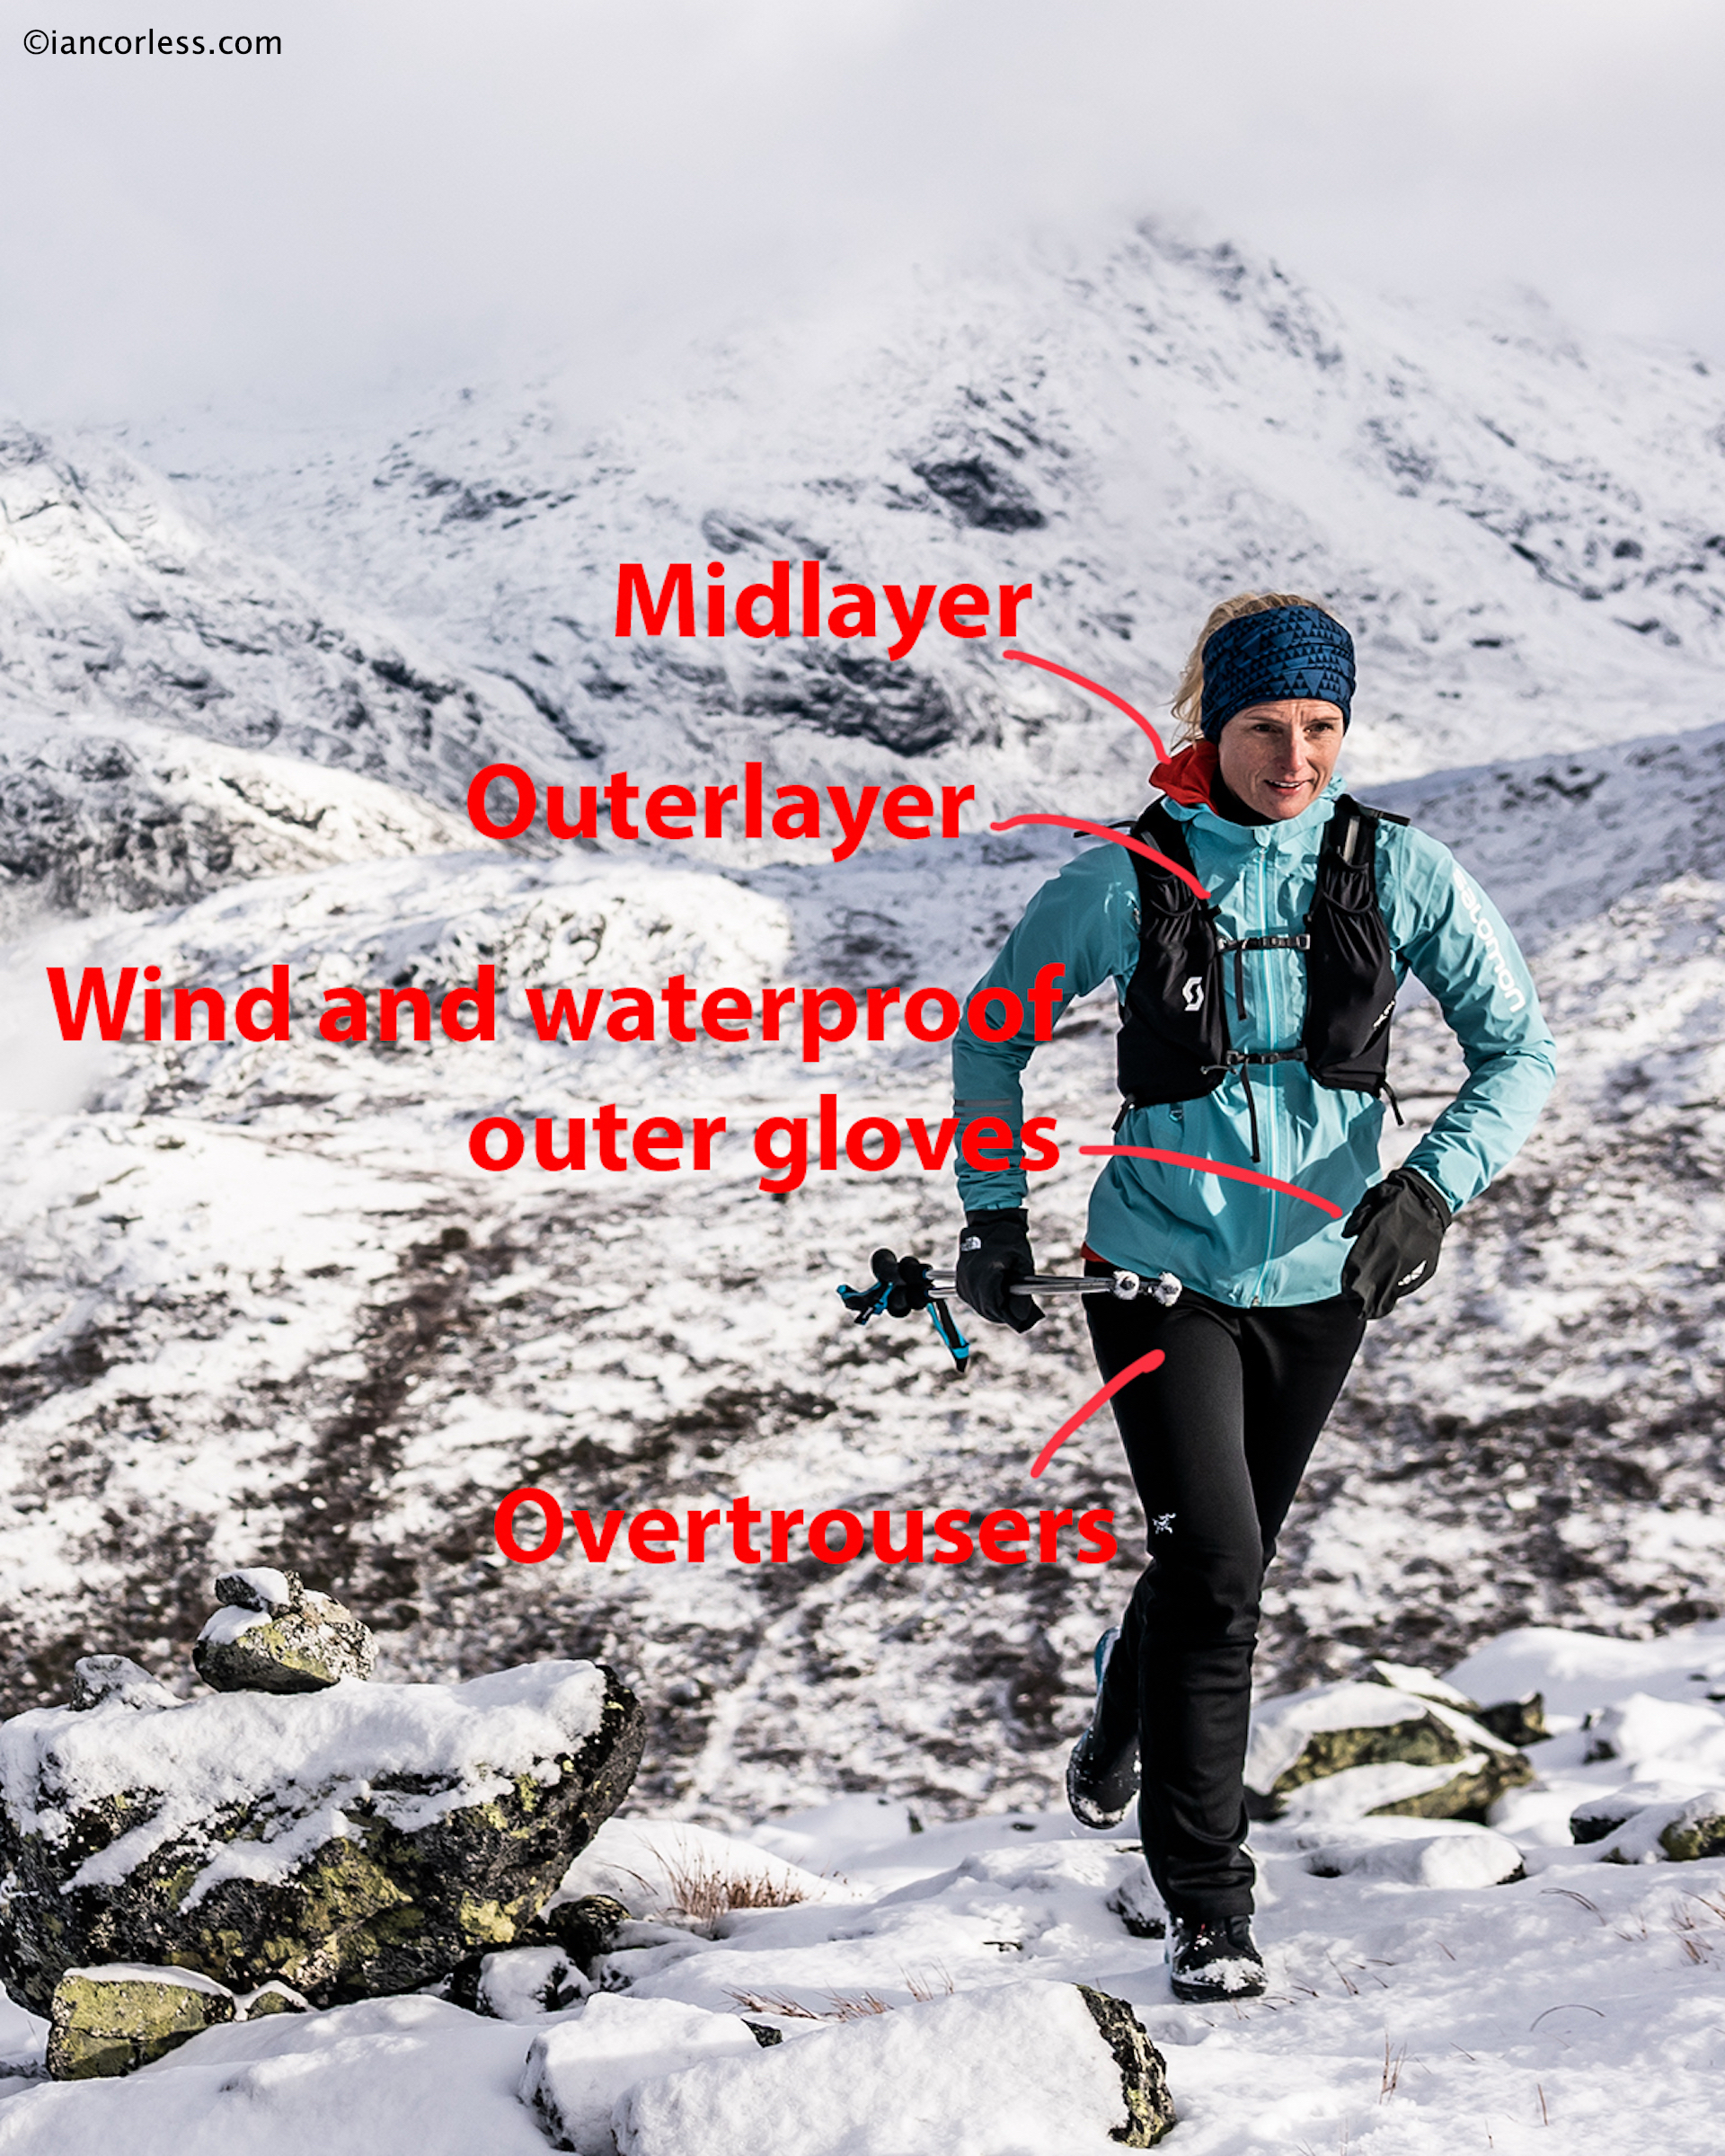
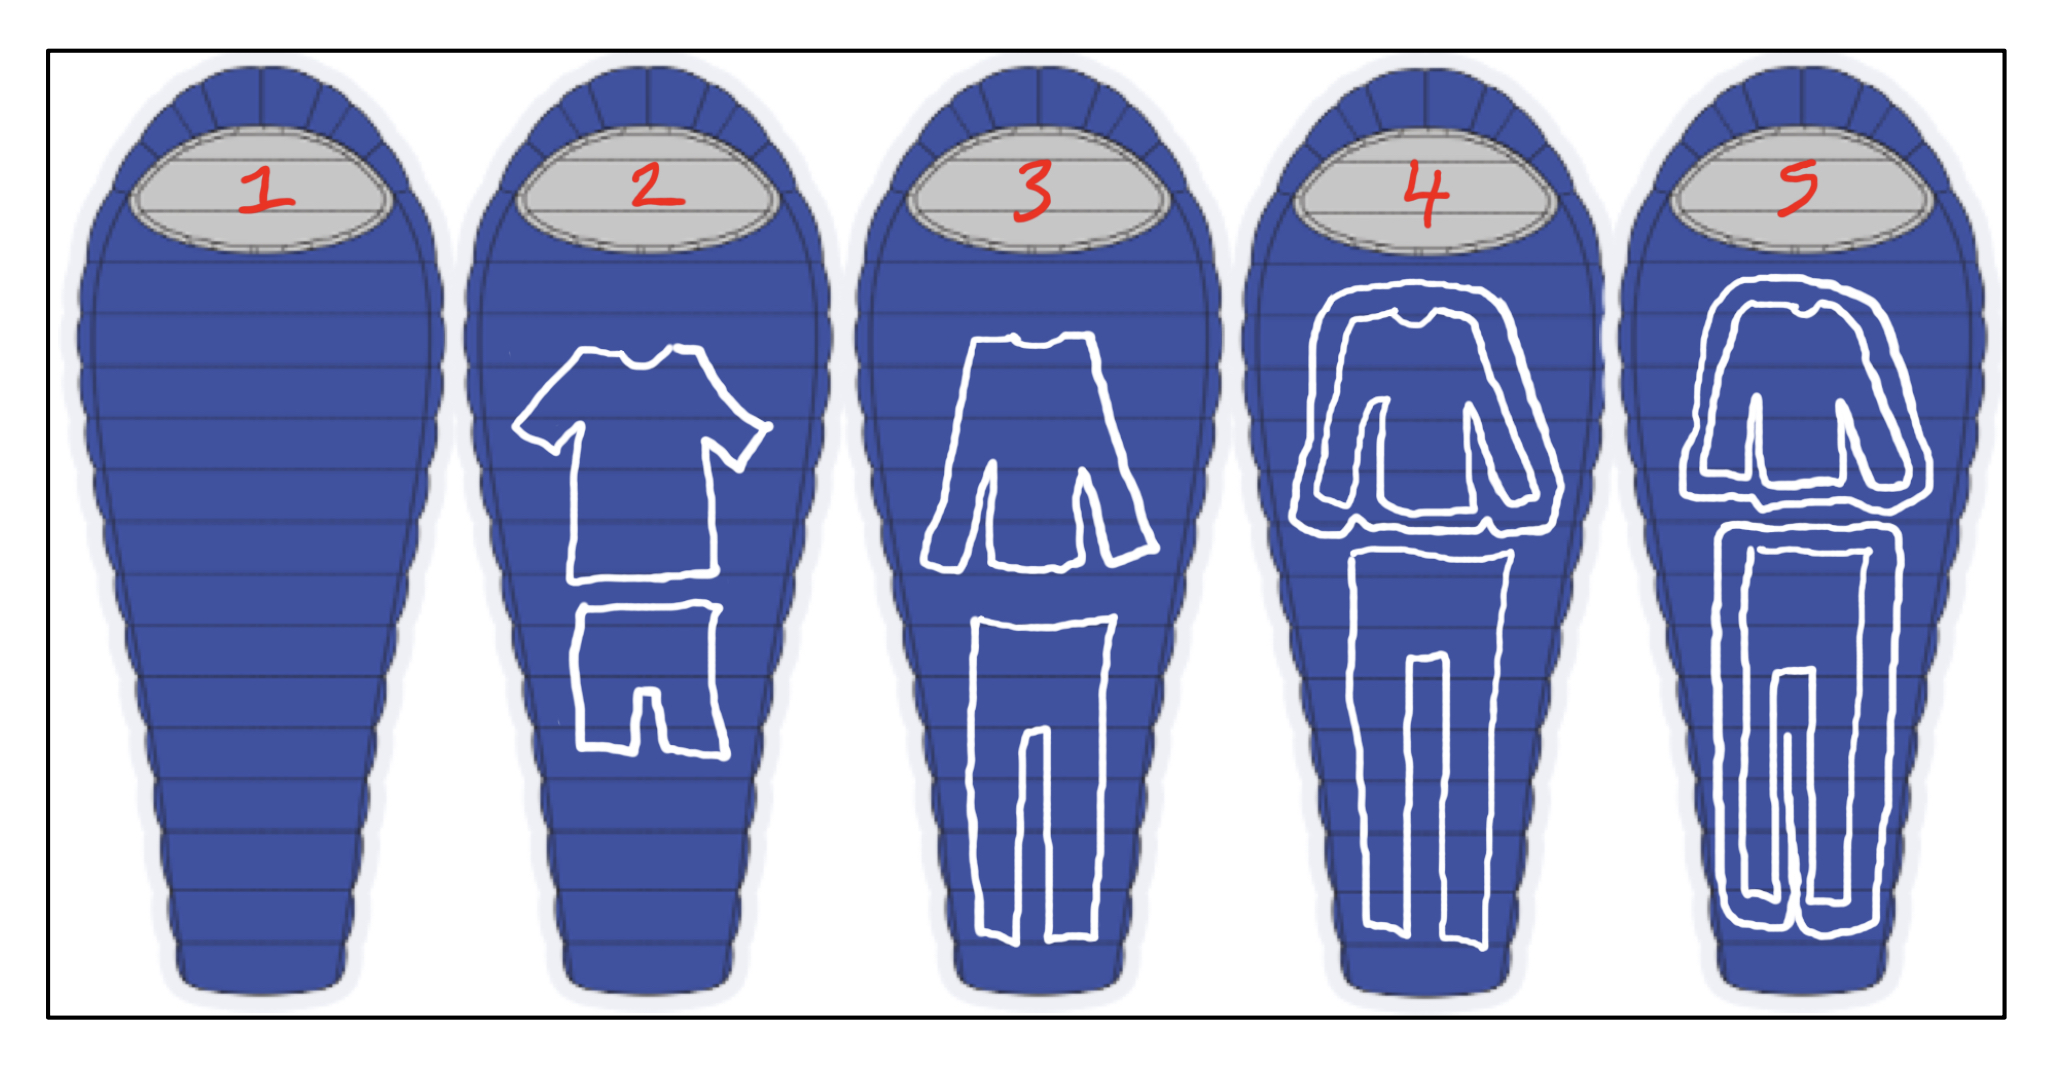
Irrespective of what sleeping bag you choose. Layering for me is a key consideration when choosing a sleeping bag and this is one key factor that helps make a sleeping bag stretch over a multitude of uses and temperatures. (See the image below.)
Sleeping alone.
Sleeping bag, T-Shirt and shorts.
Sleeping bag, L/S top and long leggings.
Sleeping bag, L/S top, long leggings and Jacket (down or primaloft).
Sleeping bag, L/S top, long leggings, Jacket (down or primaloft) and over-trousers (down or primaloft).
Note – By wearing a hat/ Buff/ balaclava or combination of all three, you will retain a great deal of body heat – remember this!
With the above diagram, you suddenly see how one sleeping bag can cover at least 5 temperature ranges and still provide comfort.
From a personal perspective, I prefer a sleeping bag that is probably not quite warm enough as stand alone for my chosen environment. Why?
Should the weather be warm, I know my sleeping bag will be fine on it’s own and if it has a zip, I can regulate even more.
I know that I can get warm by incorporating layers.
How do I know what layers I will need and what about additional weight?
The answer to the above is actually part of the process and in some ways, part of the fun of what works for you. Let’s take two scenarios, Desert and Himalayas:
Desert:
Multi-day desert races such as Marathon des Sables, require runners to carry all they need for the duration of the event. Therefore, weight is critical. However, desert temperatures can vary greatly. Some evenings can be mild and even hot. Other nights you can be blasted by wind and sand and the temperature drops to zero or below. So, the sleeping system needs to potentially cover a range of temperatures, let’s say 10 degrees. If you purchase a sleeping bag that is warm at say zero, it is going to be way too hot at 10 degrees. The sleeping bag will also be heavier and pack larger. By contrast, if you had a sleeping bag that was good for say 5 degrees, not only will it be lighter, pack smaller but importantly it will be more comfortable in warmer temperatures. You then make the bag warmer, should you need by adding layers… hat, T, shorts, longer leggings and then finally jacket. A question is often raised about the need for a jacket? I personally think it is essential – they are perfect in the morning and evening when sitting around and importantly, they are that extra important layer if you get a cold night. From my drawing sample, you would be looking at 1 to 4.
“Smart lightweight campers have been using their clothes to boost the warmth of their sleeping bags for years and climbers do it when they have to. Yet most of us are still carrying bags much bulkier and heavier than we need.” – Peter Hutchinson Designs
Himalayas:
The principal of the desert applies to the Himalayas. But obviously, one would not use the same sleeping bag. The initial starting point will be a warmer bag that is obviously heavier and larger. Also, down would almost certainly be the choice. The layering would go from 1 to 5. The reason being that daily temperatures in the Himalayas can be say, 10/15 or even 20 degrees. In the evening, depending where you are and how high you are, the temperatures can be -20. That is a huge difference and therefore you need a system that works over a huge range – this can only come from layering! Read about my Three High Passes Trek HERE
NOTE: Both of the above systems benefit greatly from a good sleeping matt that provides a layer between you and the ground. This is an essential item in my opinion. Not only does it add a barrier, it importantly adds comfort. If you are comfortable, you will sleep better. A good nights sleep means you are fresh and recovered for the next day’s challenges.
Professional explorer, Eric Larsen commented to Outside online:
“Larsen firmly believes in layering heavily in the cold, an opinion developed after years spent sleeping in subfreezing temps. “There is no such thing as a cold night’s sleep, only not enough layers,” he says. “I layer when I’m inside the bag just as much as I do while outside the bag. When you’re climbing Everest, you’re not naked under your down suit. The more heat you can preserve in a warm layer next to your body, the better.”
Choosing a sleeping bag is something very personal and we are all individual. A 6ft 2” guy weighing 85kg is going to need something very different than a 5ft 6” woman weighing 55kg, so, keep that in mind!
You know you! It’s ok to ask for advice and recommendations, but you need to keep the points above high in your mind.
There is a general rule with sleeping bags and down jackets, the more you spend, the better they are. But there are many options out there.
Understand that when purchasing a sleeping bag that often it is possible to choose a size, just like when purchasing clothing.
A UK based company PHD (Peter Hutchinson Designs) takes things one step further and can custom make a sleeping bag to your exact specifications and needs. “…a footzip, which adds 10g and allows some air circulation around the feet. Zips are an option on the Minim bags, but most competitors don’t ask for one. A short zip with draft tube adds about 55gm (2oz): a full zip and tube adds about 120gm (4oz). Zips also add to the packed size.” One of the advantages of PHD is you can get exactly what you need.
A few years ago I compared PHD, OMM and YETI at the Marathon des Sables HERE
In a recent article, I compared Rab, Sea to Summit and PHD HERE
CONCLUSIONS
Sleeping bags are an essential piece of equipment. Choosing the correct one can make or break an adventure. In simple terms, a good nights sleep allows you to rest and recover for the next day’s demands.
Nobody likes being too cold, especially at night, so keep this in mind and embrace the layering system.
Understand that we are all individual, what works for one, does not work for all.
Research the race and environment you are racing and check the highest and lowest temperatures. Start looking at sleeping bags with the appropriate *comfort rating and narrow down a search from here.
Remember, not two places are the same! For example, there is a huge difference in the desert/ weather say for Morocco, Atacama and the Grand to Grand in the USA.
Also understand the specifics of your adventure and what bag best suits your needs. To clarify on this, if you are going to the desert and the Himalayas, you will need two sleeping bags as the demands are very different. However, if you are going to the desert and then going back-packing in France in summer, the same sleeping bag will almost certainly work.
A sleeping mat is a no brainer when it comes to sleeping. It adds comfort and a barrier between you and the ground. For example, in the Himalayas when the ground is frozen and hard, why would you not put a barrier between you and basically a hard block of ice.
Please support this website. I believe everyone deserves to read quality, independent and factual articles – that’s why this website is open to all. Free press has never been so vital. I hope I can keep providing independent articles with your help. Any contribution, however big or small, is so valuable to help finance regular content. Please support me on Patreon HERE.
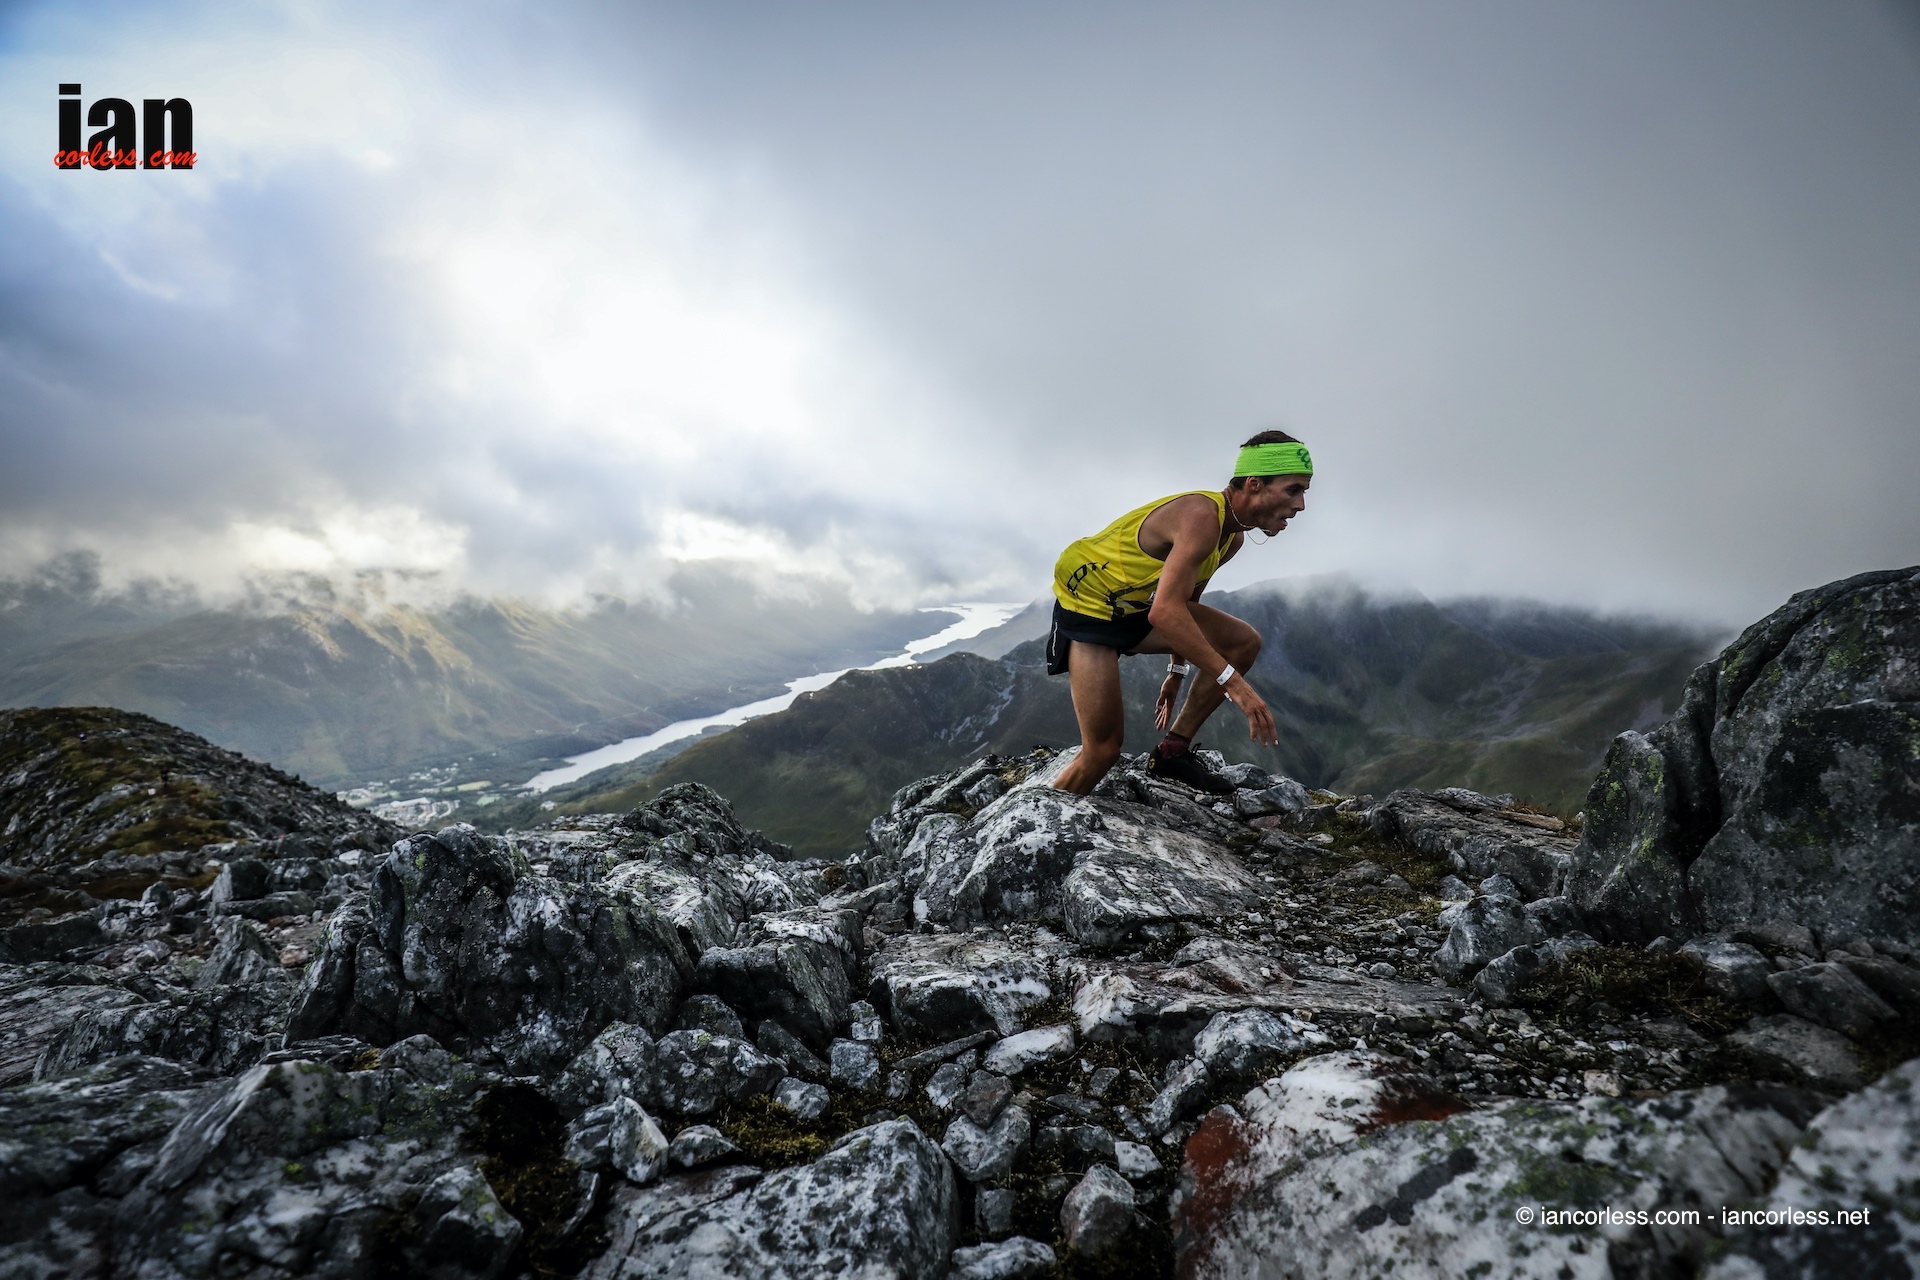
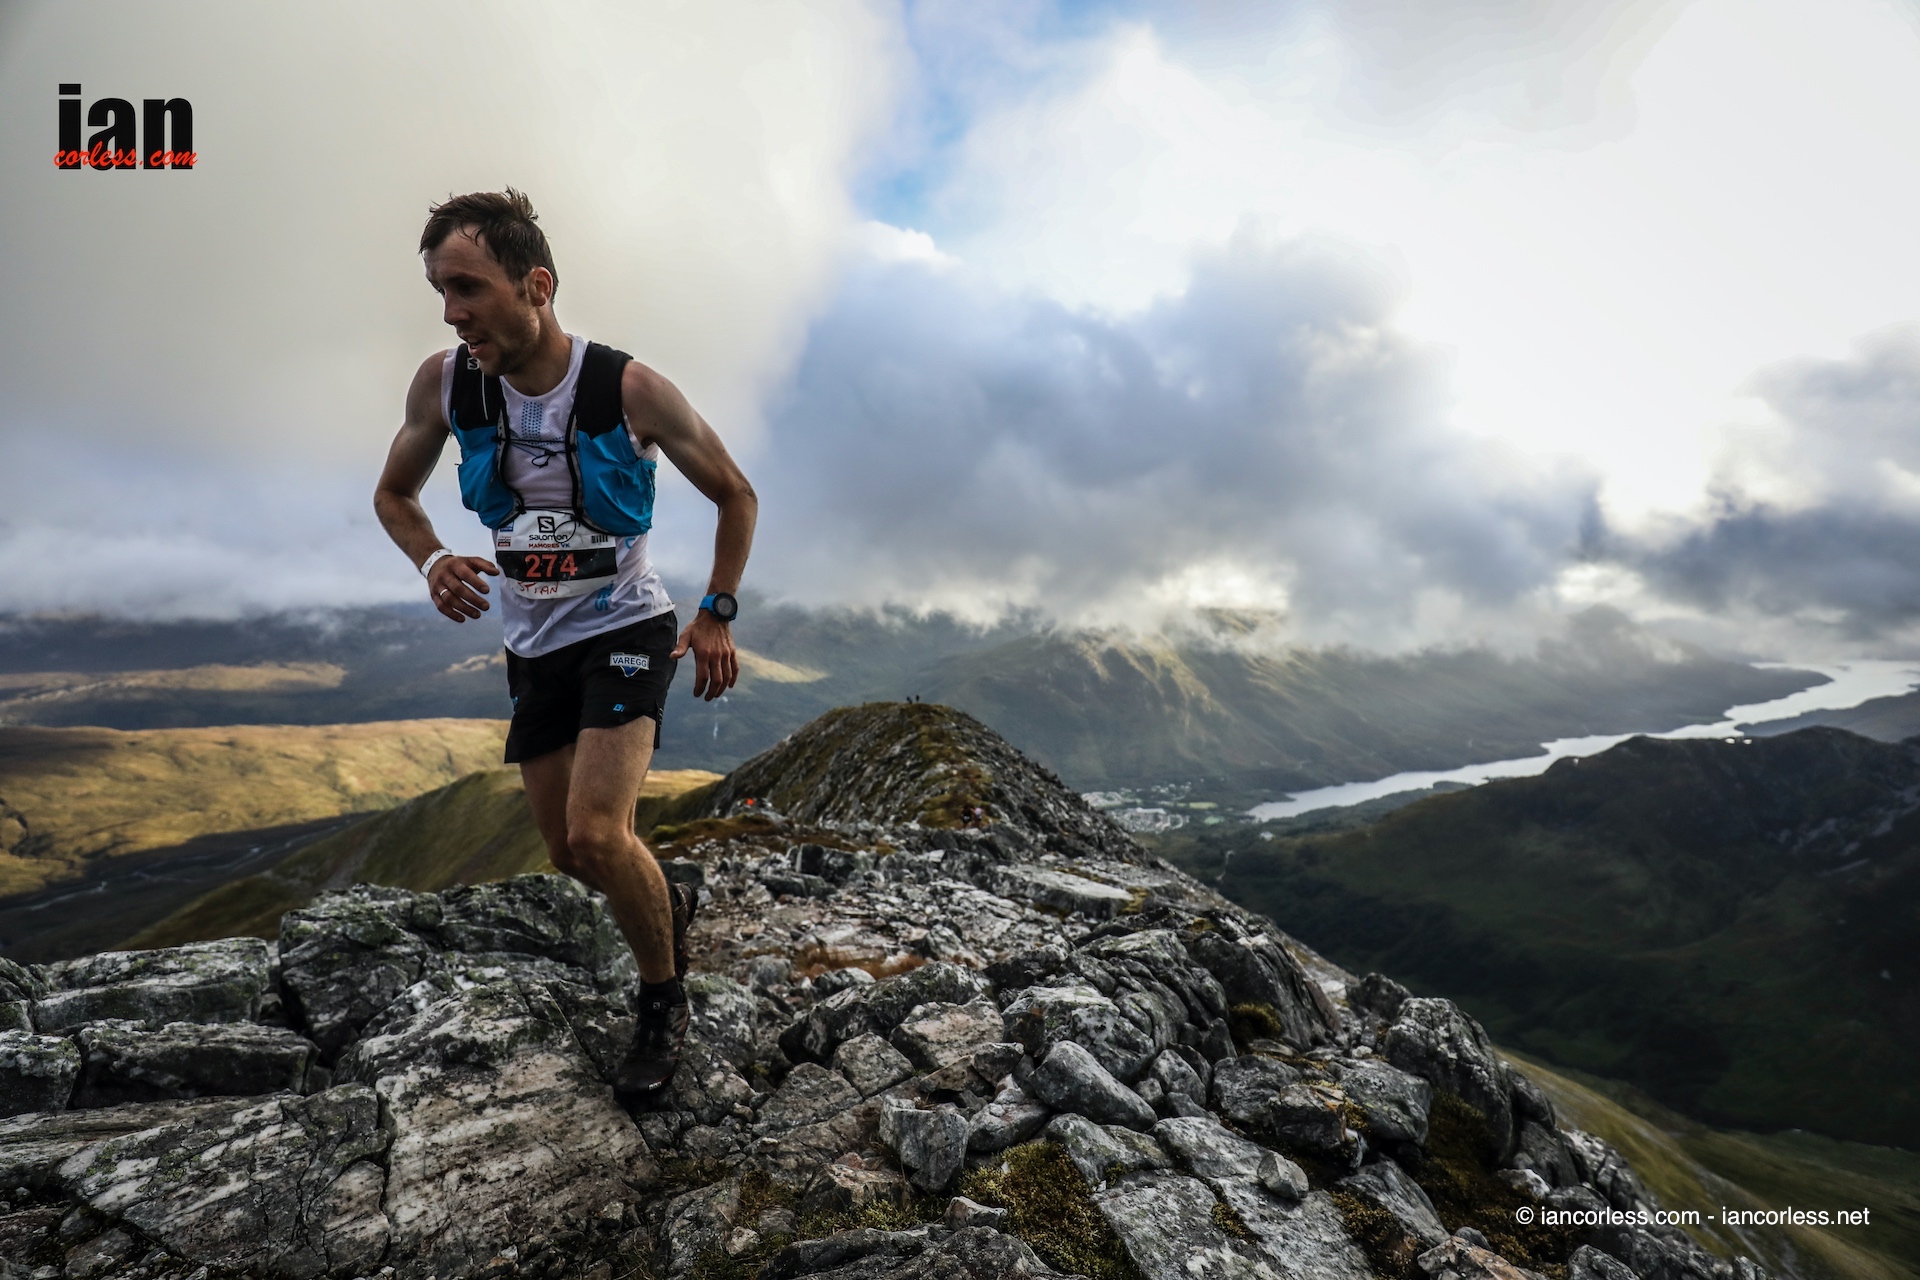
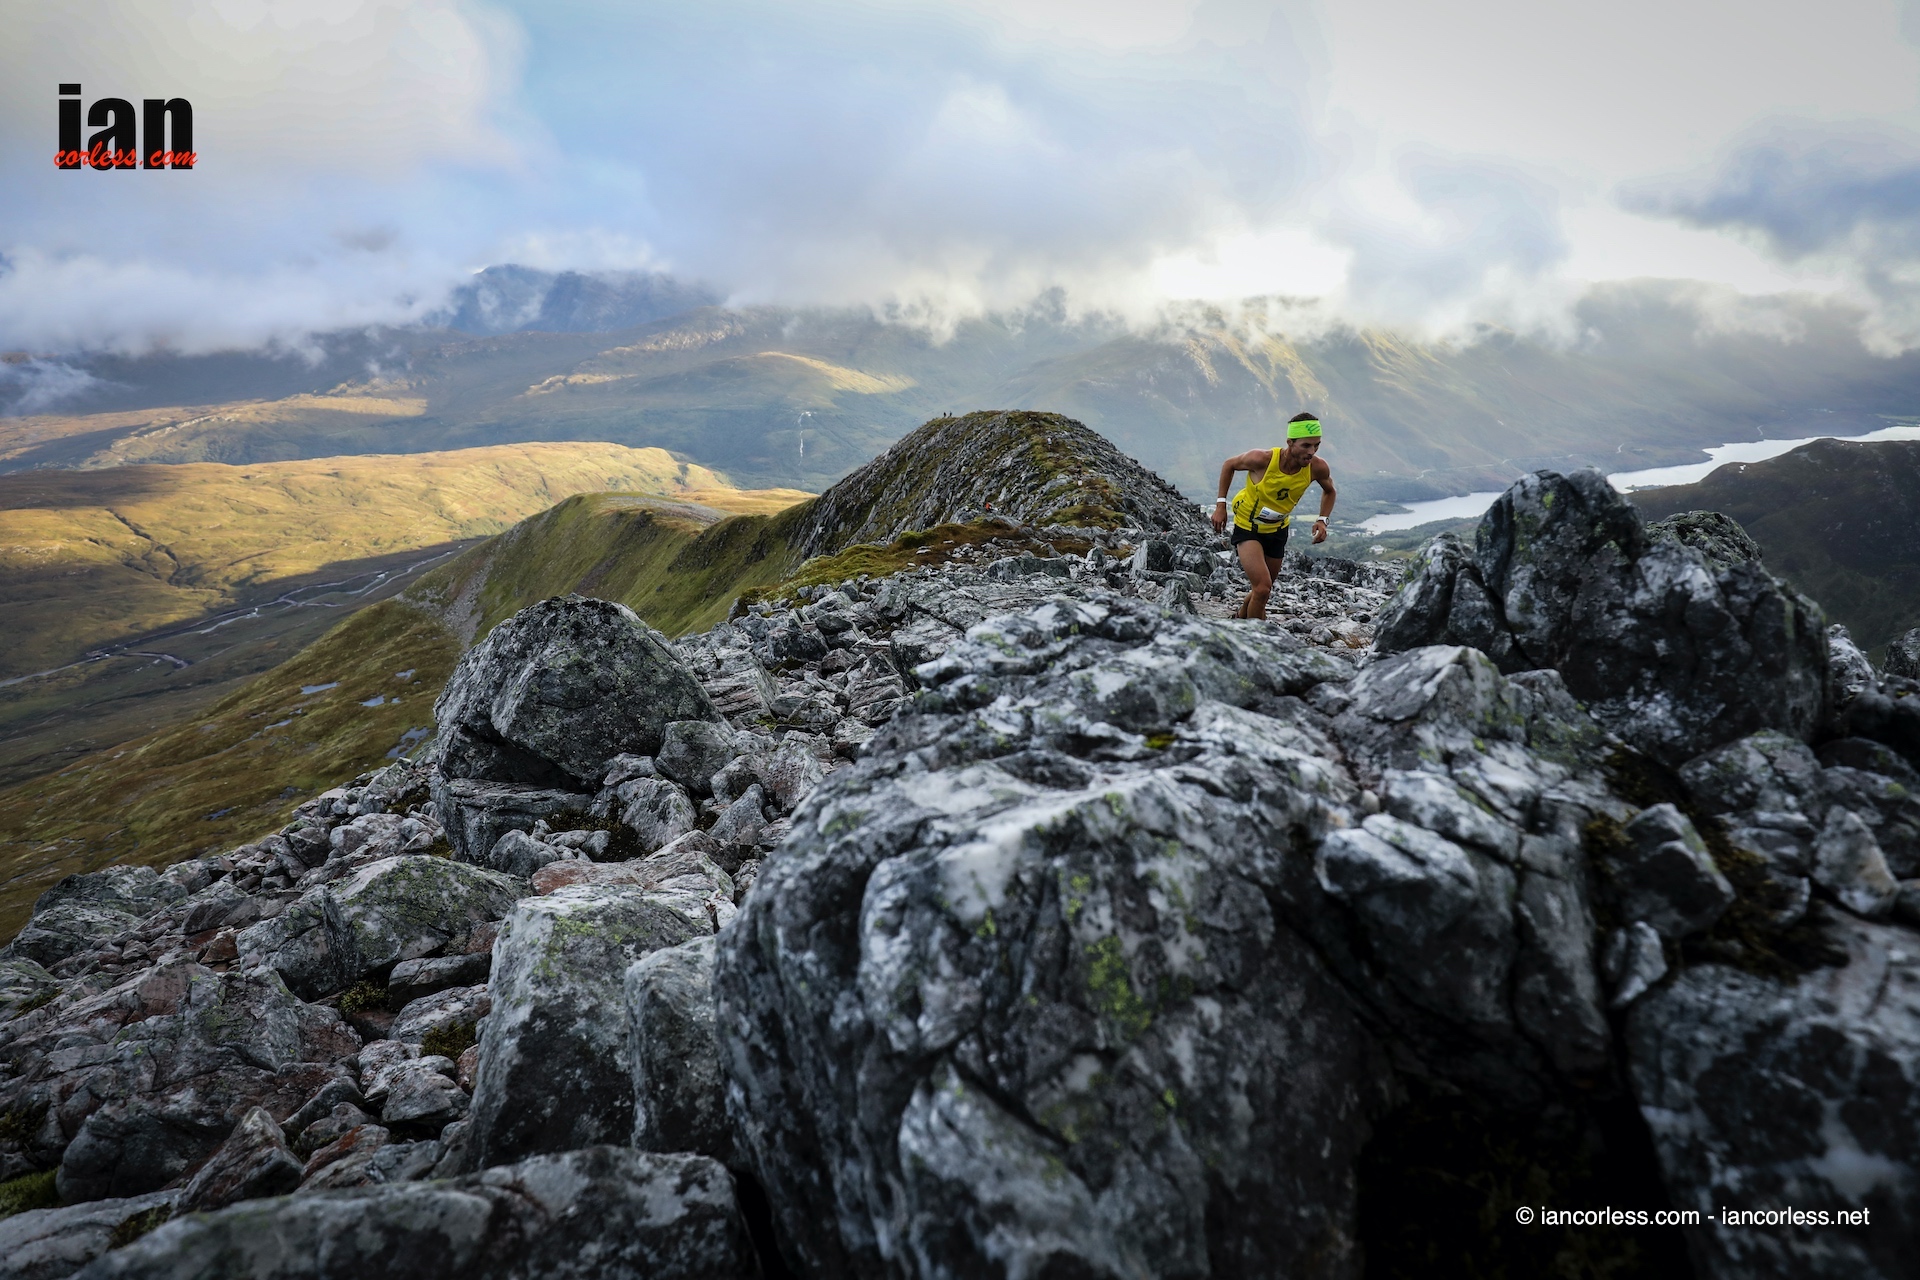
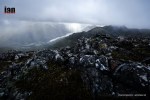
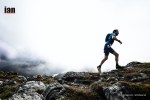
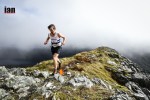
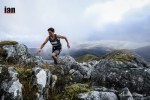
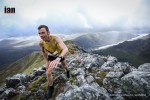
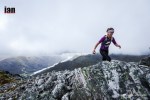
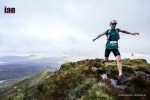
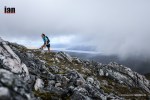
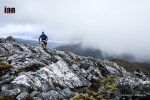
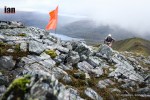
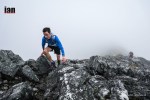
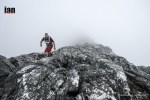
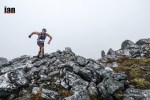
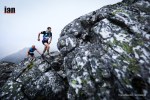
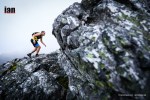
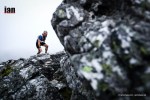
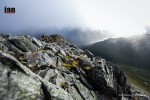
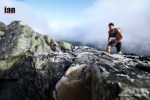
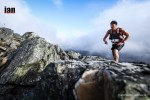
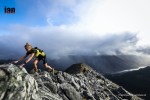
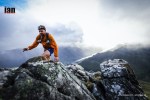
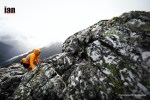
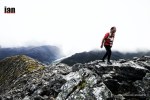
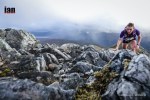
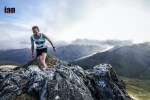
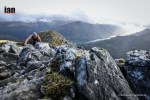
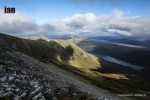
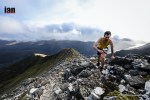
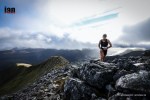
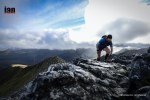
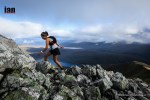
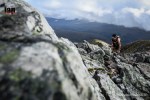
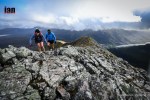
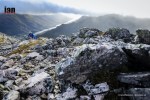
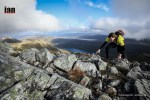
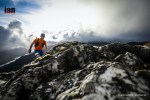
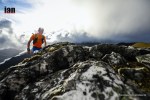
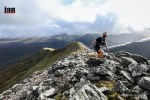
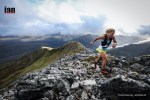
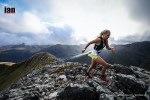
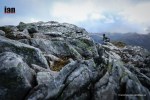
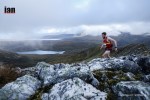
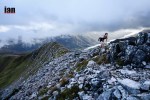
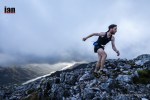
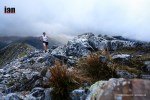
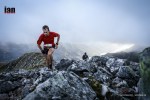
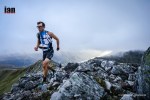
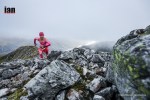
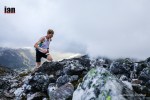
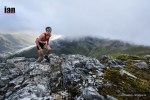
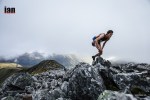
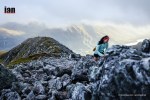
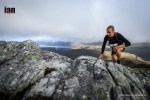
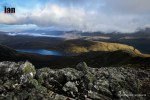
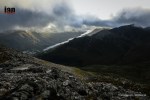
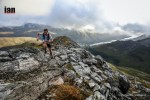
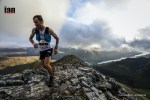
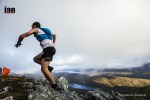
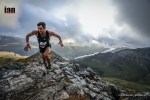
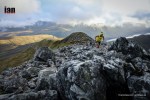
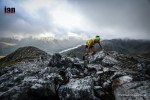
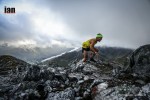
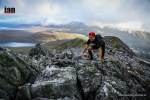
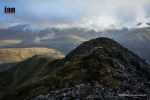
The Salomon Mamores VK™ kicked off the Skyline Scotland weekend of racing with the UK’s first ever VK (Vertical Kilometre) race and what an incredible success… The pure ethos of sea to summit was personified with the Mamores VK that provided all runners with a challenging 1000m vertical climb over a distance of 5km in a course that was split into thirds. Skyrunning at its best!
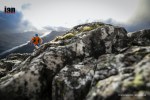
The first third was runnable trail that may well have lulled everyone into a false sense of security. What followed was a wall of vertical fell with no path, just a line of orange flags leading to the sky.
As the fell submitted out, an arrow pointed left and the final section was a stunning rocky ridge that lead to the summit at 1000m+.
The Scottish weather played its part too, throwing everything at the runners in a 4-hour time window; Sun, cloud, clag, rain and strong winds. It was the luck of the draw what you received, however, for 4-runnners, the weather could have thrown anything at them and they would have still flew up the course. Experienced Skyrunners, Stian Angermund (VK world champion), Alexis Sevennec and Francois Gonon took the top 3 spots with Sevennec pipping Angermund by just 7-seconds, 42:17 to 42:25. Francois Gonon placed 3rd 44:48 and Adrien Perret was 4th in 44:57.
In the ladies race, Georgina Tindley pipping Stephanie Provan to the top slot by 33-seconds, 54:34 and 55:01 respectively. Zoe Procter was 3rd in 58:45.
Following the well established International Skyrunning Federation ‘VK’ format, participants followed a marked course gaining 1000m of height in less than 5km. Participants were set off at timed intervals with the winner having the fastest overall time to the summit. The Salomon Mamores VK was the UK’s first VK and feedback has been incredible. This format is just what the UK needs to spice up racing for all abilities!
Whilst physically arduous, the Salomon Mamores VK™ route does not include technical terrain that requires any scrambling or rock climbing experience. As such, the race was suitable for any runner who is up for the challenge.