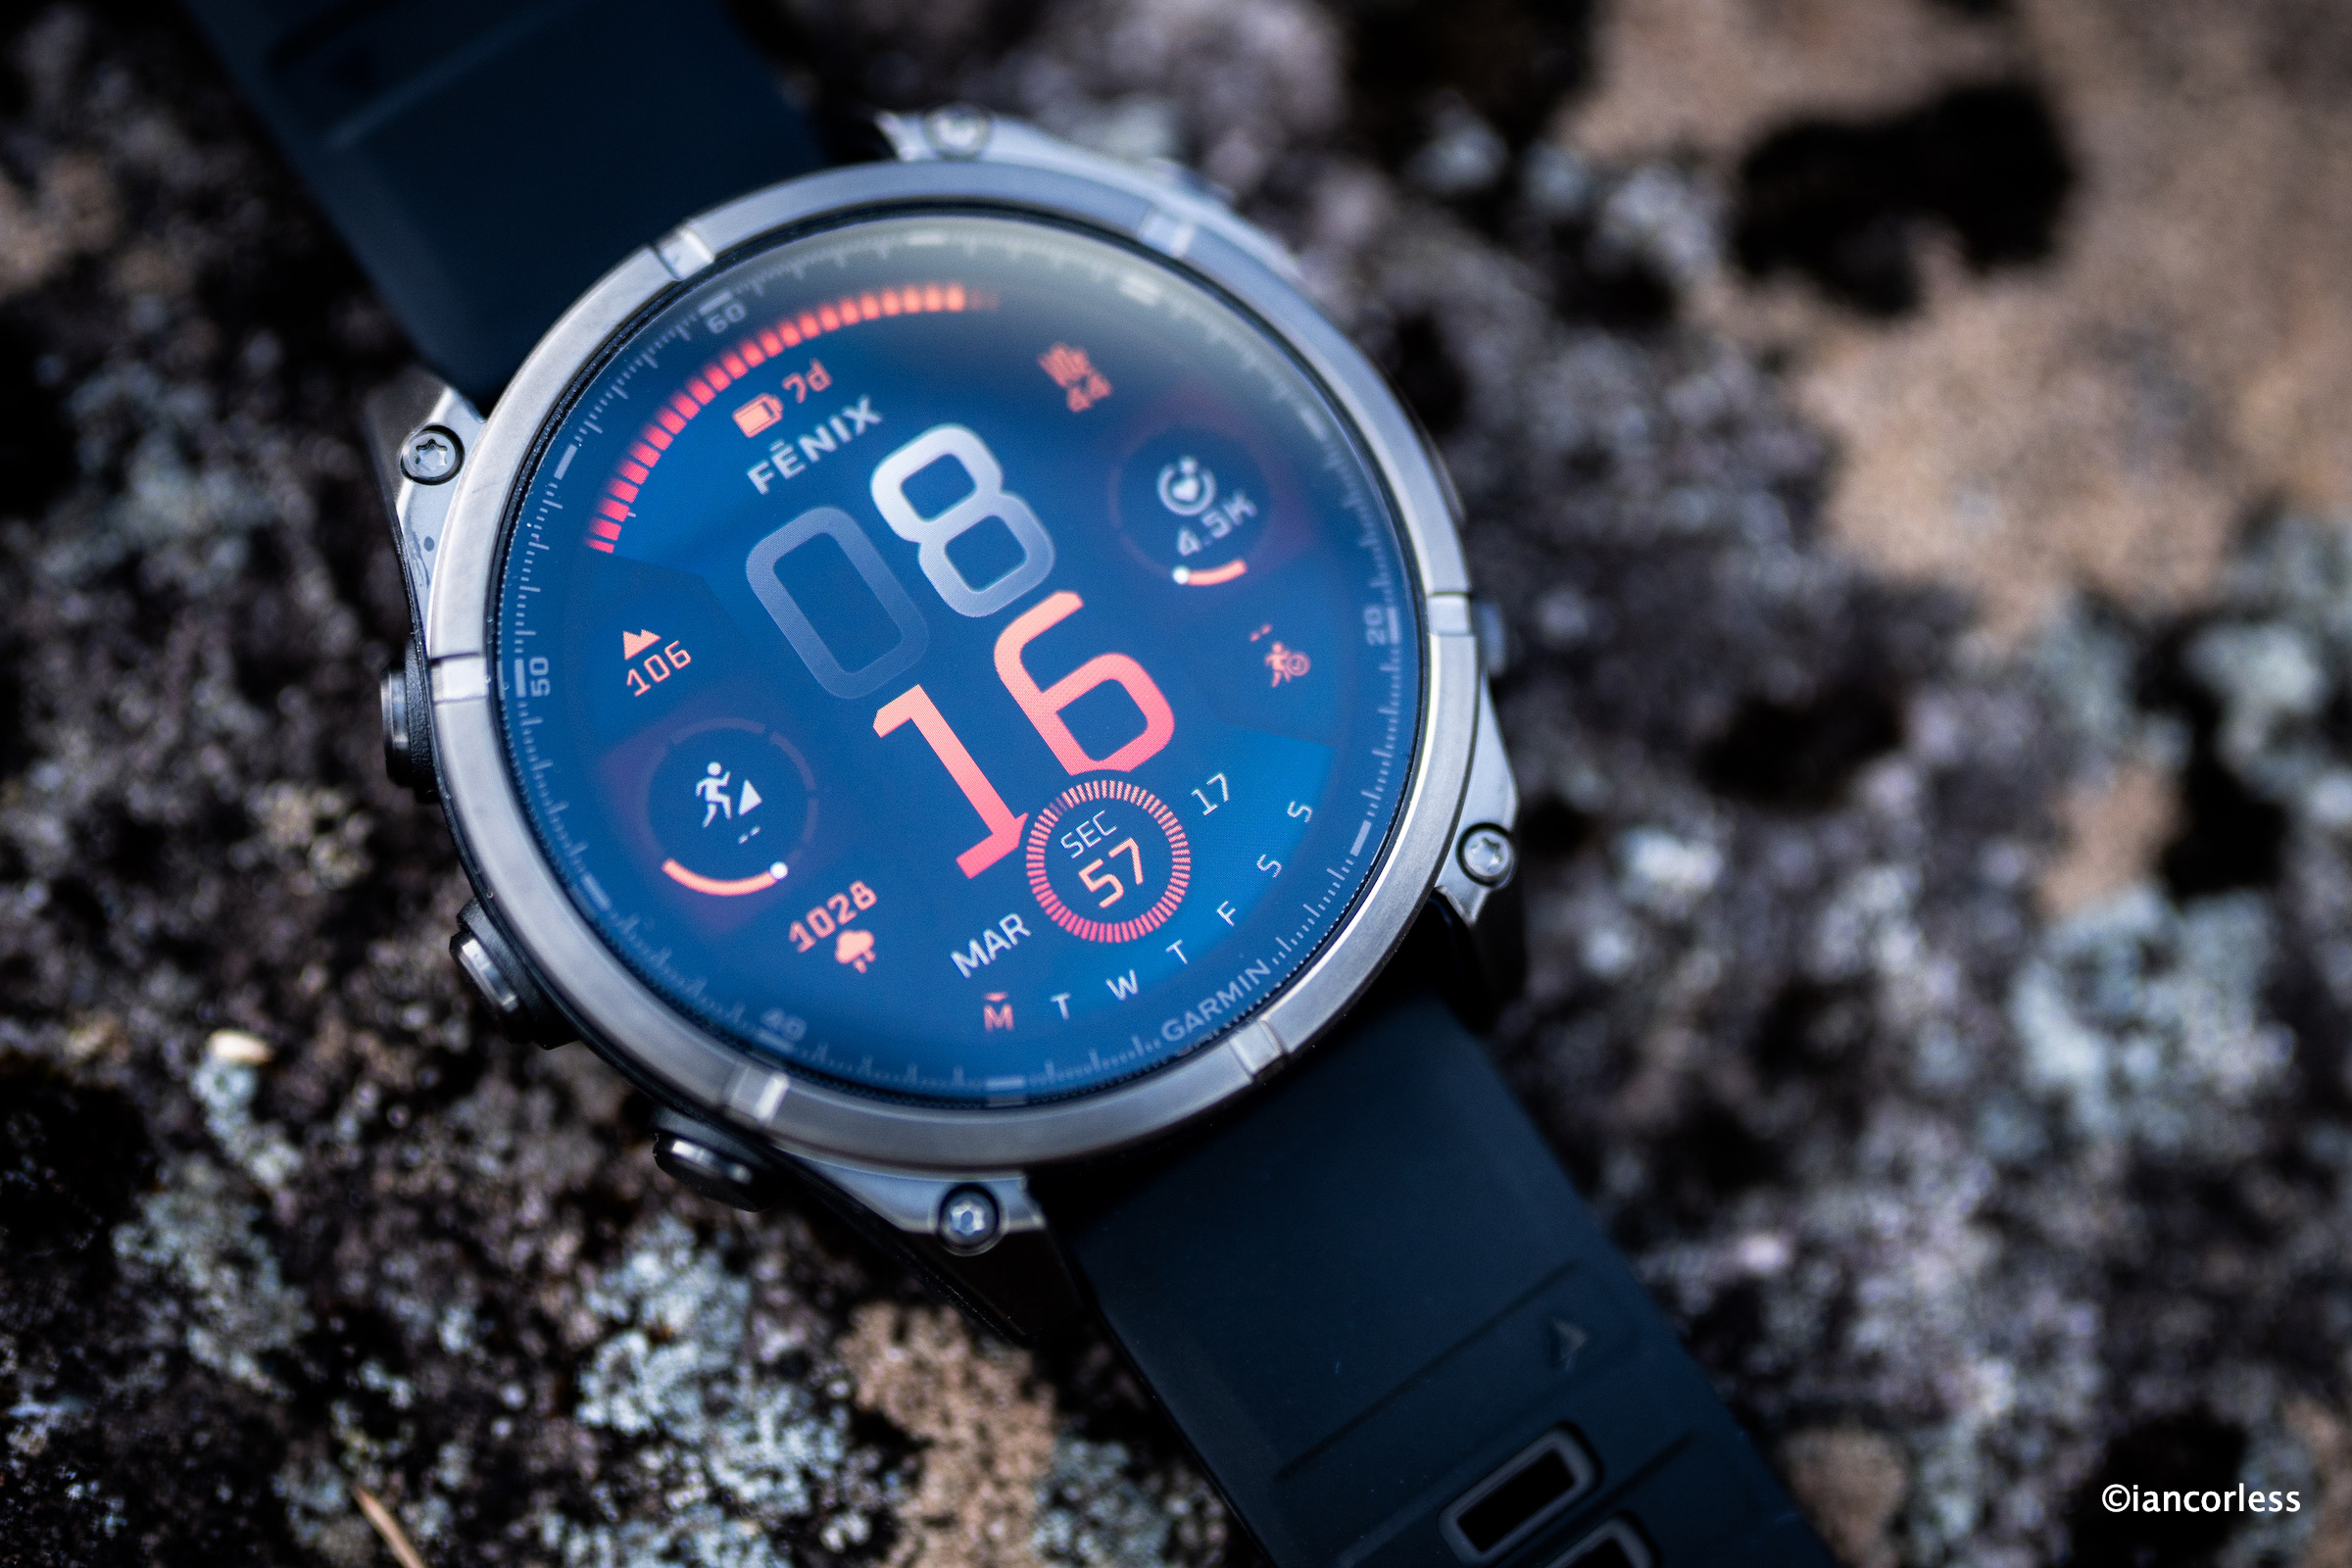
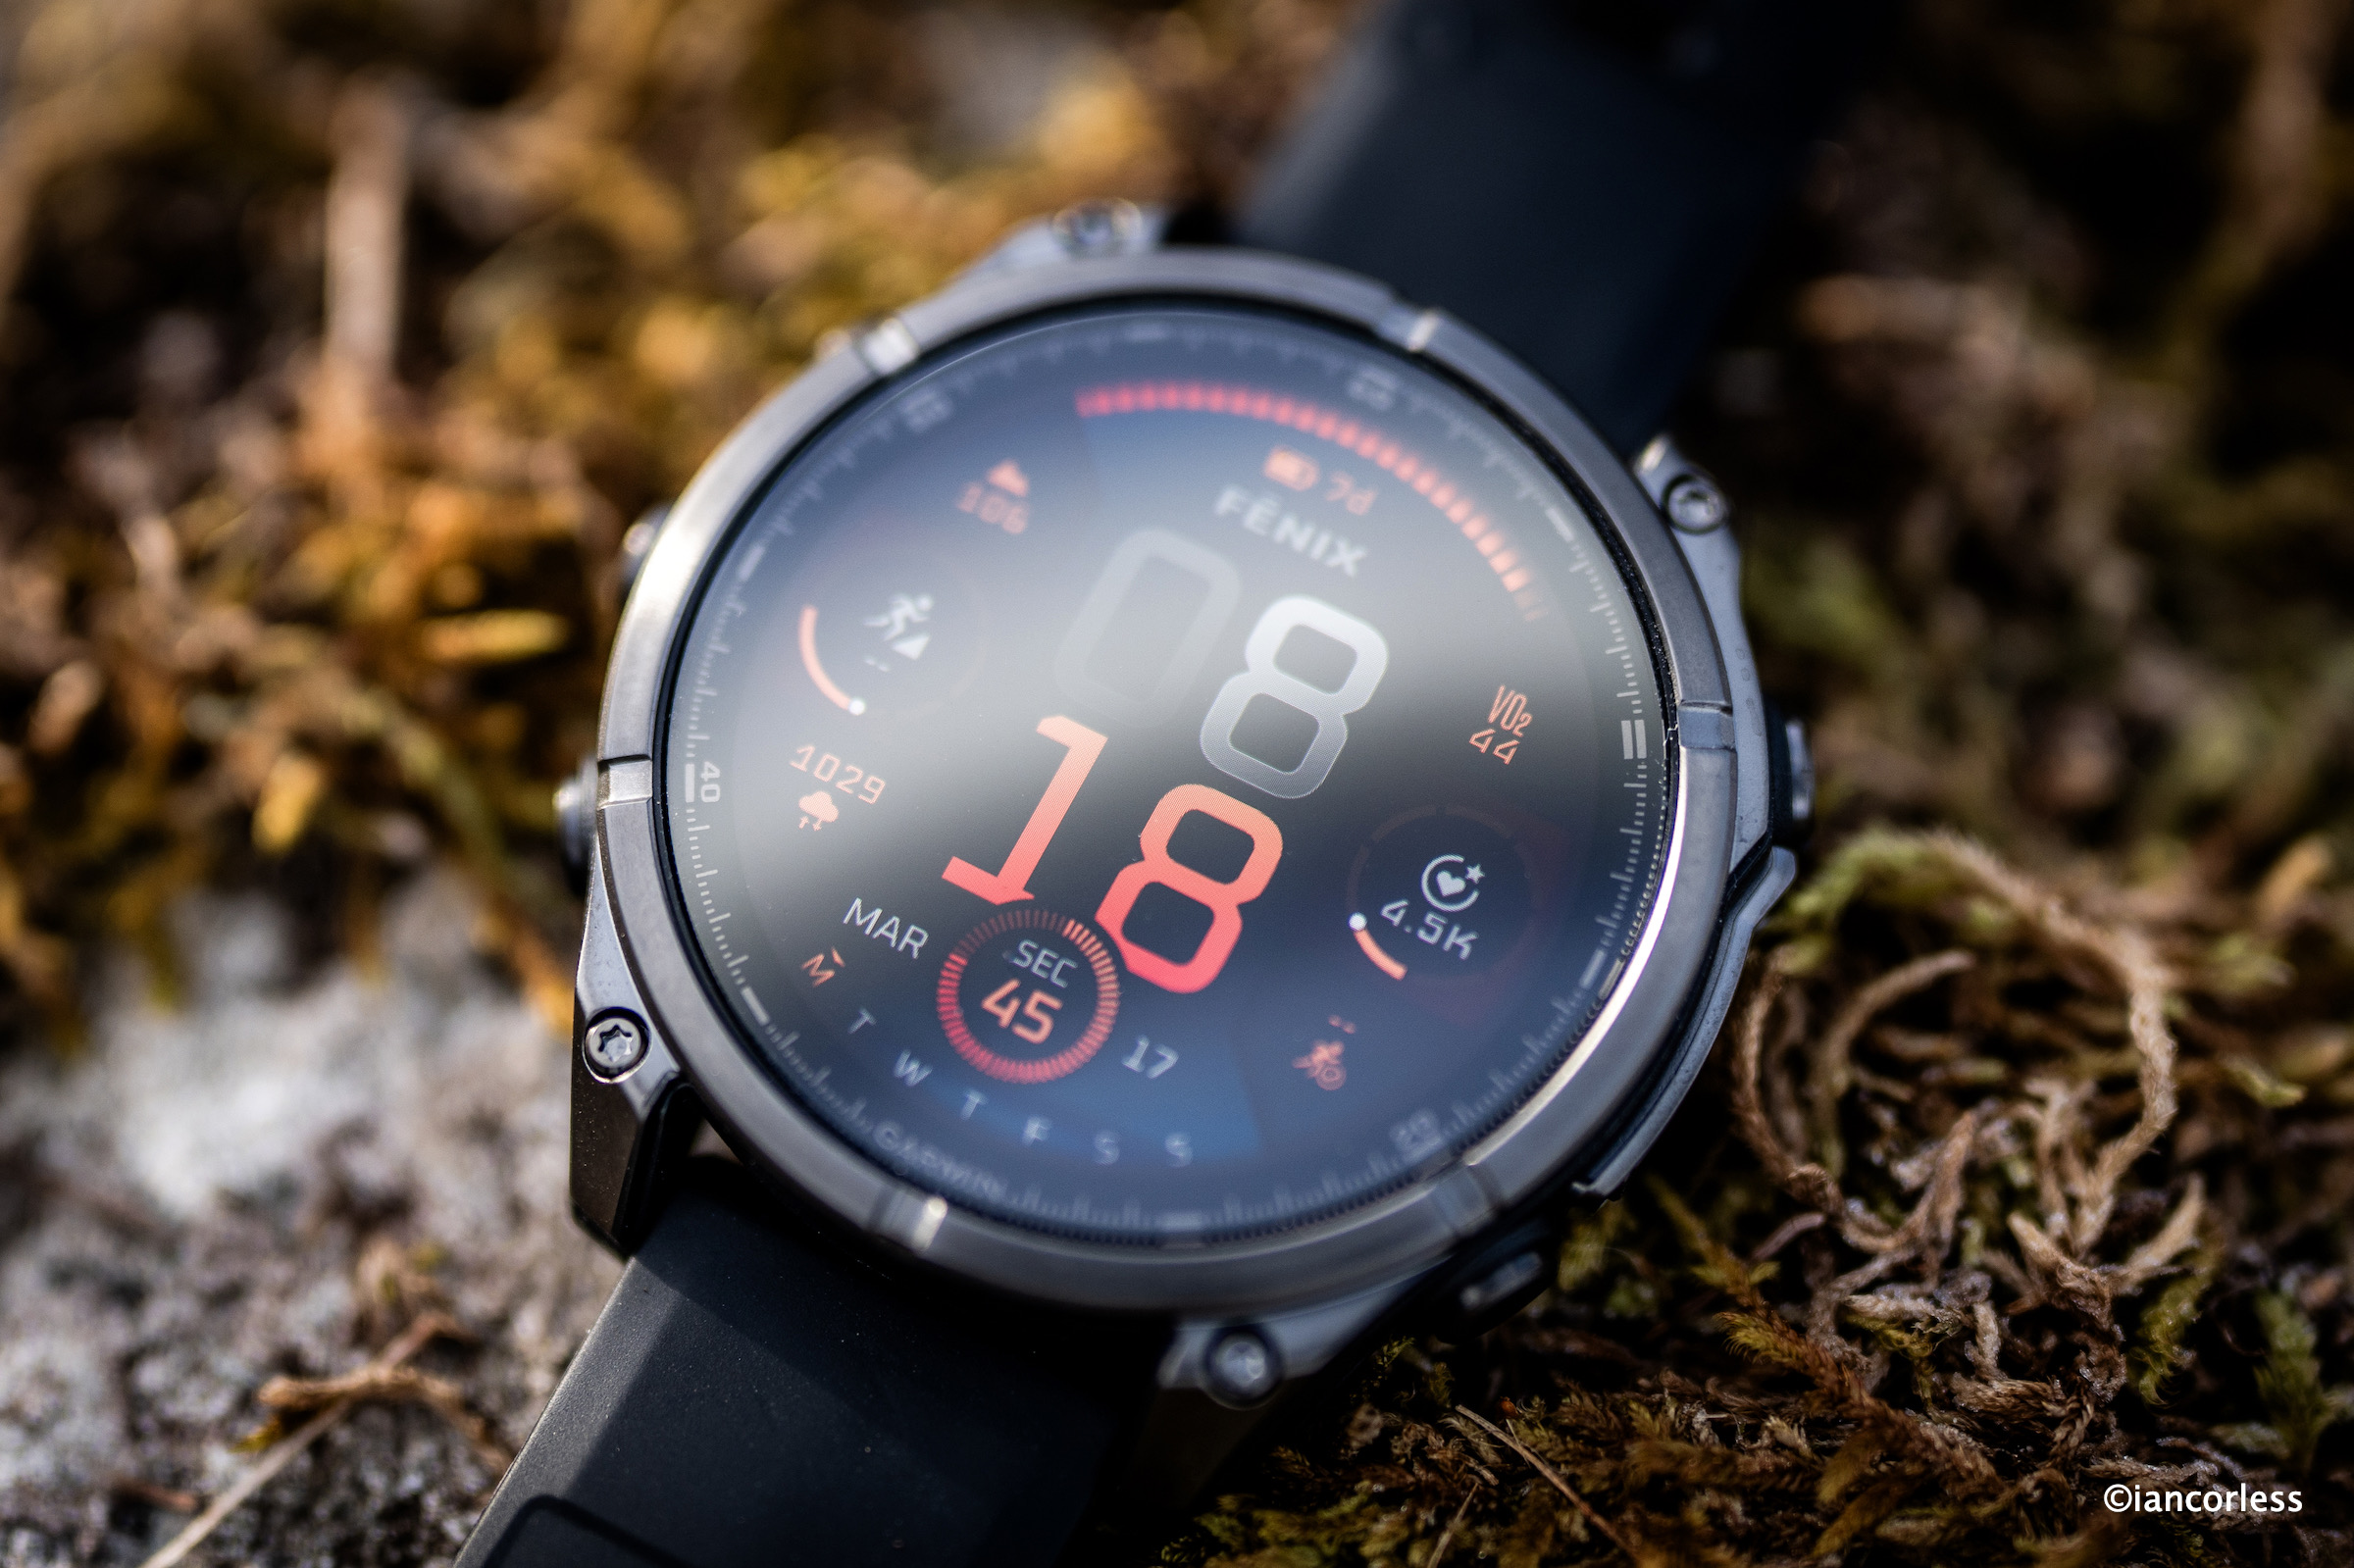
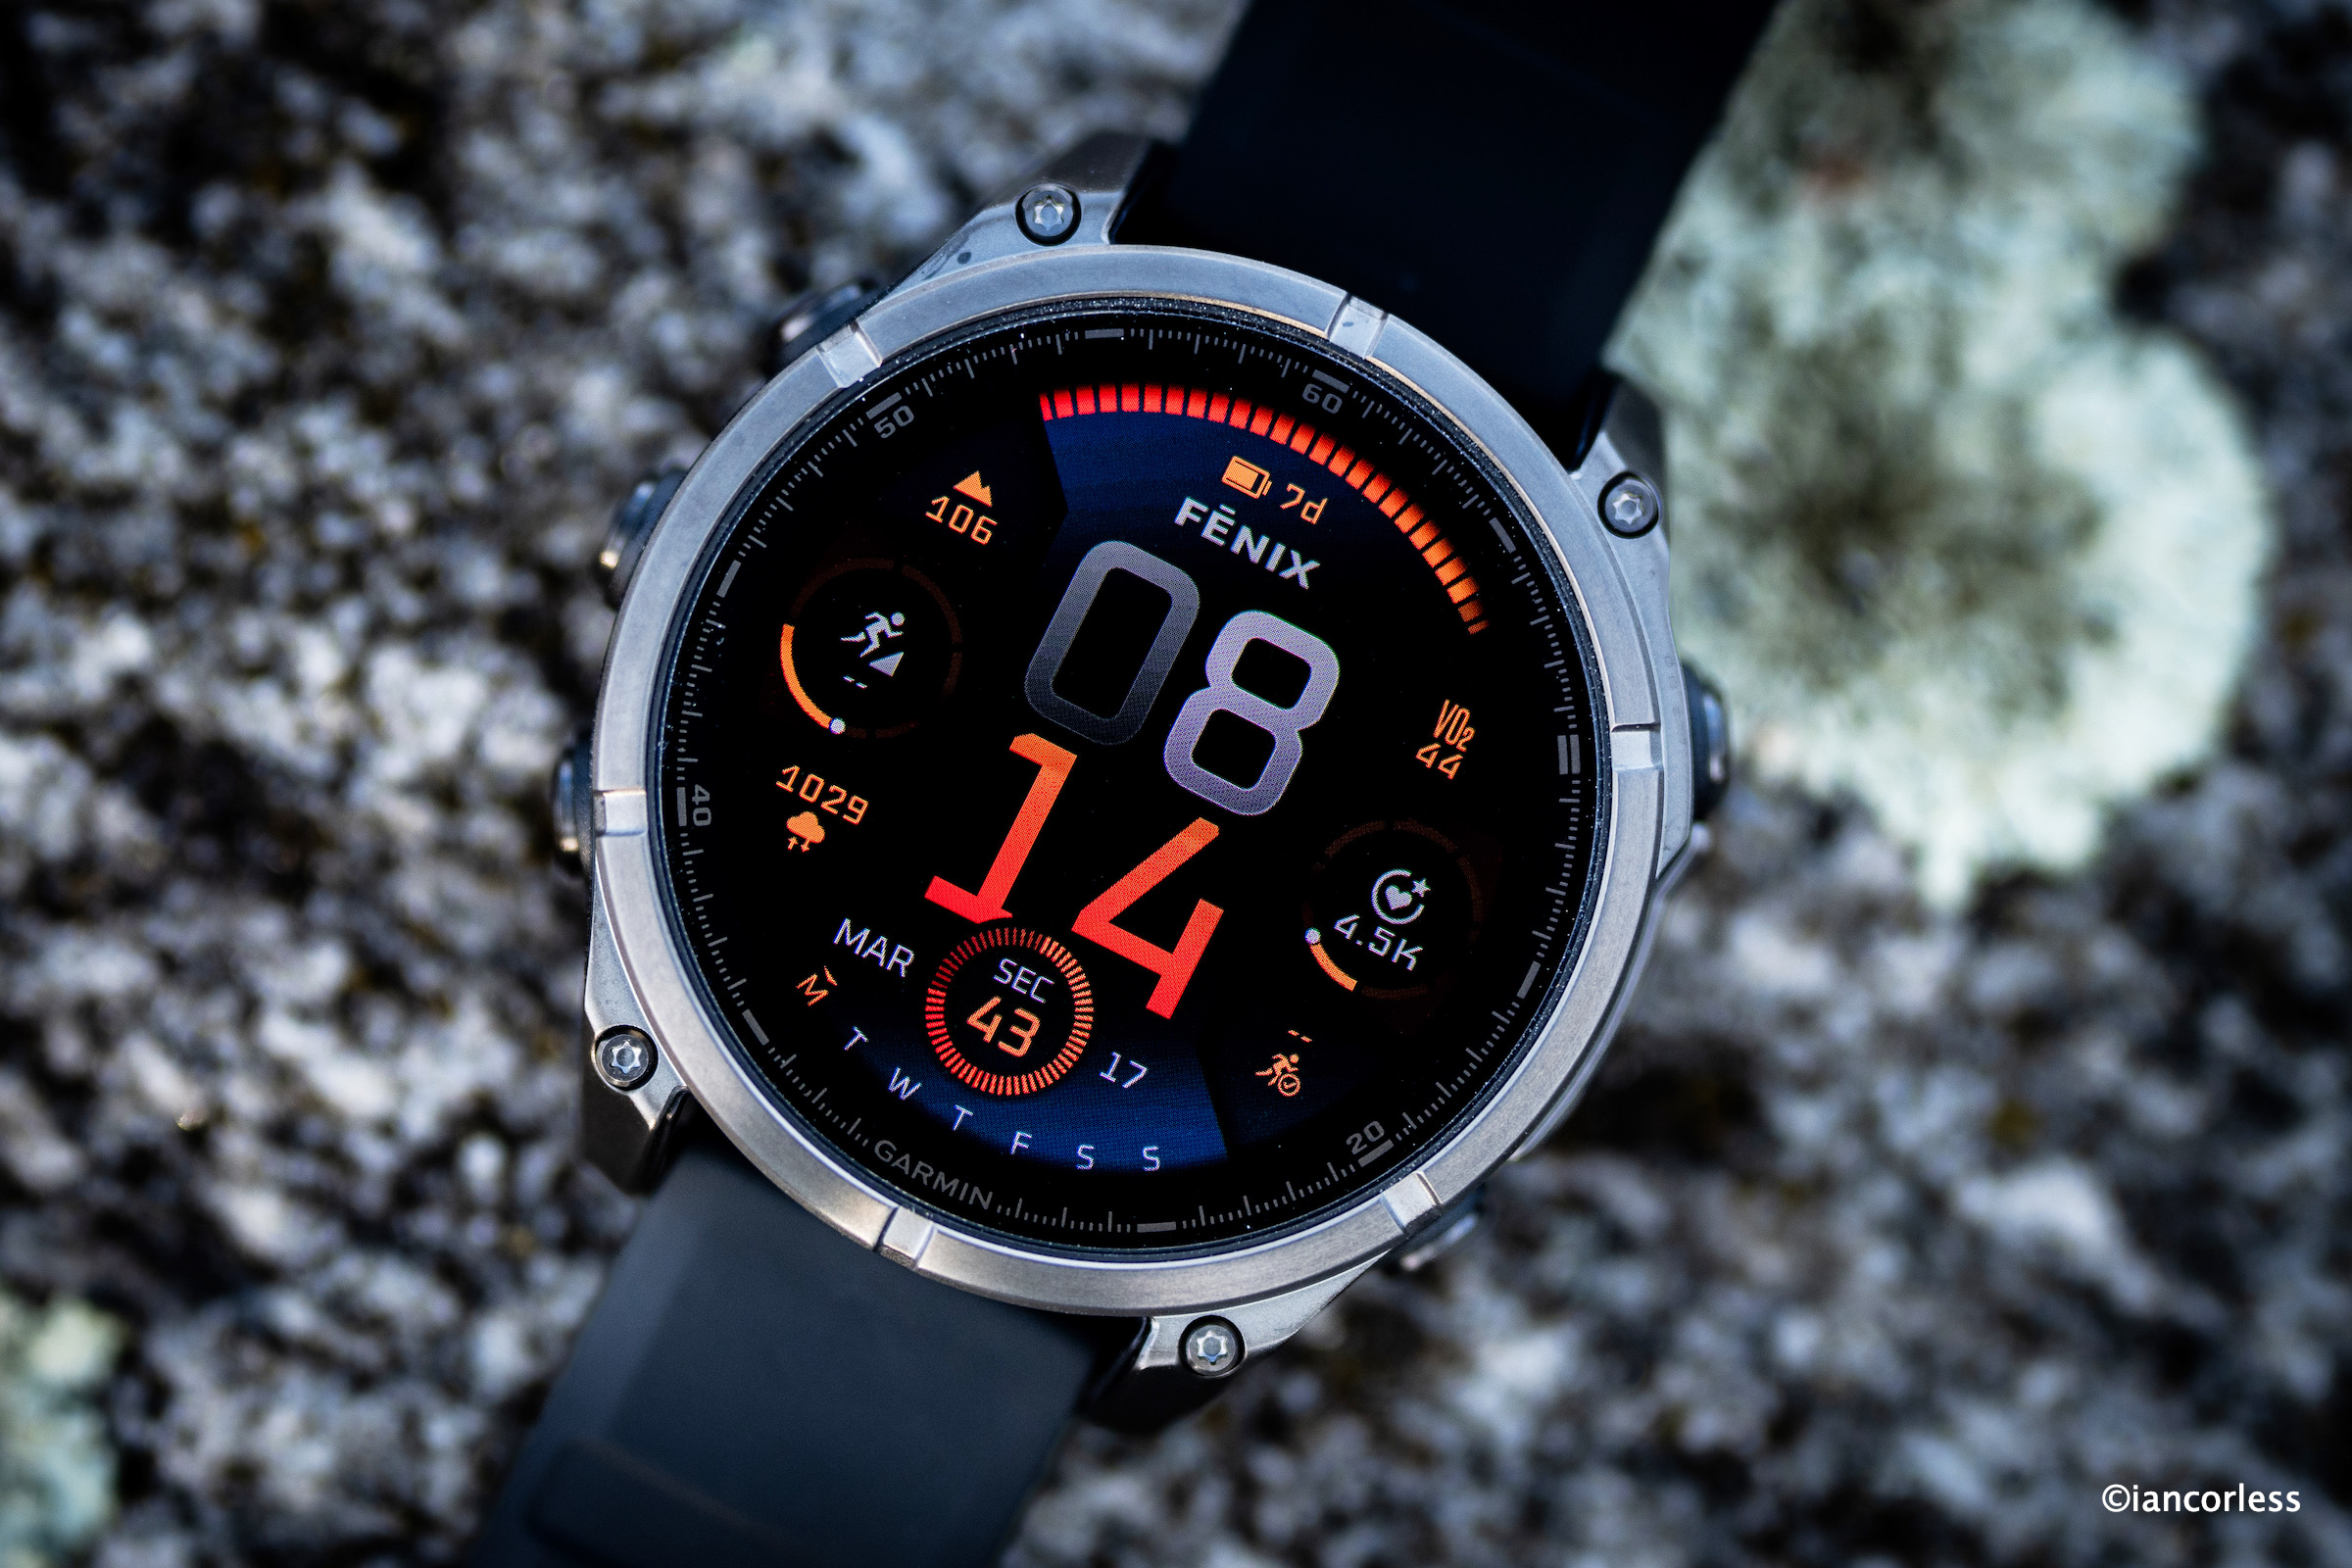
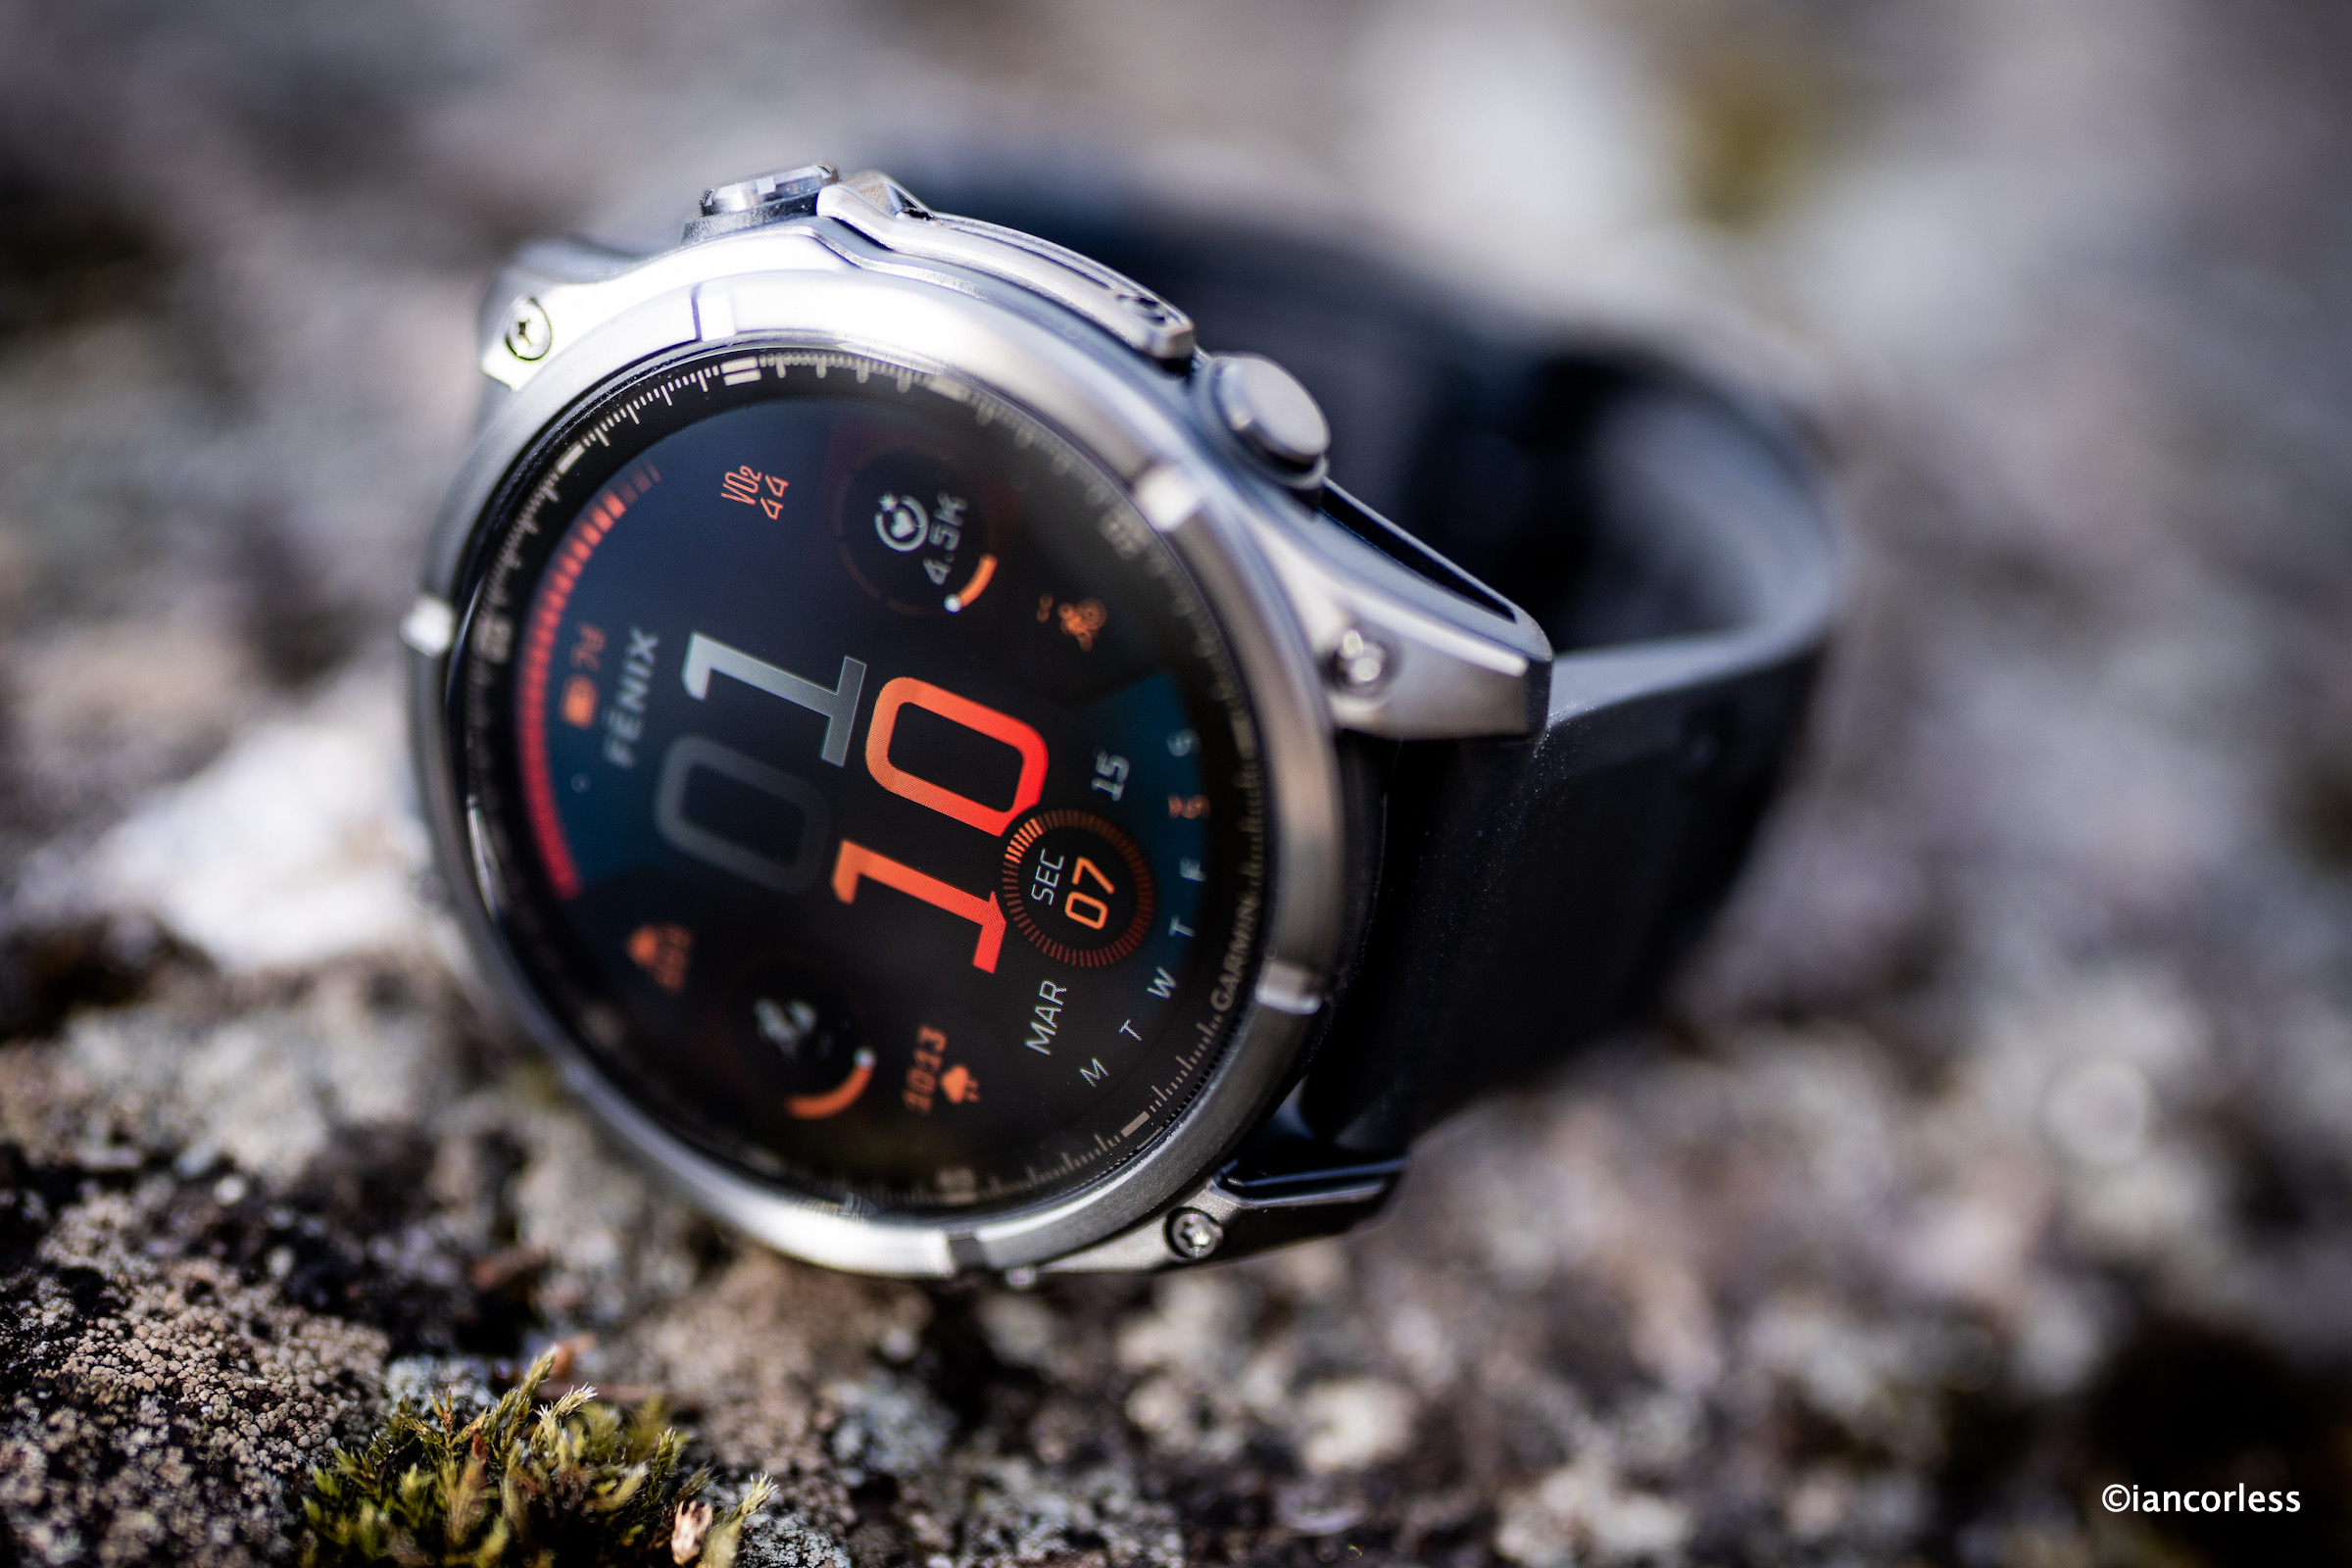
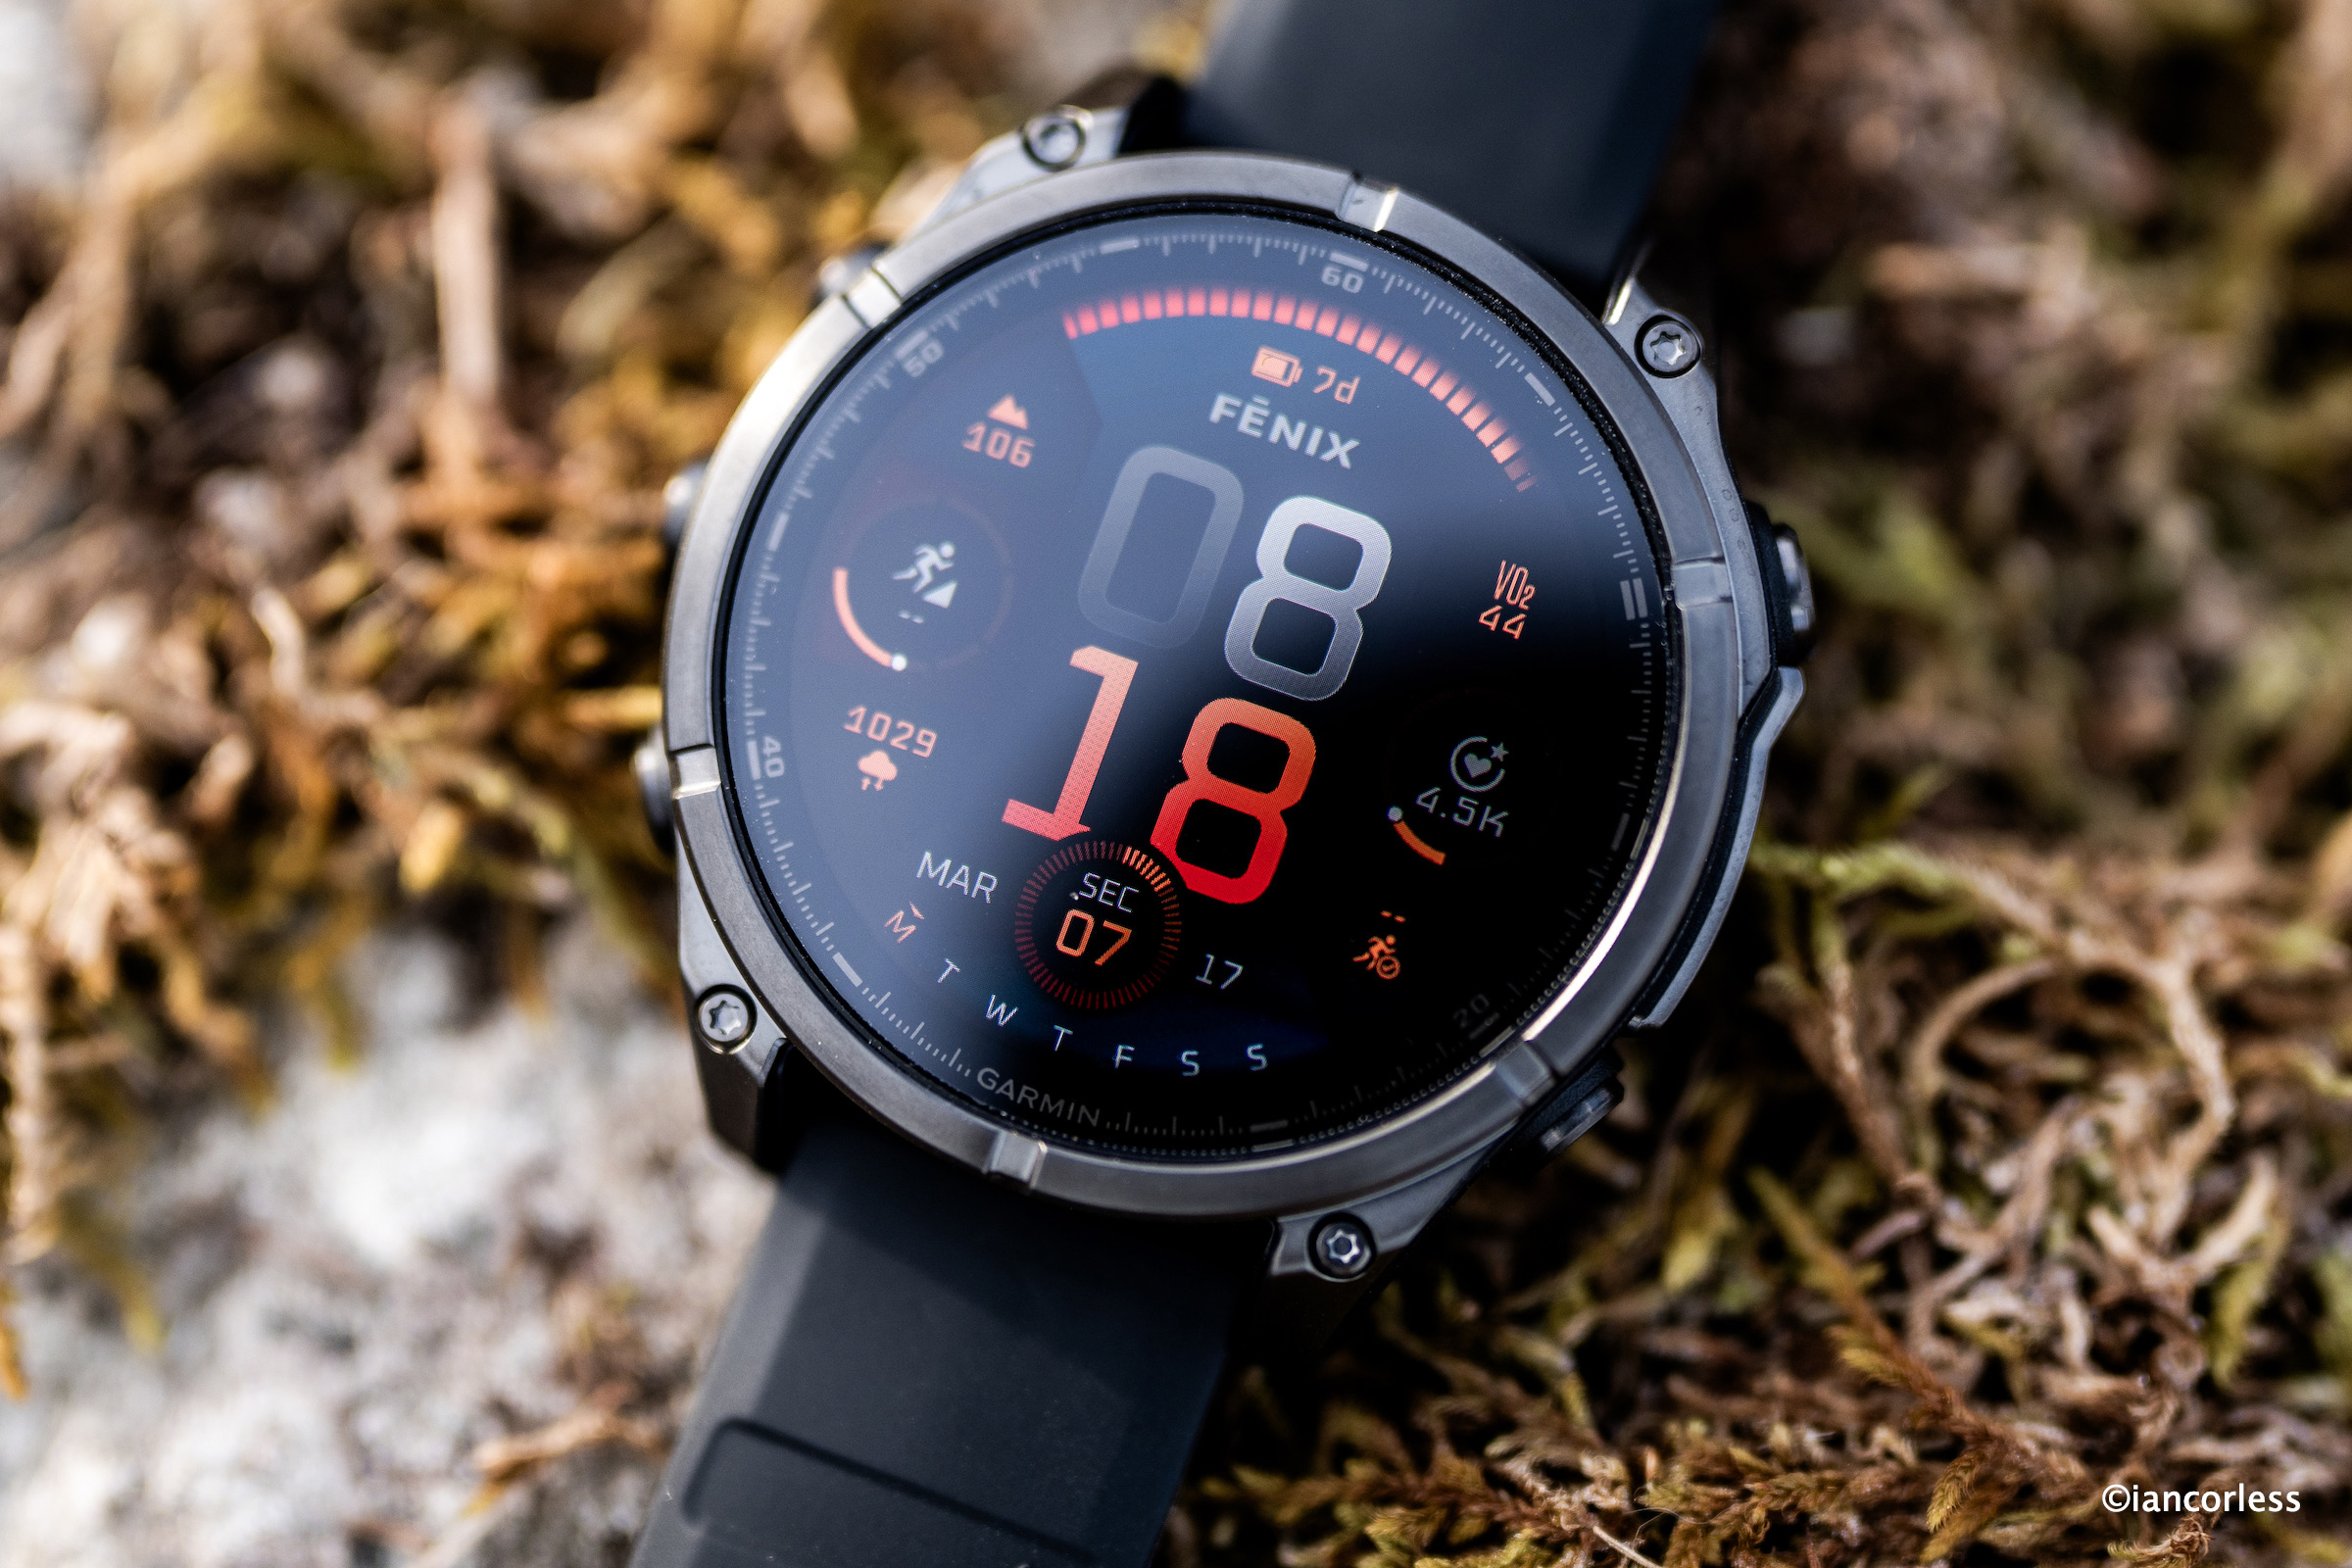
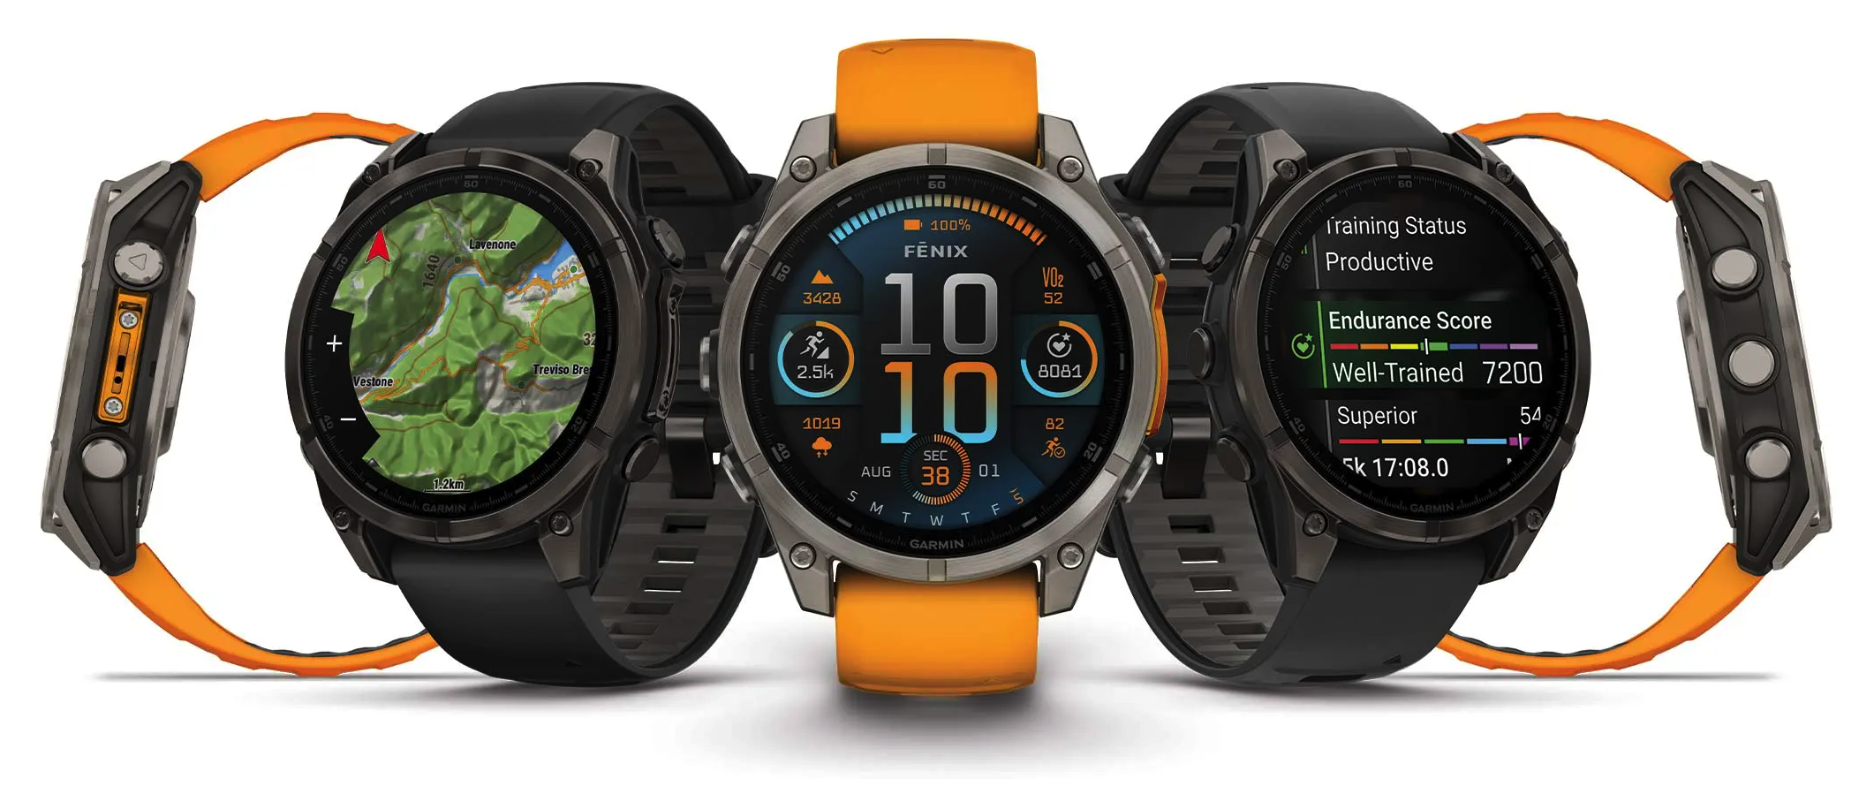
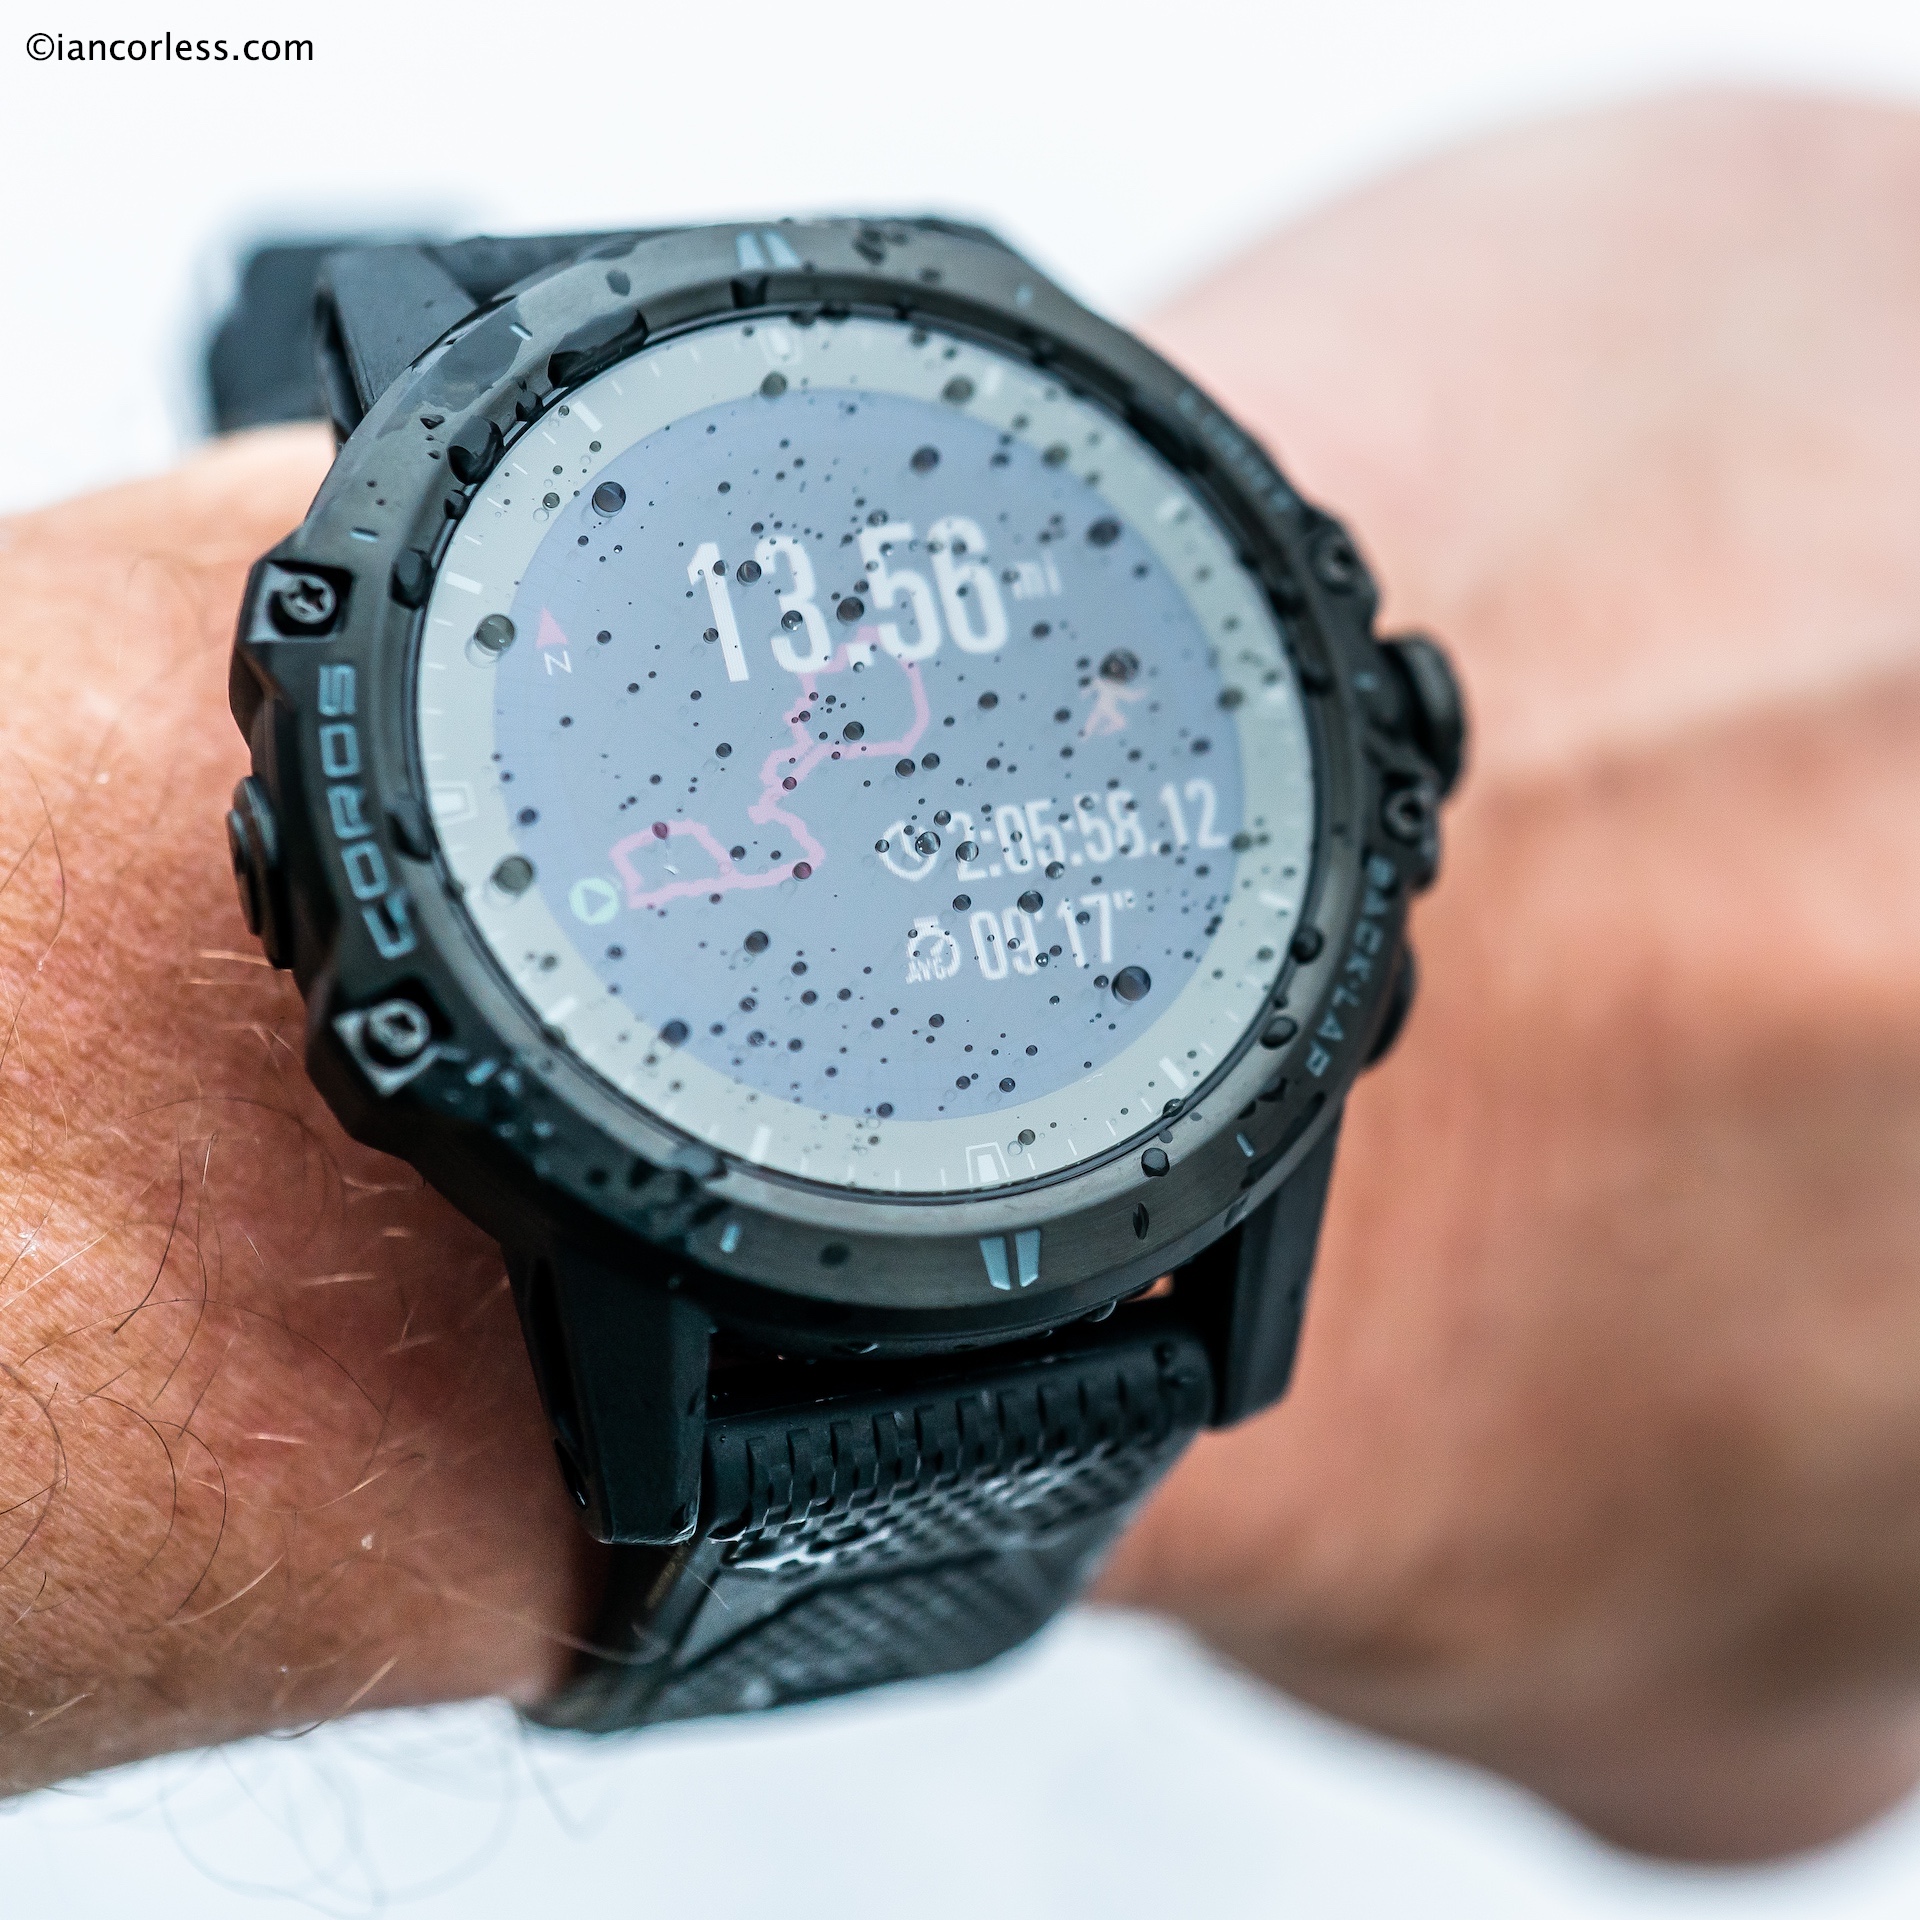
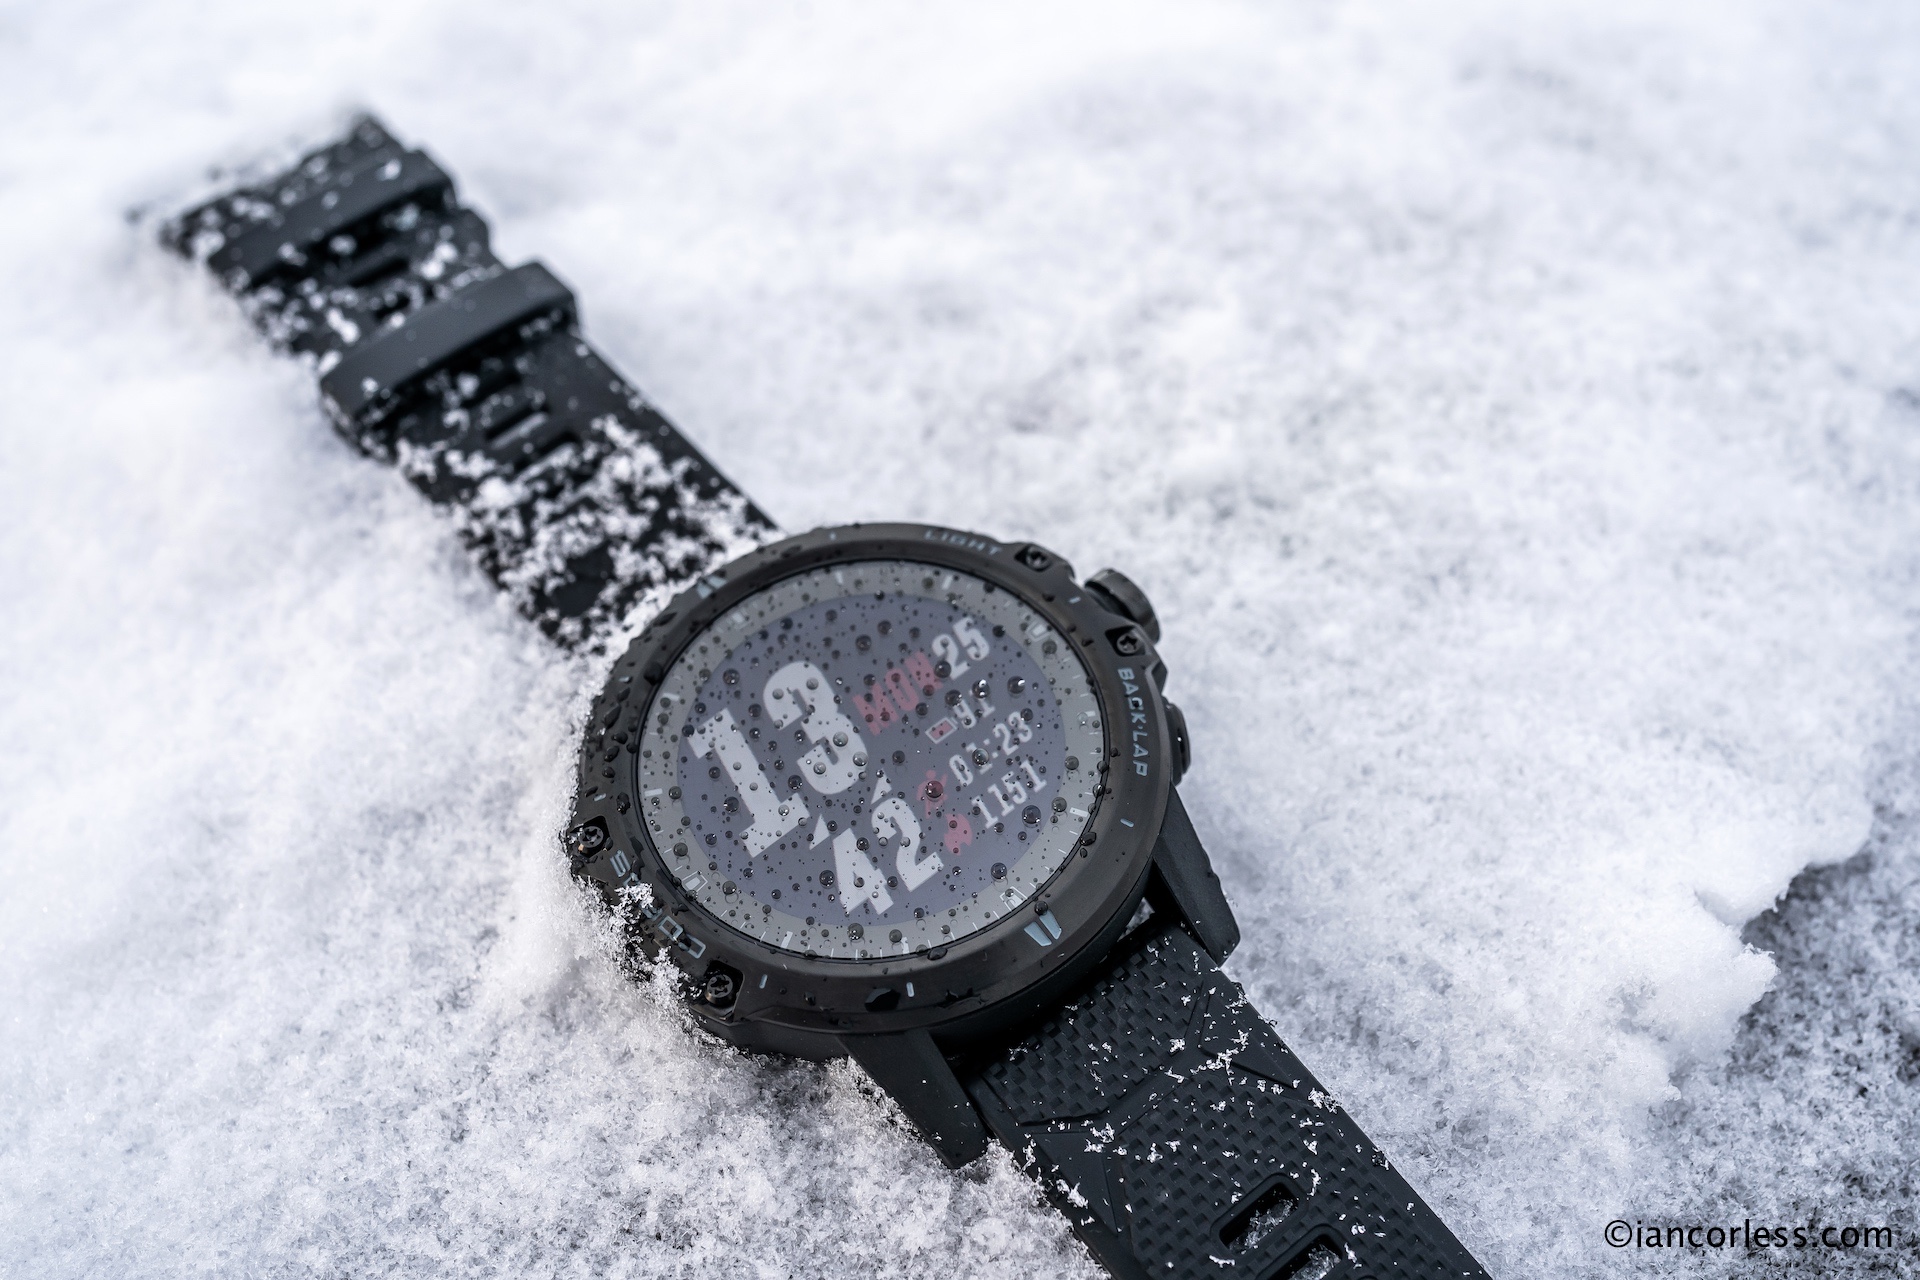
A breakthrough watch in the Garmin line-up for me with the inclusion on an AMOLED screen.. Having had an Enduro and Enduro 2, the key miss was the screen, particularly when compared to my Apple Ultra.
Depending on what you need from a watch and of course, depending how much budget you have, the Fenix 8 is, IMO, the best Fenix that Garmin has ever made.
This is not an in-depth review of the watch where I deep dive into all the stats, workings, functions and menus. There are many websites that do this, and while that may satisfy the geek/ nerd side of my nature, ultimately, I usually cut to the final paragraph called ‘conclusions’ as this ultimately answers what I need to know – Is the watch good? Is it worth the money? Is it accurate.
So, this post is a CONCLUSION
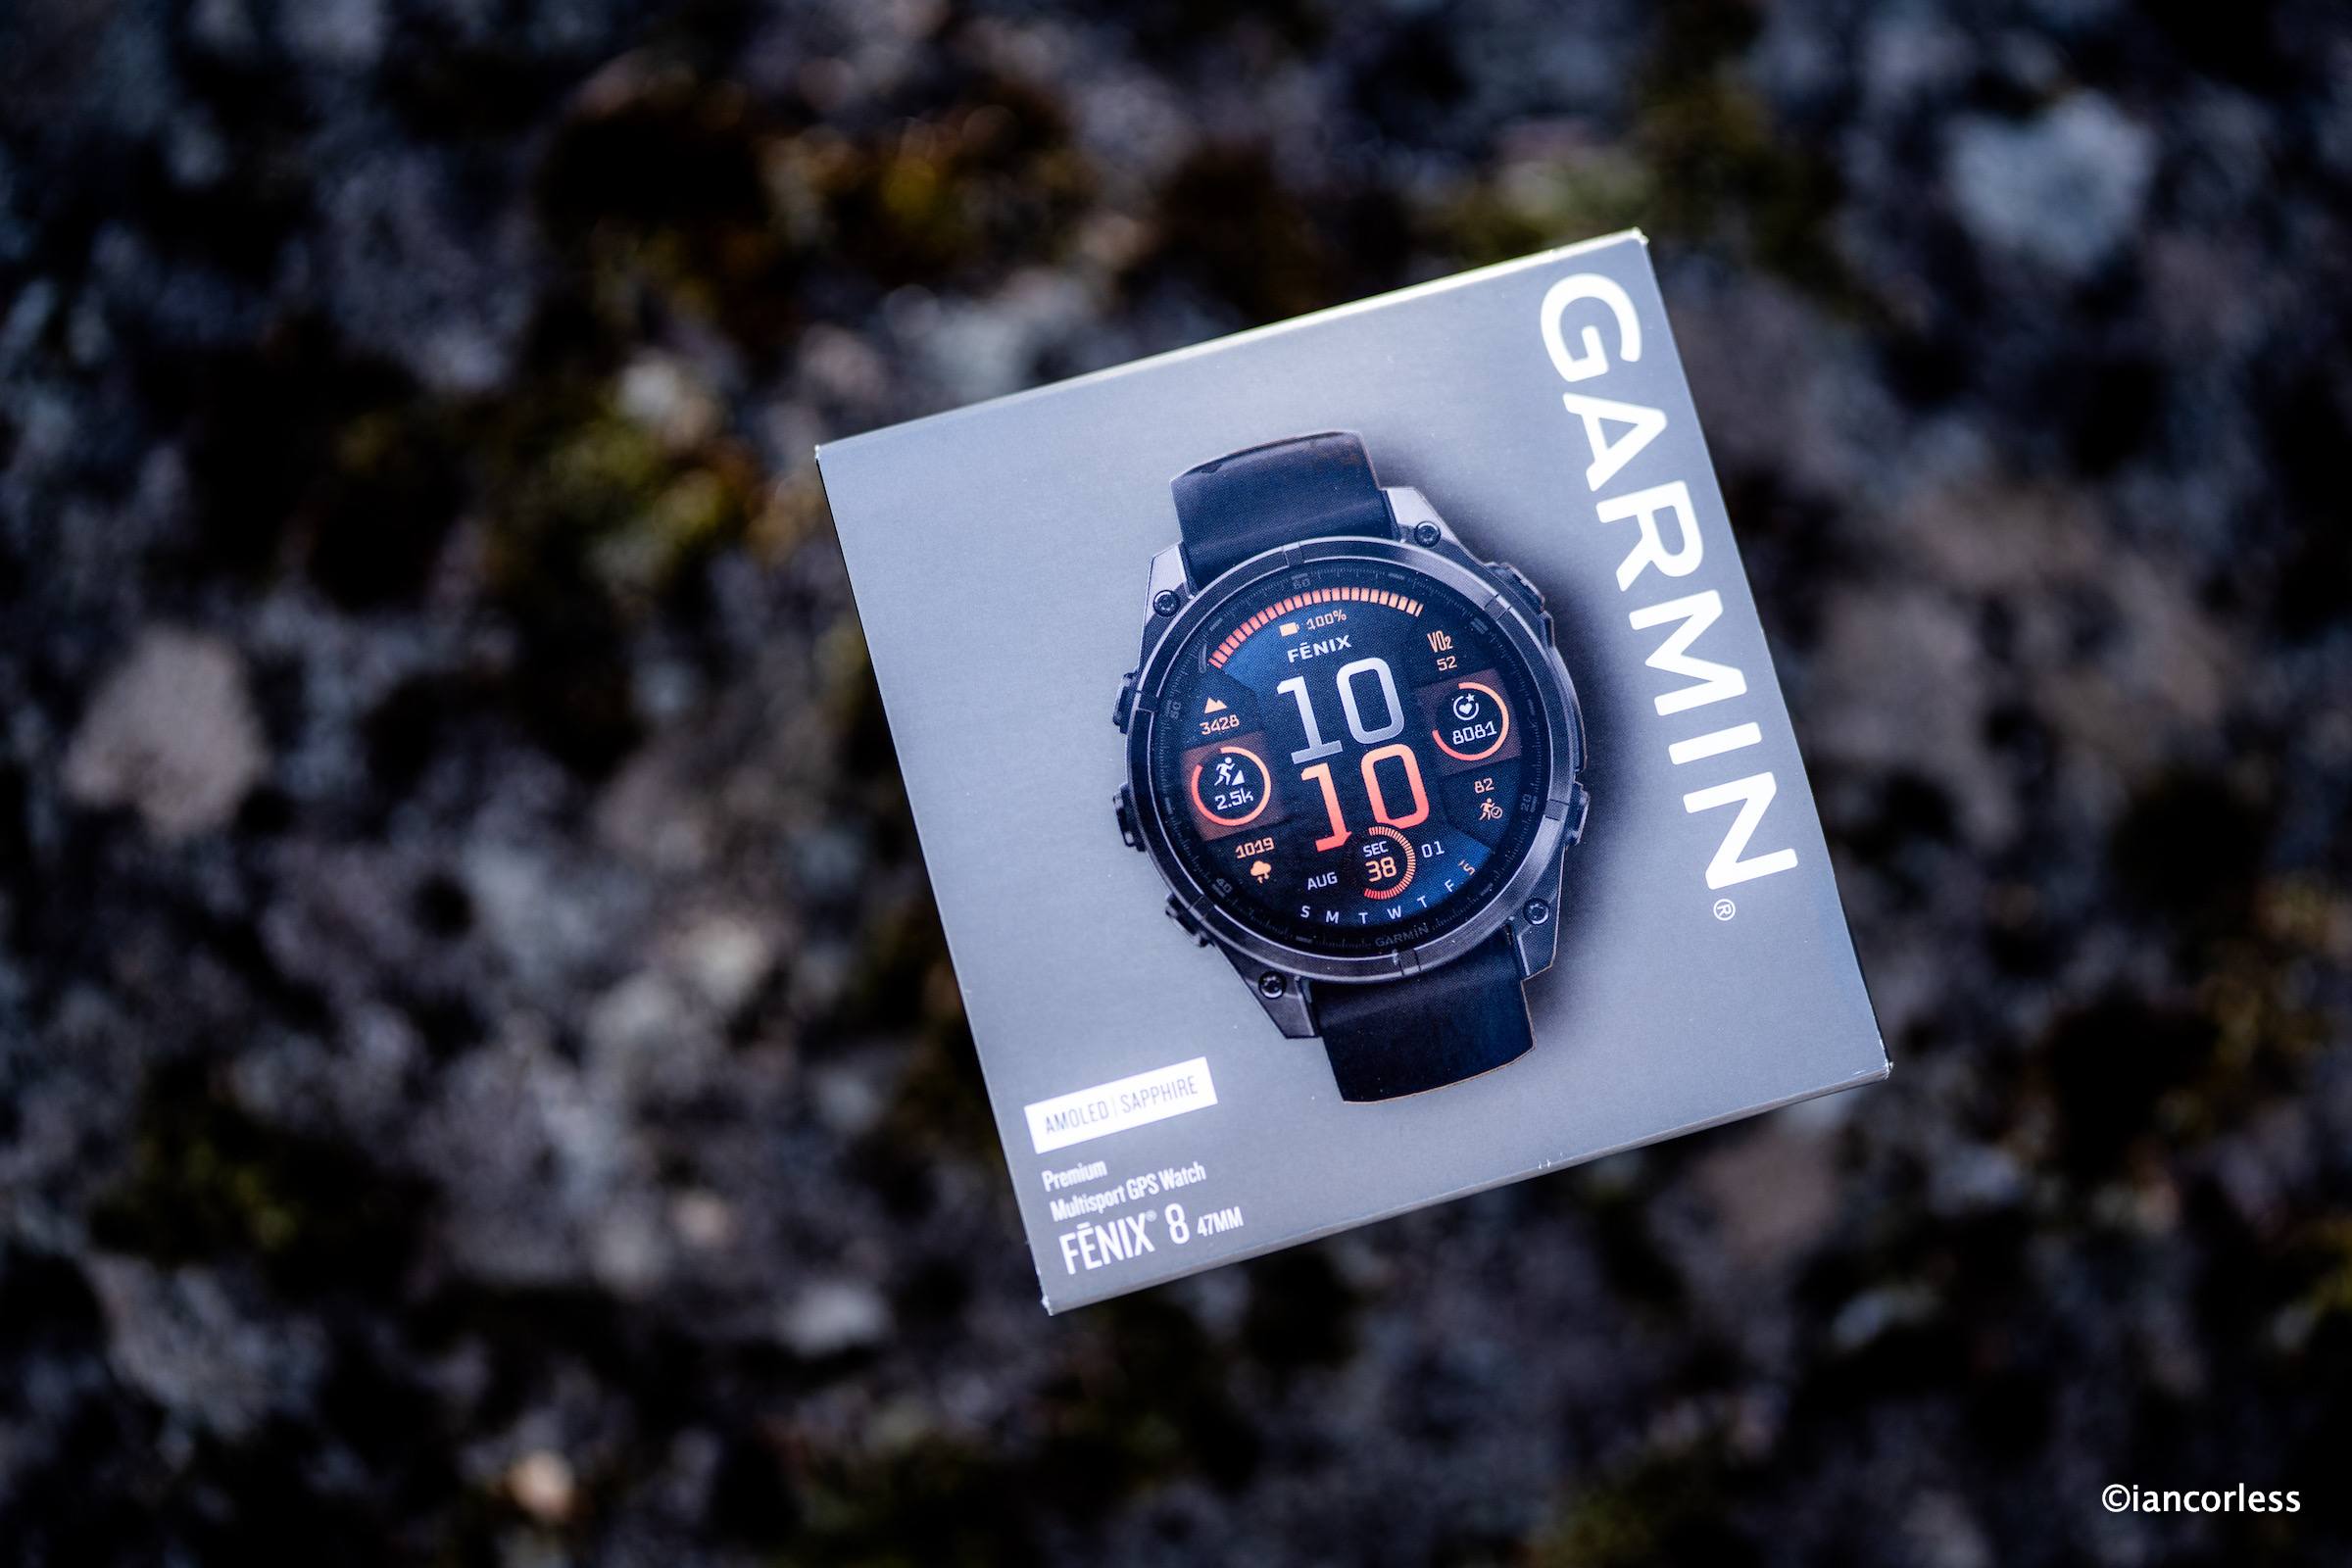
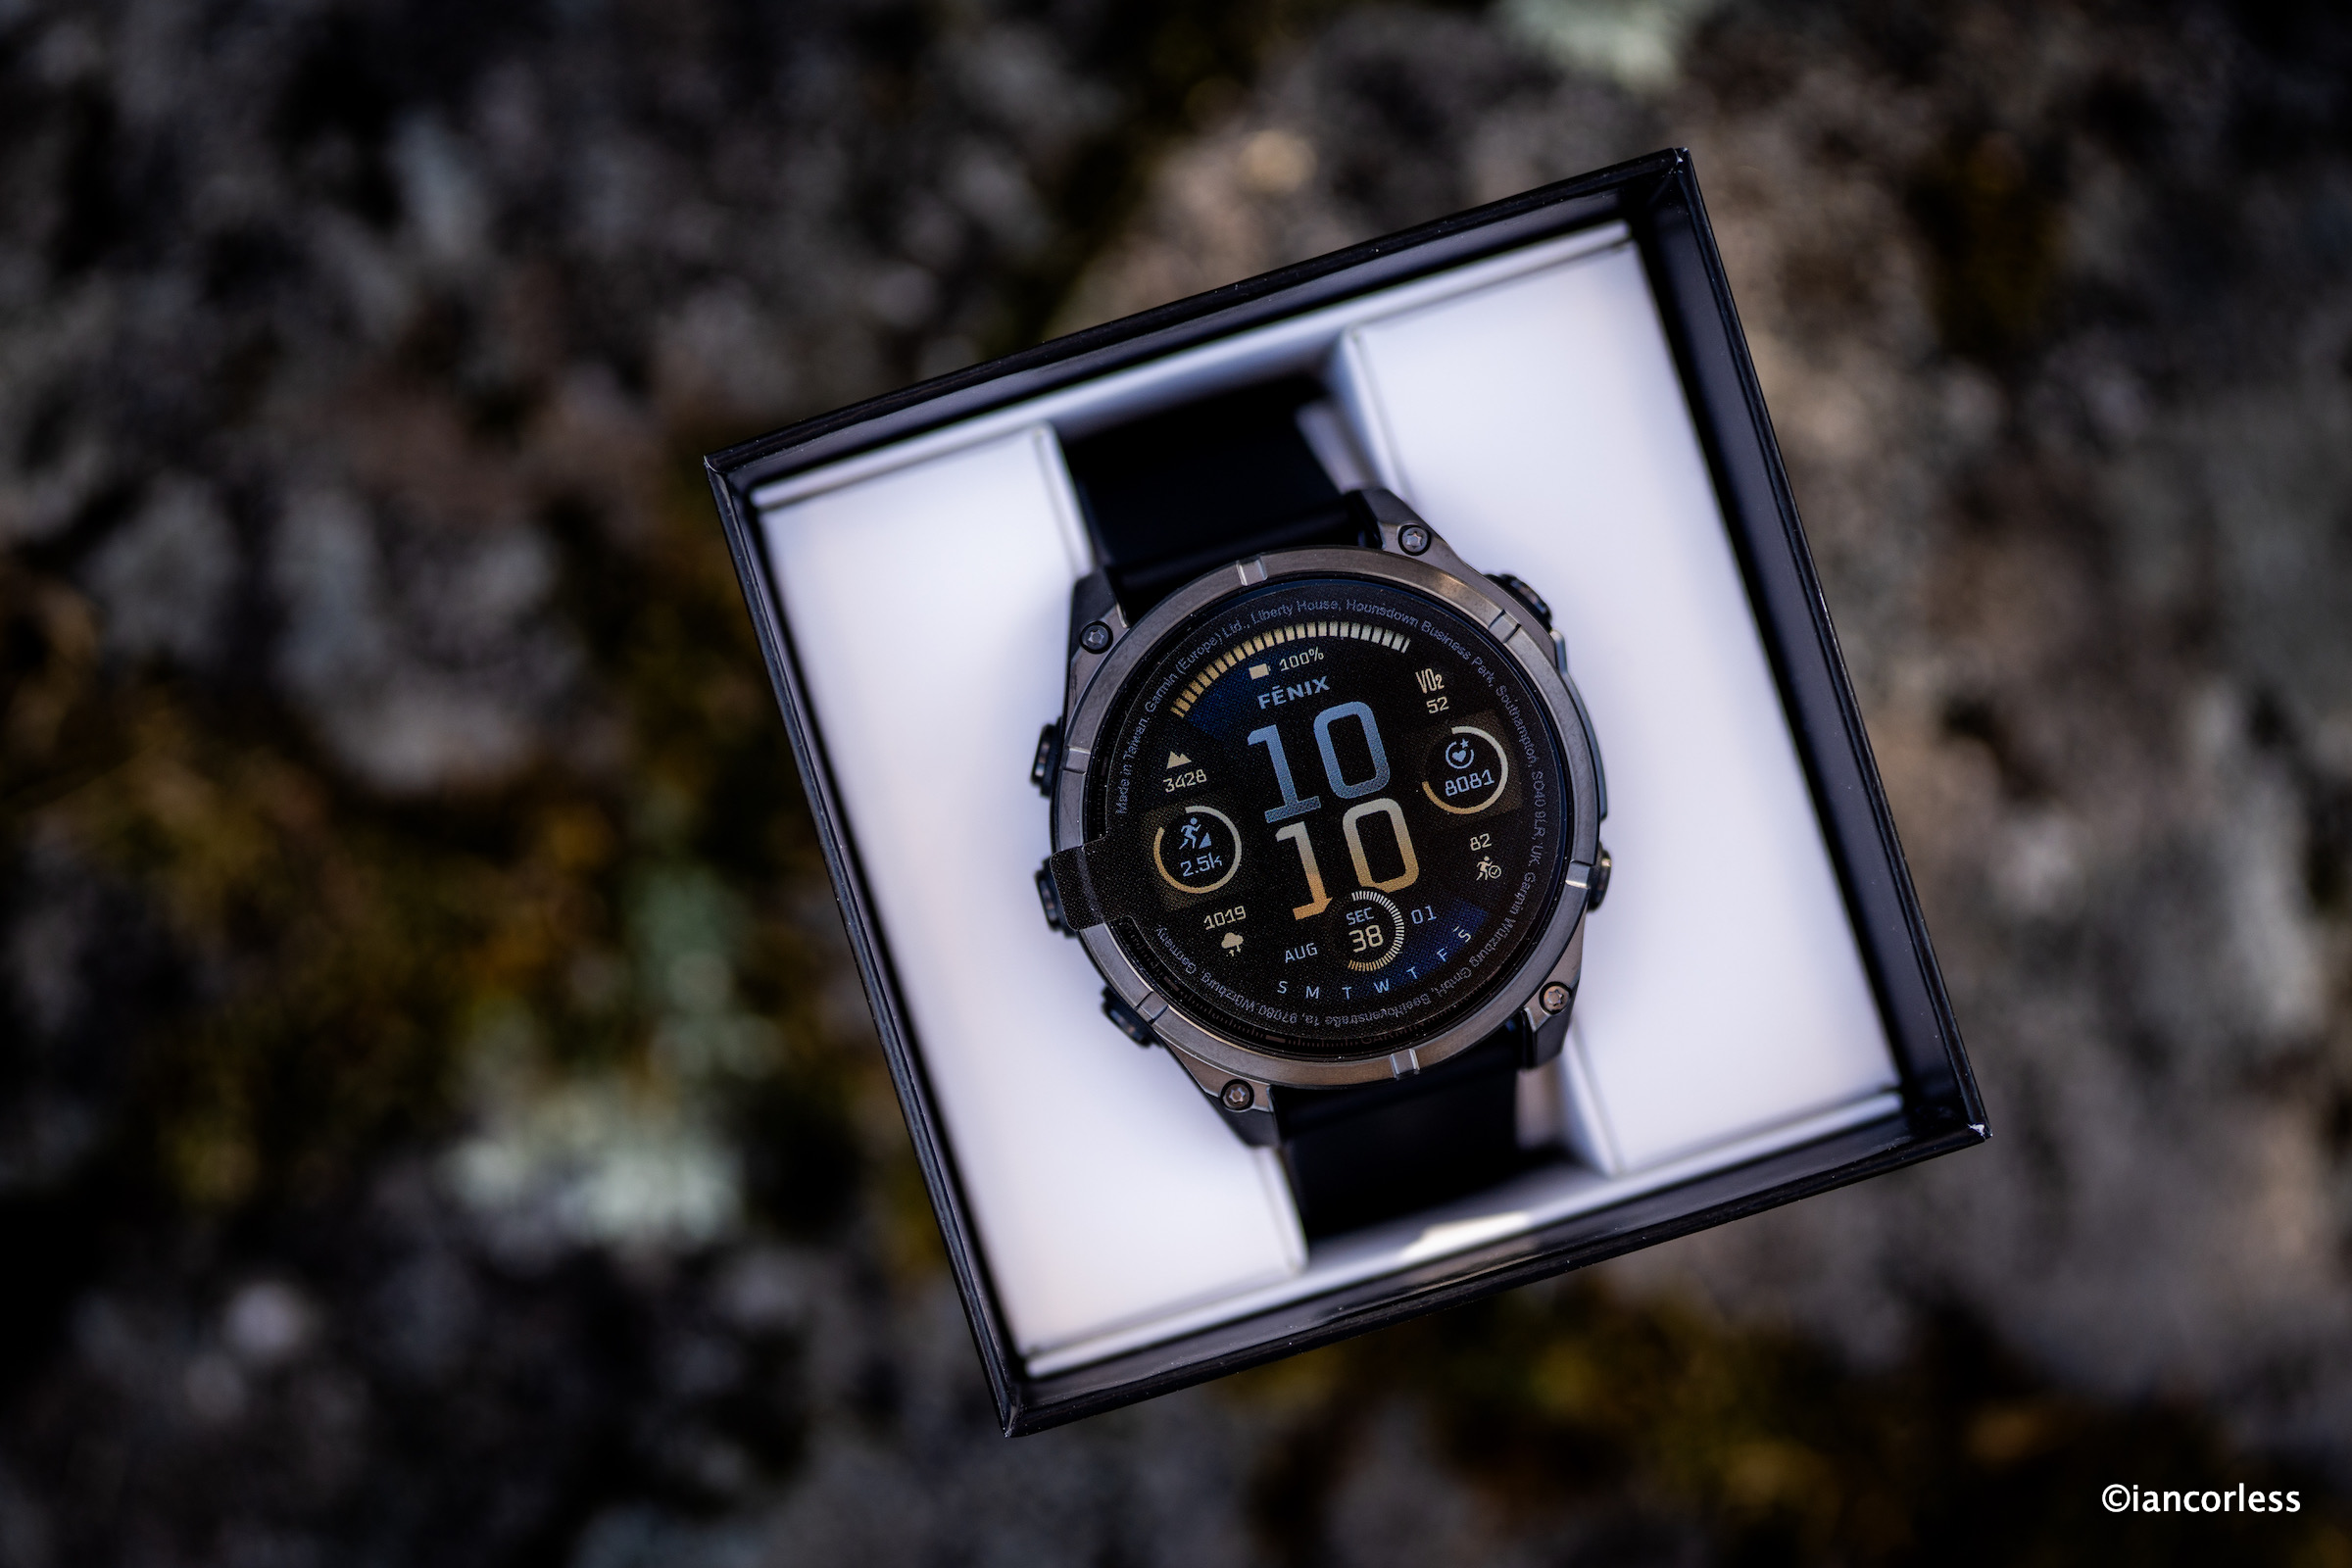
The FENIX 8 is nicely boxed with a sticker to simulate the screen.
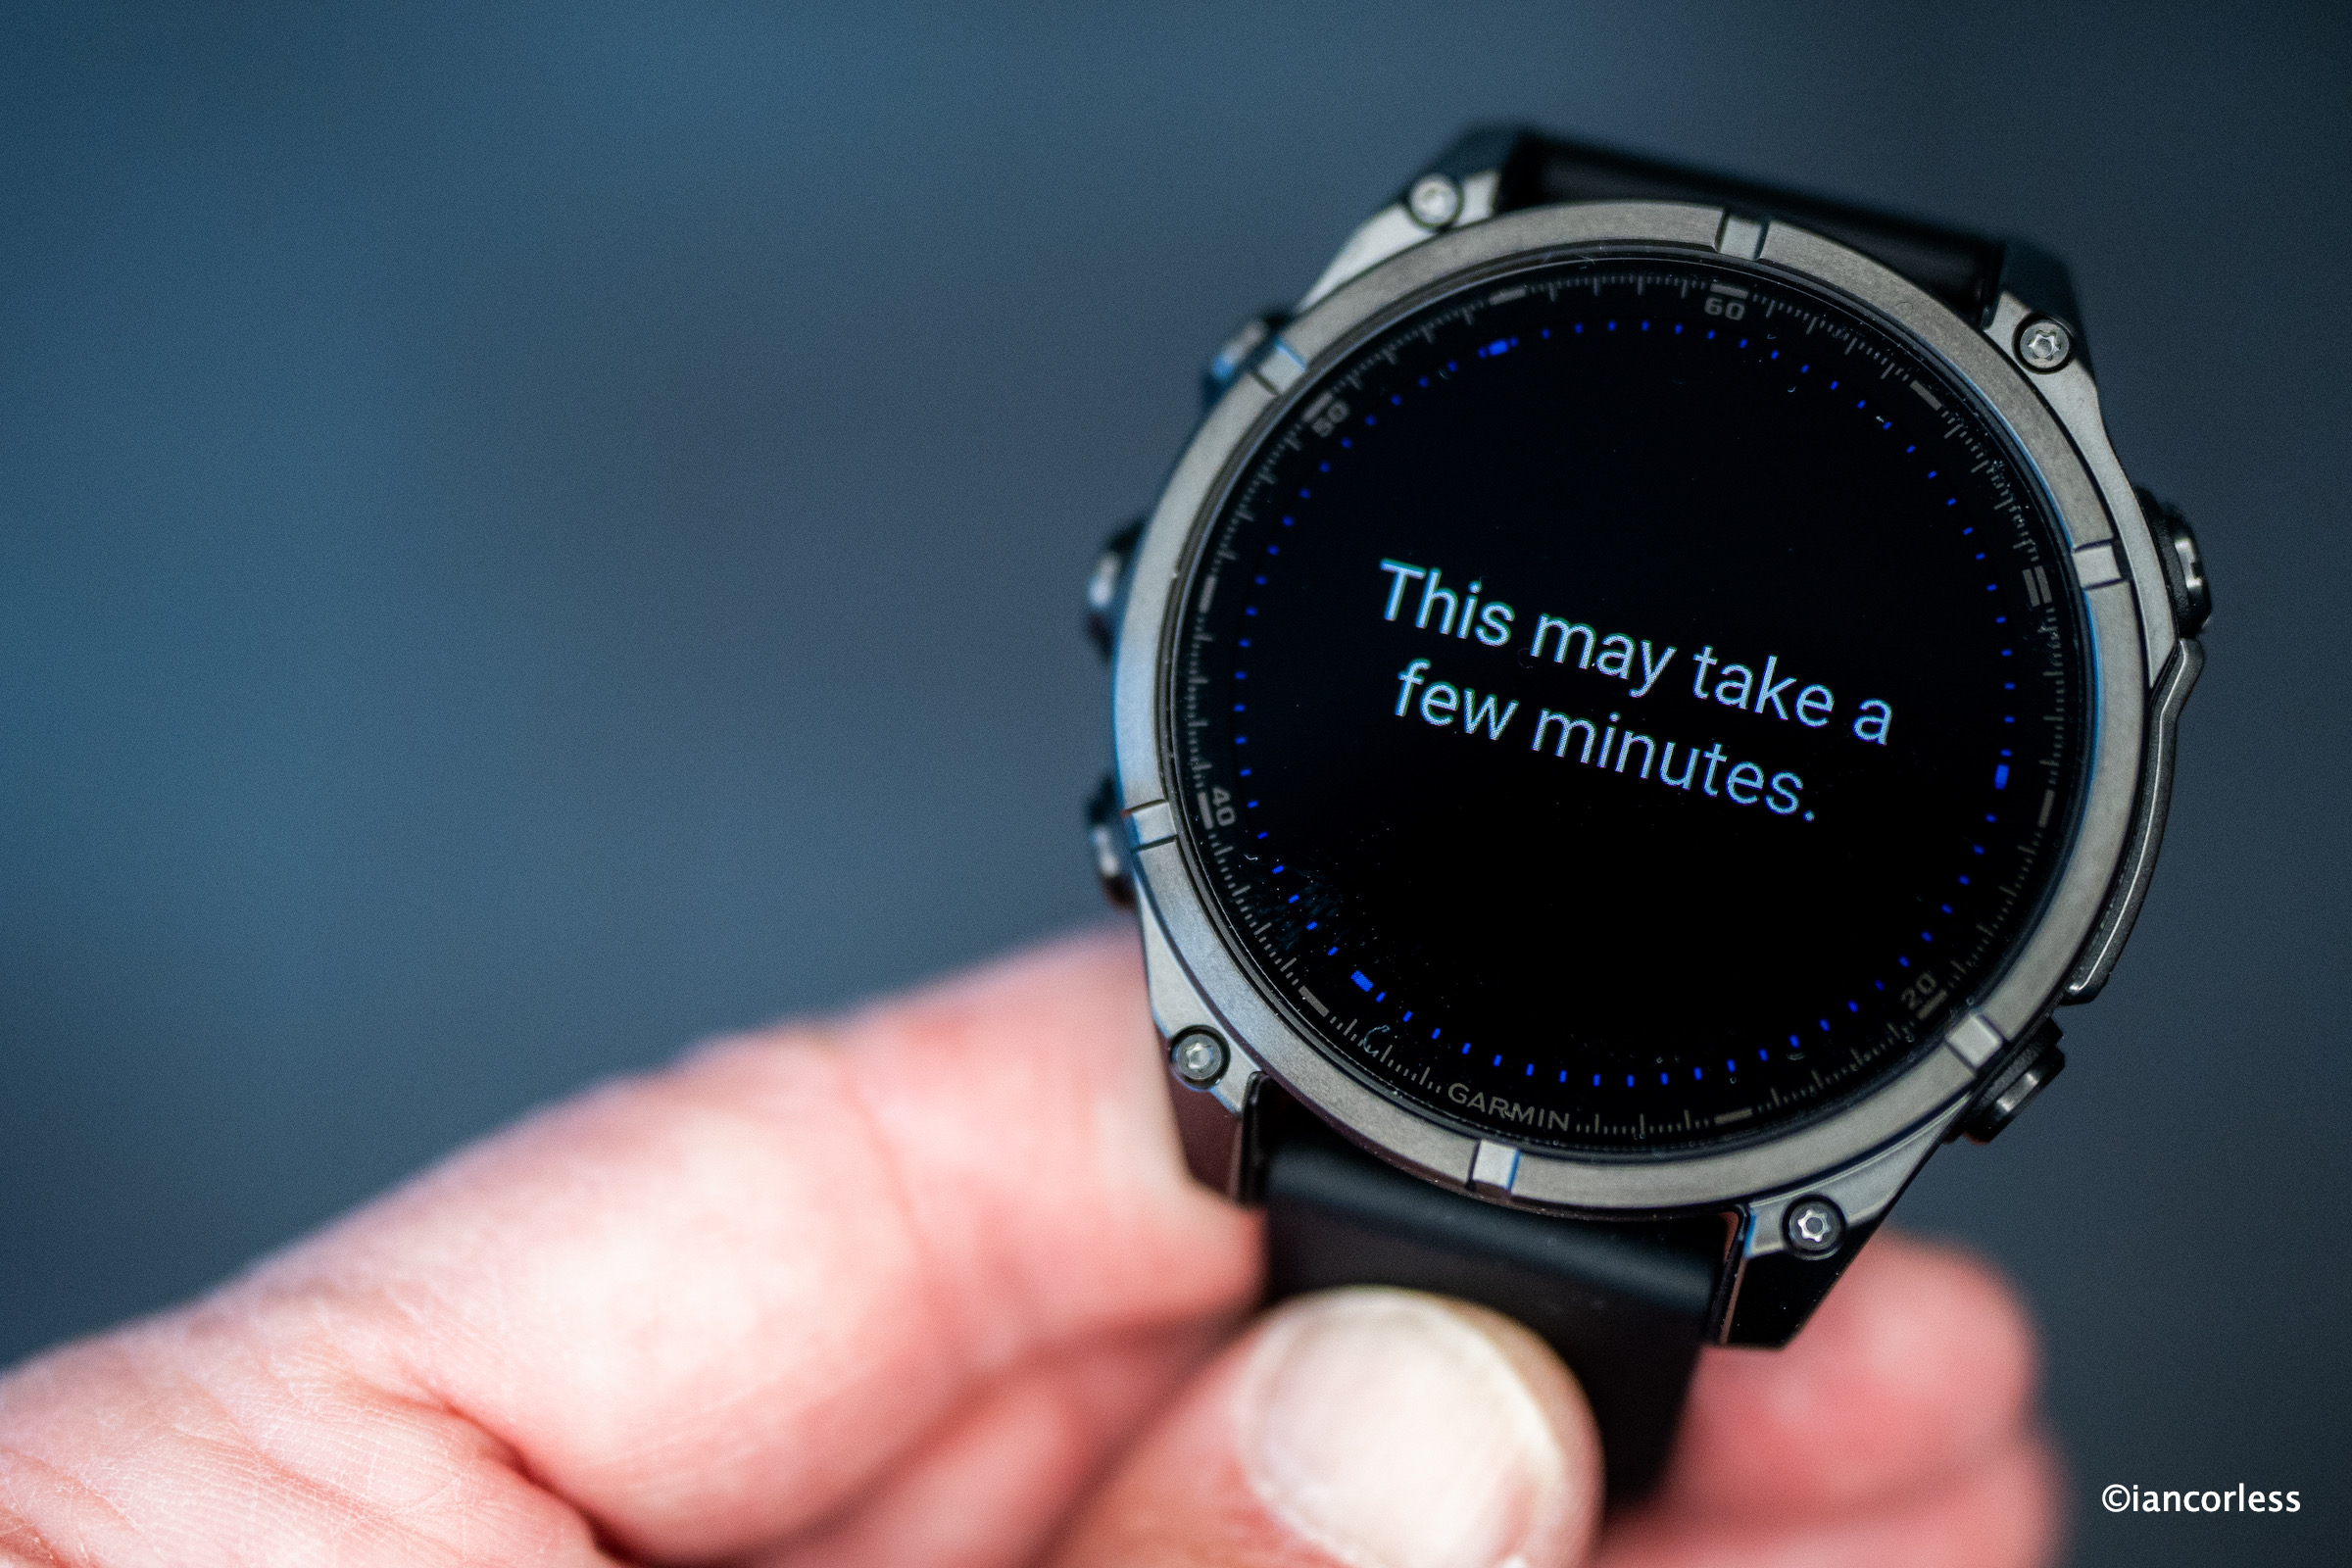
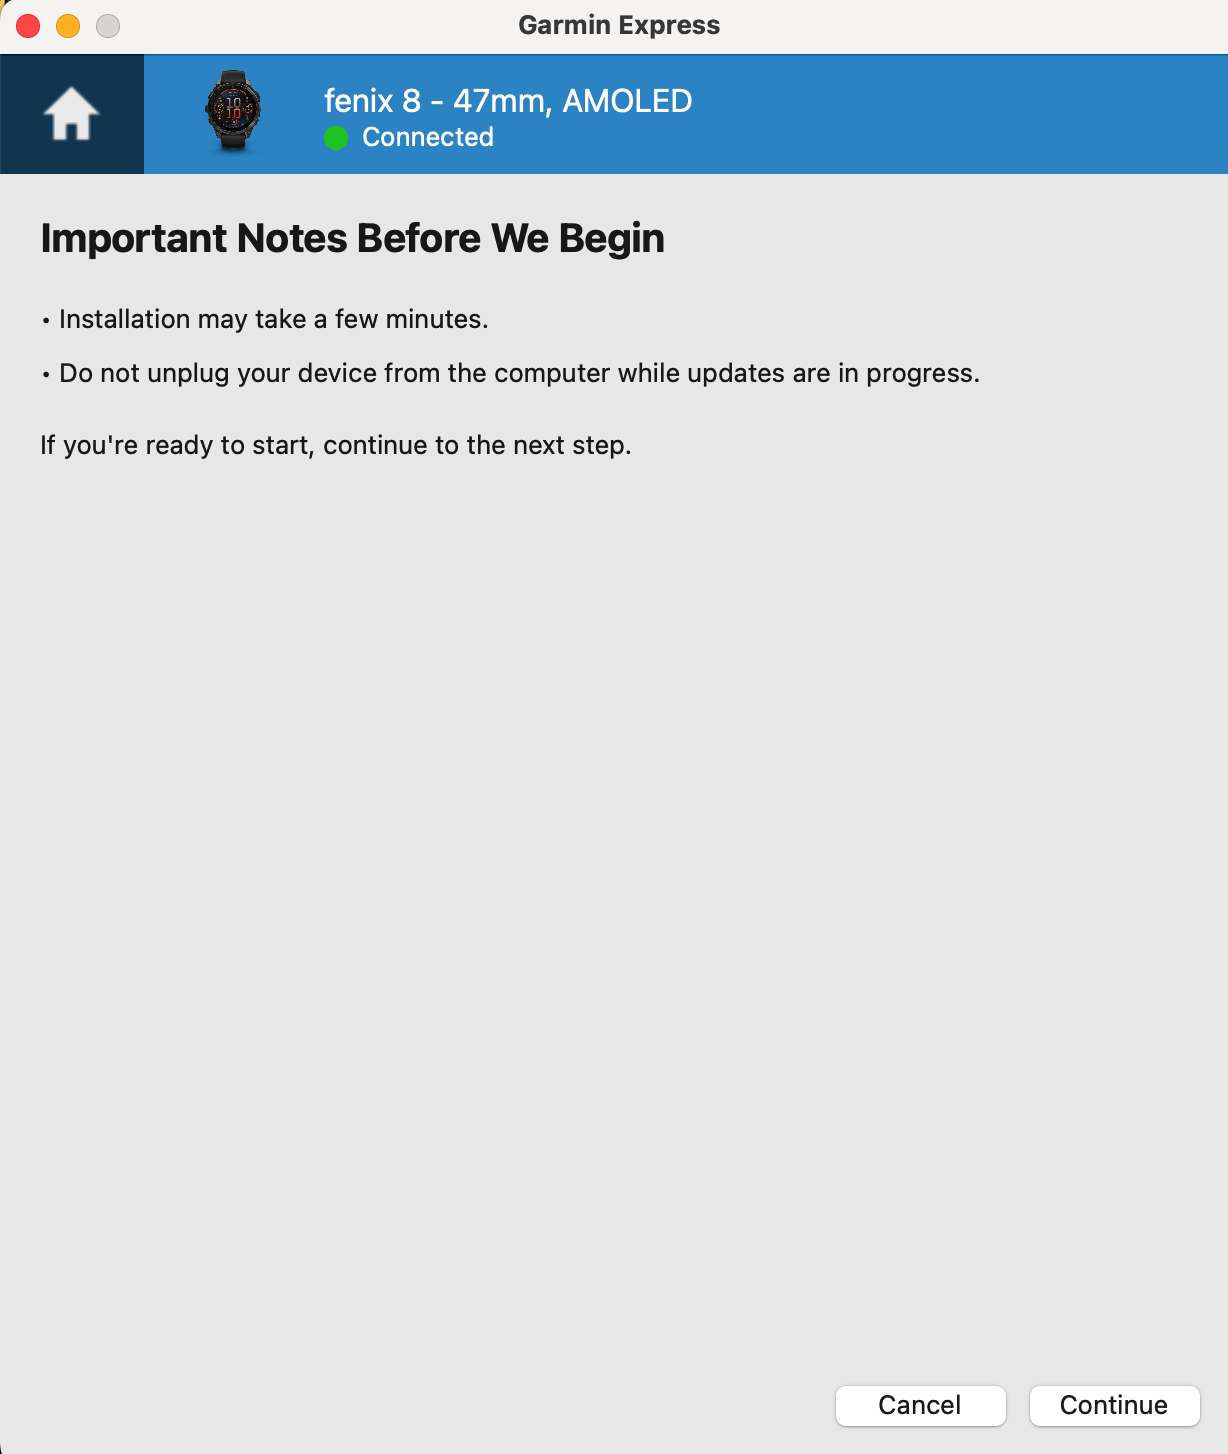
There is a minimal instruction manual and a charging cable which also doubles up to connect to your computer. Make sure you have GARMIN CONNECT on your phone and GARMIN EXPRESS on your computer. Set up is simple with the Garmin Connect app – follow the instructions.
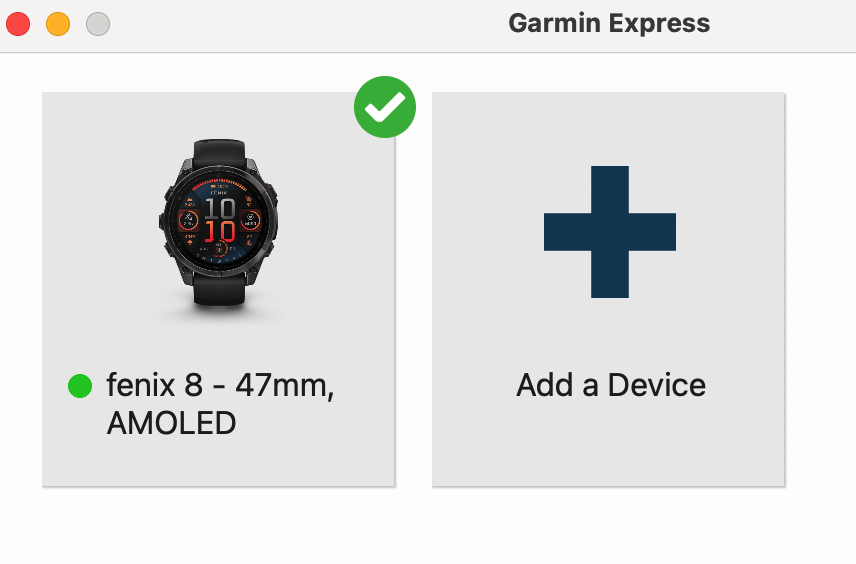
Other features for the watch, such as screen choices, mapping, music etc can be handled when connected to a computer using Garmin Express.
Simply click on ‘Add a Device’ and follow the instructions.
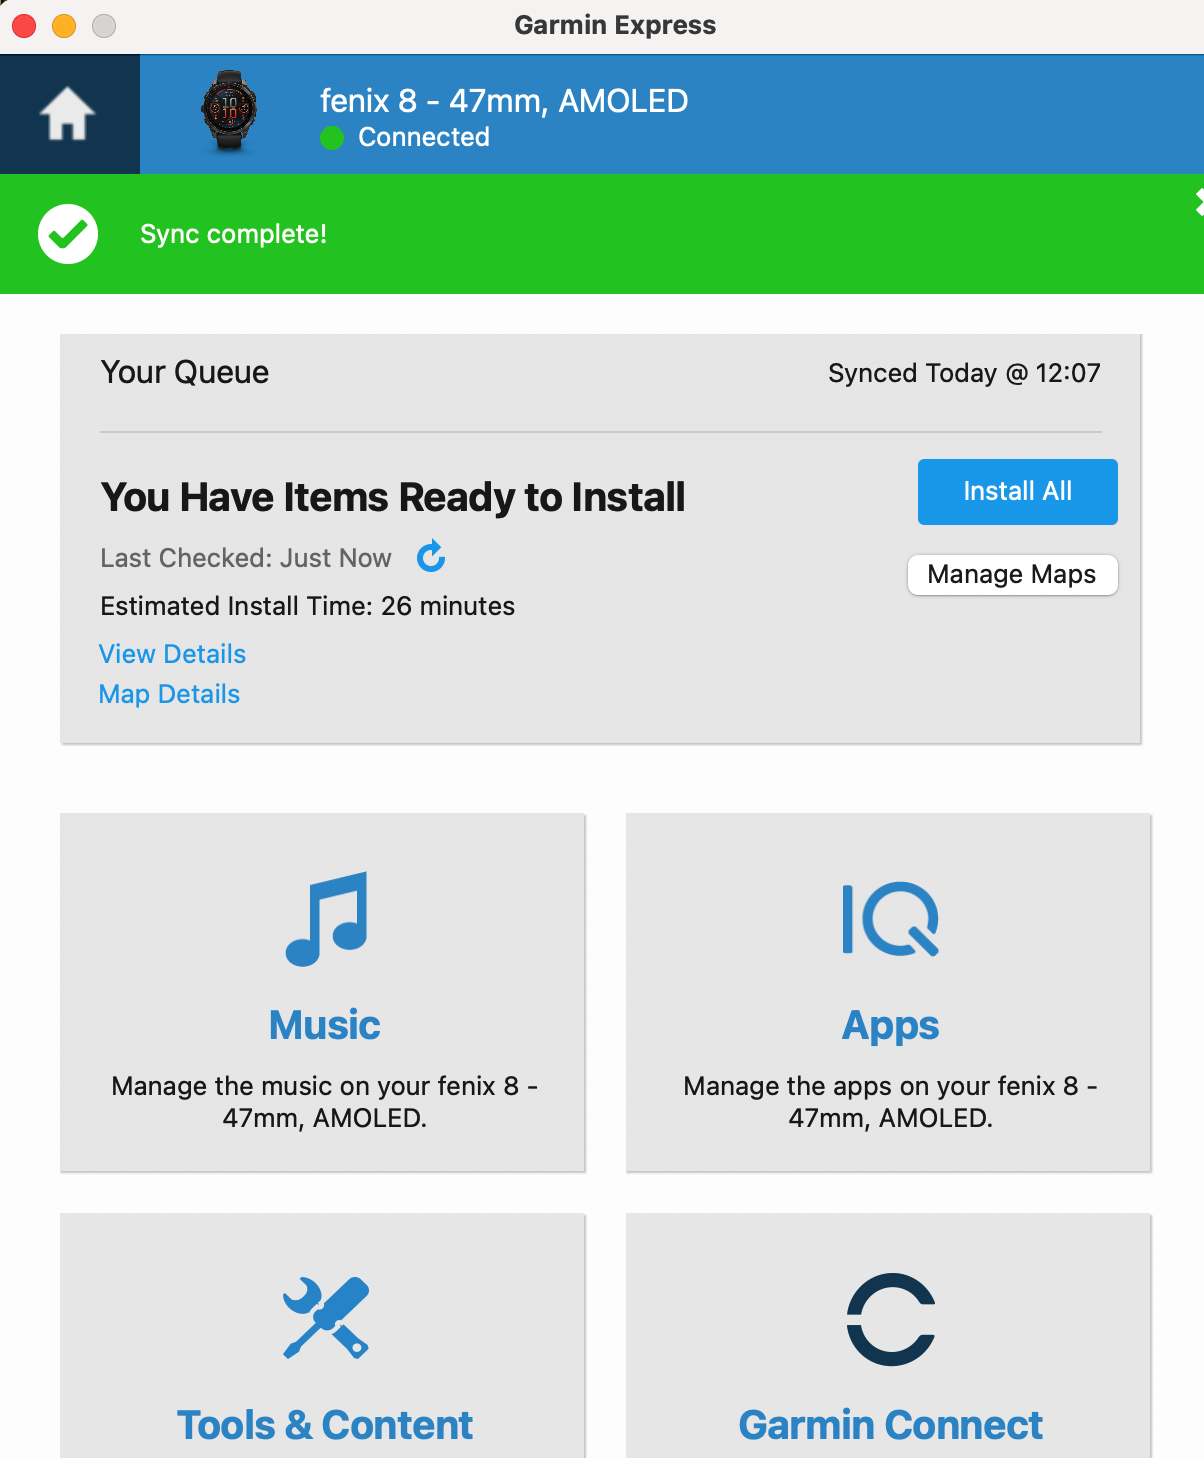
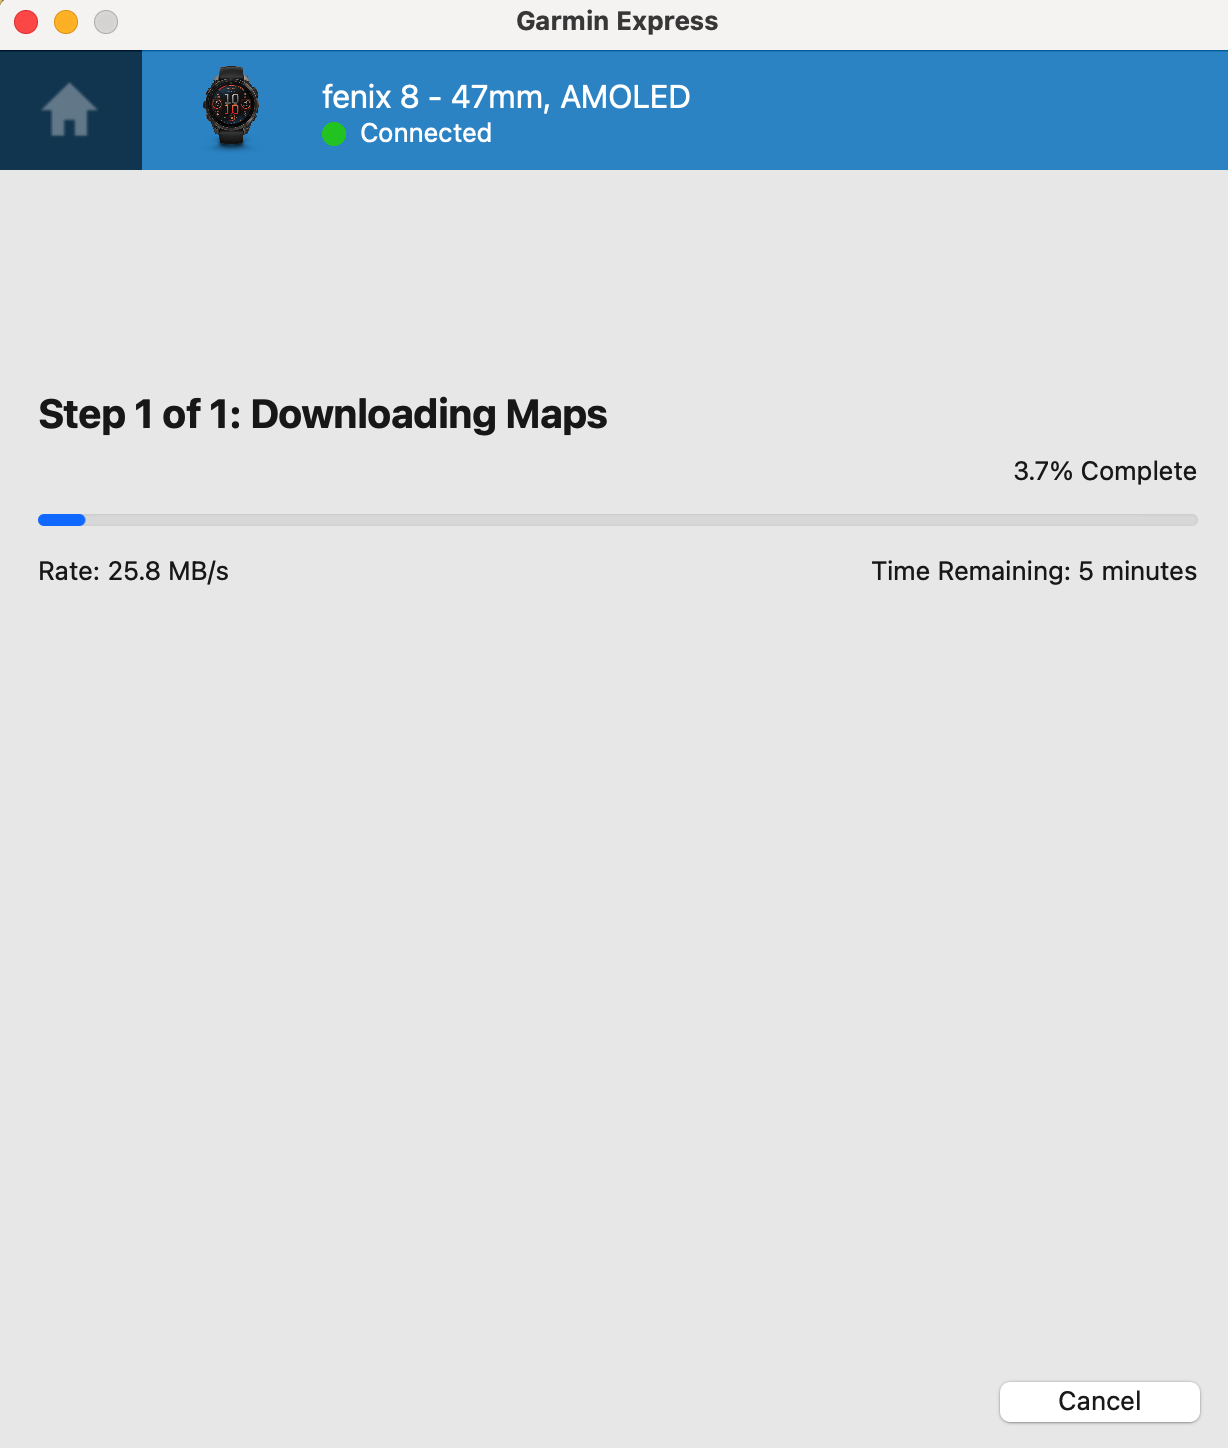
Updates are handled here and you can add music, apps, Tools & Content and access Garmin Connect.
It is all intuitive and you are given clear info when updates are complete.
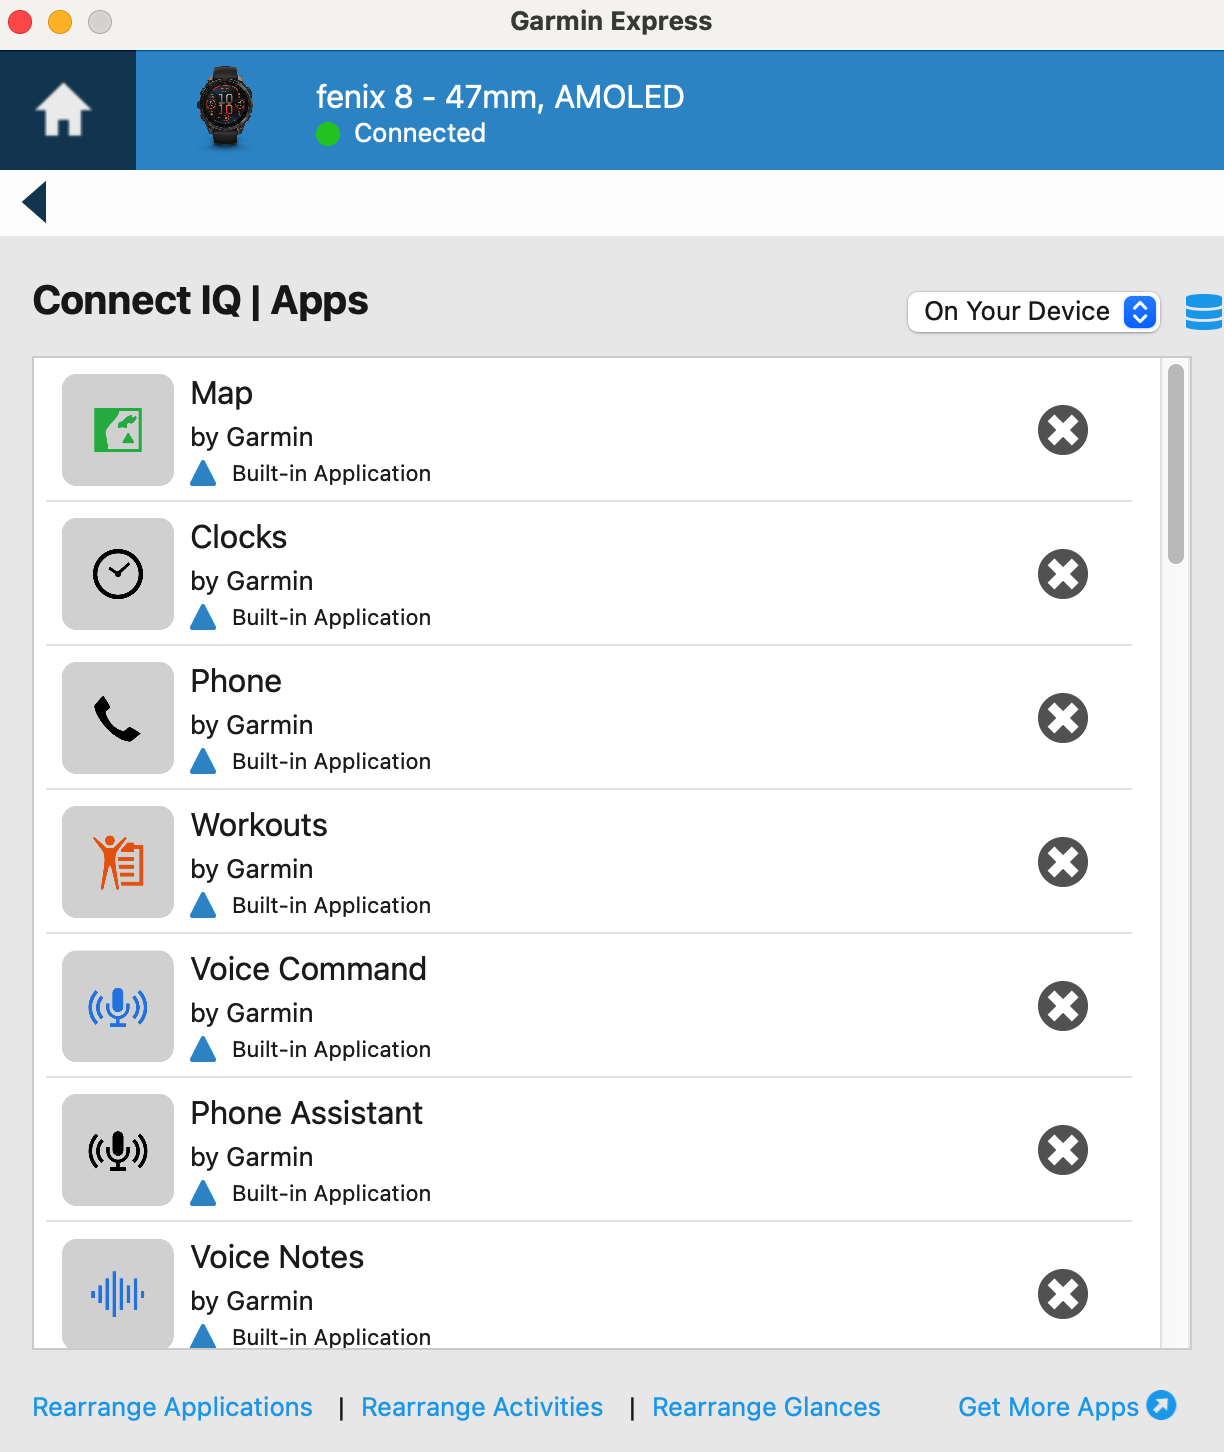
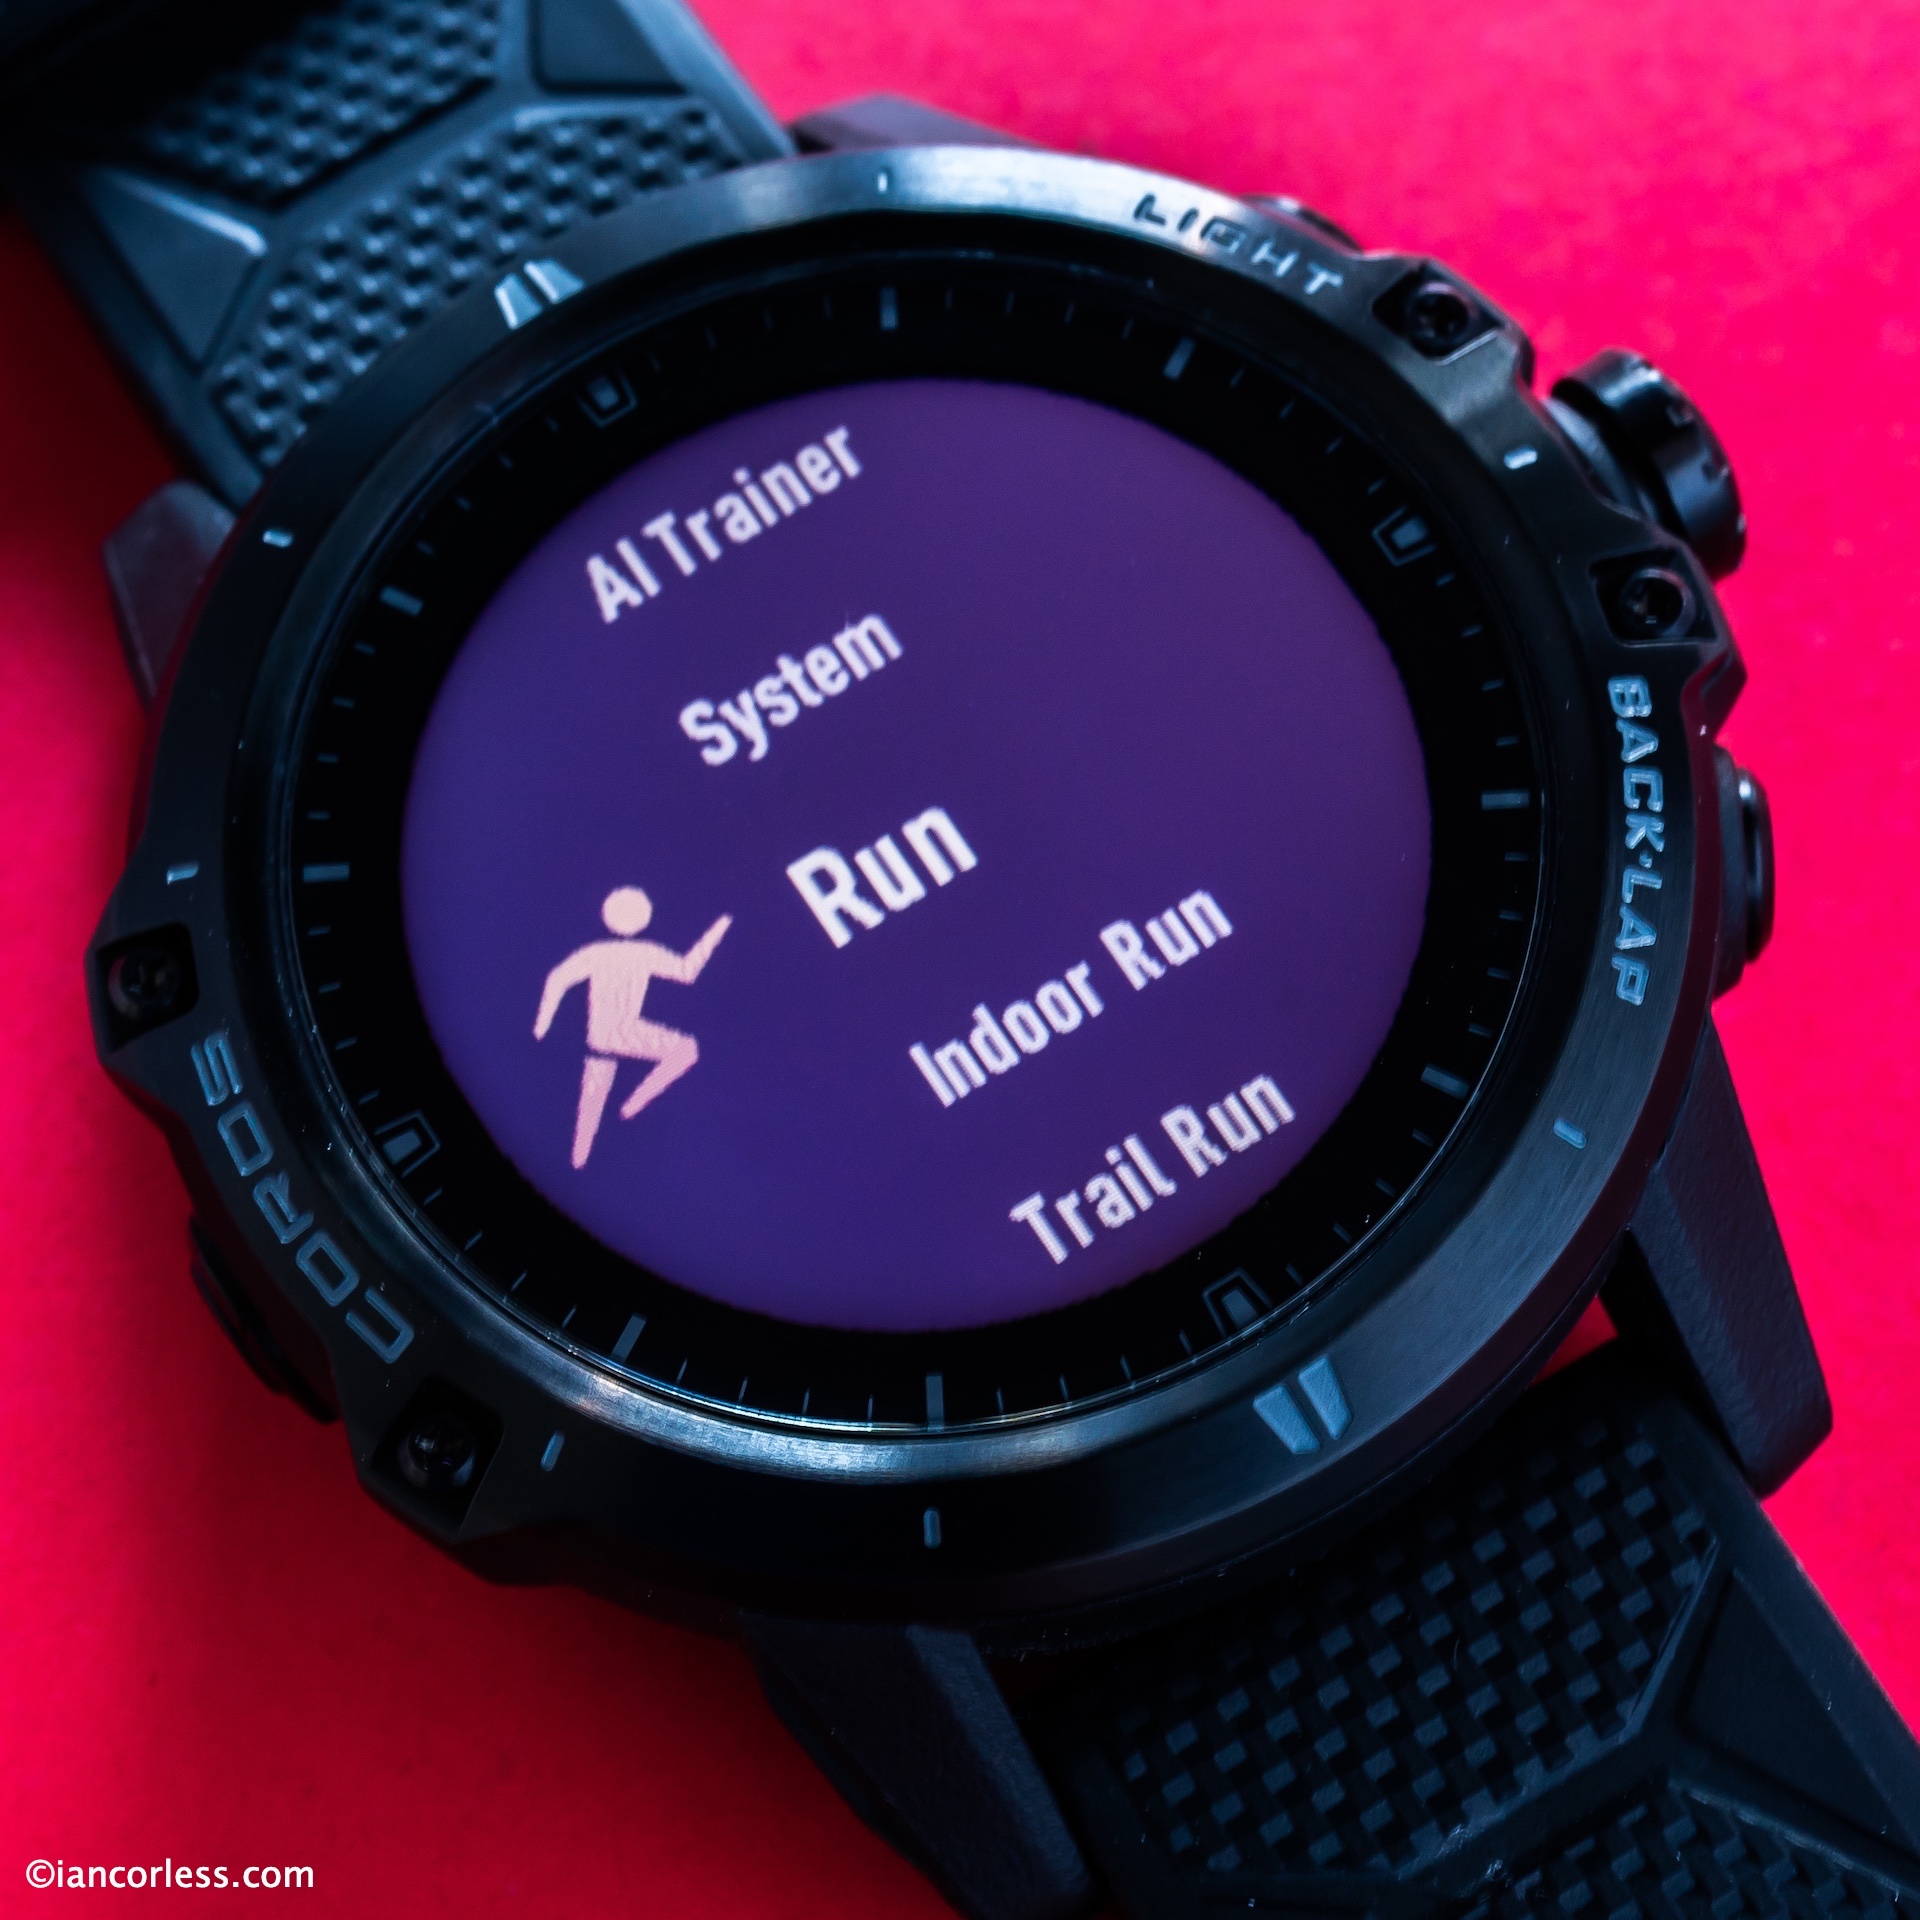
APPS are all listed as below.
And as an example, I uploaded the Falcon X screen to my watch.
THE WATCH
The AMOLED is a battery drainer, but for me, that clear screen is an absolute winner and I have found that with around 2-3 hours exercise a day in full GPX mode, I get 6-days of battery. This is 5-days more than my very loved Apple Ultra and similar to the Coros Pace Pro.
Estimated life is somewhere around 48-hours with all system GPS on, with GPS only it is around 72-hours.
What is new?
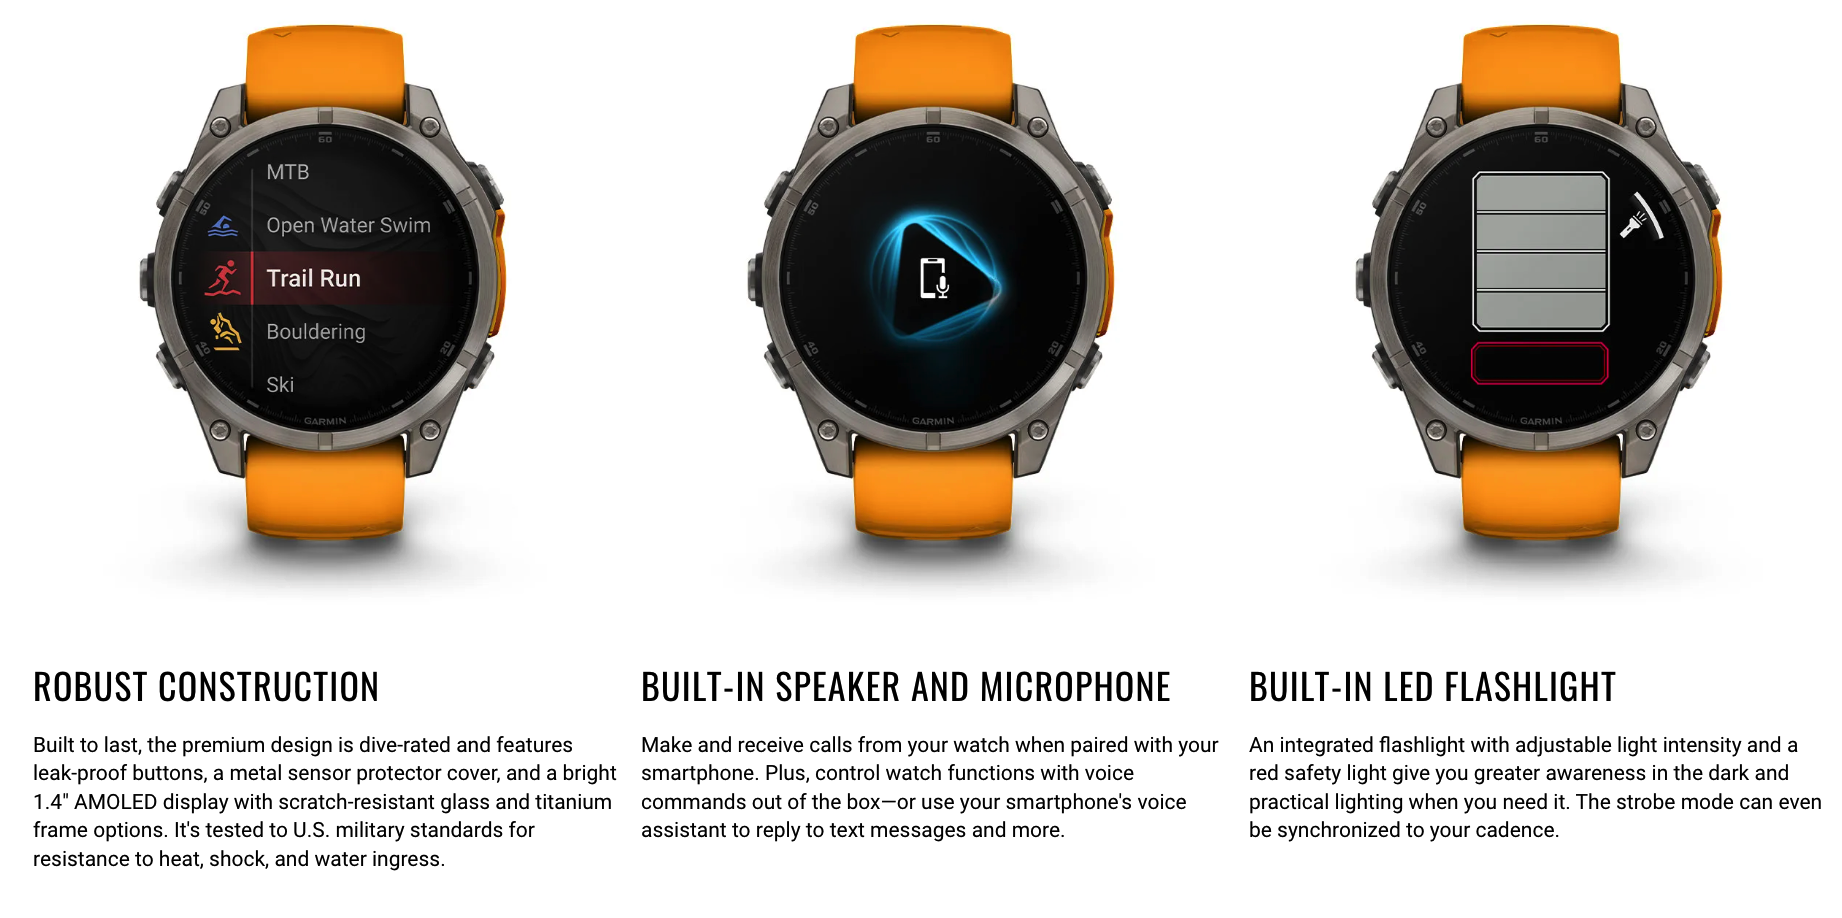
Diving related functions
Microphone and speaker
The display size is increased
AMOLED option but you can still get a Solar/ MIP display
There are countless ‘added’ functions such as:
Voice recorder,
Answer phone calls,
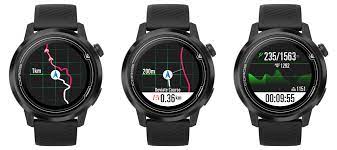
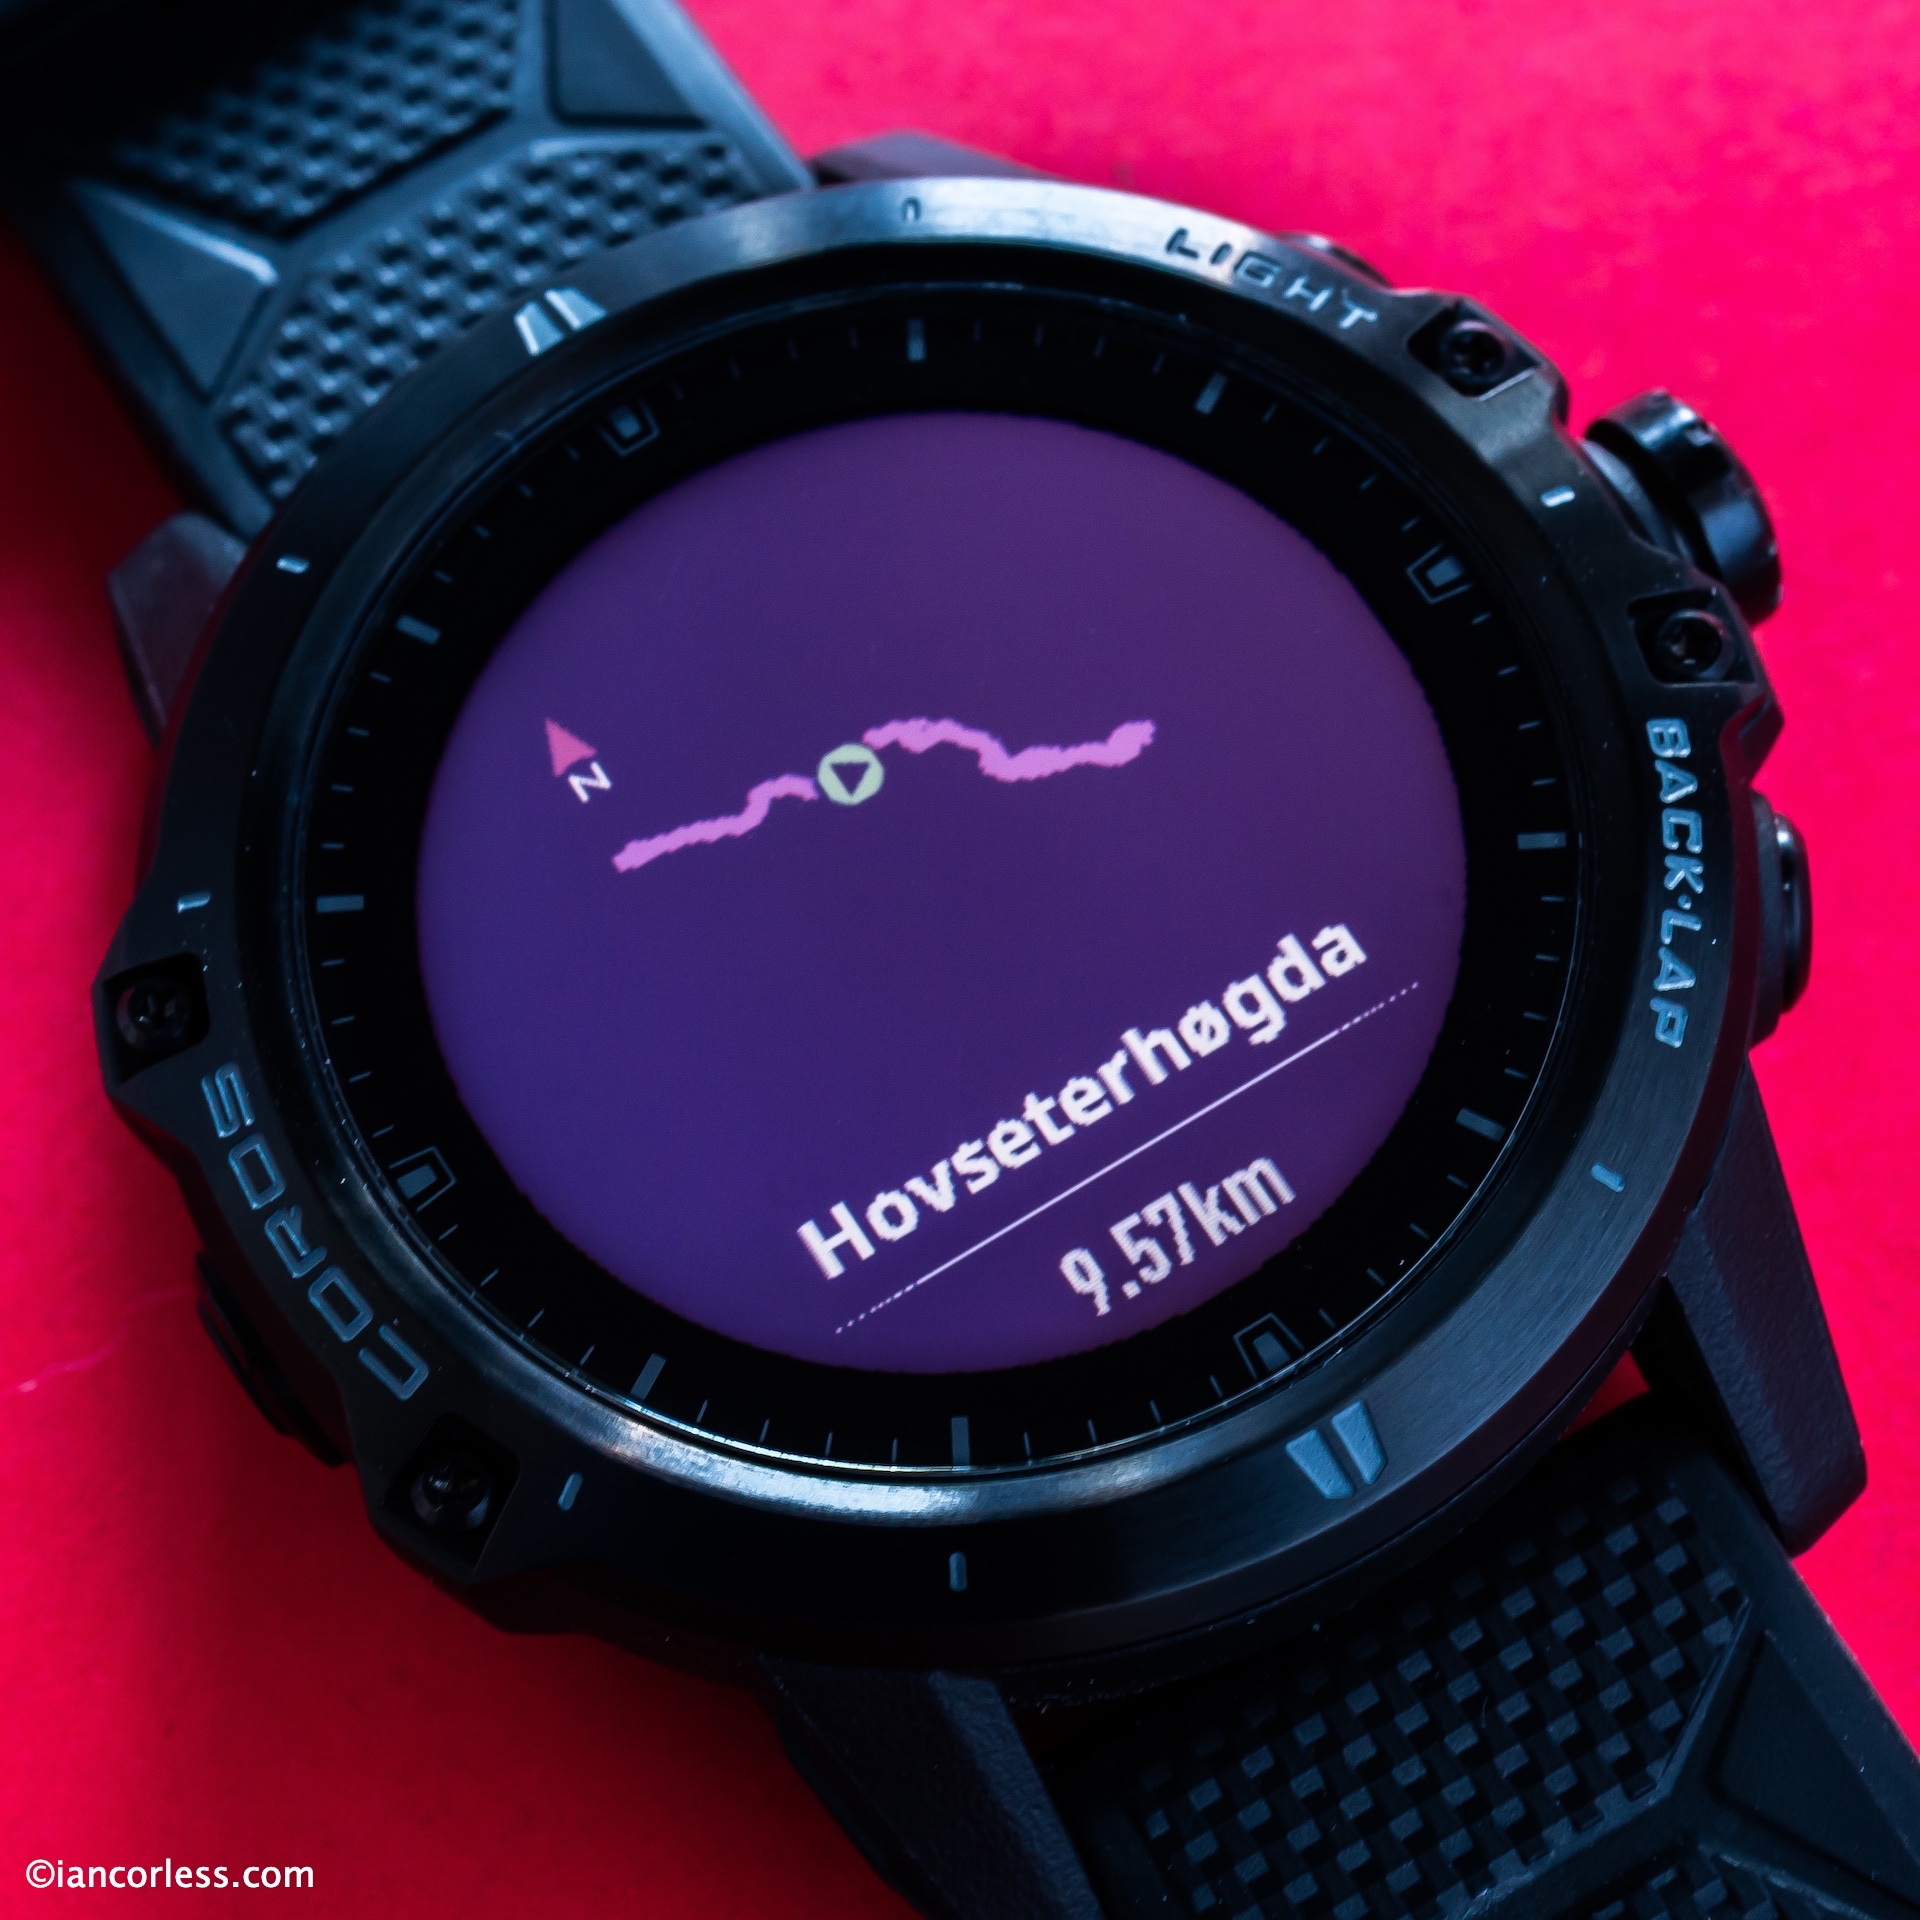
Stunning mapping,
North up toggle,
Round trip routing,
Countdown app,
Revamp of notifications,
Strength plans and routines,
Active navigation
and so much more…
This is a feature rich Garmin and one that has something for everyone. For me, the absolute stand outs are:
The screen
The navigation function and mapping
Battery
The light which also goes red
With three sizes available, 43/47 and 51mm there is a size for everyone. My default would have been to go for the 51mm but it is huge and I have found the 47mm a perfect size. Sapphirescreen costs more, don’t hesitate, pay more ad get it.
In the past years I have used Coros Vertix, Garmin Fenix 6, Garmin Fenix 7, Garmin Enduro 1 and Enduro 2 and recently I have been using the Coros Pace Pro – which is an excellent watch, with great screen and a good price point. I compared all these watches to my Apple Ultra. I know, I know, I can hear many say, there is no comparison. BUT there is. The Apple Ultra has a stunning screen and works seamlessly with an iPhone, obviously. For navigation, if you use apps like Footpath, routing and course navigation is superb. And of course, the option for apps is endless, however, the issue is the battery. I still struggle to understand how Apple fail to address this?
The Garmin Fenix 8 while lacking in all the obvious add-on apps that Apple have, is now, with the AMOLED screen, my go to daily watch. For many, the addition of a microphone / speaker will be minor, for me it is superb. The five buttons and touch screen option make using the watch easy. If you are a Diver, the new features are superb. GPS accuracy is industry standard and the optical heart rate sensor is good with the usual caveats. The light is incredible with variable power and a red light option. The light feature is one of my most used features and is a real omission on the Coros Pace Pro. Sometimes it is the little things that make a big difference.
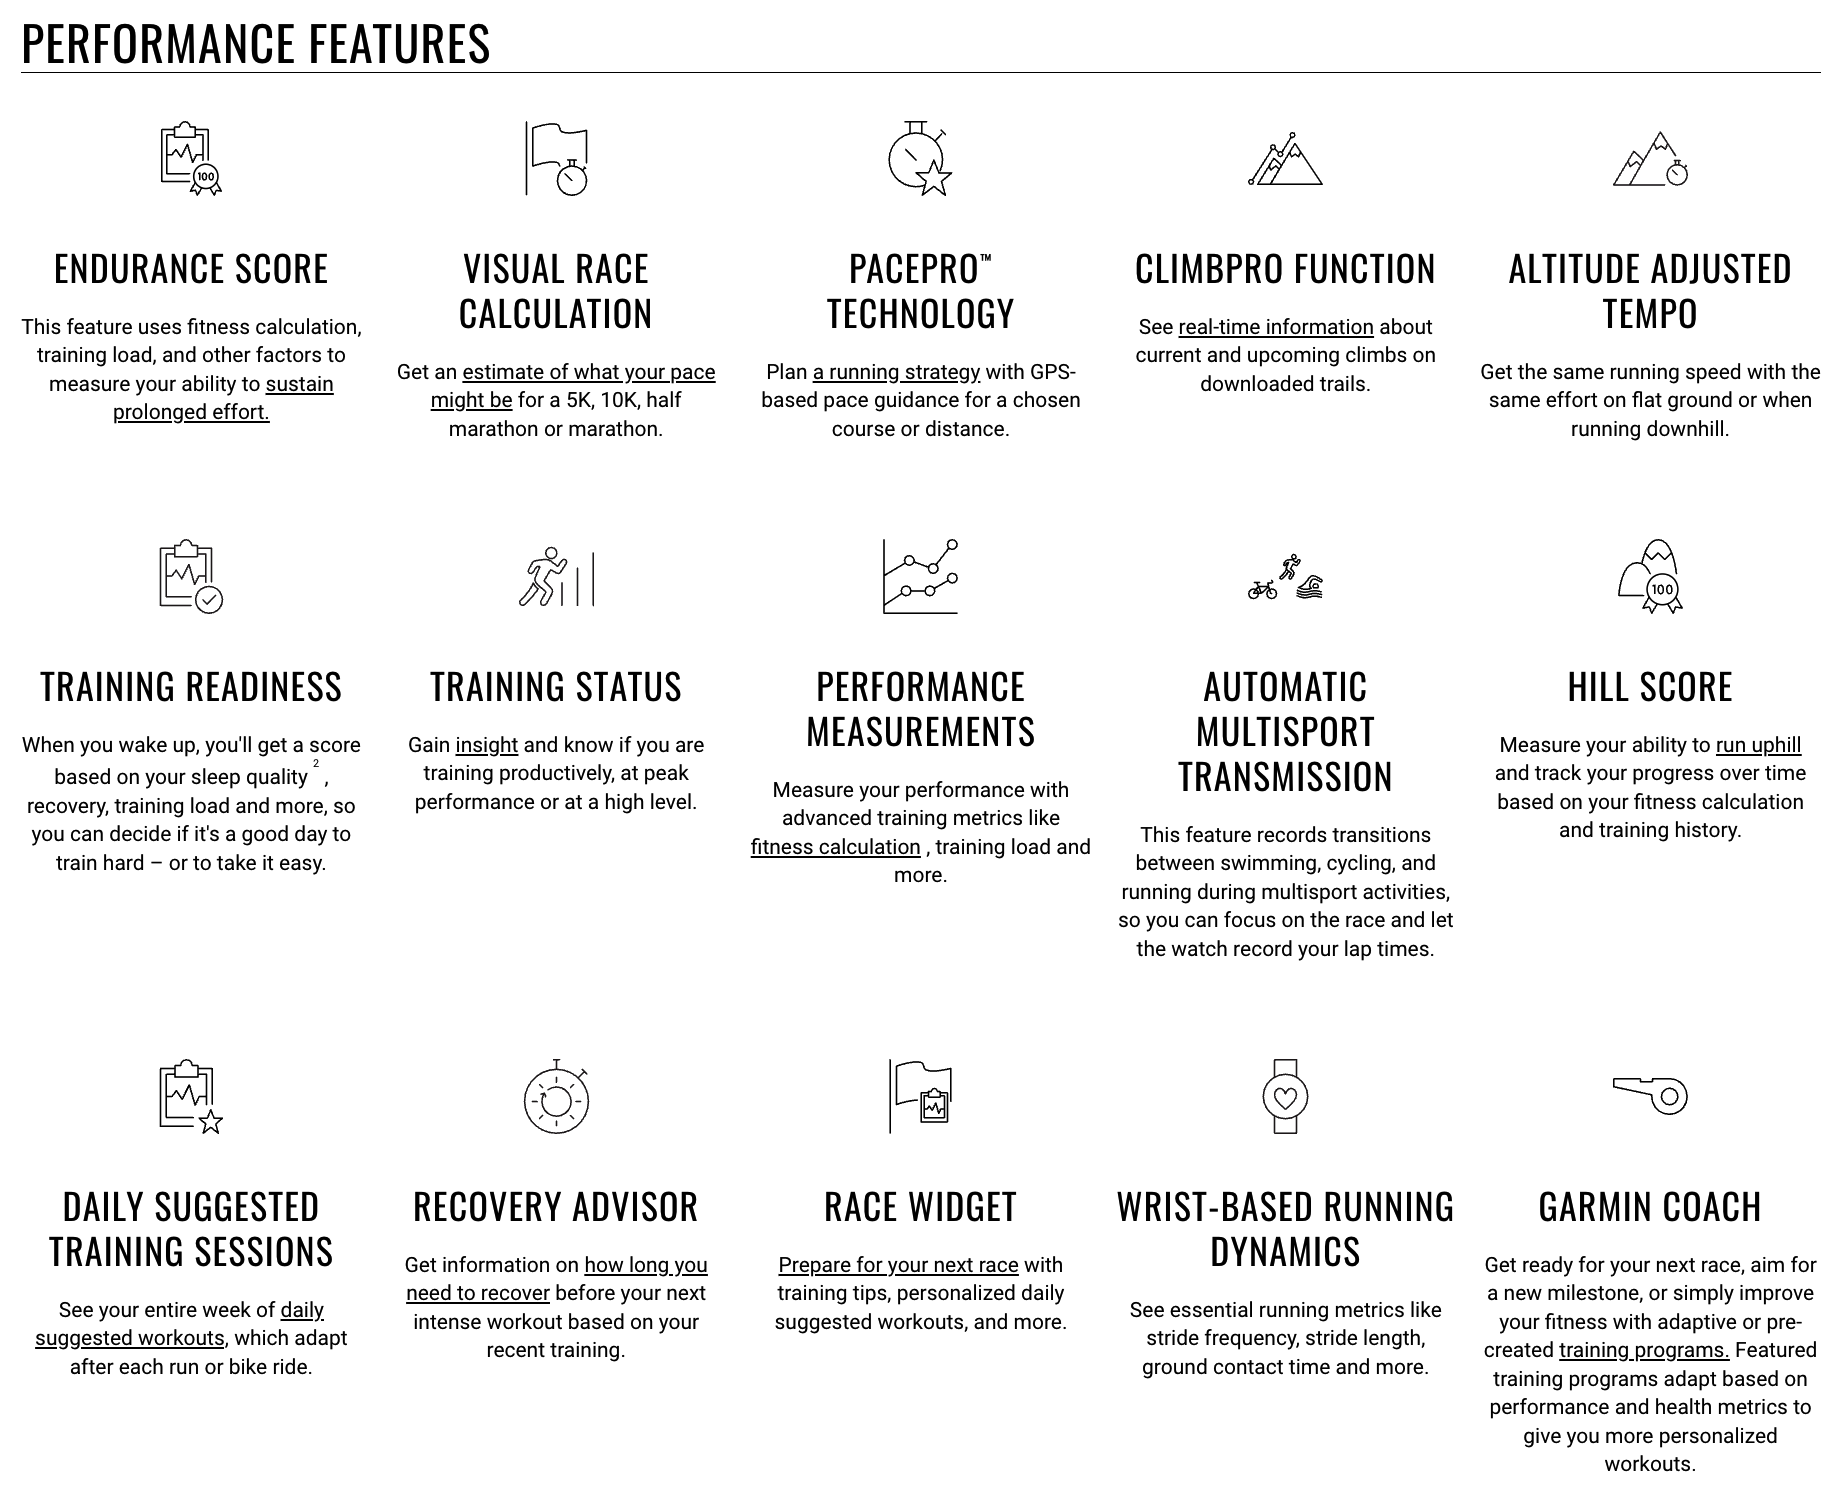
FEATURES
Is it worth upgrading? Quite simply, the AMOLED screen is a deal breaker for me and worth the upgrade from any solar/ MIP watch. I loved my Enduro 1 and Enduro 2 for battery life but did not like the screen, hence, I used the Apple Ultra for navigation on one wrist and the Enduro on the other to record data etc.
The Fenix 8 addresses this, I now have the perfect watch for multi-day adventures without asking:
Can see the screen?
Will I have enough battery?
Do I have a torch handy?
Can I navigate?
And, if required, can I use my credit card to pay for things?
I even have music! These are the key features I want from a watch like this. With battery life on AMOLED units starting to rival that of MIP-based units, the choice is easy.
Like I said, this is not a deep dive into the watch and all its features. It’s a summary of using the watch and would I recommend it? The simple answer is 100%. It’s the best GPS watch I have had and the level of features and functions are way beyond my needs and demands.
And on a final note, if you do not require AMOLED, the Garmin Enduro 3 is the choice to go for, although, you can only get the 51mm size. It has all the Fenix 8 features with a considerably cheaper price and considerably bigger battery…. If only they could the AMOLED 🙂
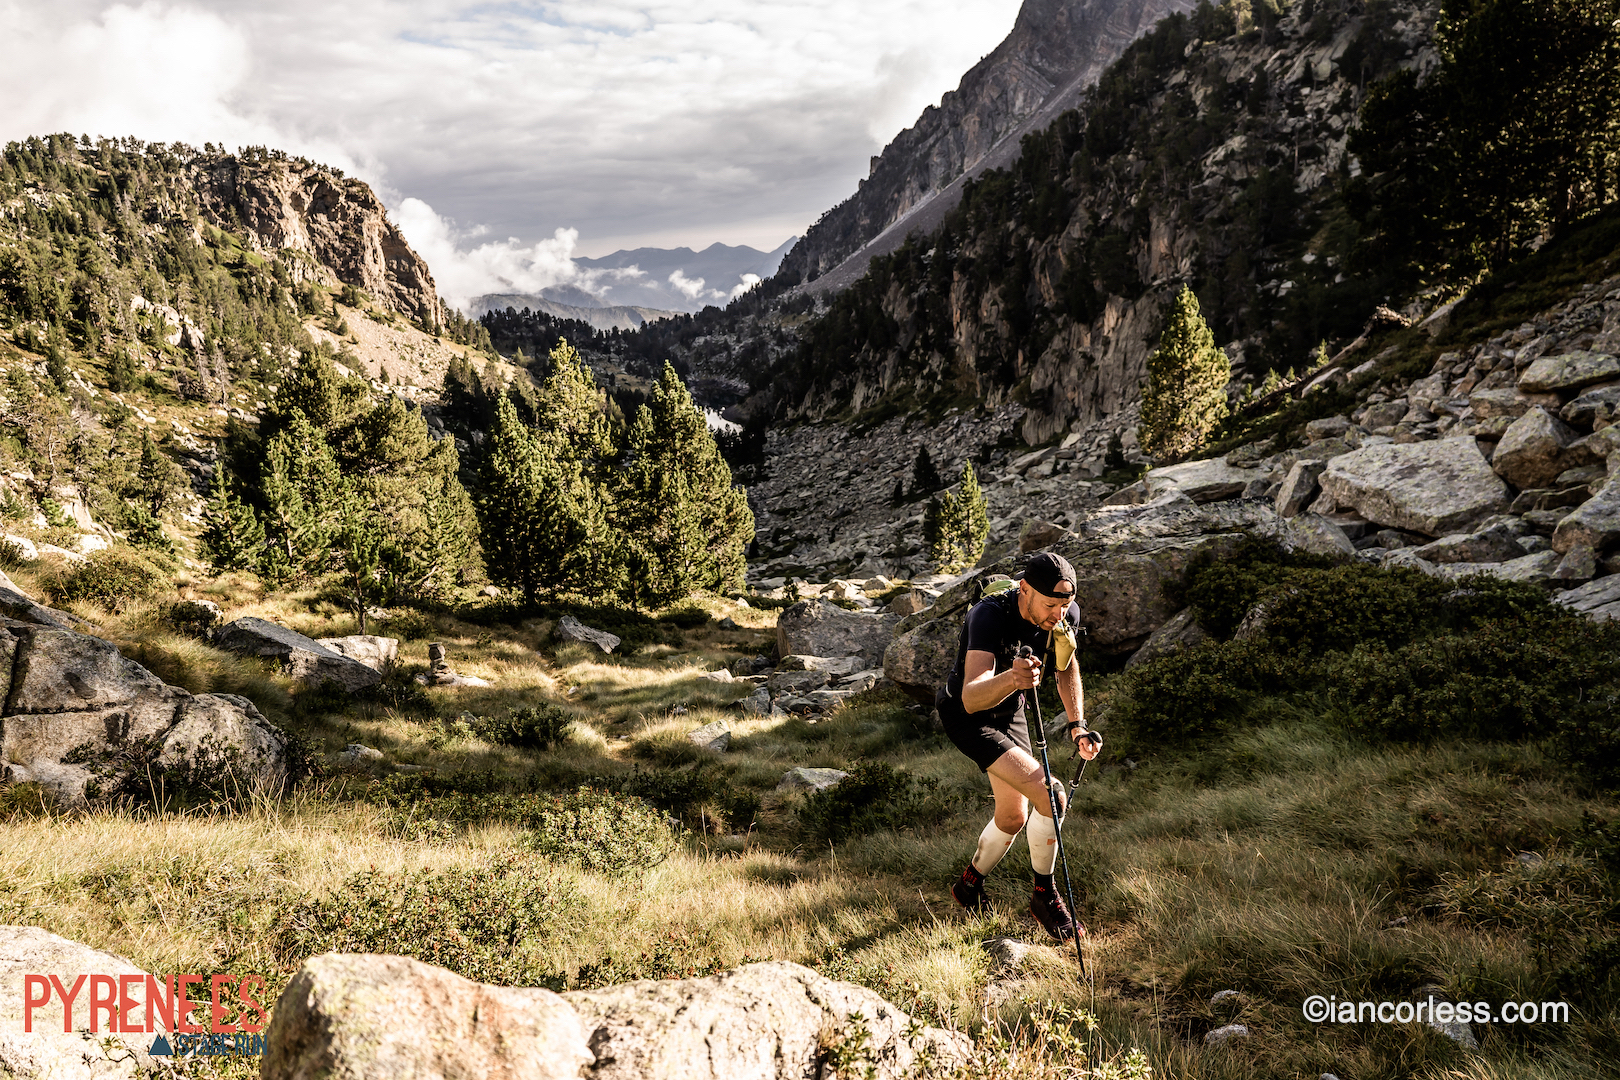
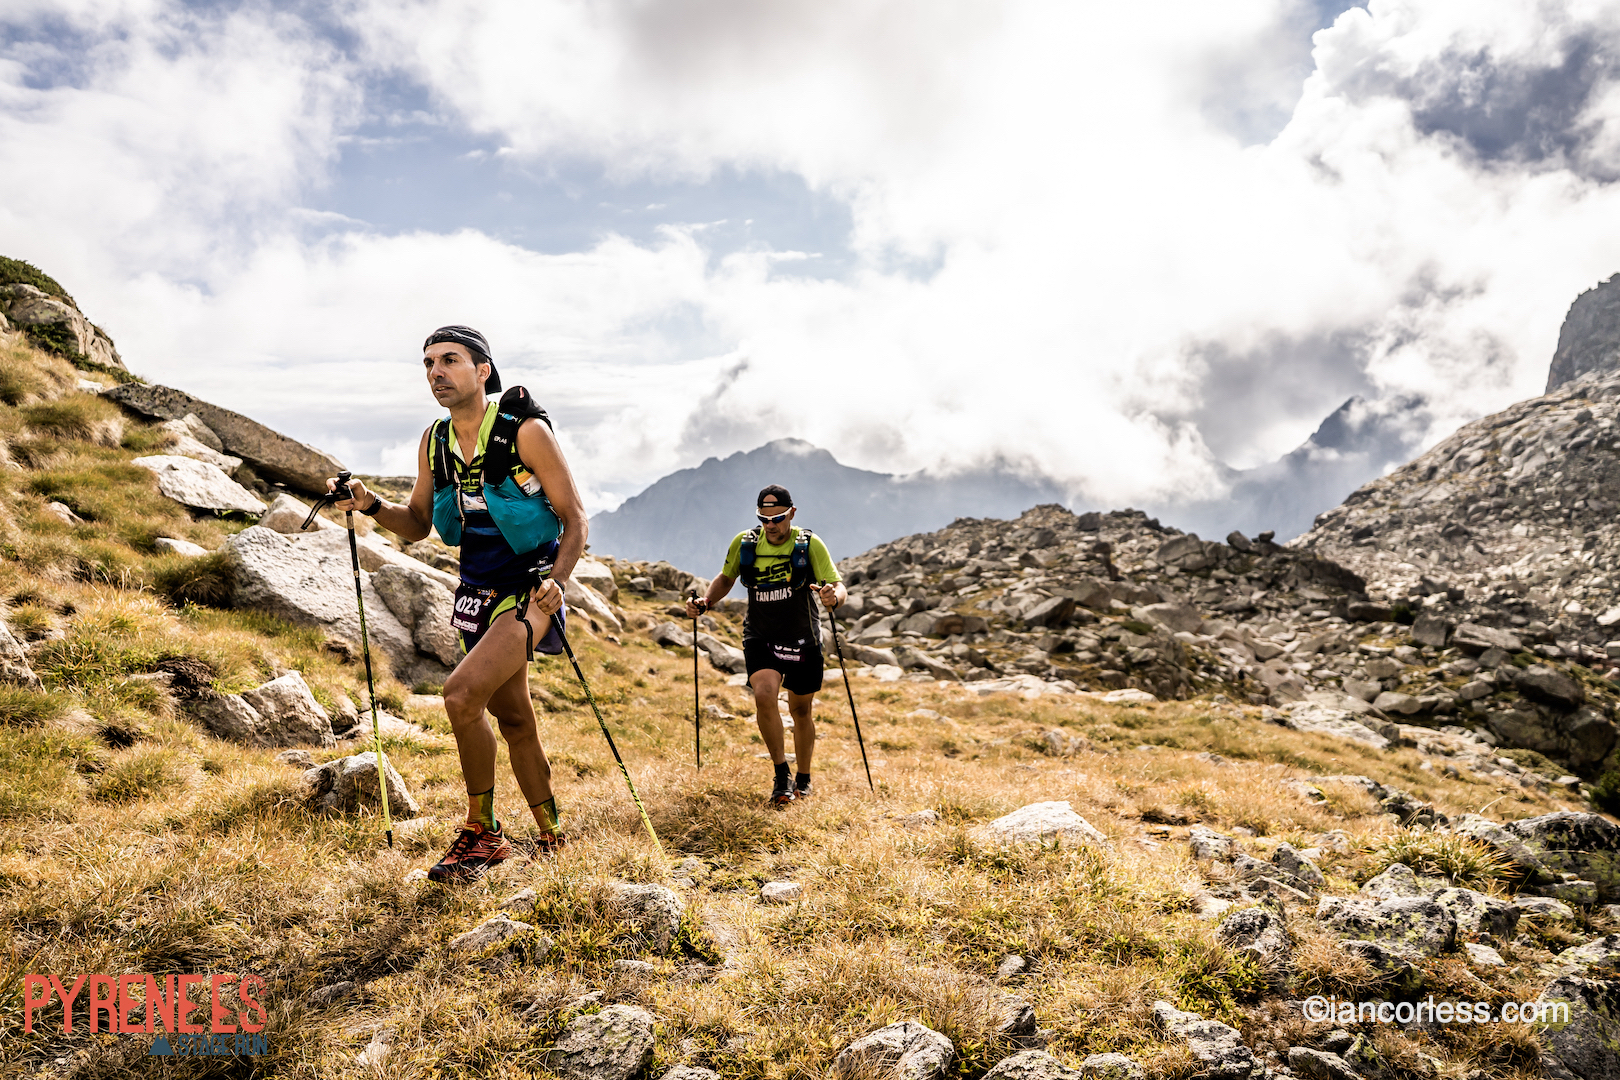
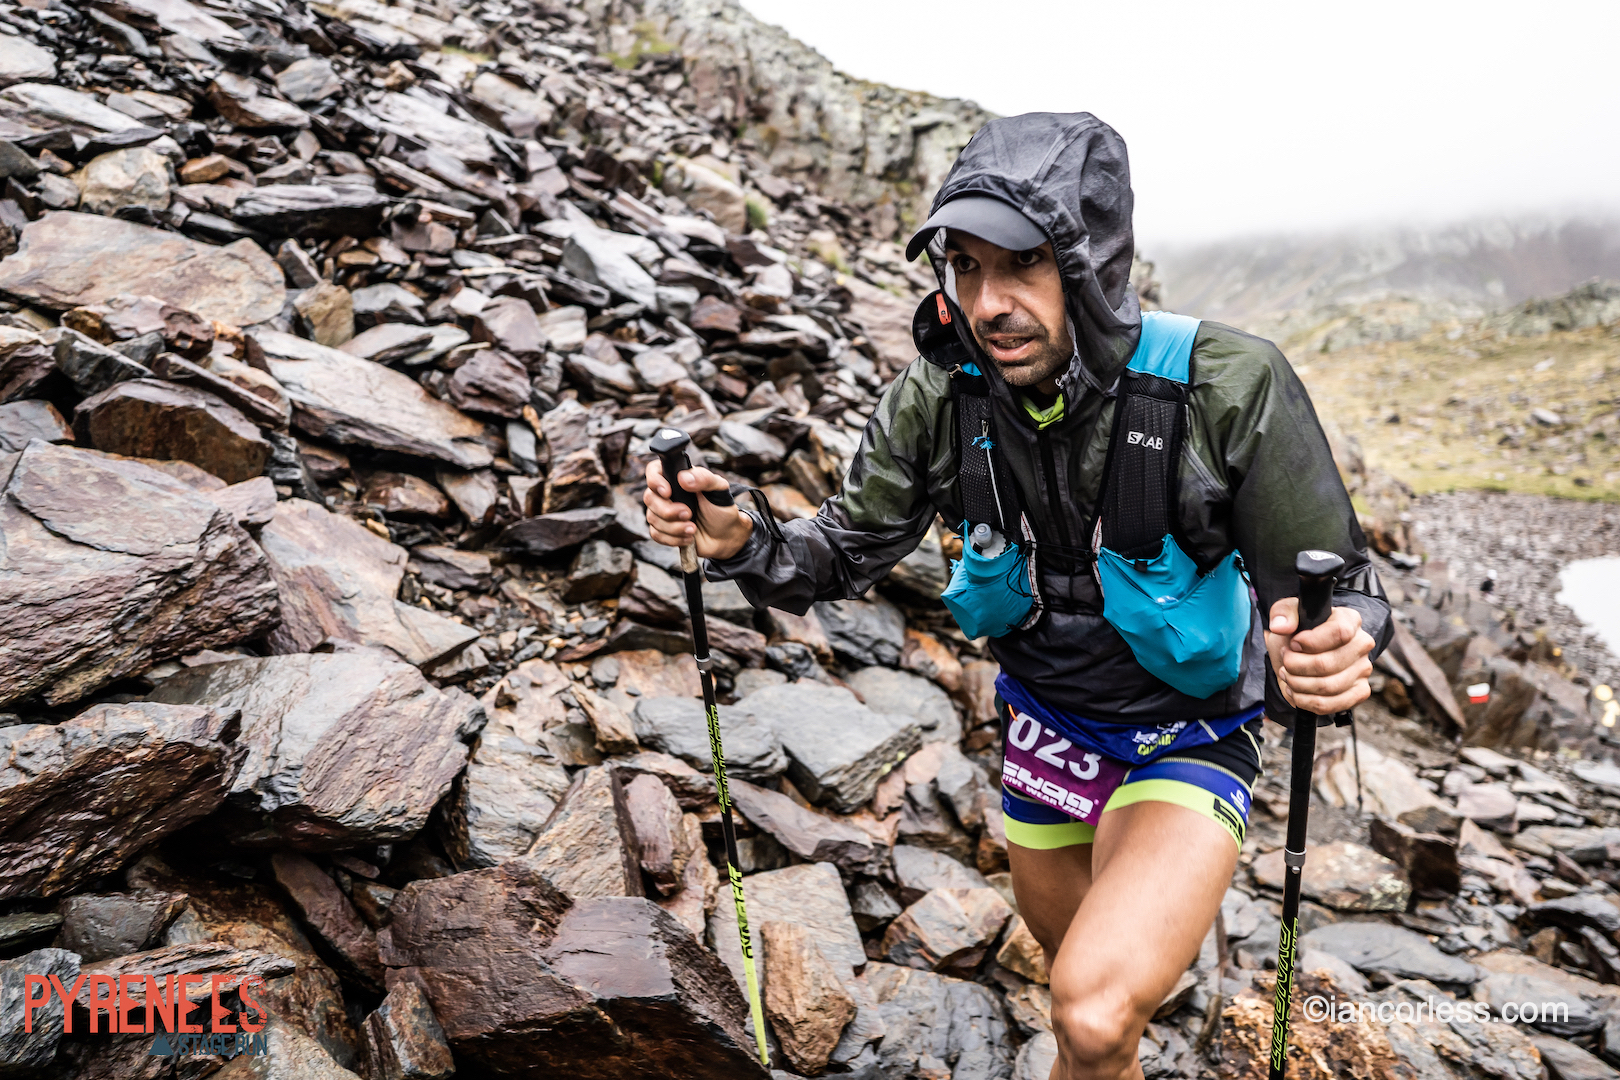
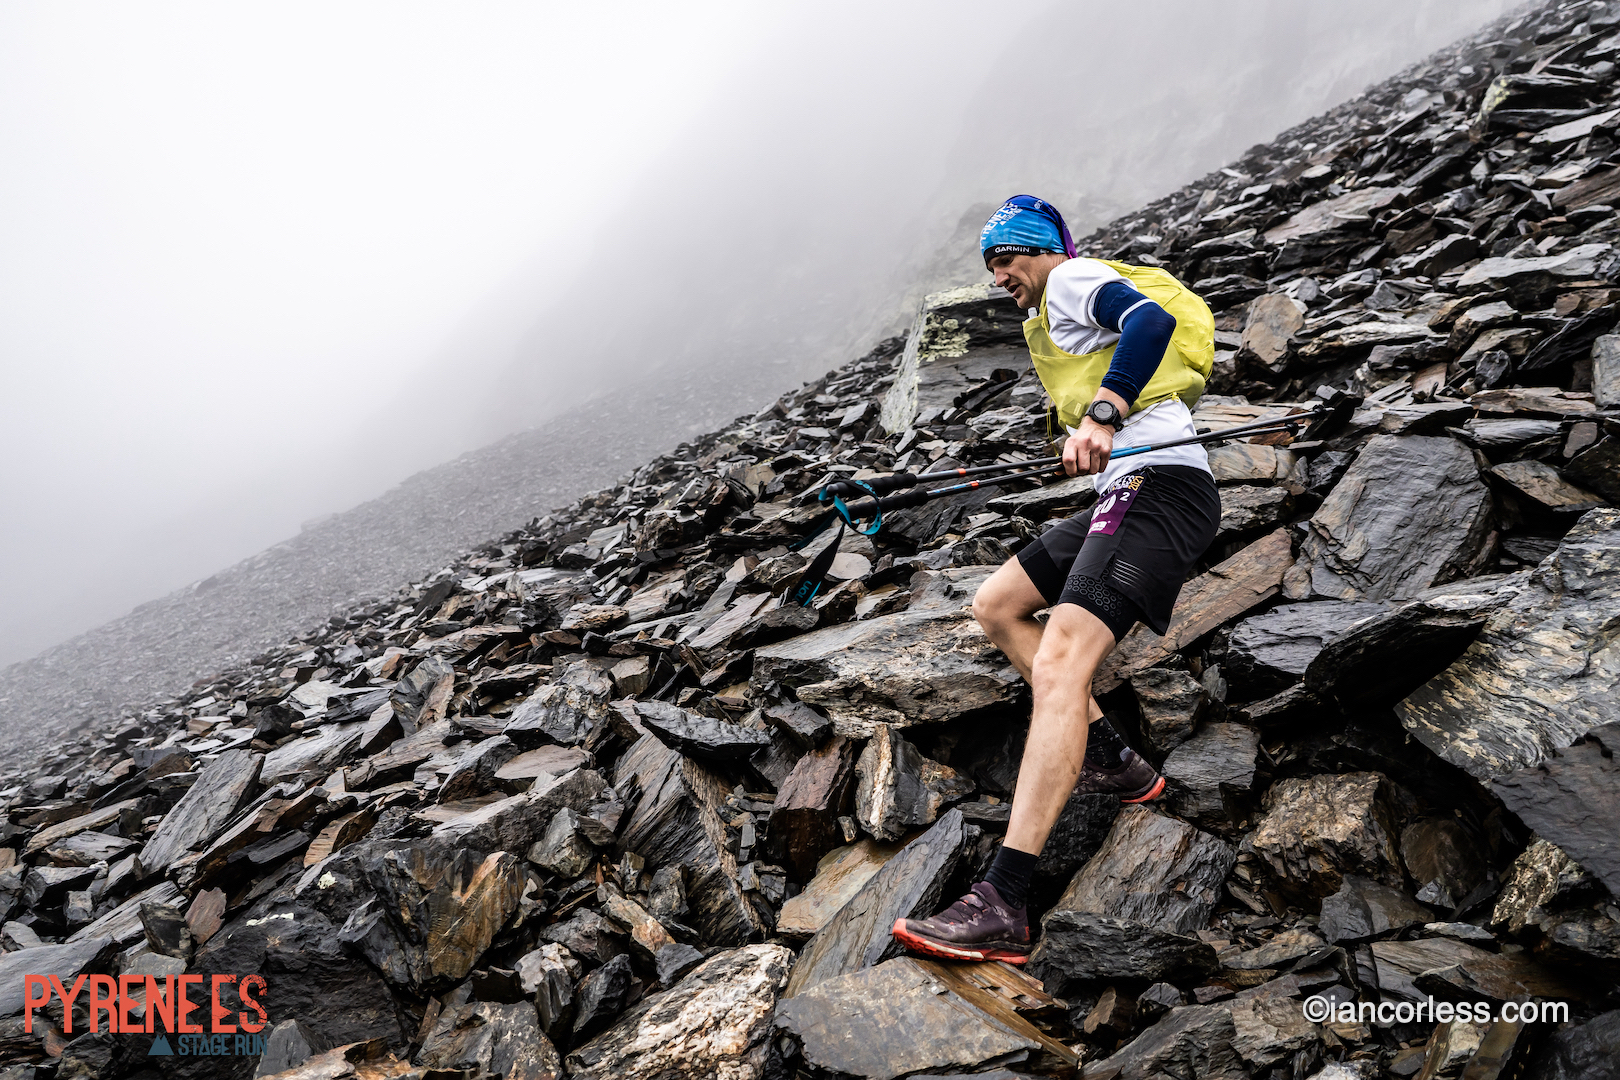
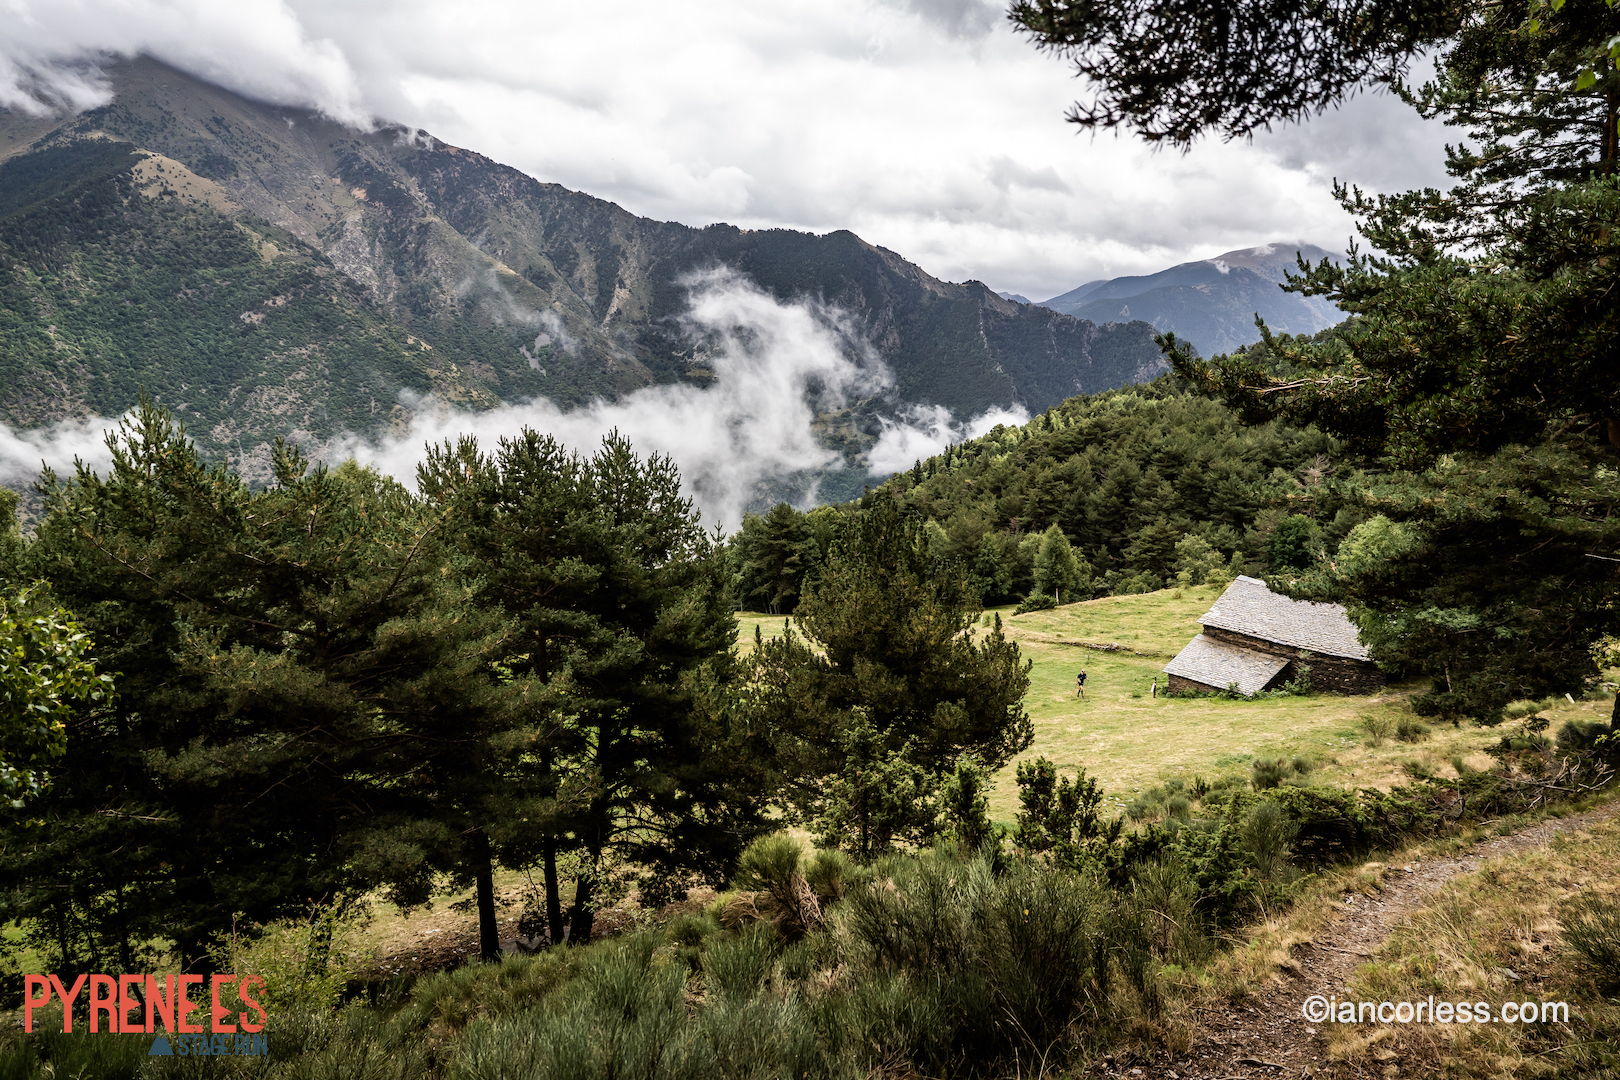
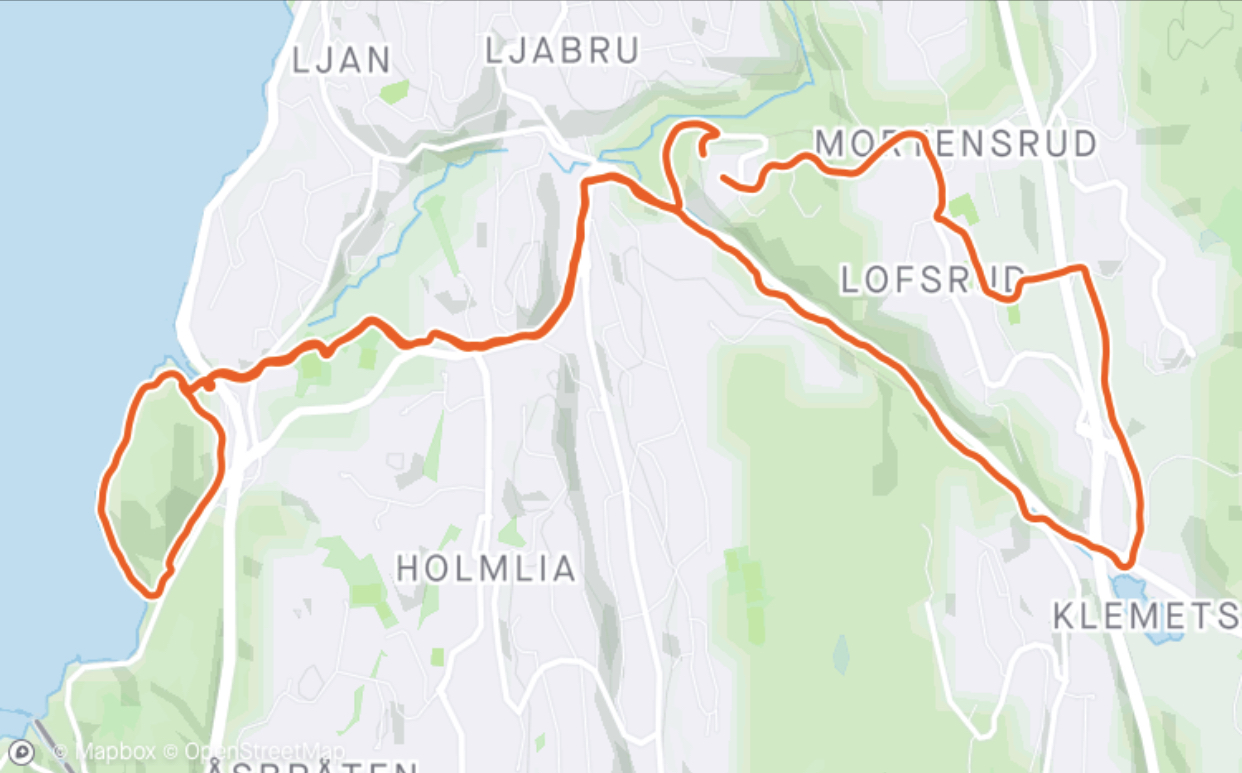
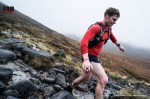
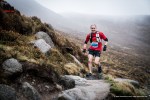
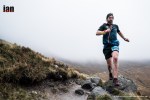
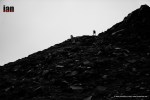
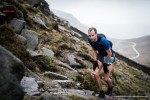
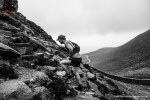
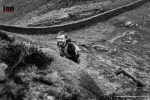
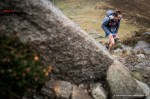
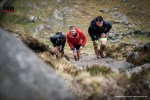
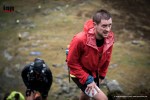
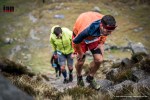
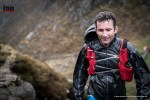
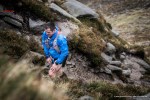
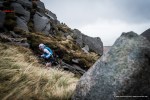
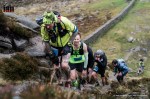
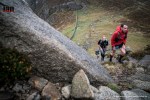
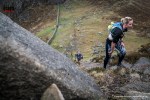
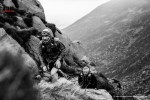
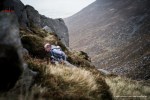
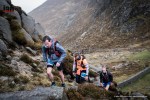
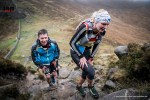
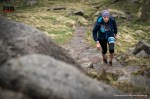
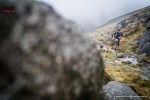
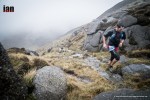
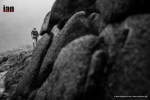
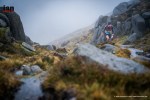
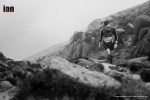
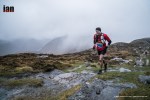
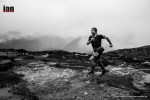
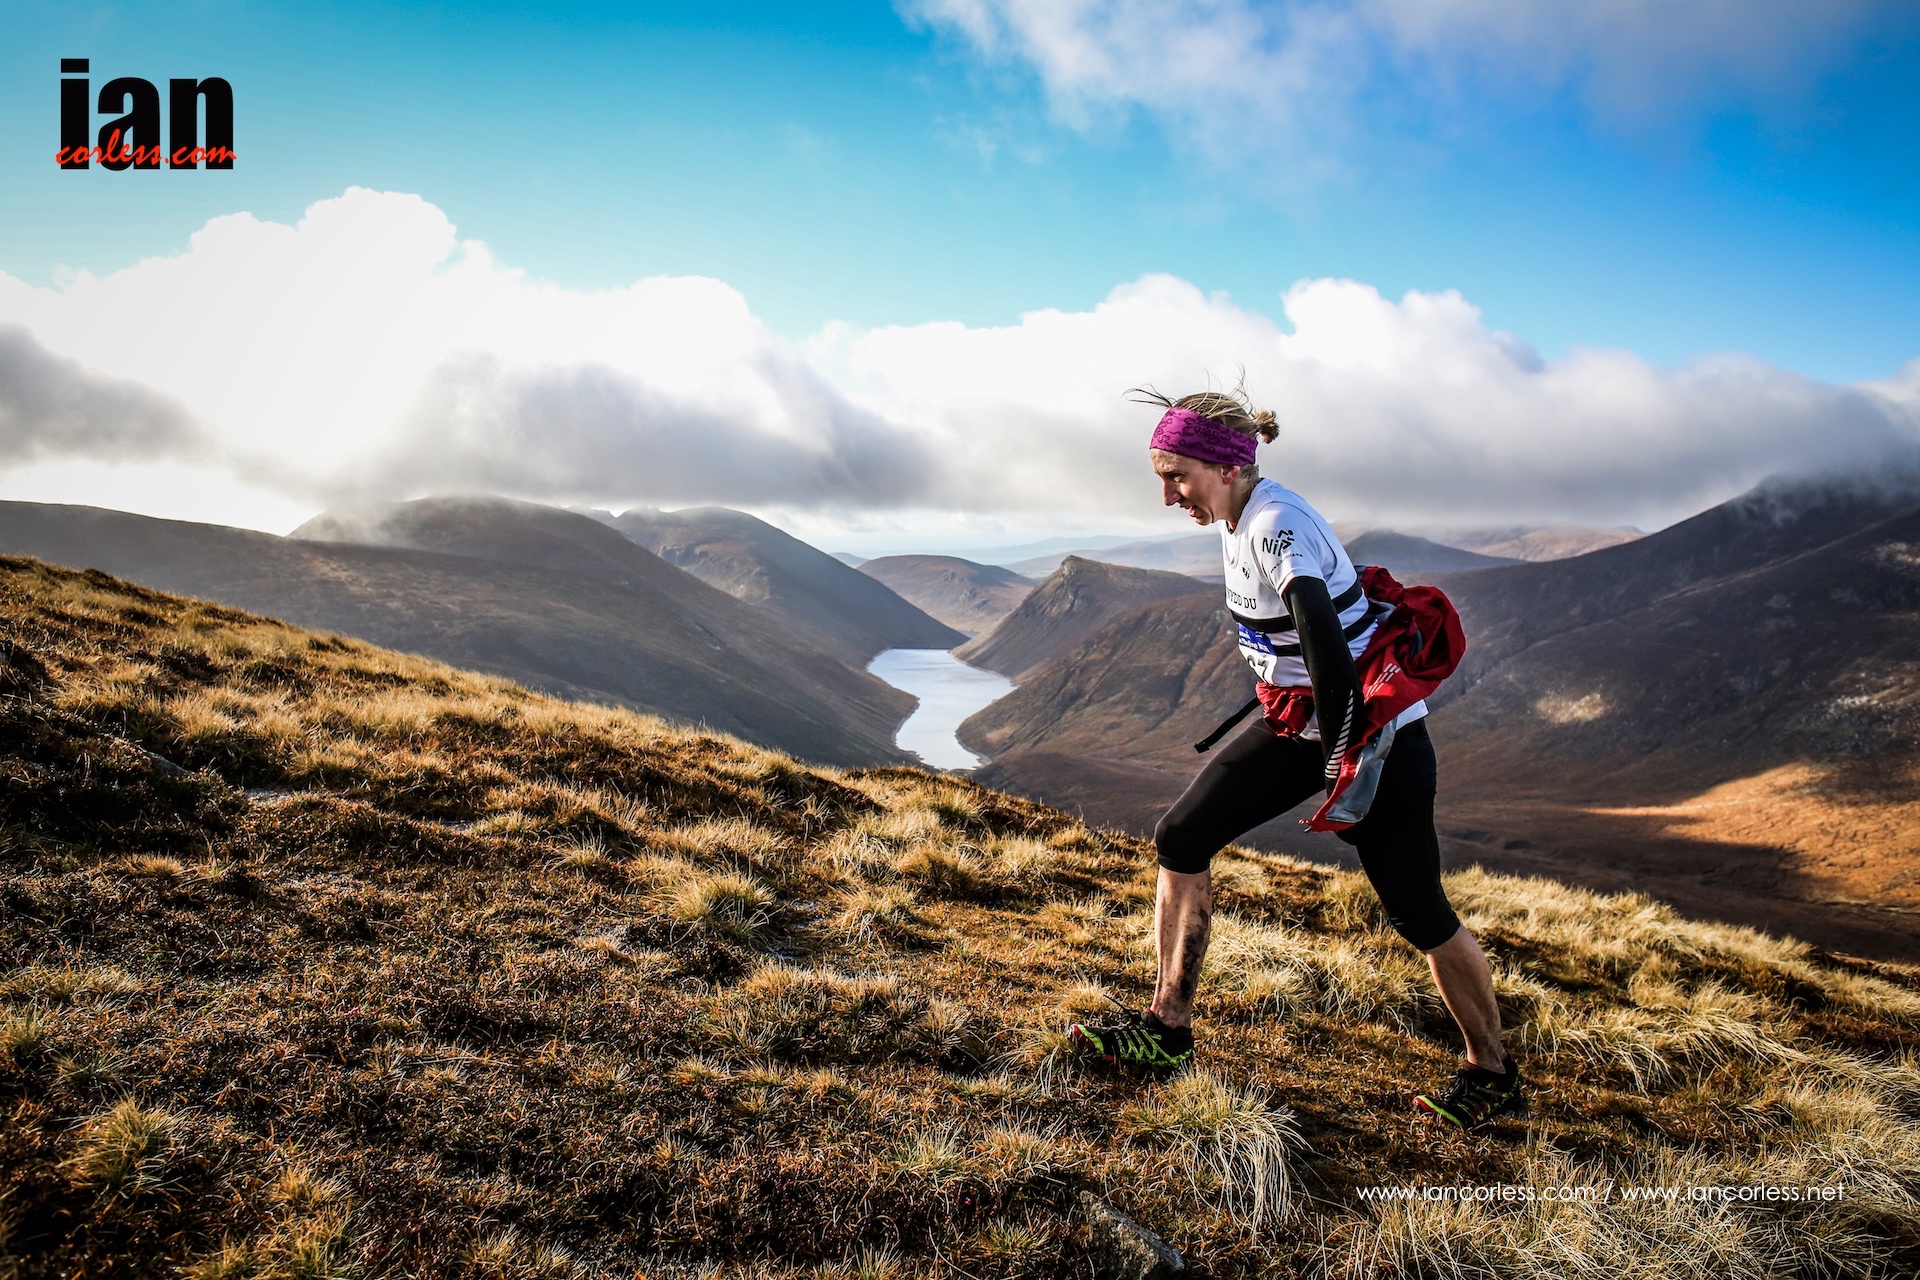
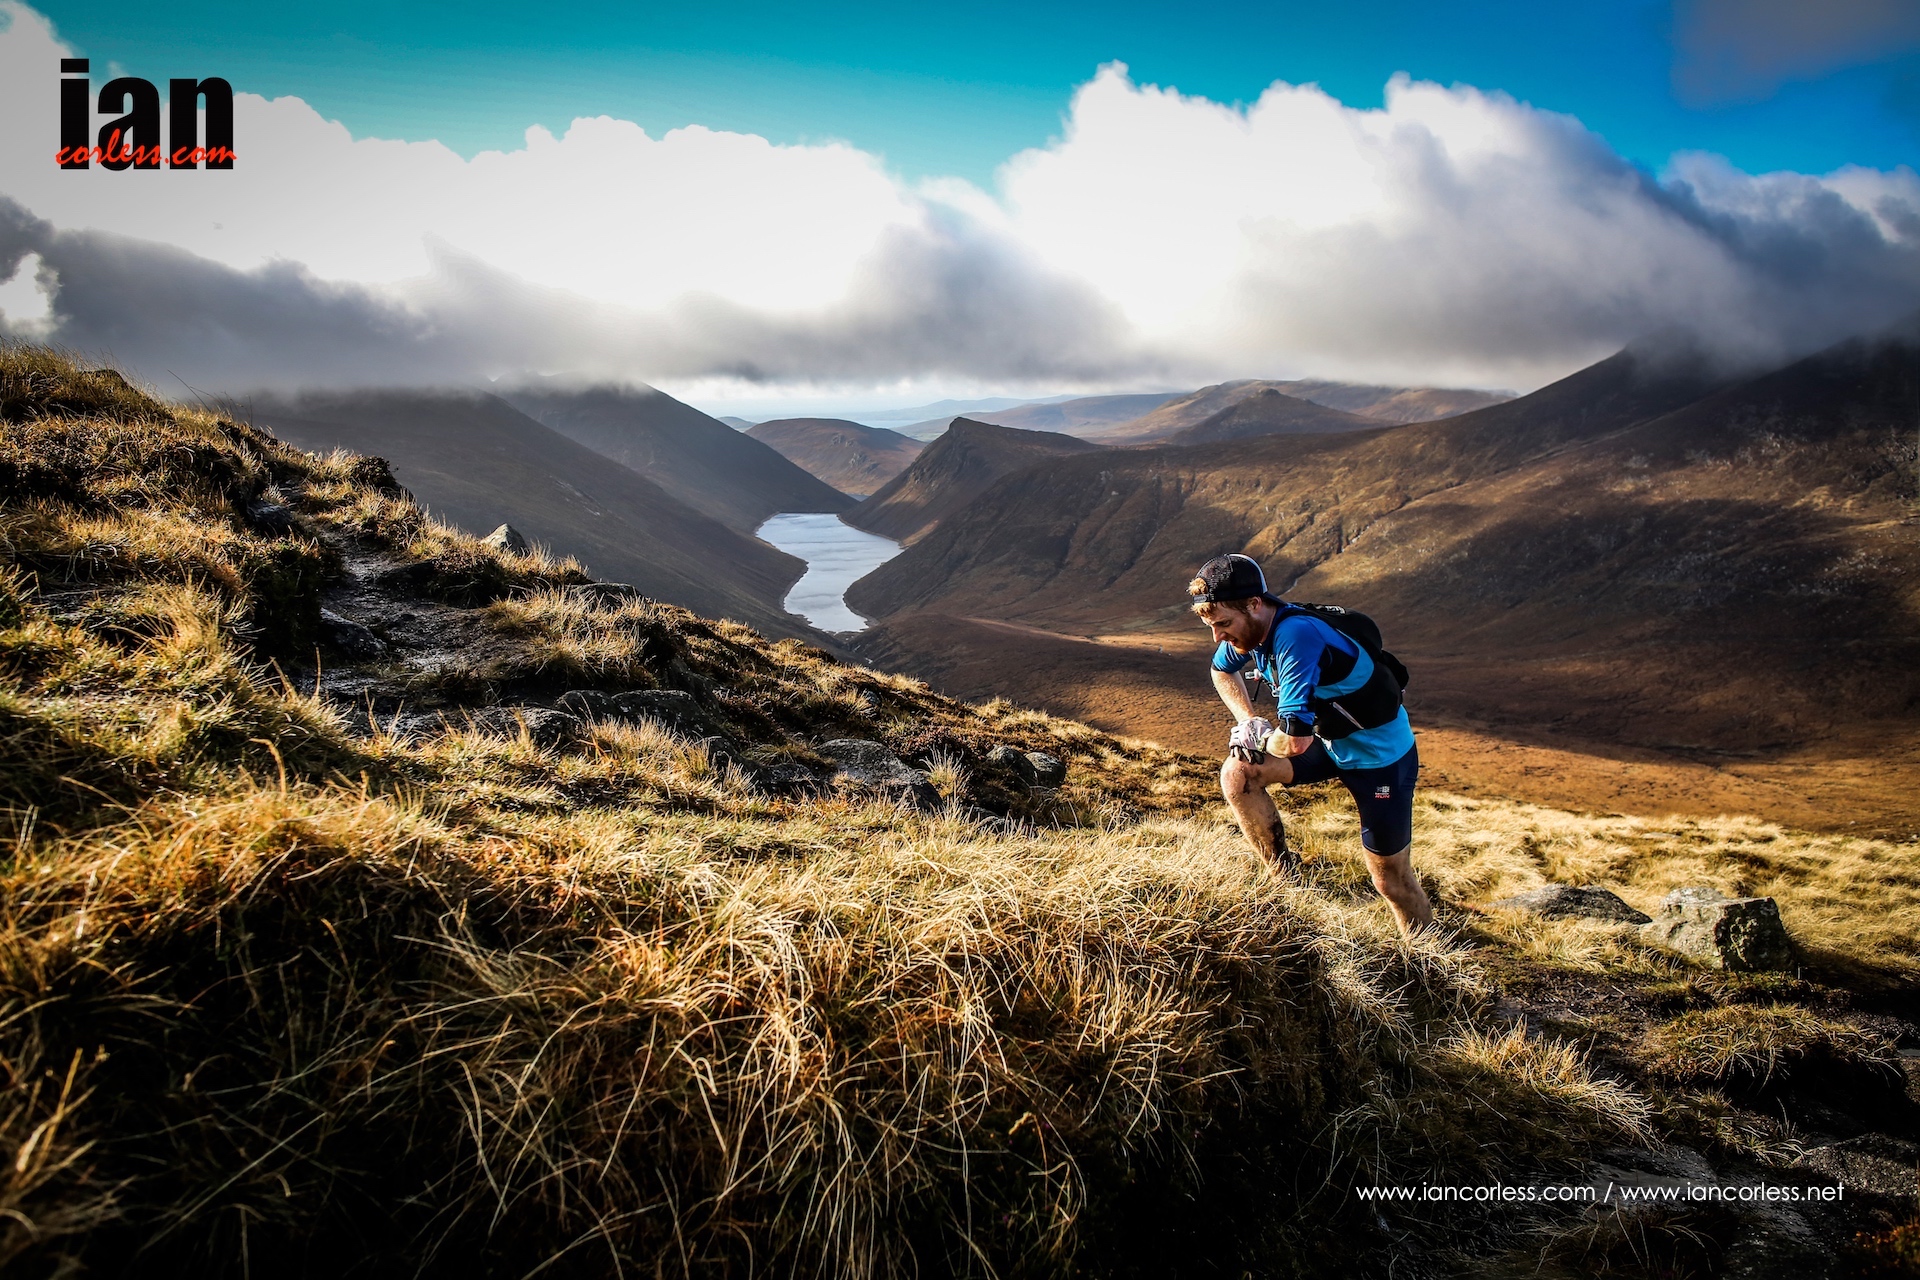
All good things come to an end. Yesterday, stage 7 concluded the 2021 Pyrenees Stage Run. In stage racing, the last day is often an easy victory run allowing participants to relax, tick off easy miles and cruise in to the finish and conclusion of the race. Not so at the PSR, stage 7 from Esterri d’Àneu to Salardú was tough one!
On paper, considering what had gone before, 32.8km’s and 2300m+ didn’t seem over scary. However, on inspection of the maps and discussions at the race briefing, it was clear that the middle section of the route would reduce runners to crawling pace.
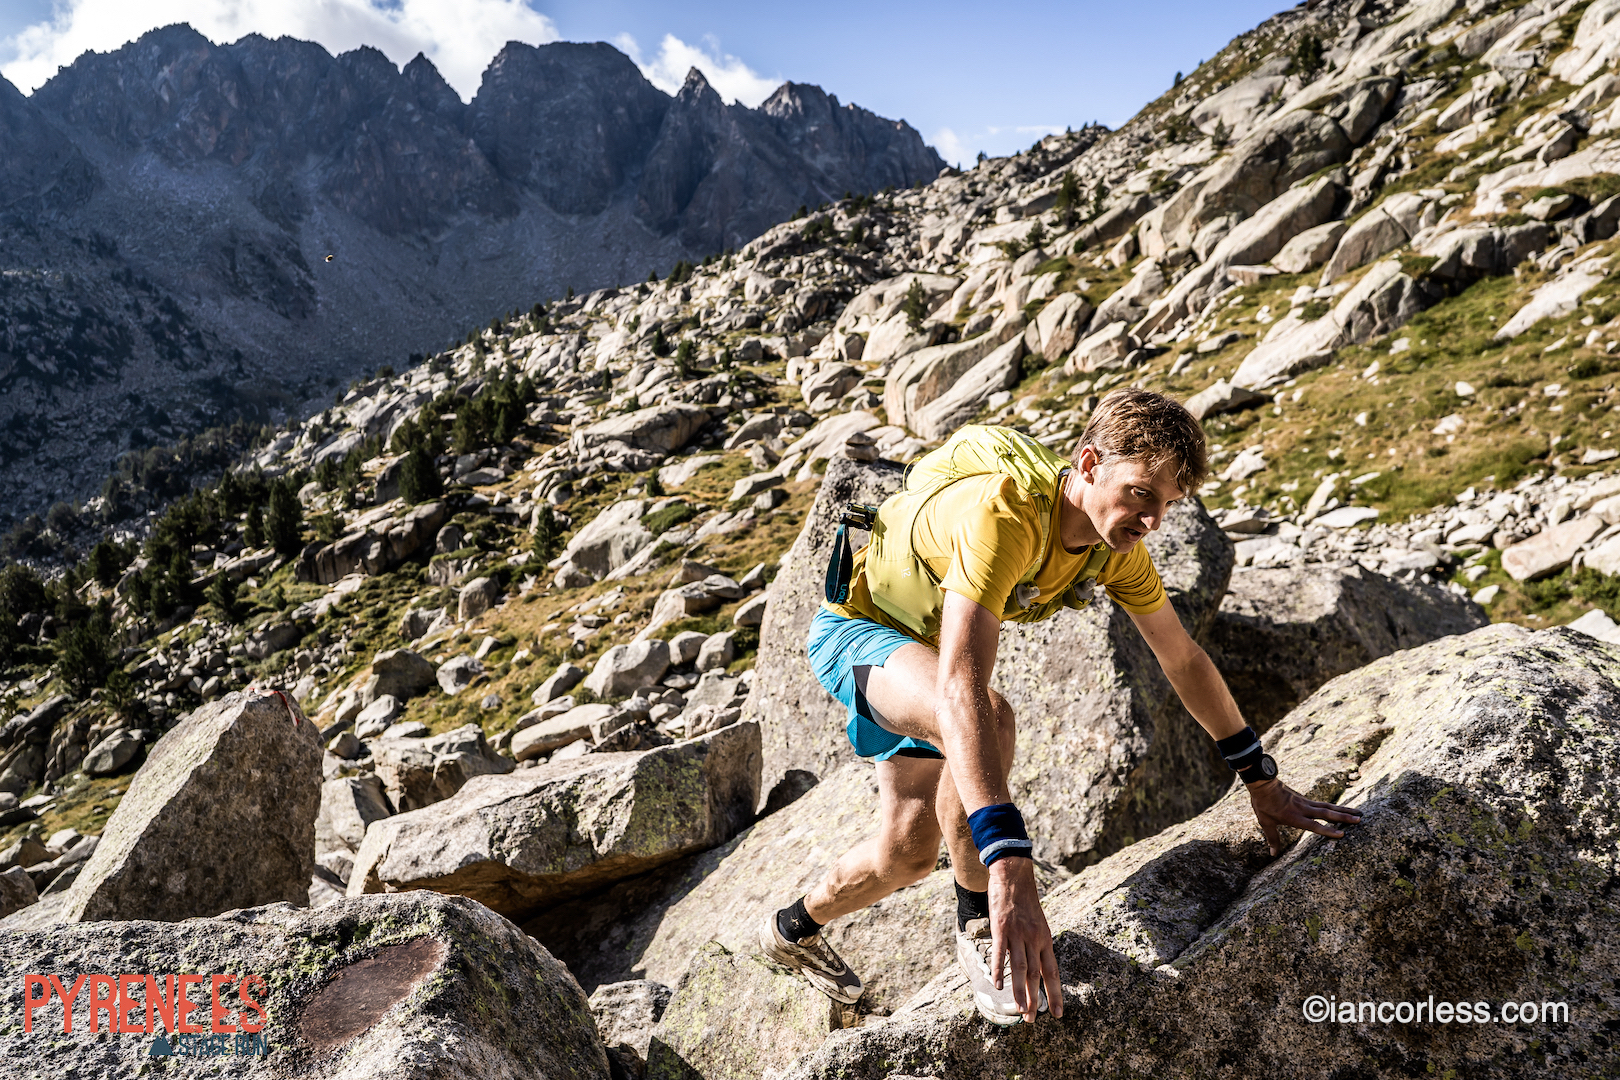
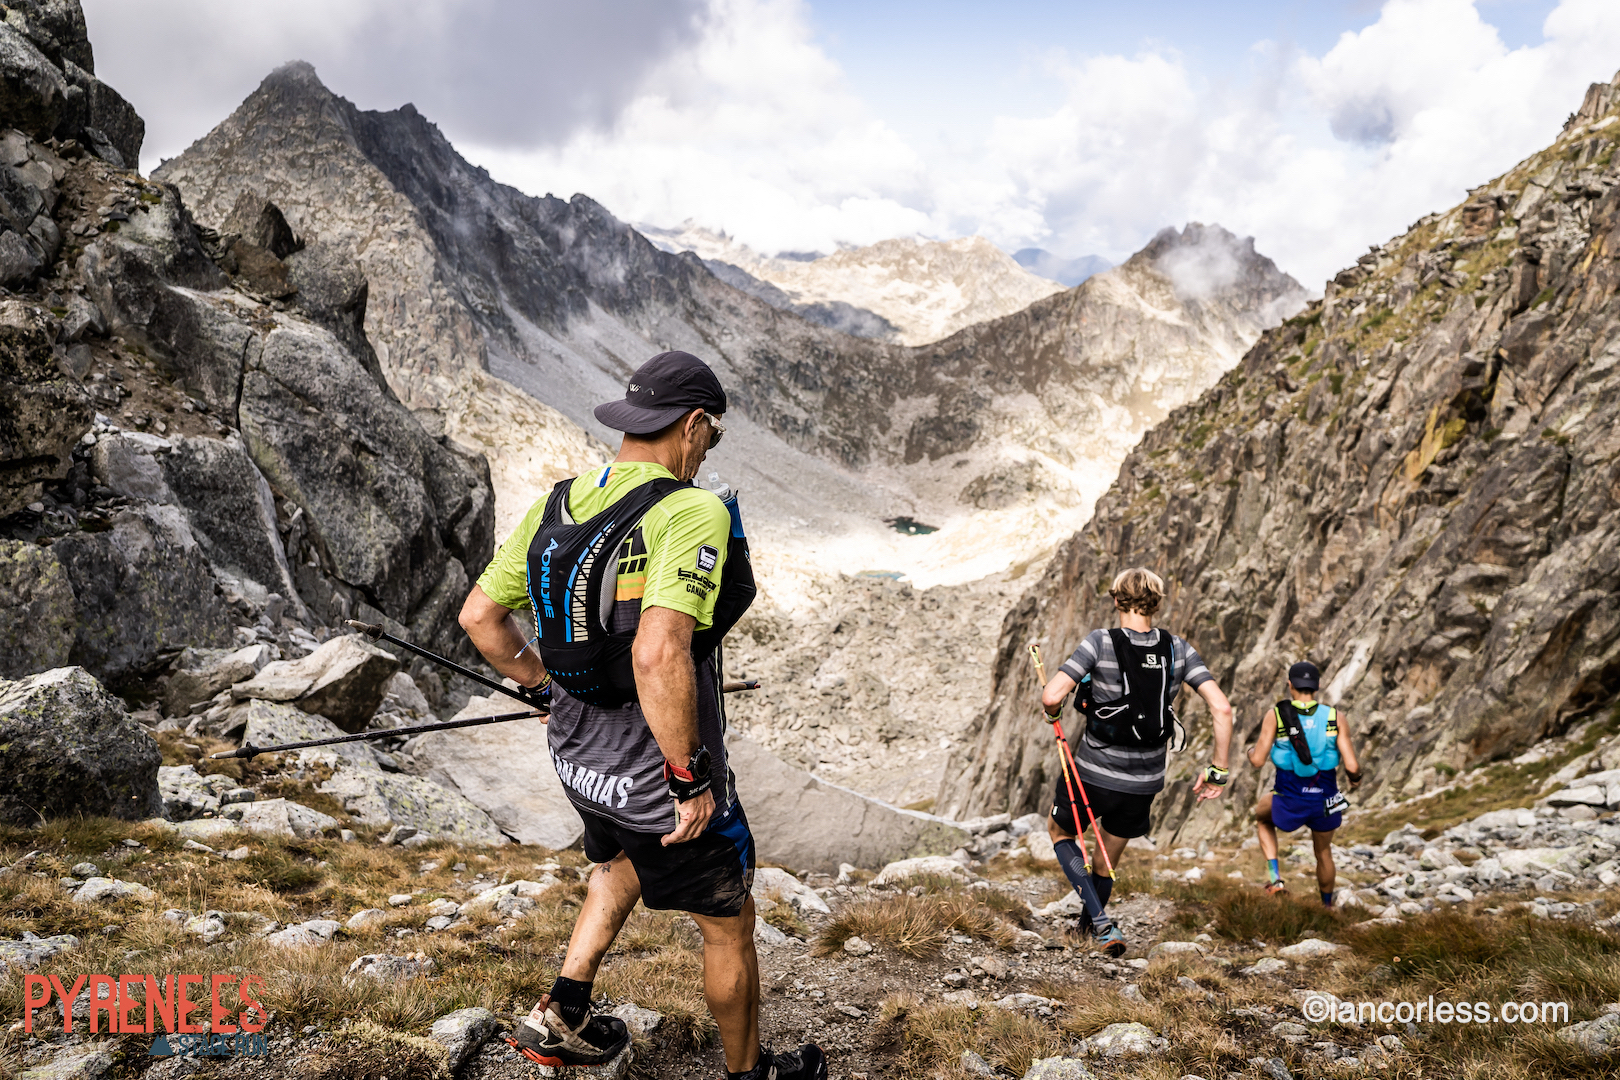
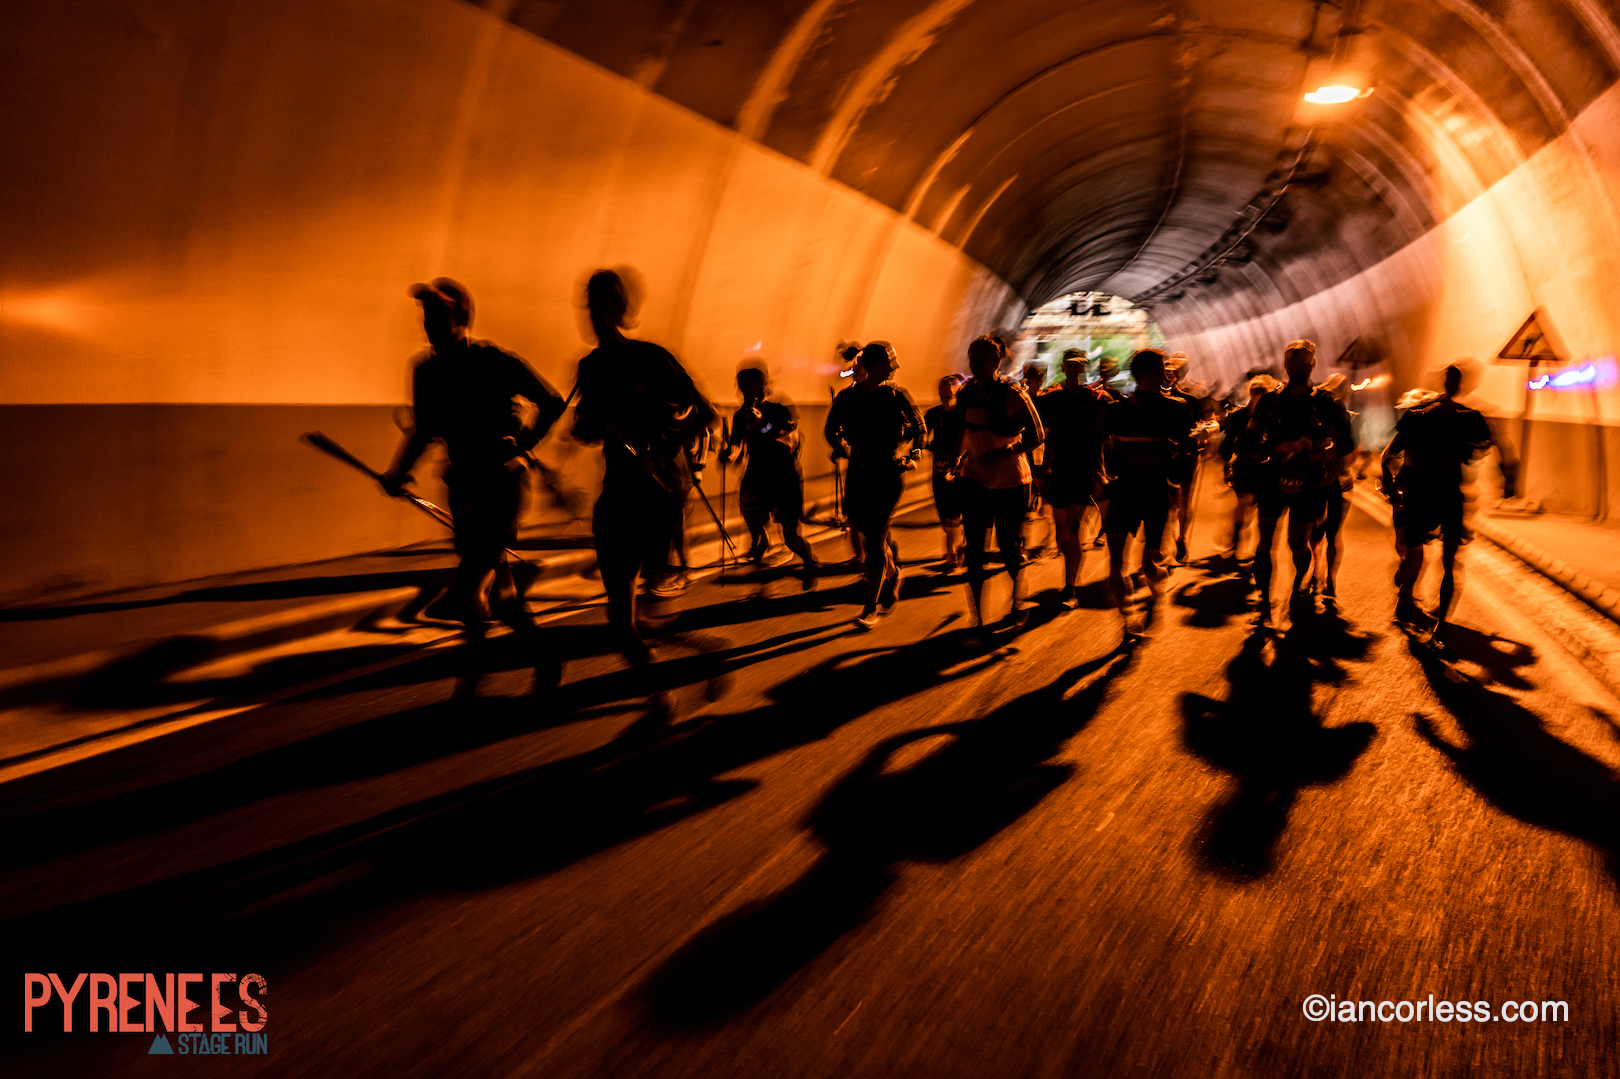
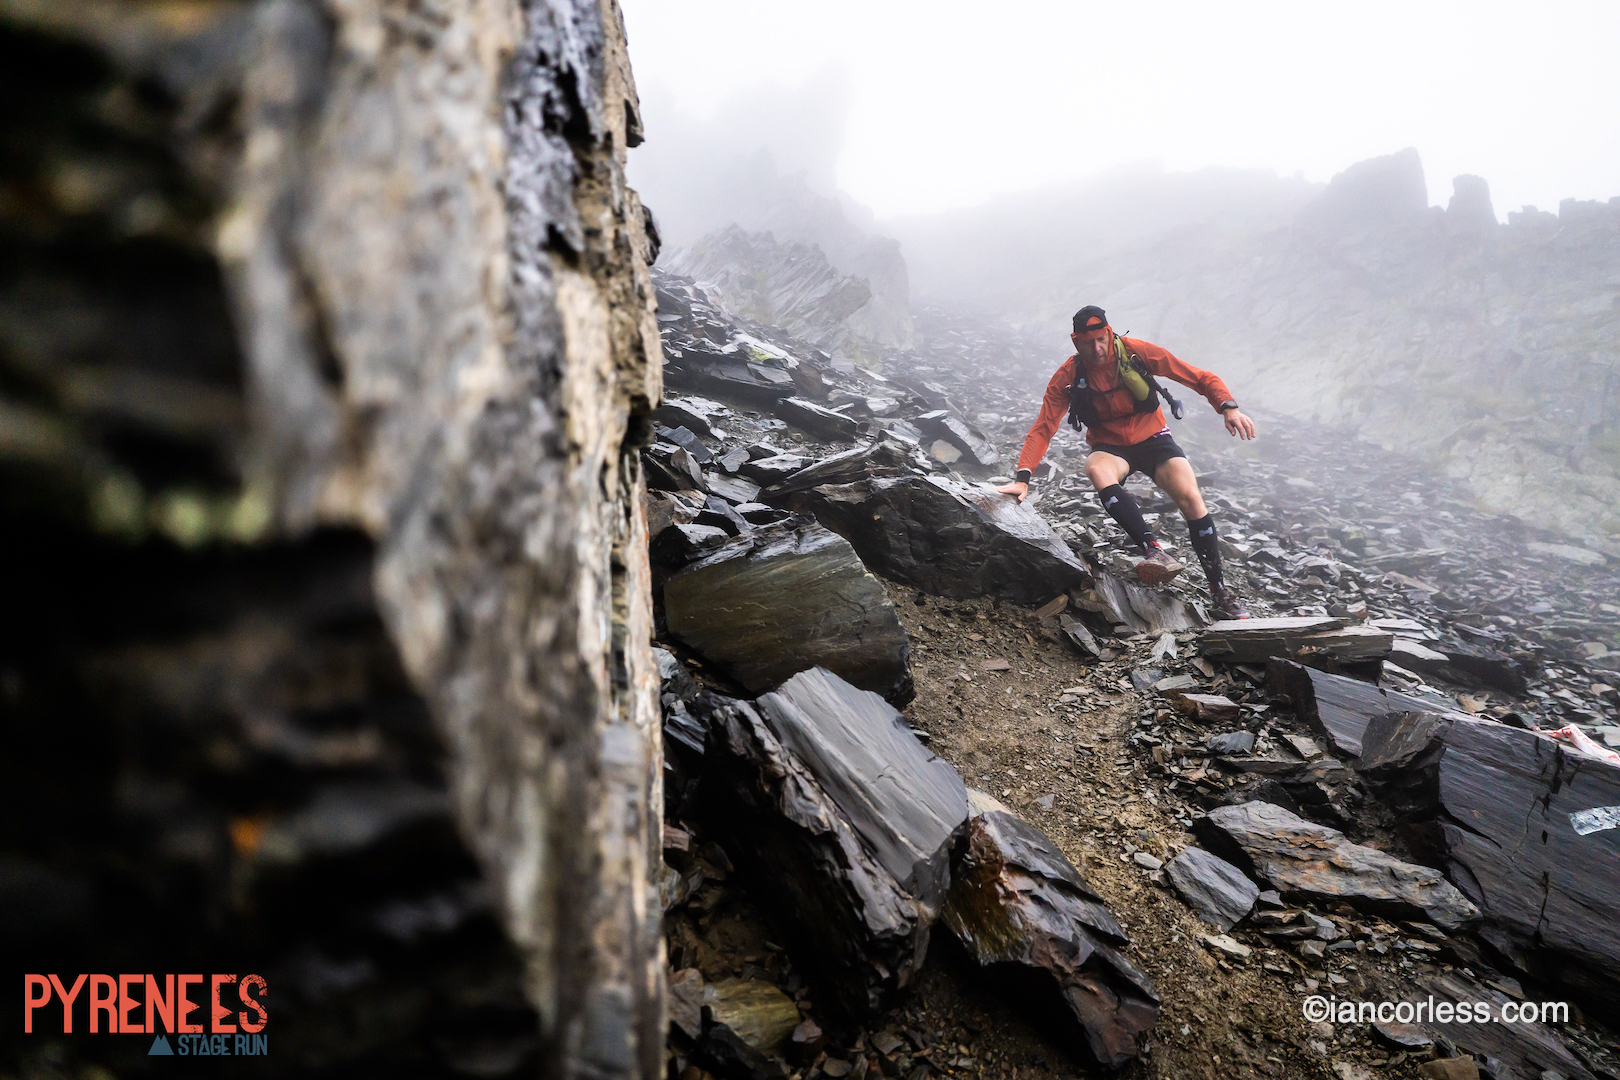
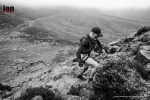
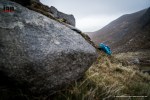
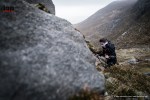
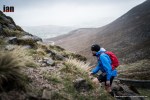
An 0700 start allowed more time to complete the distance and after an easy km, the route then proceeded to head up firstly via Pas del Corro ski station at 6.8km and 1947m. From here, there was some easy trail and then at just before 11km, single-track turned into extremely technical boulder hopping all the way up to Coll de Baisero at 2739m.
The fun wasn’t over though, a steep descent down a couloir and then more boulders and technical terrain.
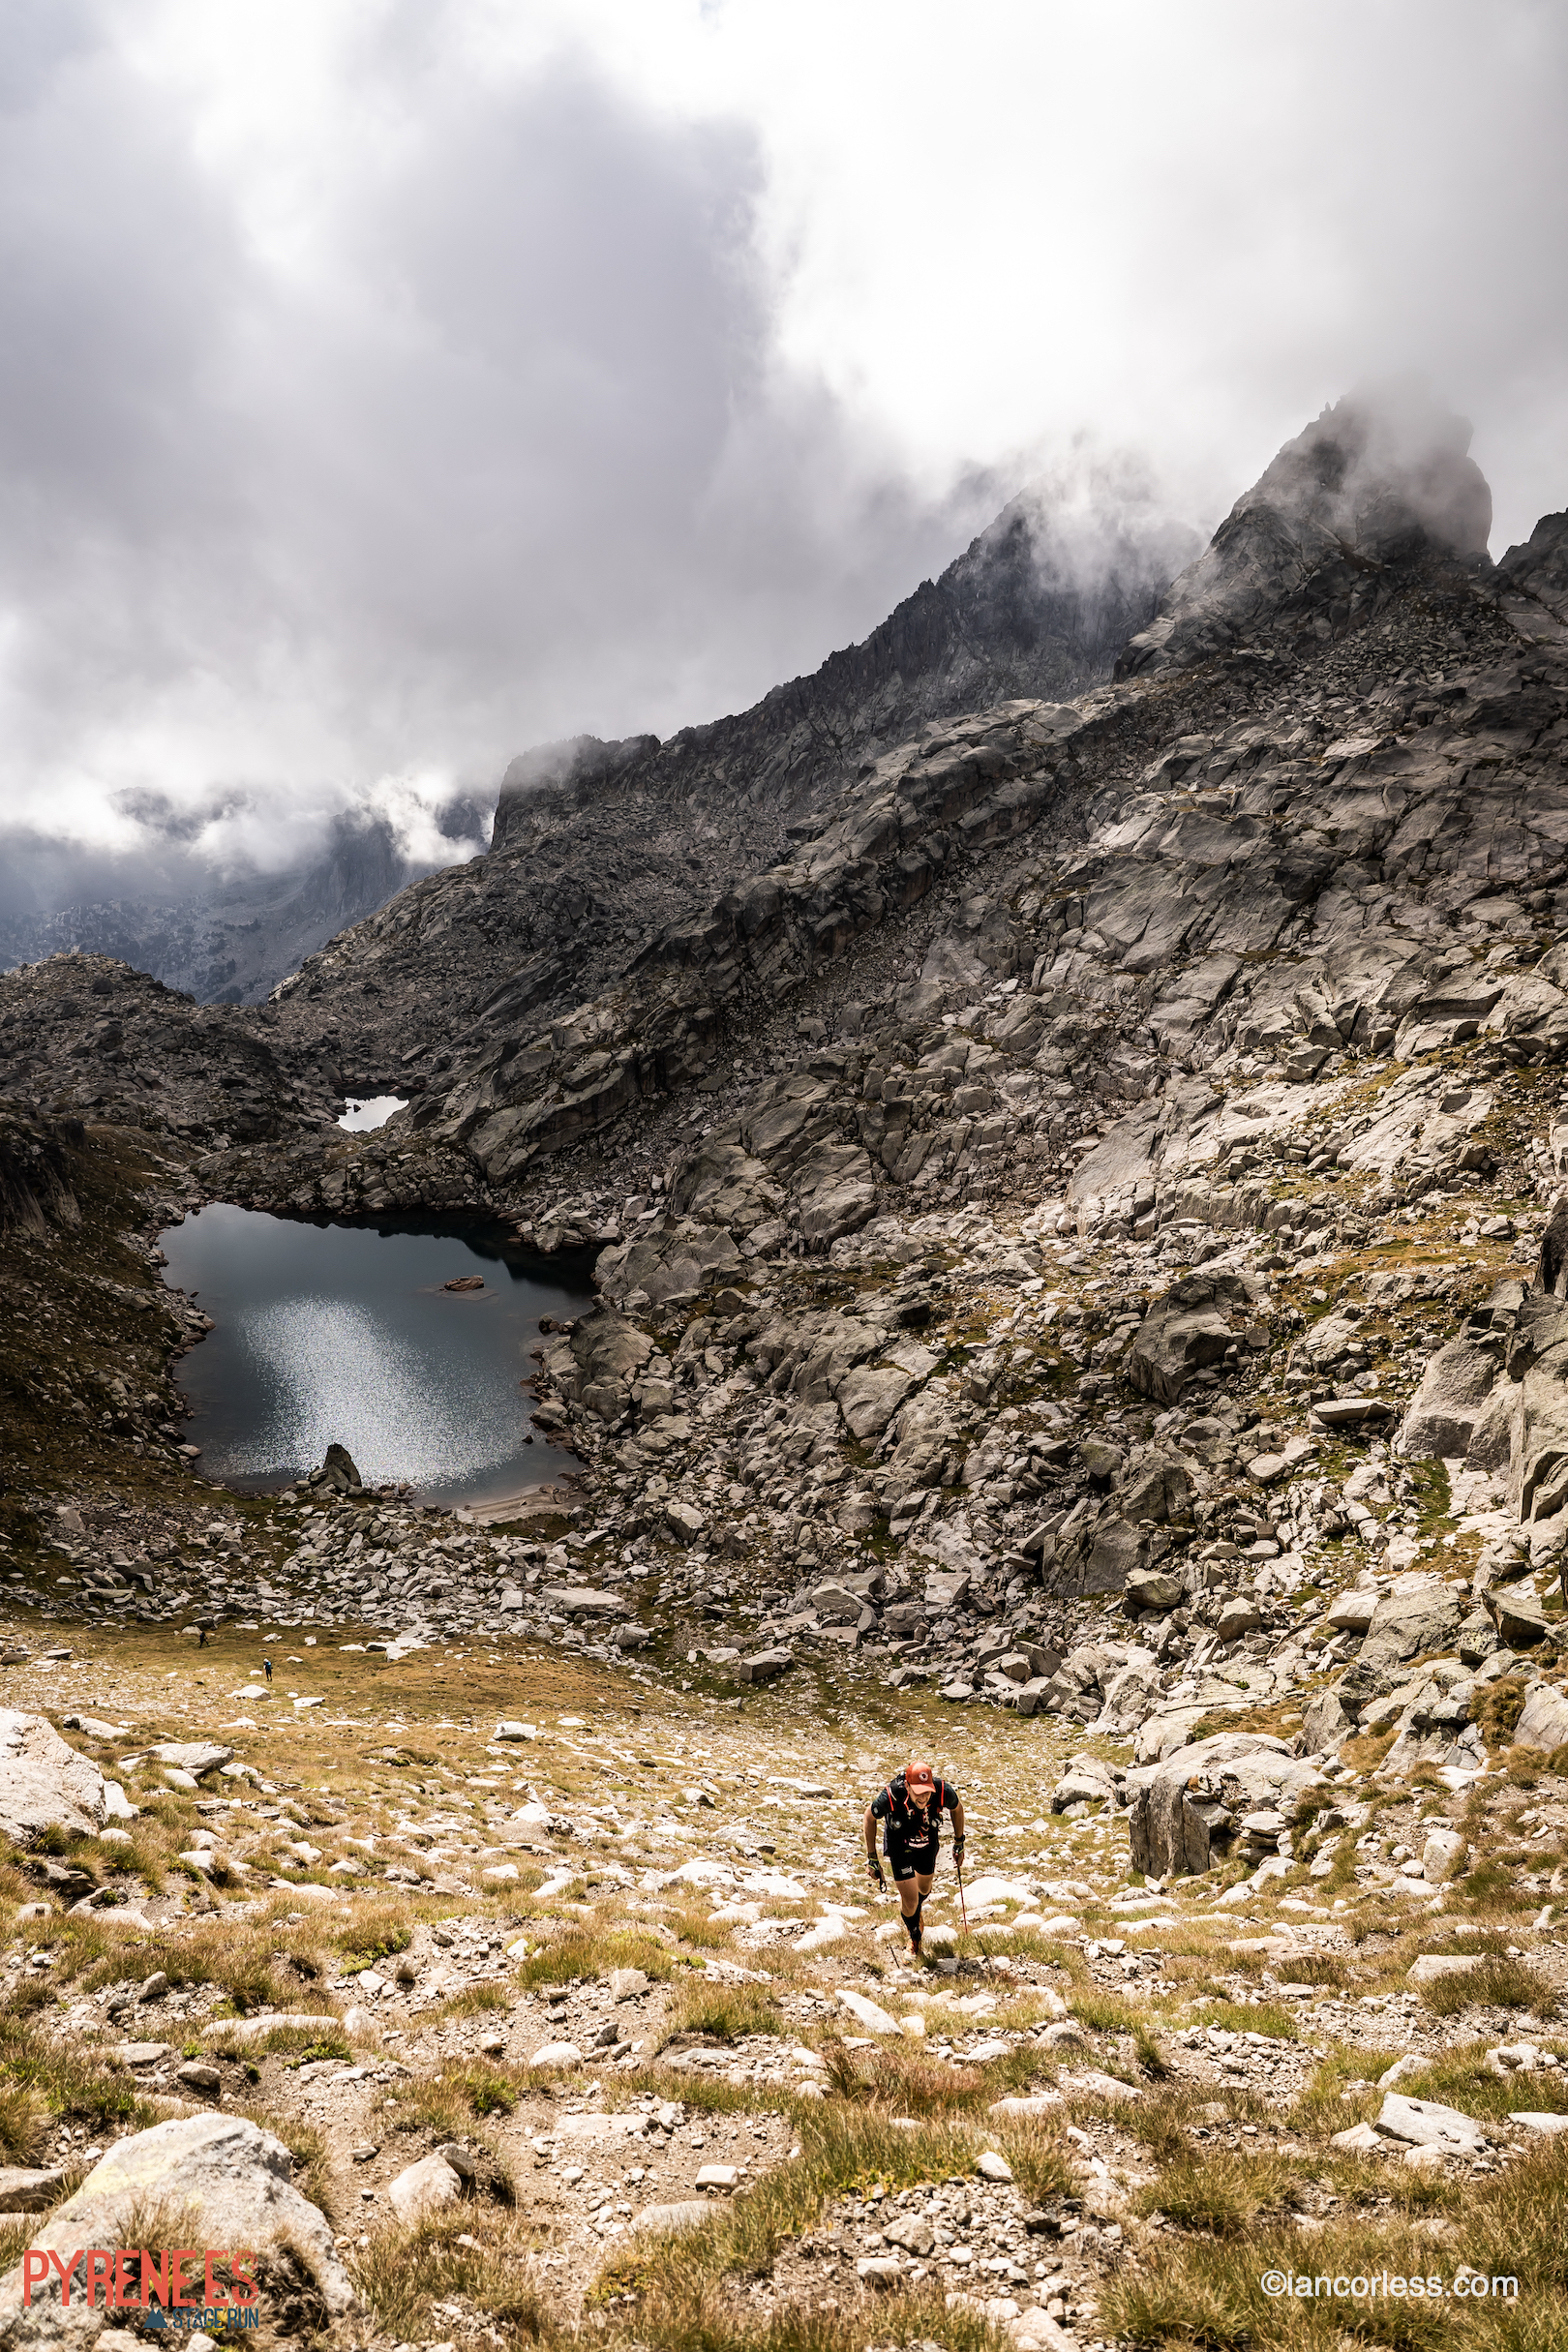
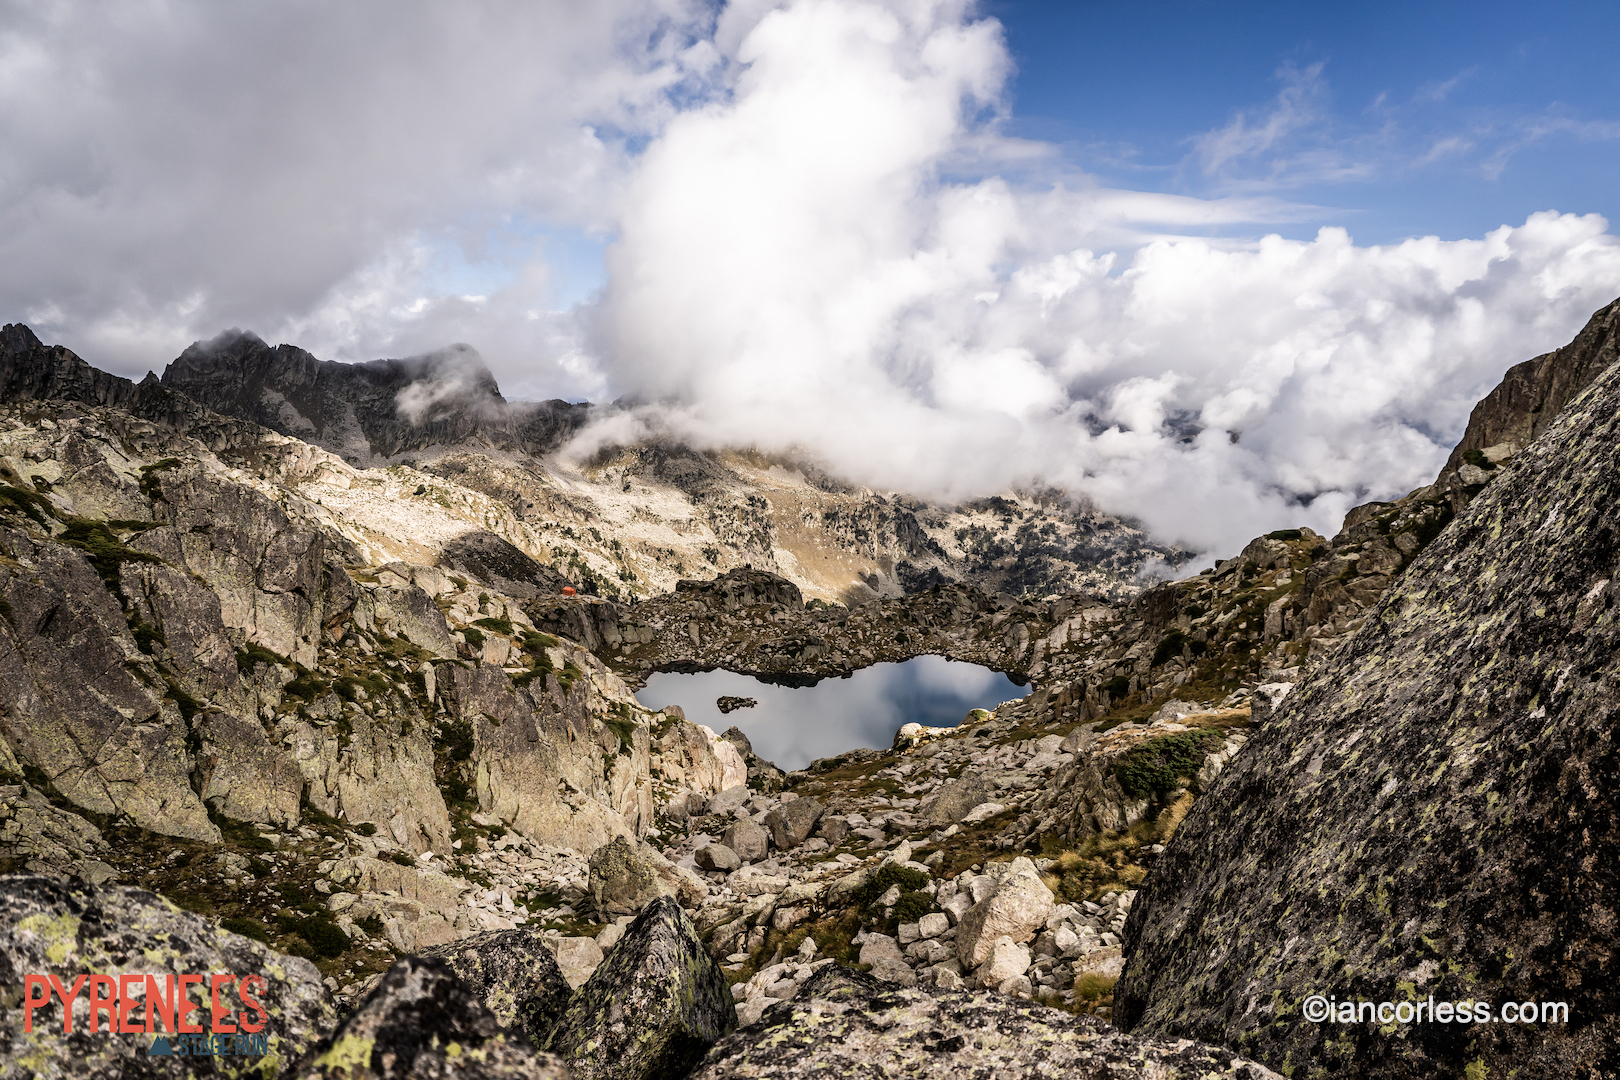
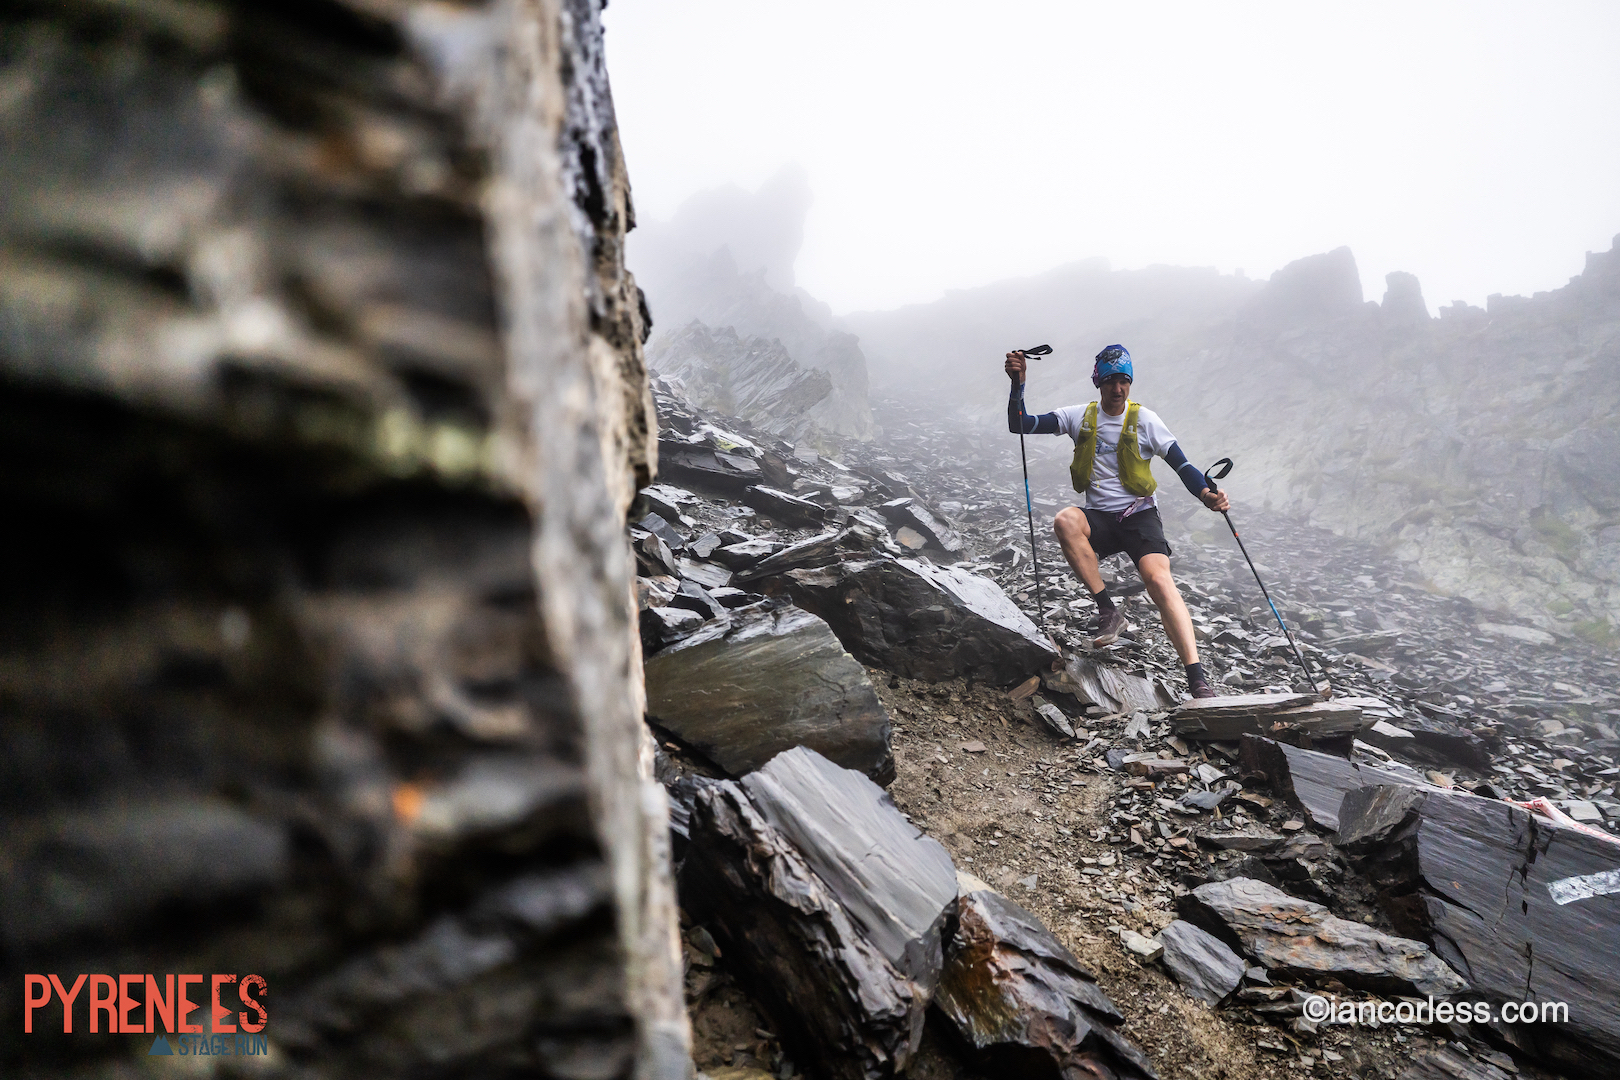
Visually stunning, mentally exhausting and technically demanding, this section of the PSR was a highlight. Cloud hung over the mountain giving a magical feel. The landscape, views, mountain vistas and lakes were magical. Lasting just 6km, this section of the route was taking 2-3 hours, yes, it was that demanding.
Refugio de Saboredo at 2310m and 18.5km covered signified a key marker and from here, the run in to the finish in Salardú was easy and pretty much all downhill.
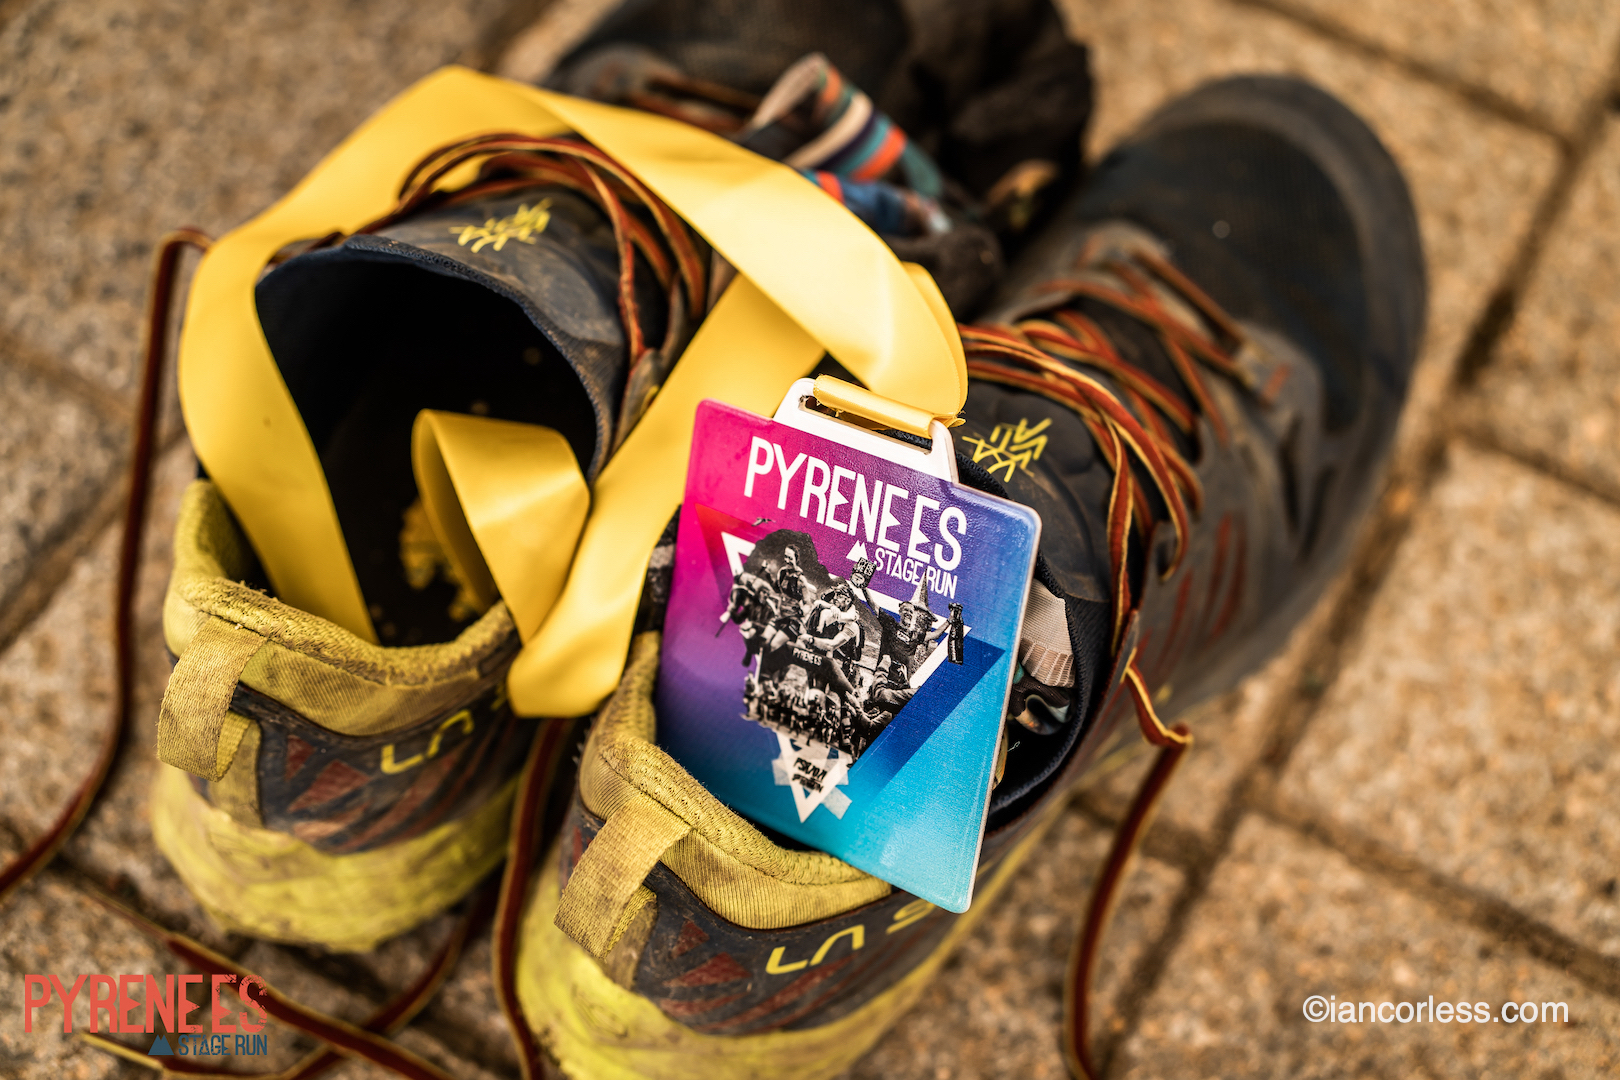
The Aigüestortes I Estanys de Sant Maurici National Park, Vall de Cabanes and Vall d”Aran was the star of the day and each runner well and truly earned the finishing medal.
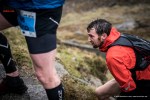
The PSR is all about enjoyment, exclusivity, good times, sharing a journey and an experience. That was clear to see with how everyone congratulated and applauded each and every finish, first or last.
In any run or race there are winners and the “Tuga Canarias” team of Gilberto Molina and Carmelo Gonzalez dominated the week with a total time of 38h 22m. In second position were the Belgians “The Ultrazzz” of Wim Debbaut, Thomas Swankaert and Kurt Dhont completed in 40h 5m with “The Sigobros Century” team of Jesús and Mario Delgado totalling 41h 54m for third.
The women’s category was dominated from start to finish by Czechs Marcela Mikulecka and Petra Buresova “Runsport Team” who finished with 45h 23m, they also placed 5th overall. In second place were the English Jeanette Rogers and Kerrianne Rogers (mother and daughter) from “Running Holidays France” team with 56h 35m
The final winners in the mixed category were the German team “Black Forest” of Steffen Rothe and Kathrin Litterst who had an unexpected end with a fast run to win overall by just 1-minute in 46h19m. Jaroslaw and Natalia Haczyk from Poland (team “BeerRunners”) placed second after leading all week with 46h 20m. Dutch “B-Running” with Bastian Mathijssen and Birgit Van Bockxmeer placed third with 48h 41m.
Now attention turns to 2022 and the next running of the PSR. One thing is for sure, the edition will be highly anticipated. There is something very special about travelling by foot covering 240 km’s through the Pyrenees and the PSR team do a great job of making the experience a special one. A stunning route and great organisation, this is a run not to be missed!
You can find all the information about the PSR in the website of the race, https://psr.run, together with the videos, photographs and results of the stages.
The Pyrenees Stage Run would not be possible without the main sponsorship of Turga Active Wear, Garmin, Puigcerdà, Encamp (And) Vall del Madriu-Perafita-Claror and bifree sports.
Please support this website. I believe everyone deserves to read quality, independent and factual articles – that’s why this website is open to all. Free press has never been so vital. I hope I can keep providing independent articles with your help. Any contribution, however big or small, is so valuable to help finance regular content. Please support me on Patreon HERE.
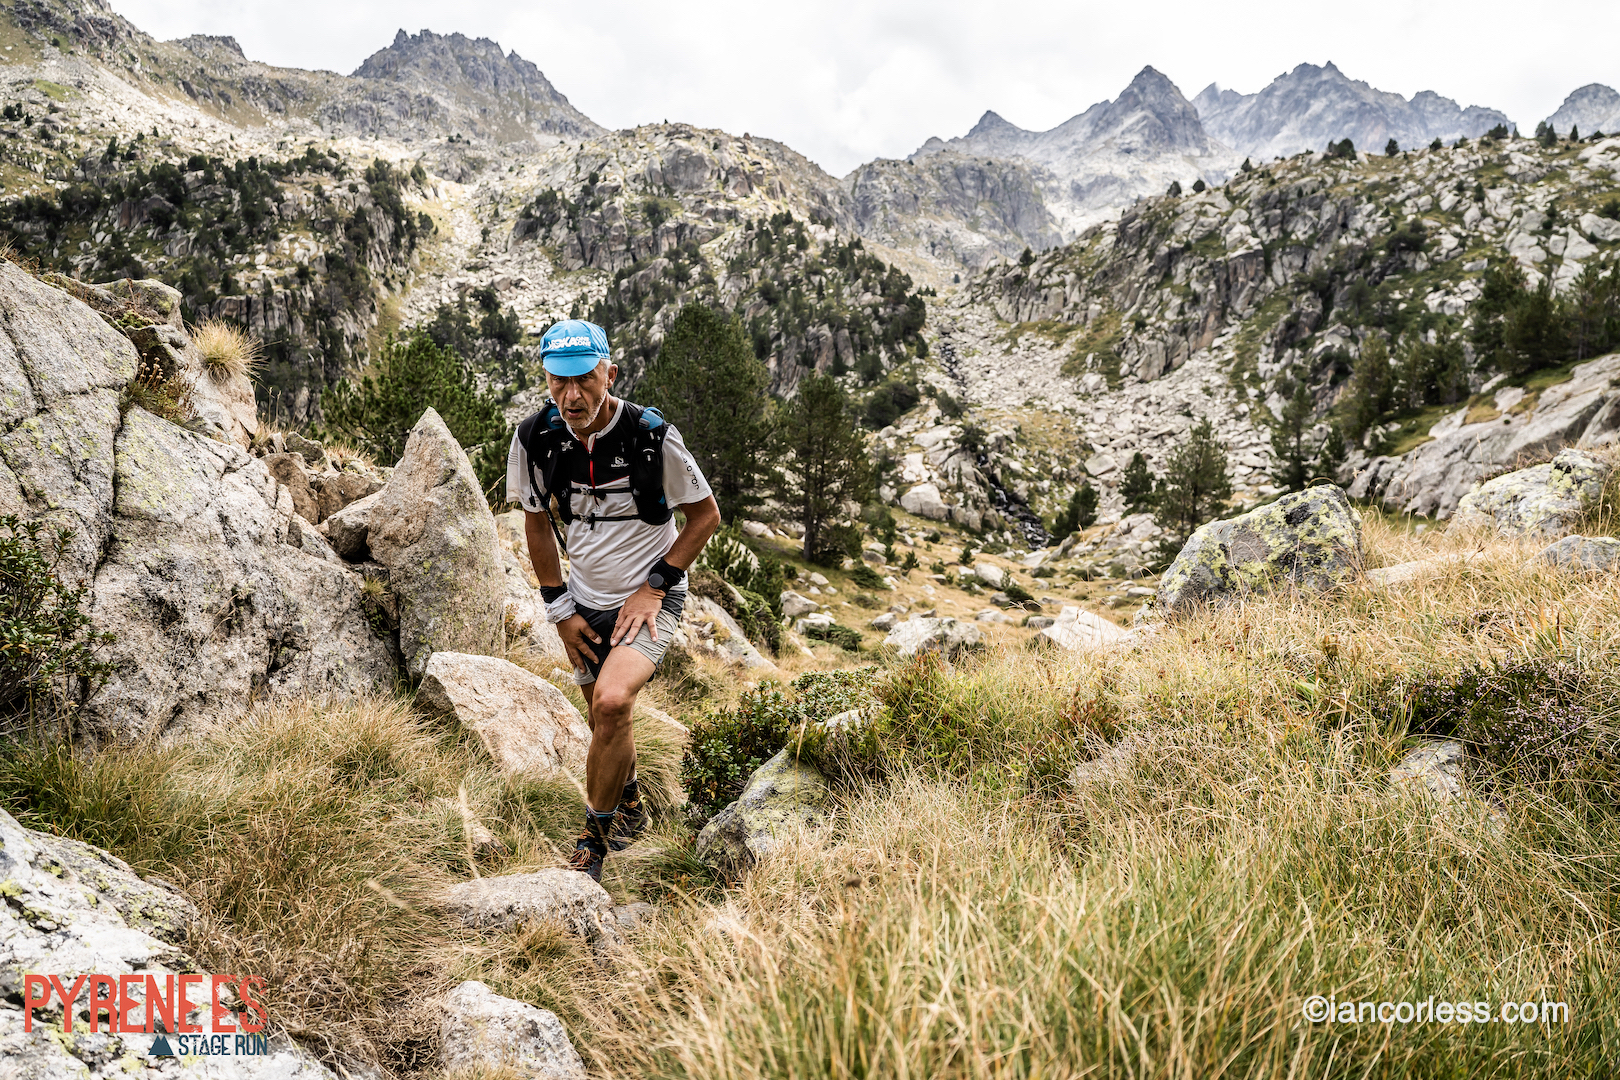
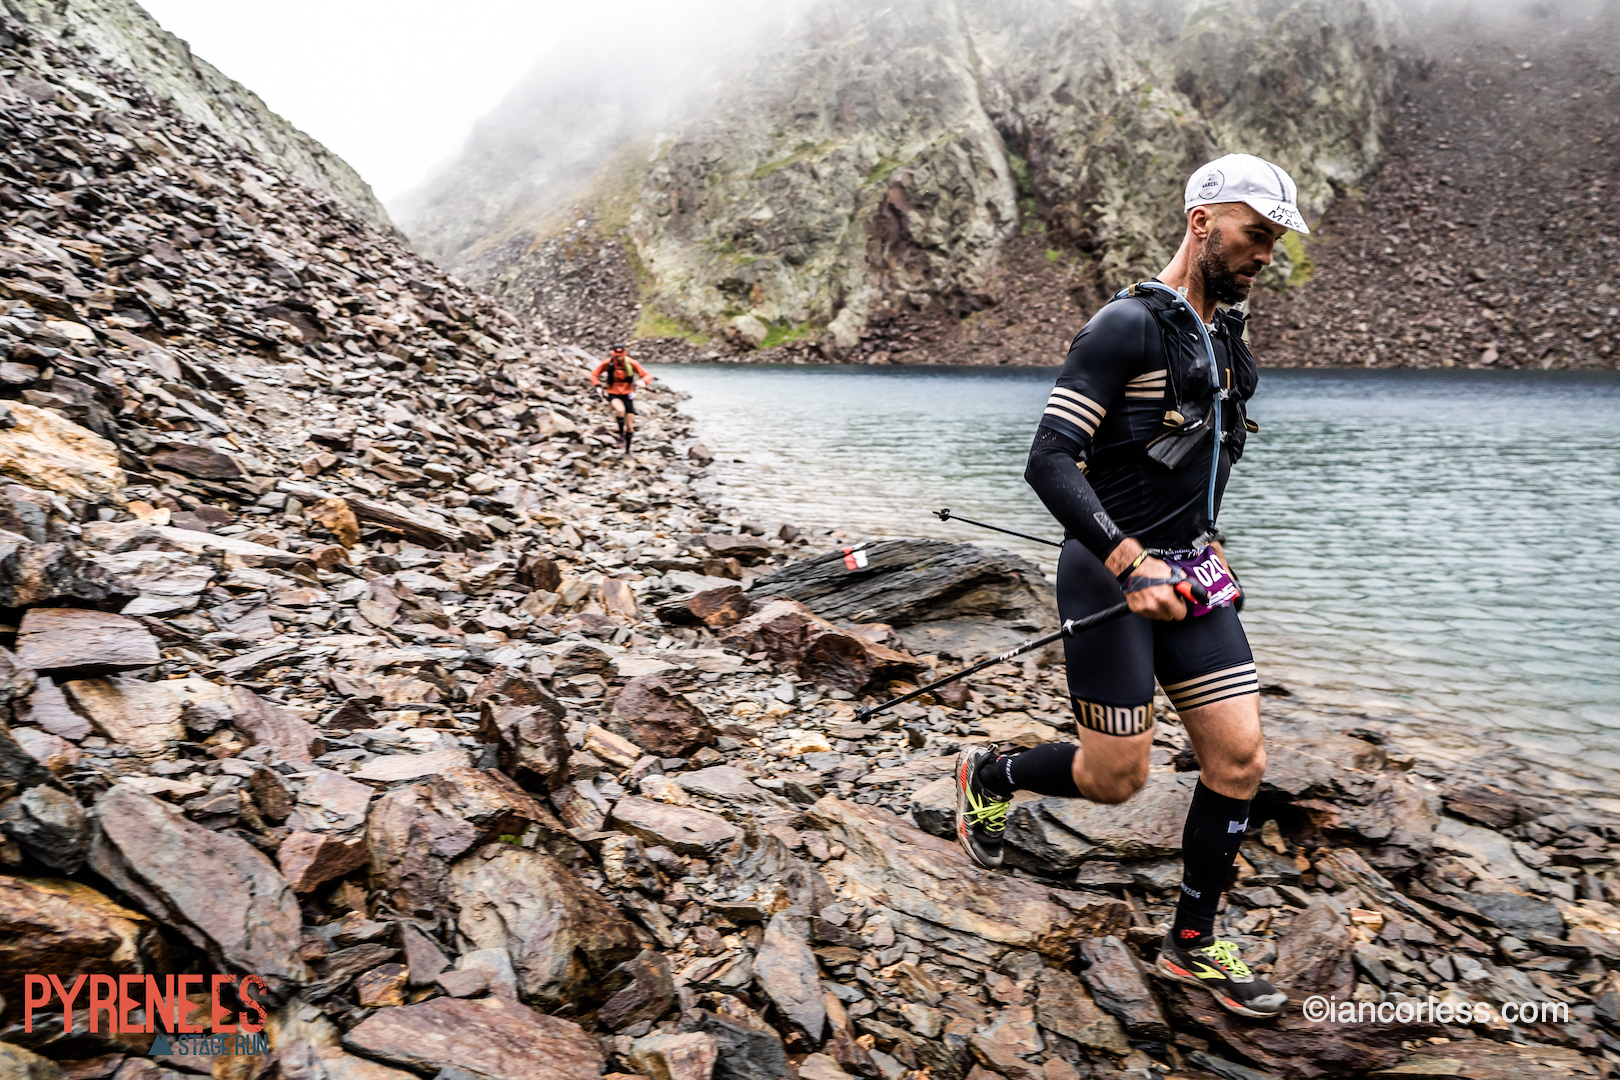
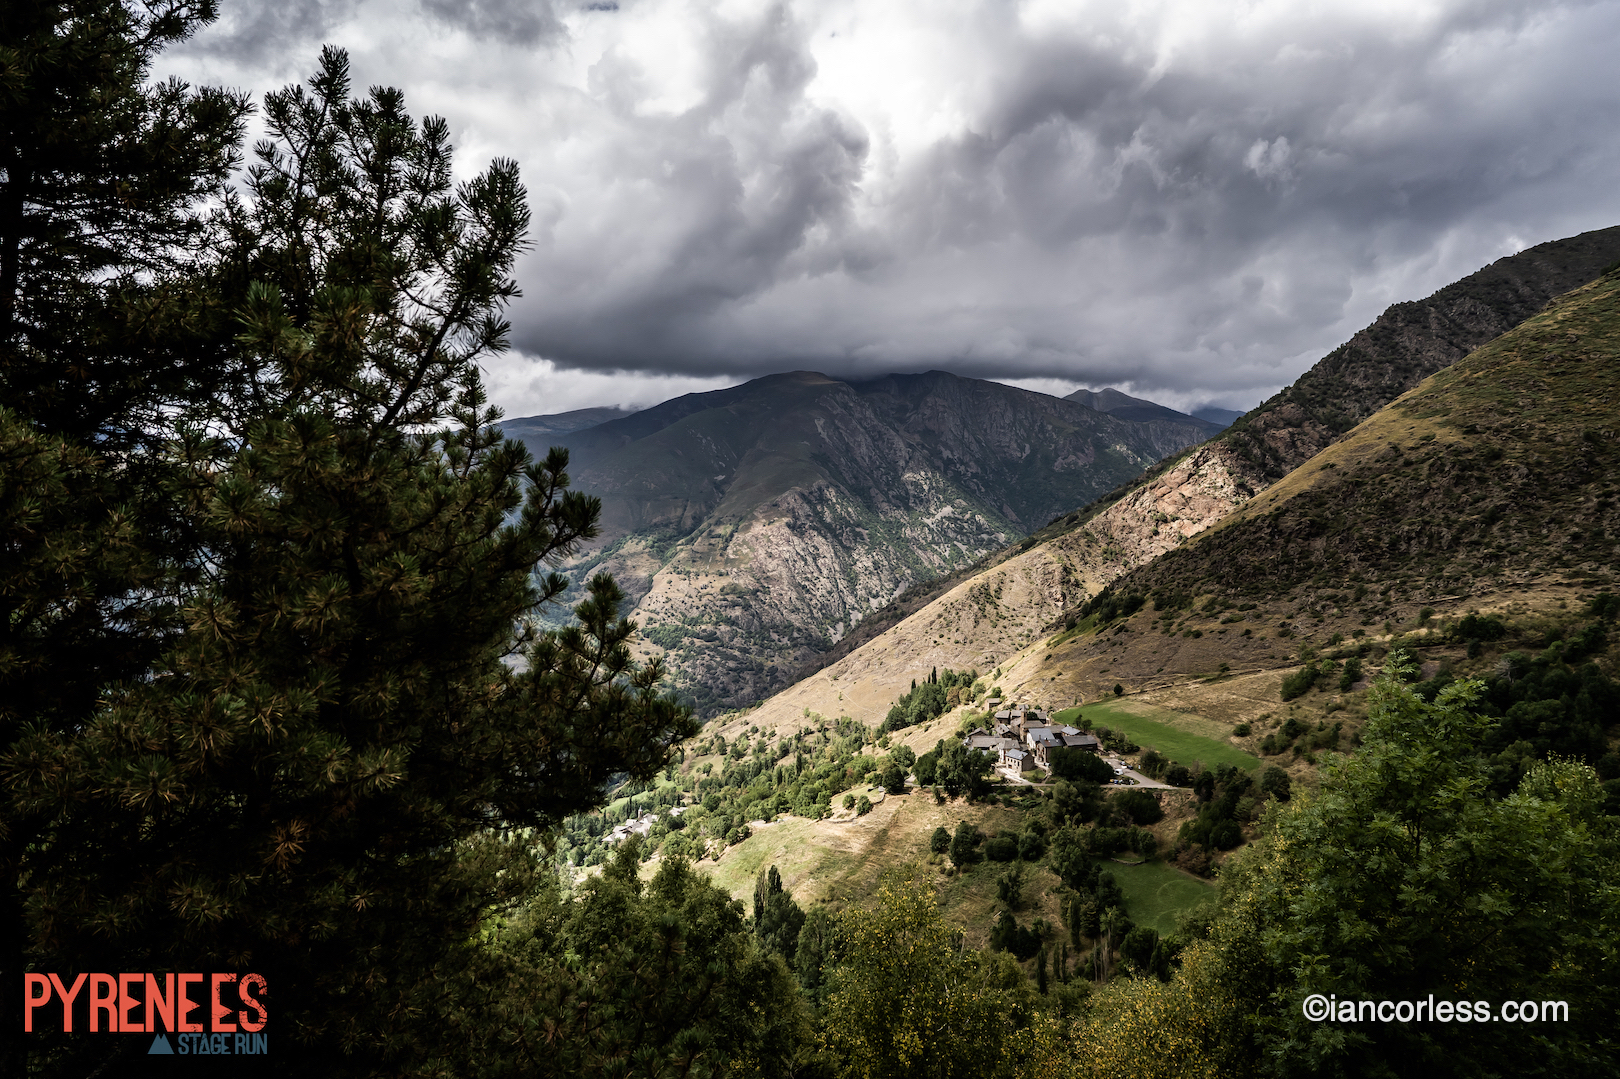
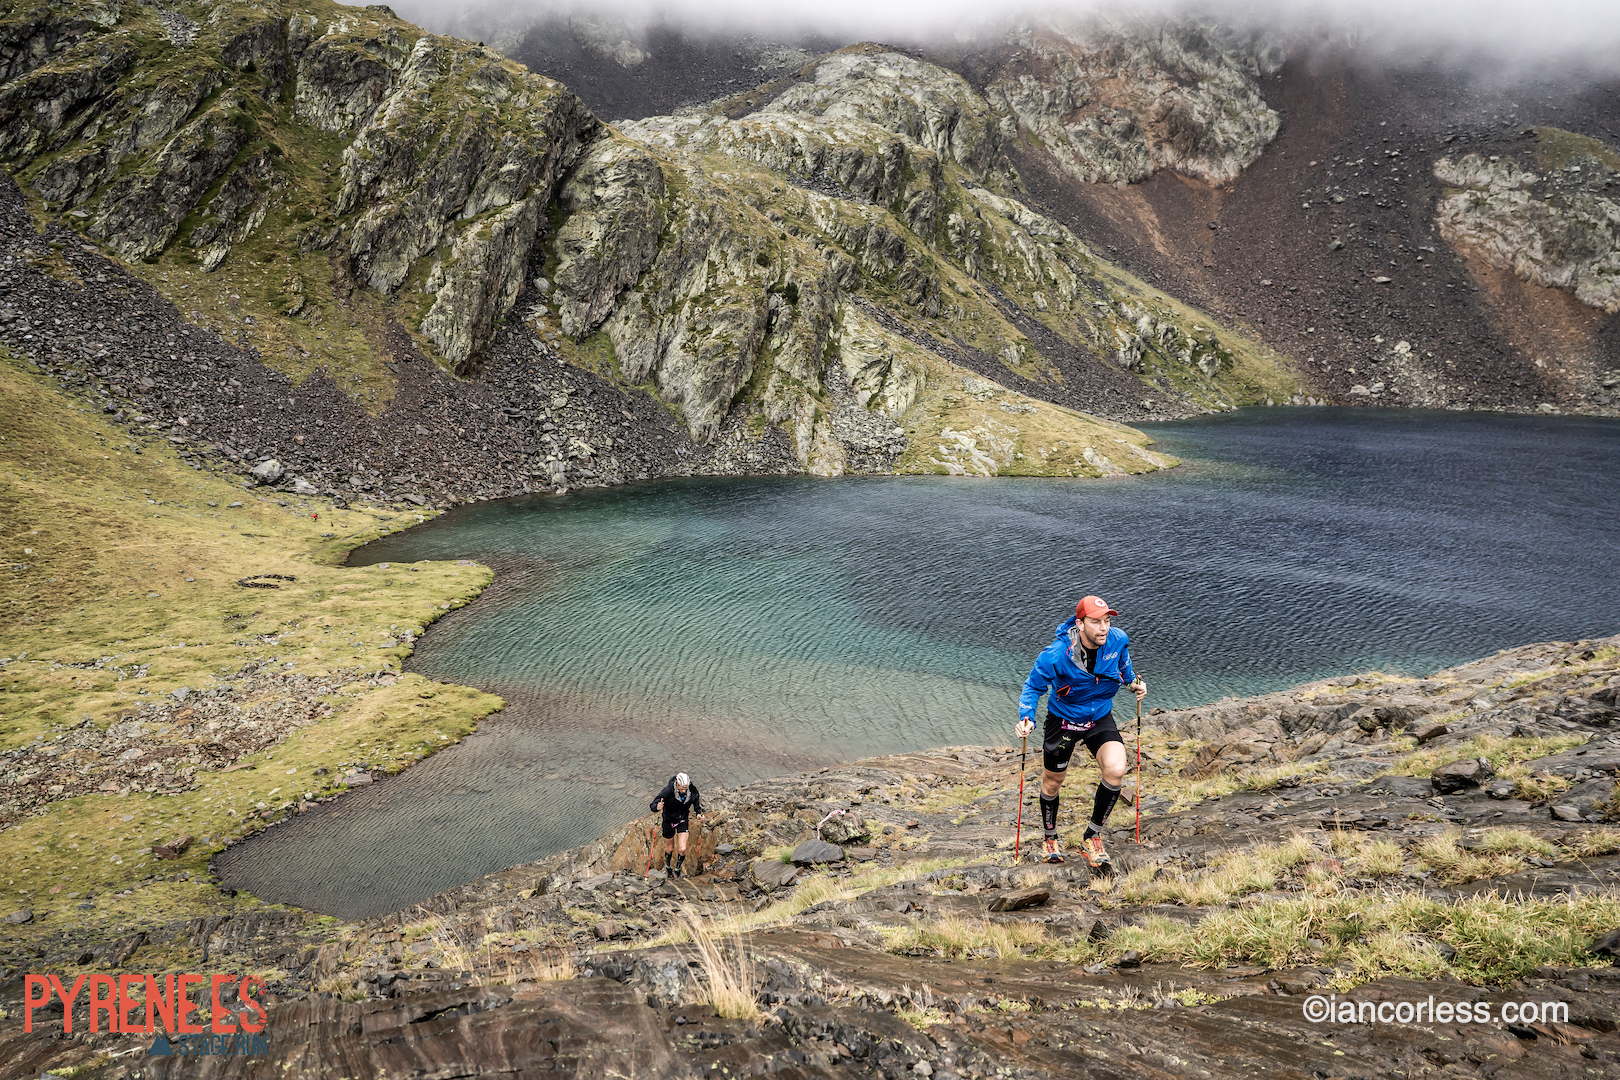
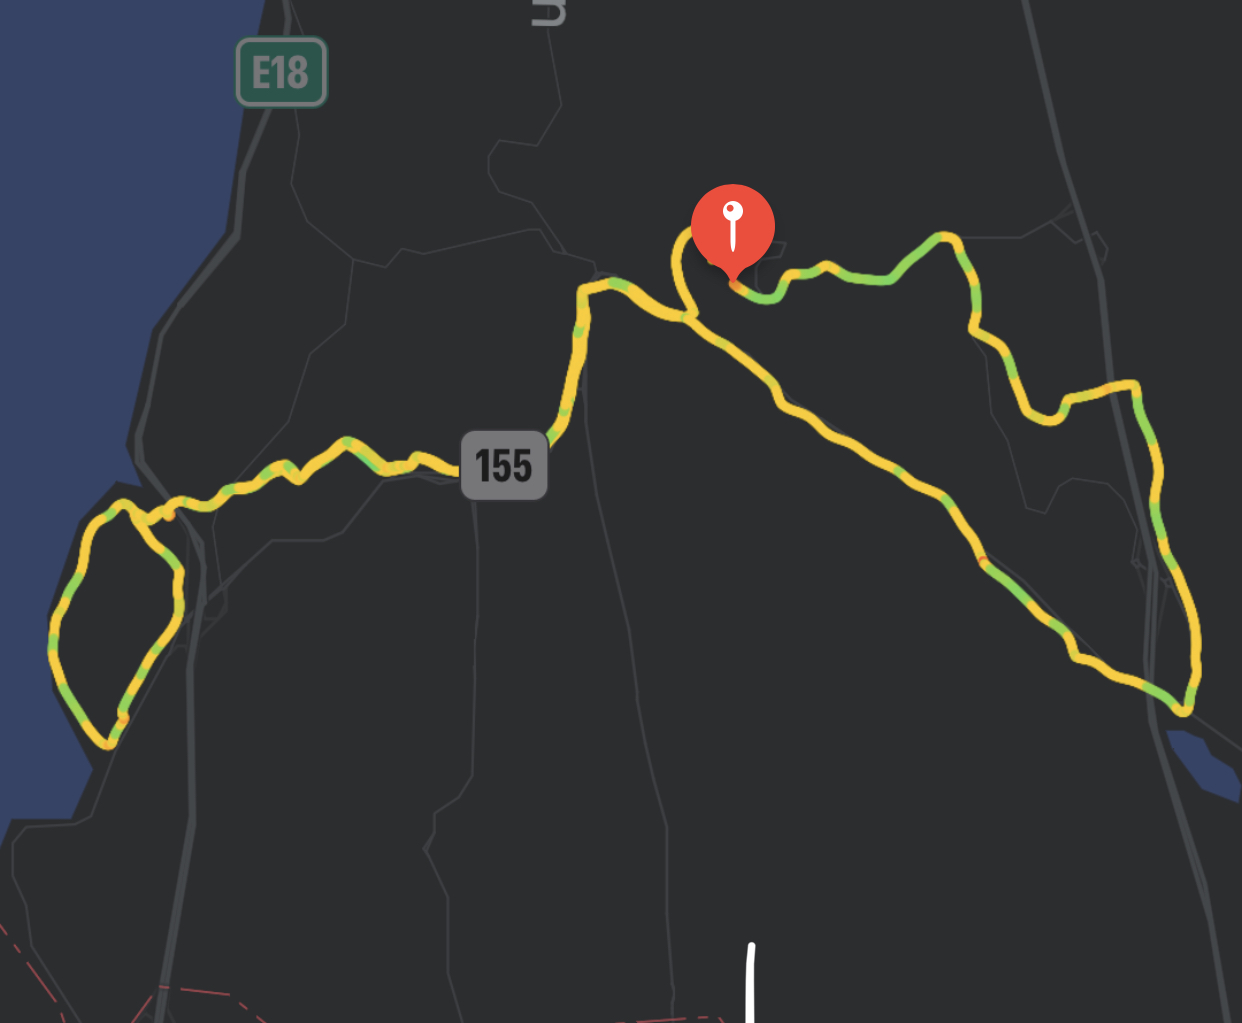
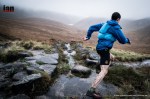
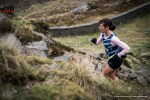
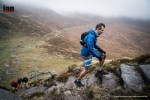
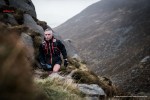
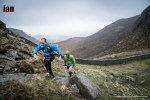
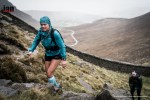
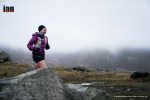
Stage 5 of the 2021 Pyrenees Stage Run may well just be the ‘best’ one. Of course, it’s all subjective and when all stage have their highlights, it’s hard to choose. However, if you love tough mountain days, stage 5 is a doozy!
The predicted bad weather came early with persistent rain and at times, strong winds. However, it didn’t deter from the type 2 fun, actually, it added to it!
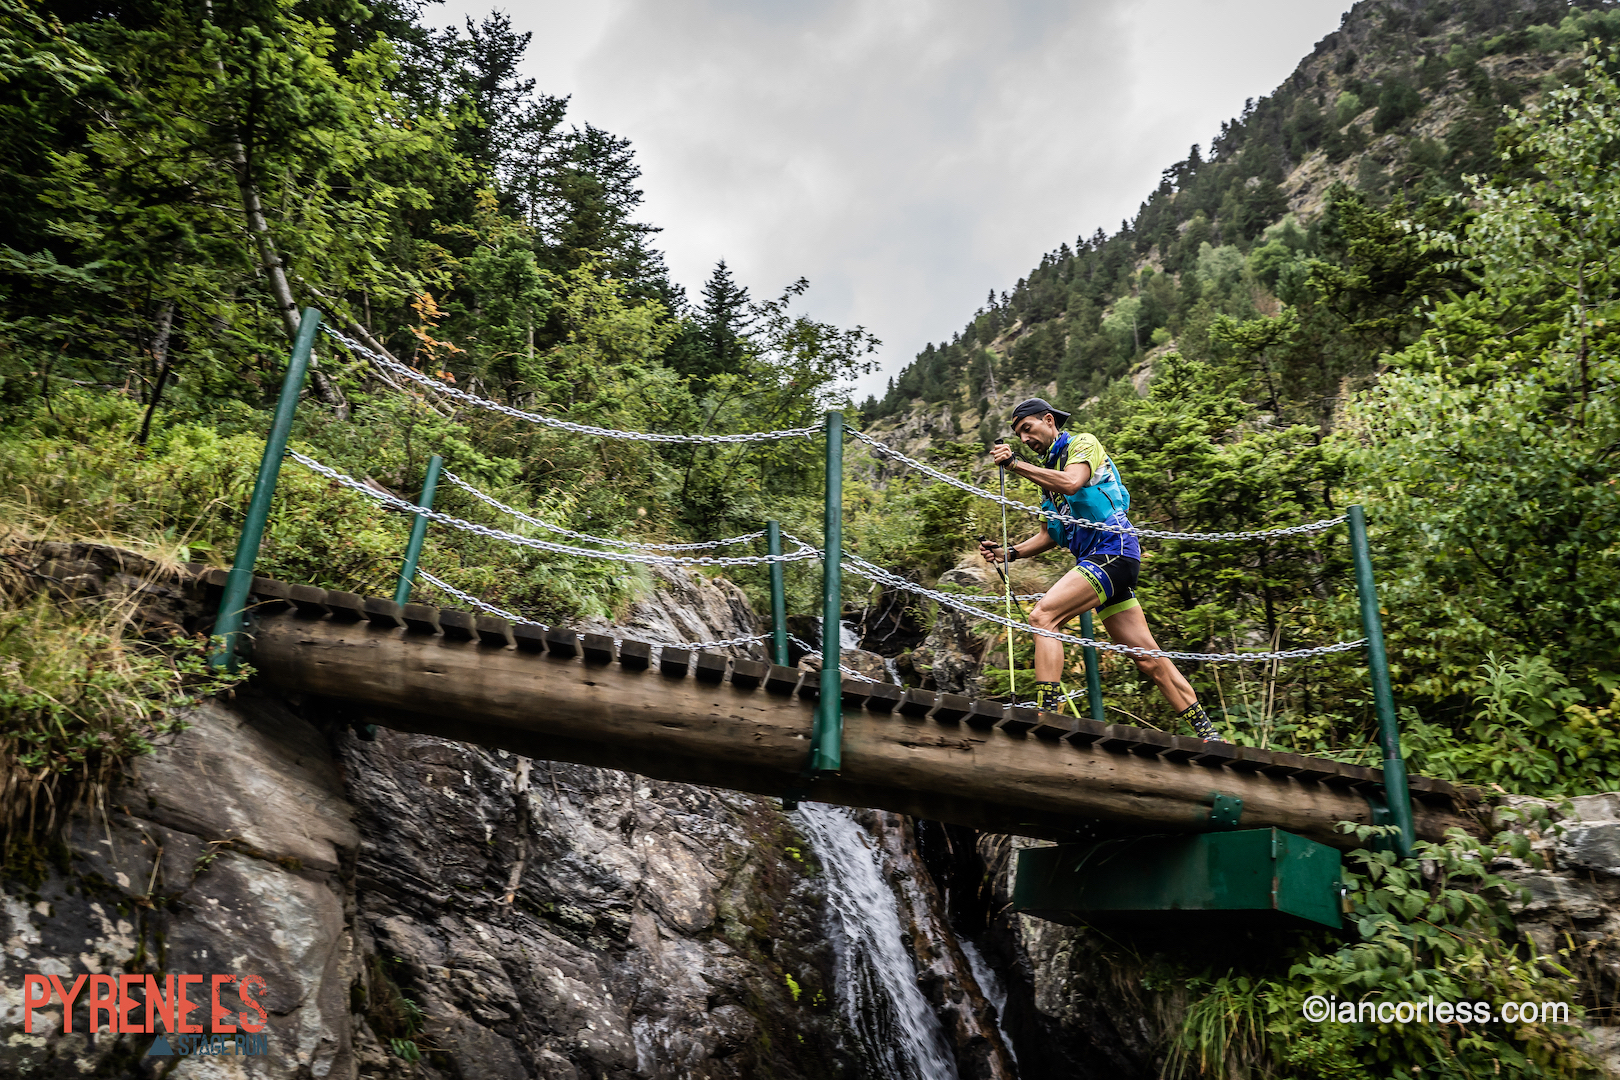
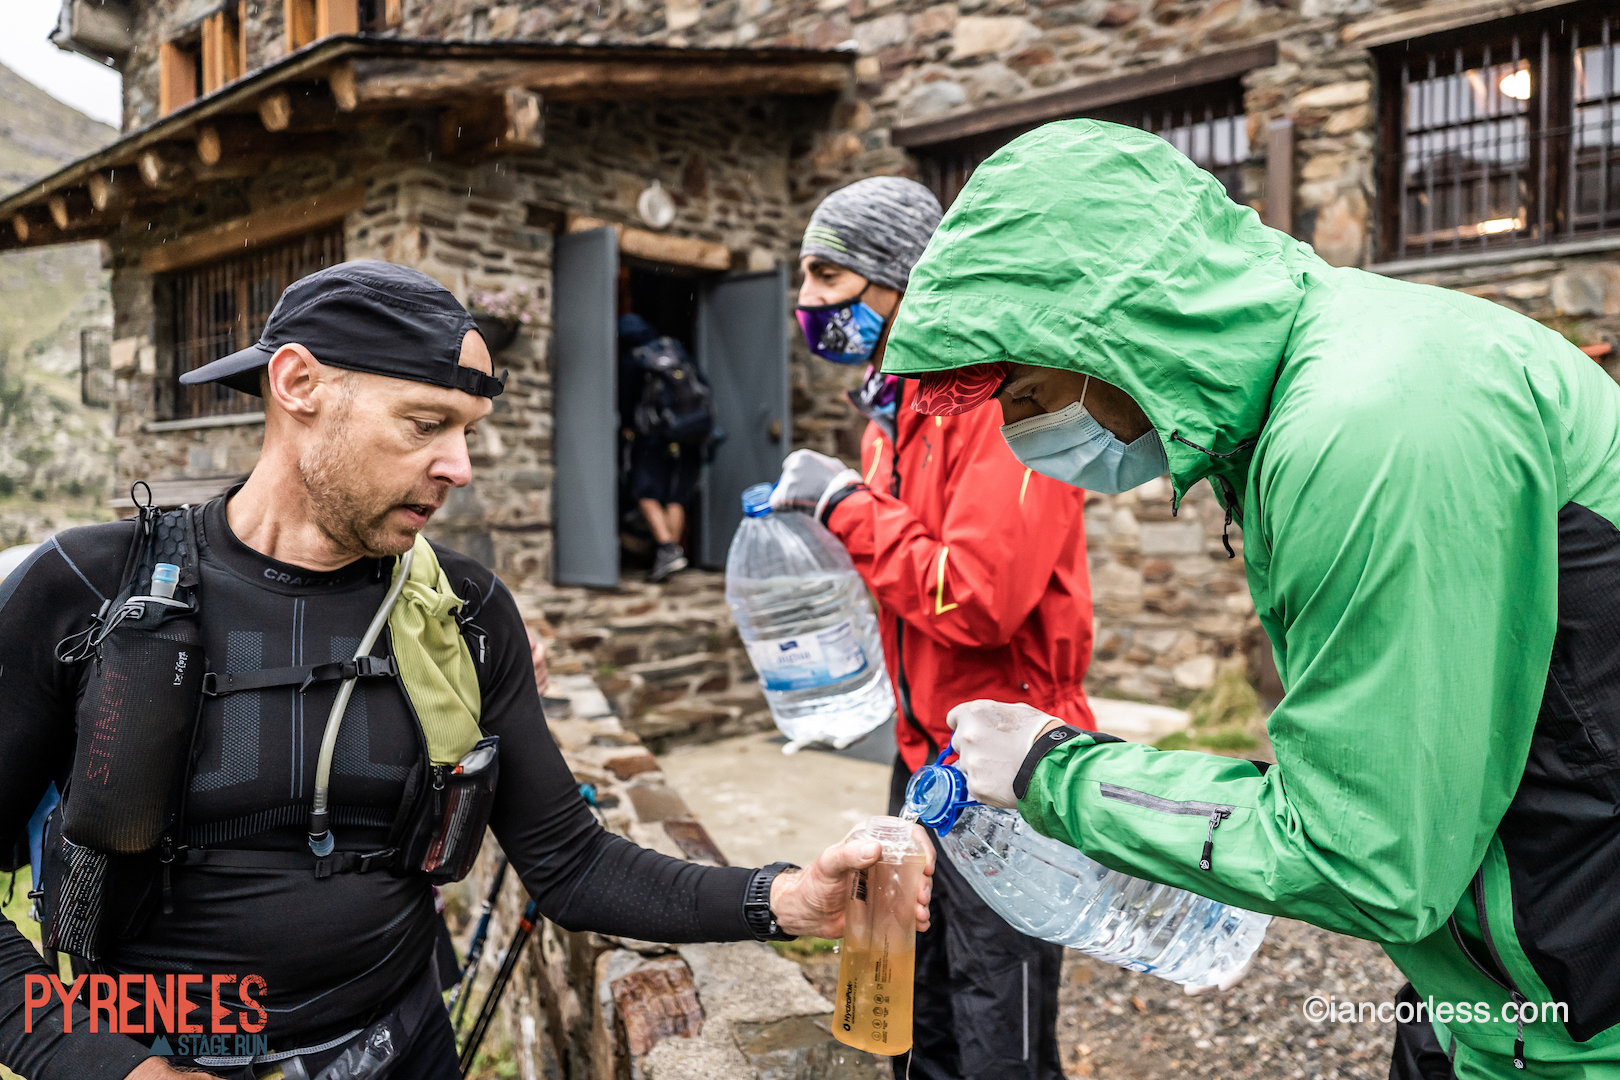
Leaving Arinsal, it was straight climb all the way to the Refugi Compadreose (2260m) and the first aid station. It was here the rain came and the temperature dropped with just 5km covered.
A short flat section and then the climb to Portella de Baiau at 2756m and the highest point of the PSR. The terrain was challenging, slippery and difficult – just perfect! The lakes providing some visual splendour in the great wet mist.
The scree descent was a highlight of the day, however, for some, it would be terrifying… It’s like skiing on rocks!
Rolling terrain, technical single-track and finally the next aid station at La Molinassa (1806m) with 16km covered. The elapsed time on watches reflecting how difficult the run so far had been.
Now easy running all the way to Àreu aid station and 24.7km.
From here, the Coll de Tudela beckoned at 2240m, a straight VK (vertical kilometre) in 5km. Just perfect at 25kmm in a 40km day.
From the summit the run down to Boldís Sobirà at 1488m was non-technical and arguably some of the easiest running of the day. Over the next 4km, there was some small rollercoaster terrain before the sharp, steep and technical drop to the line at Tavascan (1140m) – what a day!
The PSR can be followed live through the website of the race, https://psr.run, and every day a video and photographs of the stages will be published on their social networks.
Tomorrow, stage 6 is 26.34km with 1635m+ crossing the Natural Park of Alt Pirineu in the middle of magnificent forests, and ending up to Esterri d’Aneu, close to the National Park of Aigüestortes i Sant Maurici.
The Pyrenees Stage Run would not be possible without the main sponsorship of Turga Active Wear, Garmin, Puigcerdà, Encamp (And) Vall del Madriu-Perafita-Claror and bifree sports.
Please support this website. I believe everyone deserves to read quality, independent and factual articles – that’s why this website is open to all. Free press has never been so vital. I hope I can keep providing independent articles with your help. Any contribution, however big or small, is so valuable to help finance regular content. Please support me on Patreon HERE.
The Coros VERTIX multisport GPS is designed for adventure that goes beyond the usual realms of running, cycling, triathlon and so on. One could arguably say that the VERTIX is geared to mountaineers, explorers and adventurers who need a premium product, built to withstand the demands of extreme sport and with a battery that will last for the most arduous and time-consuming adventures.
Using sapphire glass, titanium DLC bezel, waterproof to 150m and a stunning autonomy of 60-hours in regular GPS mode and a whopping 150-hours in UltraMax mode, the VERTIX is quite simply a stunning unit that competes with surpasses the competition.
But is it the best watch out there?
Coros have been taking the GPS world by storm, just look on social media in forums and you will see that Suunto, Garmin and Polar users are defecting to Coros. The main reason, battery and of course, price point is significant too. The APEX and APEX PRO have paved the way for the VERTIX.
From the off, I am going to be clear and straightforward, IF you need mapping and music on your GPS, the VERTIX is not for you. Now of course, updates happen all the time and most certainly, there may well be updates to come that add these features to a VERTIX, but for now, they don’t exist.
Also, the VERTIX price point brings it much more in line with premium models from Garmin and Suunto, so, the money saving of purchasing a VERTIX is less of an attraction in comparison to purchasing an APEX, for example.
The VERTIX has the most extravagant packaging I have ever witnessed for a watch. It comes in its own case (similar the sealed cases I use for cameras) which basically for the off says, ‘adventure!’ While initially impressed I then questioned the logic and the eco values of such a case. It is an overkill! But I then went on to find that once the contents are removed, there are padding inserts to convert the case to a product that can be used for other purposes. That is a nice touch.
Top Tip – Download the COROS app to your phone before turning the watch on. The simple reason for this is that a QR code appears on the watch face at start up. Using this QR code and the camera on your phone seamlessly connects the two and you are ready to get set up. I wish someone had told me this in advance.
In the case, the watch face sits independently, and you need to attach the watch straps. The fastening system is very slick and while a small feature, it adds to the premium feel. You can change straps and purchase additional colour options if you wish.
Cables, instructions and so on sit below the watch face and straps.
Unlike many GPS units, the VERTIX just has three buttons on the right-hand side, the middle button the key one. Top right is for the light, the bottom is for the menu (hard and prolonged press) and acts as a ‘back’ button, the middle button (digital crown) works on press and rotate. The rotate superb for navigating quickly.
The rear of the watch face has an optical sensor and importantly, this includes a SpO2 sensor which measures pulse oxygen levels. This feature most definitely helps place the VERTIX at the adventure/ explore and mountaineering end of the GPS world. But Coros are not the only company to do this…Fitbit and Garmin, to name just two, have this feature on several products.
The charging port is a simple oblong and comes with some small plastic covers (inside the case) that allow you to cover and protect this area when not charging.
Nice Feature: In set-up, you can choose right- or left-hand use. I very often put my watch on my right hand when doing sport/ adventure as it means that the buttons are away from my hand and wrist. It means that accidentally pressing buttons when scrambling, climbing and so on can’t happen. On the VERTIX you can specify left hand but rotate the face which places the three buttons away from wrist/ hand. A nice touch. The one downside is that the words on the watch face ‘Light’ and ‘Back/lap’ will be reversed. No big deal.
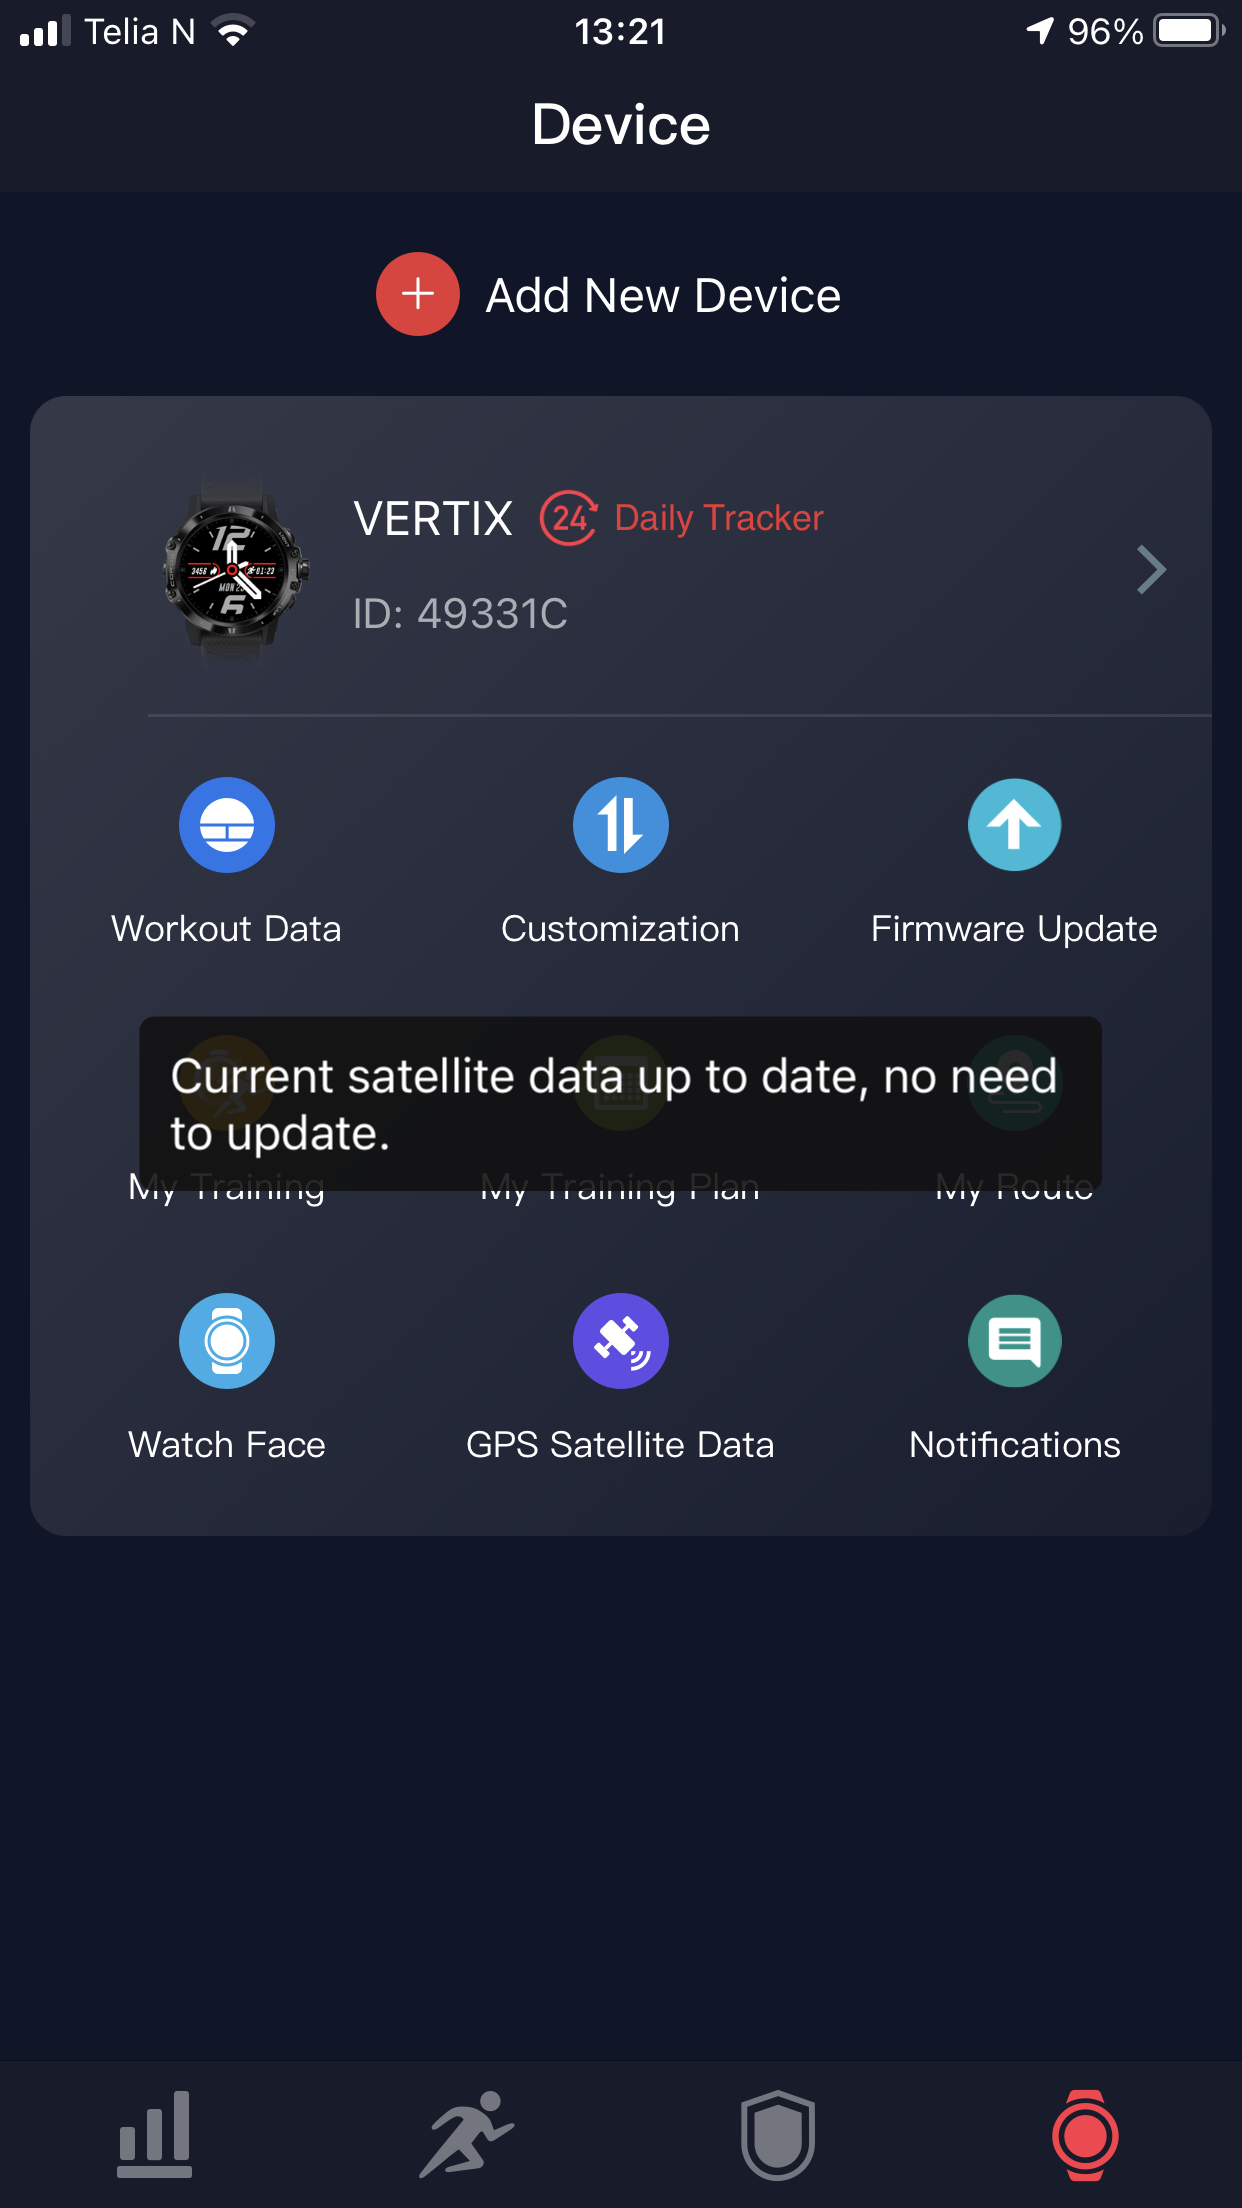
THE COROS APP
All initial set-up is done via the Coros app on your phone. It’s intuitive and straightforward, initially you are guided through the process. Watch and phone connection is via Bluetooth, there is no Wi-Fi capability.
Once set up, in the app you will see four key images at the bottom of the screen: Graph, Runner, Shield and Watch.
WATCH ICON
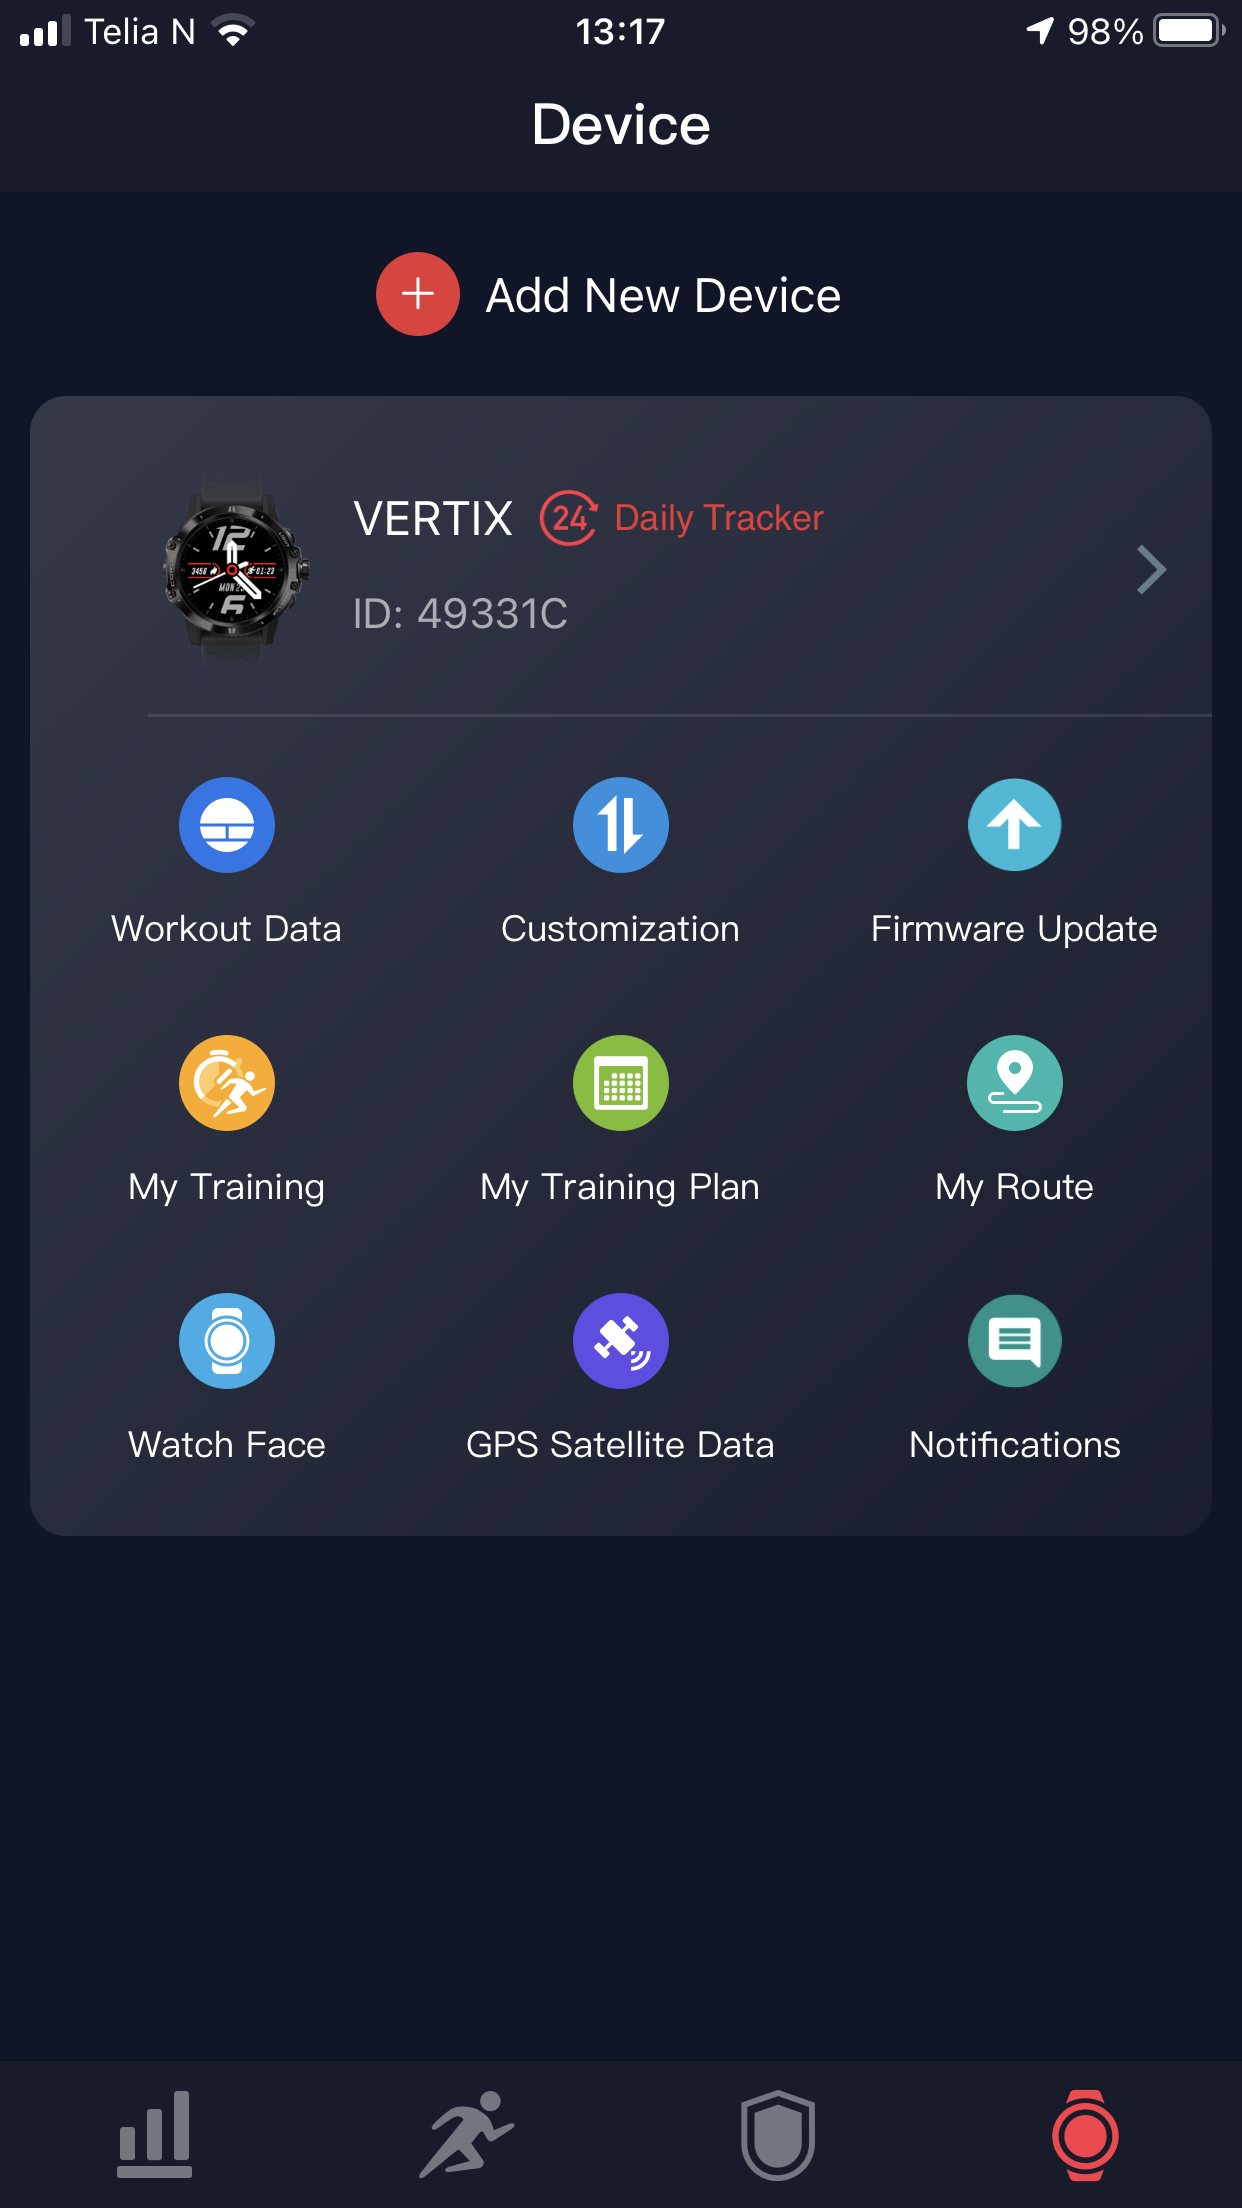
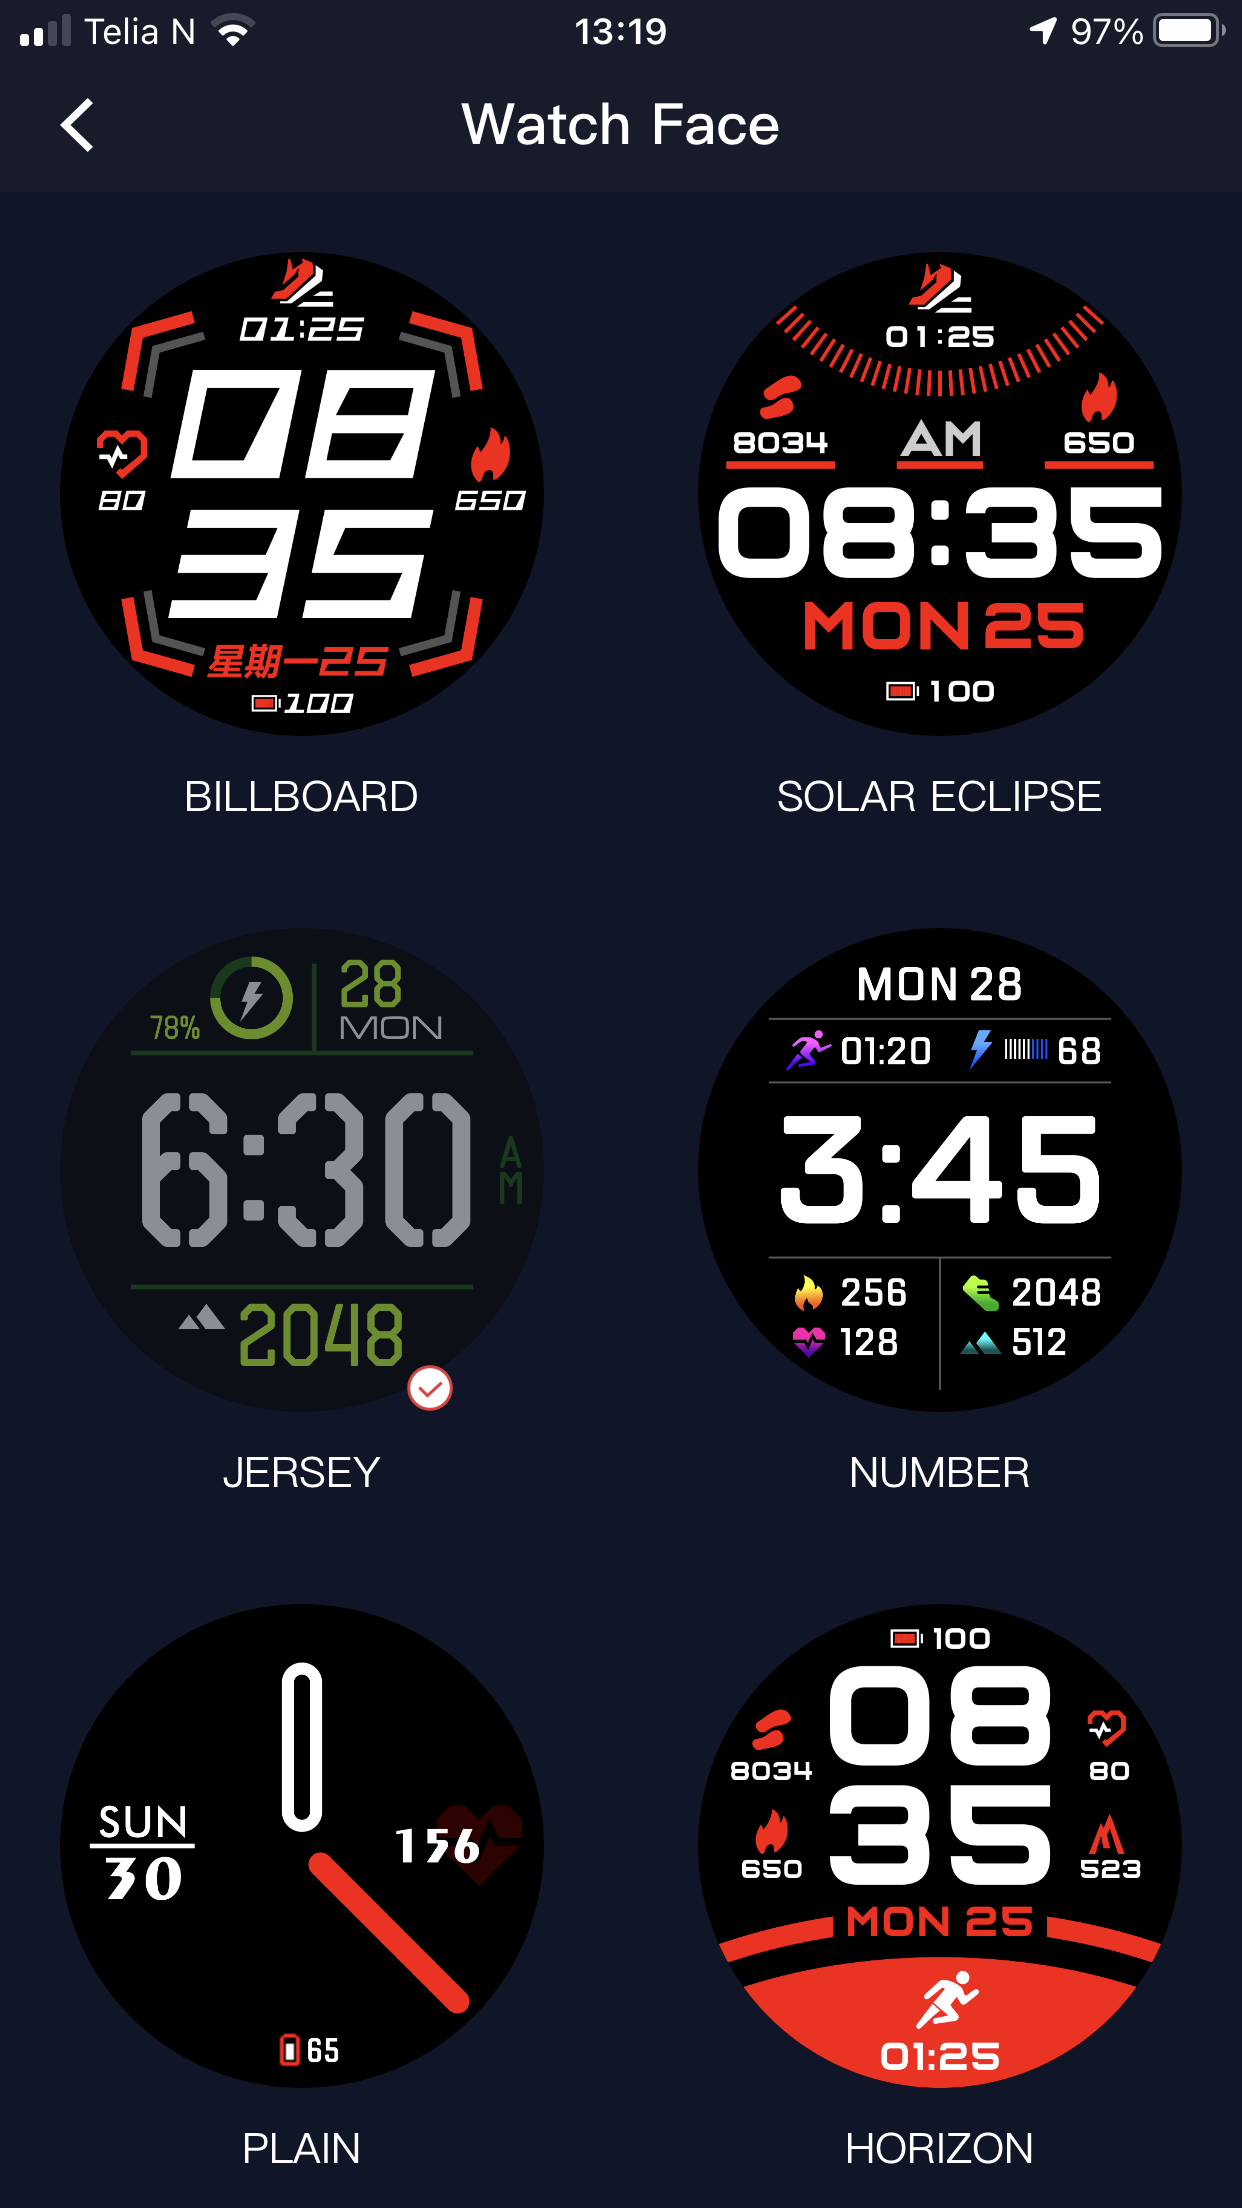
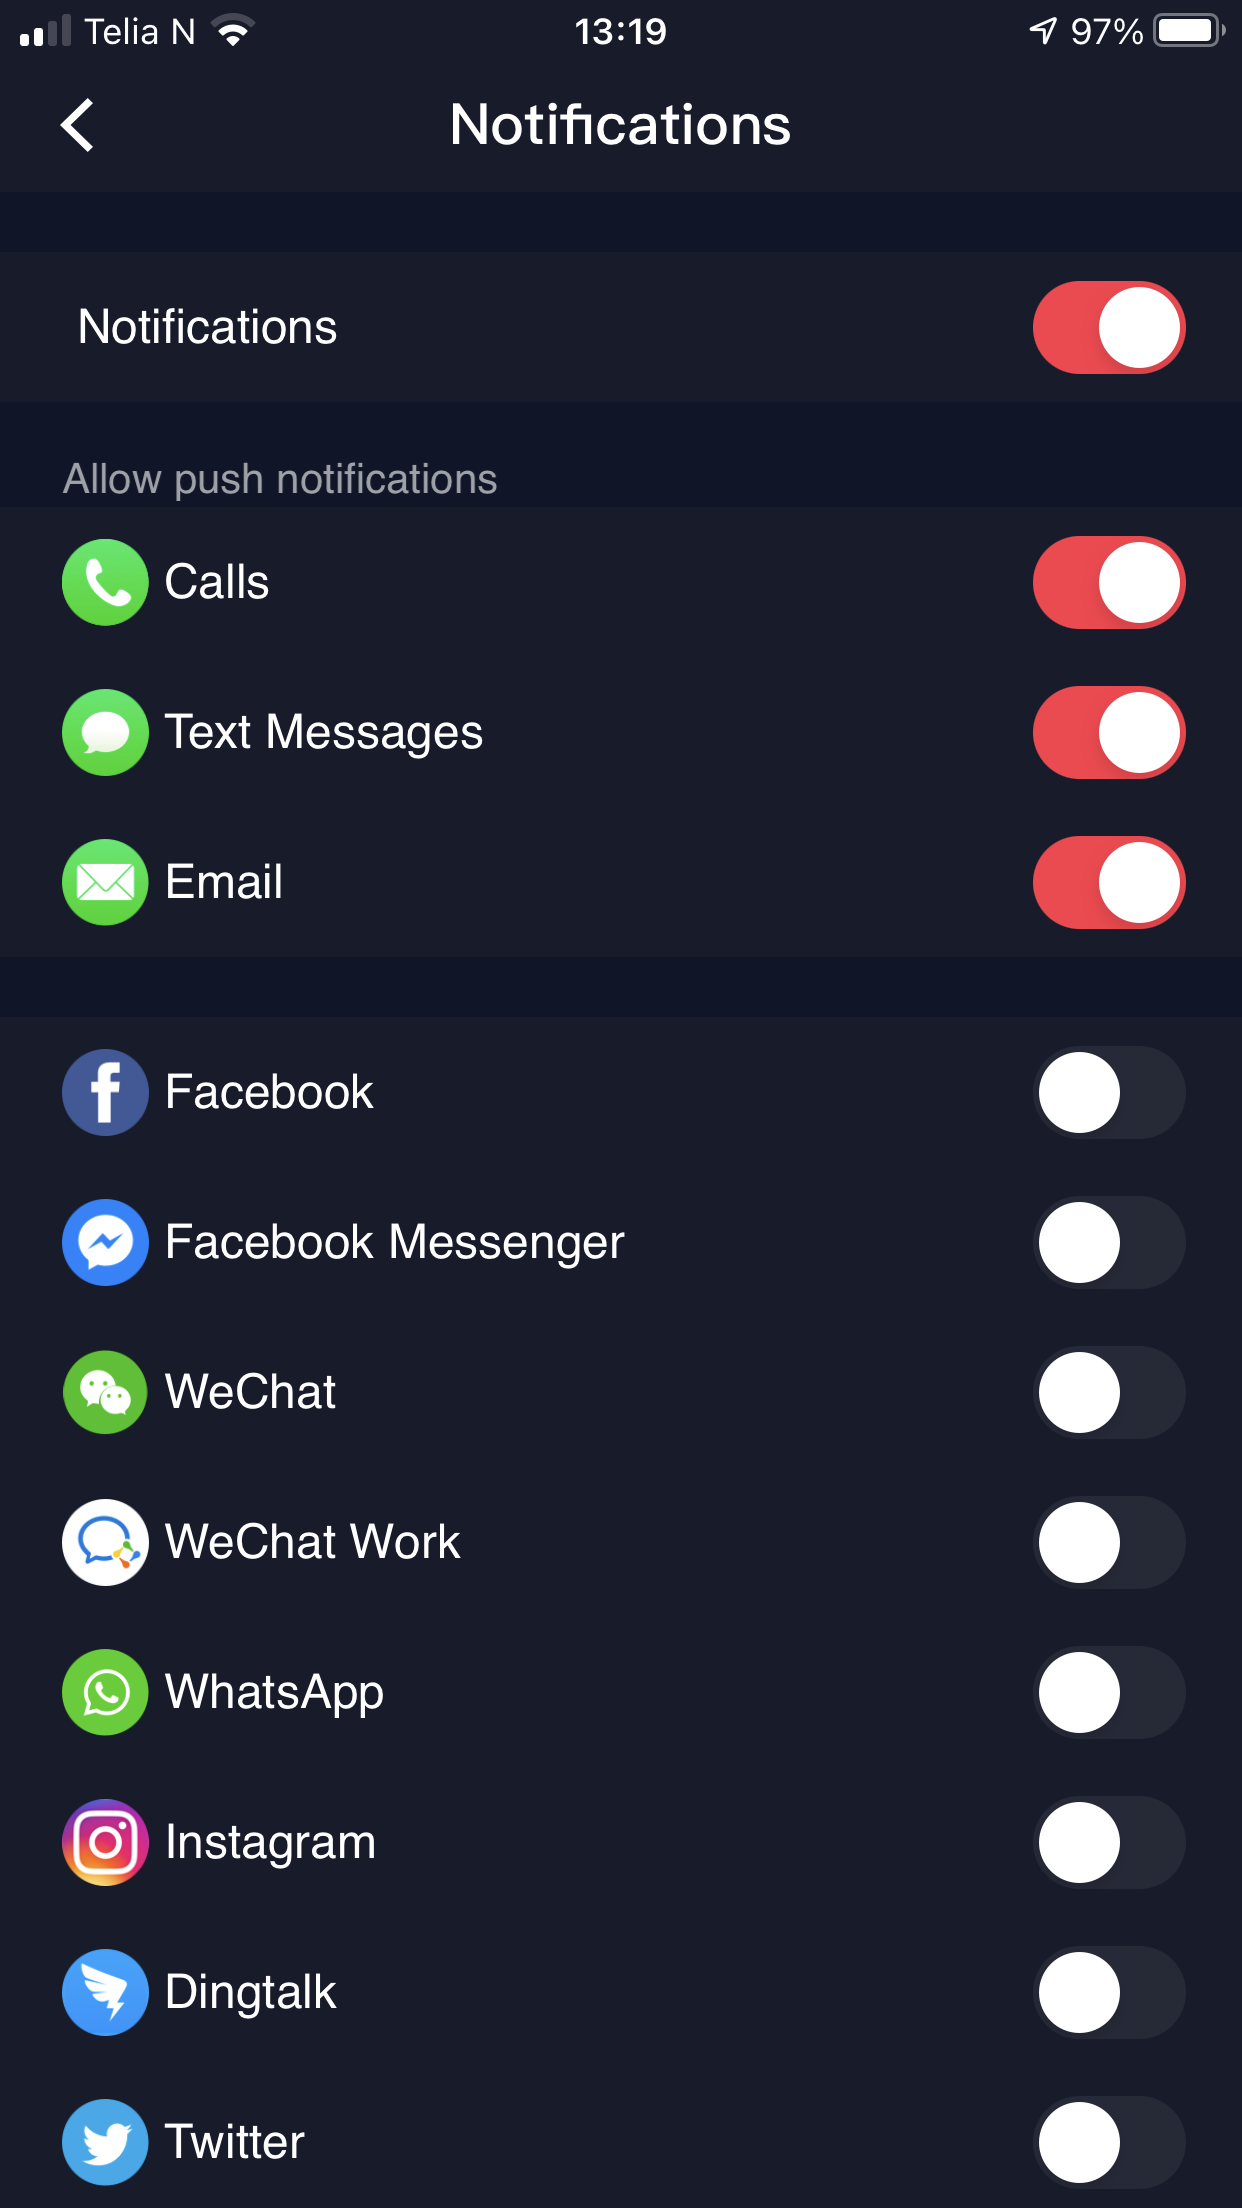
Click on the WATCH and you are given a menu of 9 key images that includes:
Workout data – Customisation – Firmware Update
My Training – My Training Plan – My Route
Watch Face – GPS Satellite – Data Notifications
Watch Face is a good start place so that you can decide on the look of the watch and what info is provided when on your wrist for day-to-day use. There are a couple of obvious ones which everyone seems to use. You can also change colour options.
Data Notifications allows you to decide what alarms, info, alerts you get from key things such as calls, text messages, email, Facebook, WhatsApp and so on and so on. I have them all off, I just don’t need that info when exercising but in day-to-day use as a watch, some alerts are useful. It all depends on the user.
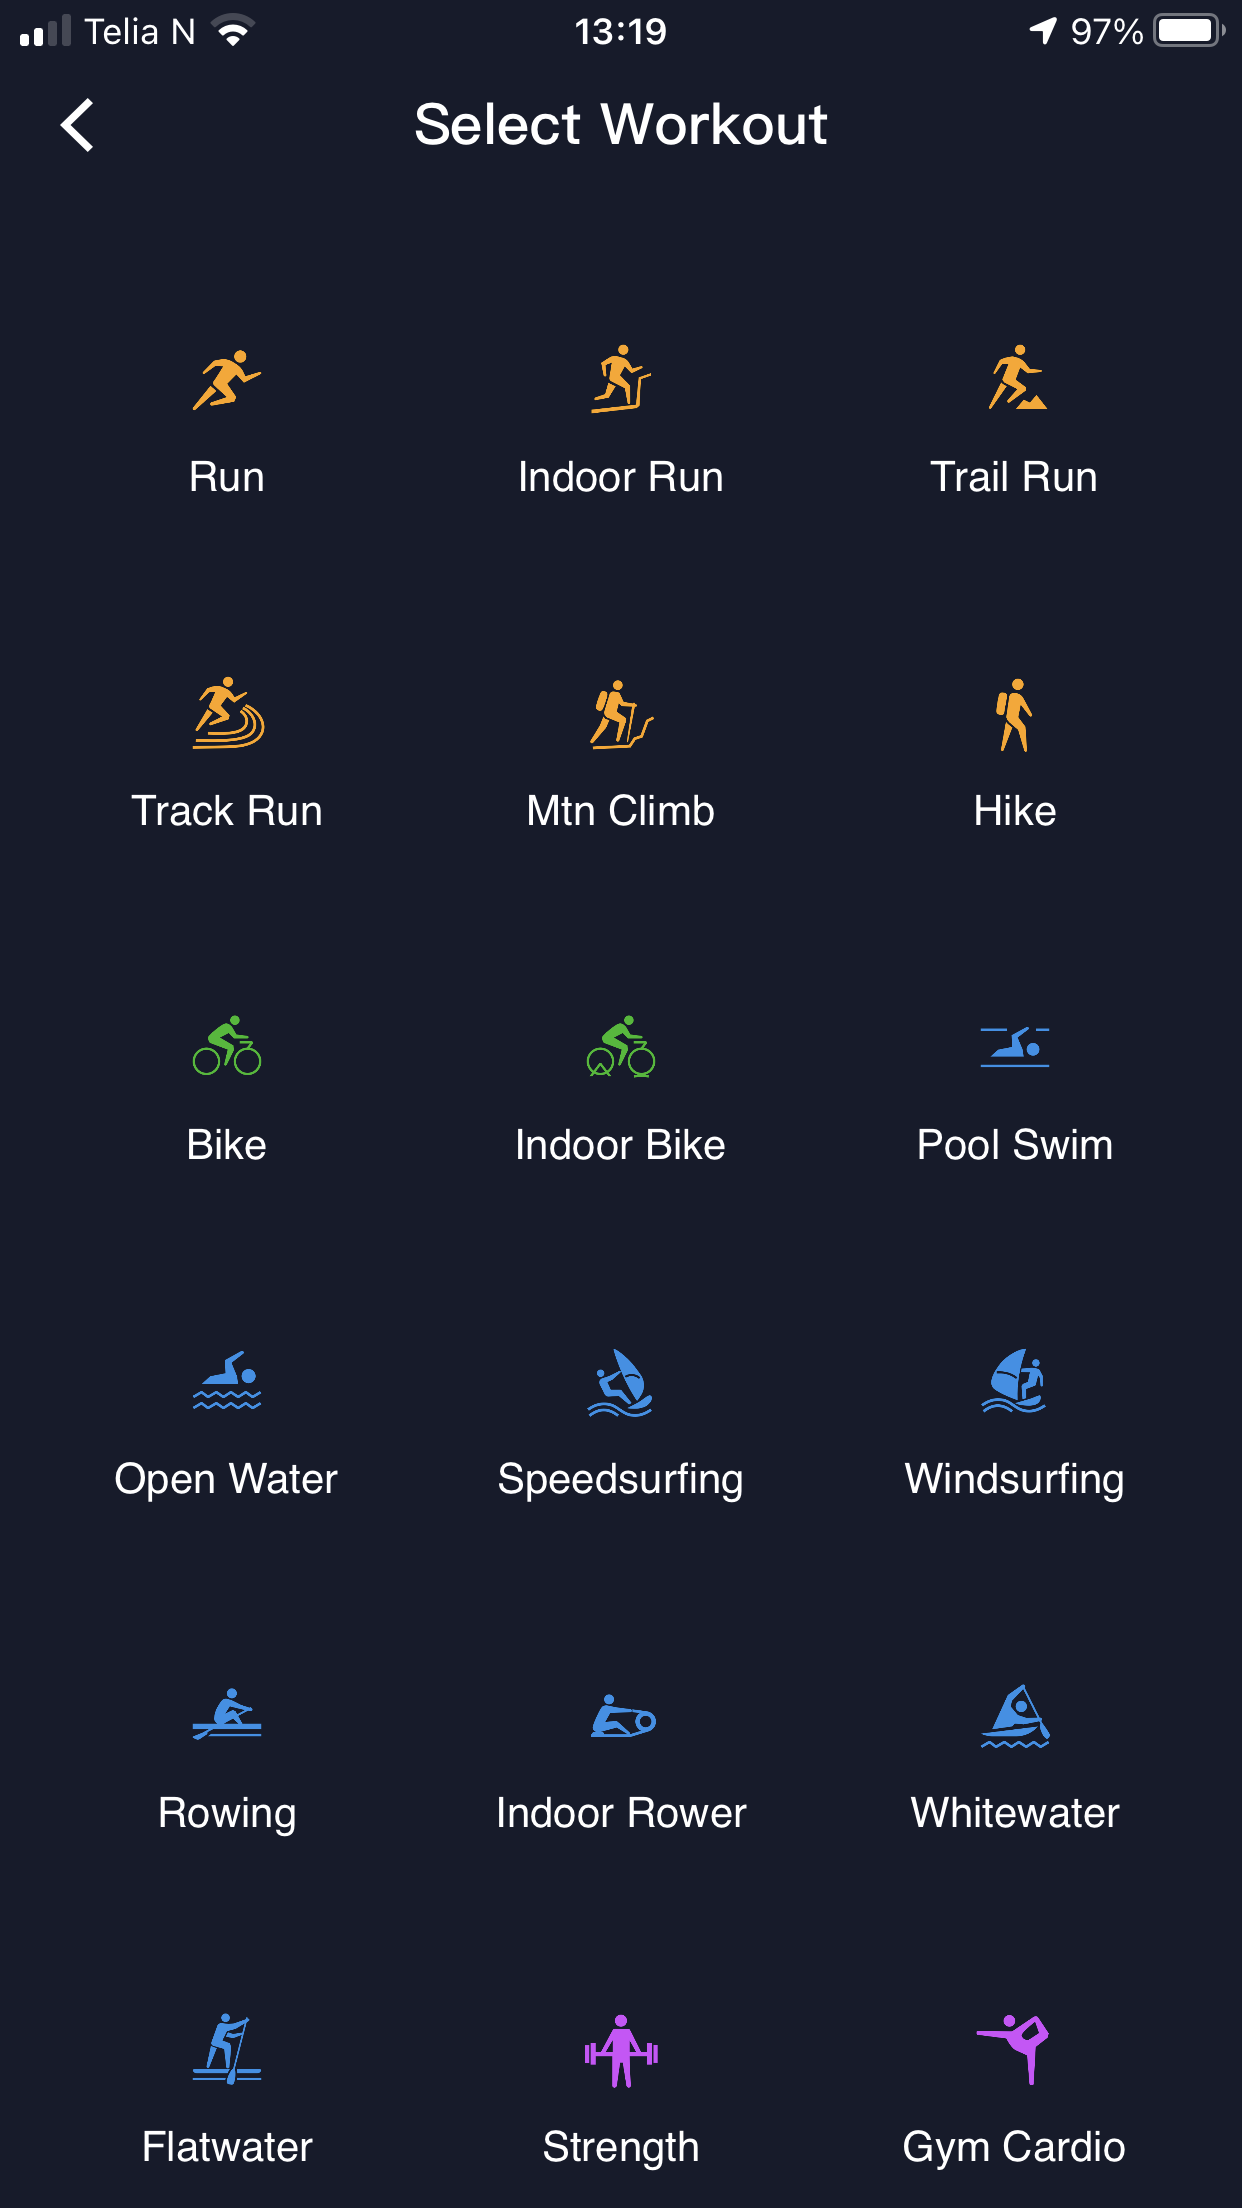
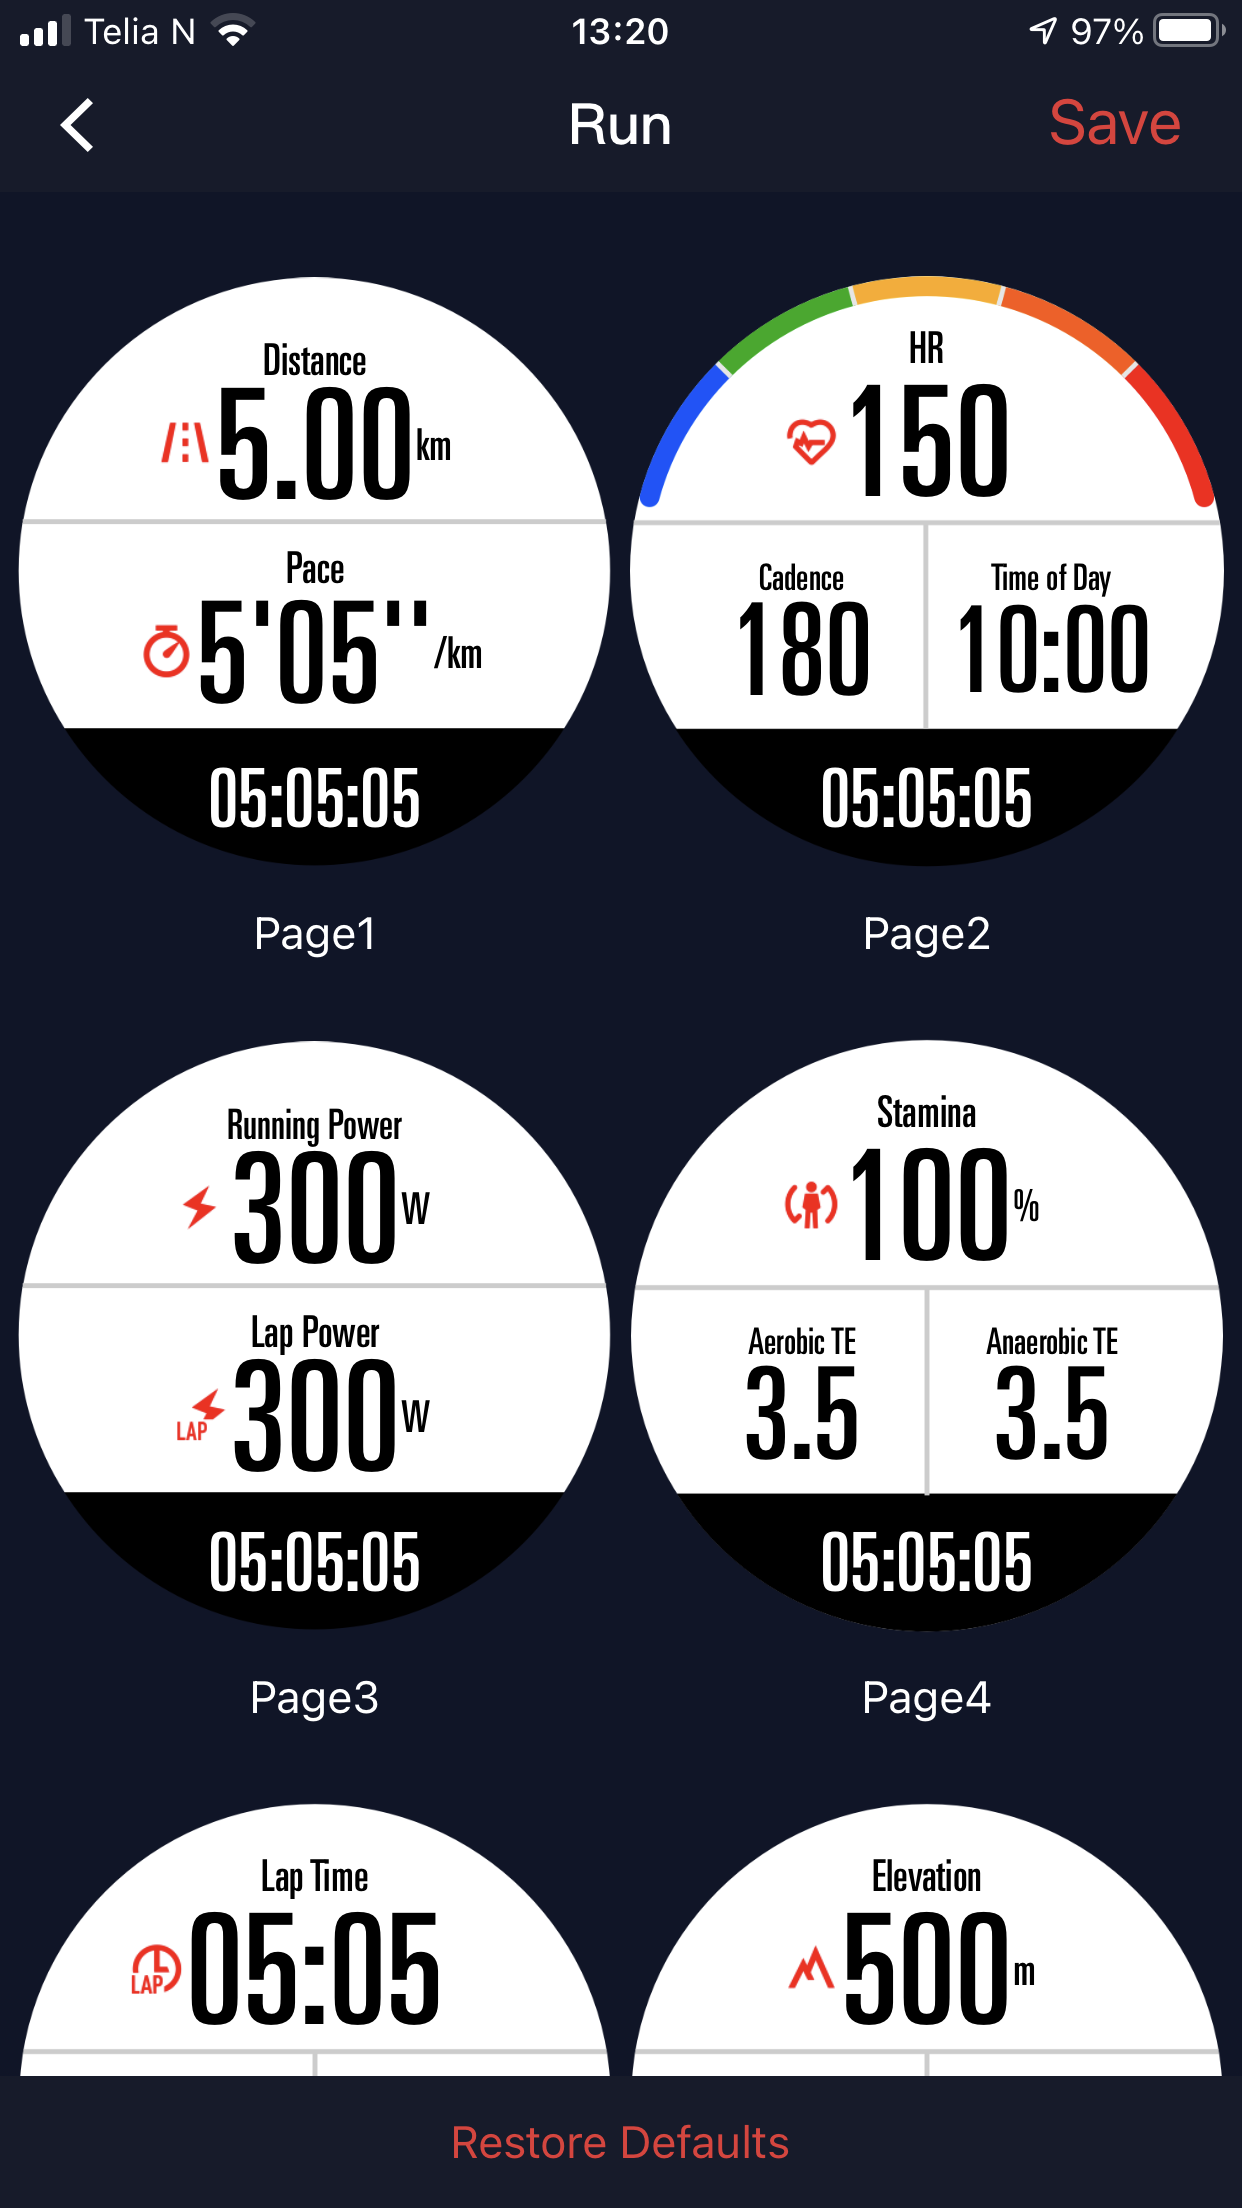
Select Workout shows what sports are covered by the VERTIX. Surprisingly this list is rather small with just 23 sports. A prime example is there is no ‘walk’ just a ‘hike’ option. Okay, you may well say there may be little difference between the two but for me, there is. So that irritated me. When you click on a sport, let’s say RUN. You are then provided options of how your watch screen will look. Choose the option that is best for you. You can do this for every sport.
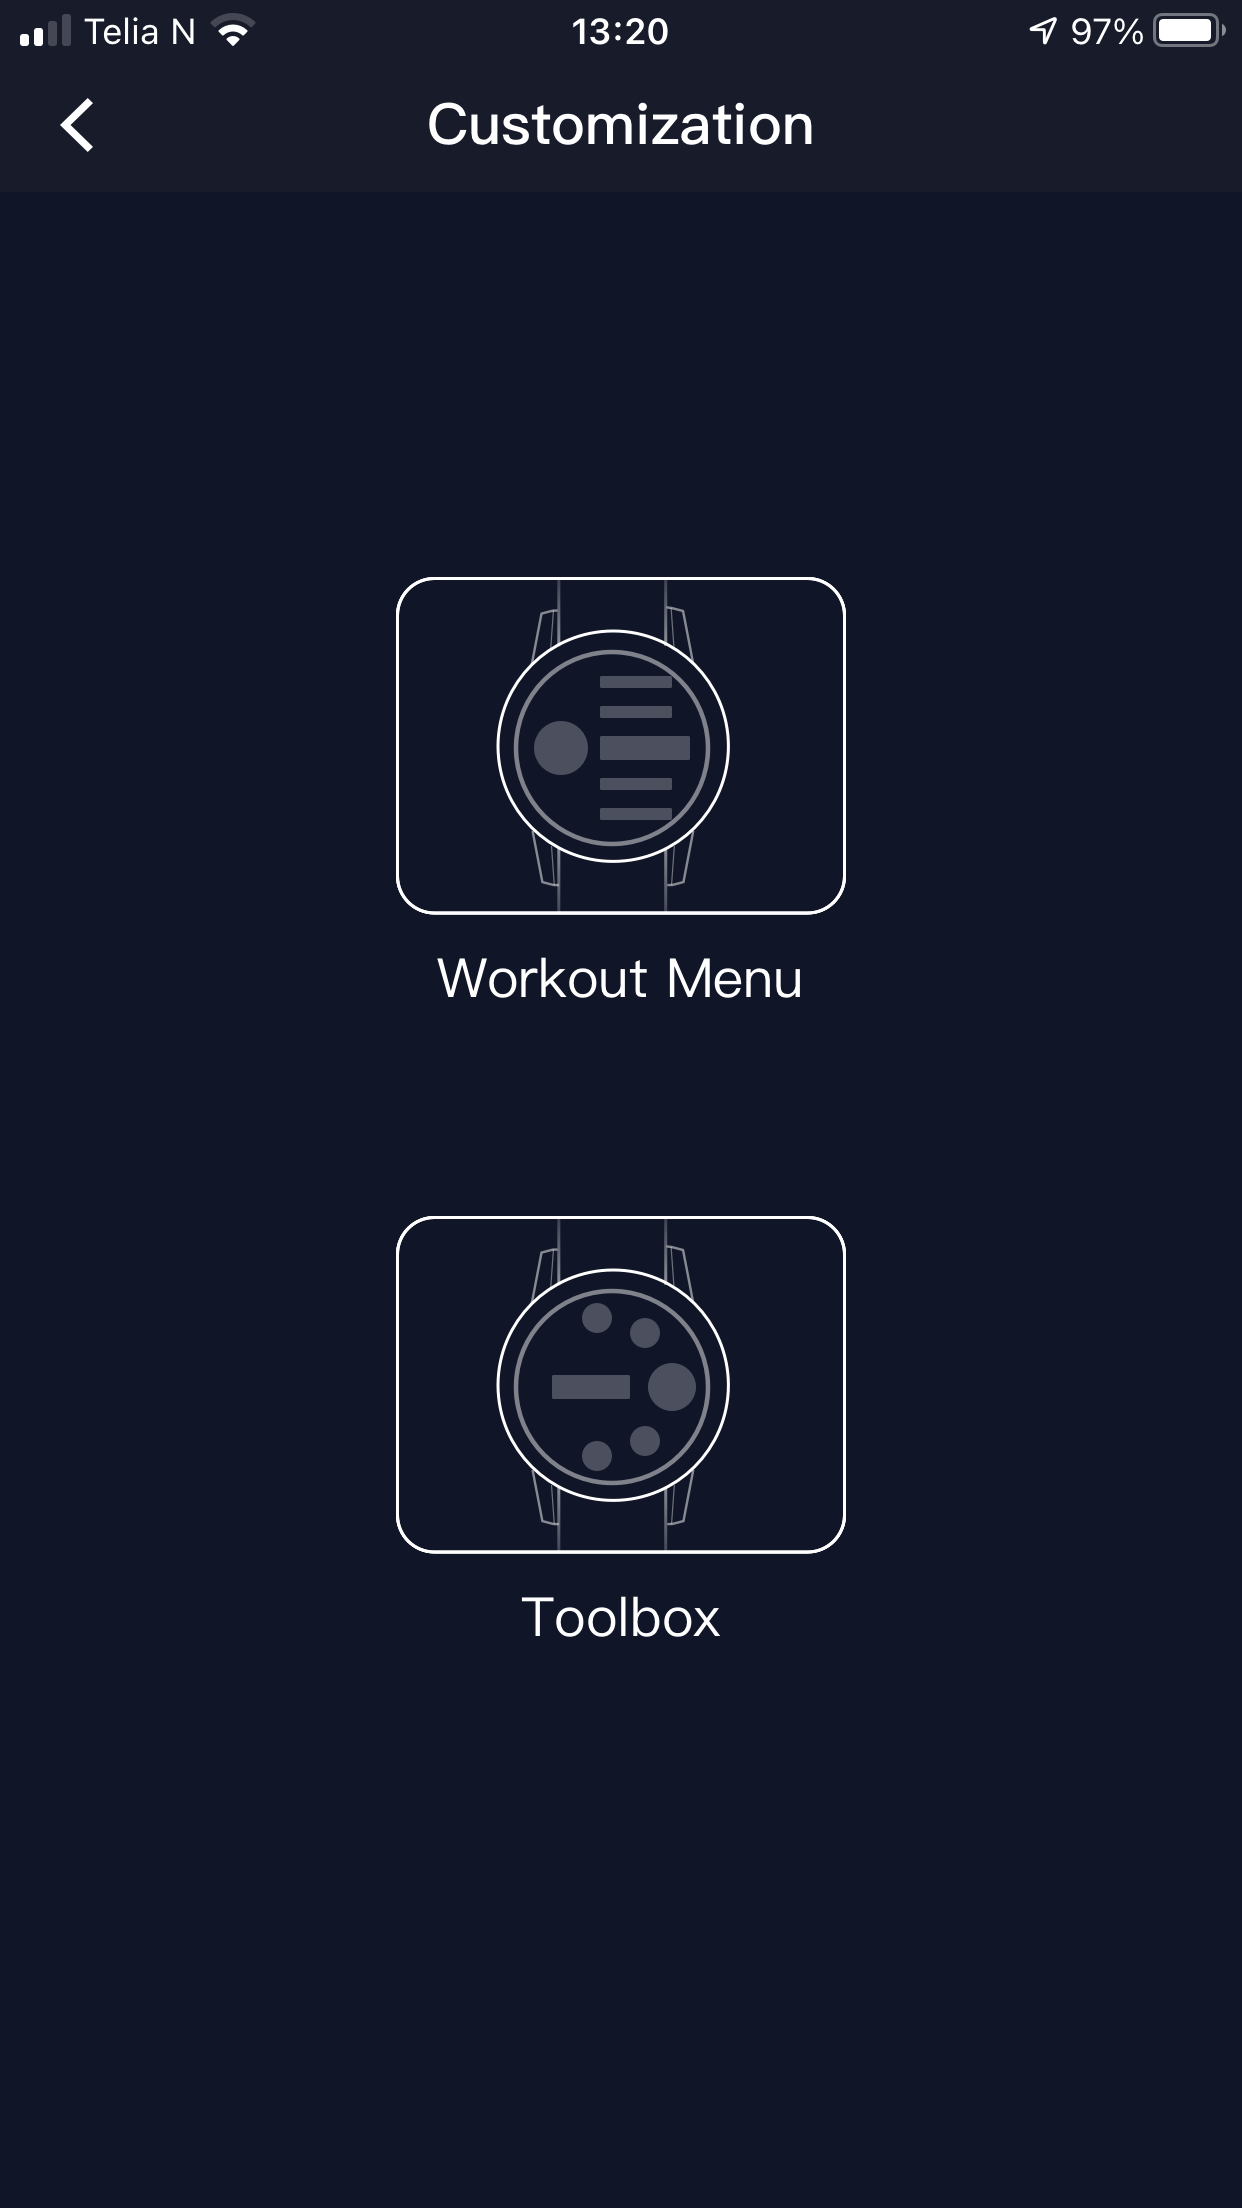
Customisation allows you to access the ‘Workout Menu’ and ‘Toolbox’ so that you can make them personal to you and your needs. Basically, smartphone configuration of data fields. Notably there is Running Power and running efficiency metrics such as leg stiffness, contact time, cadence and so on.
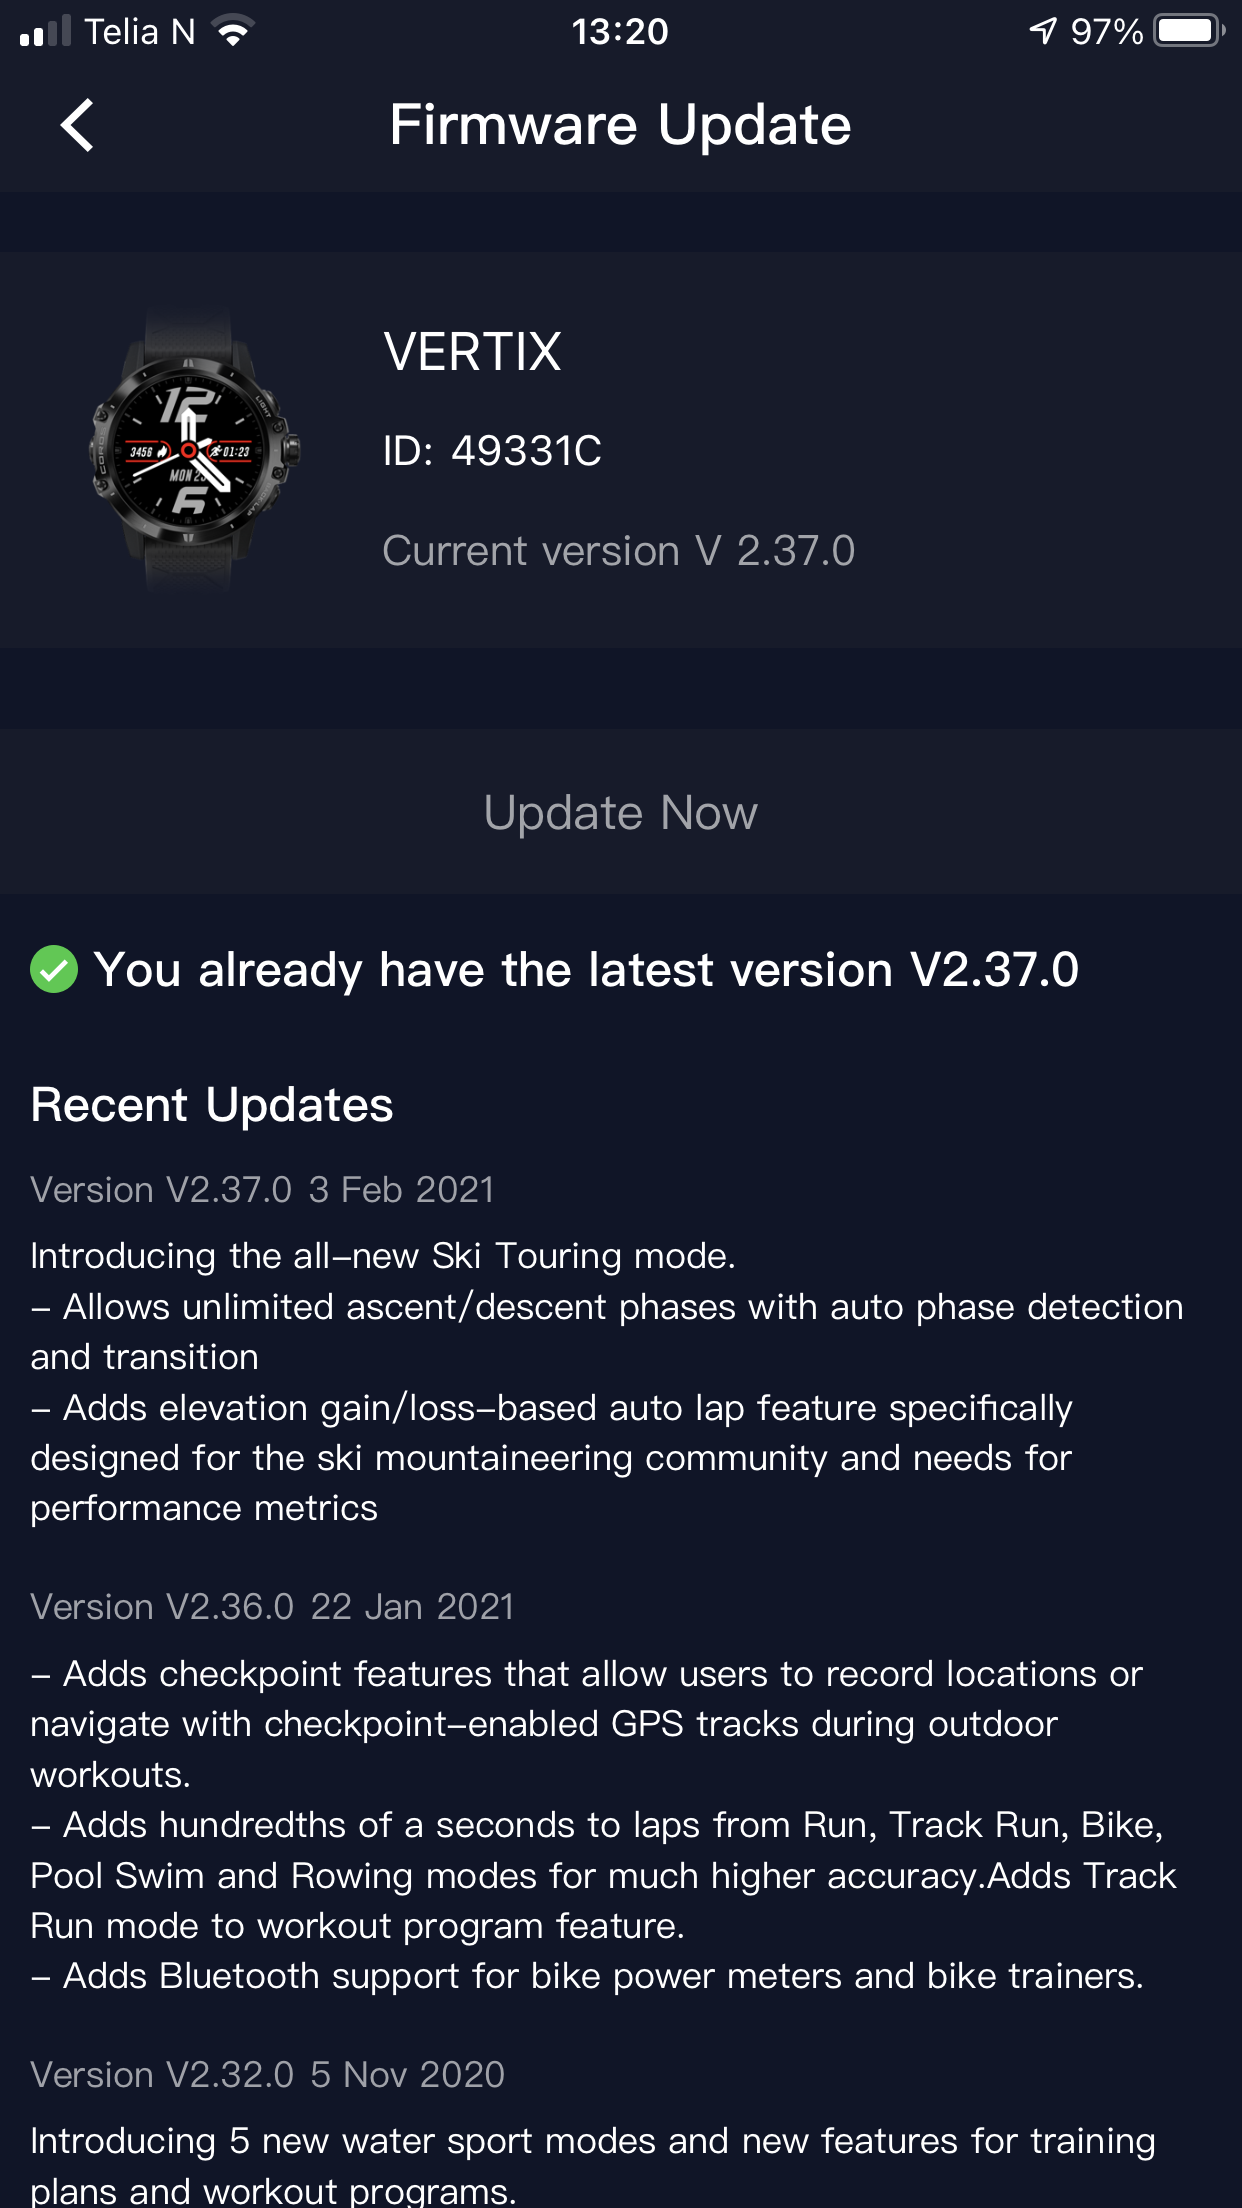
Firmware Update basically connects to your watch and informs you if you are up to date or if an update is available. It’s a no brainer, keep the VERTIX updated.
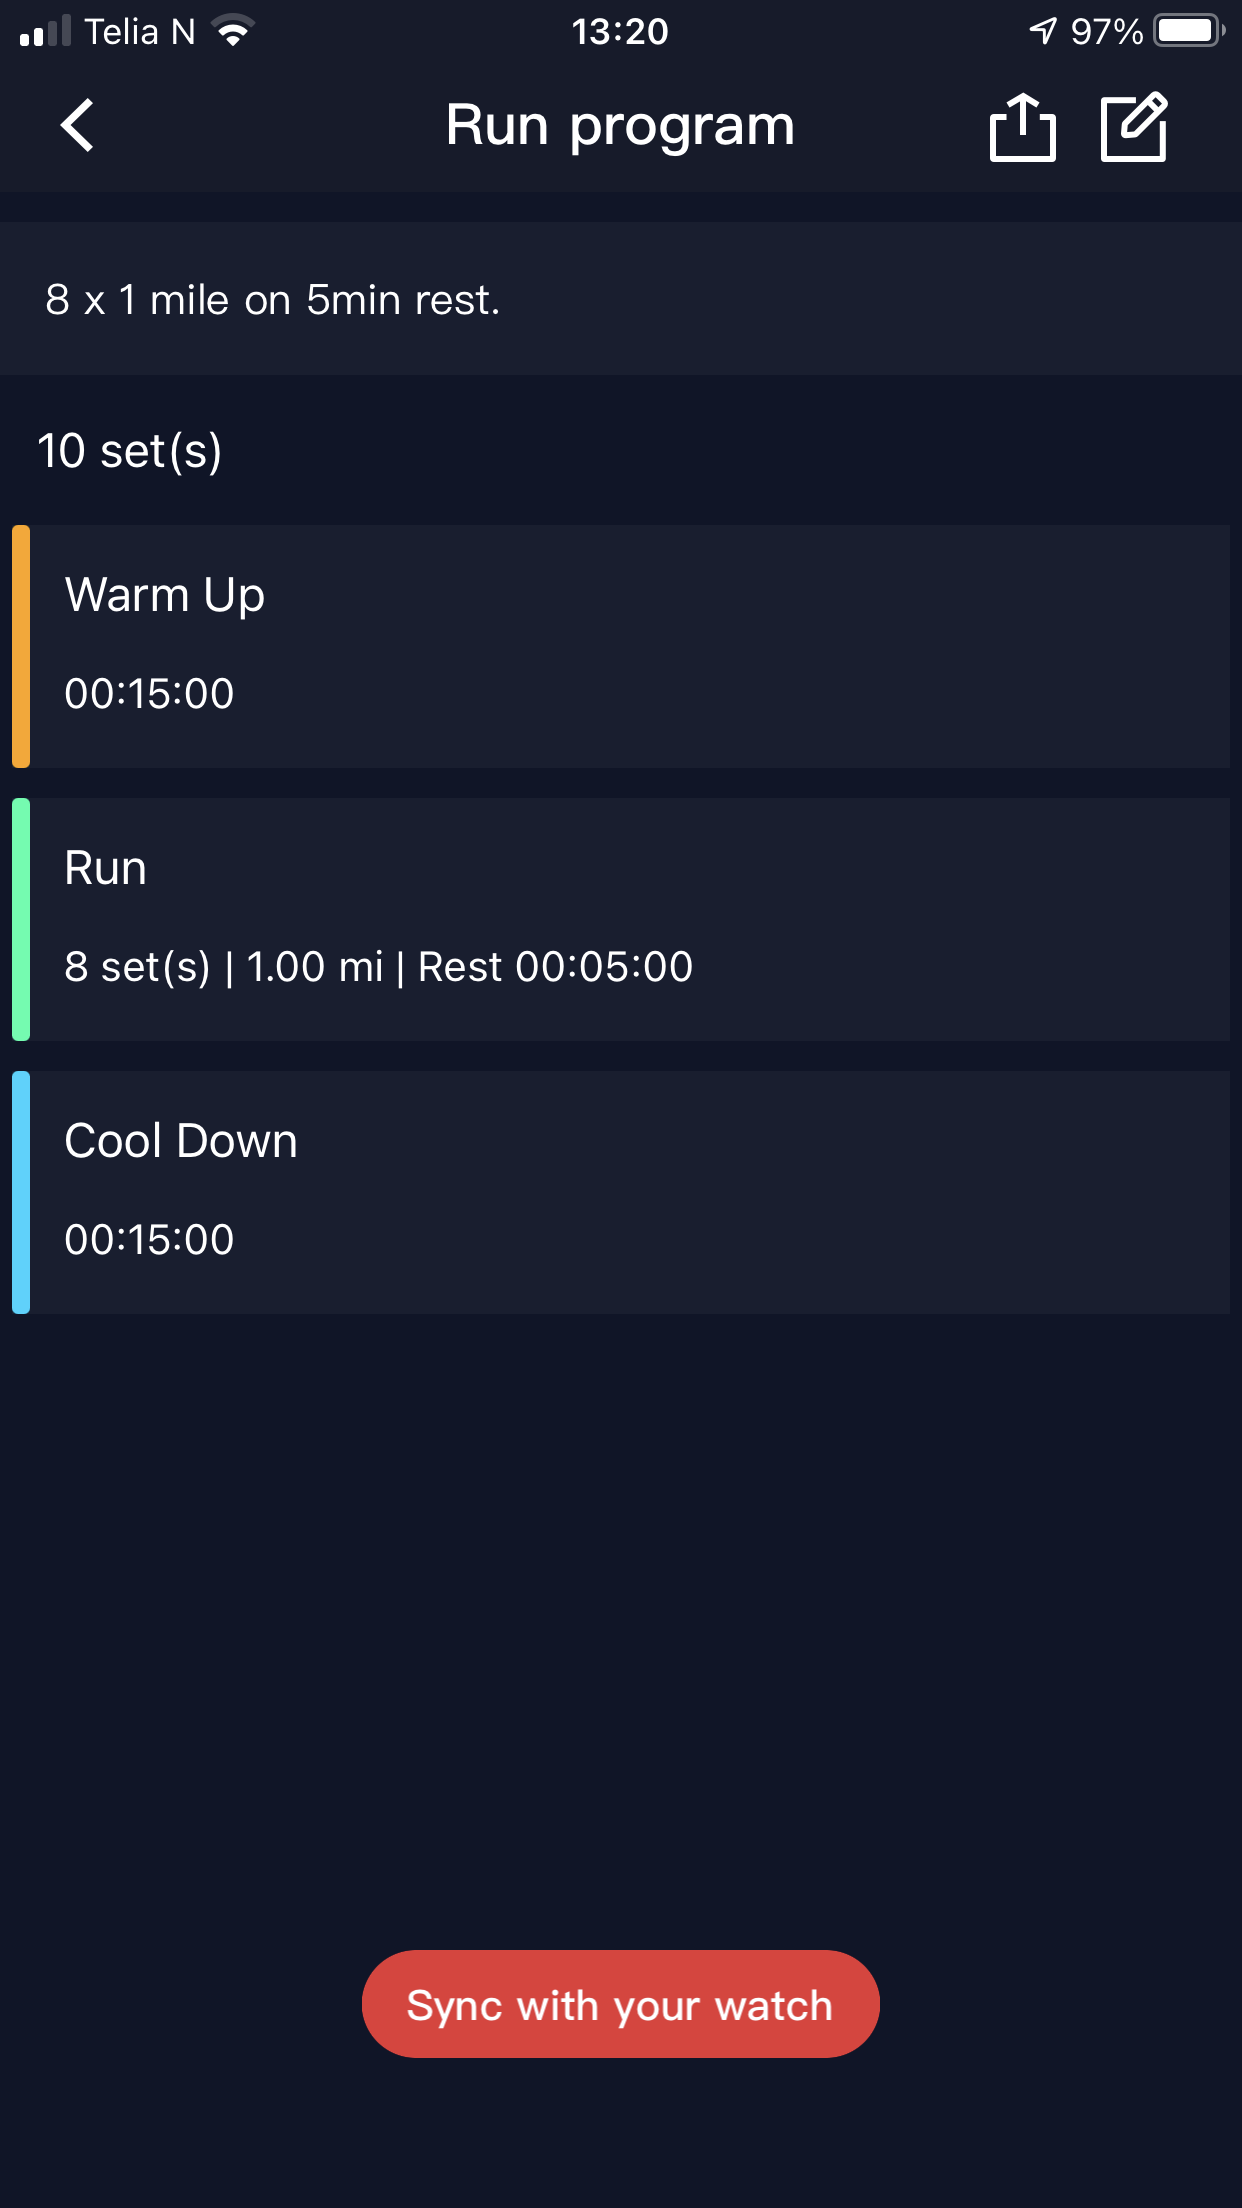
My Training allows you to download verified programs from coros.com or building a workout for yourself. Click on ‘add workout’ then ‘create program’ then choose a sport: Run, Bike, Swim or Strength. Now you can add a session, in Run for example, you can add a warmup, then intervals/ sets and a cool down. It’s a nice feature and ideal to keep you honest and on track if you need some real structure to your training. As an example, I created a session: 15 min warm up, 8 x 1-mile on 5min rest followed with 15 min warm down. I created a name, saved it and then synced with my watch via the app. This session is now on the VERTIX ready for when I need it. Storage is not indefinite; it will hold 20 workouts on the watch.
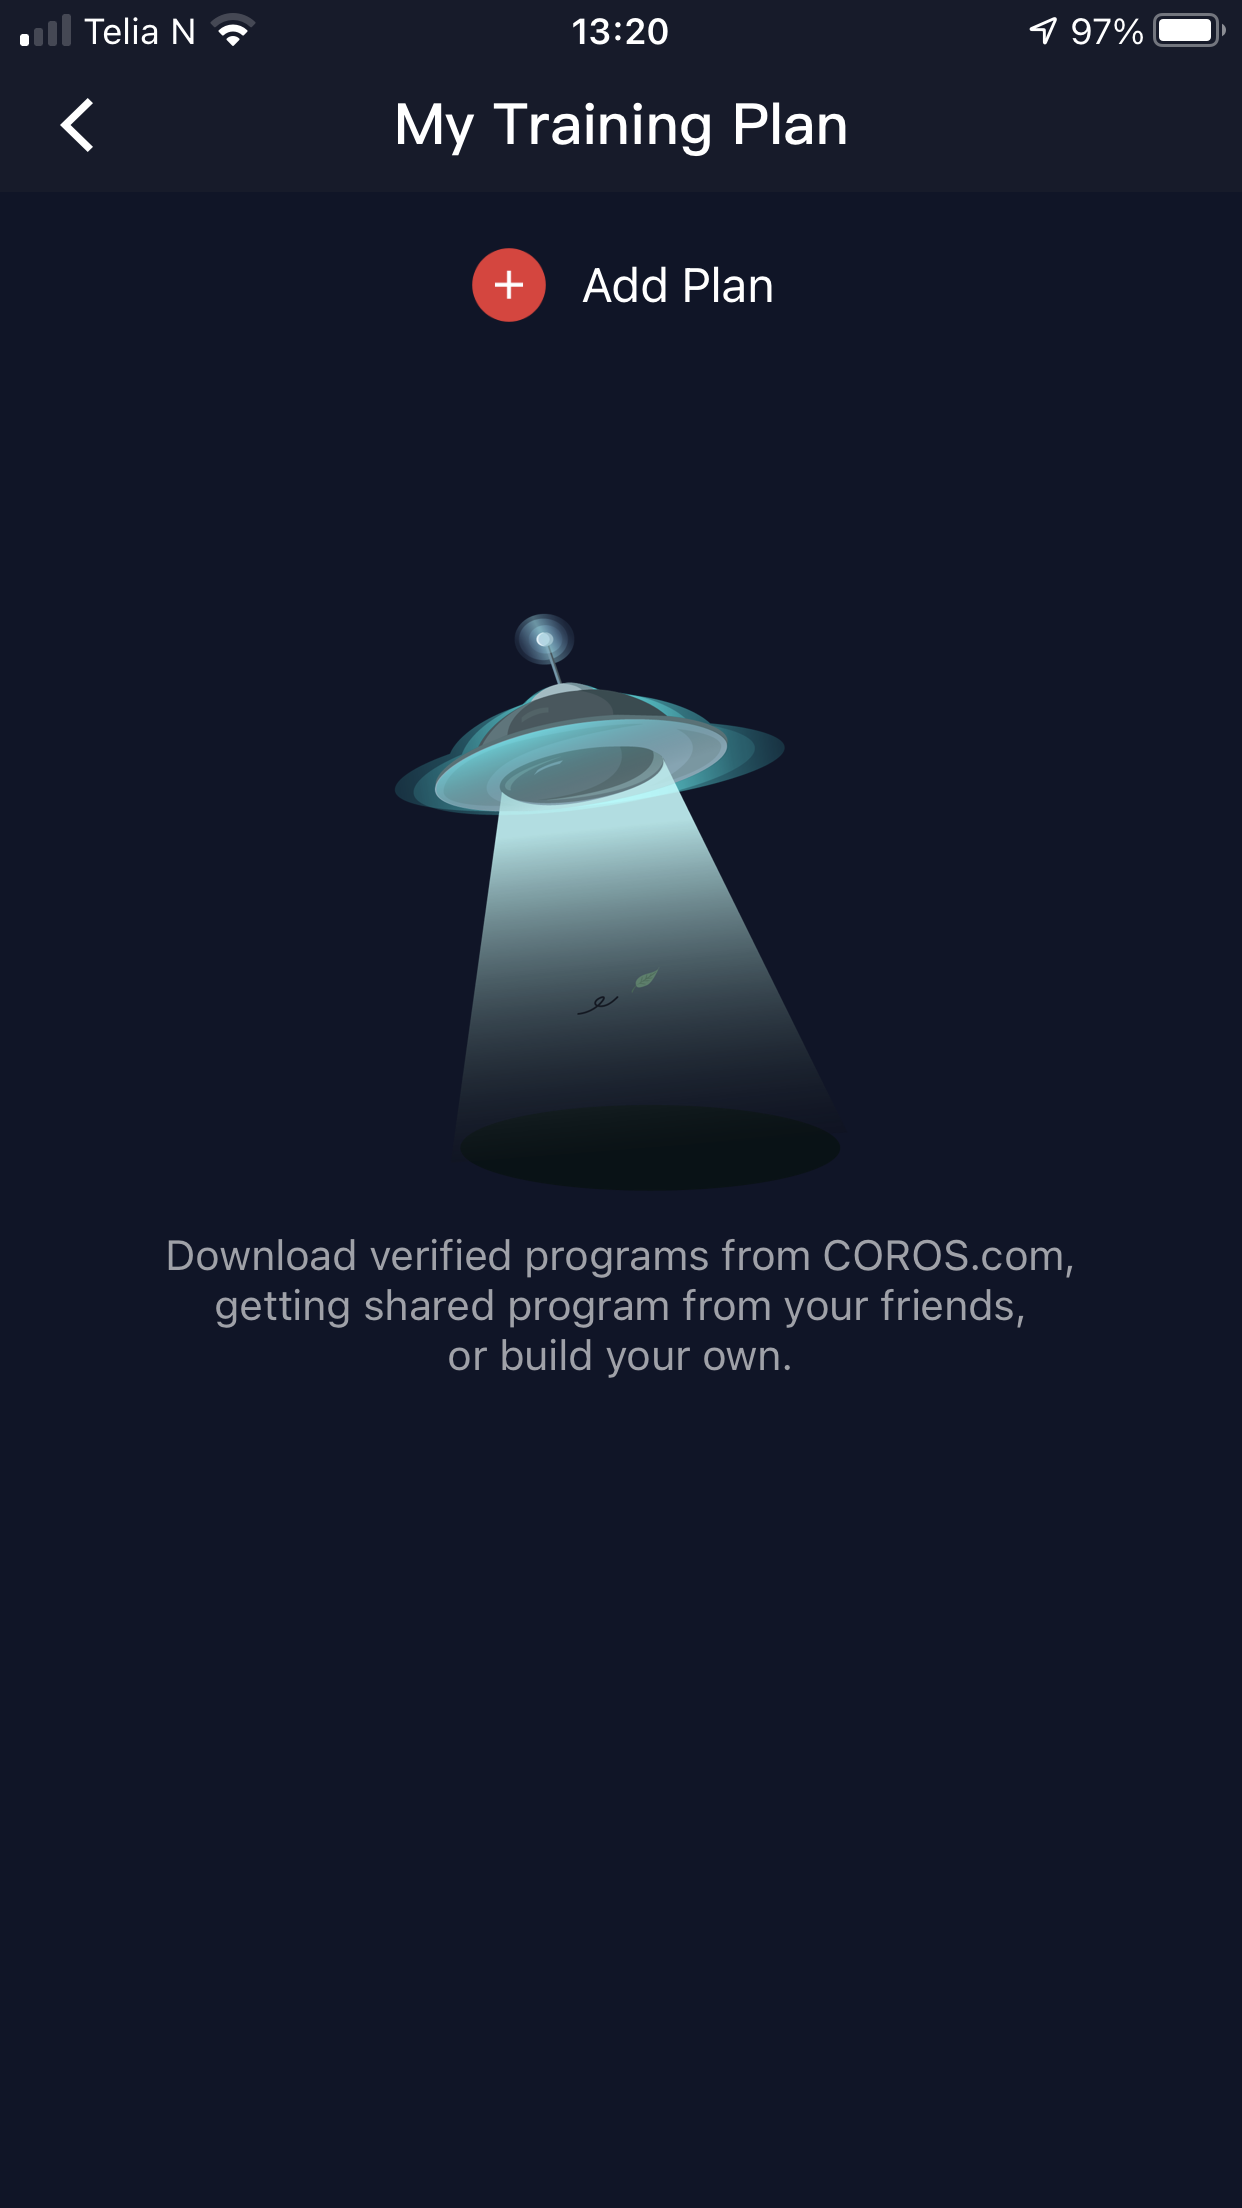
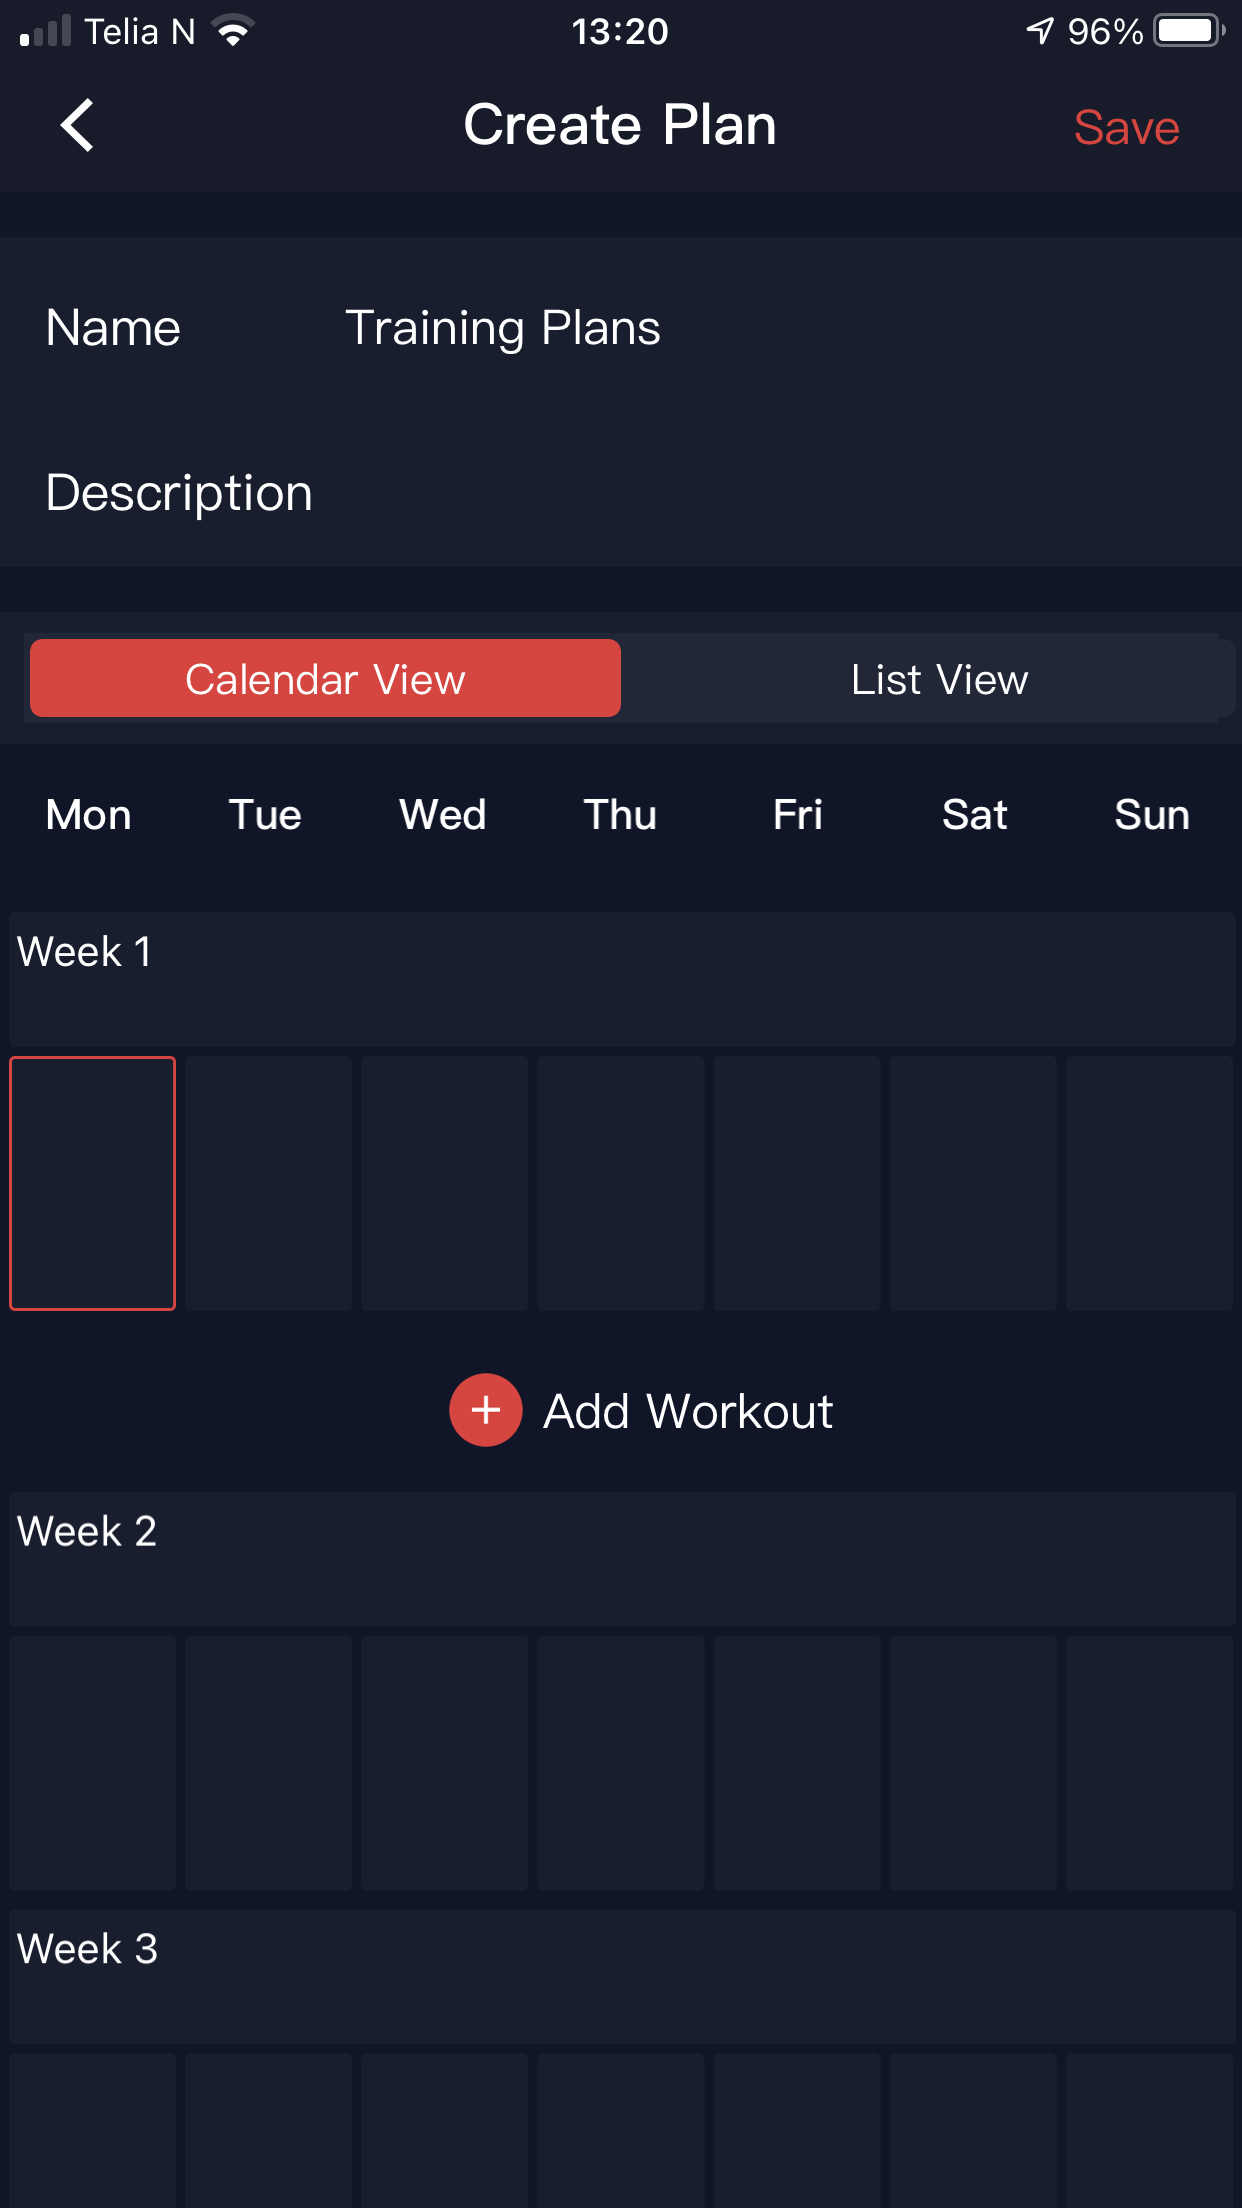
My Training Plan works in just the same way as ‘My Training’ allowing you to add days and weeks of training.
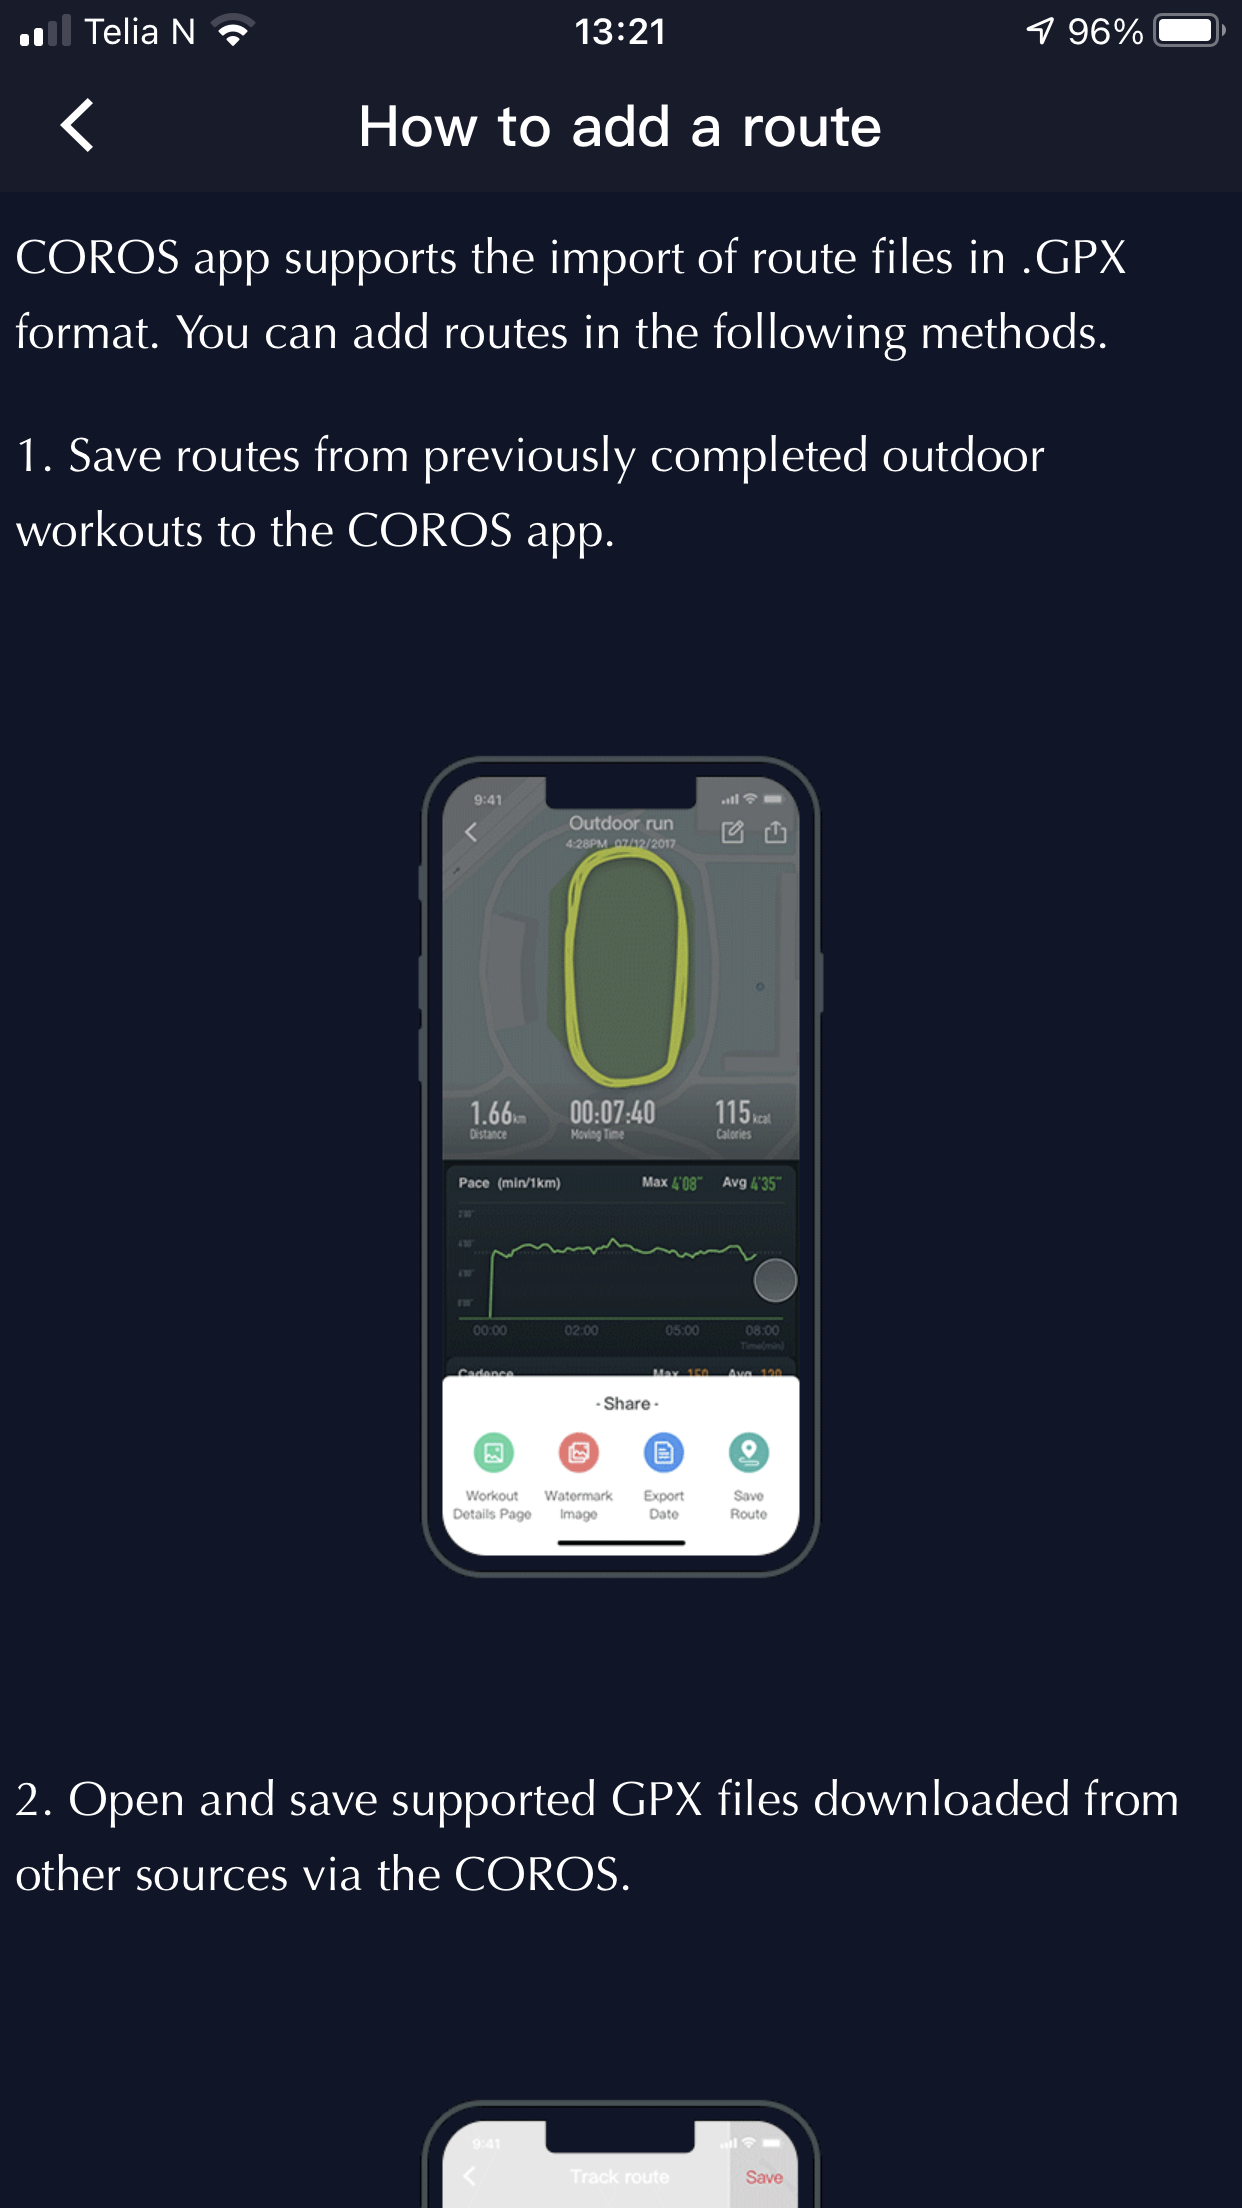
My Route allows 10 routes to be added to the VERTIX for navigation. Click on ‘Import from Library’ and then ‘How to add a route’ takes you through a step-by-step process. I found it easy and seamless. Helps if you have apps on your phone such as maps.me or footpath as you export GPX files.
GPS Satellite Data tells you if you are up to date and if you need to update.
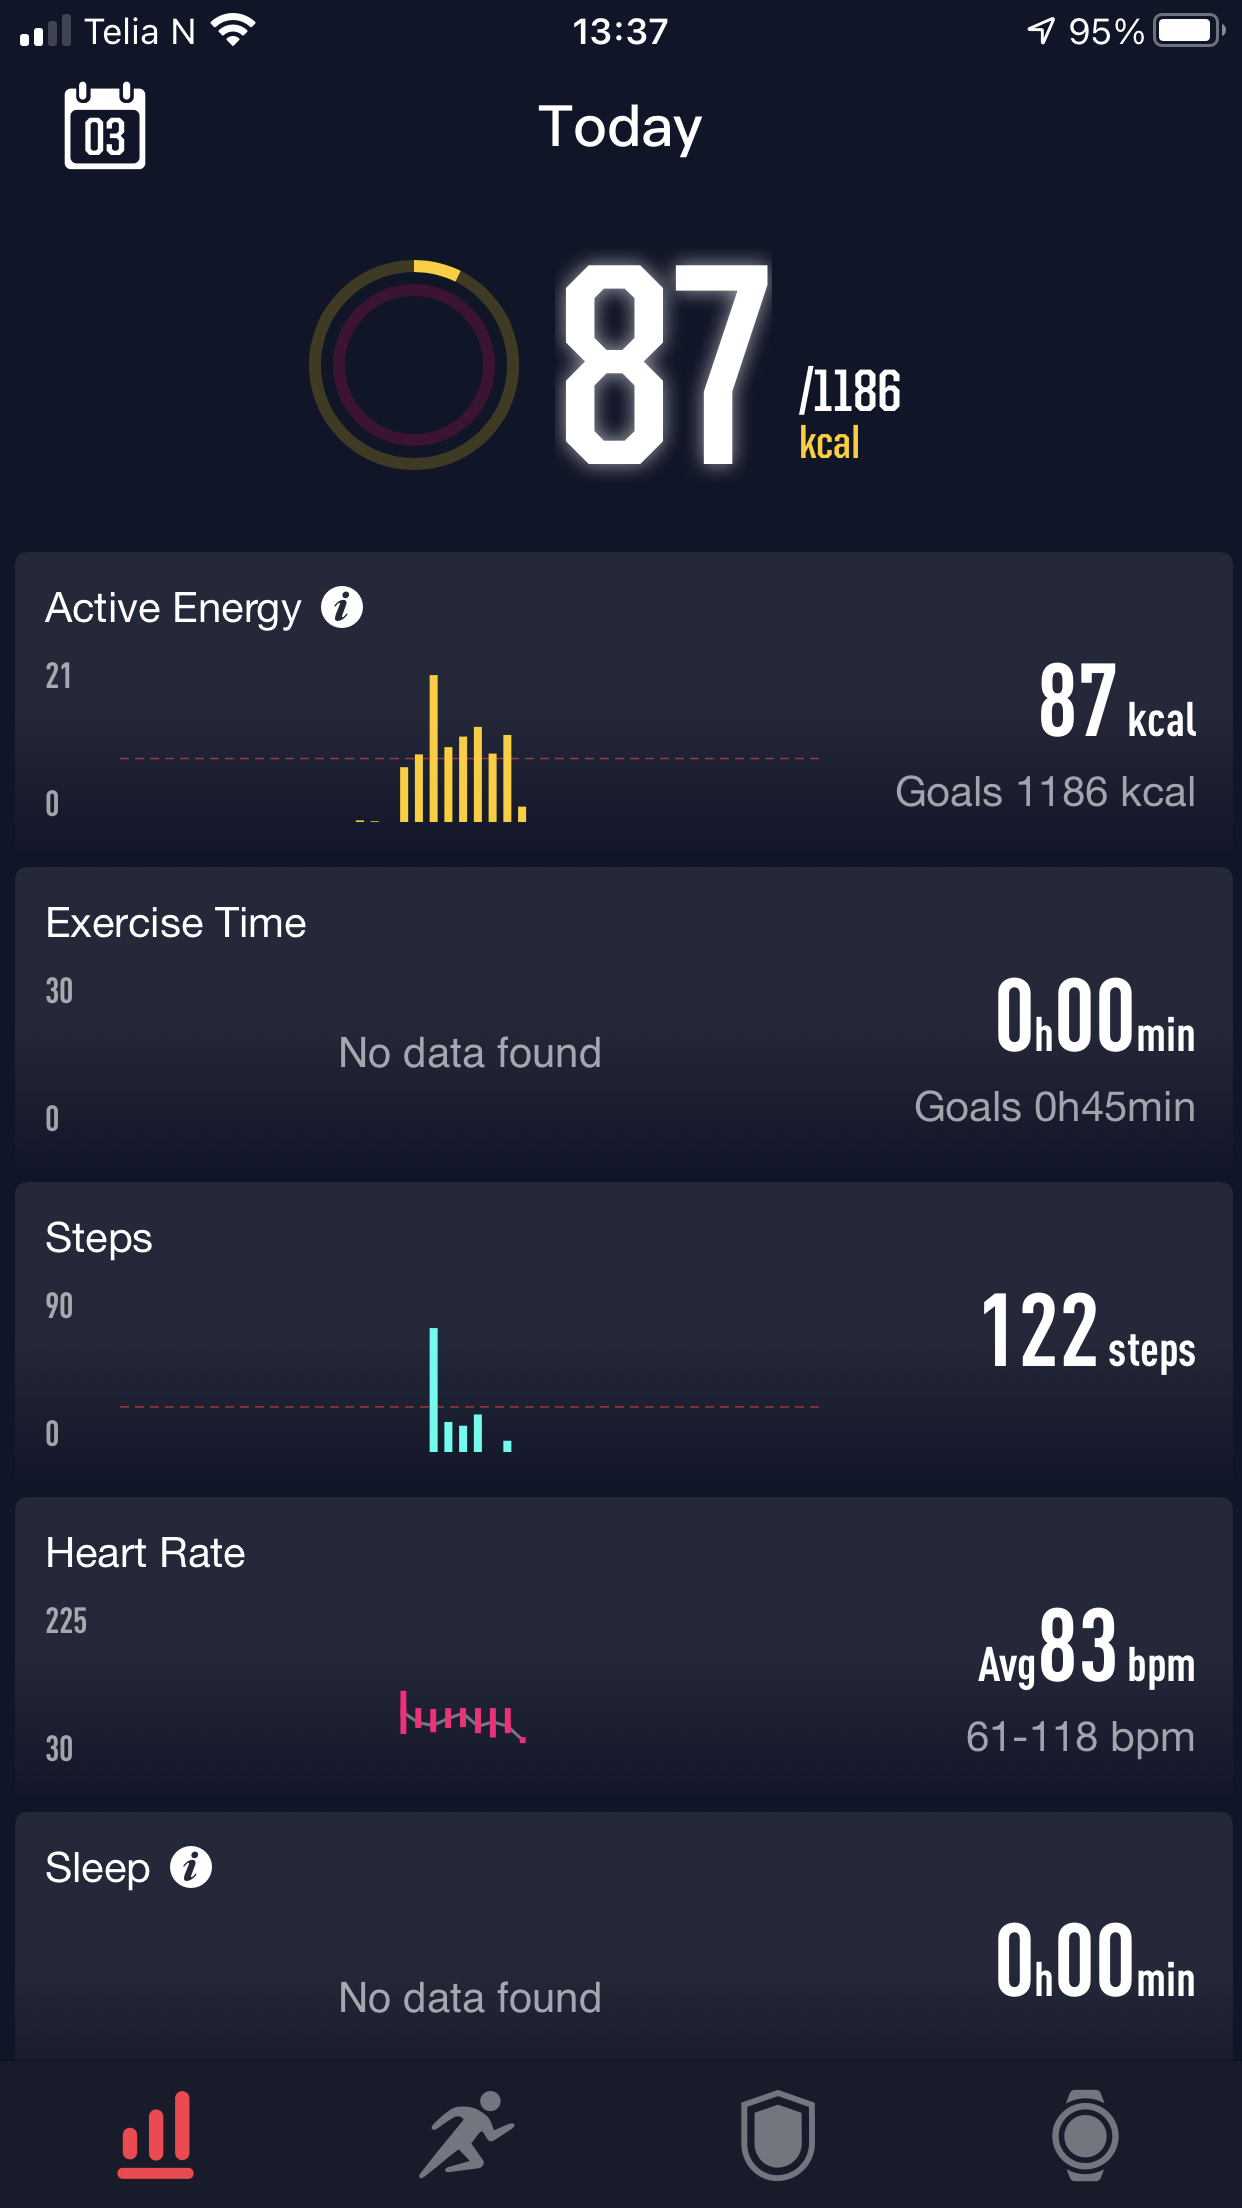
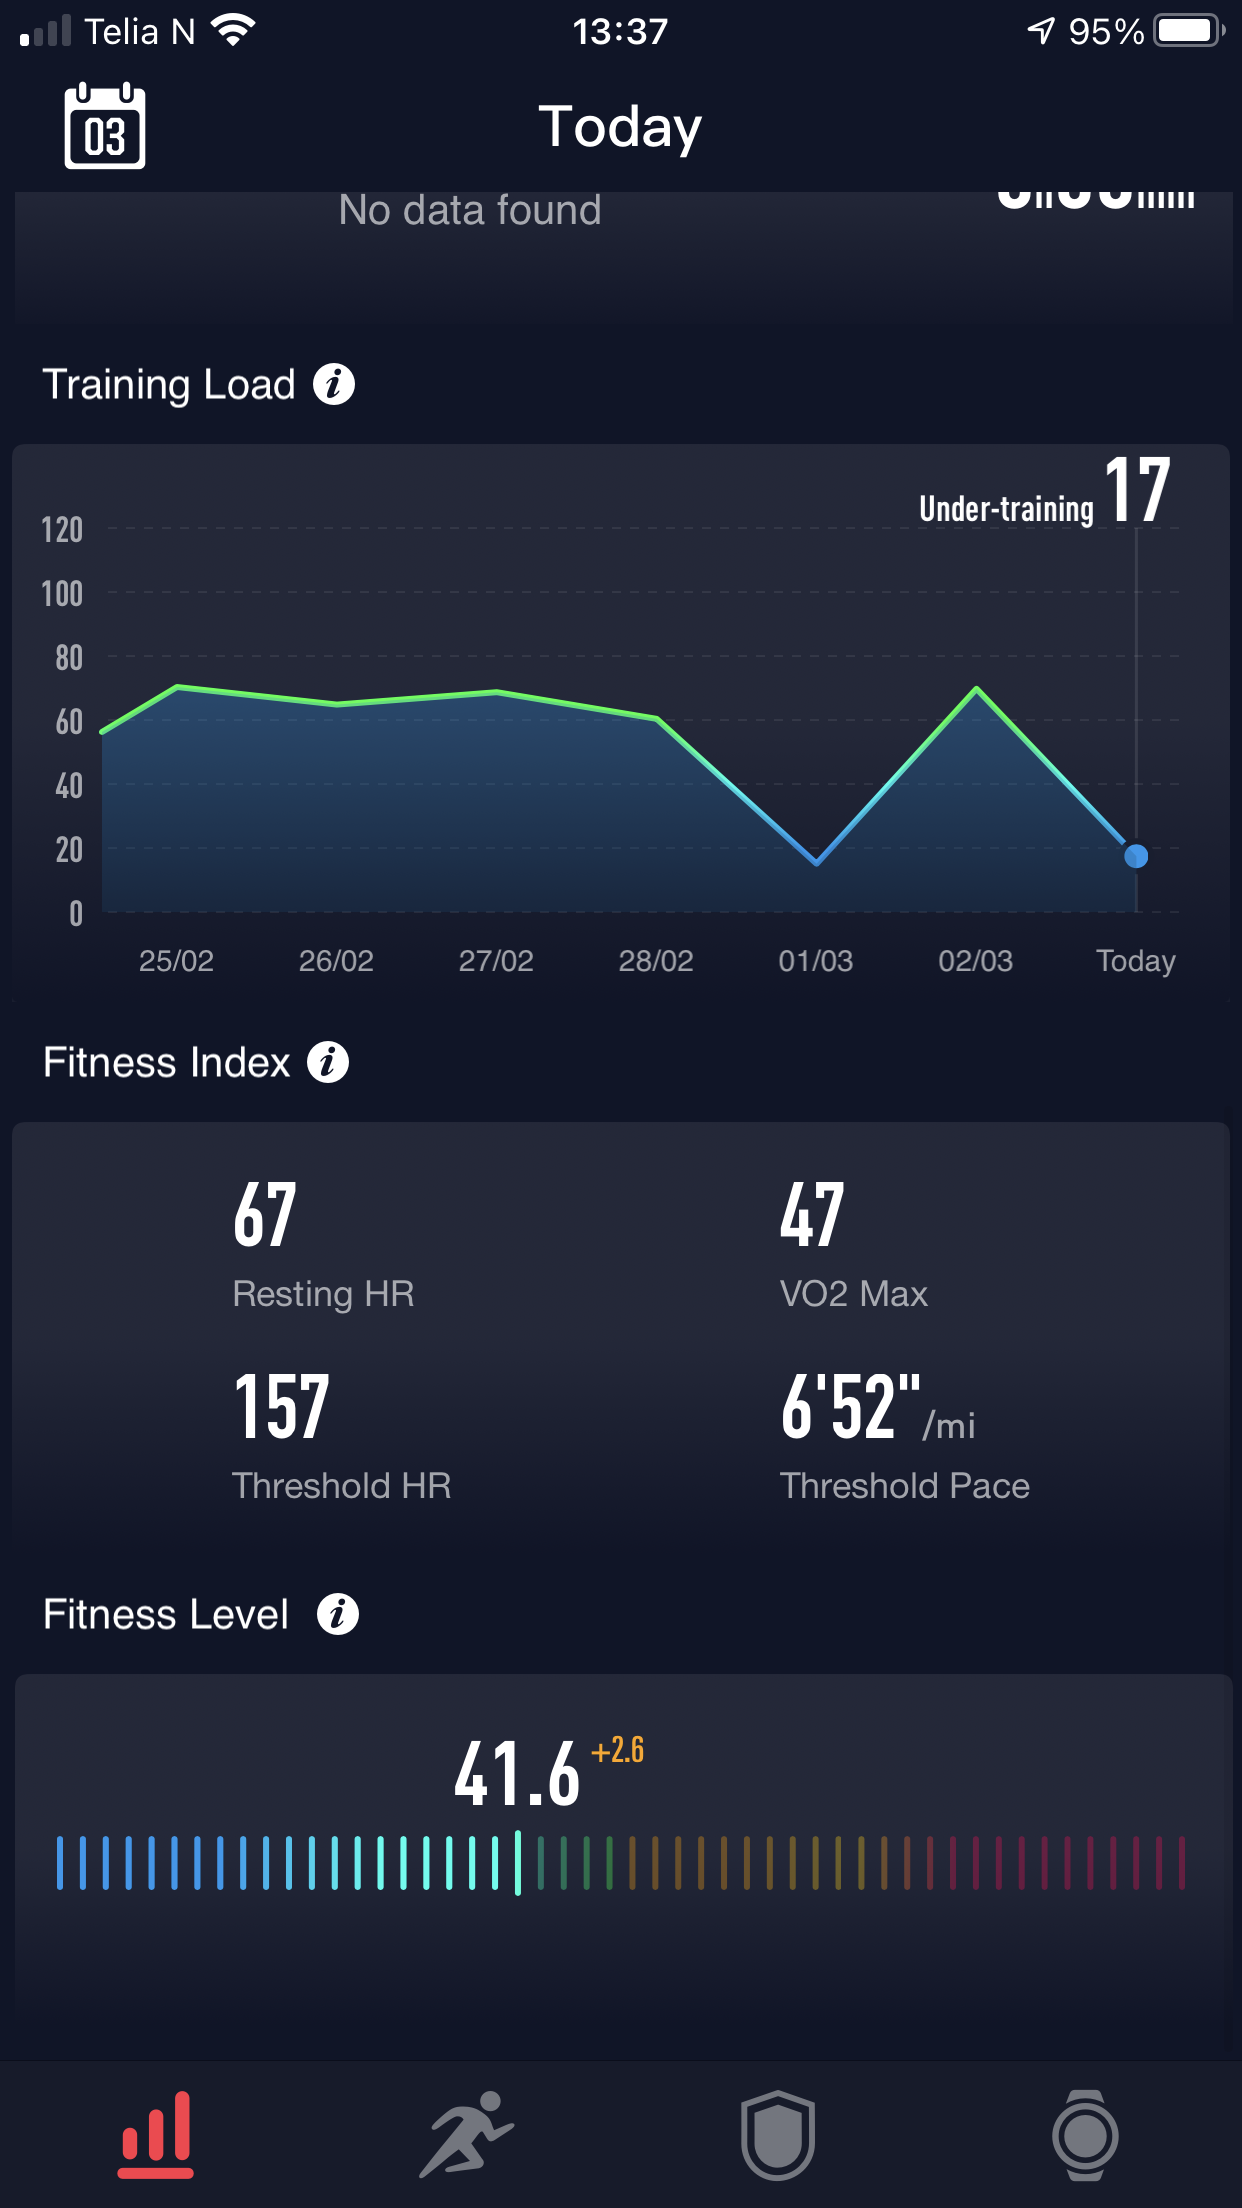
GRAPH ICON
Here you say an update of the day broken down in:
Active Energy
Exercise Time.
Steps.
Heart Rate
Sleep
Training Load
Fitness Index
Fitness Level
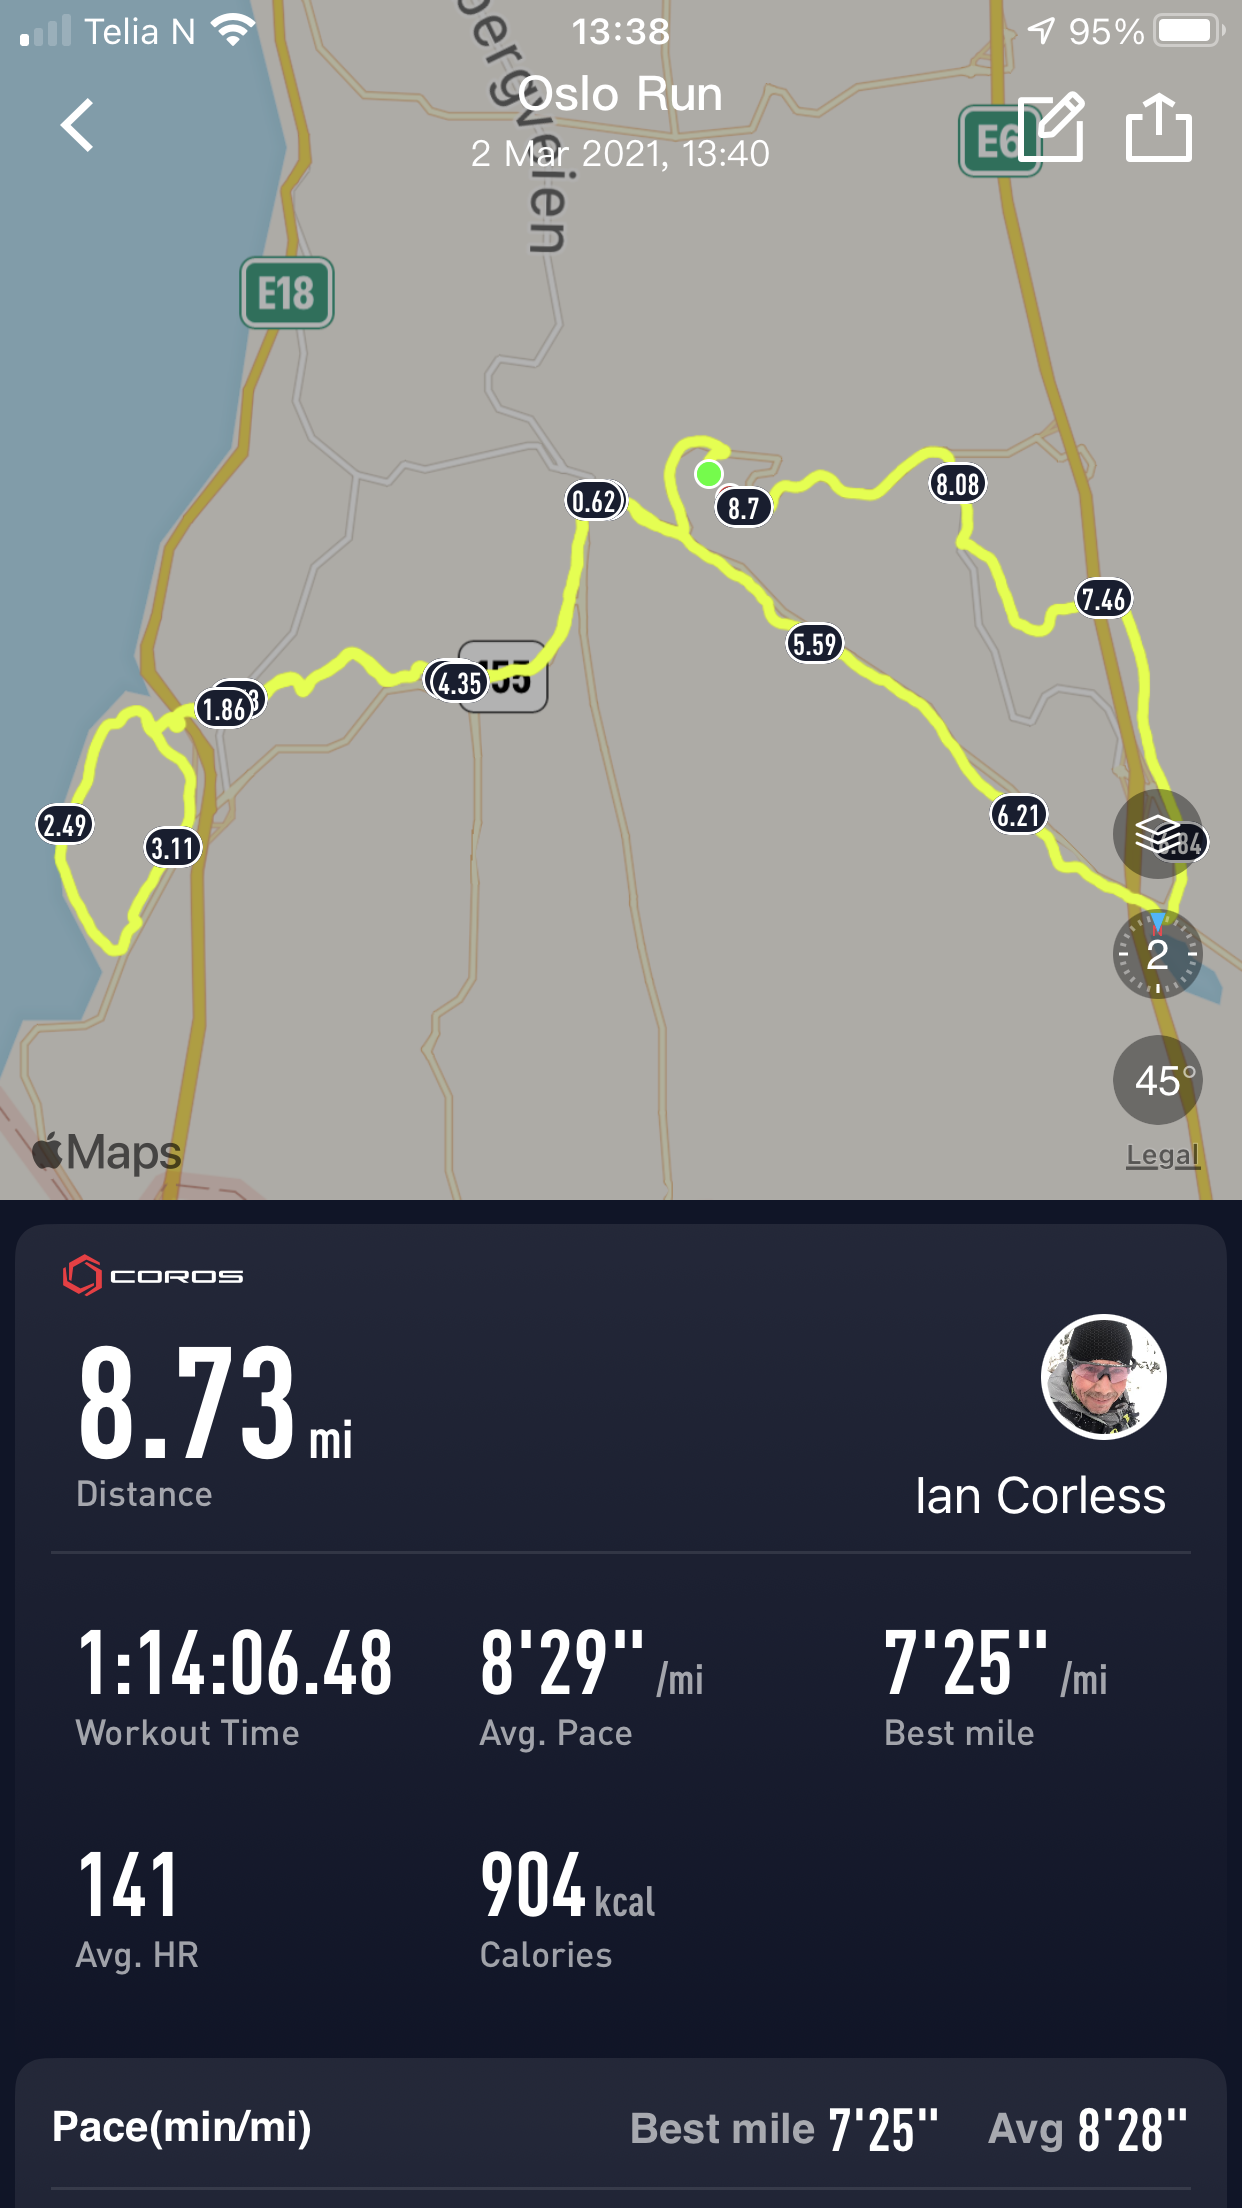
RUNNER ICON
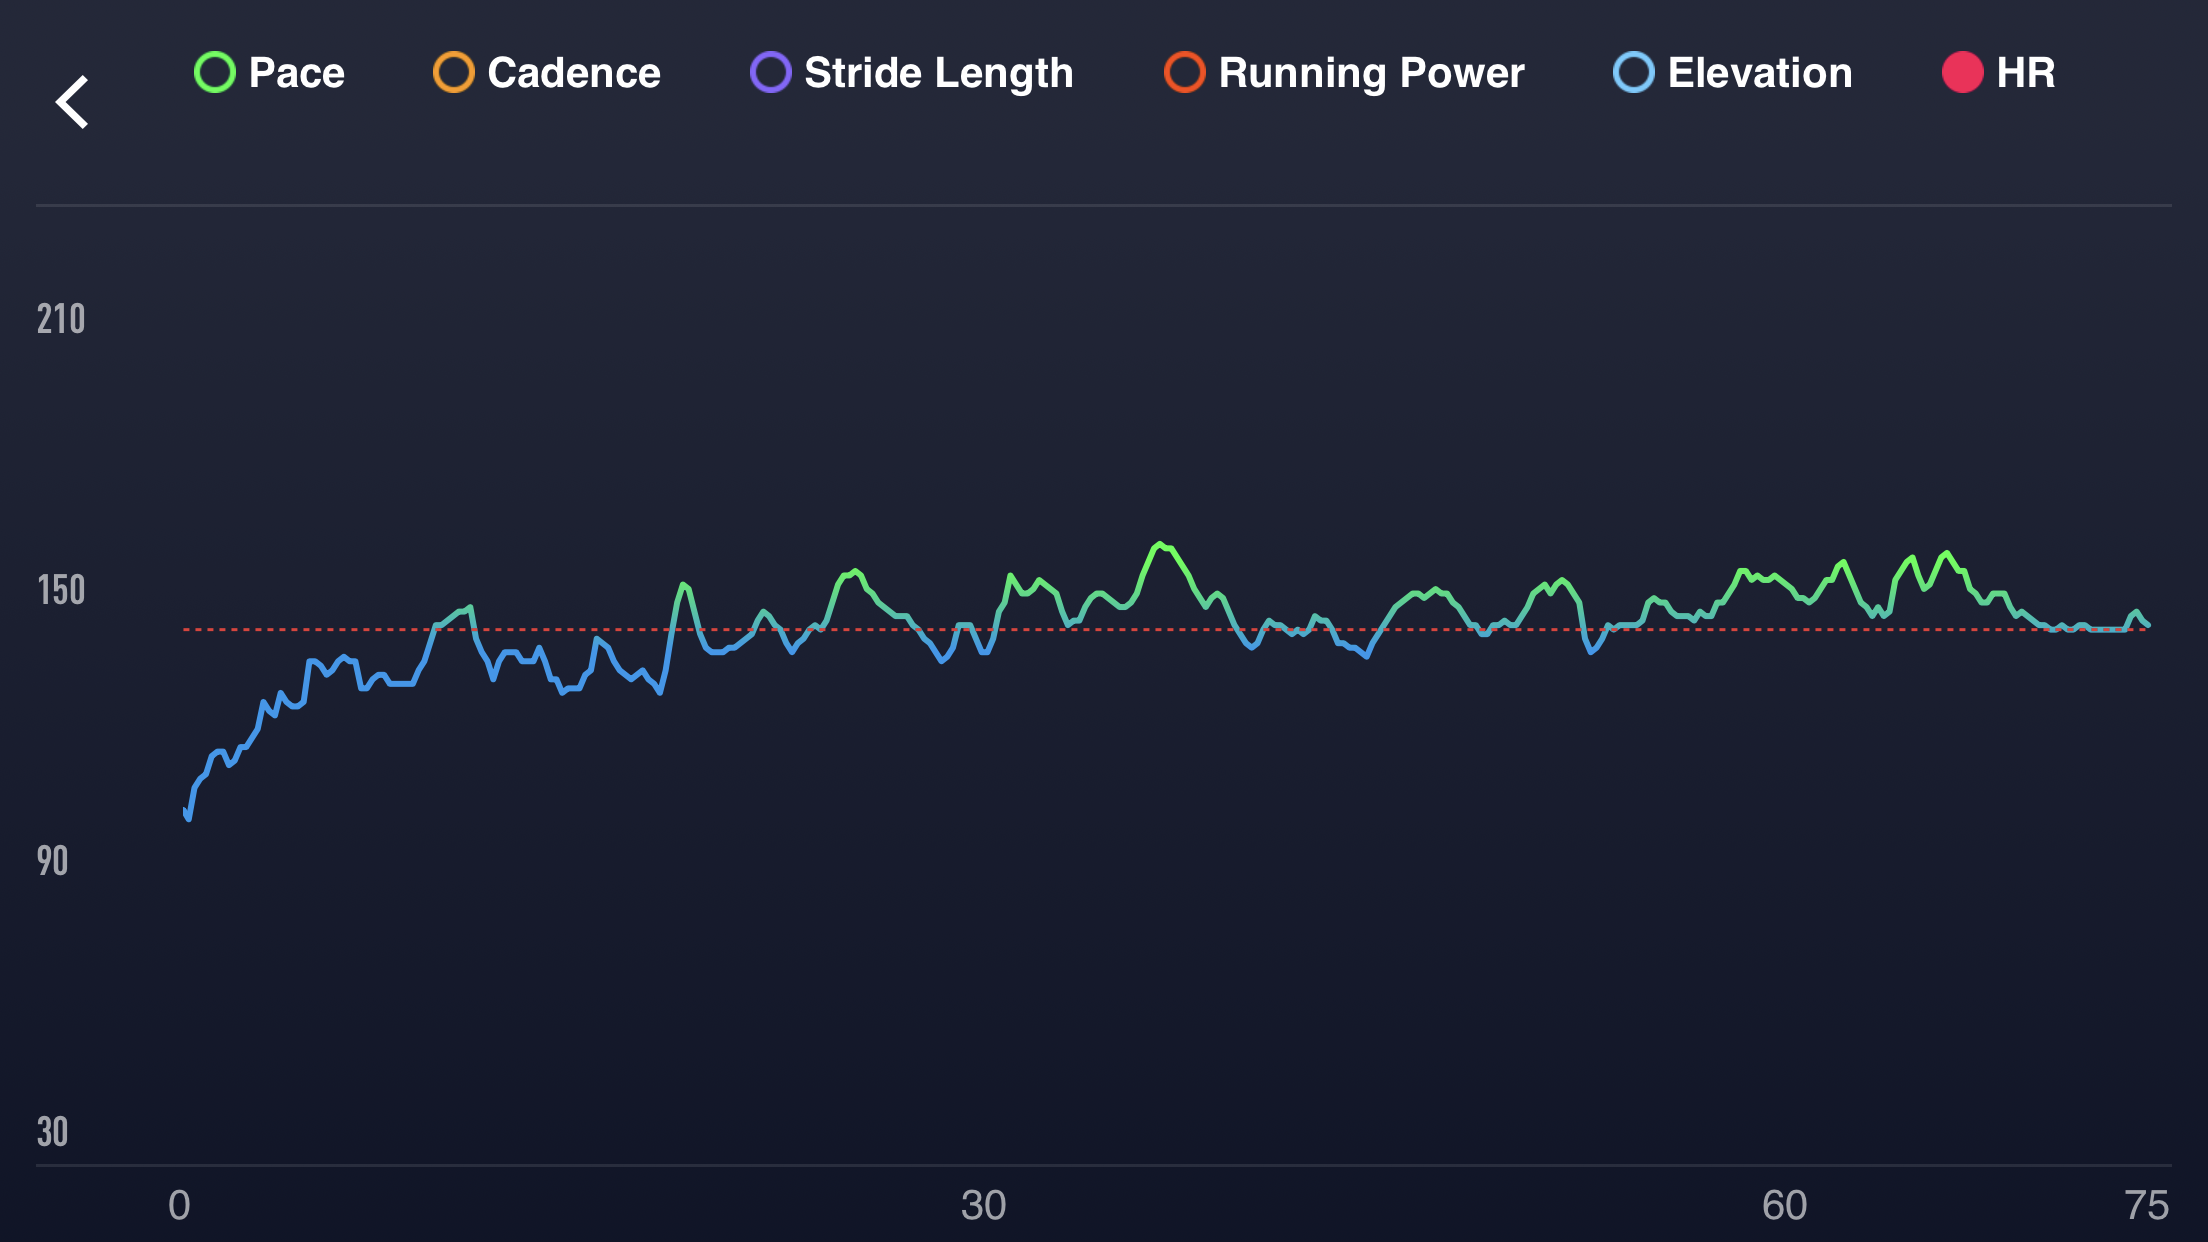
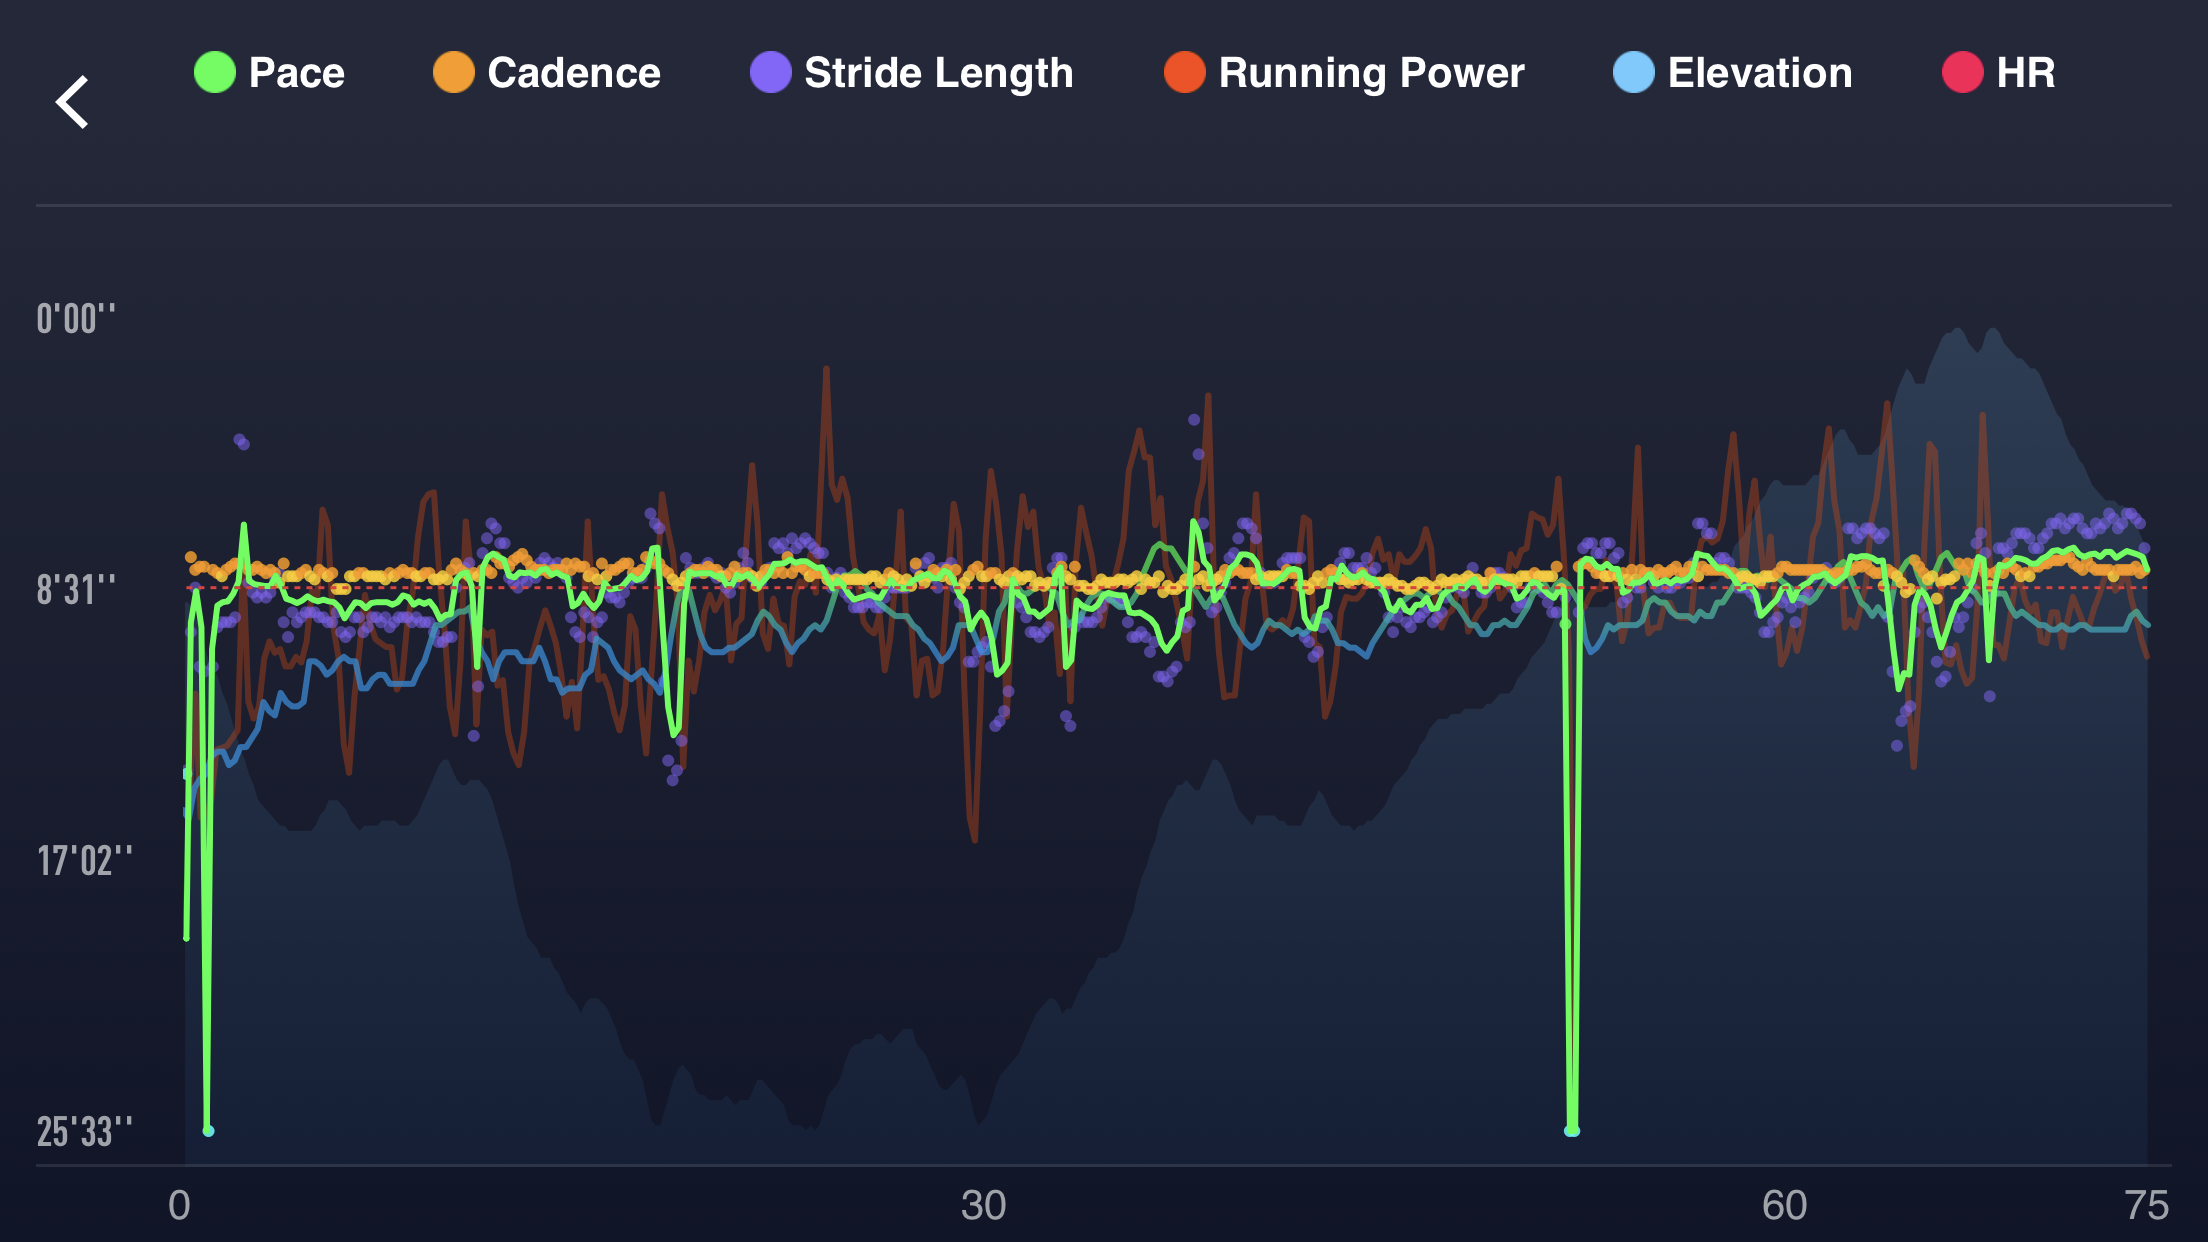
Here you can see a list of all your workouts as an overview. You can then click on a workout to get more in-depth data. It will show a map of say a run, distance covered, workout time, average pace and so on and so on.
It is detailed, visually appealing and tells everything you need to know about an exercise session.
So, if you don’t want to be on Strava or other platforms, perfect. Here you can see important metrics:
Pace
Cadence
Stride Length
Running Power
Elevation
Heart Rate
Heart Rate Zones
Training Effect
Lap Splits
In all honesty, there is no need for Strava or any other 3rd party product. The information provided in the Coros App will keep even the nerdiest nerd happy.
Information on stride length, cadence and power are three areas I have looked at and analyzed realizing that these areas are useful in making me a more efficient version of me.
SHIELD ICON
Here you can access your profile, and this is where you add weight, gender, height etc.
In addition, you can access:
Workout Programs
Training Plans
Navigation Routes Library
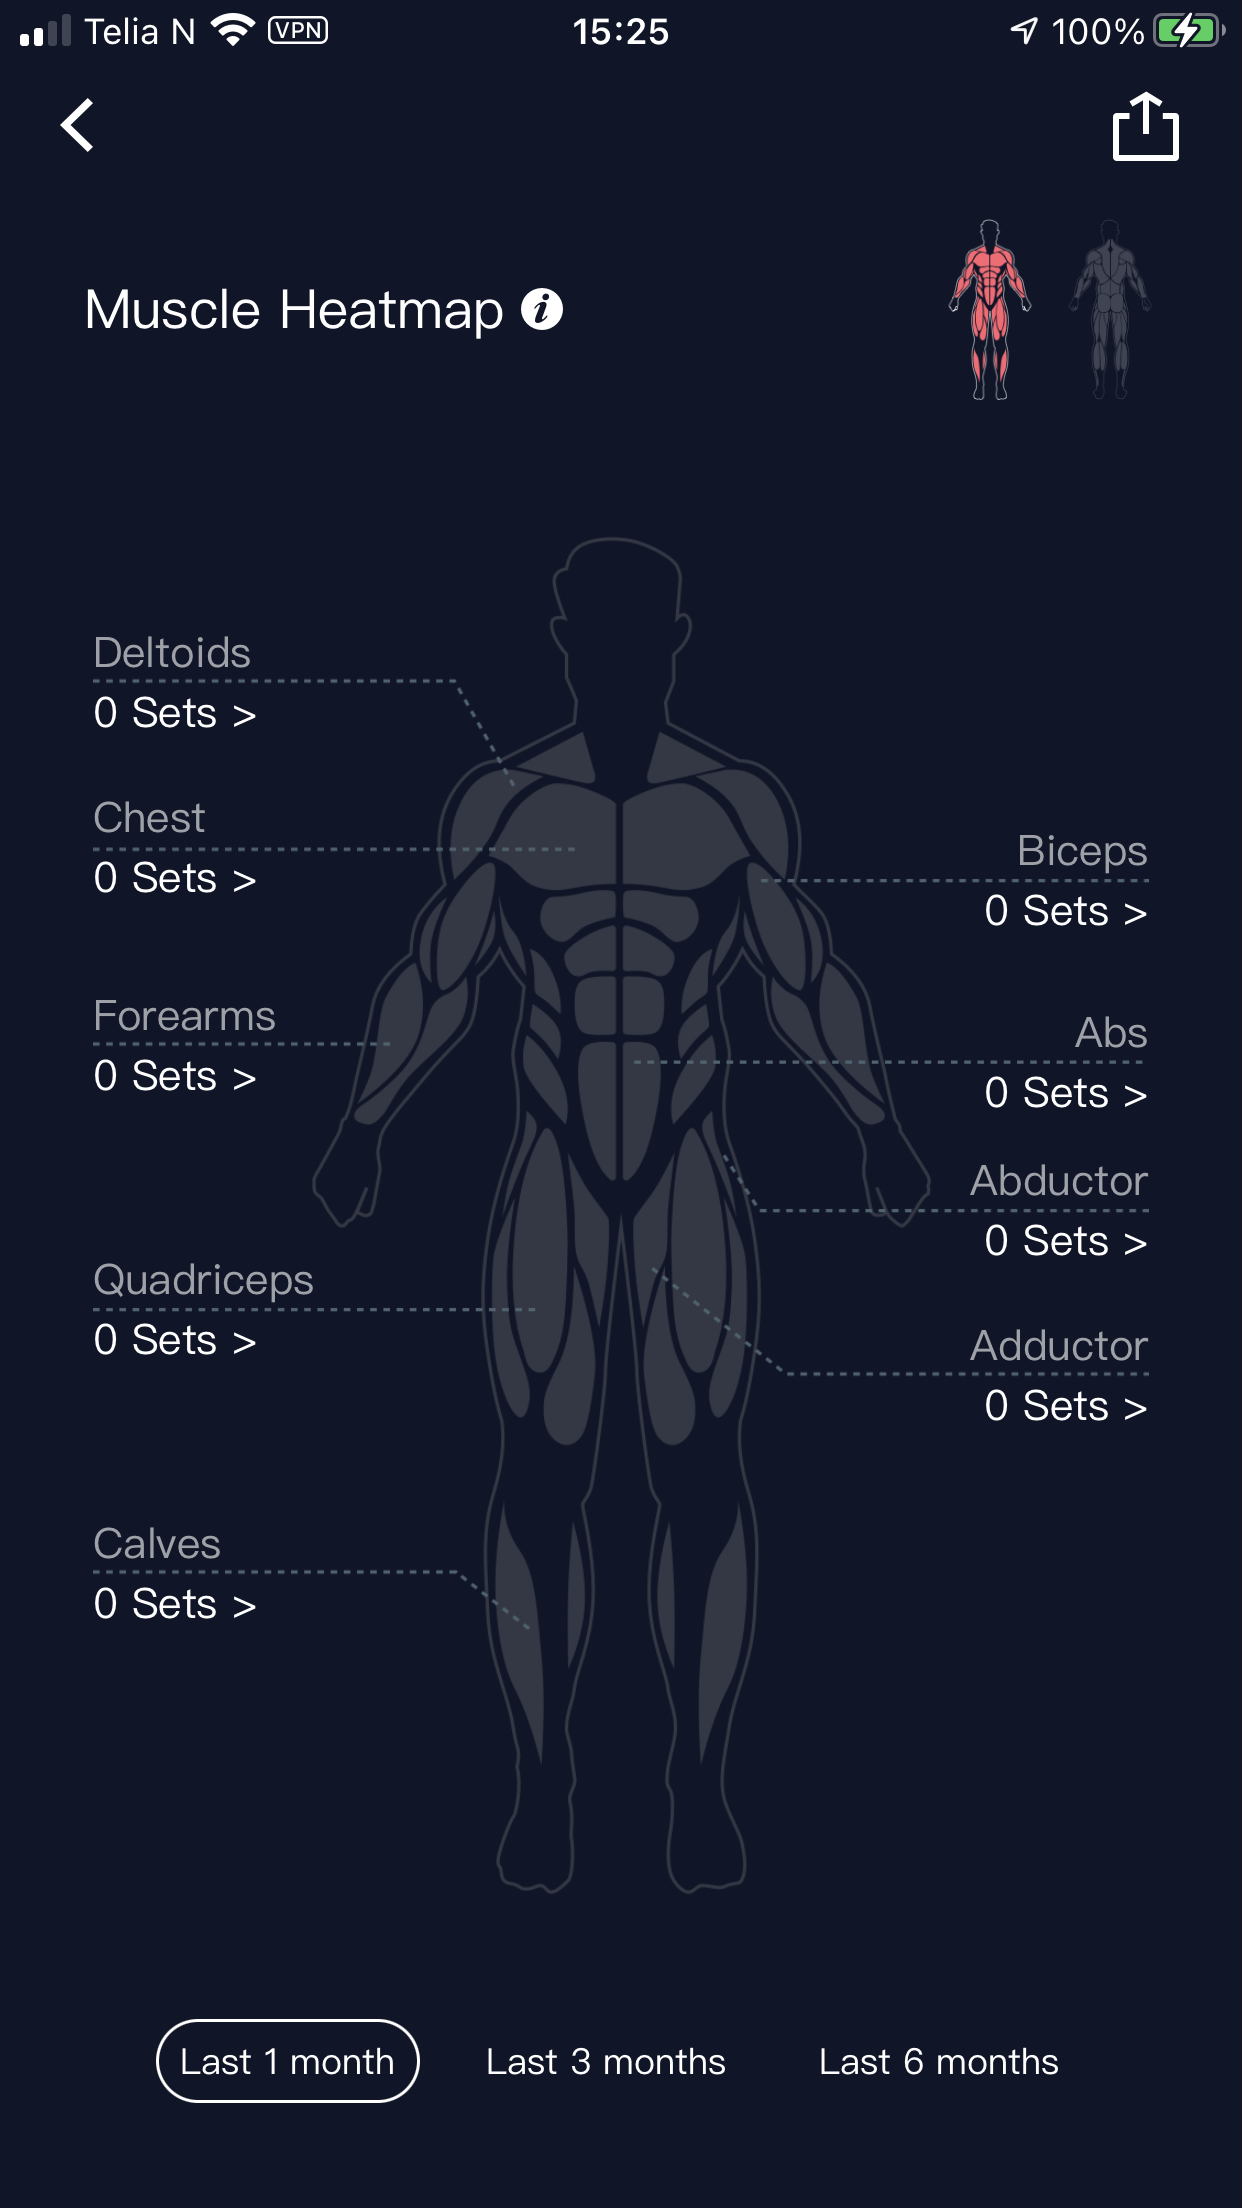
Muscle Heatmap
Record
Under ‘3rd Party Apps’ you can link your watch and information to Strava, TrainingPeaks, Final Surge and so on.
USING THE WATCH
Once you have been through the app, set everything up, you can now start training! Screen resolution is 240px and 64 colours and when not backlit, not always easy to read. Click the top right button and the screen illuminates for approximately 9-seconds and it is easy to read.
The VERTIX auto-locks and I like this. It stops any accidental button pressing. To unlock, you need to rotate the digital grown. Once rotated, press the digital crown and you will be given the menu. By turning the digital crown up or down, the menu rotates. I really like this, it’s easy to do and I found it no problem even when wearing gloves, albeit gloves that are not too thick. When at the sport you want, press the crown in. You will see ‘Start’ another press and then you will be updated on connection to satellites and heart rate. Once connected, press again and of you go.
Top Tip: If you want to add ANT+ accessories or any other item, this can be done in the ‘settings’ menu.
In RUN there are options to choose structure or focused training options such as Aerobic Training, Interval or Anaerobic. In most scenarios, I choose the sport I want, wait for connection and press start. Off I go. You can custom all sports.
When training, you can scroll through screens with the digital crown, and you can record laps by pressing the bottom button. Remember, you may need to change if the watch auto-locks otherwise you will need to rotate the digital crown to ‘open’ the watch.
Touch screen is also possible, you can switch between screens via swiping.
If you wish to pause, you can press the digital crown.
If you have finished a workout, press and hold the digital crown and it will count down, 3,2,1 and saved. The workout is then added to the Coros App on your phone and if you have set up third party connection, Strava for example will be updated with the session. You need to open the app with the watch close to upload the workout.
NAVIGATION
No mapping. Yes, no mapping which is a huge surprise, especially if Coros want to differentiate from the APEX Pro and compete with say, Garmin Fenix 6 Pro. However, there is enhanced navigation that includes the use of checkpoints. Basically, upload a GPX file to the Coros App that has pre-defined locations, they could be aid stations in a race? Sync to the VERTIX and when navigating, information is provided to the next checkpoint that includes distance and elevation. Very useful if racing. However, internal memory in the VERTIX is limited, so make sure you delete any stored files not required. The best may to upload GPX is use mapping apps on your phone, say, maps.me, Footpath or similar. Export a GPX and then ‘save’ to the Coros app. It was very easy to do. For me personally as a wearer of glasses, mapping does not work on a watch, it’s too small and there is too much information. A bread crumb to navigate is fine. Also, there is touch screen functionality, helpful with moving a breadcrumb nav screen. BUT, and I will say this again, for the VERTIX not to have mapping, it makes the competition more appealing for what is the same price point. Coros are very good updating and progress but the lack of memory on the VERTIX will probably mean that the next Coros watch addresses this, has memory and most likely mapping.
WORKOUT PROGRAMS
All workout programs can be fully customized and loaded on to devices. For the purpose of testing, I prioritised the run modes but there are many options for bike, swim, run and so on. Notable, the strength category uses heat map and has different workouts for muscle groups. Heat map indicates recovery.
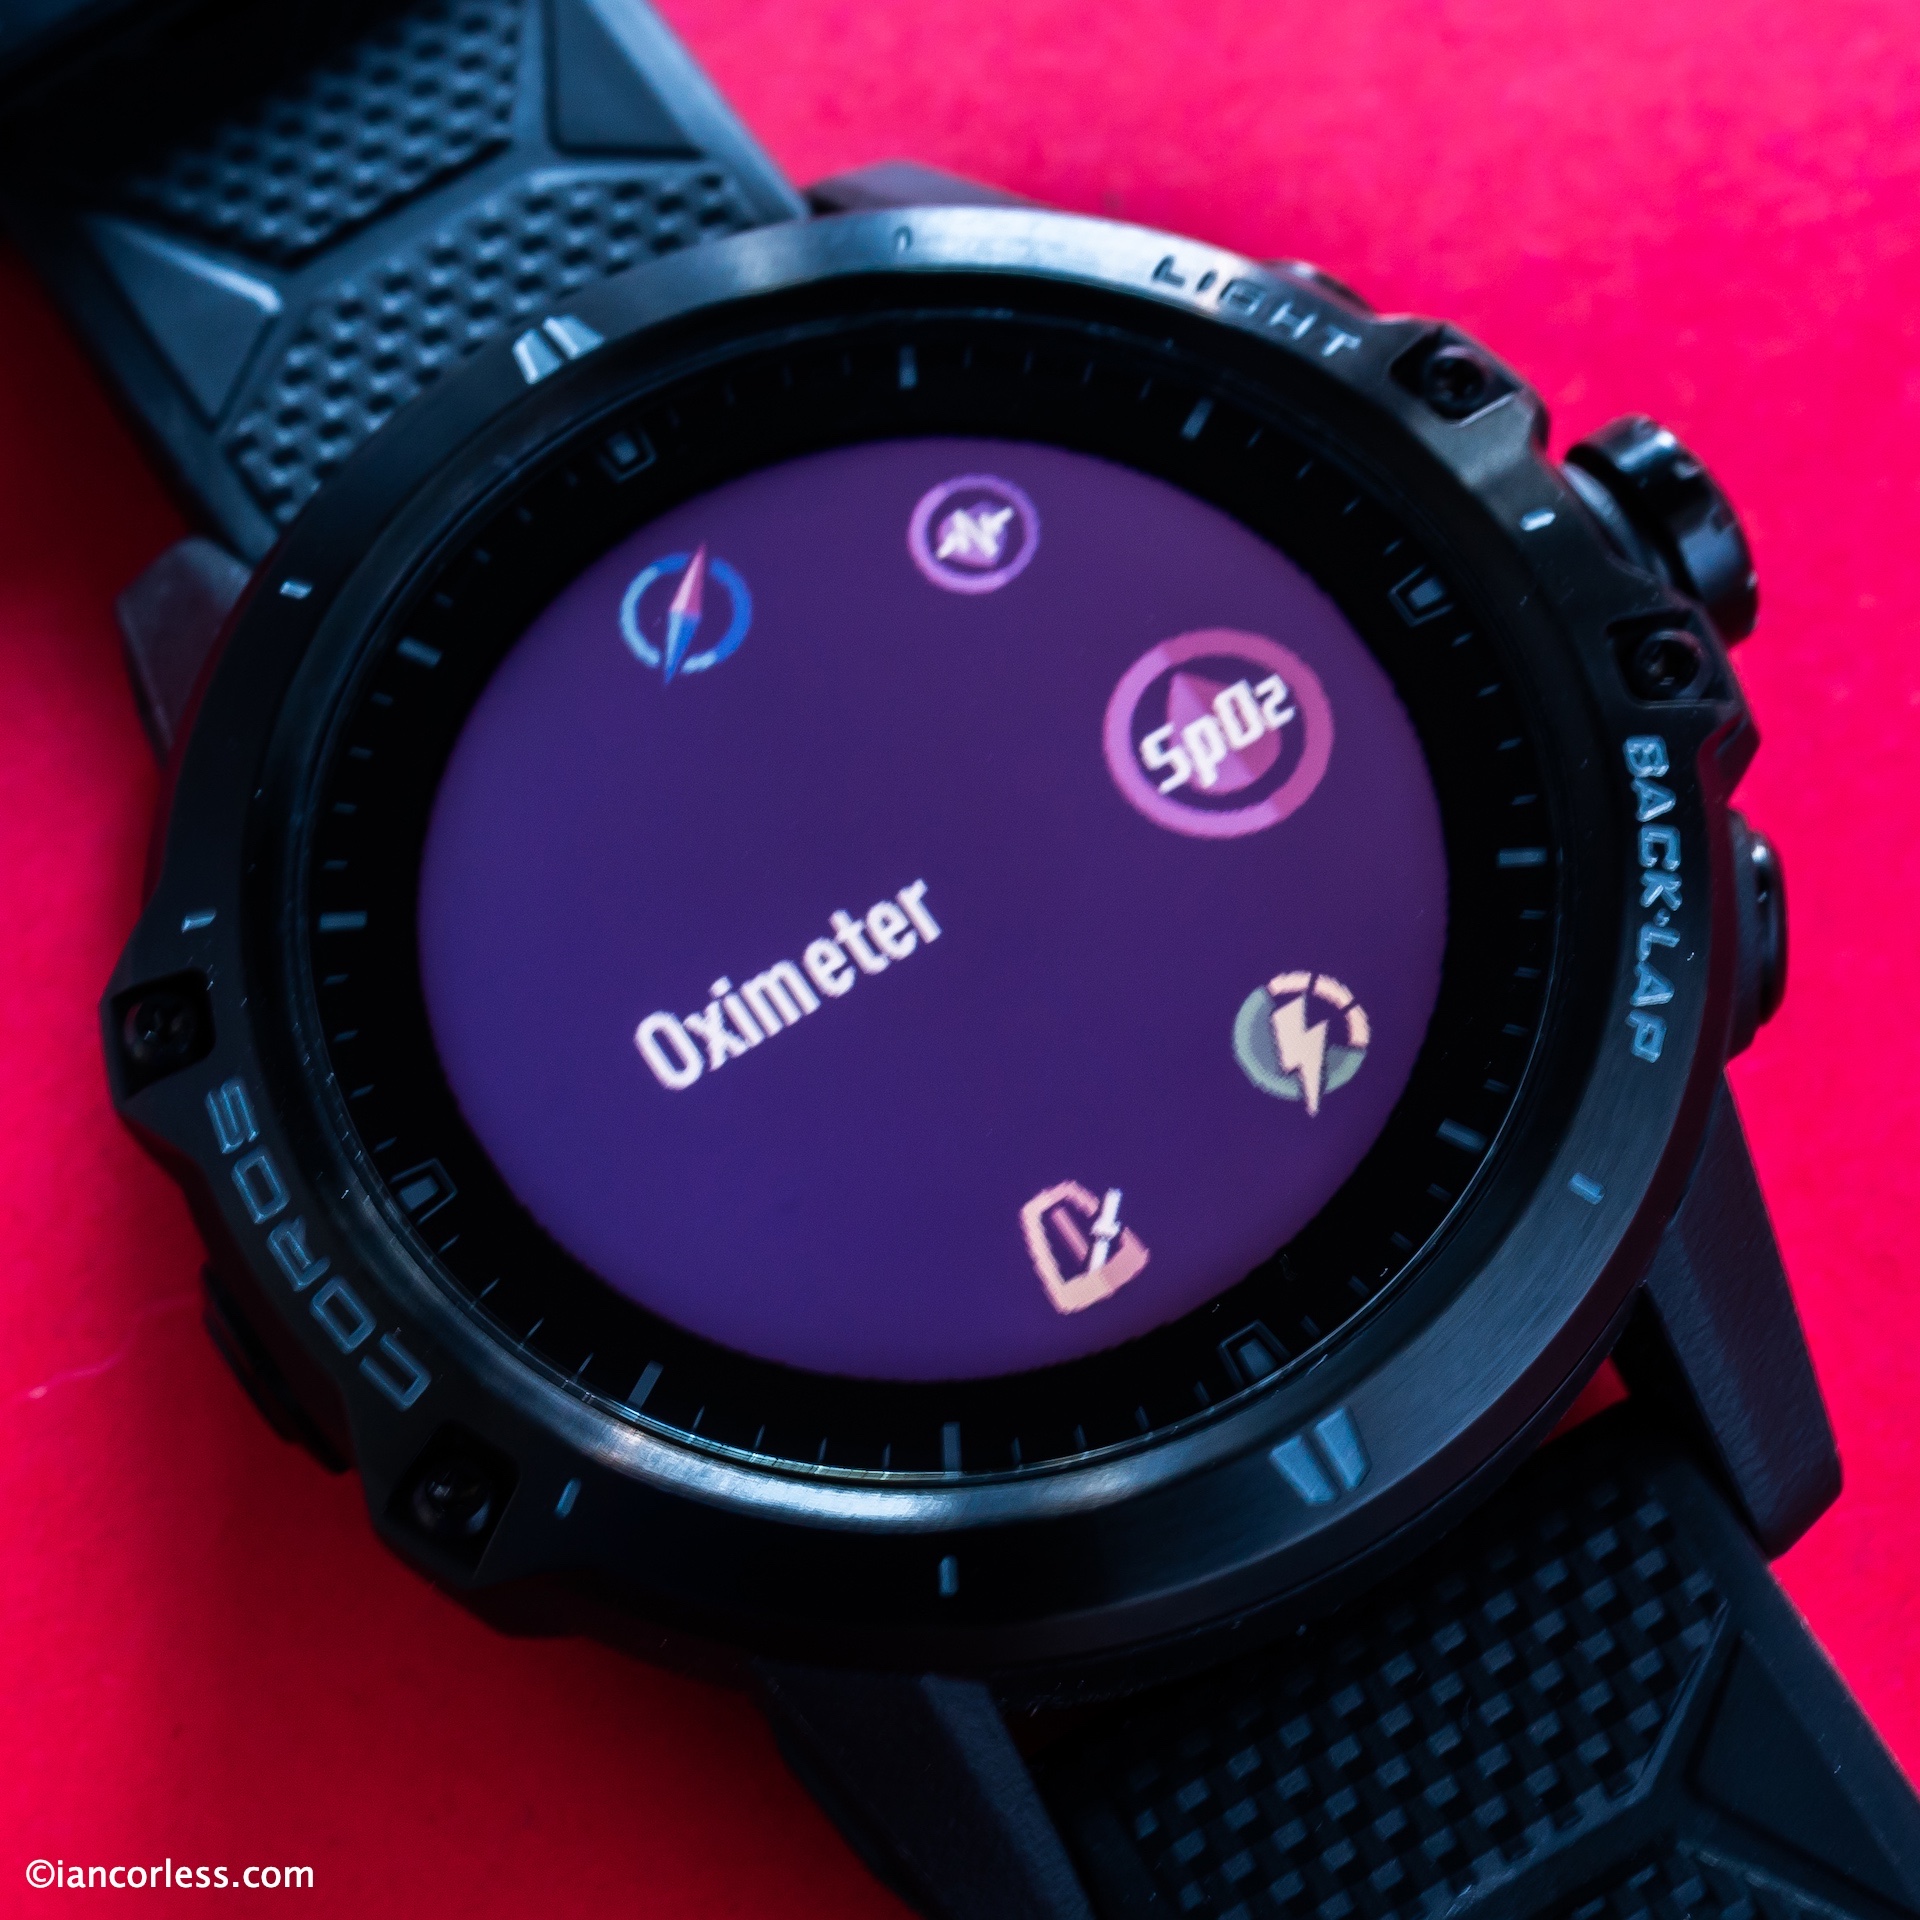
Menu is accessed by a long press of the bottom button. Here you find the following:
Navi Settings
Map
Satellite Signal
Stopwatch
Timer
Alarm
Watch Face
Night Mode
System
Save Location
Do Not Disturb
Compass
Broadcast HR
Oximeter
Battery Usage
Metronome
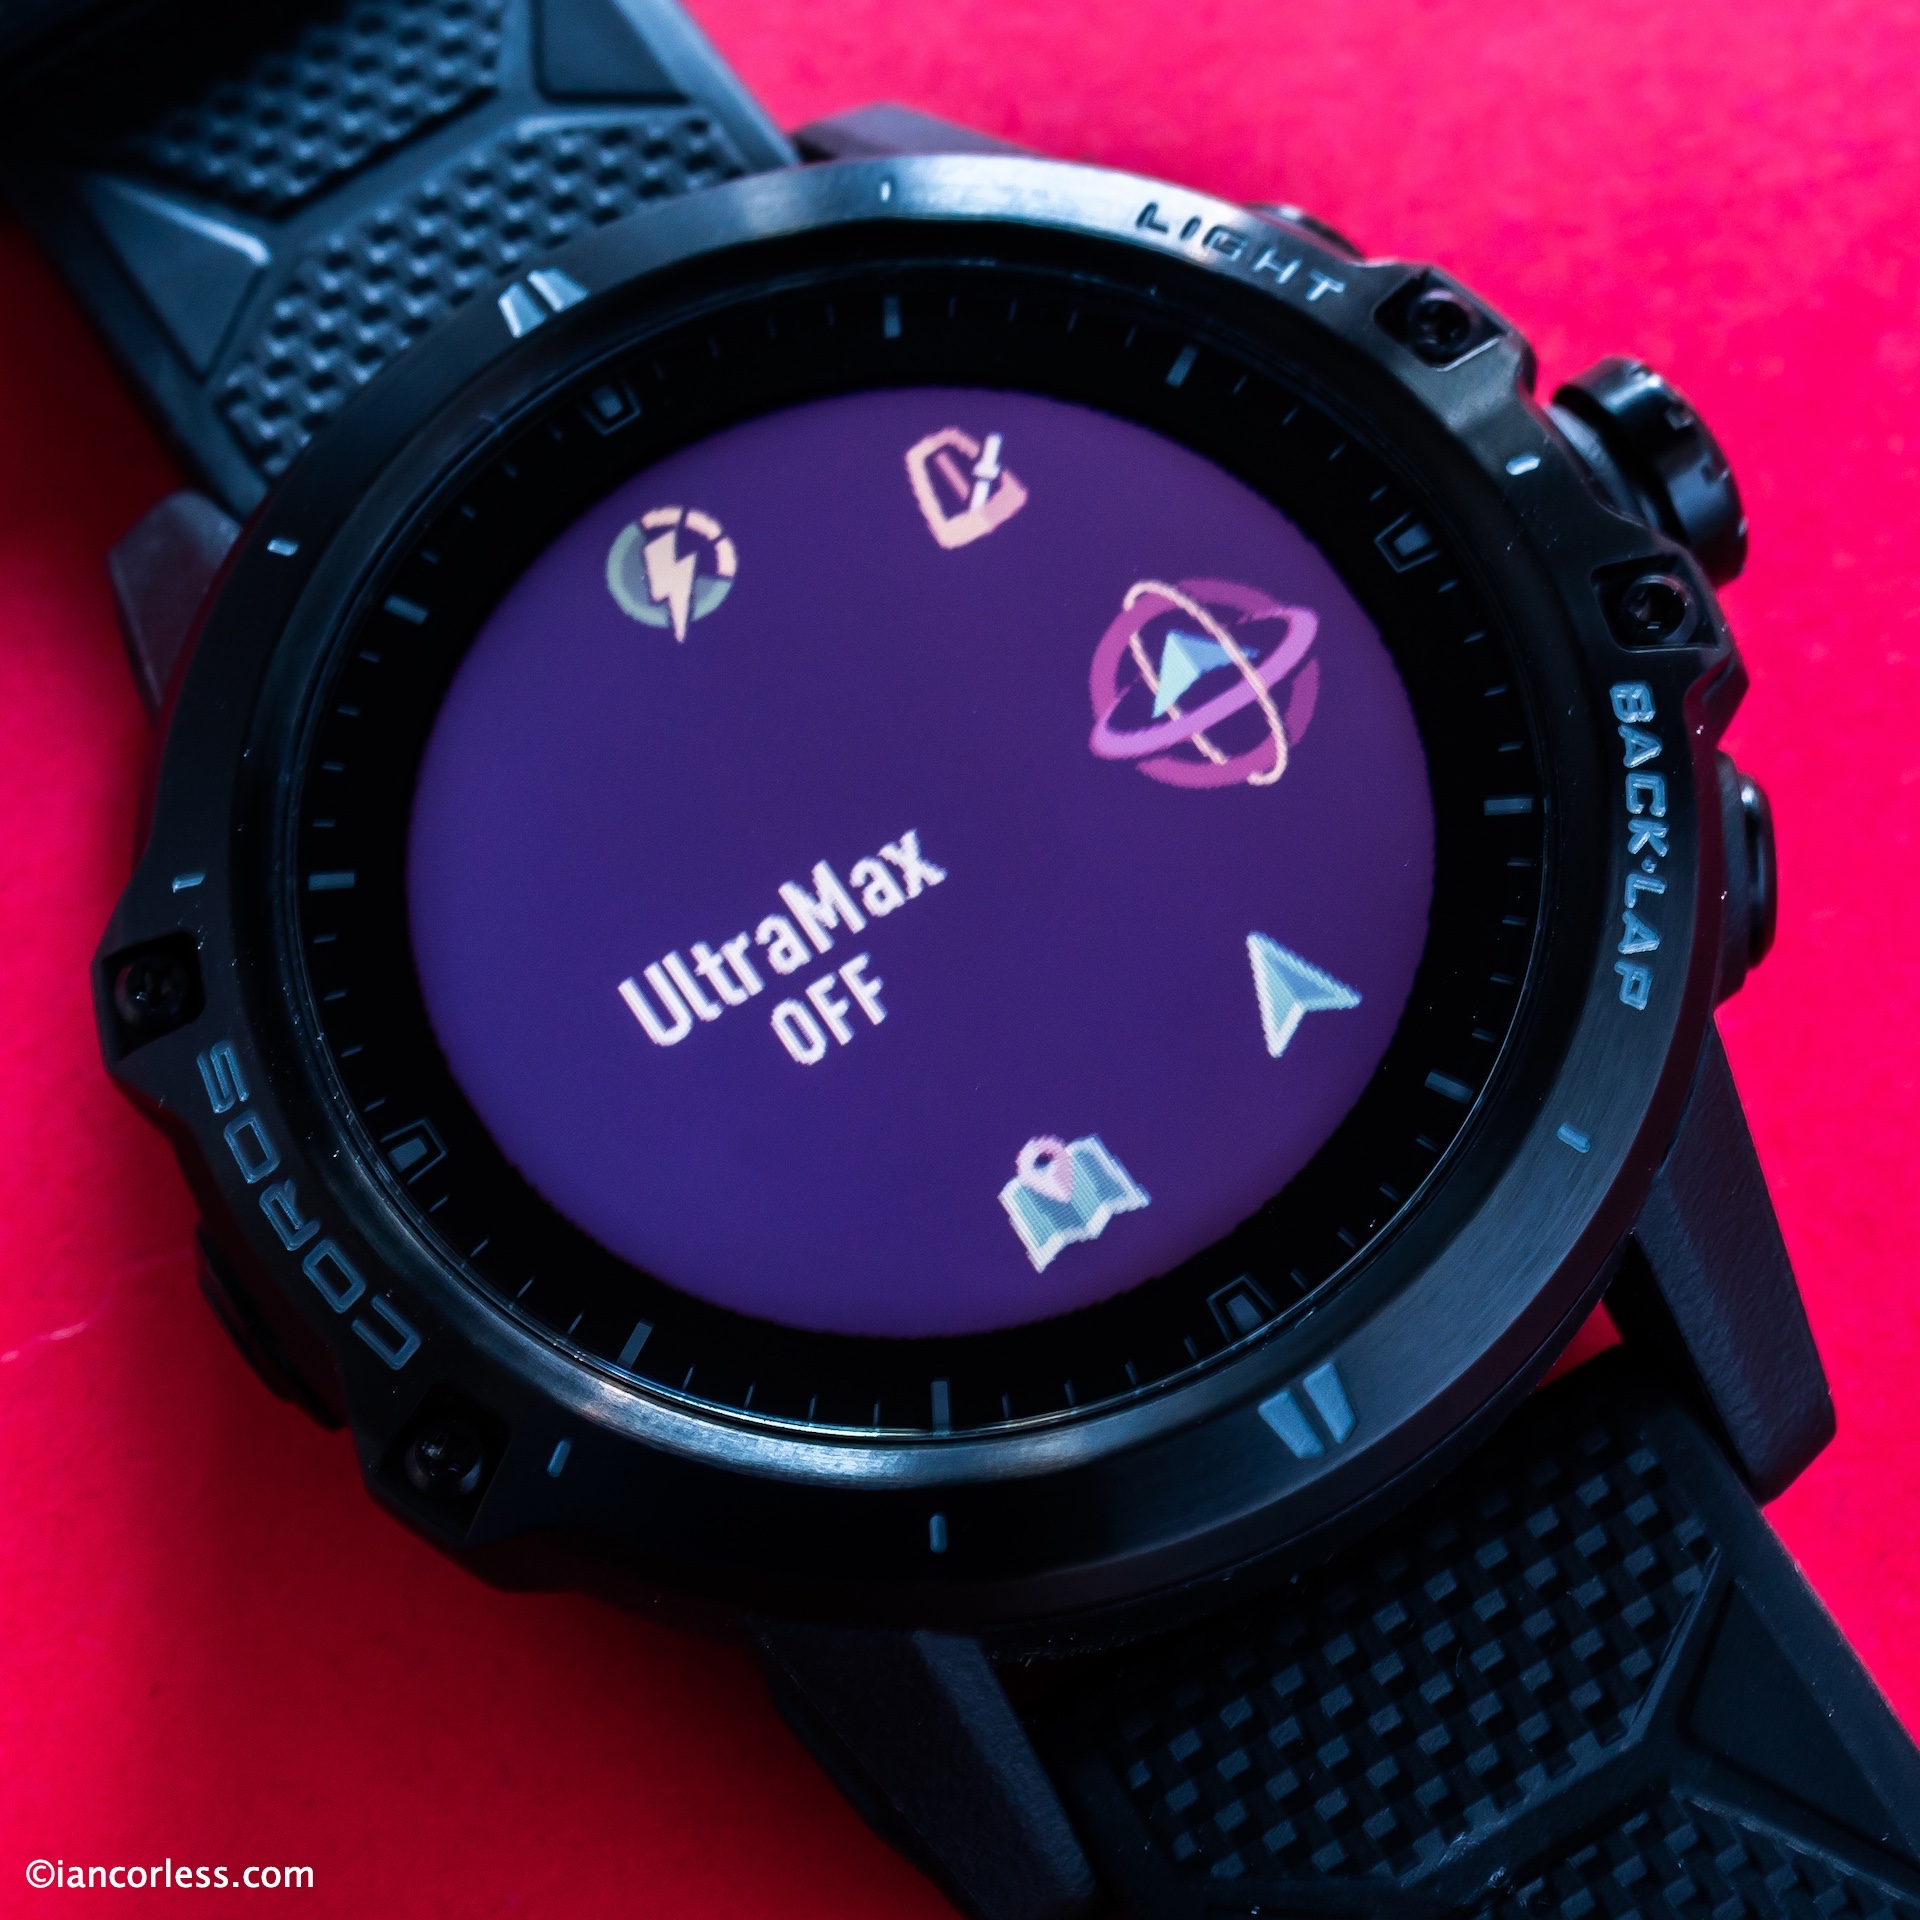
UltraMax
ACCURACY AND DATA
In all my testing I have used the VERTX alongside an Apple iWatch for every session and on many occasions, I have used a Garmin Fenix 6 Pro Solar too.
Below is the same run viewed in: Coros, Strava and Apple Watch apps.
GPS, I guess I could deep dive into the accuracy of the GPS and analyze every intricate detail. However, whenever I use a GPS unit or read a review, I often just want to know does it work and is it accurate? Using GPS and GLONASS, the VERTIX tracks position and is consistently reliable.
Quite simply, the VERTIX was in line with the iWatch and more so with the Fenix 6 Pro Solar. In countless runs, between the VERTIX and the FENIX 6 the difference was less than 100m and the mapped routes excellent. The iWatch had less accuracy +/- 1 to 400m. Having said that, on a 20km run (for me) I am not going to worry about 400m +/-. If I was an elite or Olympic athlete, it may well be super important.
In UltraMax mode GPS data is only recorded for 30-seconds in every 120-second window. This is how the battery life is extended, of course, accuracy is impacted. Motion sensors, algorithms and individual running model complete the 90-seconds when GPS is not recording.
Quite simply, the VERTIX is doing its job.
Heart rate viewed as above in the app.
Heart rate data was compared to a chest strap comparison and I was impressed. One thing is important, make sure the watch is pressed firmly against the wrist and tight. If it is loose and bouncing around, you are going to get mixed and inaccurate results. Hair on the arm, sweat and even a tattoo can impact on accuracy. Viewing the data in the Coros App is clear and while not exactly the same as the chest strap, they are will within the parameters one would accept.
You can see pace, cadence, stride, power, elevation and HR all in one view.
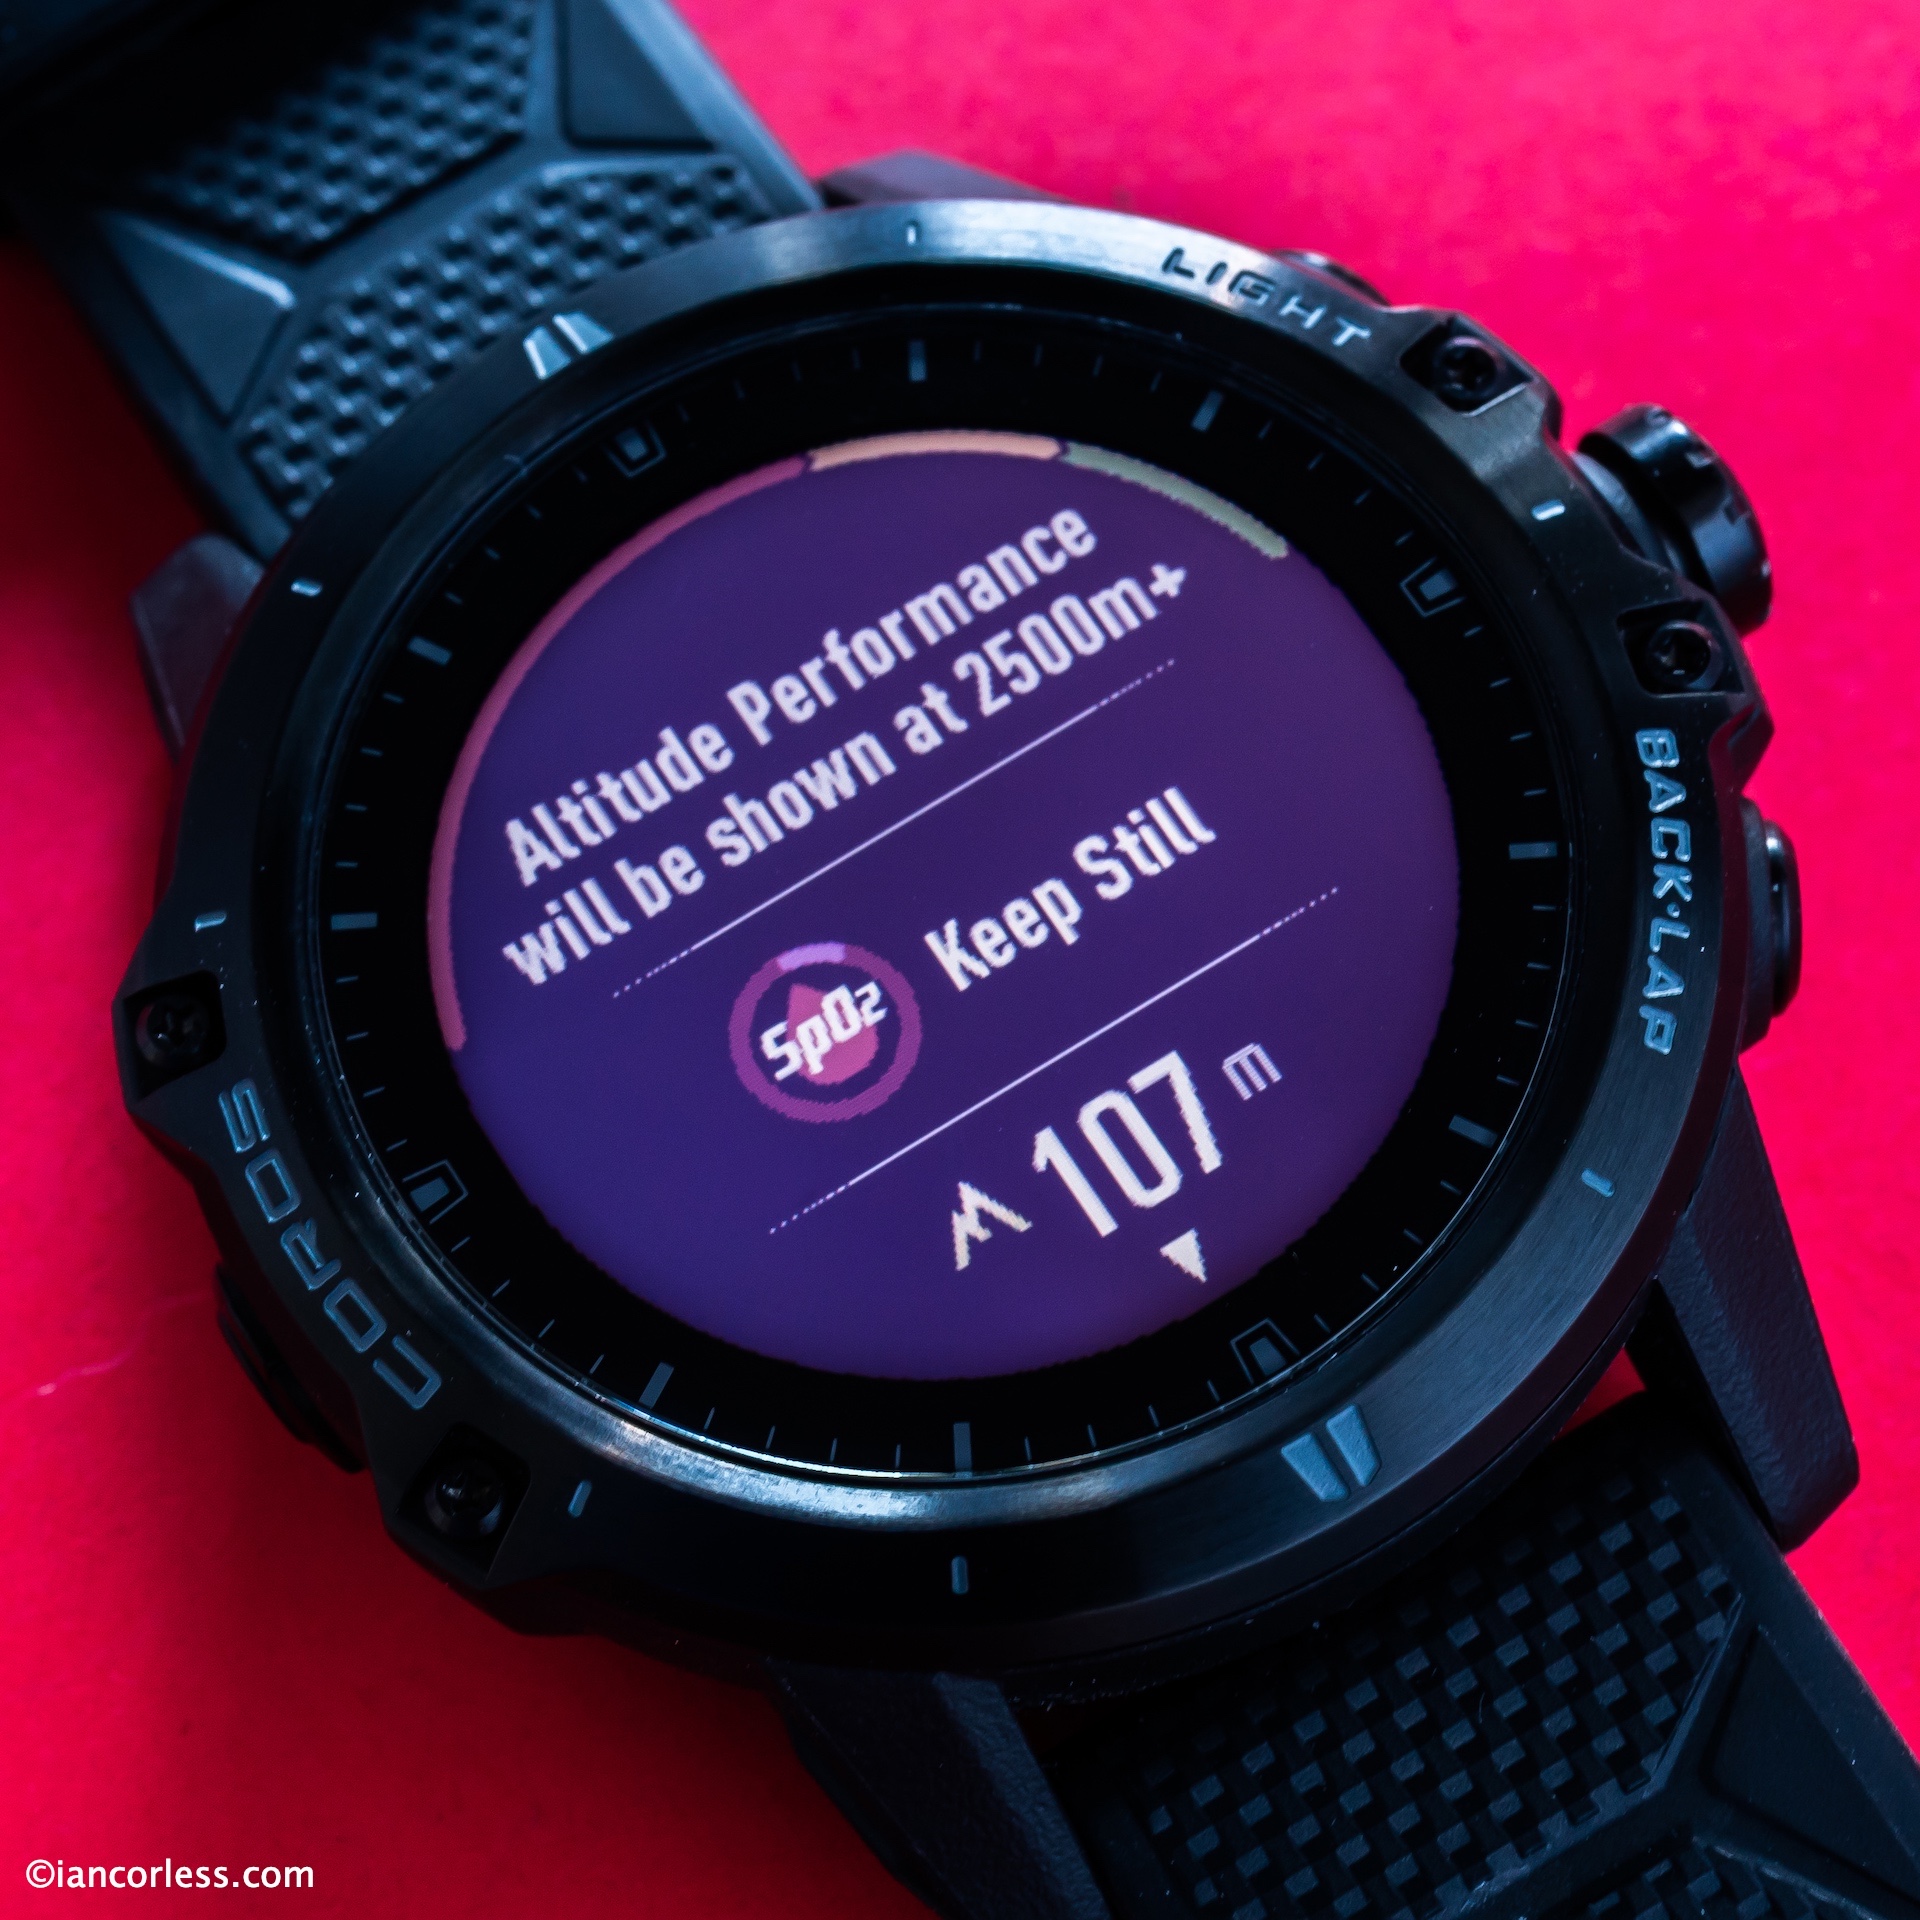
SpO2 Feature Hold down the lower right button. Rotate the toolbox menu to Sp02. Press the digital crown and you will be shown the relevant screen. Note: altitude performance is shown at 2500m+ On the display you will see your altitude and SpO2.
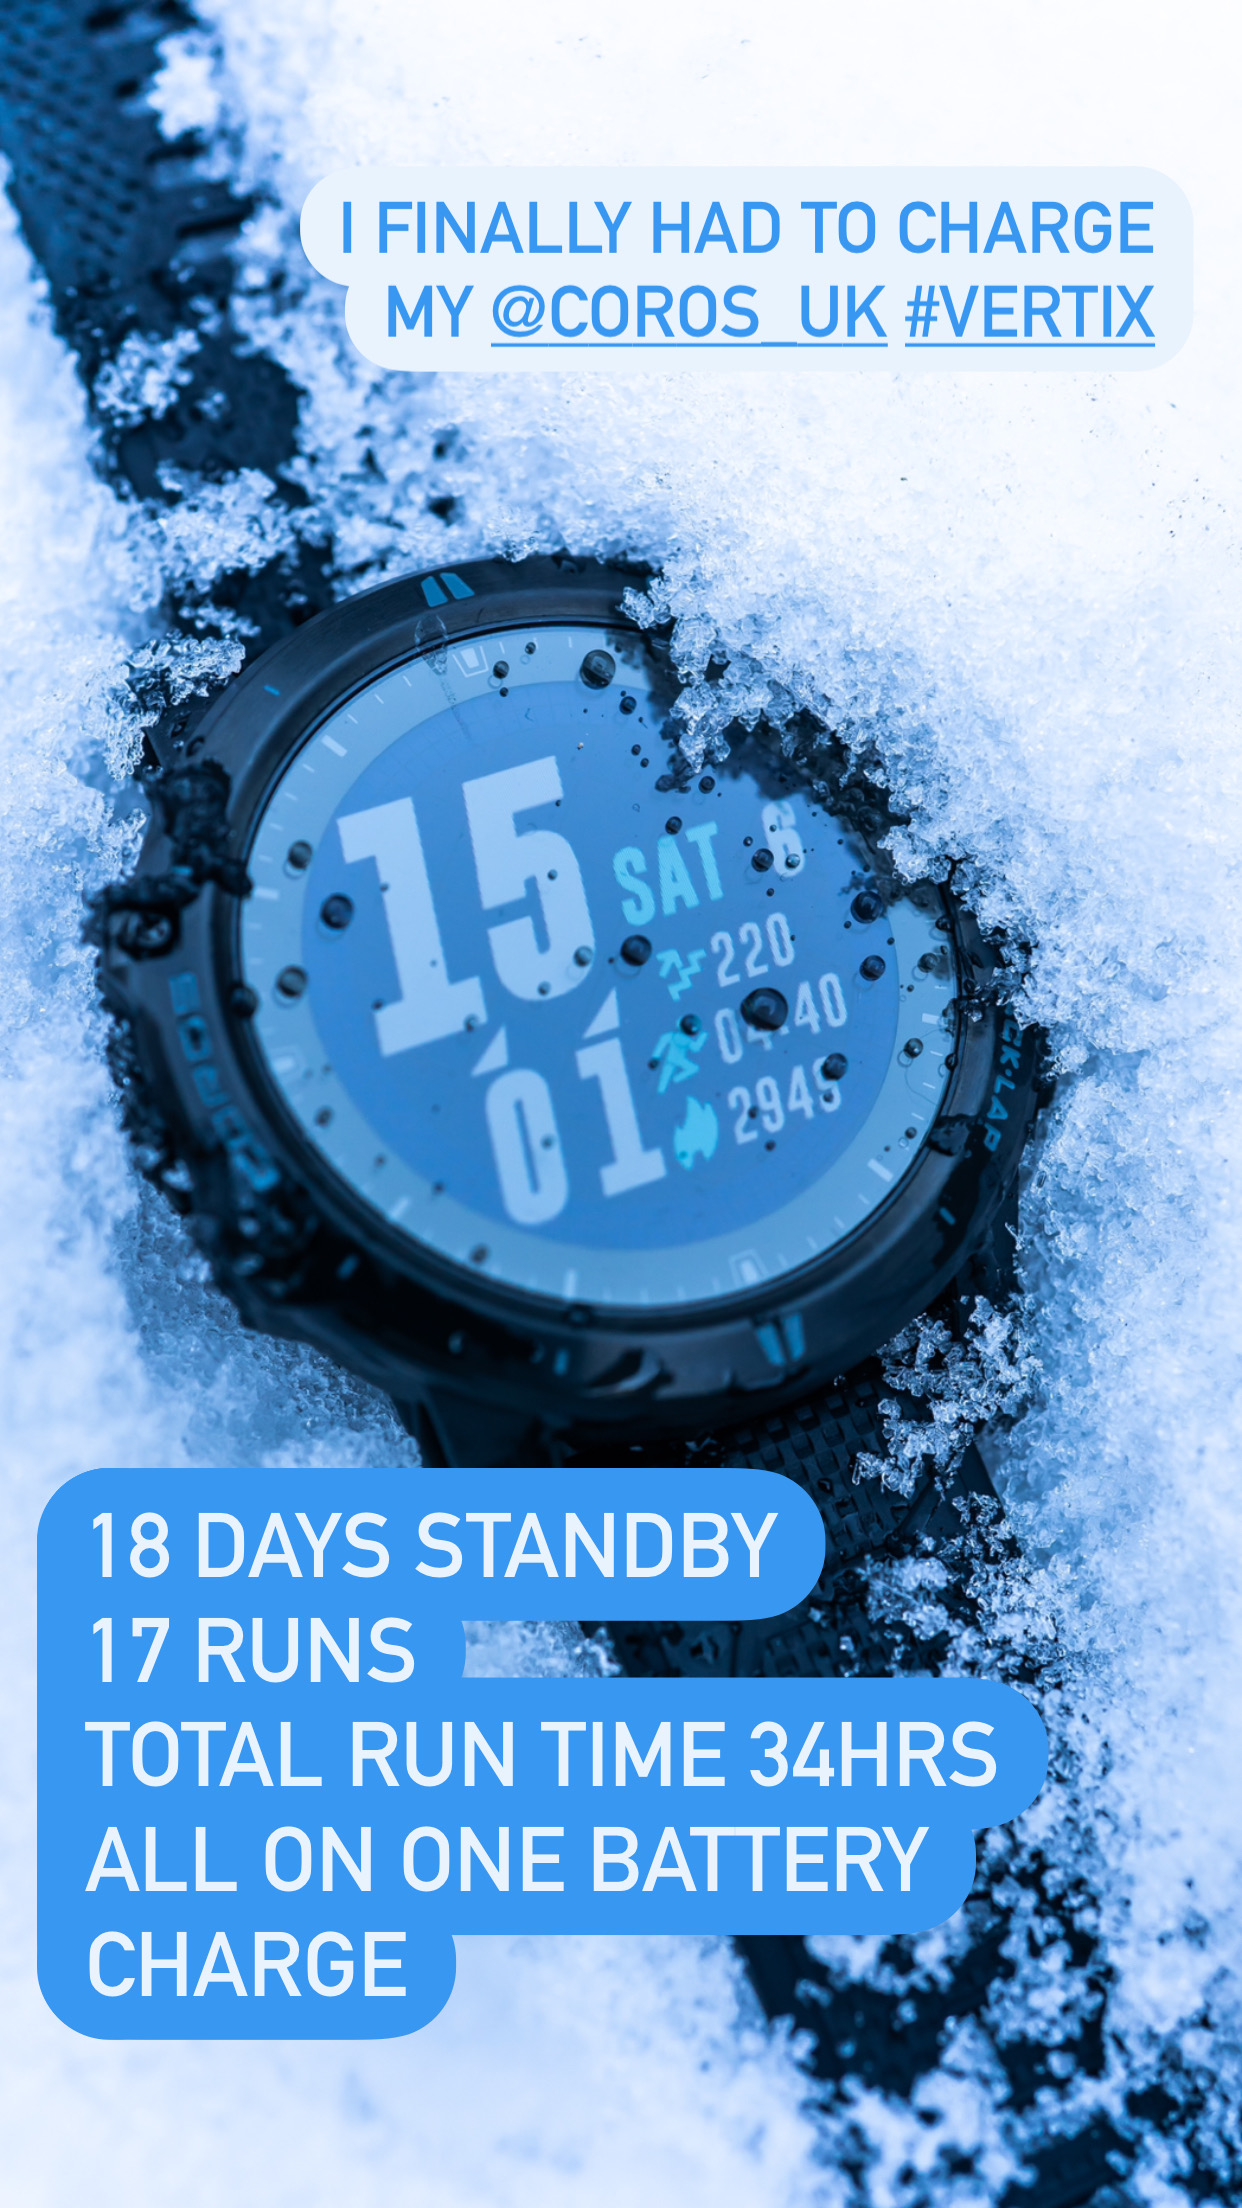
Battery is one of the standout features of the VERTIX. It’s so good, you can almost forget about it. On receiving, I gave the watch a full charge.
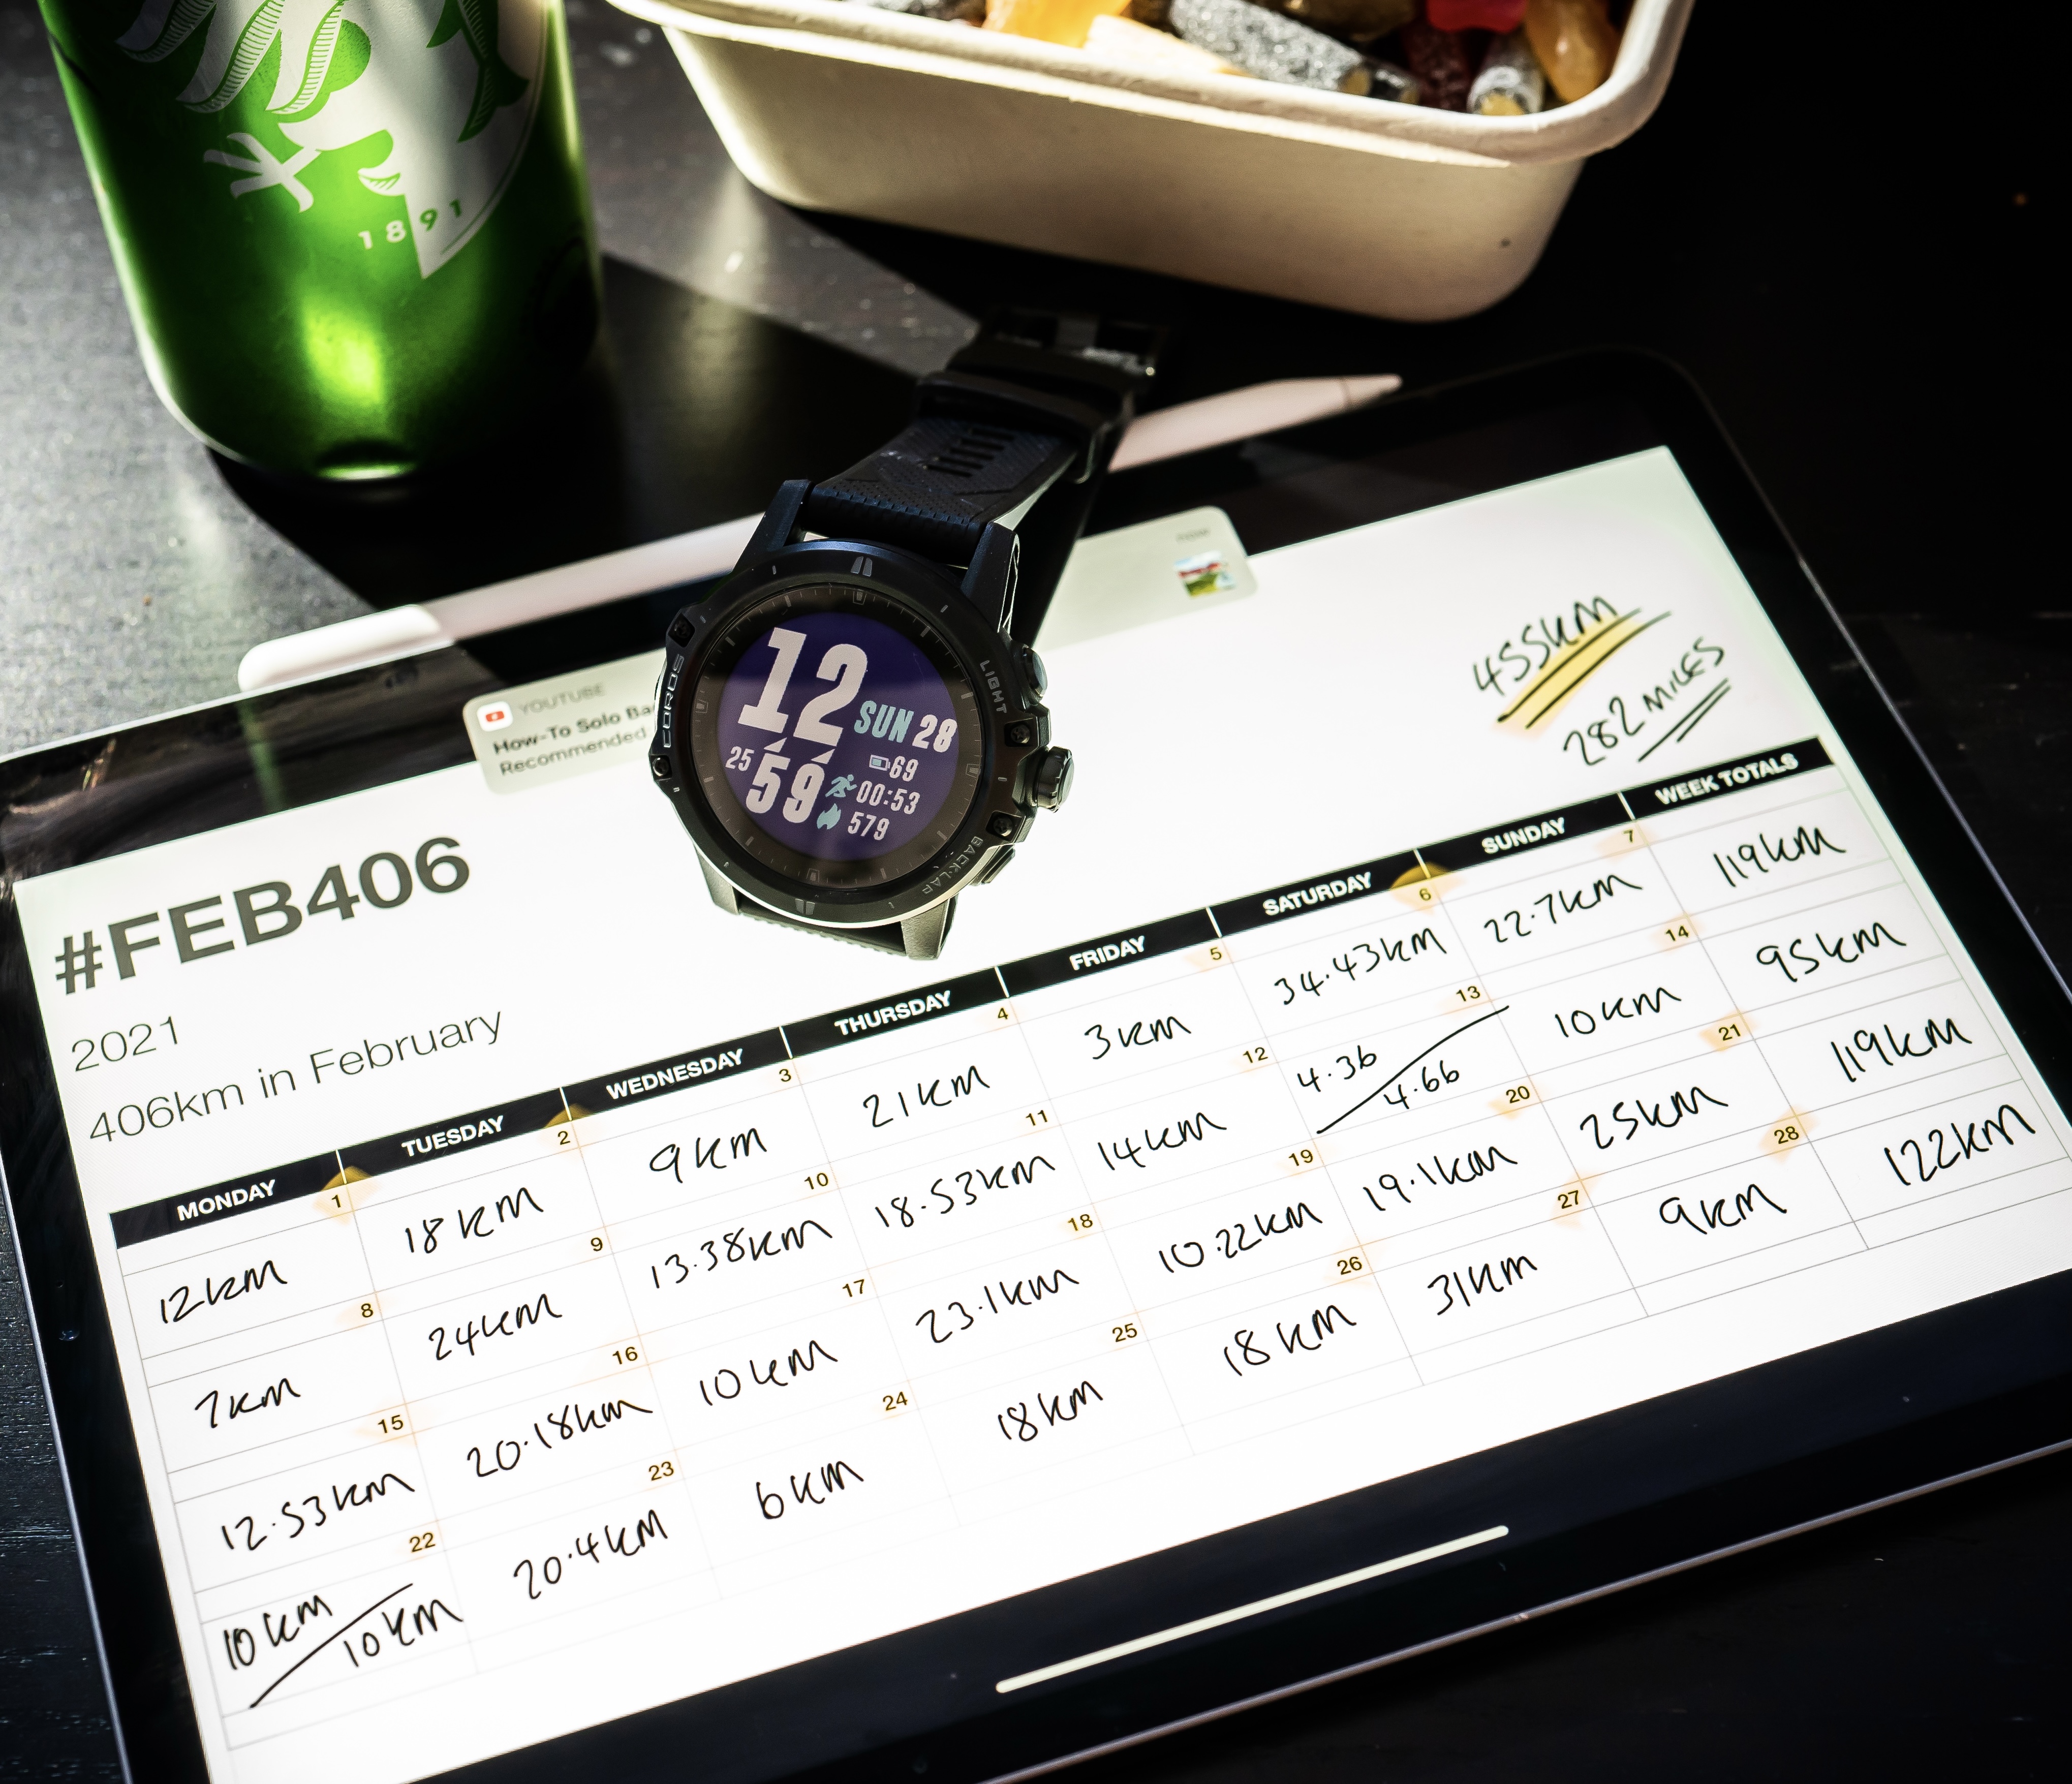
As an example, I wore the watch for 17-days, did 17 runs totaling 34 hours and still had 10% battery remaining. This was in the ‘normal’ GPS mode. That is outstanding and quite simply one of THE selling features of the VERTIX and ultimately why one would choose this over say a Suunto, Fenix or Polar. For perspective, run 1-hour a day and use the VERTIX only for running and it will last 8-weeks!
Recently I did #feb406 running the dates of February which totalled 406km. I did this all on one battery charge and that included standby time too.
I think Garmin have obviously been losing many sales due to the autonomy of the Coros APEX and more importantly the VERTIX, that just recently they released the ENDURO which is boasting incredible battery life that competes with and exceeds the VERTIX. Weirdly, the cost of this unit is eye watering and amazingly it does NOT have mapping! I honestly believe that for those sports people who are going to spend big bucks on a GPS unit, mapping is the one thing that may well tip the edge and why the VERTIX will compete against the FENIX 6 PRO for sales – for many, maps and music will swing it. But if battery is the be all and end all, and for many it is, the VERTIX is a wow.
SUMMARY
In many respects, my summary of the VERTIX could be the paragraph above in regard to battery. Quite simply, battery is the hero of the VERTIX and why it would and should be at the top of your GPS list if looking for a premium unit that lasts and lasts.
However, there is far more to the VERTIX than ‘just’ battery. There is no hiding away from the fact that the VERTIX is here to steal the glory from Garmin and Suunto. Place the VERTIX next to a FENIX 6 and they pretty darn look similar, they are almost the same size, the VERTIX a little more depth in the case. The VERTIX being lighter but it has all the build qualities as one would expect in a premium unit.
Coros are without doubt being aggressive and they want market share, this is great for the consumer as they are pushing boundaries at a far greater pace than much of the competition. It amazes me that they do not have mapping and music on the VERTIX… But I am sure it is coming!
Price – The VERTIX retails at £539.99. The Fenix 6 Pro Solar £729.99 and the Fenix 6 Pro £599.99. The new Garmin Enduro £699.99. Suunto 9 £449.00. Polar Vantage 2 £449.00. As you can see, the VERTIX is not a budget option. The APEX and APEX Pro gained traction (I believe) based on pricing and battery autonomy. The VERTIX now has stand out battery but a price that is alongside and comparable with the other brands and in some cases, more expensive.
So, why would you buy the VERTIX?
If you have been using Garmin, Suunto, Polar or whatever for some time, you will be invested in the brand and therefore will not switch on a whim, after all, a GPS is an investment. However, if you have constantly needed more autonomy, Coros are going to keep distracting you, this happened with the APEX models and now the VERTIX takes it to another level. Garmin have obviously realised this and are trying to compete with the ENDURO but at £699.99 that is a big ask – for me, it makes no sense, even if the battery life is longer than the VERTIX – Garmin say 80hrs in GPS and 300hrs in max mode compared to 60/150 for the VERTIX. Trust me, after using the VERTIX, I and pretty much anyone else does not need more autonomy.
Ultra-running, adventuring, exploring, multi-day adventures, fast packing and so on, the VERTIX is for you. Climbers will be enticed by blood oxygen monitoring and its capabilities at altitude. The features, such as power are also another key sell point for any athlete.
Ultimately, if you need mapping the breadcrumb navigation may well just not be enough for you and this is where the dilemma comes – until Coros update with mapping! On a personal note, I wear glasses and require glasses to read. I can follow a breadcrumb trail on a watch as it is clear and simple, I can’t navigate a GPX route on a watch with mapping – basically there is just too much info. So, IF I do need to refer to map/ GPX route I do that on a stand-alone device or I use additional software on my phone, such as FOOTPATH.
Notably, all watch controls are via the app, there is no desktop equivalent like with other brands. You can log in on the Coros website, but there is little to no additional extras. So, if you have a Garmin, move to Coros, the difference is huge. But, the Coros app is great, works and does the job.
The VERTIX is quality, has a great weight, sits nicely on the wrist and the app is excellent.
Key features:
Titanium bezel
Sapphire glass
150mm water resistance
Battery
Blood oxygen monitoring
Left/ right hand use and settings
Digital Crown
Stride, cadence, power and so on
HR monitor
Barometer, altimeter and compass
Training structures
Interchangeable wrist straps
The VERTIX is highly recommended. Coros website here.
No frills, hard core, designed for adventure, excellent build and amazing battery, it is a winner! BUT the omission of mapping, storage, NFC, Music and a couple of other features may well mean that the VERTIX is not for you, especially when the competition is at a similar price. But this is where the VERTIX battery steps in! The Fenix 6 for example, can’t match on autonomy even with solar. I don’t think the VERTIX price helps, if Coros really want the VERTIX to sell, it needs to be (based on UK prices) probably £100 cheaper.
For me, I have everything I need in the VERTIX and I won’t be exchanging it for anything else. The battery is a standout and I love this aspect of the watch. For perspective, my day-to-day watch is an Apple iWatch and that is still my day watch when home and I can charge it every day. I like the features of the iWatch, the screen, the integration with my Mac life. But out on the trails, in the mountains, adventuring or doing whatever, the VERTIX excels.
Watch was provided by Coros to test, this is not a paid review.
Please support this website. I believe everyone deserves to read quality, independent and factual articles – that’s why this website is open to all. Free press has never been so vital. I hope I can keep providing independent articles with your help. Any contribution, however big or small, is so valuable to help finance regular content. Please support me on Patreon HERE.
All running, particularly in the mountains, remote areas and particularly if going ‘solo’ brings an element of danger that must be managed. Winter and extreme conditions do increase risks and I discussed this in an in-depth article on Winter Running HERE
Following on from the article, I have had many questions to elaborate on the pack and the equipment I would use for day-to-day adventures and then how I would expand that equipment list for more adventurous and specific trips.
Firstly, understand yourself and your level of experience. I write about this in the article above, but it is worth emphasizing that no two people are the same. The ethos of ‘fast and light’ is great if you can go fast… BUT and this is a big BUT, what happens if you can’t go fast? What happens if you fall, are immobilized, waiting for help or a rescue?
Imagine a scene, stuck on a mountain side, you have broken your leg. You were moving fast and so were warm. But now you are still, the temperature is dropping well below zero and you are unable to move or generate heat. It’s a disaster waiting to happen, and THIS is the scenario you MUST think off when packing for an adventure.
I have a simple attitude of it’s better to carry it and not needed it.
Weather can change in minutes at any time of the year, especially in a mountain environment. However, in winter the changes are often far more extreme, Hypothermia can hit in minutes and it is deadly.
Preparation is key and assessing what ‘may’ happen on any adventure or run is crucially important to make sure that a day or multiple day’s activity remains safe.
The equipment list below are my personal choices, and I must stress here that I have tested many variables and brands to come up with the list below. Importantly, there is most definitely multiple ways and solutions to any problem, so, while my list below could be seen a perfect shopping list, it’s also fun to find out what works for you.
YOU AND WHAT YOU WEAR
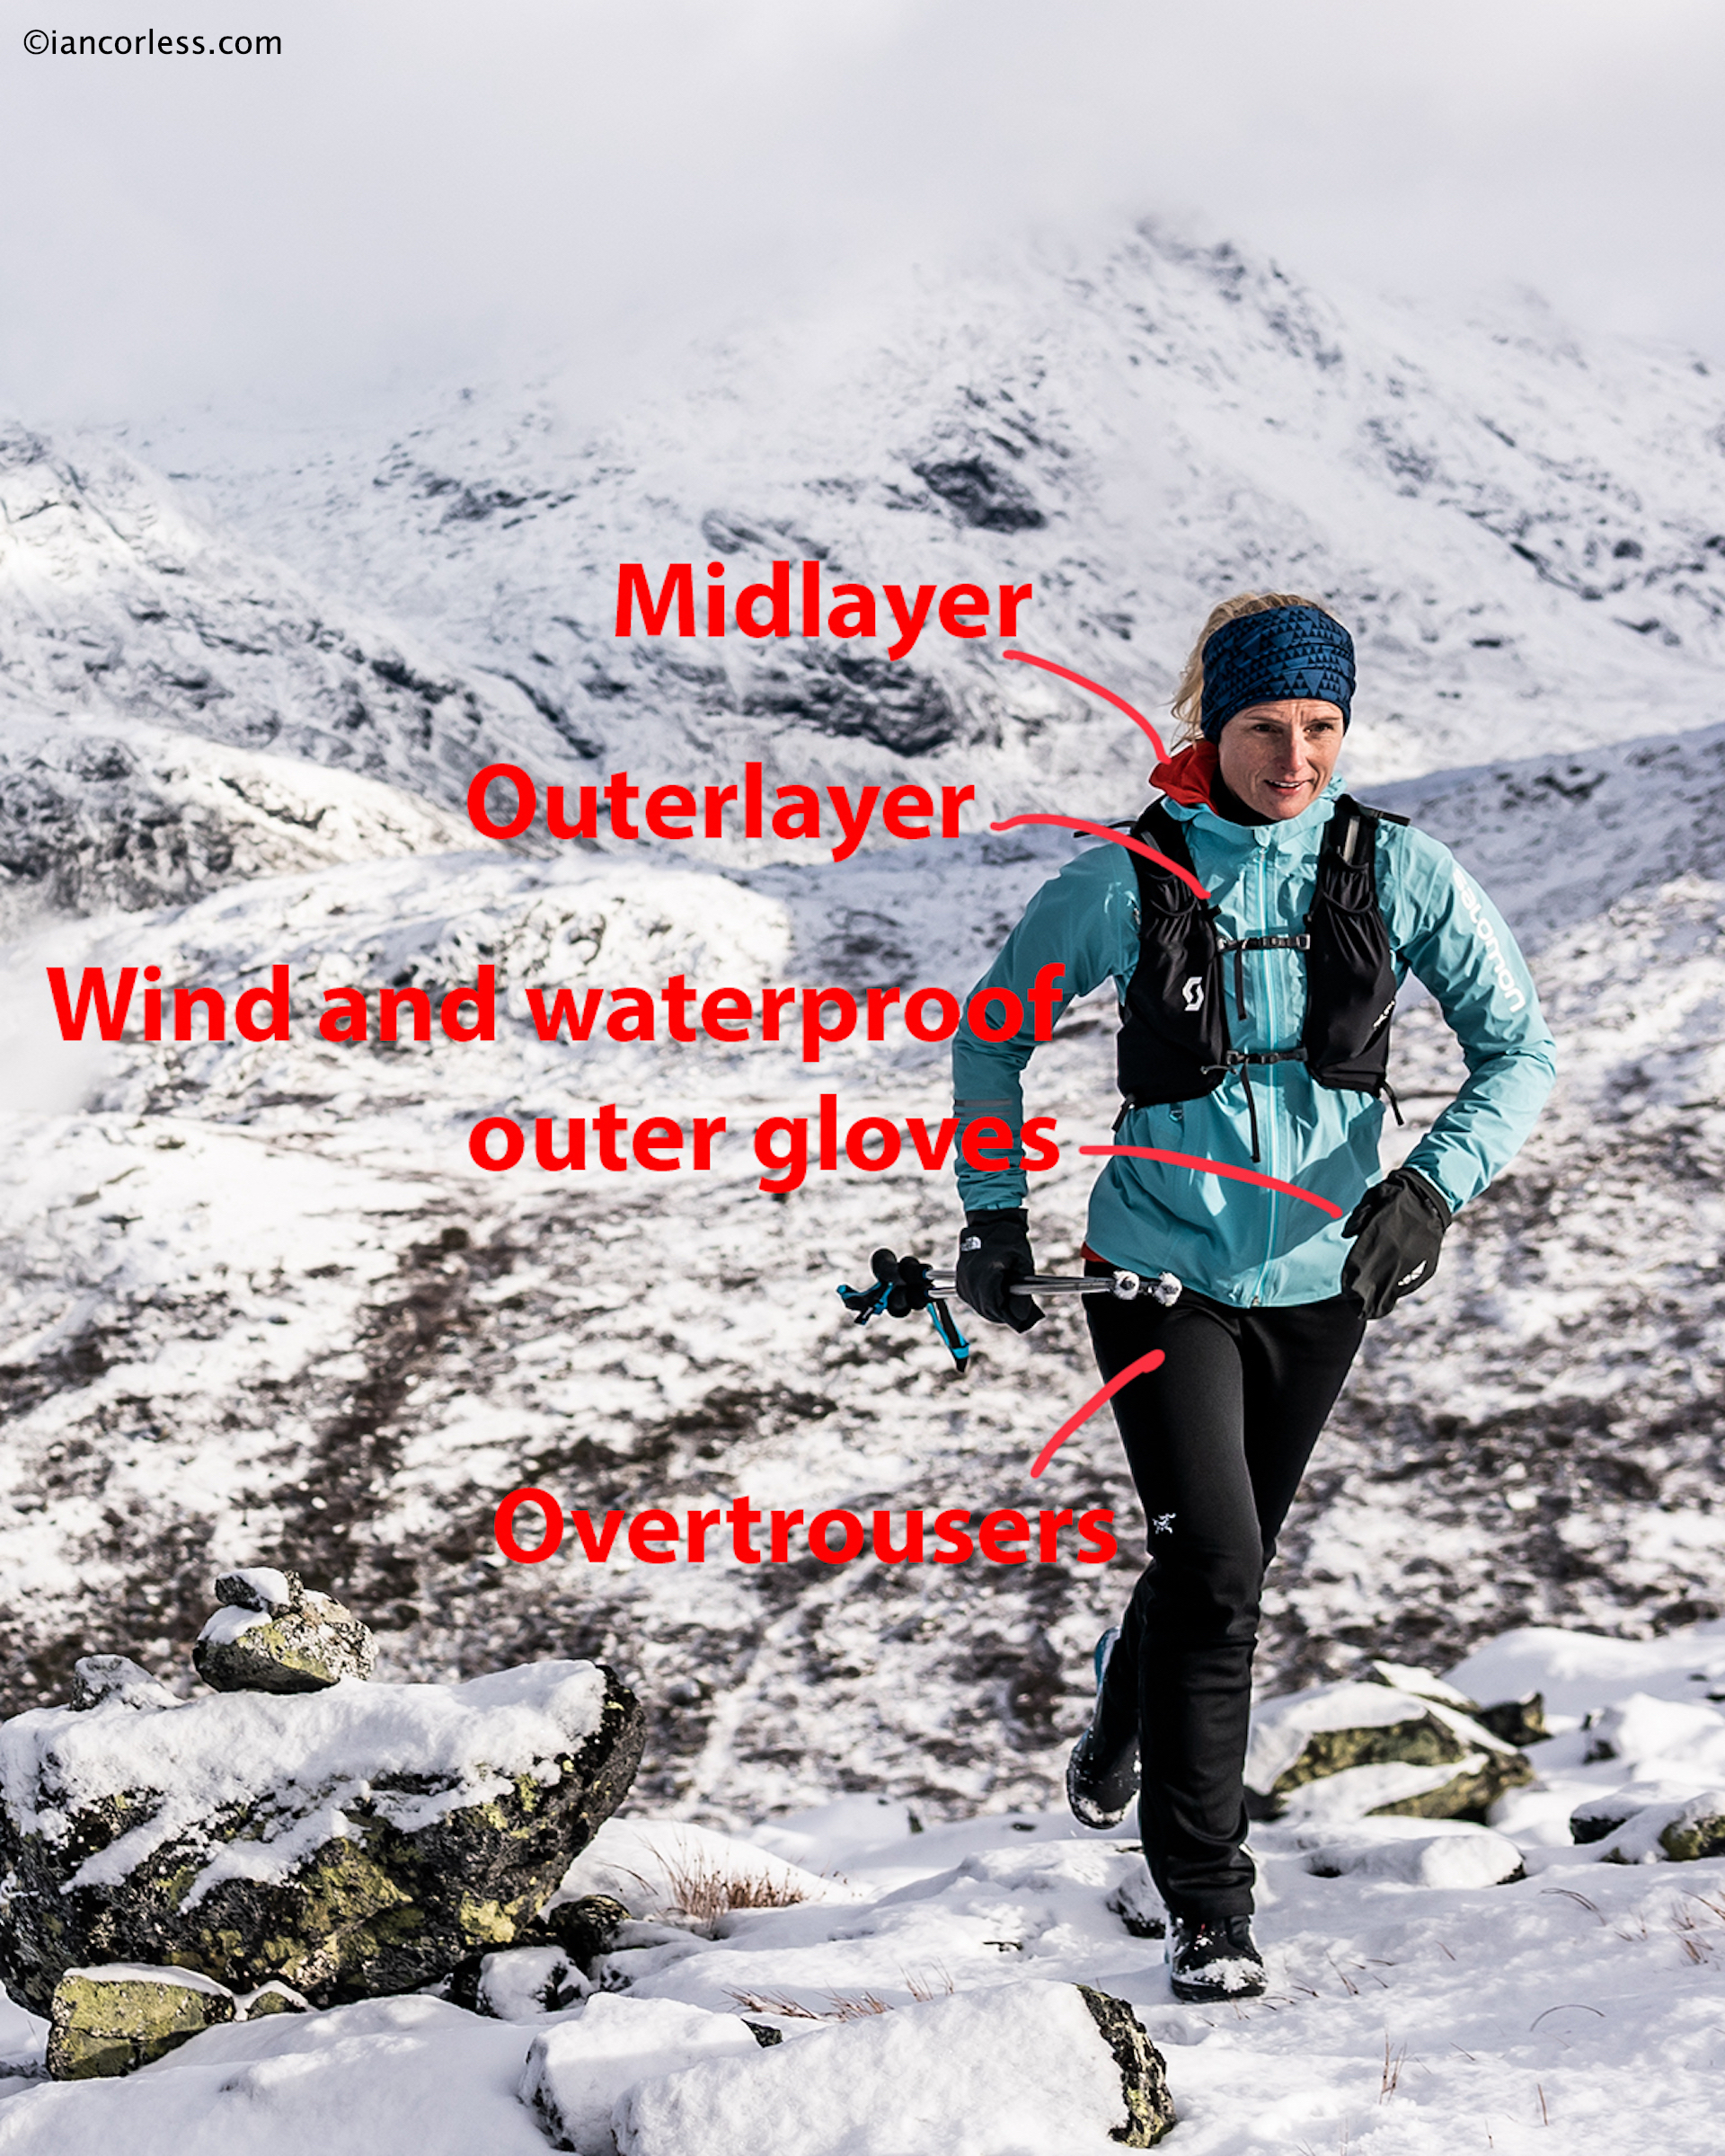
What you wear for a run/ adventure should come as second nature, but it can often be a real dilemma understanding how to balance the layers so that you don’t overheat or equally, get too cold.
Personally, I find the most difficult temperatures around 0 to +5 degrees C (32-49 Fahrenheit.) It’s cold enough to make you feel chilled (often will feel damp too) but within 15-minutes of running you feel warm.
inov-8 ambassador, Abelone Lyng
The starting point for me is a merino wool base layer, it naturally helps regulate body temperature, remains warm when wet, transports sweat away from the body, and is very good in regard to odors. Icebreaker is my product of choice and they have a simple system of 150/175/200 and 260 products, the higher the number, the thicker and warmer the product. I personally find 150 ideal, especially for running and active sports.
My jacket will balance warmth, breathability and protection from the wind, Haglöfs L.I.M Hybrid Hood manages to balance all these elements in a really lightweight package. It can even be worn directly against the skin. The inov-8 Technical Mid Hoodie is also a good choice.
Leg wear will depend on the weather and arguably I would potentially look at 3 scenarios. On milder winter days hovering around 0C I would use my standard inov-8 run tights. 0 to -10C I would use a thicker winter tight, potentially with wind block panels on the front by Swix. Below -10 and I would use Icebreaker 150 merino underneath the thicker Swix tights.
Keeping feet warm is essential in winter and again, based on weather, temperature and conditions. I will go with one of three scenarios: Merino wool, neoprene socks or Sealskinz. My default is neoprene as it works well in most conditions. It’s not unusual to wear two pairs of socks in winter, say a merino liner and thicker over sock or a merino liner inside Sealskinz, keep this in mind when getting winter run shoes, you may need a half-size larger shoe?
Hands, like feet, need to be warm. I use Icebreaker liners, with either inov-8 Extreme Thermo Mitt which is incredibly warm.
I wear a Buff or similar product around my neck, and I use a Haglöfs Fanatic hat which manages to be always warm, but not too warm!
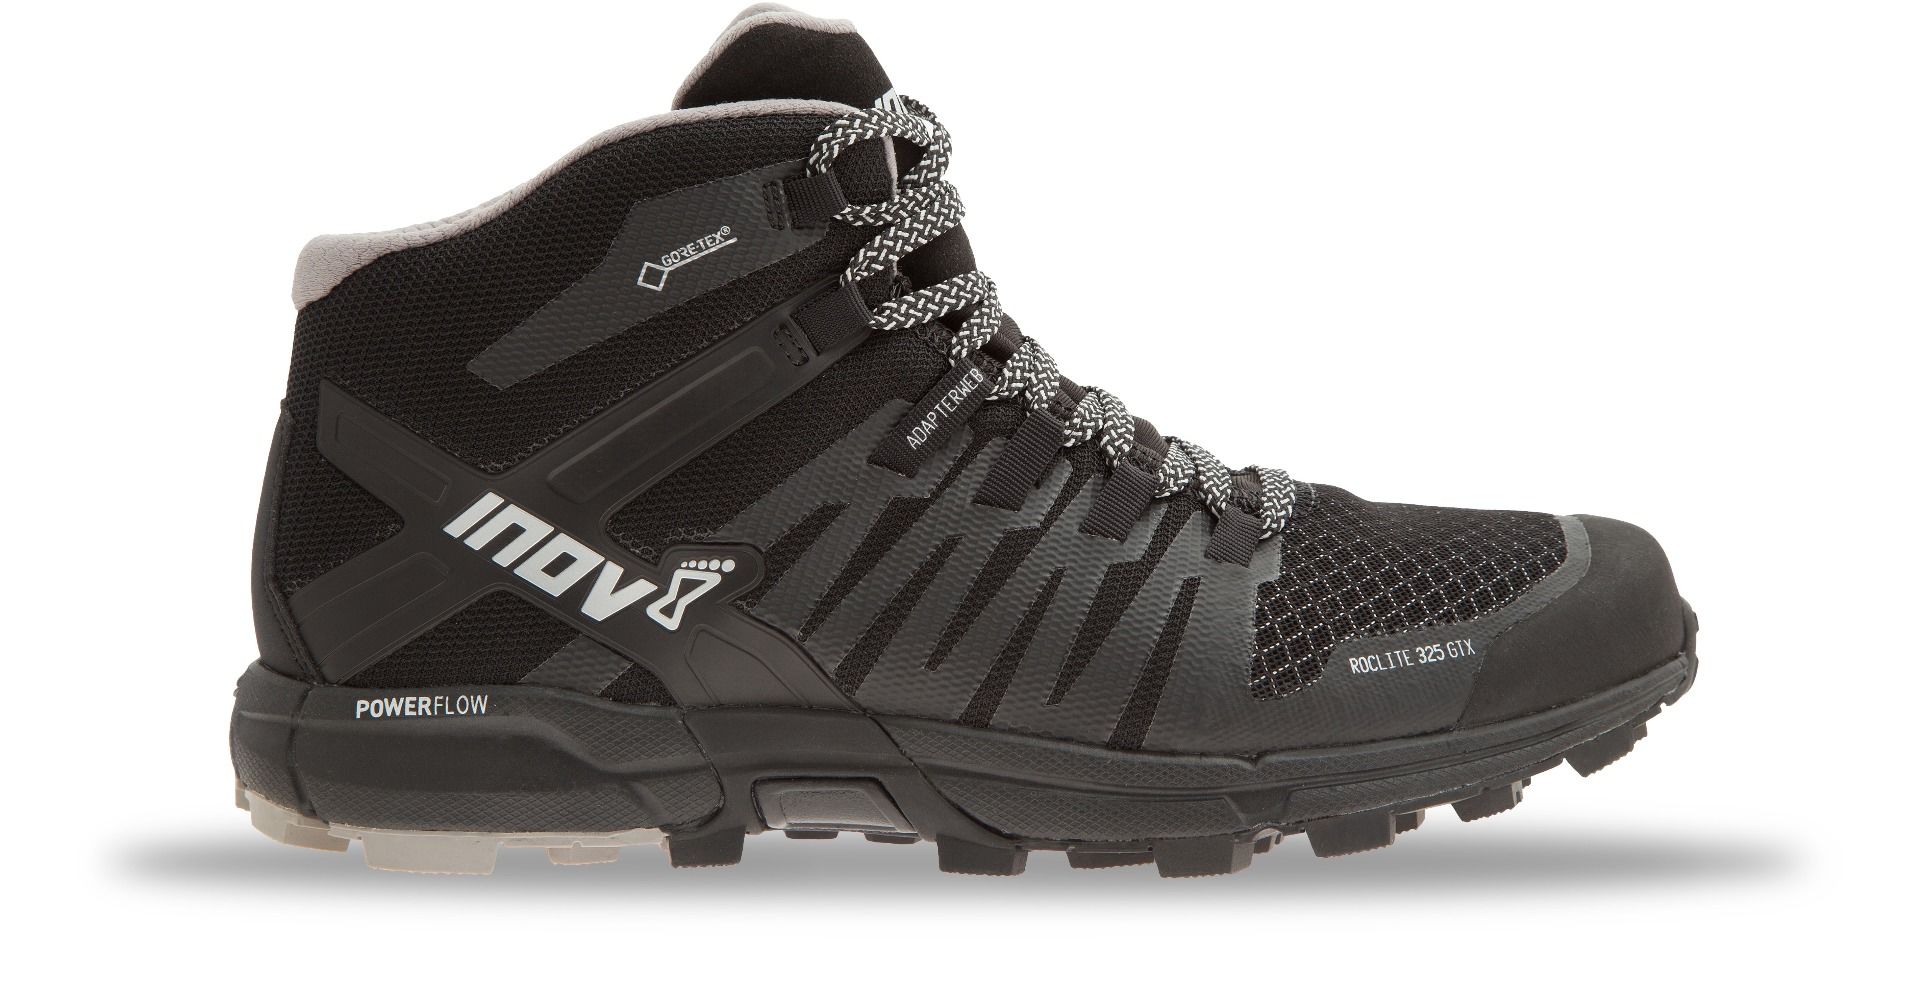
Shoes will depend on conditions but for me, once winter arrives, I usually require a winter shoe with studs to provide grip, particularly in ice. The VJ Xero 5 works exceptionally well. Of course, in most scenarios you could use your favourite trail shoes and carry micro crampons which you can add and remove as required. However, if you know you will be in snow/ ice all day, a specific winter shoe provides a much more enjoyable experience.
Finally glasses with a specific winter lens are often essential to protect from cold air, snow and reflected brightness from snow. I use Oakley Radar.
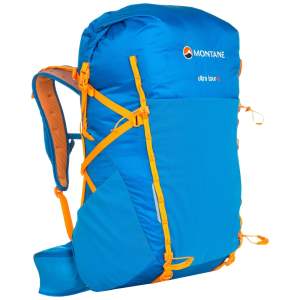
THE PACK
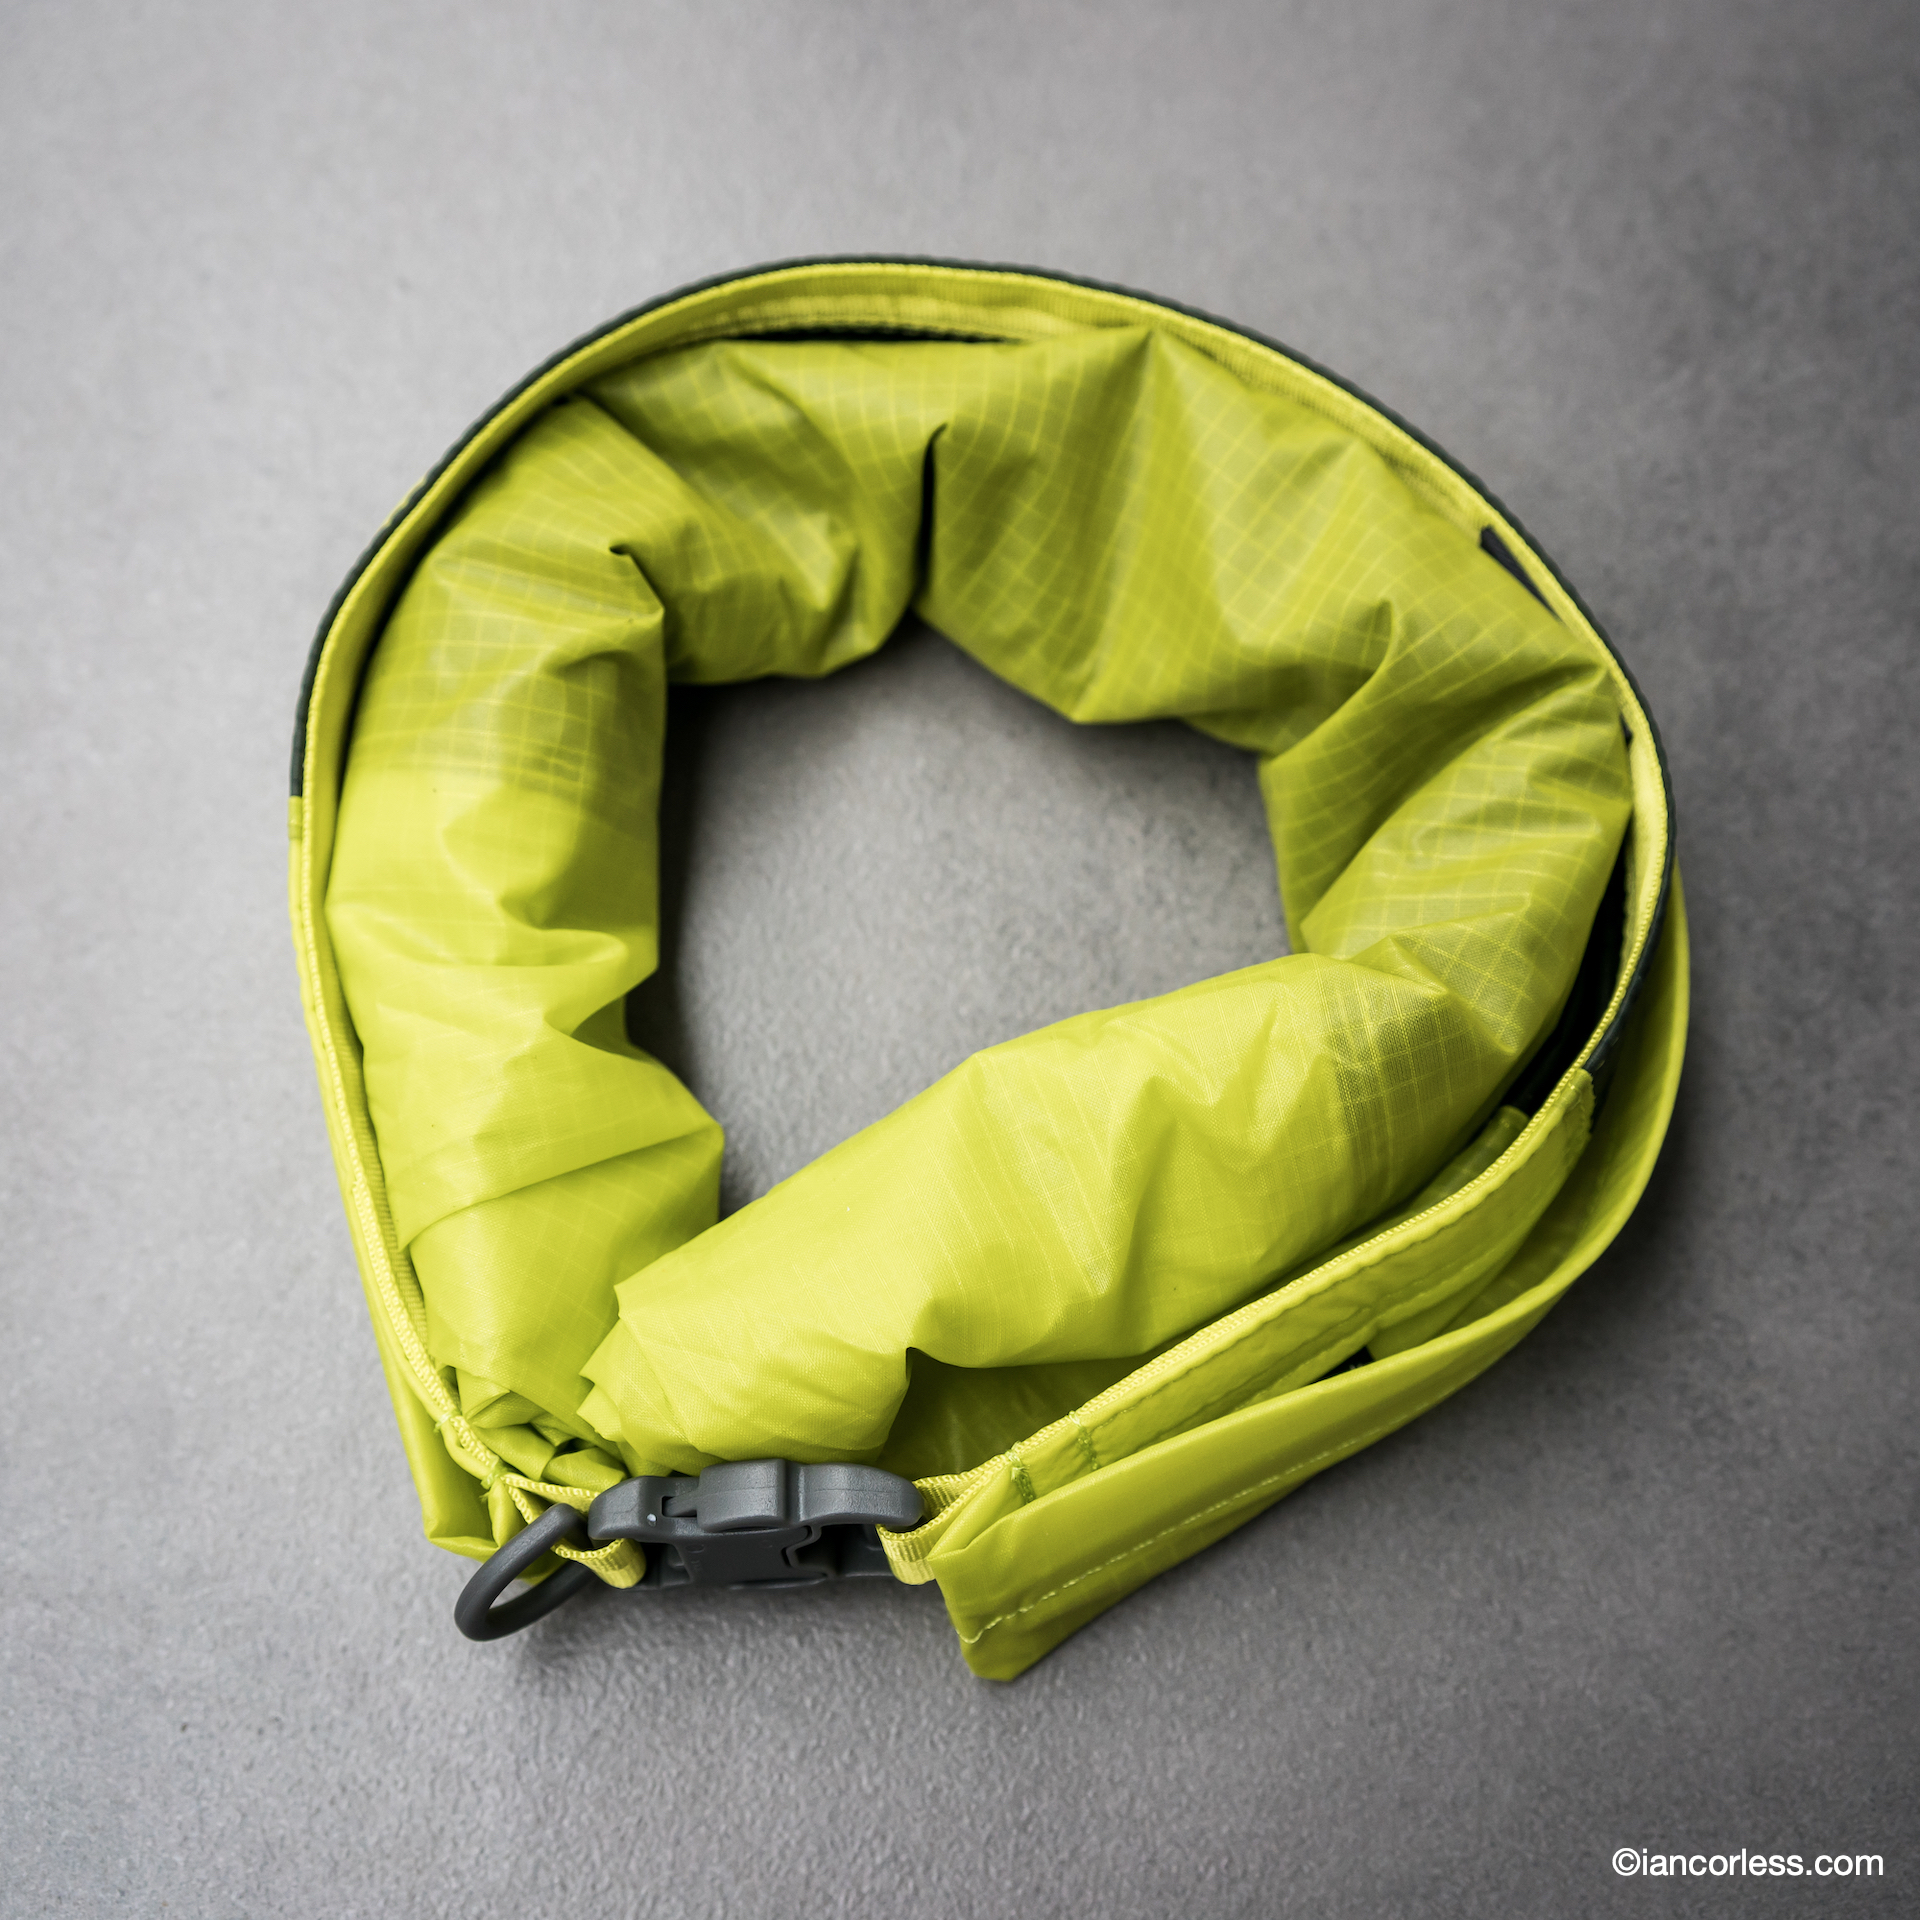
Black Diamond Distance 15is a somewhat unique pack that manages to appeal to trail runners and alpinist/ climbers who have discovered that all important link-up of sports coming together for unique adventures and/or fastpacking. These adventures tend to entail a bit of easy climbing, some scrambling, some fell running and some walking – or just about whatever you can string together.
Black Diamond Distance 15 balances running and alpinism perfectly.
A hybrid between running and climbing pack, the Distance 15 fits snug to your body and is stable with minimal bounce. The main compartment of the pack includes a quick draw-string main opening which Black Diamond say is waterproof – it is not! Please use a waterproof bag inside like those provided by Sea to Summit. A zippered security pocket inside is ideal for a wallet and there is a stretch mesh divider that will hold a bladder, or it can be used for storing nylon or dyneema.
Elasticated compression straps either side of the main bag are ideal for reducing the volume of the pack and keeping everything tight together and they can be used to secure a pair of ice axes that also have specific storage at the bottom of the back and security buckles that pass through the ice axe head. Integrated into the main compartment (on each side) are ‘Quiver Sleeves’ for Black Diamond Z-folding walking poles. The front of the pack has a vest fit with two adjustable straps and two 4-way stretch zippered pockets and four front stretch pockets that will hold soft flasks, snacks or any other essential ‘on-the-go’ items.
IN THE PACK
Icebreaker 150 top and bottom
Spare base layer, top and bottom – These would be duplicates of the Icebreaker 150 as worn.
Spare socks – Merino run sock.
Jacket
Mid layer/ insulation – In winter, I will already be wearing a mid-layer, either the Haglöfs or inov-8 as mentioned above. My additional insulation would be down and the Haglöfs Essensis an incredible all season product. It has warmth, very low weight and first-class goose down with 800 CUIN filling that it is DWR treated – the filling stays dry for up to 10,000 minutes with exposure to wet conditions.
Barrier shorts
*Barrier Shorts – Haglöfs make an excellent, light and packable barrier short for the extreme cold.
Haglöfs Gore-Tex Paclite
Waterproof jacket – The inov-8 Ultrashell Pro is an excellent very lightweight waterproof jacket but in winter I will usually take a heavier duty Gore-Tex Paclite L.I.M jacket by Haglöfs.
inov-8 Trailpant
Waterproof pants – inov-8 Trailpant waterproof and breathable designed for really cold, wet conditions.
Icebreaker liner gloves
Liner gloves – I would carry an additional pair of Icebreaker merino as mention above.
Sentinel by Mountain Equipment
Black Diamond waterproof over mitt
Outer gloves – I would typically carry two outer gloves as I suffer with cold hands, a warm Sentinel mitt by Mountain Equipment and a waterproof over mitt by Black Diamond.
Hat – Spare hat as above.
Buff – Spare as above.
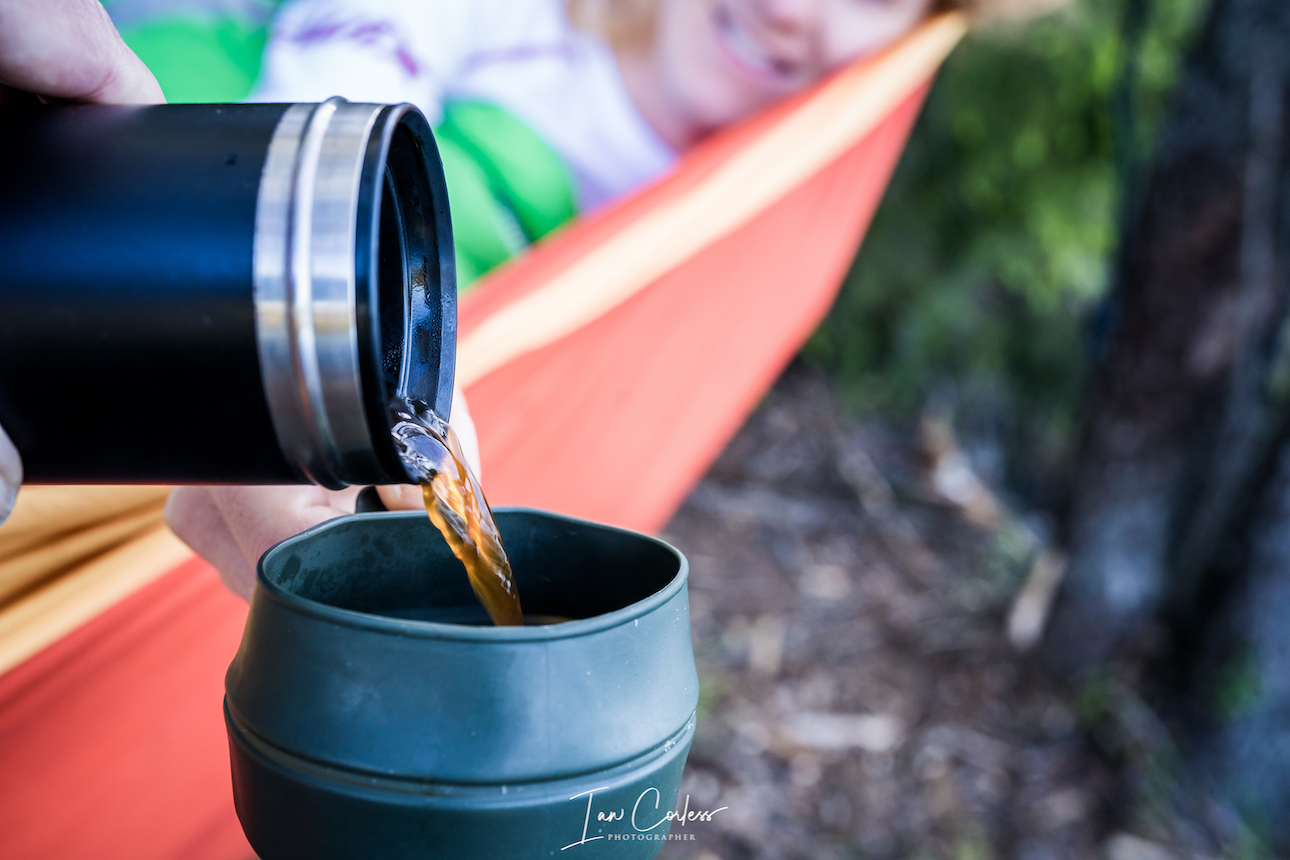
Food and hydration – In winter, a main issue can be frozen bottles, so I carry one or two small Thermos flasks with coffee, sweet tea or hot chocolate. It can make a big difference to have this option. For snacks I will use energy bars, Kvikk Lunsj or similar. Always a good idea to plan a cafe stop on longer runs too!
Phone – I use an iPhone and I make sure I have mapping software such as Footpath and what3words for emergency use.
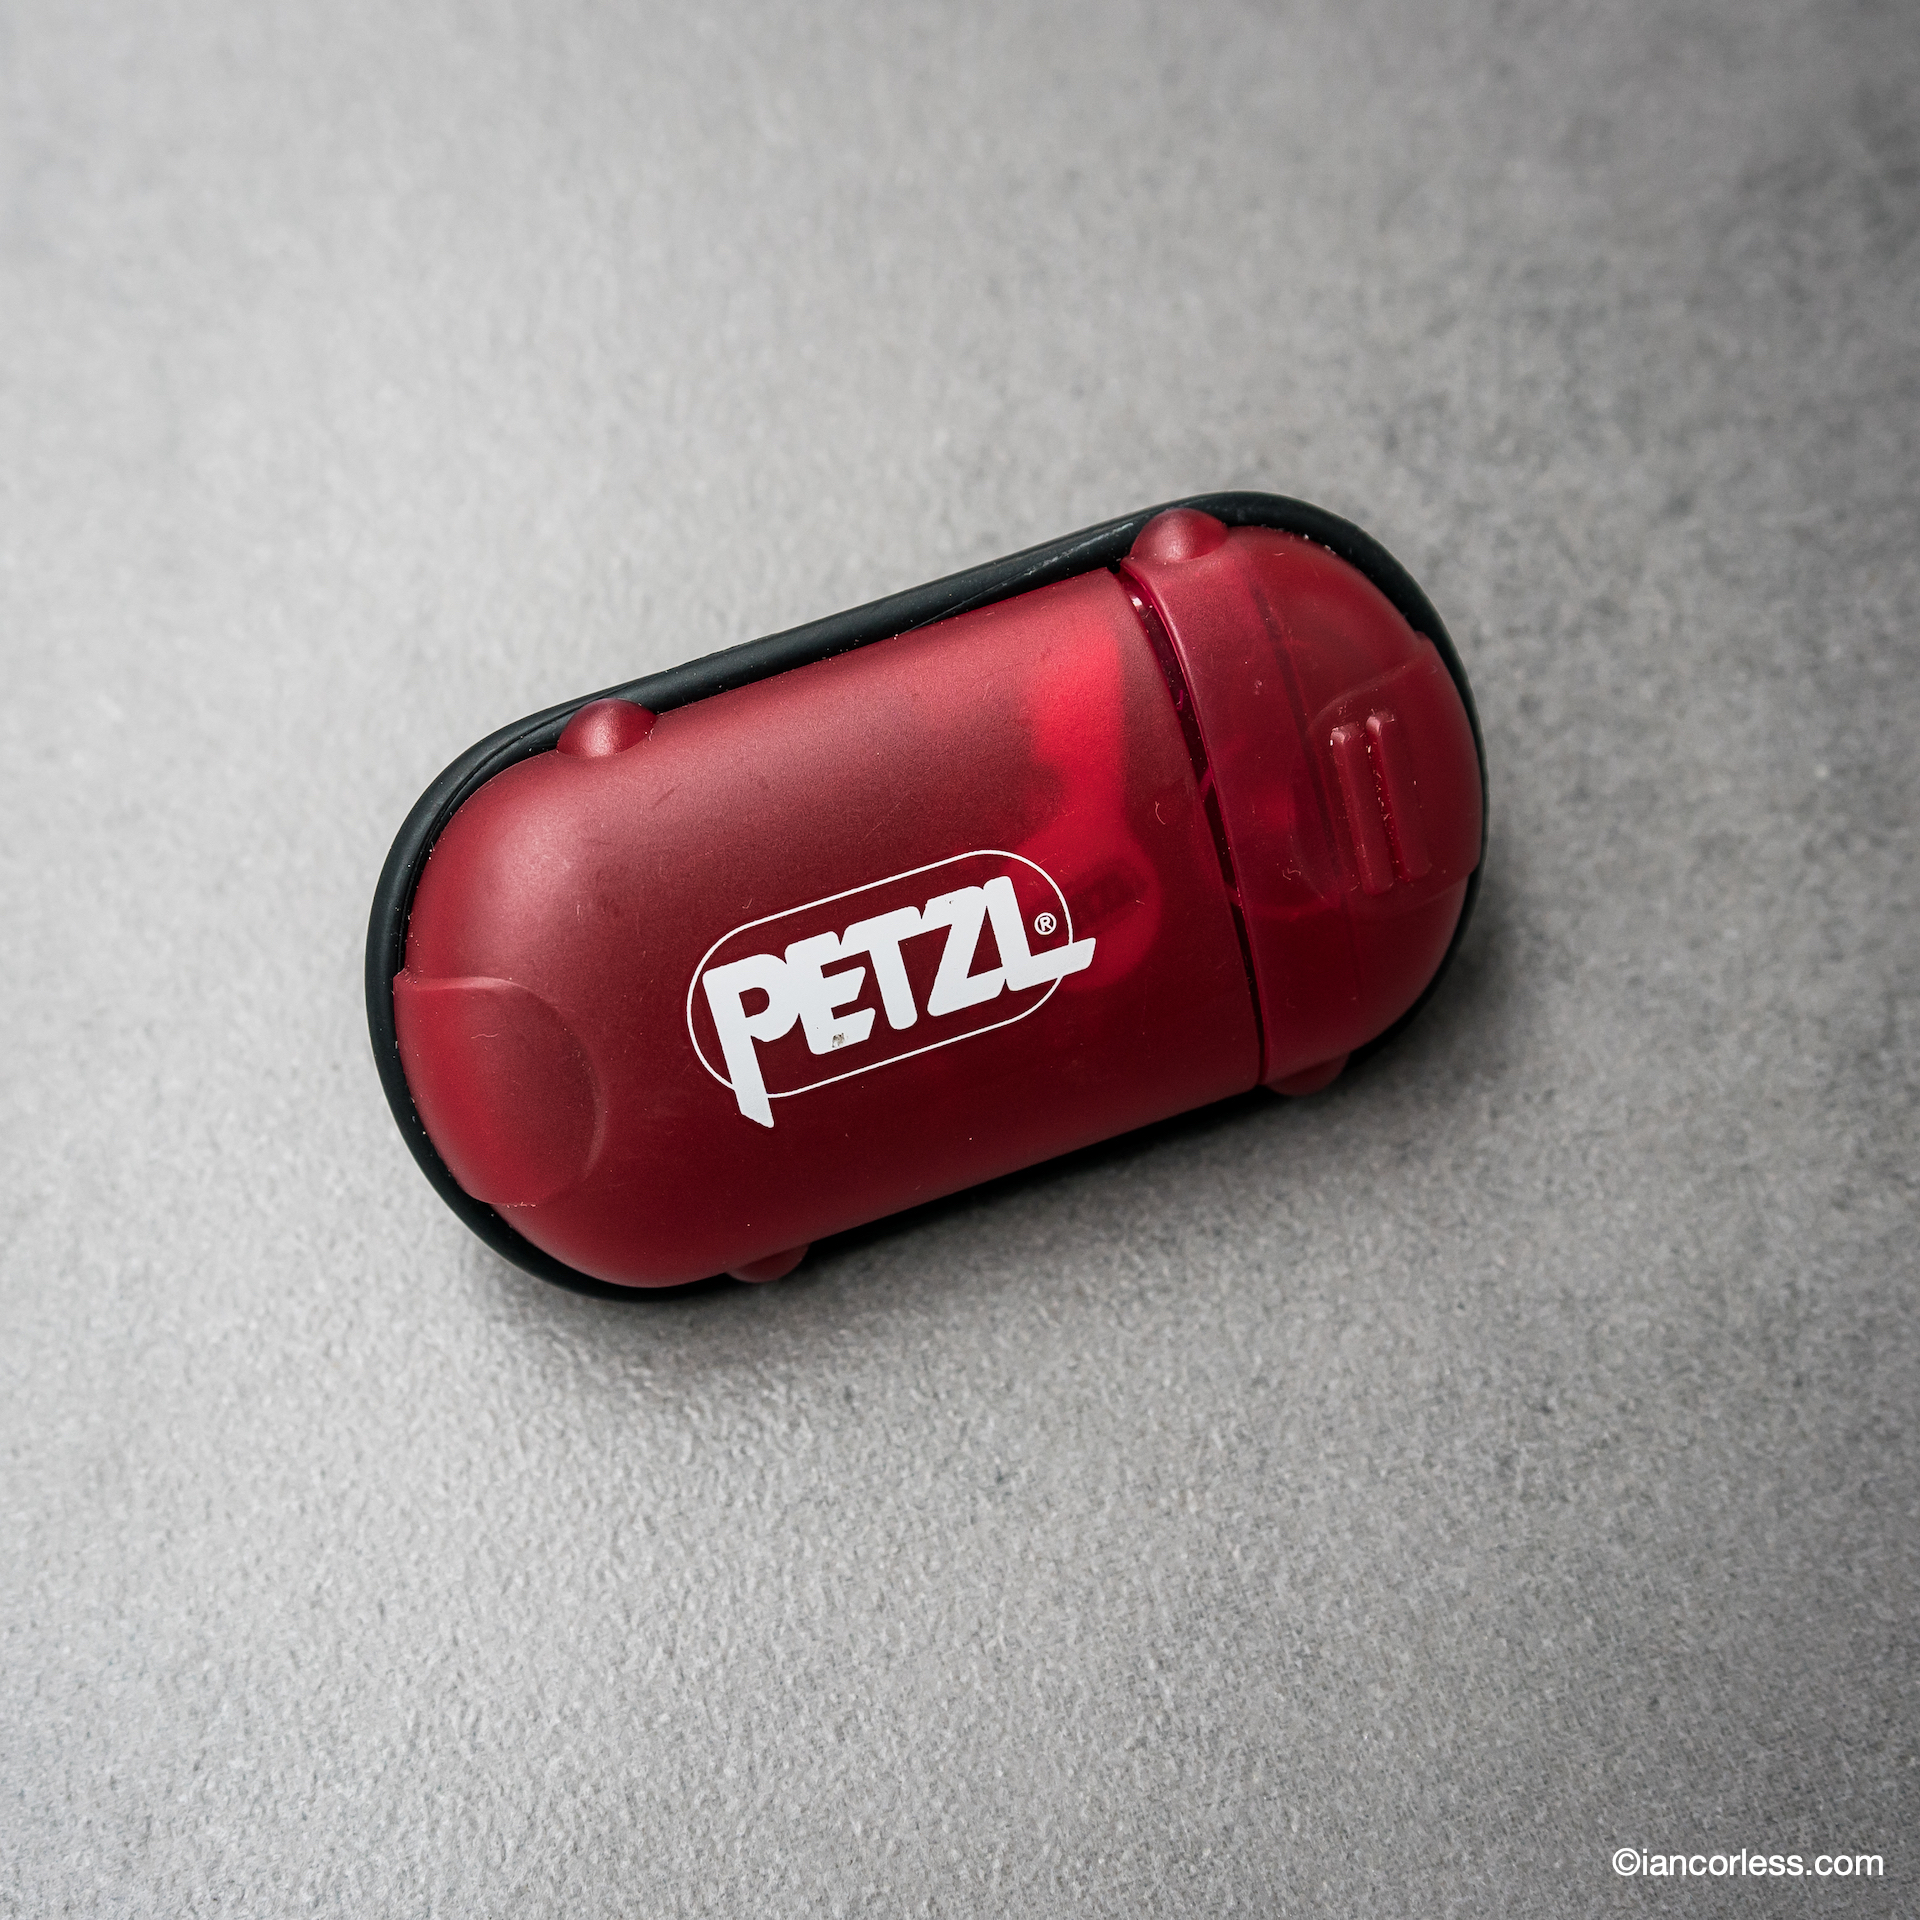
Petzl e-lite
Silva Trail Runner Free
Headtorch – A simple Petzl e-lite as a ‘just-in-case’ for all runs but if running at night I use a Silva.
Waterproof liner bag – (maybe 2 depending on needs) – Sea to Summitmake excellent lightweight bags to make sure all spare clothes etc remain dry.
Survival bivi
Bivvi – Terra Nova Survival bivi that is fully waterproof, breathable and has a simple drawcord closure. It packs away into a small stuff sack.
Hand and feet heat pads
Heat pads – An essential back-up for hands and feet by Nevercold or similar.
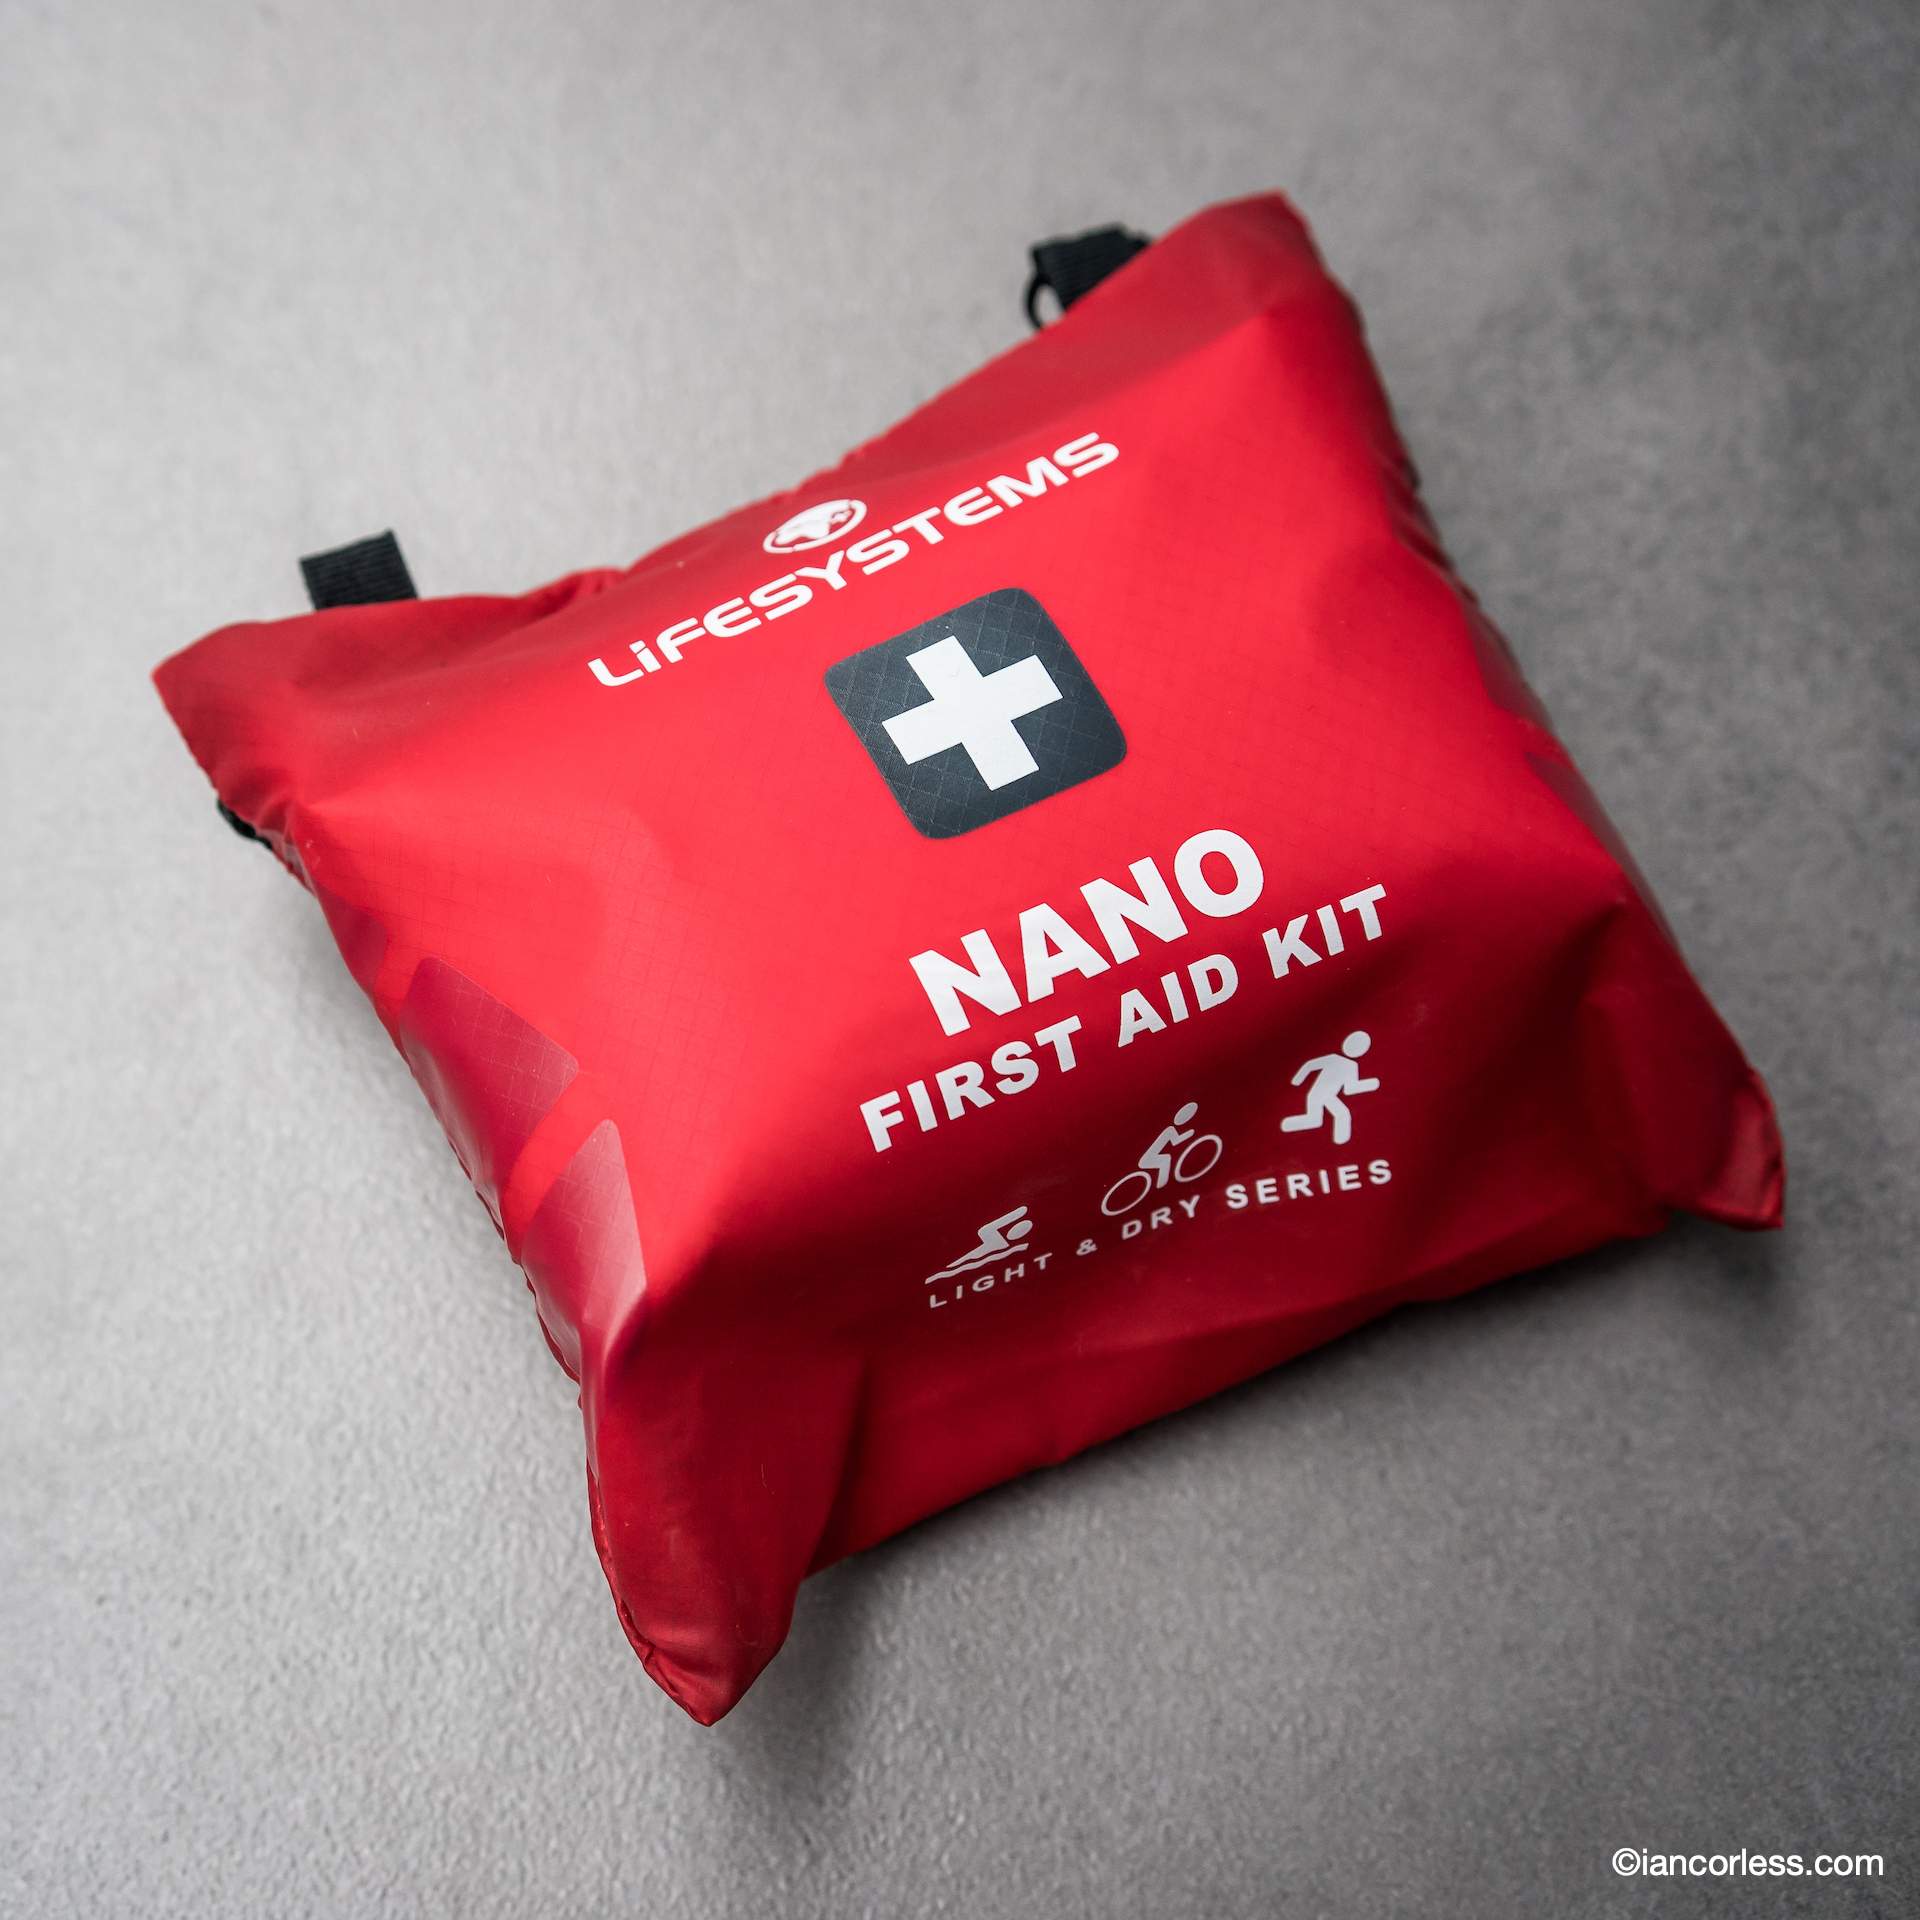
First aid – Lifesystems small emergency kit in waterproof protection.
Additional power.
Batteries/ Battery pack – Modern tech doesn’t last long in extreme cold so carrying a back-up battery can be a good idea, Goal Zero make good products.
*Hand Ice Studs – Isvidda Isdubb If you are running on the ice, it is important that you use ice hand studs both for your own and others’ safety. (These are often sold for those ice fishing.)
All items with * are only applicable based on the adventure, the type of terrain, weather conditions and personal experience. The inReach is a wonderful security blanket that is arguably ideal for any run/ adventure but if you have a phone (with power) at least you have one emergency back-up. However, phones don’t always have reception.
Running across a frozen lake, Norway.
LIGHTERPACK is a great online tool that helps you manage equipment and keep track of pack weight and contents, HEREis an example of what is listed above.
SUMMARY
Winter adventures are incredible and exhilarating. On a personal level, I find them more challenging and exciting than many Spring/ Summer trips due to the added complexity. However, that complexity can prove to be fatal.
Don’t compromise in winter. Be prepared.
The above list of equipment is designed to show you what is possible and how to make weight as minimal as possible without losing efficacy of the items. You could go away and purchase this list of items and you’d have all you need for winter running.
However, if you are like me, looking around, testing items and comparing is part of the fun… It’s actually what I have been doing for years, that is how this list came about.
So, do the research, make sure you not only have what you need for an adventure but make sure you have all the extras needed should a situation arise leaving you vulnerable.
Please support this website. I believe everyone deserves to read quality, independent and factual articles – that’s why this website is open to all. Free press has never been so vital. I hope I can keep providing independent articles with your help. Any contribution, however big or small, is so valuable to help finance regular content. Please support me on Patreon HERE.
My recent article on Fastpacking (here) gained a great deal of attention. In many respects, I am not surprised, I think mini or extended semi or selfi-sufficient journeys are extremely popular and only on the increase.
The above post was in-depth and provided an overview of options that are available to make a fastpack trip effective. In some cases, coffee being a prime example, I did not go with the lightest possibilities available. The main reason for that? Comfort usually comes with a little more weight.
After a recent fastpack trip (just one-night wild camping,) I posted a photo of my pack contents and it created some interest as the weight was 5.4kg including pack, food, water, tent and all my essential items.
I received countless messages for more information, so, here goes. A detailed breakdown and description of the items and why I use them or more importantly, why I take them! Gladly, some of the items I do not need to use but need to have, just in case.
Below is a video, in-depth, where I discuss all the items listed below.
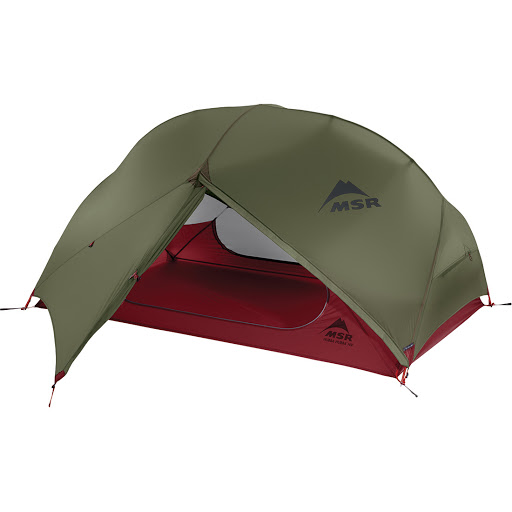
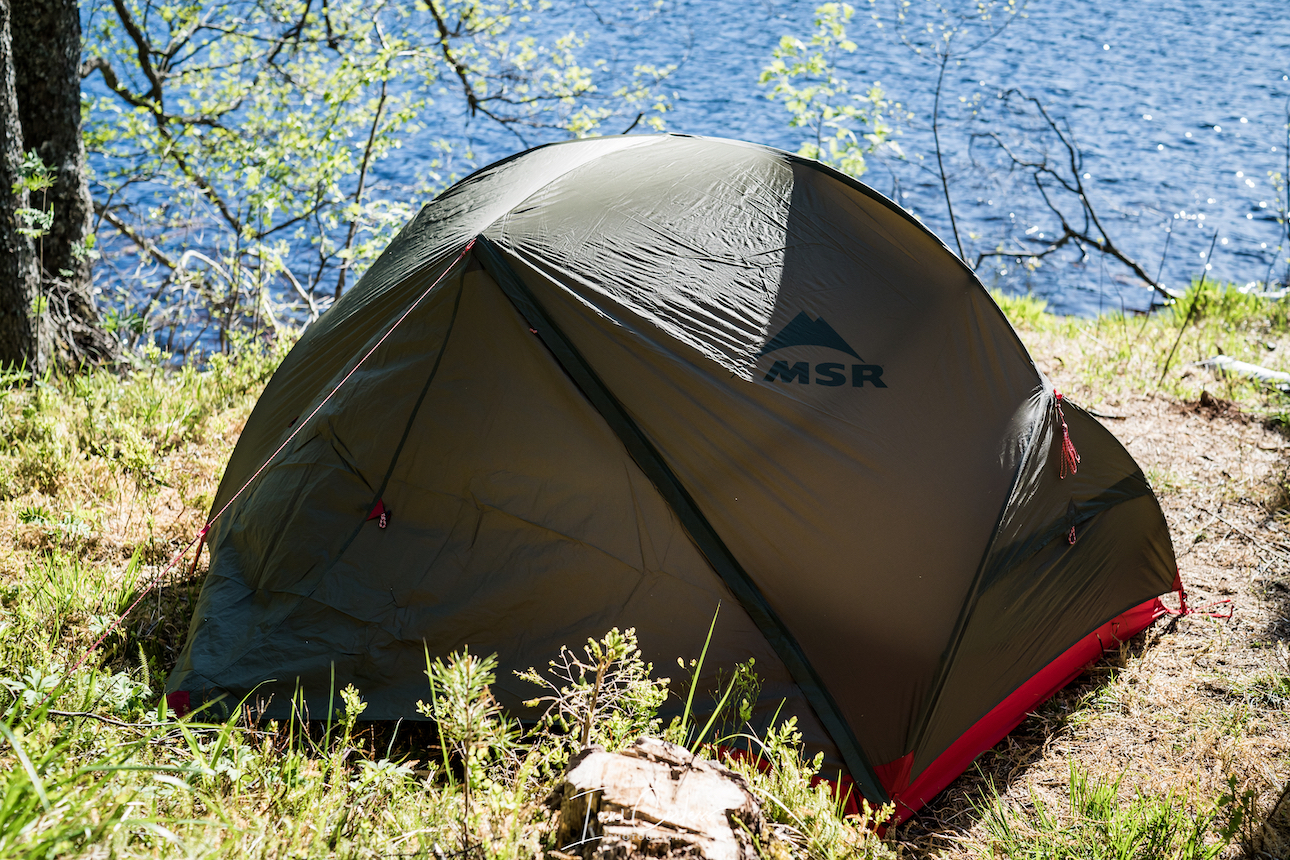
My go to tent is a MSR Hubba Hubba NX tent (here) which is 1600g which is 2-person tent. It has loads of space both in width and height, it has two access doors with room to store pack, shoes and an area to cook in if required. It is free-standing, can be pitched inner or outer only. Split between 2-people, it is 800g each.
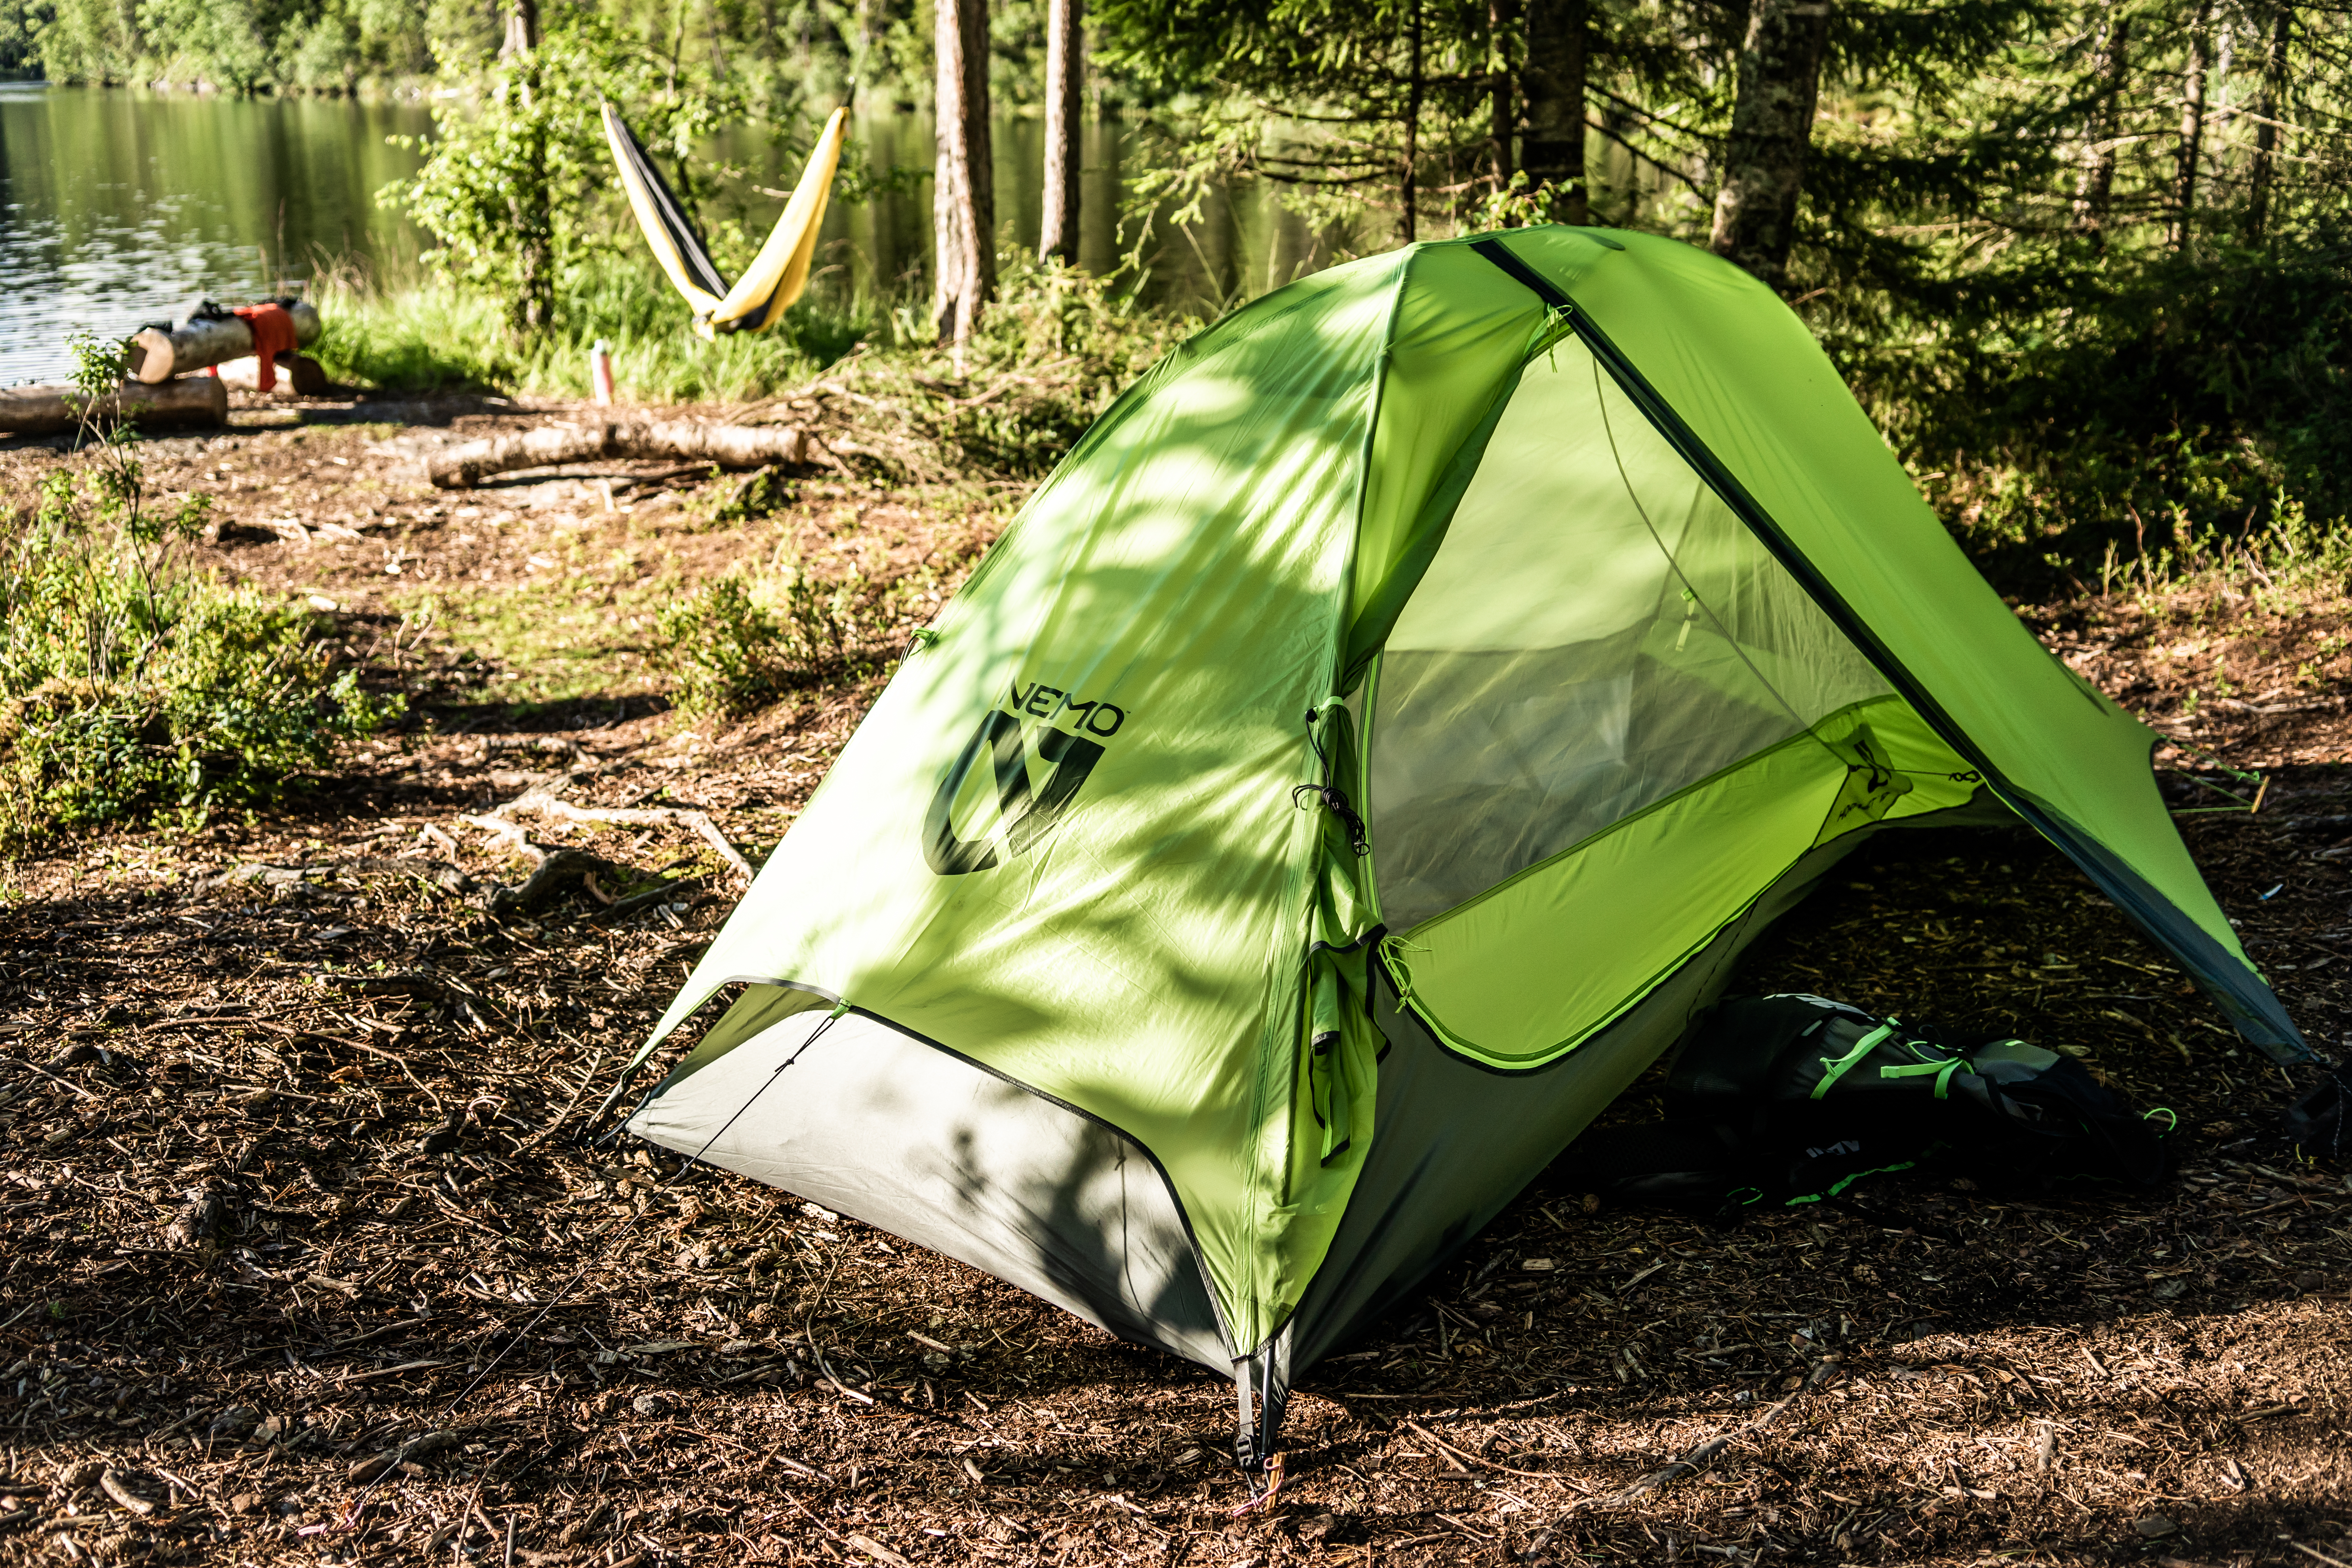
Current favourite solo tent is the Nemo Hornet 1P (review HERE) which has loads of space and comfort and all coming in at 731g.
NEMO Hornet 1P
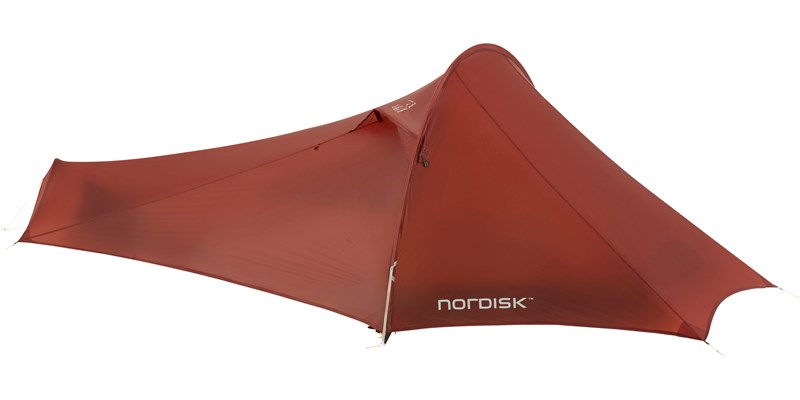
If I was solo fastpacking and wanted the lightest and smallest possible, I would change the tent to a Nordisk Lofoten 1 LW (here) which is arguably the lightest and smallest packing tent in the world (still with comfort and stability) weighing just 490g and is the size of a bottle of water, 11cm x 22cm. It’s a two-layer tent which still provides an area for gear storage, with a height of just 70cm, sitting space is compromised. However, if fast, light are priorities, this takes some beating. Also, you can use the 2-man inner inside the same fly-sheet, with obviously less storage option.
Do you need a 12-week and/ or 24-week Multi-Day Training Plan perfect for a multi-day adventure or a race like Marathon des Sables? They are designed to provide you with a structured weekly plan culminating in a target event.
View a sample week HEREfrom the 12-week plan. Purchase HERE. (£14.50 pw)
View a sample week HERE from the 24-week plan. Purchase HERE. (£12 pw)
Wearing:
I don’t add the clothes I am wearing to my overall fastpack weight, but it is worth looking at options and variables. I was surprised when comparing run shorts how weights varied. For example, I had shorts with an inner (like cycling shorts,) they weighed 157g, considerably heavier than my RAB Skyline.
RAB Skyline shorts – 96g
RAB Skyline Tee – 84g
Smartwool socks – 45g
Hat – 45g
Glasses – 30g
Buff – 36g
Scott Supertrac RC2 shoes – 290g
Pack:
inov-8 25ltr fastpack 619g – This is actually a prototype pack, specifically made for athletes on the inov-8 team. It’s a really great pack, one of the best I have used. It has a vest like fit, waist belt, comfortable strapping and loads of extra mesh pockets that make it a joy to use. I have recently encouraged inov-8 to bring this to production.
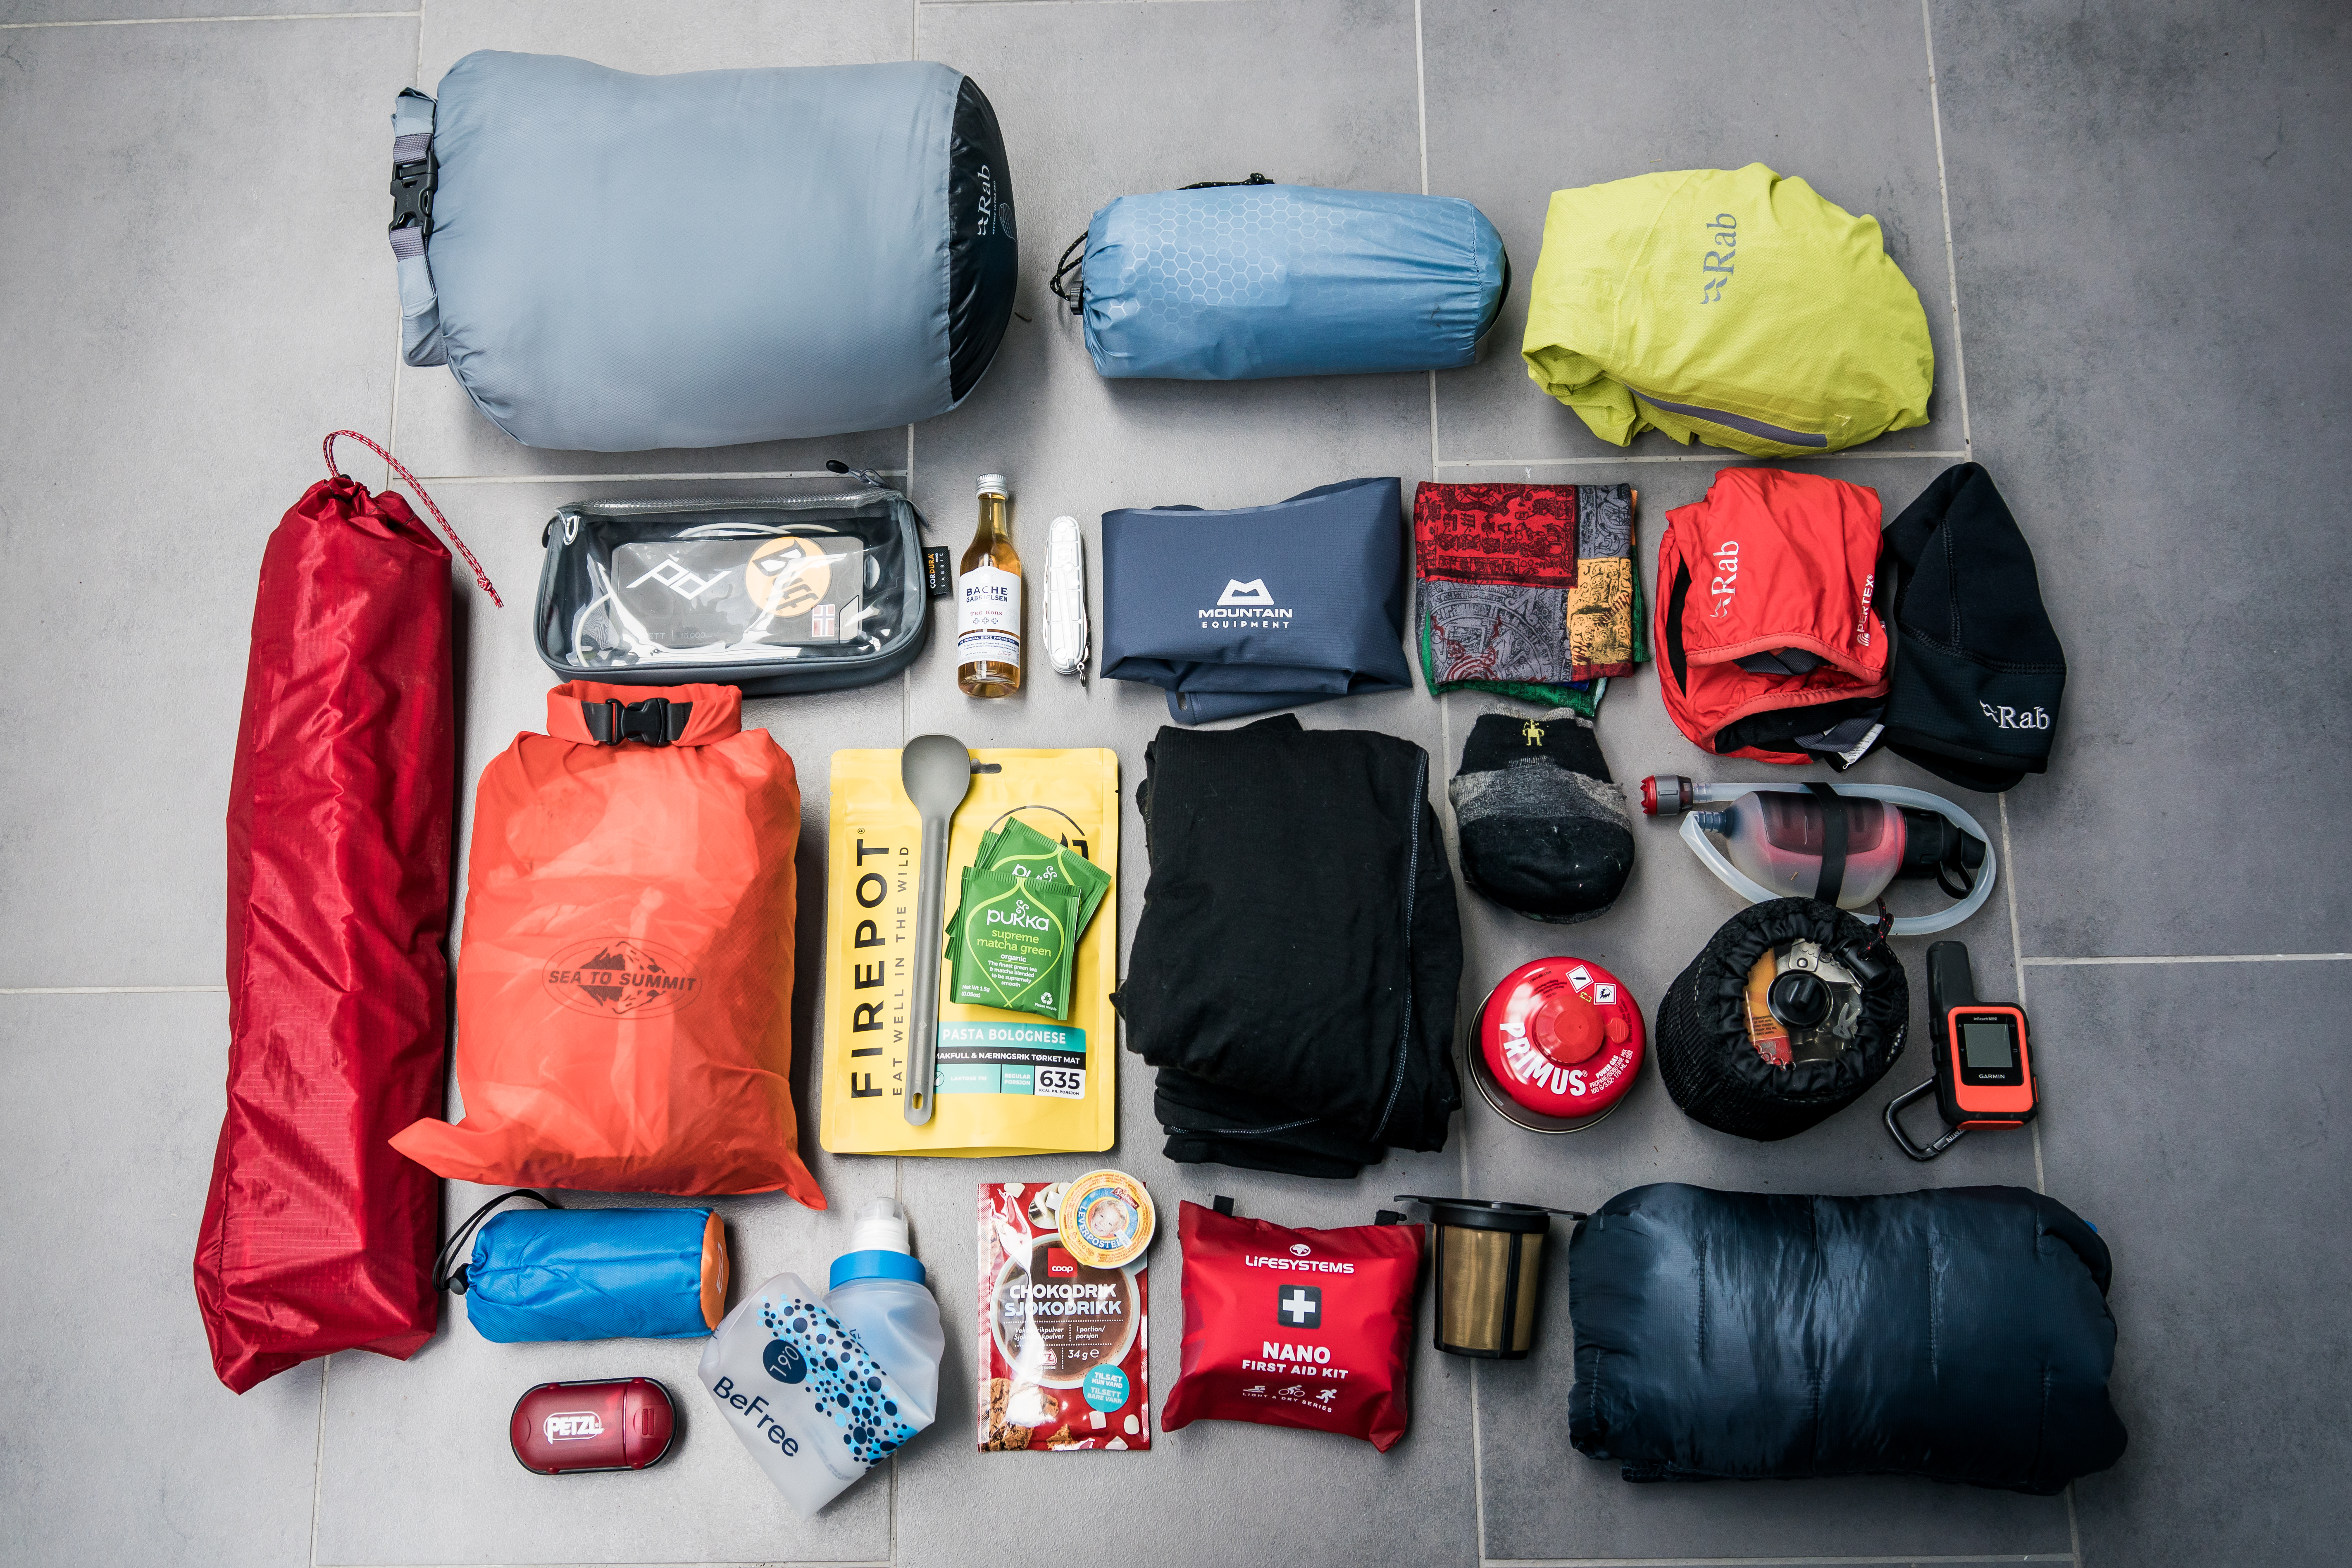
Pack Contents:
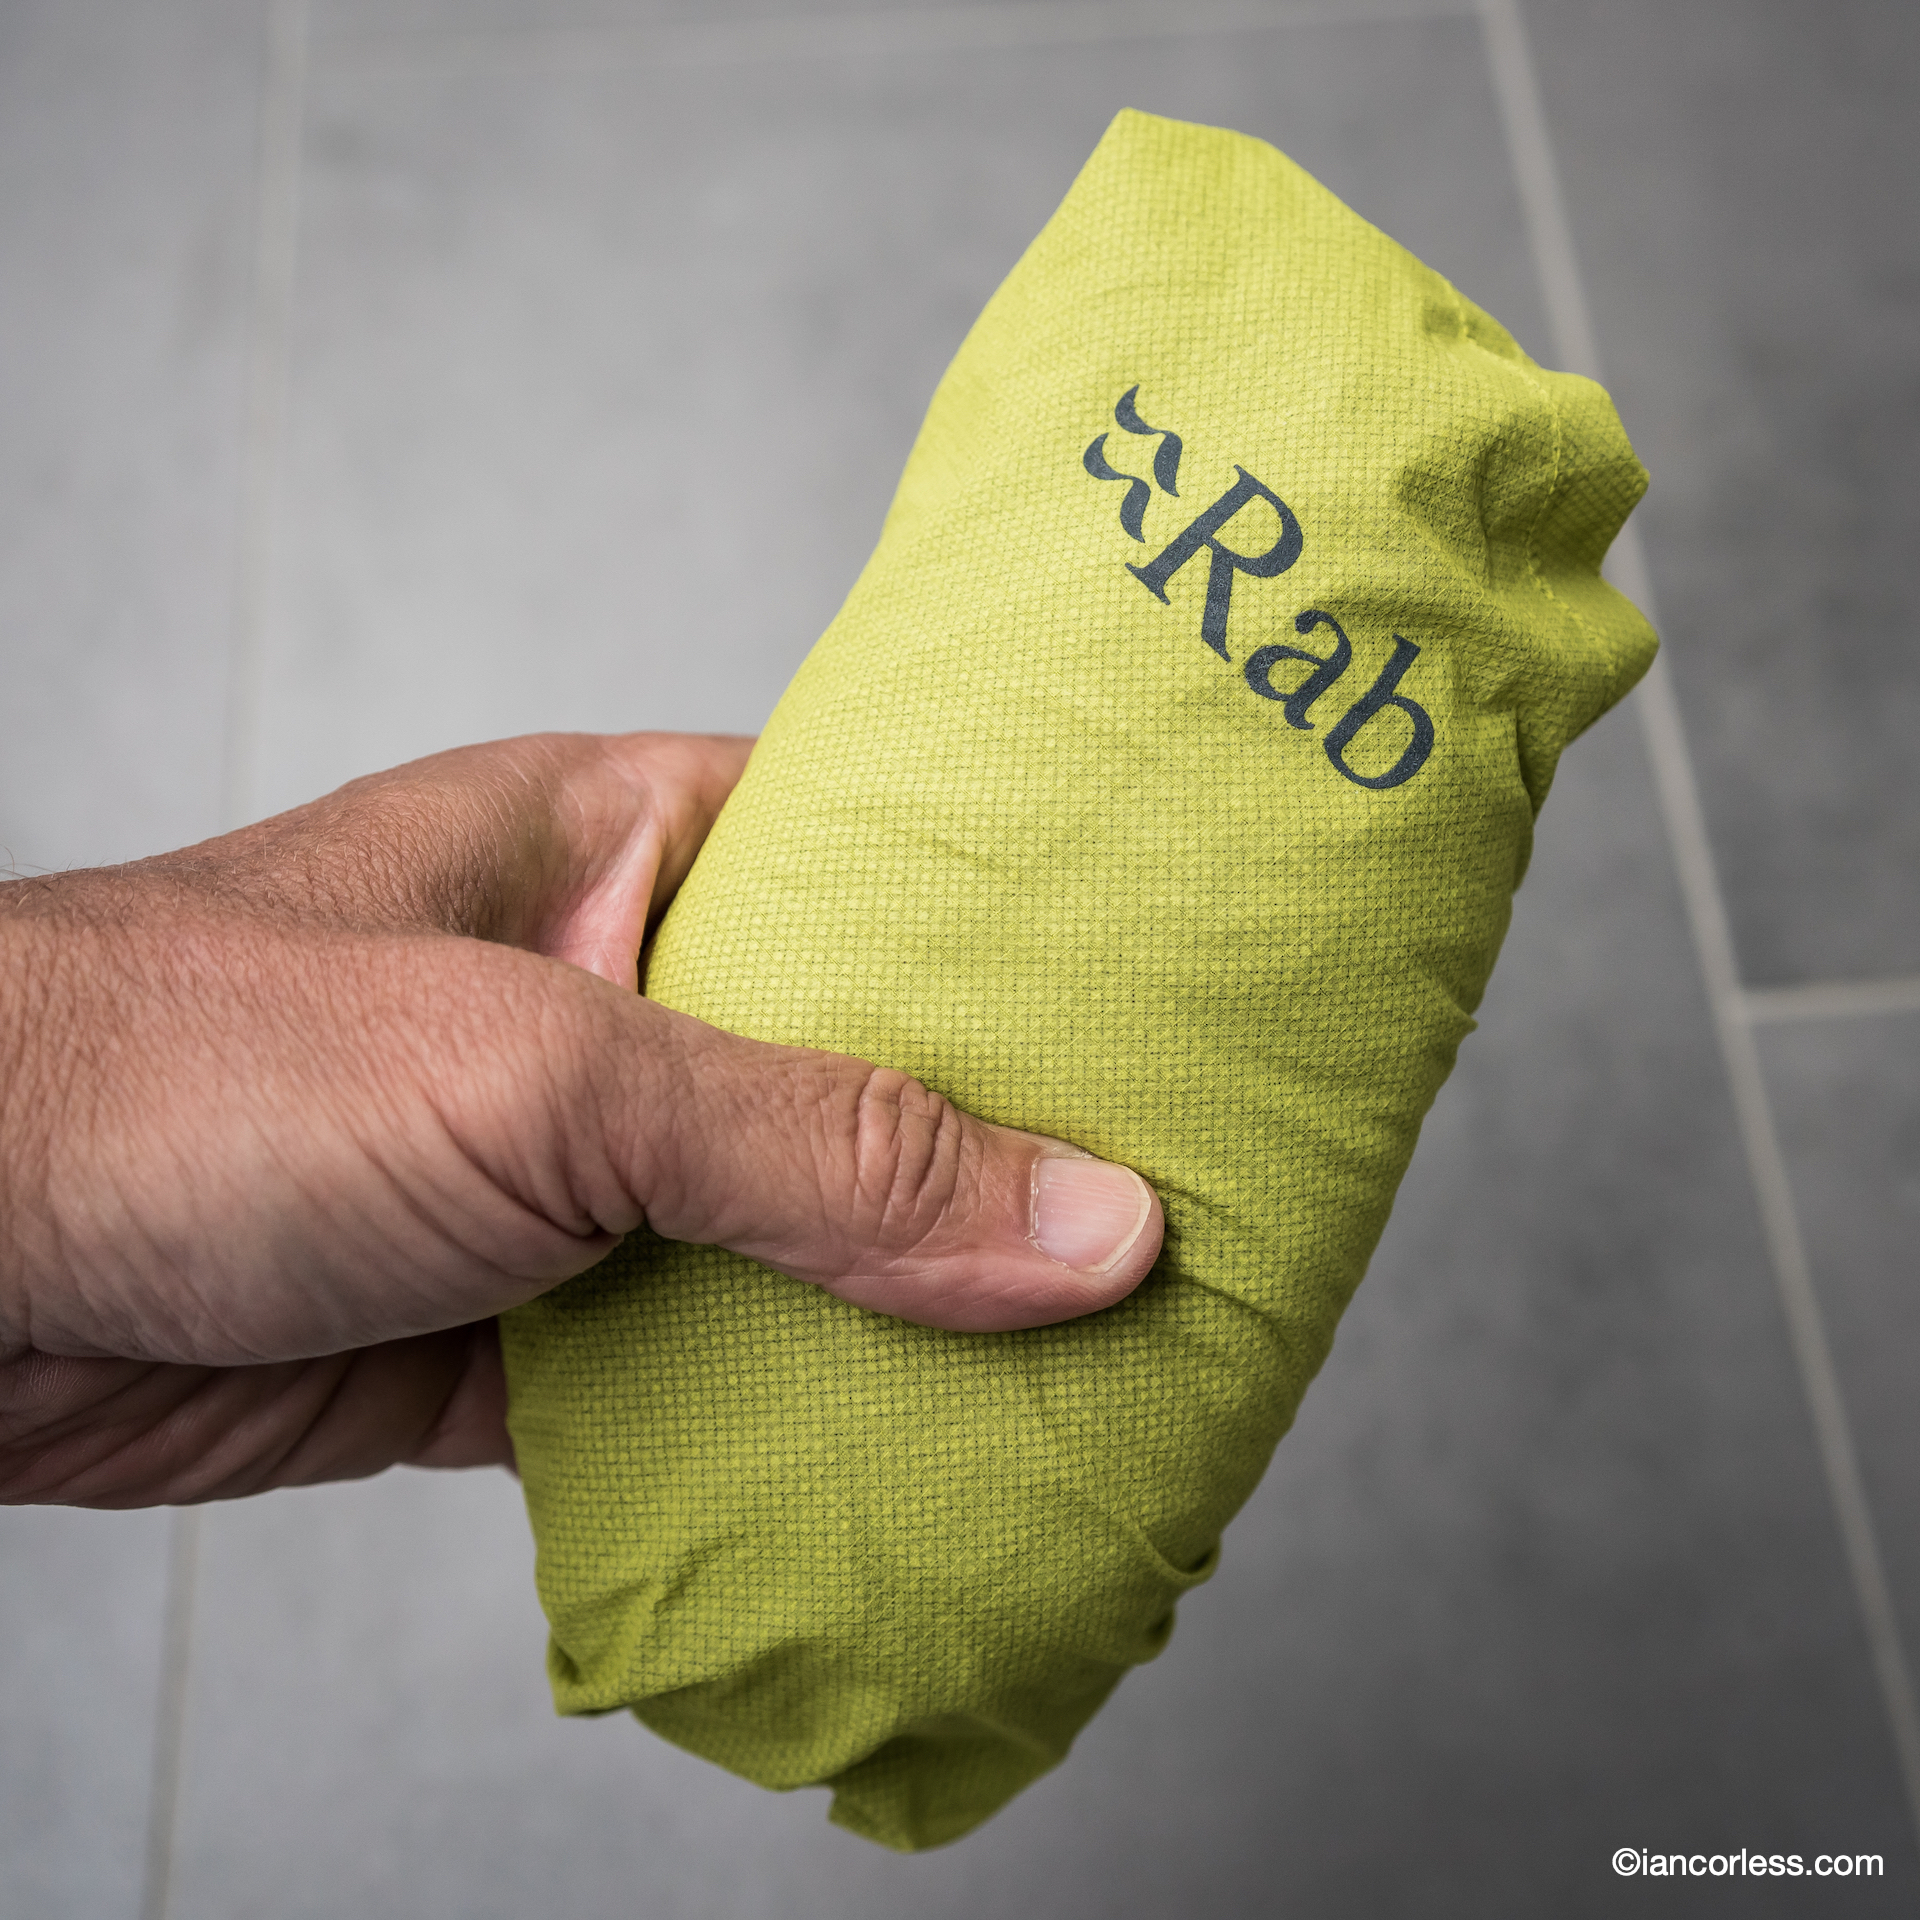
Rab Phantom Pull-on 90g – One of the lightest and smallest waterproof shells I have used.
RAB Phantom
Patagonia Micro Puff Vest (synthetic with ripstop Pertex Quantum) 162g – Synthetic filling but weight and small packing just like down. The perfect compromise. This warms the body and core and saves weight over a jacket. Obviously, you need to asses conditions, a jacket may be better. If so, I use a RAB Kaon which weighs 260g.
Patagonia Micro Puff Vest
RAB Hat 34g
RAB Gloves 60g
Icebreaker 175 leggings 140g – Merino providing warmth on the trail (if required) and warmth when stopping for the day and sleeping.
Icebreaker 175 top 150g
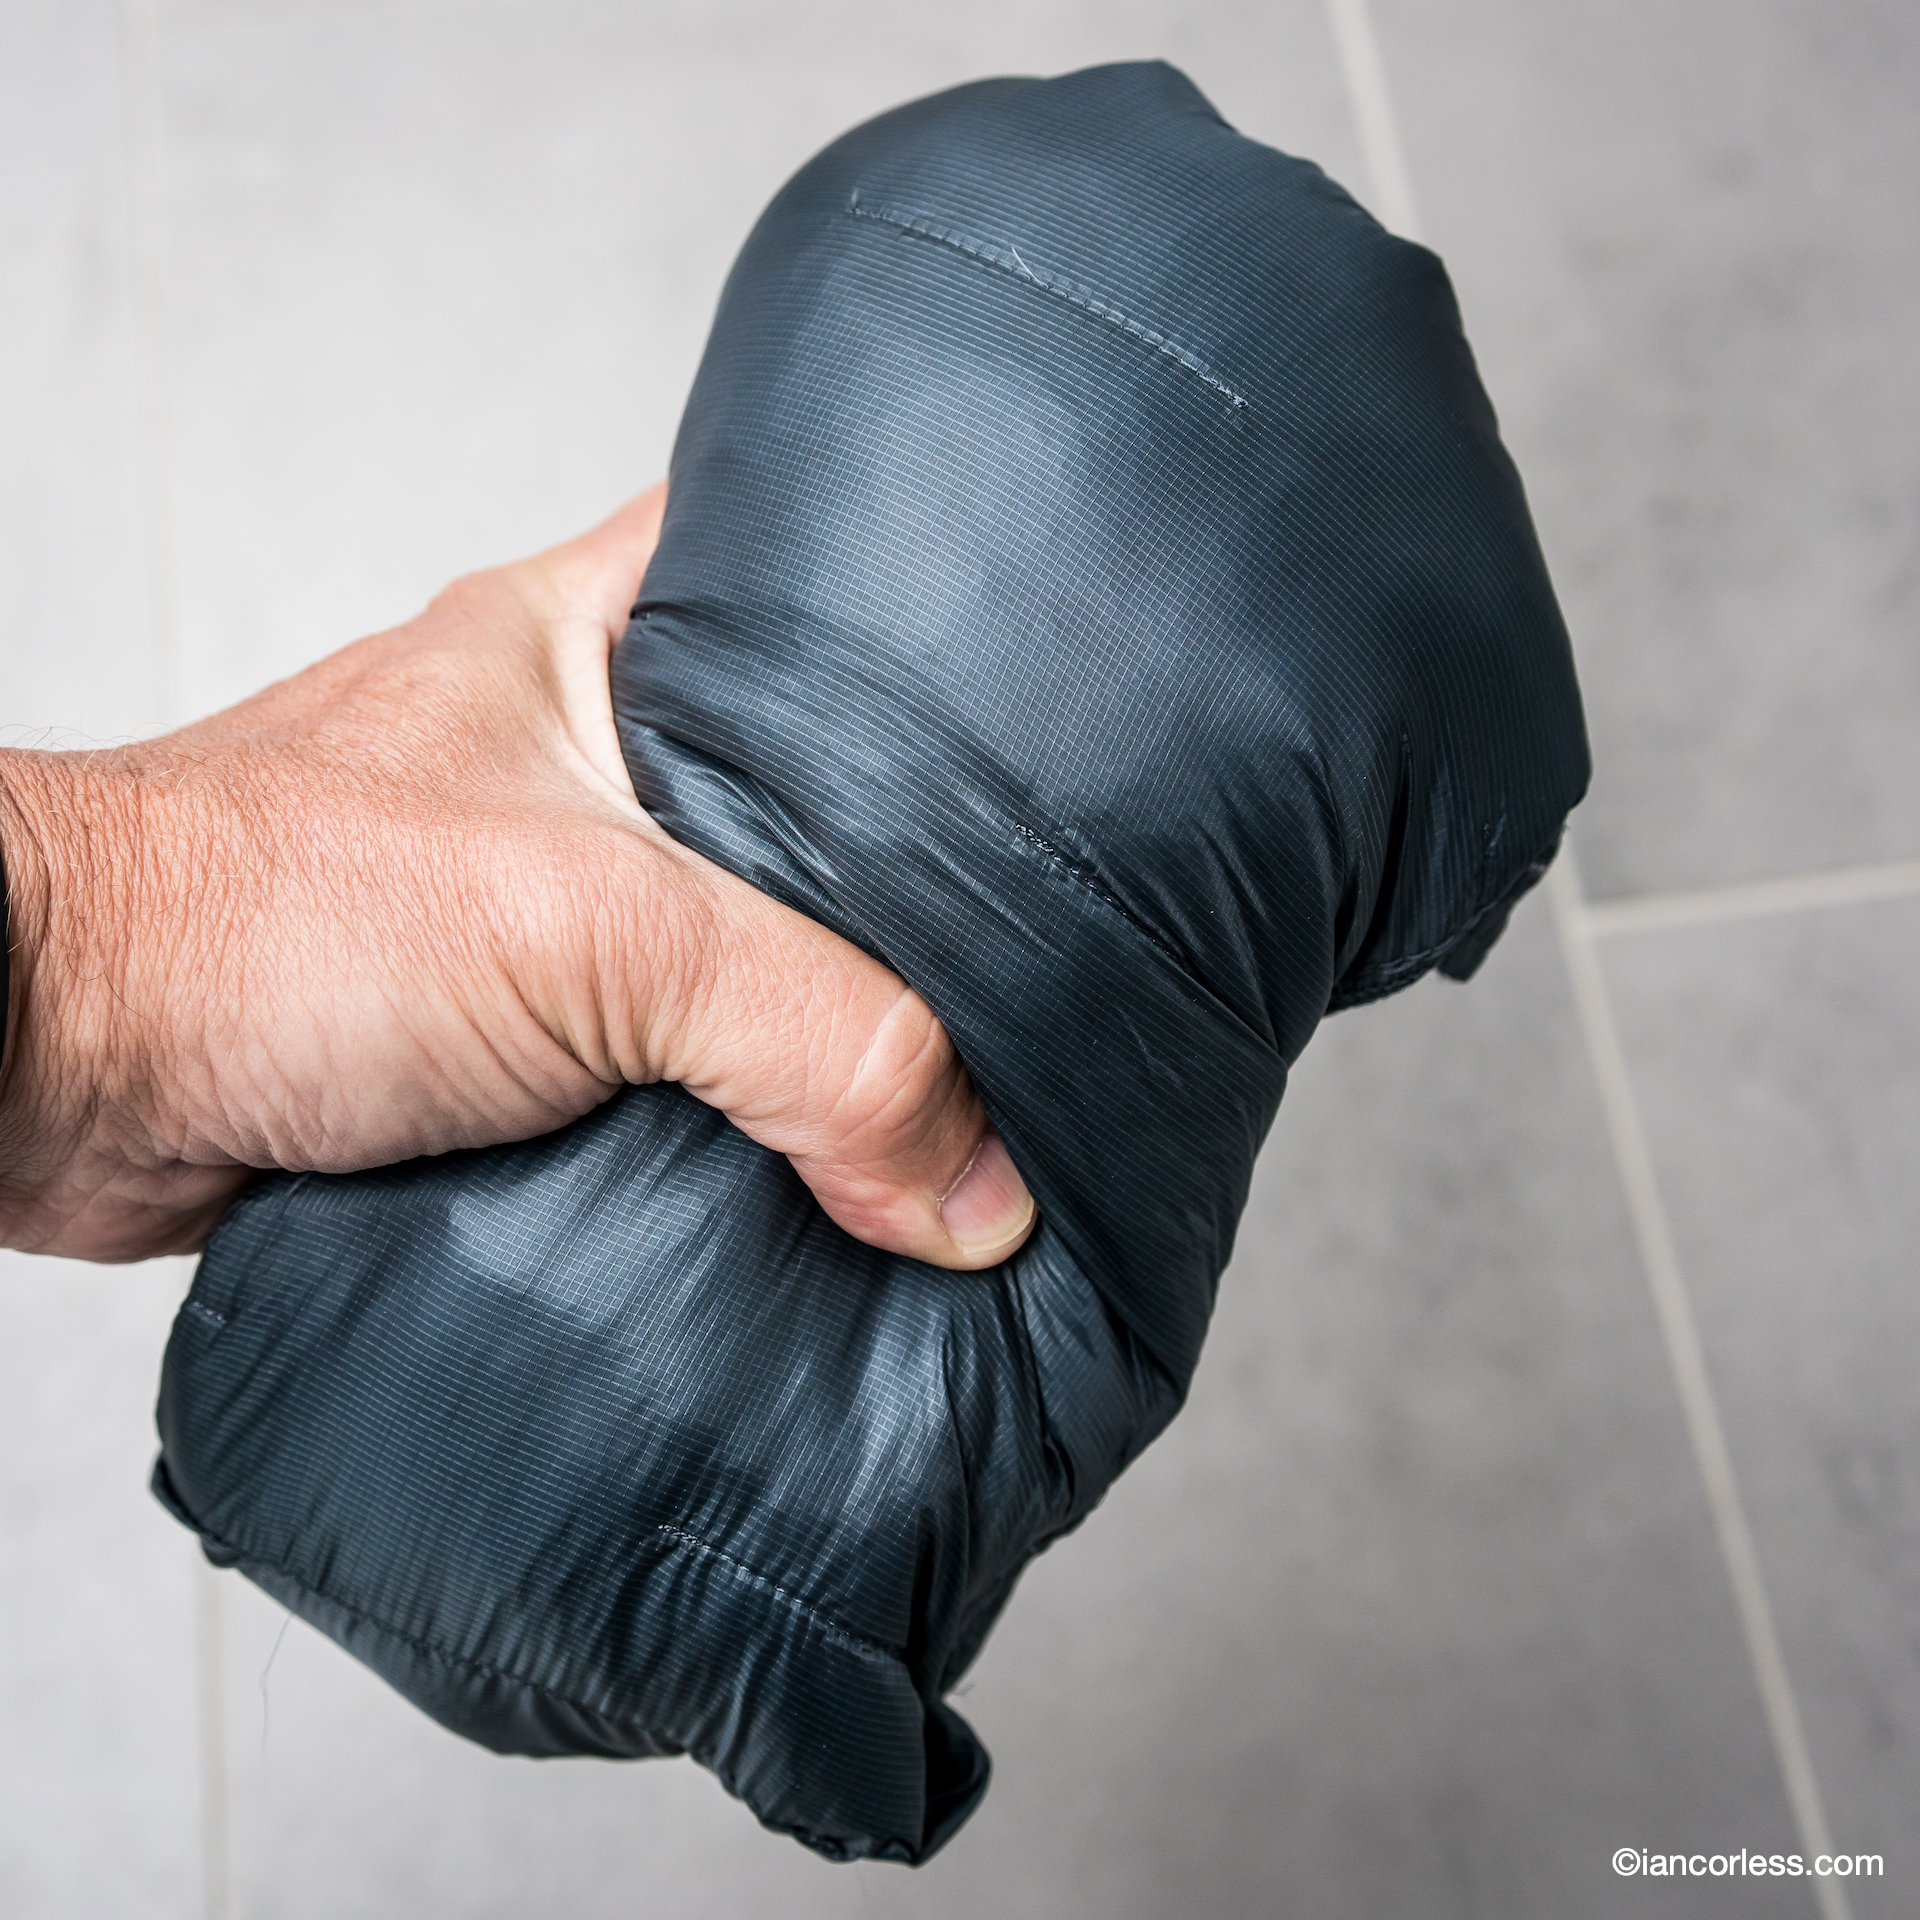
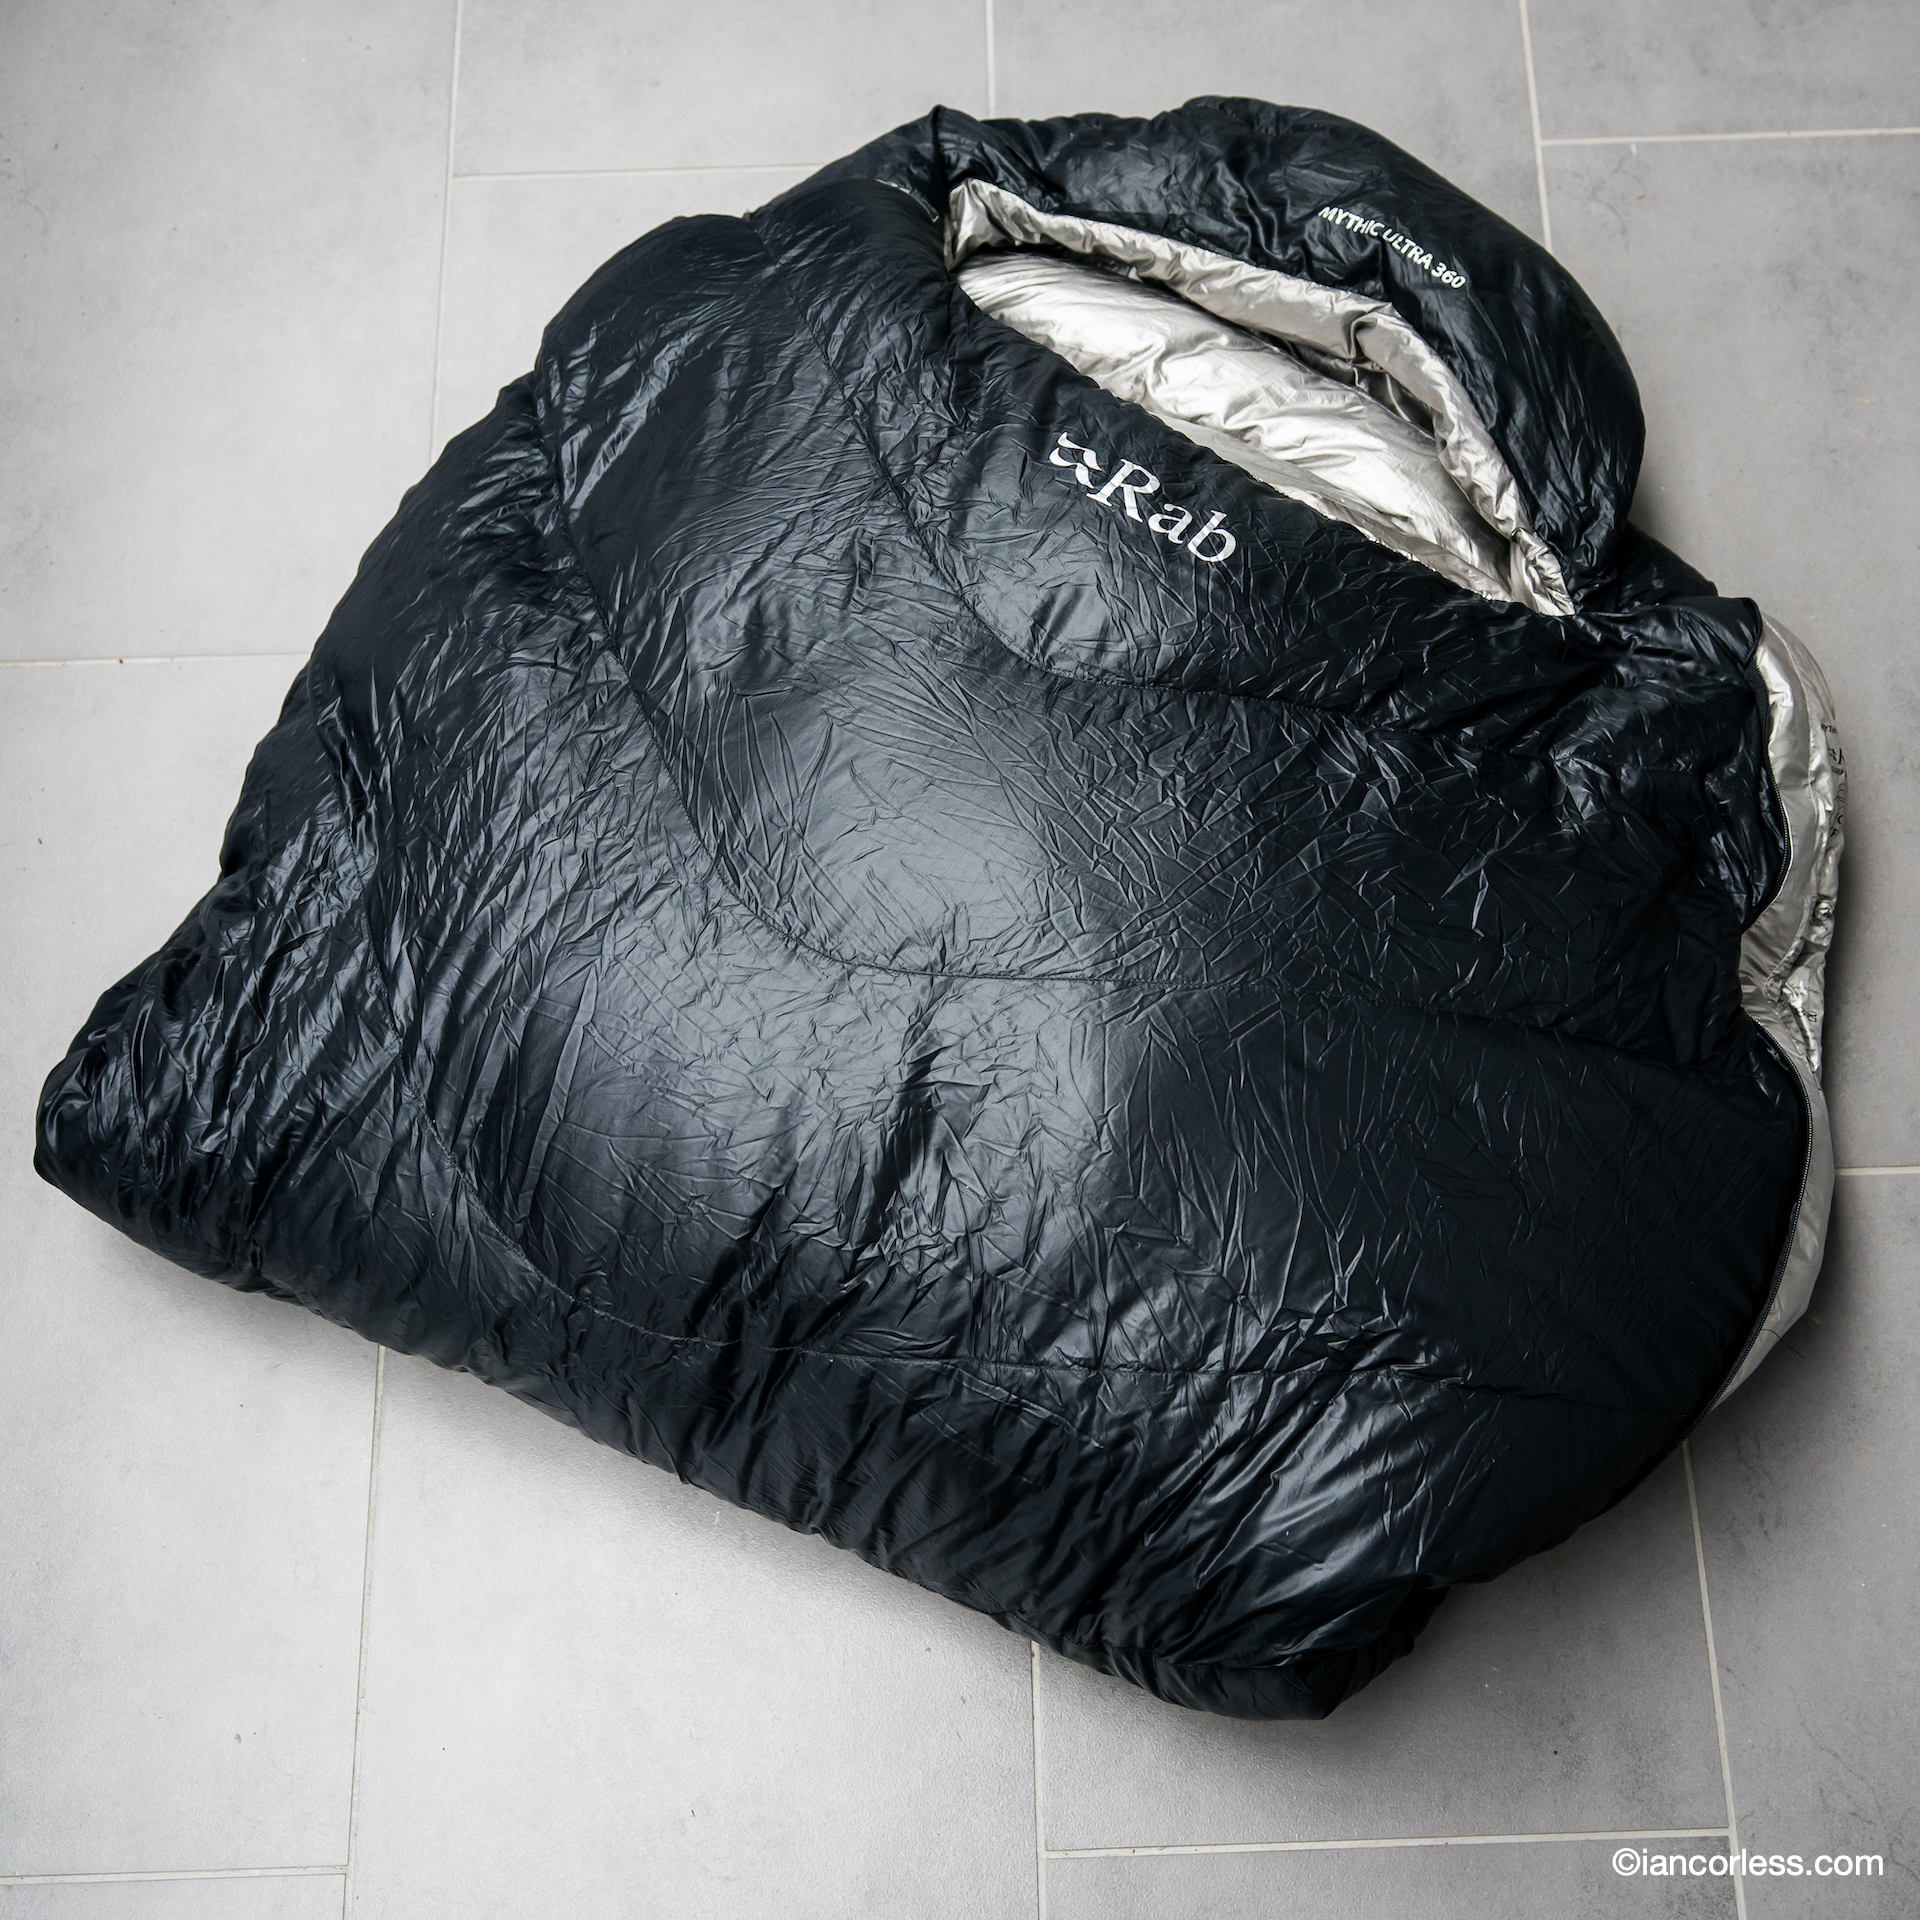
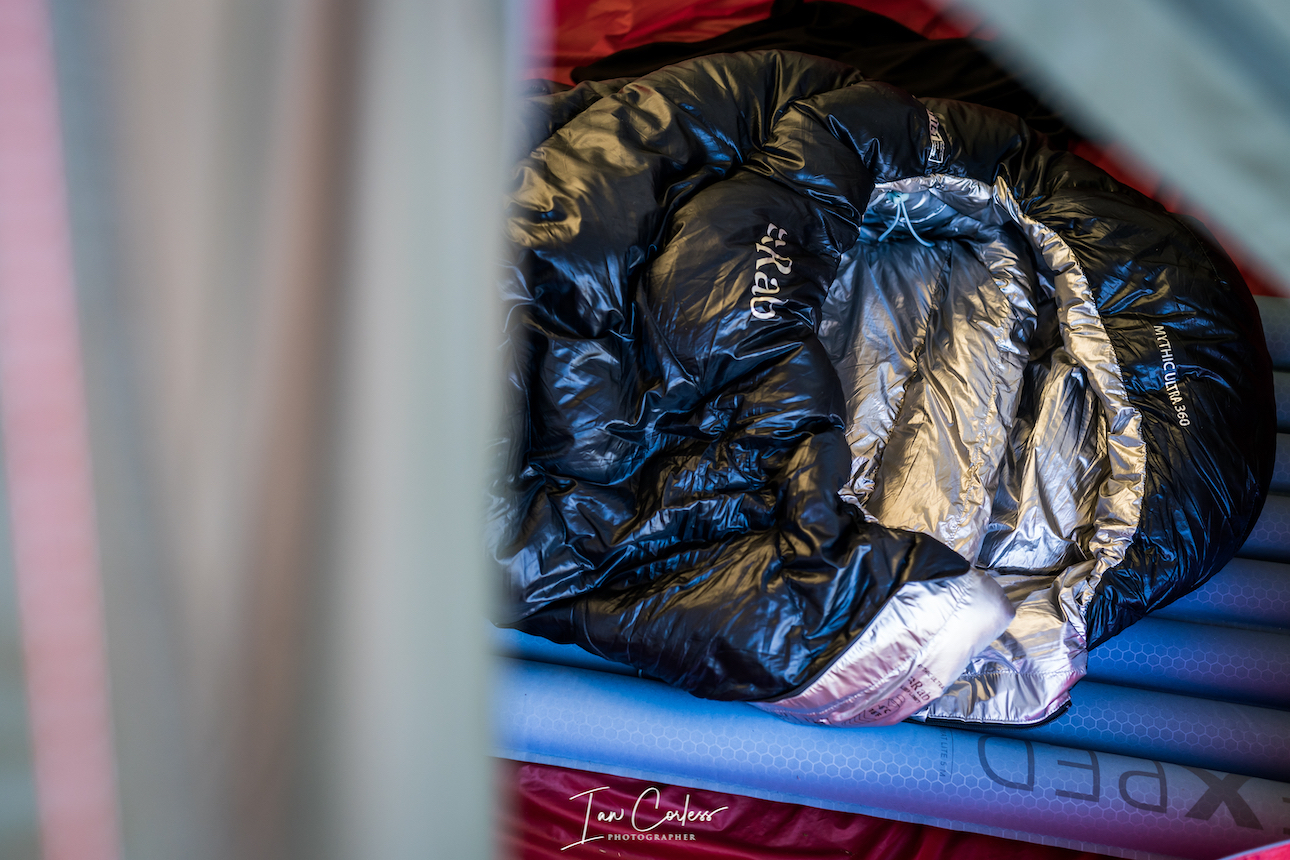
RAB Mythic Ultra 360 sleeping bag 606g – State of the art sleeping bag with groundbreaking technology. Two versions are available, and this is the warmer one. The Mythic Ultra 180 provides a saving of 200g (weight 400g) and is perfect for warmer weather fastpack and/ or warm sleepers.
RAB Mythic Ultra 360 sleeping bag
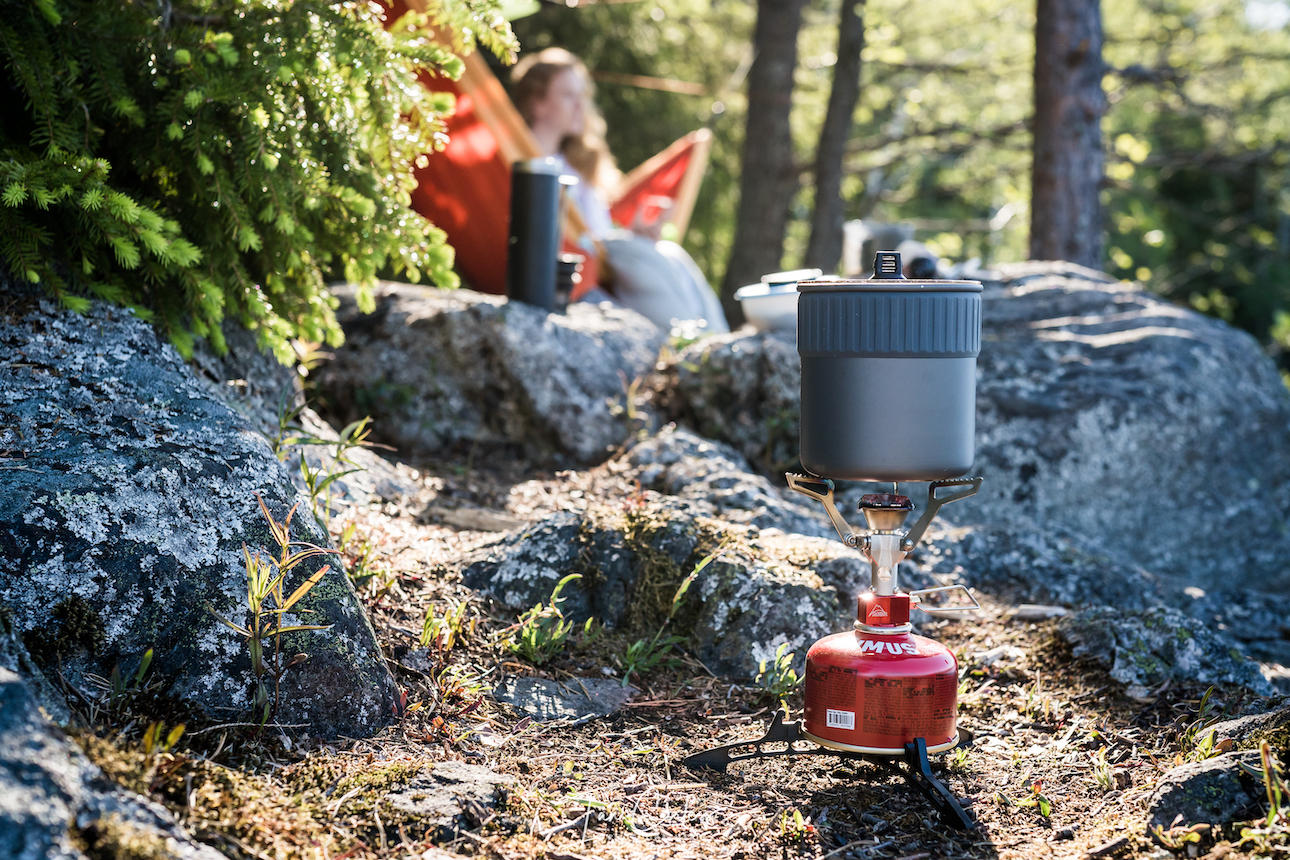
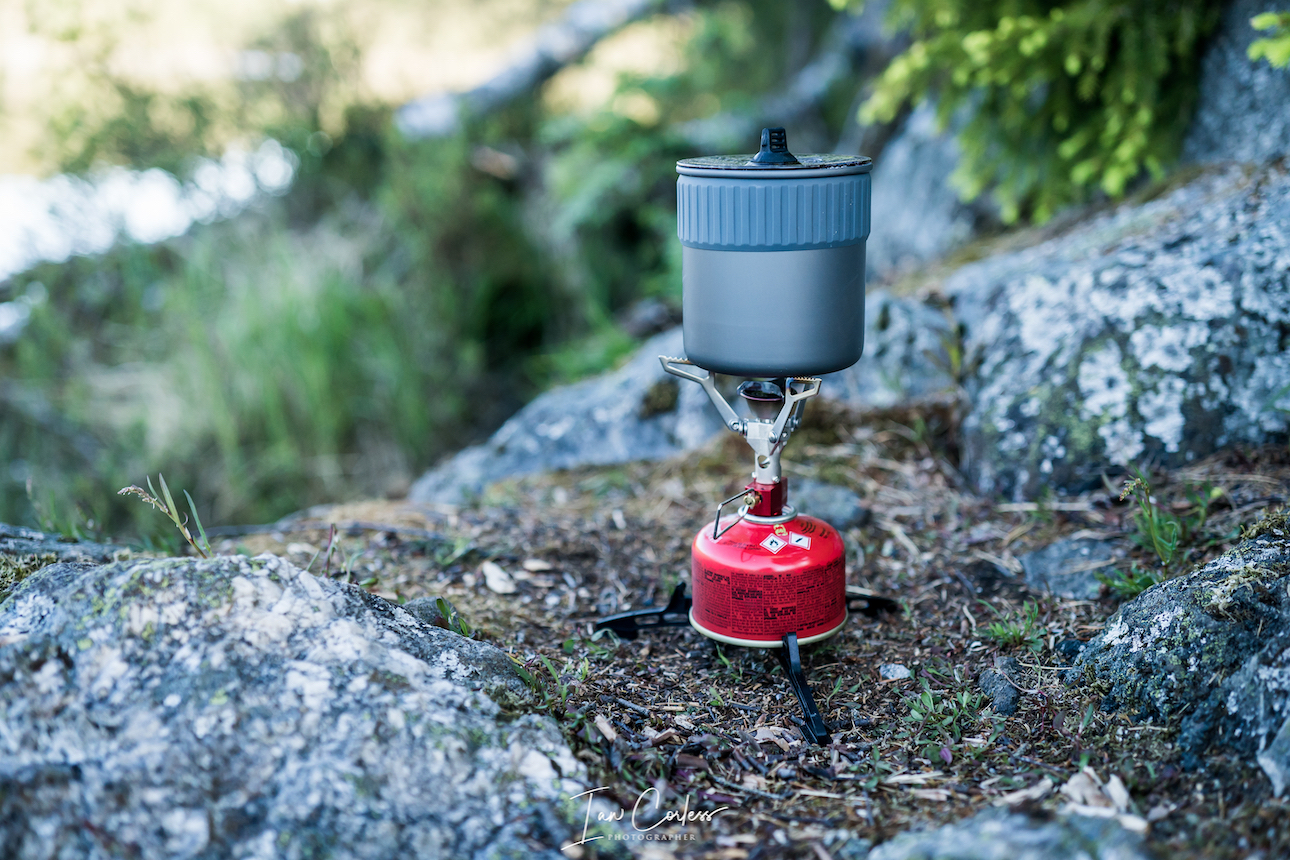
MSR Pocket Rocket Stove Kit 280g – Small, compact, lightweight and the gas canister can be stored inside. Perfect minimalist solution.
MSR Pocket Rocket Stove Kit
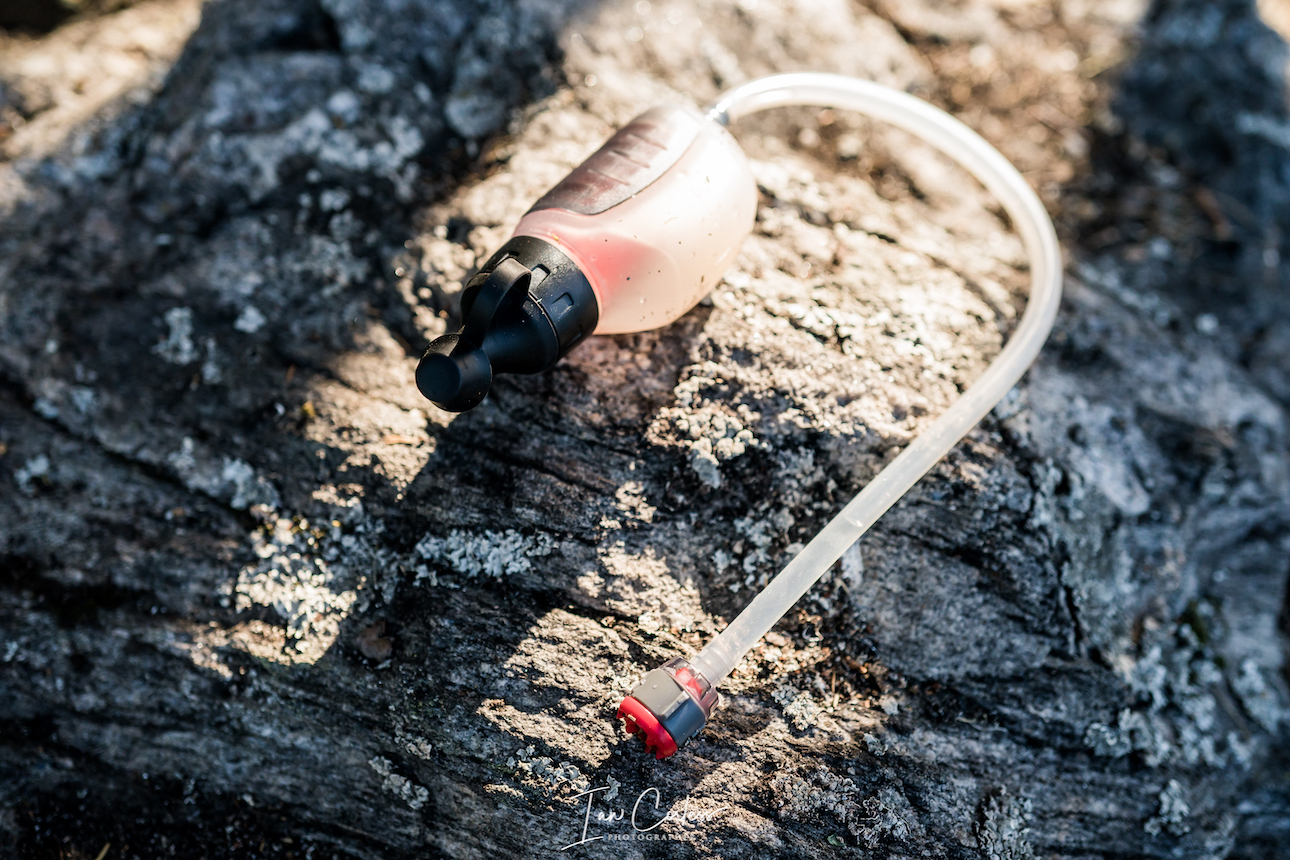
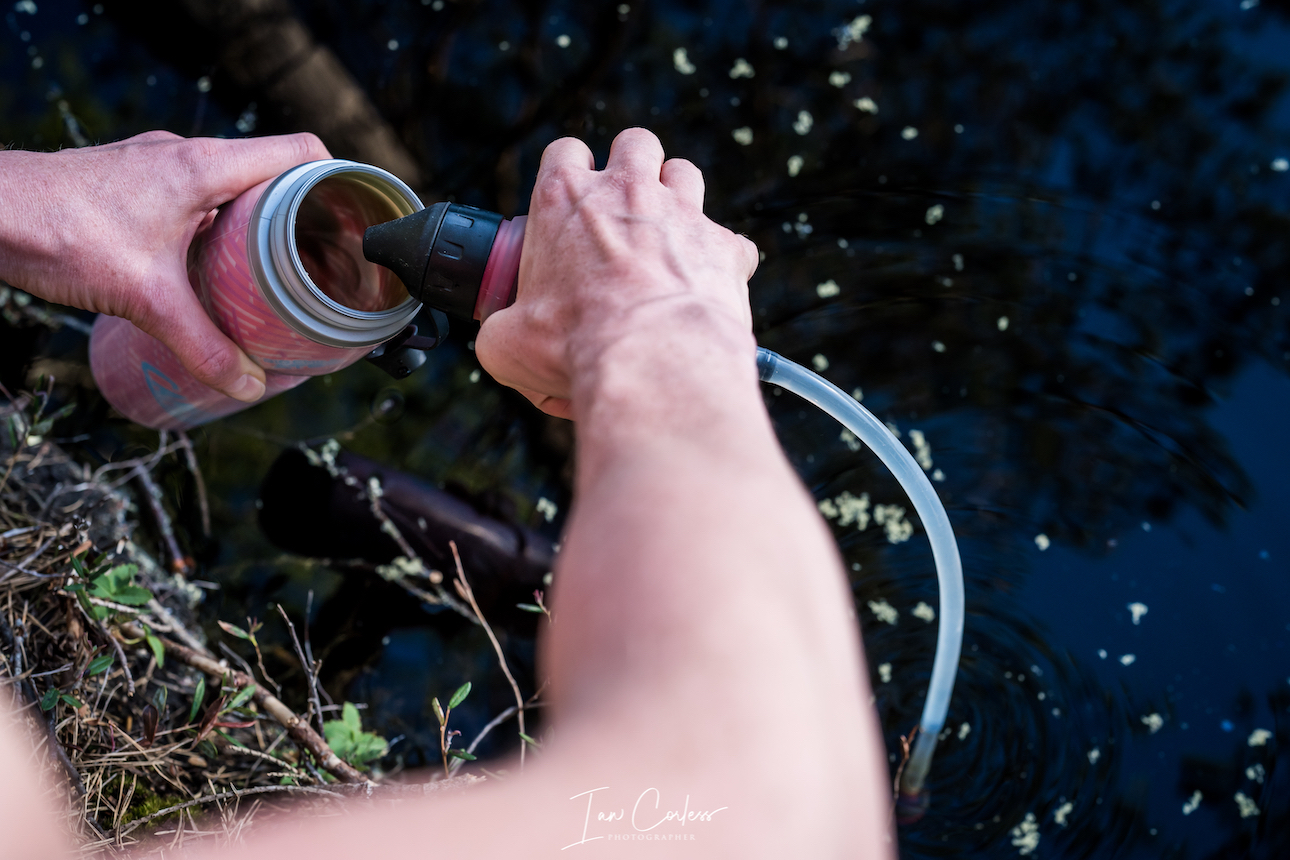
MSR Trailshot 140g – A small and lightweight water filter system that guarantees water that one can drink and cook with.
MSR Trailshot
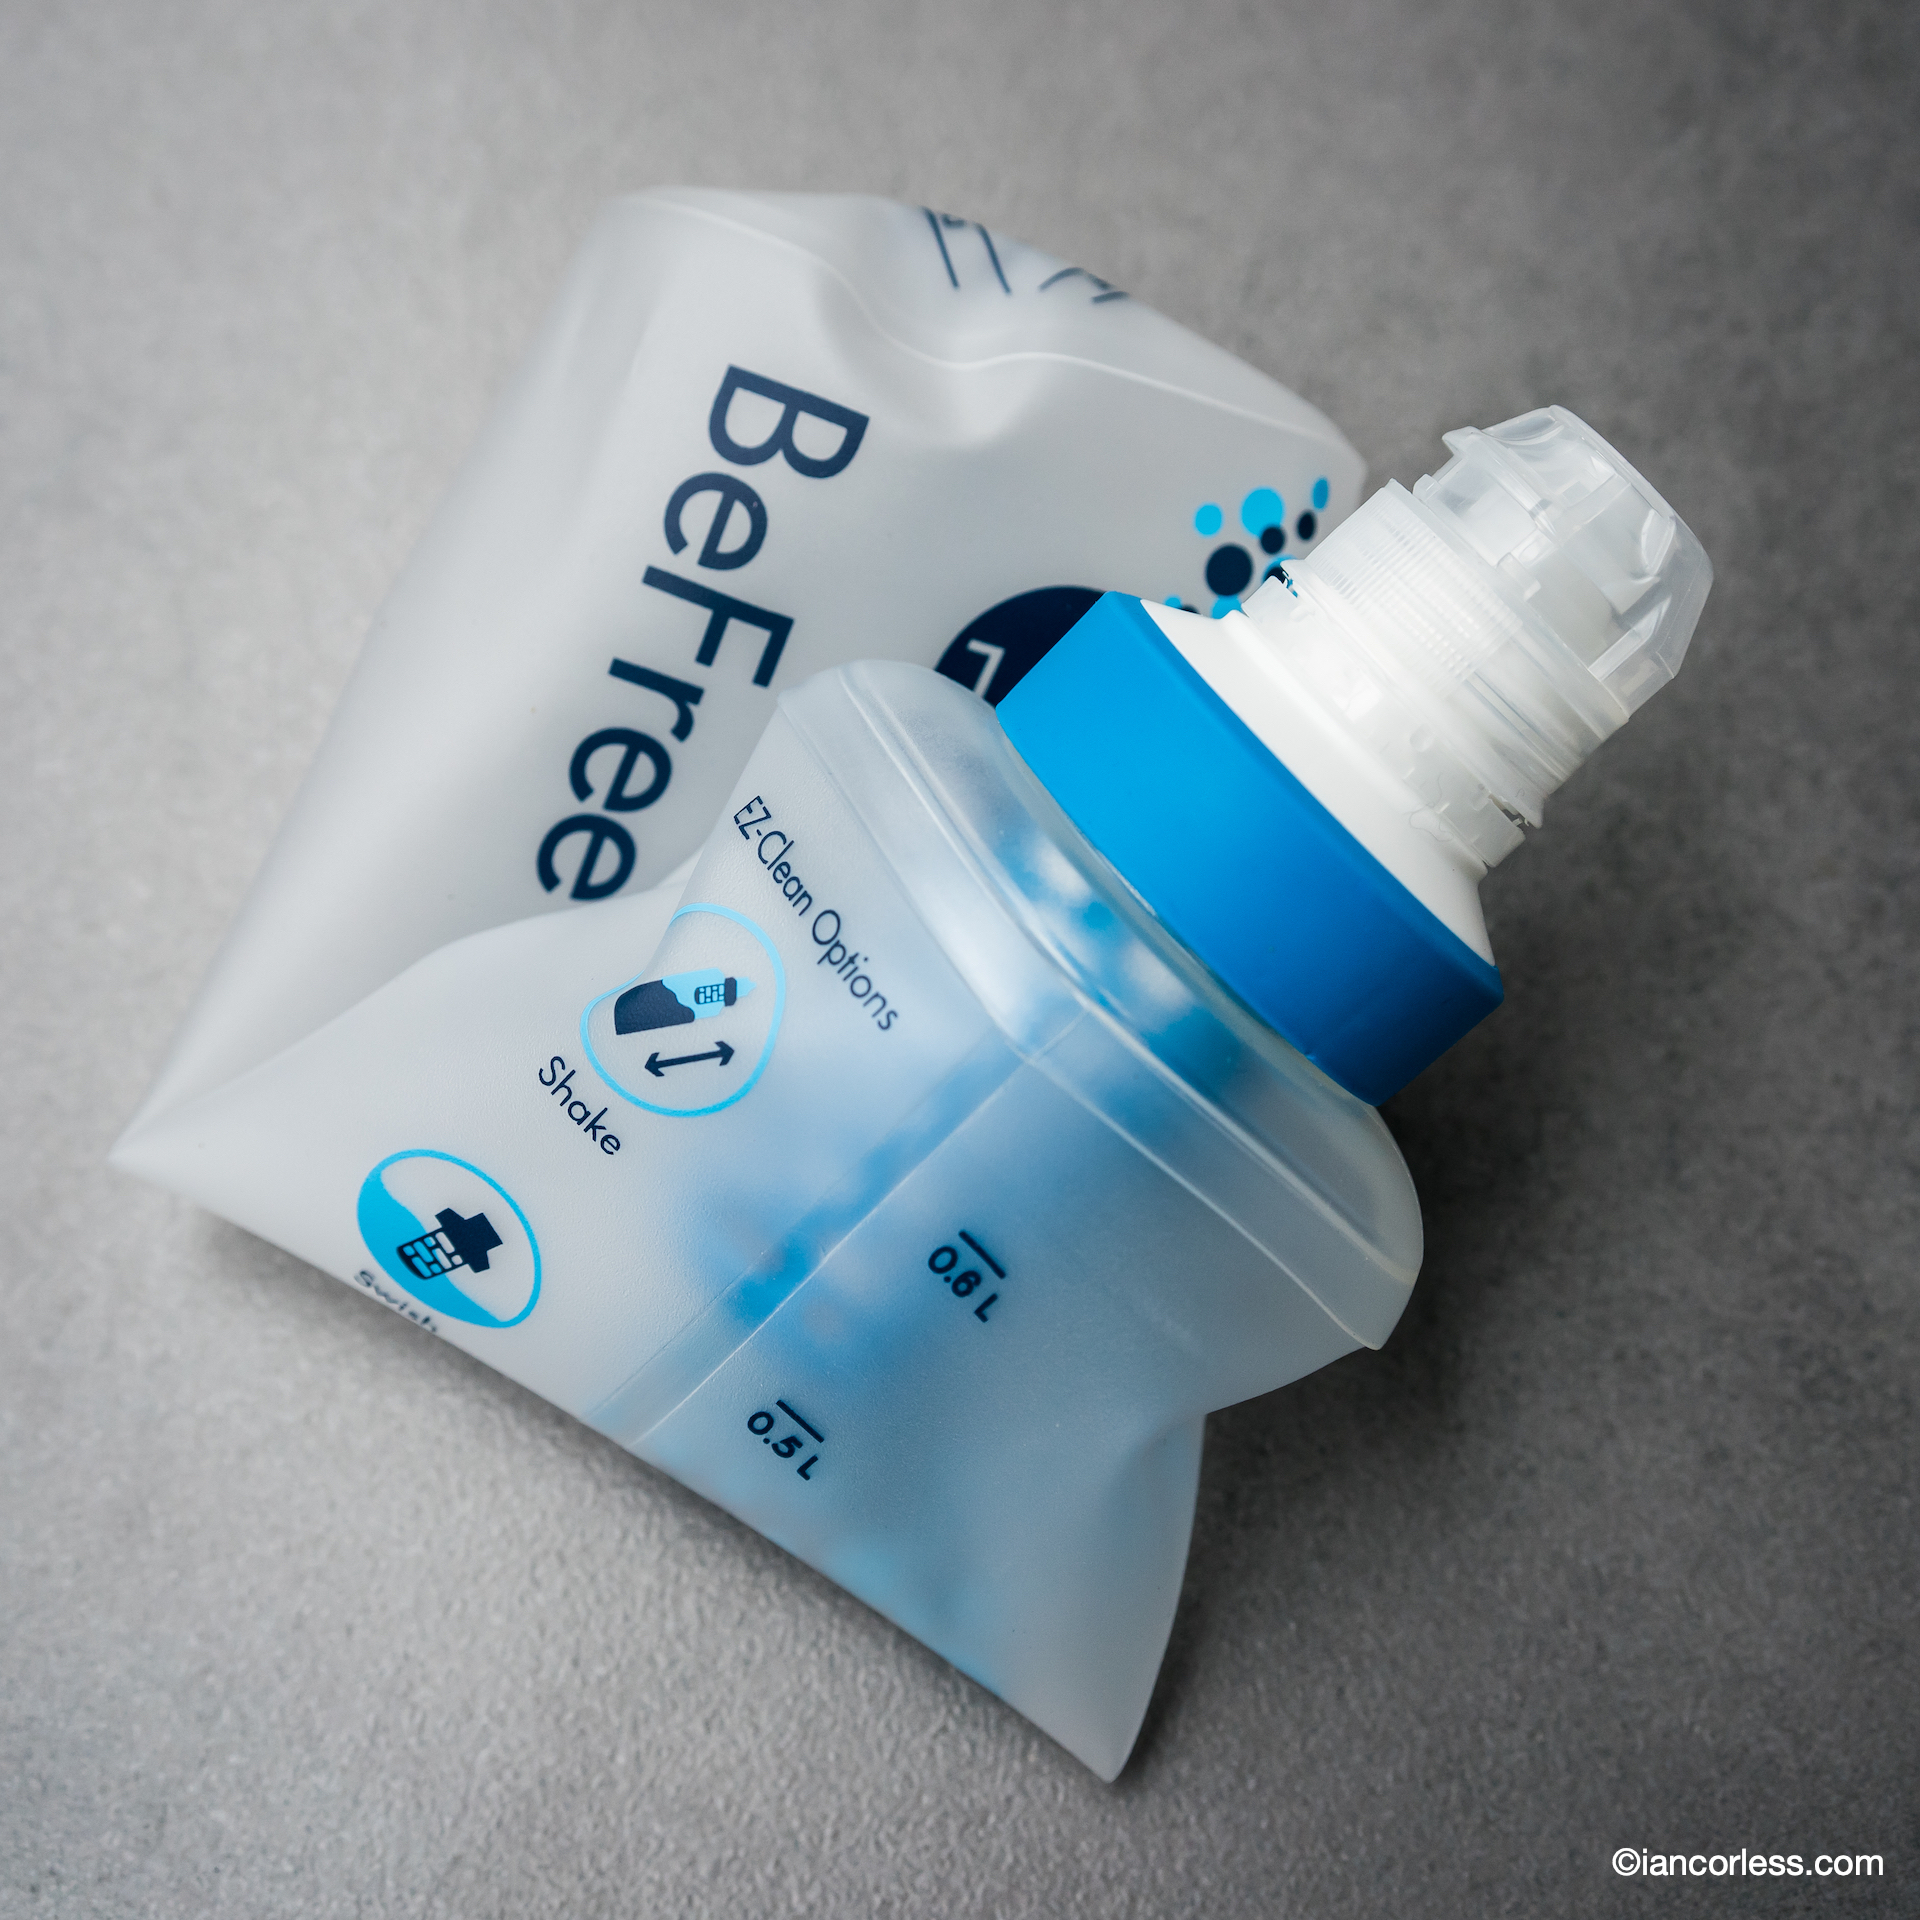
Katadyn BeFree Water Filter bottle (0.6L) 59g – This is a 600ml soft-flask with water filter inside. It allows for minimal weight and the ability to get water anywhere on the trail and drink on the go.
Katadyn BeFree Water Filter bottle
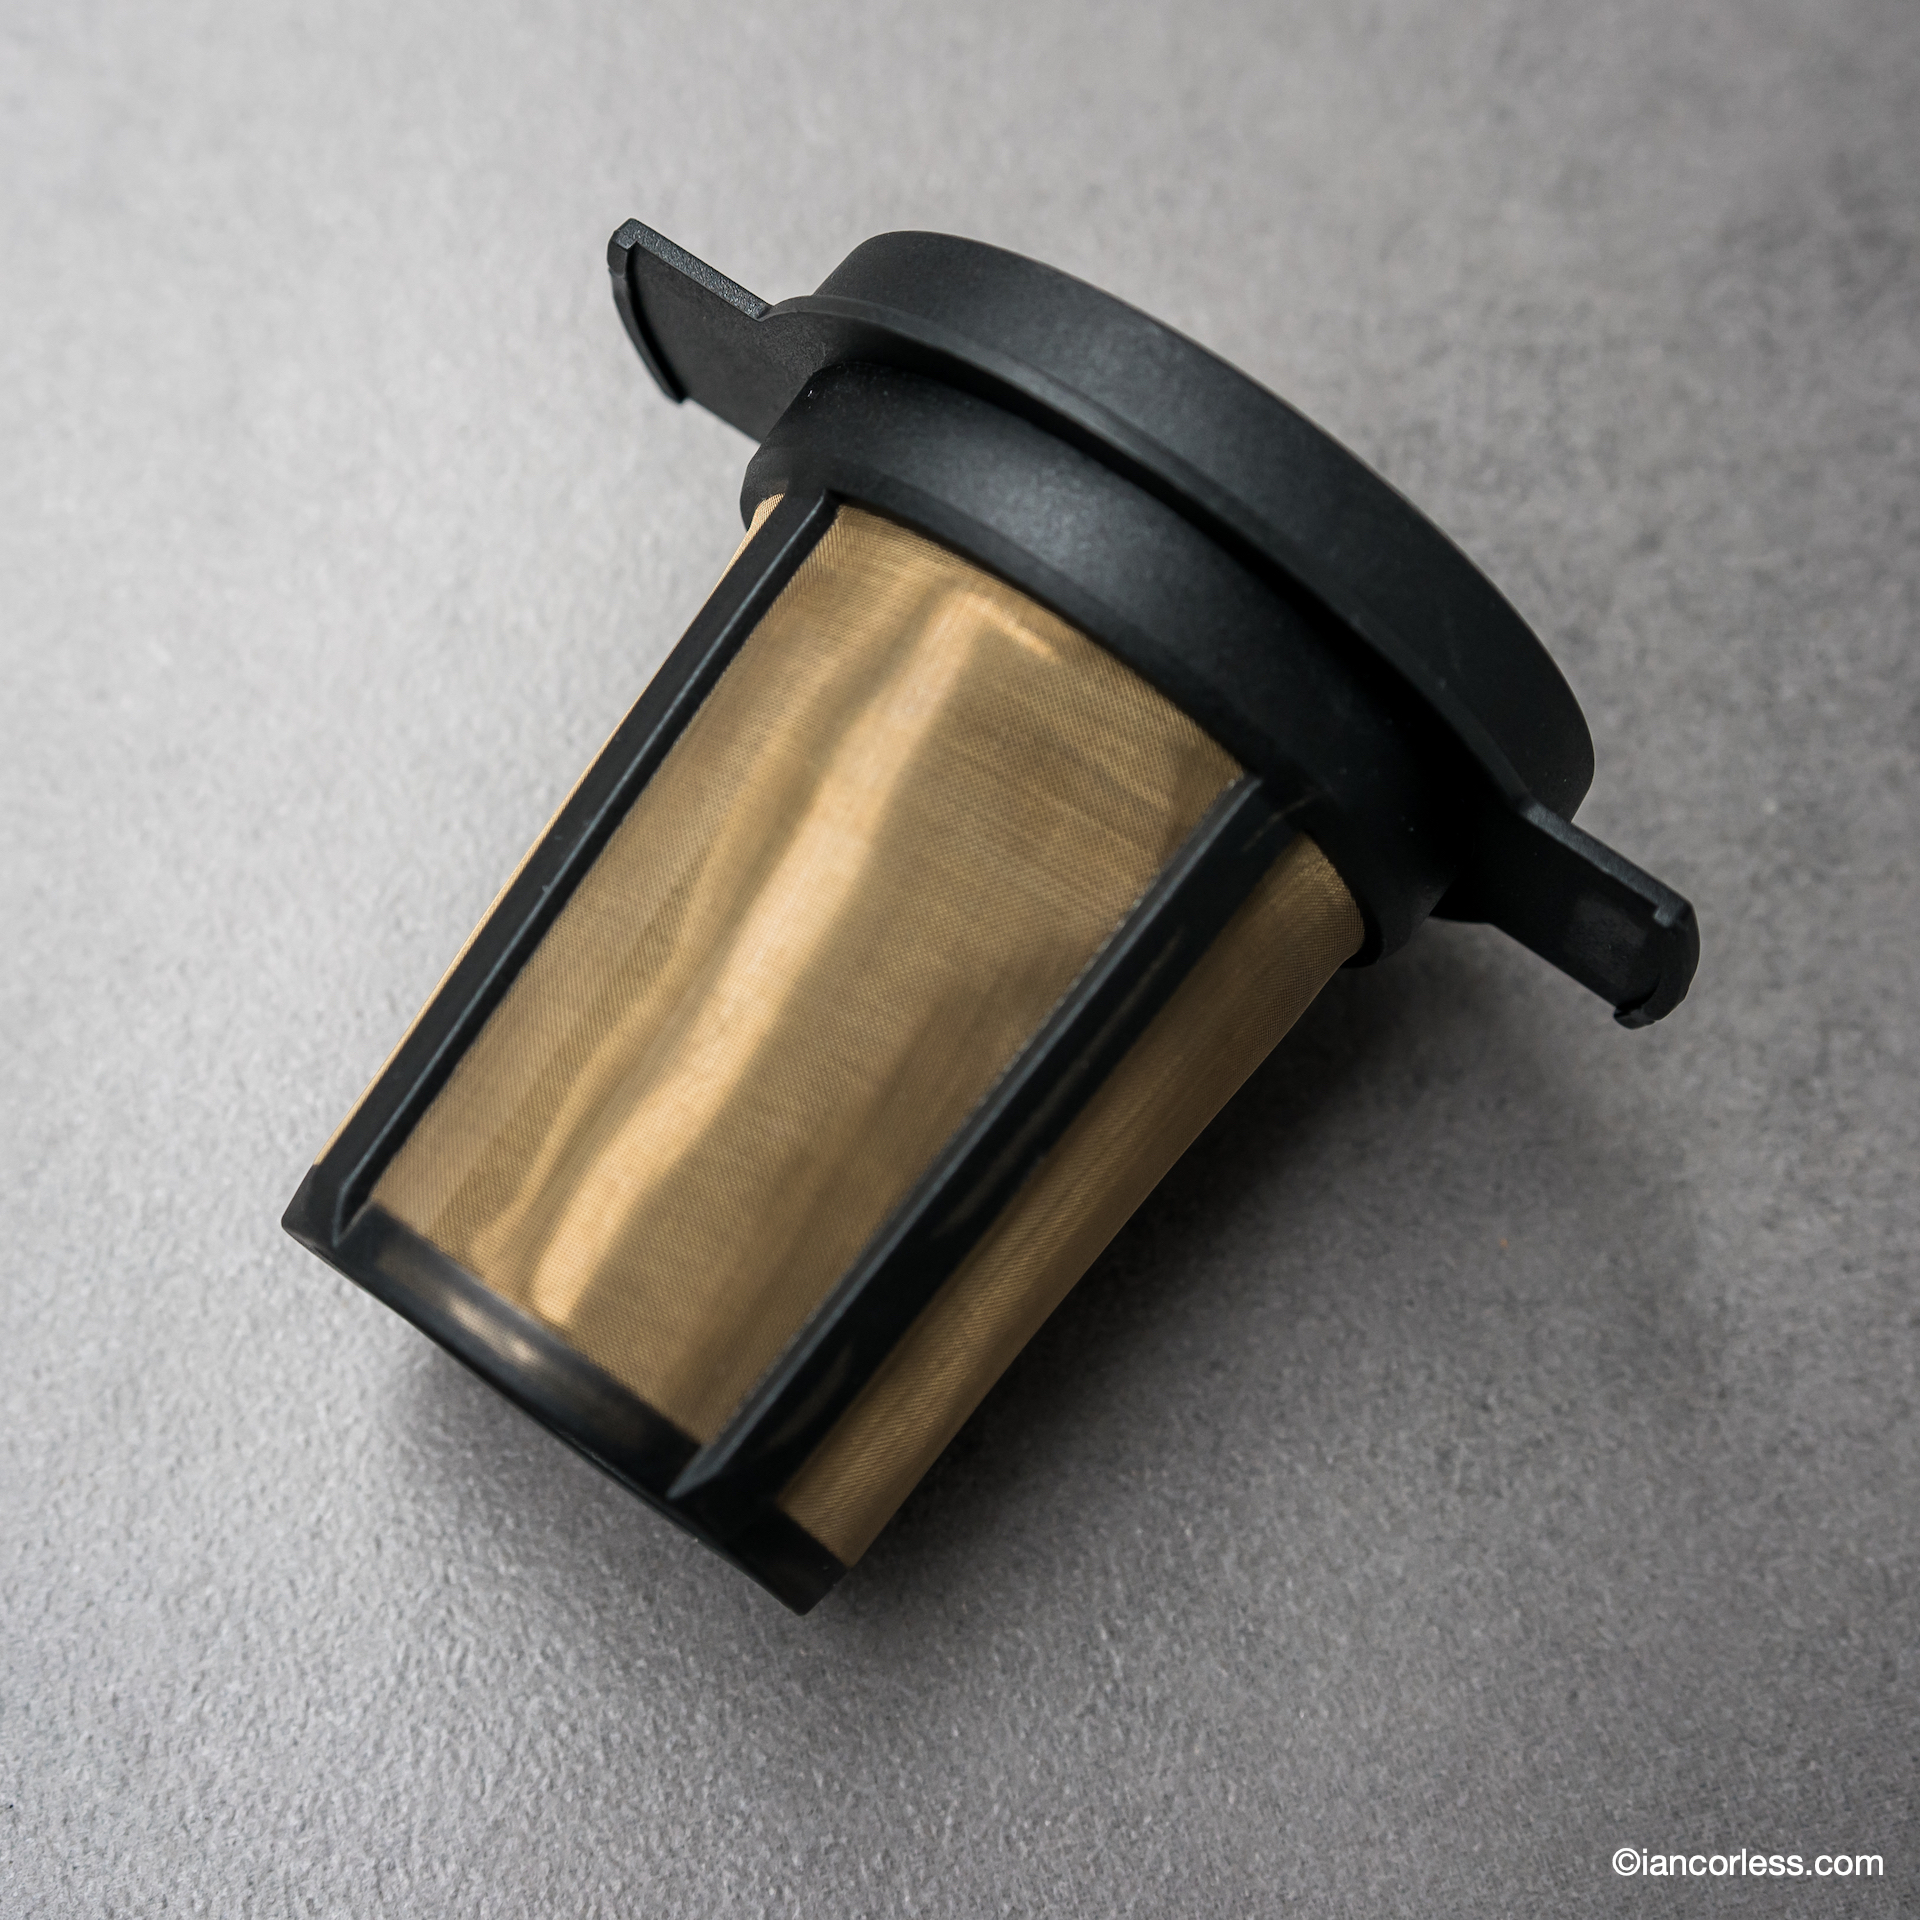
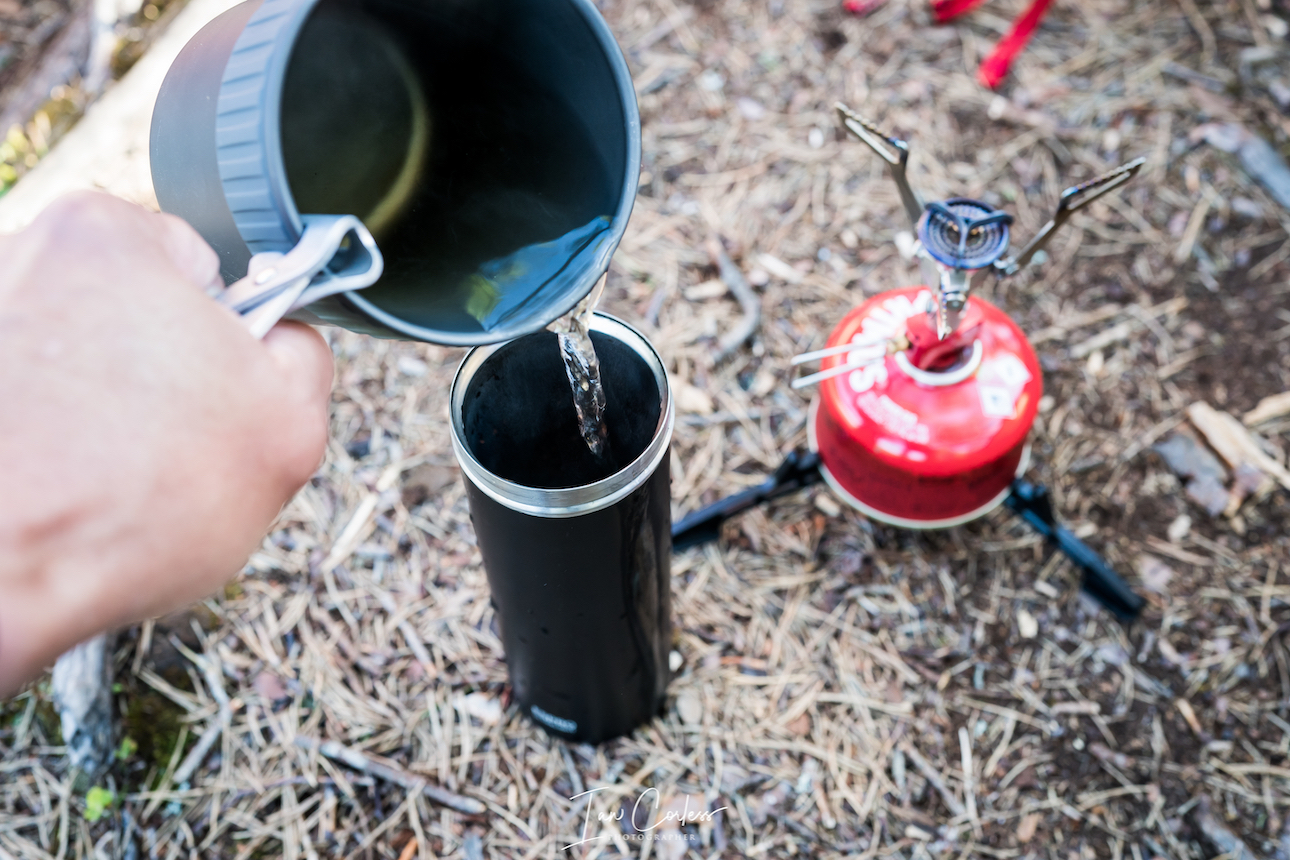
MSR Mugmate Coffee/ Tea Filter 30g – An ingenious small coffee/ tea filter that provides a lightweight solution for the coffee addict. Just pop it into a cup!
MSR Mugmate
Gas canister 113g
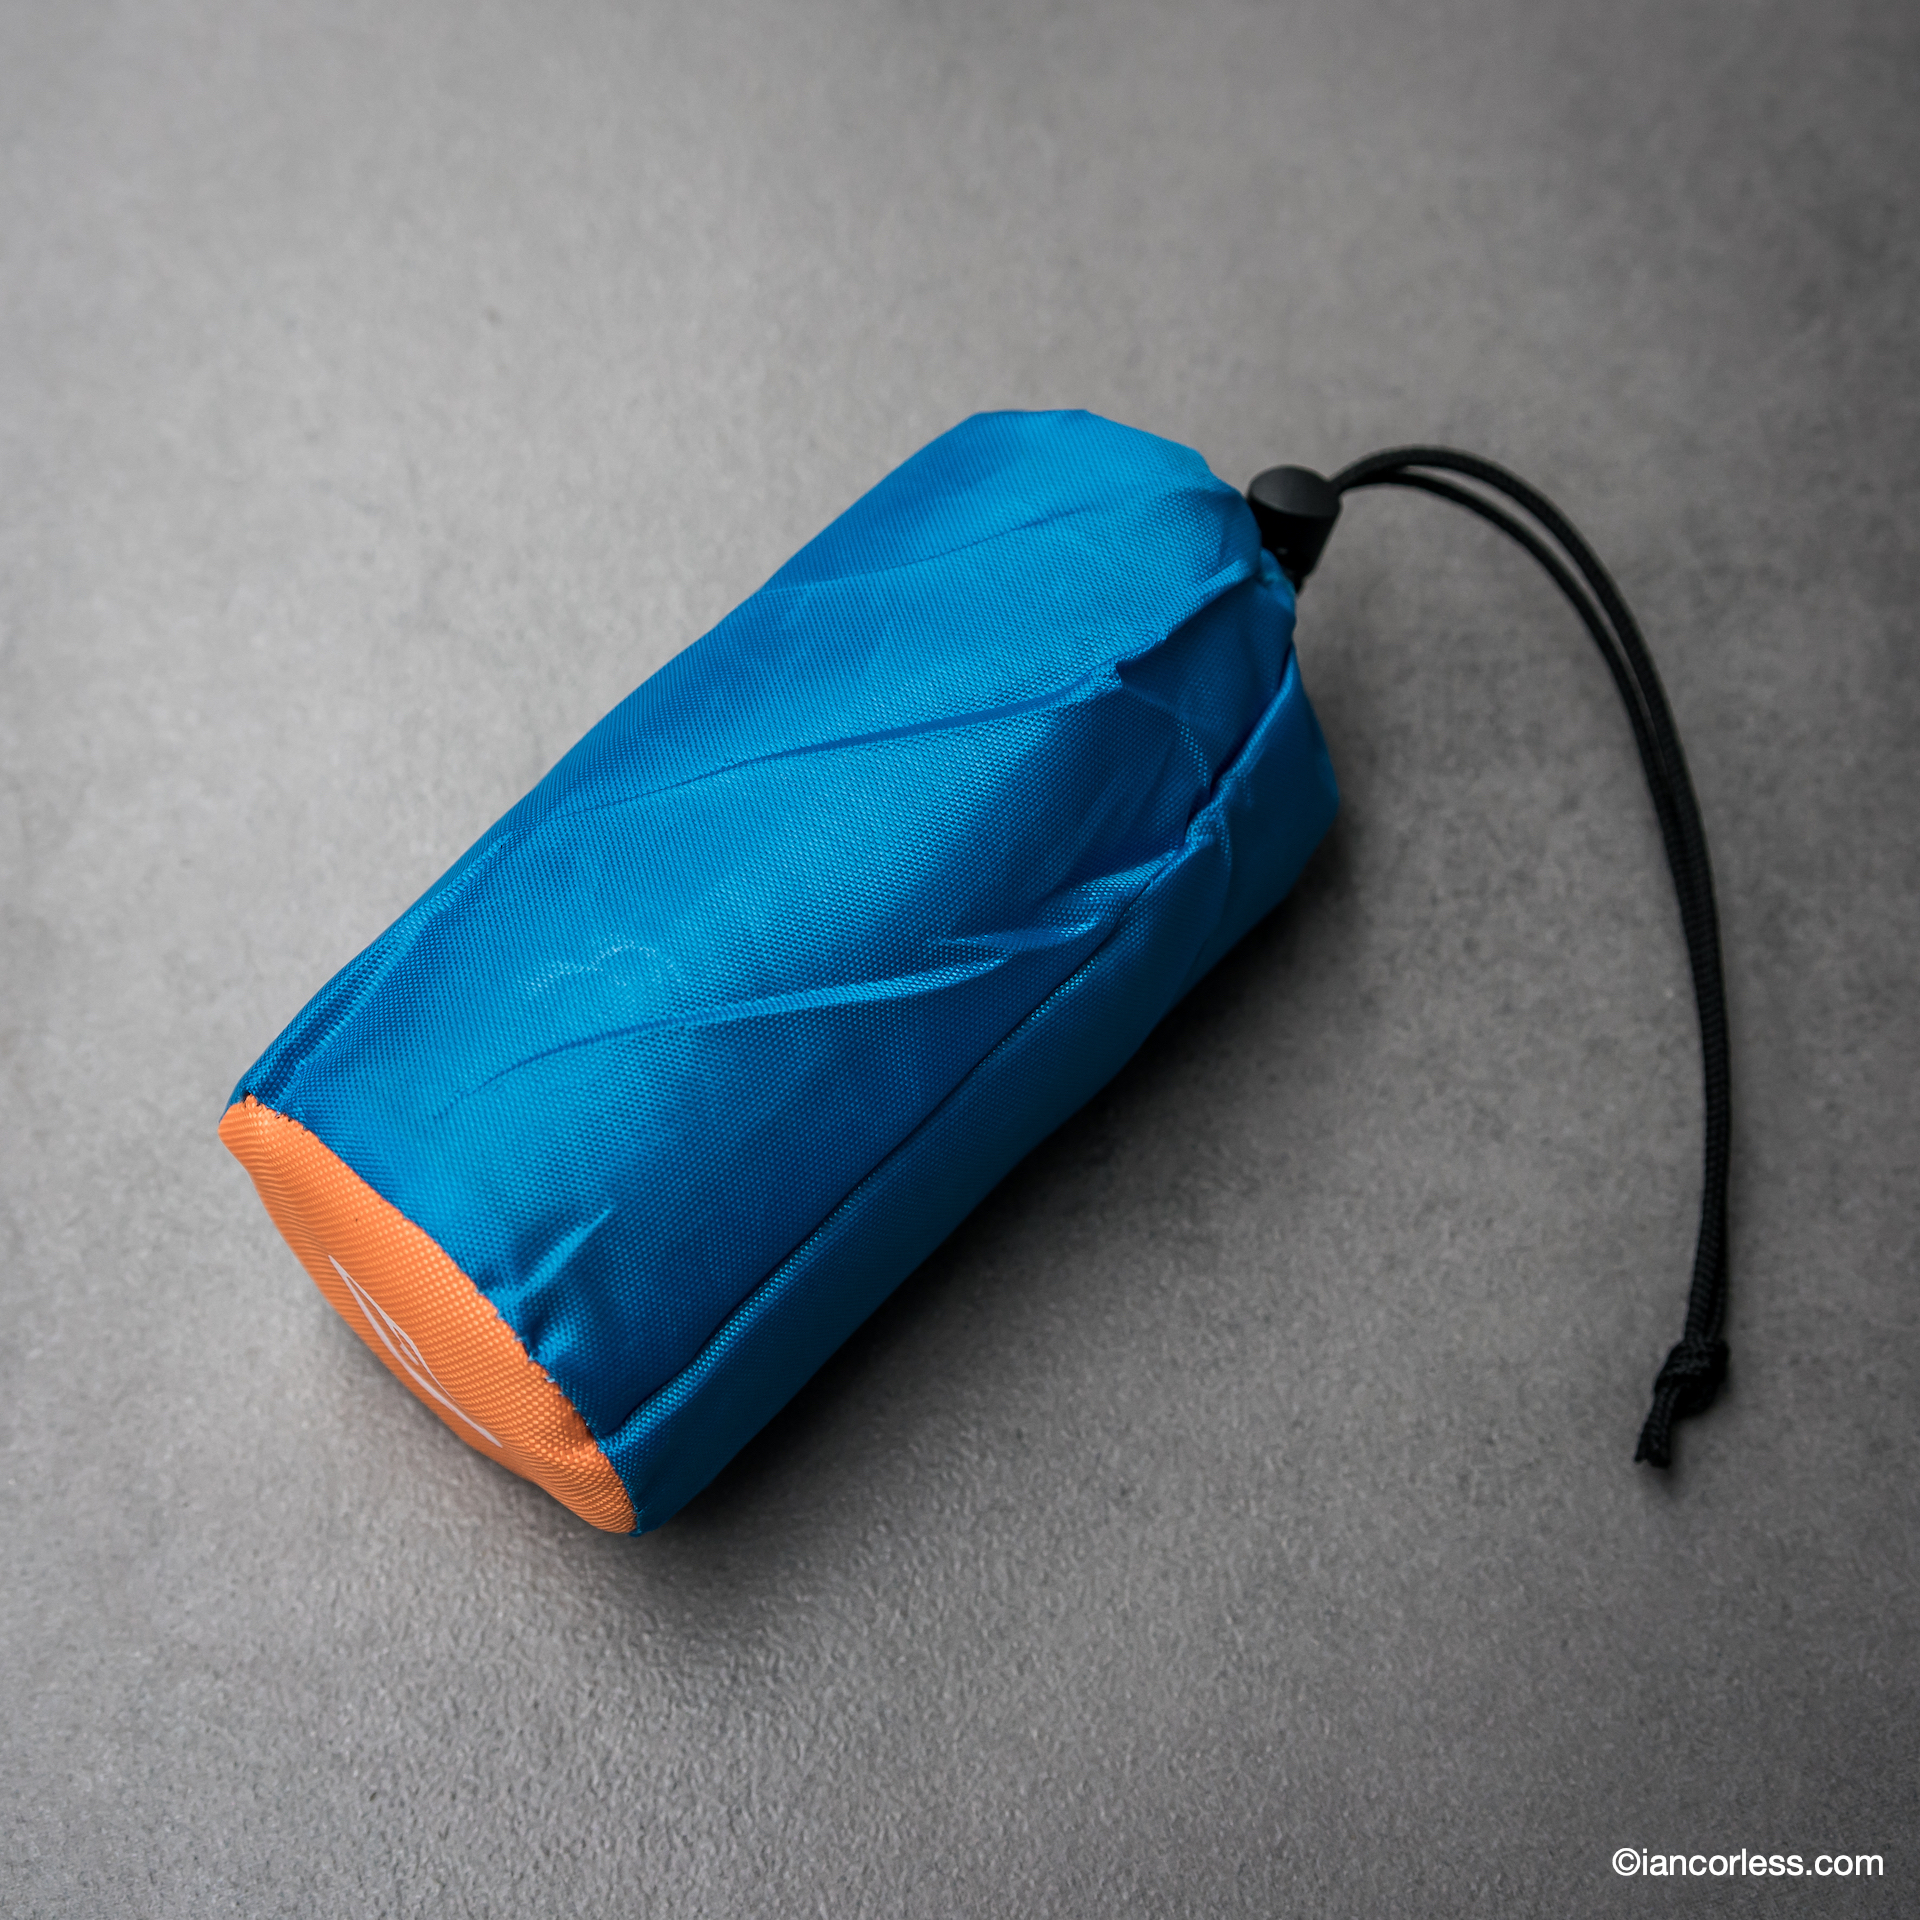
Bivvy bag 151g – Great back up for added warmth should something unplanned happen.
Bivvy bag
Headtorch 46g – The Petzl e+LITE is one of the smallest and lightest around. Perfect when camping to provide light for reading and cooking. However, if you need light to run/ walk this is not the best option.
Petzl e+LITE
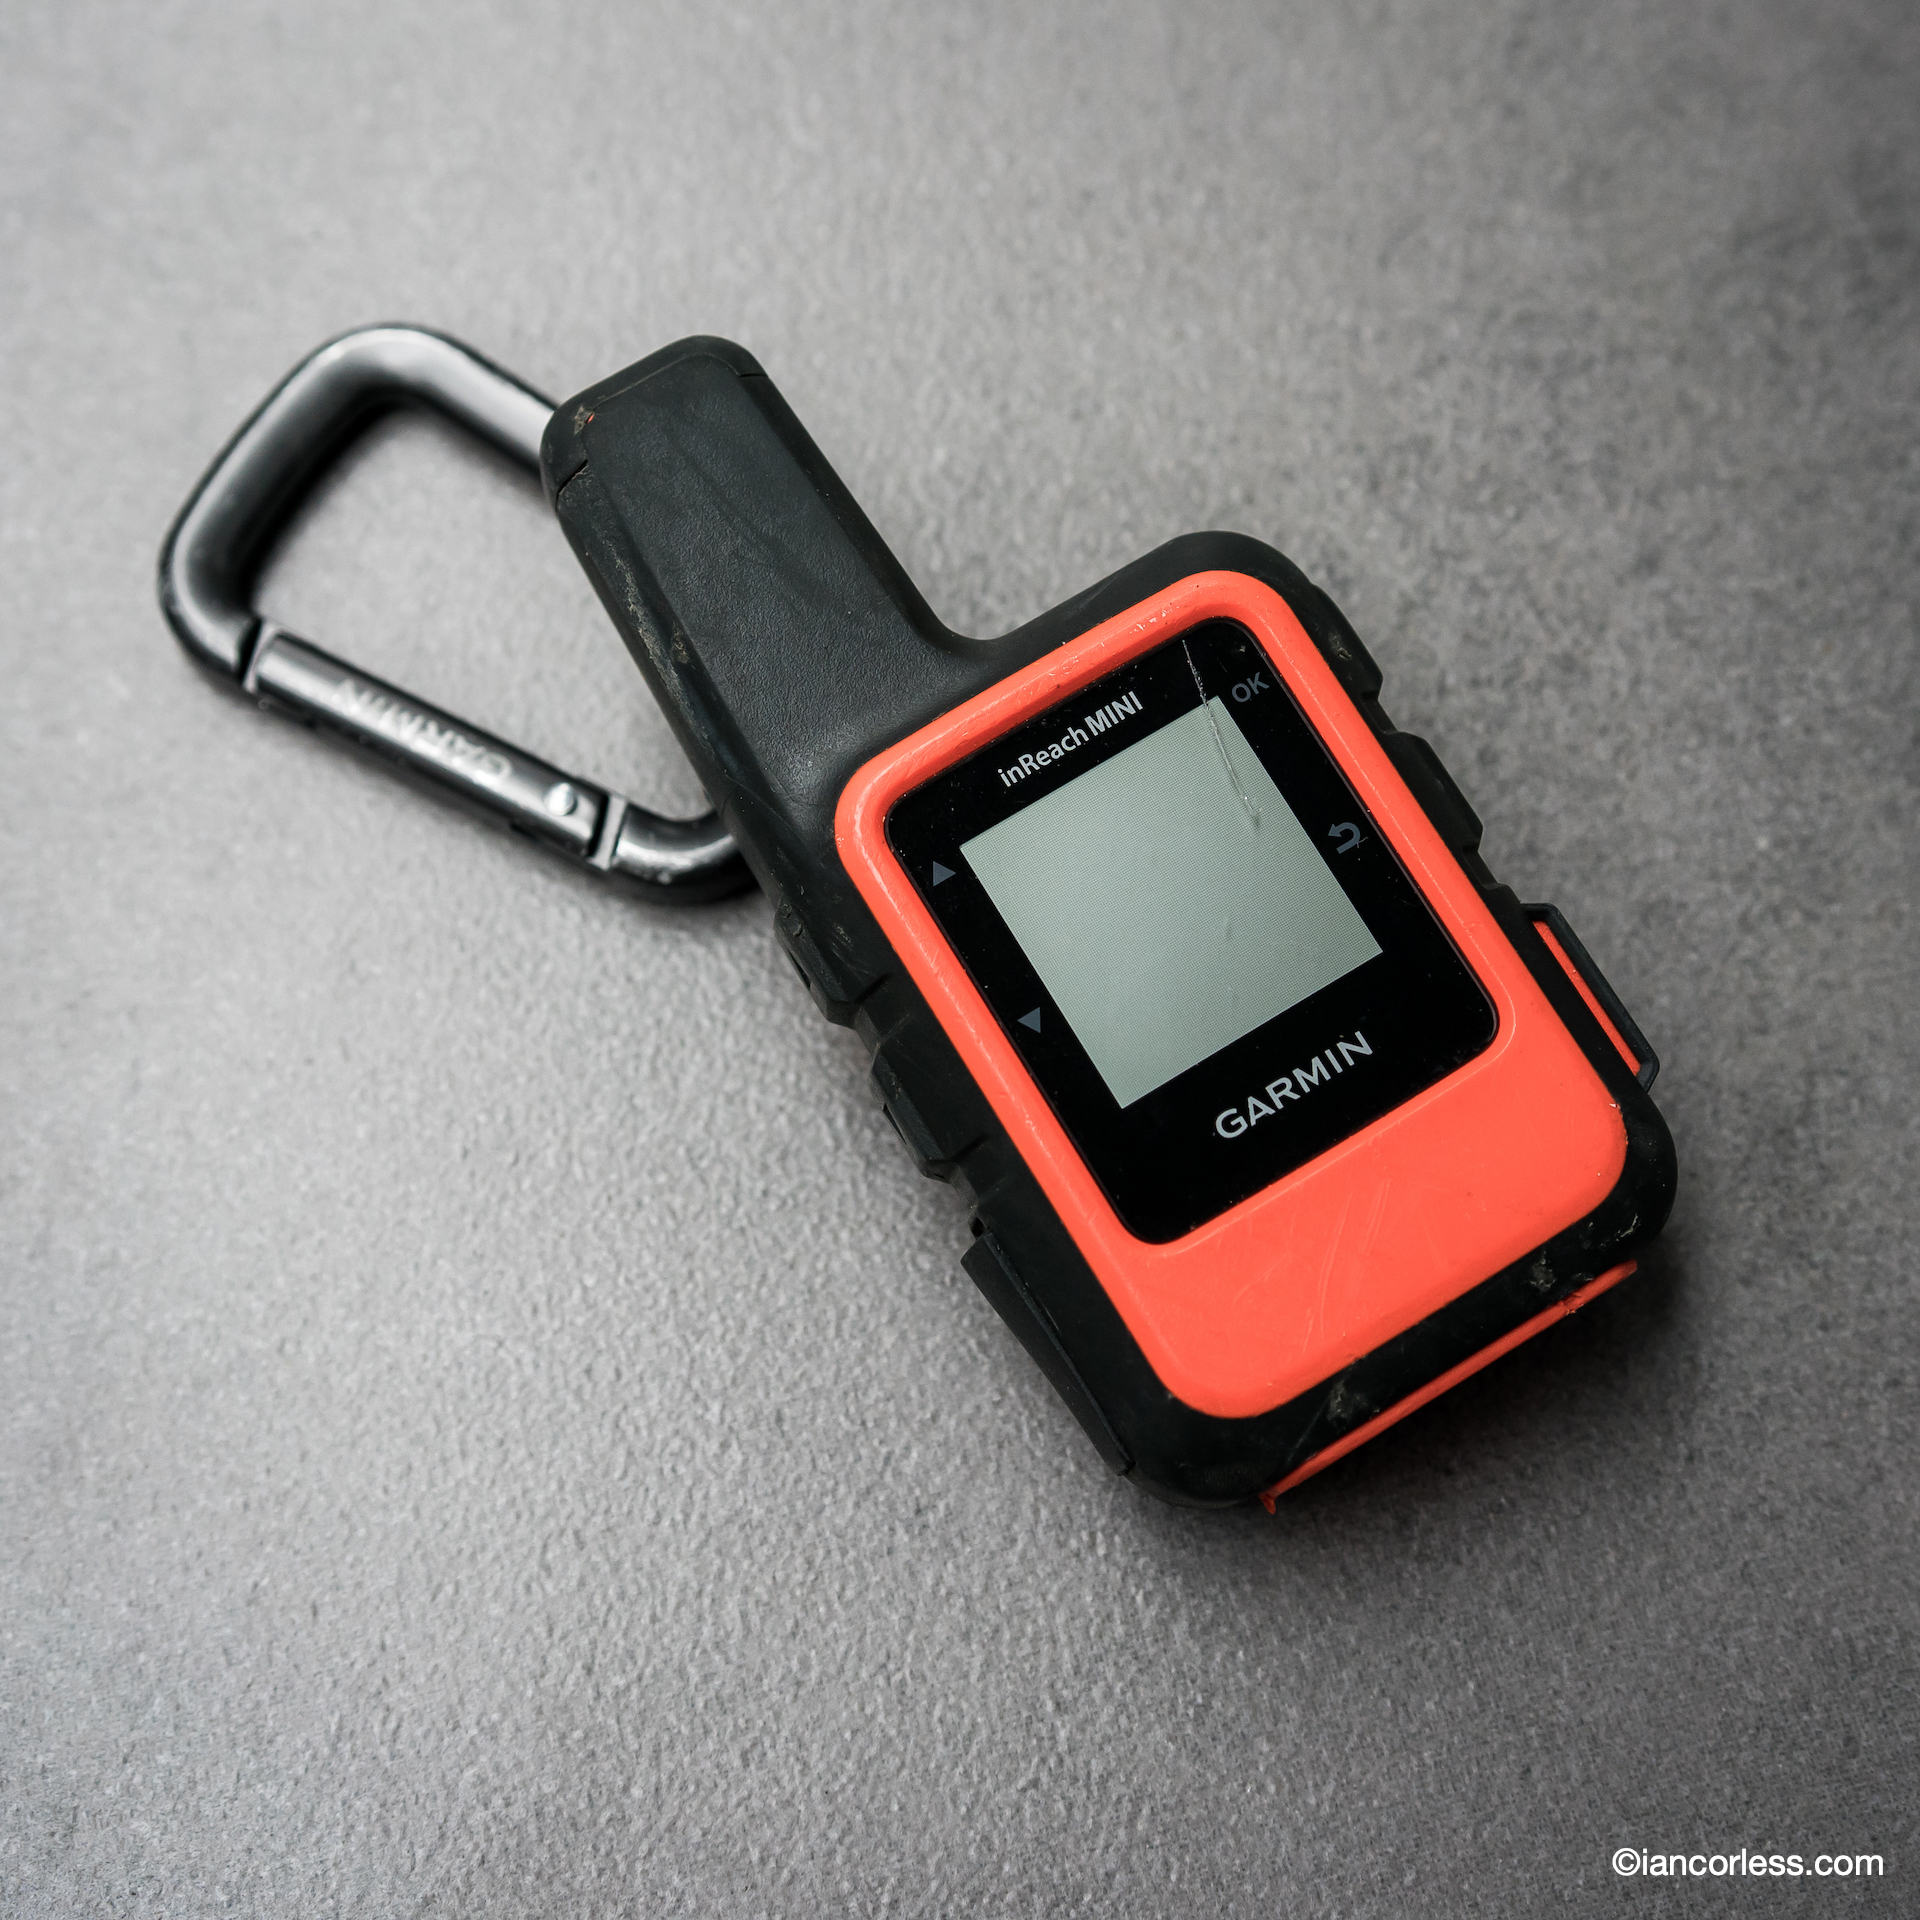
Garmin InReach mini 114g – I take this on all adventures. Ideal back-up and safety with an emergency button.
Garmin InReach mini
Mattress 300g* – Klymit V Ultralite SL (here) is full length, small pack size and very comfortable. *Photo is not the Klymit.
Pillow 50g – You can always use a dry bag with clothes inside as an alternative?
First Aid 101g – Simple system by Lifesystems in a waterproof bag.
Dry Bag 68g – I use a 30ltr and use it is a liner for the pack. I find it easier to push everything in one place.
Sea to Summit spoon 12g – Sea to Summit with a long handle designed so that you can eat out of dehydrated food packs.
GoalZero Flip10 charger 75g – Good enough for one, maybe two phone charges.
Food:
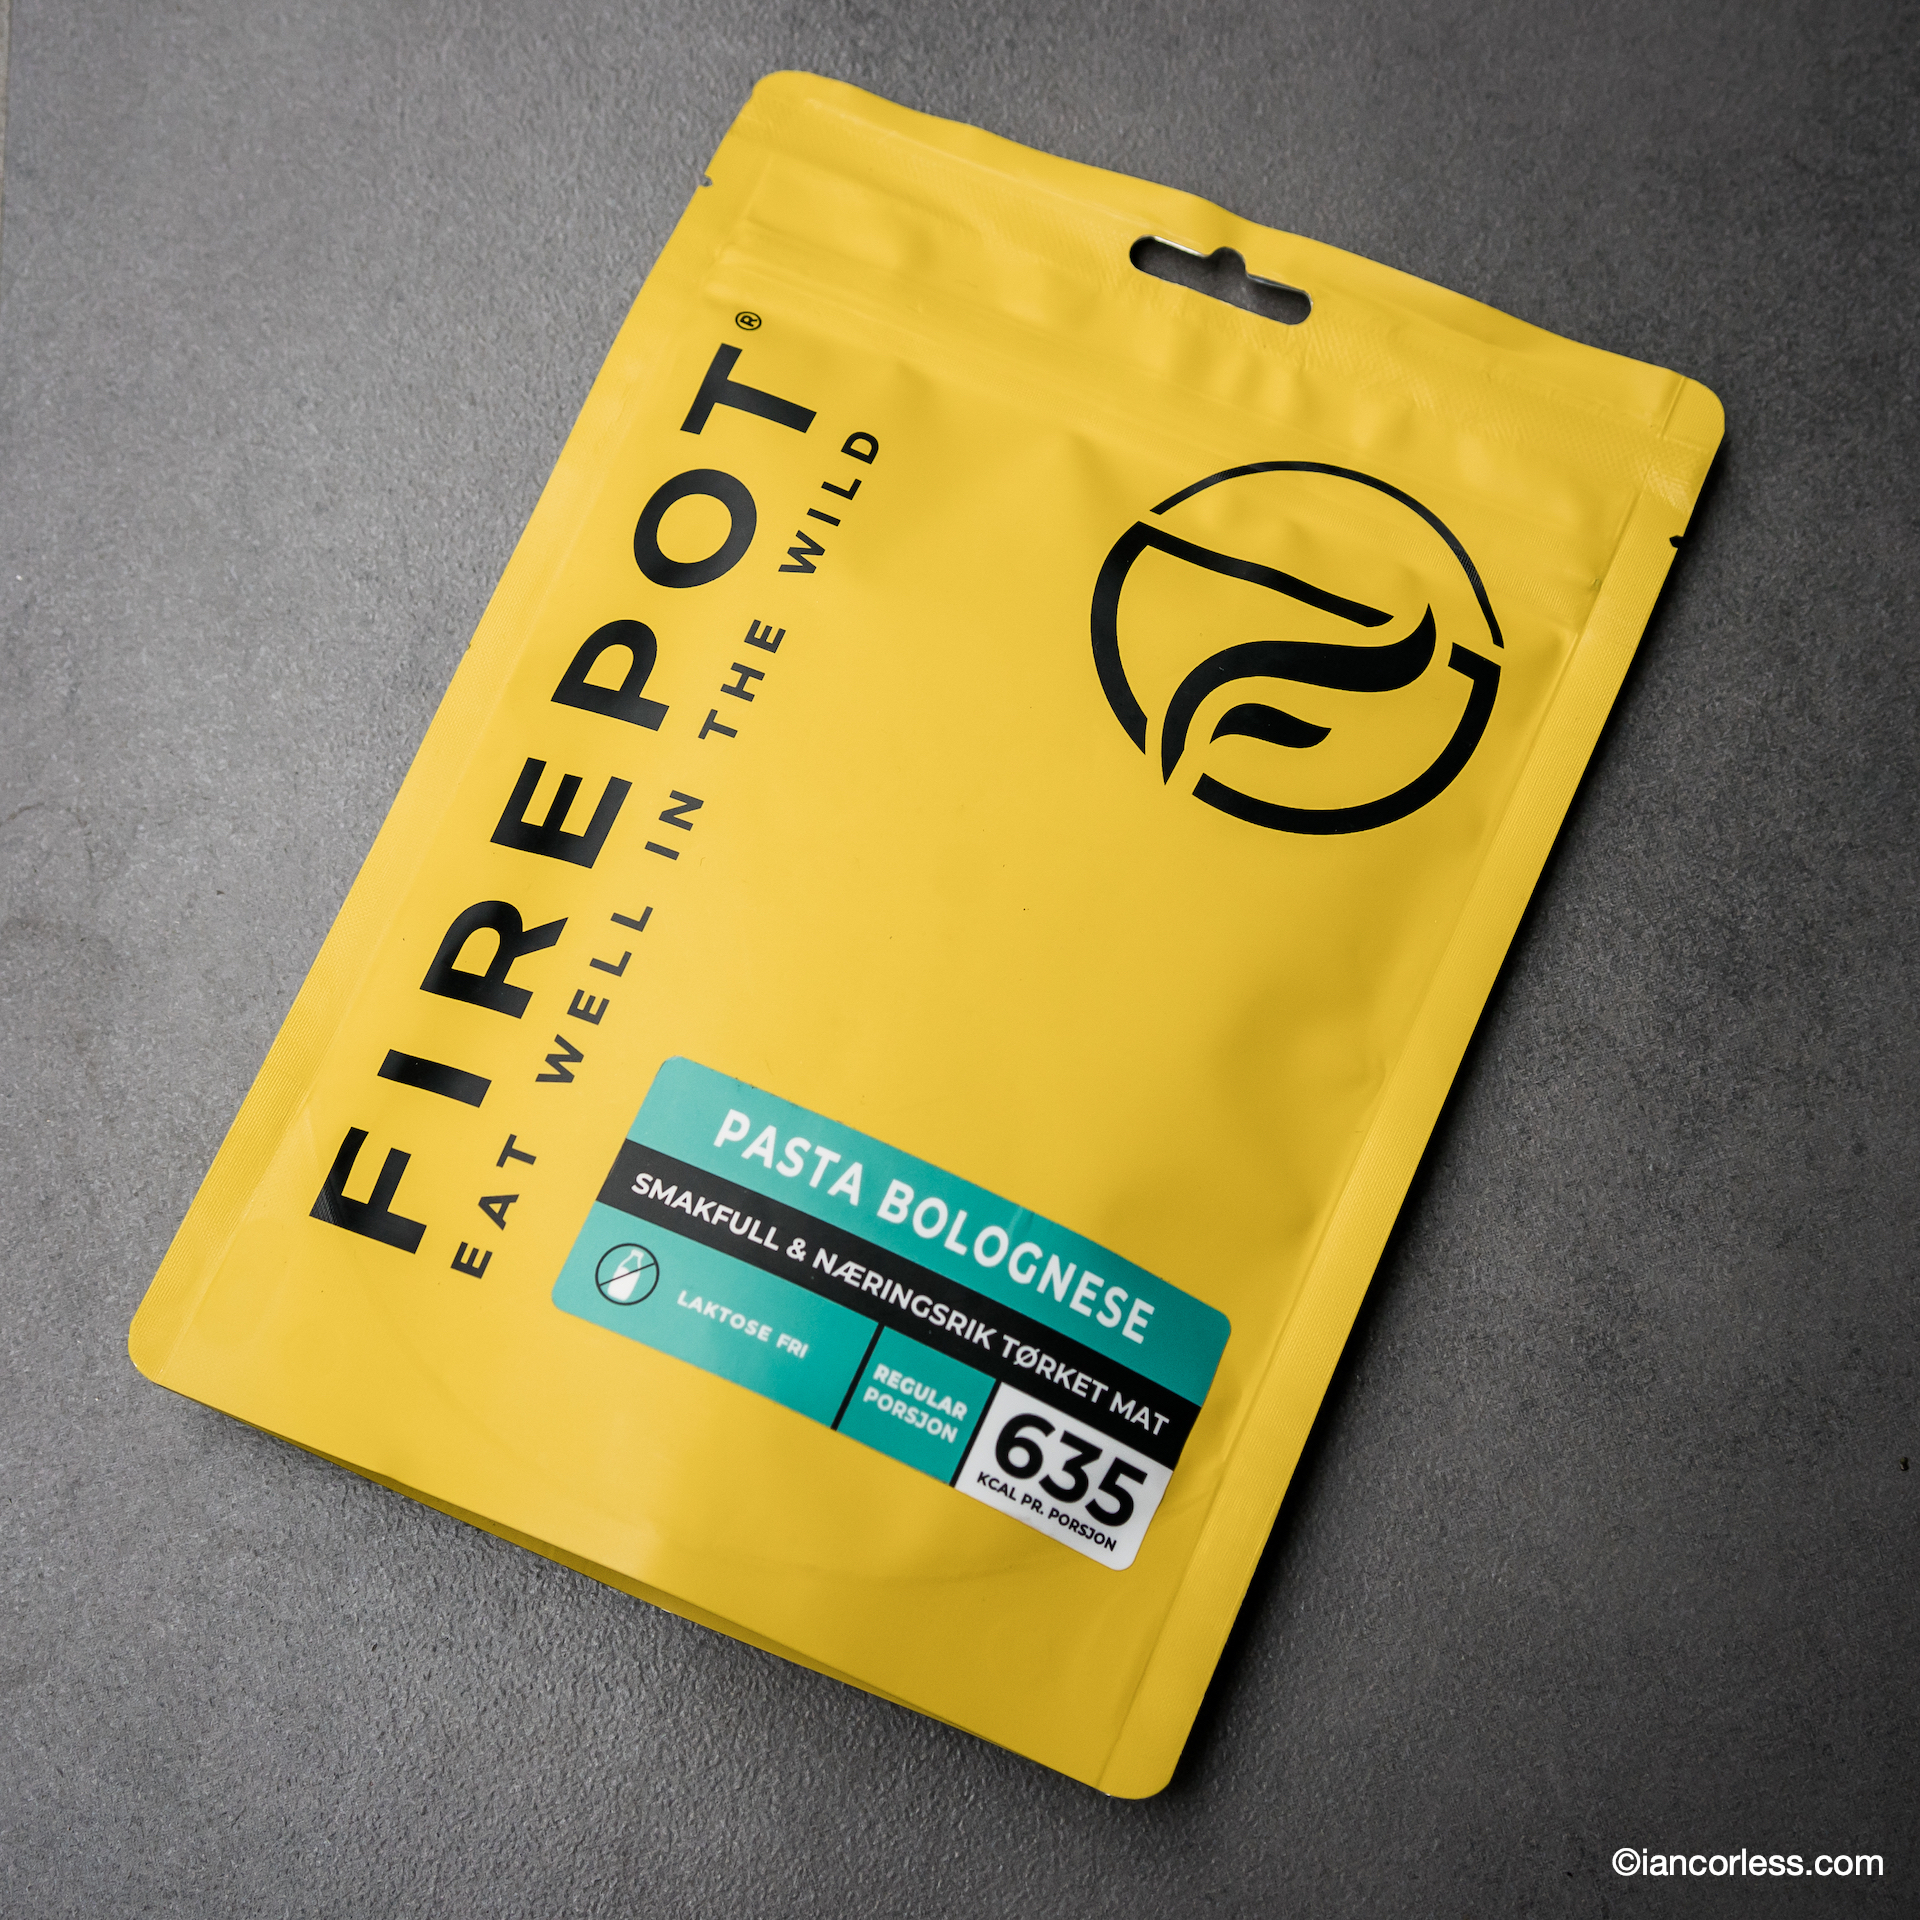
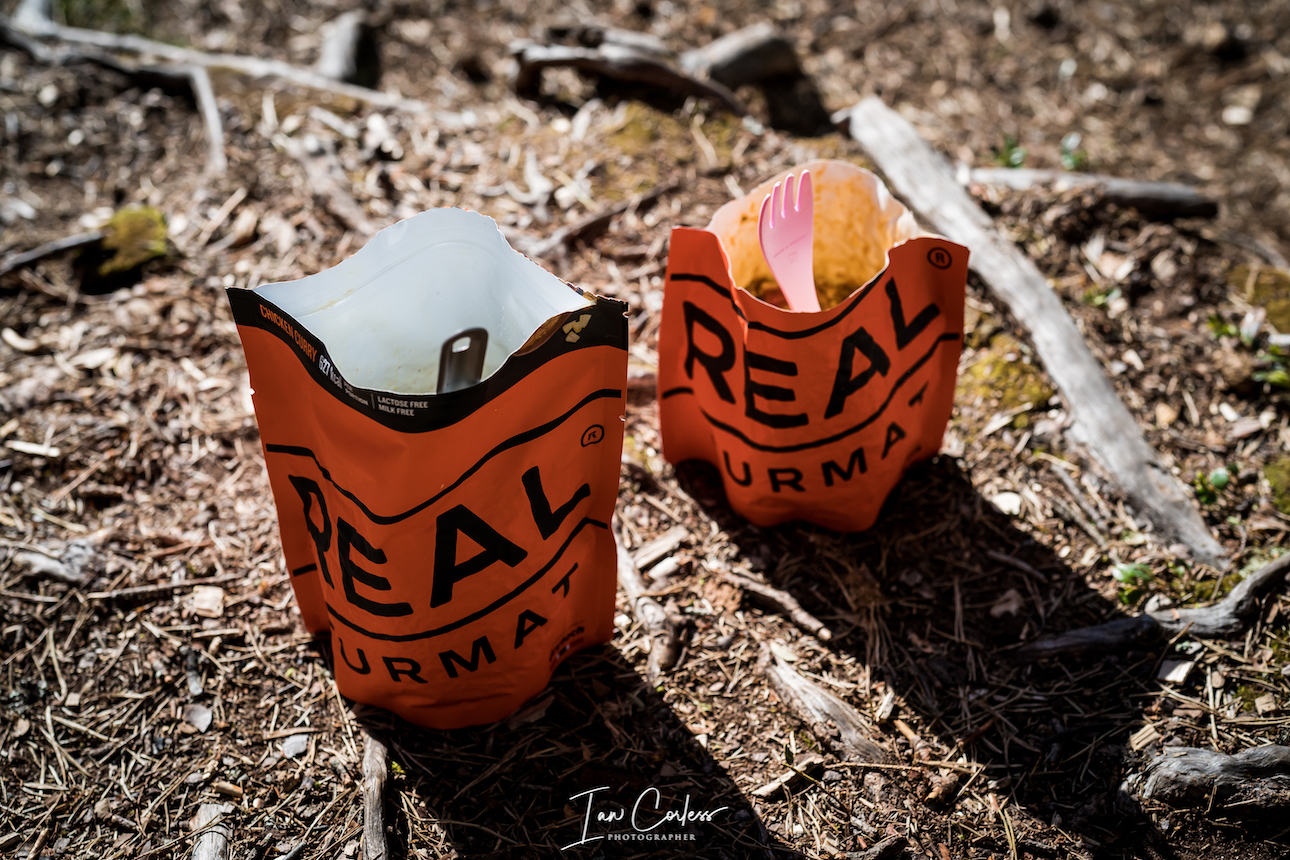
Firepot dehydrated meal 158g (per meal) – Dehydrated medals are a go-to solution for a meal when on the trail. Firepot have good calories, great taste and a good selection available.
Water 600g – This is the weight of water in the 600ml soft-flask.
Camera: (obviously optional)
Sony A9 with 35mm f2.8 pancake lens 800g – I am a photographer, so, this is my serious luxury item and it comes with a weight penalty.
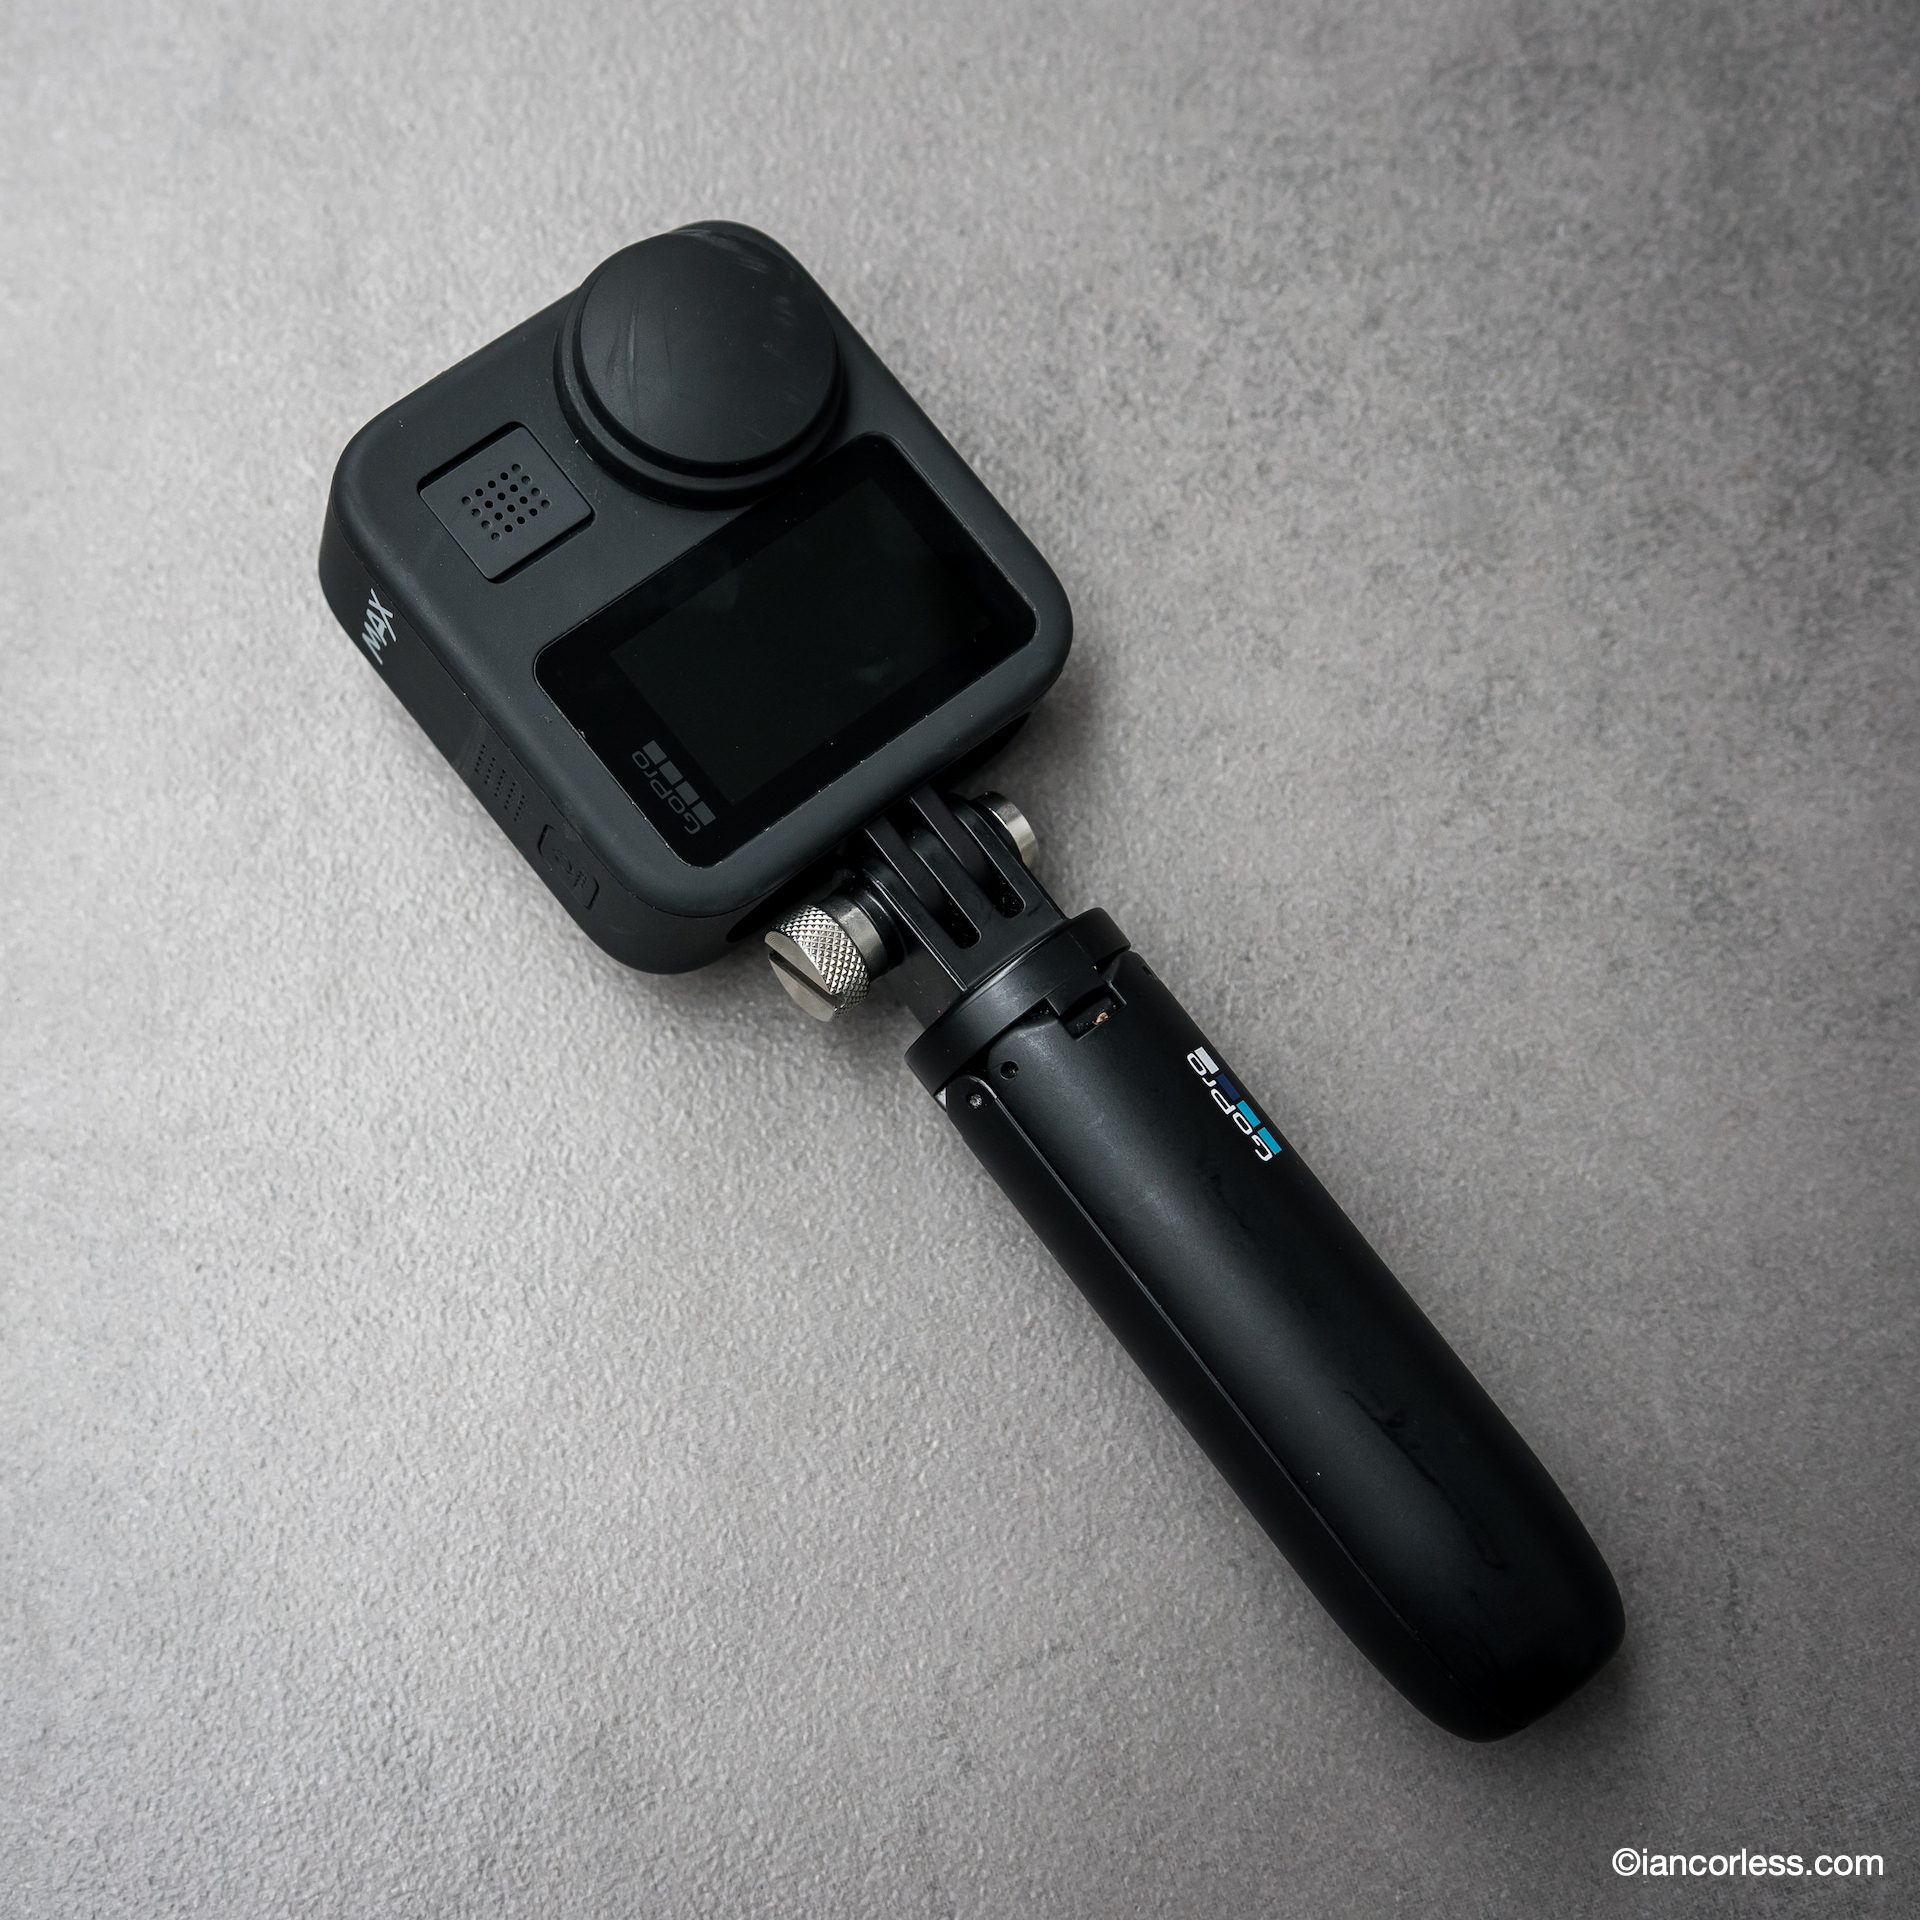
GoPro Max 231g
SUMMARY
Travelling light is great fun. It allows you to move faster with less strain. However, it is essential you travel light for the conditions. Too light and you may well get in trouble. So be careful and attentive. Light does not mean you will be uncomfortable, but you must accept a compromise comes from being minimal.
In Scandinavia, Kvikk Lunsj is an ‘essential’ for the trail. The chocolate consists of four rectangular wafers covered in milk chocolate, with thinner layers of chocolate between the wafers in order to break the chocolate into pieces easier. The chocolate has been advertised as a “hiking chocolate”, and it is often associated with skiing trips in Norwegian culture. Freia began printing the well-known Fjellvettreglene (Norwegian: the mountain code) on the inside of the packaging.
There is much relevance to the points below and a great reminder for all.
1. Plan your trip and inform others about the route you have selected. Plan your trip based on the group’s abilities, and always include alternative options. Obtain current information about the area and the weather conditions. Listen to the advice of seasoned mountaineers where possible. Ensure you have sufficient knowledge and practical skills to complete this trip. Respect the natural environment. Plan ahead and do not leave any litter behind you. Arrange meeting points during the trip that don’t require mobile coverage or accurate timing. Is your planning sufficient to guarantee an enjoyable trip no matter what?
2. Adapt the planned routes according to ability and conditions. Assess the conditions continuously and adjust your plans accordingly. Respect the weather! Travelling with others is safer and means you will have someone to share your experiences with. If you’re travelling alone, exercise caution. Do not embark on a long trip without sufficient experience. You must be able to take care of yourself as well as the others in your group. Be considerate of other hikers. Make sure you have read The Right of Access and its requirements. Make sure your group maintains an open and direct line of communication at all times. Can you complete the trip under these conditions and with this group?
3. Pay attention to the weather and the avalanche warnings. Always check the weather forecast and avalanche warnings to see what impact they have on the area. Follow the advice and choose a gentler terrain when conditions are too demanding. Check the conditions on yr.no, storm.no and varsom.no. Monitor the development of the weather and avalanche conditions along the way. Bear in mind that plans may need to be adjusted.
4. Be prepared for bad weather and frost, even on short trips. Dress appropriately for the weather, and the terrain. Remember that the weather changes quickly in the mountains. Bring extra clothing, and the equipment your route and terrain requires. Extra food and drink can help save lives, if the trip takes longer than planned or you have to wait for help. Is your group equipped to deal with a sudden change in weather?
5. Bring the necessary equipment so you can help yourself and others. In the winter, you need a windsack/bivvy sack, sleeping pad, sleeping bag and a shovel so that you can spend the night outdoors if you have to. A windsack can save lives. Bring a high-visibility vest or a headlight, that will make it easier to find you if necessary. Bring a first aid kit so you can help yourself and others. Always use a transmitter/receiver and have an avalanche probe and a shovel if you are traveling in avalanche prone terrain. Pack smart! Packing lists for different tours can be found at ut.no. Mobile phones can be a useful tool but remember that they do not work in all situations and areas. If an accident occurs, alert the police at 112, go for help or try to notify someone with other means. Are you able to take care of yourself and help others?
6. Choose safe routes. Recognize avalanche terrain and unsafe ice. Take an active decision to avoid terrain that is prone to avalanches and plan your route well. Be aware that avalanches can start in drops higher than five meters and steeper than 30 degrees. Even if you walk in flat terrain, you can trigger an avalanche on the mountainside above you. An avalanche dropout zone can be three times the height of the drop. Avoid terrain traps, such as narrow gorges. Consider what will happen if there is an avalanche. Be aware that a cornice can break off when you walk on a mountain ridge. Be aware of ice conditions when you walk on regulated lakes and rivers. Can an avalanche happen where I plan to go? What will the consequence be?
7. Use a map and a compass. Always know where you are. A map and compass are an essential basic equipment that always work. Pay attention to the map even when hiking on a marked trail. Knowing where you are on the map, makes for a better hiking experience. GPS and other electronic aids are helpful, but make sure you have extra batteries. Do you know where you are?
8. Don’t be ashamed to turn around. Evaluate your route continuously and if conditions are becoming difficult, choose your best alternative long before you or group members become exhausted. Have the circumstances changed? Should you turn around? Is anyone in your group have problems completing the route? Should the group turn around? Enjoy the hike for its own sake and remember that there will be other opportunities if it is too challenging today.
9. Conserve your energy and seek shelter if necessary. Adjust your hiking speed to the weakest member of the group, and make sure that everyone can keep up. Remember to eat and drink frequently. When you exert yourself, your body needs more fluids than you may feel you need. Don’t wait until you are exhausted before you seek shelter. Strong winds will tire you out quickly. Use your windsack or dig a snow cave before it’s too late. Are you able to get back to your base? Do you know where the nearest shelter is?
Please support this website. I believe everyone deserves to read quality, independent and factual articles – that’s why this website is open to all. Free press has never been so vital. I hope I can keep providing independent articles with your help. Any contribution, however big or small, is so valuable to help finance regular content. Please support me on Patreon HERE.
Runner’s and particularly ultra-runners have this wonderful ability to cover distance under their own power with very little needs or requirements. Some water, some food, a warm jacket and waterproofs and adventure awaits.
However, you can only go so far without the eventual need to return home.
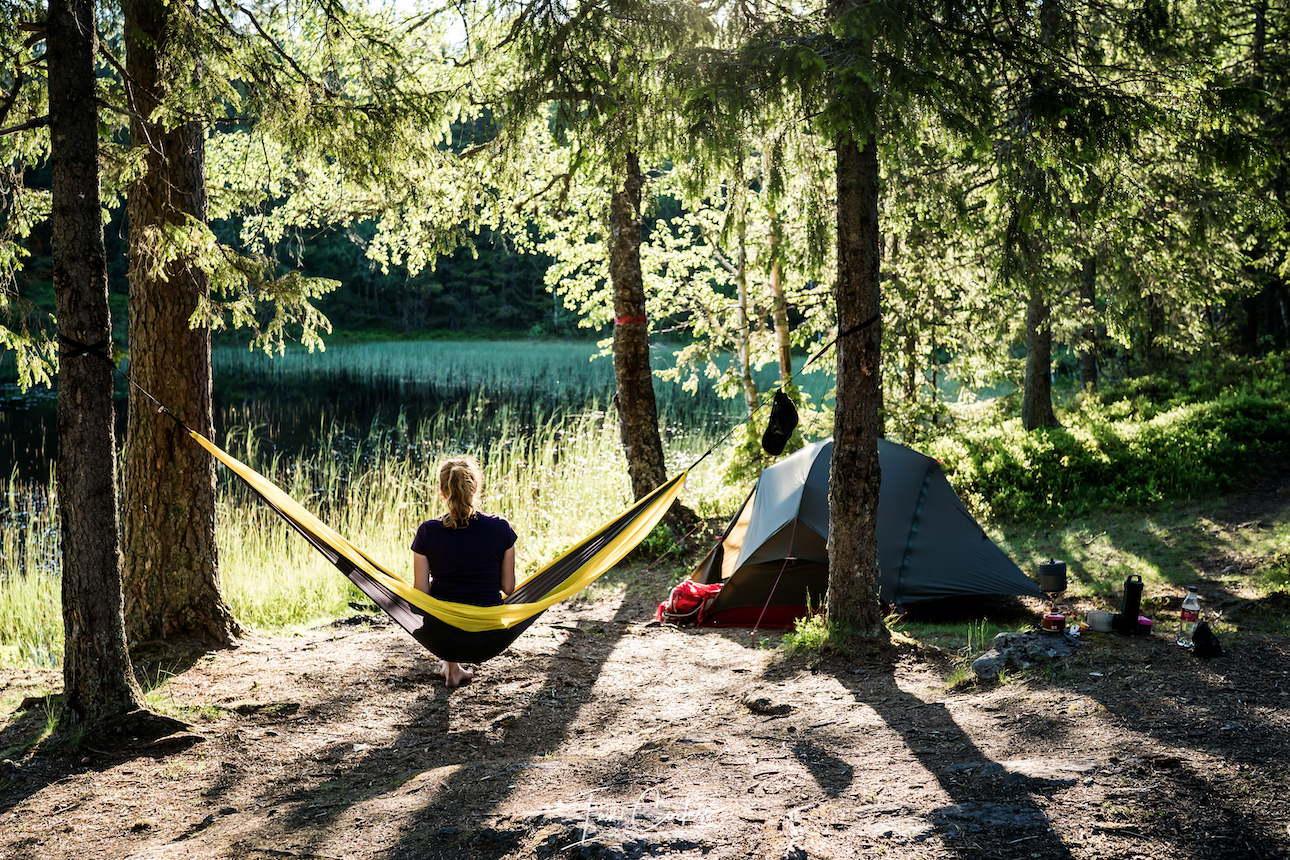
Fastpacking manages to encompass the world of backpacking and running to create a different adventure, fast and light! Backpackers tend to carry a plethora of equipment and move at a slower pace, happy to adventure for days and weeks at a leisurely pace.
Fastpackers, arguably are runners or hikers looking for the need to travel for multiple day’s but still cover good distances and not be excessively slowed down by weight and excess equipment. The crux though is often the balance of weight and one’s ability to still run/ fast hike.
“Fastpacking isn’t for every outing though. Sometimes you want to take it easy, set up camp, and enjoy a particular area. That’s when backpacking shines. Sometimes you just want to crush through a workout. That’s when you want to go for a really fast run.” Says Simoni, adding that he opts for Fastpacking, “when I want to tag multiple mountain summits in an area at one time, without needing to take multiple trips. If you’re squeezed for time, Fastpacking can really help maximize an adventure. I find it very rewarding to cover so much distance with minimal gear.” – Justin Simioni via La Sportiva
One could arguably say that races like Marathon des Sables, which is 35-years old in 2020, have paved the way for Fastpacking bringing a ‘fast and light’ scenario to a race format allowing participants to cover 250km’s in a self-sufficient manner.
However, Fastpacking has been around for many, many years. Long before MDS, and long before the term Fastpacking. But in recent years, the sport has developed into something else, no doubt boosted by the growth and popularities of FKT’s and lighter, more functional equipment.
It’s important to clarify, that Fastpacking is what you make it. Personally, I enjoy a lighter pack, moving fast (but not running) and being self-sufficient. This allows me to carry a little more weight, travel for longer, enjoy the process and still cover over a marathon per day. You though may prefer to be more minimalist, look at micro/ mini adventures of 2-4 days and aim to run for much of the way. There are no rules to the speed or distance you go.
It’s also important to consider many other factors that come into place:
Location and environment – There is a big difference to Fastpacking in Nepal to say the Alps.
Time of year – Winter conditions require more equipment and more specific equipment.
Weather conditions – Check weather and be prepared.
Access to water – Streams, rivers and lakes
Access to external help – If you are going remote, be responsible and plan accordingly.
It’s easy to see from the above, there is no one definitive kit list, but there are crossovers that apply to both.
Route Plan
Plan the route in advance, understand the terrain and understand what possibilities exist to obtain water. Importantly, carry a system that will ensure that you can drink water that is available from any source. Work out how long a planned route will take and then plan for contingency should something go wrong. Note that vertical ascent, descent and technical terrain will require moving slower. It’s not unusual to sometimes only cover 2km’s in 1-hour. Make sure you inform family or a friend of your planned trip, start day and end day. That way you have a backup and someone checking out for you. It may sound alarmist, but should something happen, you may well not be able to call for help. Contact and research with local authorities and ascertain current conditions on the trails and be aware of any restrictions.
Do you need a 12-week and/ or 24-week Multi-Day Training Plan perfect for a multi-day adventure or a race like Marathon des Sables? They are designed to provide you with a structured weekly plan culminating in a target event.
View a sample week HEREfrom the 12-week plan. Purchase HERE. (£14.50 pw)
View a sample week HERE from the 24-week plan. Purchase HERE. (£12 pw)
The Pack
Typically, a Fastpacker will look for something between 20 and 40 liters. For summer and short adventures, it is possible to go lighter and smaller. In winter, one will need more equipment that is often heavier and bulkier. Quite simply, the heavier the pack, the harder it is to run. So, if the plan is to run as much as possible, you need to go as minimal as possible whilst keeping safe. Make sure when testing and trying a pack that you add weight and understand how it feels when moving. Many brands are now producing packs specifically for Fastpacking. Personally, I like my pack to have a waist belt as this helps distribute the load and make the pack more secure. I would say that a minimum pack weight will be 6.5kg (14.3lbs) with water. Where possible, you would not want a pack to exceed 10kg (22lbs).
On a personal level, I would always go with a tent as I personally feel that it will offer more flexibility, especially if one shops in a clever way. My go to tent is an MSR Hubba Hubba NX (1/ 2 and 3 person versions available).
Things to look for in a tent:
Weight
Flexibility
How many season use?
Space
For example, the above MSR is a free-standing tent, so, it can be pitched inner only. If you know you are Fastpacking in ‘guaranteed’ good warm weather, you could travel without the fly sheet and basically sleep in a lightweight and bug proof shelter. Equally, if you know that you are fast packing in a bug free (mosquito) environment, you could leave the inner at home and just travel with the flysheet. This then provides a secure waterproof shelter, and, in this scenario, it acts just like a tarp but with more protection.
Tarps offer a light solution that can be used with trekking poles and if one is going very minimal and fast, they provide a very simple answer for overnight protection. It all comes down to comfort and what one is prepared to accept as ‘comfort’ whilst Fastpacking. Big Agnes make the Onyx which comes in at under 200g. A Tarp is a compromise if you will have bugs such as mosquitos whilst on your adventure.
Hammocks are also an option providing one has trees to secure against. But if you add a bug net and tarp, in my opinion, a tent is a much better option. But a hammock can be a great addition to any Fastpacking kit, I use an Amazonas (here)
Sleeping Bag
A sleeping bag is essential for any adventure but firstly you need to ask some very specific questions before purchasing. I would say that ideally, one potentially could need several sleeping bags based on time of year and weather conditions. Remember, that any sleeping bag can be made warmer with layers. Add a hat, gloves and down jacket, suddenly the sleeping bag is considerably warmer.
Down is by far the lightest and smallest packing size, however, down cannot get wet! So, if you think you will encounter damp and wet conditions, you should consider a bag with a synthetic filling. Weight and pack size are important and with sleeping bags, the more you pay, usually, the lighter and smaller it will be.
Be careful on the ‘comfort’ rating of the sleeping bag.
Upper limit – the highest temperature the average male can expect to have a comfortable night’s sleep at without too much sweating.
*Comfort – the temperature at which the average adult woman can expect to have a comfortable sleep. *This is the ideal for most people choosing
Lower limit – the temperature at which the average adult male can expect to have a good night’s sleep in a curled position.
Extreme – the lowest temperature at which the average adult woman can survive. This rating comes with caution and additional consideration should be given if you plan to sleep in temperatures this low.
Recommendations:
PHD – Make sleeping bags and jackets to order, I am a long time fan here
Yeti – Passion One and Passion Three are a good start point here
Rab – The new Mythic Ultra is a personal favourite, available in 180 and 360 here
OMM -The Mountain Raid 160 is a great bag if you need synthetic filling here
Sea to Summit – The ‘Spark’ range have been getting rave reviews here
The minimalist Fastpacker will go with no matt or a very simple and small pad that provides just enough coverage for one’s hip if sleeping on one’s side. Personally, a good night’s sleep is essential, and a good/ light matt is an essential element to a fast and light kit.
Also, one should consider that in winter/ snow conditions, a matt will be essential for insulation.
Another consideration is potential problems from a puncture. Many inflatable matts become super light by using extremely light material. Be careful when using and make sure any potential sharp objects are removed before sitting or sleeping!
Matts very considerably but a personal favourite is the Klymit V Ultralite slim which offers full length body comfort all for 316g. It also packs very small. There are lighter matts and I list them below:
Thermarest NeoAir Uberlite 158g
Klymit Inertia X 258g
Nemo Insulated Short 278g
Sea to Summit Ultralight 294g
Exped AirMat HL 304g
Ultimately, the matt you choose may come down to a tradeoff between price/ packing size and weight. Be careful, some matts can be noisy when you move. Ok of going solo but really irritating if you are in close proximity of someone else.
Cooking System
For me, the MSR PocketRocket Deluxe (here) or 2 (here) kit is perfect. It has all one needs in a very small pack size and weight. I use the PocketRocket 2 kit that allows me to place a gas canister inside the 278g kit + a 4oz canister.
Another consideration would be JETBOIL Micromo Cooking System (here) which is the lightest system they do and if you just need to boil water, this is perfect!
Food
Dehydrated food is probably the most obvious option here and there are many varieties on the market. They are a one-stop option that requires water to hydrate and if you wish to be extremely minimal, some options exist that do not require hot or boiling water. A personal favourite is Lyo (here) and Real Turmat (here) – It may sound crazy but they both make foods that I would consider eating when not fast packing. They also do Vegan and Vegetarian options.
Check out Chicken Tikka Masala, Nettle Curry, Penne alla Bolognese and if Vegan, Organic Chilli and Barley Risotto. Breakfasts such as Mexican Scrambled Eggs and Organic Millet Porridge.
For any adventure, I work on a breakfast and a dinner and then carry snacks for during the day, this can be energy bars or if on a long Fastpack, I will even consider carrying another main dehydrated meal. Typical weights are 132g with approx 600 cals.
For me, Fastpacking is fun and adventure. I am not looking for FKT’s and therefore I do allow myself one or two luxuries. Coffee for me is an essential part of any trip and I mean good coffee. I could just take some coffee sachets and have a combined weight of grams.
No! For me, I take fresh ground coffee in a sealed tub and I use one of two coffee presses.
The Espro is my favourite as it acts as a flask/ drinking canister too. But it does come at a weight and size cost.
I fully appreciate that if going fast and light, the above is a complete no, no! But for me, that smell of fresh coffee each morning is worth it.
Water
You are going to be self-sufficient for multiple days, so, you need to find water and plan to obtain water from the route you will take. You can use purification tablets, I take the MSR TrailShot pocket sized filter (here) which meets U.S. EPA drinking water standards* and NSF protocol P231 for removal of bacteria (99.9999%), protozoa (99.9%), and particulates.
Clothing
Clothing requirements depend on the time of the year, the weather you will encounter and the duration of the Fastpack. Needless to say, one has to accept that changing clothes, taking a shower and feeling wonderfully fresh daily is not what Fastpacking is about. Layering clothing is essential to allow for fluctuations in temperature. Do your research, check weather forecasts and plan accordingly. The above photo is my equipment for a Fastpack in Nepal. Make sure you have a ‘Drybag’ to make sure all contents of the pack are protected from the weather, Sea to Summit (here) for example.
A good start point is as follows:
Short sleeve T
Long sleeve shirt
Shorts
Underwear x2?
Socks x2?
Hat with peak
Warm hat
Gloves
Merino base layer, top and bottom – I use Icebreaker here
Lightweight waterproof jacket – I use RAB Charge here
Lightweight down/ Primaloft jacket – I use RAB Kaon here
Buff
Bivvy bag
The above, for most, would be a start point and based on where and when Fastpacking, you could maybe add or takeaway certain items.
If going to more extreme and cold environments, the demand on clothing and what one takes will increase. I wrote an article on Fastpacking in Nepal (here) and this is a worthwhile read. Please note in Nepal, one can use tea rooms, so, one saves on tent/ tarp weight immediately if required.
Tracker/ Beacon
I use a Garmin InReach Mini (here) and it is superb. Small, light, has SOS button and allows for 2-way messaging anywhere in the world. I do not go on any adventure without it now. In conjunction with a mobile phone and associated App, functions become easier to use. Subscription services can be changed monthly and therefore one can add or takeaway facilities as required.
Another option to consider is a SPOT device.
Essential Extras:
Water purification
Toilet paper/ wet wipes
Hand sanitizer
First-aid kit
Sunscreen
Bug repellent
Headlamp and batteries
Lighter/ matches
Whistle
Map
Compass
Earphones
Optional Extras:
Trekking poles – to be honest, for most of my Fastpacks, poles are an essential and especially if one is using a Tarp or similar.
Battery pack for recharging.
Conclusion
Fastpacking for me, is one of the most pleasurable ways to travel by foot. The ability to cover distance, usually in a point-to-point way under ones own power and being self-sufficient is extremely rewarding. You can move as fast or as slow as you like, take as long as you wish and fully immerse yourself in the surroundings and environment.
Please support this website. I believe everyone deserves to read quality, independent and factual articles – that’s why this website is open to all. Free press has never been so vital. I hope I can keep providing independent articles with your help. Any contribution, however big or small, is so valuable to help finance regular content. Please support me on Patreon HERE.
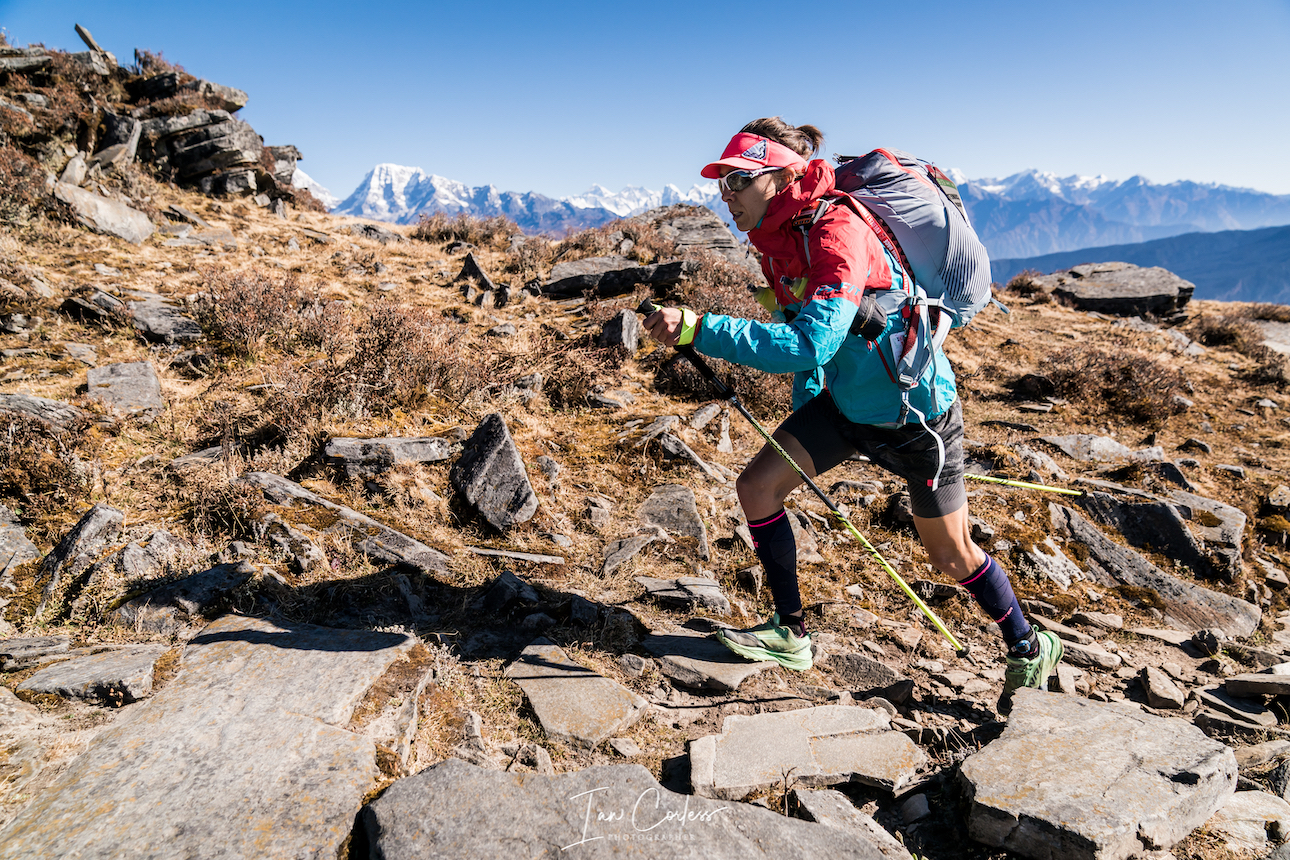
Nepal, the magic of Nepal! It truly is a remarkable place and if you are a trekker, fastpacker, runner or mountaineer, it is arguably THE best place in the world. Nepal changes people, it really does. I experienced the change on my first visit 7-years ago and I have been going back ever since. It’s not just the trails, the Himalayas or the stunning vistas; It is so much more! It’s the combination of all those elements for sure, but it is the Nepali people that often lure me back. They truly are the salt of the earth.
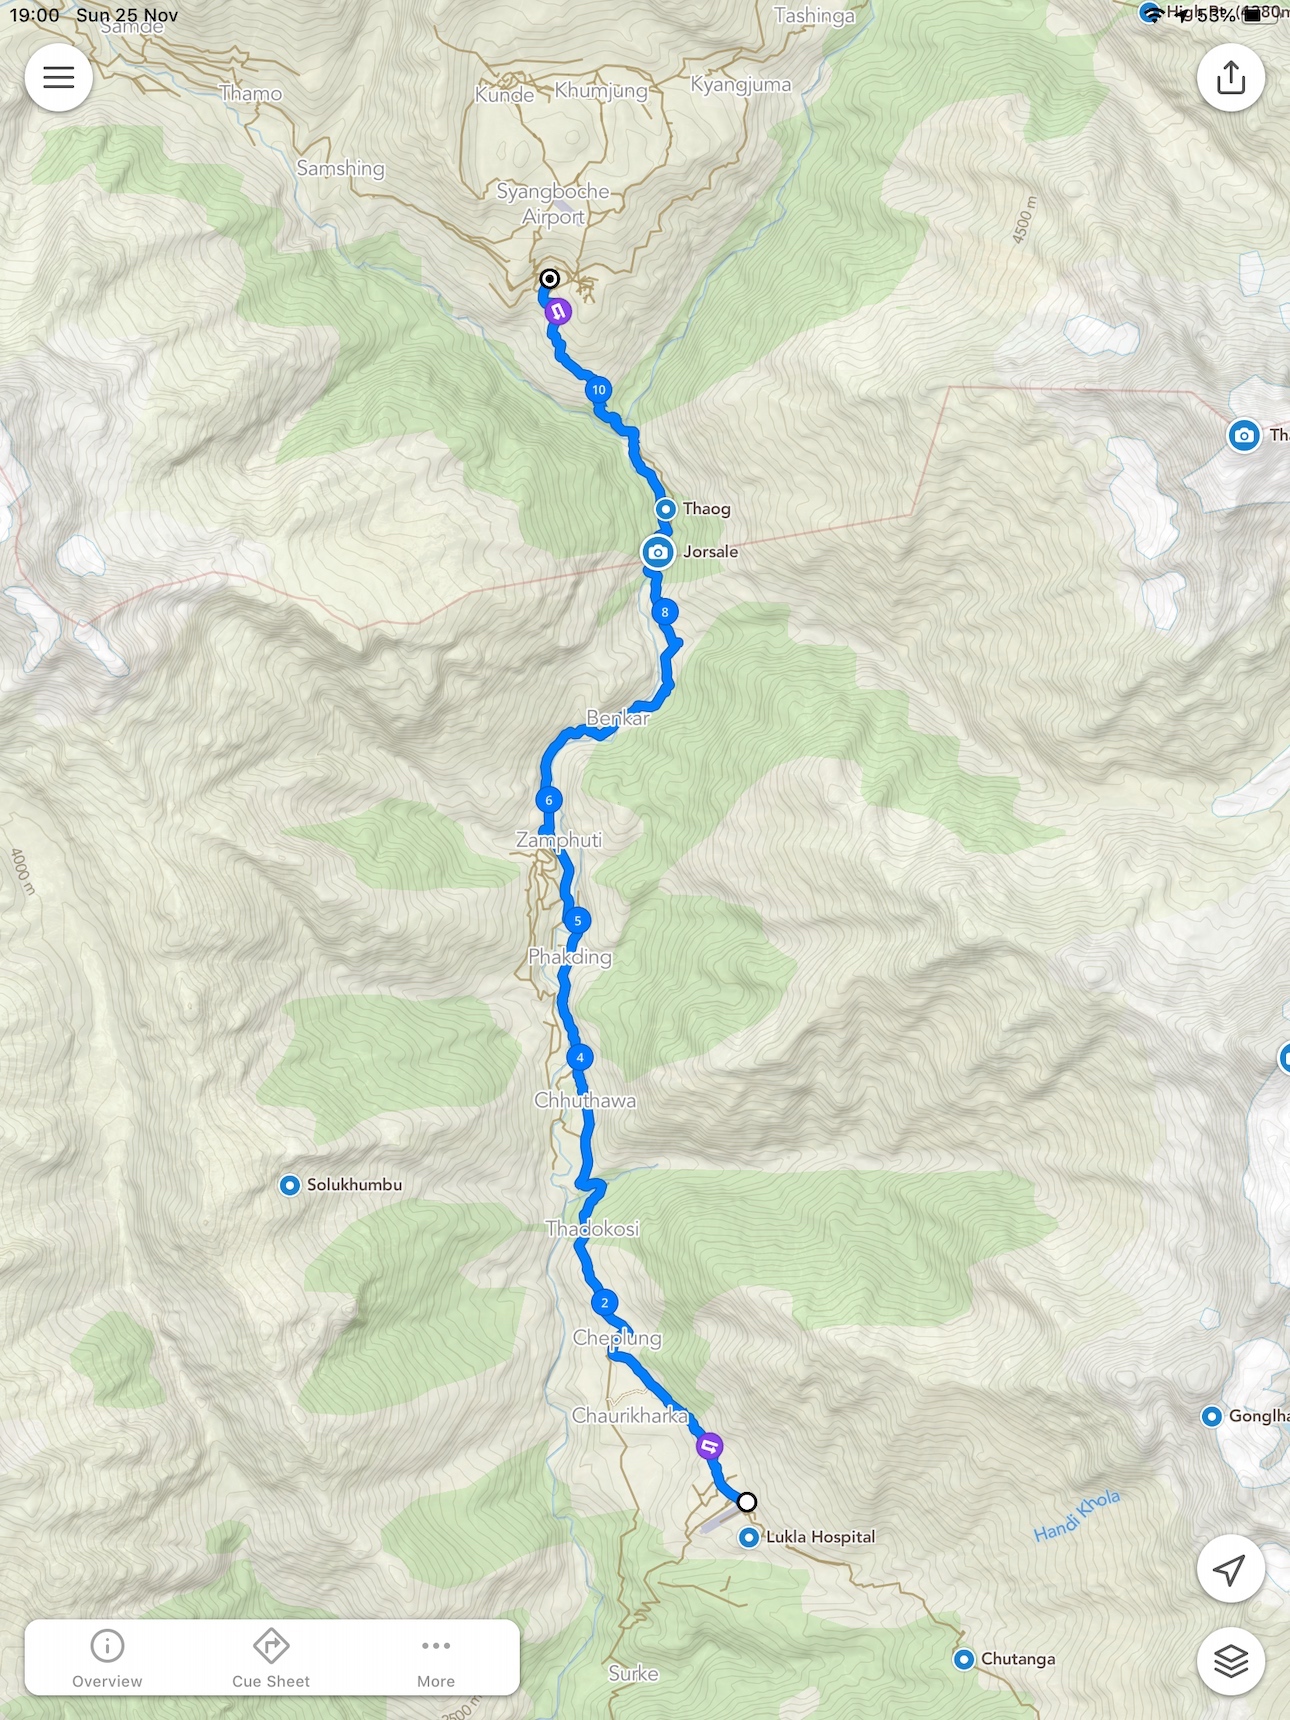
I have just returned from once again working on the ‘ETR’ – Everest Trail Race. It’s a 6-day running journey of 160km’s that starts at Jiri and traces a route that Hillary and Tenzing took when they first made their way to summit Everest. It’s a magical race and the structured format is a wonderful way to experience Nepal for the first time.
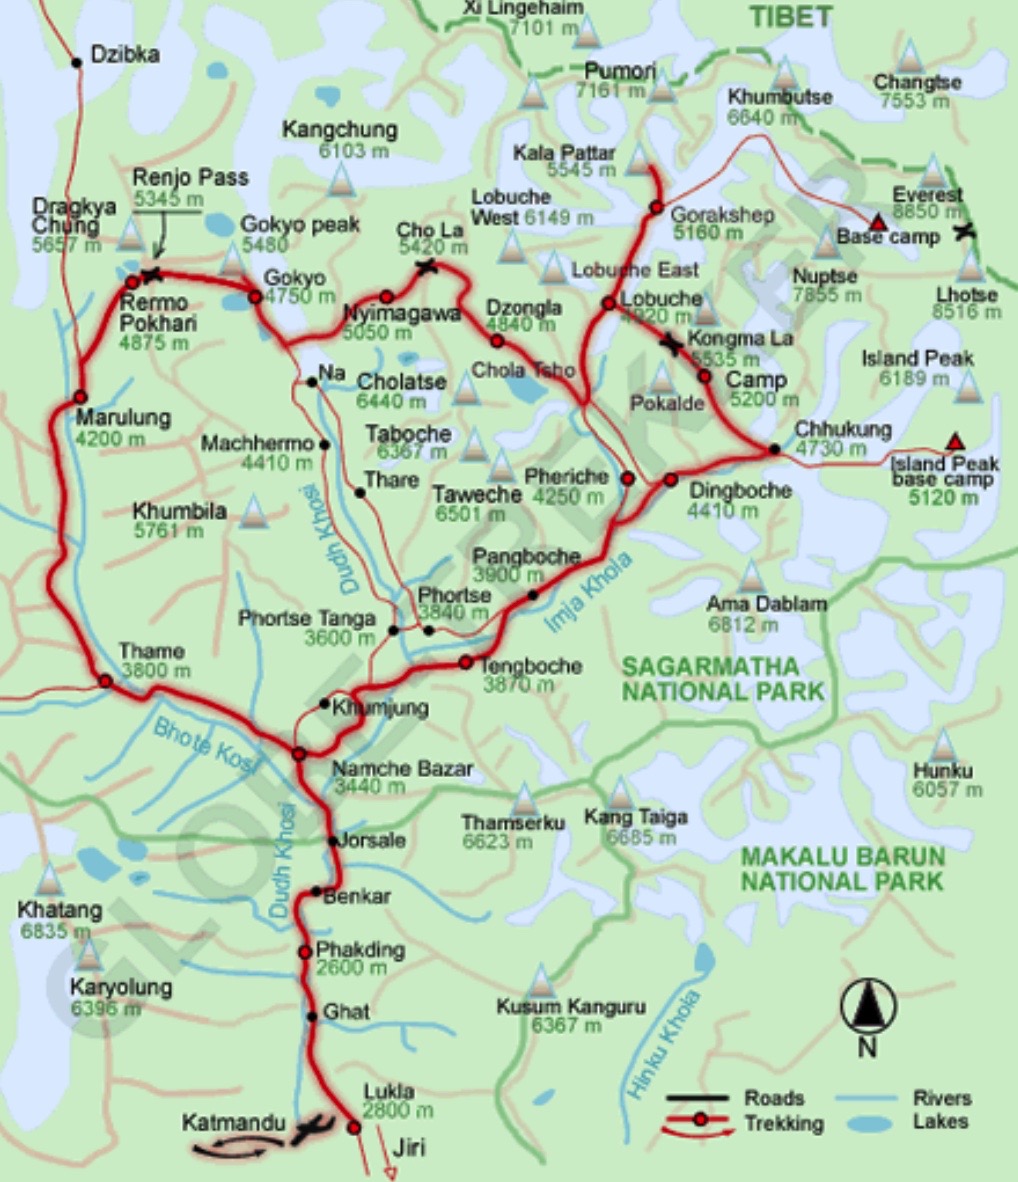
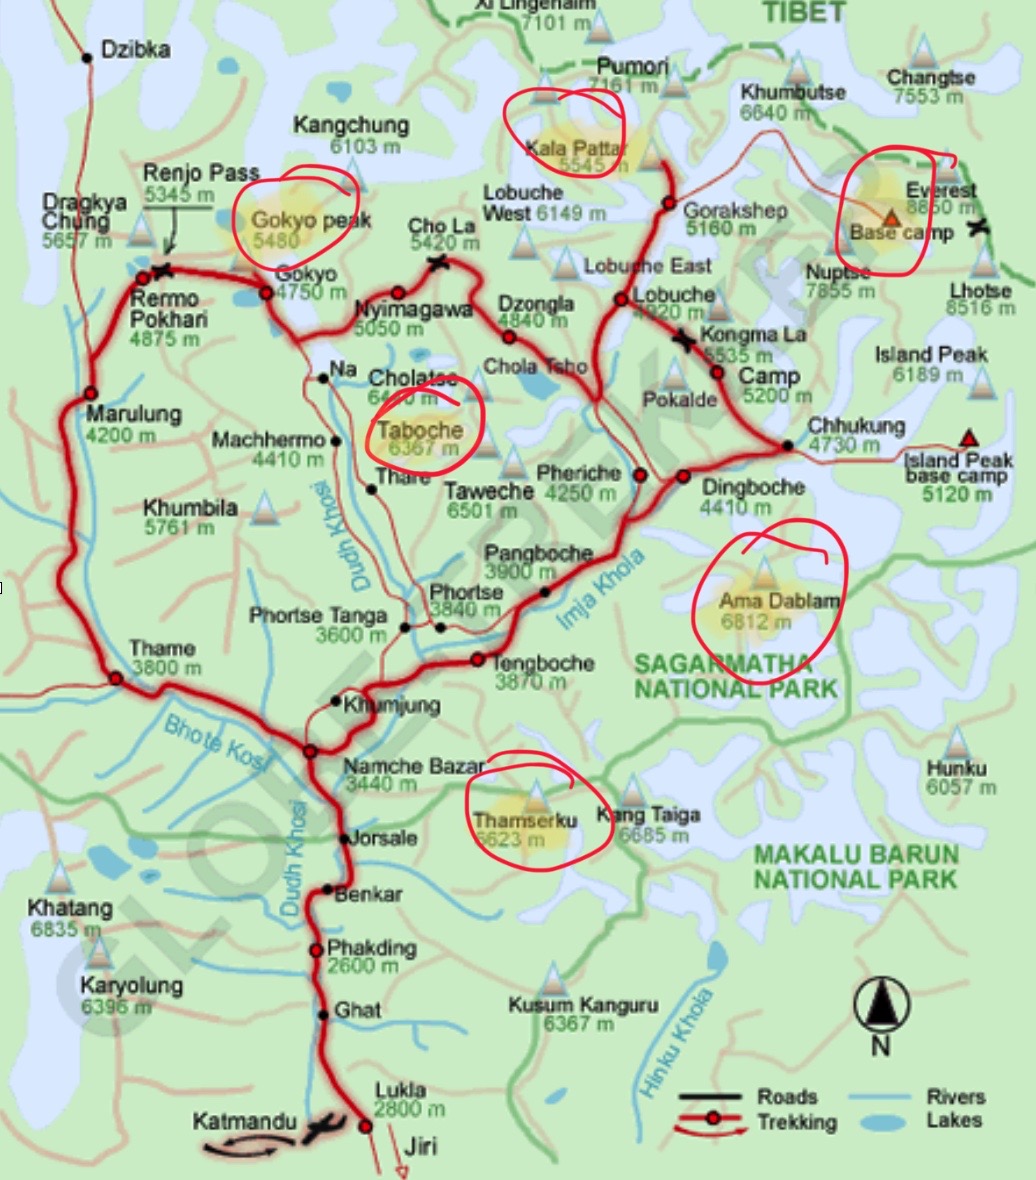
Home for 2-days and I was already missing the trails, views and the people, however, a stinking cold I picked up on the journey home was keeping me from sleeping. In the middle of the night, I laid a Nepal map on the floor and started to plan a journey that would take in the ‘Three High Passes’ on a circular route from Lukla.
It was as I stared at the map, I began to realise the options open and the possibility to do out and backs and add some serious additions to what is, an already very popular trek.
The high passes are:
Renjo La 5338m
Cho La 5380m
Kongma La 5535m
Now of course, before undertaking any route like this you have to ask yourself some really sound questions and gain an understanding of trekking or running at altitude – you don’t just do it. You have to ease yourself in and acclimate to the demands.
For me, I am not overly worried at being circa 5500m. My job regularly takes me to high altitudes, for example this year alone I have been over 5000m in China, been at 4000m in Turkey, been at the summit of Mt. Teide in Tenerife, been at the summit of Monte Rosa and of course, just recently I have done Everest Trail Race. So, I am pretty well prepared to go to 5500m or higher. The big question is usually, can one stay there?
See the map below:
My route would follow the very clearly defined high pass trek, clockwise, finishing with the higher Kongma La at 5535m. For example, this is usually done in 16-18 days and often 21-days are recommended to allow for any issues or problems.
My idea, once again (I did a trek last December) was to avoid the noise and the frenzy of Christmas and travel to Nepal for an adventure.
Rough plan was to leave the UK for Dubai Dec 13th, arrive in Kathmandu on the 16th. Start my trek on the 18th and finish on the 30th. Return to Kathmandu on the 31st and then have some RnR time before returning to the UK.
That allowed me 13-days.
However, I know from experience that I can move considerably faster and cover more ground than a normal trek, so, it got me looking – what could I add?
The plan is to add ‘out and backs’ to my route that would add some spice and challenge:
Gokyo RI
Kala Pattar?
Everest Base Camp
Ama Dablam Base Camp
Taboche
Thamersku Base Camp
I am well connected with the guide / Sherpa community in Kathmandu and so I asked Pasang Sherpa and Lhakpa Rangdu (both who have summited Everest multiple times, Lkakpa, 11 times!) Was my schedule feasible? Pasang knows me well and he immediately said yes! He confirmed that I usually cover double what most trekkers do in a day, also, mt time on the ETR confirms this. So, the plan was turned into a reality.
Initially I was going to go alone, but December in Nepal is very cold and relatively quiet. Pasang did not insist, but highly recommended a fast Sherpa to join me. I didn’t need much persuading and I agreed. I was adamant though – no porter, we carry our own equipment for the duration moving fast and light.
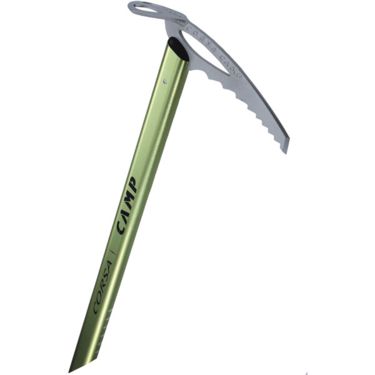
Another factor to consider was the crossing of glaciers. I had already made the decision to carry mini-spikes and a light ice axe.
THE PLAN:
13th Dec leave UK
17th KTM
18th Depart for Lukla (early flight I guess) and then we hike to Namche.
19th Lumde
20th RENJO PASS to Gokyo to include Gokyo RI
21st CHO LA PASS to Dzongla
22nd Gorak Shep w/ Kala Pattar?
23rd EBC and back to Lobuche
24th KONGMA LA PASS to Somare
25th Ama Dablam BC and back to Pangboche
26th Tabuche Peak and back to Pangboche
27th Monjo
28th Thamersku BC
29th Lukla
30th Spare day
31st Back to KTM
1st KTM
2nd Onward travel
It is very easy to look at a fastpack like this and lose perspective. Daily distances mean very little when climbing and descending at altitude and particularly in this environment – it is going to be very cold too, especially at night.
Pasang Sherpa – the main man and my Mr Fixer.
EQUIPMENT:
I recently wrote an article on equipment for fastpacking in Nepal, HERE. While much of what is in this article is correct, I am making some changes for December. First and foremost I am replacing my SPOT with a Garmin inReach MINI. I asked friends was the difference worth it and I have to say I am currently blown away with the device. User friendly, small, great battery life and perfect sync with the EARTHMATE App on iPhone. The map below is what I imported into the inReach as a ‘just in case’ scenario is needed.
However, the primary use for the inReach will be safety. It has a SOS button and that in a remote environment can be the difference between life and death. Also, I can send and receive messages – not essential but really great for letting the important people in my life know that I am ok. The other function will also allow anyone to follow me by using this link HERE – I must stress, I am going for no FKT’s, not looking to set records or do anything out of the ordinary, however, you may like to see where I am? I haven’t decided yet if I will turn the inReach on each morning and off each evening or leave it permanently on. The battery will last 20-days on 30-min tracking.
I am going to use the Montane Ultra Tour 40 backpack. It is light, super comfy and will allow me to carry all I need.
I have purchased a pair of RAB Endurance Down Gloves which are maybe overkill, but, I have had friends at EBC and in that area in December and it has been -25, so, I don’t wantcold hands!
I am using the inov-8 ROCLITE 325 Gore-Tex fastpack boot.
I normally do not take waterproof clothing but I have decided to take the inov-8 AT/C Race Pant (170g) and AT/C Stormshell Jacket (175g).
Ice Axe – I am taking the amazingly super-light CAMP Corsa which is just 200g
YakTrax XTR cramp ons
The rest of my equipment will be as follows:
Day:
inov-8 3/4 tights.
inov-8 AT/C Merino Top
inov-8 AT/C soft-shell Pro Top
Plus inov-8 ROCLITE 325 Gore-Tex, inov-8 AT/C Race Pant (170g) and AT/C Stormshell Jacket
Night:
RAB INFINITY 500 sleeping bag
RAB NEUTRINO PRO Jacket
RAB MICROLIGHT Jacket
RAB SUPERFLUX HOODY
RAB 120 long sleeve base layer
RAB 120 pant
PHD down socks
RAB PROTON PANTS
RAB gloves, hat and neck rolls
Extras:
Basic toiletries
Headtorch and spare batteries
Earphones
Phone
Pen
Passport
Black Diamond Z Poles
Waterproof bags
Camera:
Sony A7RIII with 35mm f2.8 prime lens and 4 batteries/ 2 spare SD cards.
*****
Departure form the UK is Dec 13th and you can follow my tracker HERE
I will do iPhone posts during the trek, mainly on Facebook and Instagram Story. All the good images will come post the trek when I can download and edit.
Misty skies, gale force winds, mud, rain, relentless climbing, technical terrain and an incredible field of runners made the 2017 GarminMourne Skyline MTR a tough one! Now in it’s 4th edition, the race has over the years been known for its tough conditions, many said, post race, this tear was the toughest!
Concluding Skyrunning UK’s 2017 calendar, the Garmin Mourne Skyline MTR really was a fitting end to what has been an incredible year. The course, organisation and the field of runners made this a special and unforgettable day in the mountains.
The addition of Ian Bailey, a previous champion of the race, it was always going to be a quick race up at the front, especially with Seamus Lynch toeing the line. In the early stages it was Lynch who lead the duo but with half the race covered, Bailey took the reigns at the front and never looked back forging a convincing lead. At the finish, Bailey crossed in 3:57:18, just over 10-minutes ahead of Lynch.
It was another 5-minutes before Ryan Stewart arrived rounding out the top-3
In the ladies race, Shileen O’Kane would bring local knowledge, fell running experience and being a participant in the last three editions, this would no doubt provide and advantage? It did! O’Kane pushed from the front throughout the race but she was constantly shadowed by Megan Wilson. The duo traded blows and on the climb to Donnard, it looked like Wilson may take the lead… O’Kane kicked though and descended to the finish line with almost a 4-minute margin over the Dark Peak fell runner, 4:56:43 to 5:00:09. Catherine Forsythe was the 3rd lady, crossing the line in 5:40:26.
The 2017 Garmin Mourne Skyline MTR once again established itself as a must-do race. The combination of location, local infrastructure, great organisation, enthusiastic locals and a brutal course will guarantee that demand will be high for the 2018 edition.
Covering 35km and a total elevation gain of 3370m, the Garmin Mourne Skyline MTR is everything a Skyrunning race should be.
The Skyrunning UK season concludes in Ireland this coming weekend with the Garmin Mourne Skyline MTR. What a year it has been! From the very first edition, the GMSMTR has sold out and demand continues to exceed places available. It’s a testament to the team behind the race.
The 2016 edition was won by Germain Grangier in a time of 3:49:39 and the ladies’ race was dominated by Jasmin Paris running 4:30:02. However, the ladies course record still stands with USA based runner and Salomon athlete, Stevie Kremer.
Ian Bailey, former course record holder at the Garmin Mourne Skyline MTR returns in 2017 and will not only be looking for victory but dipping under the 3:49:39 set by Grangier last year.
Skyrunning UK Series champions will be confirmed in Ireland. The battle is on for a male champion, Tim Campion-Smith is the odds-on favourite with a convincing 25-point lead. Jason Millward, Tomasso Migliuolo and Jonathan Palmer are in with a shout. Tim Campion-Smith will not run in Ireland, however, Jason Millward will! With a 20% bonus at stake for the final event, if Millward wins or places 2nd, he would leapfrog Campion-Smith for the 2017 overall title by dropping his lowest ranking points (9th at Ben Nevis Ultra) and replacing them with points from the Mourne Skyline MTR – 1st would provide 30 points, 2nd 26.4 points and *3rd would provide 22.8 points.
It is likely that Jonathan Palmer will move from equal 3rd to 3rd overall after the Mourne Skyline MTR. Of course, if Millward has a poor run and Palmer has a great run, this could change!
*3rd place would not be enough for overall victory, it would provide a total of 45.8 points to Campion-Smith’s 48-point tally.
The ladies race is wide open! Kirsty-Jane Birch currently leads the ranking with 11 points but it looks like she will not race in Ireland and therefore she will not have three qualifying races. This leaves the door open for 2nd placed Rebecca Morgan who has 5 points and will race at the Mourne – in many respects, she just needs to finish the race but a top-10 would guarantee overall victory.
As in previous editions, there is a wealth of talent toeing the line. Look out for:
Seamus Lynch, Jonathan Palmer, David Hicks, Barry Hartnett, Ryan Stewart and Shane Donnelly.
Linda O’Connor, Megan Wilson, Martsje Hell, Elizabeth Wheeler, Karina Jonina, Jacqueline Toal, Shileen O’Kane, Hazel McLaughlin and importantly Janne Geurts who placed 2nd at the V3K but this is only her 2nd Skyrunning UK race and therefore cannot qualify for the Series despite having the most points.
Owned by the National Trust, the Mourne Mountains are an area of outstanding beauty, it includes Slieve Donard (850m), the highest mountain in Northern Ireland and Ulster and as such it provides a perfect location for a mountain race.
Among the more famous features, the Mourne Wall is a key element of this region and a key aspect of the race. Comprised of forest path, fire roads, single track, granite trail and tough uneven broken fell, the race is a tough challenge. In just 35km the course has a brutal 3370m of ascent and no less than 9 peaks, the highest being Slieve Donard at 850m.
The coastal town of Newcastle hosts the start of the race and a short section of road leads into Donard Park via the promenade entrance and the ‘Granite Trail’ awaits for a long and relentless climb. Dundrum Bay is visible to the west, before a fast-downhill section to a climb of the stony and challenging Glen River Path to the Col between Slieve Donard and Slieve Commedagh.
At Hare’s Gap, the first major peak awaits, Slieve Bearnagh, first passing the North Tor before reaching the summit quickly followed with the technical ascent of Slieve Meelmore. The Mourne Wall becomes a key feature of the race and for the first time the runners follow its line for just 0.4km before veering right and descending towards The Mourne Way path.
Fofany Dam precludes the only road section of the course which leads to the Mourne Wall and the style between Ott and Slieve Loughshannagh. The climbs and summits come thick and fast now; Slieve Loughshannagh, Slieve Meelbeg and the course continues to follow the Mourne Wall leading to a repeated climb of the technical and challenging Slieve Meelmore, this time in the opposite direction. The toughest climb of the day follows, Slieve Bearnagh.
Passing around the North Tor it is downhill towards Hare’s Gap and a steep climb next to the Mourne Wall towards Slievenaglogh and Slieve Commedagh, Northern Ireland’s second highest mountain. It is ironic that Slieve Commedagh should lead into Slieve Donard and the highest point of the race. On a clear day, the views are magnificent out over the sea, inland towns and villages are visible and of course, the Mourne Mountains. From the summit, it’s all downhill to the finish via the rocky Glen River Path and a fire road that leads into Donard Park and the finish.
You can follow the race in words and images at iancorless.com and a race summary and image selection will be posted on skyrunninguk.com