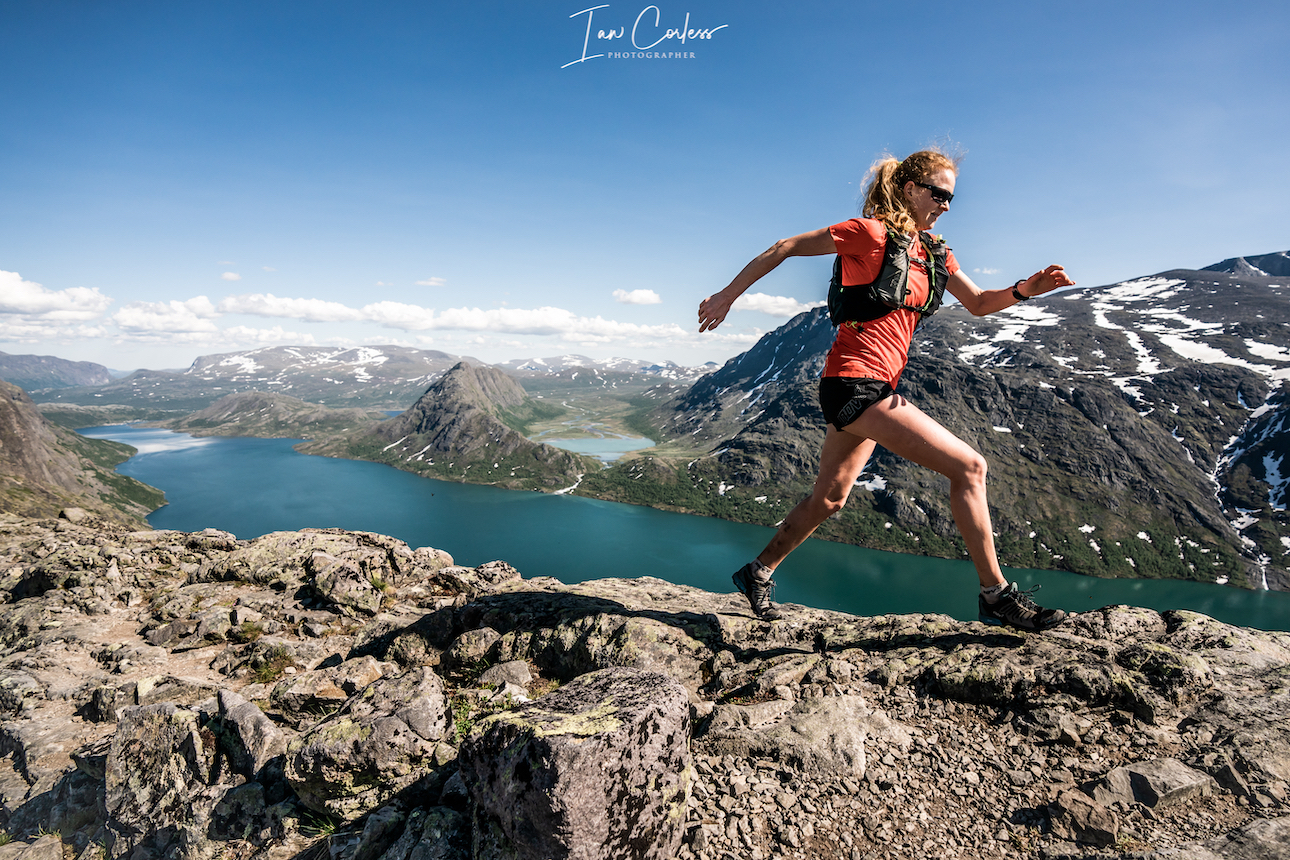
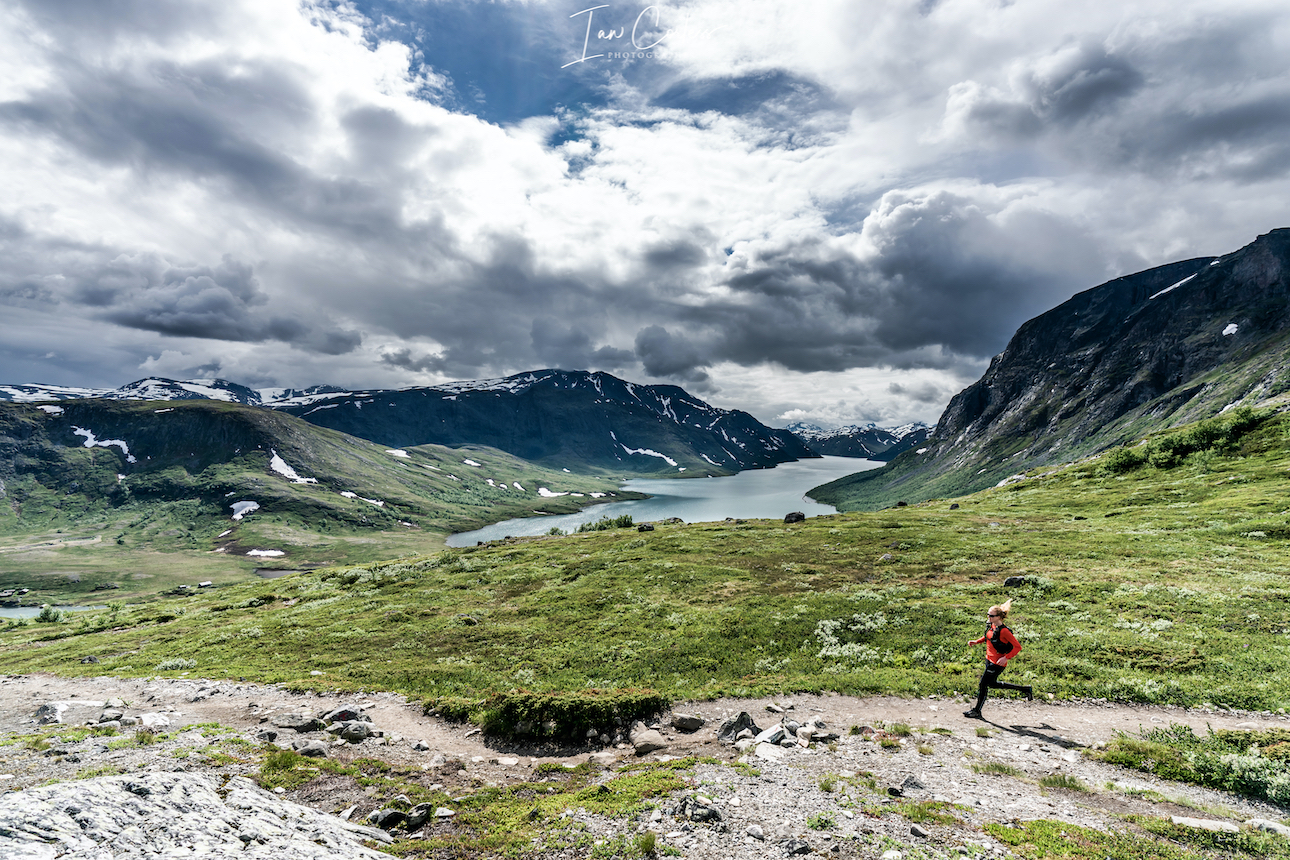
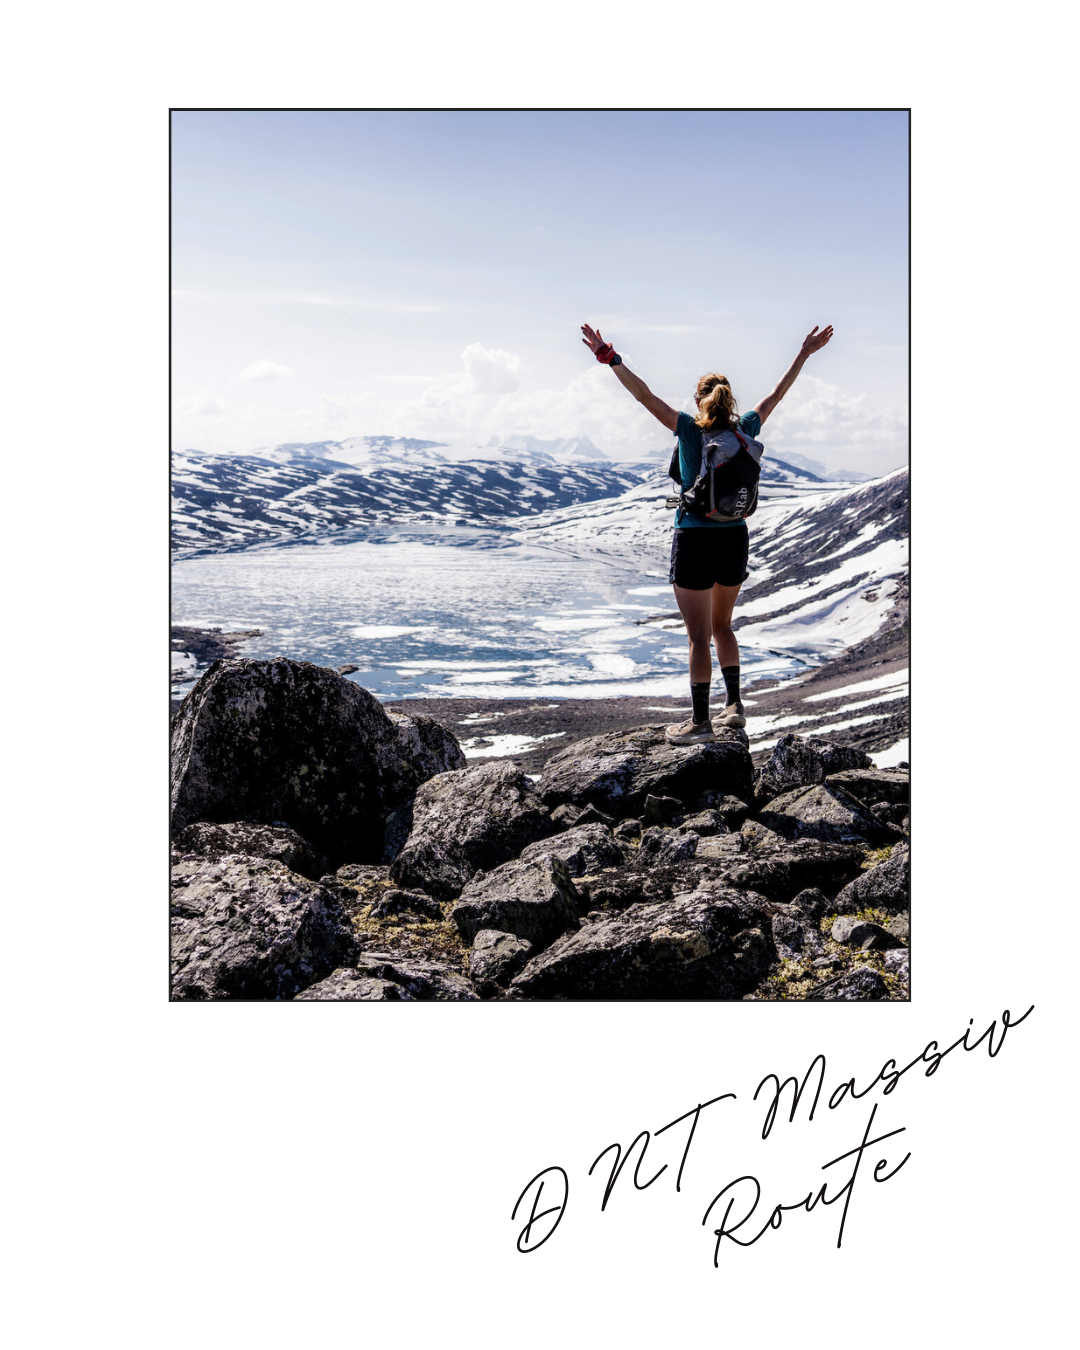
You may assume it’s all about speed and pressure. Not this time. Norwegian runner, Abelone Lyng, put her own spin on the legend that is the DNT MASSIV TRAIL
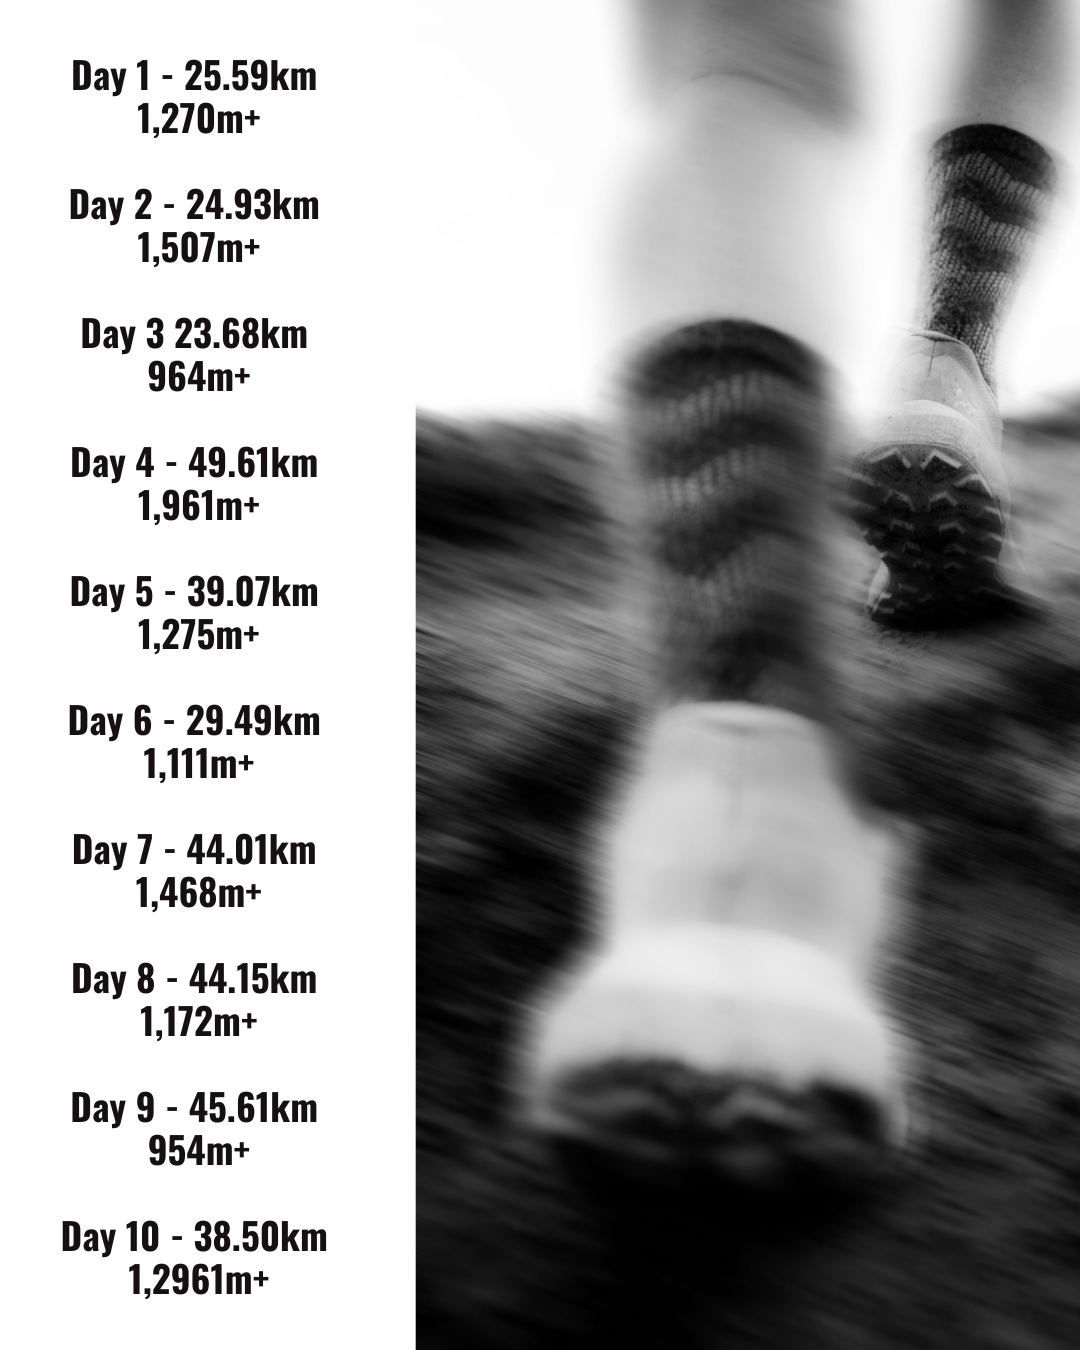
A 364 km journey, and just under 13,000 m vertical gain across four national parks in Norway
Breheimen, Jotunheimen, Skarvheimen, and Hardangervidda.
In just 10-days, Abelone moved fast and light, unbroken, solo, yet utterly connected.
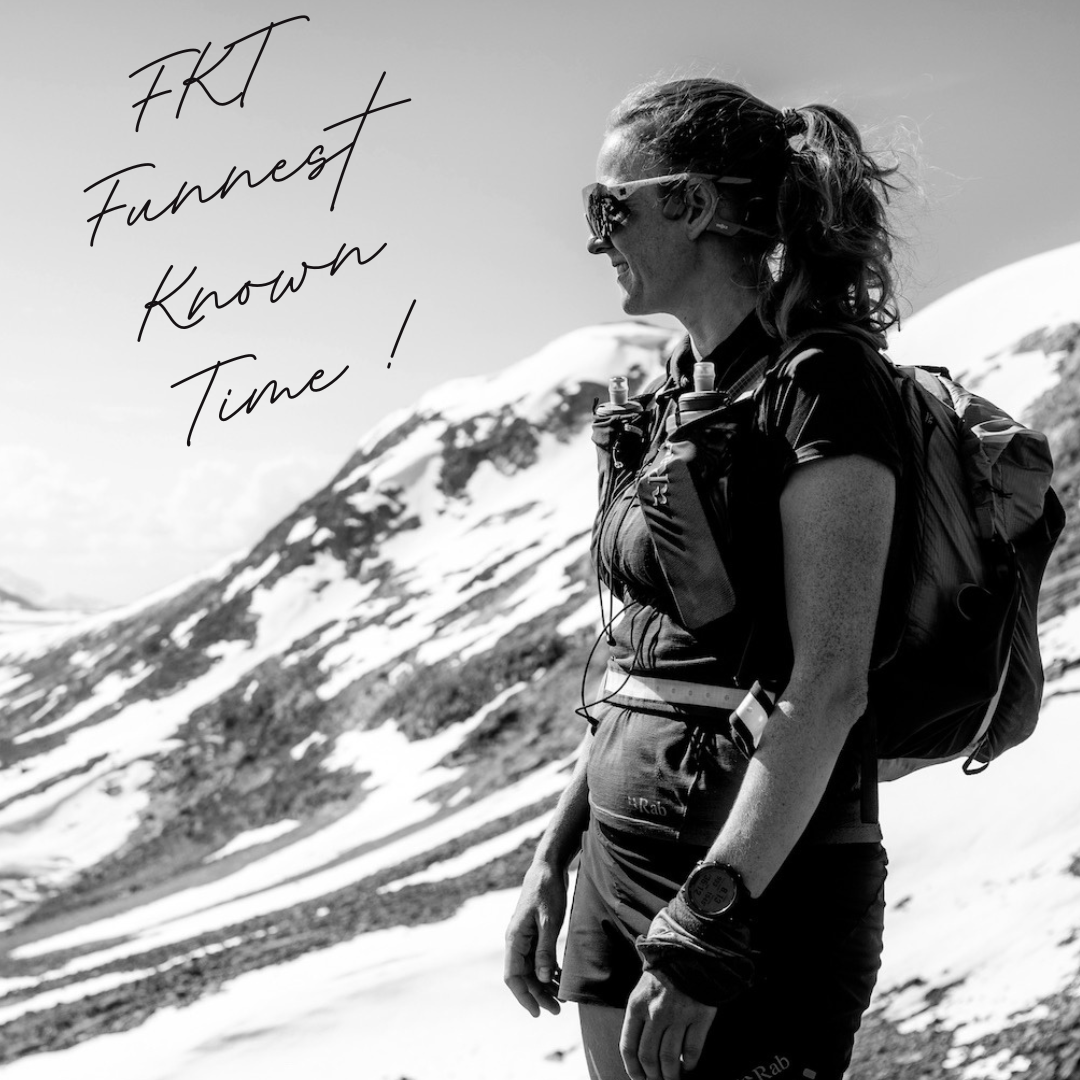
She didn’t chase a formal FKT.
She chased what she coined a “Funnest Known Time.”
Home of the Giants 2024 has just come to a conclusion. And what a week it has been.
This trip came about through personal adventure in the Jotunheimen mountains of Norway and the desire to share and showcase this magical playground.
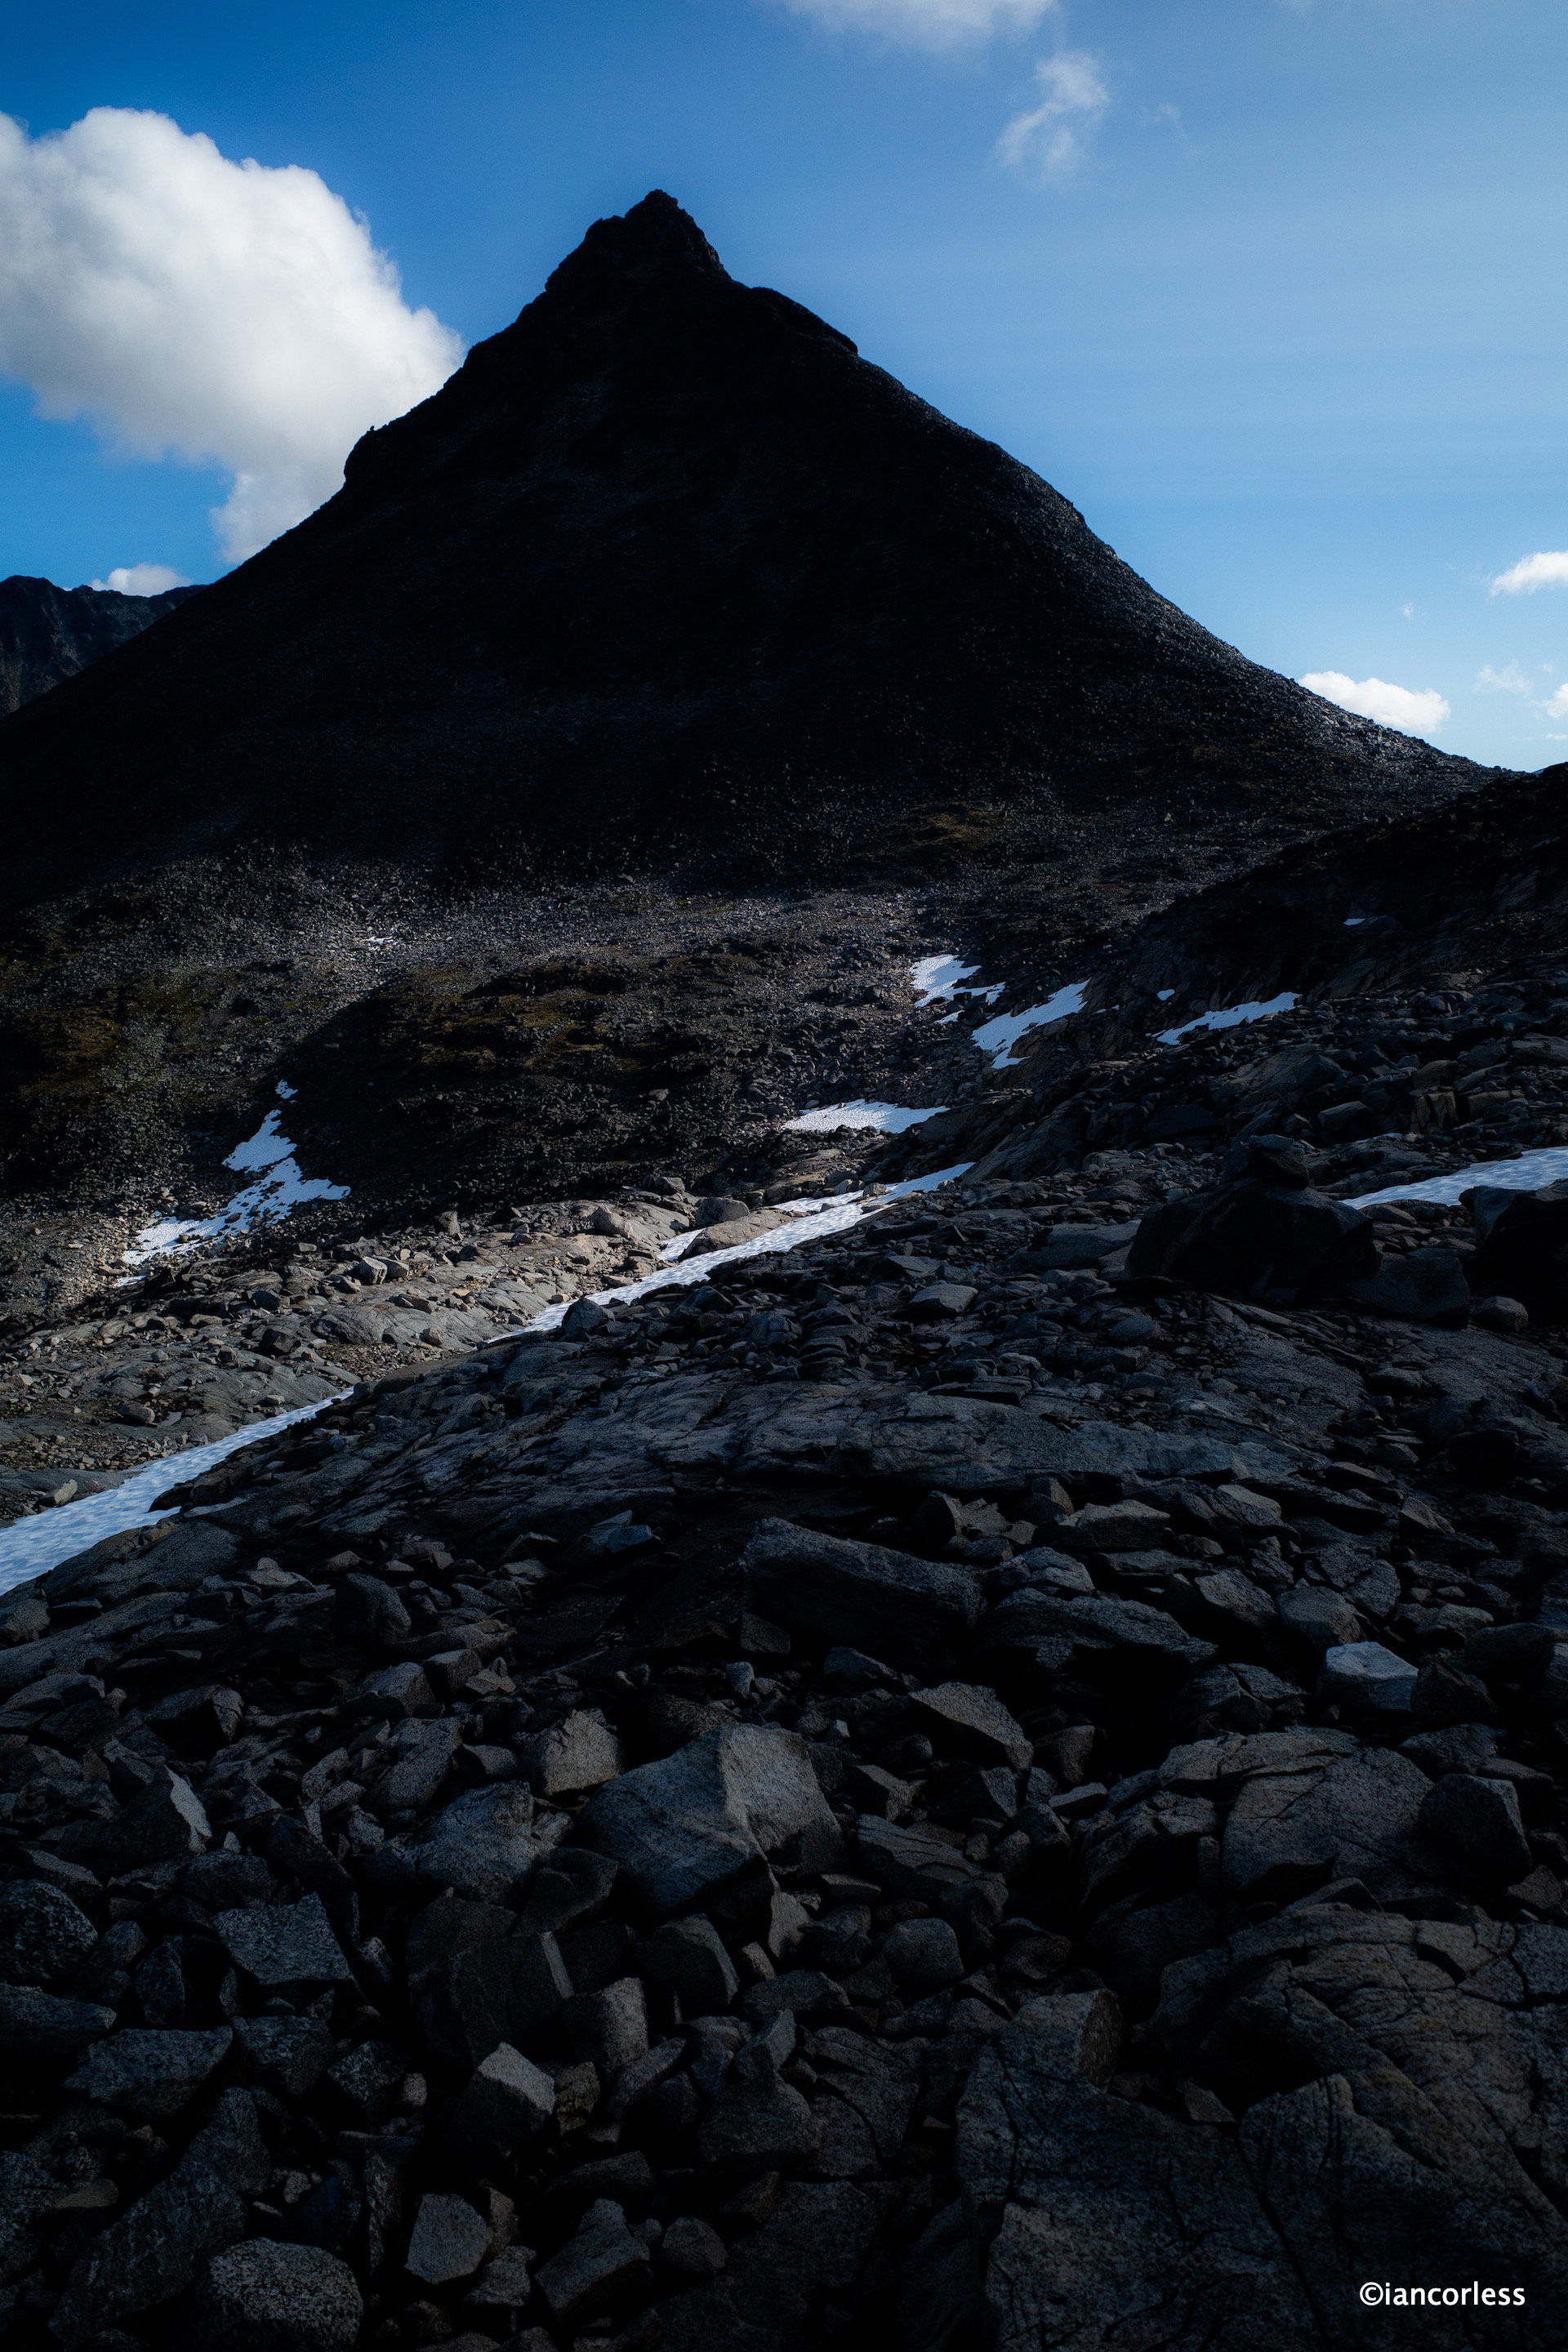
Baz at the summit of Kyrkja
What is Home of the Giants?
A multi-day adventure, 6-days in total, through a magical and challenging landscape. Unlike a race, this journey was created as a finely balanced exclusive trip for up to just 12 participants. A challenge at a more relaxed pace, taking in an amazing route whilst moving light in a semi self-sufficient mode using DNT cabins for overnight accommodation.
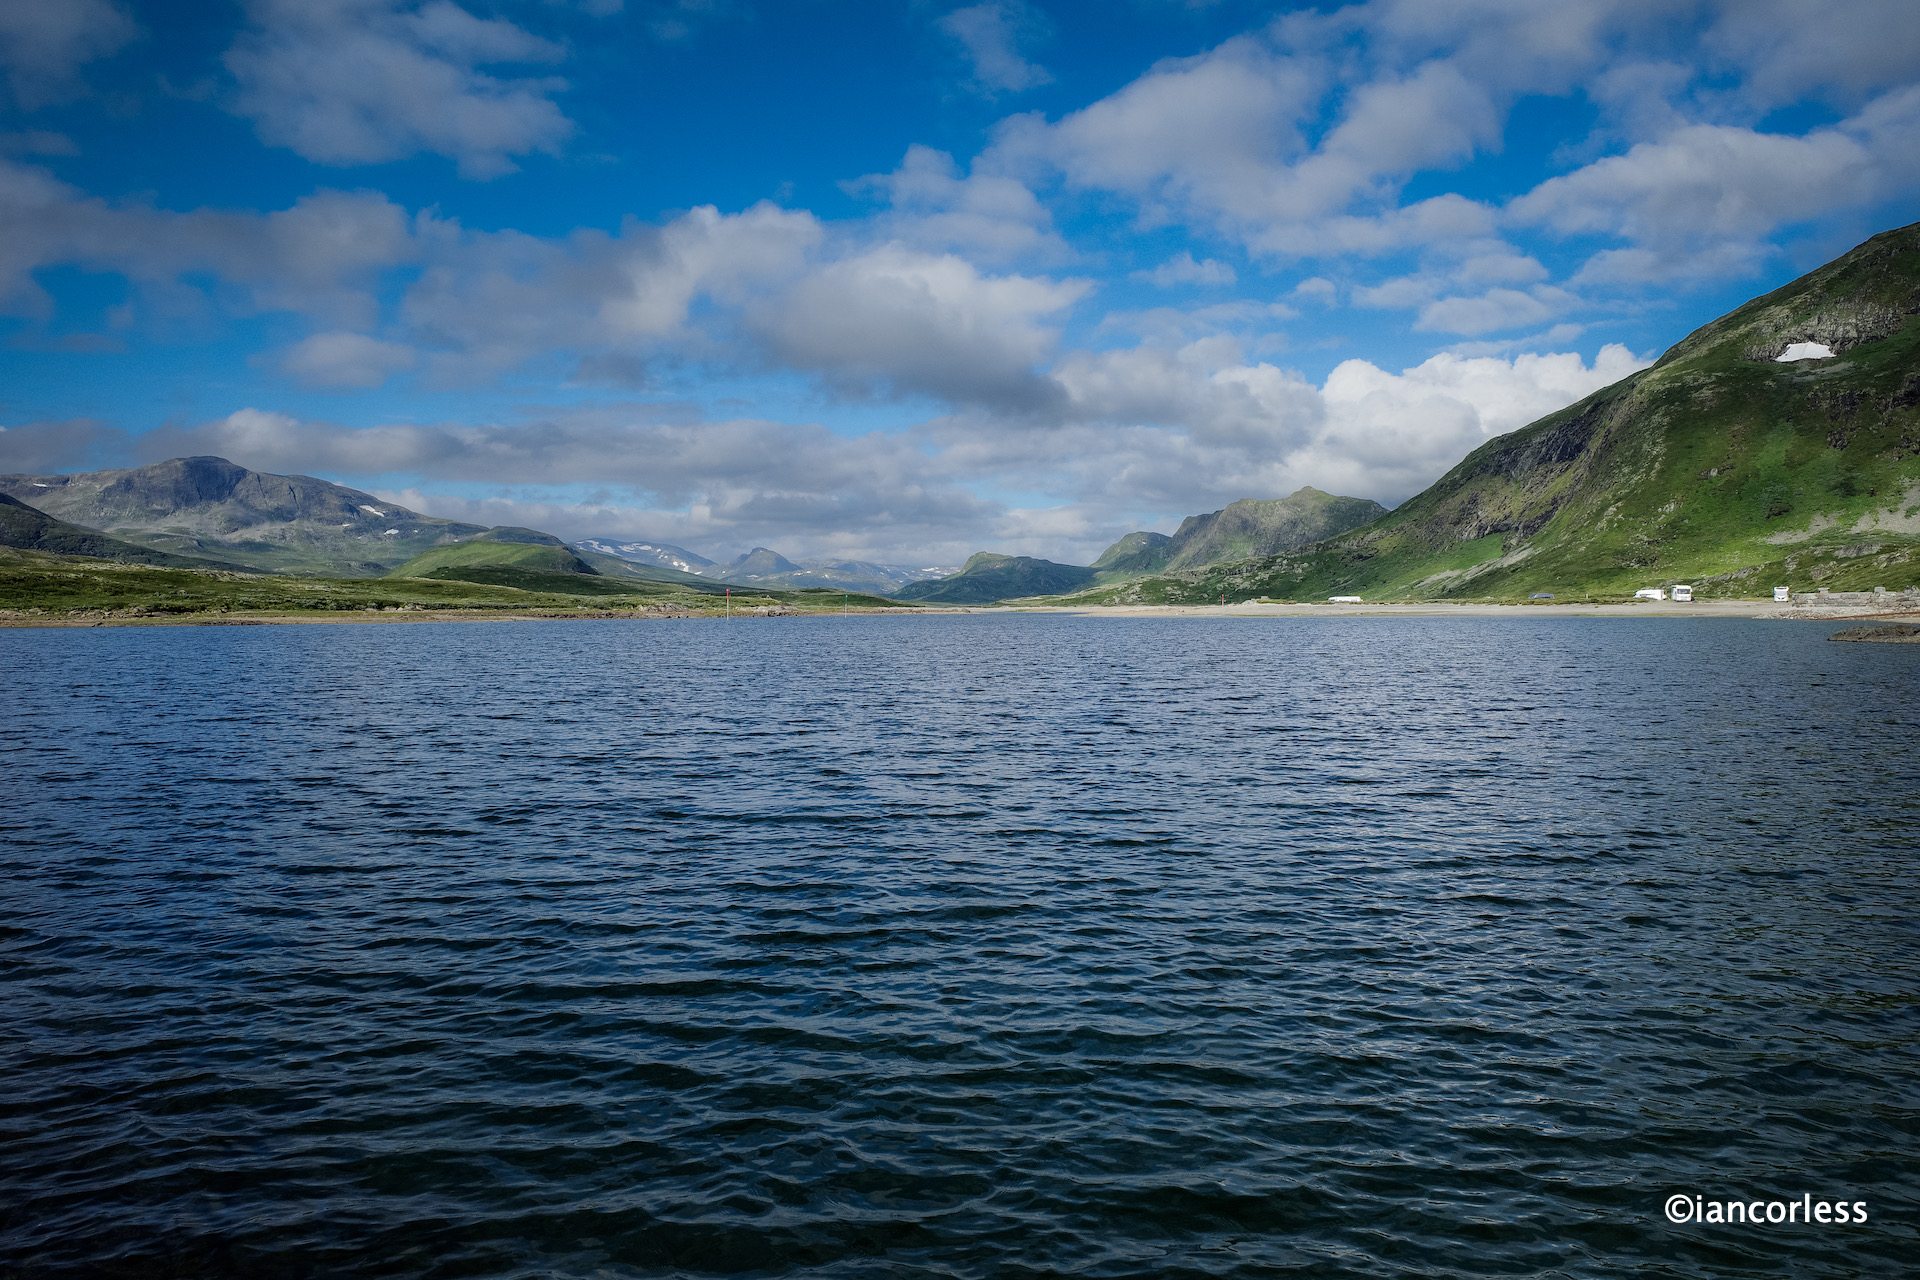
Lake Bygdin
Based around the concept of stage races, Home of the Giants is about moving lighter and therefore faster with a minimum amount of equipment without compromising safety. All we needed could be carried in a small pack weighing approximately 3kg (plus liquid).
It is important to emphasize that Norway can have spring, summer and winter in one day. Never underestimate the challenge of the environment. It is all well and good being light IF you can move fast. You also need to consider the ‘what if’ scenario and should you become slow or a worst case scenario, injured and waiting help/ rescue. At a minimum you MUST have merino top and bottom, warm insulating layer (down or PrimaLoft) waterproof jacket and pants, hat, gloves and a bivy bag. I also strongly recommend a product such as Garmin InReach. Much of Jotunheimen has no phone connection, an InReach with emergency SOS button, for me, should be mandatory.
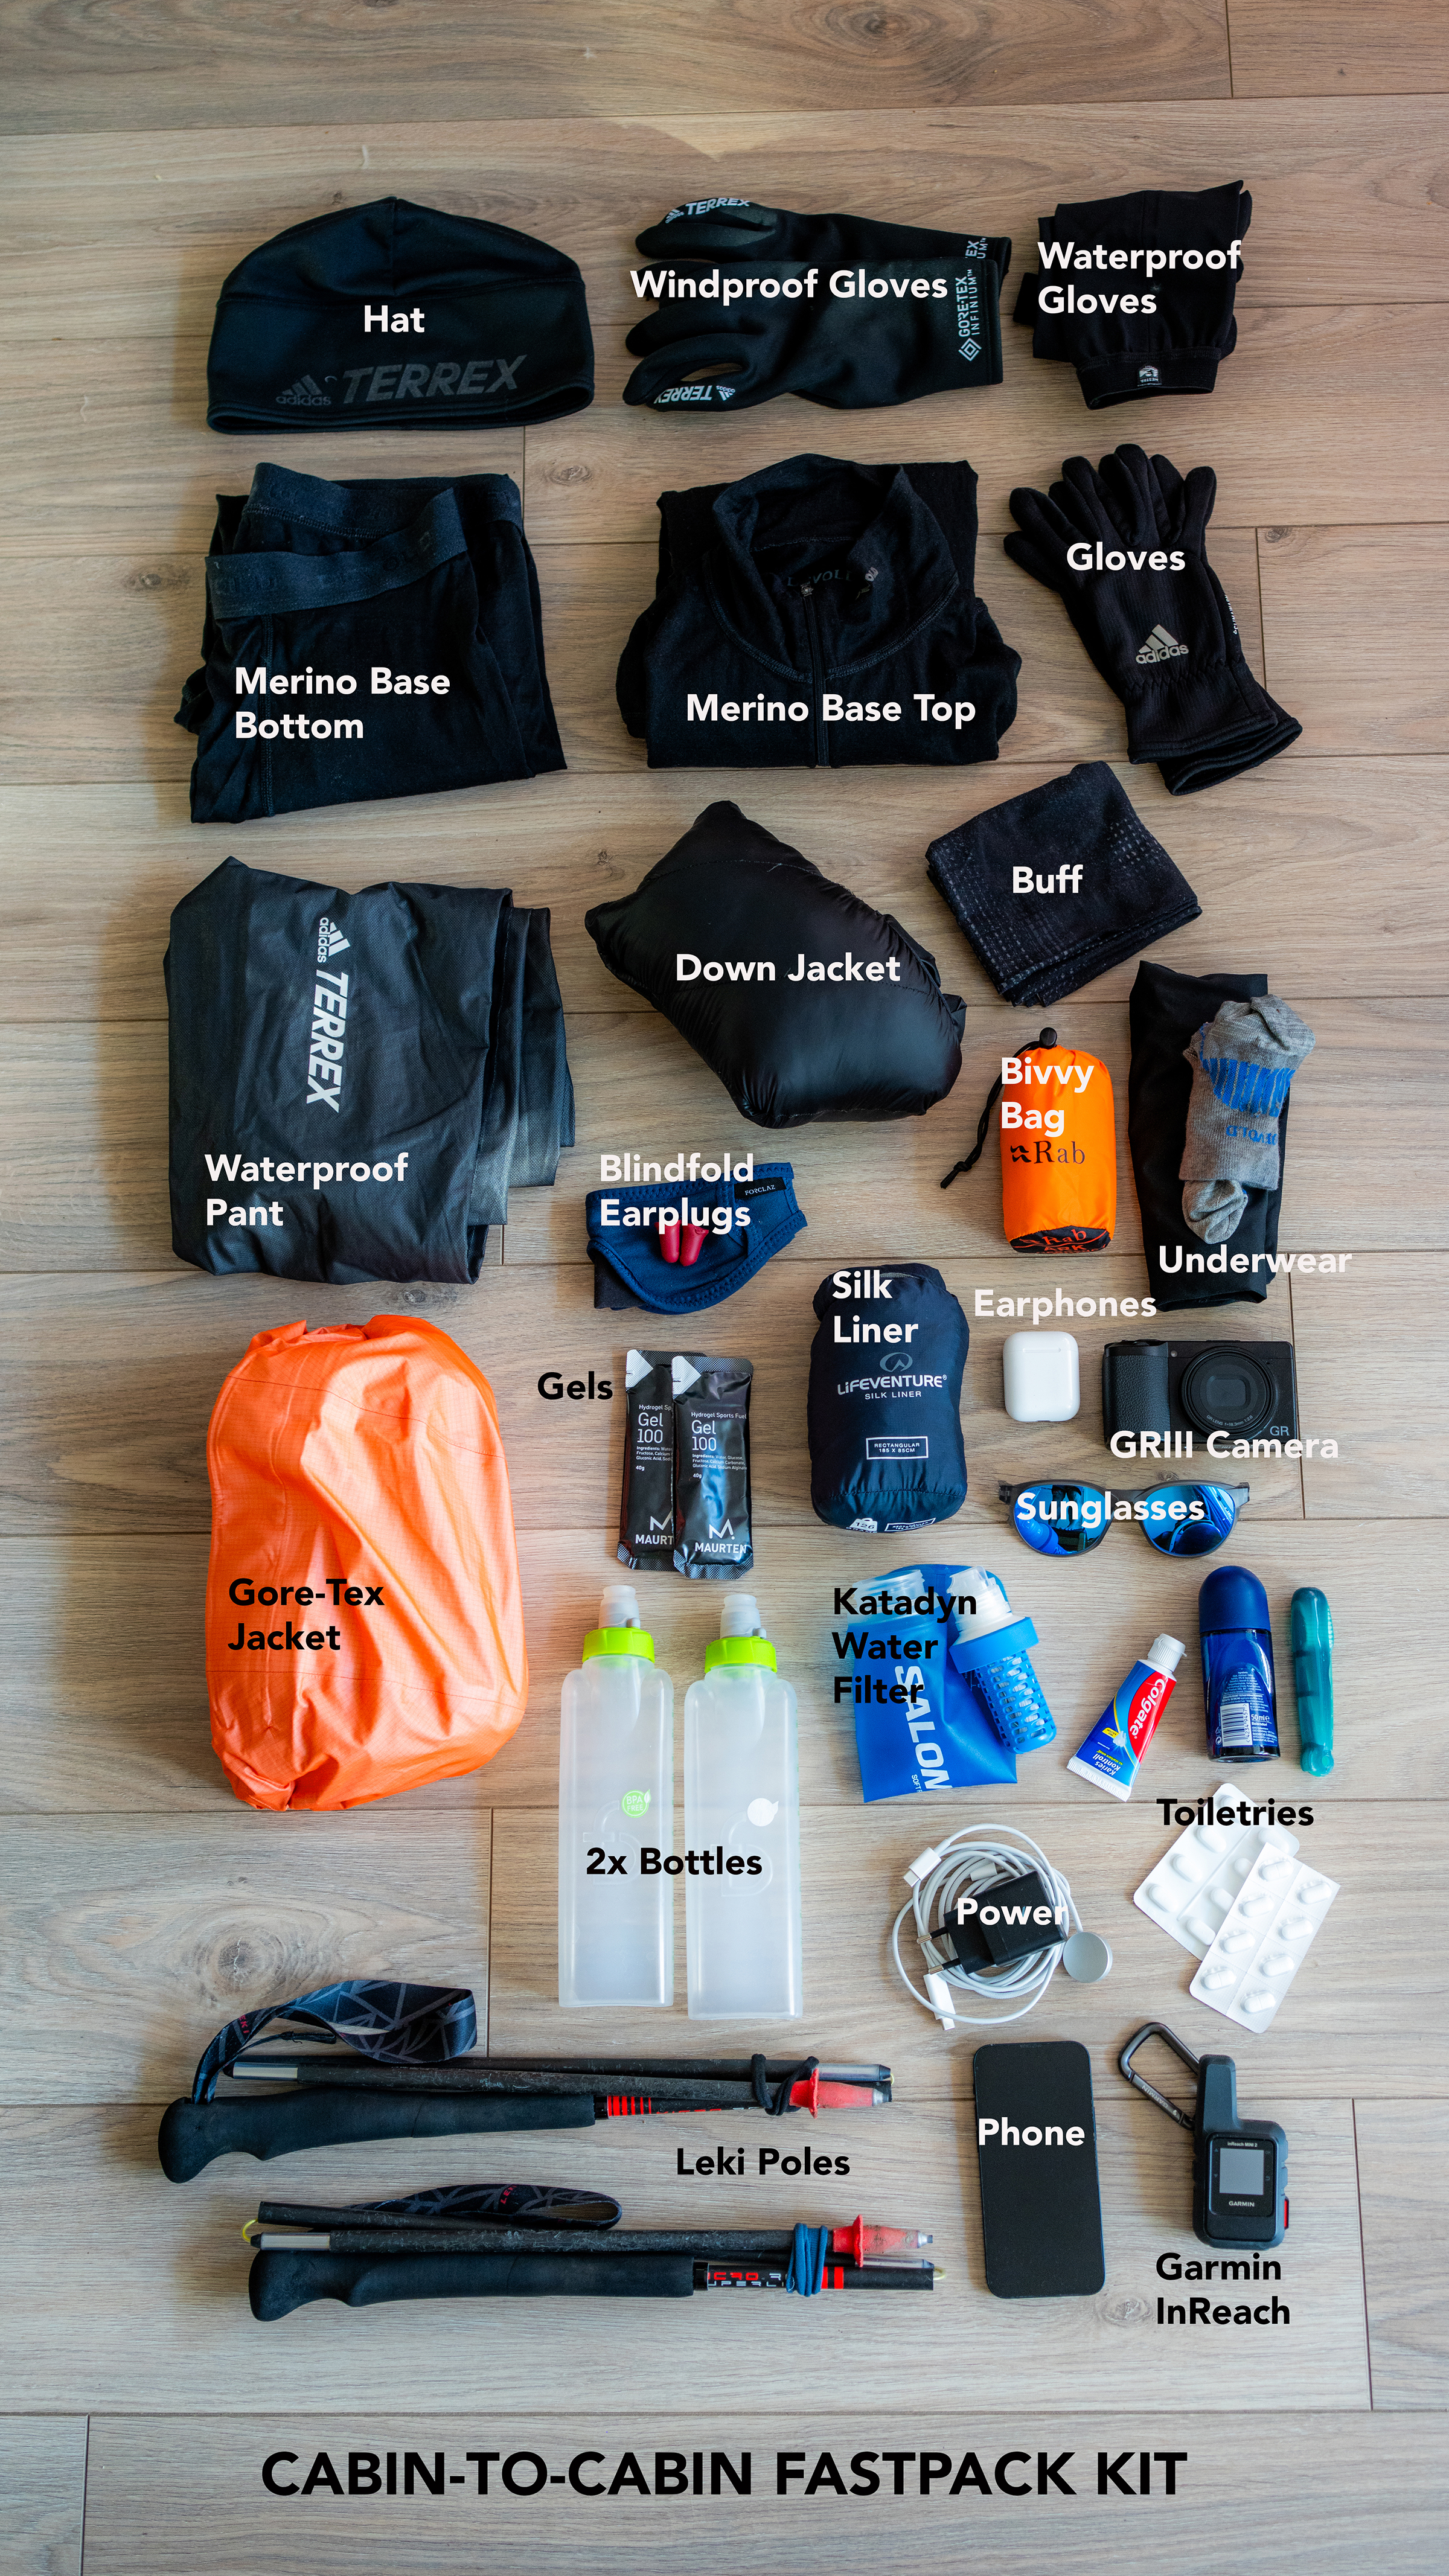
You can see an example of my pack below and the details are as follows:
Camelbak Octane Pack 600g
adidas hat 32g
adidas gloves Infinitum 52g
Hestra waterproof gloves 53g
adidas gloves 41g
Devold merino base top 193g
Devold merino base bottom 166g
Buff 43g
Haglofs down jacket 163g
adidas waterproof pant 125g
adidas Gore-Tex jacket 272g
Rab bivvy bag 110g
Underwear 98g
Gels 81g (for emergency)
Silk liner 126g
Blindfold/ earplugs 22g
Earphones 44g
Ricoh GRIII camera 251g (a luxury)
Sunglasses 18g
Bottles x2 90g
Katadyn water filter 52g
Toiletries 196g
Power supply 138g
Phone 136g
Garmin InReach 108g
Leki poles 250g
3379g
Staying at DNT staffed cabins provides the best of both worlds, they provide a bed for the night, dinner, breakfast, a packed lunch and they have additional facilities such as relaxation areas, showers and a bar. It’s the ultimate way to travel light in the mountains. Beds are in dorms or private rooms that depending on the cabin can be solo, double, triple, quadruple or five plus. Most DNT’s have a rule that irrespective of if you arrive and there are no beds, you will not be turned away, so, rest assured, a safe haven is always available.
OUR JOURNEY
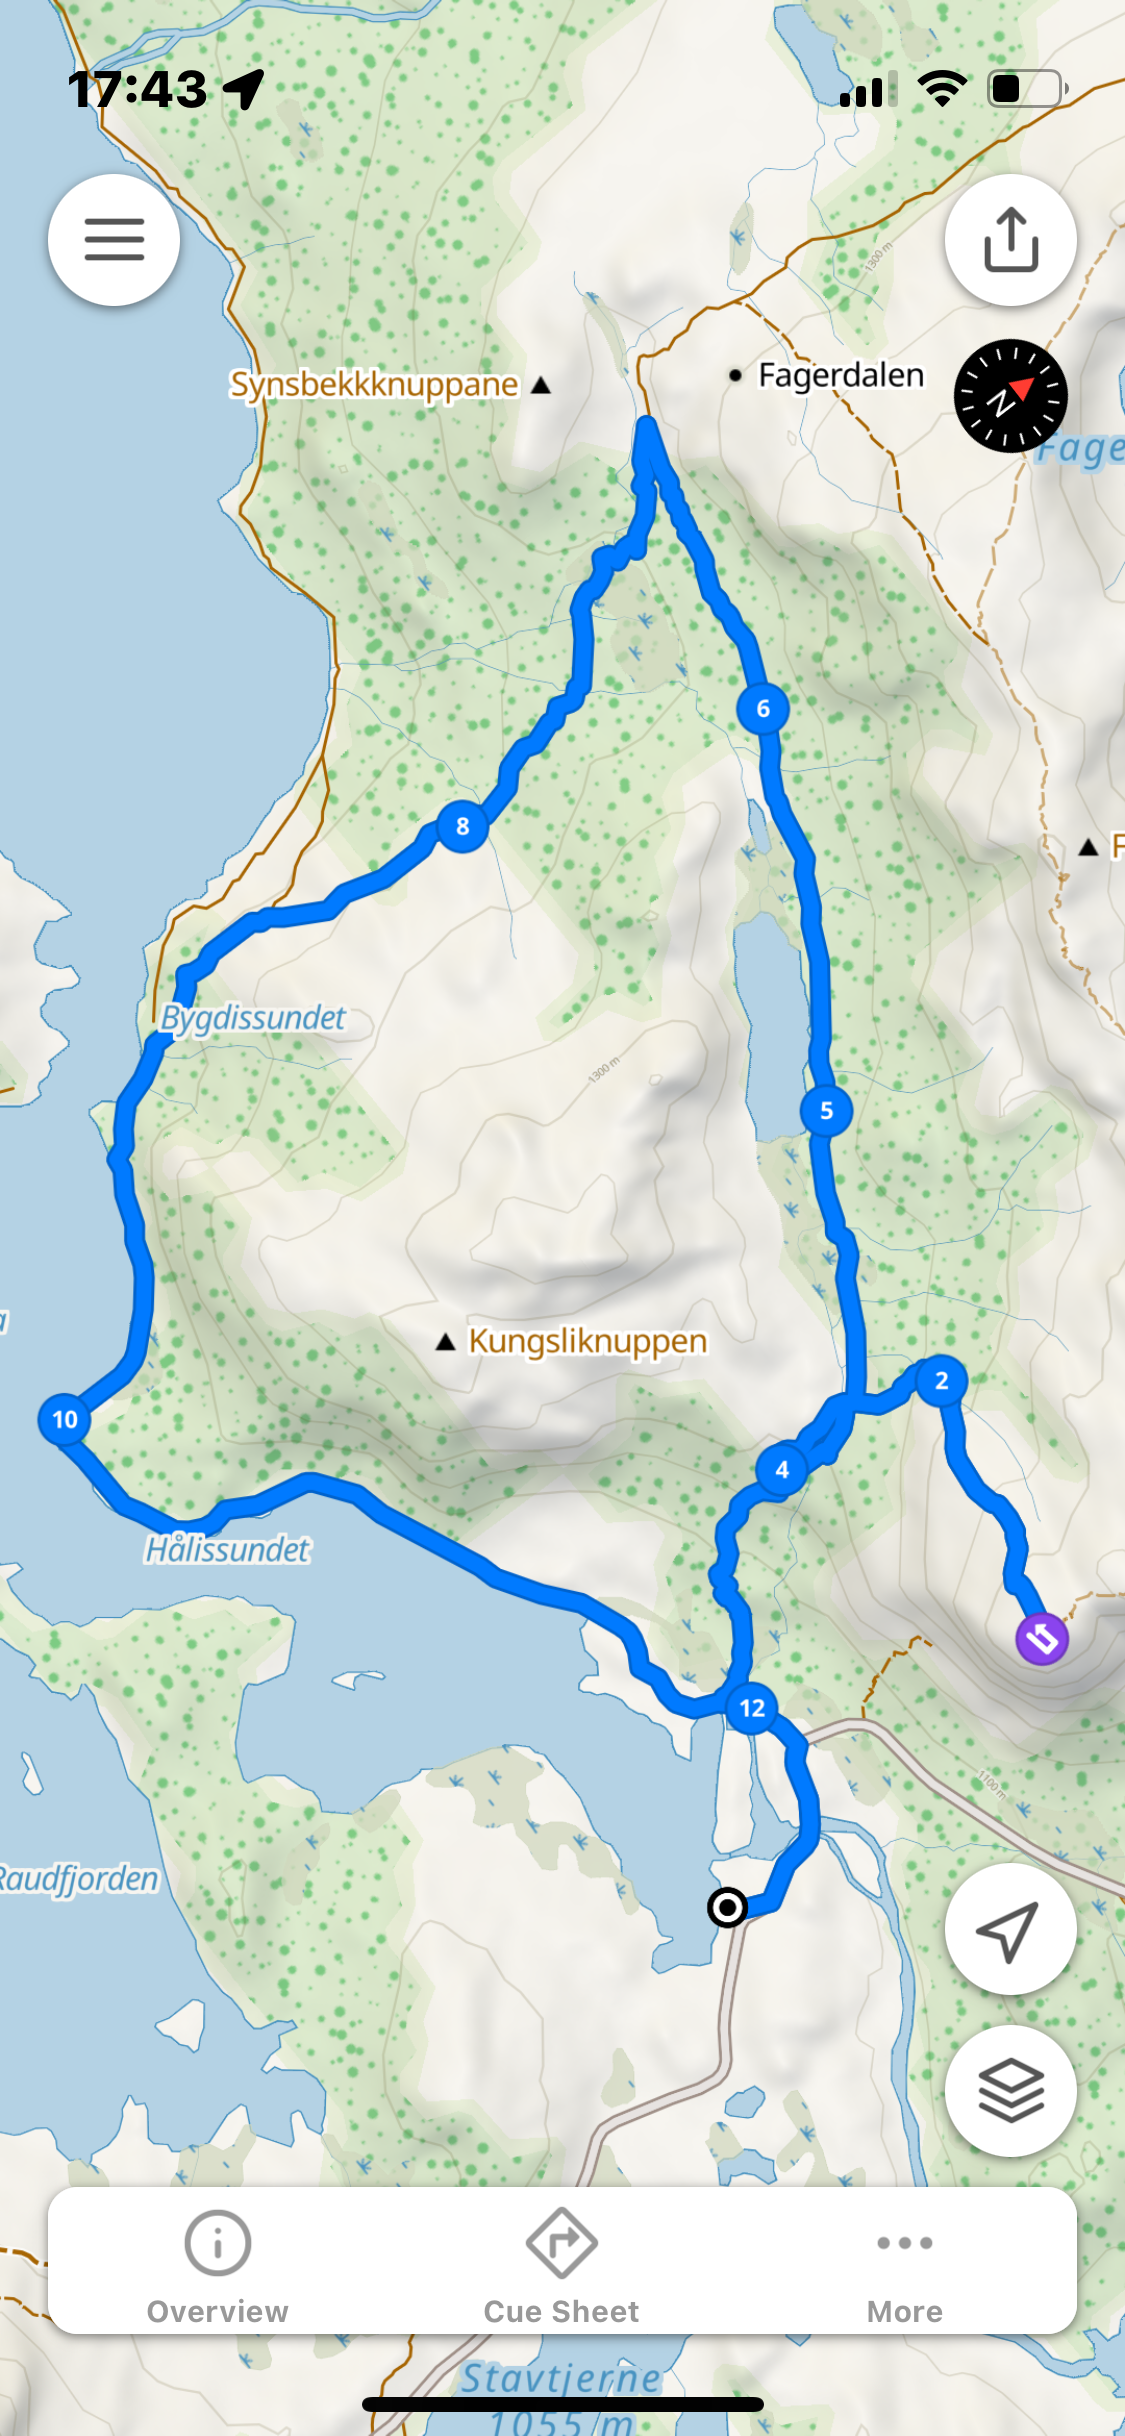
Day 1 –Oslo to Bygdin
We departed Oslo bus terminal at 0830 Monday for a direct trip to Bygdin Fjellhotel. The journey taking 4-hours with a 15-minute break ideal for a midday arrival. The weather was grim with torrential rain for most of the way. It was an ominous start and constant glancing at weather apps confirmed that our week ahead would have mixed weather. It’s Norway after all!
Synshorn summit
Arrival at Bygdin was seamless and after a break at 1500 we departed in the rain to take in the summit of Synshorn (1464m) which is a great introduction to Norwegian mountain terrain. The plan was initially to just summit and return, a 75-minute journey at a steady pace. However, the weather, although still wet, was not cold and after long travel, we all decided to continue for a back-up and planned 12km route. We followed the ridge north to Heimre Fagerdalshøe (1510 m above sea level) with a great view over Bygdin to Falketind. We then continued in the direction of Synsbekk and connected to the ’T’ marked trail that would bring us back to Bygdisheim and the lake for a short gravel road section back to the hotel.
Day 1 loop
It was a great intro to the week and then we could enjoy the benefits of Bygdin Fjellhotel – a warm shower, sauna and a lovely traditional Norwegian dinner.
Day 2 – Bygdin – Eisbugarden – Skogadalbøen
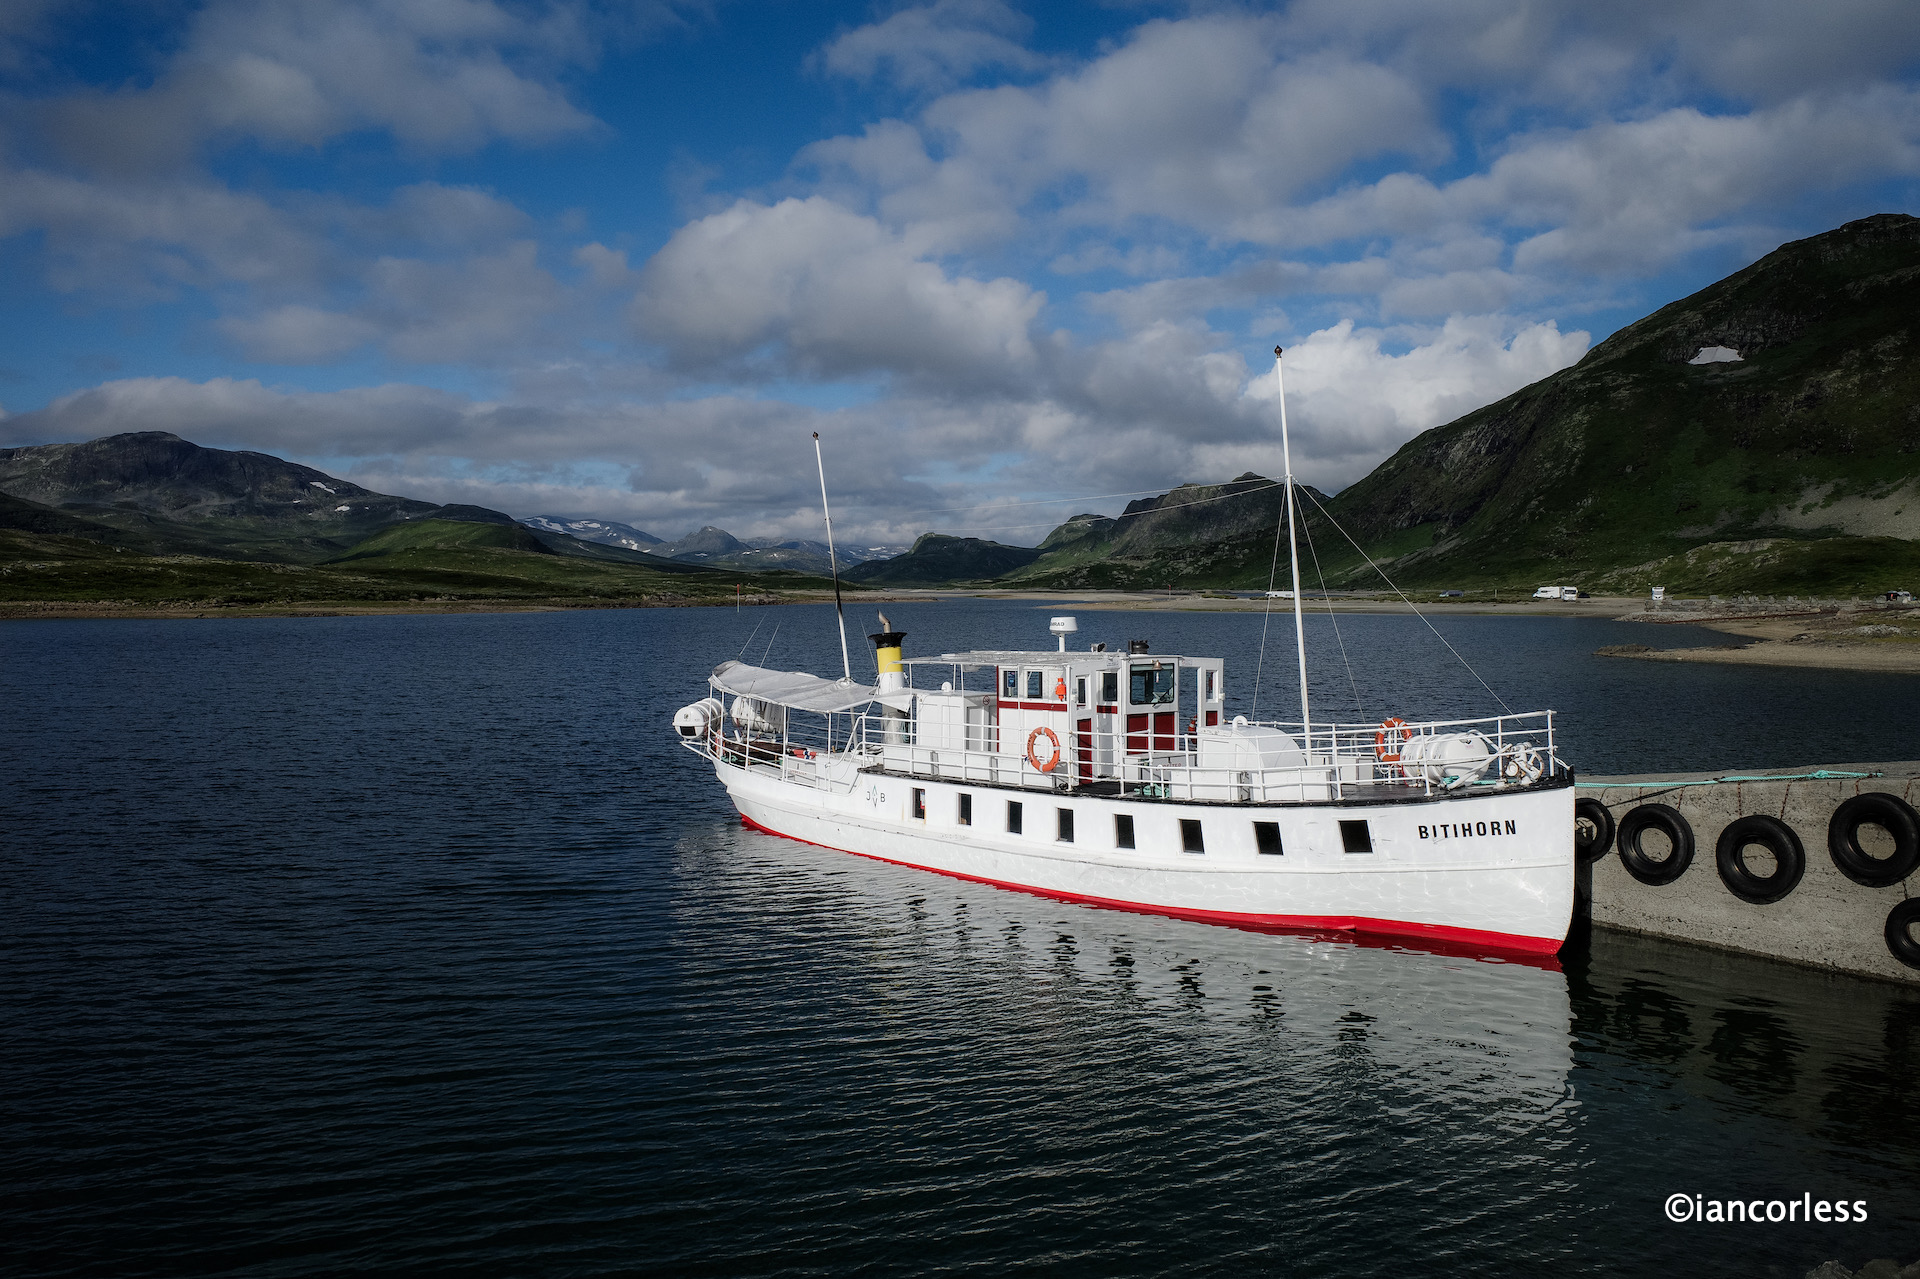
M/B Bitihorn
It was a casual start to the day with a hearty breakfast and then meeting the M/B Bitihorn boat at 0900 for a transfer the length of Bygdin lake (stopping at Torfinnsbu) and then continuing to Eidsbugarden.
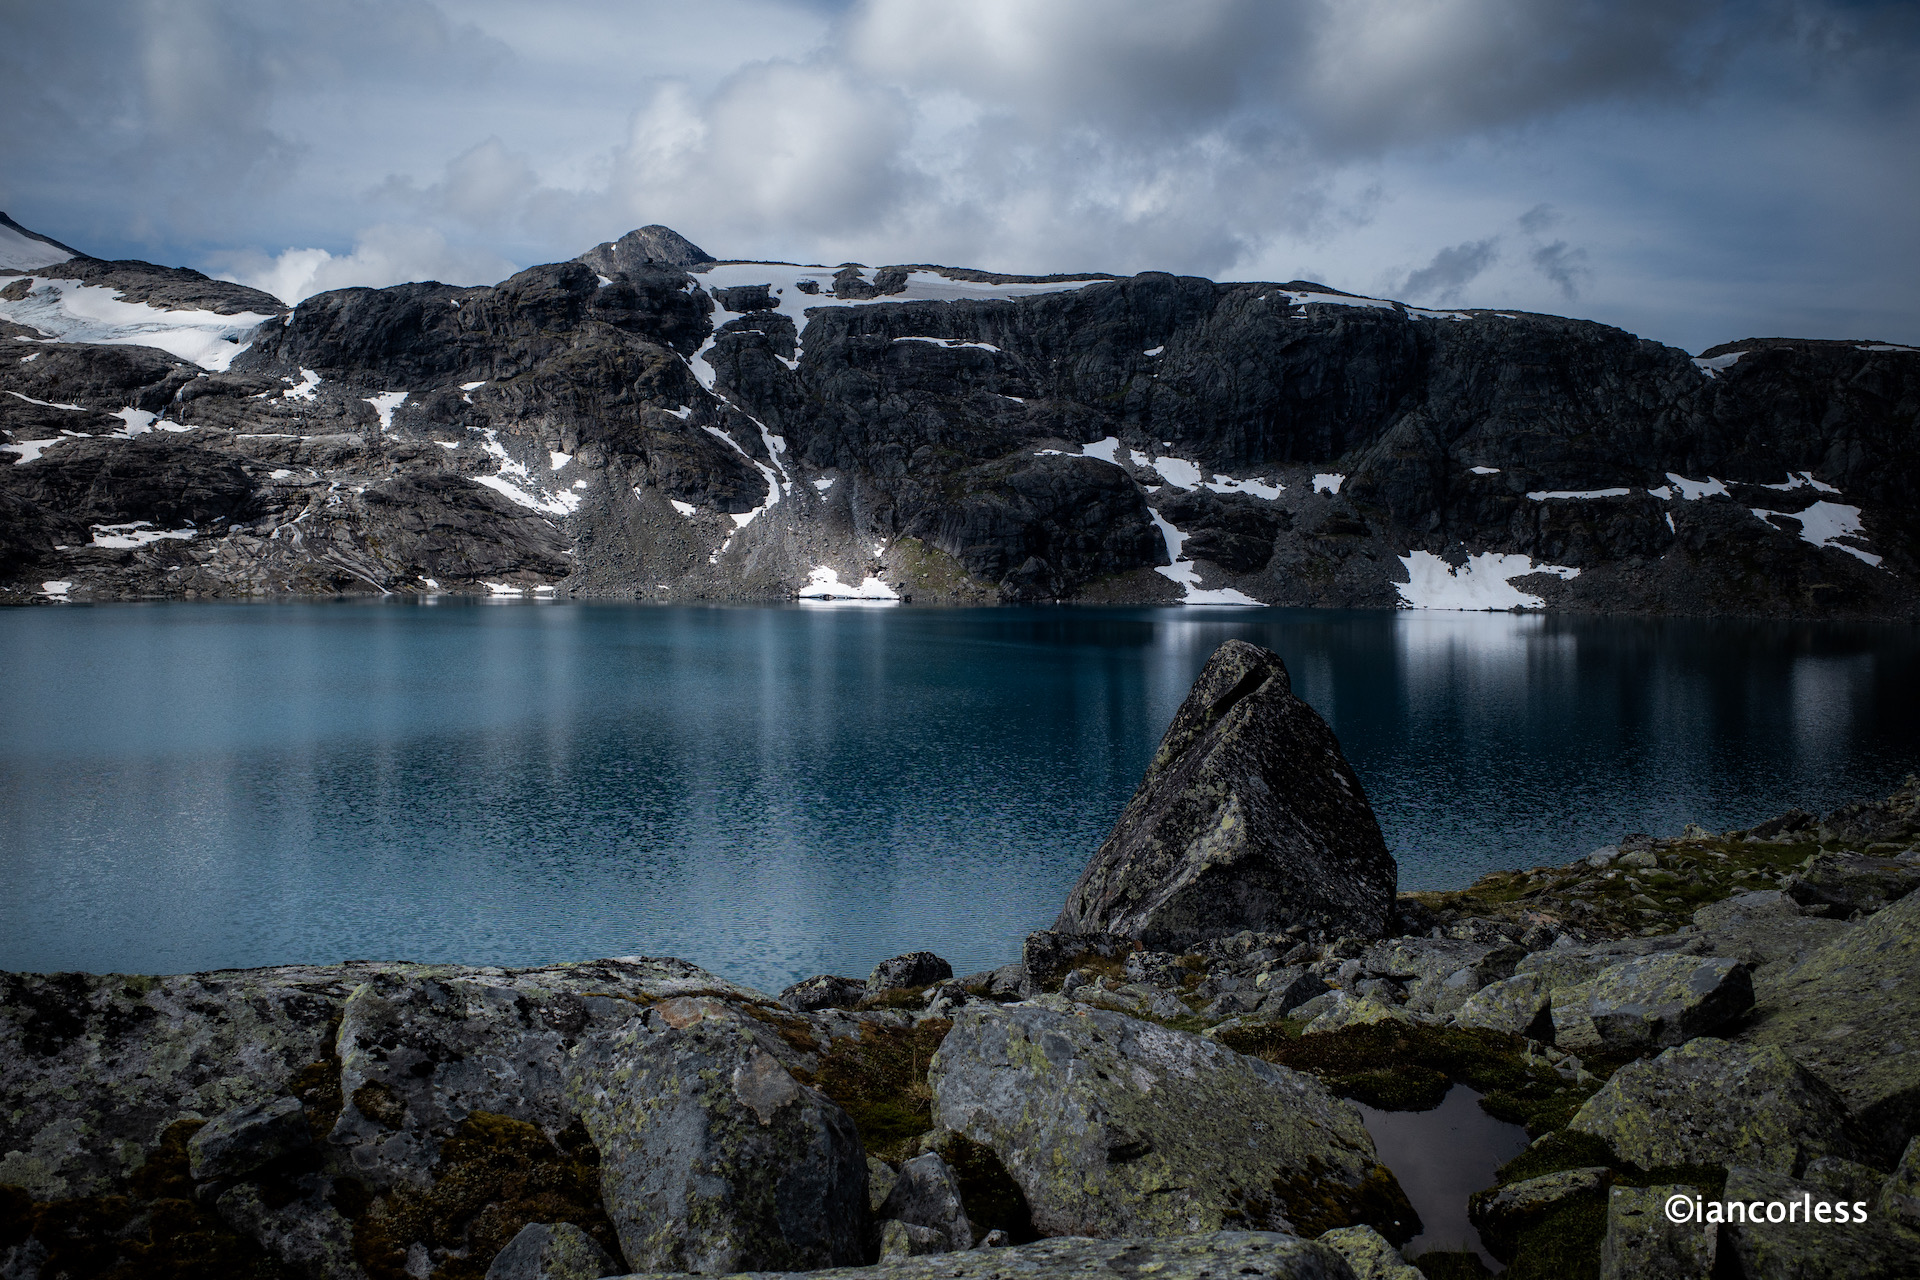
Lake GjendeTorfinsbu self-service DNT
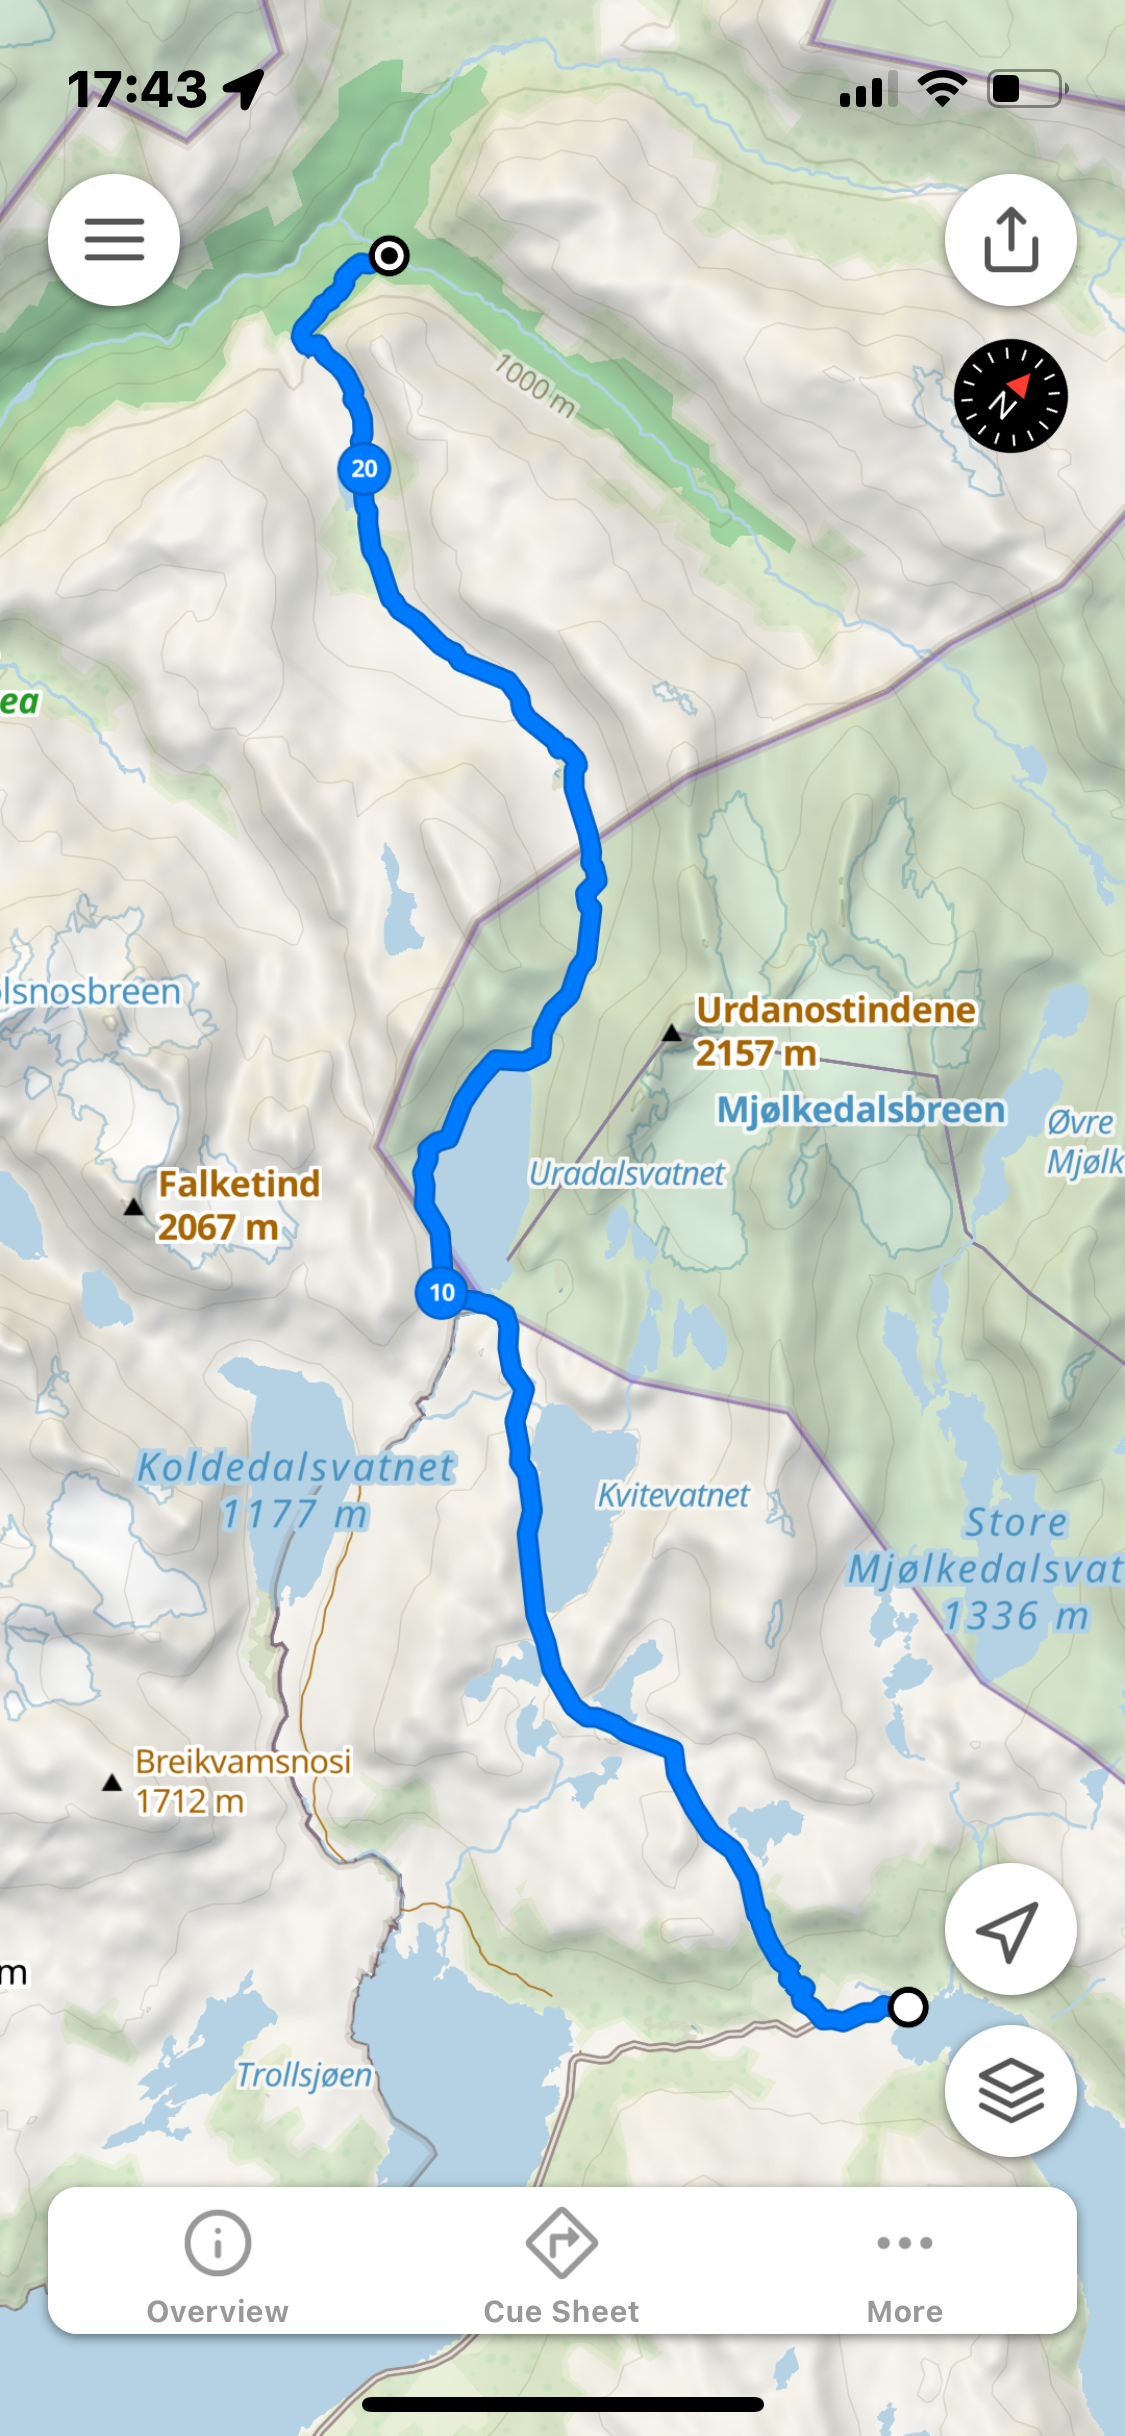
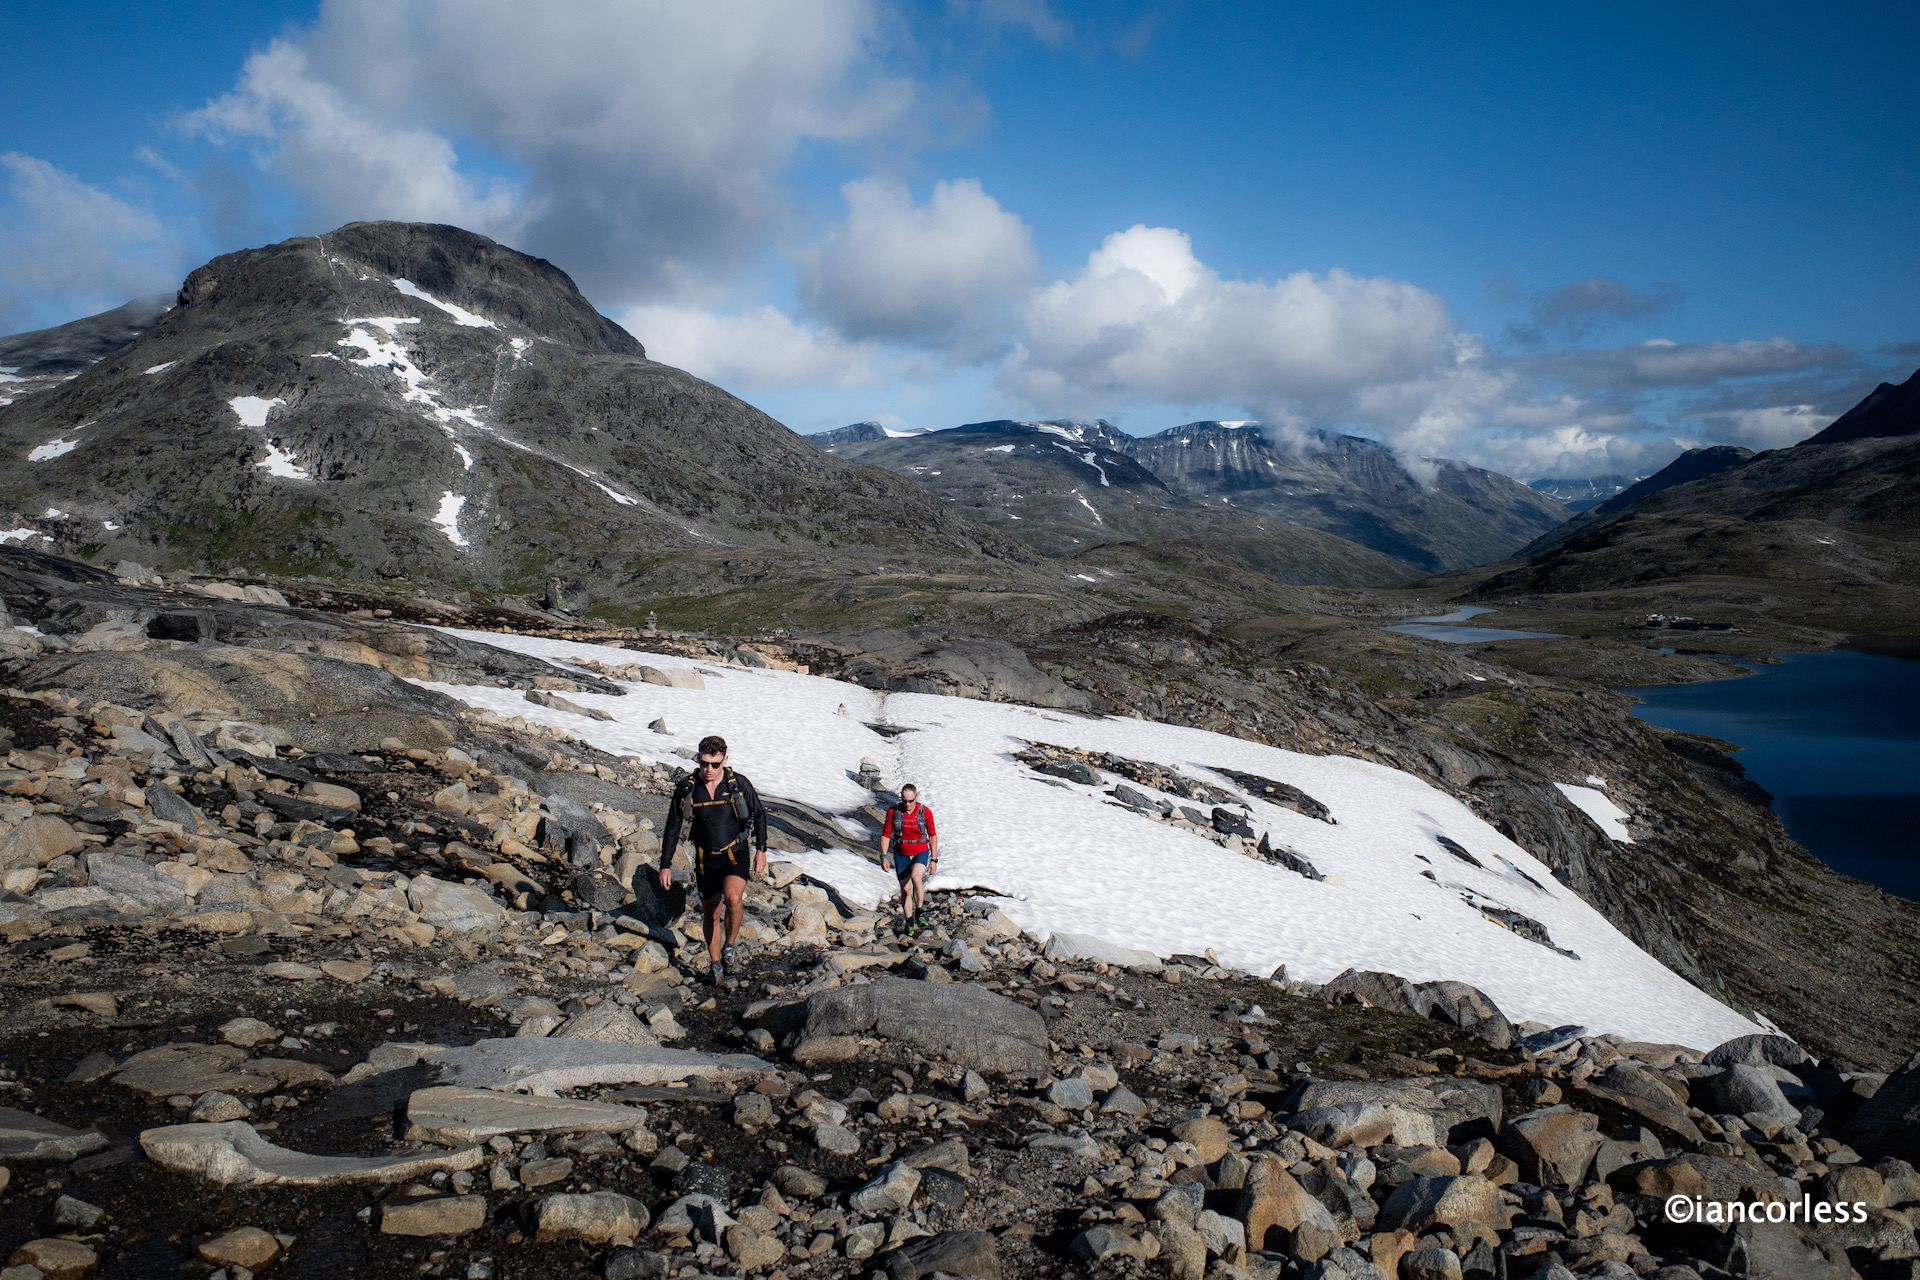
By 1100 we were ready for our first full day, Eidsbugarden to the remote Skogadalbøen DNT cabin. The route is considered very demanding due to the nature of the terrain. It’s very important when looking at routes in Norway that you never focus too much on the distance but more the time it will take to cover the distance. Depending on the time of year, this route can have a great deal of snow, so, be careful and do research in advance. For us, we had several snow fields to cross and all were in good condition.
Eisbugarden to Skogadalbøen
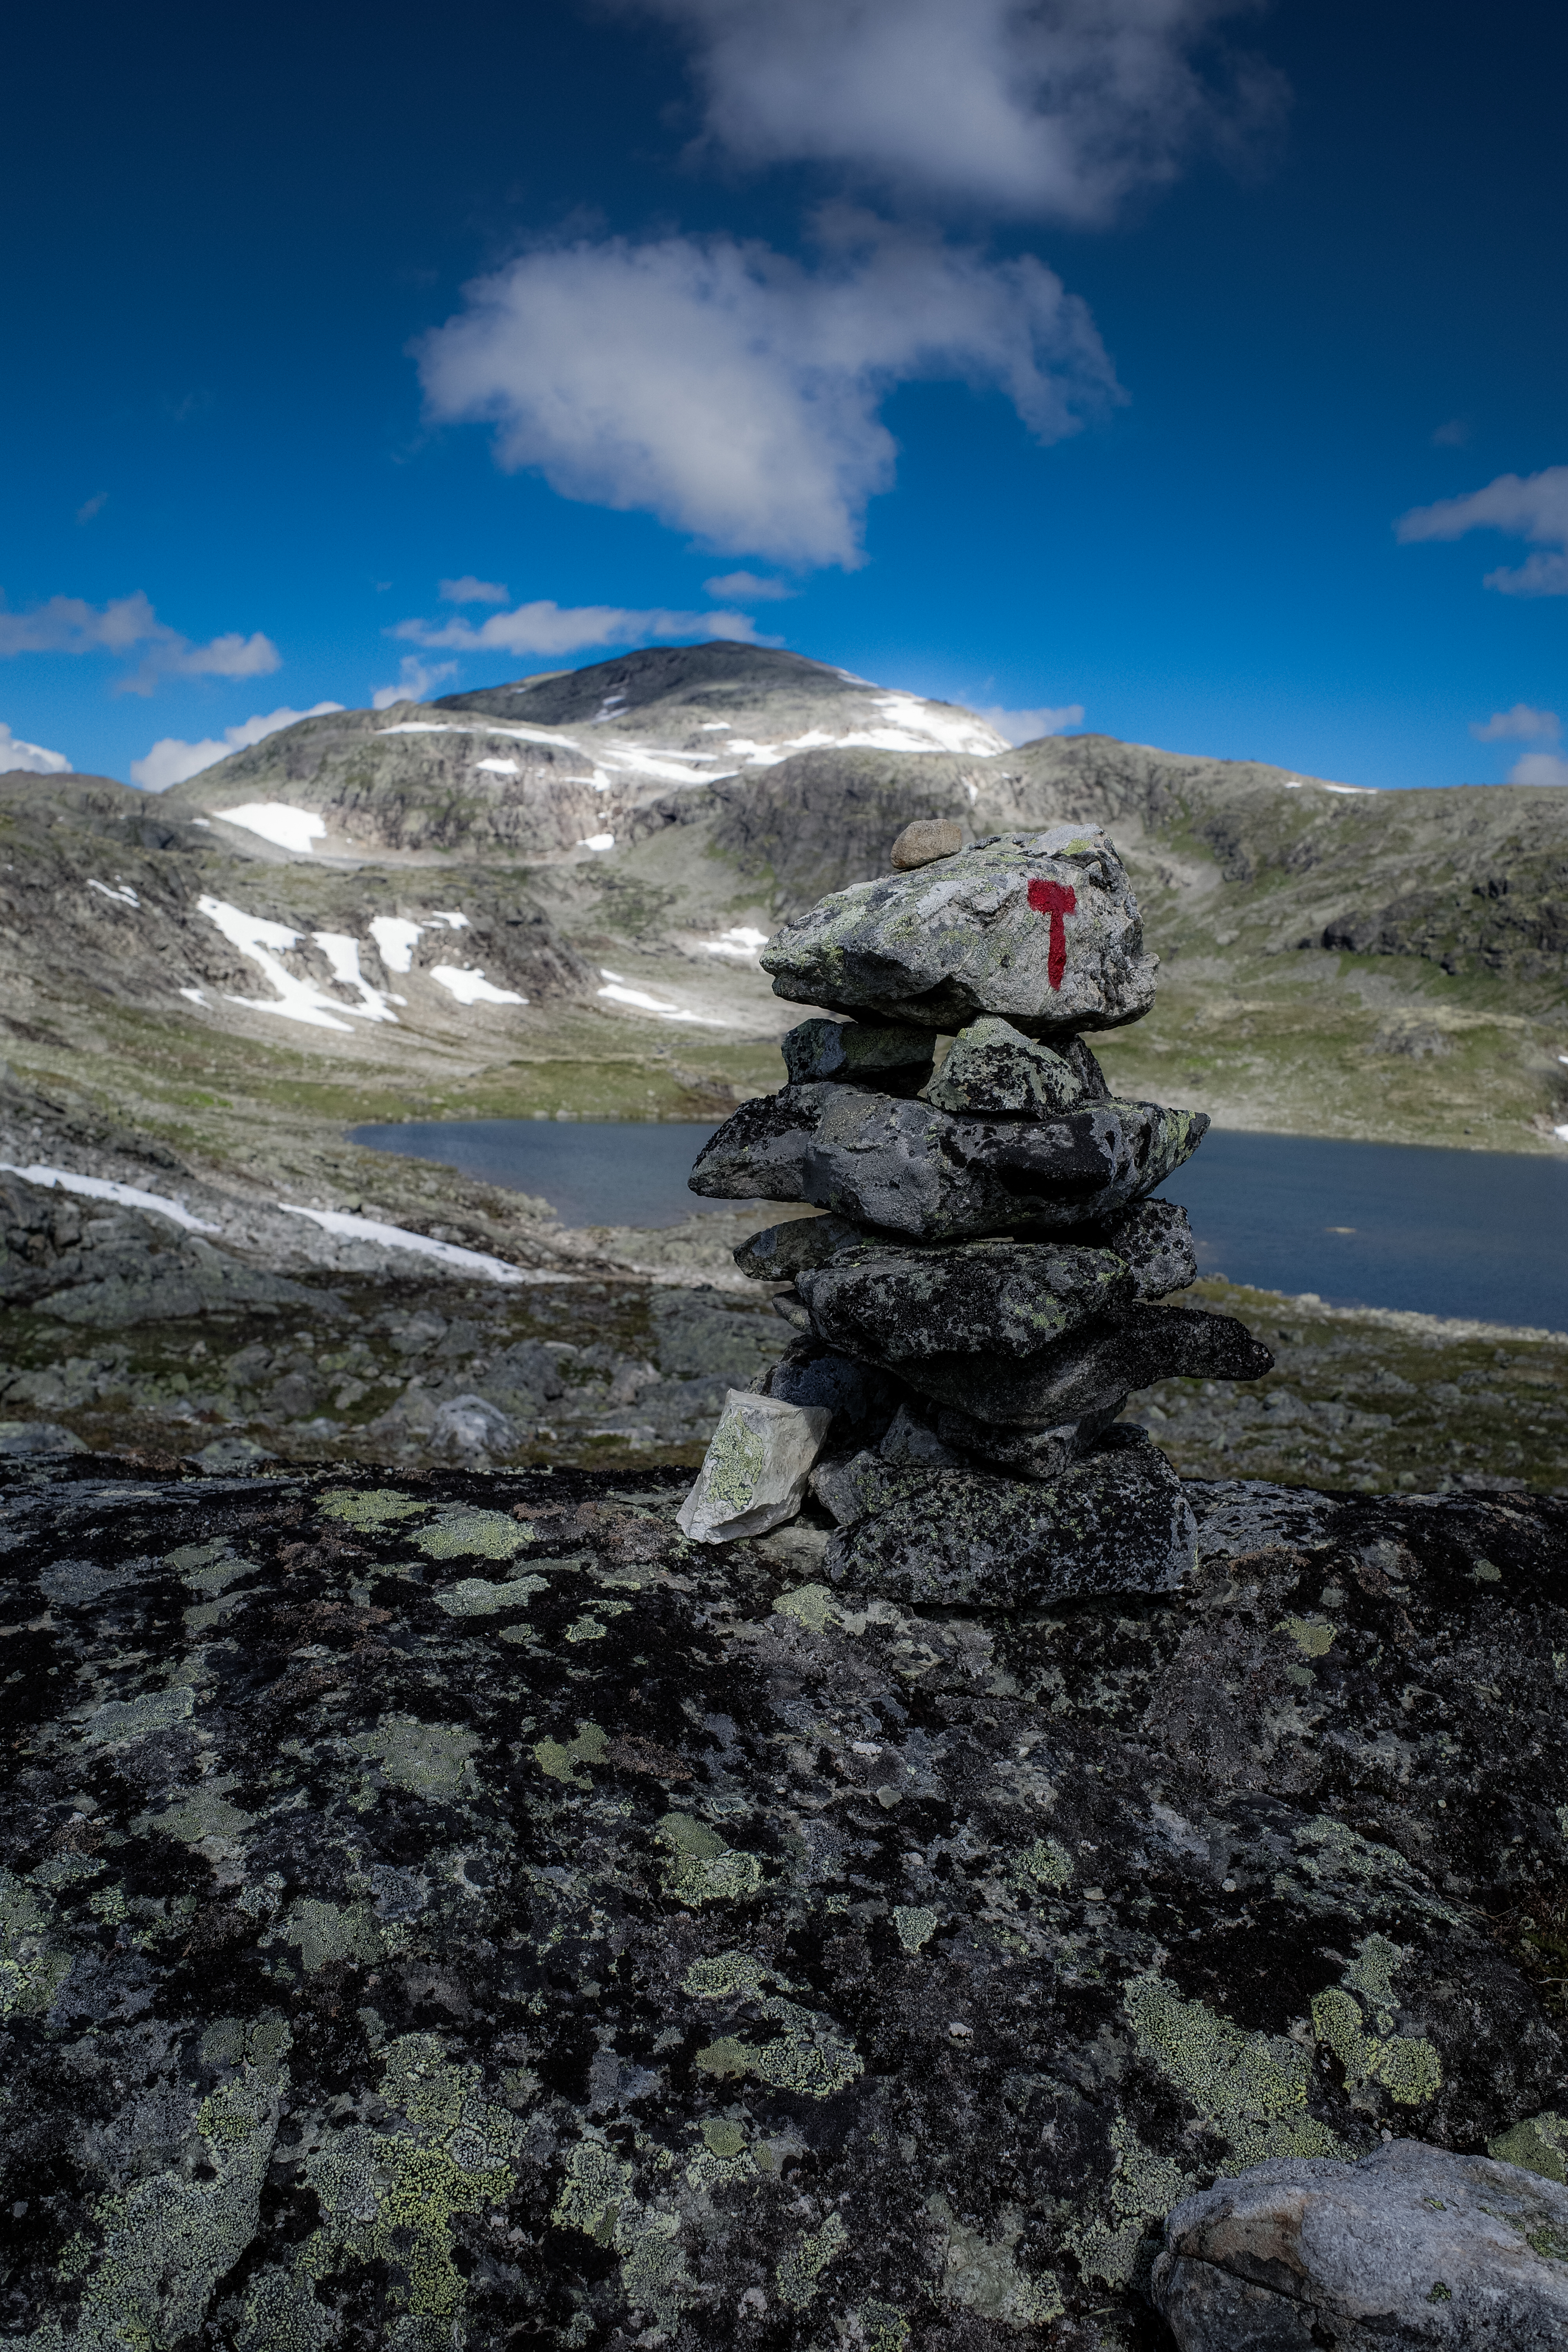
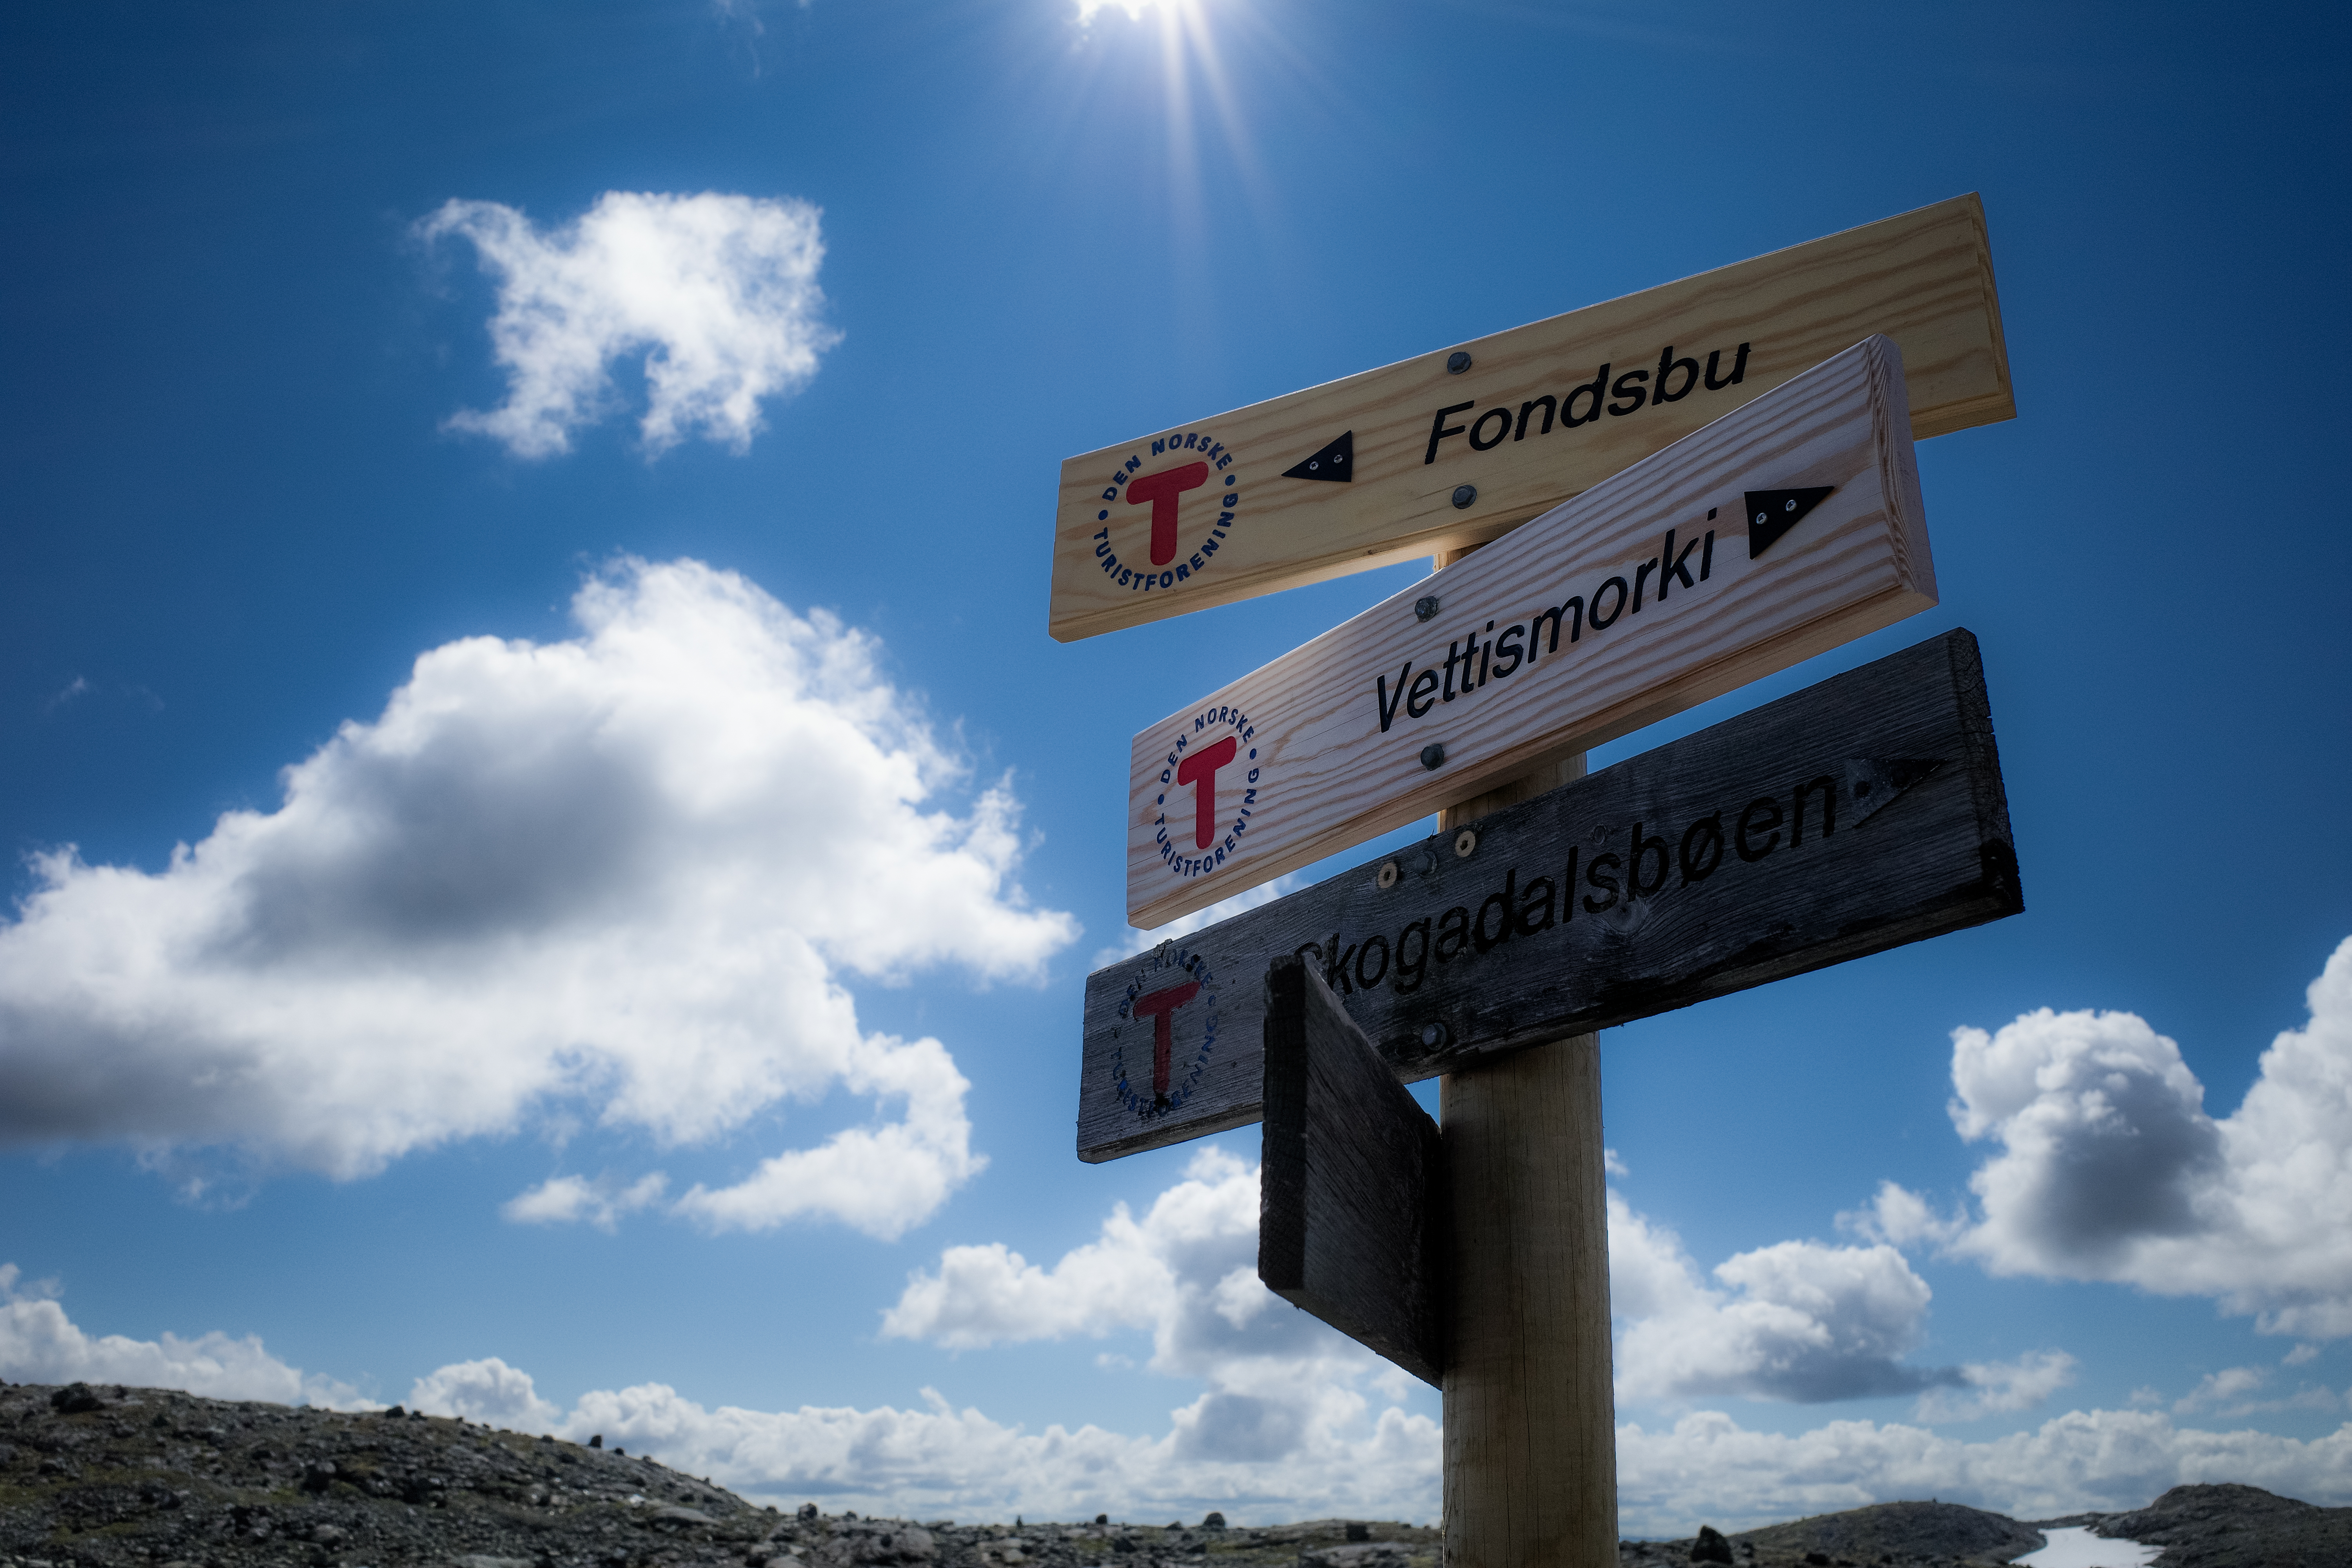
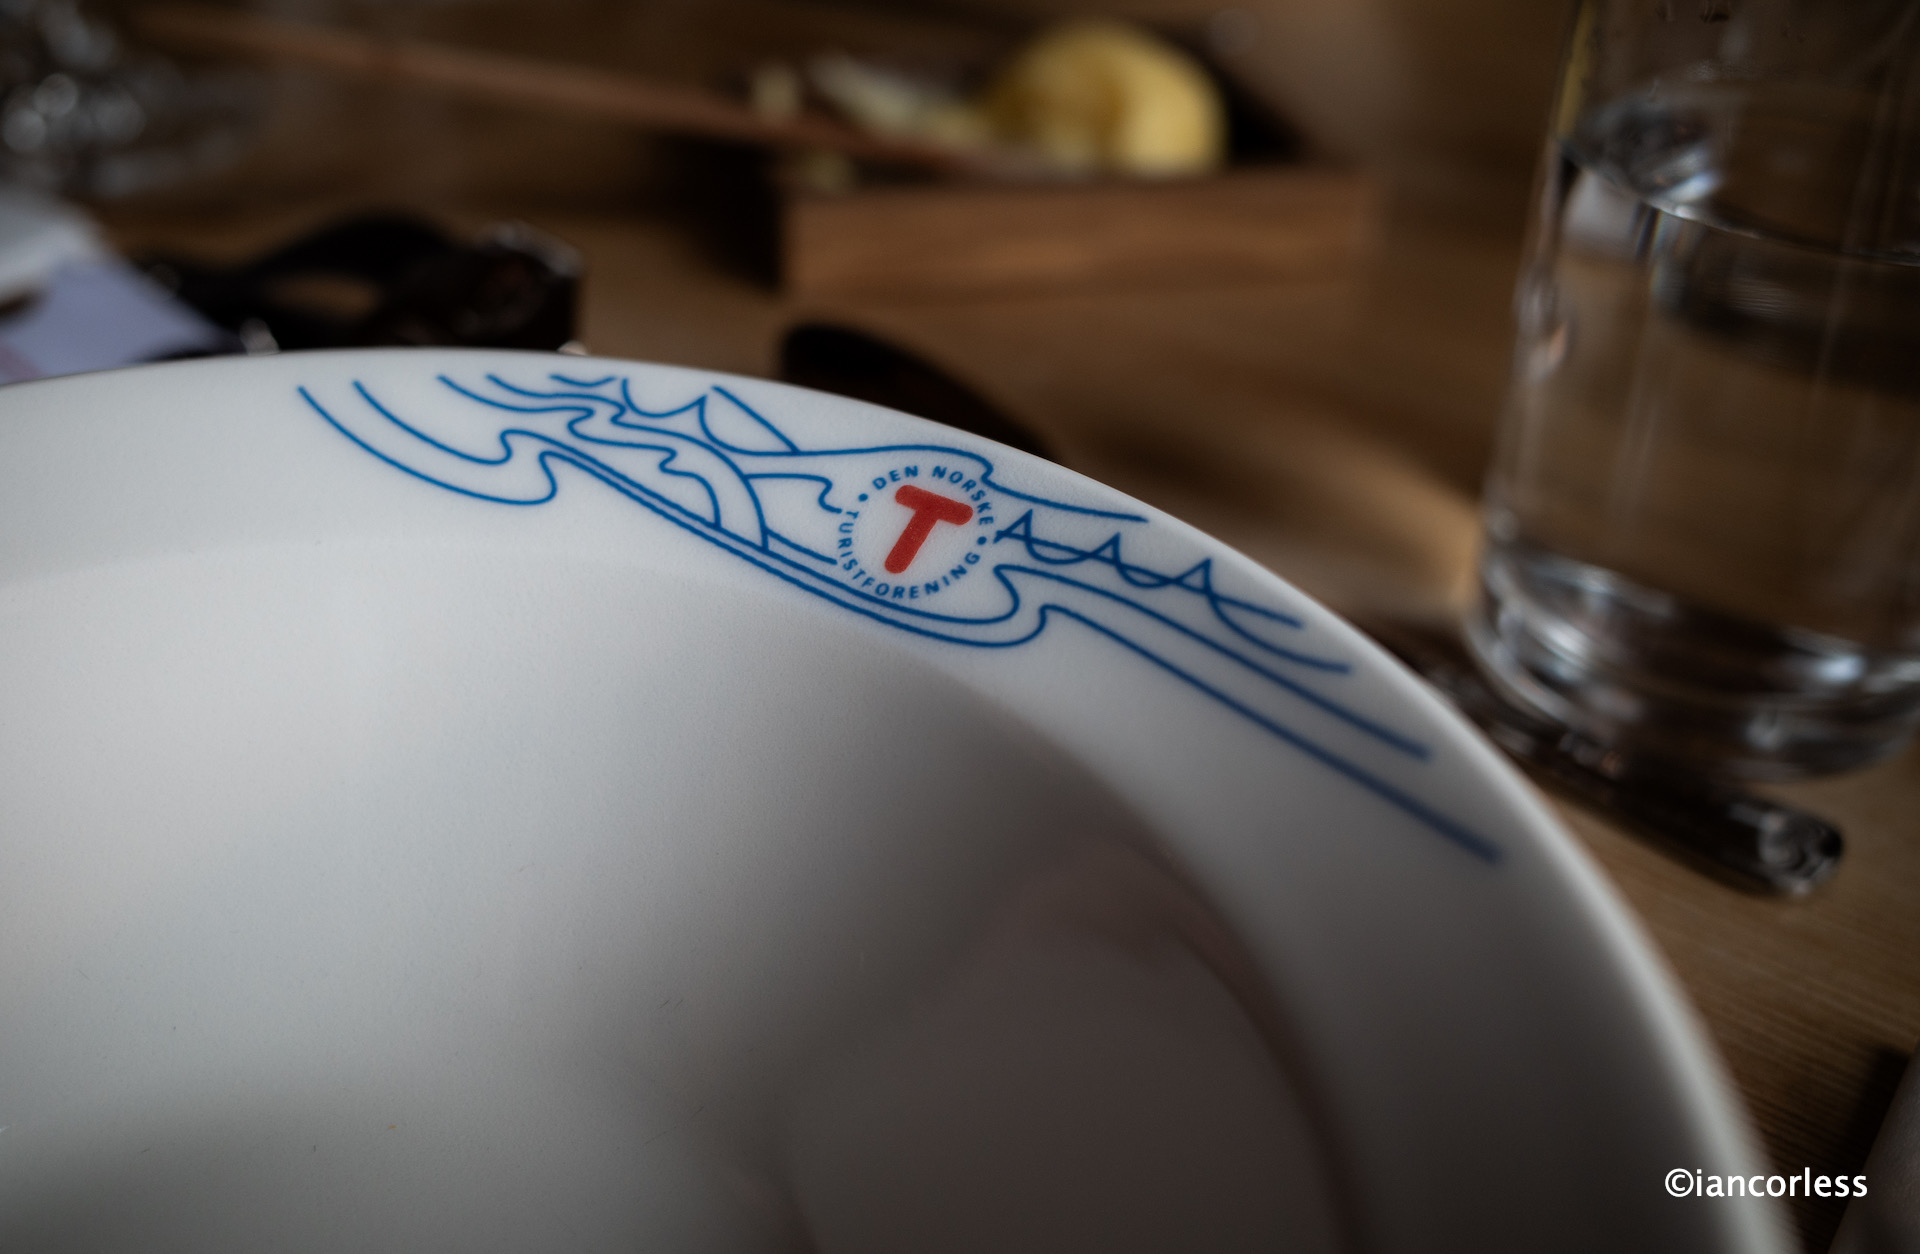
DNT mark the routes with red Ts
Our weather was glorious, blue skies, white fluffy clouds and amazing views.
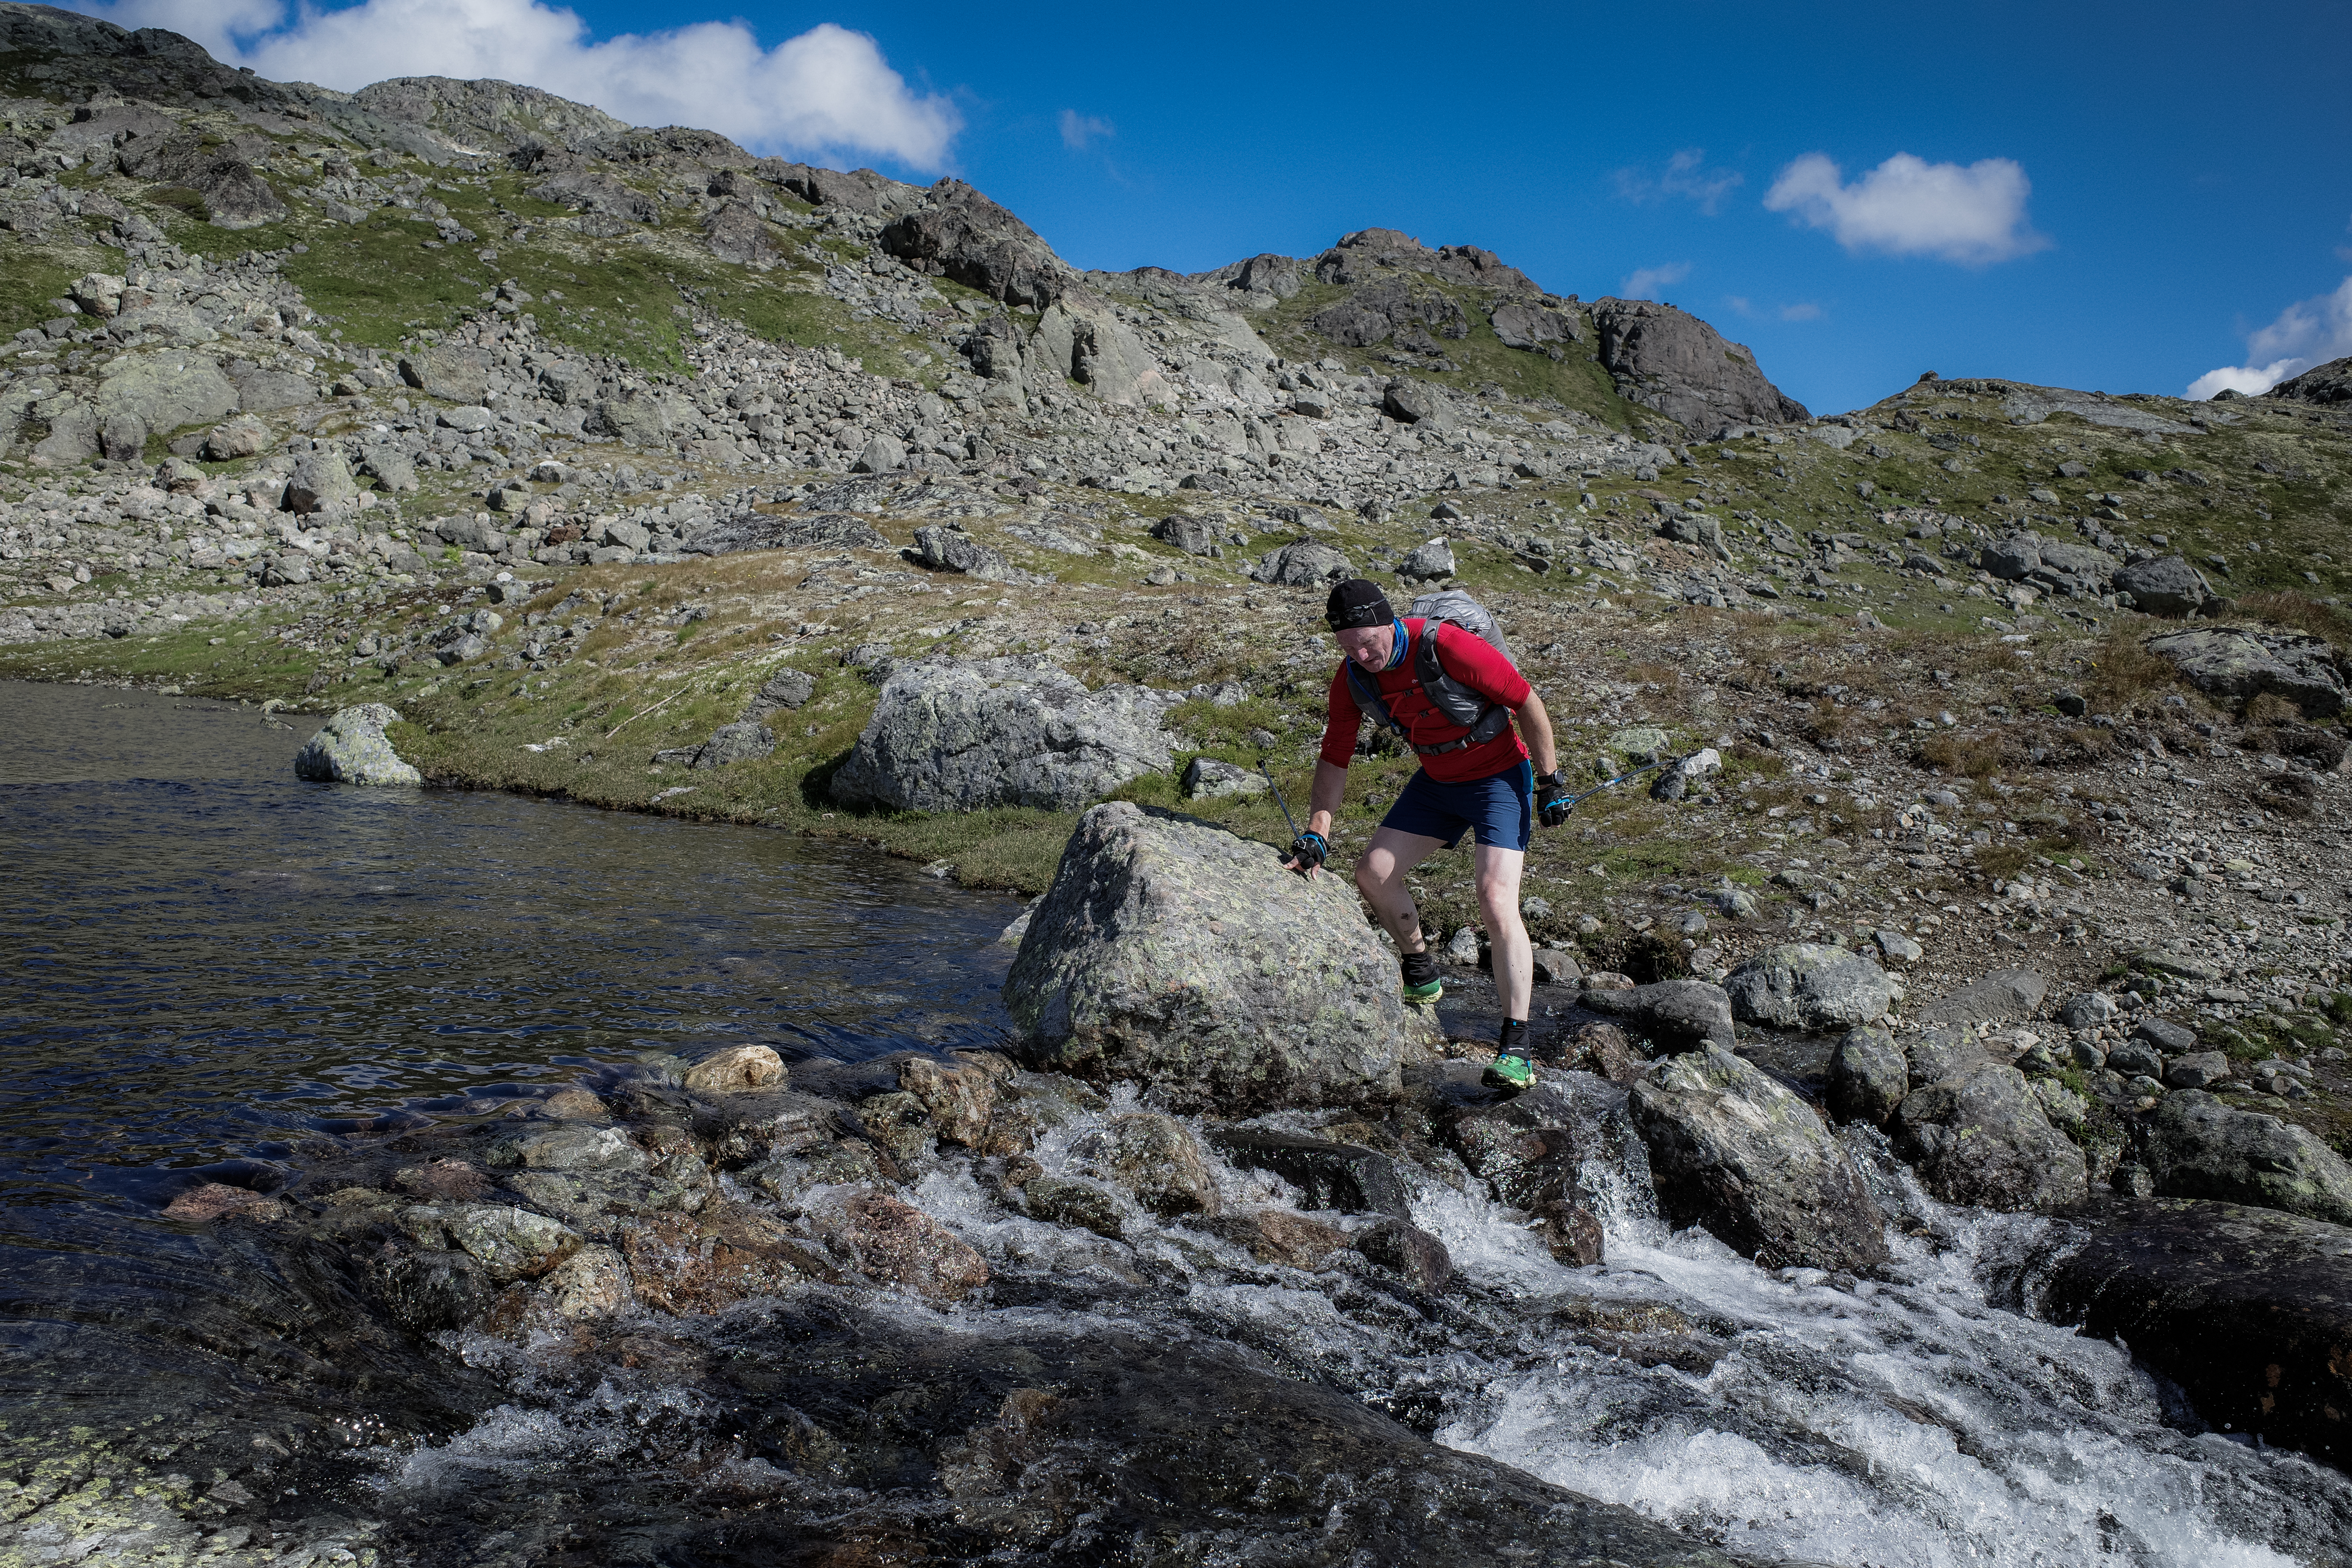
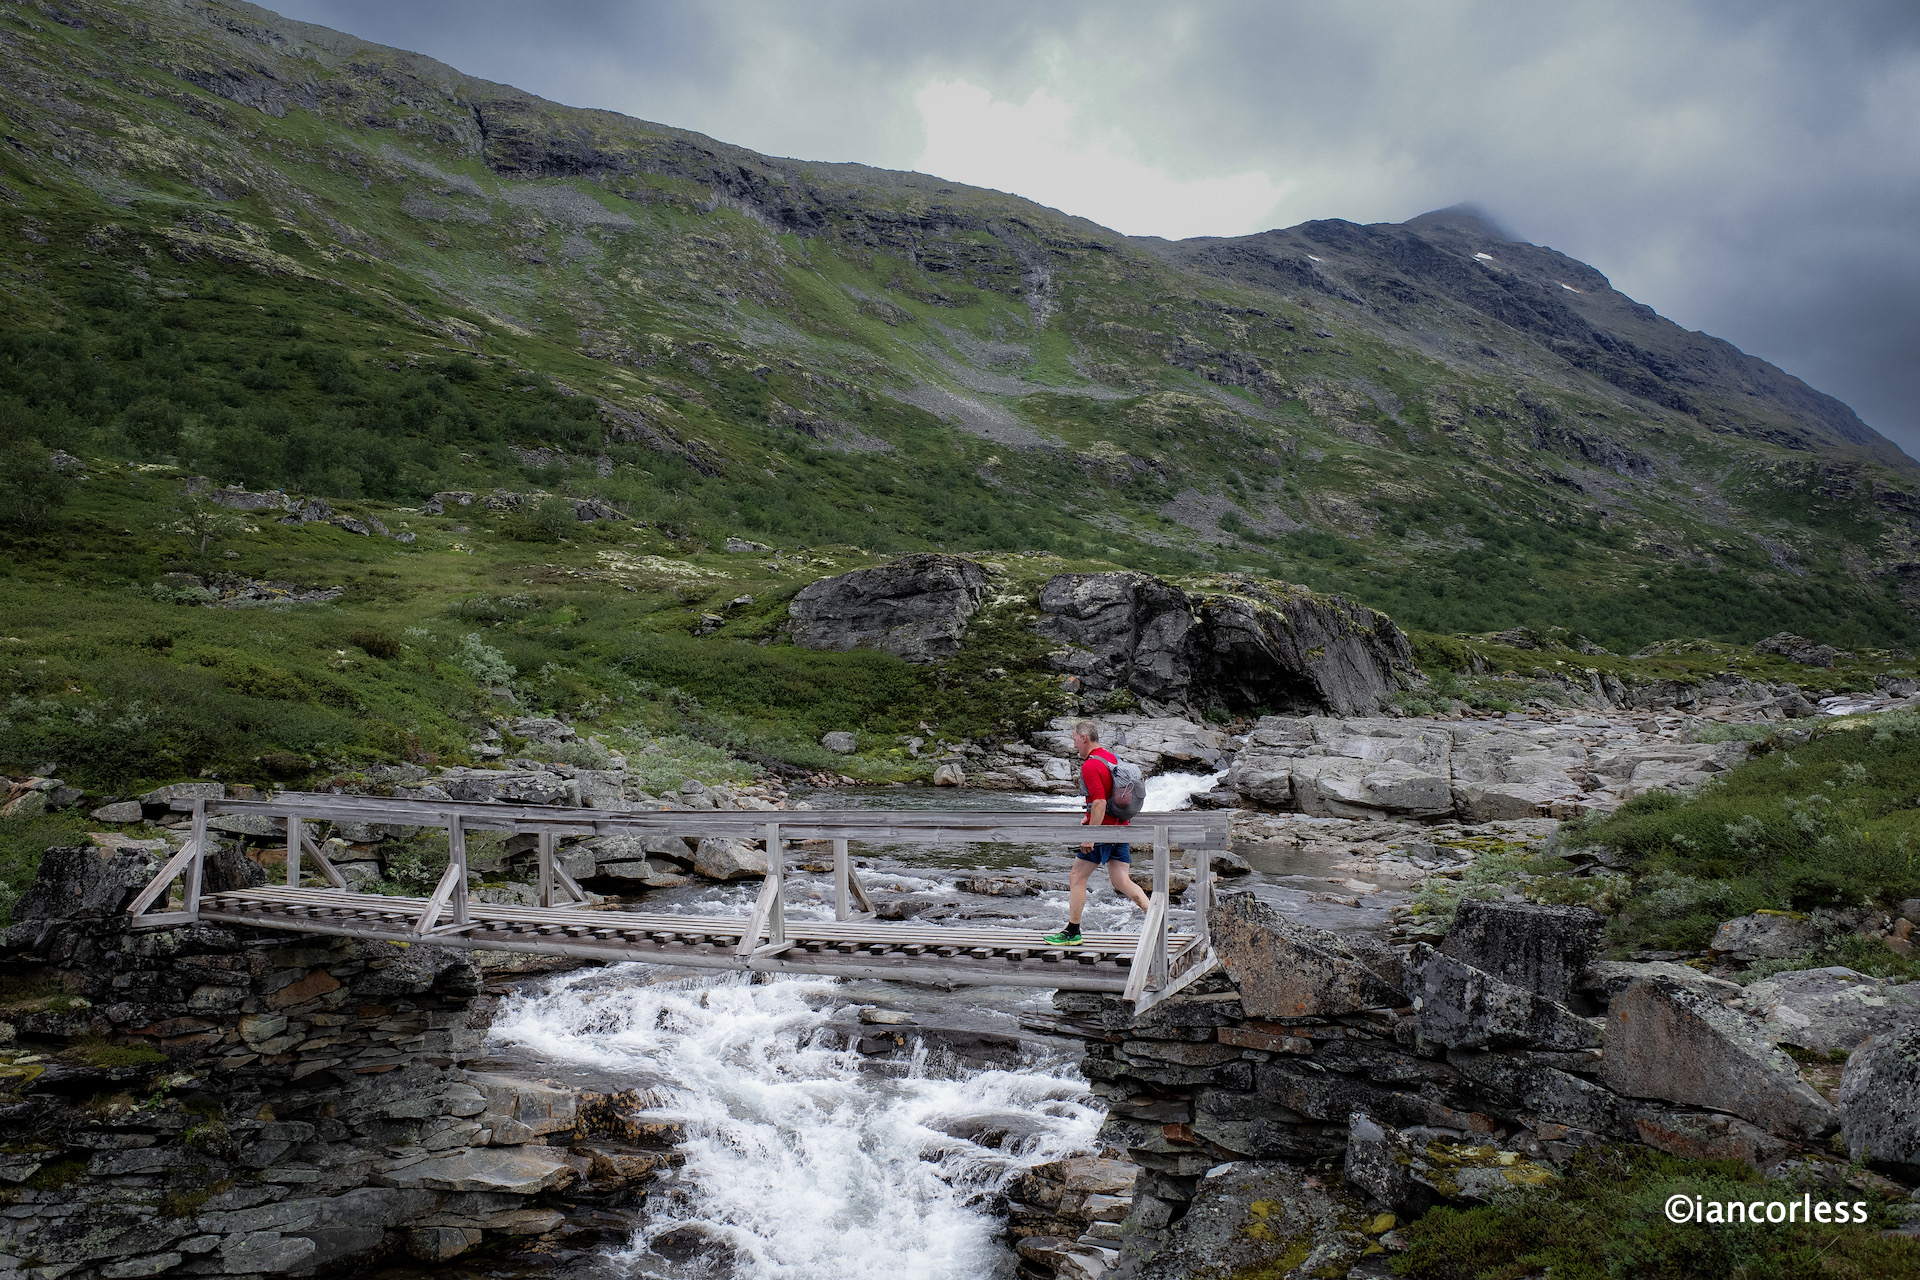
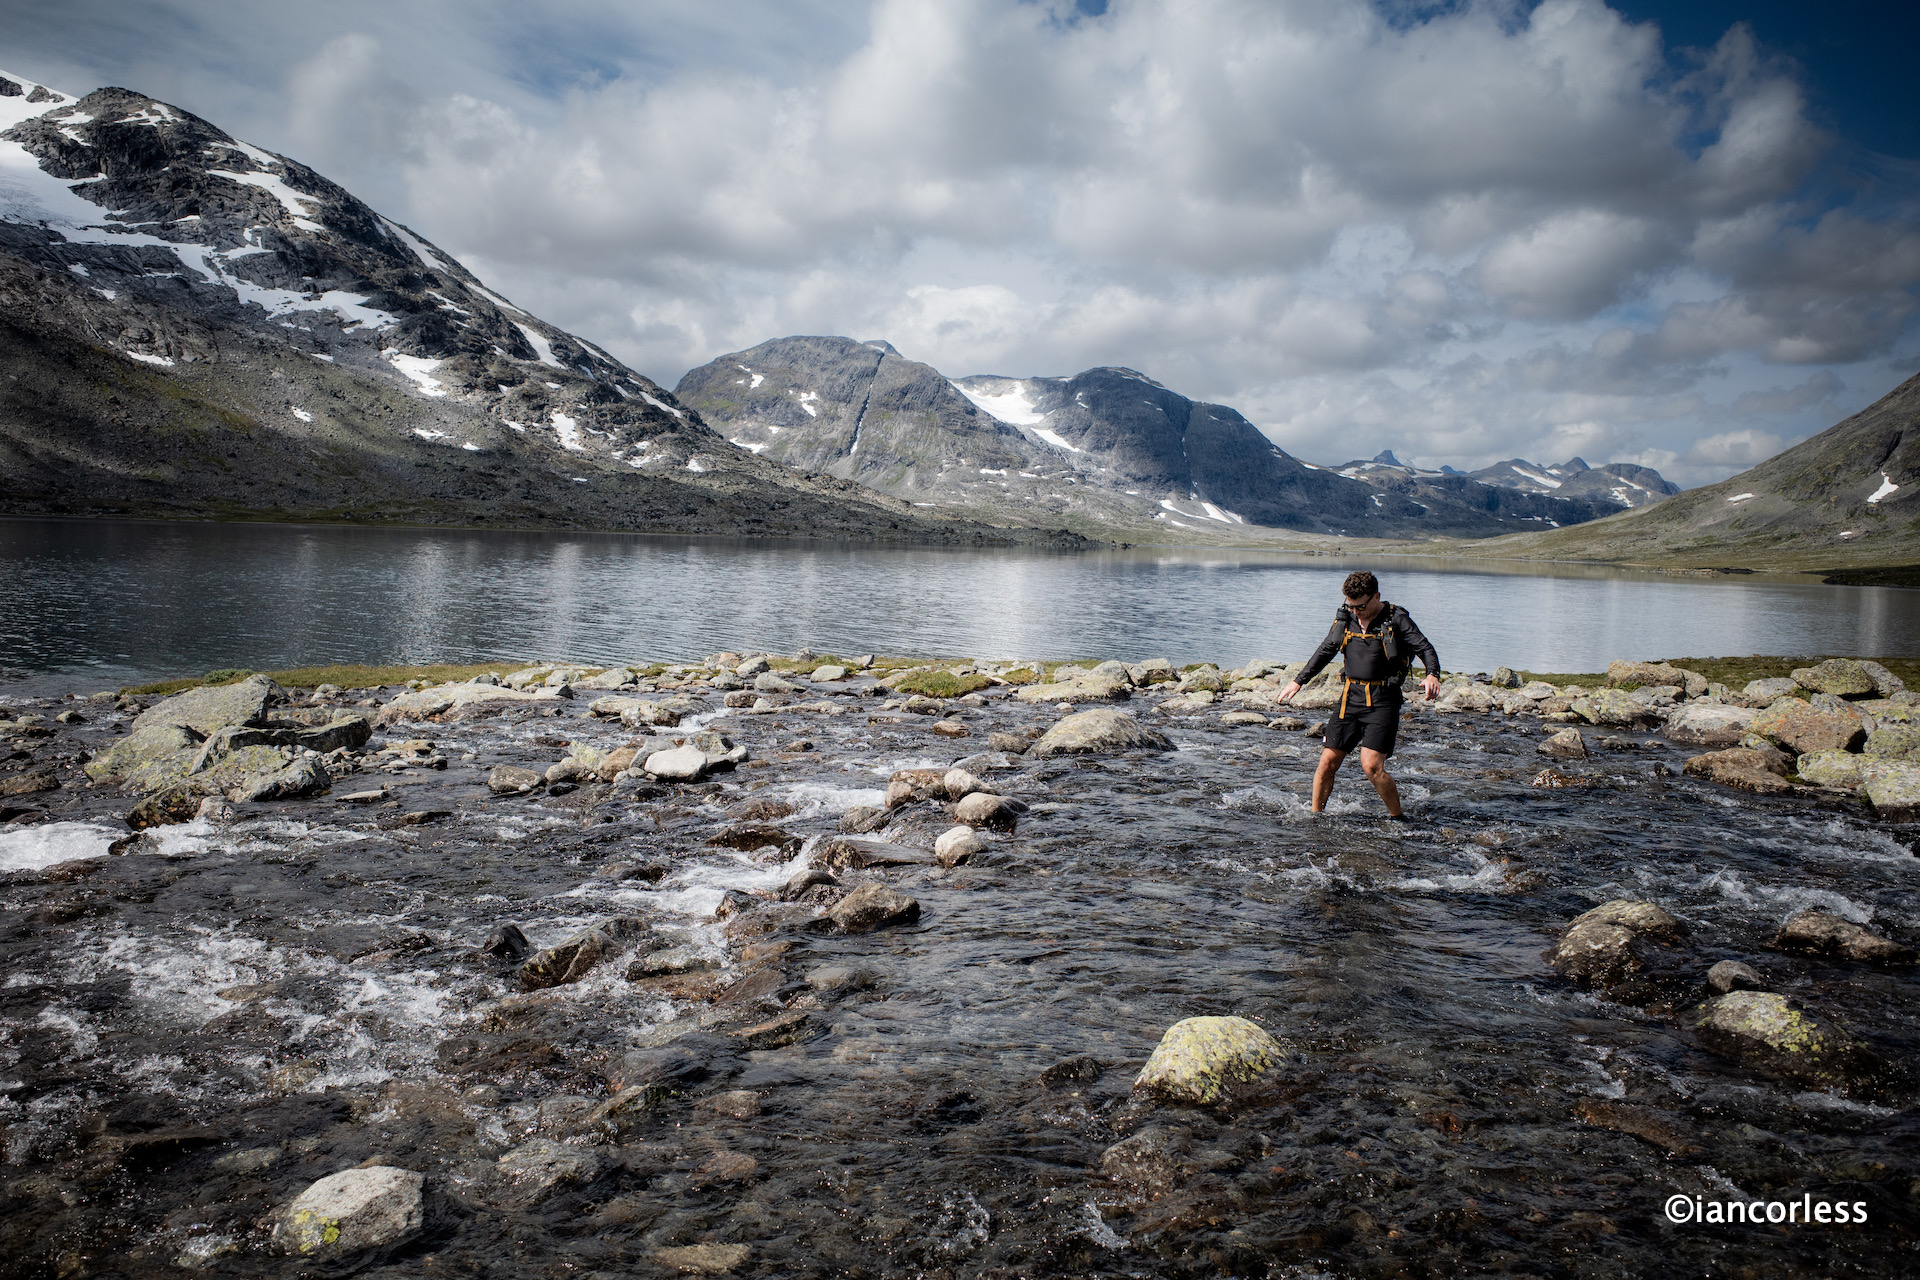
Plenty of water crossings
A short road section and a right turn and we were already climbing through saturated and boggy ground to Sløtafjellet. Then the rocks and boulders started.
Beautiful but hard terrain
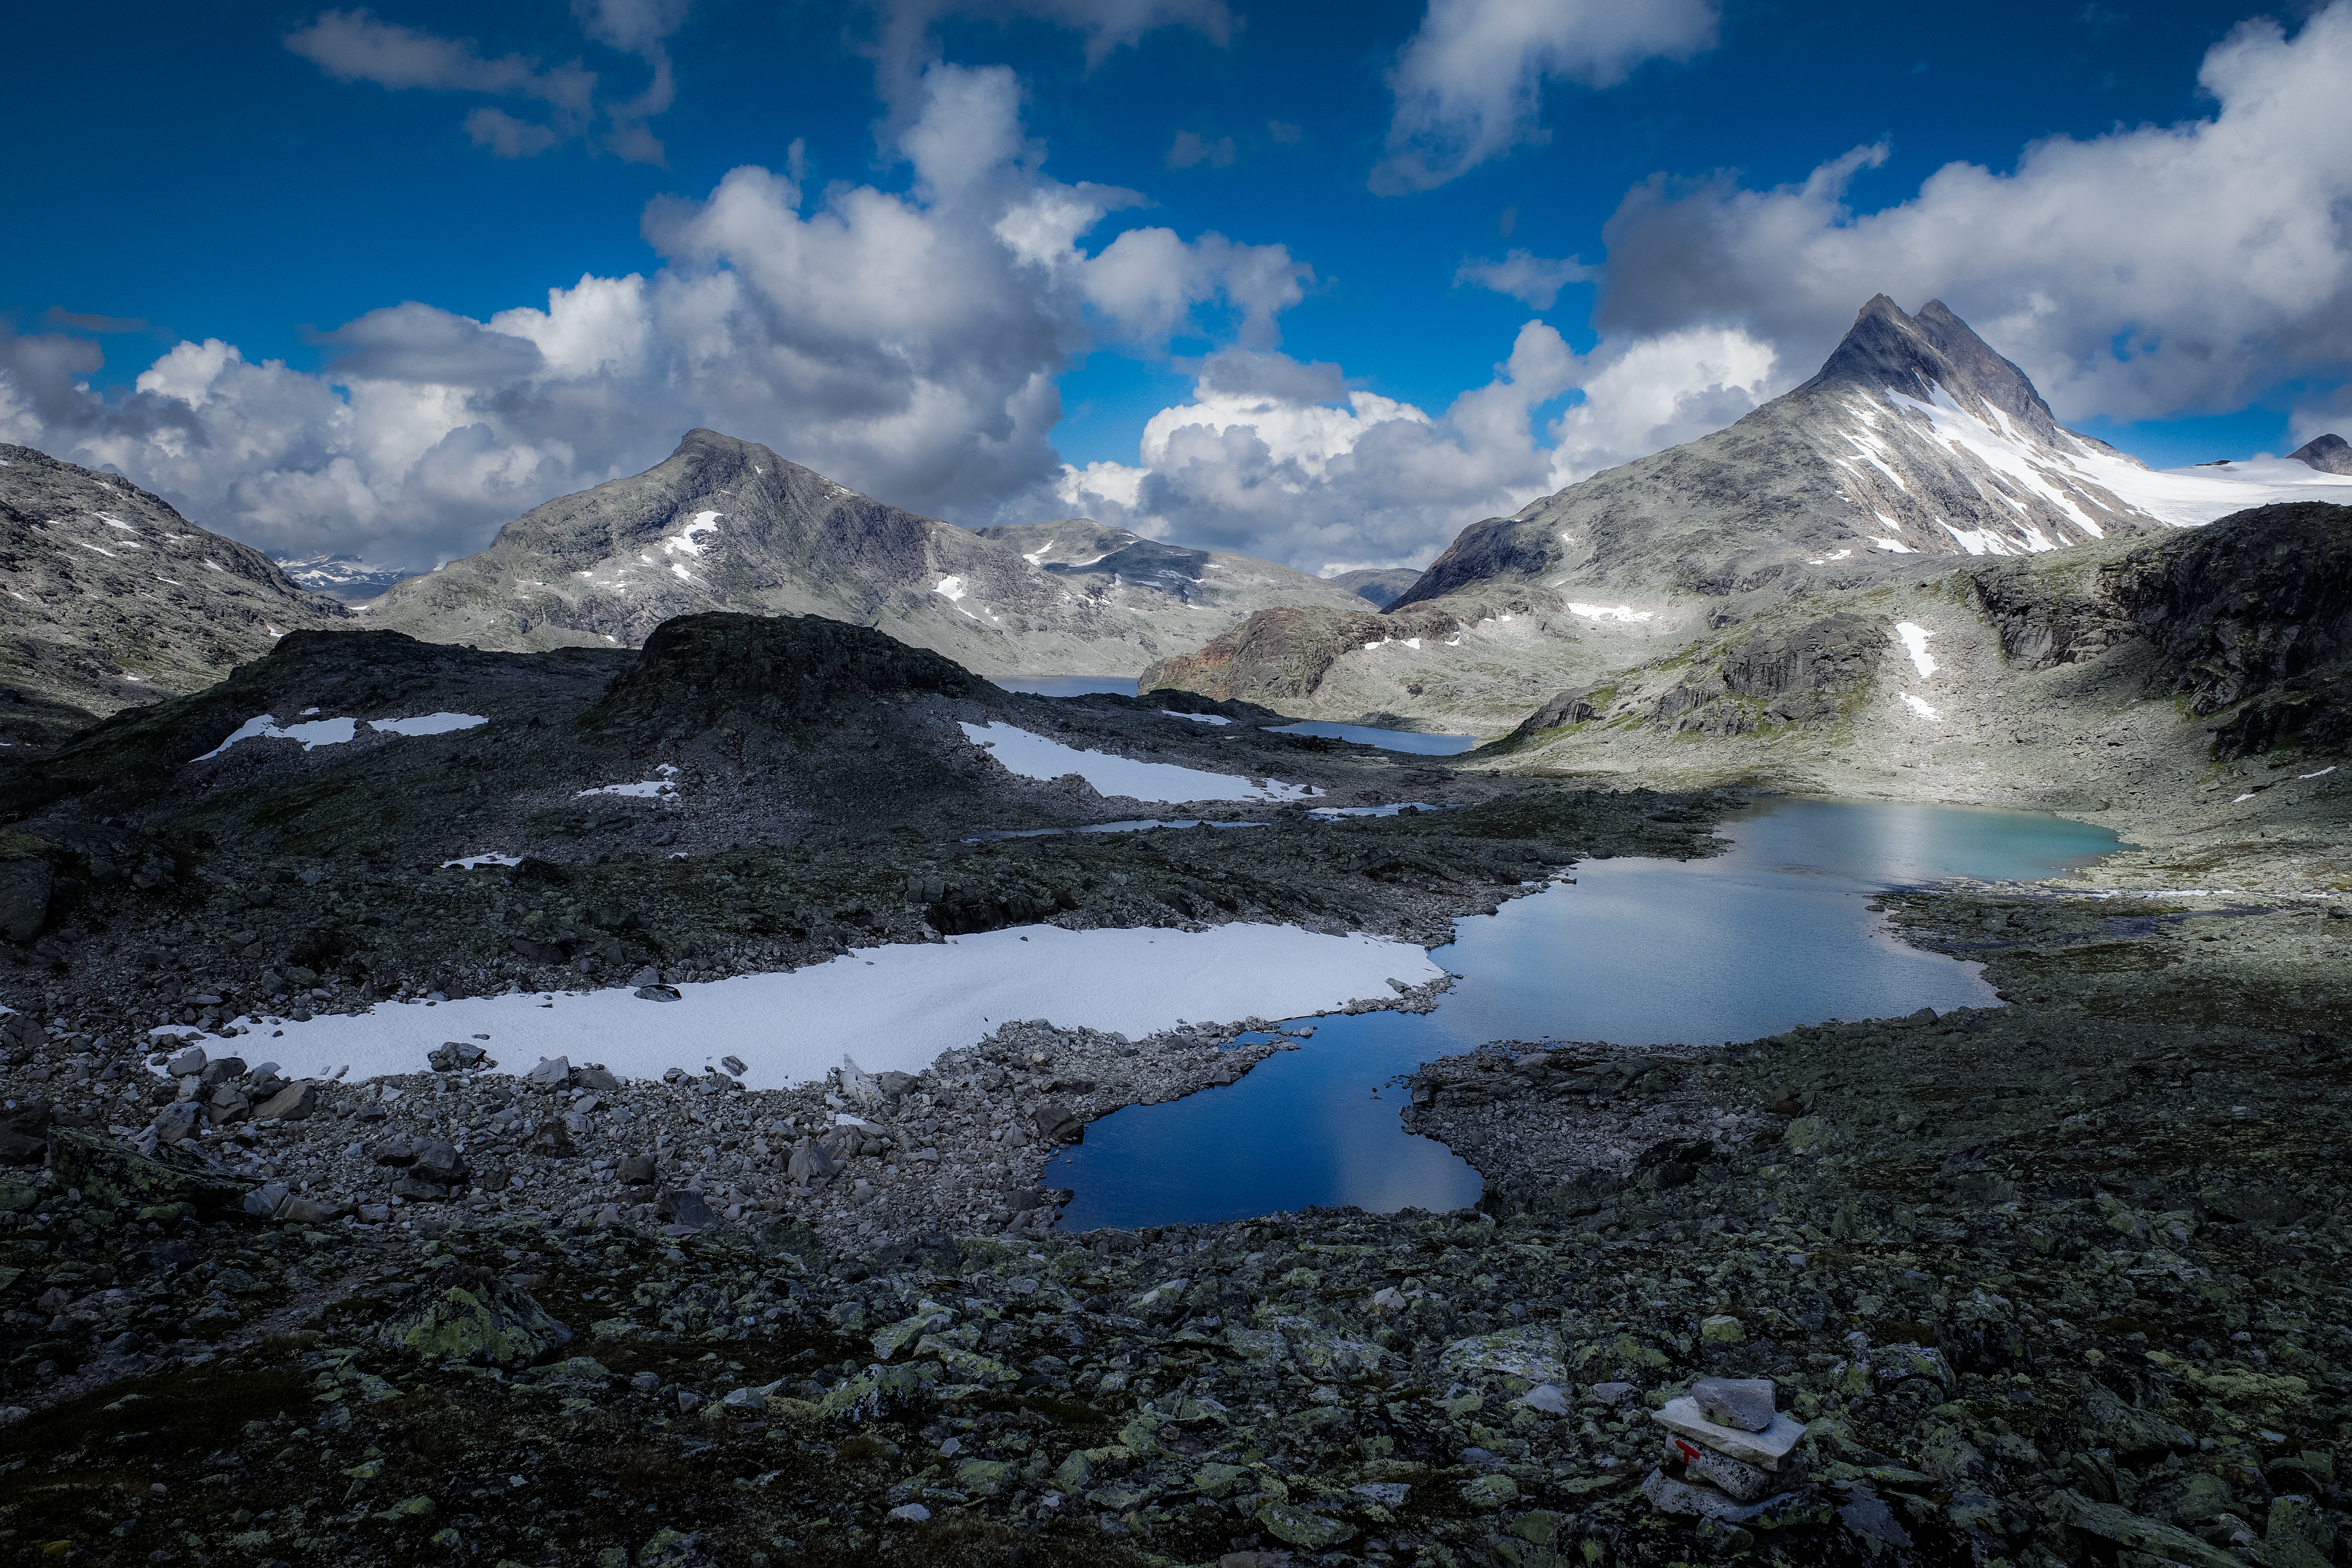
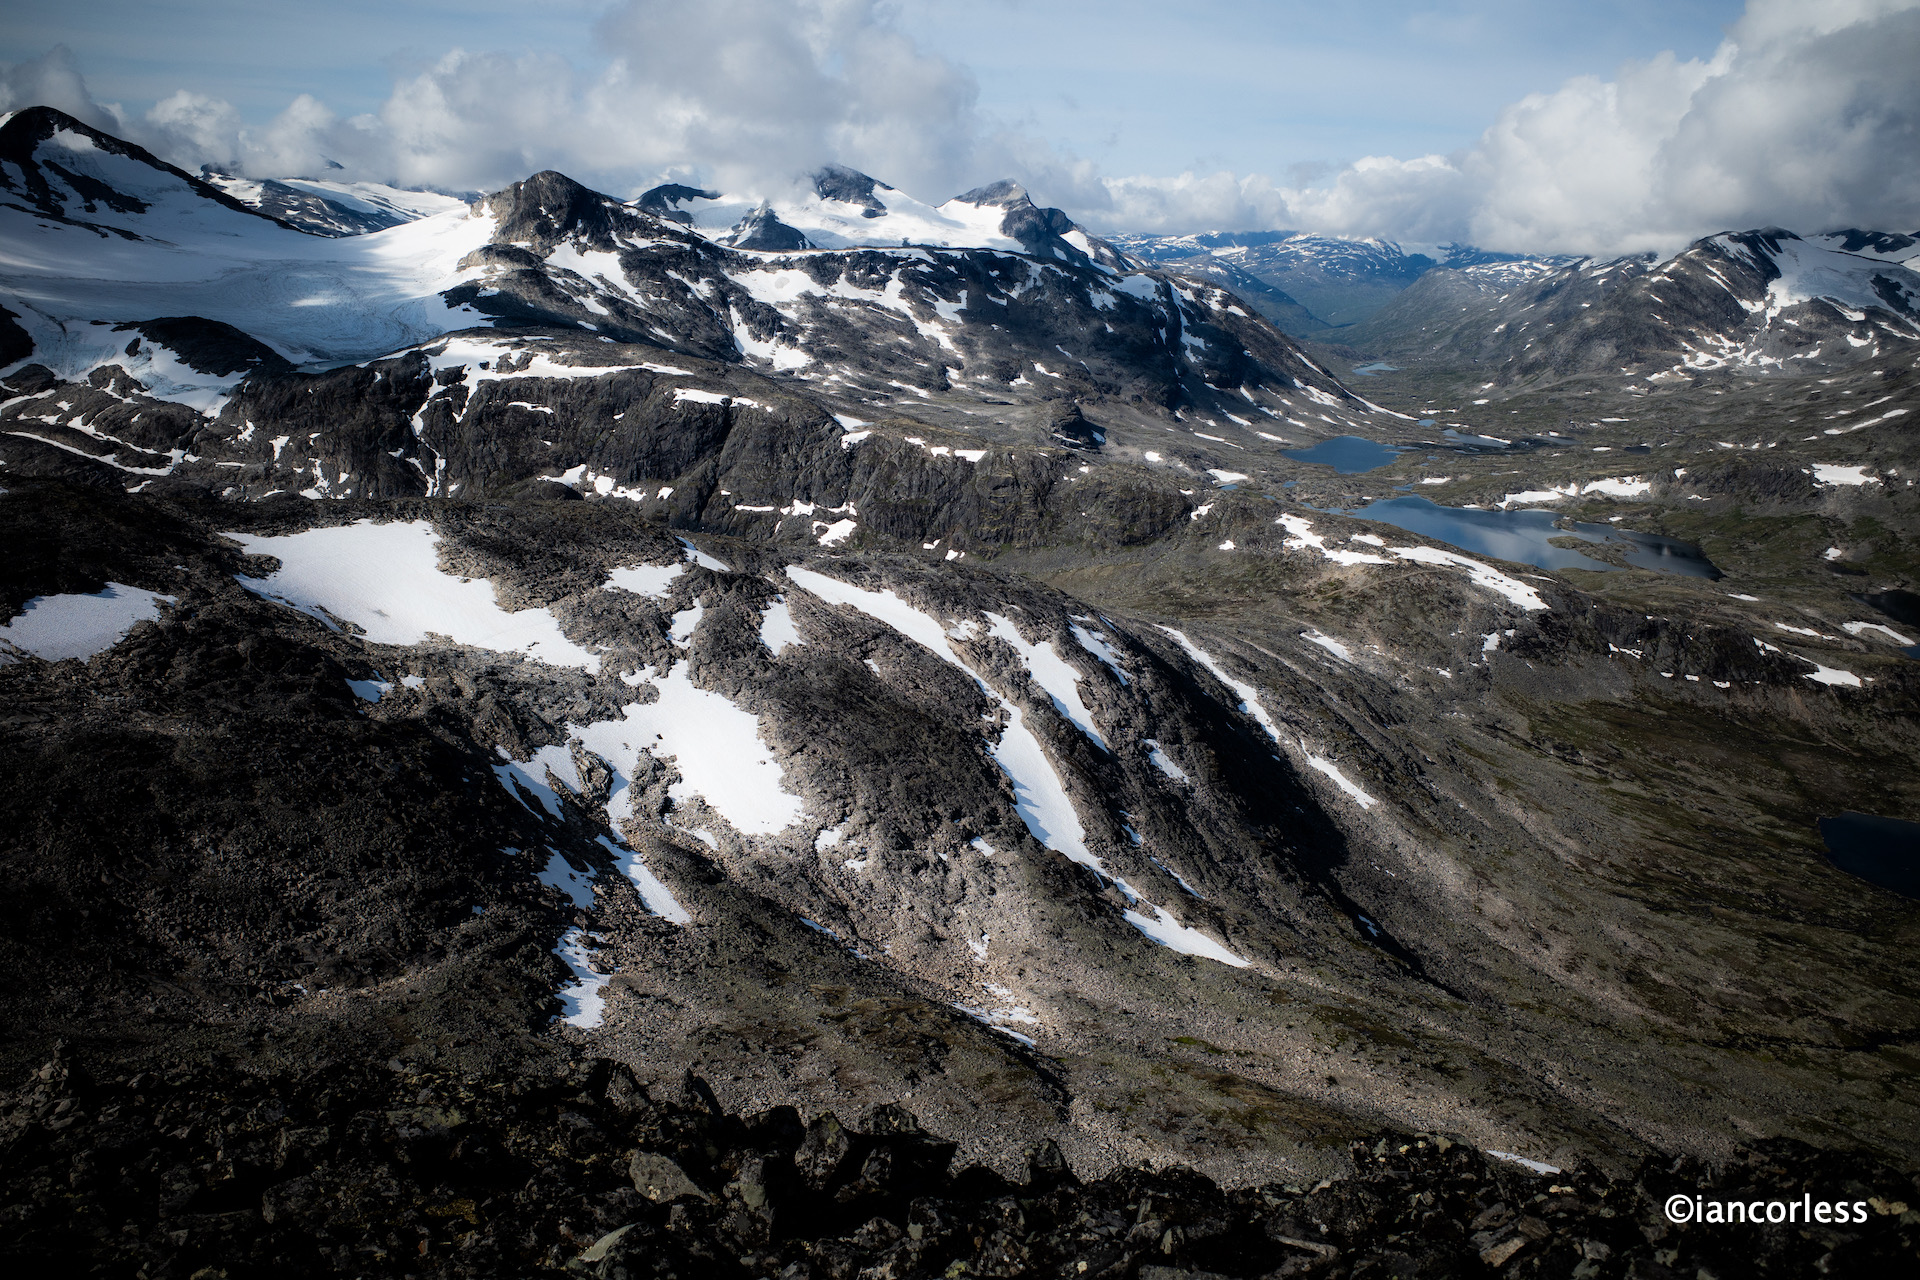
This route has a ‘reputation’ for the rocky terrain and hence the difficulty rating. It’s hard to move fast! The route climbs up passing lakes and at all times you are surrounded by stunning snow-covered peaks – magical.
sign posts help keep you on track
Arriving at Kvitevatnet lake you keep to the left and at the end climb up towards Uradalsvatnet lake, againkeepin to the left.
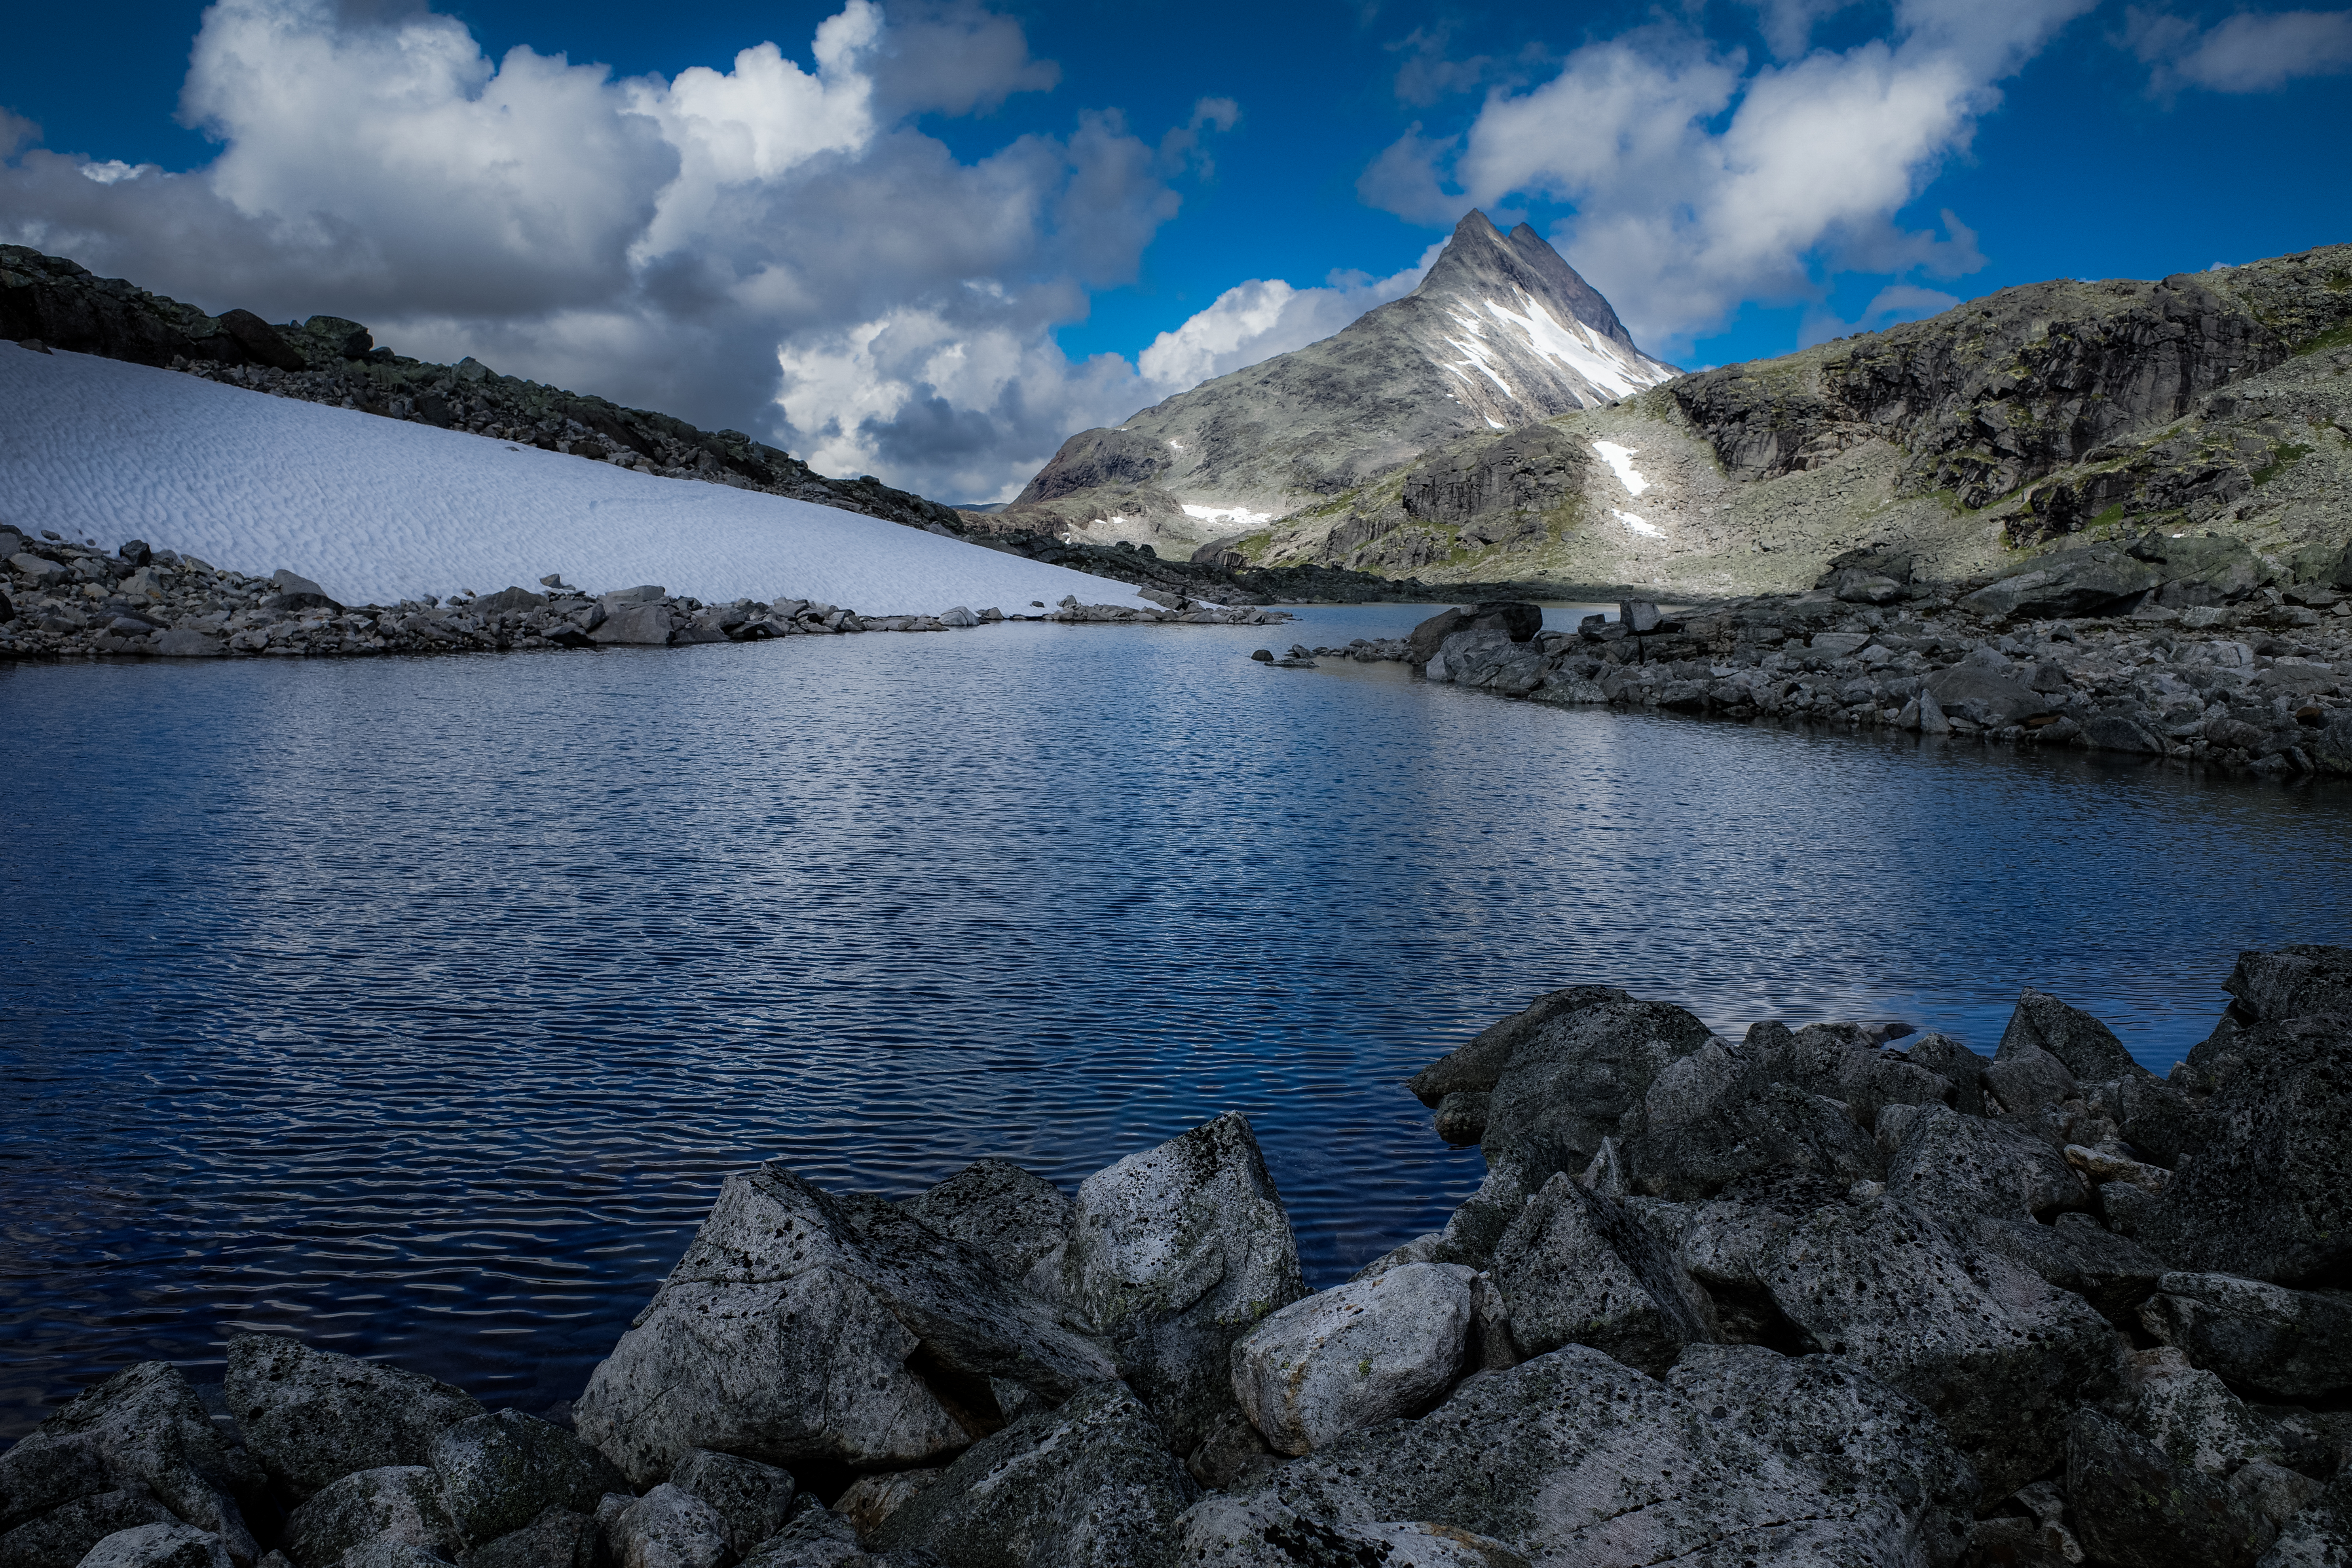
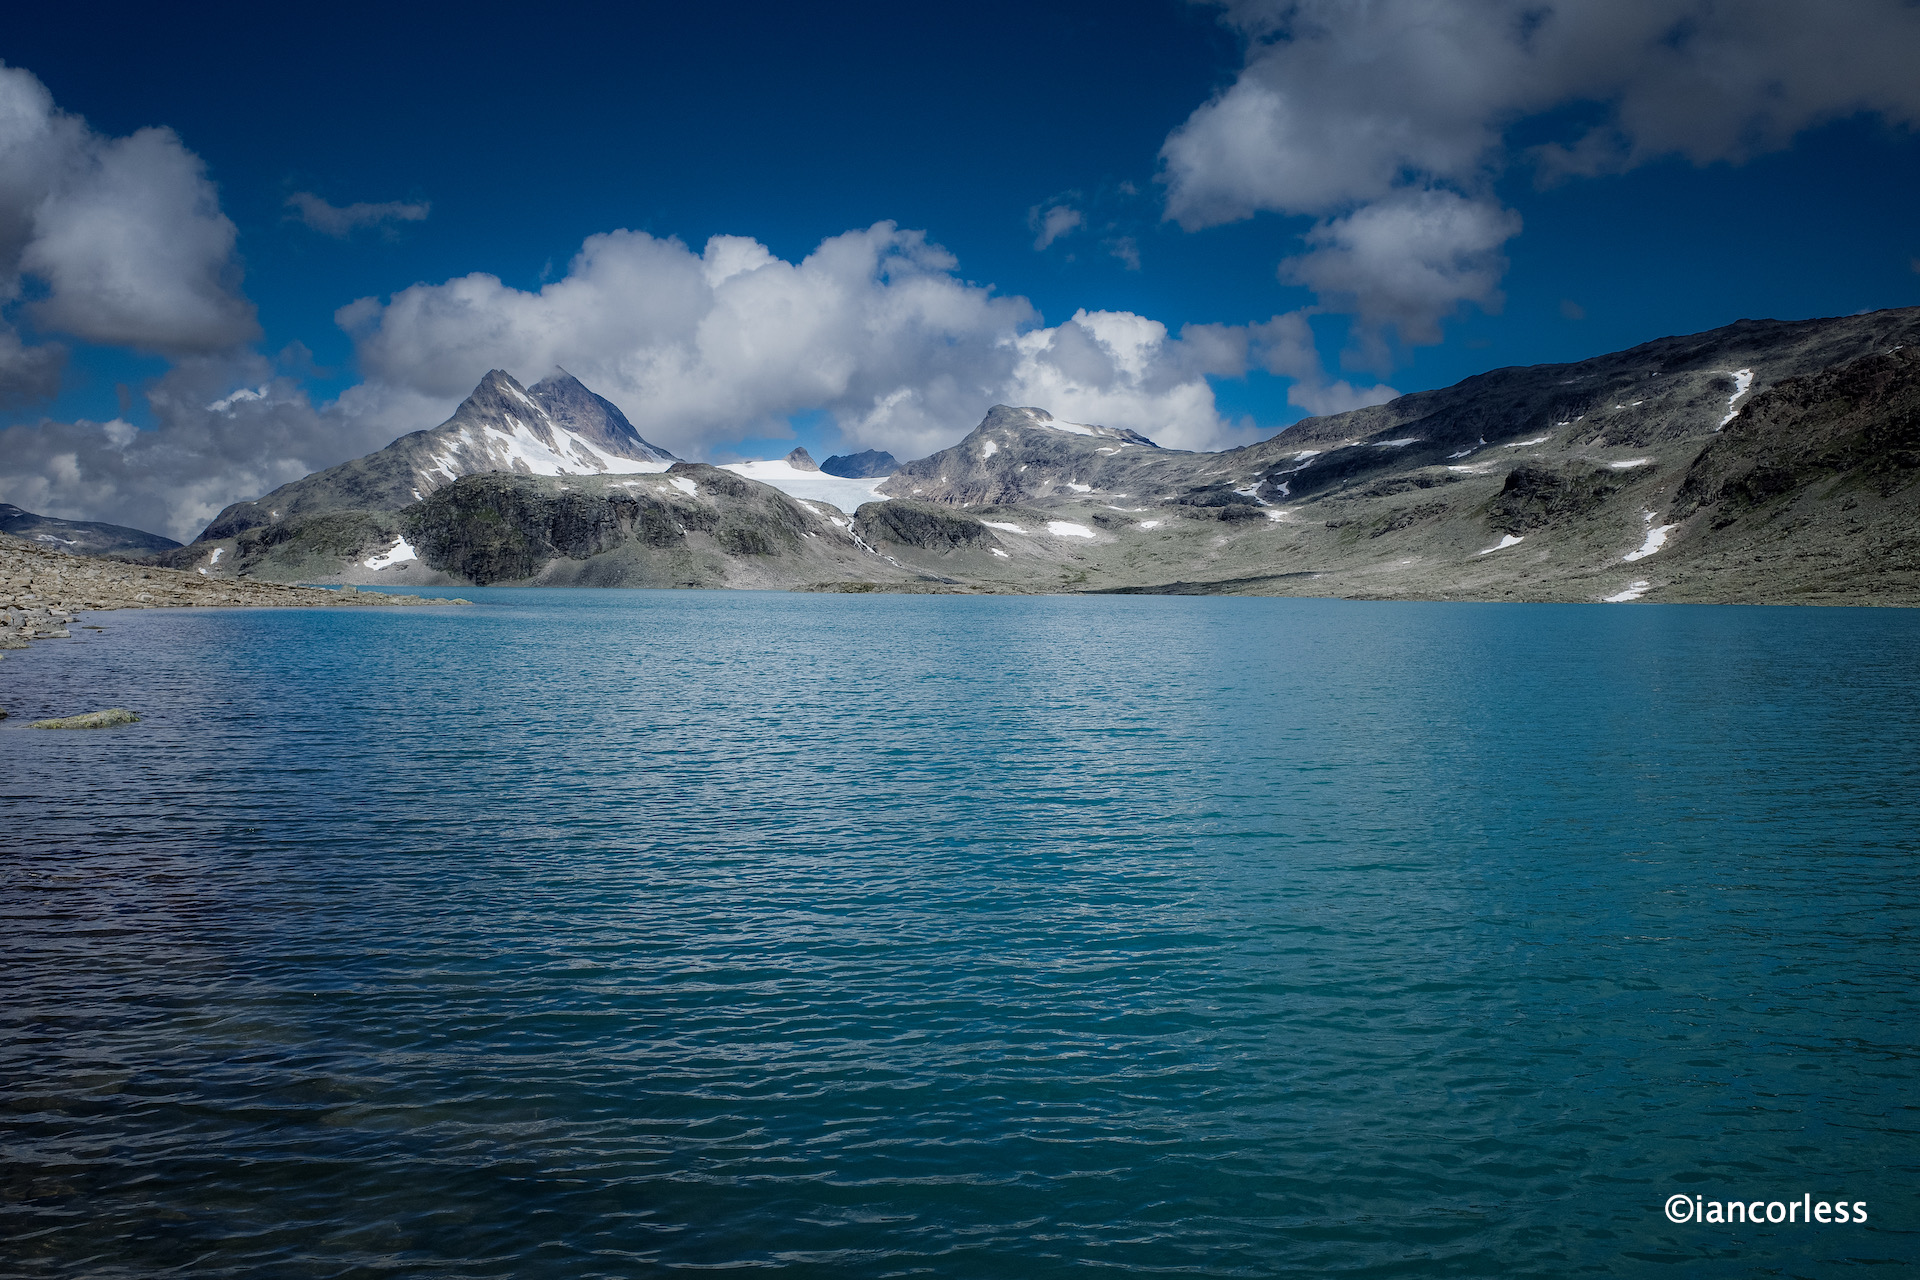
Lakes, rocks, snow and mountains. Perfect!
Passing through Uradalen the route eventually reaches its high point and then the descent starts through more ‘runnable’ terrain towards Skogadalsbøen.
The terrain became ‘easier’ towards the end of the day.And more vegetation.
Of course, there is a kick in the tail with more rocks and very closed in and dense single-track with lots of mud. We covered 24.5km, 670m+ in 4h 55m. Geoff and Baz were pretty tired at the end, and I think it’s fair to say that Baz had seen and experienced enough rocks and boulders to last a lifetime. My reply was always, 1this is Norway, this is Jotunheimen!’
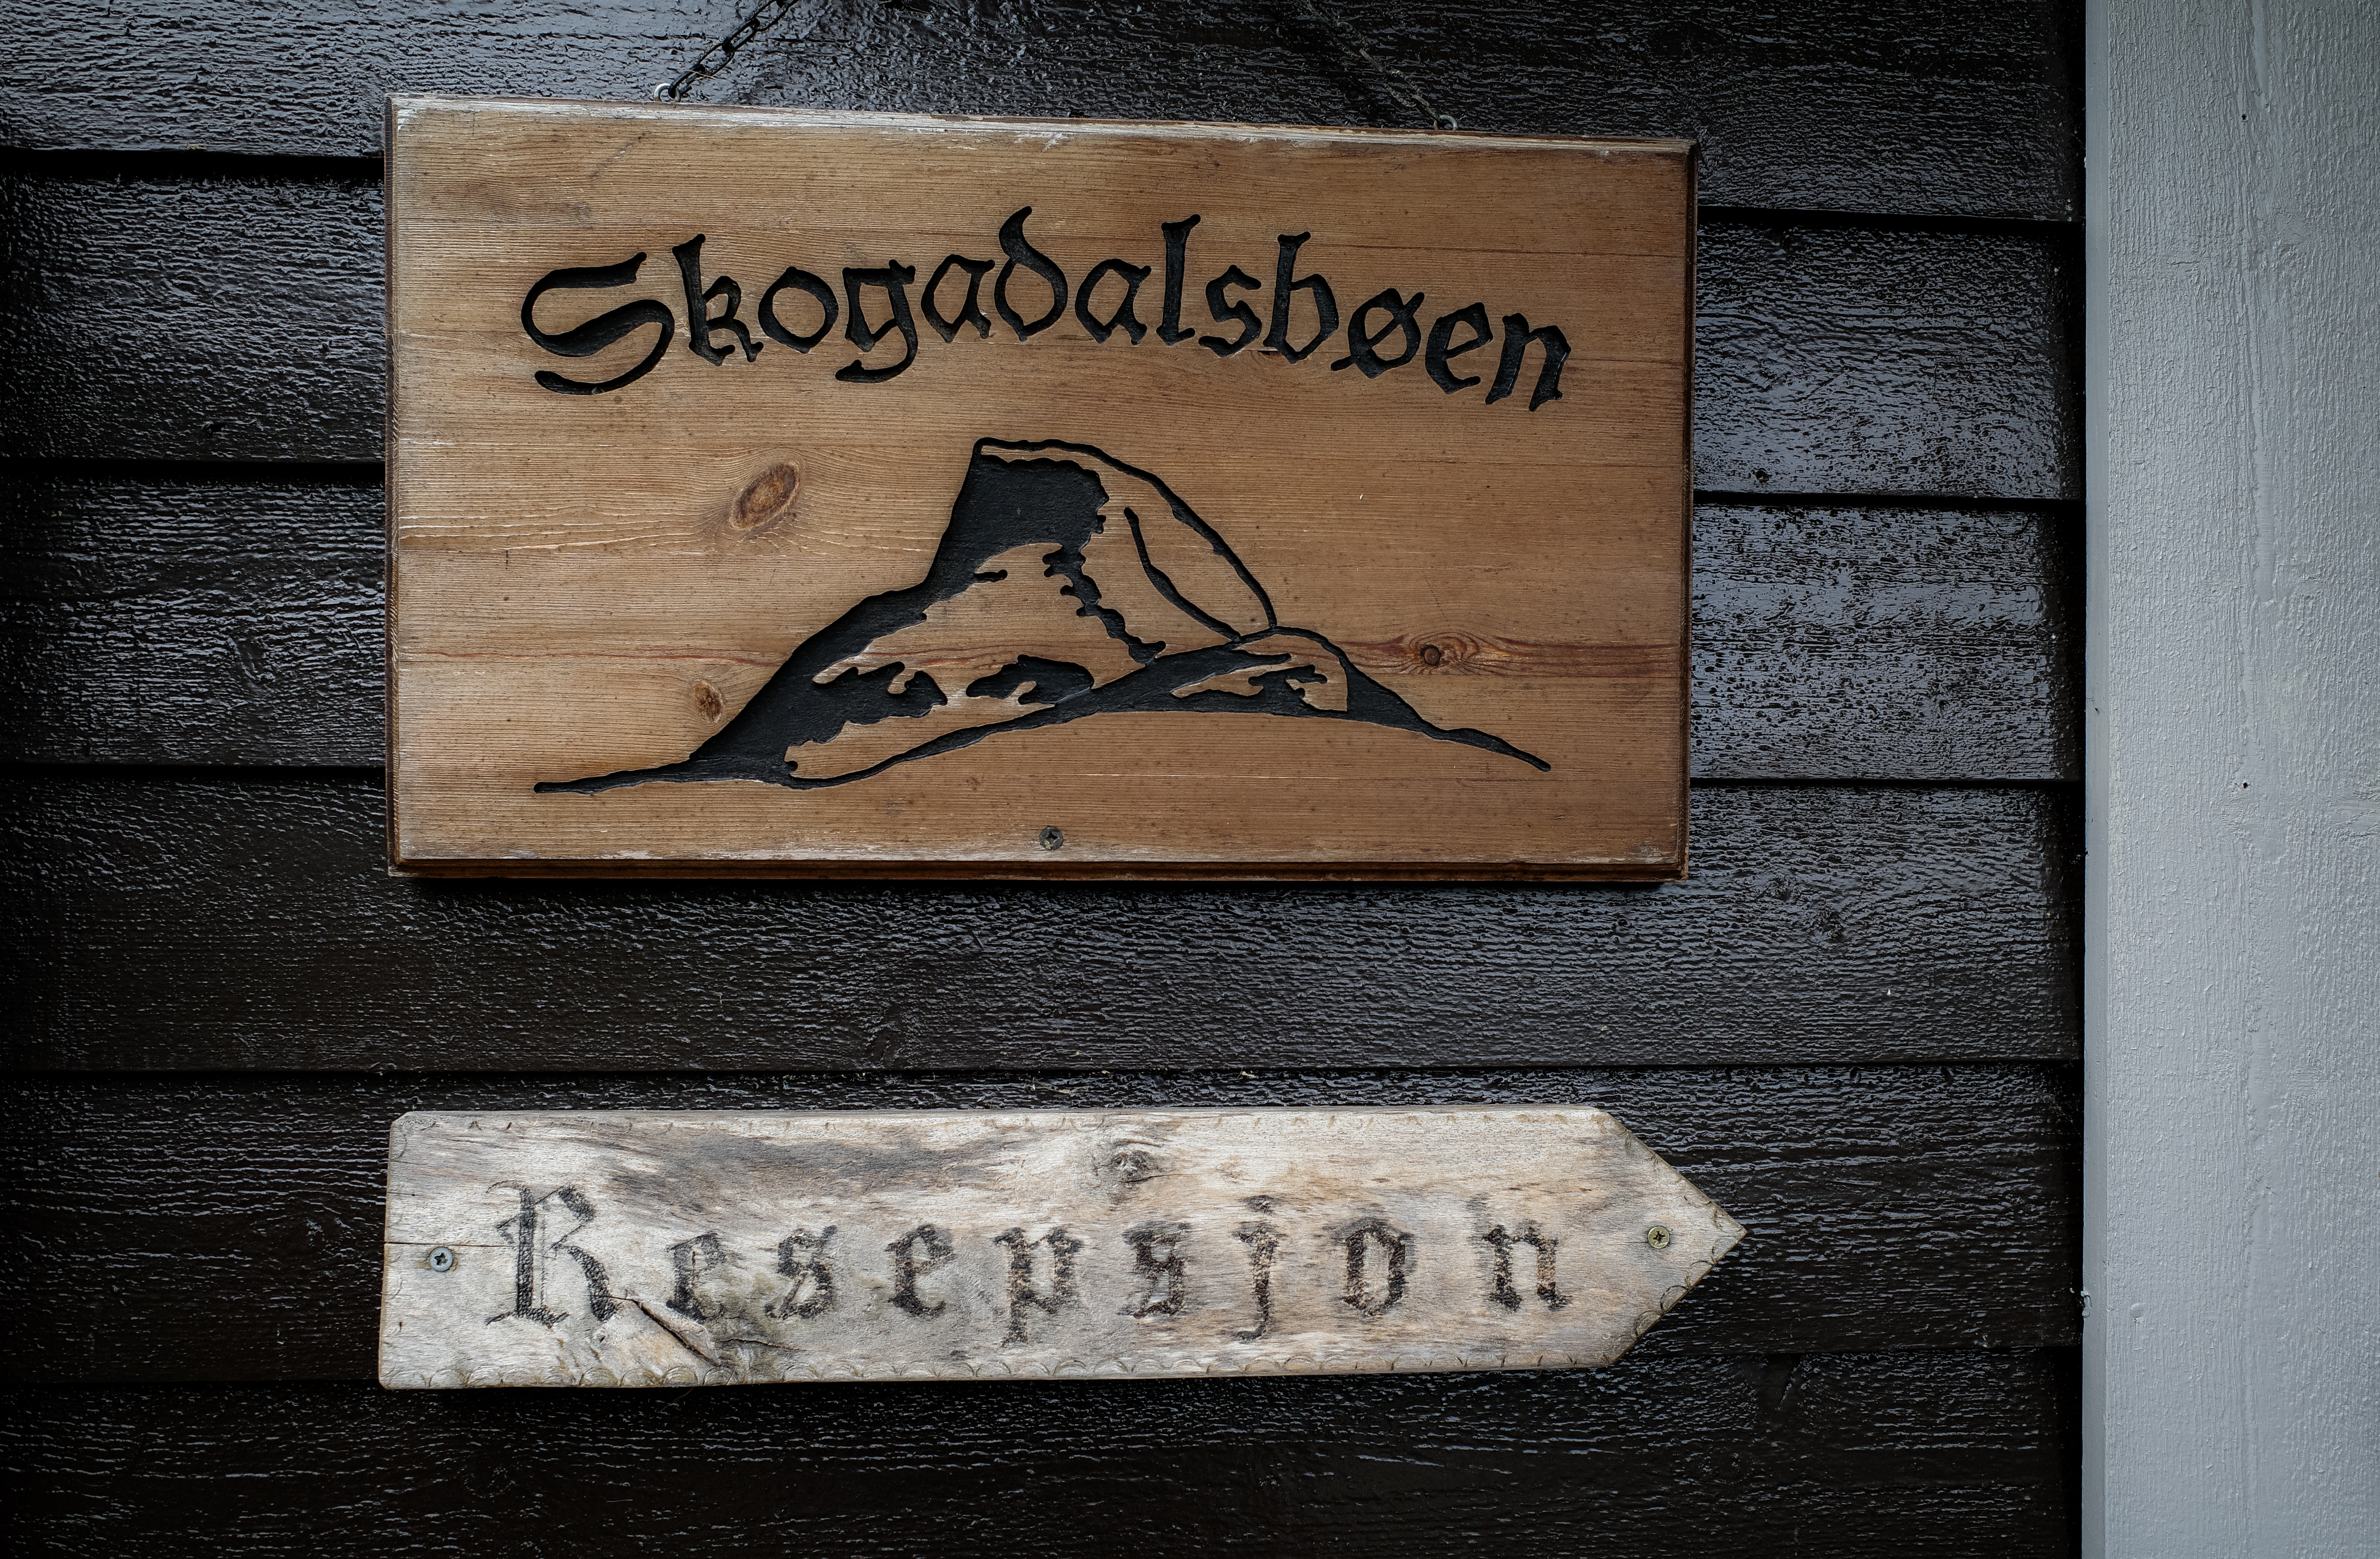
A nice sight after a long day
My girlfriend, Abelone, had initially planned to join Home of the Giants. Our intention, two groups of 4/5-people. However, in the buildup to the event we had 6-people cancel – not ideal. These cancellations caused many logistical problems and of course, there was never any risk of cancelling, but it did mean that Abelone was not needed to guide a group. However, she was on holiday with her son Håkon (10) and after summiting Fannaråki they joined us at Skogadalbøen DNT.
As usual, we had an amazing three course dinner, a lovely evening of banter and then a good night’s sleep.
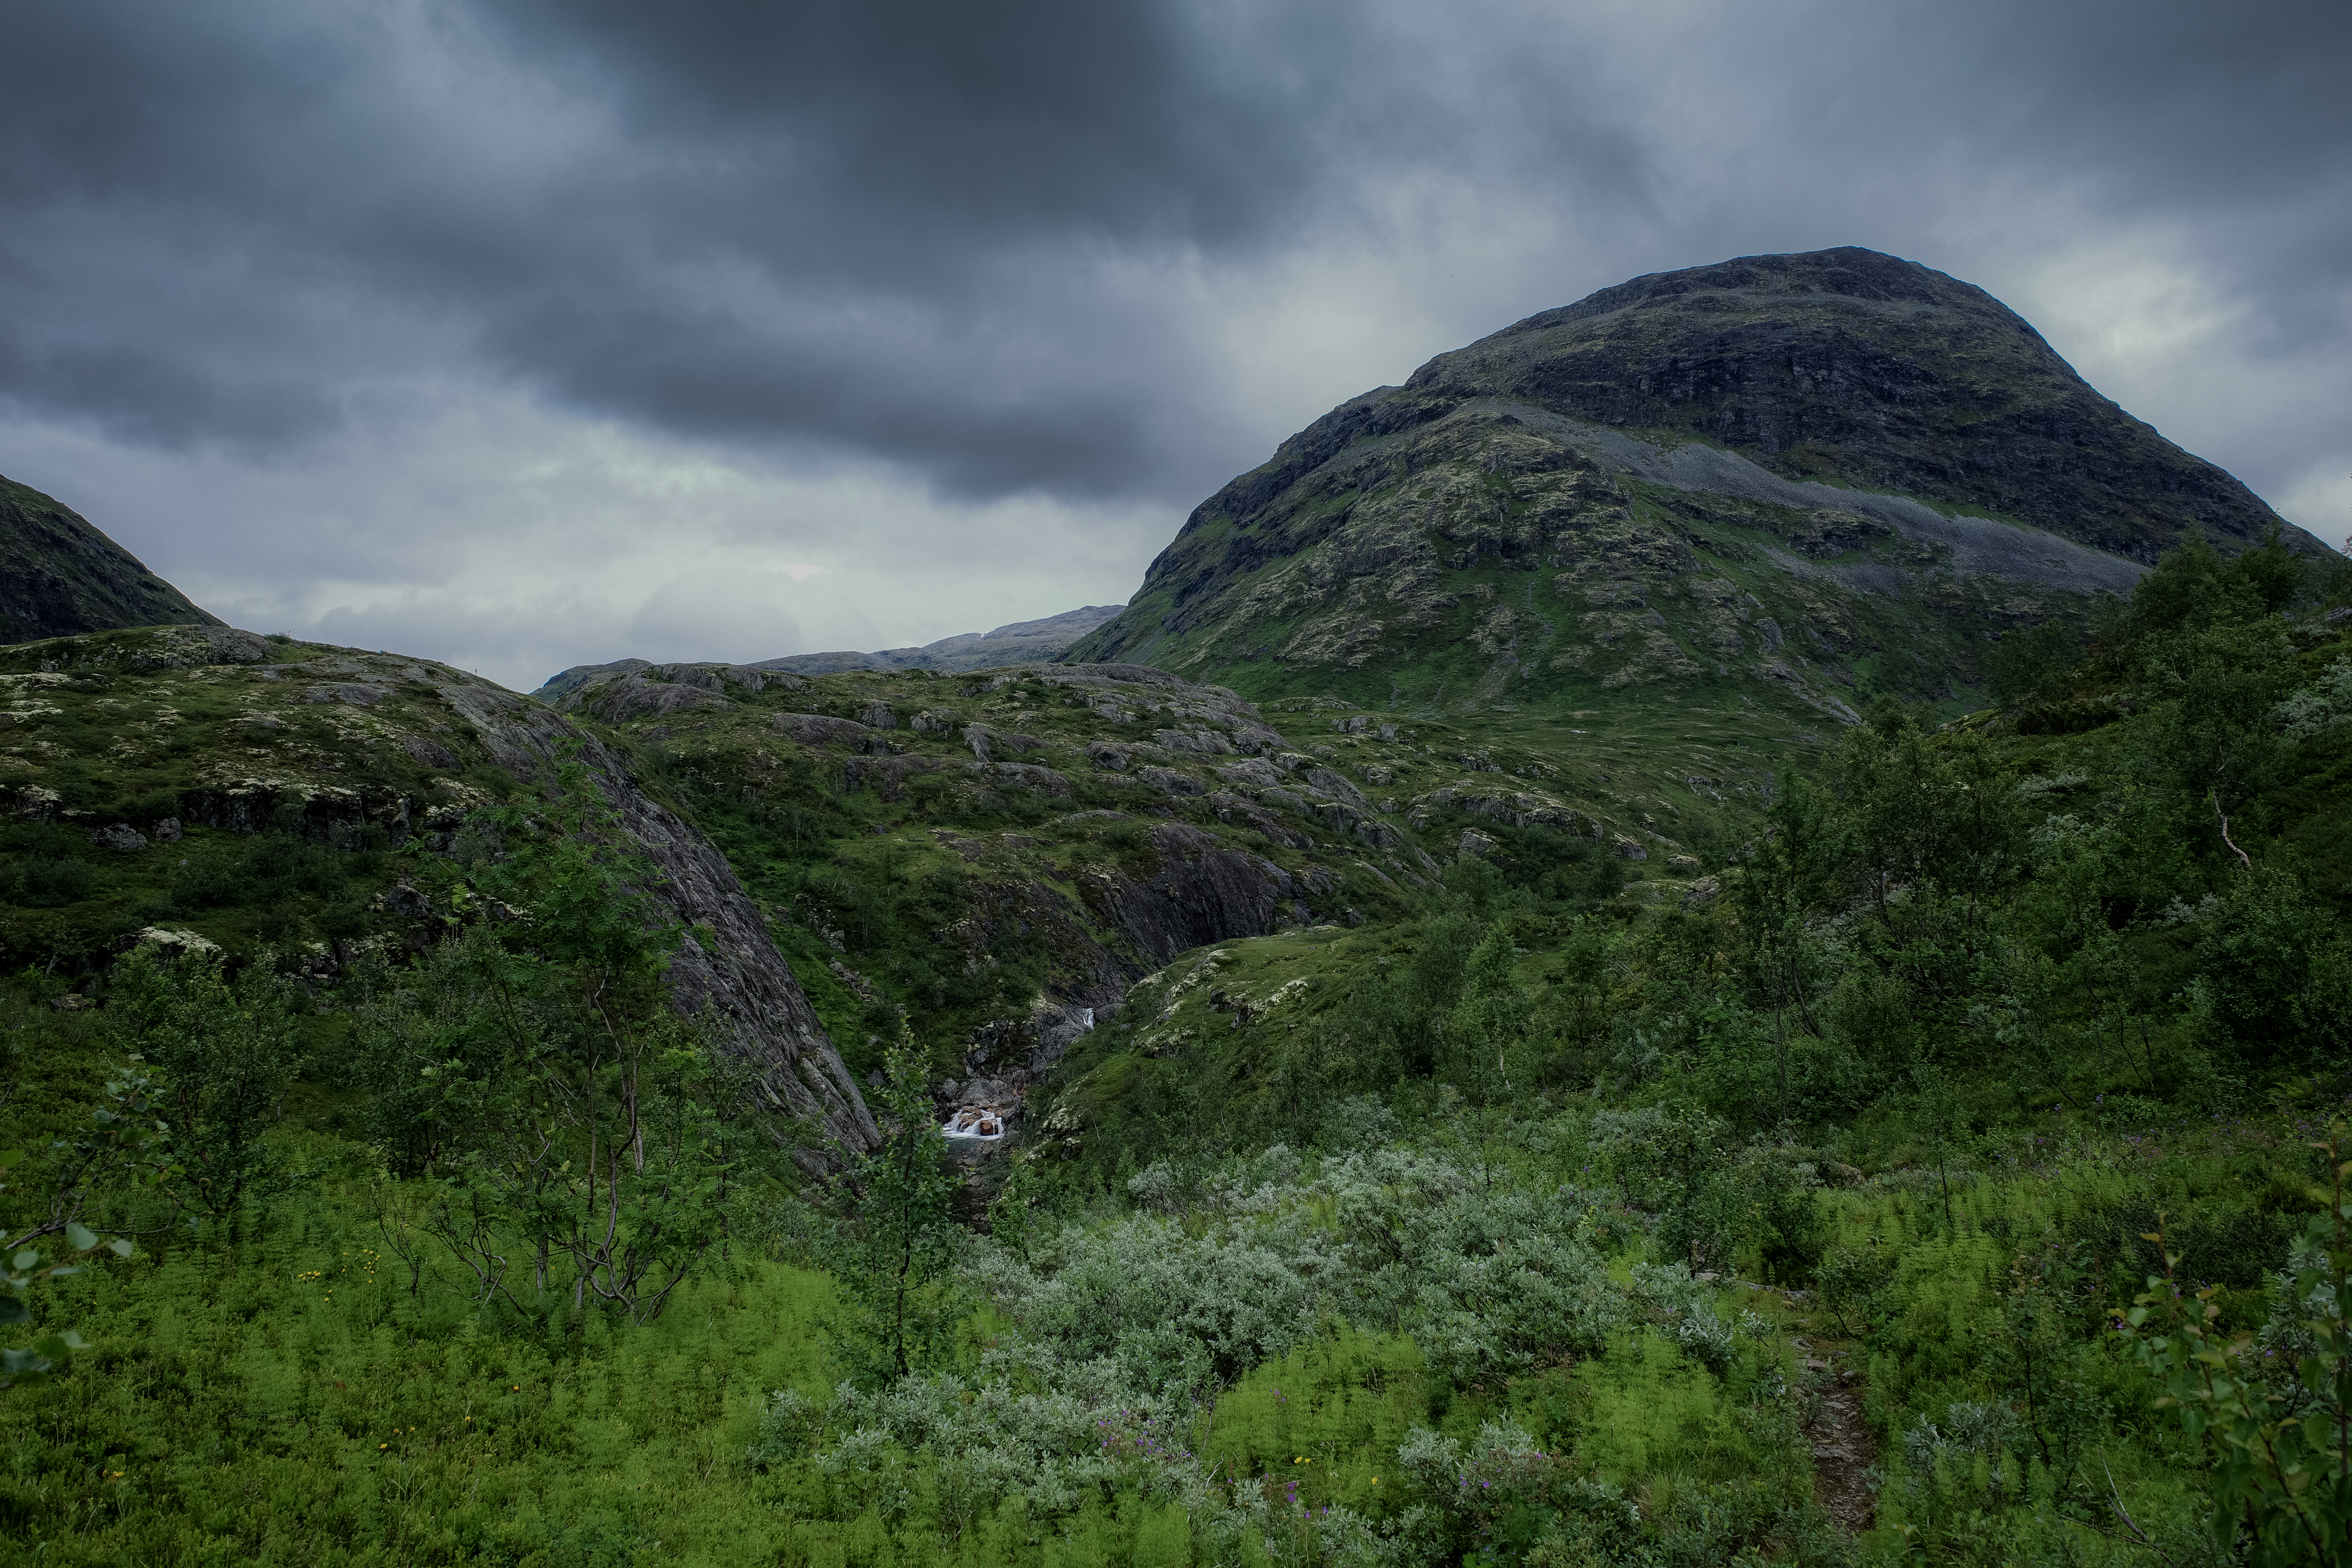
Day 3 – Skogadalbøen to Leirvassbu
Day 3 with a moody start.
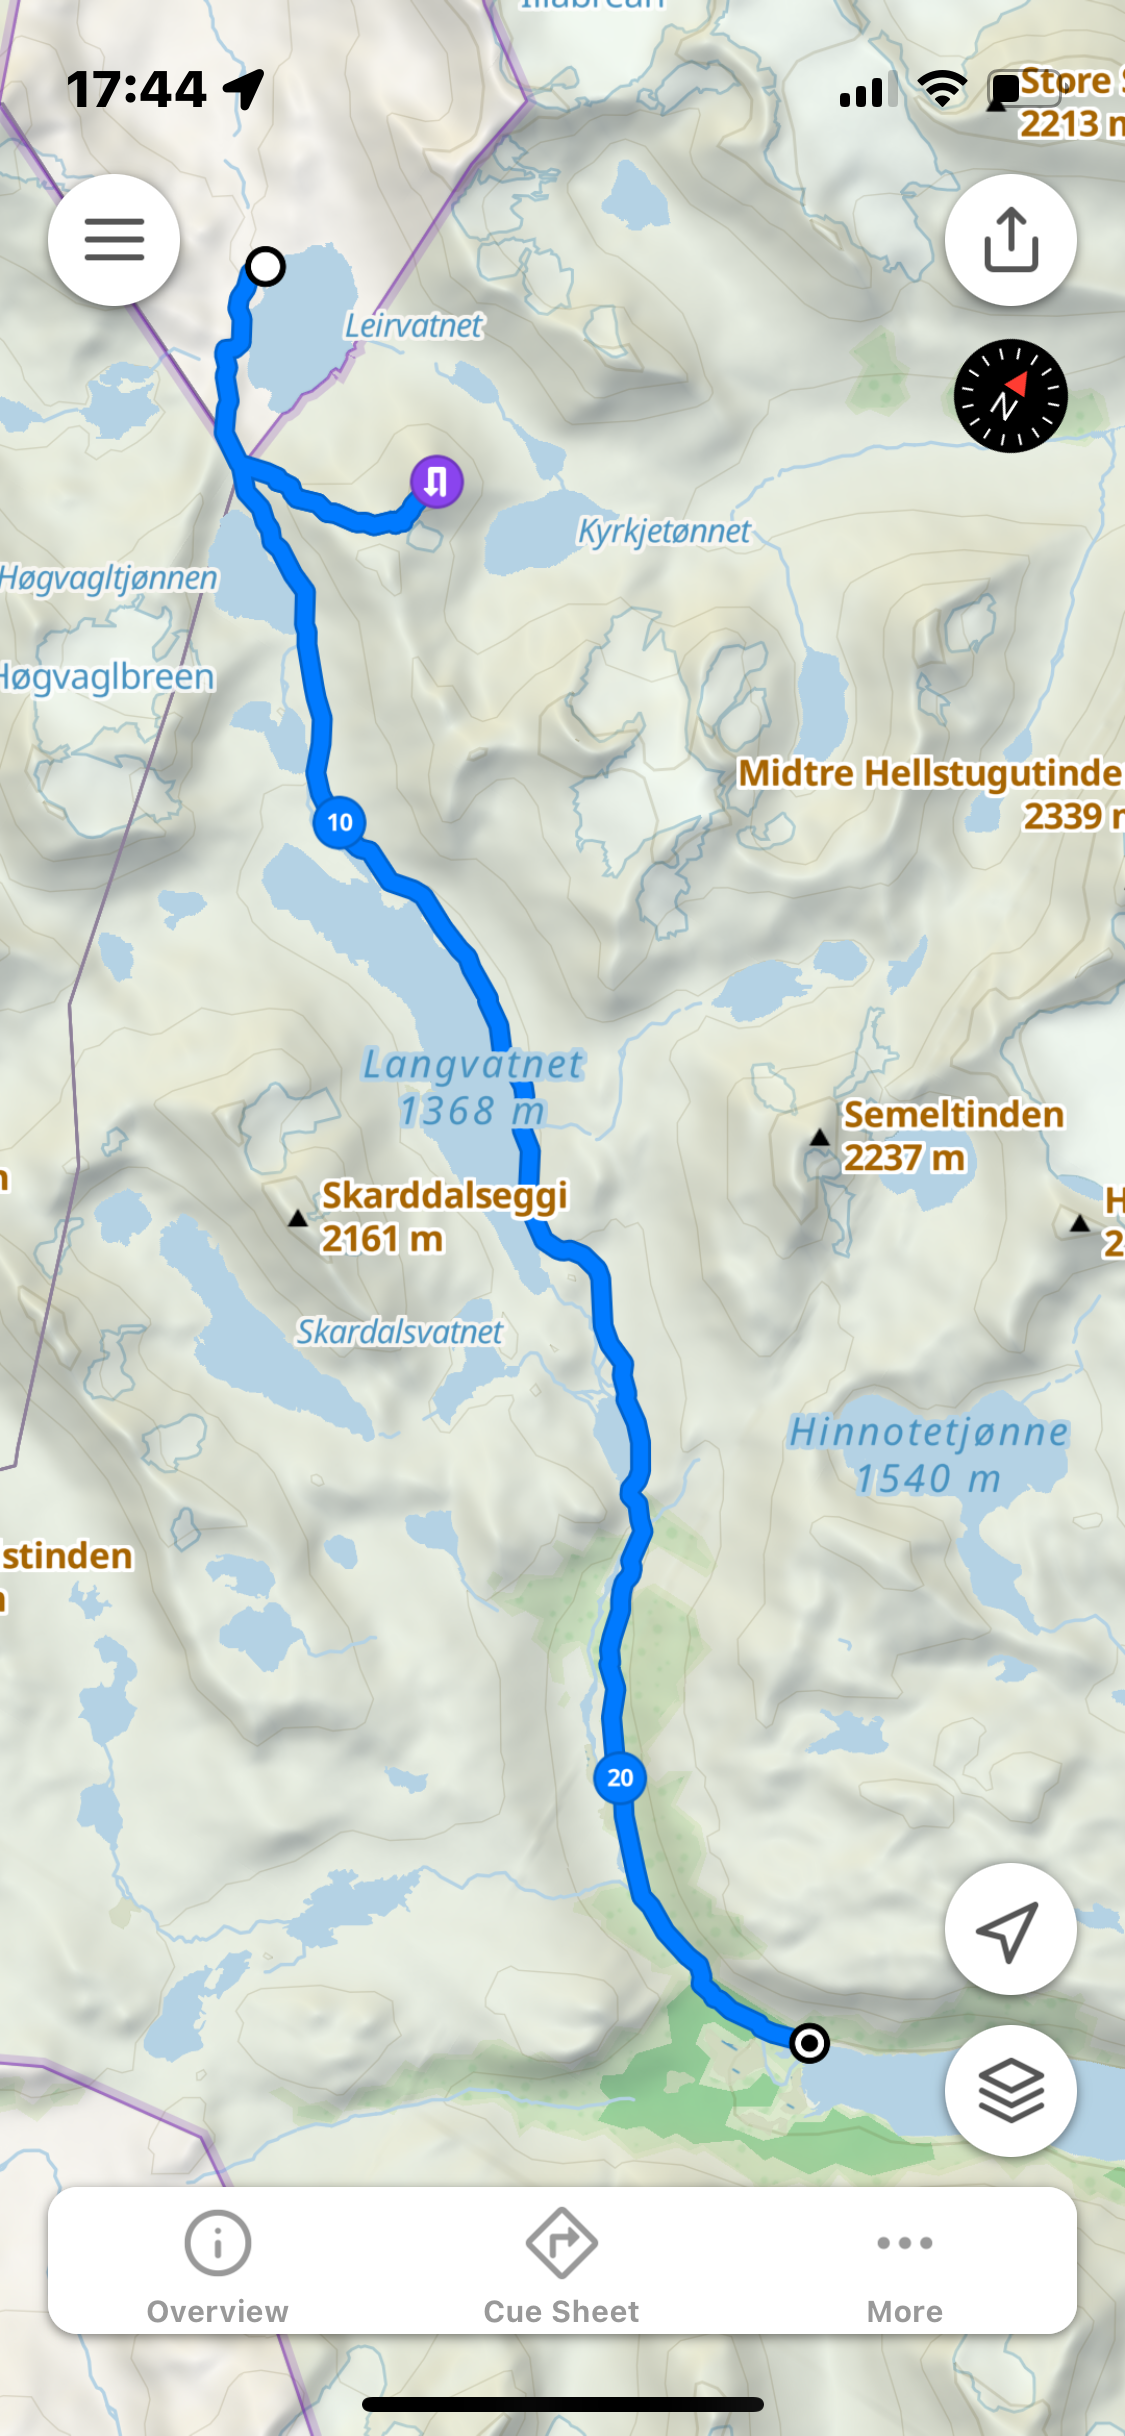
Skogadalbøen to Leirvassbu
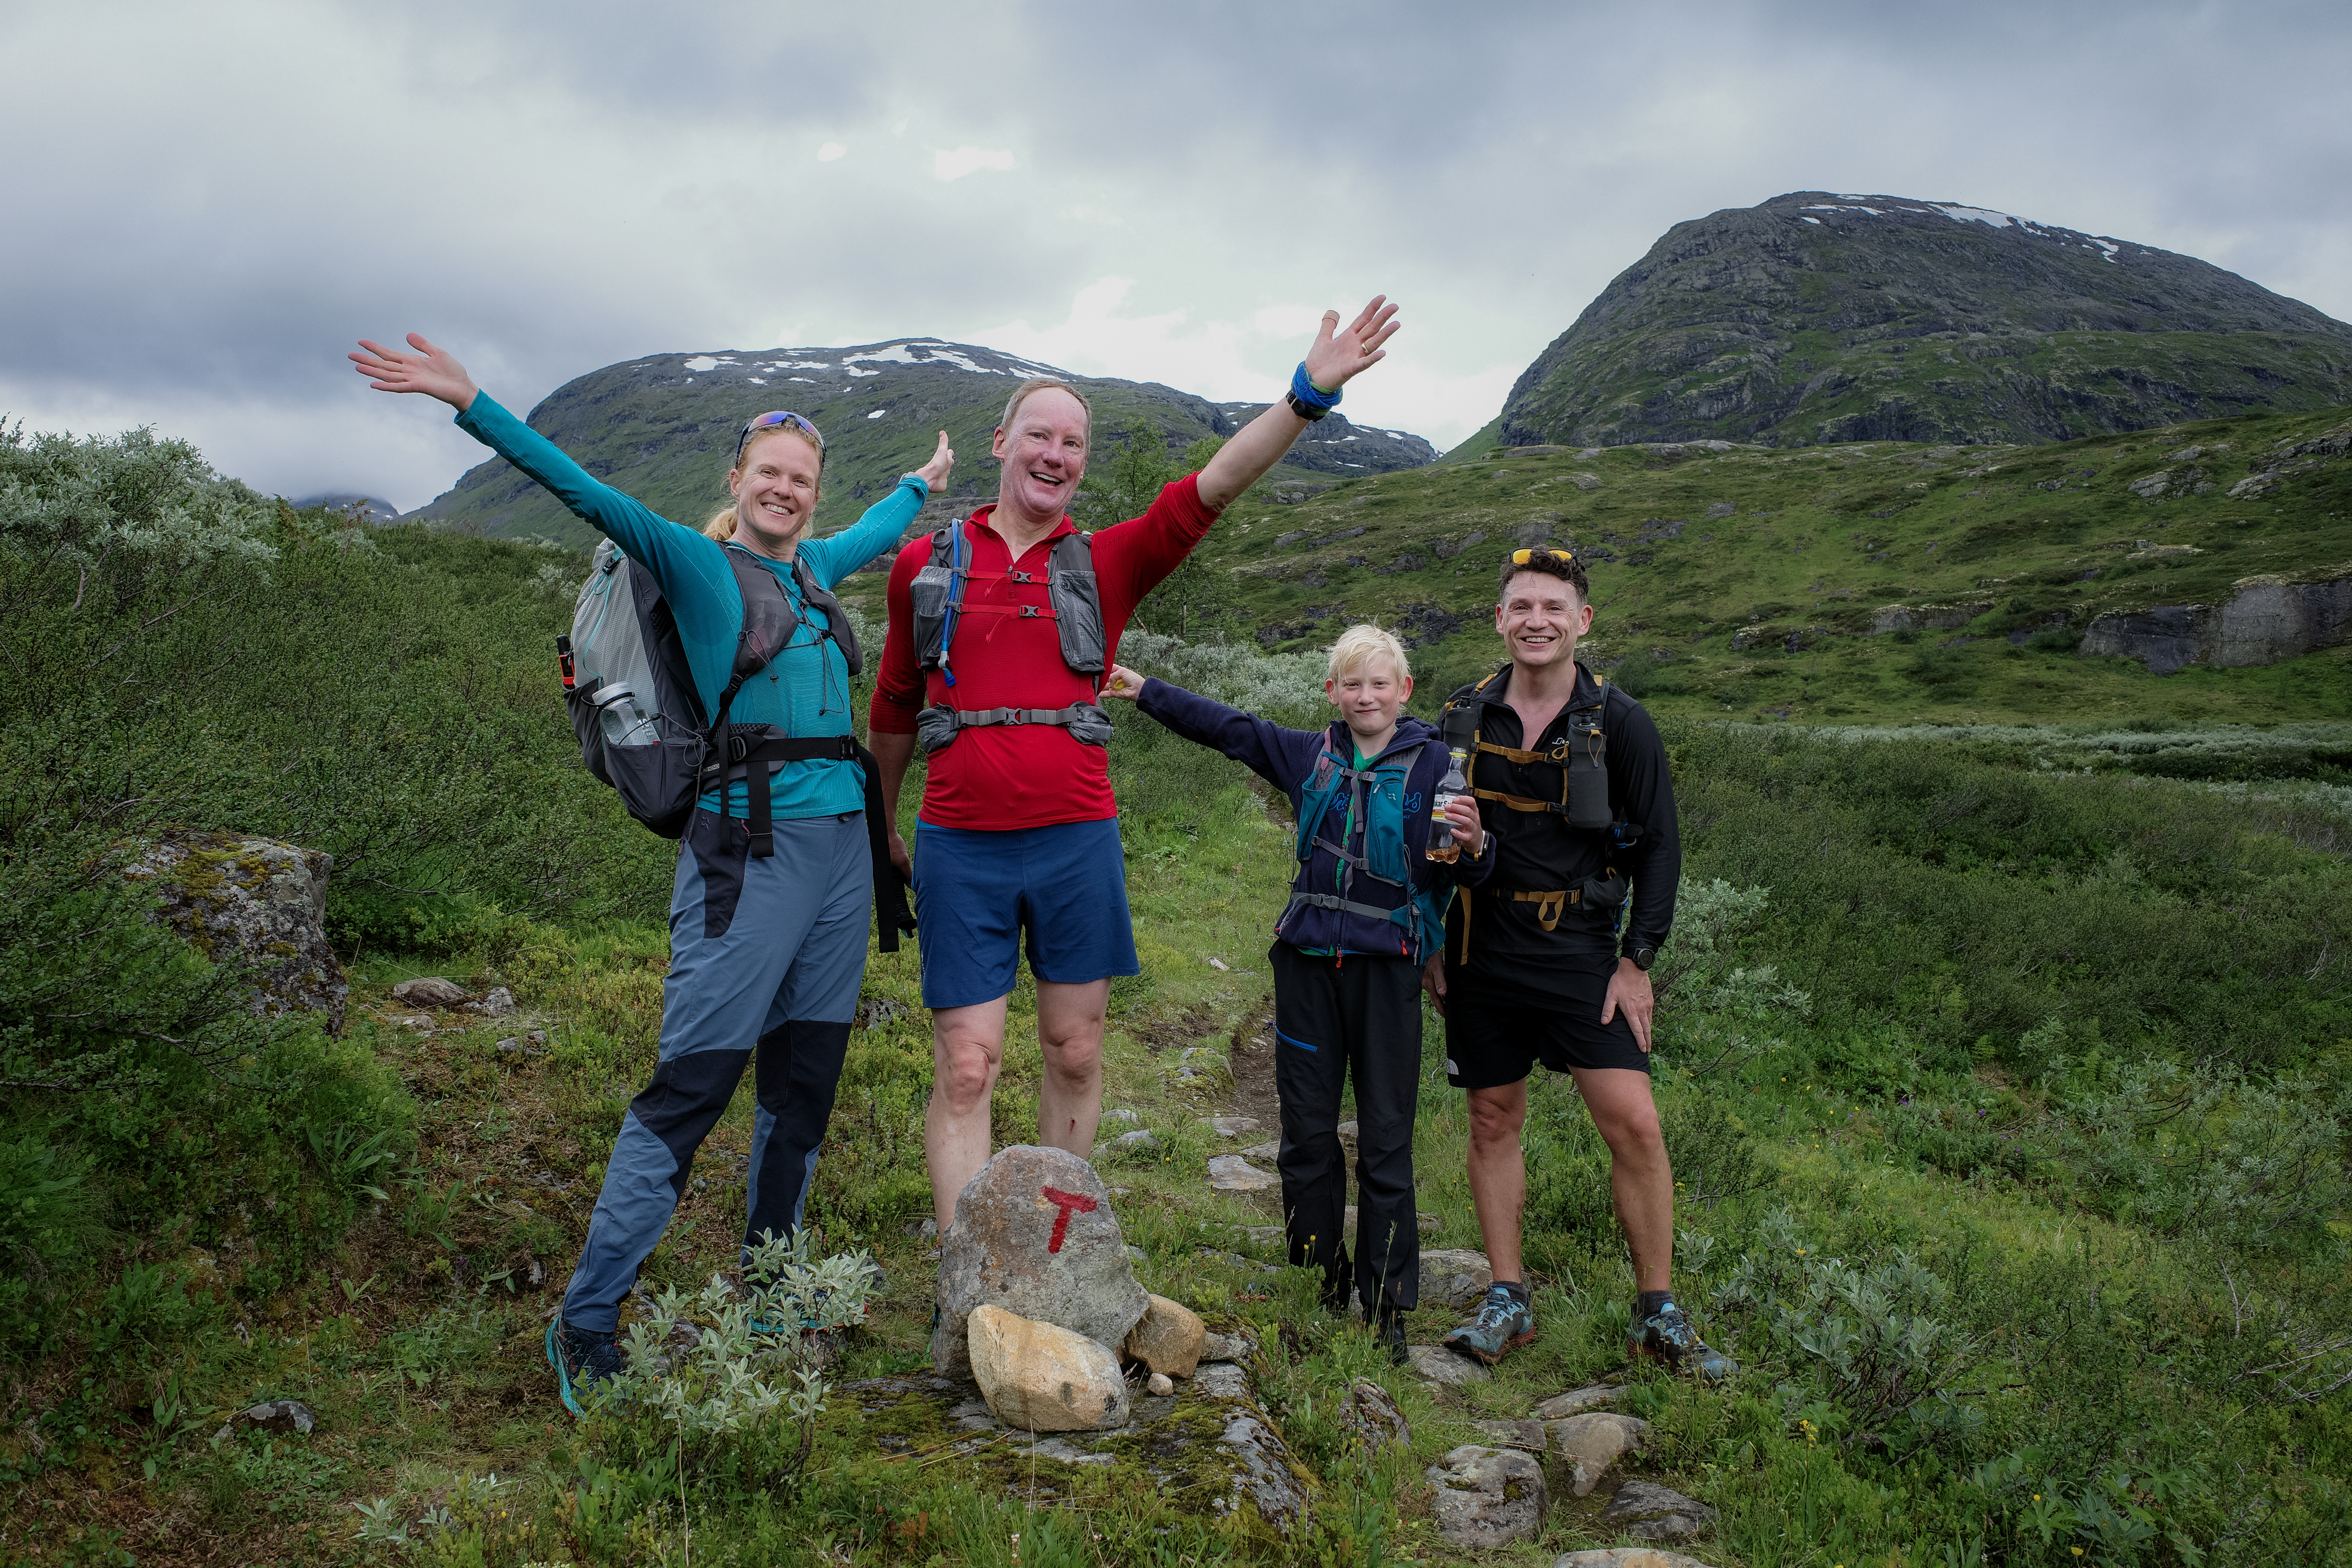
Skogadalbøen to Leirvassbu is in comparison to the previous day, an easy route. Even though UT.NO describe it as a ‘very demanding summer route.’ Håkon had decided he enjoyed the group dynamic so much he wanted to also do the 19km route. He and Abelone got underway and some 30-minutes later we started.
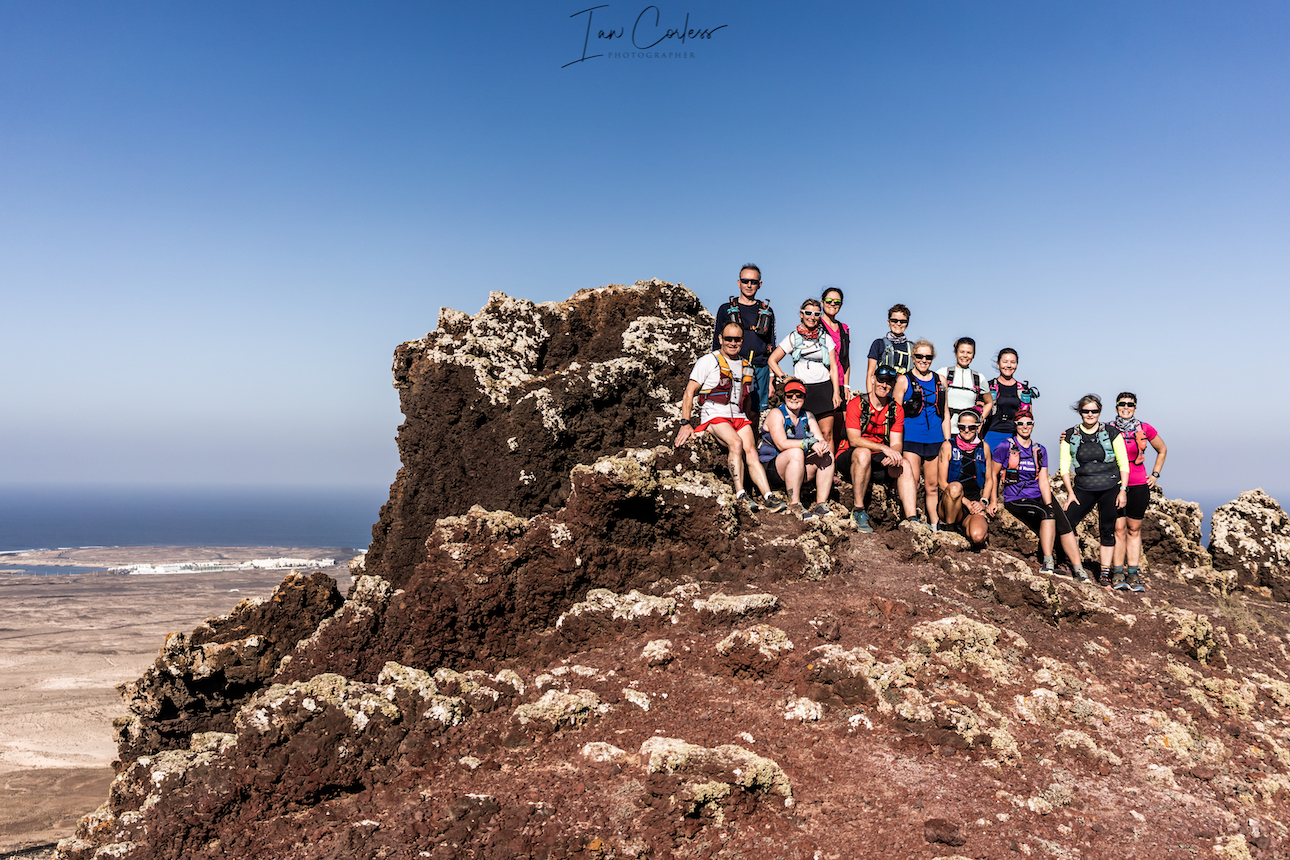
Passing them early in the trail we had a group photo and pushed on. Today was a running day, albeit steady and relaxed. Geoff and Baz had big smiles; I think they almost considered it a rest day after what had been experienced the day before.
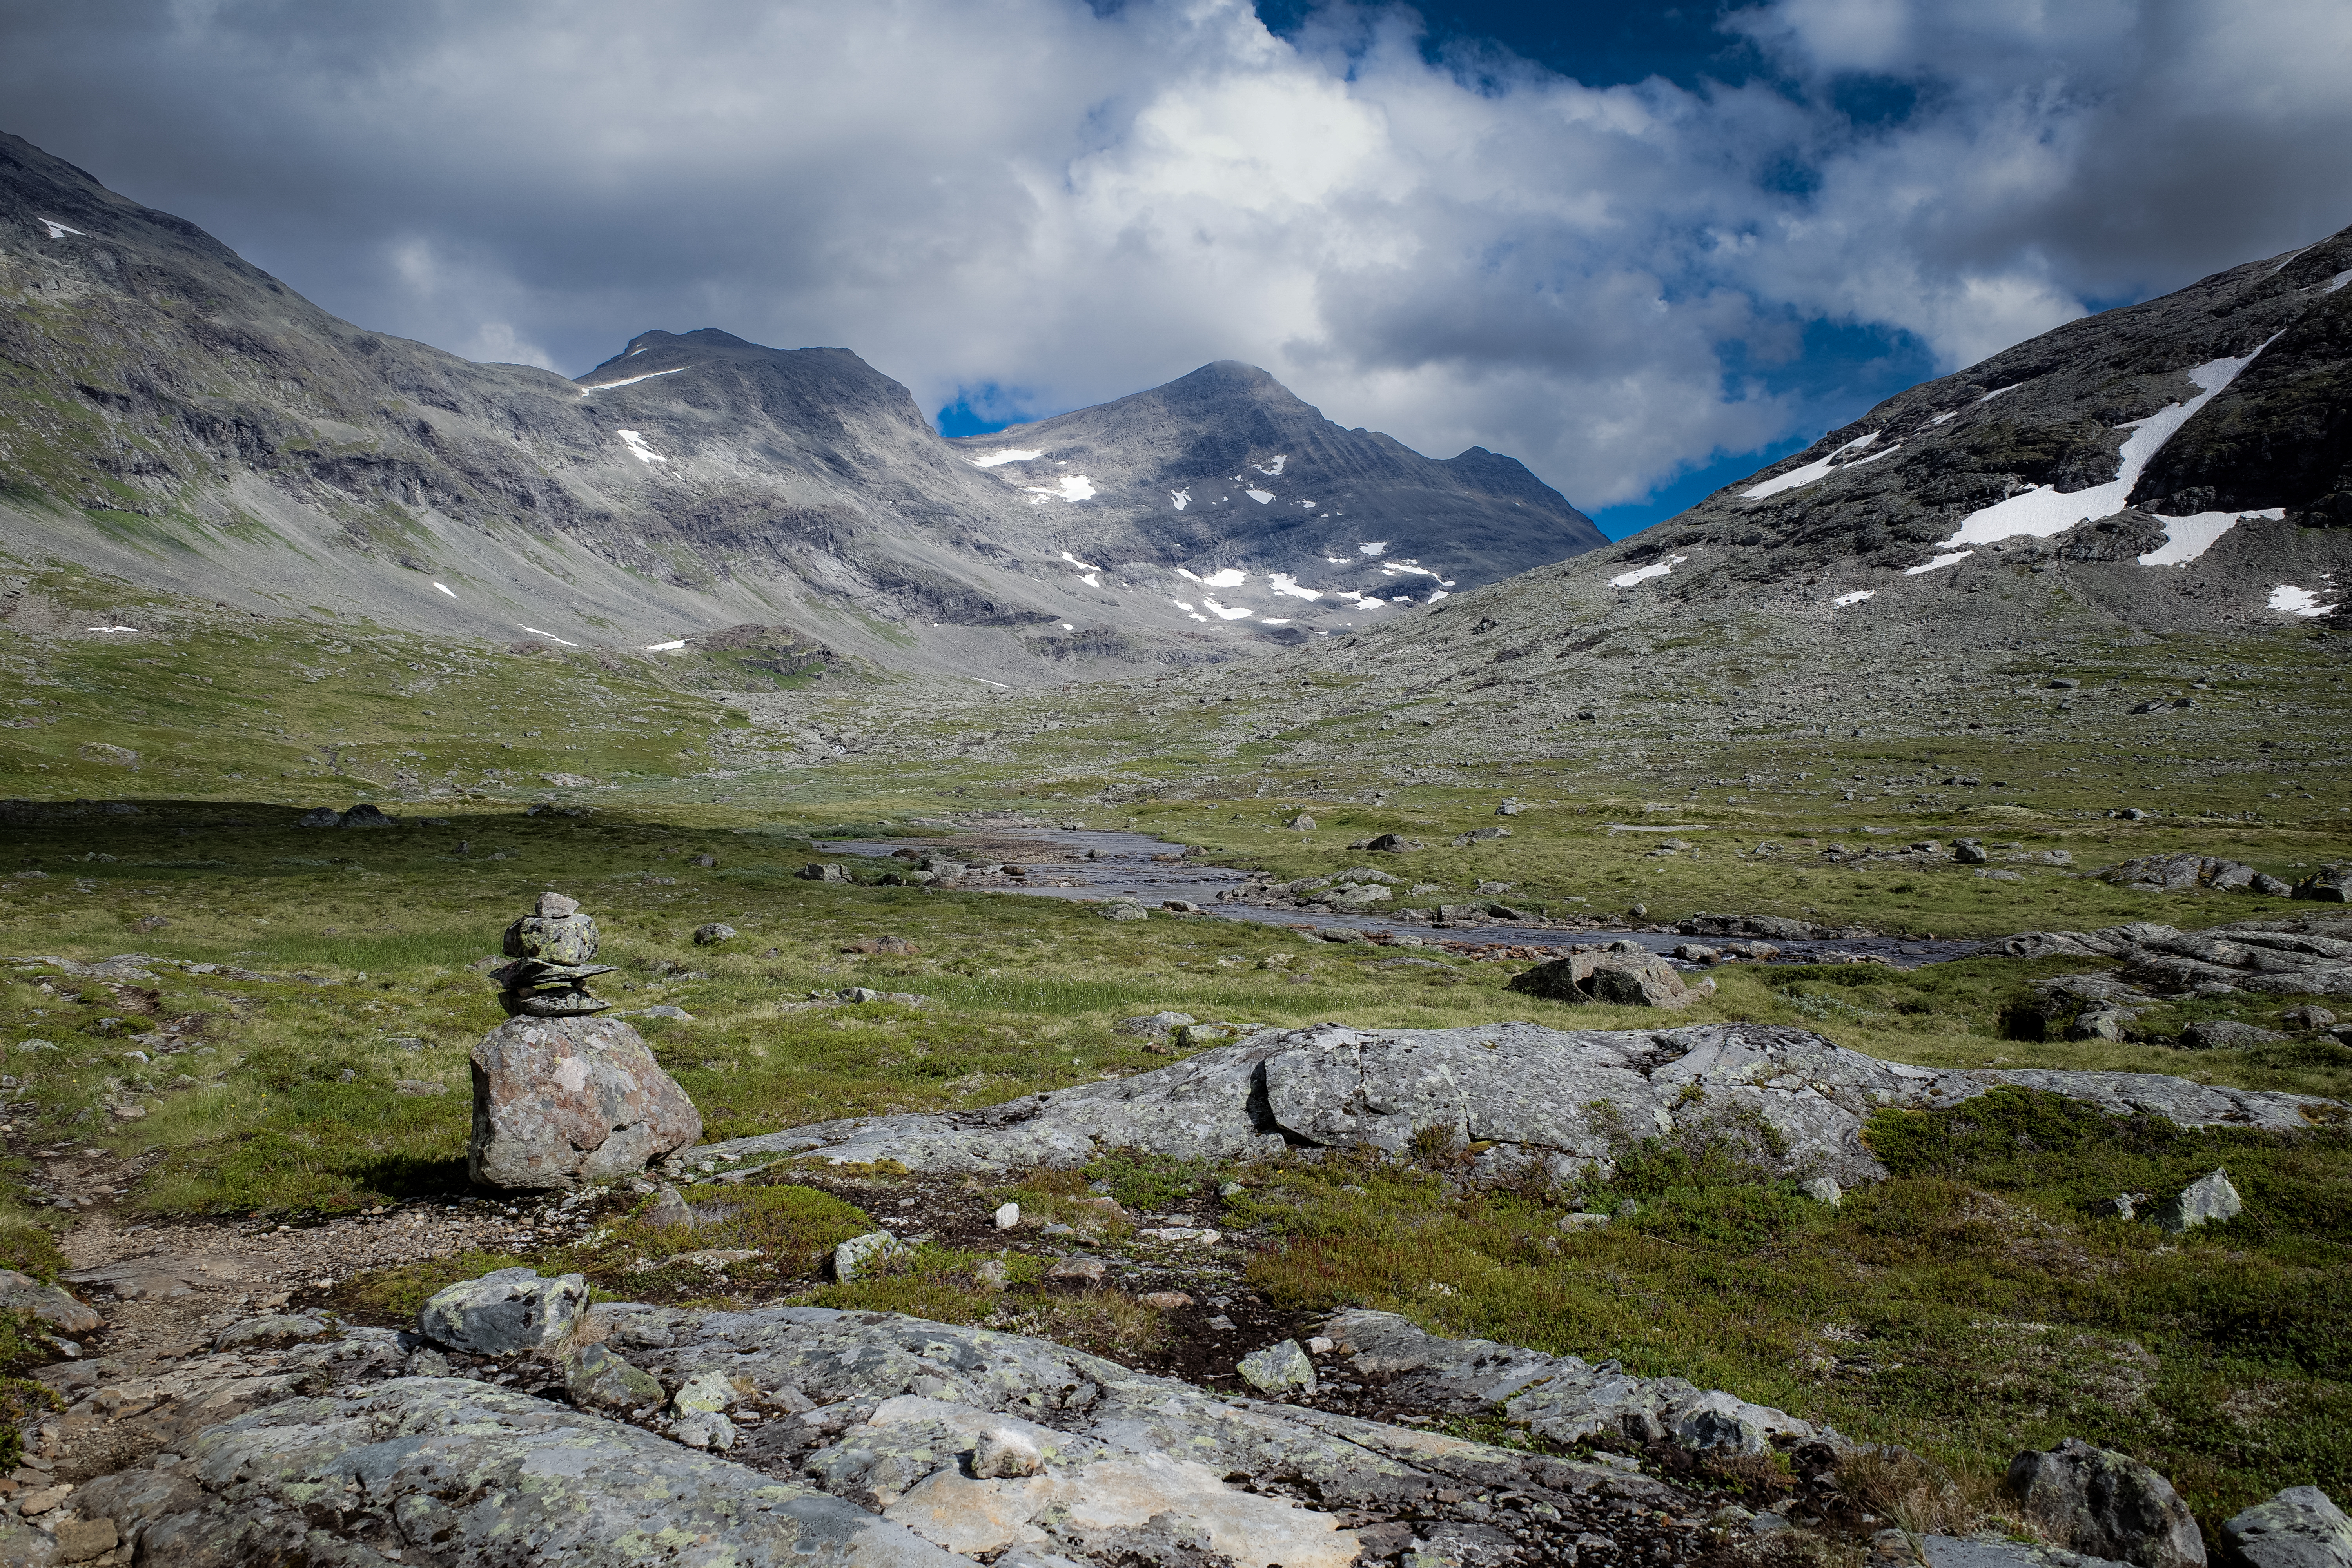
Green valleys surrounded by mountains
The ground constantly wet and boggy, the weather was overcast and cloudy with occasional light drizzle.
Many water crossings
Passing through Storutladlen and onwards to Gravdalen it was a great feeling day. The views and landscape ever changing. After passing Gravdalsdammen, we soon joined an undulating gravel road that took us to Leirvassbu DNT.
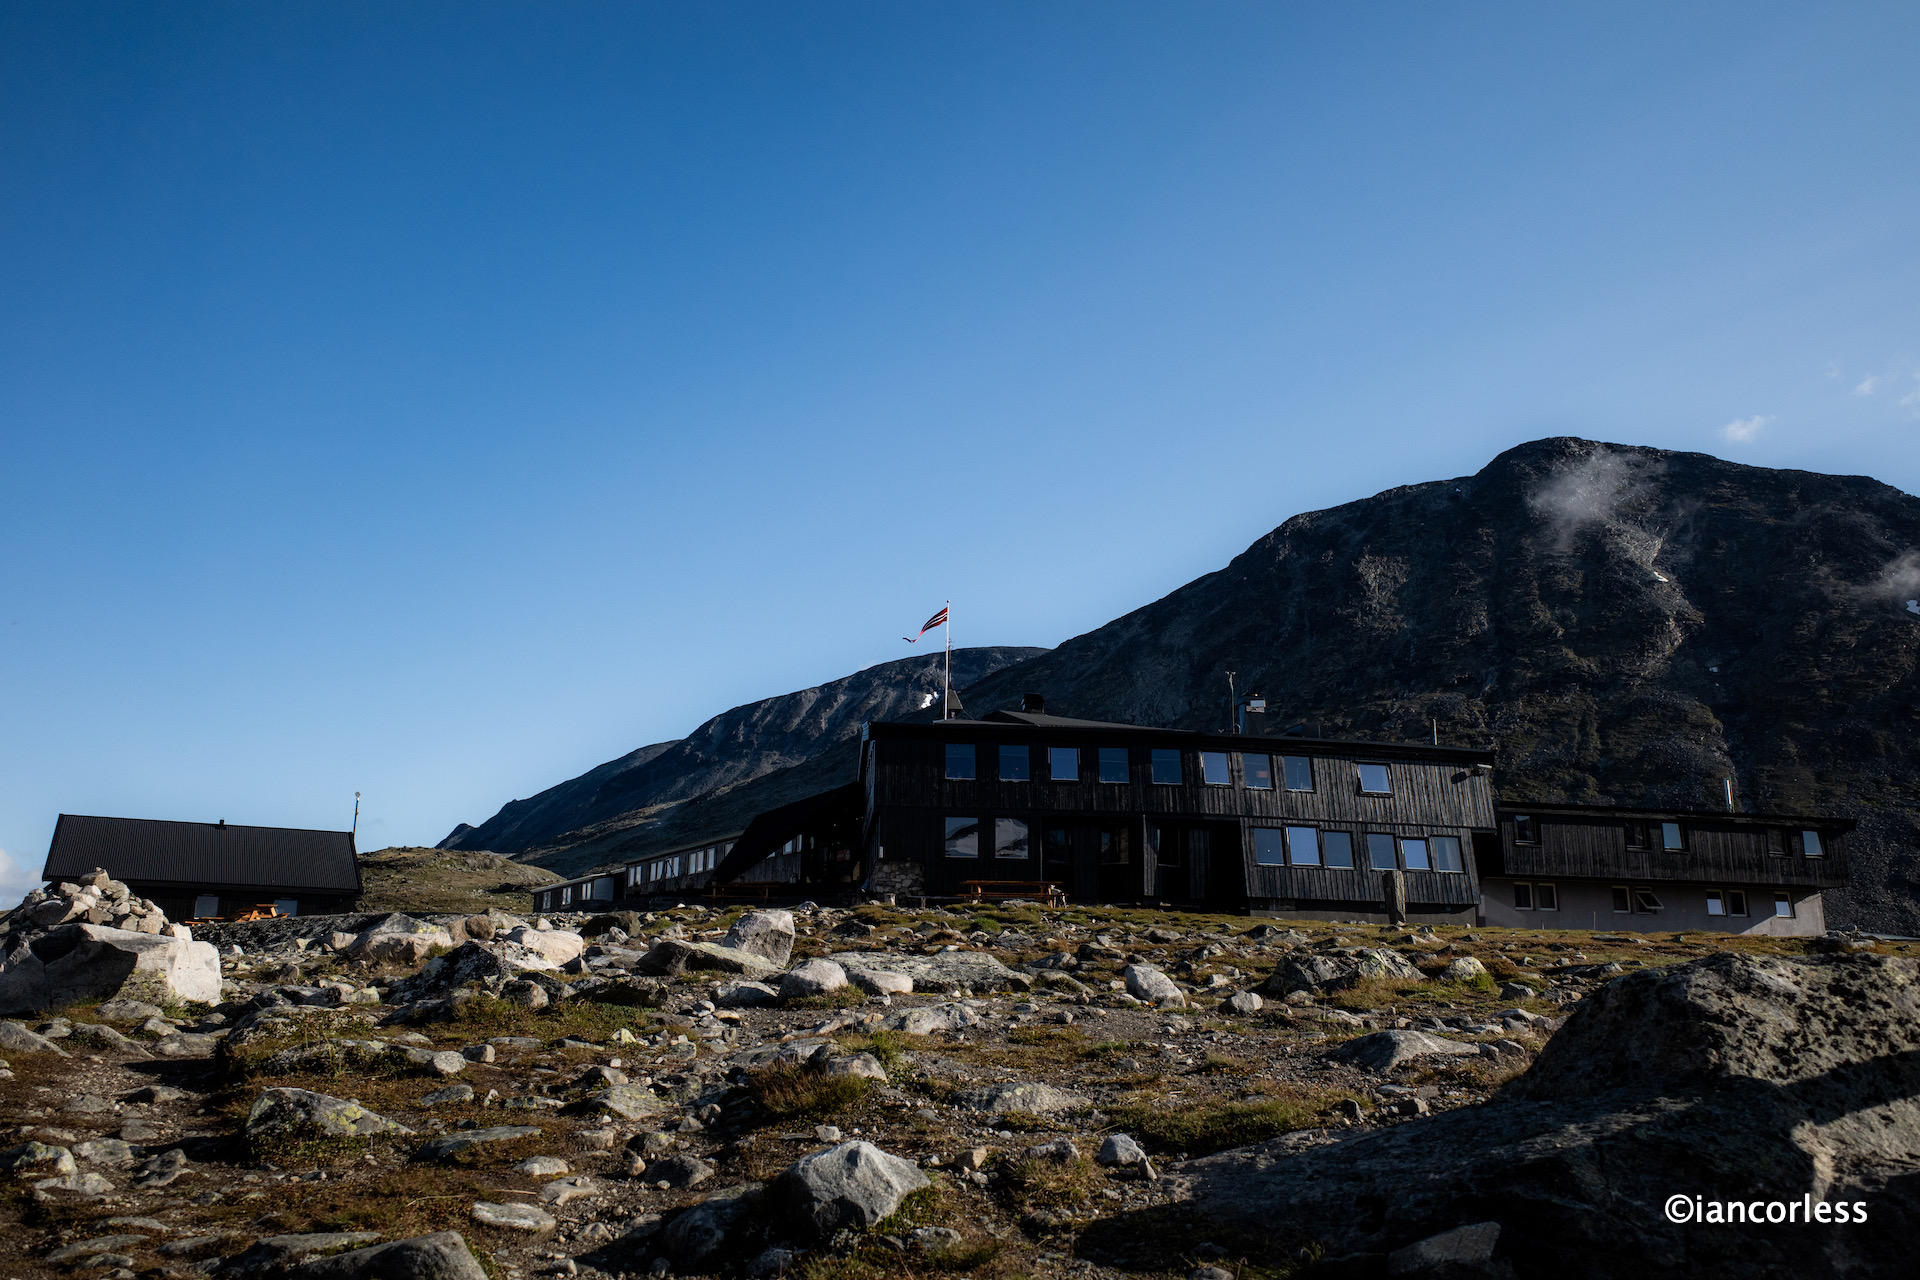
Leirvassbu DNT
On the approach, Kyrkja (2032m) was to our right, shrouded in mist and clag. Today was not the day to attempt the summit. After 19.68km, 811m of vert we finished in 3h 34m. Abelone and Håkon arrived a couple of hours later, Håkon sprinting ahead with a smile. What a joy to see. Geoff and Baz were blown away by Håkon’s speed, enthusiasm and commitment.
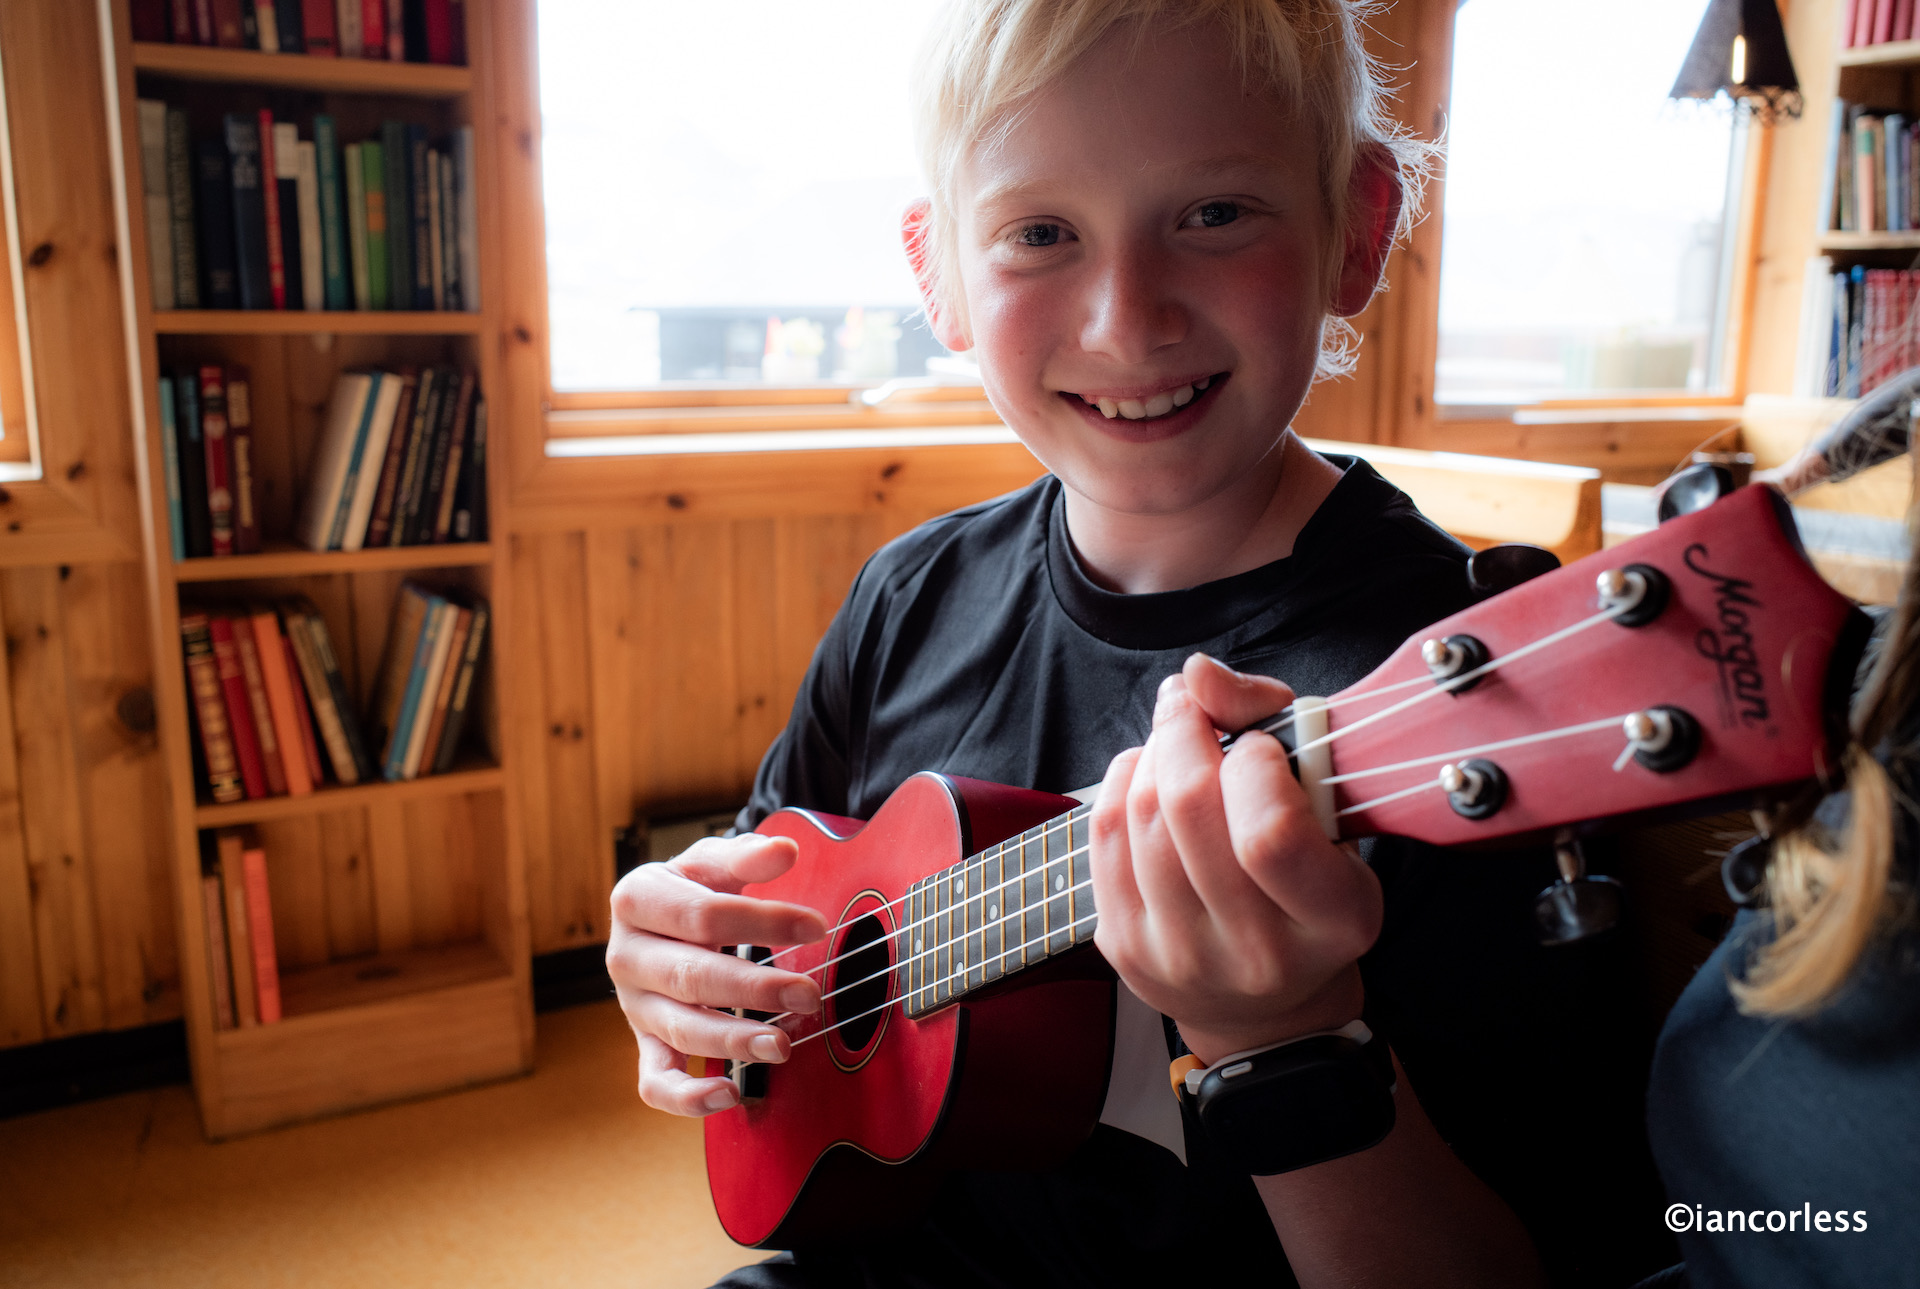
Entertainment by Håkon
Early finish and we could then rest, relax, enjoy the Leirvassbu DNT and prepare for the following day. Leirvassbu DNT is a large and modern cabin with no dorms, a large bar area and an excellent restaurant. A stunning location surrounded by mountains, a great place for staying more than one night as there is lots to explore. It has road access, so, it can be accessed by private car or bus, worth knowing just in case you need a contingency escape option.
DNT dinner always a highlight
The weather forecast for the following was good and it was therefore decided we would summit Kyrkja first and then continue to Gjendebu. Abelone and Håkon would miss the summit go straight to Gjendebu and therefore miss out on the 2 to 3h detour.
Day 4 – Leirvassbu to Gjendebu via Kyrkja
Kyrkja
The weather gods did not disappoint. It was a stunning day and a perfect morning to climb Kyrkja.
Leirvassbu to Gjendebu via Kyrkja
The early slopes to Kyrkja, Leirvassbu on the right
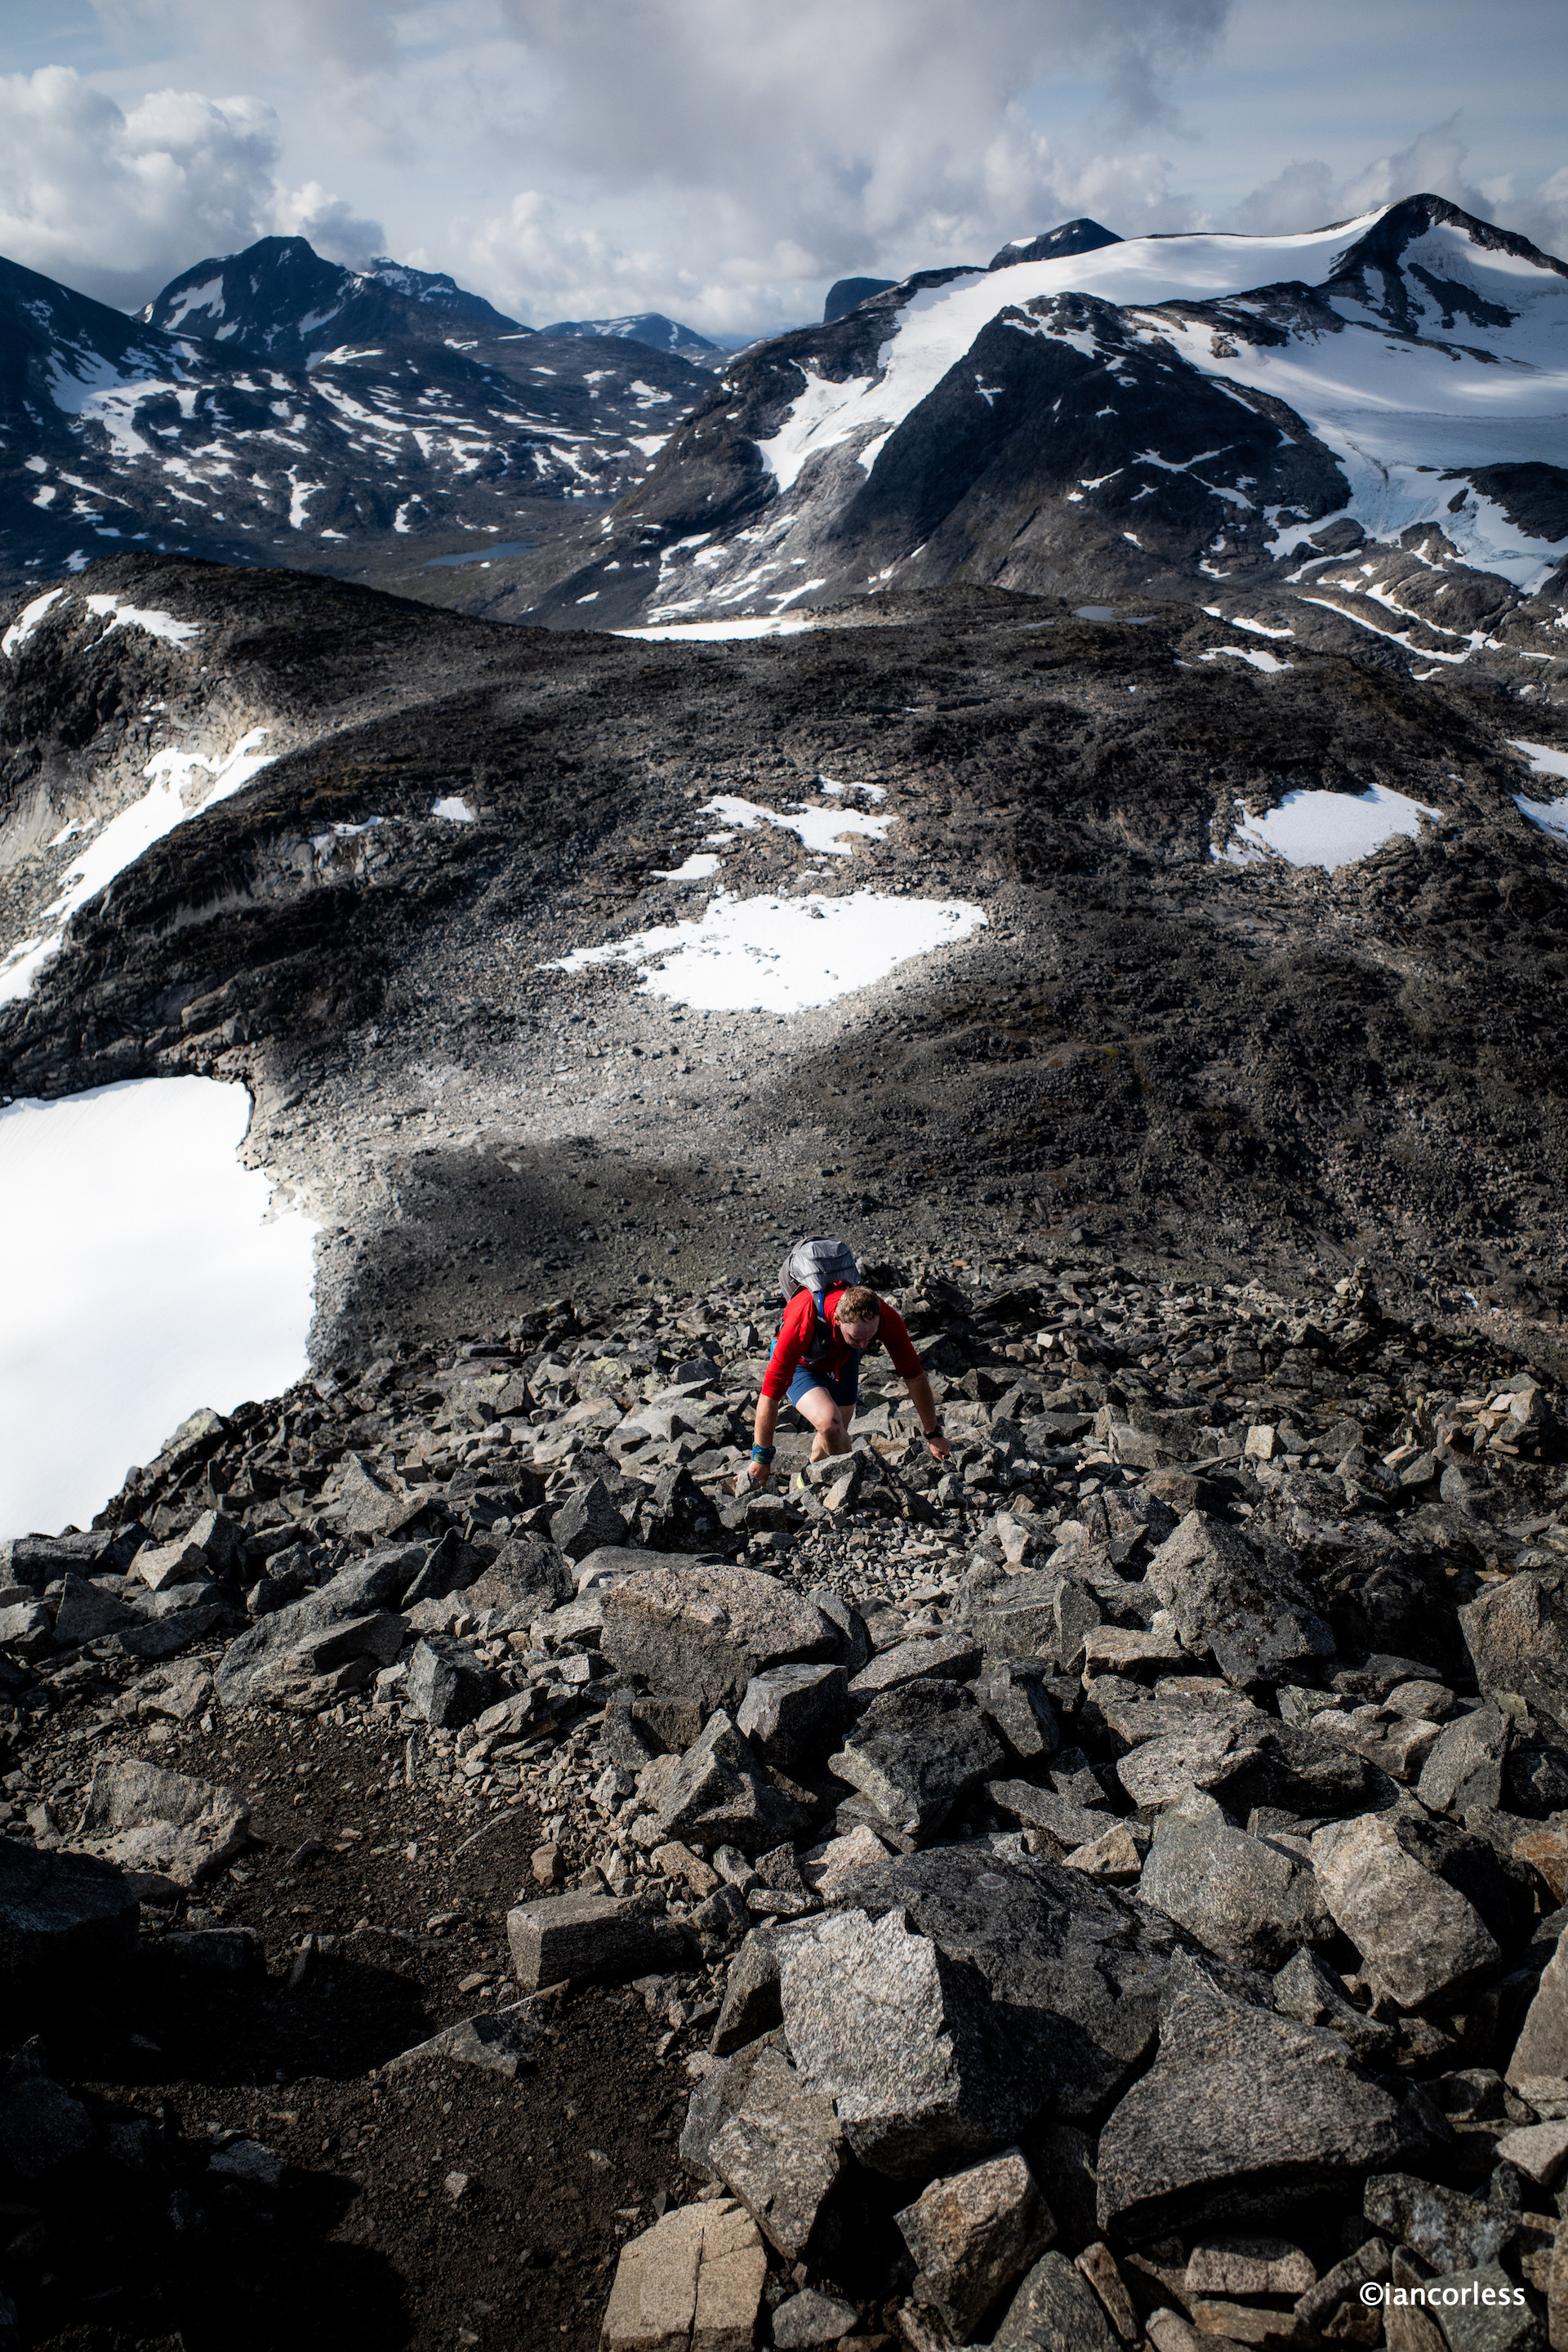
Abelone and Håkon left just before us they made their way to Gjendebu, we soon caught them, passed and then we started the climb to the summit. The early slopes mix trail, rock and snow crossing with boulders everywhere.
And up we go
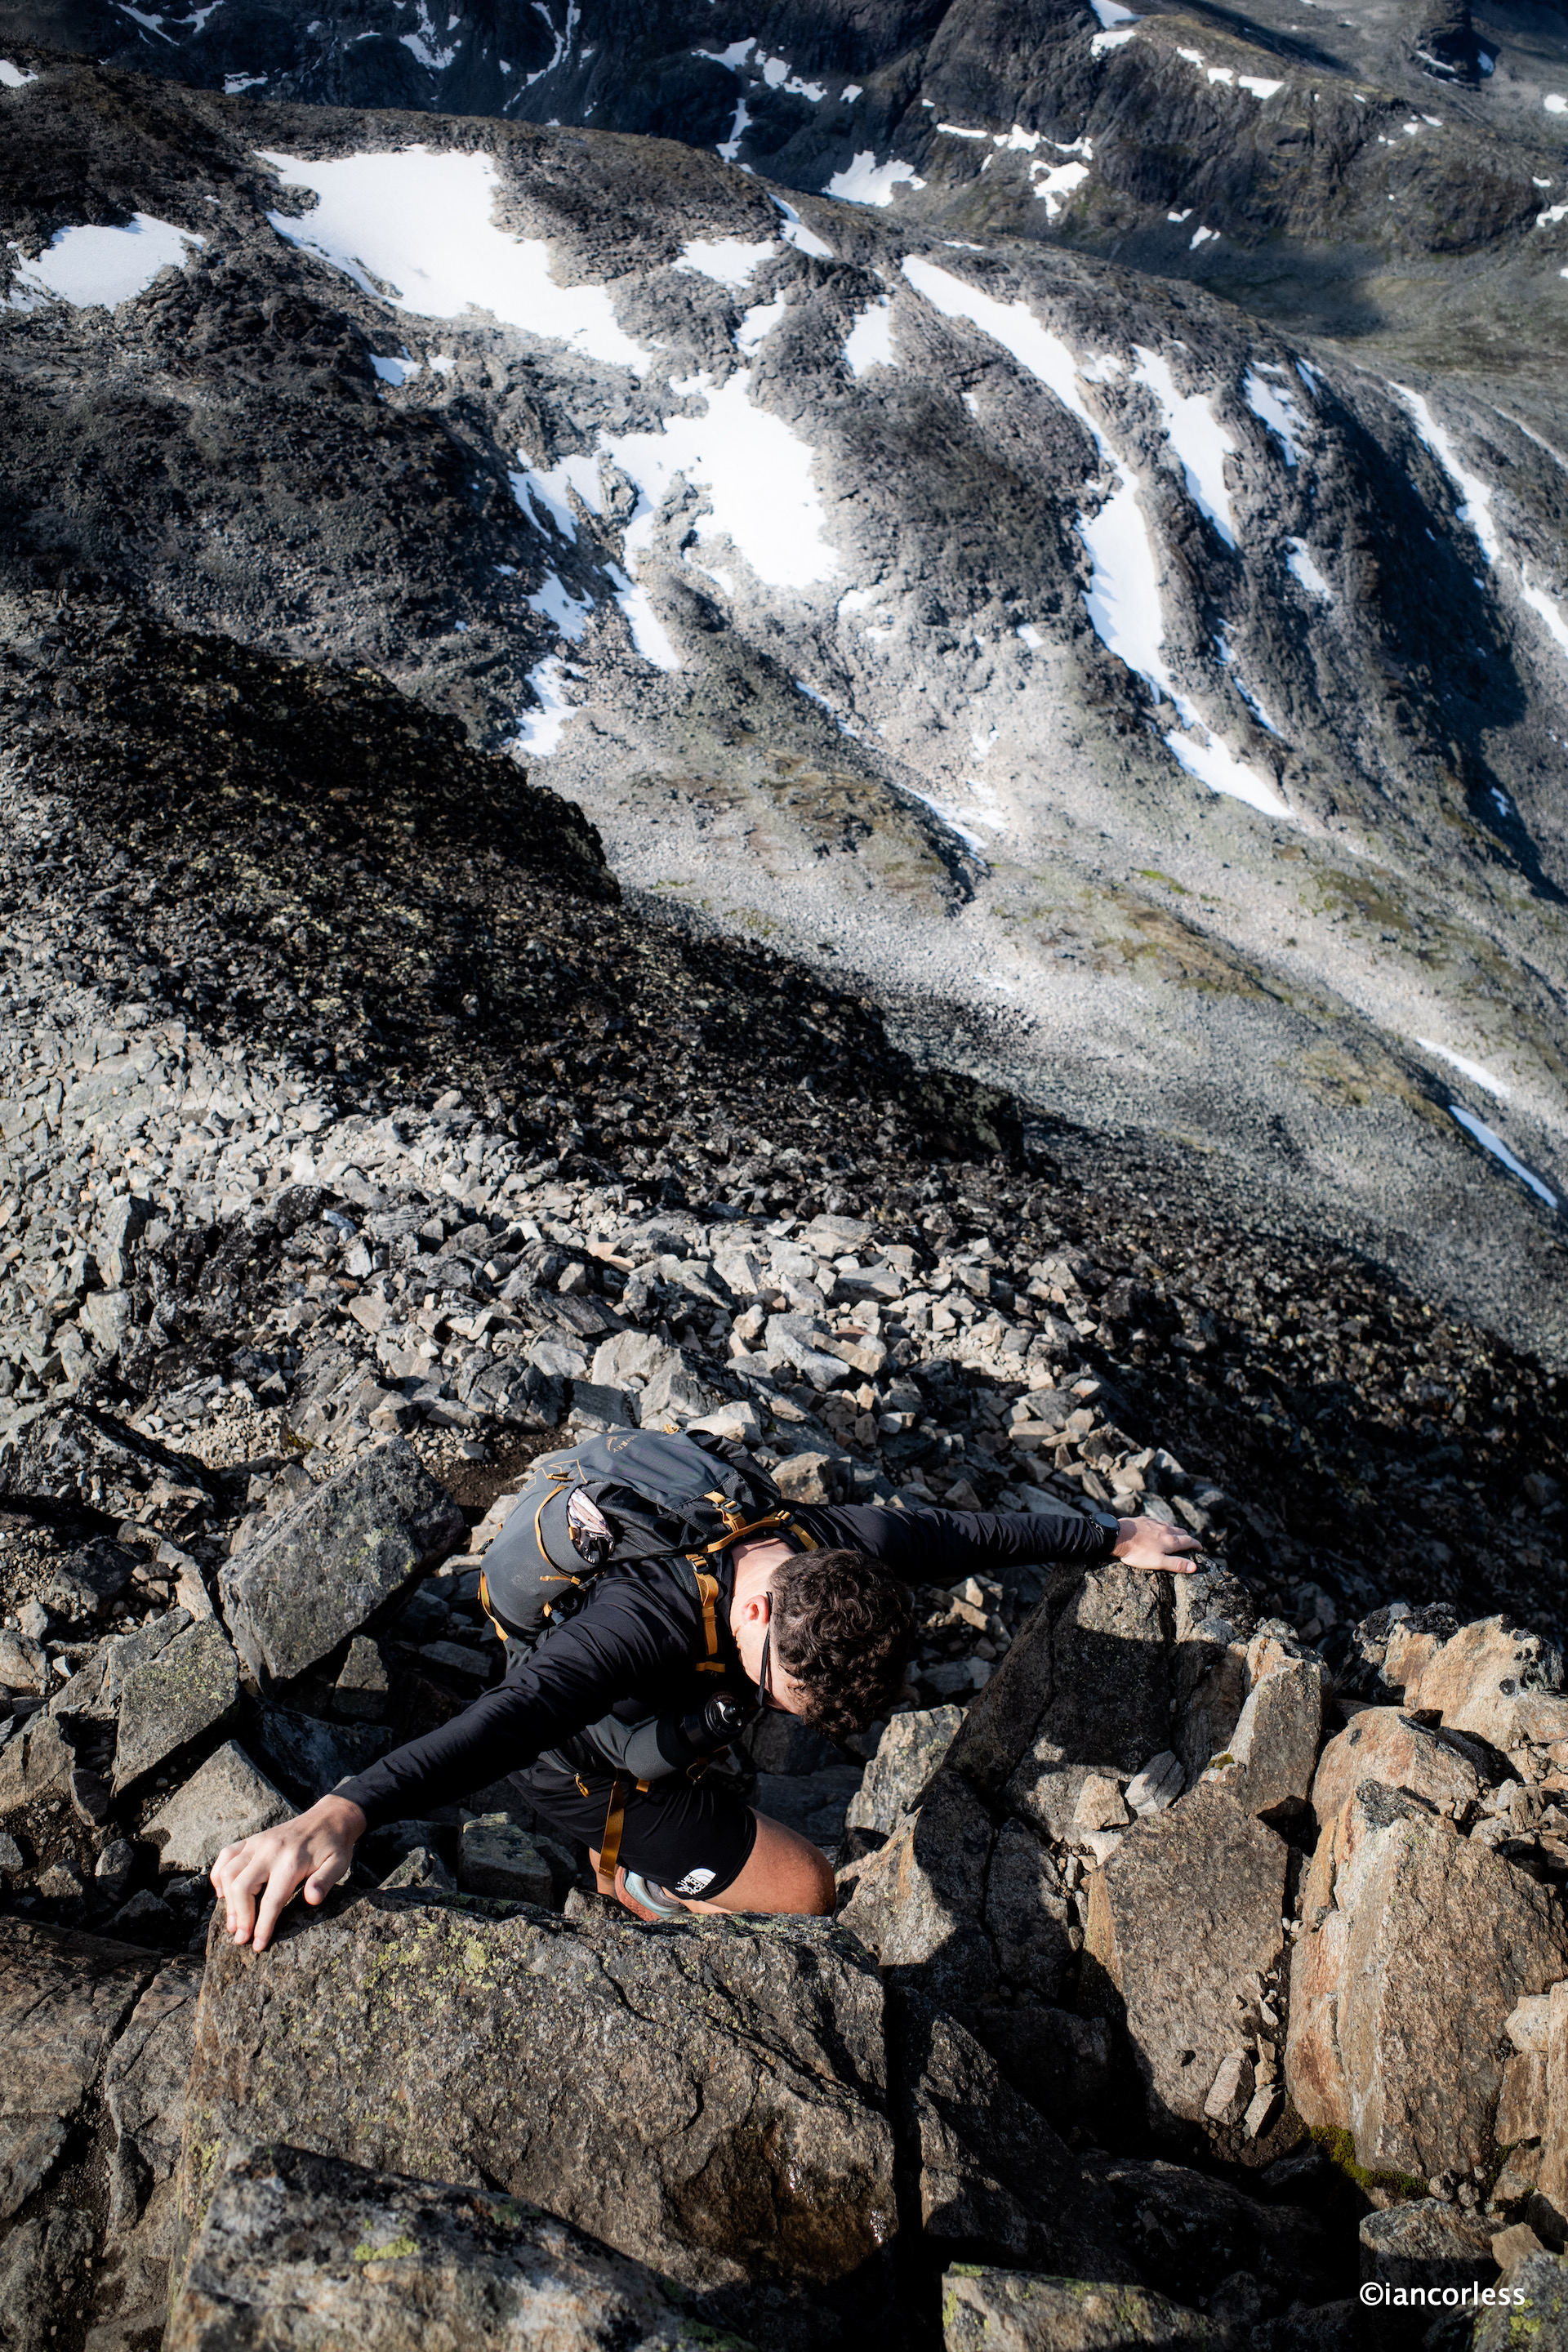
Once at the base of Kyrkja, the climb really starts and it’s a hands-on scramble to the summit. Cairns are placed regularly and at times the route is obvious. Other times, the route is vaguer.
Good hand and feet placement important.
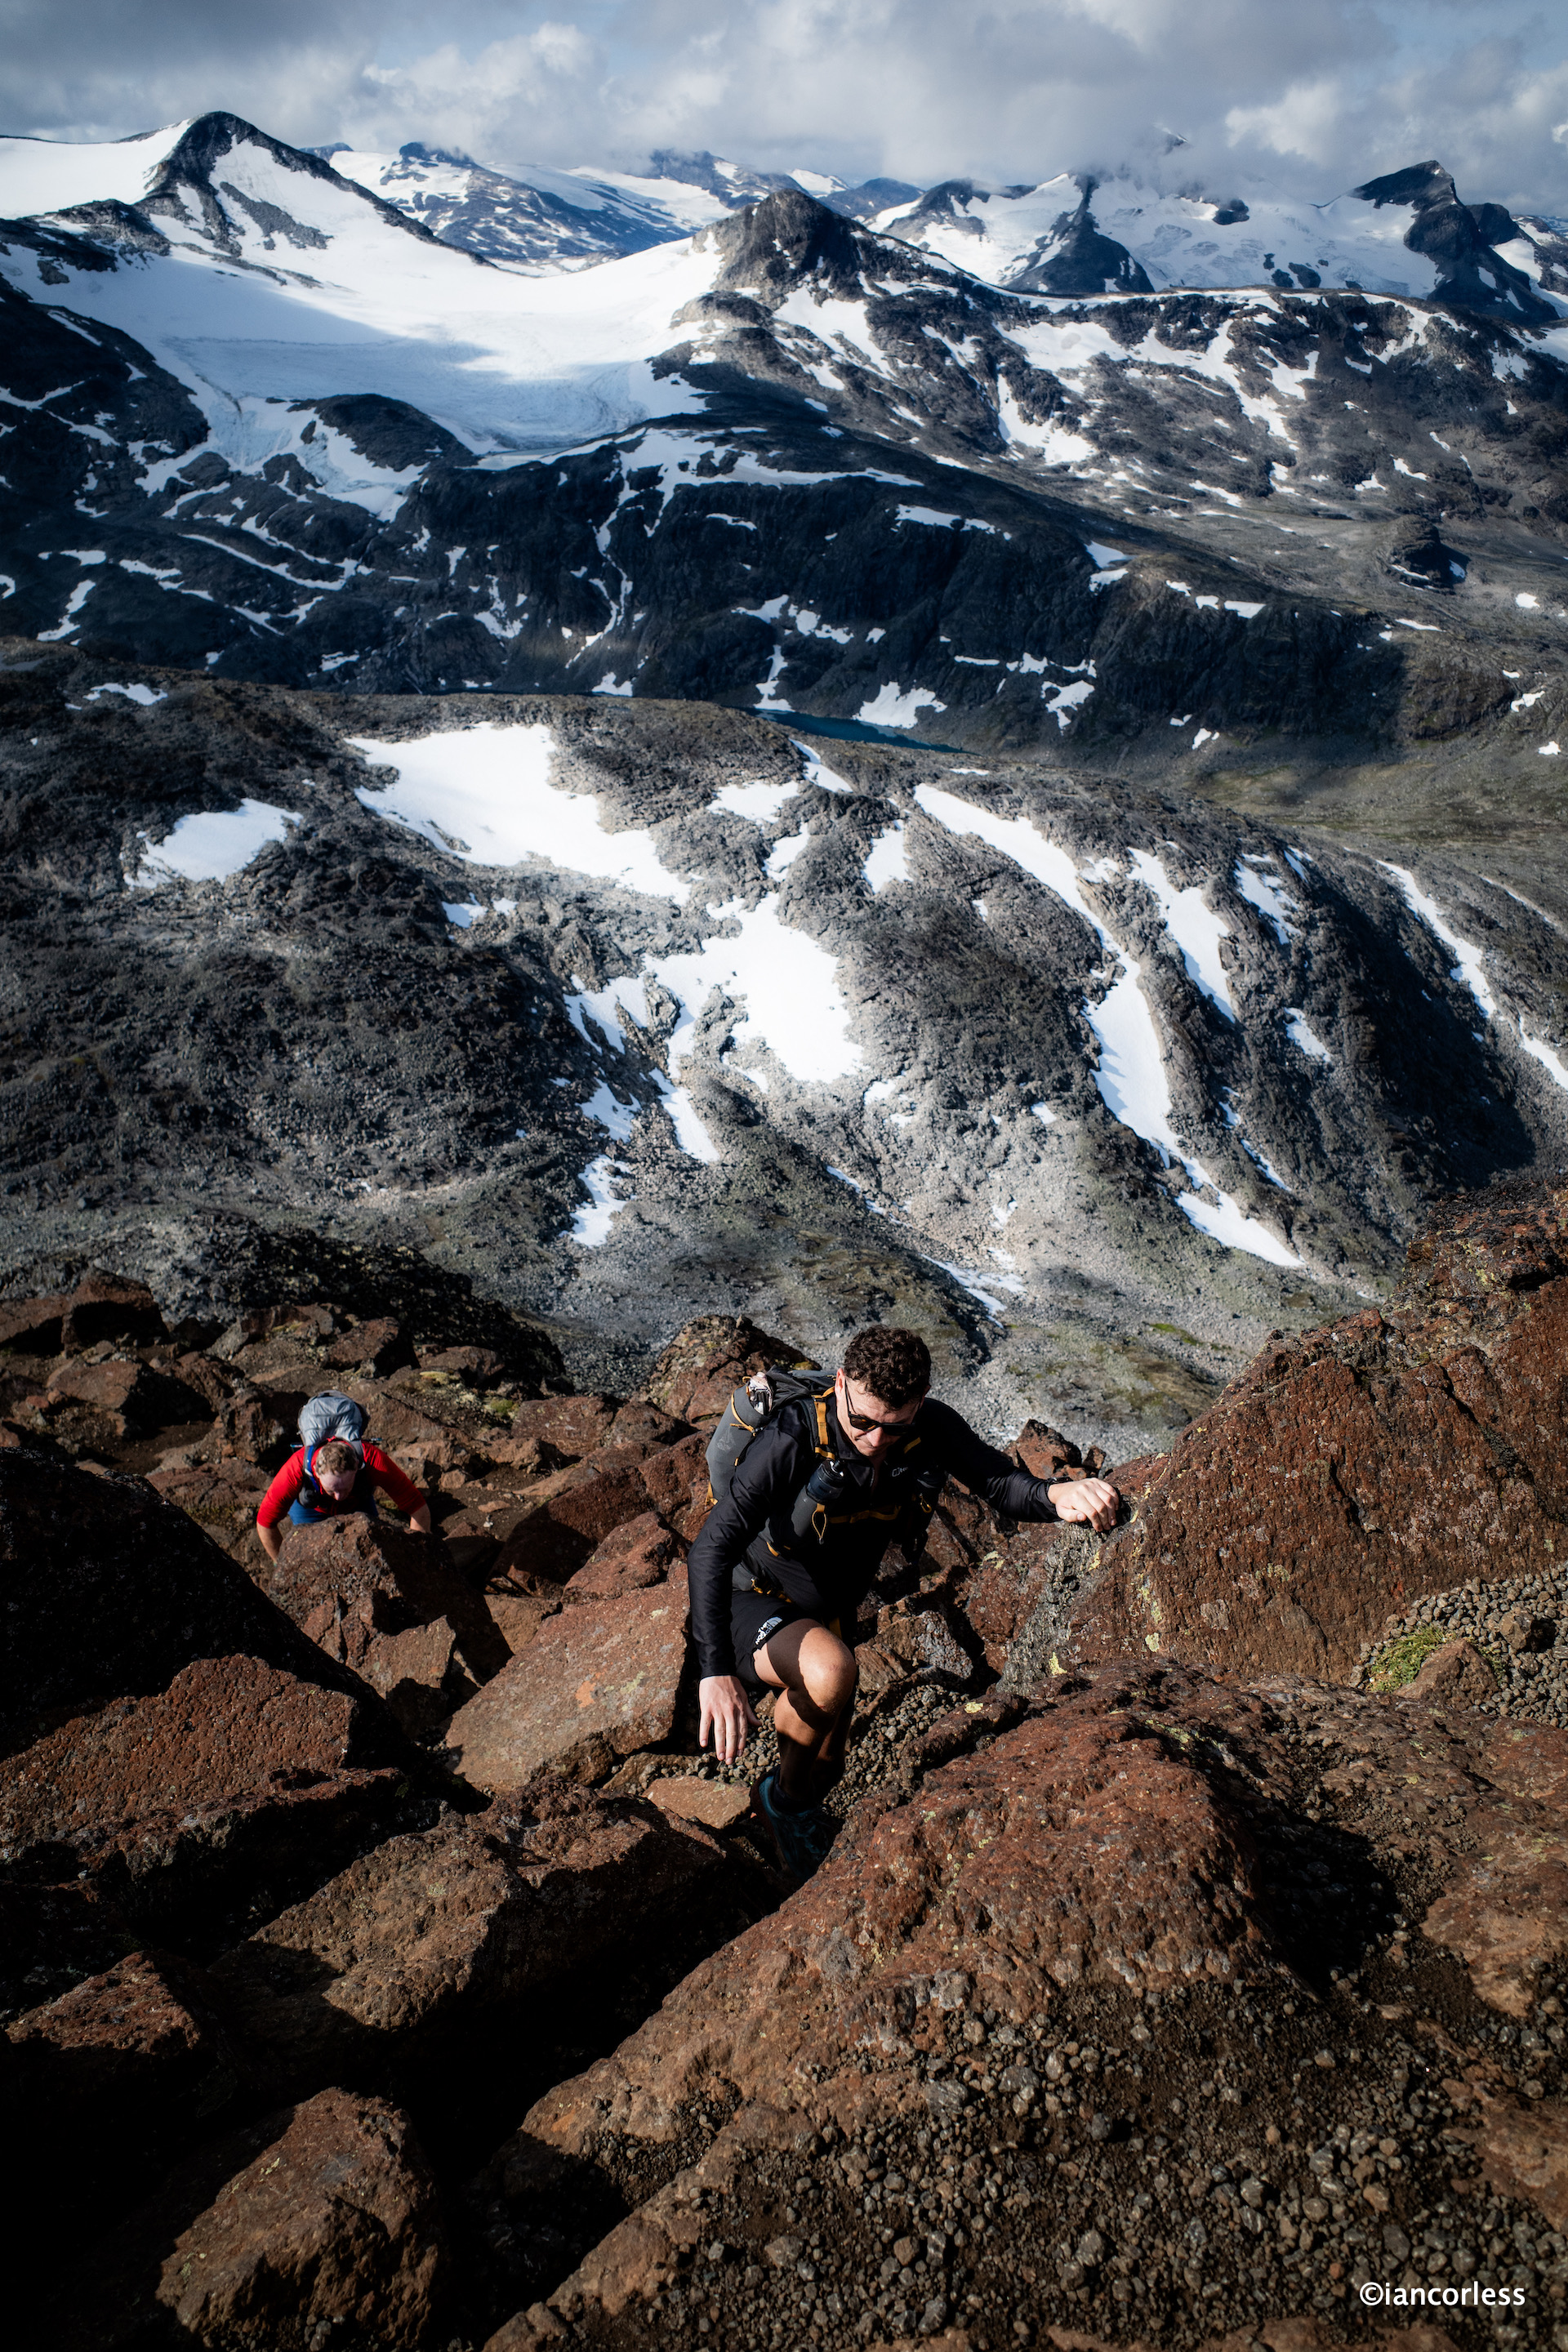
There are several sections with more exposure when sound had-holds, and secure foot-placing is essential. It’s not a difficult scramble but as with all these things, going at a calm and steady pace reaps rewards.
Slow and steady
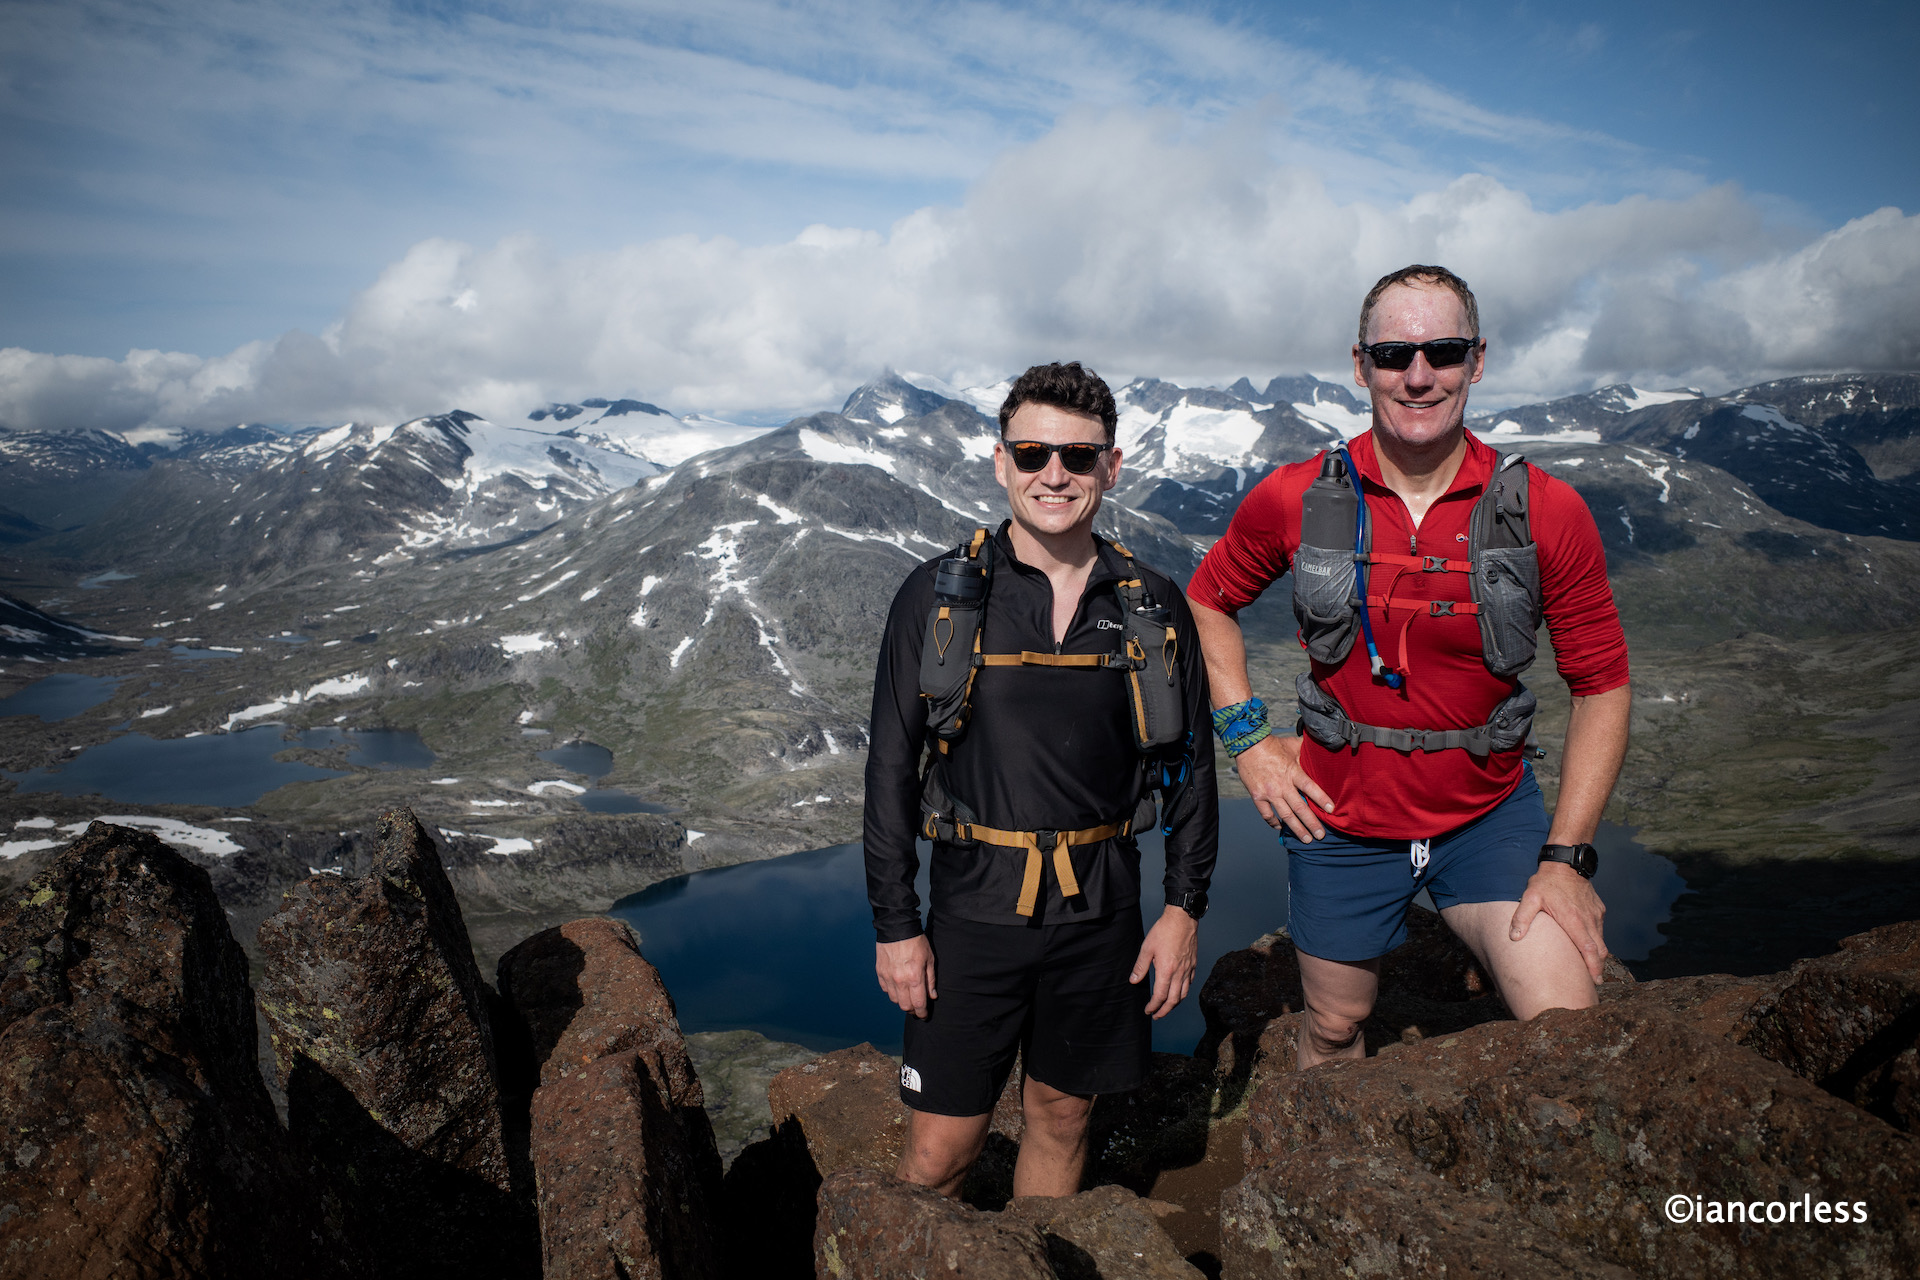
Geoff certainly felt pushed here. He is not too happy at heights, but he pushed on, listened to to best route options and before he knew it, he was with Baz at the summit.
Job done!
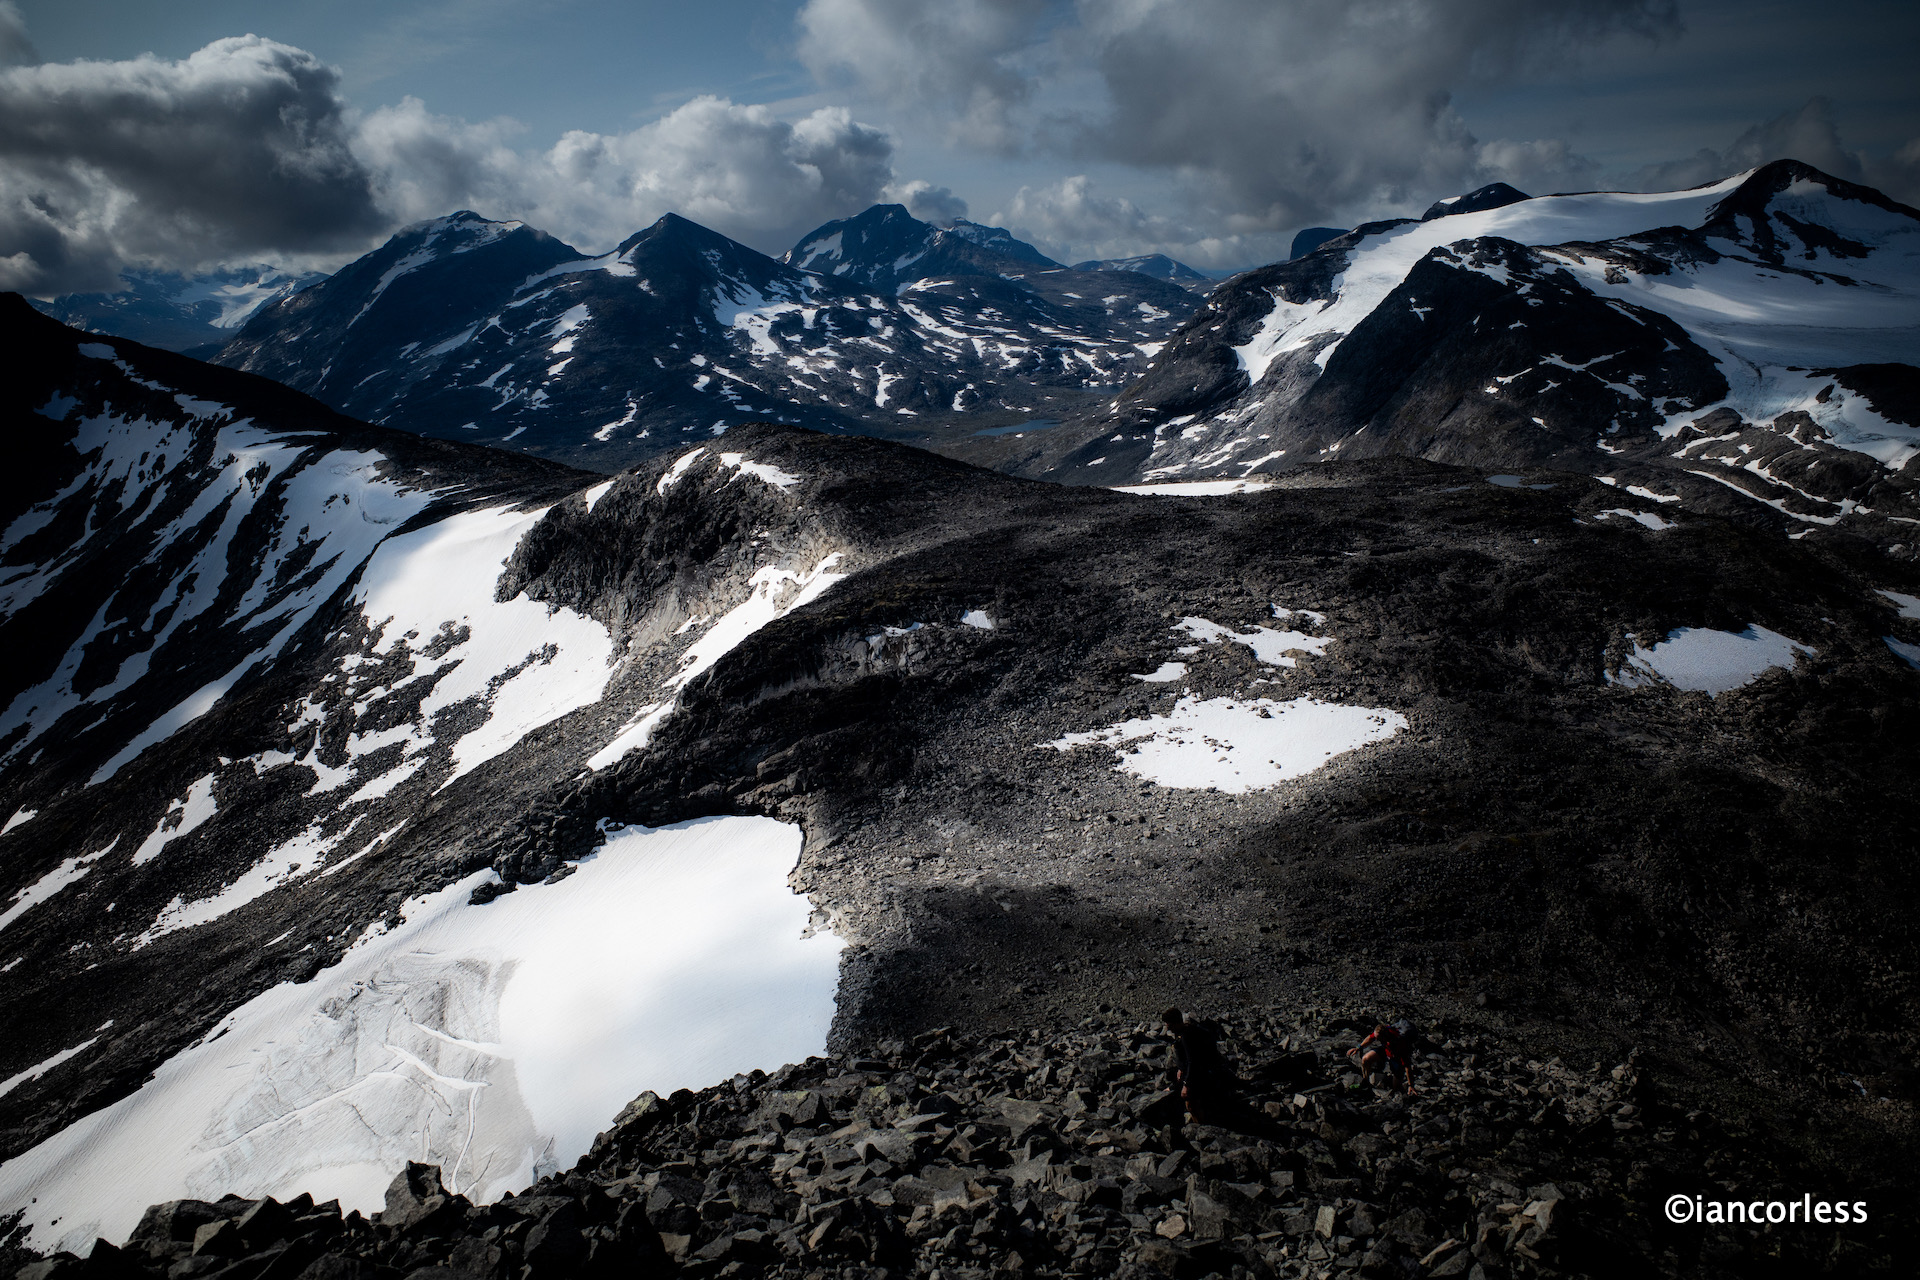
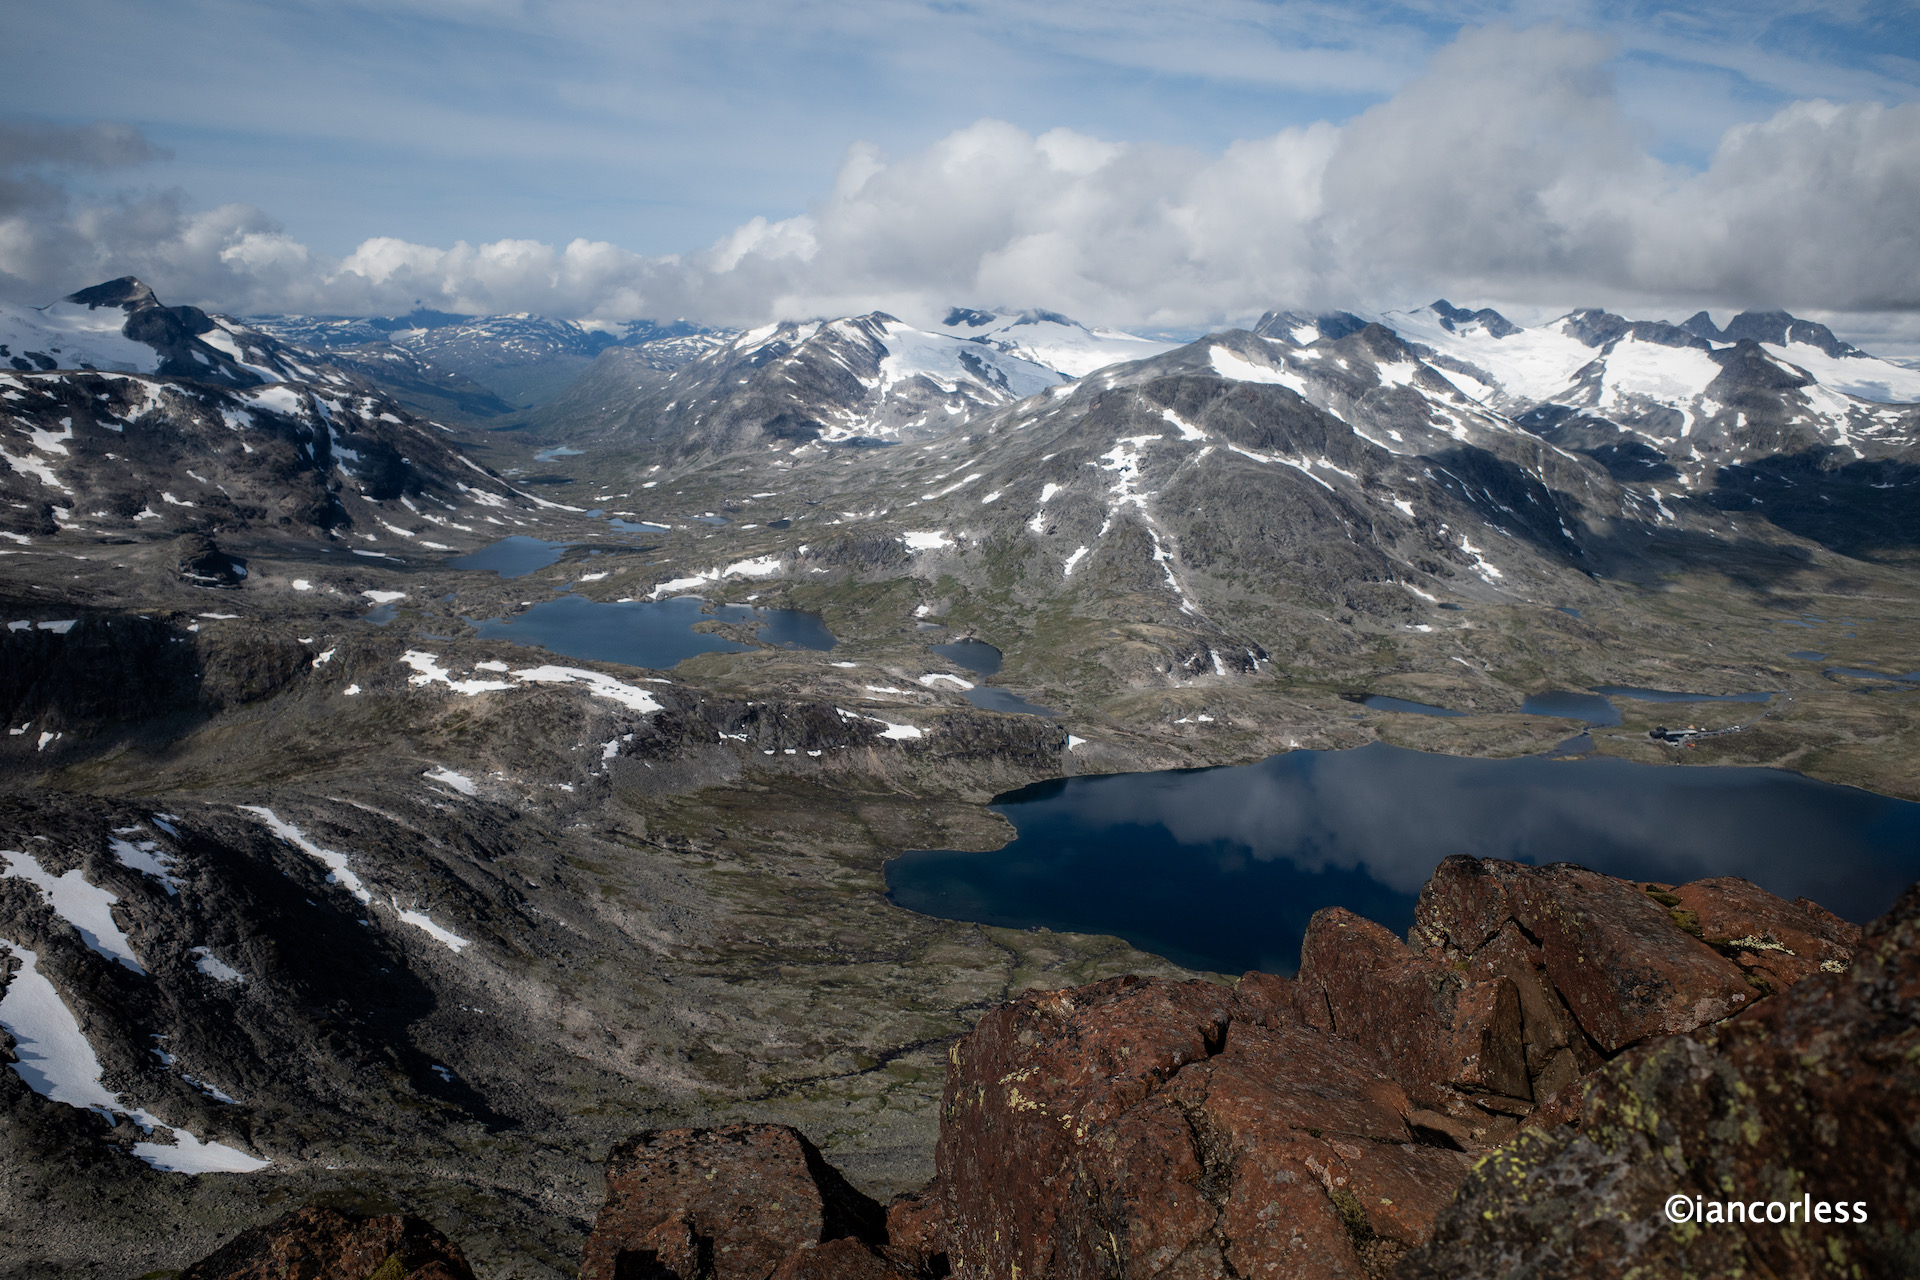
The 360 views here are quite magnificent. What goes up must come down and depending on your ability, head for heights and skill level, the downward route can be harder than the climb.
Coming down easier than going up?
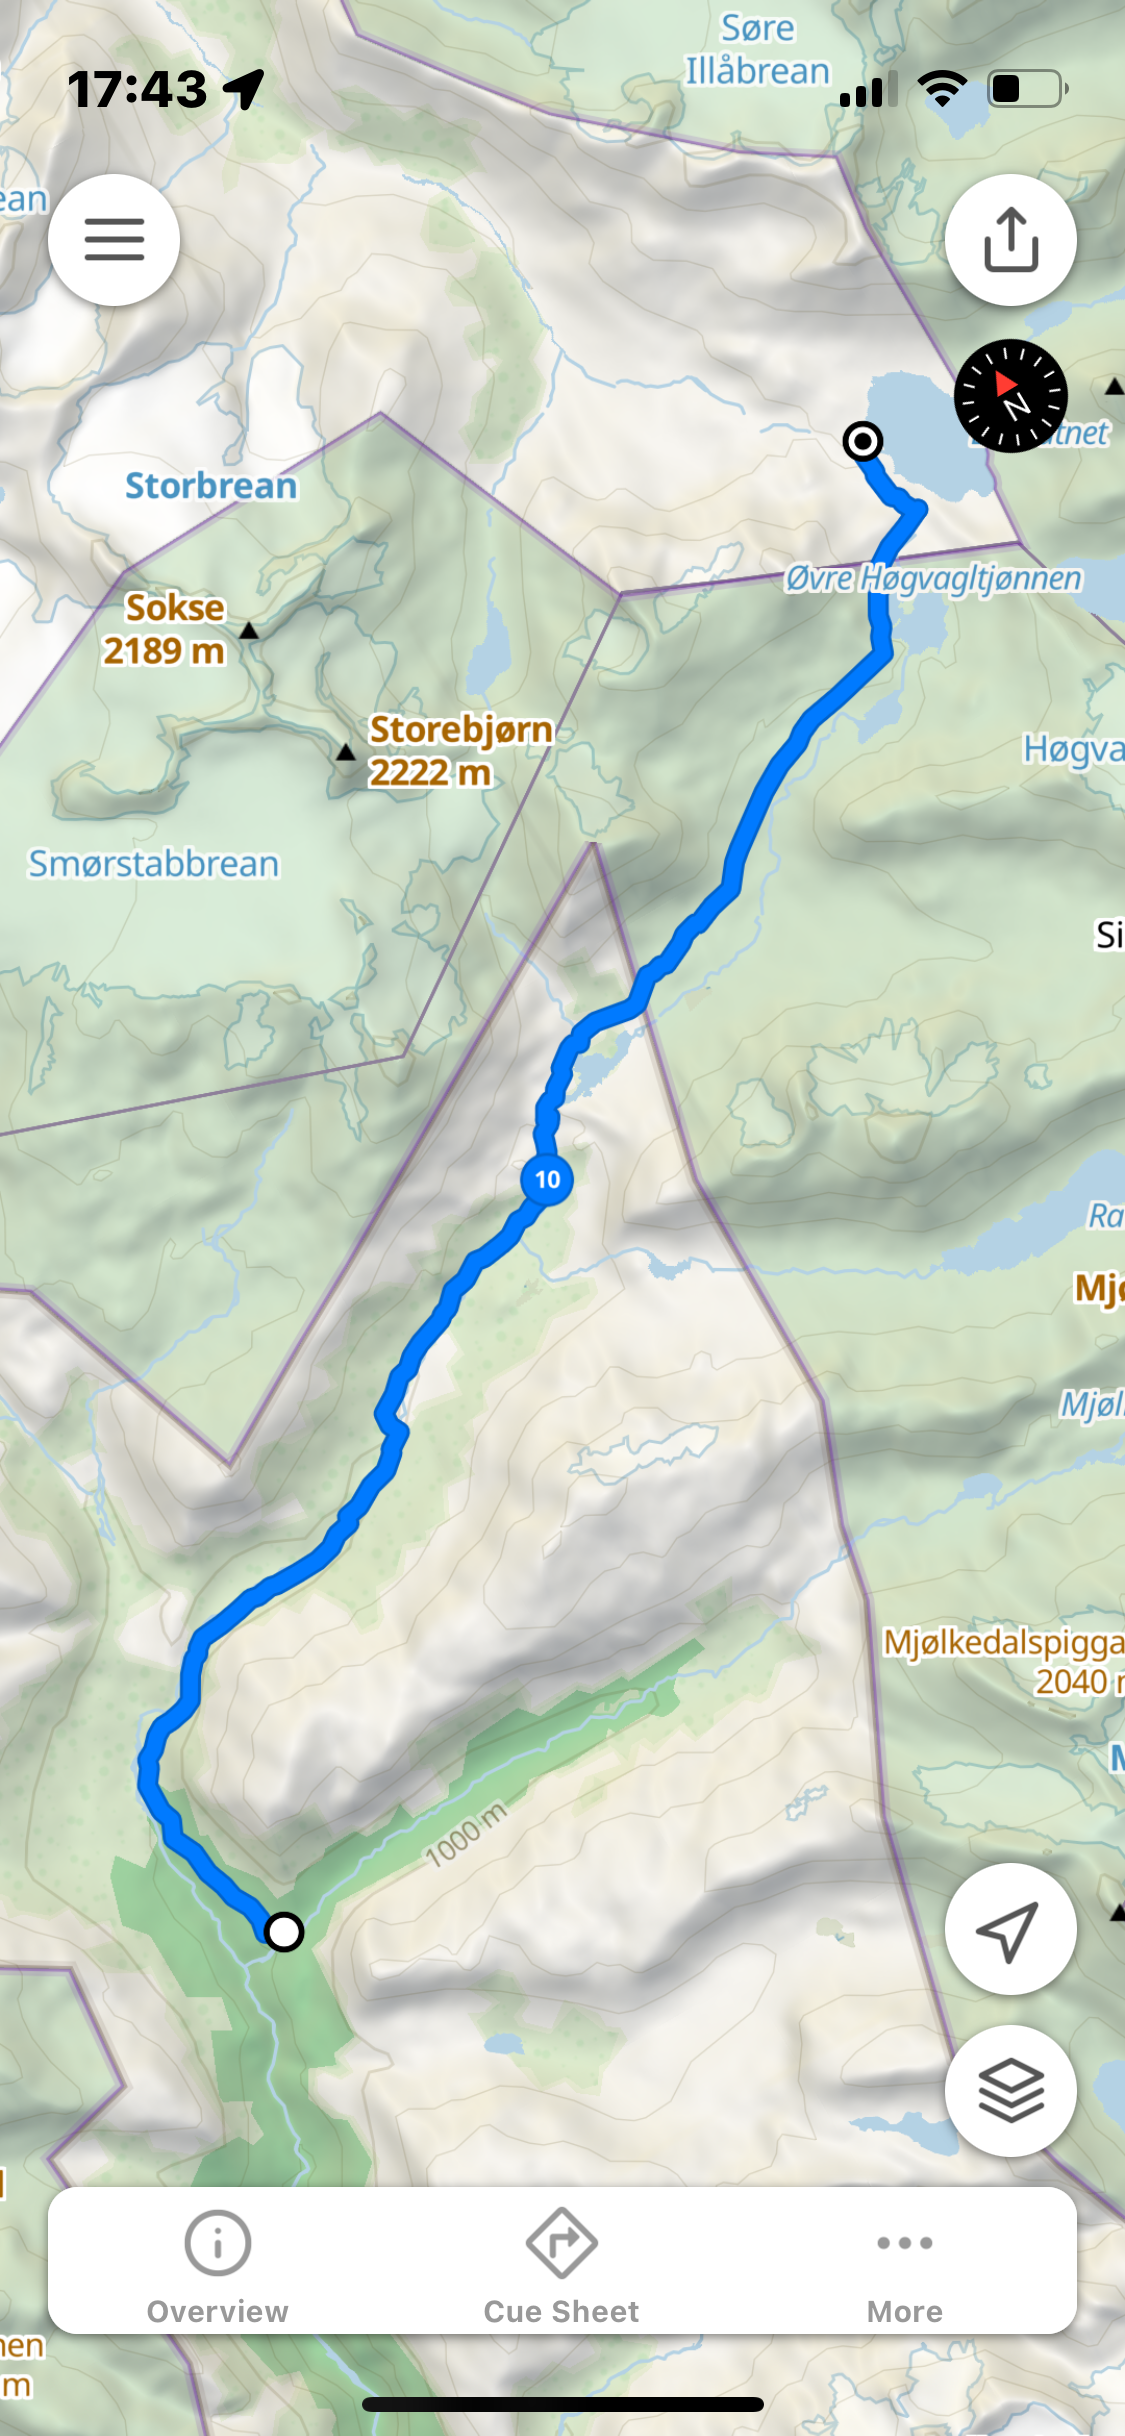
All three of us were soon at the bottom and re-tracing back on the trail to Leirvassbu and then at Høgvaglen we turned left and started to follow the red Ts on the route to Gjendebu.
Øvre Høgvagltjønnen
The route now is more runnable mixing rocky terrain, water crossing, fjell, single-track and of course mud.
Passing three key lakes, Øvre Høgvagltjønnen, Nedre Høgvagltjønnen and Langvatnet we were soon descending next to Hellerfossen waterfall and then passing through Storåddalen.
Make sure you follow the correct Ts
The trails now were saturated and muddy and considerably greener than what we had experienced earlier in the day. There was also plenty of cows.
You never have dry feet!
Before we knew it, we were running into Gjendebu after a stunning day of 25.69km, 741m of vert and 4h 42m on the clock. Baz and Geoff jumped in the lake, I got the beer in.
Day done.
Sitting in the sun, I wondered where Abelone and Håkon where? I had absolutely expected them to be here before us BUT there had been a chance that we may, have caught them in the last km or so… Apparently, Håkon was on a mission to beat us, and he ran the final 3km! What an effort by him, incredible. We had expected them to take 6-hours, and they had taken 5, bravo!
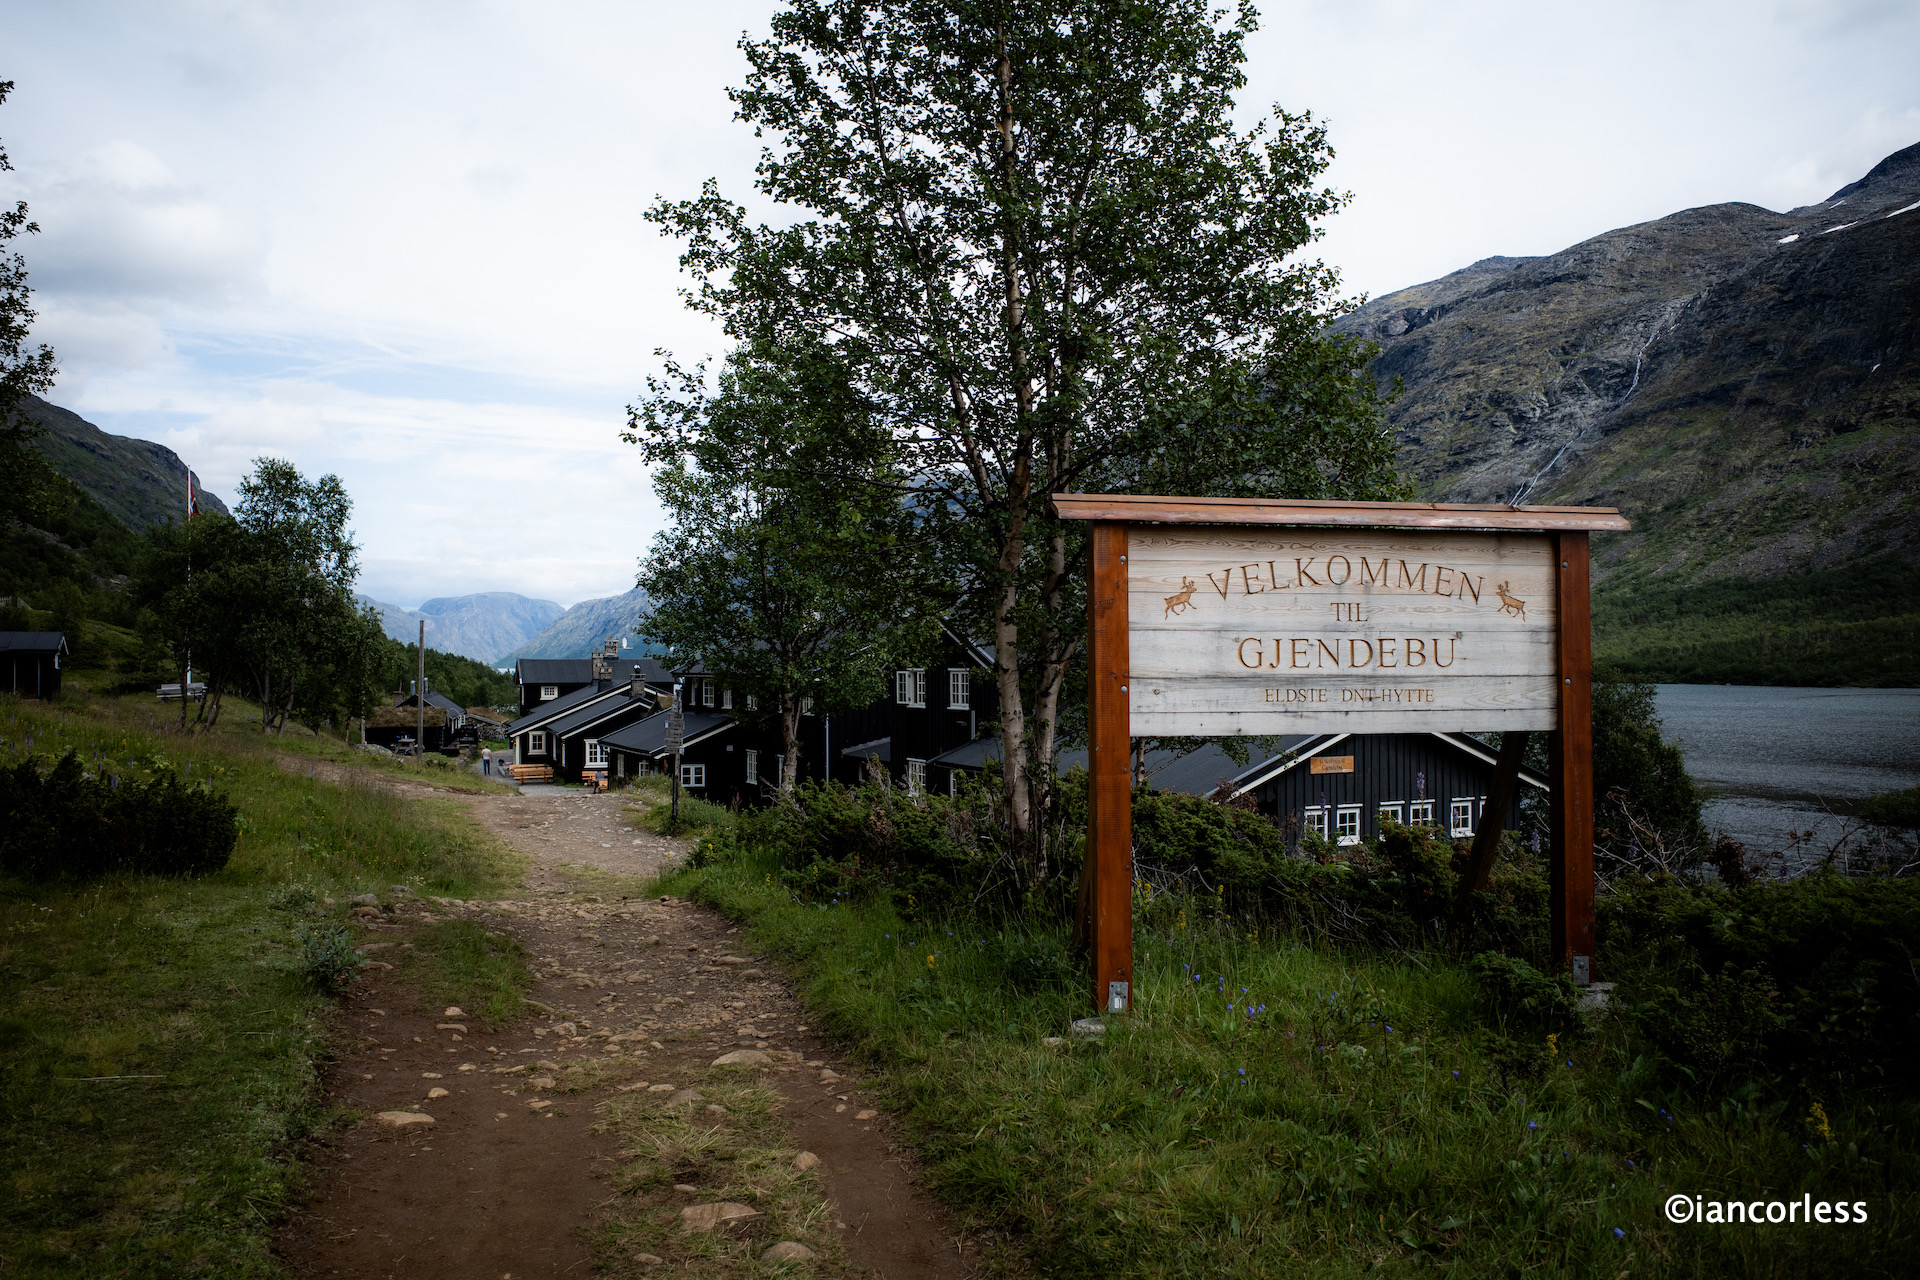
Gjendebu is a wonderful DNT and the oldest. It’s wonderfully traditional and recently refurbished. Comfort level is high, service superb and food excellent.
Day 5 – Gjendebu to Gjendesheim via Bukkelægret, Memurubu and Besseggen
The view from the iconic Besseggen Ridge
Leg 1 Gjendebu to Memurubu
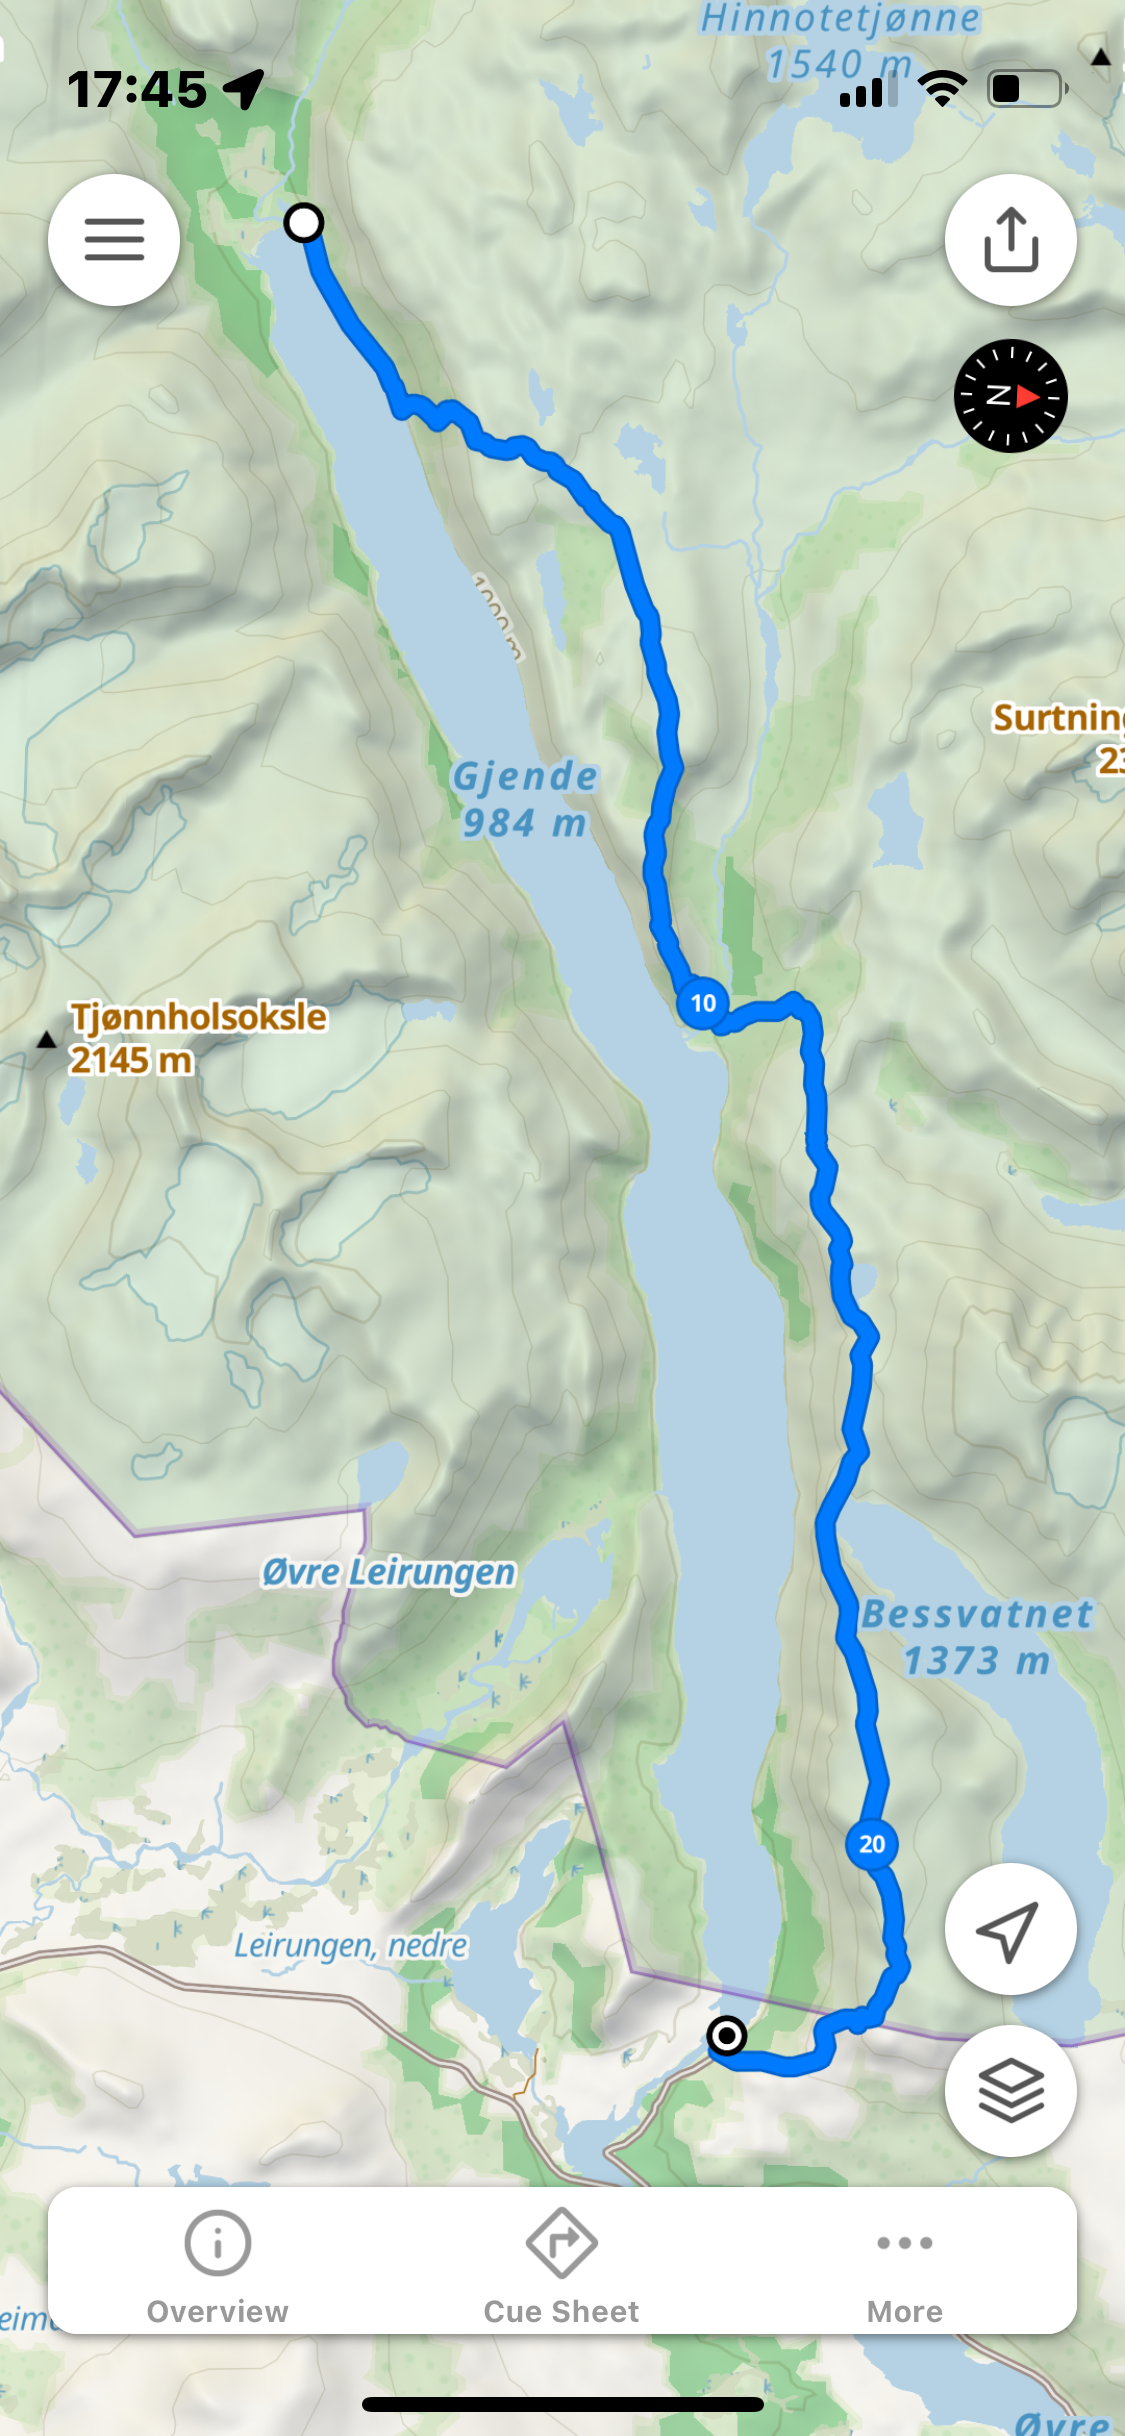
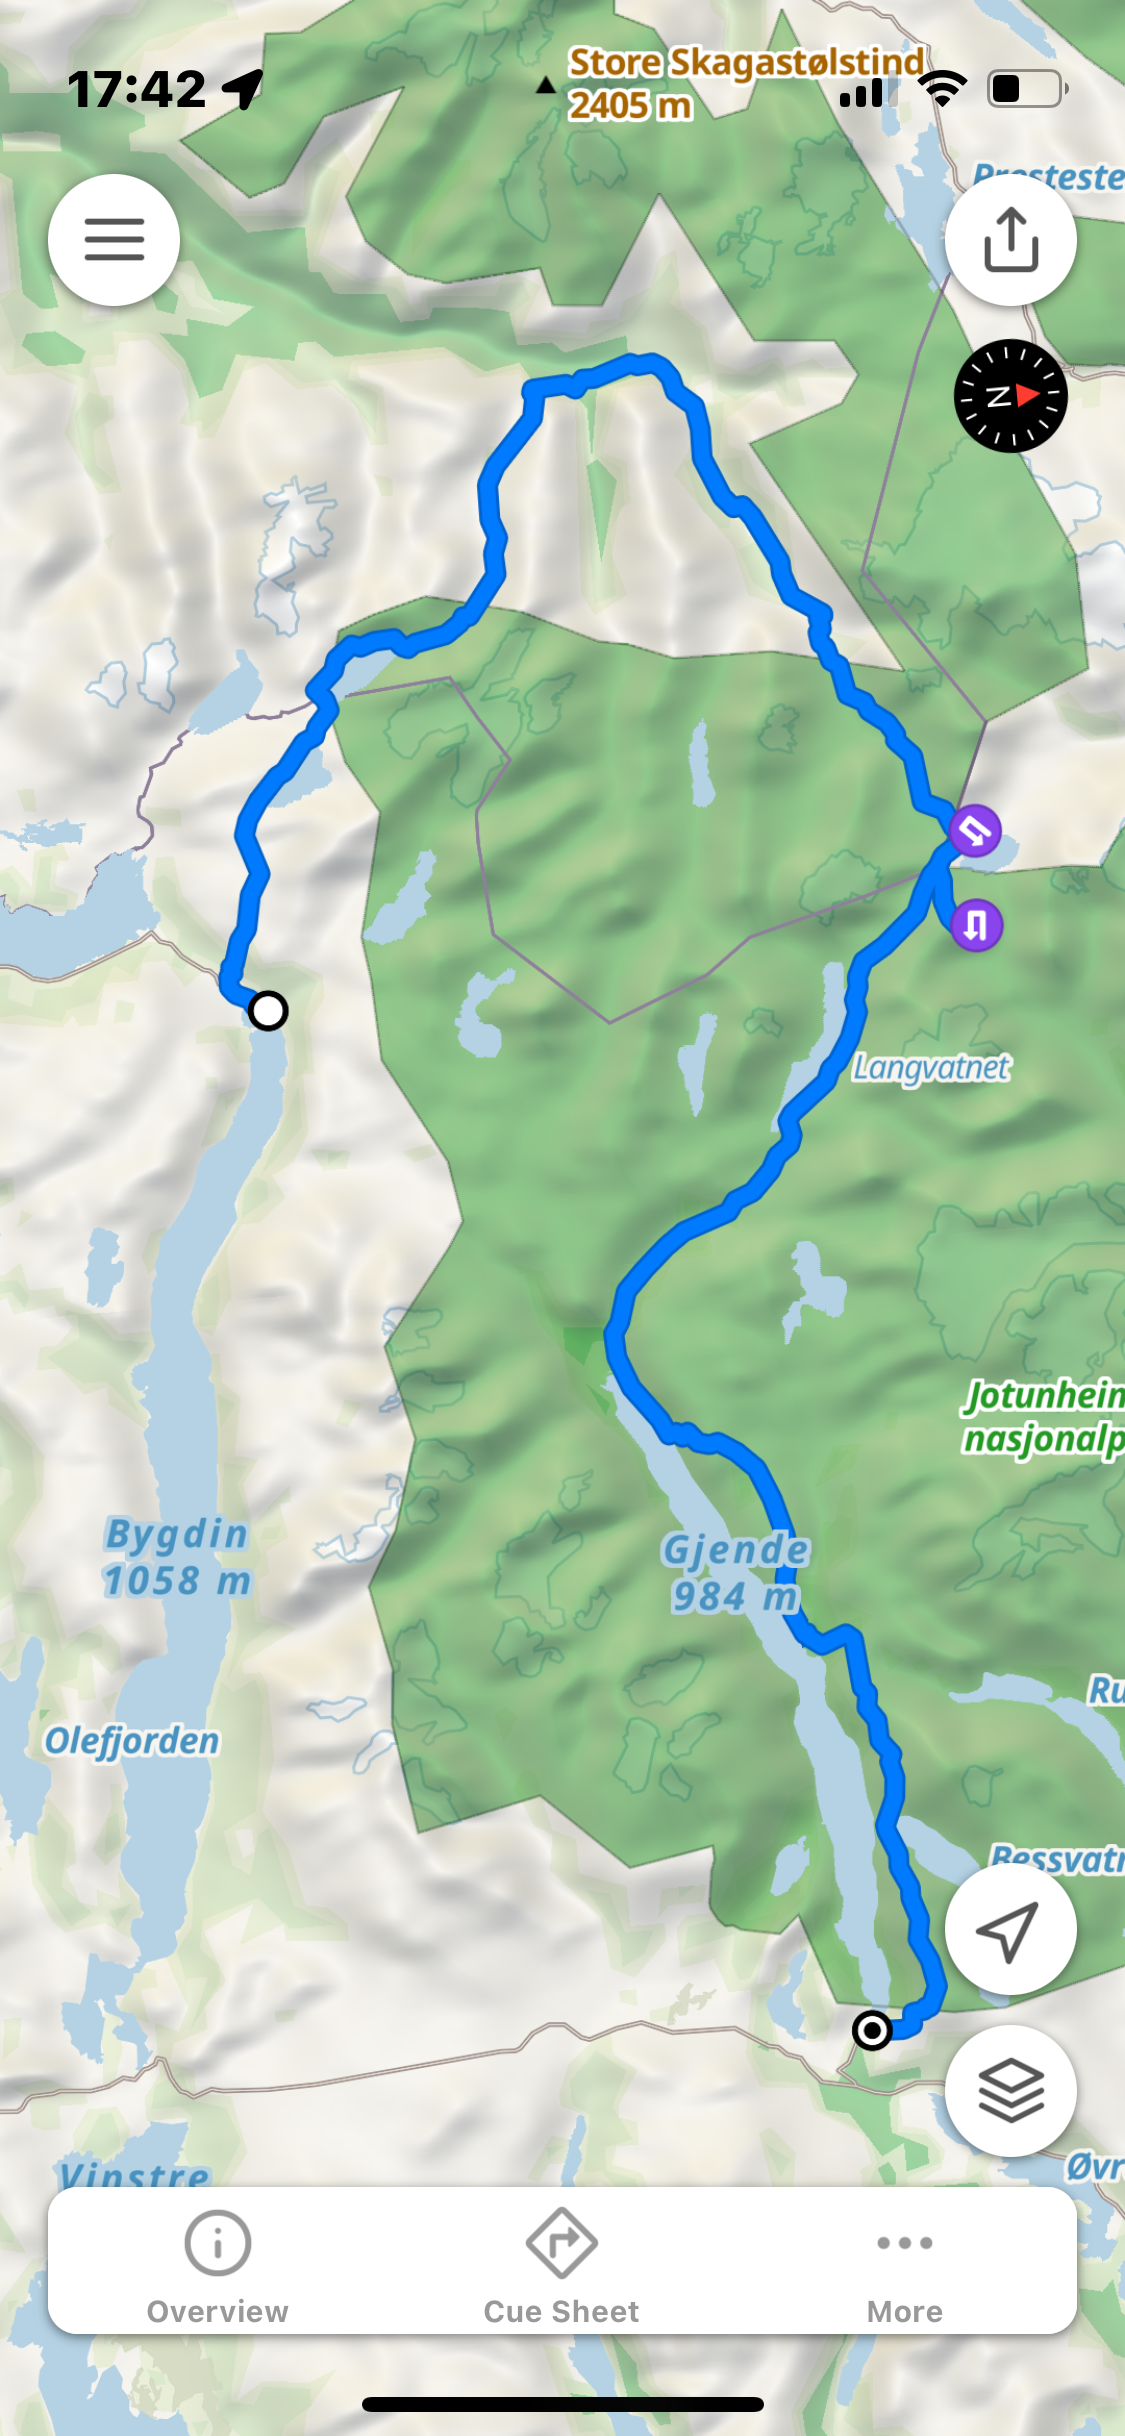
Gjendebu to Gjendesheim
I took no photos for this day, the weather was too bad, so, enjoy the image above of a considerably better day with Abelone.
Our longest day ahead and the weather forecast was rain all day. We were committed with our route BUT as always, sense and forward thinking was key. Our route was a two-day route, Gjendebu to Memurubu one day and then Memurubu to Gjendesheim day two. To do the whole lot in one day does require a fast and light approach.
The first leg is 11km and at Memurubu we had the option to pick up the boat to our finish, should conditions deteriorate.
The early km’s follow a single-track rocky and muddy trail next to Gjende lake. After 4km you turn left and then steeply climb. This section, Bukkelægret, is renowned as being difficult, especially in bad weather due to the gradient, slippery rock and the multiple chain sections. UT.NO say, ‘Chains and railings in exposed places. NB: Do not go outside the marked path! It is the only possible decrease. It is better to walk in the opposite direction if you are afraid of heights or choose the longer route around Storådalen.’
The route up was fine and although the rain was constant, we were all warm and enjoying the climb.
Once at the top I made a silly navigation error. I turned right following a trail that leads towards Kjuklingen. Within less than a km I knew I was wrong. I stopped, took a moment and then Baz, Geoff and I backtracked. While running I looked to the right and could see the trail up the other side of the mountain and eventually, we picked back up the red T’s and we were back on track. A frustrating mistake but these things happen!
Travelling northeast into Lågtunga, between Grunnevatnet and Sjugurdtinntjønne and down over Sjugurdtinden. We had a stunning moment when we were confronted by a large male Reindeer. We dropped to a walk and approached slowly. At the time I expressed how unusual it was to see one alone. But, as we crested the summit, a herd of maybe 20-30 reindeer were visible, what a sight!
The final descent to Memurubu is steep, rocky and slippery – care is needed, especially in torrential rain.
At Memurubu we entered the cabin and took an ‘aid station’ break of warm coffee and buns. I changed base-layer to a dry merino top and prepared for the next section.
We had had rain all day so far, but it had been pleasant in type 2 kind of way. Baz and Geoff decided to wear tights, I stayed in shorts. The option to pull out and take the ferry was not really an option, we were committed to the task.
Leg 2 Memurubu to Gjendesheim
The climb out of Gjendebu is steep and I soon removed my jacket, there was a hint of better weather coming and I loudly said, ‘it is clearing up!’ Famous last words…
The jacket soon came back on, and the rain increased. I was now on my second set of gloves, good old Raynauds in the hands brutal in bad weather.
This route is one of the most popular in Norway. Many take the early boat to Memurubu from Gjendesheim and then return via Besseggen, an average time taking 7-hours. On a good day there are many, many people. Today, hardly anyone.
The terrain is hilly and rocky as we headed to the foot of Besshøe and then on to Bjørnbøltjønne, the highest point on the route before heading down to the southern end of Bessvatnet.
Now we were at Besseggen, the steep climb ahead of us and Geoff loudly saying, ‘Are we going up there…!’
I reassured him it was not as bad as it looked. However, the steep rock face has an extra challenge in the rain. We stared the climb and soon came across a group of teenagers frozen on the mountain unable to proceed. They were questioning the decision to come this way, and they asked Geoff what time the last boat was at Memurubu! Unfortunately, they would not make the last boat if they backtracked, however, the cabin would look after them.
Ahead I heard screaming and crying. It got louder as I climbed only to find a mother trying to climb with a young girl who was beyond terrified. I offered help but it was refused. ‘We will be fine; she is just very anxious and scared.’ No shit I thought to myself. As I climbed up, I saw her husband and another child. They had back-up help but I stopped multiple times to make sure that I was not leaving a potentially disastrous situation.
Geoff and Baz were making good headway, every 5 to 10m I would stop and make sure their line was good.
The 350 meter climb up to the top cairn on Veslfjellet 1743m soon passed and now the weather was wild.
Wind was raging in from the right, the rain was torrential and the visibility poor.
We regrouped and I clearly expressed that we NEEDED to move. It was no stopping and all running now down the, at times, steep and rocky descent to Gjendesheim.
This was without doubt the hardest hour of the whole week and clearly demonstrated how Norway, as beautiful as it is, can turn wild and violent.
Soon we were on the final stone steps that lead to the DNT and lake Gjende.
We were absolutely soaked and exhilarated with the day. It was true Norwegian mountain day, and we had completed the whole 26.1km with 1800m vertical in 6h 30m on what was a very tough and slow day.
All three of showered for a good 15-minutes. A cold beer followed quickly and before we knew it, we had another wonderful 3-course meal with Reindeer as the main course.
The evening was chilled and relaxed. We had a short concert of traditional music, and we discussed the completed adventure.
My offer for a following morning run was very quickly turned down.
A good sleep and the following day we departed at 1400 for a direct bus to Oslo and onward travel.
What a stunning week!
Thoughts and Summary
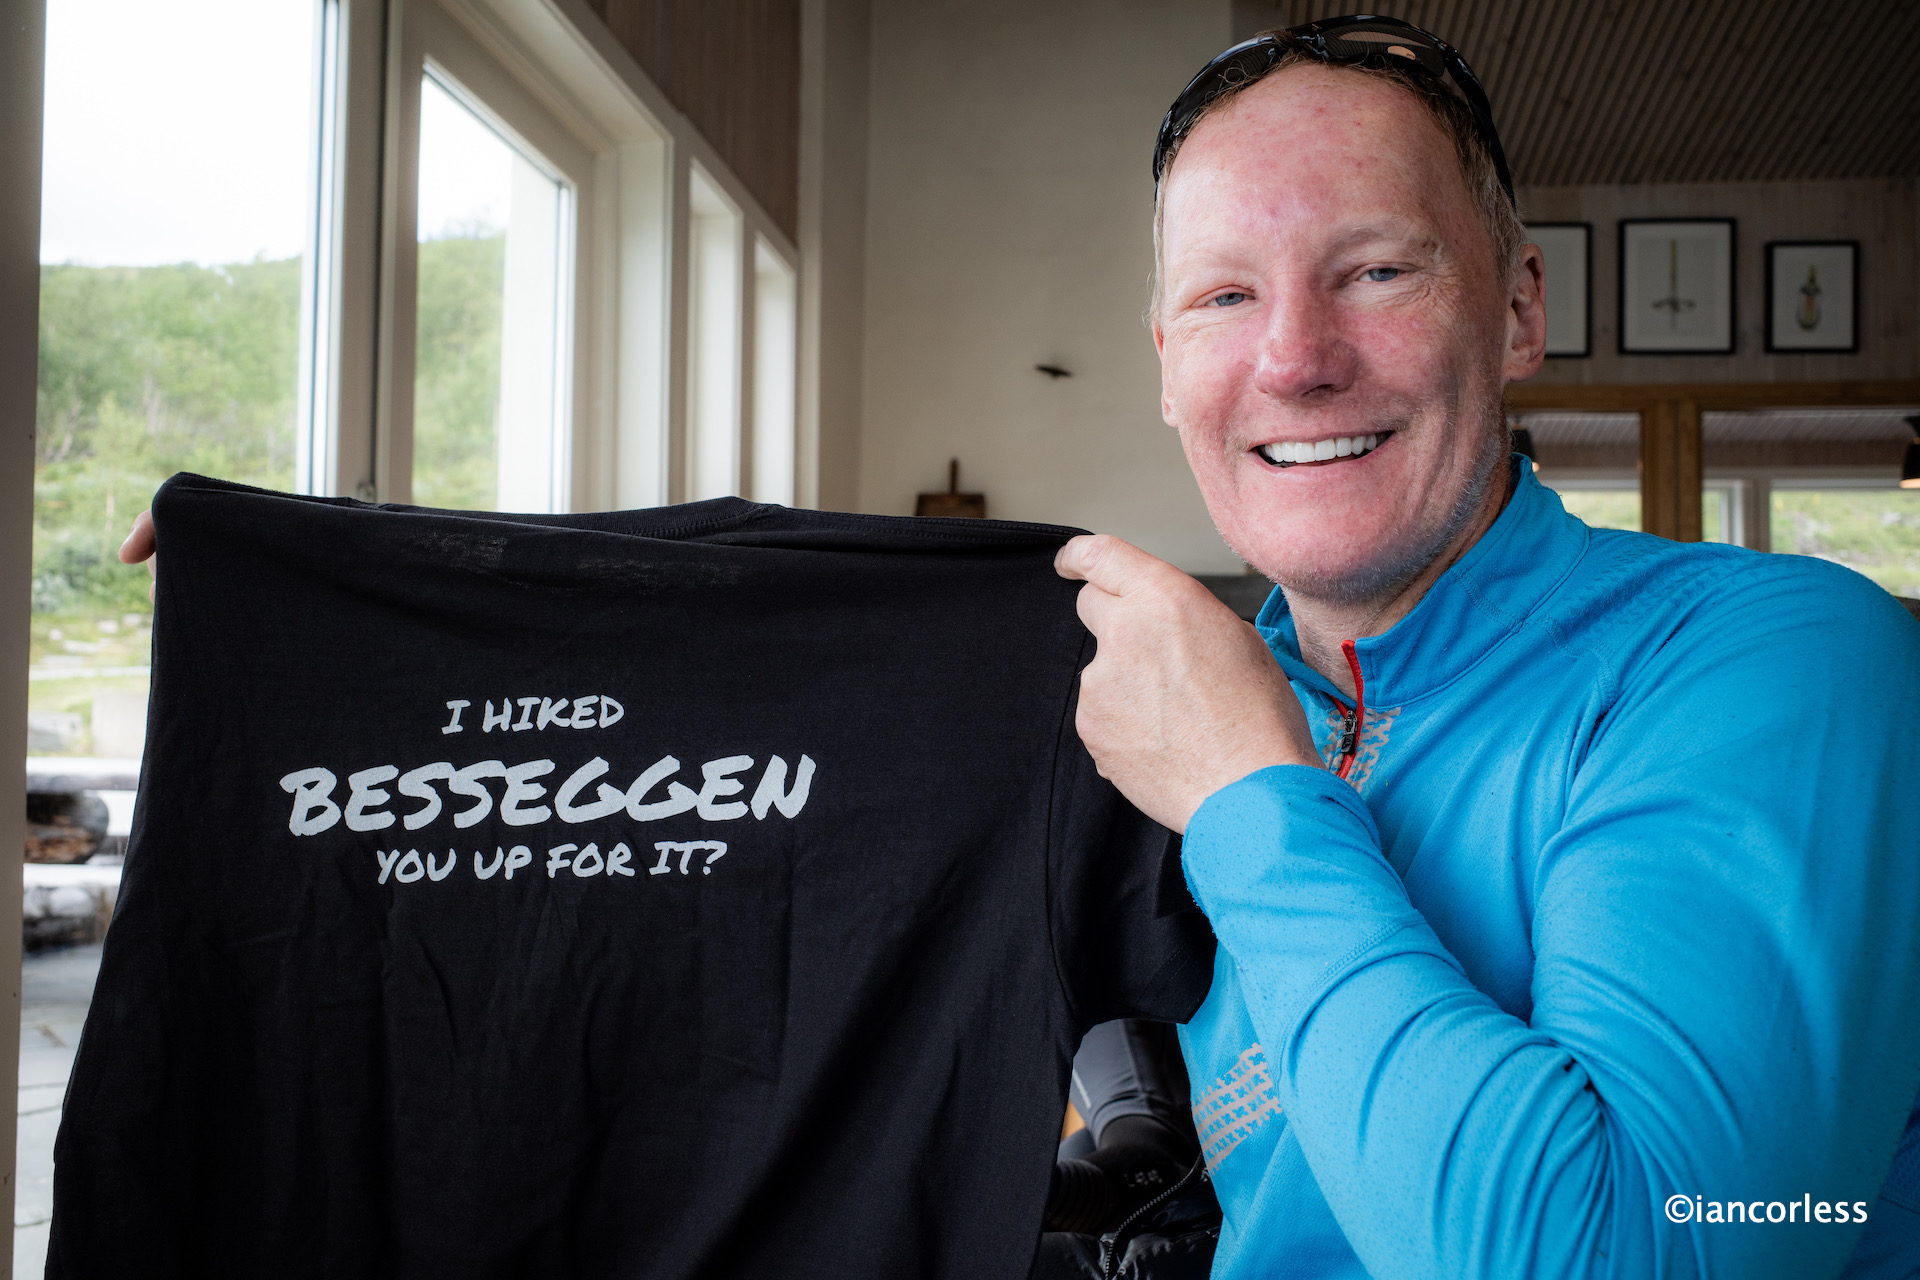
He got the T shirt 🙂
For me, there is no better way to travel through the mountains of Norway than by cabin-to-cabin. What the DNT offer is a five-star service and it really is a privilege to have this available. A shower, a bed, hot meals and a drying room for apparel and shoes is stunning.
Few people travel fast and light, they prefer to move at a slower pace with loads of equipment and take long stops and plenty of sight-seeing.
However, fast and light allows for a faster pace, the option to cover more distance and ultimately, more relaxation times in the cabins.
You do need to be experienced and prepared to move in this way.
Magical
In sunny and beautiful weather, fast and light is easy. In bad weather you need to be prepared, constantly making judgement calls and adjusting speed so as to ensure you are safe. Our final day a prime example.
We were well prepared and all three of us had the right and correct equipment for the planned adventure. The option to change a base layer at Memurubu for me was spot on, as was the decision for Baz and Geoff to move out of shorts and into tights. Despite the torrential rain, wind and colder temperatures, all three of us still had emergency layers of insulated jacket, waterproof pants and a bivvy bag available in our packs.
We all brought poles and on day 1 we used them a great deal, less so after. Geoff broke a pole on day 1 which was frustrating. However, when finished, Geoff said he would not bring poles next time. I understand his thought process, but, the additional weight of just over 200g is an excellent security blanket if moving slower or picking up an injury. Just learn how to use pols before.
The full route
Due to the nature of the DNT layout, sometimes we were not in the main building, and we all wished we had brought some very light flip-flops. I am now searching the internet for the lightest and most practical.
Good shoes are essential and normally I would never say YOU MUST get these shoes, but VJ Sport shoes and the amazing Butyl outsole are the only run shoes that can be relied on for Norwegian rock, especially when wet. Geoff and I wore VJ, me in the MAXx2 and Geoff in the Ultra. Gaz wore Altra and he had no grip – it compromised his enjoyment.
Norwegians have a saying, there is no bad weather, just bad equipment. It’s very true. We had mixed weather for our trip and in all honesty, it made the trip better. I never took my camera out on the last day as the weather was so bad, but I absolutely loved the challenge of making that route in bad conditions. Just a shame Geoff and Baz did not get to see those iconic Besseggen views down the lake and the surrounding area.
Finally, if you are interested in joining us in July 2025 for a similar journey, please get in touch. We will have 8-places available.
The passing of September and the arrival of October can signify dread and a sense of despair in many as daylight disappears and the weather changes. However, one of the secrets of ‘surviving’ this new season is to embrace it. Don’t look at the negatives, on the contrary, the perceived negatives are actually positives. Seasons exist for a reason.
Lethargy, low mood and the perceived feel to hibernate are all characteristics we feel during the winter months and first off, don’t fight it, accept that winter brings an opportunity to recharge, relax, read a book, catch up on some movies, light a fire, get a blanket and yes curl up on the sofa and relax. There is no harm or guilt in this.
SAD (Seasonal Effective Disorder) is something we all can feel and yes, some feel it considerably more than others, particularly if Serotonin is reduced and this is often treated with drugs. But light, or the lack of it, is a great contributor. Top tip – Look at changing the bulbs on your lights to ‘daylight’ balanced and when required, adjust brightness throughout the day to help simulate the natural passing of light. It’s a great and easy way to help simulate the variable light intensity changes in one normal day.
Mindset is a key factor to a successful winter and once you get the mind tuned, you will soon appreciate and embrace the possibilities that the winter season can bring, especially as a runner or someone who enjoys outdoor life and activity.
As in all things, we are individuals and as such, we all treat circumstances and changes in different ways. I personally see winter as an opportunity to do things I could not do in spring and summer. I see the challenges that winter will bring as a test, both physical and mental and I look upon it as an opportunity to learn and adjust. Resources and circumstances do go a long way in making my ability to adapt successful, so, to start off, look at these aspects and put yourself in a good place before the cold, wet and dark hits.
In a discussion with a friend over a glass of wine, I was surprised to hear our discussion begin to deteriorate…
“I just hate this time of year. The daylight is leaving us earlier and earlier each day, the light is already arriving so late in the morning and I can feel the damp starting to creep into my body. It will be only a matter of weeks before I am in perpetual cold and dark, I cannot wait for spring!”
It is easy to see from the above quote that before winter has begun, my friend is defeated. I smiled and laughed with him and turned the conversation around.
“Yes, the darkness is coming as is the cold, the wet, the snow and the ice,” I replied. “But what a remarkable opportunity this brings. Just think about it. Cozy nights at home with candles and a movie. Adventures in the snow. Running with a head torch. Learning a new skill. Reading and yes, I could go on and on. Winter for me is just a wonderful opportunity and I cannot wait for it to begin.”
I already felt like a winner as mentally I was prepared and excited for the opportunity, whereas my friend, was already starting the hibernation process.
EMBRACE THE WINTER
I strongly believe that embracing winter and making the most of the season starts with mindset. With a good mindset as outlined above, you will already be in a great place to start.
Marino Giacometti, founder of skyrunning also made the summit on race day – ‘for fun!’
As runner’s and outdoor enthusiasts, we are all at different abilities and yes, we all have different reasons why we do what we do. A great example being an elite runner may well look at winter as an opportunity to address weaknesses and maybe spend more time in a gym working on strength and core.
Monte Rosa Skymarathon
A running enthusiast may well just want to tick over, keep fit and maintain a healthy weight during winter months. And then there is the outdoor enthusiast who may well accept that running is something that will go on a back burner for the coming months and accept that walking, indoor cycling, skiing, gym work and so on is the way forward. Whatever group you fall in, take a couple of hours with a pen and paper and self asses how the last year has been and what you want to achieve the following year, this will help provide some specific goals over the winter to keep focused. This planning and assessment can be as simple as complicated as you wish.
As an example, mine is to embrace the season and the weather and to seize every opportunity. I will hone my head torch running. I will practice my ice and snow running. I will experience my first snow shoeing and I look forward to multi-day snow adventures that will carry me from one point to another in a self-sufficient way. But I also want to write more. I want to read a couple of books that I have never found the time for and I also want to embrace the downtime to rest and recover. My connection with nature and breaking from the digital world is integral to a healthy existence and that cannot stop just because the season has changed.
CLOTHING
We have all heard it before, “There is no such thing as bad weather, just bad clothing.” It’s true I am afraid. Clothing is one of the key essentials that makes any winter adventure not only bearable and enjoyable. As outdoor people, we have never been as lucky. Technology in apparel has now progressed to a level that we can be warm and dry in super-light products. The downside of course is cost and yes, gearing up for winter can be expensive.
Layering is key with apparel, starting with warm layers against the skin, insulating layers on top and then waterproof and windproof layers as the final touch that will protect from the elements. Merino is great as a base layer and I have a long sleeve top and legs as a starting point. Now of course, I may or may not use them as this depends on the outdoor exercise I am doing. As an example, I would wear the top if running but not the legs. A mid-layer is more often than not either Primaloft, down or synthetic. Each has its place but if you could only choose one, Primaloft (or similar) would be the most versatile due to its ability to retain warmth when wet and still be lightweight. The outer layer should be waterproof and windproof with taped seams and again, it is essential to have jacket and trousers.
The above looks at the core, but if you are like me, the extremities are my most vulnerable in winter and after getting frost nip both in my toes and fingers on the summit of Monte Rosa several years ago, I know need to ensure that I have multiple options for keeping my feet and hands warm. I use Merino base layer socks and gloves which are very thin. For my feet, I then add thicker Merino socks over and inn certain scenarios I have even used Gore-Tex or Neoprene over socks. For my hands, mitts always provide the most warmth and I will use them as first choice. If I need finger dexterity, I often purchase gloves several sizes too big that will allow for multiple layers to retain warmth.
A hat, buff and glasses add the finishing touches. A good hat is one of the easiest ways to retain heat inside the body. A Buff is perfect for around the neck, pulled over one’s nose and mouth to keep out cold air or you can use as a hat. Glasses are an essential to keep out the elements from my eyes and particularly essential if doing any outdoor activity in snow.
Finally, footwear is an absolutely key element to make any outdoor activity successful. There is no one-stop solution here and as a runner, your everyday trail shoes may be ideal for a bulk of your runs, however, specific conditions require specific shoes.
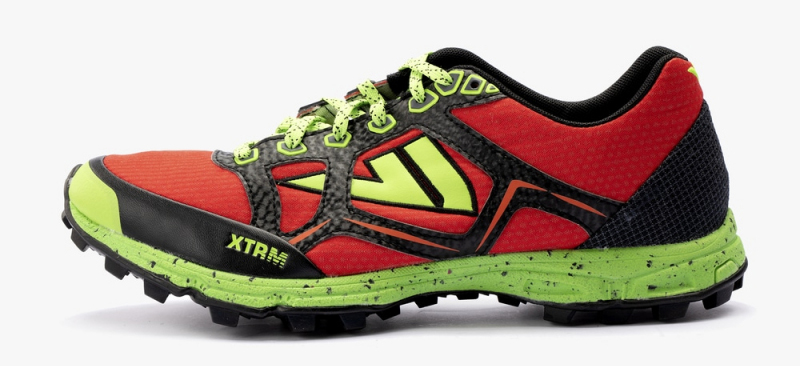
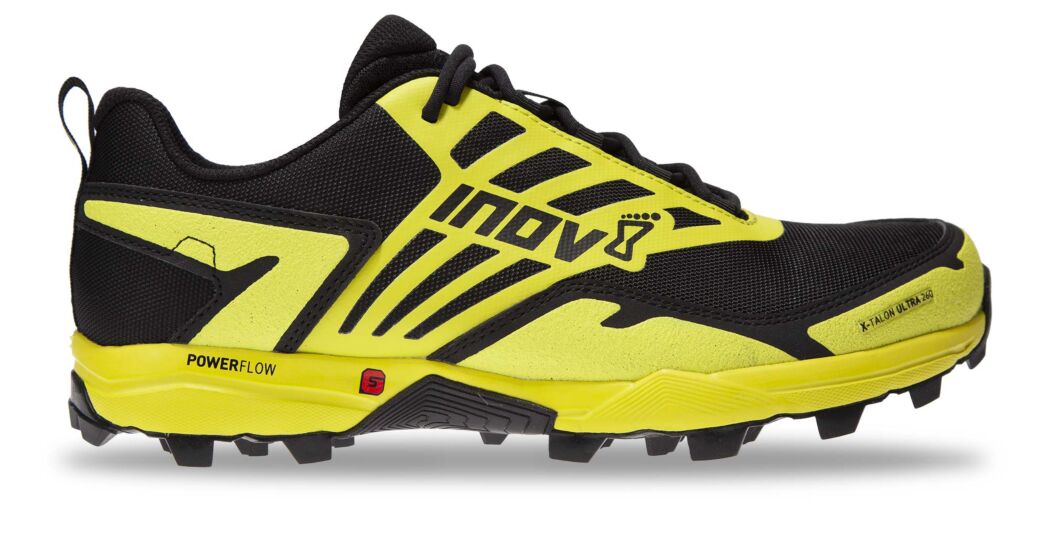
Mud/ Wet – You need an aggressive outsole that will grip and gain traction not only of sloppy wet mud but also on tree routes, rocks, gravel and a multitude of other surfaces. Top recommendations are VJ Sport and inov-8 who have been producing shoes to handle the elements for years. Personal favorites are the XTRM (here) and X-Talon(here.)
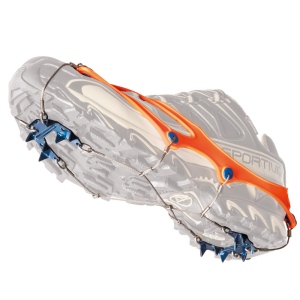
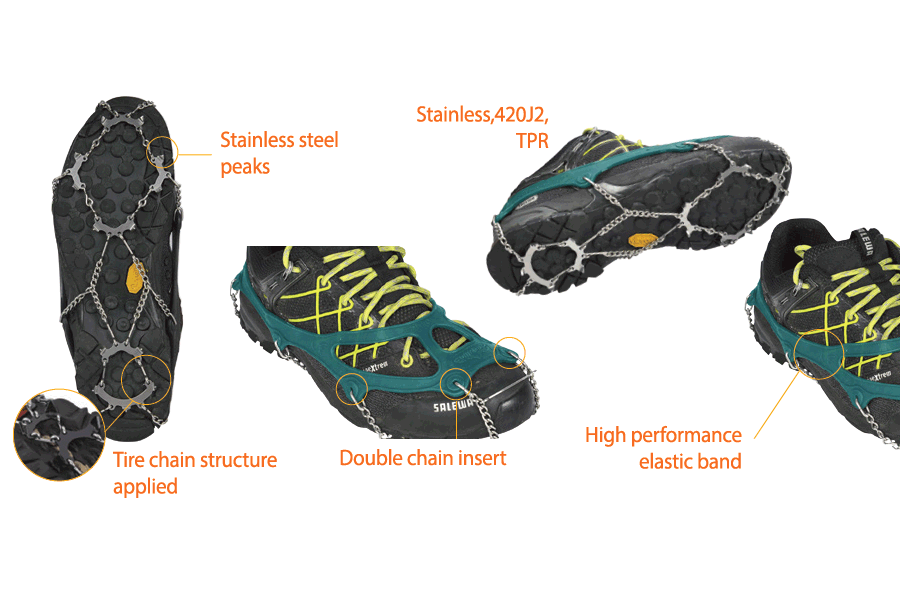
Snow/ Ice – In soft snow, the shoes that you use for mud/wet will usually work fine providing adequate grip. However, ice brings new challenges and many runner’s avoid ice at all costs. However, products exist that allow for running in such conditions. Firstly, you can micro-crampons (Snowline or Nortec as examples) that simply adapt any running shoe for ice.
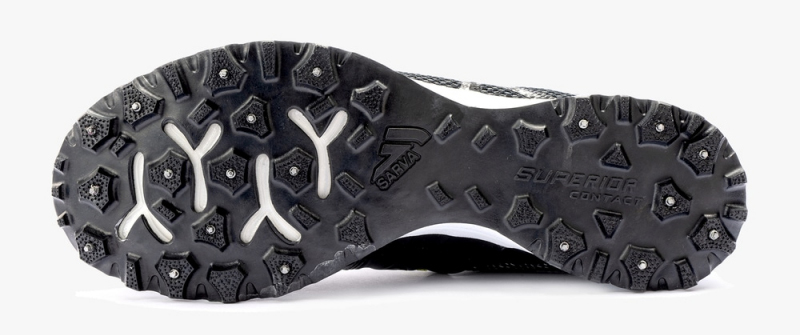
I personally prefer a specific shoe, such as the VJ Sport Xante (here) which as all the attributes of my favorite trail shoes and the added grip from 20 studs. Or the Arctic Talon (here) by inov-8.
Xante
Arctic Talon
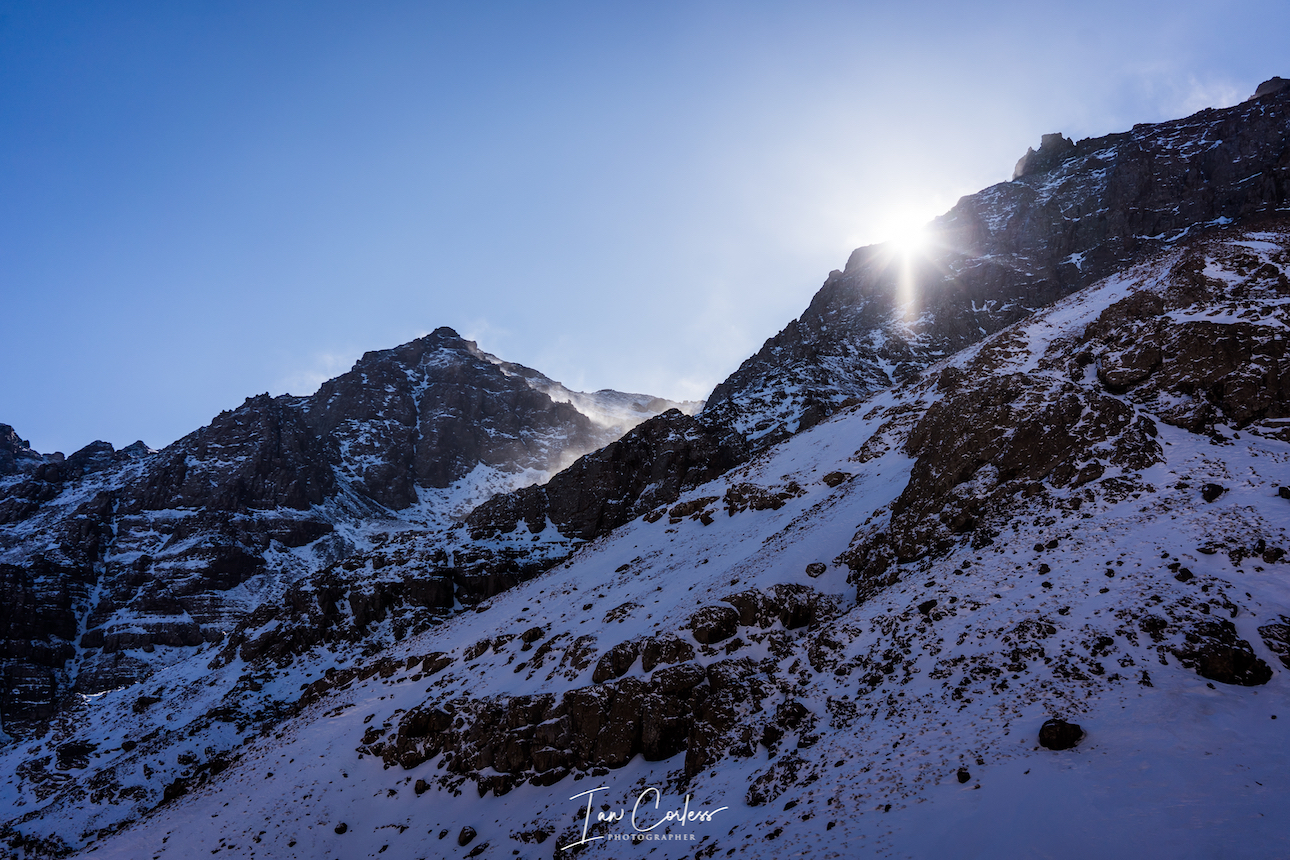
As a final note on footwear, I use boots and more substantial crampons when venturing in to more alpine and challenging terrain. Read about a trip to the Atlas Mountains here. There is no one answer here but if moving fast and light, the new inov-8 Rocltite Pro G 400 (here) is a great cross over and then I use two specific mountain boots, La Sportiva G5 (here) or the Trango Extreme (here.)
There is no one solution here and having the options to adjust clothing based on weather conditions is key.
Top Tips:
Carry a pack that will allow you to carry options of clothing. For example, it may well be dry when you leave but rain could come at any time, make sure you have waterproof layers with you.
Take off and add clothing as you exercise. When it’s cold, we often start with many layers as the first 15 min can feel uncomfortable. However, our core soon warms up. Take the layers off early to avoid sweating. Sweating is not your friend in cold climates. Be prepared to add and take off as required. One of the many reasons many people do not, is because it can disrupt the flow of exercise, however, a little time stopping pays dividends in the long term.
Avoid getting base or mid layers wet.
Carry an extra base layer.
Protect extremities – hands, feet, nose, ears and lips.
Protect skin with sun block as and when required and post-exercise use a moisturizer – winter is hard on exposed skin.
Start easy and build into any outdoor activity allowing for a gradual warm up.
Have appropriate footwear.
Don’t forget to drink.
Take snacks/ food and even a flask or consider the option to obtain hot drinks.
SAFETY
Even at the most basic level, winter brings extra challenges and risk. A simple road run has increased danger due to increased challenges not only for you as a runner, but for those who are sharing the outdoors with you – drivers! Reduced visibility, challenging conditions under foot and on the road can make that simple road run feel like an assault course, so, accept that sometimes staying indoors and or going to the gym is a better option. But we don’t want to be forced to stay indoors and why should we? If you have the correct apparel and footwear, all is good, yes? Well, nearly… Running on the road and I would most definitely consider adding the following:
Wear bright clothes or wear a reflective vest such as the Ultra Performance (here) which is minimal and light.
Add a flashing light to your arm and ankle. Example here.
Use a head torch.
Take a phone.
Moving from road to trail and the risk from traffic is reduced greatly especially if one can start immediately on trail with no road running involved. Therefore, the need to wear reflective clothing can be reduced. But the risk of falling is greatly reduced and depending on where you are, that risk can be potentially life threatening. So, adjust safety measures based on:
When you are running.
Where you are running.
The duration of the run.
If running alone.
Running for 1-hour on a local trail is very different than a multi-hour adventure. I personally have a standard kit list and I take the basic on every run. It’s an overkill for the 1-hour runs and for the longer sessions, I add to it as required and dictated to by location and conditions.
Spare Merino base layer.
Spare gloves.
Lightweight waterproof jacket.
Lightweight waterproof pants.
Space blanket.
Head torch.
Mobile phone.
First aid.
500ml water.
Snack
The above, is my absolute basic kit that will go in a lightweight pack.
I then add equipment based on:
What am I doing?
Where am I doing it?
When I am doing it?
What are the options exist to cut short my adventure?
How remote will I be?
What are the risks involved?
What weather can I expect?
What is the worst-case scenario?
The above is a great start point. Even a local run has great risk if one is alone. Imagine running in the forest with snow on the ground, the temperature is just below zero and you are at least 30-minutes from anyone else. If you hit the deck, sprain an ankle, break a bone or whatever, you are suddenly stationary in subzero temperature. This is high risk.
Adapting to the environment, conditions and challenges is not something to be feared. It is actually fun! I go back to the mindset approach at the beginning, I see this as an opportunity, an experience to learn and a great potential to be taken out of my comfort zone.
What equipment/ advice can make a run/ adventure safer and address the list of questions above?
If possible, share any trip with another person. It’s more social and you have a backup.
Check weather conditions.
Tell a friend/ family member where you are going and when you will be back.
Have a phone and if necessary, an additional charger. It’s worth considering purchasing a phone that is not a smartphone – battery life is usually amazing.
Carry a tracker such as Garmin InReach or Spot.
Think layers and have base layer, warm layers, waterproof layers, hat, gloves and buff. On a personal note, I take spare gloves, socks and a base layer should I get wet and need the comfort and warmth of dry layers.
Know where you are going and have a map and compass. A GPX file is also a great option for watch/ smartphone.
Specific equipment:
Carry micro-crampons if you think snow/ ice is high risk.
Carry a bivvy bag which can be a life saver if stuck in a remote location with an inability to move.
Goggles are better than glasses if you are in a blizzard or strong winds.
Carry an ice axe if venturing anywhere with winter conditions.
Hand spikes for ice (more details below).
Snowshoes (more details below).
In many scenarios, common sense comes in to play and quite simply, a little extra weight and safety is far better than the alternative. Accept in winter that you will move slower and in a different way.
WHAT OPTIONS EXIST IN WINTER
This question can be asked in two ways, firstly, one’s head can be lowered, shoulders dropped, hands below the waste, a look of desperation on the face and, “What options exist in winter…?” The person asking this question has already decided that the answer is none!
For me, the way to ask this question is standing upright, huge smile on my face and the question, “What options exist in winter?” Already has me ready and primed to list a plethora of activities to keep even the most hardened sport enthusiast occupied for quite some time.
Night running.
Snow running.
Ice running.
Road running.
Climbing
Ice climbing.
Hiking
Fastpacking
Snow shoeing.
Learn something new.
Spend time with family and friends.
And the list goes on! Location, finances and available time all have a bearing on what is and what is not possible. One thing is for sure, possibilities are endless.
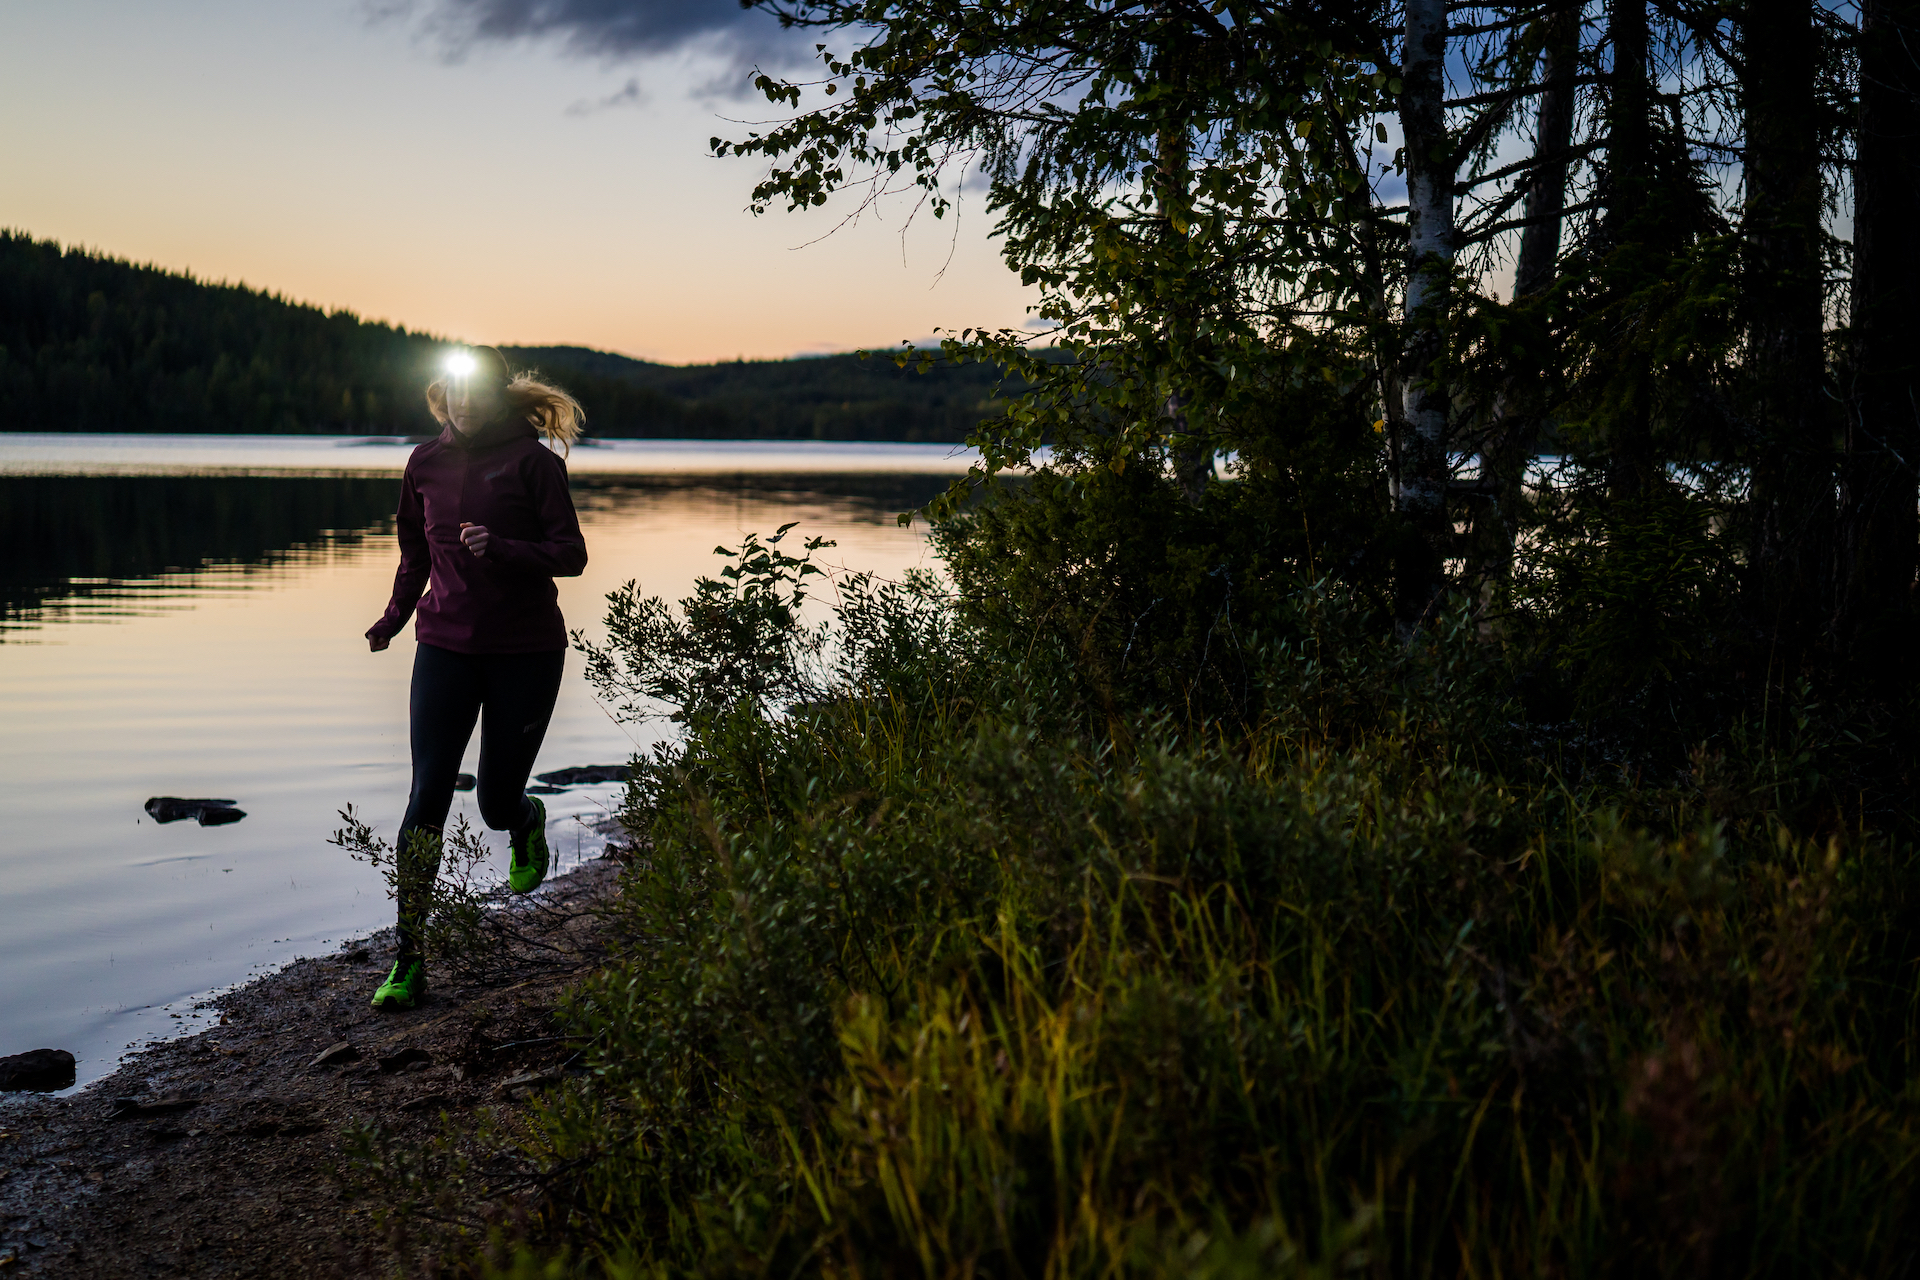
Night Running.
Quite simply, you need your run apparel and appropriate equipment as listed above. Importantly you need a head torch. Not all head torches are the same and an investment in the right kit early on saves money later. If you are running in the city with a great deal of ambient light and just the odd foray on trail, you may well get away with a budget torch and something around 200 lumens would work. However, if you are heading into the pitch black, running in forest, venturing into the mountains and pushing the darkness envelope, you are going to need a specific tool for the job. As an example, Norwegian lighting company Moonlight (here) provide head torches from 700 to 7000 lumens. Be specific on your needs and requirements and importantly consider autonomy, beam direction and spread, options for spare batteries and the option to keep the battery in apparel while still using the head torch, especially important in very cold environment when warmth will make the battery last longer.
Snow Running.
Layer up so that you have the flexibility to reduce heat and get warm as required. In many scenarios, particularly soft snow, a good aggressive trail shoe will work. However, consider the risk of ice so carry micro spikes. If in the mountains, knowledge and experience of snow conditions would be advisable. Be prepared with additional equipment such as poles and ice axe. Needless to say, gloves are really important.
Ice Running.
Use micro spikes for specific shoes as mentioned previously to ensure that you have grip and traction. In some places, Norway and Canada a good example, summer lakes freeze over and they become an incredible playground. Caution, safety and experience is required and if you have never run this way before, take advice from those that have. Importantly run with hand spikes (pictured below) available at all times should a disaster happen – these help you get out of a situation.
Measure the ice.
What is a safe thickness? 4 inches or more is ideal.
Check the ice colour – clear blue or green is good.
Fresh ice is best.
Know rescue techniques.
Climbing.
Mountains in winter offer an incredible playground and if you are new or inexperienced, the first option would be to sign up for a weekend trip with experienced professionals. The equipment requirements, techniques and safety measures vary considerably.
Ice Climbing.
No need to venture outside. In 2019 as an example, I started on a series of indoor ice climbing lessons which has now set me up for experiencing ice climbing outdoors. There is obviously a need for specific equipment: helmet, glasses, harness, ice axes, boots and crampons. However, most places, indoor or outdoor, offer the option to hire equipment as part of the lessons.
Snow Shoeing.
Fimbulvetr Hikr-X
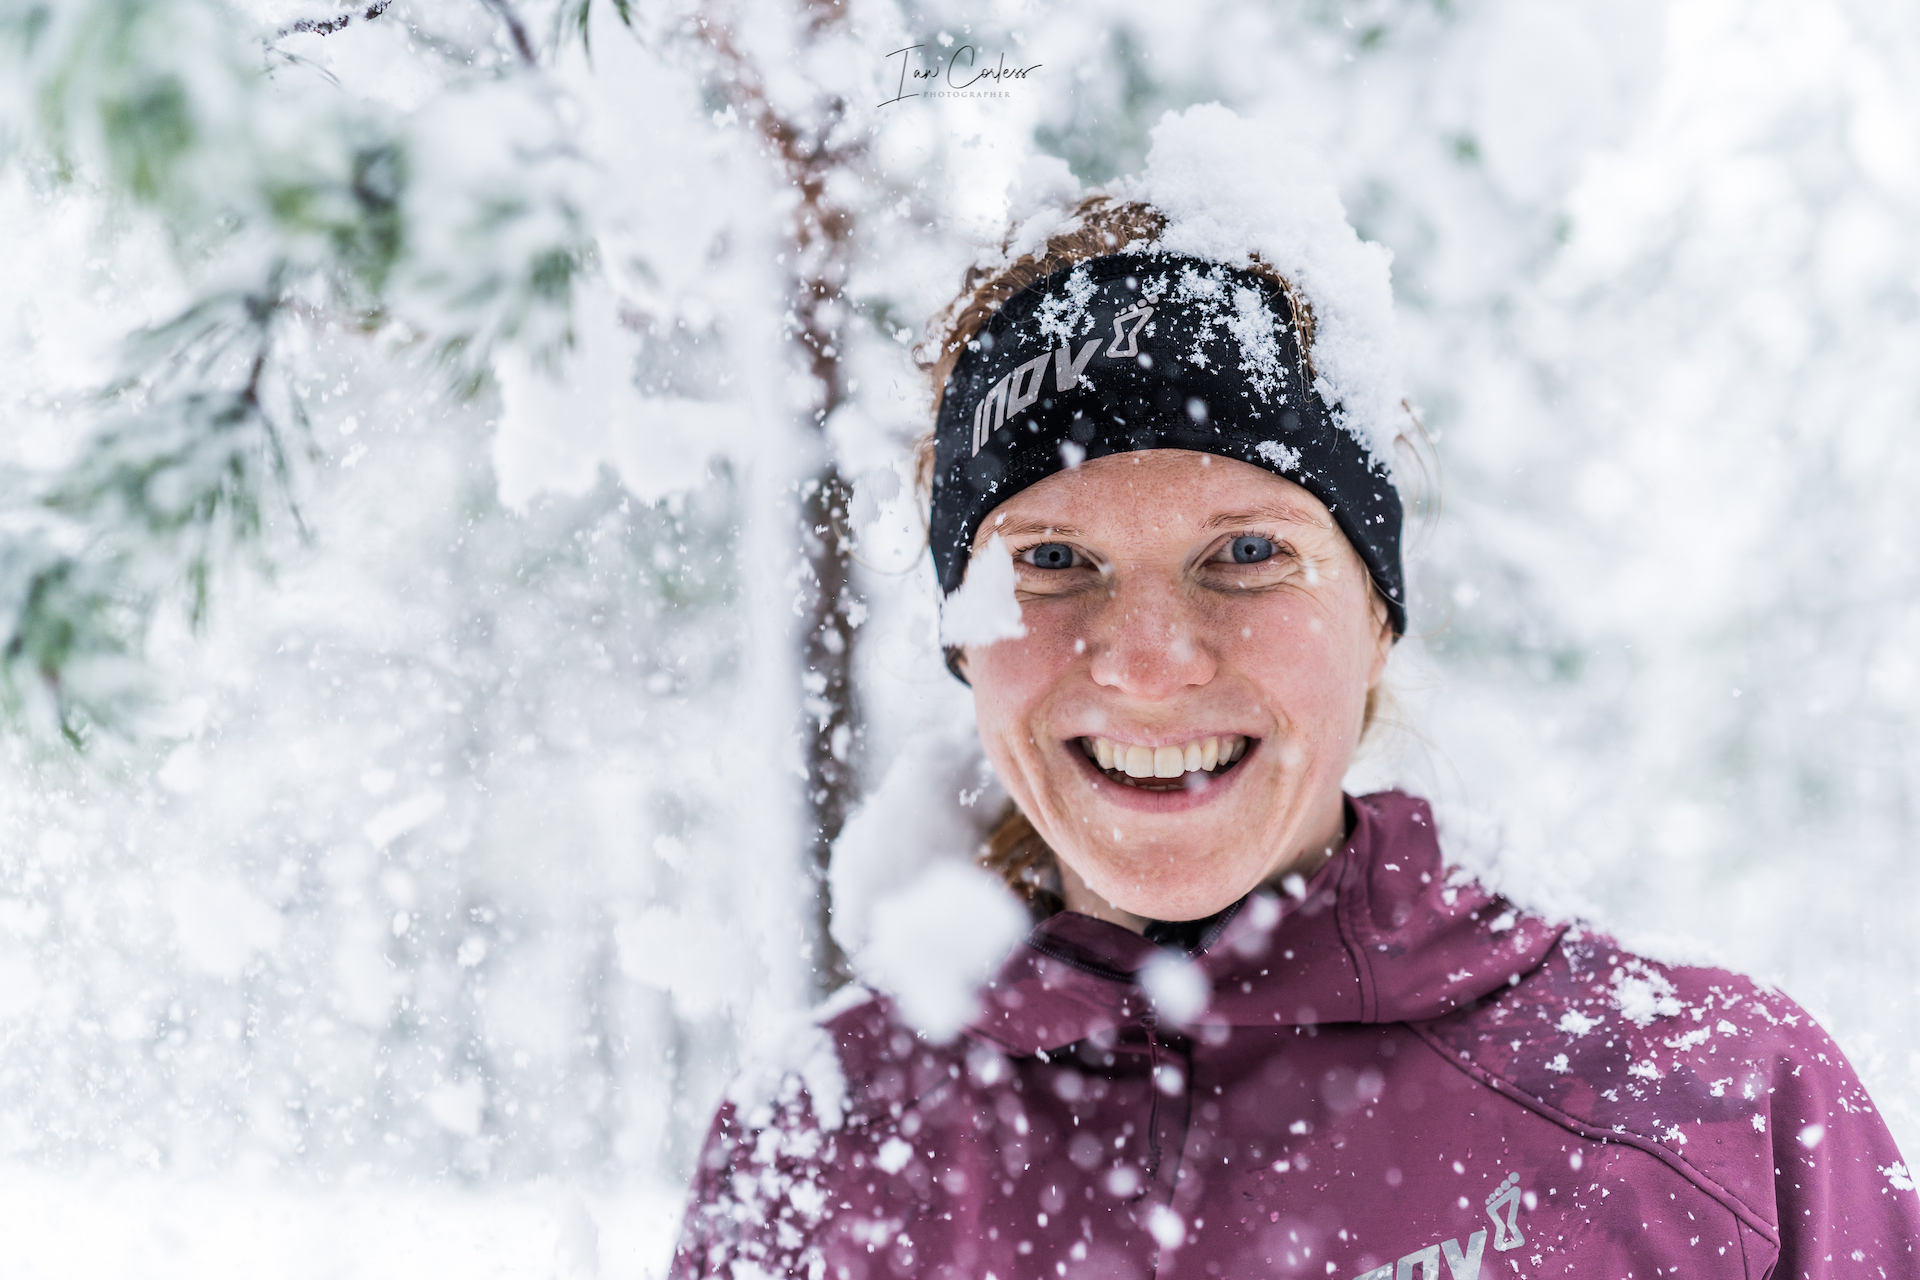
A great winter exercise that provides an alternative to skiing or snowboarding that is an extension of running. Snowshoes basically allow you to float and not sink in the snow. But there is a difference to snow hiking and snow running, both in the shoe used and the type of snow. Run snowshoes are smaller, allow for a more natural gait and require the snow to be har packed. Whereas in soft snow, you need a much larger snowshoe to stop you sinking in the ground. Either option provides a great challenge and workout. Of course, races exist that require snow running both with and without snowshoes, so, if you are signed up or plan to race like this in the future, seize the opportunity. Abelone Lyng (here), winner of the Ice Ultra does winter snow shoeing trips in Norway.
Fast Packing.
Peak Design Field Pouch attached to a Montane Pack when Fastpacking in Nepal.
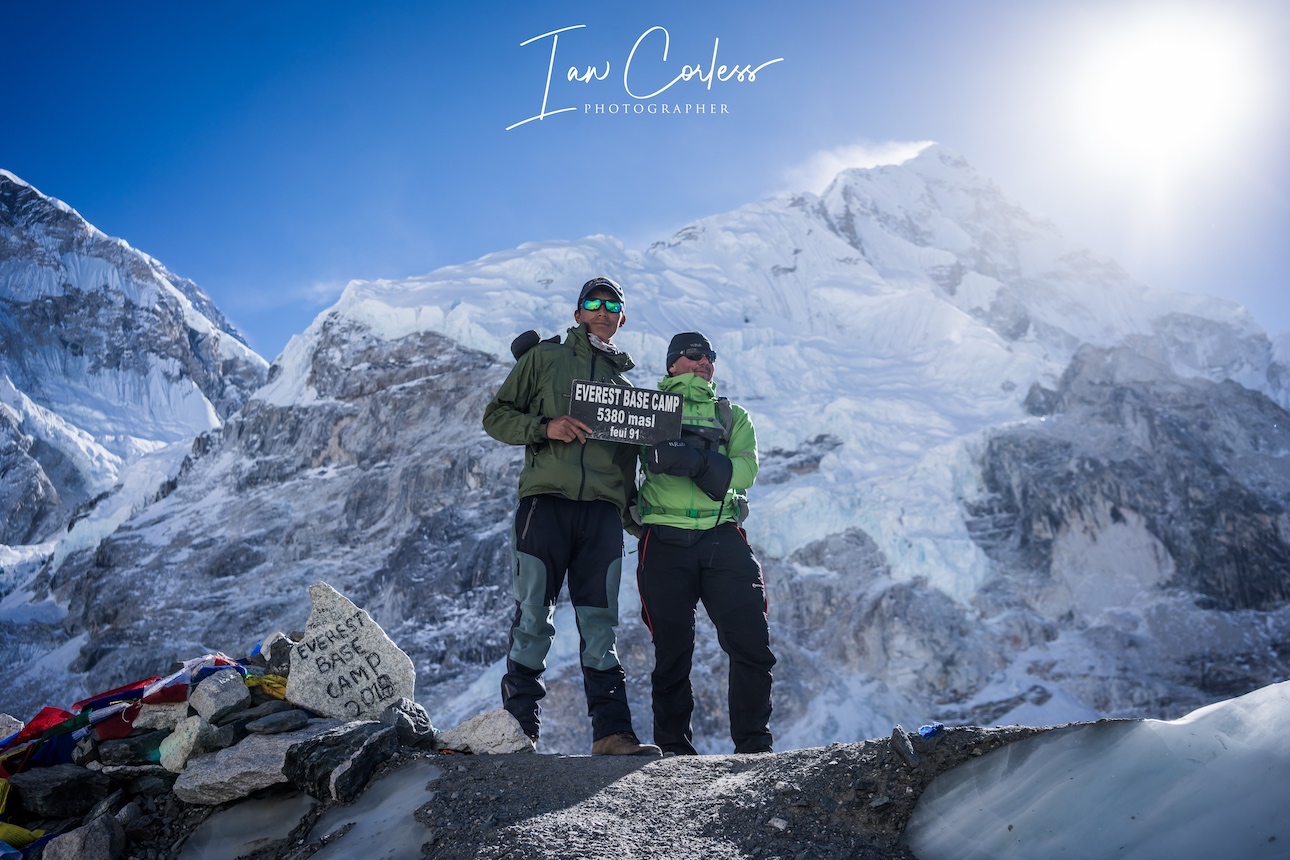
Snow, ice and cold weather doesn’t mean that multi-day adventures need to stop, on the contrary. Find a route, plan accordingly, have the correct equipment and off you go. These adventures can involve winter camping (you need a 4-season tent, appropriate matt and sleeping bag) or you can run/ hike form hut-to-hut or hotel-to-hotel. You are only limited by your imagination. Accept that you will move slower. Nepal is a magical playground for winter adventures.
Hiking.
Wrap up and include the family. Sport and our pursuit of it can often be selfish, not purposely, but we can get engrossed in challenge and adventure and often exclude the ones we love. Share the journey.
Training Camp.
Consider a training camp, maybe this could be something in warm weather to break up the winter months. I have been organizing a warm weather camp every January in Lanzarote for over 10-years, info here.
Other options:
Sign up for a challenge.
Make it social.
Add variety.
Train in the home.
Rest.
Learn something new.
Enroll in a class.
CONCLUSION
Ultimately, don’t letter winter get you in a spiral of mood swings, depression and locked indoors. It’s all about the mind and understanding that the variety winter brings is actually far more exciting and challenging than good weather and dry predictable trails.
Seize the conditions. Plan accordingly. Have the correct equipment. Test yourself with something new and trust me, by the time Spring comes around you may well be a little disappointed.
Please support this website. I believe everyone deserves to read quality, independent and factual articles – that’s why this website is open to all. Free press has never been so vital. I hope I can keep providing independent articles with your help. Any contribution, however big or small, is so valuable to help finance regular content. Please support me on Patreon HERE.
Norway has long been a desirable location for the mountain enthusiast. One only need to add the word ‘Norway’ to a Google search engine, and you will be rewarded with photos that make the jaw drop.
At roughly 33% bigger than the UK and 1/3rd the size of USA, one begins to understand the scale of this Scandinavian country and its 5.3 million inhabitants.
Just think about it, Norway is 33% bigger than the UK, but the UK has 66.6 million inhabitants…
Needless to say, outside of Oslo (681,000), Bergen (271,000) and other key locations such as Trondheim and Stavanger, open space and amazing landscape is available for all to explore.
In a series of articles and posts, we intend to introduce you to the magic of Norway.
Norway is the longest country in Europe and therefore, travelling anywhere is not a quick process. It has 60.000 miles of coastline, towering mountains and dramatic fjords. Remarkably it has 2-300 peaks over 2000m+, Galdhøpiggen the highest at 2469m closely followed by Glittertind at 2464m. There are over 1000 peaks over 1650m, so, if you love mountains, Norway should be at the top of the ‘to-do’ list!
We started our articles with HARDANGER which you can read HERE.
The list will grow as we progress through Norway, but expect posts on:
Stavanger
Senja
Tromso
Lofoten Islands
Romsdal
Lyngen
Svalbard
And more…
JOTUNHEIMEN
The ‘home of the giants’ contains the 29 highest mountains in Norway, and as such, it is a playground waiting to be explored. It has 250 peaks over 1900m! Established in 1980, Jotunheimen National Park covers more than 1,000 square kilometers of Sogn og Fjordane and Oppland counties. Reinder, elk, mink and wolverines live in the park and most certainly, in the more remote and quiet areas, it is possible to have a sighting.
In terms of distance and travel, the entry to the Jotunheimen region is roughly 4-hours of driving from Oslo or Bergen.
The area is vast with a multitude of possibilities and therefore, this article will be very much be a ‘part one’ to be followed up with additional posts as we explore more of the area.
It is a popular area and in the months of June, July, August and September, you can fully expect routes to be popular with hikers, climbers and tourists. July and August being the key months due to more stable weather. However, June is a wonderful month as snow can linger on many routes.
Any visitor to Jotunheimen, particularly on a first visit, will have the iconic Besseggen top of the list along with the highest peak in Norway, Galdhøpiggen at 2469m. We will include both of these here in this article and introduce you to other options: Knutshøe, Surtningssue and Besshø.
PRACTICALITIES
First and foremost, this is an introduction to Jotunheimen, and we hope that you will read this article, digest the information and then plan your own adventure.
Jotunheimen is expansive and in all honesty, best travelled on foot.
DNT – CABINS
Jotunheimen has a plethora of cabins (DNT) which link all the major trails and routes and certainly, the DNT option provides the easiest and most logical way to link routes for an amazing multi-day experience. There are 550 cabins in Norway looked after by The Norwegian Trekking Association. There are different cabins: staffed, self-service and no service.
Staffed – Staffed lodges serve breakfast and dinner. Many have showers and electricity, either from the power grid or from a local generator.
Self-Service – The self-service cabins are equipped with all that trekkers need for cooking and sleeping. Firewood, gas, kitchen utensils, table linen and bunks with blanks or duvets and pillows (hut sacks, also known as hut sleepers, are required!)
No service – No service cabins usually have the same equipment as self-service cabins, but they have no provisions. There also are a few simpler no-service cabins where you’ll need a sleeping bag and perhaps more equipment.
Use ut.nohere for what is available, there is also a very good phone app.
If you plan to use DNT it makes sense to become a member as you will save money, join here.
In nearly all cases, particularly in high-season and for popular routes, booking ahead (here) is a good idea. But rest assured, DNT will never turn you away, ‘…but everyone who comes to a cabin will have a place to sleep, either in a bunk or on a mattress on the floor.’ A 2020 price list is available here. A full board option is a great idea as you get a bed, 3-course dinner (always excellent), breakfast and a packed lunch. So, if moving from DNT to DNT you can really travel fast and light and make the most of the days. NOTE: You do not need a sleeping bag, just a sleeping bag liner – great for weight saving!
WILD CAMP
Jotunheimen is a paradise for wild camping, so, if you are on a budget, looking for a raw experience or want to fastpack, this is the place for you. In most cases, you can camp close to or at a DNT cabin. So, it can be possible to save on lodging and still eat at a DNT. Especially useful if venturing out for multi-days, that way you can really save on food weight.
Screenshot of DNT meal prices:
HOTEL
Hotels are in abundance in Jotunheimen and they provide an option to be used as a base or as stops as one travels around. They are great as a start and end to a holiday in this area, but not the best option if you really want to explore.
OVERVIEW
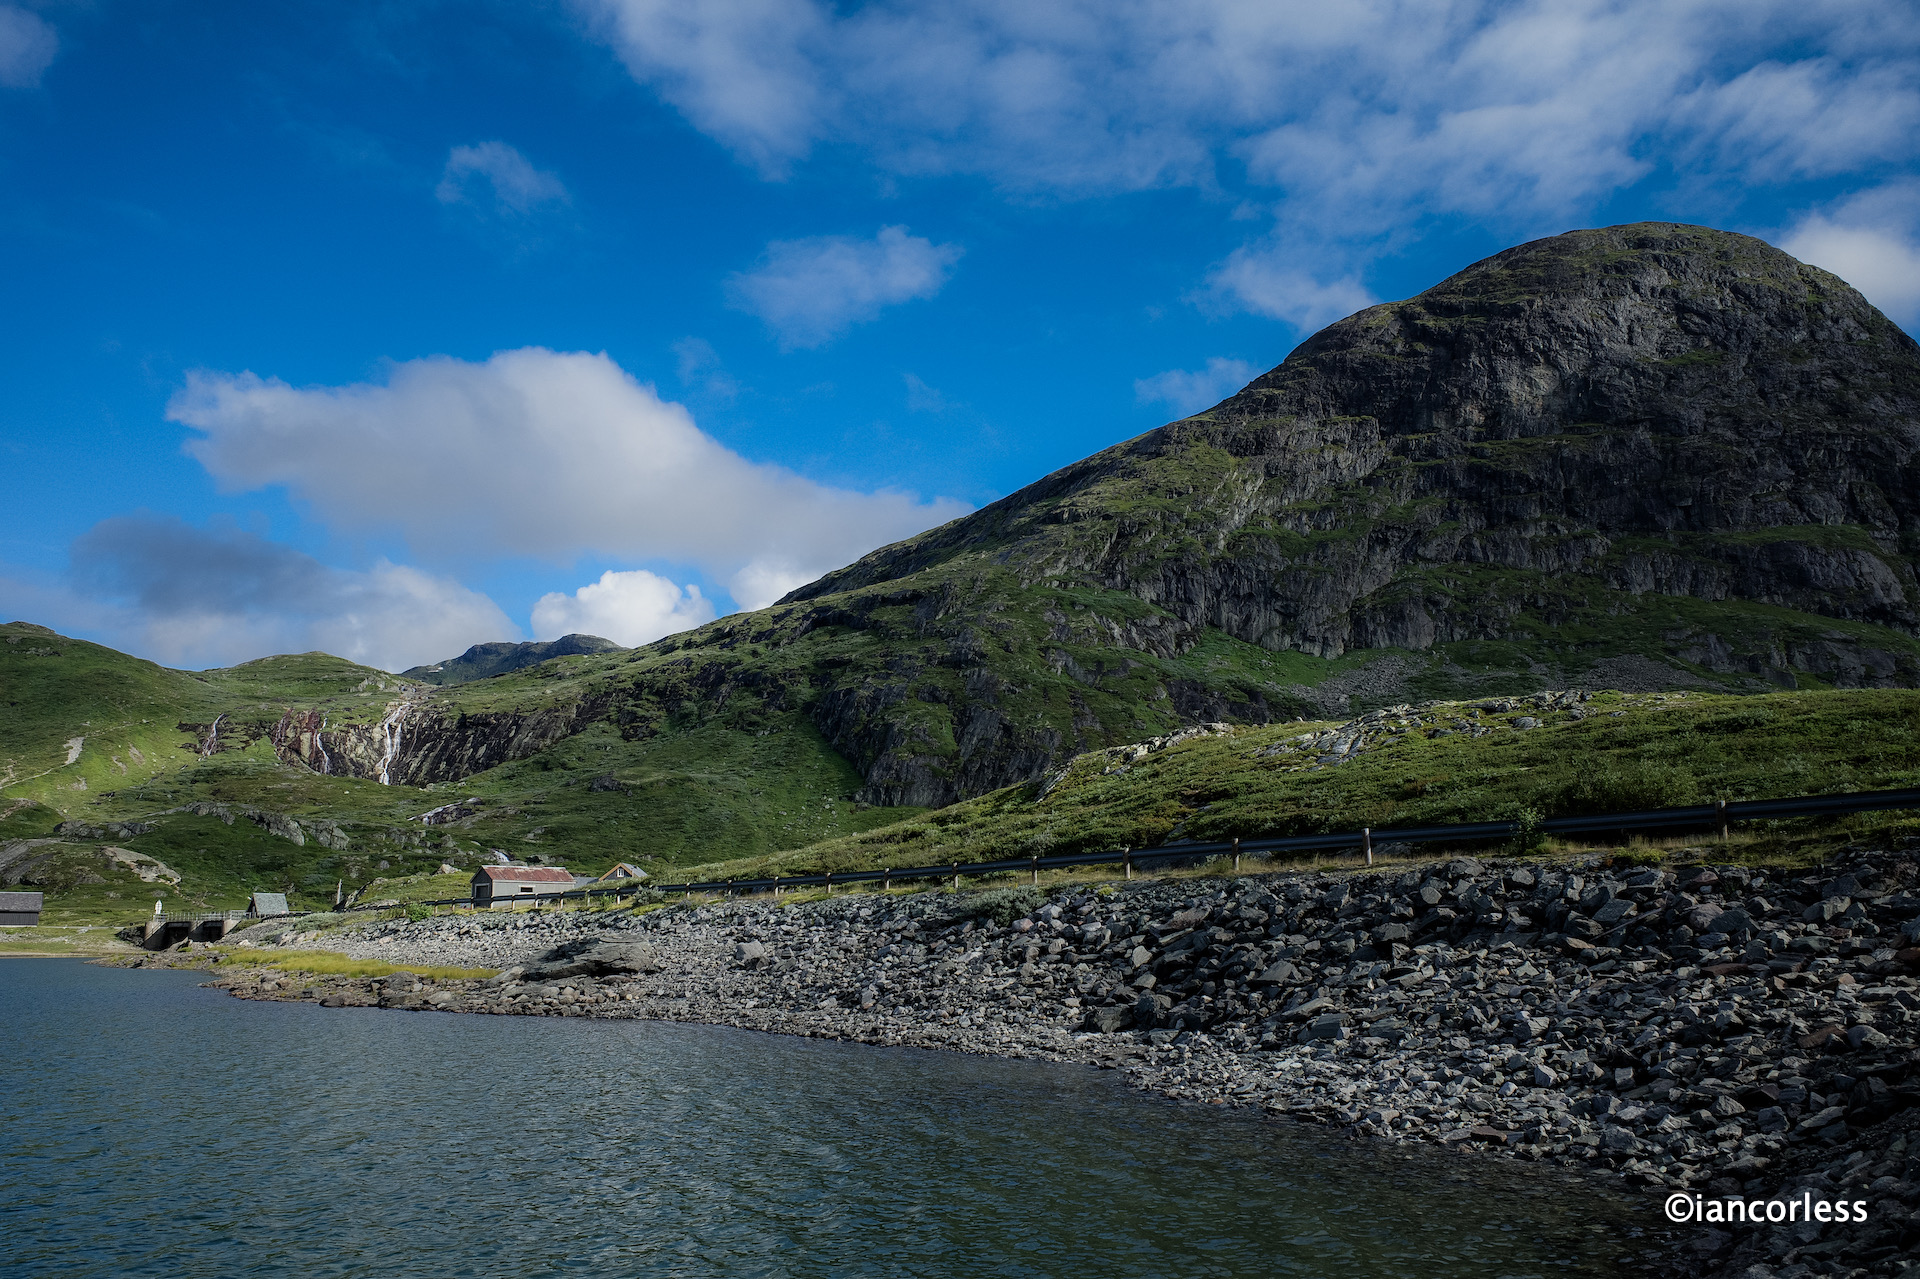
Bygdin is perfect entranceway to Jotunheimen and you could start the journey with a little luxury at the Bygdin Fjellhotell. It is also possible to wild camp in this area, even close to the hotel. Located at the end of Bygdin lake, it’s a perfect start point.
This fjord has a ferry which you can use to access Torfinnsbu or Eidsbugarden – both of these provide great start points for a fastpacking journey.
Fastpacking Journey:
Although not discussed in-depth this article, you could leave your car at Bygdin, take the ferry to Torfinnsbu then take the trail to Gjendebu. From here you could then head north via Storådalen, Urdadalen and then to Spiterstulen which is the gateway to Galdhøpiggen. You could then climb Galdhøpiggen and return to Spiterstulen. From here, proceed to Glittertinden, on to Glitterheim and then follow the trail down to Gjendesheim via Tjørnholtjørna and Russa. From Gjendesheim take the trail via Vargebakken and Valdrersflya to arrive back at Bygdin Fjord. GPX here.
From Gjendesheim you could take the ferry to Gjendebu (you were here on day 1 or 2 of the fastpack) and now follow the trail to Memurubu. At Memurubu you have several options? A great day out is to take the trail to Surtningssue summit heading out on the lower trail that passes Memurudalen. At the summit, return via the way you came and then the trail splits and you can return to Memurubu via different route (full details listed below). From Memurubu you can now take the Besseggen route (details below) to Gjendesheim.
Proposed Trip:
As mentioned, Jotunheimen has many options and while the above fastpacking route and option is probably the ‘ideal’ way to explore the area, we wanted to break options down into manageable junks.
Areas to explore:
Knutshøe
Galdhøpiggen
Surtningssue
Besseggen
Besshø
Schedule:
Day 1 – Travel and overnight at Bygdin area.
Day 2 – Knutshøe route and then drive to Spiterstulen (2 hours) to either wild camp or stay at the DNT hut.
Day 3 – Climb Galdhøpiggen and then drive to Gjendesheim to stay in the DNT or wild camp.
Day 4 – Take the first ferry from Gjendesheim to Memurubu. Pitch tent or check-in at DNT and then do the Surtningssue route. Overnight at Memurubu.
Day 5 – Besseggen ridge to Gjendesheim – You can send luggage/ tent on the ferry so that it will be at Gjendesheim when you arrive from the trek. Overnight in either DNT or wild camp.
Day 6 – You can either travel home OR add an extra day with the climb to Besshø and return to Gjendesheim for an additional overnight wild camp or DNT.
Day 7 – Travel
Please note:
Make sure you book the ferries in advance here. They get very busy, particularly the first one from Gjendesheim. If you have a car, you need to stay at the Reinsvangen ‘Long Stay’ car park (here,) make sure you pay for parking to cover the duration of your stay. A shuttle takes you to the ferry or you can walk, approximately 1.5 miles. When possible, book the DNT’s you require in advance.
THE ROUTES
Knutshøe
A short drive from Bygdin, Knutshøe is a great introduction to Jotunheimen. Many consider Knutshøe a more challenging route than Besseggen? However, it is very much considered the younger brother or sister.
The total route is approximately 12km taking an anti-clockwise loop. You reach a high point of 1517m and in total you will accumulate 700m +/- while covering the distance. It is rated as ‘difficult’ and without doubt, it does have some exposure. Depending on experience and speed, the route could take up to 6-hours. However, moving fast and light and combining running and hiking, it is easy to complete in well under 3-hours. All the difficulty is in the first half of the route when you climb up and then descend. Once down, you have a flat 6/7km valley to cross back to where you started. GPX here.
Access to the route is from the main road and there is a small parking area that can accommodate approximately 20 cars. It is possible to wild camp here too. Either way, arrive early and start the route as soon as possible.
Note! If raining, this is NOT a good route to take. There is a considerable amount of rock both up and down and it can become very slippery.
Leaving the car park, follow the trail and when at a fork, go right and head up the climb. The route requires scrambling, some climbing and at several points you will encounter steep drop-offs.
Depending on experience, you may find some areas of the route really rewarding or terrifying. It is not a very difficult route; however, it does demand respect and patience.
At all times, the views are spectacular and ahead of you, on the other side of the lake, you have Besseggen completely in view pulling you in.
At the summit, you have a wonderful 360 view and if timed correctly, you will be able to see the ferry boats going back and forth on the lake below.
The descent is rocky, challenging and requires patience. Make sure hand and foot holds are secure and take your time.
Rock eventually becomes trail and before you know it, you will be at the bottom and next to the Gjende river. It is now possible to get water if needed?
You now go left and follow the trail back. At times, it’s easy to lose the trail so be attentive, as a recommendation, stick with the tree line and not the river. Your feet will get wet, guaranteed!
Once back at the car, take time to rest, change clothes and then make the 2-hour journey to Spiterstulen. En-route, there are possibilities to stop and buy food/ supplies.
Galdhøpiggen
The drive to Spiterstulen brings you straight to the start point for Galdhøpiggen. Having the journey out of the way allows for good recovery in the evening and an early start the next day. As mentioned, you can stay at the DNT or wild camp in this area.
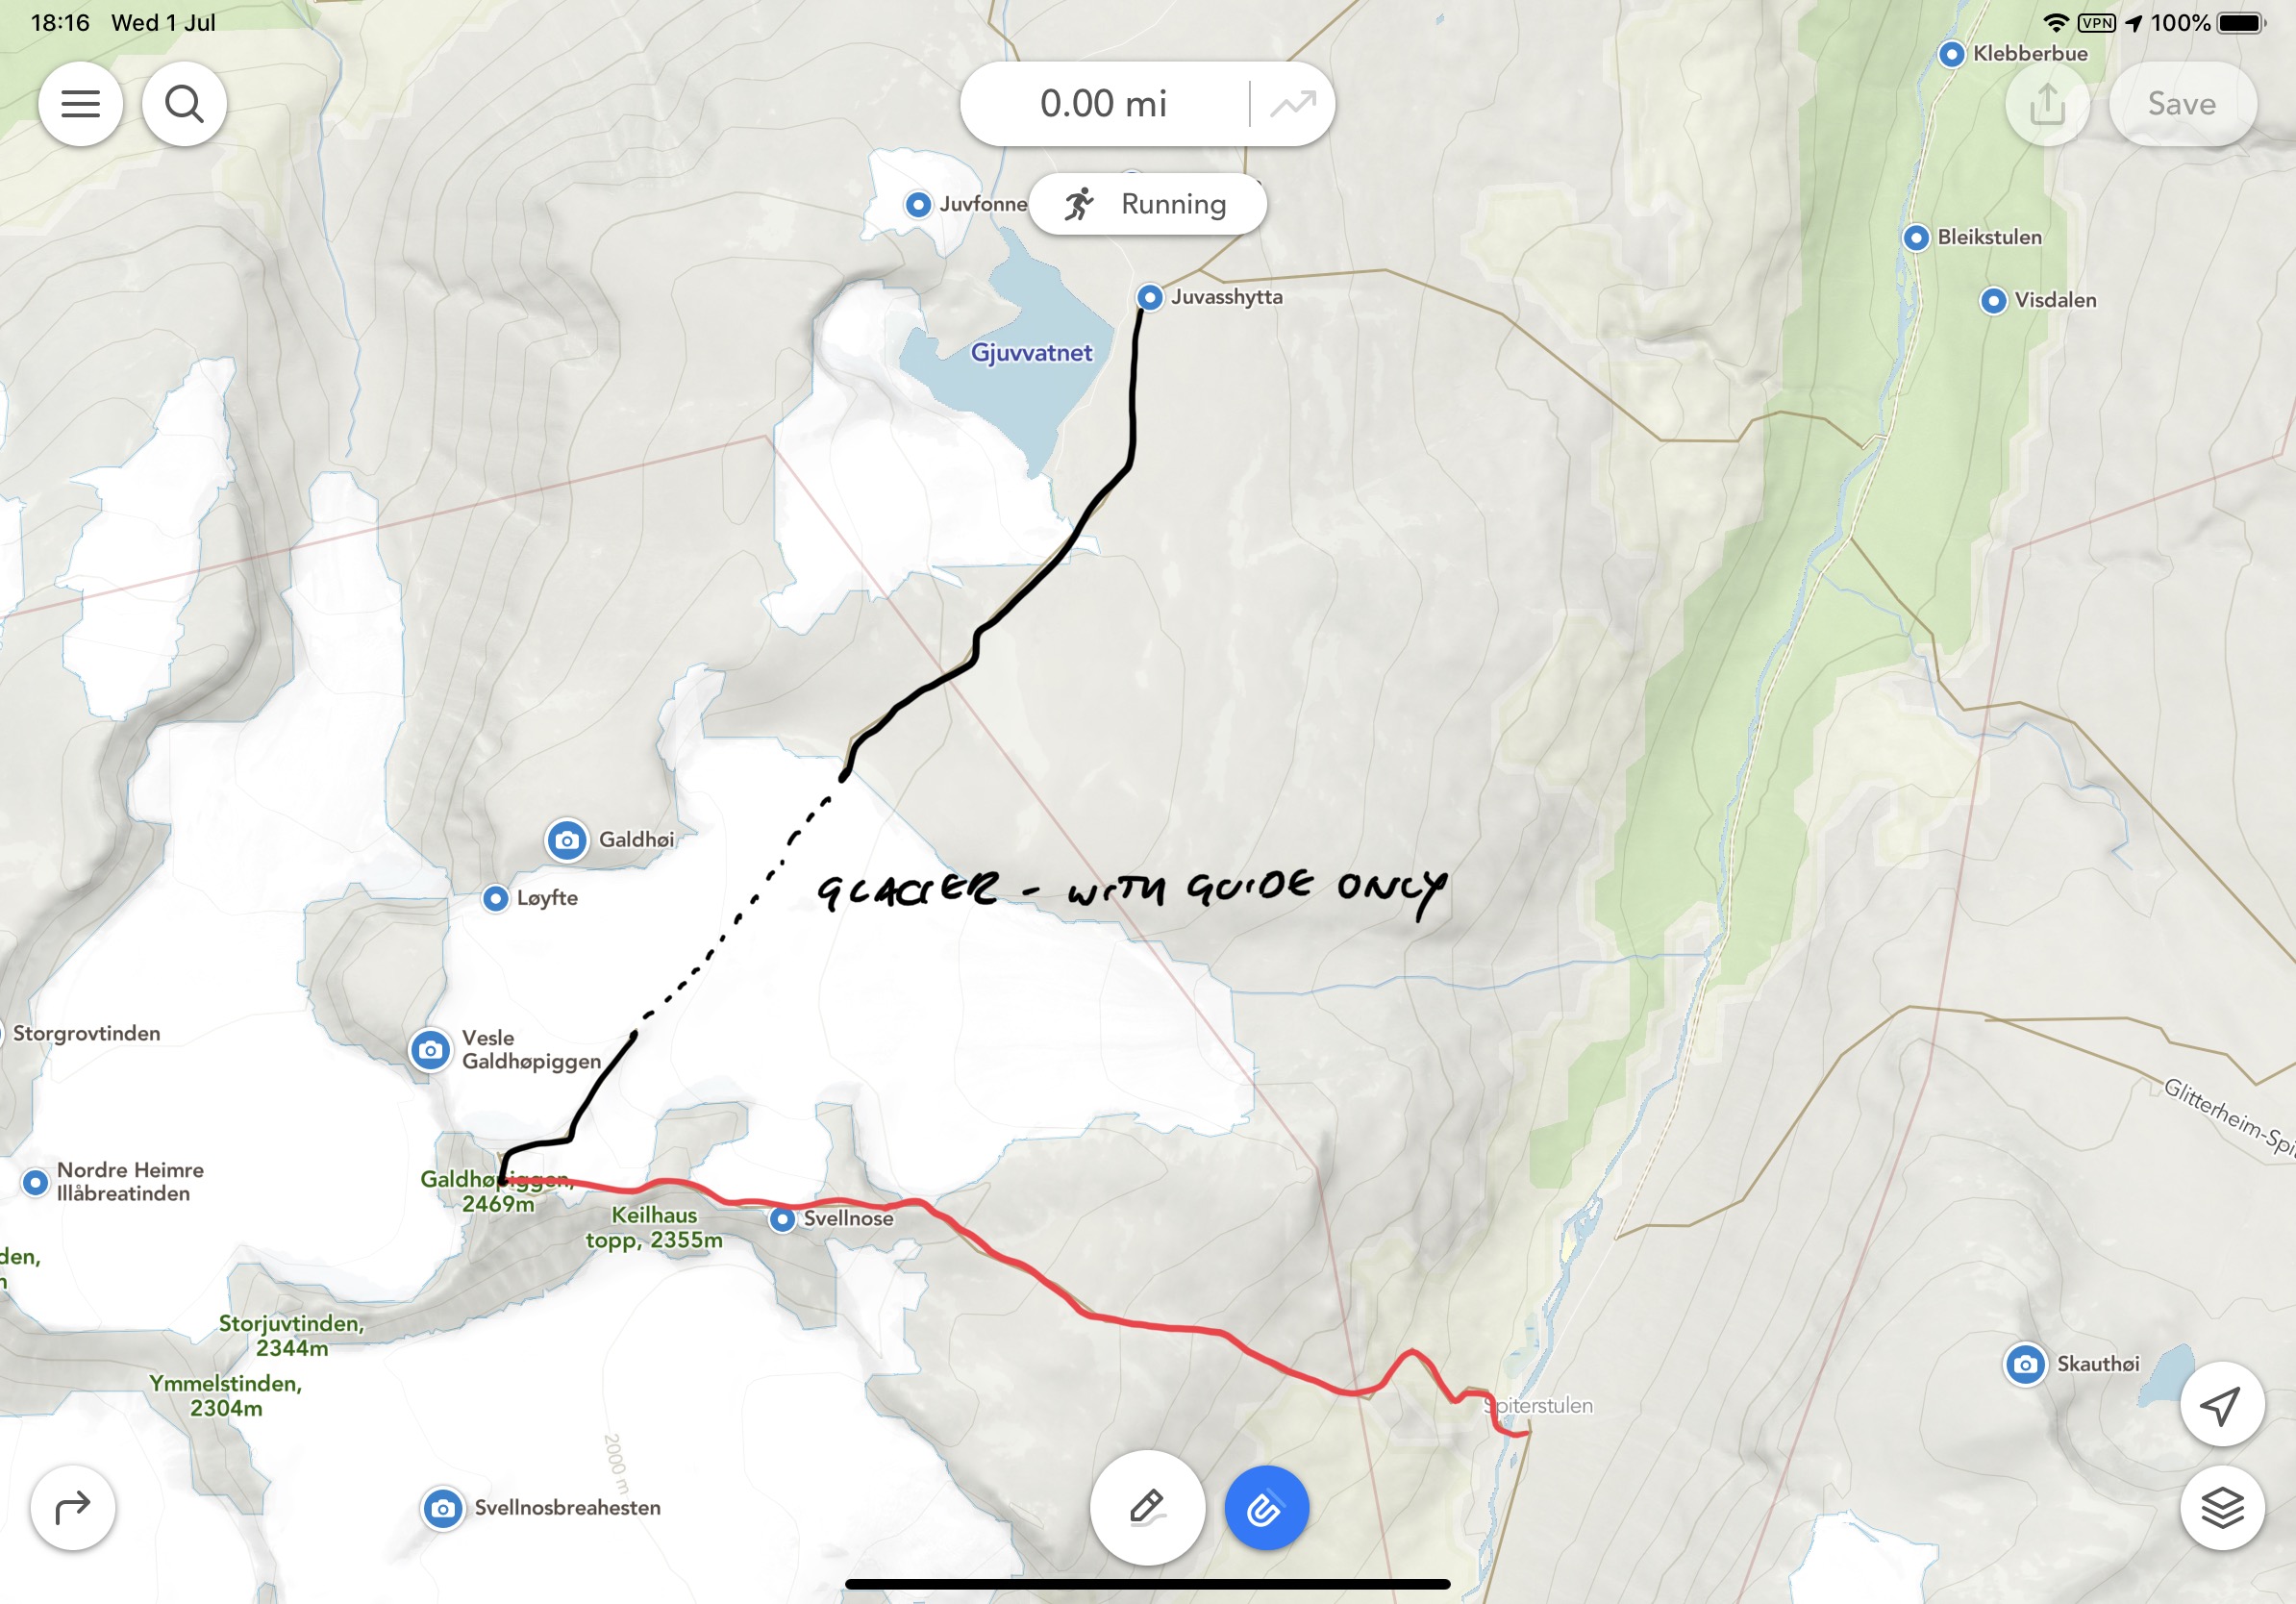
The highest peak in Norway (2469m) and Northern Europe is understandably a huge draw. For many, they take a guided trip leaving from Juvasshytta mountain lodge (1841m.) Guides take groups across the glacier. The glacier of course sounds appealing… However, it is an easy route with far too many people.
The route from Spiterstulen mountain lodge may not contain a glacier, but the 1400m vertical climb offers far more challenges. Especially if one travels in June as snow will still be present. The route is up and down is via a well-marked trail, GPX here.
Considered demanding, the route can take 8-hours plus, again, we completed the route in half the time.
During the adventure, you will scale two peaks, totaling over 2,000 meters in height, Svellnose 2272m and Keilhaustopp 2355m! The terrain is tough and requires concentration at all times. Made up of rocks and boulders, for much of the time you are constantly piecing together a jigsaw puzzle to find the best route through. In wet weather, the route is very dangerous. Remember to follow the red “T”s that indicate the trail.
At times, you will cross snowfields and of course, stick to well used routes. Take no risks on the snow!
Several points can take you very close to the edge of the ridge. At all times be attentive, not too much of a problem in good weather, but in poor visibility you need to make sure of the route.
As you go up you feel several times that the summit is ahead only to reach a peak and then see several more in the distance. The final push becomes obvious as a hut is at the final summit and you will probably see a stream of people coming in from the right who have crossed the glacier.
At the summit the views are magnificent and well worth all the effort. An early start may well guarantee you some quiet time and space.
You descend via the way you came and in all honesty; due to the amount of rocks, it may well be more difficult to go down? Certainly, if you have tired or sore knees, you will feel every meter of the 1400m.
The route out and back is approximately 14km.
If you had an early start, you will be back by midday/ early afternoon and then you can take the 2-hour drive to Gjendesheim.
At Gjendesheim you can stay at the DNT or wild camp. This allows you a good night so that you can get the first ferry the next day.
Surtningssue
Make sure you have a place booked on the first ferry from Gjendesheim to Memurubu. This is typically 0745 arriving at 0805.
On arrival at Memurubu you can pitch your tent (got to cabin and pay) or go to the cabin and check-in for your booking. Note, the cabin here is not a DNT and we recommend you book here.
Once ready, you can then start the Surtningssue route. This, in our opinion, is a hidden gem and is often neglected as Besseggen takes all the glory.
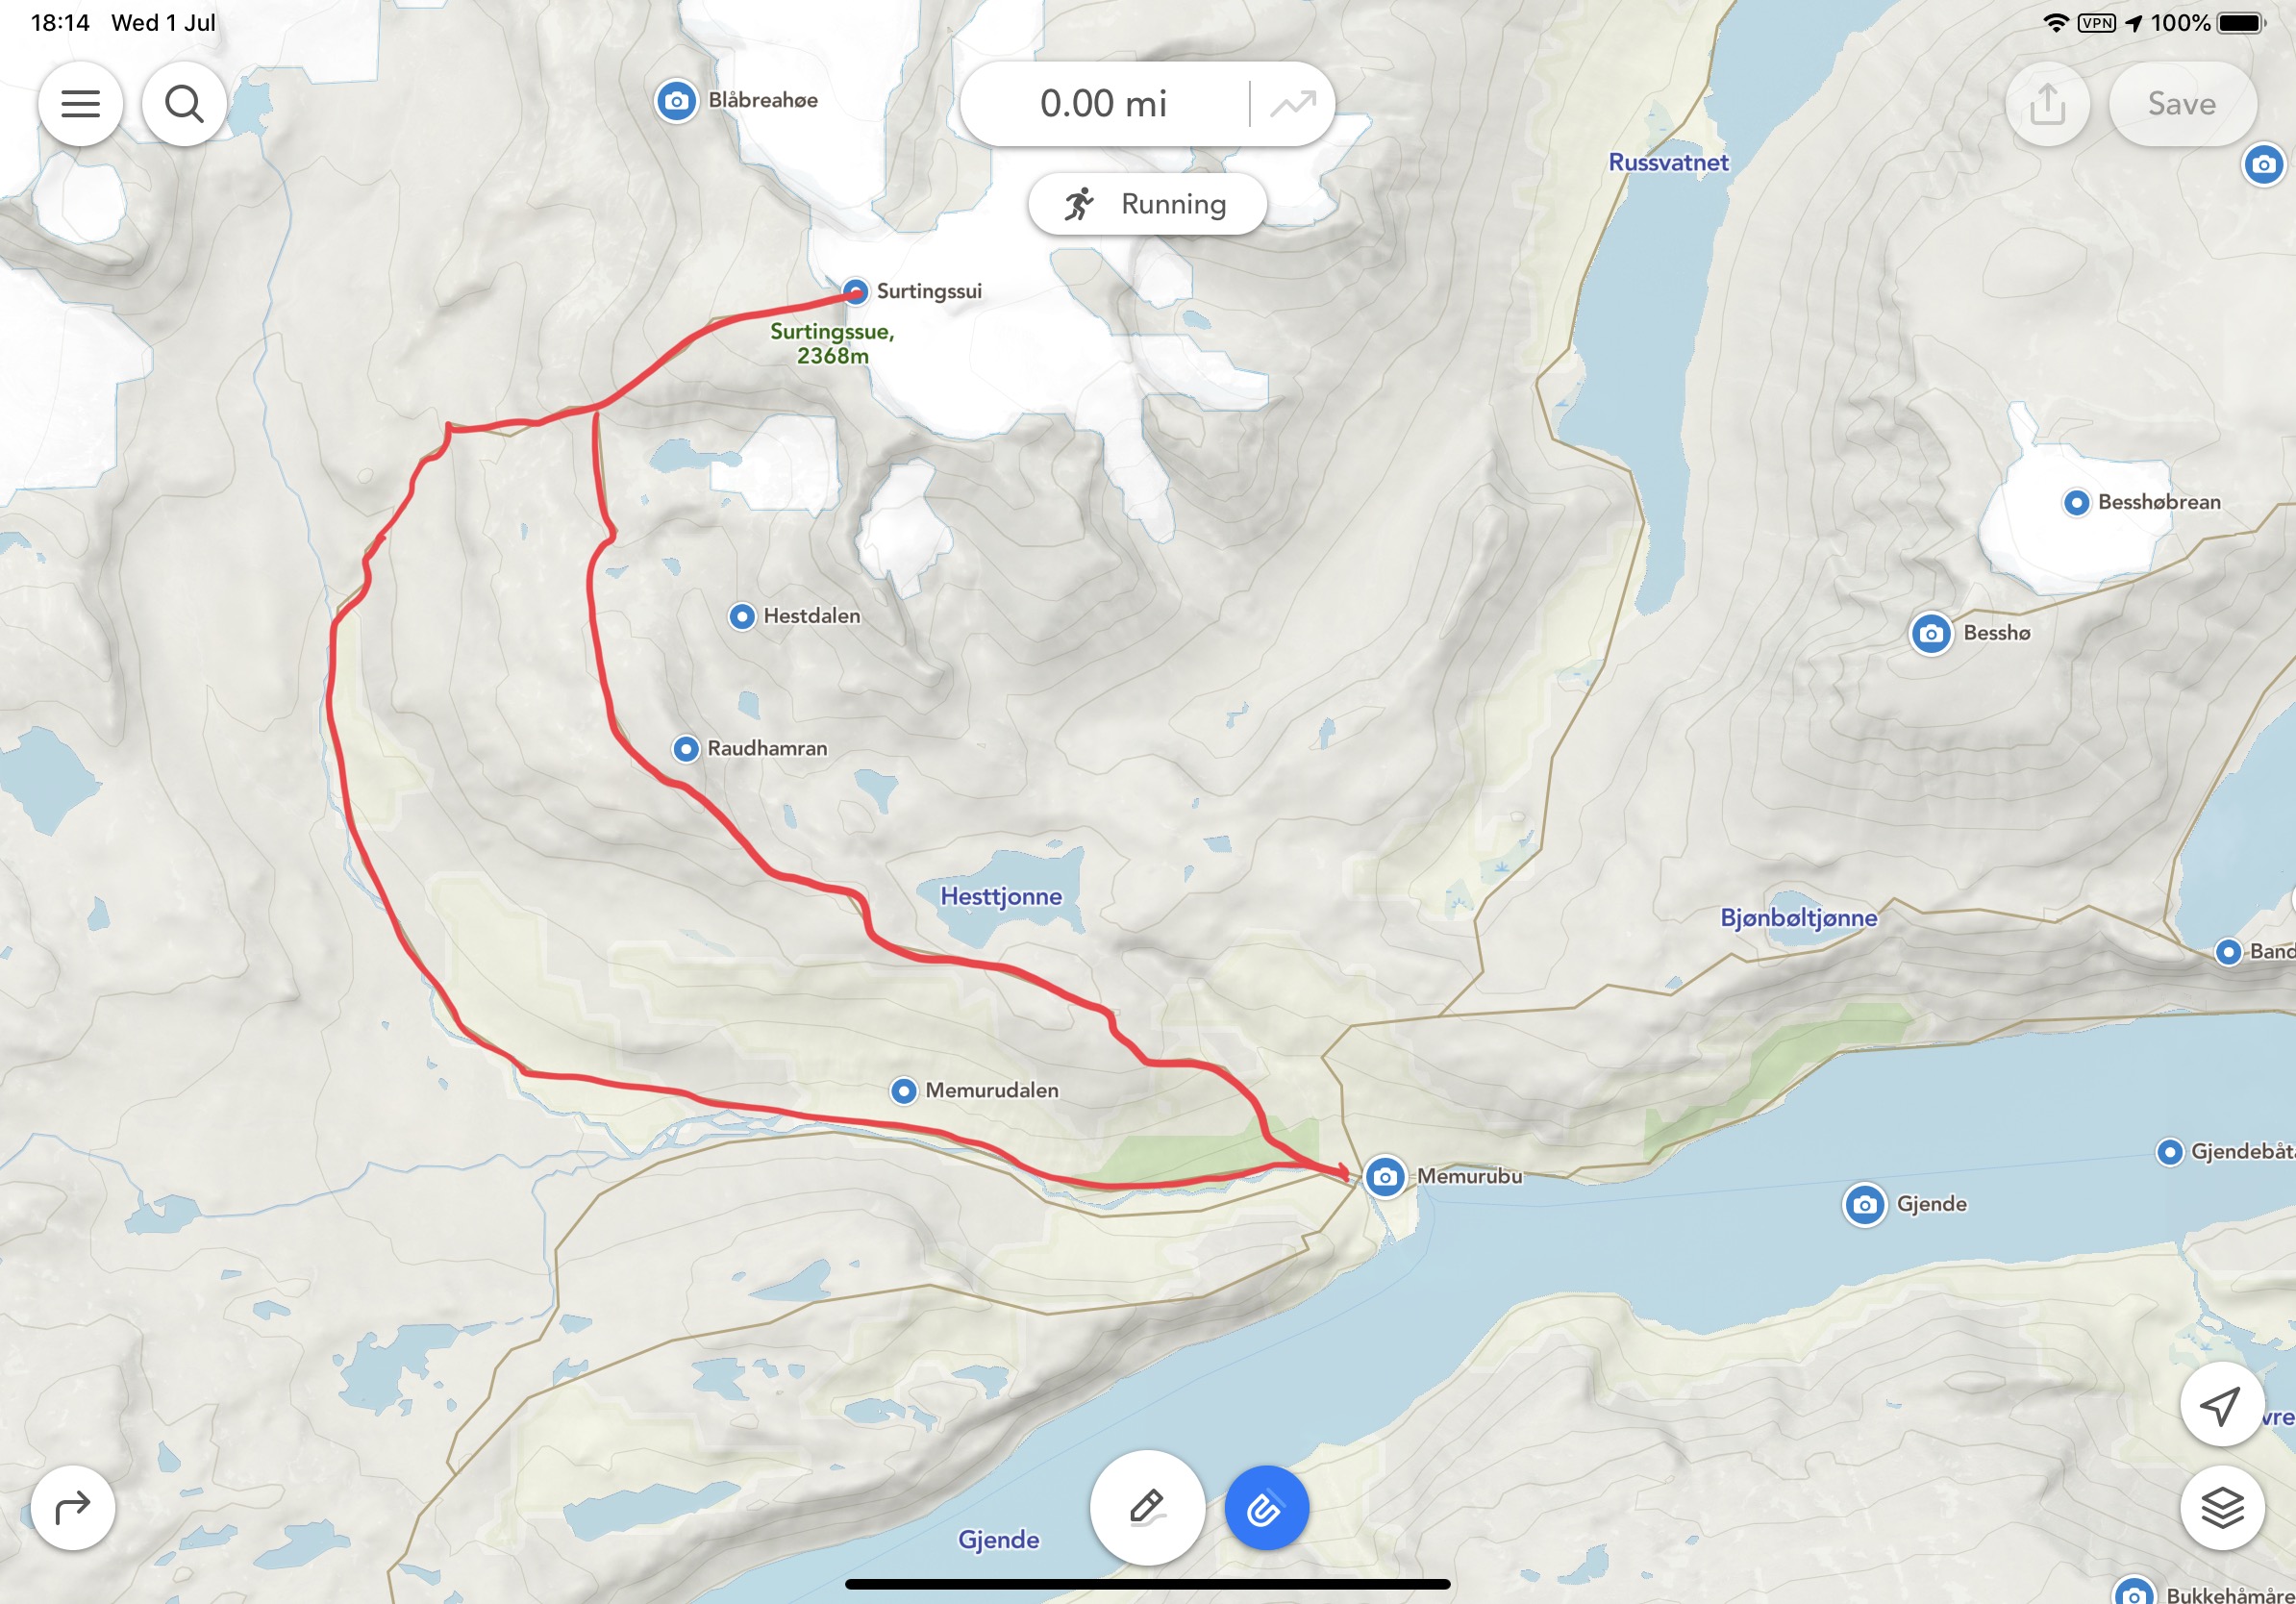
At 24km long, it’s a great day out that offers many challenges and importantly, you will see hardly any other people. On our trip, we saw nobody.
Leaving Memurubu the route is clearly marked. Make sure that you branch left when the opportunity arises. This will provide you with a clockwise route to the summit at 2368m and then back to Memurubu via a different route.
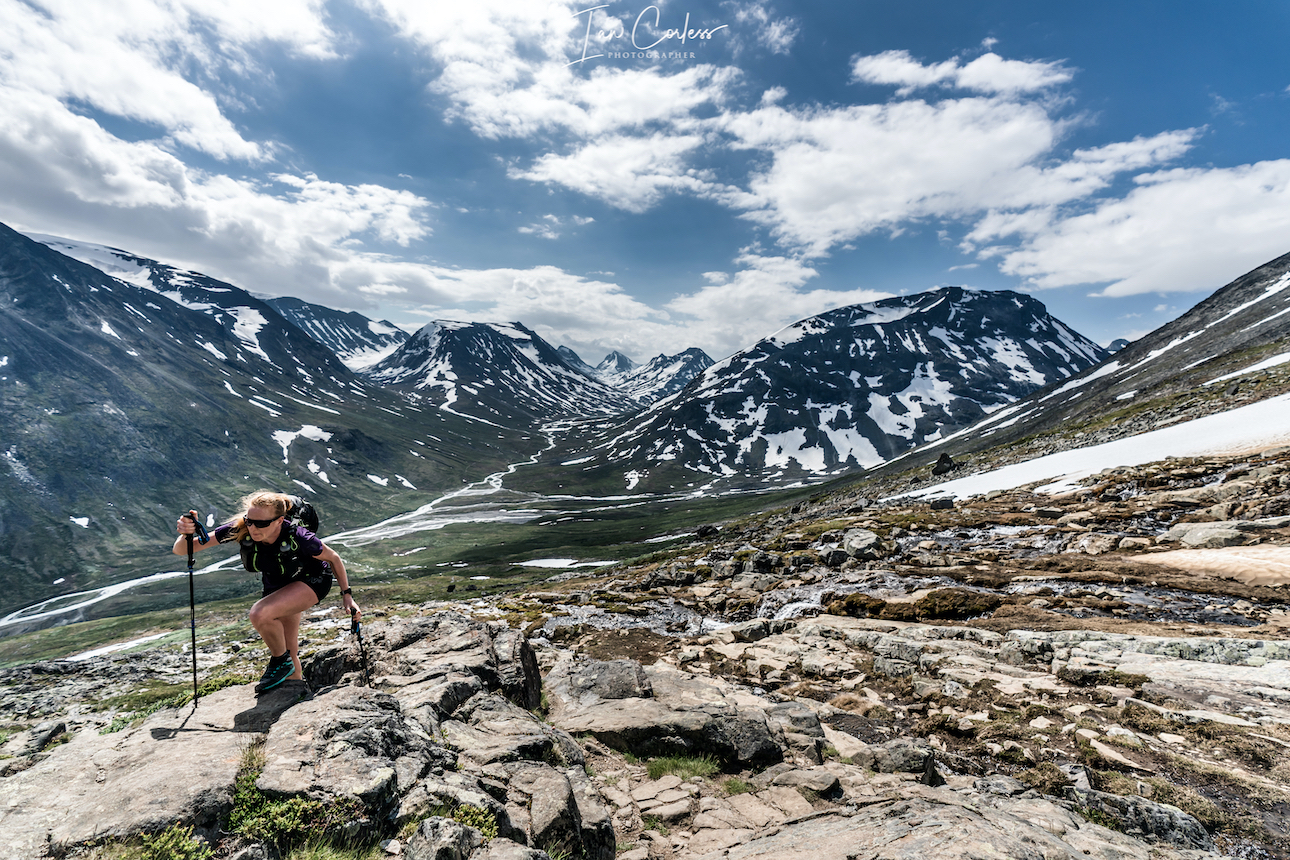
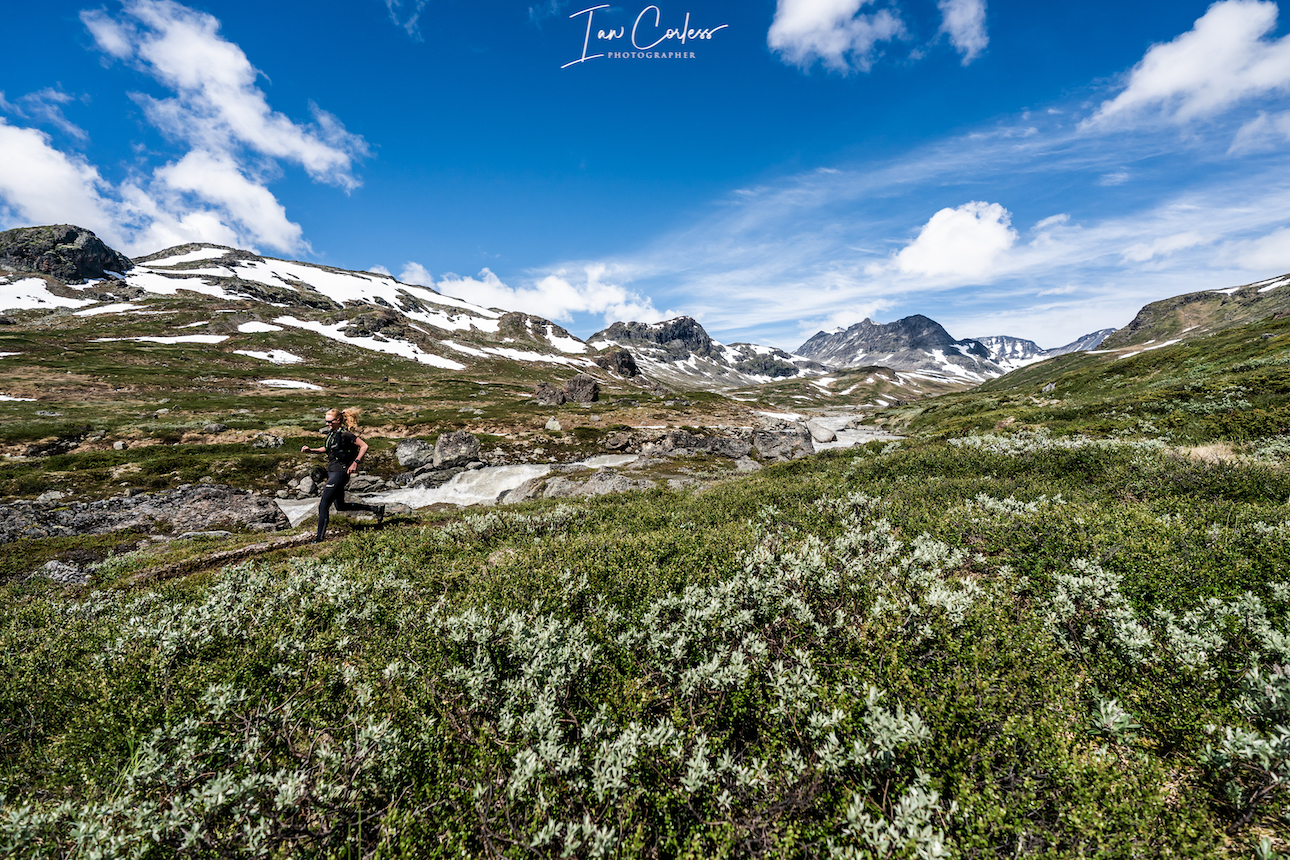
The first 8km’s are single-track trail that is very runnable. The views are stunning and only get better as you move up the trail. One advantage of experiencing the trail in June is lingering snow.
Once through the valley you start to head east. It is definitely worth having the GPX route (here) available either on a phone or watch so that you can stick with the route. Although marked, it has considerably less markings than other routes and often you are following stone cairns.
From 8/9km the route now winds up to the summit through rocks and boulders. Care is needed! At approximately 11km the trail will split with a very clear red sign showing a left and right option. This is where you go left to the summit. On your return, this is the place where you split and take the ‘other’ route back to Memurubu and therefore creating a loop.
The trail up is now steep with several false summits. You will finally see a stone hut that is open and available for shelter if required. The final push to the summit is approximately another 200m. For those in the know, they say the summit provides the greatest view and panorama of Jotunheimen.
It’s exposed at the top, airy, with plenty of potential hazards, so, take care.
The descent is via the same route until you reach the red marker. Now you veer left. Once again, the terrain is challenging as there are countless rocks and boulders.
For most of the way, the route is well marked until the final km’s. We lost the trail but could see Memurubu ahead and therefore self-navigated back to the cabin.
This route is a stunner. We felt alone and isolated. We saw nobody and encountered wild reindeer with their young.
Besseggen
Besseggen is a classic ridge that ‘must’ be done. Some Norwegian’s say that you cannot be Norwegian until you have done the route. It’s a point-to-point route, so, plan ahead and send any luggage/ tent with the ferry boat. They will have your luggage waiting for you after the trek at the ferry port in Gjendesheim.
At 14km long, with approximately 1100m of vertical gain it may not appear to be a too demanding route? However, many consider it is! Many take 8-hours to do the route and 10/12-hours is not unusual. GPX here.
For perspective, there is a mountain race that takes on the exact route and the course record is an unbelievable 1hr 15min 40sec by Thomas Bereket. Trust me, if you experience this 14km point-to-point, you will wonder (continuously) how is it possible to run this so quick? Kilian Jornet ran the race in 2016, along with Thorbjørn T. Ludvigsen, Kilian won in 1.17.54.
We completed the route in 3-hours 30-minutes and that was with many photo/ video stops.
The route is very, very popular and we therefore recommend you start early. One advantage of running and fast hiking is you soon catch anyone ahead and trust me, you want to be alone as much as possible to experience the trail and views.
All this who stay at the cabin or camp will start (usually) before 0800 and then the first boat arrives at 0805 releasing another wave of people.
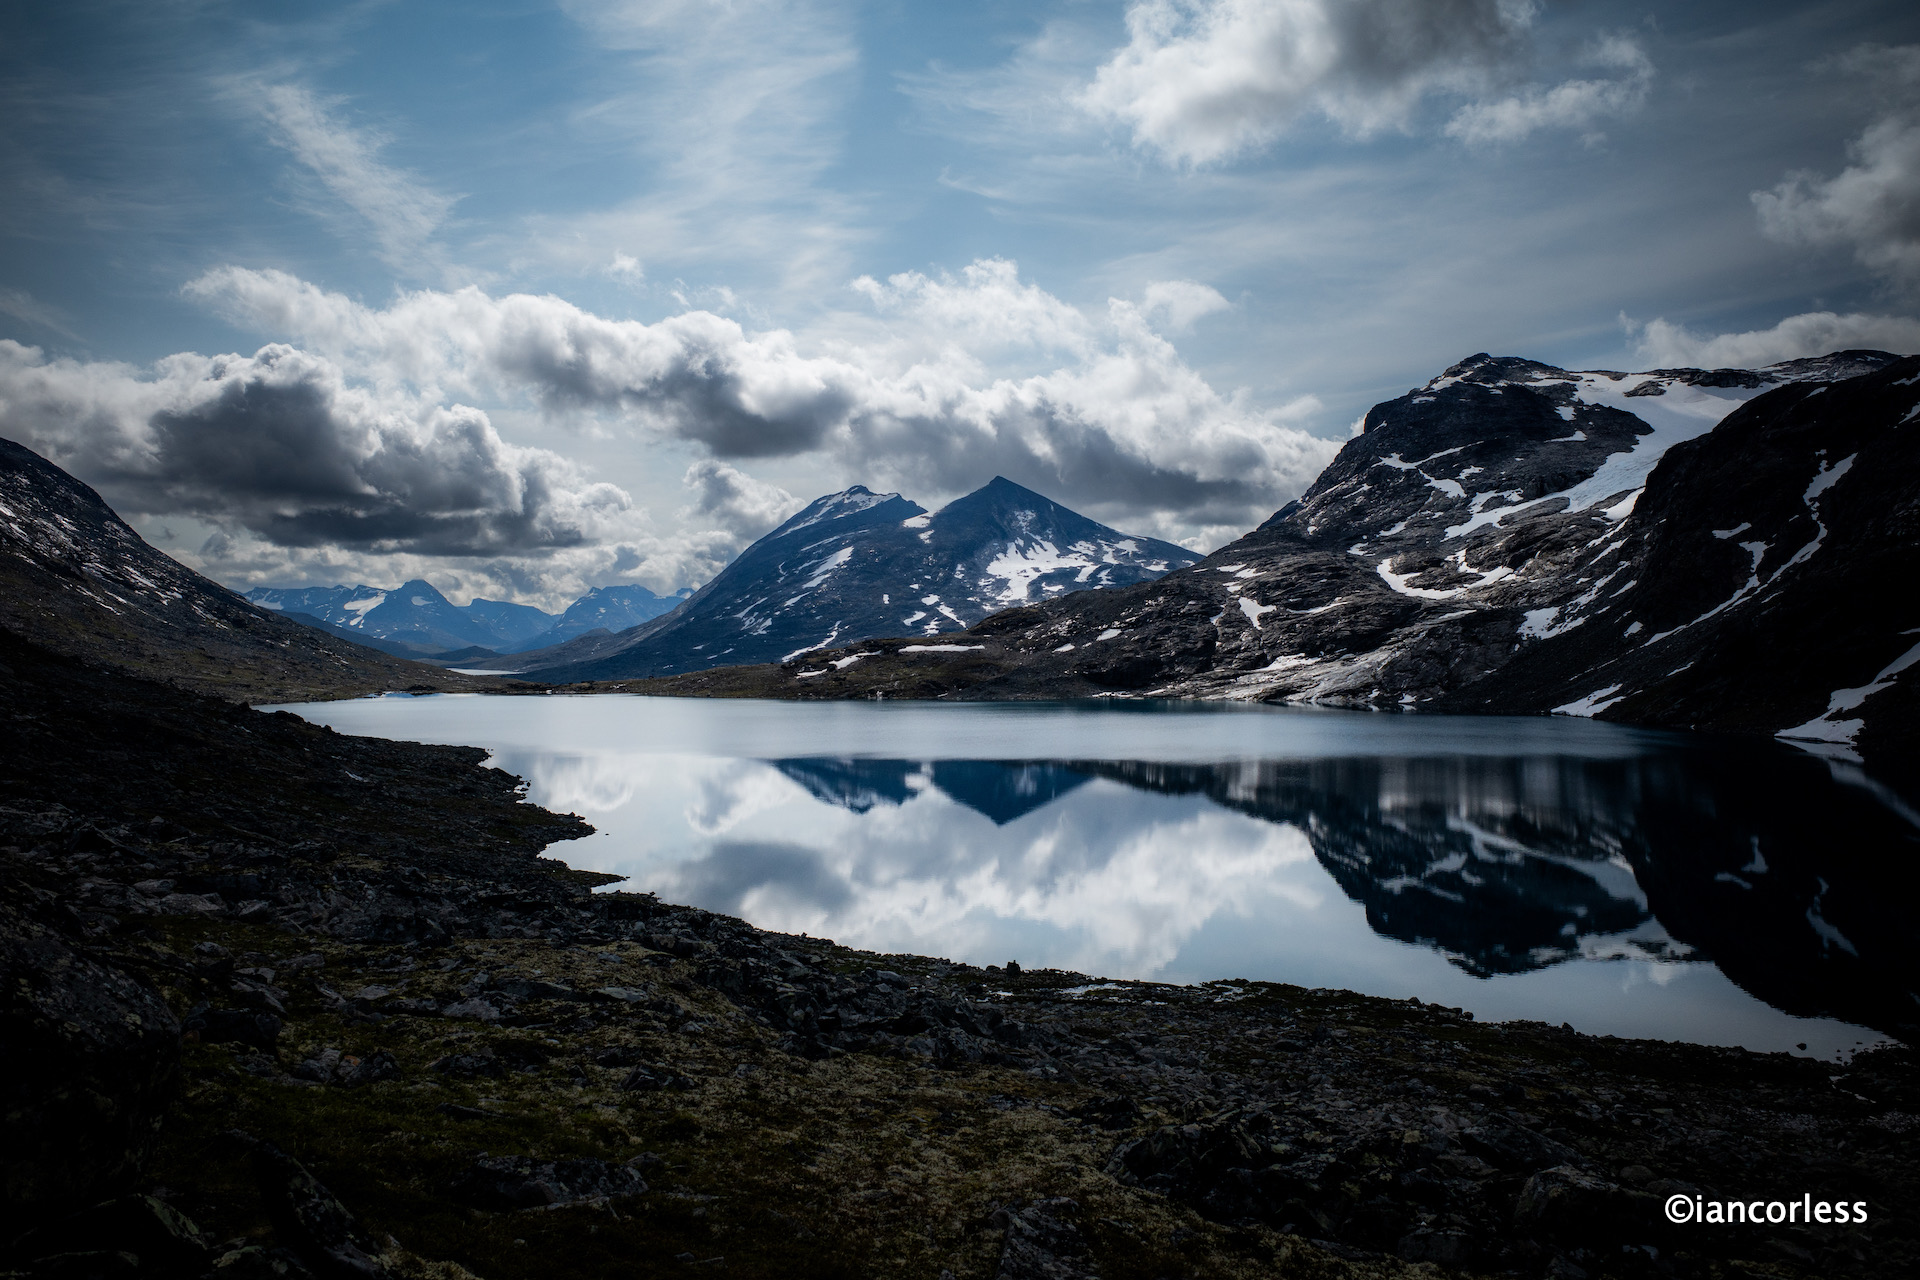
Characterized by the colourful emerald Gjende and deep blue Bessvatnet lakes, Besseggen ridge splits the landscape. It’s dramatic and bold and in wet weather, treacherous, so be careful!
Leaving Memurubu the trail immediately rises up and twists, mixing rock and single-track. It’s a fun trail and the first plateau already provides great views. You will pass Bjønbøltjønne lake, a good opportunity to get water if needed? Continuing up, eventually another plateau arrives and now you have a stunning view of the Besseggen ridge. It’s quite intimidating. To the right the Gjende lake and you will clearly see Knutshøe which looks fantastic.
The trail now drops, it is steep in places. Bessvatnet lake (1374m) is to your left and you walk along its edges with Besseggen looking down on you.
Bandet ridge is a significant point with approximately halfway covered and Besseggen the next challenge.
Rising 300m, Besseggen (in my opinion) is less intimidating when climbing, however, there is plenty of opportunity for exposure. It’s relatively steep but there are plenty of foot and hand holds. It’s worth stopping many times for photos. The views are remarkable.
The steepest section comes towards the end but does not last long and then you are on a plateau that gently and continually rises to Veslfjellet (1743m) which is the highest point.
The trail is now very flat and after about 1 kilometer you reach a trail junction. Follow that trail to the right down towards Gjendesheim. The route now twists and bends. Follow the markers and in here the trail is steepest with many rocks. Take care, they can be slippery, even in dry weather.
Gjendesheim ferry finally comes to view and then the final 1 or 2km is easy to the finish.
If you sent luggage with the boat, it will be available under the wooden shelter at the port. A shuttle bust will take you to the car park for the journey home.
Or, you may wish to wild camp or sleep at the cabin and the following day tackle Besshø.
Besshø
At 2258m, Besshø is 500m higher than Besseggen and it is a trail that sees little foot fall. In many respects, it is like Surtningssue and as such, it has a huge attraction.
From Gjendesheim it is an out-and-back route of 22km with 1300m +/-. It’s a route that could take 12-hours but if moving fast and light, sub 6-hours is perfectly achievable.
The route starts with the end of the Besseggen route but instead of turning left for Besseggen, you veer right in the direction of Russa/ Glitterheim.
Bessvatnet lake will appear on the left and eventually you will cross a small bridge in the eastern corner. Cross the river you will see two small cabins on the left, now follow the trailer 2 to 3 miles north on flat/ boggy trail. Besseggen will be on your left and at the far end of the lake is Bandet which you crossed just before climbing Besseggen.
Look out for the right turn that leads to Besshø summit. The climb is at times demanding and marked with stone cairns which often disappear. It’s easy to lose the route so it’s advisable to have a GPX available (route here). Depending on the time of year, you may need to cross snow fields – care needed. The route is very rocky and strewn with boulders of different sizes. Many are loose, so, caution is required. It’s a challenging route but visually stunning.
The return route is via the way you came.
RECOMMENDATIONS
Never underestimate the mountains and the environment in which you are exploring. June in particular is the start of the hiking season and as such, snow can be a factor on all of the above routes. This adds an additional potential for injury and problems. Particularly as the snow is melting and this can create snow holes, snow bridges and crevices. Do not take any risks and follow established routes and existing footprints.
It is definitely worth carry Micro-Crampons as a safety measure, particularly in June and September. Also, trekking poles are a great addition but not essential.
Make sure you check in with DNT cabins for all the routes and check conditions to make sure that you have no surprises.
Weather is crucial and many of the above routes would become very dangerous in wet weather. Rocks and boulders in Jotunheimen are everywhere, when wet, they can be treacherous. Boots are always recommended for hikers but if moving fast and light, top quality mountain running shoes are perfectly acceptable on experienced feet. I cannot emphasize enough that grip is essential! You need an outsole that works on wet and dry rock. Running shoes are very personal but recommendations are VJ Sport MAXx and XTRM, Scott Supertrac RC2 and inov-8 Roclite.
It may be 30deg next to the fjord and glorious sunshine, but at the summit, it can be below zero, blowing a gale and torrential rain. You must take personal responsibility and be prepared for all conditions. At a minimum please take:
Suitable pack
Hat
Gloves
Warm insulated layer
Warm trousers
Waterproof jacket/ pants
Food for the duration of the hike and some contingency
1,5 ltrs of water (which can be replenished on all the routes via streams/ waterfalls)
Take water purification tablets as a just in case and consider a water purifier such as MSR Trailshot (here)
Map/ Compass
Charged mobile phone with a suitable App such as ‘Footpath’ (here)
Cash/ Card
Garmin InReach or similar
Bivvy bag
Sunglasses
Sun cream
Plan your routes, be realistic on timings and always start early. One of the huge advantages of outdoor activity in Norway is daylight. In June, July, August it is light at 0300 and goes dark after 2200 hrs.
CONCLUSION
Jotunheimen is to mountain lovers, what Disney is to fair ride lovers.
It’s a playground of trails, routes, summits, views, experiences and wildlife all wonderfully interconnected with marked trails and DNT cabins.
This article is created as a gateway to the area knowing only too well that it will whet your appetite for other adventures.
As mentioned at the beginning, the best way to explore this area is by foot and we are sure that once you have followed our weeklong adventure above, you will already be planning to return and explore.
In comparison to our first Exploring Norway article on Hardanger, I would consider Jotunheimen a more challenging environment, so please consider experience and fitness when contemplating any of the above routes.
We cannot emphasize enough the role of weather and the impact it has on all of the above recommendations. The mountains will always be there, cancelling a planned route or turning back is acceptable and wise.
PERSONAL NOTE
Special thanks to Abelone Lyng who has extensive knowledge of Jotunheimen. Her experience was invaluable in planning routes and making a workable itinerary.
Please support this website. I believe everyone deserves to read quality, independent and factual articles – that’s why this website is open to all. Free press has never been so vital. I hope I can keep providing independent articles with your help. Any contribution, however big or small, is so valuable to help finance regular content. Please support me on Patreon HERE.


 Rock eventually becomes trail and before you know it, you will be at the bottom and next to the Gjende river. It is now possible to get water if needed?