There is no better way to kick-off a new year than arriving in Lanzarote for a week of good weather and all things running.
2025 signifies 19-years of training camps for me in ‘Lanza!’ They have changed and tweaked over the years and for the past 8-years, the current trail running format has been the template on how we tweak and develop each camp.
For 2025, we actually scaled the camp back to a smaller format, despite many requests to attend the camp, we kept it small with under 25 participants.
This was a significant step in ensuring smaller run/walk groups and the ability for everyone to get to know each other. It really worked, I’d go as far to say it was the friendliest and most cohesive camp in many years.
To ensure happiness on the trails, we had a core team of four guides, Pierre Meslet, Abelone Lyng, Hanna Bradshaw and Ian Corless. In simple terms, we break the guides down into groups of:
1. Faster running.
2. Running with some walking.
3. Walk/ run and
4. Walking.
Groups of 3-6 people really work and this was a huge success.
Our days follow a similar format:
0900: Morning a run that extends to the afternoon based on the distance. We have different routes and distances for each day.
A break for lunch.
1500: A talk and or workshop.
1745: Recovery run of 3-5km.
1900: Optional evening meet up for drink/ chat before dinner.
Exception to the above is one evening we do a run and overnight bivouac camp.
The last day is ‘long run’ day which starts at 0800 and covers between 30km to 45km.
Every edition of the camp, we get a great variety of abilities and experience, 2025 was no different. Up at the front we had a multiple MDS podium champion, at the other end, we had a couple who had never run longer than 10km before. It’s what makes the camp great. Mixed abilities and everyone providing knowledge.
Our bivouac night, as always, was special. Due to some glow sticks, a portable speaker and some good tunes, it was even more special. Nothing like a mini rave in a volcano.
If you do all our sessions, typically weekly mileage is around 160km/ 100 miles. It sounds a huge amount huh? It is, but on the camp recovery and downtime plays a huge roll and even the relative novices were accumulating big distances and believe it or not, our duo who had never run longer than 10km before both did just over 30km’s on the last day, a huge success for them and the camp!
A key to the recovery process for each runner is Pierre Meslet offering the option to book massage and Luke Read from Airbornfit offering strength and conditioning.
Of course, nothing is compulsory, participants can miss sessions as they wish, however, this rarely happens. The camp takes hold and neary everyone surpasses persoanl expectations or limits.
We conclude the camp with a group meal; a great opportunity to relax and clebrate the achievements of all.
The only sad moment comes with the closure of the camp and onward travel home.
However, as I told all our 2025 participants, it’s only 51 weeks to the next camp and already, many have signed up with eager anticipation of what will be a 20 year celebration in 2026.
Fancy joining us for one of the best running weeks ever?
Who is the camp for? Anyone who is interested in running. We cater for everyone and we specifically cater for those who are doing stage races such as Marathon des Sables. Ultimately, its just a great week of running, be that for stage races or single stage races of any distance.
A key consideration for any self-sufficient multi-day journey is weight. Additional weight is just a burden, so, fine tuning equipment for your adventure is key.
In races such as Marathon des Sables, there is a requirement to be completely self-sufficient with just water and a shelter provided.
So, in addition to the clothes you are wearing, you must carry all the food required for the week, any luxuries and importantly warm layers: sleeping bag, sleeping mat, jacket and so on.
The debate, ”Do I need a warm jacket?” takes place every year and in all honesty, the most truthful answer is yes and no! It doesn’t help does it! The reason being, in a hot year, the need for a jacket can be very minimal or not at all. However, in a cold or cooler year, a jacket can be a life saver. So, the best answer here is usually have a jacket, take it with you and before the race, whilst in race location, make a decision based on the current weather and forecast.
Sleeping bag in some ways is easier to answer, yes, you need one! However, that is only the start of the process with a sleeping bag, you need to take into account key questions:
Do I sleep warm?
Do I sleep cold?
Am I tall?
Am I short?
Do I have wide shoulders?
Do I get cold feet?
And the above list can go on.
Also, budget is a consideration, there are many sleeping bag options and prices vary greatly.
Ultimately, for a jacket and sleeping bag we want the following:
The lightest possible.
The warmest based on our needs.
The most flexible system.
I personally have always been in favour of having a jacket, mornings can be cold and evenings can be chilly, so, the option of a jacket is great. Also, if you have a jacket, you can look at taking a lighter, less warm sleeping bag and looking to ‘boost’ warmth if required by wearing the jacket inside the sleeping bag.
With all the above in mind, UK brand PHD have come up with a potentially perfect solution.
The ULTRA JACKET and the DESERT RACE HALFBAG.
Before discussing in-depth, PHD understand the need for weight v warmth, they also understand layering and the benefits of top-quality ethically sourced down.
The ULTRA JACKET is super light at 200g and is filled with 1000 fillpower down, good for temperatures as low as -5 deg.
The DESERT RACE HALFBAG is a half size sleeping bag weighing 240g. This bag stops at the waist is filled with high-quality 950 fillpower down and is designed to keep legs and feet warm. However, the technology does not stop there. Understanding that deserts can be windy, they have added a neck-length sand cover or extender to cocoon your body, arms and hands to cut out air movement. This allows the user to regulate warmth and comfort.
If it is cold, you quite simply add the ULTRA JACKET and then pull the neck-length sand cover over.
This combination provides a sleep/ warm system for well under 500g that packs very, very small. Effectively, with this combination of products, not only do you save weight, but you increase flexibility and options.
THE JACKET
The Ultra Jacket weighing 200g for a men’s medium is a high quality product filled with 1000 fillpower down giving warmth to -5 degrees. It is a simple, no frills product designed to be as warm as possible and as light as possible. The outer fabric is windproof which adds to the warmth. It does have hand pockets with no zips, again to save weight. There is a zippered inner chest pocket. Standard colour is black but it is possible to choose red and as with all PHD products you can have a custom make with Hypershell or you can add a hood. You can also have a custom fit, specifying body width, body length and arm length.
Prices start at 498.00 UK pounds / 582 euros.
PHD say, “Our lightest sub-zero down jacket. A ‘K Series’ product. Warmth to weight at the limit of possibilities for extra-keen lightweight backpackers and mountain racers. Now also available in custom sizes.”
THE BAG
The Desert Race Halfbag is a simple, lightweight and effective solution for those looking to save weight, increase flexibility and still keep warm, it comes in a standard length.
The neck-length sand cover is a brilliant addition.
The addition of the neck-length sand cover increases warmth and flexibility on windy and cooler nights. Using top-quality 950 fillpower down, this half bag is incredibly light and packs small. It has stitch through construction ensuring down stays evenly spread with no cold spots. As with all PHD products, it is possible to have a custom make, for example add a zip, have it made short or long, choose a colour (green, red, black or white) or you can add Dri-LX outer fabric.
Prices start at 342.00 UK pounds / 400 euros.
PHD say, “Designed specifically for desert racing. From the legendary Saharan Marathon des Sables to the Kalahari’s KAEM, and the growing number of events in the Gobi, the Atacama, the Australian interior and all around the world, these events have their own particular set of challenges to overcome. Sweltering 40 degree (C) race days can give way to 4 degree (C) nights – that’s cold enough for frost – in which warmth, sleep and recovery play a vital part in preparation for the next day’s challenge.”
950. A newcomer to our range. European goose of rare quality. A high value alternative at the top levels of performance. We have introduced a wide range of options in 950 in response to the soaring cost of 1000.
1000. European goose down of unique quality with exceptionally large lively clusters. 1000 provides the highest warmth-for-weight performance possible from down and has been used in PHD products since 2008. Unfortunately, scarcity (and the fashion industry) continue to push up the price steeply every year. This rarest of all downs we reserve for the K Series, our lightest products right through the range from marathon ultralights to alpine kit and on into high mountain gear.
IN USE
Desert Race Halfbag with neck-length sand cover and ultra jacket with hood
The system is absolutely brilliant and I have fallen in love with the weight of the two items, the flexibility to adjust my sleep comfort temperature and when it has been cold, the down jacket really gives a massive boost and pulling up the neck-length sand cover encapsulates me so that I feel I have a full sleeping bag.
There are some important points to consider, the effectiveness (warmth) of the jacket and half bag is improved by using a sleeping mat which adds comfort and insulation from the ground. Also, I intentionally chose a jacket with no hood as I preferred the lighter jacket weight and the option to add a hat or beanie to increase warmth. It’s really simple, want a jacket or sleeping bag to be warmer, cover your head.
CONCLUSION
The combo of jacket and halfbag is now, without doubt, going to be chosen fast-packing/ multi-day option. It just makes sense. I have a really warm jacket for sitting around. I have a really warm halfbag and when the two are combined, I have a really excellent and adaptable system for sleeping. The light and storable sand cover is really simple, use it or don’t use it, no worries, but the extra security and protection this gives is brilliant. PHD are really on to something here.
With high quality down products and lightweight fabrics, they compress and adapt when packing, so, adding these to a race bag after packing they will take up little or no space. As an example, I used two small dry bags (3L) by Osprey and Sea-to-Summit and packed the jacket and bag away to see how small I could compress them.
Are there any downsides? Yes, the price. The jacket and halfbag in standard configuration will cost you 840.00 UK pounds/ 982 euros. That is a hefty price tag. However, if you look at the cost of a down jacket and full sleeping bag, the prices are comparable, +/-.
This offer by PHD does not come cheap and yes, you can shop around and find options that are considerably cheaper. I guess I look at this a little like buying a car, any car providing it has fuel and it is in working order, will take you for A to B. However, based on desires, budget and the desire for the best, you can do that A to B ride in a small Fiat or a Ferrari. PHD are coming at the Ferrari end offering a luxury bespoke product that is extremely light, packs really small, is perfect for the task that is required and for that, you pay a price!
Only you can decide if it is worth it!
I have been using PHD for over 10-years, I have used their Minim bags in the Sahara and the Hispar bags in the Himalayas. The ability to have custom features has been, at times, a luxury. My original Sahara bag had no zip to save weight, however, my next bag had a full-zip which allowed me the option to use it as a blanket/ duvet. The Ultra Jacket and the Desert Race Halfbag has taken things to a next level and in doing so, they have provided me multiple options for temperature regulation in varying climate conditions and I love this. Should I go to a very cold climate in the future, I could now use this jacket and halfbag in combination with my Hispar bag to give me excellent sleep comfort below -20degs, that is awesome.
PHD have always made a superb product, it is made in the UK with the highest quality products and importantly, ethically sourced down, which comes at a price. They may be expensive, but you get a top-quality product and excellent after service and care.
Reviews:
“It worked exactly as described. I consider the temperature ratings accurate. We had a couple of nights when the wind picked up and the sand blew. When this happened I was grateful for being able to pull the sand sheet on the half bag up over my head and use the drawstring to keep the sand out” – Gareth Scobie (Marathon des Sables competitor).
“The sensation of immediate warmth in the Ultra Jacket is unsurpassed. The 1000-fill is so high-lofting, it puffs up as if a pump has been attached. Rare and wonderful.” – Judy Armstrong in TGO Magazine.
“For me the half bag and pullover was perfect, probably the best bit of kit I bought. To be wearing the top half as a jacket in the evening, then slip into the lower half was simplicity itself. It was plenty warm enough…” – Dain Jensen (Marathon des Sables competitor).
Episode 245 of Talk Ultra is with Ferdinand Charriau, head of communications for Marathon des Sable – The Legendary. In this podcast we discuss the final details as the 2024 edition is just weeks away.
The stock cubes provide a better and less aggressive provision of salt.
Water rations will not be as strict as in previous years, for example, at a CP, if you have 2 x 750ml bottles and a 500ml soft-flask, you can fill all three.
A 1.5ltr bottle will be issued at CP1 on the ‘long day’ so that it is possible to have a 3ltr capacity for the ‘long day!’
CP distances will be as usual 10 to 13km apart. HOWEVER, there will be intermediate water stations now, say at 6km +/- so you can access additional water.
There will be cold water at CP’s (not to drink) but the medical team will pour cold water to cool body temperature.
Stage starts will be between 0600 and 0730 depending on the stage and the length. For example, the ‘long-day’ will start at 0600. Most days will start around 0700 to 0730.
Email in printed format will not be provided. There will also be no email tent. However, there will be IP phones available for emergency use only. MDS ideally do not want you to use them, but, the option is there.
Mobile phones are allowed BUT you must not use them in bivouac – You must leave the camp in communicate in an isolated place. However, the MDS recommend being disconnected – be with yourself, and your tent mates.
Foot care will be as good if not better than before.
There will be fast response vehicles too – extra security en-route
There will also be medical runners – They will wear an orange bib and they will run the route for immediate response on the course.
There will be live tracking – access via the MDS website so people at home can follow.
Fuel blocks – If you have problems taking fuel. Fuel will be available in B1 and there will be enough for well over 200 people.
There will be a MDS shop in B1 selling all the mandatory kit – just in case!
Make sure you travel wearing your run apparel and carry you pack.
Meeting point is Ouarzazate airport on Friday 12th from 0800.
Be patient on arrival for passport control.
Bus transfer to B1 is approximately 6-hours. You will be given the road book. Also a lunch pack will be provided.
At B1 you will be provided a 5Ltr bottle of water, there will be a welcome briefing and then self-sufficiency starts.
There will be NO hot water provision in camp. If you want hot water, you provide it yourself.
Admin day will have a significant change and will be done via tents and not numbers as in the past, this will mean less wait time and more opportunity to sit in the shade.
Make sure you have original medical documents for admin day.
It’s important to have the minimum 2000 calories per day, but at admin, the team will not be very strict. Take personal responsibility. Have your food in bags for each day and then state the total calories in each bag.
There will be a medical emergency tent in the middle of bivouac. There will be more staff in the runner’s bivouac.
If there are any questions – email, contact on social media or call. The MDS team are available for you.
Wednesday 27th there will be an English and French broadcast.
There will be some new surprises, to be revealed in bivouac!
RAB have produced two state of the art sleeping bags in the Mythic Ultra 180 and Mythic Ultra 360 sleeping bags. Utilising the same technology, both bags offer low weight, small pack size, Hydrophobic Down and the ground-breaking TILT technology – Thermo Ionic Lining Technology. The TILT in real simple terms brings elements of an emergency space blanket incorporated into the design of the bags.
Offering best performance at weight for any comparable bag, both the 180 and 360 have been my ‘go-to’ bags since early in 2020.
Quite simply, amazing levels of warmth for low weight.
The RAB Mythic 180 has 180g of 900+ fill power Hydrophobic down and a comfort limit of 0 degrees and a weight of 390g. It’s a perfect bag for warmer weather and any adventure when low weight, small pack size and warmth are important. Perfect for multi-day racing for Marathon des Sables or similar and, is brilliant for fastpacking adventures when travelling in a self-sufficient manner.
The RAB Mythic 360 has 360g of 900+ fill power Hydrophobic down and a comfort limit of -8 degrees and a weight of 620g. This bag utilises all the same technology of the 180 and quite simply is warmer and heavier. Just like the 180, it’s the perfect bag for racing and fastpacking adventures in colder and more challenging conditions.
The recent 18-months have allowed me more time outdoors than ever before and almost weekly I have ventured outside on multi-day fastpacking adventures or overnight trips. The 360 and 180 have been on most of these trips offering low weight, small pack size and incredible warmth.
I am lucky, based in Norway, I get to fully experience the cold of winter and in summer, warm and comfortable nights.
An overnight fastpack in February and I was camping in -18 degrees on snow in a small one-man tent. The Mythic Ultra 360 with a comfort rating of -8 was not going to be enough for a cold night, however, I had planned accordingly carrying Merino base layers, down pants, and down jacket. When all combined inside the Mythic Ultra 360 I was cozy warm. This was an extreme test of the 360 and importantly, I think it’s important to understand how layering is an important element to the use of any sleeping bag. It offers incredible flexibility.
But the true test of the 360 has come on regular trips in Autumn and Spring when the temperatures are hovering around +5 to -5. In these situations, the bag has performed flawlessly providing low weight and incredible warmth all in a small package. The groundbreaking TILT really does perform and as mentioned earlier, it’s like adding a space blanket inside the bag. It’s heat reflective and therefore increases the internal warmth for minimal extra weight.
I consider the bag a game changer for its weight v performance but of course, this comes at a price. Expect to pay around £700 for this technology.
Using 7D ripstop nylon, TILT and excellent design, the Mythic Ultra 360 has been the most comfortable bag I have ever used. One would potentially think that just 360g of down would not be enough, especially for a -8 bag, but that is where the technology kicks in and that is why the price goes up. It’s the perfect bag alpinists, adventurers, and runners.
It has boxwall construction and trapezoidal baffles which allows the down to loft reducing cold spot risk. It has an ergonomically designed collar and hood that closes in around the head and neck reducing cold getting inside the bag and therefore allowing the warm air inside the bag no opportunity to escape. An anti-snag zip guard, angled foot box and short zip are additional features.
As you would expect, internal space is compromised, after all, this helps keeps the weight down. So, this may be a consideration, it’s suitable for someone up to 6-foot tall with comfort. After that, it would come down to personal comfort and needs. Shoulder width is 27 inches, hip width 21 inches and the foot width 16 inches.
FEATURES
The bag comes with a large cotton sack so you can store without compressing the down, it is also supplied with a compression dry bag. It has a ½ length zip on the left only. The down is Hydrophobic, so, it can get wet and retain warmth, an important feature. 7D Ripstop fabric and importantly the TILT technology is a USP to boost warmth thereby facilitating lower bag weight. Tested to EN1357:2016 standards, the Mythic Ultra 360 has comfort of -2, Comfort limit of -8 and an extreme limit of -27 (but I wouldn’t want to be in that situation!)
CONCLUSION
This is a high-performance bag and state of the art. If the cost is no problem and you require small size, low weight, and warmth, the RAB Mythic Ultra 360 should be on your list. It’s an amazing bag!
Mythic Ultra 180
At £550 the 180 has all the features of the 360 above and it has the same measurements: Suitable for someone up to 6-foot tall with comfort. After that, it would come down to personal comfort and needs. Shoulder width is 27 inches, hip width 21 inches and the foot width 16 inches.
It also has all the same features including the cotton storage bag, dry bag, 7D ripstop, TILT, 900+ Hydrophobic down and same great construction.
Quite simply, the Mythic Ultra 180 is a stripped down 360 designed for warmer temperatures and thus bringing even lower weight and pack size.
At 400g, it is perfect for racing or fastpacking when temperatures at night are expected to be 0 degrees or above, as such, it’s a perfect bag for Marathon des Sables or similar multi-day adventures. It’s also ideal for Mountain Marathon events and summer alpinism.
All the pros and cons listed above for the 360 are directly transferable for the 180.
FEATURES
The bag comes with a large cotton sack so you can store without compressing the down, it is also supplied with a compression dry bag. It has a ½ length zip on the left only. The down is Hydrophobic, so, it can get wet and retain warmth, an important feature. 7D Ripstop fabric and importantly the TILT technology is a USP to boost warmth thereby facilitating lower bag weight. Tested to EN1357:2016 standards, the Mythic Ultra 180 has a comfort limit of 0 degrees.
CONCLUSION
Low weight, amazing warmth and small size, the Mythic Ultra 180 is a bag for warmer temperatures when price is no issue and features are paramount. It’s a perfect bag for racing and fastpacking adventures and the Hydrophobic down gives peace of mind in poor weather conditions.
FINAL THOUGHTS
The RAB Mythic Ultra 180 and 360 bags are state of the art and work together with each other offering low weight and warmth for any adventure. I am fortunate to have both and therefore can switch between 180 or 360 based on weather conditions. However, all sleeping bags have greater flexibility when one adds layers. The 360 can be used in much colder temperatures with Merino and down layers. You could argue that this adds extra weight to the overall pack, but, if you are out in in -10 or lower, you will be carrying these layers anyway for day use.
The 180 is a lighter bag and again, adding a layer or multiple layers when inside will increase warmth. A prime example being a race like MDS, many take a very light down jacket for when sitting around, add this inside the bag and the warmth increases.
However, here in the RAB Mythic Ultra, remember the TILT works by reflecting heat, so, one would need to test and try what method provides the best warmth.
Ultimately, if you need a sleeping bag the 180 and 360 offer two great starting points and they should be a consideration.
Please support this website. I believe everyone deserves to read quality, independent and factual articles – that’s why this website is open to all. Free press has never been so vital. I hope I can keep providing independent articles with your help. Any contribution, however big or small, is so valuable to help finance regular content. Please support me on Patreon HERE.
It is finally here… I have been waiting to get my hands on the INSTINCT XX 20L pack ever since I laid my eyes on it and now I have one to test.
Unprecedented in design, the XX marks a new beginning for those seeking the ideal solution for multi-day trail races, ultra-distance events or their next self-sufficient adventure.Stunning in function and versatility, the XX’s intuitive design offers easy access to key elements in the most critical conditions. Extreme function allows customization in how gear/ clothing/ food/ hydration can be carried.The XX is evolutive in volume and brings intelligent, segmented storage.
This is not a review, this is a first look and importantly I have done a video that address questions that I have asked and asked…
How much liquid will it hold?
Will it take 750ml bottles both hard and soft?
Do they have different sizes?
Is there a female version?
Over the coming days I will be testing the pack completely and I will video packing and showing capacity and features.
Below shows the pack with a typical multi-stage equipment list.
I will then do a 2-day fastpack carrying all I need, including tent, to see how the pack performs with a loaded weight of 8kg.
Below shows the pack with a typical fastpacking set up.
To show packing flexibility, the above pack is as in the Fastpacking video BUT with the tent split between one of the mesh pockets and the main compartment. All other contents remain the same, just packed differently.
Initial impressions confirm the pack has vest comfort and amazing flexibility and fit. Notably, the pack has the option to adjust in size shifting from 24L to 18L – important in a multi-day like MDS when you eat food and the need for less volume is required.
KEY FEATURES : – Large back door = instant access to main compartment and easy viewing of internal items – Independent roll-top pocket for increased storage – Removeable top pouch carries smaller items (first aid kit, knife, etc). A stretch mesh pocket over the top allows instant access to jacket storage or a solar battery panel
The XX allows : – 2 x 750ml+ bottles/softflasks in front – 2 XL vertical front zip pockets – 2 zipped shoulder pockets – 2 XL mesh front pockets – 3 fixing options for poles (front/back) – Ice pick on back – Shovel fixture – Easy backside carrying of sleeping mat or other objects (ex: tent) – Independent 3L water bladder pocket – X-Large 2-in-1 overlapping stretch mesh pockets on lower backside
Follow here for full review, video and photos.
Please support this website. I believe everyone deserves to read quality, independent and factual articles – that’s why this website is open to all. Free press has never been so vital. I hope I can keep providing independent articles with your help. Any contribution, however big or small, is so valuable to help finance regular content. Please support me on Patreon HERE.
Embrace winter, mercury dropping in the thermometer is no excuse to put outdoor adventure on hold. On the contrary, the new season brings a whole new set of adventures that could not be entertained during the months of Spring and Summer – read an article HERE on ‘Embracing Winter for New Adventures.’
Fastpacking is often looked upon as a good weather activity and not something that can be entertained or planned for the winter months. I disagree! Winter brings multiple possibilities and although fast packing in spring/ summer has many carry overs to autumn/ winter, some distinct differences are notable and important.
I have produced two articles on Fastpacking, one HERE and the other HERE looks at going lighter. Quite simply, fast packing is about finding the perfect and optimal balance between equipment and weight. To move fast, one’s pack needs to be as light as possible. In spring and summer, that job is easier as one requires less equipment. For example, sleeping bag will be lighter, tent will be lighter, clothing will be reduced and so on. Winter brings added challenges of balance and if you get it wrong, not only can it mean a miserable time, it can also be extremely dangerous.
WHAT TYPE OF TRIP?
I like to think of winter fast packing adventures primarily falling in two categories:
1. Self-sufficient with tent.
2. Self-sufficient and staying lodges, cabins, tea houses or even hotels.
To clarify, when I say ‘self-sufficient’ I mean carrying everything one needs for the adventure you are undertaking. If one is travelling with a tent, you will almost certainly be carrying all your food too. However, if staying in lodges, cabins, tea houses or hotels, then access to food will be possible and therefore the need to carry such items will be reduced.
For the purposes of this article, I am going to look at point 1 as this requires more planning, more equipment and a great deal more thought. For point 2, the equipment list would be as point 1 with the ability to remove items.
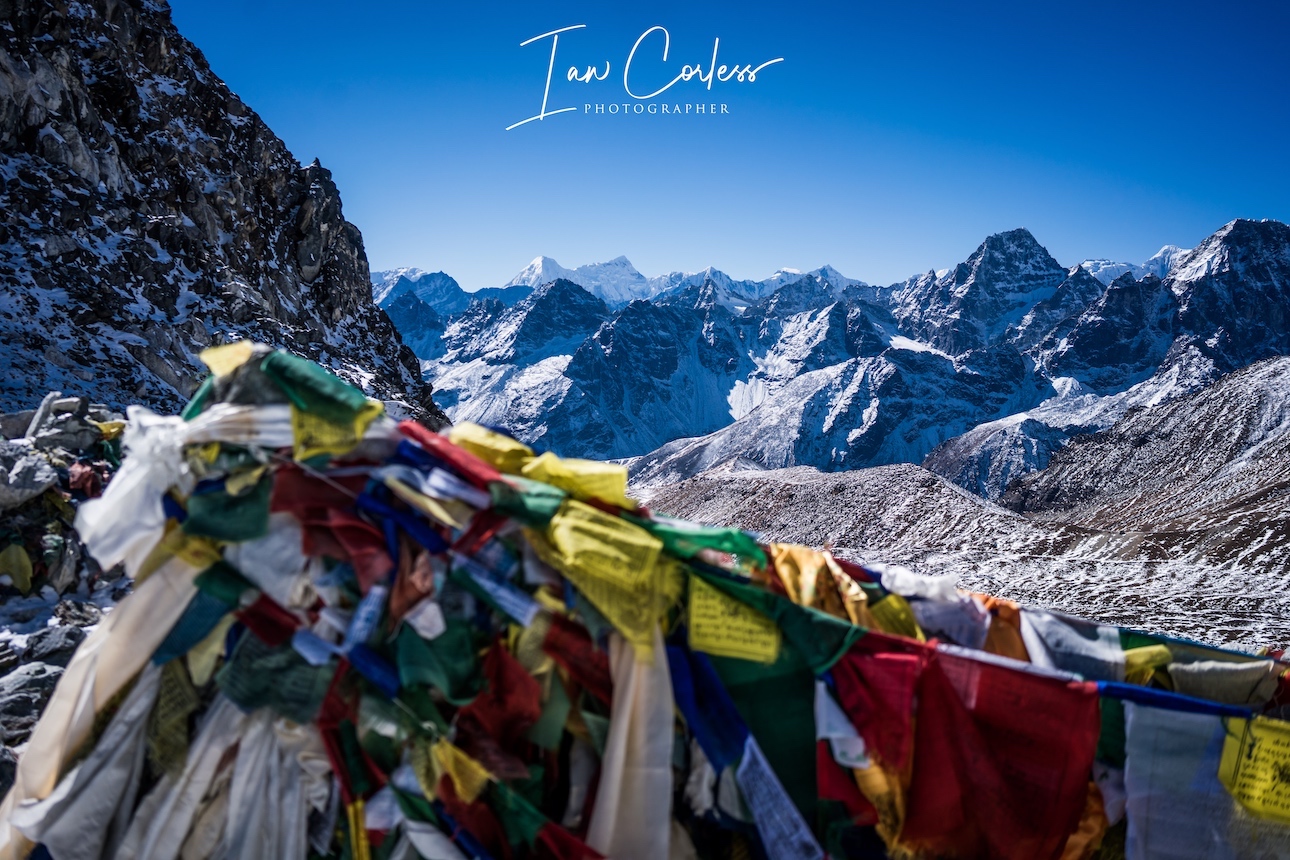
A fastpacking trip can be as simple as two days with one overnight stop or it can be a lengthy trip of multiple days or even weeks. As an example, in recent years I have taken myself to Nepal in December and fastpacked for ten days plus using tea houses for accommodation. Read an article on the ‘Three Passes Trek 2018: Ultimate Trek in the Everest Region’ HERE.
Any length of trip is valid and if new to winter adventures, it makes sense that maybe a first trip involves just one overnight so that you can fine tune what does and does not work for you.
Do you need a 12-week and/ or 24-week Multi-Day Training Plan perfect for a multi-day adventure or a race like Marathon des Sables? They are designed to provide you with a structured weekly plan culminating in a target event.
View a sample week HEREfrom the 12-week plan. Purchase HERE. (£14.50 pw)
View a sample week HERE from the 24-week plan. Purchase HERE. (£12 pw)
EQUIPMENT
Weather in Autumn can still be warm but one needs to be prepared.
Fastpacking in winter is the same as summer, but the need for more substantial equipment increases. Key is multi-purpose so that as mentioned previously, balancing minimal weight with equipment is optimal.
Planning is also essential so that one understands what equipment is needed and required. It goes without saying that winter conditions can bring anything, so, being prepared is an absolute no1 priority.
Ask questions:
Will I have rain?
Will I have snow?
Will I have ice?
Am I going to high altitude?
Is the terrain technical?
Will I be climbing?
Questions as above are a starting point when deciding what to take. A prime example being that an ice axe, crampons and maybe even a harness will be required on a fastpack trip – If you don’t have them, that could be a BIG problem!
Do the research, understand the trip, understand the distance you will be covering and understand the amount of days the journey will take.
Once you have answers to the above, you can plan the equipment.
Top Tip: While solo adventuring is exciting and exhilarating, winter adventures with another person make a trip safer and, in my opinion, more enjoyable. It also means you can share the additional tent weight and supplies weight.
A winter tent will be heavier and more durable as the impact of the weather is greater and the need for protection is increased. The first question, is size? Many of us will not have the option or luxury to have several tent options that allow us to choose a solo, two or three-person tent. So, if purchasing for the first time, the best option would almost certainly go for a 2-person tent.
The tent needs to be 4-season unless you know in advance that your winter adventure will not have weather extremes. If the latter is the case, you may well get away with your 3-season tent.
Heavier fabrics, more substantial poles and less mesh make 4-season tent shopping a challenge. Budget is also a key consideration. A tunnel tent is optimal and if pitched correctly, it will withstand strong winds and harsh weather. Use a well-insulated, all-season tent designed to withstand strong winds and the weight of snow, as well as a full nylon inner to prevent as much heat loss as possible.
My favourite tent is the Hilleberg NALLO which comes in several sizes, 2,3 and 4 person and the ‘GT’ versions have greater storage which is not a consideration for me but could be a consideration if bike packing? The NALLO 3 is 2.6kg and one of the lightest all-season tents on the market.
A cold winter morning.
2.6kg may sound heavy, especially when fastpacking but if you divide that weight between 2 (1300g each) or 3 (866g) it compares with lightweight solo tents such as the NEMO Hornet which would not stand winter conditions.
Ultimately invest in a tent as it will serve you well and last a great deal of time. Cutting costs early on will only come back later and bite you later.
Using a Tarp or Bivvy bag is not a consideration for me in winter unless in an emergency.
PACK
A multi-day fast packing trip to the Atlas Mountains, Morocco.
Packs are very personal and the correct one for you comes down to too many variables. I have said previously that I feel the ideal fastpack size to be 20-25 ltr. However, in winter, I usually go to 30 ltr and in Nepal I have gone to 40 ltr.
Montane Trailblazer 30 is a personal favourite as it fits like clothing with a vest-like fit and it has a waist belt.
Think about simple and effective storage space, minimum fuss, good fit and comfort.
Options:
Ultimate Direction Fastpack
Six Moon Designs
Inov-8
OMM
Terra Nova
SLEEPING BAG
RAB Mythic Ultra 360
After the tent, the sleeping bag is going to be the next largest and heaviest item. However, think cleverly about sleeping bag and also consider the key phrase, multi-purpose.
Because you may experience -15 at night during a fastpack, this does not mean you require a -15 sleeping bag…. Personal favourite is the RAB Mythic Ultra 360.
“Smart lightweight campers have been using their clothes to boost the warmth of their sleeping bags for years and climbers do it when they have to. Yet most of us are still carrying bags much bulkier and heavier than we need.” – Peter Hutchinson Designs
Layering in a sleeping bag (just like in clothing) is key to regulating temperature and a perfect way to carry a lighter sleeping bag without compromising on warmth and comfort. Read an in-depth article HERE on ‘Choosing a Sleeping Bag for an Adventure.’
Key points to consider:
Am I using the sleeping bag in a dry or wet climate?
Is the weight of the bag really important? Normally the answer here is, if you are carrying it, yes, the weight is important.
Do I need the sleeping bag to pack as small as possible?
Do I need the bag to work in one or more situations? Another way of looking at this is, do I need to compromise on points 1-3 to get value for money.
Ask some personal questions:
Do I sleep warm?
Do I like to be warm and if not warm, am I miserable?
Am I prepared to be a little cold to be as light as possible?
Do I need a full-length zip, half-zip or am I happy to have no zip?
Consider other factors:
If you are tall, wide, have big shoulders etcetera, etcetera then some sleeping bags will just not work for you as they will be too small.
If you are small/ petite an off-the-shelf sleeping bag actually could be too big for you, this is not a huge problem, but if you wanted the bag to be as small and light as possible, you could go custom made.
Top Tip: Down is the lightest and packs the smallest. However, down cannot get wet. If it does it loses warmth and effectiveness. Some brands now offer ‘treated’ down that can withstand weather variables, so, consider this. If you are going to be in a wet/ damp climate, a synthetic filling may well be the best choice. Do not put your head inside the sleeping bag – make sure you breath out and not inside the bag as the moisture is not good.
SLEEPING MAT
Typical fastpack kit set up.
If you are in a tent during the winter, you NEED insulation between you and the ground. Do not compromise here. No matt and you are guaranteed a cold, sleepless and restless night. There are many variables to look at and while weight is crucial, so is warmth. The weight of one’s body presses a sleeping bag flat when sleeping and therefore the warming properties are reduced. Cold comes up from the ground, which can be very dangerous.
It is possible to purchase insulated matts and they are obviously heavier. Ask questions about your personal needs and self-asses. Do you sleep warm?
Look at the ‘R’ number of a sleeping mat. The higher the R number, the more insulation it gives.
If you are going to be pitching a tent on snow or ice, the R needs to be 3 at a minimum and ideally 4 or higher.
Sea to Summit produce an Ultralight mat with an R of 3.1 at 480g in regular length. By contrast, the Comfort Plus XT with an R of 4.7 is over 1000g
COOKING SYSTEM
While your spring/ summer gas canister system will work in winter, many choose to use a liquid fuel system as the pressure in the bottle can be maintained by pumping. MSR do a product called WhisperLite that can use gas or liquid fuel.
I personally use a Jetboil Flash or my MSRWindBurner which both boil water very quickly and work exceptionally well in windy weather.
I simply need to boil water and/ or melt snow.
FOOD
Firepoot food tastes great and is well balanced.
Food is a significant consideration for winter and personally the need for warm and nutritious food increases. Dehydrated food is a staple both for breakfast and dinner and while many brands are available, Firepot Food is my favourite. A *typical meal is around 125g in weight and offers upwards of 500 calories. Baked Apple Porridge is superb in the morning and Chili Con Carne has spice and great taste. Options are available for larger packs. Taking Chili Con Carne as an example: the 135g pack has 600 cals and they have a 200g pack with 890 cals.
I take coffee for the morning and sachets of hot chocolate for the evening.
CLOTHING
Hat and buff great for keeping the warmth in.
There is no one answer to clothing and many questions to ask. To start, I will assume for the purpose of this article that you are a runner who will be moving fast (er) than a hiker.
Key considerations re weather:
Will it be dry and cold?
Will it be wet and cold?
Will it be wet/ dry and cold?
Understanding the answer to the above helps clarify clothing choice. For example, Nepal in December will be cold and dry (usually) therefore the need for wet weather clothing can be reduced. It also means that down will be the main insulating layer. By contrast, if exploring the mountains of northern Norway, you will potentially experience all weather variables and therefore the need for synthetic insulating layers may be preferable to down and the requirement for waterproof jacket and trousers almost essential.
I see apparel in three scenarios:
What I wear in the day.
What I wear when I have finished for the day.
What I wear to sleep.
Remember the key word, multi-purpose.
Layering is essential to regulate temperature and at all costs, you need to reduce sweating, especially in subzero conditions as the sweat can freeze against the skin. Accept that you will need to move slower and that you will need to be diligent in stop/ starting to add and remove layers. It’s easy to feel too warm or a little cold and not stop because it impacts on your rhythm, this can be a really bad decision. Make sure you add/ remove as required.
DAY
Long sleeve Merino, run tights and gloves is a great starting point for warmth.
Head: Hat.
Eyes: Wear glasses, especially in snow.
Neck: Buff
Body: Long-sleeve merino base layer top.
Hands: Merino base layer gloves.
Legs: Winter run tights.
Feet: Merino socks.
Shoes – These will be specific to the task and weather conditions. Obviously, I will not be carrying options (unless climbing,) so, my shoe choice will be based on the most demanding conditions. As a starting point, my standard trail running shoes with aggressive outsole would be ideal for mud and soft snow. If I was going to encounter ice I would either take micro-crampons to use on my trail shoe or use a specific shoe such as the Arctic Talon by inov-8. Extreme cold, challenging conditions and many variables and I would use a boot but a lighter option that is designed with a runner in mind, Roclite (370 or 400) by inov-8 works exceptionally well.
inov-8 Roclite boots with crampons.
WARMTH and WATERPROOF
Add and remove layers based on the weather and conditions.
Using the above as a starting point, the need to add layers will depend on the conditions you are experiencing.
Head: You lose a great deal of heat through your head, so simply adding and removing a hat is a simple way to regulate temperature. There are many options here that typically fall in 3 categories:
Peaked hat
Beanie
Head band
I often like the head band option as it keeps my ears warm but still allows some heat to escape through the top of my head. If it is really cold, I will use a beanie.
Neck: In colder temperatures I like to have a Buff/ wrap around my neck. This is especially useful as the temperature drops as you can pull the item over your mouth and nose. They can also be used as a hat if required.
Hat, glasses, buff and layers provide great protection.
Body: A simple and extremely light windproof is great for adding and removing to regulate temperature. In colder conditions, the need to add insulation will be required and as mentioned, this can be down or synthetic. Ultimately, this layer, especially if still moving fast does not need to be too bulky or too warm. A Rab Kaon is a current favourite which has the best of both worlds by using treated down in a small and lightweight package. Rain, wet conditions and strong wind can make any trip miserable, so, a good and lightweight jacket with taped seams is essential. The Stormshell by inov-8 is perfect. Top Tip: Consider the size of the waterproof jacket, sometimes going one size bigger is better to allow for insulation underneath.
Hands: I struggle with my hands and particularly with my fingers, so, I do not compromise. I wear Merino wool base layers and then Mitts over the top by inov-8. If I need the use of my fingers, I will use a Gore-Tex glove by Rab. Importantly I carry a spare set of Merino base layer gloves and even a pair of more substantial mitts if conditions dictate. My hands are my weakness!
Legs: Winter run tights such as the inov-8 Winter Tight are ideal in all conditions and they are my ‘go-to’ for all runs. In rain I will use just the run tight. However, if the temperature drops to zero or below and the wind gets up, the need to add another layer becomes important and I use the Trailpant by inov-8 over the top.
Feet: Merino socks are essential as they work extremely well when wet. I often use an Injini 5-finger Merino as a base layer and then a Smartwool Merino sock over the top. On occasion I have used Neoprene socks as an extra warm layer.
Shoes: As discussed above but if going to extreme conditions and climbing I use La Sportiva boots, the G5 is perfect for snow conditions with crampons. Also consider that maybe you need snowshoes?
AT THE END OF THE DAY
The end of a long day at Tengboche, Nepal.
You have finished fast packing for the day, you are warm, and the priority is pitching the tent. Before you do that, make sure you:
Add an insulated layer.
Add a windproof.
Wear a hat.
Put on gloves.
Once you have done the above, pitch the tent and get inside.
Priority is to remove layer and importantly remove base layers if they are damp or wet. Putting on a dry base layer is essential to keep warm
Replace run tights with Merino base layer tights.
Remove socks and put on dry socks.
Now add the insulated layers such as jacket, hat and gloves. If extremely cold, get inside your sleeping bag and retain the heat you already have.
Depending on the conditions and the environment, you may very well have additional warm layers that were not mentioned above. Three essentials for me in extreme conditions are:
The above 3 items can pack small and the warmth to weight ratio can make a huge difference. Trekking in Nepal or a similar place in winter and they are essential items.
Hut/tent slippers are a great addition for warm feet and allow you to get out of run shoes/ boots. They are light and can roll up. They fall in the luxury category but if you have space and don´t mind a little extra weight, they can be very worthwhile.
Be specific with the choice of insulated layer. There are many options available that balance weight/ warmth delicately.
SLEEPING
First and foremost, make sure you are warm when going to sleep. If not, you will waste energy trying to get warm. If conditions allow, don’t hesitate to do some press ups, jog on the spot, do star jumps and so on before getting in a sleeping bag.
As a start point, I will wear:
Beanie.
Buff.
Long sleeve Merino base layer top.
Long leg Merino tights.
Merino socks.
Merino liner gloves.
The above provides me with a starting point. Of course, if conditions allow, I can remove some of the items above to regulate temperature.
If it is cold, I will wear a down jacket.
Extremely cold and I will wear my down pants and socks.
It all goes back to layering, multi-purpose and why I initially said that a lighter and less warm sleeping bag can often work providing you have the options to add warmth.
A good night’s sleep is essential.
Top Tips: Put clothes inside the sleeping bag to stop them getting cold and damp. Put all batteries/ phone etc inside the sleeping bag, they will last longer. Need a heat boost? Boil some water, add it to a very secure water bottle and put inside sleeping bag – the ultimate hot-water bottle! Have a bottle for taking a pee in or a FUD if you are a woman. Getting out of a tent in the middle of the night in wind, rain and/ or snow is not a good idea.
TOP TIPS FOR THE WINTER
Climbing Slogen in Norway. We pitched our tent in the valley and travelled light to the summit.
Prepare and plan a trip meticulously understanding the weather conditions you will encounter.
Have the correct equipment for the trip.
Make sure you have a phone, the ability to charge and re-charge it and have a tracking device such as a Garmin InReach.
Tent must be durable and correct for the conditions.
A tent can be made warmer by reducing ambient space – use packs etc around you and don’t be afraid to ‘spoon’ a tent-mate.
Prepare ground for camping, particularly important in snow/ ice conditions. If possible, clear snow to reveal the ground underneath.
Use a mat as insulation between you and the ground.
Layer and regulate temperature.
Add hot water to a drink bottle for the perfect sleeping bag warmer.
Put clothes inside sleeping bag.
Have ear plugs and blindfold.
Eat and drink warm food and snacking in the middle of the night is a great idea.
Have a pee bottle or suitable device if a woman. Holding a pee in is not a good idea as this will waste energy and heat,
Insulated bottles are essential to stop water freezing. Turn bottle upside down.
Poles are great in the mountains.
Use poles when conditions dictate.
Use dry bags to keep all clothing dry.
Have plastic zip-lock bags for emergencies.
Make sure you have a first aid kit.
Zip ties, Gorilla tape and a small tube of super glue can go a long way for ‘on-the-go’ repairs.
Carry a multi-tool knife.
Use a long-handled spoon for dehydrated meals.
Remember it gets cold at night.
Eye protection is crucial.
Take a pillow.
Decide on the correct fuel for the stove. Subzero, go with liquid fuel.
Melt snow for water.
Carry a water filtration system.
Have a method for removing toilet paper and waste.
Have wet wipes or similar.
Sunscreen in snow is essential along with lip balm.
If possible and allowed, make a fire.
Camp fires are great as long as it is safe and friendly to the location/ environment.
If possible and allowed, make a fire.
Take insoles out of shoes and put inside sleeping (providing they are not wet)
A second stove option and backup may be worthwhile. If using gas canister, the MSR pocket rocket burner is super small and light.
Ventilate your tent.
Keep hydrated.
Protect extremities. Hands and feet. Consider hut/tent slippers.
Headtorch and spare batteries.
Headtorch is an essential item.
LUXURIES
Depending on the length of the trip, luxuries are best kept at a minimum. However, on a lengthy trip in Nepal I did take an iPad mini as it allowed me to write, provided the option for movies and music and I could re-charge in tea houses. If I was self-sufficient camping, I would leave this at home.
Take a phone. Maybe use an old-style phone and not the latest smartphone. The latter is power hungry.
iPods and fancy earphones are great, but you cannot beat a pair of simple wired earphones as they do not need re-charging.
Take a notebook and pen (if not taking an iPad mini).
A battery for re-charging.
Remember, you need to carry any luxury so be ruthless.
AVOID
Hypothermia
Frostbite
Embrace winter and the challenges it brings.
Please support this website. I believe everyone deserves to read quality, independent and factual articles – that’s why this website is open to all. Free press has never been so vital. I hope I can keep providing independent articles with your help. Any contribution, however big or small, is so valuable to help finance regular content. Please support me on Patreon HERE.
The passing of September and the arrival of October can signify dread and a sense of despair in many as daylight disappears and the weather changes. However, one of the secrets of ‘surviving’ this new season is to embrace it. Don’t look at the negatives, on the contrary, the perceived negatives are actually positives. Seasons exist for a reason.
Lethargy, low mood and the perceived feel to hibernate are all characteristics we feel during the winter months and first off, don’t fight it, accept that winter brings an opportunity to recharge, relax, read a book, catch up on some movies, light a fire, get a blanket and yes curl up on the sofa and relax. There is no harm or guilt in this.
SAD (Seasonal Effective Disorder) is something we all can feel and yes, some feel it considerably more than others, particularly if Serotonin is reduced and this is often treated with drugs. But light, or the lack of it, is a great contributor. Top tip – Look at changing the bulbs on your lights to ‘daylight’ balanced and when required, adjust brightness throughout the day to help simulate the natural passing of light. It’s a great and easy way to help simulate the variable light intensity changes in one normal day.
Mindset is a key factor to a successful winter and once you get the mind tuned, you will soon appreciate and embrace the possibilities that the winter season can bring, especially as a runner or someone who enjoys outdoor life and activity.
As in all things, we are individuals and as such, we all treat circumstances and changes in different ways. I personally see winter as an opportunity to do things I could not do in spring and summer. I see the challenges that winter will bring as a test, both physical and mental and I look upon it as an opportunity to learn and adjust. Resources and circumstances do go a long way in making my ability to adapt successful, so, to start off, look at these aspects and put yourself in a good place before the cold, wet and dark hits.
In a discussion with a friend over a glass of wine, I was surprised to hear our discussion begin to deteriorate…
“I just hate this time of year. The daylight is leaving us earlier and earlier each day, the light is already arriving so late in the morning and I can feel the damp starting to creep into my body. It will be only a matter of weeks before I am in perpetual cold and dark, I cannot wait for spring!”
It is easy to see from the above quote that before winter has begun, my friend is defeated. I smiled and laughed with him and turned the conversation around.
“Yes, the darkness is coming as is the cold, the wet, the snow and the ice,” I replied. “But what a remarkable opportunity this brings. Just think about it. Cozy nights at home with candles and a movie. Adventures in the snow. Running with a head torch. Learning a new skill. Reading and yes, I could go on and on. Winter for me is just a wonderful opportunity and I cannot wait for it to begin.”
I already felt like a winner as mentally I was prepared and excited for the opportunity, whereas my friend, was already starting the hibernation process.
EMBRACE THE WINTER
I strongly believe that embracing winter and making the most of the season starts with mindset. With a good mindset as outlined above, you will already be in a great place to start.
Marino Giacometti, founder of skyrunning also made the summit on race day – ‘for fun!’
As runner’s and outdoor enthusiasts, we are all at different abilities and yes, we all have different reasons why we do what we do. A great example being an elite runner may well look at winter as an opportunity to address weaknesses and maybe spend more time in a gym working on strength and core.
Monte Rosa Skymarathon
A running enthusiast may well just want to tick over, keep fit and maintain a healthy weight during winter months. And then there is the outdoor enthusiast who may well accept that running is something that will go on a back burner for the coming months and accept that walking, indoor cycling, skiing, gym work and so on is the way forward. Whatever group you fall in, take a couple of hours with a pen and paper and self asses how the last year has been and what you want to achieve the following year, this will help provide some specific goals over the winter to keep focused. This planning and assessment can be as simple as complicated as you wish.
As an example, mine is to embrace the season and the weather and to seize every opportunity. I will hone my head torch running. I will practice my ice and snow running. I will experience my first snow shoeing and I look forward to multi-day snow adventures that will carry me from one point to another in a self-sufficient way. But I also want to write more. I want to read a couple of books that I have never found the time for and I also want to embrace the downtime to rest and recover. My connection with nature and breaking from the digital world is integral to a healthy existence and that cannot stop just because the season has changed.
CLOTHING
We have all heard it before, “There is no such thing as bad weather, just bad clothing.” It’s true I am afraid. Clothing is one of the key essentials that makes any winter adventure not only bearable and enjoyable. As outdoor people, we have never been as lucky. Technology in apparel has now progressed to a level that we can be warm and dry in super-light products. The downside of course is cost and yes, gearing up for winter can be expensive.
Layering is key with apparel, starting with warm layers against the skin, insulating layers on top and then waterproof and windproof layers as the final touch that will protect from the elements. Merino is great as a base layer and I have a long sleeve top and legs as a starting point. Now of course, I may or may not use them as this depends on the outdoor exercise I am doing. As an example, I would wear the top if running but not the legs. A mid-layer is more often than not either Primaloft, down or synthetic. Each has its place but if you could only choose one, Primaloft (or similar) would be the most versatile due to its ability to retain warmth when wet and still be lightweight. The outer layer should be waterproof and windproof with taped seams and again, it is essential to have jacket and trousers.
The above looks at the core, but if you are like me, the extremities are my most vulnerable in winter and after getting frost nip both in my toes and fingers on the summit of Monte Rosa several years ago, I know need to ensure that I have multiple options for keeping my feet and hands warm. I use Merino base layer socks and gloves which are very thin. For my feet, I then add thicker Merino socks over and inn certain scenarios I have even used Gore-Tex or Neoprene over socks. For my hands, mitts always provide the most warmth and I will use them as first choice. If I need finger dexterity, I often purchase gloves several sizes too big that will allow for multiple layers to retain warmth.
A hat, buff and glasses add the finishing touches. A good hat is one of the easiest ways to retain heat inside the body. A Buff is perfect for around the neck, pulled over one’s nose and mouth to keep out cold air or you can use as a hat. Glasses are an essential to keep out the elements from my eyes and particularly essential if doing any outdoor activity in snow.
Finally, footwear is an absolutely key element to make any outdoor activity successful. There is no one-stop solution here and as a runner, your everyday trail shoes may be ideal for a bulk of your runs, however, specific conditions require specific shoes.
Mud/ Wet – You need an aggressive outsole that will grip and gain traction not only of sloppy wet mud but also on tree routes, rocks, gravel and a multitude of other surfaces. Top recommendations are VJ Sport and inov-8 who have been producing shoes to handle the elements for years. Personal favorites are the XTRM (here) and X-Talon(here.)
Snow/ Ice – In soft snow, the shoes that you use for mud/wet will usually work fine providing adequate grip. However, ice brings new challenges and many runner’s avoid ice at all costs. However, products exist that allow for running in such conditions. Firstly, you can micro-crampons (Snowline or Nortec as examples) that simply adapt any running shoe for ice.
I personally prefer a specific shoe, such as the VJ Sport Xante (here) which as all the attributes of my favorite trail shoes and the added grip from 20 studs. Or the Arctic Talon (here) by inov-8.
Xante
Arctic Talon
As a final note on footwear, I use boots and more substantial crampons when venturing in to more alpine and challenging terrain. Read about a trip to the Atlas Mountains here. There is no one answer here but if moving fast and light, the new inov-8 Rocltite Pro G 400 (here) is a great cross over and then I use two specific mountain boots, La Sportiva G5 (here) or the Trango Extreme (here.)
There is no one solution here and having the options to adjust clothing based on weather conditions is key.
Top Tips:
Carry a pack that will allow you to carry options of clothing. For example, it may well be dry when you leave but rain could come at any time, make sure you have waterproof layers with you.
Take off and add clothing as you exercise. When it’s cold, we often start with many layers as the first 15 min can feel uncomfortable. However, our core soon warms up. Take the layers off early to avoid sweating. Sweating is not your friend in cold climates. Be prepared to add and take off as required. One of the many reasons many people do not, is because it can disrupt the flow of exercise, however, a little time stopping pays dividends in the long term.
Avoid getting base or mid layers wet.
Carry an extra base layer.
Protect extremities – hands, feet, nose, ears and lips.
Protect skin with sun block as and when required and post-exercise use a moisturizer – winter is hard on exposed skin.
Start easy and build into any outdoor activity allowing for a gradual warm up.
Have appropriate footwear.
Don’t forget to drink.
Take snacks/ food and even a flask or consider the option to obtain hot drinks.
SAFETY
Even at the most basic level, winter brings extra challenges and risk. A simple road run has increased danger due to increased challenges not only for you as a runner, but for those who are sharing the outdoors with you – drivers! Reduced visibility, challenging conditions under foot and on the road can make that simple road run feel like an assault course, so, accept that sometimes staying indoors and or going to the gym is a better option. But we don’t want to be forced to stay indoors and why should we? If you have the correct apparel and footwear, all is good, yes? Well, nearly… Running on the road and I would most definitely consider adding the following:
Wear bright clothes or wear a reflective vest such as the Ultra Performance (here) which is minimal and light.
Add a flashing light to your arm and ankle. Example here.
Use a head torch.
Take a phone.
Moving from road to trail and the risk from traffic is reduced greatly especially if one can start immediately on trail with no road running involved. Therefore, the need to wear reflective clothing can be reduced. But the risk of falling is greatly reduced and depending on where you are, that risk can be potentially life threatening. So, adjust safety measures based on:
When you are running.
Where you are running.
The duration of the run.
If running alone.
Running for 1-hour on a local trail is very different than a multi-hour adventure. I personally have a standard kit list and I take the basic on every run. It’s an overkill for the 1-hour runs and for the longer sessions, I add to it as required and dictated to by location and conditions.
Spare Merino base layer.
Spare gloves.
Lightweight waterproof jacket.
Lightweight waterproof pants.
Space blanket.
Head torch.
Mobile phone.
First aid.
500ml water.
Snack
The above, is my absolute basic kit that will go in a lightweight pack.
I then add equipment based on:
What am I doing?
Where am I doing it?
When I am doing it?
What are the options exist to cut short my adventure?
How remote will I be?
What are the risks involved?
What weather can I expect?
What is the worst-case scenario?
The above is a great start point. Even a local run has great risk if one is alone. Imagine running in the forest with snow on the ground, the temperature is just below zero and you are at least 30-minutes from anyone else. If you hit the deck, sprain an ankle, break a bone or whatever, you are suddenly stationary in subzero temperature. This is high risk.
Adapting to the environment, conditions and challenges is not something to be feared. It is actually fun! I go back to the mindset approach at the beginning, I see this as an opportunity, an experience to learn and a great potential to be taken out of my comfort zone.
What equipment/ advice can make a run/ adventure safer and address the list of questions above?
If possible, share any trip with another person. It’s more social and you have a backup.
Check weather conditions.
Tell a friend/ family member where you are going and when you will be back.
Have a phone and if necessary, an additional charger. It’s worth considering purchasing a phone that is not a smartphone – battery life is usually amazing.
Carry a tracker such as Garmin InReach or Spot.
Think layers and have base layer, warm layers, waterproof layers, hat, gloves and buff. On a personal note, I take spare gloves, socks and a base layer should I get wet and need the comfort and warmth of dry layers.
Know where you are going and have a map and compass. A GPX file is also a great option for watch/ smartphone.
Specific equipment:
Carry micro-crampons if you think snow/ ice is high risk.
Carry a bivvy bag which can be a life saver if stuck in a remote location with an inability to move.
Goggles are better than glasses if you are in a blizzard or strong winds.
Carry an ice axe if venturing anywhere with winter conditions.
Hand spikes for ice (more details below).
Snowshoes (more details below).
In many scenarios, common sense comes in to play and quite simply, a little extra weight and safety is far better than the alternative. Accept in winter that you will move slower and in a different way.
WHAT OPTIONS EXIST IN WINTER
This question can be asked in two ways, firstly, one’s head can be lowered, shoulders dropped, hands below the waste, a look of desperation on the face and, “What options exist in winter…?” The person asking this question has already decided that the answer is none!
For me, the way to ask this question is standing upright, huge smile on my face and the question, “What options exist in winter?” Already has me ready and primed to list a plethora of activities to keep even the most hardened sport enthusiast occupied for quite some time.
Night running.
Snow running.
Ice running.
Road running.
Climbing
Ice climbing.
Hiking
Fastpacking
Snow shoeing.
Learn something new.
Spend time with family and friends.
And the list goes on! Location, finances and available time all have a bearing on what is and what is not possible. One thing is for sure, possibilities are endless.
Night Running.
Quite simply, you need your run apparel and appropriate equipment as listed above. Importantly you need a head torch. Not all head torches are the same and an investment in the right kit early on saves money later. If you are running in the city with a great deal of ambient light and just the odd foray on trail, you may well get away with a budget torch and something around 200 lumens would work. However, if you are heading into the pitch black, running in forest, venturing into the mountains and pushing the darkness envelope, you are going to need a specific tool for the job. As an example, Norwegian lighting company Moonlight (here) provide head torches from 700 to 7000 lumens. Be specific on your needs and requirements and importantly consider autonomy, beam direction and spread, options for spare batteries and the option to keep the battery in apparel while still using the head torch, especially important in very cold environment when warmth will make the battery last longer.
Snow Running.
Layer up so that you have the flexibility to reduce heat and get warm as required. In many scenarios, particularly soft snow, a good aggressive trail shoe will work. However, consider the risk of ice so carry micro spikes. If in the mountains, knowledge and experience of snow conditions would be advisable. Be prepared with additional equipment such as poles and ice axe. Needless to say, gloves are really important.
Ice Running.
Use micro spikes for specific shoes as mentioned previously to ensure that you have grip and traction. In some places, Norway and Canada a good example, summer lakes freeze over and they become an incredible playground. Caution, safety and experience is required and if you have never run this way before, take advice from those that have. Importantly run with hand spikes (pictured below) available at all times should a disaster happen – these help you get out of a situation.
Measure the ice.
What is a safe thickness? 4 inches or more is ideal.
Check the ice colour – clear blue or green is good.
Fresh ice is best.
Know rescue techniques.
Climbing.
Mountains in winter offer an incredible playground and if you are new or inexperienced, the first option would be to sign up for a weekend trip with experienced professionals. The equipment requirements, techniques and safety measures vary considerably.
Ice Climbing.
No need to venture outside. In 2019 as an example, I started on a series of indoor ice climbing lessons which has now set me up for experiencing ice climbing outdoors. There is obviously a need for specific equipment: helmet, glasses, harness, ice axes, boots and crampons. However, most places, indoor or outdoor, offer the option to hire equipment as part of the lessons.
Snow Shoeing.
Fimbulvetr Hikr-X
A great winter exercise that provides an alternative to skiing or snowboarding that is an extension of running. Snowshoes basically allow you to float and not sink in the snow. But there is a difference to snow hiking and snow running, both in the shoe used and the type of snow. Run snowshoes are smaller, allow for a more natural gait and require the snow to be har packed. Whereas in soft snow, you need a much larger snowshoe to stop you sinking in the ground. Either option provides a great challenge and workout. Of course, races exist that require snow running both with and without snowshoes, so, if you are signed up or plan to race like this in the future, seize the opportunity. Abelone Lyng (here), winner of the Ice Ultra does winter snow shoeing trips in Norway.
Fast Packing.
Peak Design Field Pouch attached to a Montane Pack when Fastpacking in Nepal.
Snow, ice and cold weather doesn’t mean that multi-day adventures need to stop, on the contrary. Find a route, plan accordingly, have the correct equipment and off you go. These adventures can involve winter camping (you need a 4-season tent, appropriate matt and sleeping bag) or you can run/ hike form hut-to-hut or hotel-to-hotel. You are only limited by your imagination. Accept that you will move slower. Nepal is a magical playground for winter adventures.
Hiking.
Wrap up and include the family. Sport and our pursuit of it can often be selfish, not purposely, but we can get engrossed in challenge and adventure and often exclude the ones we love. Share the journey.
Training Camp.
Consider a training camp, maybe this could be something in warm weather to break up the winter months. I have been organizing a warm weather camp every January in Lanzarote for over 10-years, info here.
Other options:
Sign up for a challenge.
Make it social.
Add variety.
Train in the home.
Rest.
Learn something new.
Enroll in a class.
CONCLUSION
Ultimately, don’t letter winter get you in a spiral of mood swings, depression and locked indoors. It’s all about the mind and understanding that the variety winter brings is actually far more exciting and challenging than good weather and dry predictable trails.
Seize the conditions. Plan accordingly. Have the correct equipment. Test yourself with something new and trust me, by the time Spring comes around you may well be a little disappointed.
Please support this website. I believe everyone deserves to read quality, independent and factual articles – that’s why this website is open to all. Free press has never been so vital. I hope I can keep providing independent articles with your help. Any contribution, however big or small, is so valuable to help finance regular content. Please support me on Patreon HERE.
Norway has long been a desirable location for the mountain enthusiast. One only need to add the word ‘Norway’ to a Google search engine, and you will be rewarded with photos that make the jaw drop.
At roughly 33% bigger than the UK and 1/3rd the size of USA, one begins to understand the scale of this Scandinavian country and its 5.3 million inhabitants.
Just think about it, Norway is 33% bigger than the UK, but the UK has 66.6 million inhabitants…
Needless to say, outside of Oslo (681,000 pop), Bergen (271,000 pop) and other key locations such as Trondheim and Stavanger, open space and amazing landscape is available for all to explore.
In a series of articles and posts, we intend to introduce you to the magic of Norway.
Norway is the longest country in Europe and therefore, travelling anywhere is not a quick process. It has 60.000 miles of coastline, towering mountains and dramatic fjords. Remarkably it has 2-300 peaks over 2000m+, Galdhøpiggen the highest at 2469m closely followed by Glittertind at 2464m. There are over 1000 peaks over 1650m, so, if you love mountains, Norway should be at the top of the ‘to-do’ list!
We are starting our articles with HARDANGER which is easily accessible from Oslo or Bergen and although based in the south of Norway, it does not lack any of the drama or mind-blowing views that northern Norway offers in abundance.
The list will grow as we progress through Norway, but expect posts on:
Stavanger
Loen
Jotunheimen
Senja
Tromso
Lofoten Islands
Romsdal
Lyngen
Svalbard
And more…
HARDANGER
The fjord (Hardangerfjord) resort of Kinsarvik will be used as an initial start point for adventures in the Hardanger area, by car, it is 2hrs 30min from Bergen and 5hrs from Oslo.
Located in the west of Norway, Hardanger is a traditional district with a great deal to offer in both summer and winter. For the purposes of this initial introduction, we are looking at a 4-5-day trip in June.
June provides a wonderful opportunity as the area transitions from winter to summer, if lucky, much of winter can remain and therefore you can gain the best of both worlds. It’s worth pointing out now, that winter conditions in Norway are harsh and you need to be prepared both physically, mentally and have the correct equipment to explore safely in this area. If any of the above have a question mark, look to travel and explore in July/ August when snow conditions will have disappeared.
Areas to explore:
Dronningstien aka The Queens Trail
Trolltunga
Folgefonna Glacier via Buerbreen
The waterfall route via Husedalen Valley
Climb Oksen
Other opportunities:
Kayak in one of the longest fjords in the world.
Via ferrata to Trolltunga.
Ice climb on the Folgefonna Glacier.
PRACTICALITIES
Norway is not a cheap place and therefore one needs to look at budget when exploring any area of the country. Flights, depending on the time of year will vary in price and car hire can be expensive. However, in many scenarios, a hire car allows one freedom to explore. Train services and public transport is good. We recommend a car to explore Hardanger.
Camping is part of the outdoor life and there is nowhere better than Norway to sleep outside. Norway allows for wild camping, however, be careful, some areas, particularly Trolltunga have a camping exclusion zone.
For the purposes of this mini trip, we used an official campsite and wild camped. Below I provide a map to show an overview of the routes and areas we explored.
Our itinerary was as follows:
Day 1 – Travel and overnight stop.
Day 2 – Dronningstien aka The Queen Trail
Day 3 – AM: Trolltunga – PM: Buerbreen Glacier
Day 4 – Waterfall route via Husedalen Valley
Day 5 – Oksen and travel home.
All of the above trails are not long and are all achievable in one day or less.
The Queen Trail is a longer route (20km) with mixed terrain on a point-to-point route.
Trolltunga is exposed and with snow (time of year dependent) – a more extreme challenge, particularly if one has limited snow experience.
Buerbreen Glacier is a short route but has plenty of vertical and technical terrain, expect fixed ropes, some snow and water crossing.
Husedalen Valley, the waterfall route is a great out and back with stunning views and at times, some testing terrain. Your feet will get wet!
Oksen is a straight up climb (1000m+) with some exposure, challenging terrain and the potential for snow/ glacier travel depending on the time of the year. It’s an out and back route.
Day 1 base was Kinsarvik. There is an official campsite, Kinsarvik Camping AS (here) which has cabins, space for motorhomes and tents. You are recommended to book any camping, especially in high season. Alternatively, you could wild camp close to Kinsarvik.
There is a Spar supermarket opposite the fjord, and this sells everything, including camping supplies. So, this is a great opportunity to stock up on any anything that you may require.
Our day 2 and day 3 base was an official campsite in Odda, called Odda Camping (here). This area due to its proximity to Trolltunga has potentially less options for wild camping, however, some options exist in Buer close by. It was a perfect location with a fjord as a backdrop, showers (20 Nok charge) and toilet facilities. At 250 krona per night (£20) it was a great option. Odda has a developed town with plenty of facilities, so, should you need anything, it will be available in the town.
Day 4 we wild camped below Oksen. There is nothing close by, so, be prepared with food etc.
Day 5 we wild camped on the way back to Oslo.
THE ROUTES
Dronningstien aka The Queens Trail
The trail is a point-to-point route between Kinsarvik and Lofthus. We recommend parking opposite the ESSO Petrol Station next to the fjord, parking is free.
The actual trail starts at Røte which is 4km up a road from route 13, very close to the ESSO petrol station. However, we recommend doing this on foot. Location is shown on the map below.
For the first 4km you will have no marking and then at Røte you will see blue a ‘D’ or blue spots. This is the route to follow.
The official route is 16km and is estimated to take 8-9 hours and is described as ‘long and demanding!’ For perspective, we did the route with an additional 4km, we had a great deal of snow and we constantly stopped for photos. Yes, we did run, and we completed in 4hrs 50min. We did not push the pace or go fast.
Recommendations are for July to September but in June you have the chance of snow, 2020 had a great deal of snow, far more than normal. For us, this was a real plus!
The early km’s are all climbing and uninspiring but there are some wonderful views. Once the ‘D’ starts, the route becomes trail and you continue to climb eventually breaking out of the tree line. The immediate views over Hardangerfjord are quite amazing and breath tanking. It did not take long to realise why this was a favourite route of HM Queen Sonja, hence, The Queen’s Trail name.
Once high, the terrain has some undulations, but it is mostly flat with all the climbing coming in the early km’s. You will see from the run route below that we had snow for all the high sections and some snow on the descent to Lofthus. We had amazing weather, blue skies and plenty of heat. You really need to be careful of snow bridges, snow holes and potential danger and hazards. Best practice is to follow existing footsteps and pay attention to markers. Some ‘D’ or blue markers will be missing because of the snow but navigation is not a problem.
At all points, the Hardangerfjord is to your right and the views are stunning. On occasion you are brought to the edge of the plateau. Take time to stop, look over and soak up how incredible the vistas are.
You will find breathtaking views of the Sørfjord, Odda, the Folgefonna Glacier, Hardanger Bridge and Eidfjord. You can also see all the way over to Kvanndal and Utne, and along the fjord to Kinsarvik.
Water is available at several points via streams, waterfalls or melting snow. Take the opportunity to replenish bottles.
Before the highpoint of the route, there is a little climbing with some fixed rope, it’s nothing too scary or dramatic. Just use caution.
The high point is a square pile of stones (cairn) at 1107m which has a box on so that you can sign the book inside to confirm you were there.
From here, it is mostly descending all the way back to Lofthus. You will eventually switch from blue ‘D’ or dots to red ‘T.’ The descent is steep, winding, may have snow and includes the ‘Monk Steps.’ Open expansive trail eventually becomes tree covered.
Keep descending down. You will pass through a car park for those who wish to climb up from Lofthus. Keep descending and you will pass the famous orchards of this area, you will finally join the main road next to the fjord. The route is done!
A public bus back to Kinsarvik leaves from opposite Hotel Ullensvang. Please check on timings, but our information was 1551, 1810 and 2100hrs. There is a cafe/ shop called Kompaen that serves food and drinks should you need to replenish after a hard day on the trails before heading back. Make sure you taste some local apple juice or cider.
At Kinsarvik, we had a picnic by the fjord and then headed to Odda and Odda Camping. This would allow us an early start the following day for Trolltunga.
Trolltunga
The Trolltunga (Trolls Tongue) is an iconic route in Norway. Formed about 10,000 years ago by glacier erosion it is considered one of the most spectacular cliffs in Norway. From the side, it quite literally looks like a tongue balancing 700m above the Ringedalsvatnet lake.
Considered as a ‘demanding’ route, the out-and-back can be estimated to take 8-12 hours and the typical season is June to September. Outside of this timing one must have a guide. This year, 2020, Norway has had a great deal of snow and unusually, this year’s route was pretty much 90% snow and we had strict instructions to adhere to the marked route.
Despite conditions, we found the route very runnable and the snow was perfect. We did the out-and-back in 4-hours, just under 5-hours with all the photo stops. And trust me, photo stops are compulsory!
For most, particularly with snow, this is a challenging route, mainly due to the 20km+ distance, elevation gain and at times, demanding terrain.
It is a very, very popular route and therefore is often extremely busy. However, Coronavirus greatly has impacted on tourists and visitors in 2020 and the normal busy trails were quiet.
There are three car parks with limited space, 30 cars at P3, 180 at P2 and 220 at P1, book in advance (here) and if possible stay at car park 3 (Mågelitopp.) This is closest to the trail head and costs 600 Nok (£50). Car park 2 is 500 Nok. Car parks open 0600 hrs. There are also shuttle buses from Odda/ Tyssedal to Skjeggedal and then Skjeggedal to Mågelitopp with a cost of appx 450 Nok. You may think these costs pricey, however, the money is used by the local community to cover the impact of tourism in the area.
Importantly, this is a high mountain route with highly changeable conditions. Go prepared with extra warm layers, gloves, hat, waterproofs, food and water. You can replenish water en-route from streams and waterfalls.
It is possible to start from Skjeggedal which adds 4.3km up and down to the route hiking (or you can get the shuttle) but we decided to miss this as we were adding the Glacier route to our afternoon.
Start early, if running, you have the potential to arrive at Trolltunga first and have great opportunities for photos. It has been known at busy periods to wait over an hour to get on the tongue for the ‘iconic’ photo. We actually started at 0800 and caught all the hikers ahead of us. We actually had at least 40-minutes at the tongue for photos and picnic before the next people arrived.
Skjeggedal to Mågelitopp is a steep tough climb and well-marked. From Mågelitopp, the start of the Trolltunga route is just below the car park, the route is clearly marked and relatively flat. It’s marshy to start with interspersed rocks. We had snow in these early sections, so, we were well aware that the whole route would be snow bound.
The first few km’s are arguably the toughest with 800m of vertical.
After the initial hard work, the trail rolls along, the snow conditions making our trip perfect. At all times, the views to your right are stunning with mountain vistas and the stunning Ringedalsvatnet lake.
For safety, there is a mountain outpost and two emergency huts/ shelters should you have a problem.
There is a twin waterfall, Tyssestrengene and Tyssehylen Lake to pass before arriving at Trolltunga.
The approach to Trolltunga is perfectly safe and not technical for an experienced outdoor person. However, if new to hiking and extreme environments, take a little time, move slowly and make sure of foot and hand holds. Hopefully, you may not have to wait for an opportunity to walk out on the tongue for your photo moment.
The return route is a reverse of the outward route.
Without snow, the route would be very different and in a personal opinion, less beautiful and dramatic. The snow added a real extra element to the journey, so, I would recommend attempting Trolltunga as early in June as possible.
Once back at the P3 car park we returned to our campsite for a relaxing lunch.
Buerbreen Glacier
The reason we chose P3 for Trolltunga was to allow us to do the out-and-back route to the Buerbreen Glacier which is a short drive from Odda.
The route is less than 6km and has appx 450m of vertical gain, but the route has a great mix of some technical terrain, fixed rope, water crossings and snow if you are lucky.
Leaving Odda, you head to Buer and continue up the road to eventually arrive at a car park. Cost is 150 Nok.
A gravel road starts the route from a farm. There is a plethora of animals around to entertain.
Entering the forest, the trail winds upwards continually with very little flat trail. Expect wet feet and the need to use ropes to ascend rock sections. If conditions are wet, take care.
Keep looking back as the views are wonderful, countered by the dominant glacier ahead. The route up does have some challenges with fixed ropes.
Eventually the trail stops with the glacier ahead. Do not be tempted to veer off the route and explore on the glacier. Needless to say, this requires a different skill level, specialist equipment and knowledge of the glacier and its conditions.
The panorama and views at the glacier are magical.
You return via the way you came.
At under 6km, it’s a great addition to the more adventurous morning at Trolltunga. Don’t underestimate this little hike. It’s a wonderful trail and the views are magical.
We returned to Odda Campsite for a relaxing evening.
Husedalen Valley
This route was not on our original plan; however, we were advised by locals that Husedalen Valley in June is incredible due to the melting snow and the succession of waterfalls.
Leaving Kinsarvik head up Husavegen Road and continue until you arrive at a parking area on the left.
The route is 12km +/- out and back with 630m+. The initial km’s are gravel road, first waterfall is called Tveitafossen.
The gravel road forks, take the right trail. You climb steeply next to a pipeline before entering forest trail.
The second waterfall is already visible, Nyastølfossen.
The views are incredible and the noise of the waterfall impressive. The trail rises steeply at times with some demanding trail. Nyastølfossen is hidden, peeping through the trees and then suddenly you get full views. Take time to stop, watch and take photos.
The third waterfall, Nykkjesøyfossen is located in a beautiful meadow. This is a popular wild camping spot with incredible views, so, keep this in mind. There is a small hut and also a public toilet here. The trail is easy to lose here but keep close to the water edge (on your right) and follow climbing and scrambling over the rocks. Eventually you will see the trail rise up.
The trail goes up again through trees and heads towards the 4th and final waterfall, Søtefossen. At times it’s easy to lose the route but in all honesty, you cannot get lost, just head for the waterfall. Eventually you can go no further as the 4th raging torrent forces you to sit down and watch its beauty.
You return via the same route.
This route is often listed as demanding, as always, this depends on experience and fitness. Estimated to take 5-6 hours we did the route in 3h 25m with continuous photo stops.
On returning to the car, we returned to the fjord at Kinsarvik for a lunch break and then we travelled over to Oksen to wild camp.
Oksen
The drive to Oksen takes you over the impressive Hardanger Bridge (toll payable 150 Nok) which is the longest suspension bridge in Norway at 1380m long.
Please note, once you have left Kinsarvik (or any other town for that matter) you will not pass any shops or supplies on the route to Oksen. It’s a narrow out-and-back road that passes close to the fjord and remote houses. Eventually you will drive up heading to ‘Tjoflot’ – continue along the winding road and eventually you will come to a dead end where parking is available. A fee is payable for parking.
Our suggestion is to arrive late afternoon or early evening and wild camp close to the car park or, start the climb of Oksen and after approximately 1-mile you will find a plateau with two huts, here is a good place to camp.
With either of the above options, you can start the climb of Oksen early the following morning ahead of other people arriving. We decided to camp near the car park as we wanted to do the whole climb in one go.
This route is very different to the previous day’s expeditions. It feels much more remote, exposed and has many similarities to a classic VK (vertical kilometer) route. You will climb just over 1000m+ in less than 5km to reach the summit.
We had dry weather but cloud and strong winds. Like the rest of the Hardanger area, once above a certain height, we had snow all the way to the summit making the journey extra special.
The early climbing is through forest as the trail winds up. Once you reach the plateau where the two huts are, the trail is now open and wide. The route is well marked but be careful in snow sections, at times it’s better to deviate on to firm/ harder ground.
The whole route is steep and especially so between 400-600m+ and after 800M+ with the route flattening out towards the summit.
At all times the views are incredible and arguably the views of Hardangerfjord, Sørfjorden, Granvinsfjorden, Eidfjorden and Samlafjorden are the best in the region.
The summit is marked with a stone cairn signifying the altitude of 1241m.
Take time to explore the summit and look at the different views. There is a stunning vista of the suspension bridge too.
At the summit you have options to extend your route. This was our original plan; however, snow and weather conditions were very unpredictable, and we decided (correctly) not to take risks and continue.
Had we had crampons and ice axe; we most certainly would have continued to Ingebjørgfjellet (passing Oksatjorni) which is signposted from the summit (5.4km away). The route is not marked, so, you need map and compass or a GPS. I use the ‘Footpath’ app on my iPhone which works excellently. Maps.me and ViewRanger are others to consider.
The return to the car is via the way you came, unfortunately, due to road access and a lack of public transport there is no other option. As an alternative, it is possible to climb Oksen from Hamre, however, you need to use a different road to access this area. The route up goes via Seljesete and Seljenuten.
The route is considered demanding with a time allowance of 7-hours. As mentioned previously, with good fitness and mountain experience it is perfectly feasible to do the route in under 3-hours even with plenty of photos.
We concluded our trip with a detour travelling back to Oslo. The weather was perfect, and we were not eager to return home when another night camping was possible. We called at Vøringfossen (here) which is an impressive waterfall towering 182m high.
We then continued to Ringericke and climbed up the Mørkonga gully to then camp high next to a lake for a final night.
RECOMMENDATIONS
Never underestimate the mountains and the environment in which you are exploring. June in particular is the start of the hiking season and as such, snow can be a factor on all of the above routes. This adds an additional potential for injury and problems. Particularly as the snow is melting and this can create snow holes, snow bridges and crevices. Do not take any risks and follow established routes and existing footprints.
Make sure you call in the Tourist Office in Kinsarvik and discuss your route options and take advice on current conditions and dangers.
It may be 30deg next to the fjord and glorious sunshine, but at the summit, it can be below zero, blowing a gale and torrential rain. You must take personal responsibility and be prepared for all conditions. At a minimum please take:
Suitable pack
Hat
Gloves
Warm insulated layer
Warm trousers
Waterproof jacket/ pants
Food for the duration of the hike and some contingency
1,5 ltrs of water (which can be replenished on all the routes via streams/ waterfalls)
Take water purification tablets as a just in case and consider a water purifier such as MSR TrailShot (here)
Map/ Compass
Charged mobile phone with a suitable App such as ‘Footpath’ (here)
Cash/ Card
Garmin InReach or similar
Plan your routes, be realistic on timings and always start early. One of the huge advantages of outdoor activity in Norway is daylight. In June, it is light at 0300 and goes dark after 2200 hrs.
CONCLUSION
Hardanger is a paradise.
Quite simply, if you do the route options above, not only will you see some of the most amazing views ever, you will be rewarded with wonderful challenging days that will provide you with a lifetime of memories.
Weather, as always, is key. We chose our weather window and traveled to the area knowing that we would be rewarded with great conditions.
Of course, if you are making a special trip to the area, you will need to take the weather you are given. Although it is great to have a plan, be prepared for that plan to change based on weather conditions and personal safety. We were desperate to travel to Ingebjørgfjellet after Oksen summit but made a sensible call and retreated.
The mountains and trails are going nowhere, always remember this!
The routes provided are achievable for all with enough allocated time based on individual experience and fitness.
Due to Covid-19, we experienced considerably quieter trails. On many occasions we were completely alone. Having spoken with locals and others, this is not normal! So, be prepared for more people when you venture to this area, especially Trolltunga.
For us, camping enhances the experience and brings you closer to the nature and environment. However, this is campervan heaven, and should you need a hotel, many are available.
Needless to say, we have picked highlights of the area and there is more to explore, but that will be another article!
This area would be fantastic for a Fastpacking trip, read here about equipment.
I am fortunate to have travelled the world, experienced mountains, summits and trails in iconic locations. Norway may not have any peaks/ summits that can compete with the Alps, Pyrenees or the Himalayas, but what it does have is the most incredible views.
I can honestly say, our mini trip to Hardanger is one of the most rewarding ever!
Special thanks to Abelone Lyng who was my partner in crime. Abe is the ‘muse’ in all the photos, the girl with a big smile and yes, these trails would have been a little less magic without her to enjoy the journey. She was also the inspiration for the trip and it is thanks to her we visited these amazing places.
Please support this website. I believe everyone deserves to read quality, independent and factual articles – that’s why this website is open to all. Free press has never been so vital. I hope I can keep providing independent articles with your help. Any contribution, however big or small, is so valuable to help finance regular content. Please support me on Patreon HERE.
The penultimate day of our training camp was a cracker and one that many of the camp attendees have called a highlight.
Our first run was between 8-10 miles and included a climb, traverse and descent of the Montana Soo. It’s a great route and one that pushes many out of their comfort zone as the terrain is often steep, technical and challenging with loose stones.
At the summit it provides a great photo opportunity with Club La Santa off to the right in the distance.
For the more experienced runners, they move fast over the terrain embracing the challenge that it brings. Others move slower, more deliberate and thoughtful. We include it in the camp as it closely replicates the feeling and exposure that one can get at the large Djebel at Marathon des Sables.
After the mountain loop, we all returned back to CLS for a 3 hour break before a self-sufficient run. This is our mini multi-day experience that allows all our clients to run to a bivouac location in ability based groups with packs carrying sleeping bag, essential, dehydrated food for dinner and breakfast and a minimum of 1.5ltr of water. Most packs weigh around the 5kg mark.
We transport tents to the bivouac, rationed water and two gas burners to provide hot water for cooking. Once the runners leave CLS, they are self sufficient.
At the bivouac, they put up tents.
As the sun disappears they test out dehydrated food and simulate a bivouac experience. They understand the weather, the need for warmth and then they sleep under the stars.
Our night started perfectly with beautiful clear skies. Amazing star views and warm temperatures. As the night progressed, the wind increased and very much simulated a stormy night in the Sahara. For many, it was a sleepless night with shaking tents and sand being blown everywhere.
An early breakfast call, self-sufficient breakfast, water rations given and they were then off for another 13-miles of soft-sand and dune training before returning back to CLS.
Our final day has one final talk by Elisabet Barnes and Sondre Amdahl and then a group dinner to say farewell…
The next time we will all meet will be in Morocco for the 35th Marathon des Sables.
Our 2021 Training Camp will be announced soon HERE
This time last year I was making final preparations for my ‘Three High Passes‘ trek that included Renjo La, Cho La, Kongma La and the additions of Kala Patthar, Everest Base Camp and Ama Dablam Base Camp.
You can read about the route HERE and view photos HERE.
Having just returned from Nepal, this time visiting Mira Rai in her home village and working on Everest Trail Race (here). I was fueled to put a plan into action that I have contemplated for the last 12-months.
MERA PEAK, ISLAND PEAK and LOBUCHE EAST
Three 6000+ summits, in succession in a 16-20 day period.
It seems a logical progression for me, the peaks being considered entry level 6000’ers that are graded as ‘trekking peaks’and not ‘expedition peaks.’
To clarify, I have come to higher mountains and challenges as a natural progression. I am a runner who has been fortunate to get high, work in difficult places and organically push my boundaries. Of all the things I have done, my 2018 High Passes Trek was the most rewarding and it has left me wanting more.
‘Three Summits Expedition’
It’s not a project I will take lightly, and I have already started the necessary learning curves to hopefully make the 2020 Three Summits a success. I have three ascents of Toubkal (Morocco) under my belt, two in summer and more importantly, one in winter that will replicate many of the conditions I will encounter on Mera for example. I plan at least two trips (in winter) to Toubkal in early 2020. I have the first planned for January, the second probably in April. I also plan to climb Monte Rosa (4600m) in June and then if all plans fall together, hopefully Mont Blanc (4800m) in August.
In addition to the above I have signed up for ice climbing lessons, a winter skills weekend and a basic abseiling course. I don’t want to leave anything to chance and, in the process, I want to really enjoy the learning curve.
What will the ‘Three Summits’ entail?
The loop above shows an approximation of the route and the return leg after Lobuche may change as mentioned below. The total distance will be approximately 120-miles but it is hard to get a fixed figure on this, especially with so much vertical.
Arriving in Lukla, we would take the quiet trekking route to Thuli Kharka that includes crossing three passes: Kalo Himal 1st 4540m, Zatrwa La Pass 4620m and an unnamed pass at 4285m. Thank Tok follows, then Kothe (Namaste Lodge and Lama Lodge) may provide us with a lodge option? Thangnak leads to Khare and then base camp for Mera Peak.
Mera Peak at 6476m is the highest trekking peak in Nepal. A trek that leads though rhododendron forest trails of the Hinku Valley. Once acclimatized we will ascend to a high camp just below Mera La and prepare for an attempt on the central summit of Mera Peak (6461m).
Of all the peaks we will attempt on this expedition, Mera is not technically demanding but climbing at this altitude is physically challenging, we will also need to be attentive to snow conditions and wait for an optimal weather window. From the summit, we will have perfect views of five of the six highest mountains on earth.
From Mera Peak we will descend to Base Camp and then the following day start our trek to Island Peak.
This section of the trek is arguably the most challenging with a crossing of Amphu Labtsa Pass, at an elevation 5845m. It is a glaciated pass covered in Serac cliffs. It is the only way out of the otherwise isolated Honku valley. The base of the valley is at 5,000m and has several glacial lakes including the Panch Pokhri or Five Sacred Lakes. The Amphu Labtsa Pass involves technical mountaineering and is Alpine Graded D (difficult). The ice and rock summit is exposed and the descent to the Imja Valley that will lead to Island Peak requires abseiling following a fixed rope. Arguably, the Amphu Labtsa Pass may be more challenging than the three summits on this expedition?
Island Peak is a classic 6000+ Himalayan Peak and graded PD+/AD which will require our team to use multiple skills that includes crampons, fixed ropes and potentially crossing ladders over crevasses. The attempt for summit will take place early morning (estimated at 2am) and will require many hours in darkness on steep ground covering scree, loose rocks and switchbacks. The final ascent to the summit is steep (40-55 deg) and will require fixed rope work (Ascender and carabiner on a cow tail rope) via mixed terrain: rock, snow and ice.
At the top of the headwall the summit ridge extends a further 250m to the small peak with amazing views looking back towards Ama Dablam. Because Island Peak is close up to the vast and dramatic south side of the Lhotse/Nuptse wall, Everest will not be visible. The climb down is a reverse of the way up and will require some abseiling on the upper sections. It is a single line abseil with no top roping. The lower one gets, the easier it becomes, and we will descend to base camp.
The next section of the trek will go to Chukhung and then Lobuche via one of the three‘High Passes’ – Kongma La.
Once at Lobuche, the final summit of Lobuche East at 6119m waits for us. Considered one of the more challenging trekking peaks in the Everest region our summit attempt will be made from high camp on the south ridge.
Once back at Lobuche, our expedition will then return to Lukla and the route/ schedule here is currently flexible based on time available. We are anticipating and attempting the whole route in a challenging 16-days; however, we will have 20-days available. This will allow us some contingency days for bad weather.
Route options for the return:
1. The most direct route will be to drop down to Dingboche, Pangboche and then take a high pass to Phortse. From here we will pass through the Khumjung Valley, Namche Bazaar and then take the main trekking route back to Lukla.
2. One other option would be to complete the ‘High Passes’ and from Lobuche take Cho La Pass to Gokyo and then Renjo La Pass to Thame. From here we would go to Namche Bazaar and then follow the main trekking route to Lukla.
Summary
The above is a challenge and one that is not taken for granted. The mountains are the boss and all I can do is plan accordingly. I have liaised with my contacts in Nepal, namely Pasang Sherpa who is a good friend. He has summited Everest twice, Ama Dablam many times and when it comes to the Himalayas, he is my Mr. Fixer. As such, he will be present on the expedition and have ultimate control of all aspects.
Our team will be small and personally selected with 4 and no more than 6 in the team. In addition, we will have Pasang and porters.
My ethos is to be self-sufficient as much as possible. I want and am happy to support the Nepali community and pay for porters. But I am not happy for me to carry 10kg and a porter carry 40kg. Therefore, I expect each member of the expedition to carry equal weight.
Altitude is a fickle beast and there are no guarantees. Fitness is not an indicator of how well one works above 4/5 and 6000m and in advance we will most definitely have group discussions on plans of how we work this in a real situation.
Our expedition will need individual plans so that we all understand what will happen when plans do not go as expected. For example, in a group of 4-6, it is not unreasonable for 1 person to have an issue on one or all of the ascents. We will need to have safety for 1 person (or more) to turnaround if required, while the others proceed to a summit.
There are little or no lodges between Lukla and Island Peak and what is available, may not be open in late November/ early December. Therefore, we will need to carry tents, cooking supplies and food for this section of the expedition.
Late November and early December will hopefully bring more stable weather, but we do run a risk of increased snowfall. It is also colder.
We will have specific equipment needs for each of the summit attempts in addition to what we will need for day-to-day trekking:
High altitude boots
Crampons
Helmet
Harness
Ice Axe
Cow Tail
Ascender
Carabiners
Departure date from Kathmandu to Lukla will be November 23rd (tbc). With the expedition taking 16-20 days. (We need to allow for 20 because we may not be able to summit due to bad weather.) Return to Kathmandu will be scheduled for Dec 12th.
Finally
This expedition is without doubt a challenge. It is going to push me to some new areas and in the process, I am going to learn not only new skills, but I am going to learn a great deal more about myself.
I plan to document the process in words and images. Lessons learnt, mistakes made and hopefully provide a platform for mutual learning.
With a New Year looming, I am excited to start it with my most adventurous project yet!


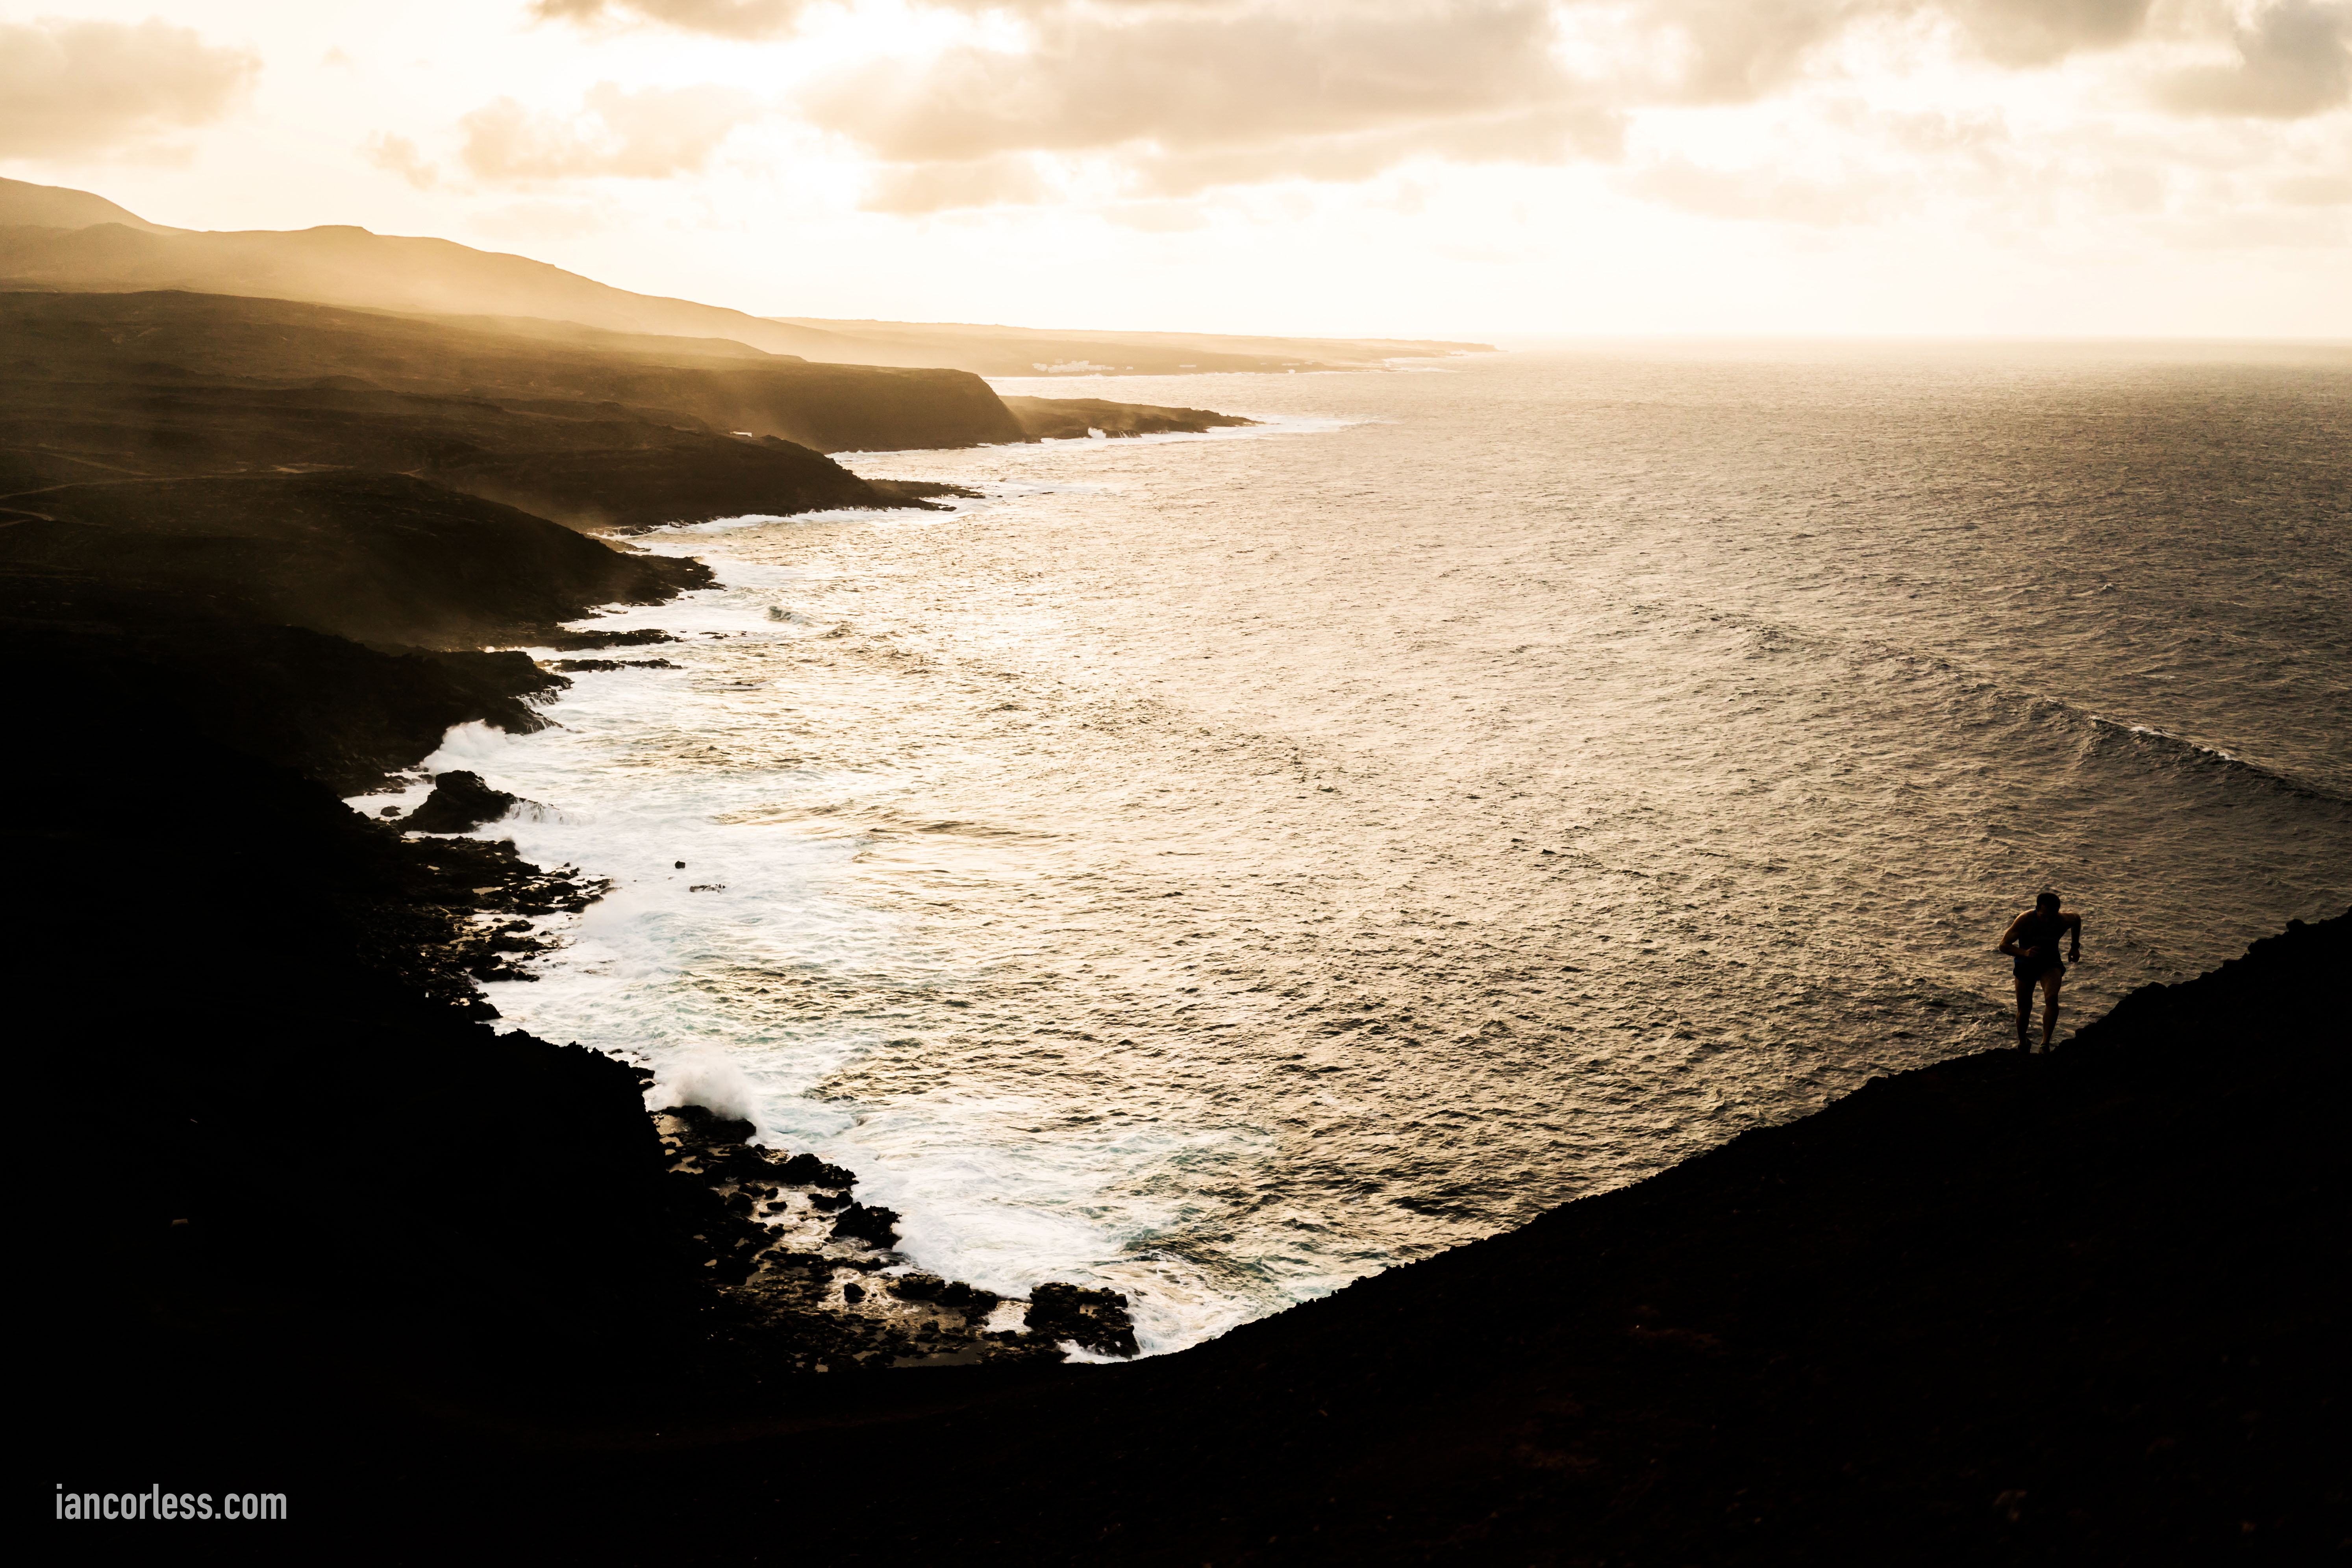
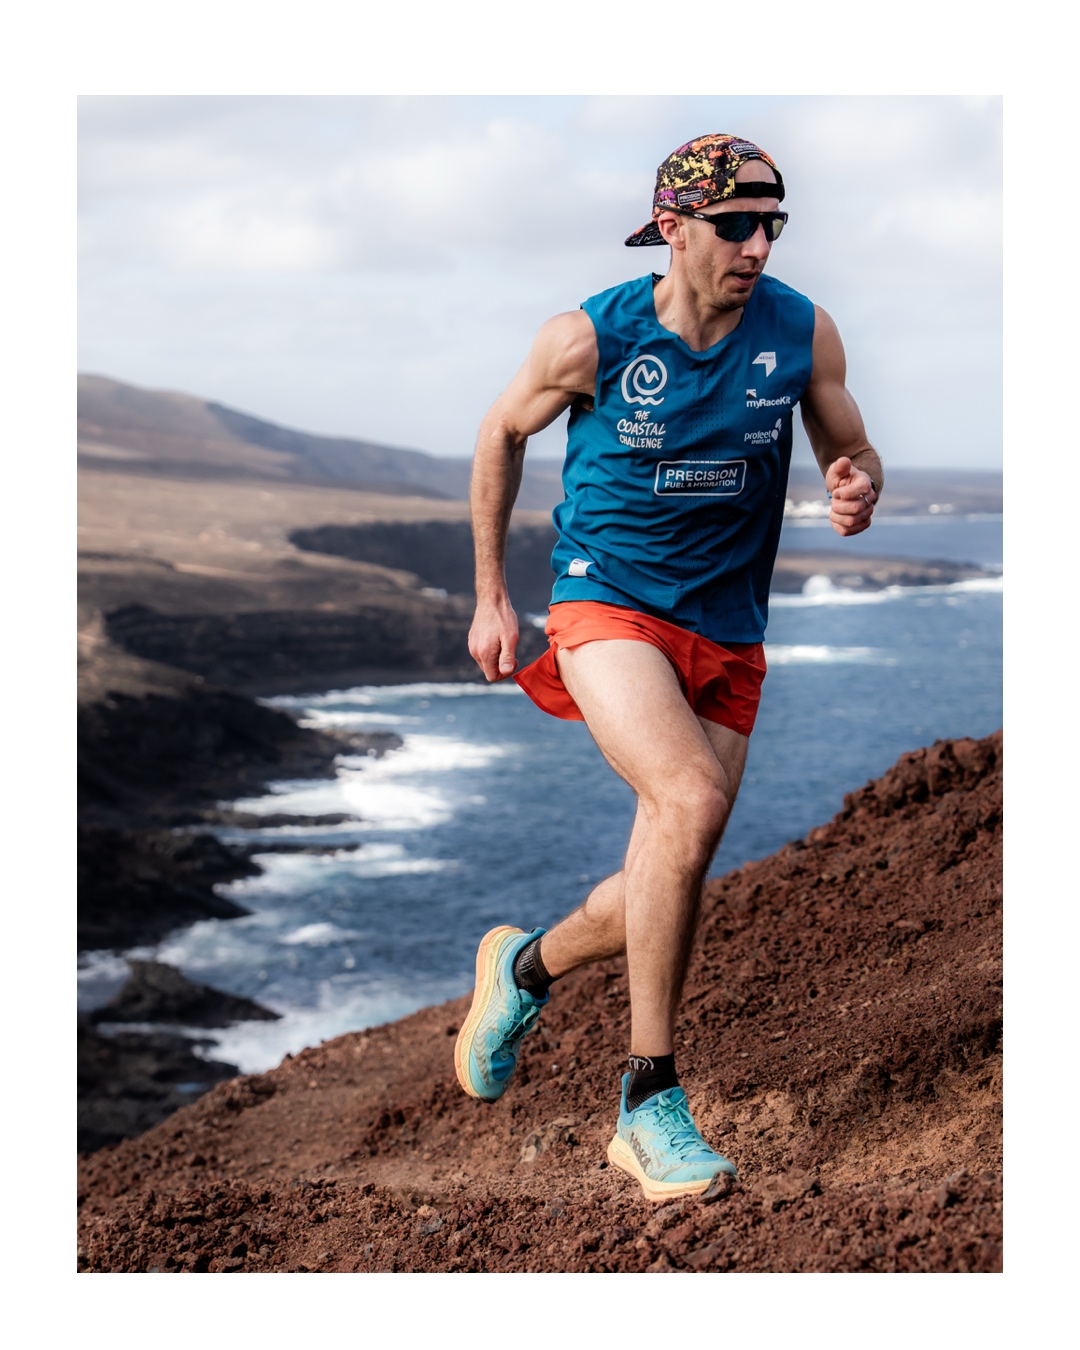
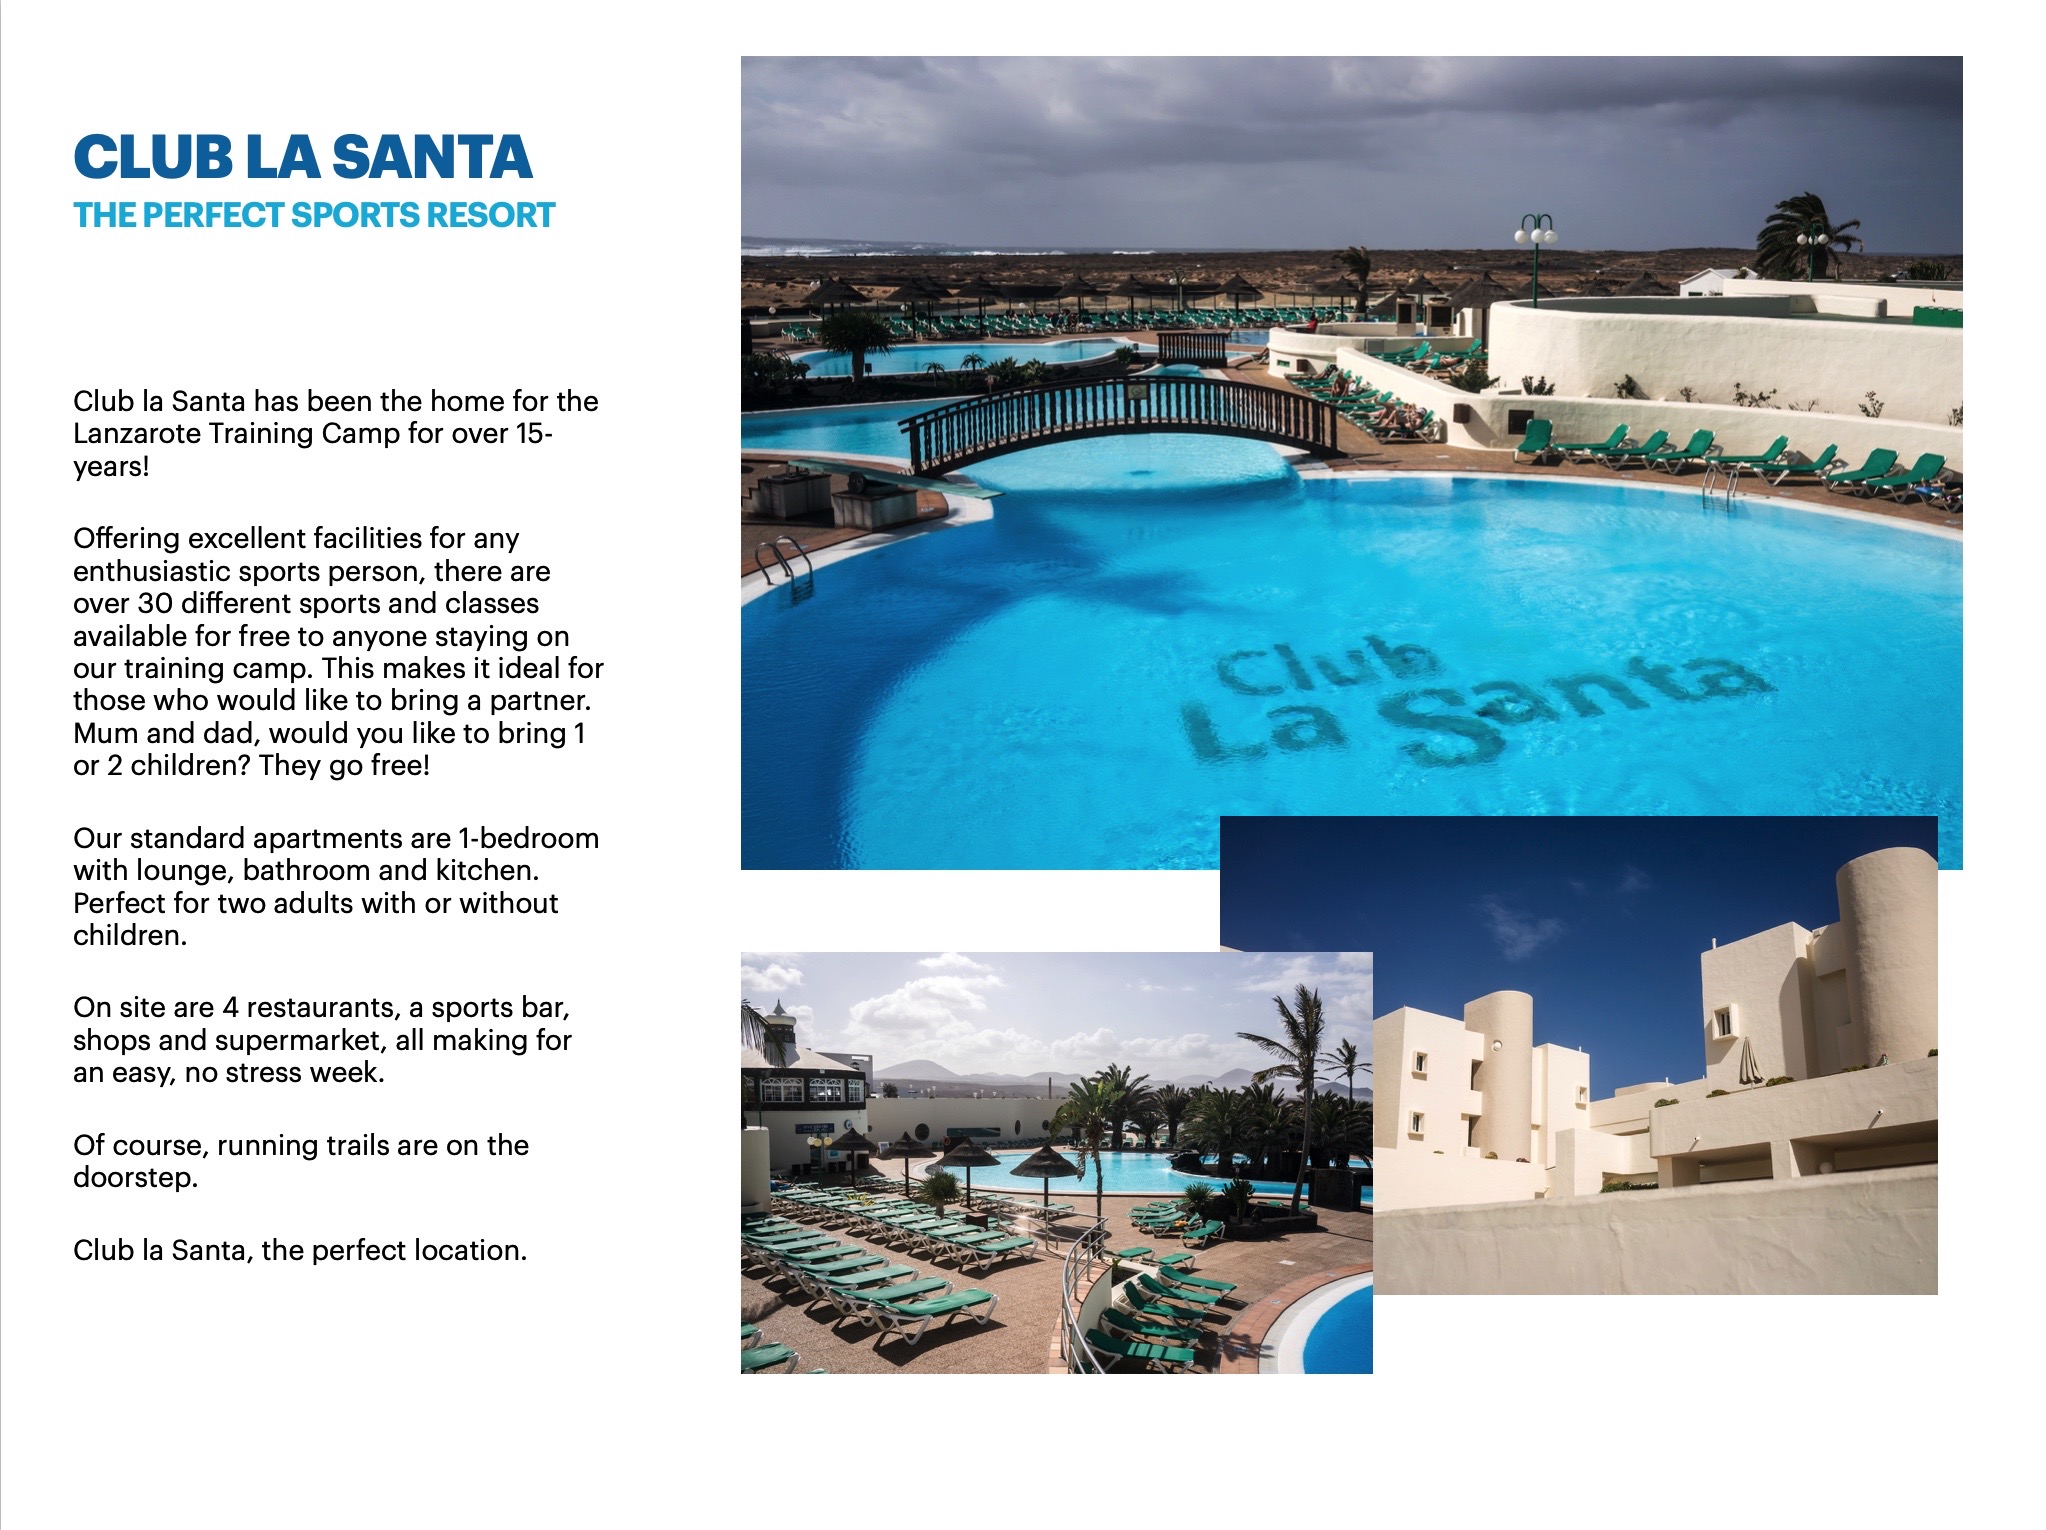
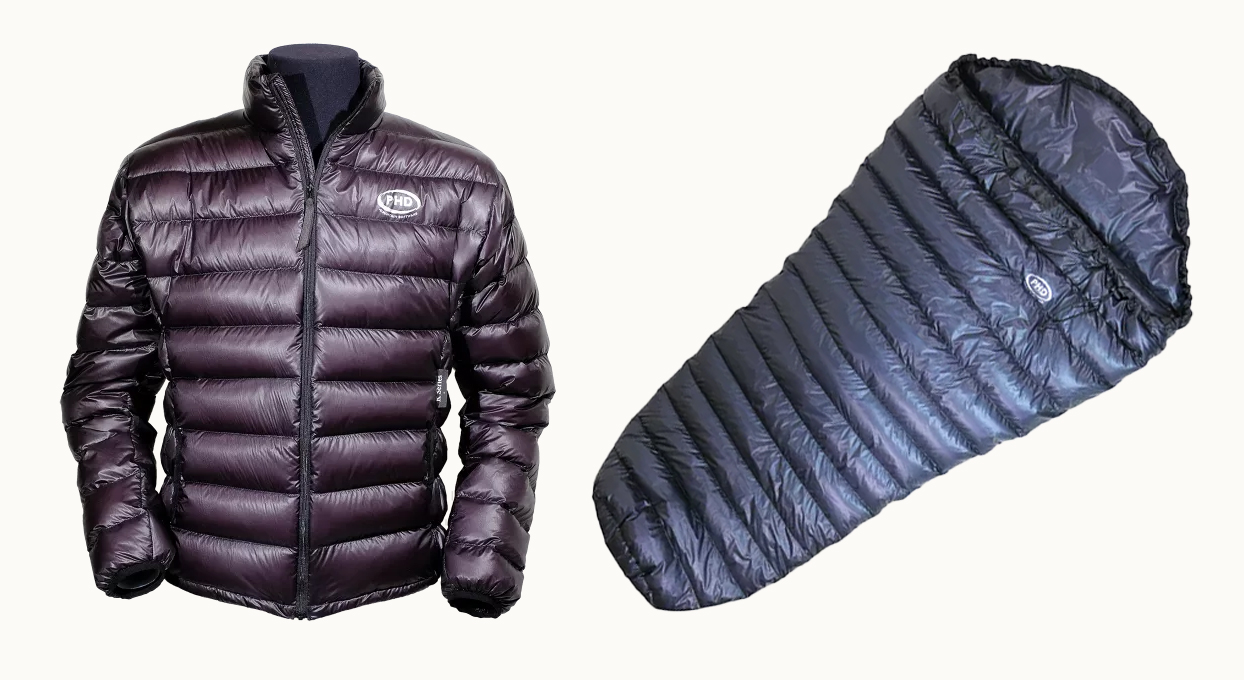


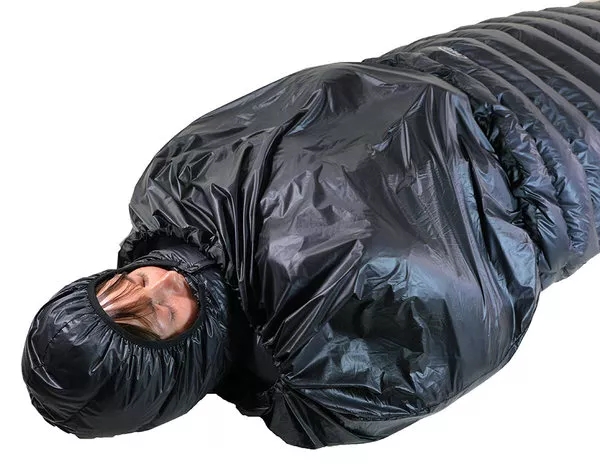

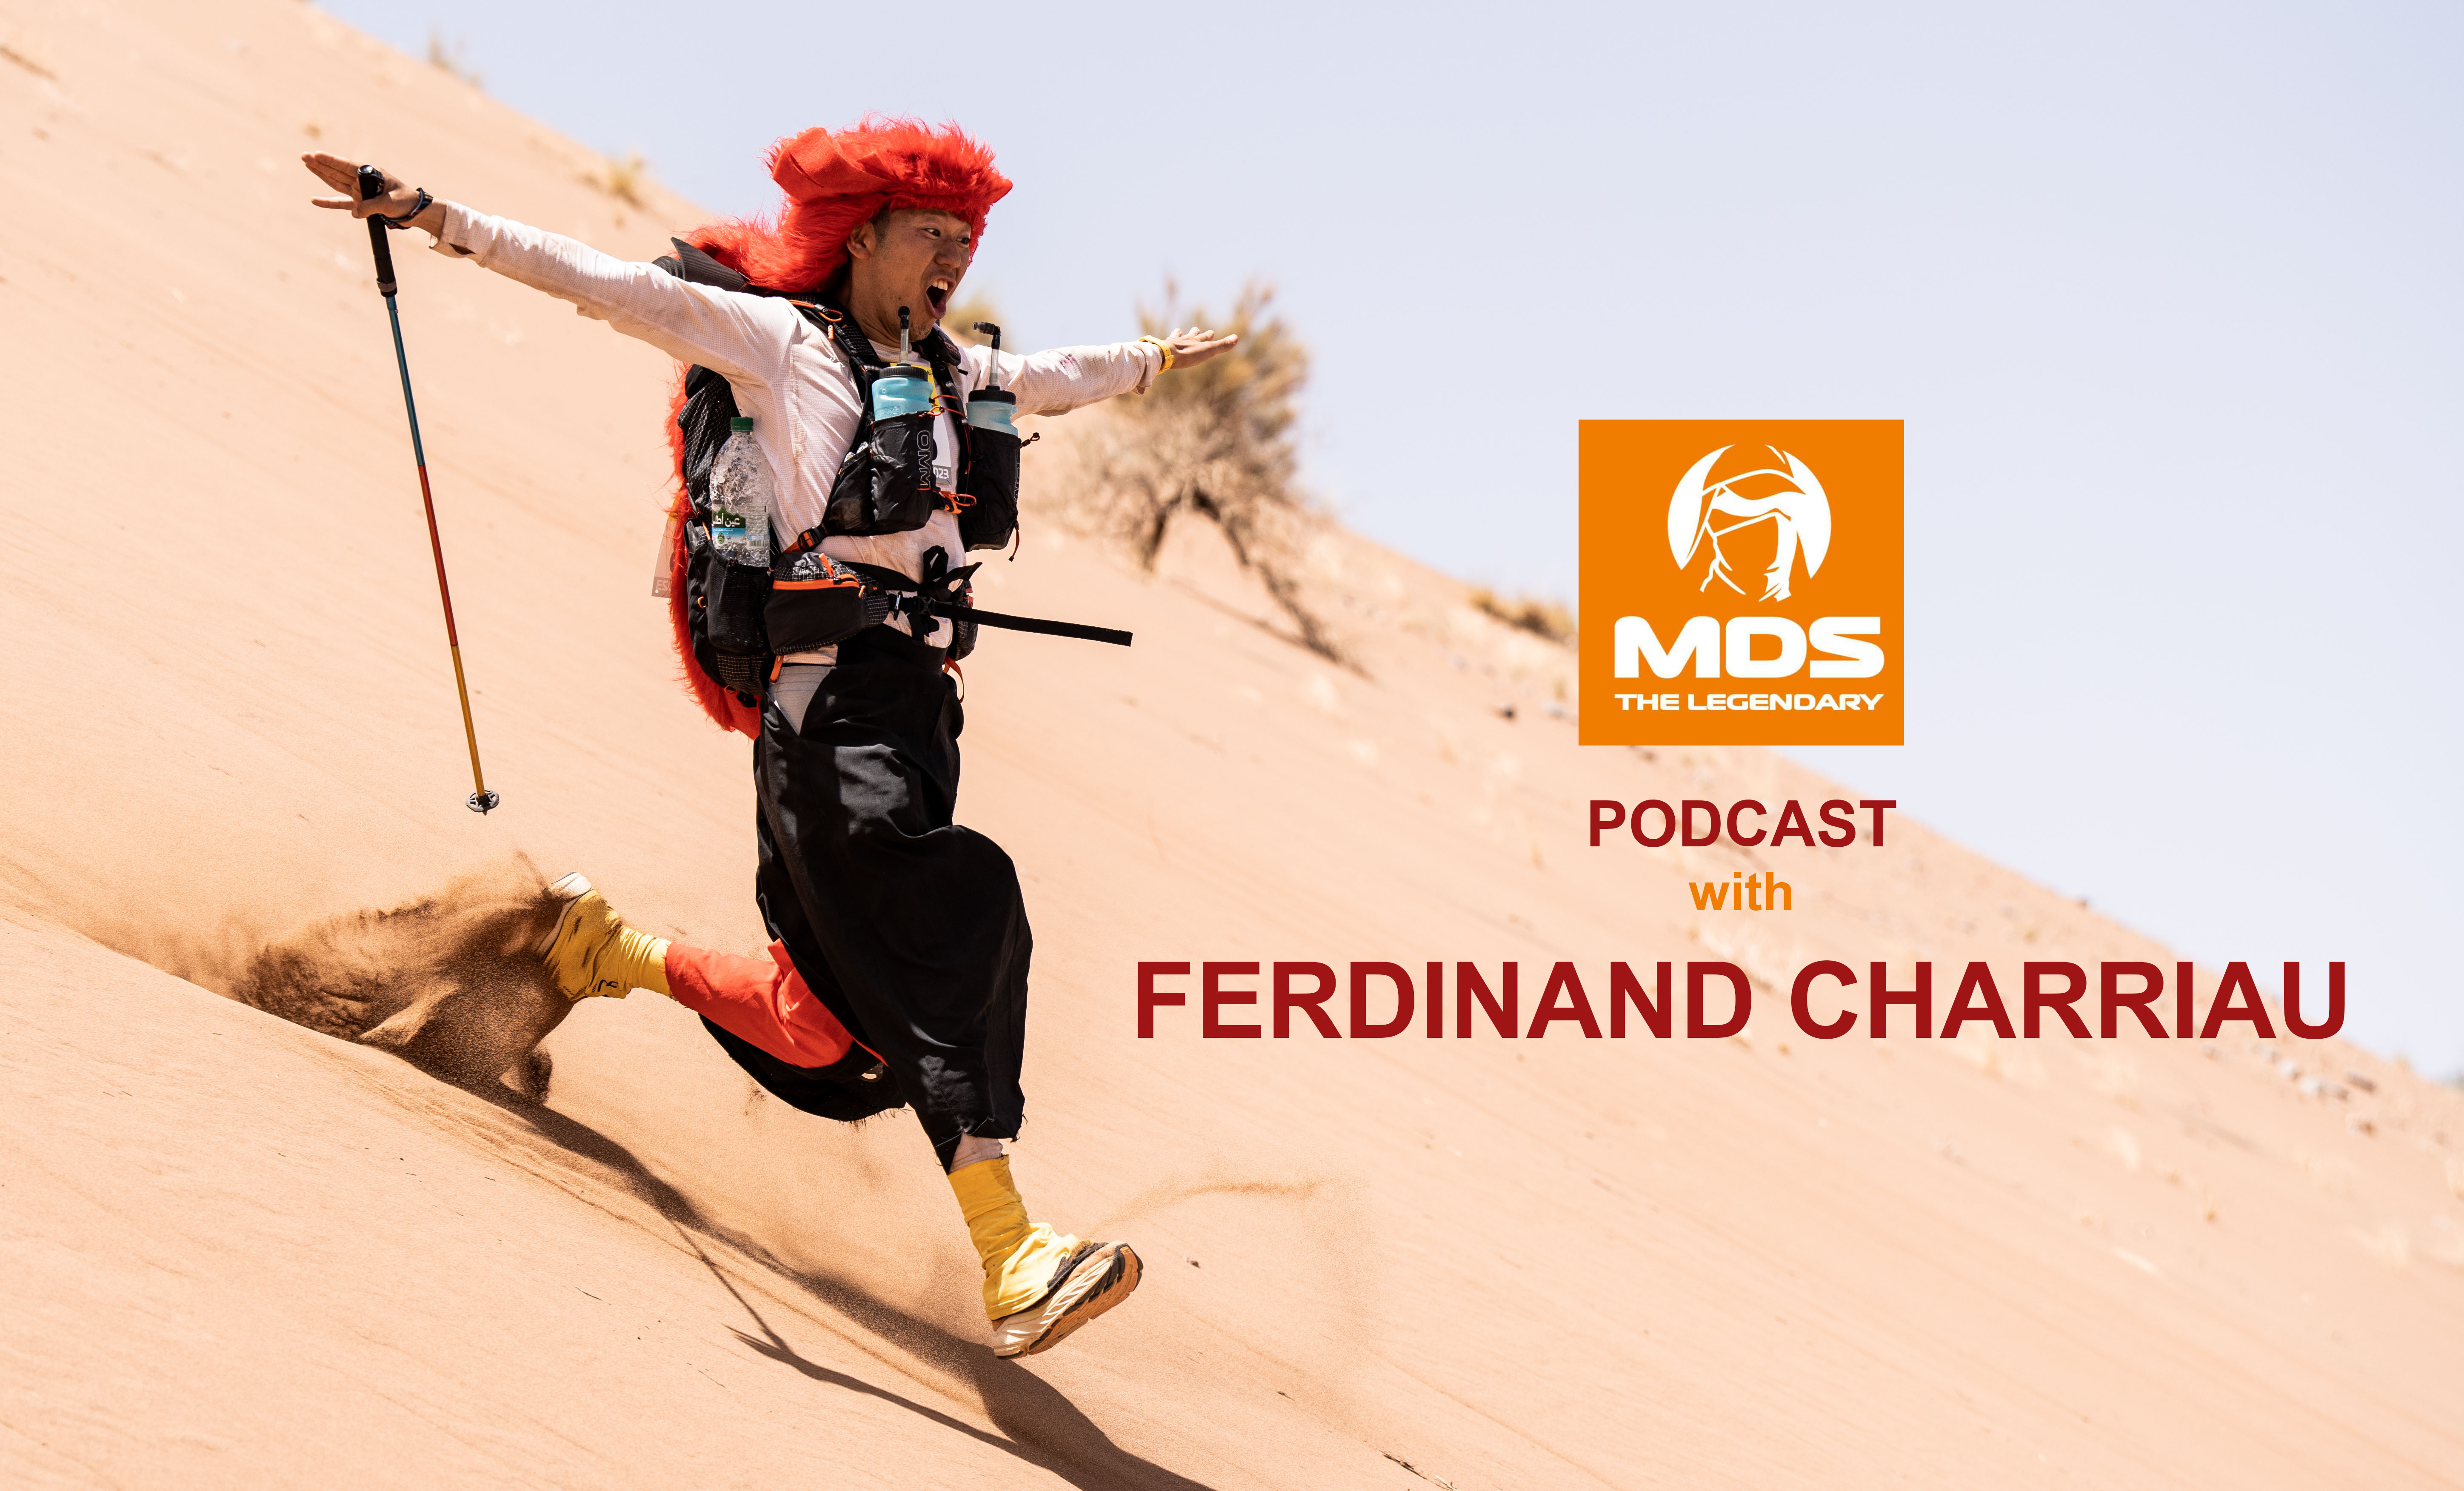


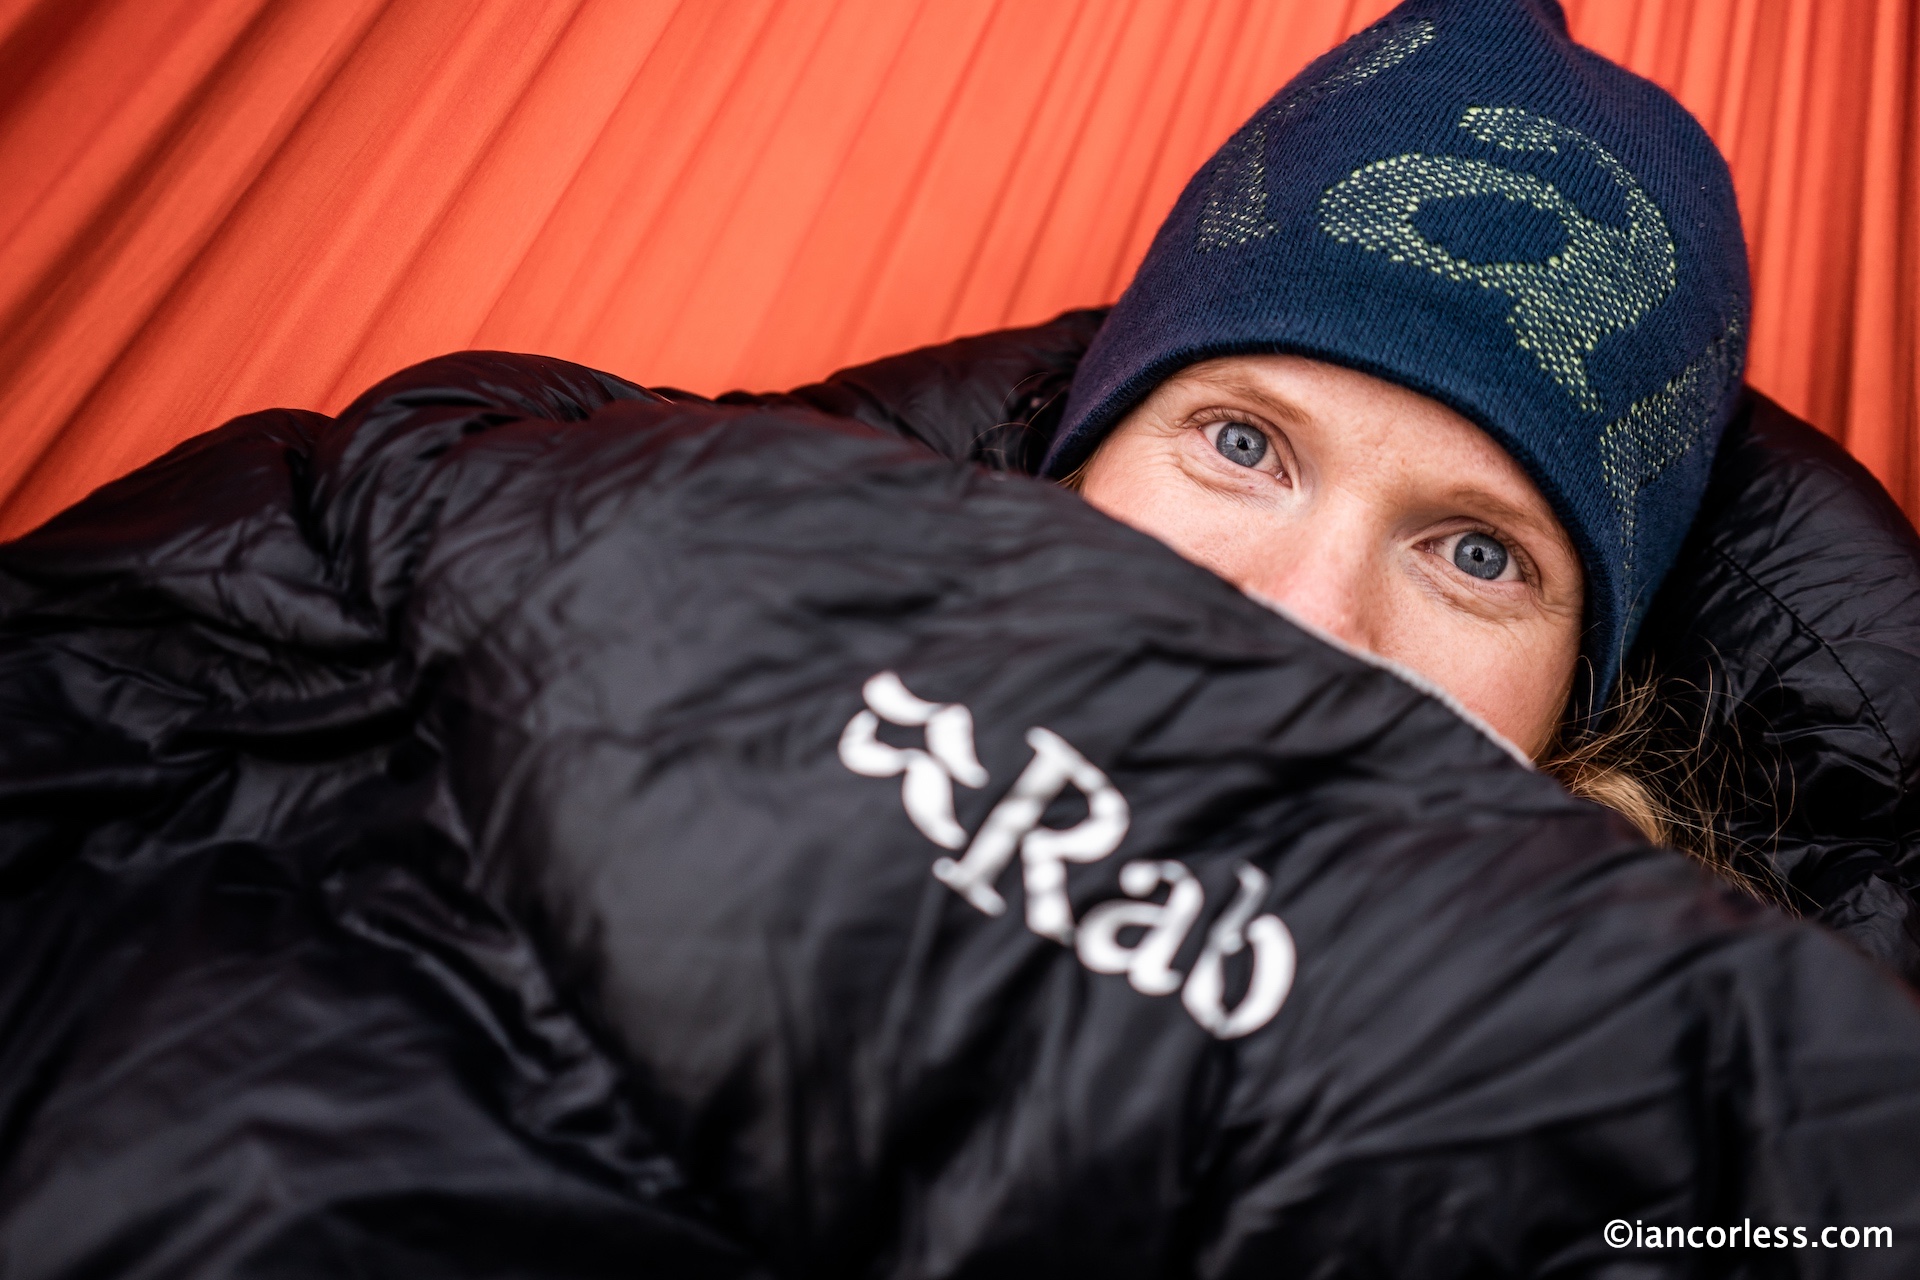


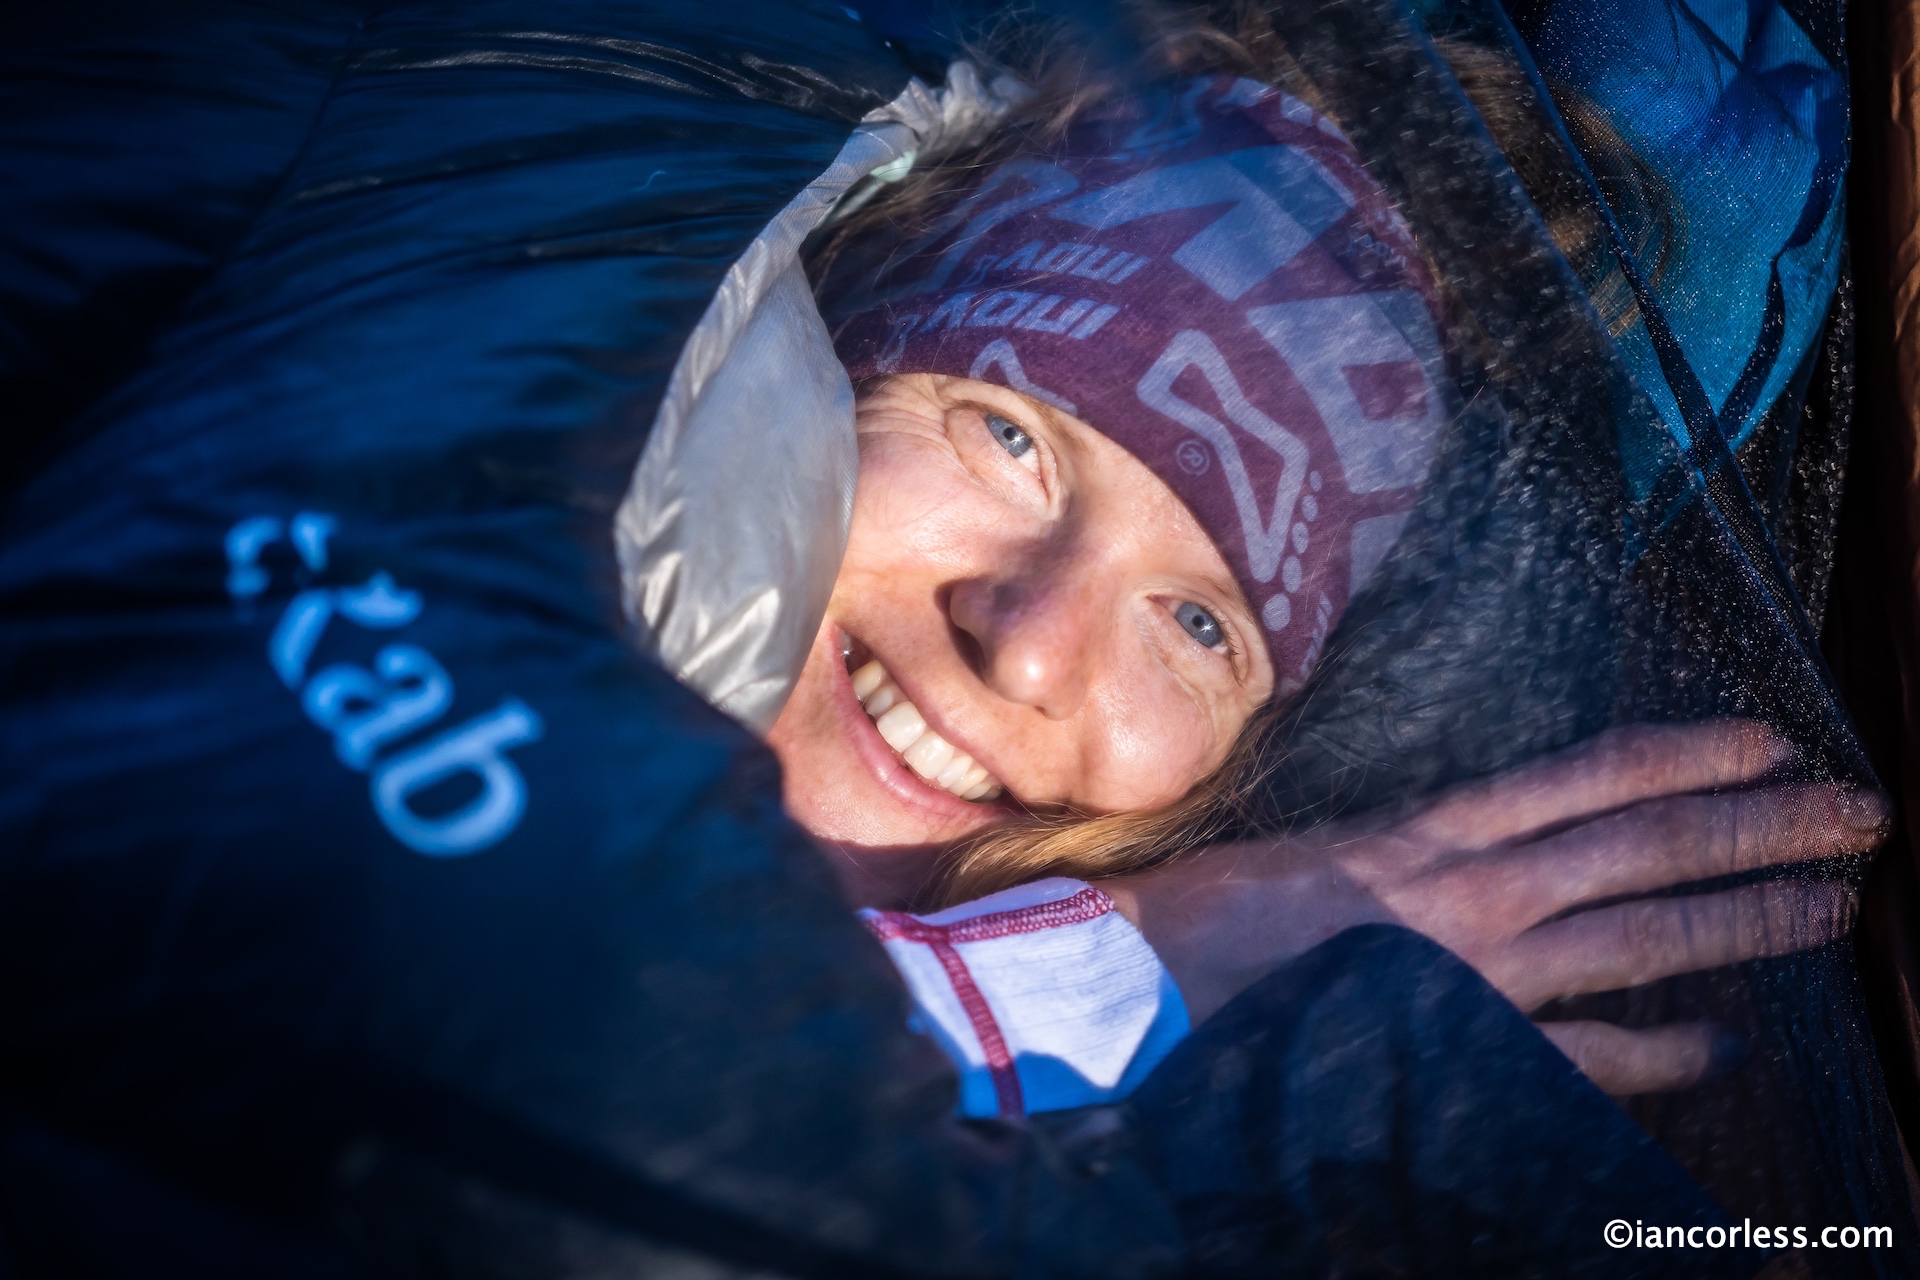


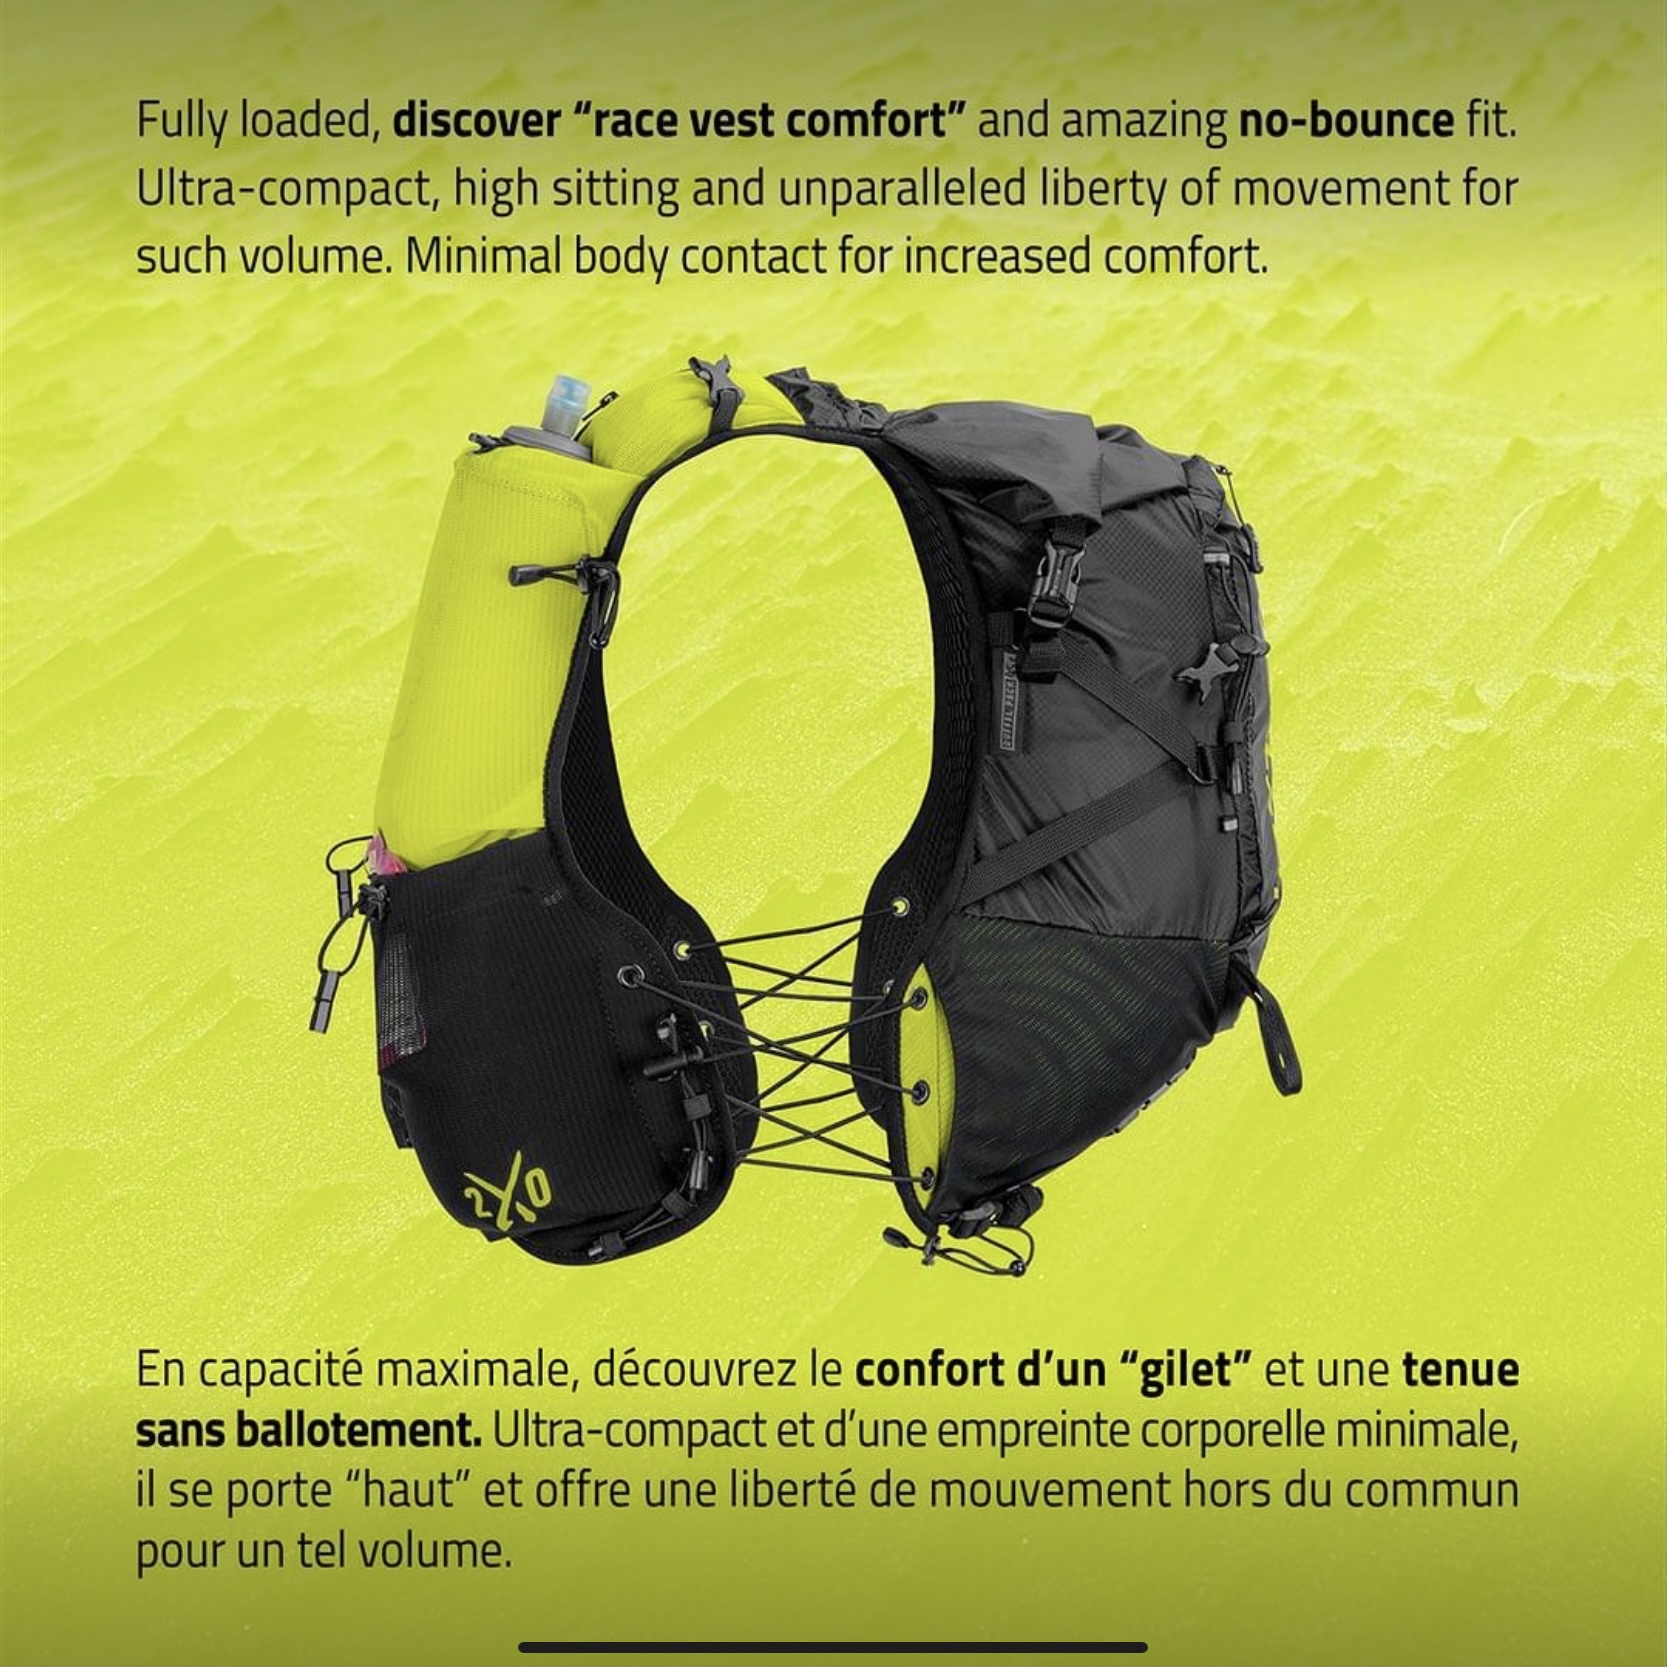
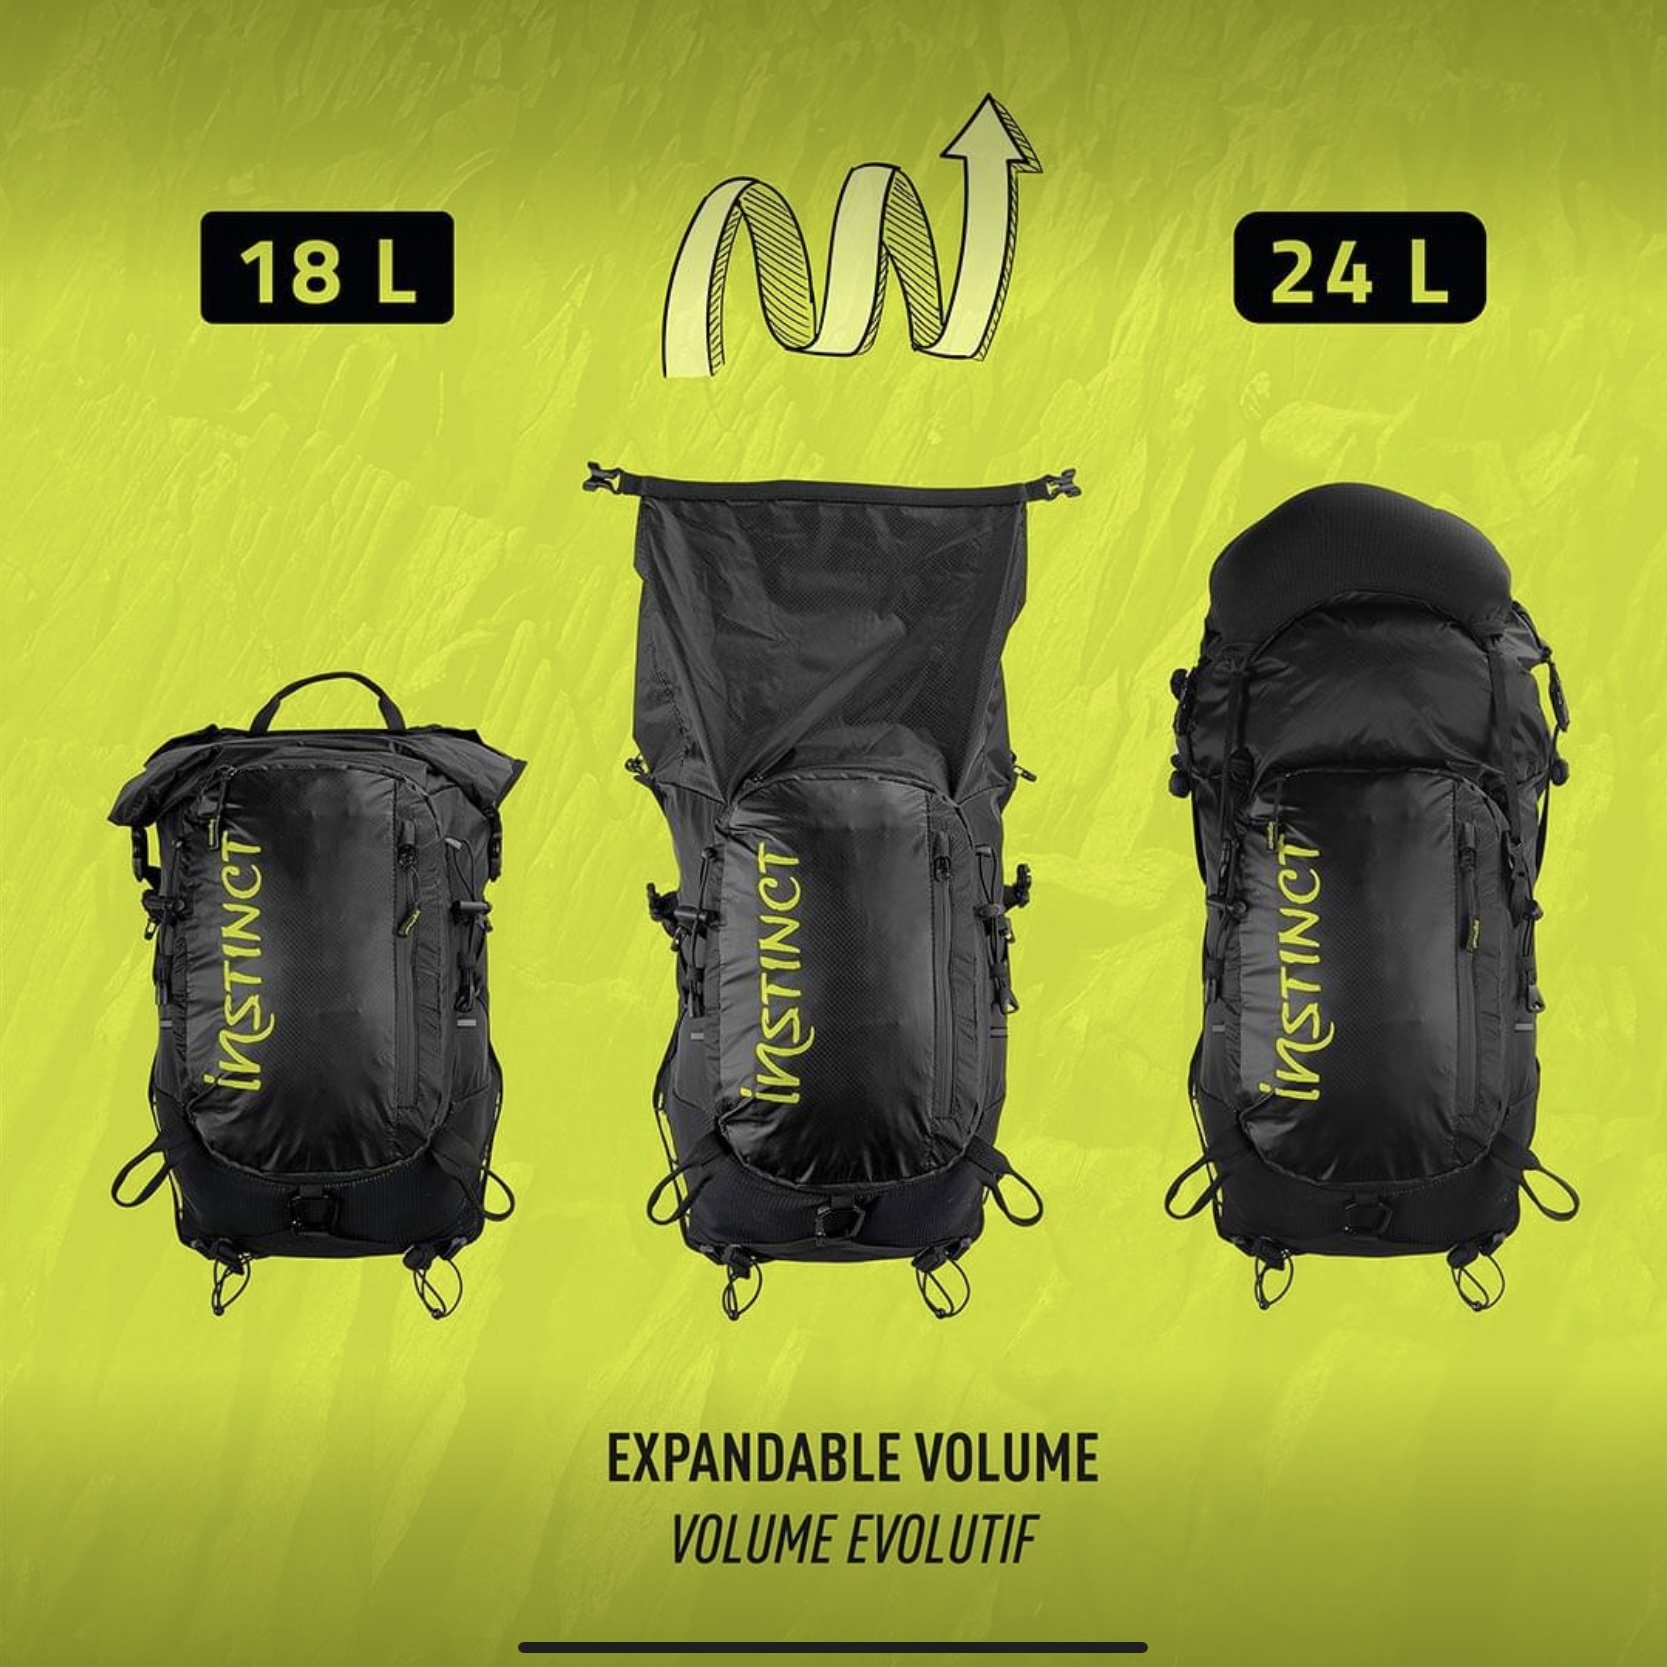

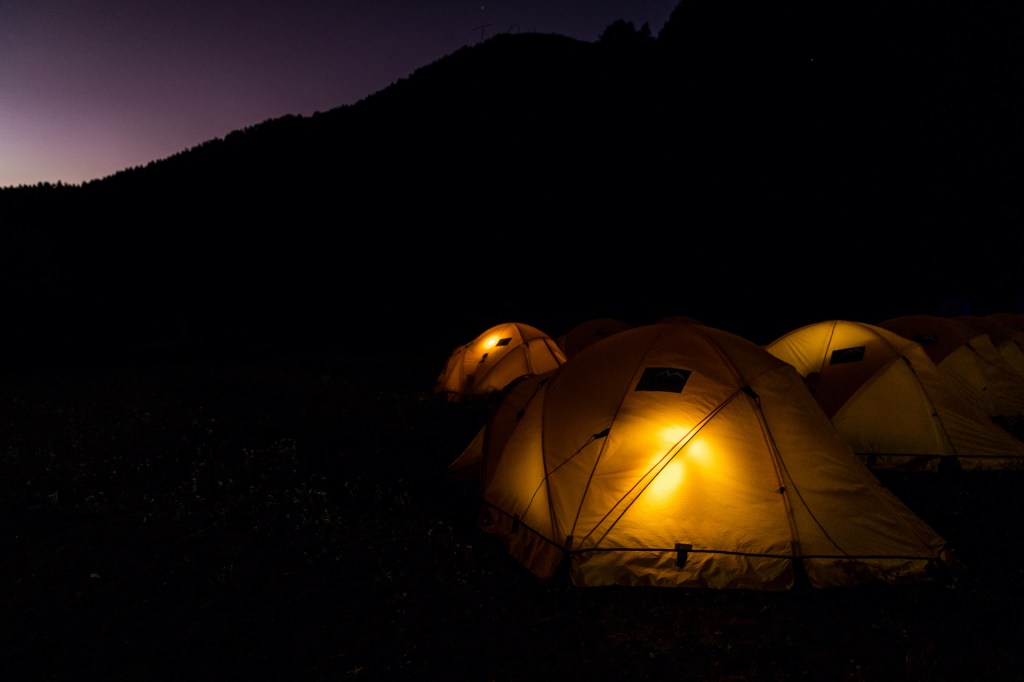

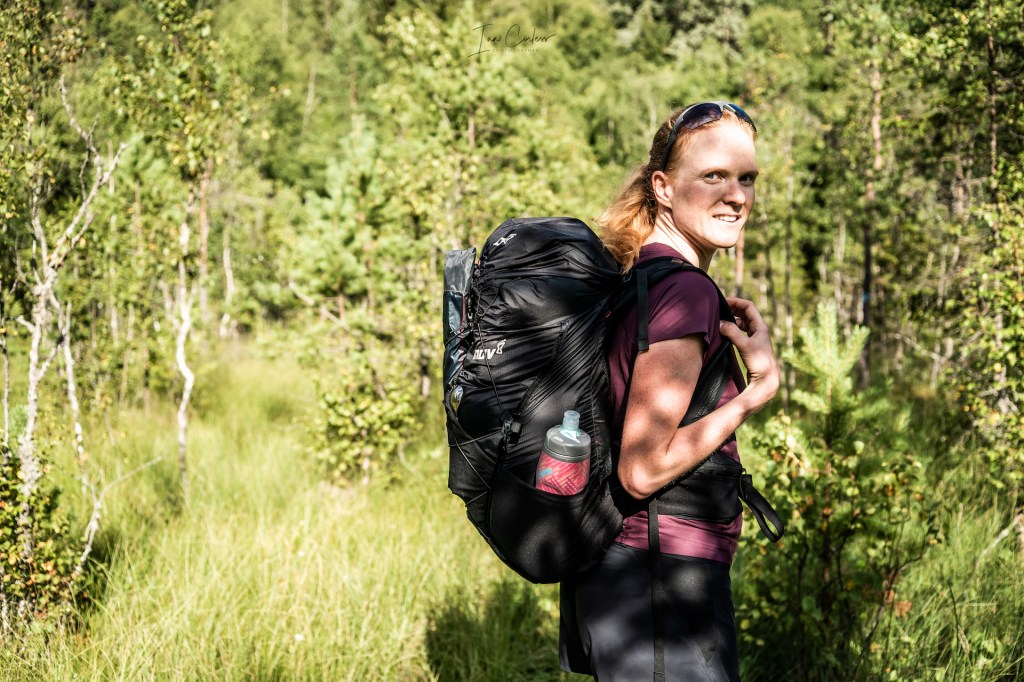
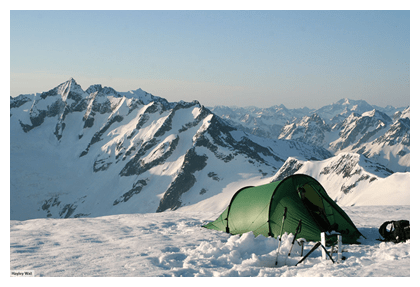
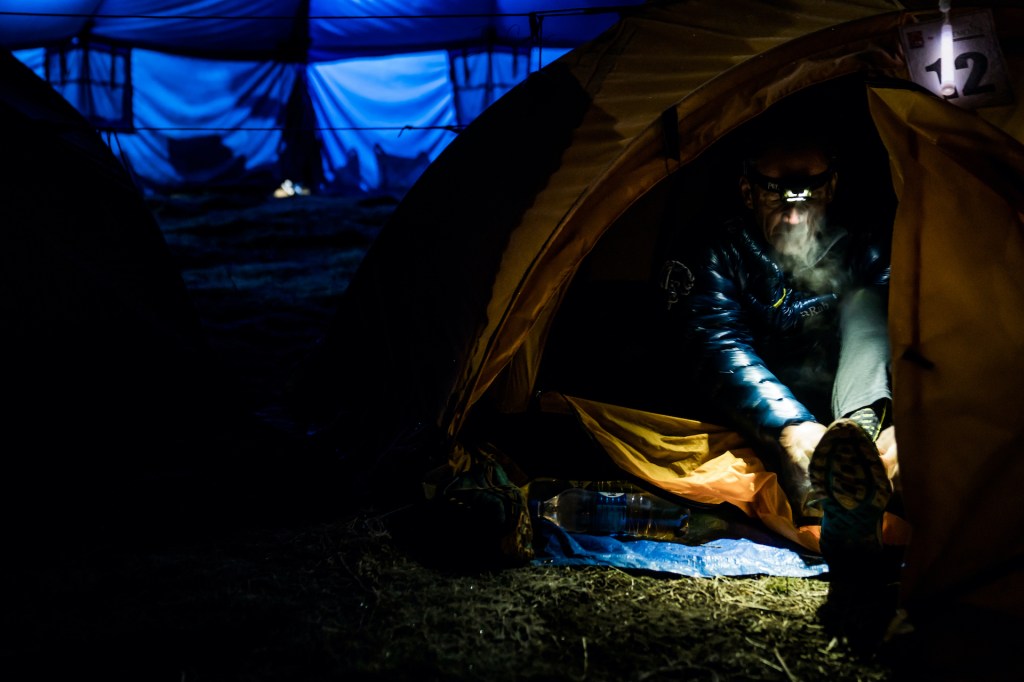
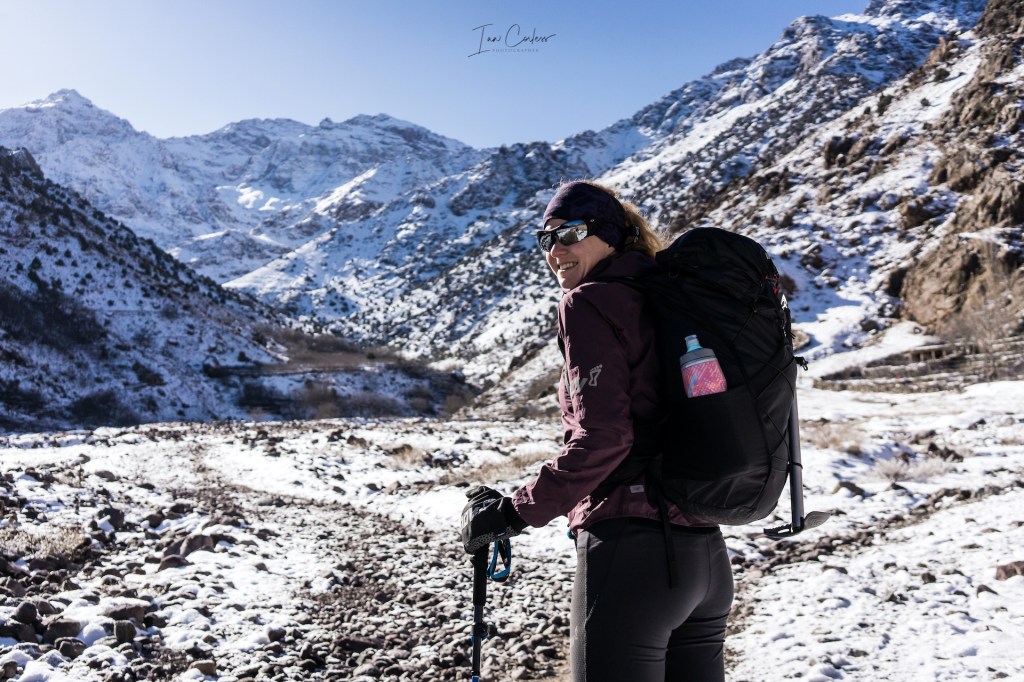
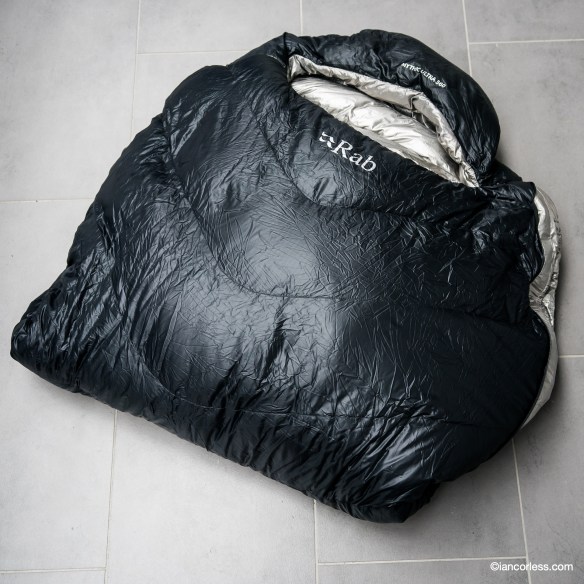

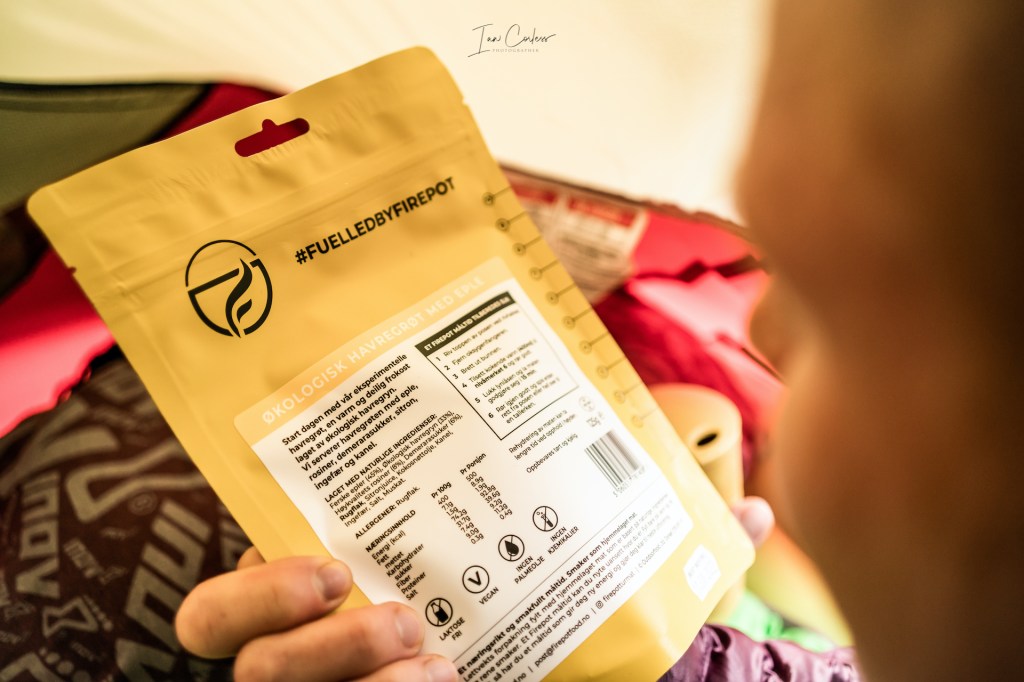
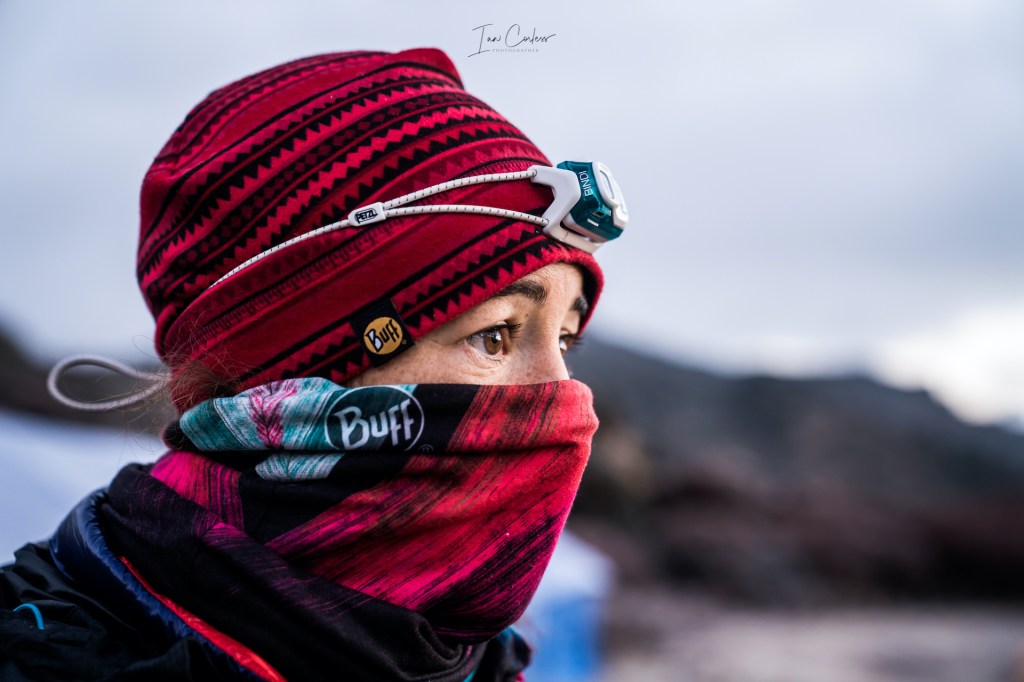
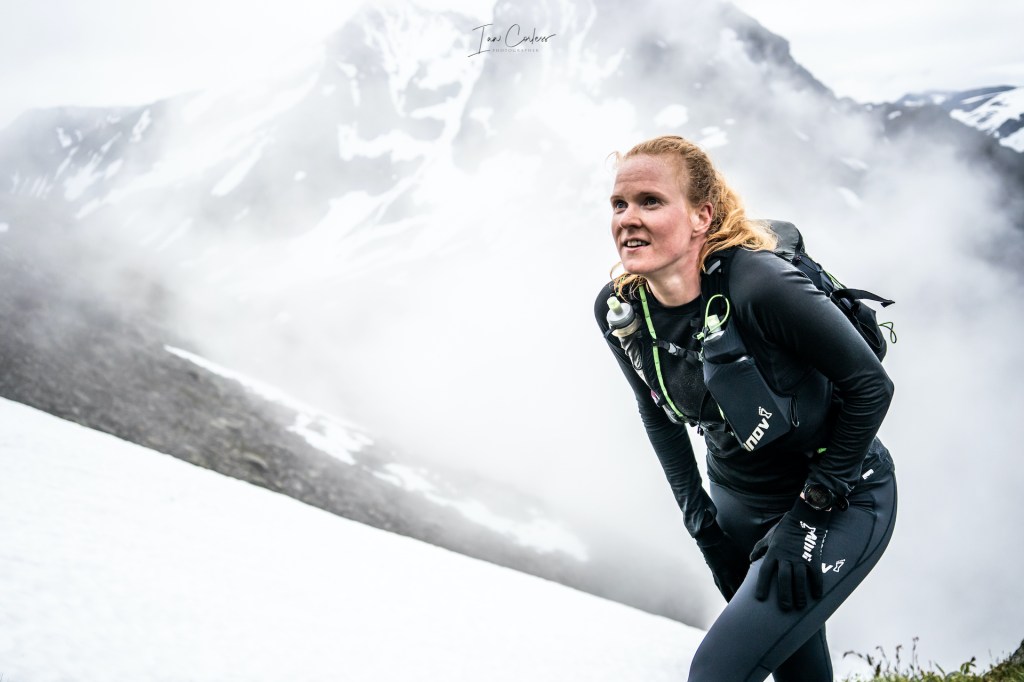
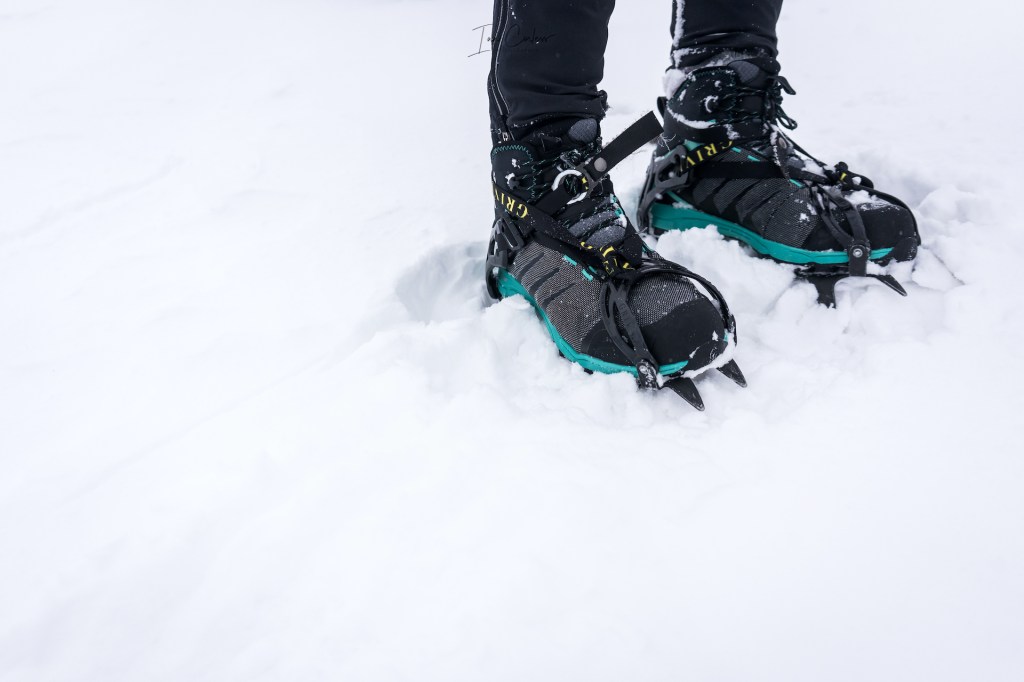
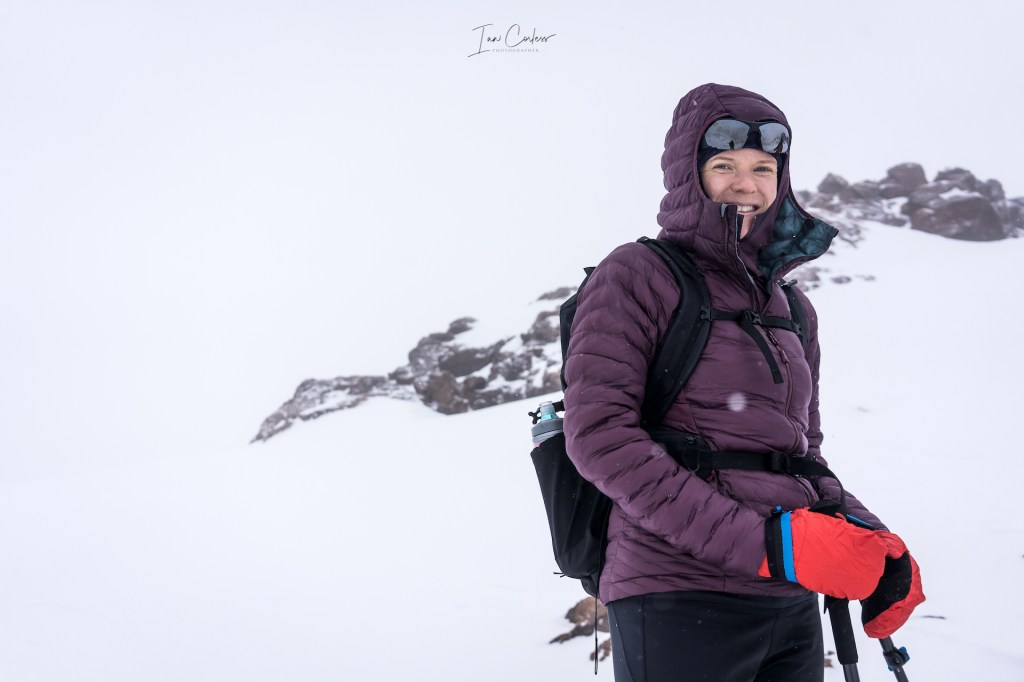
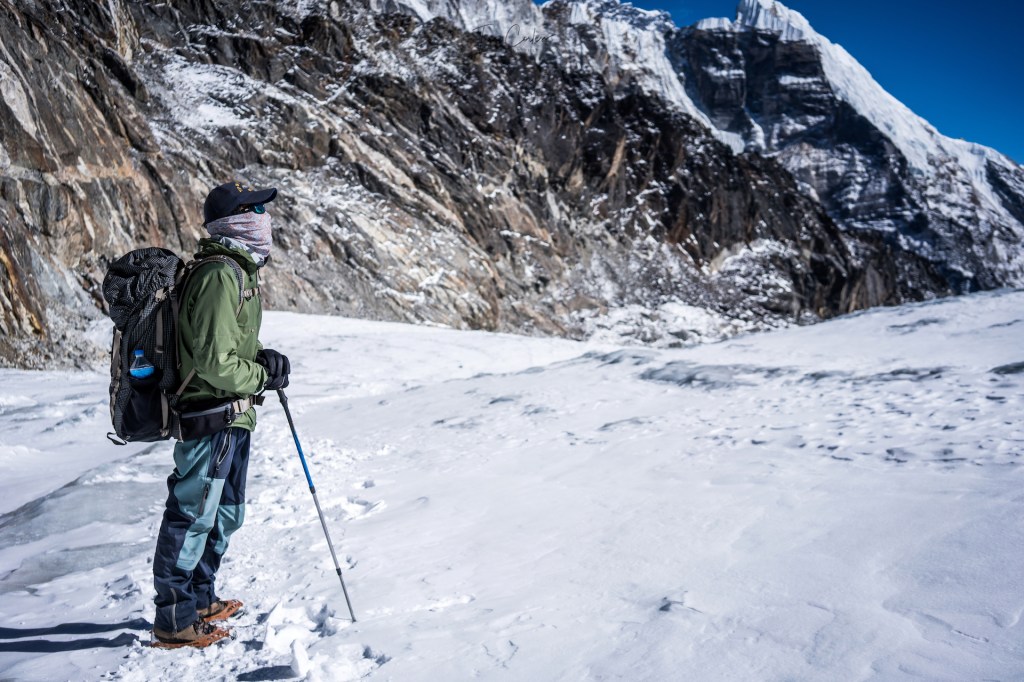
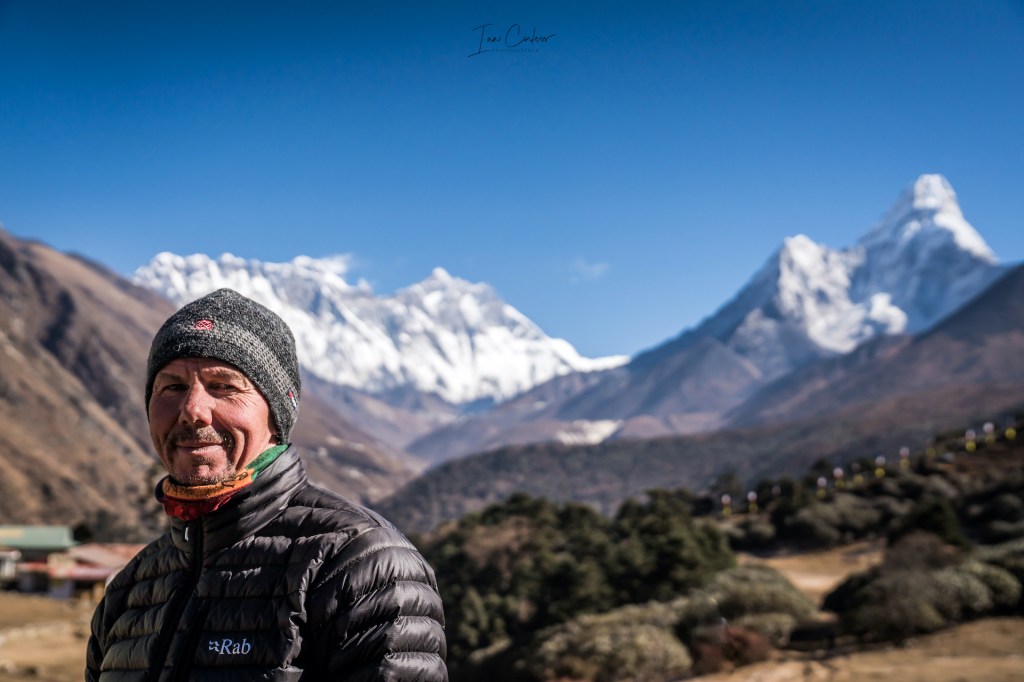

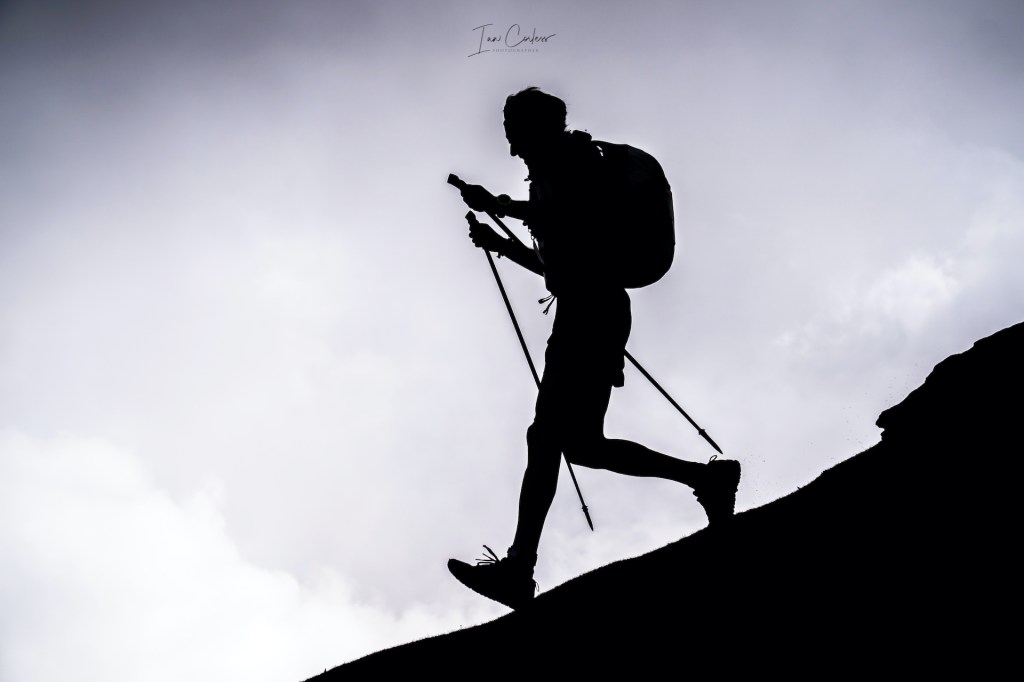
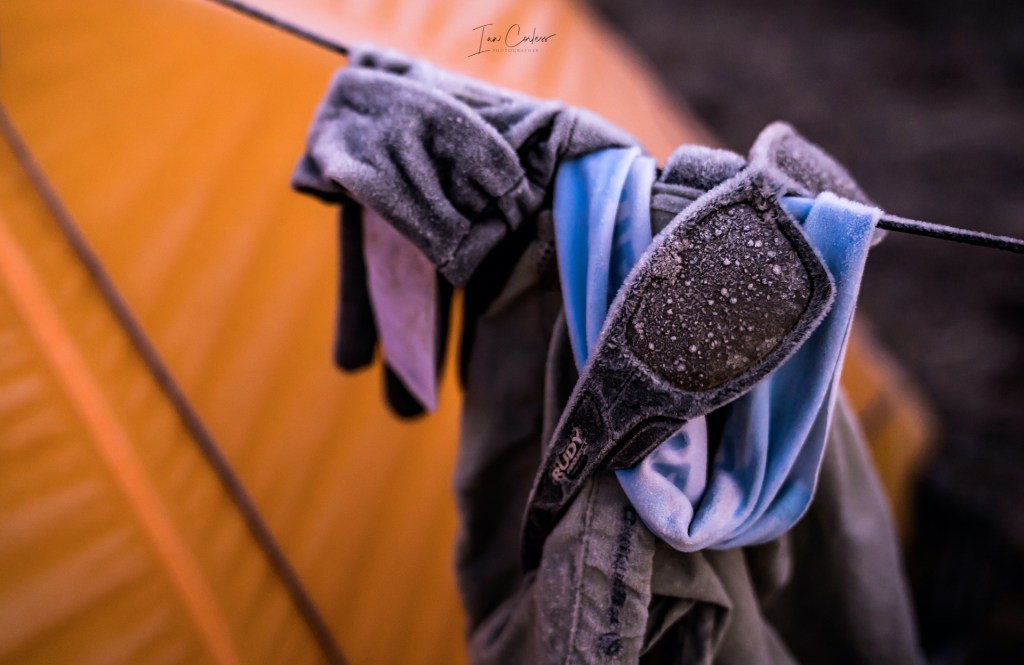
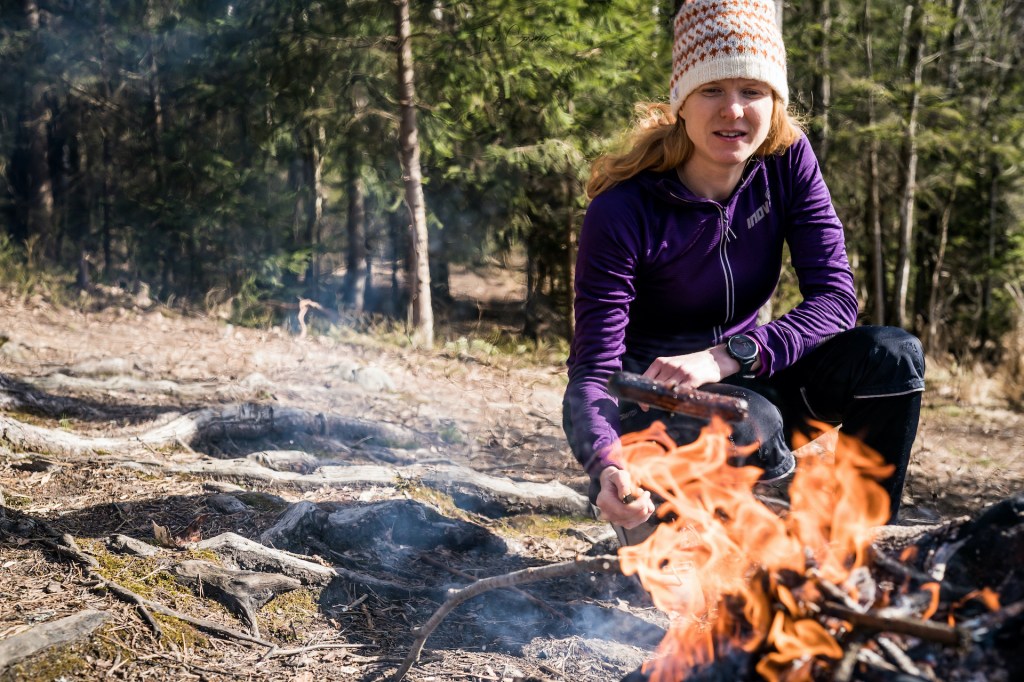
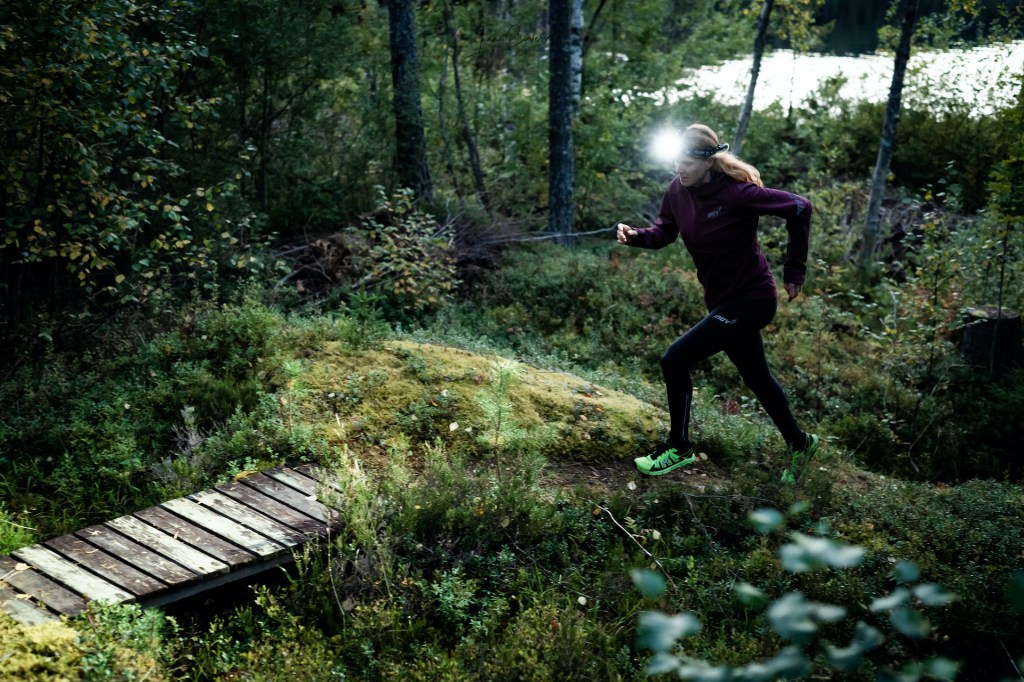
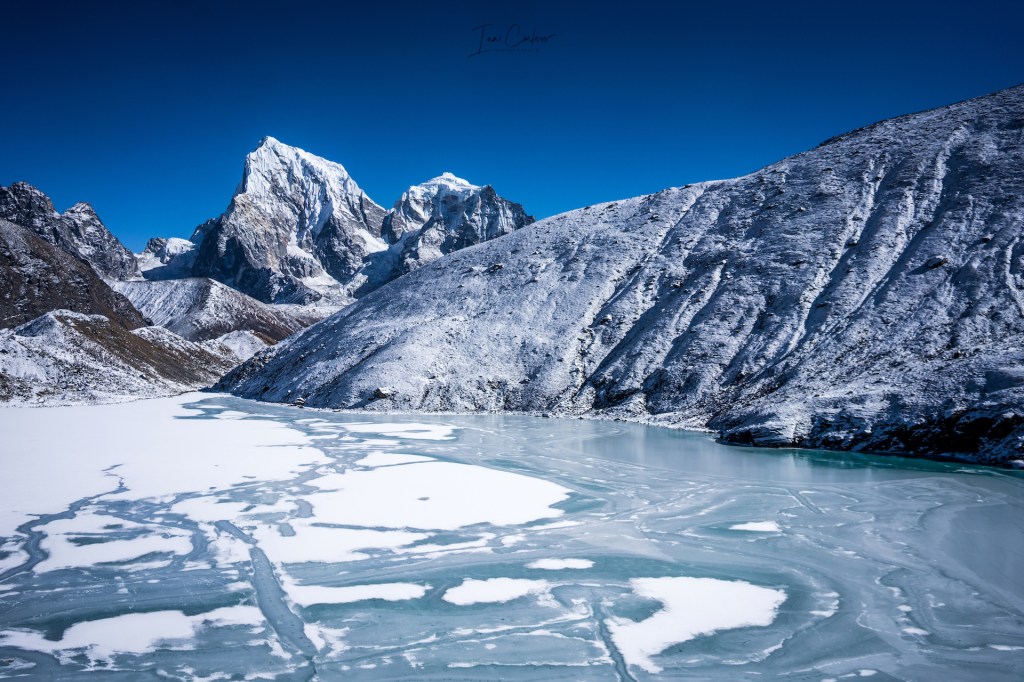

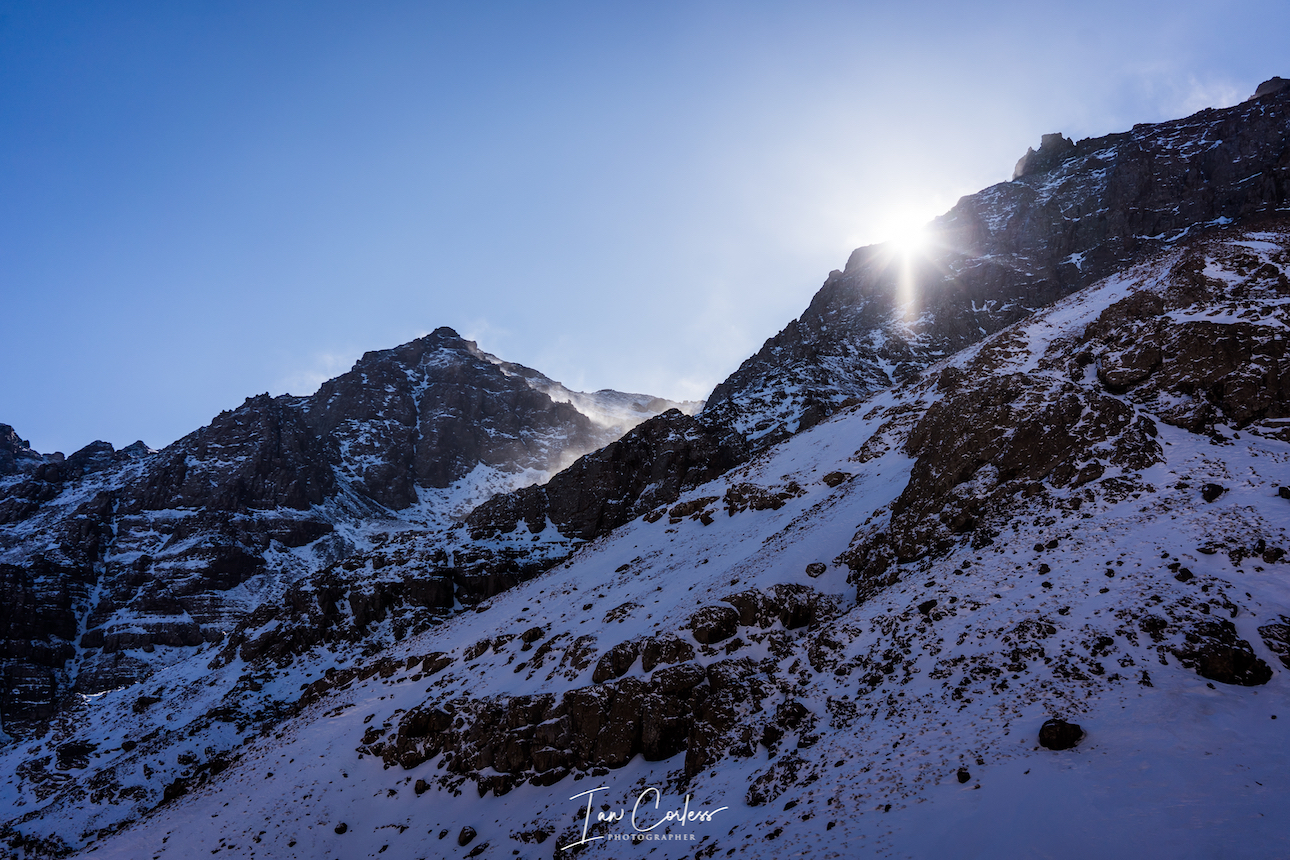
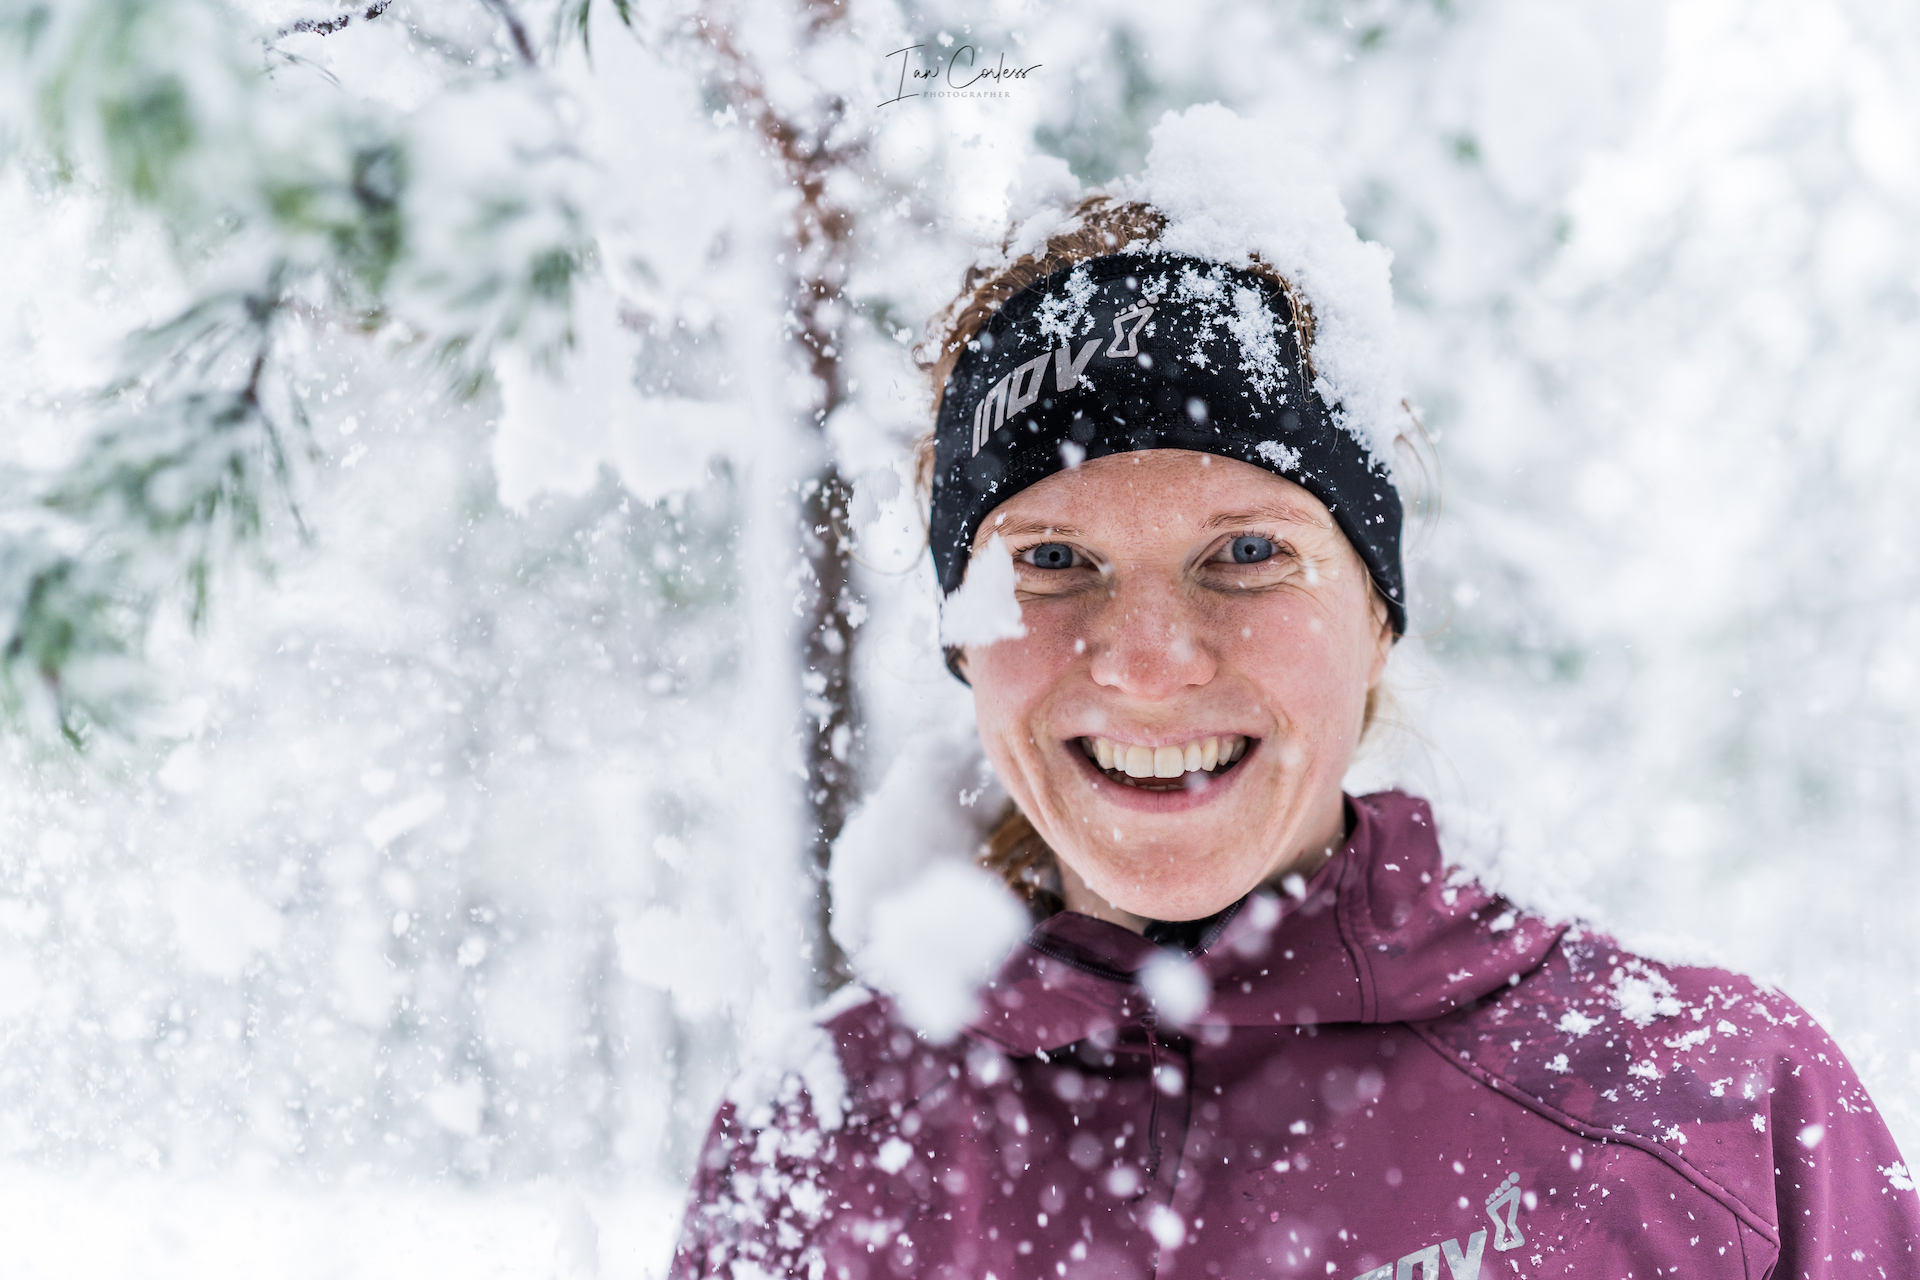


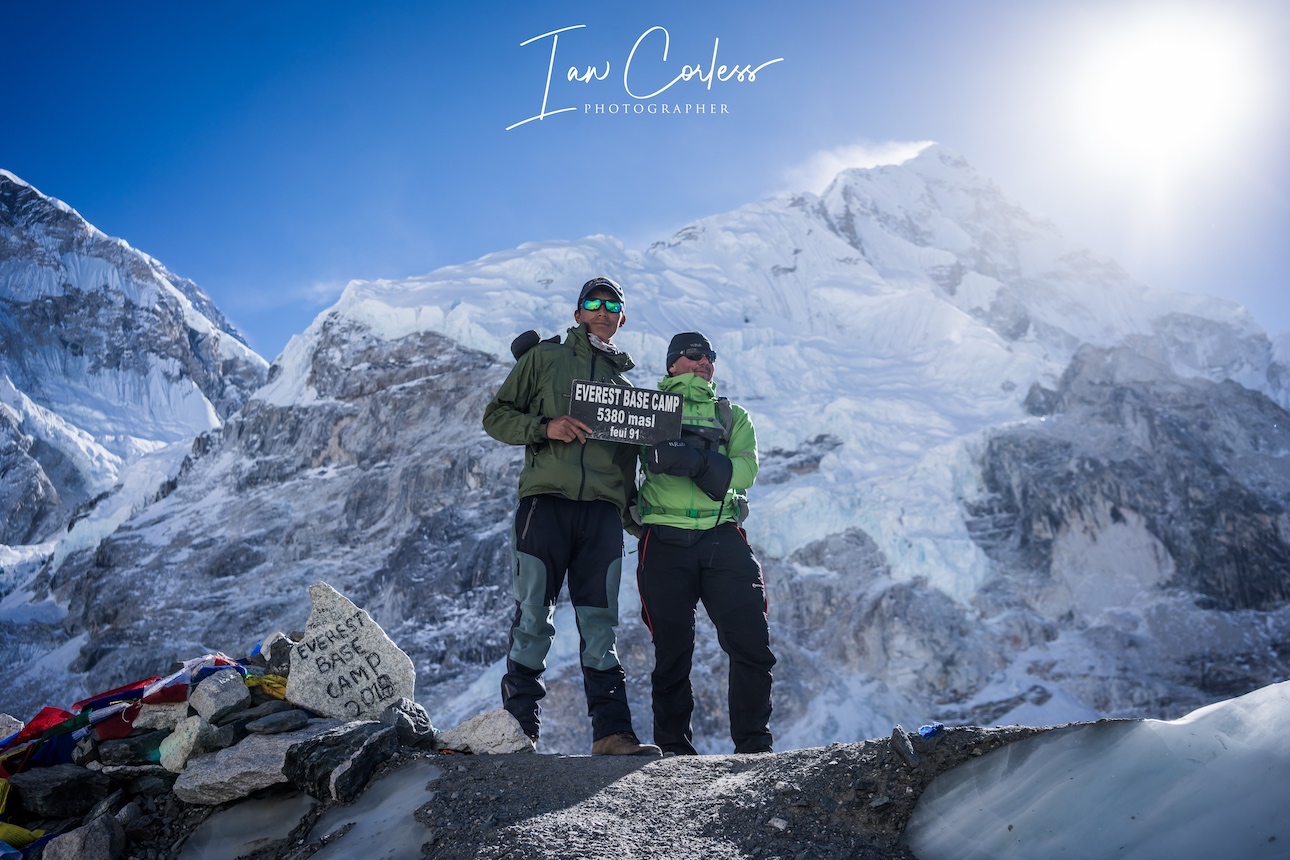


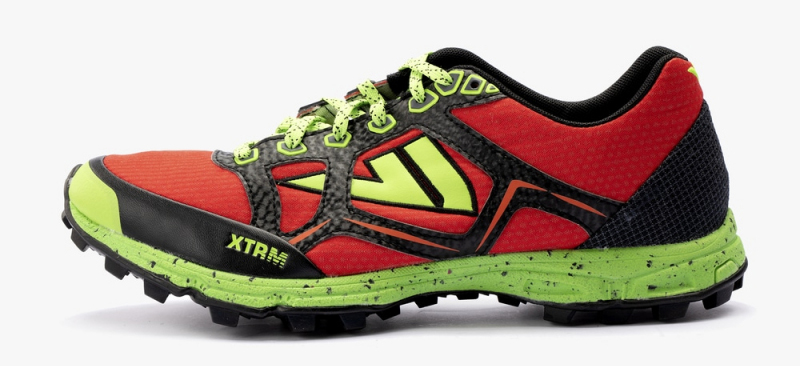
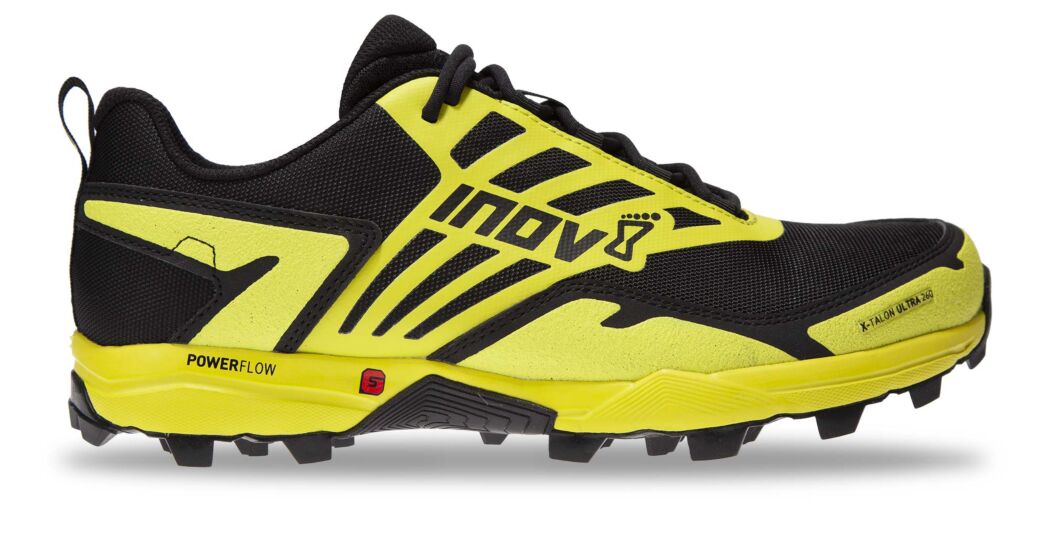
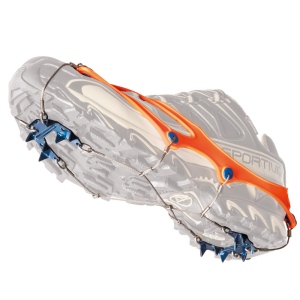
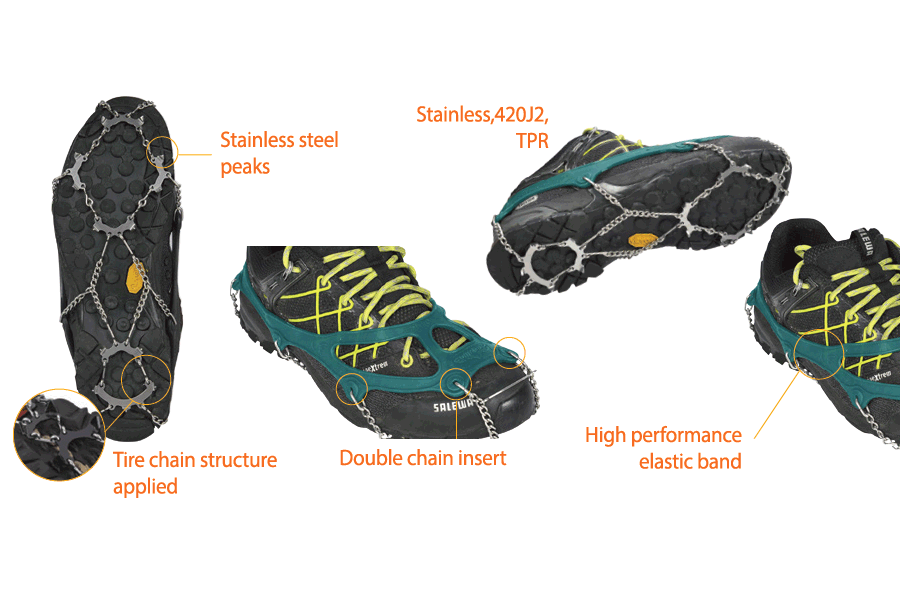
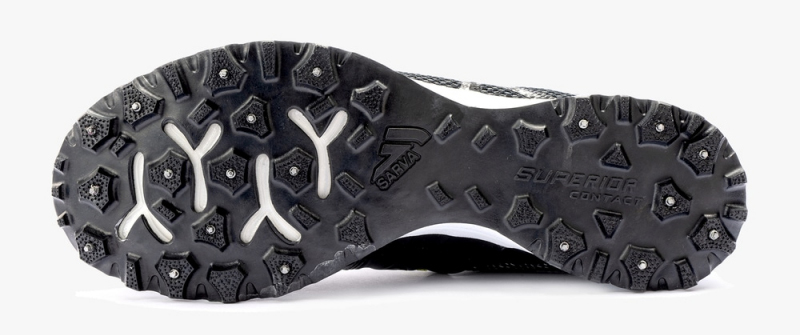


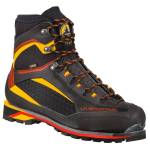

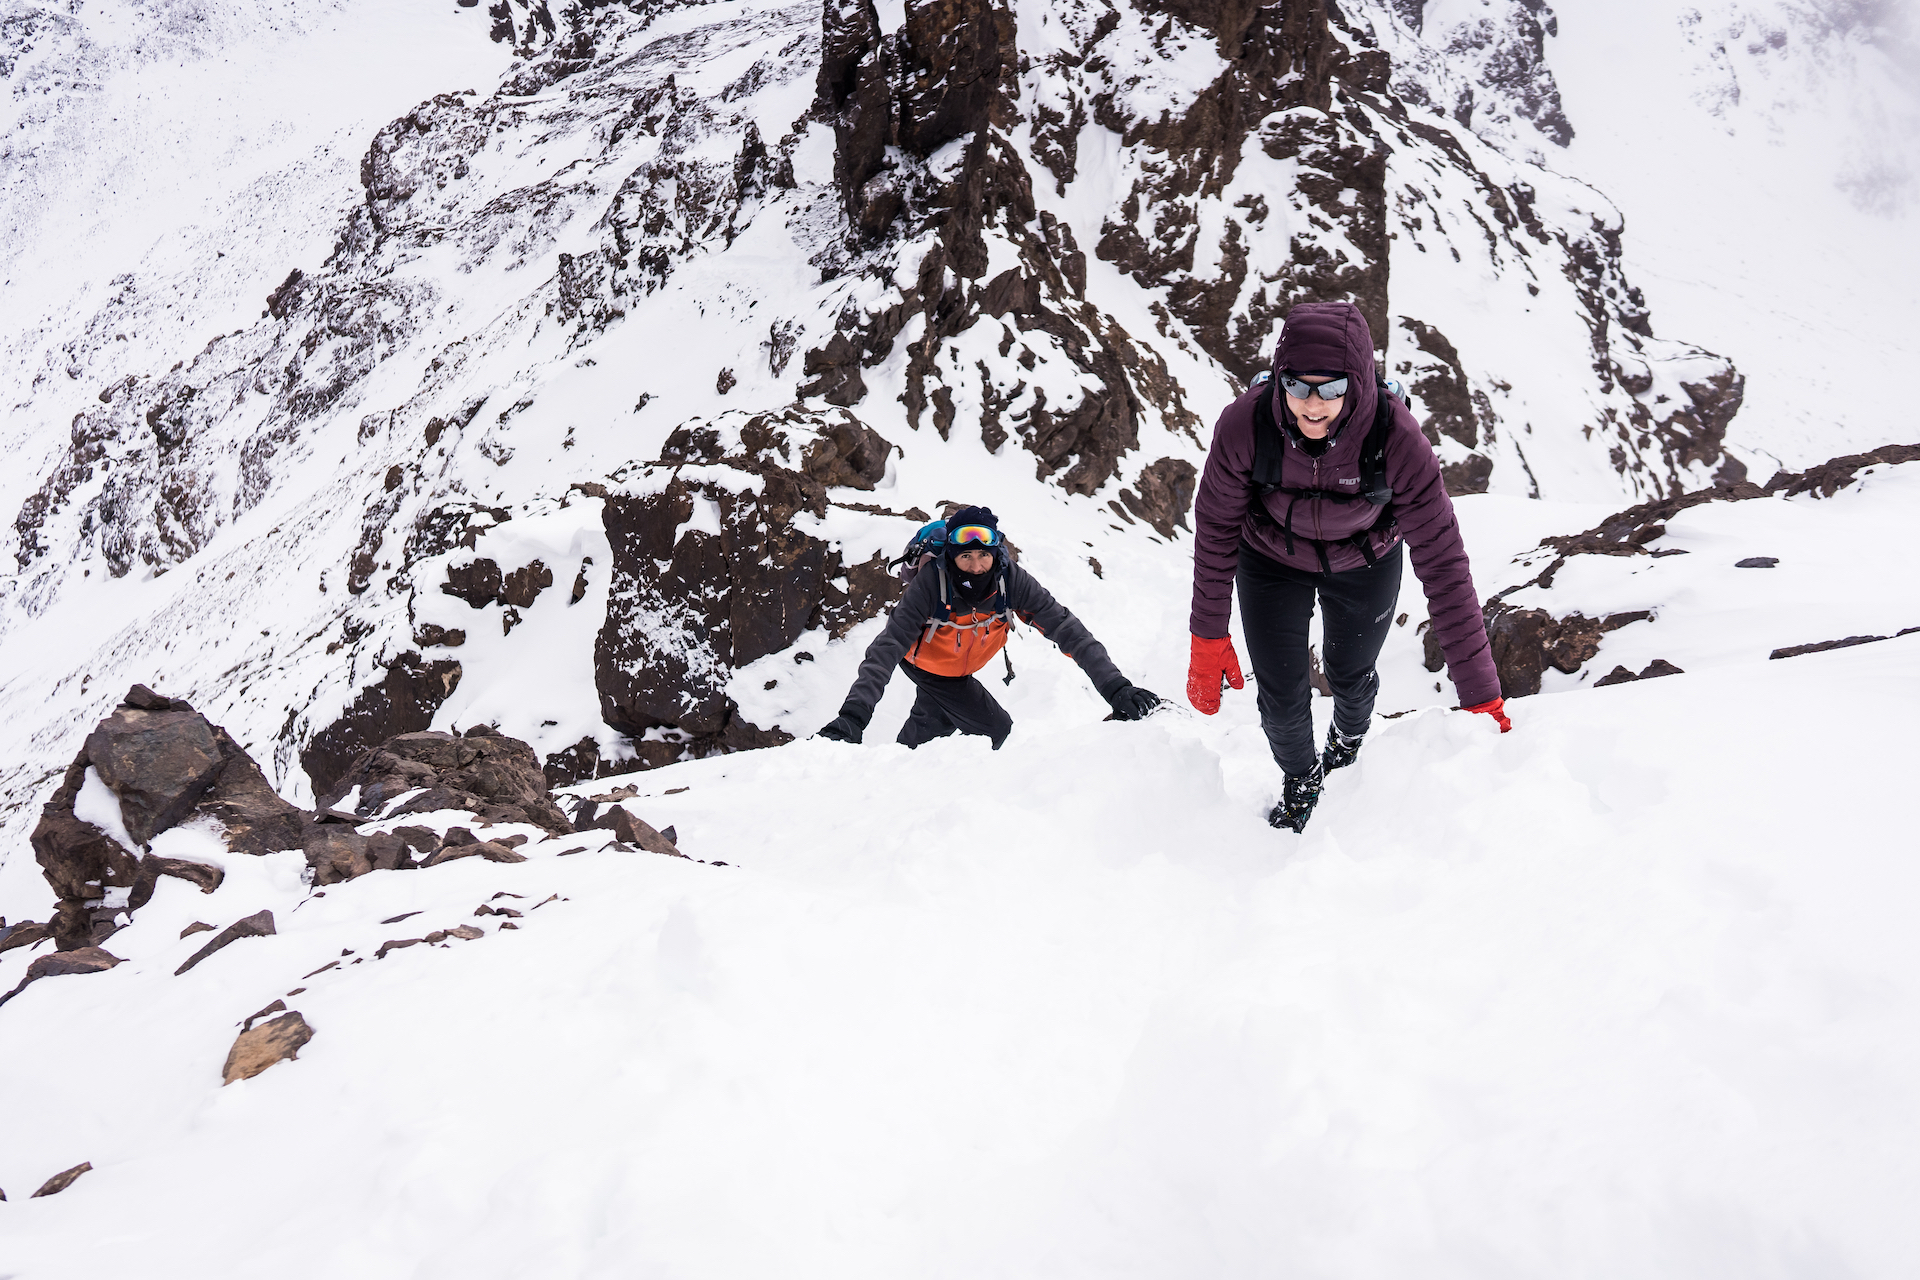

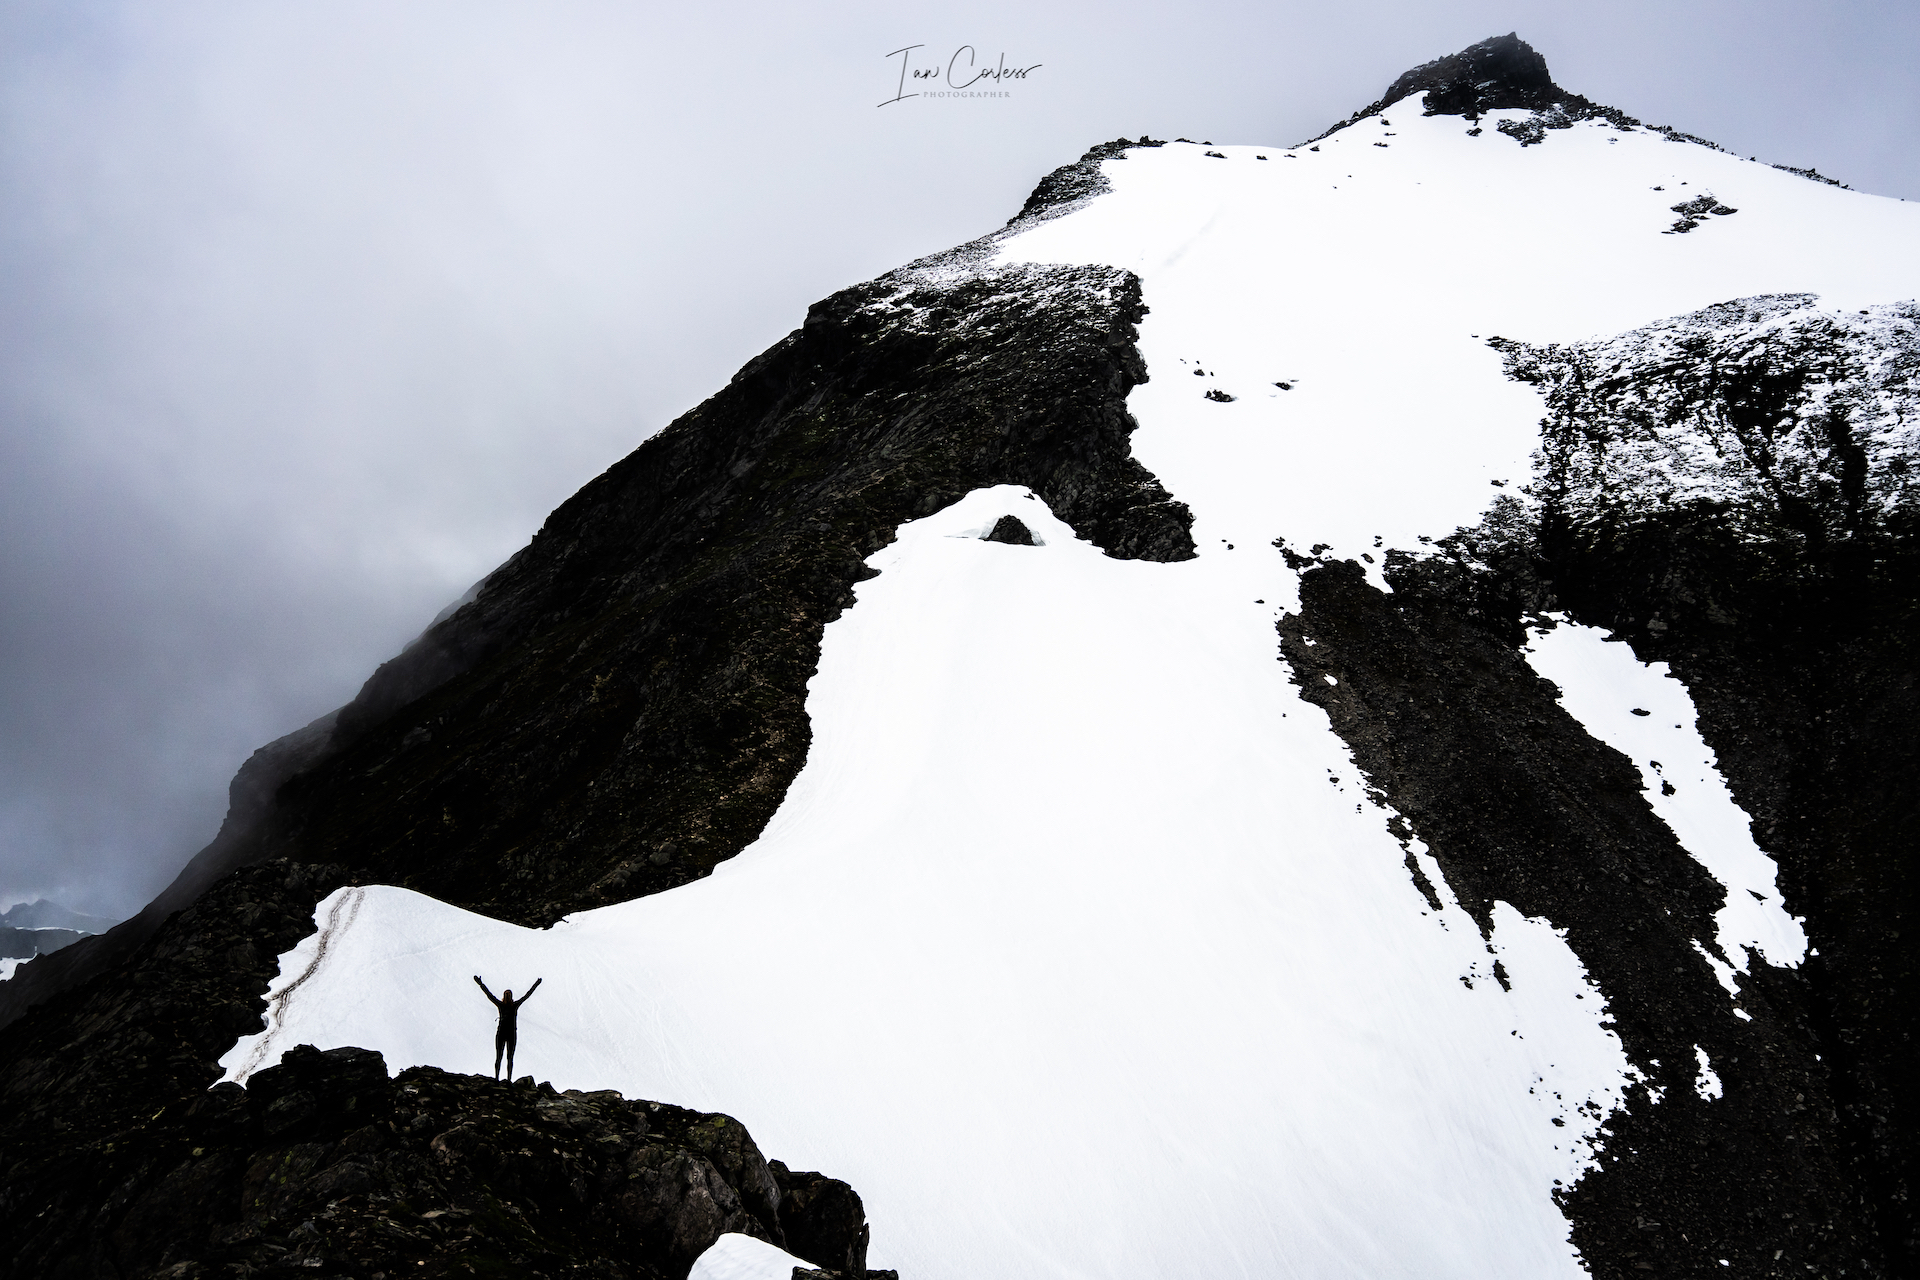
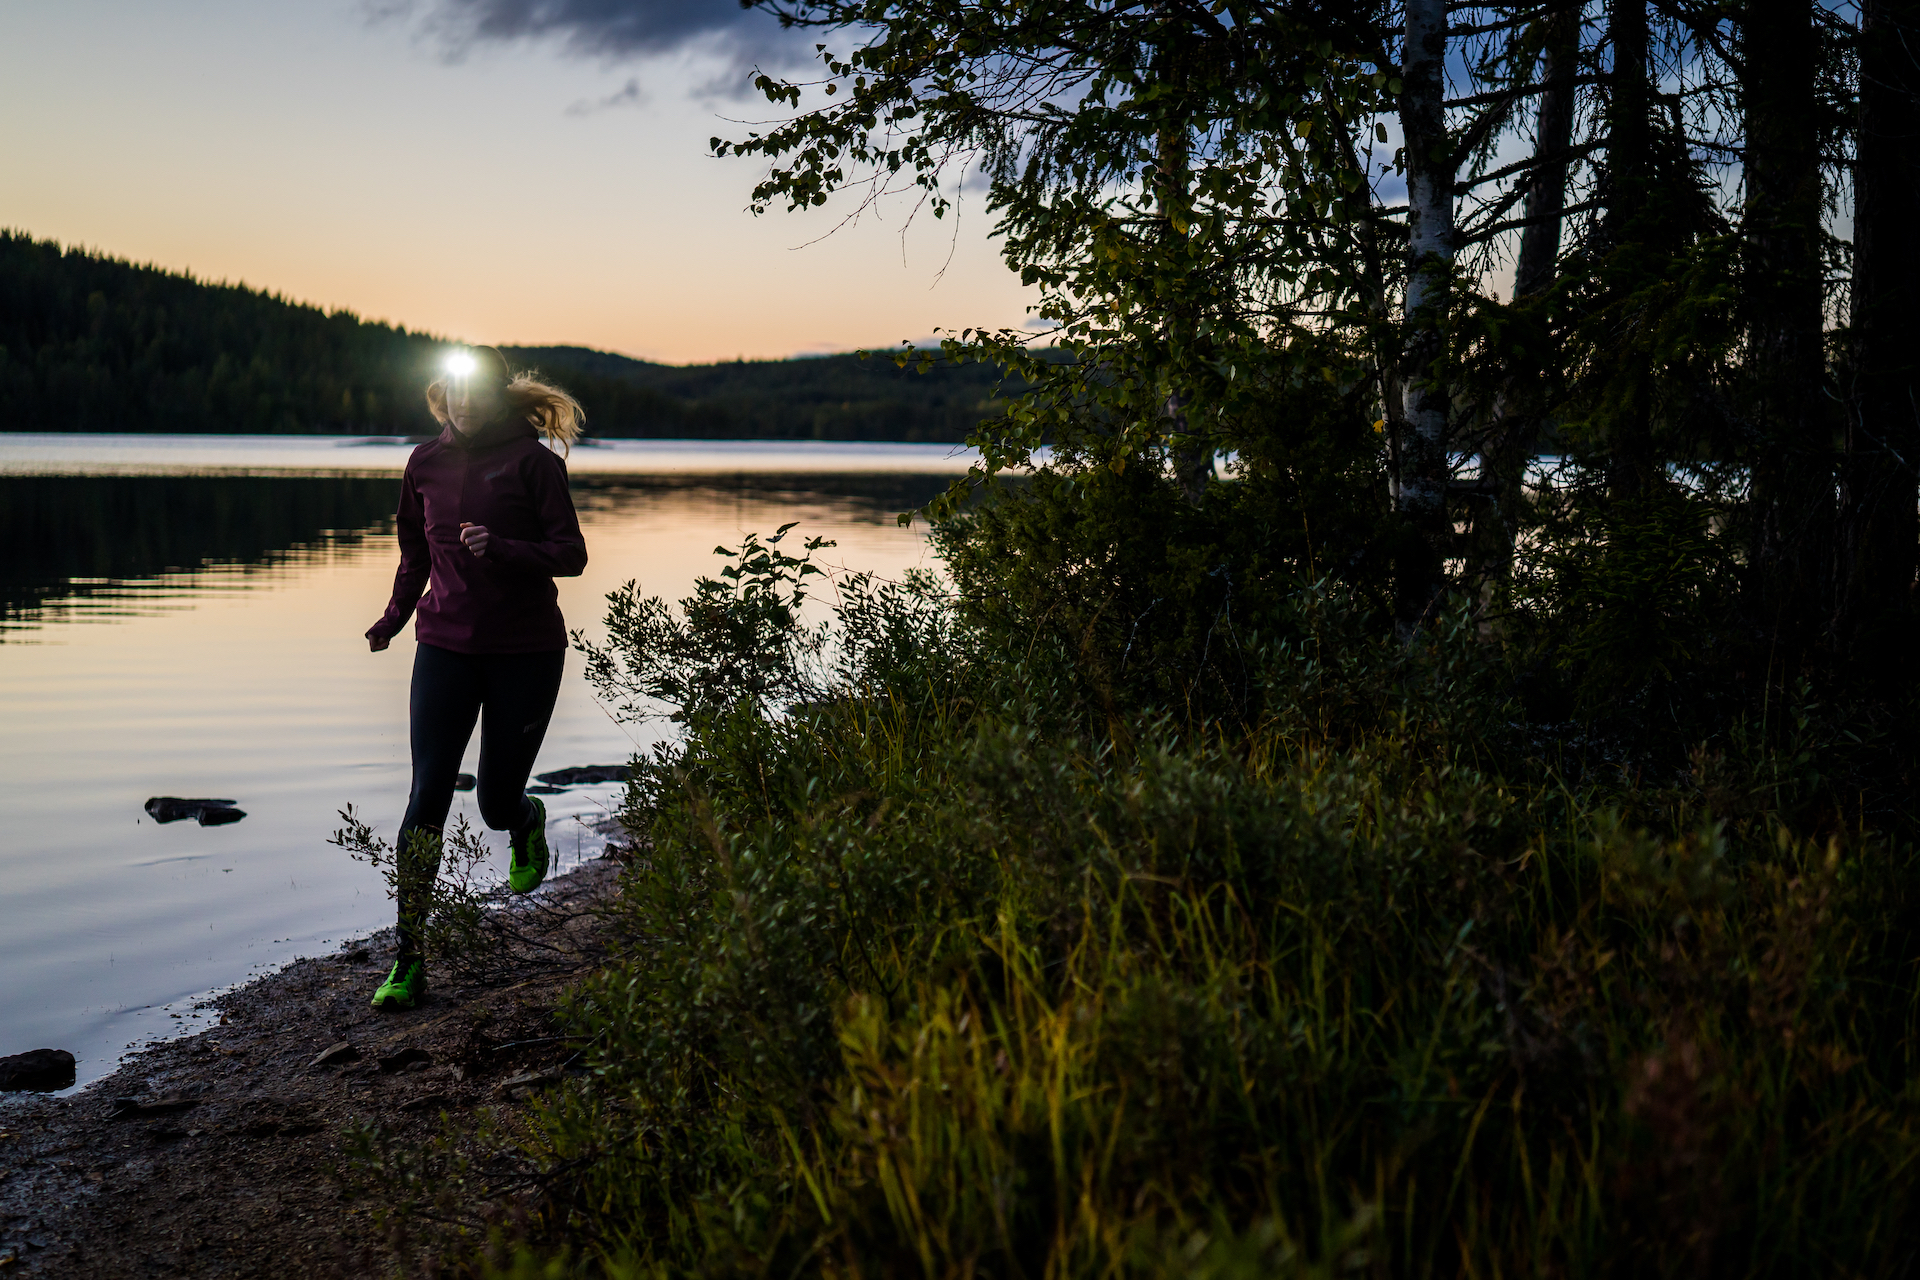


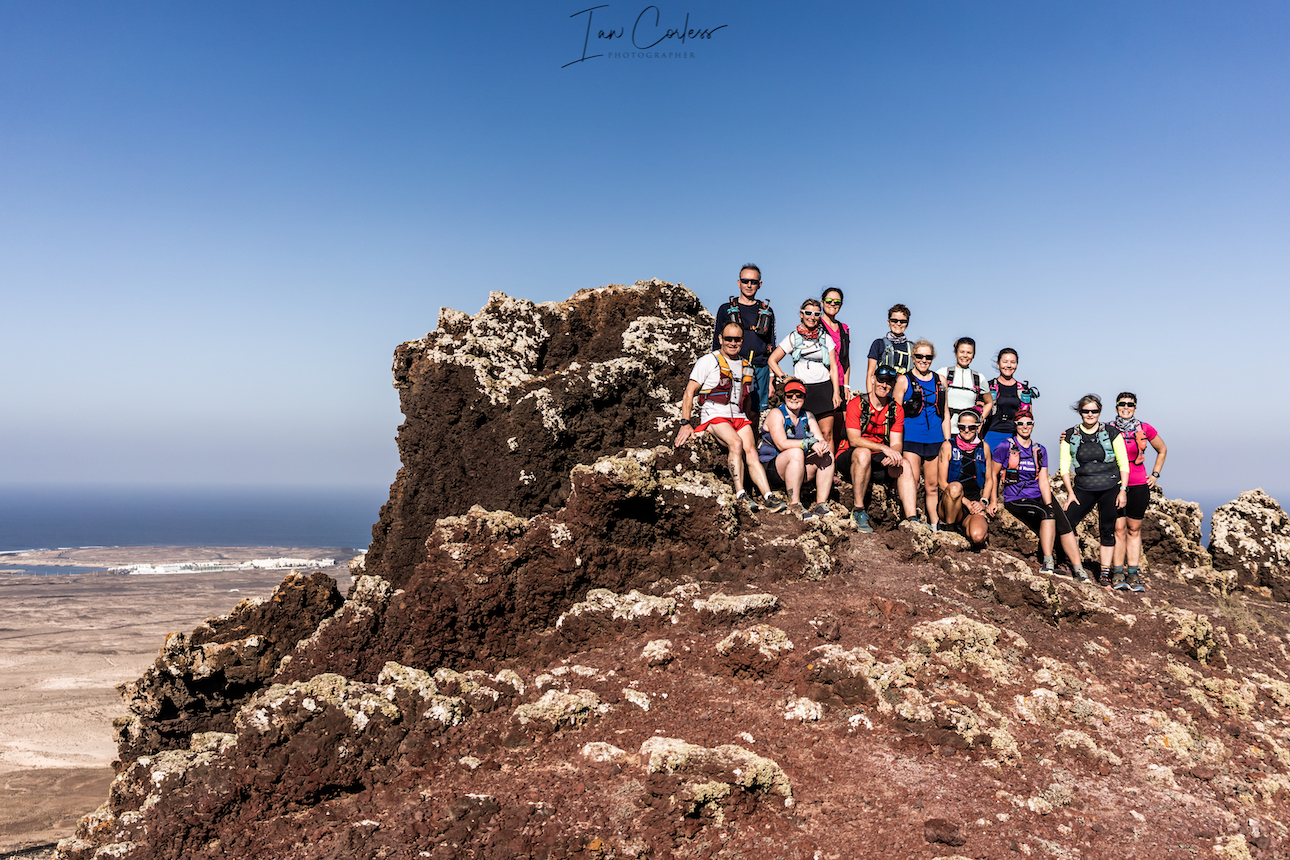

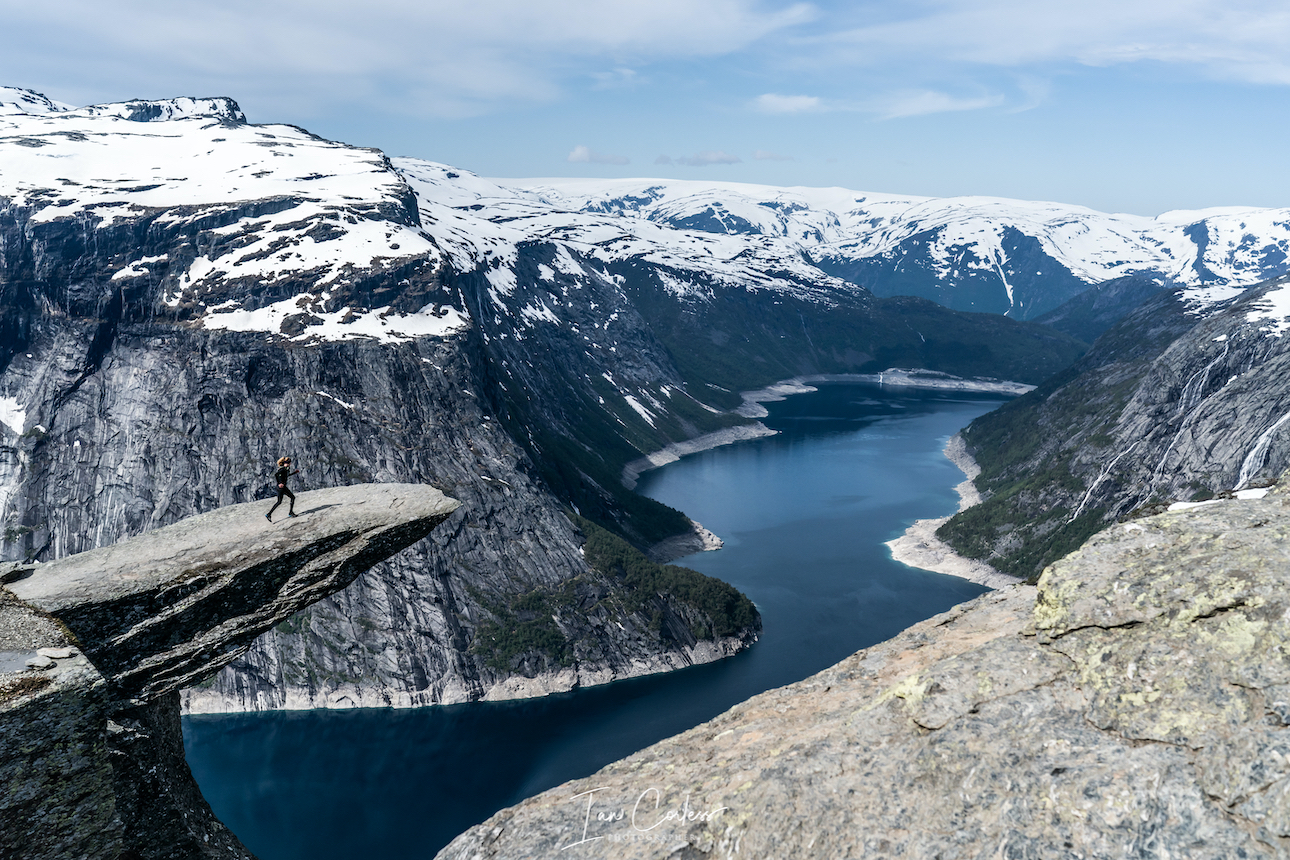
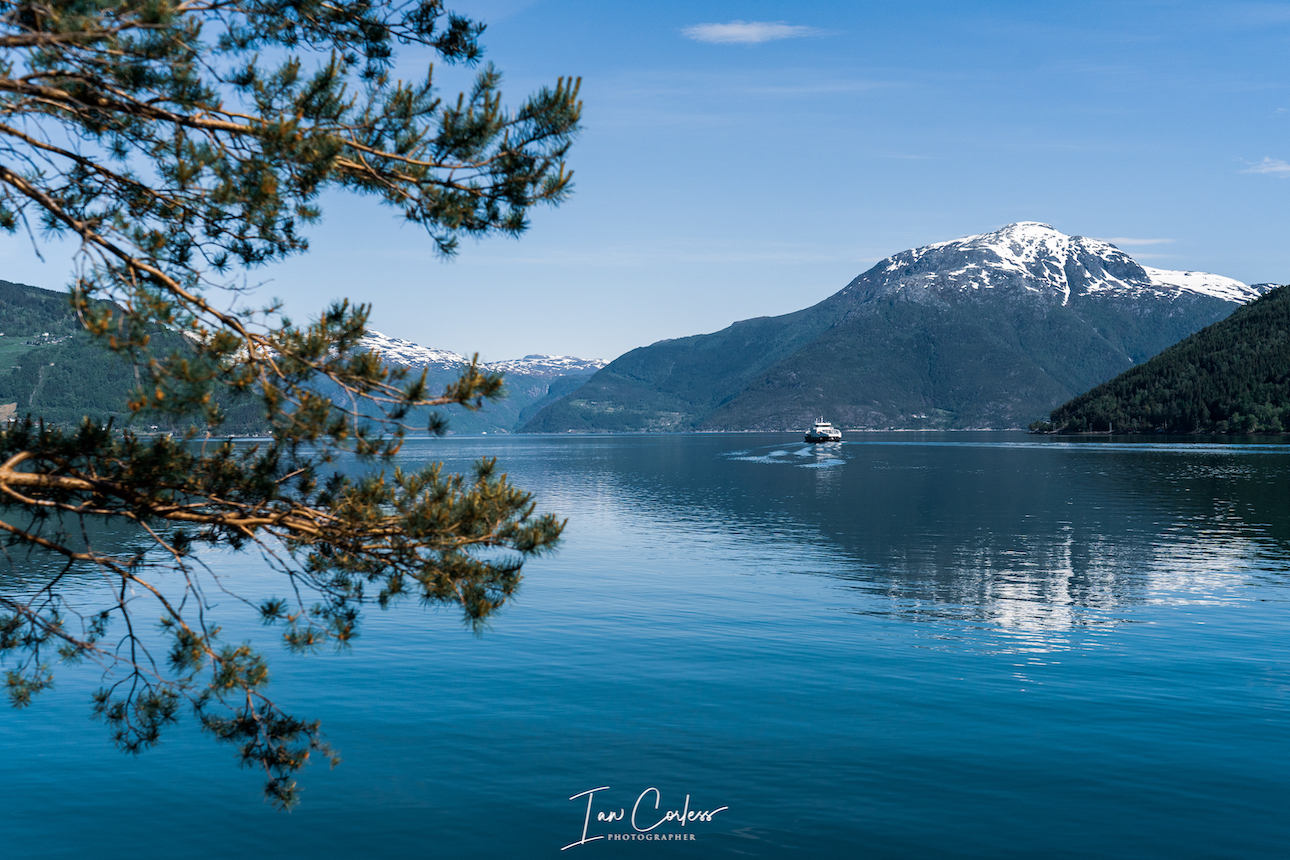
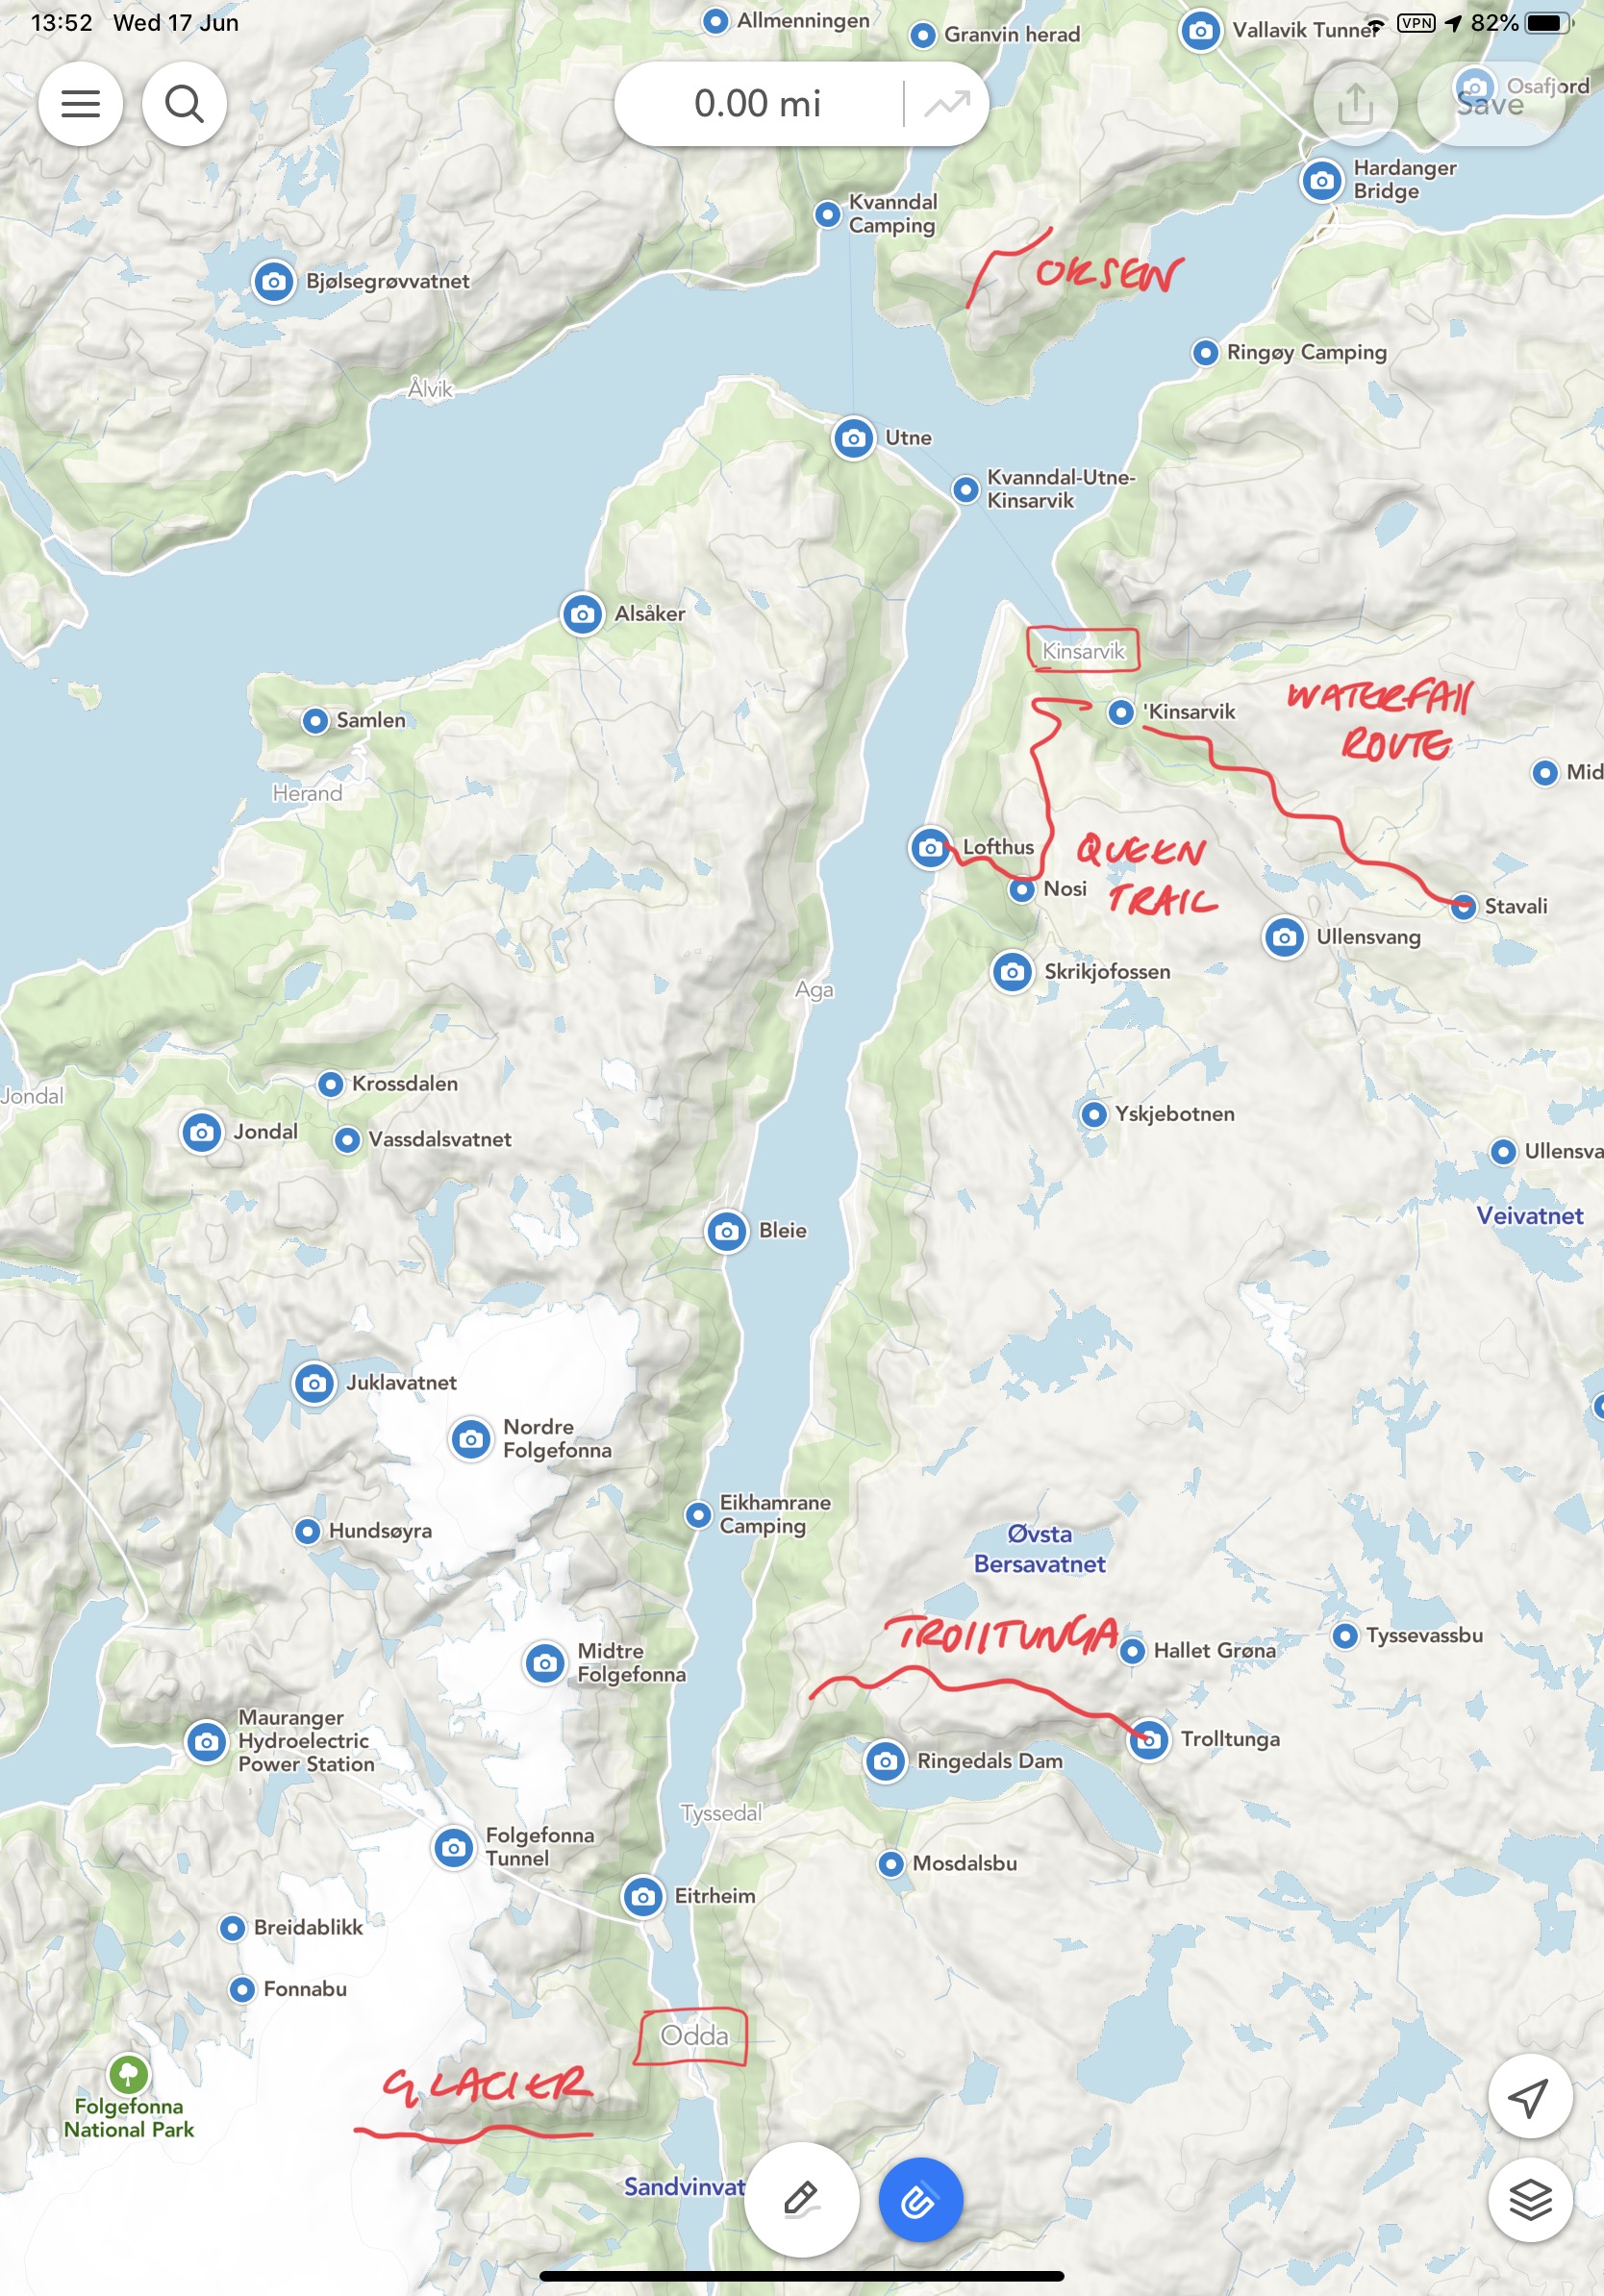
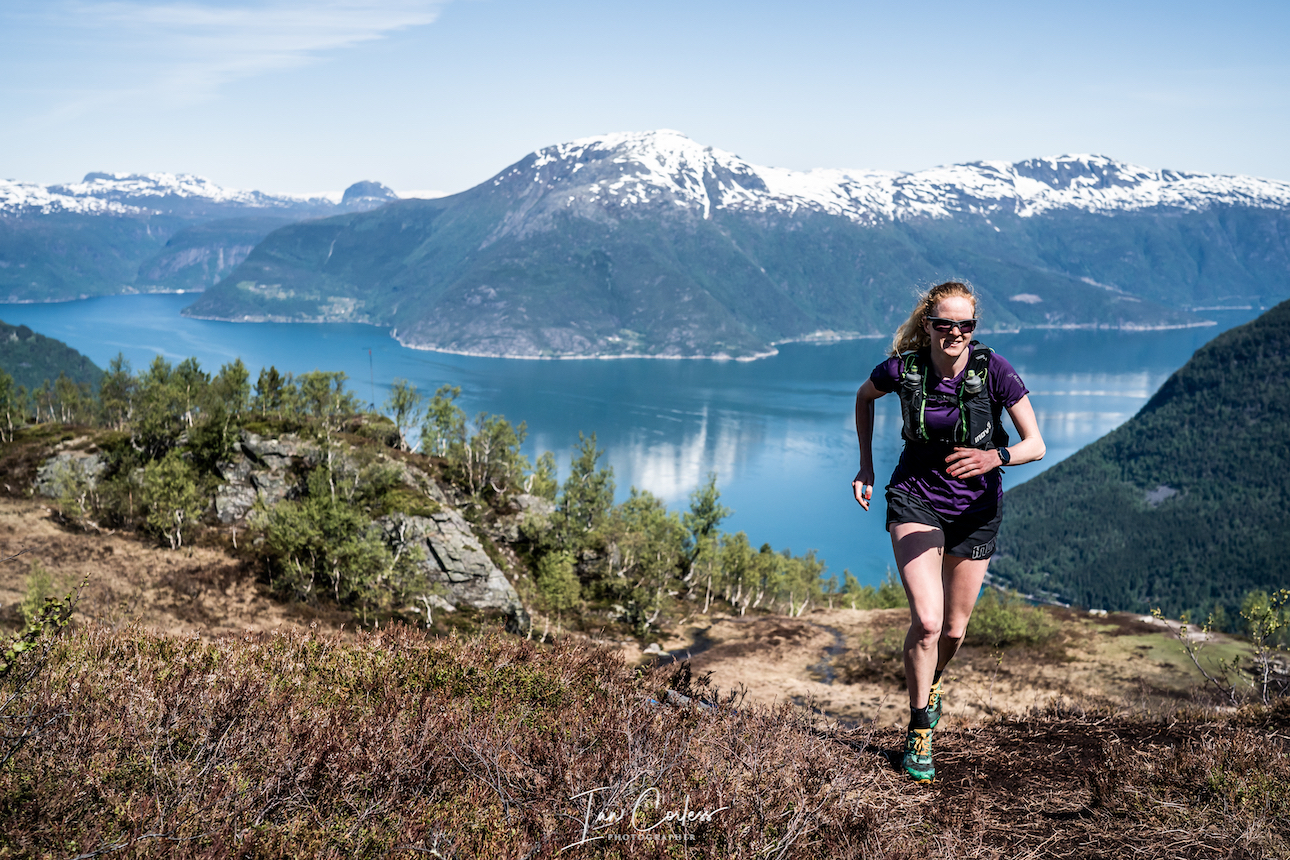
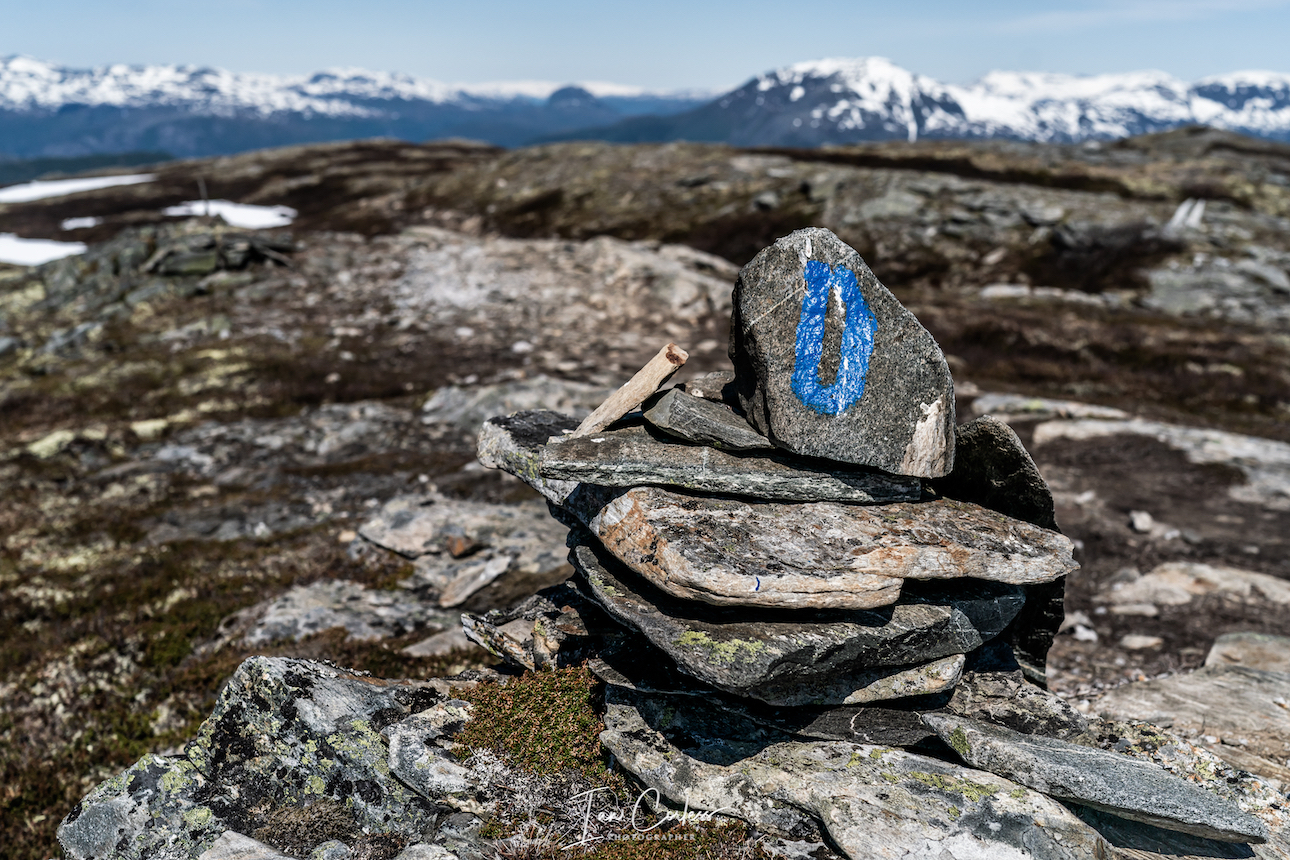
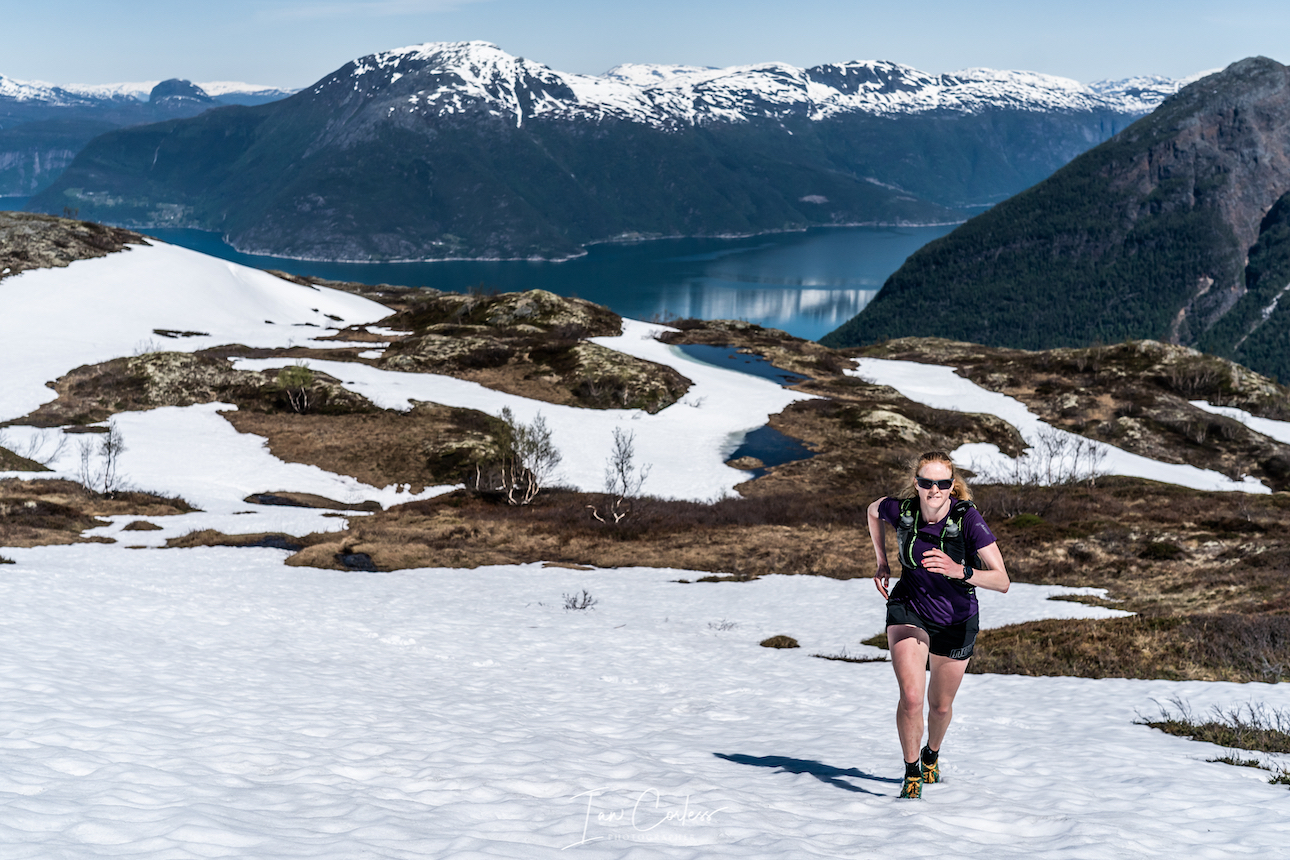
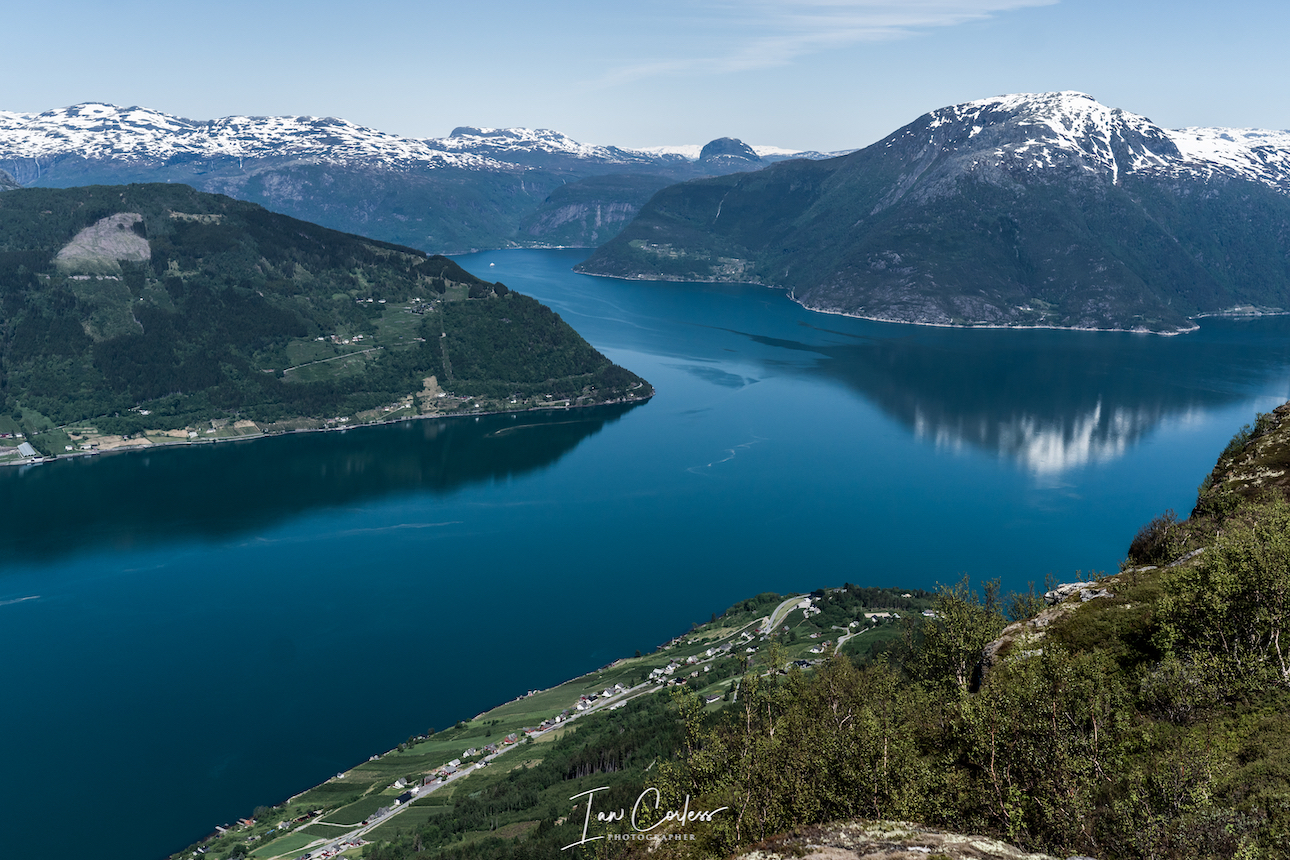
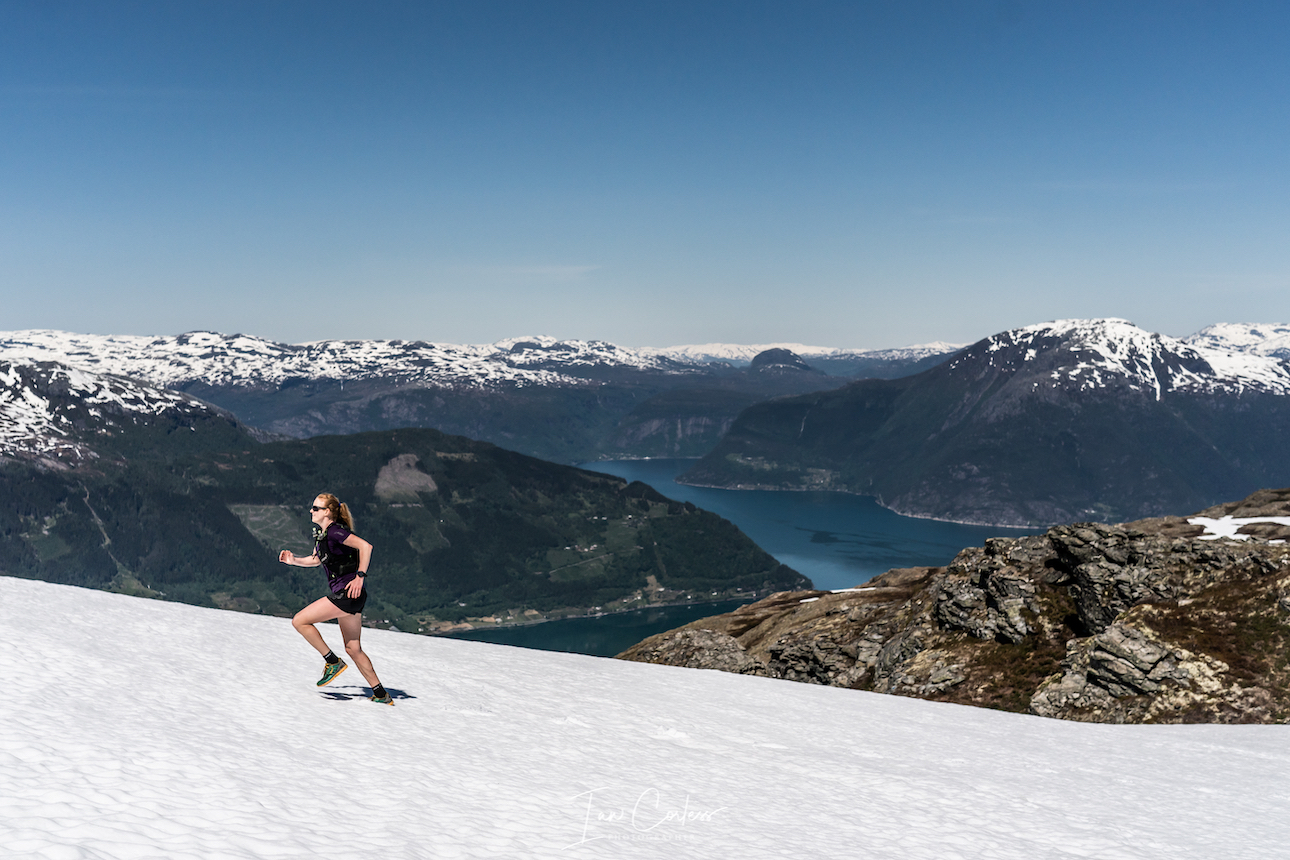
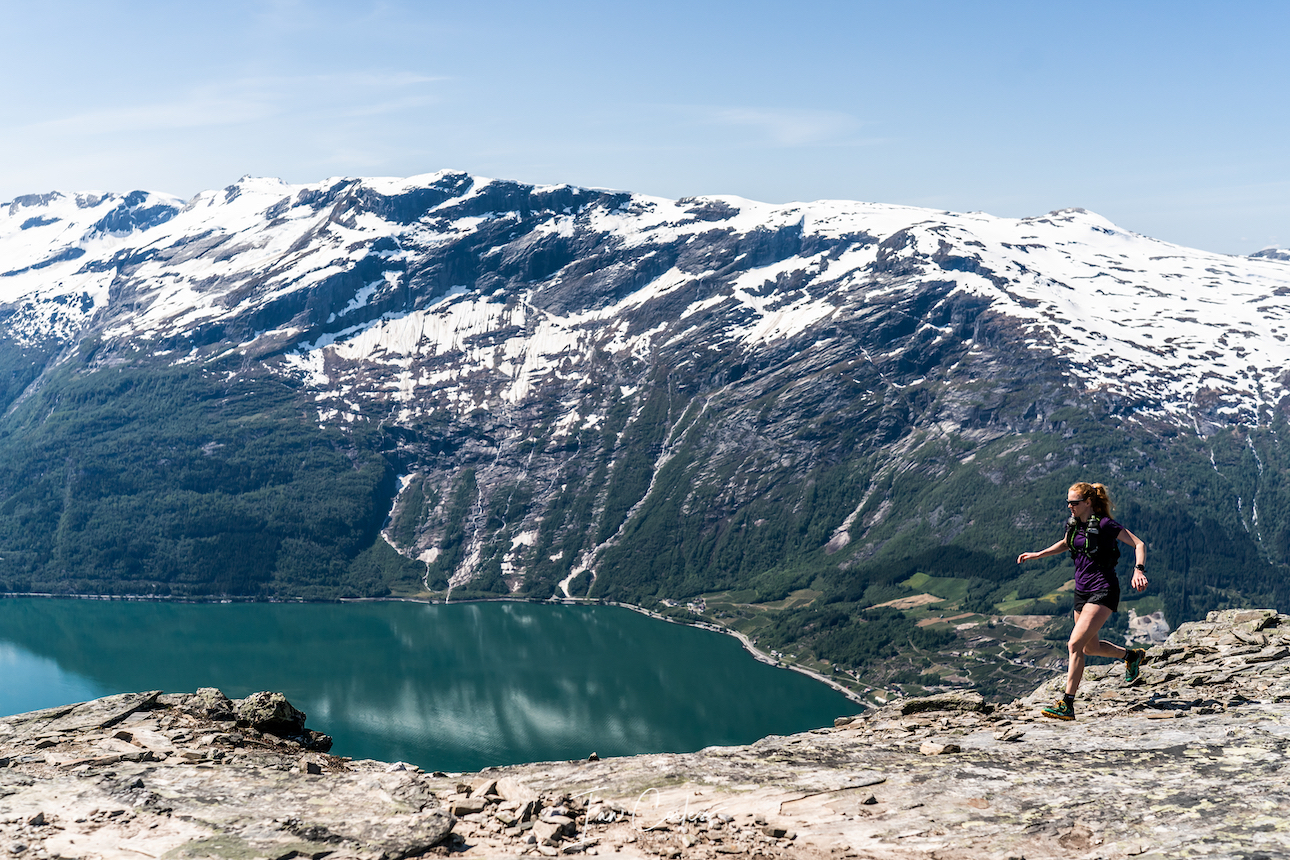
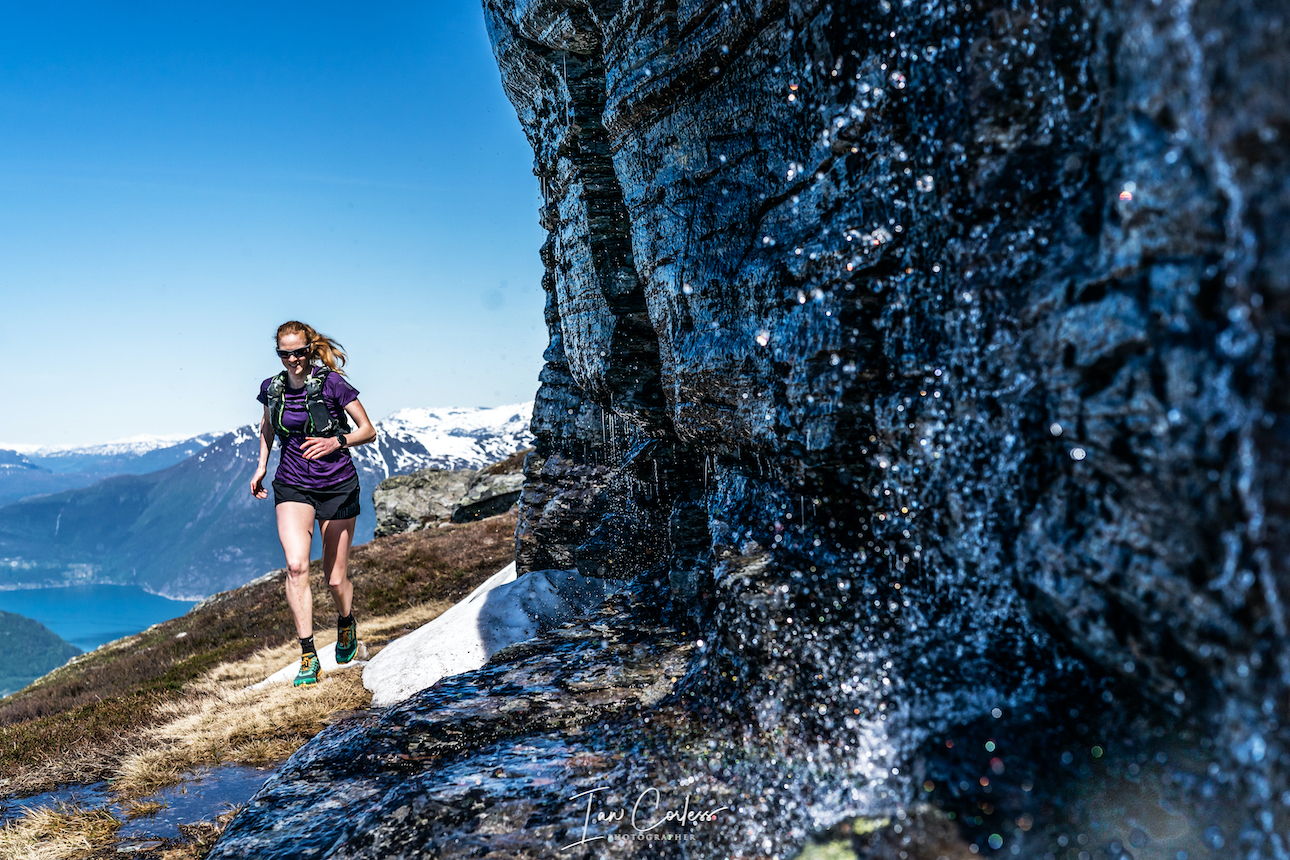
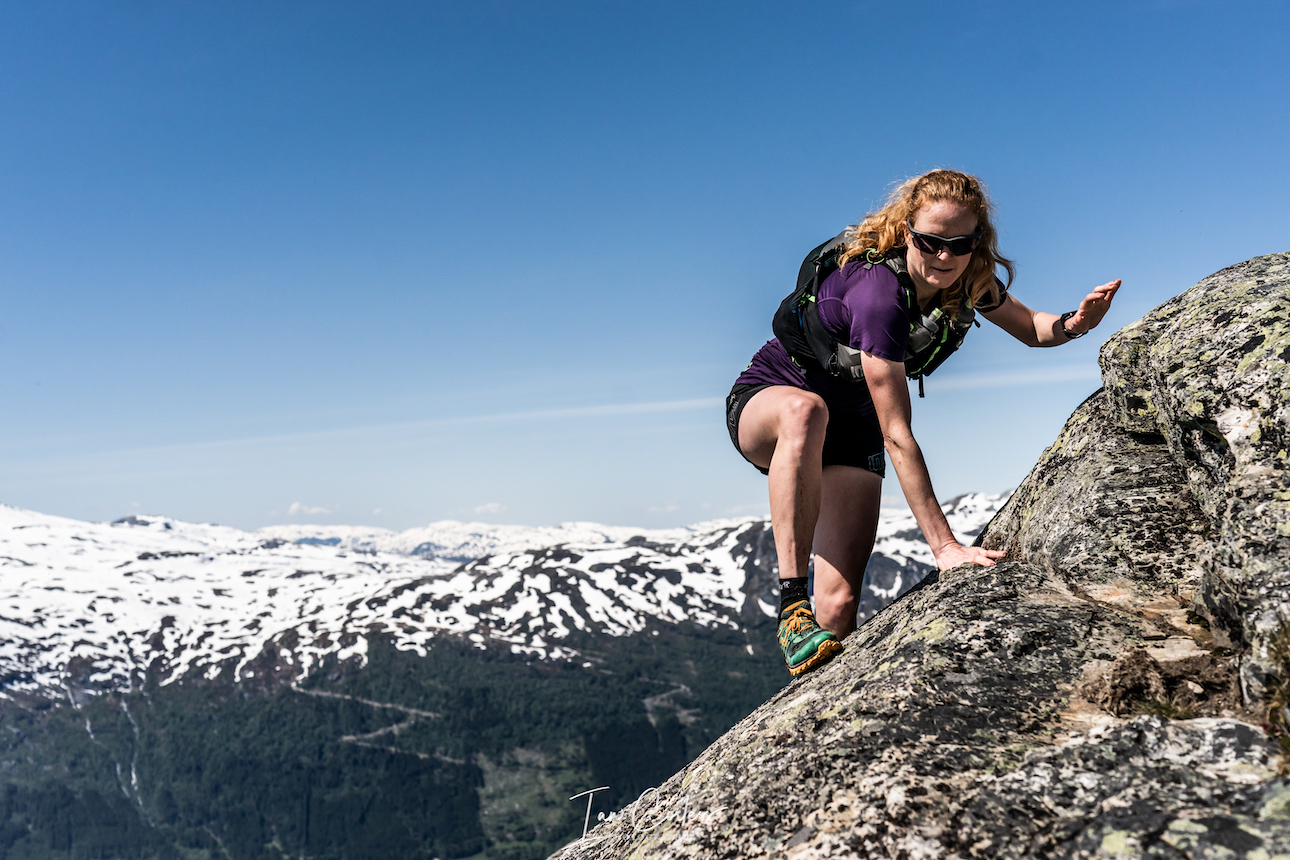

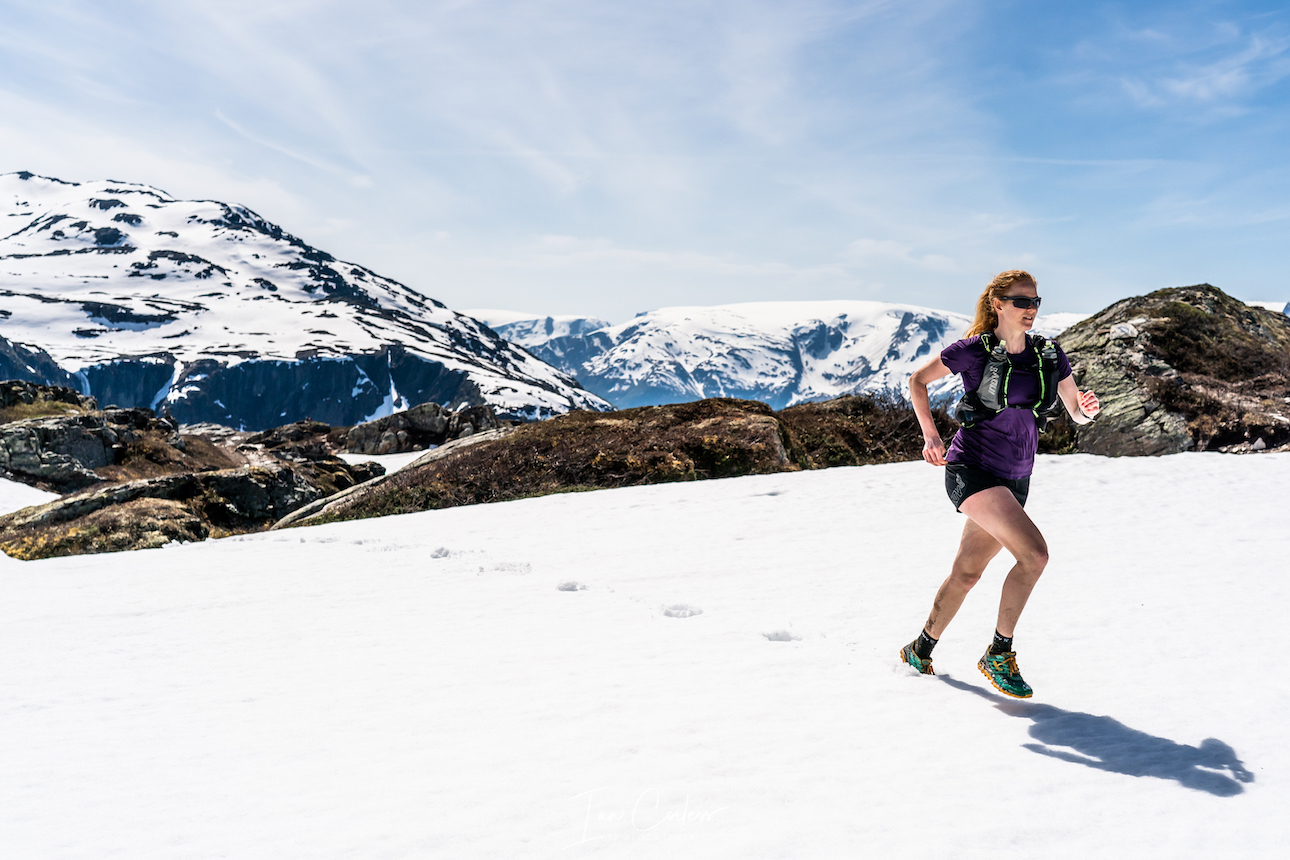
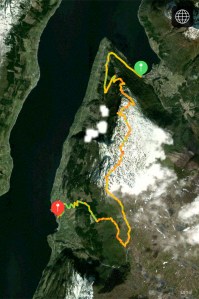
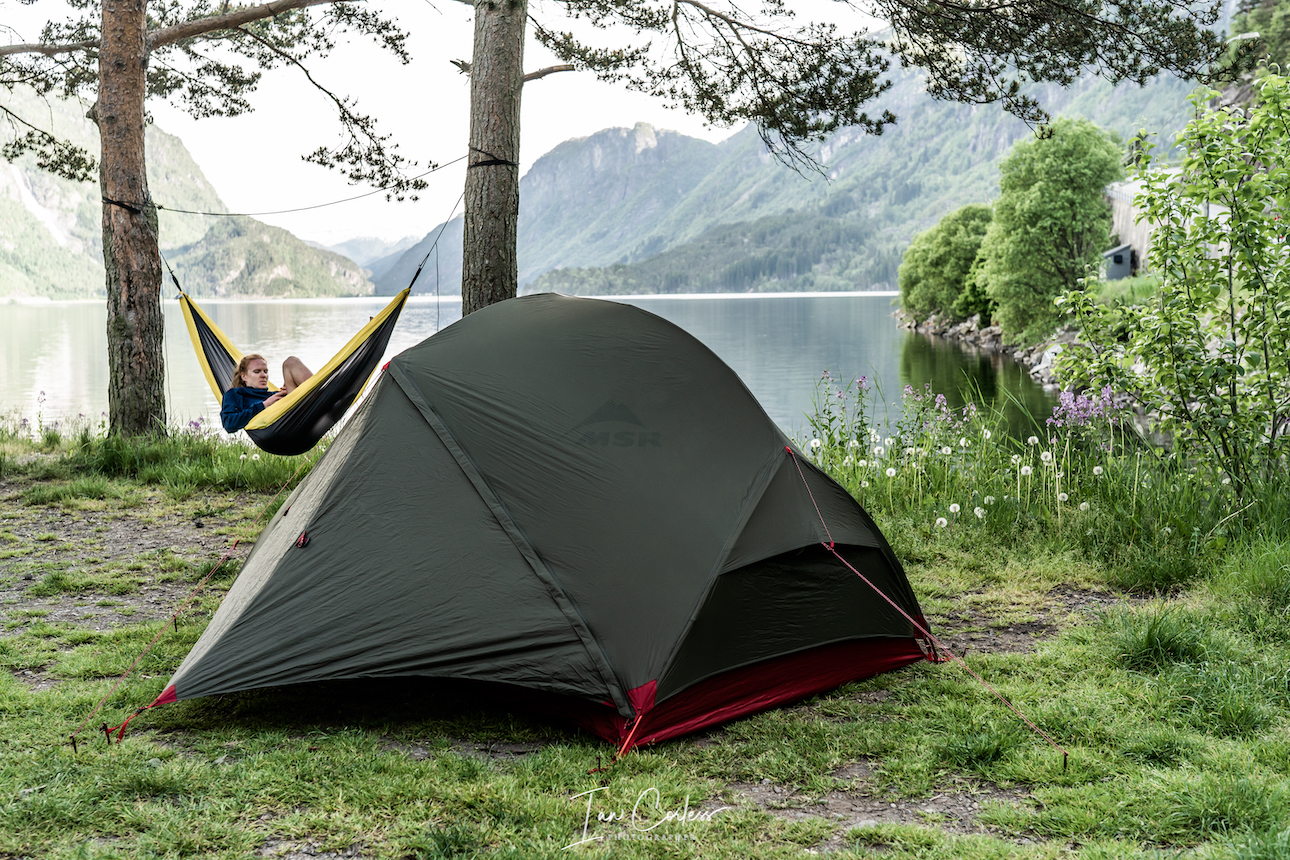
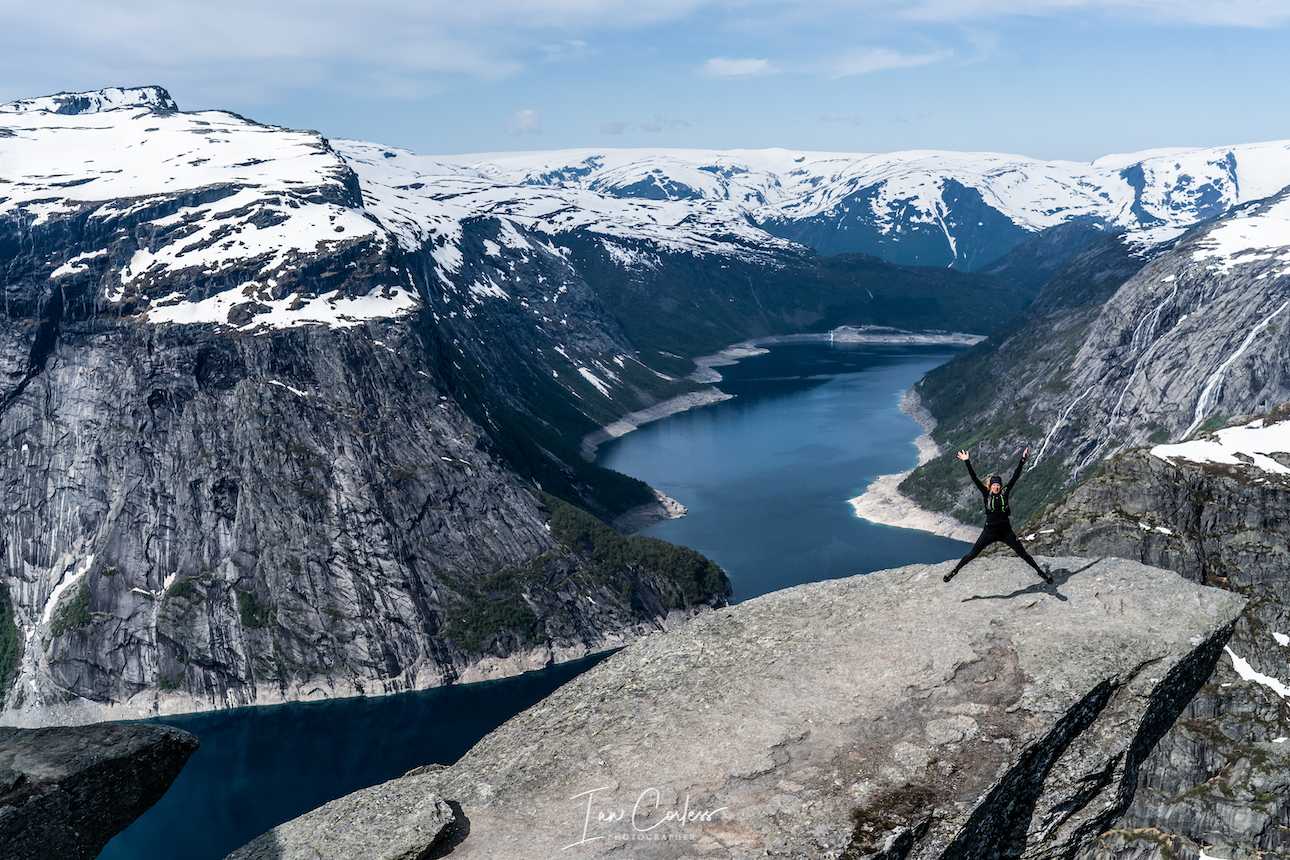
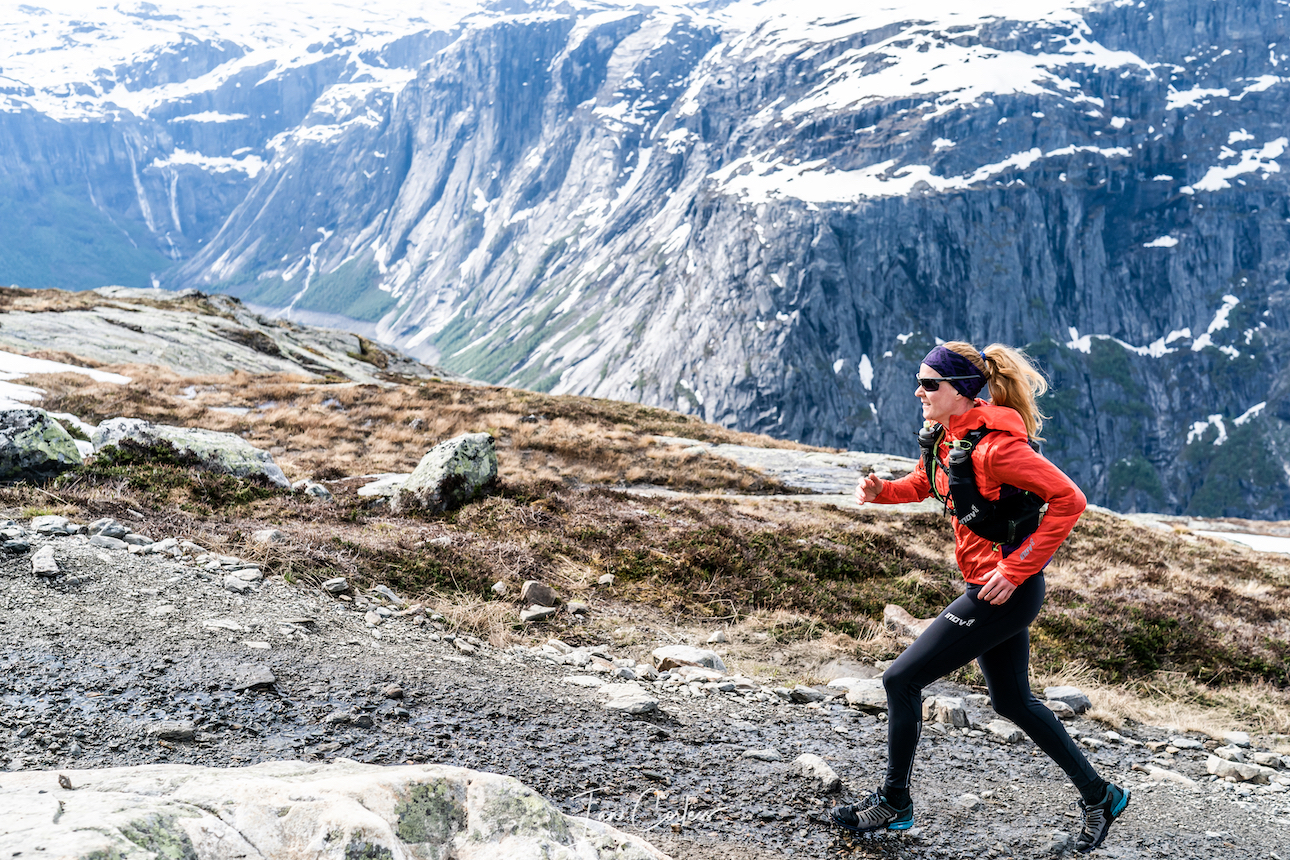
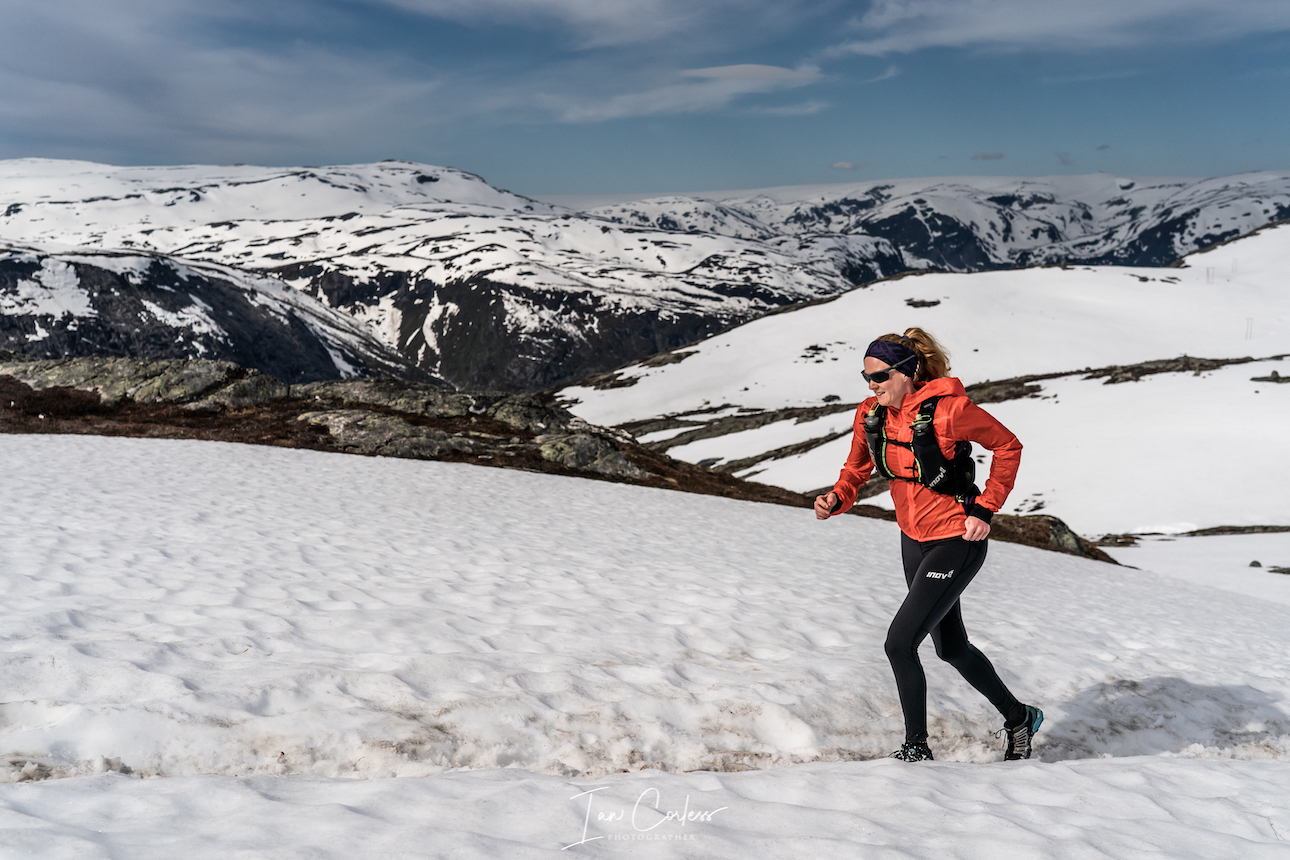
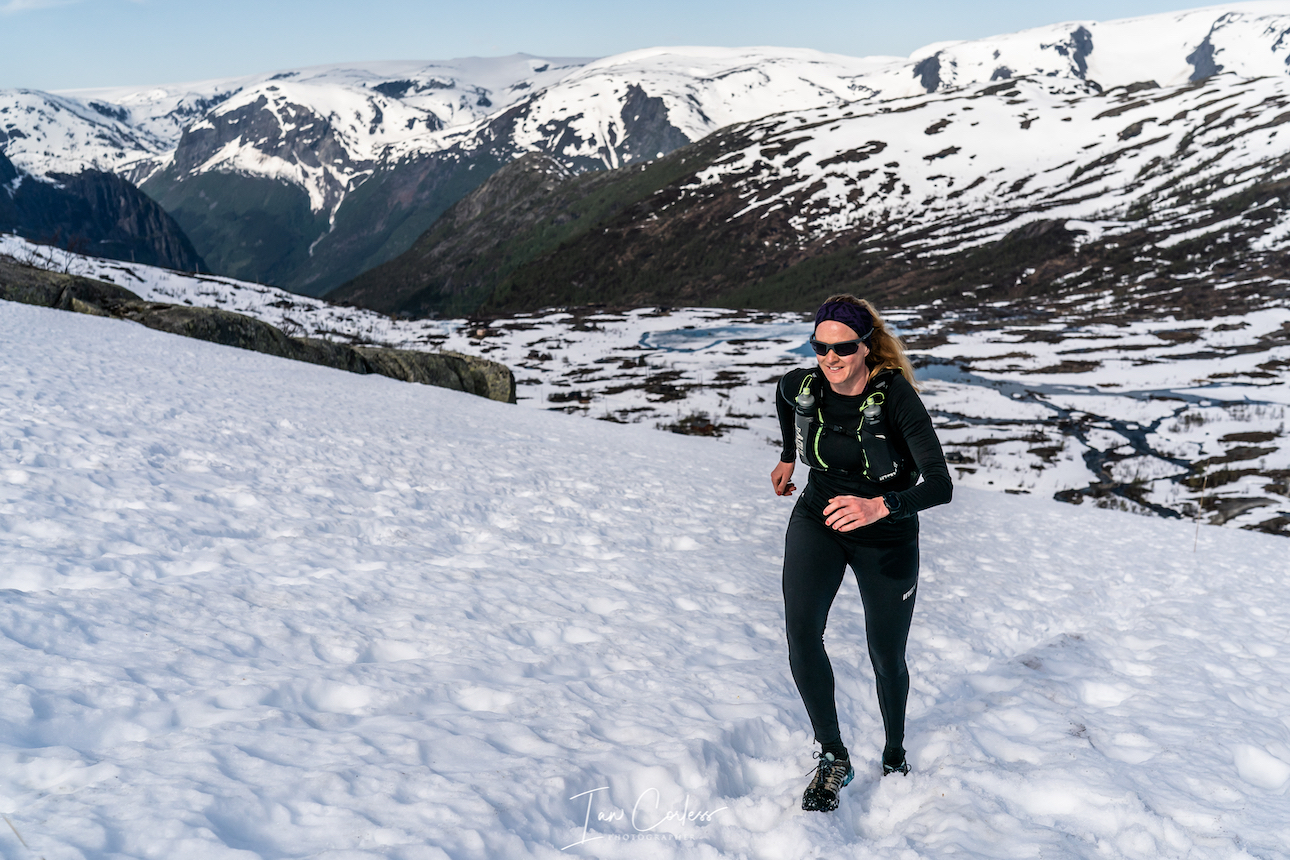
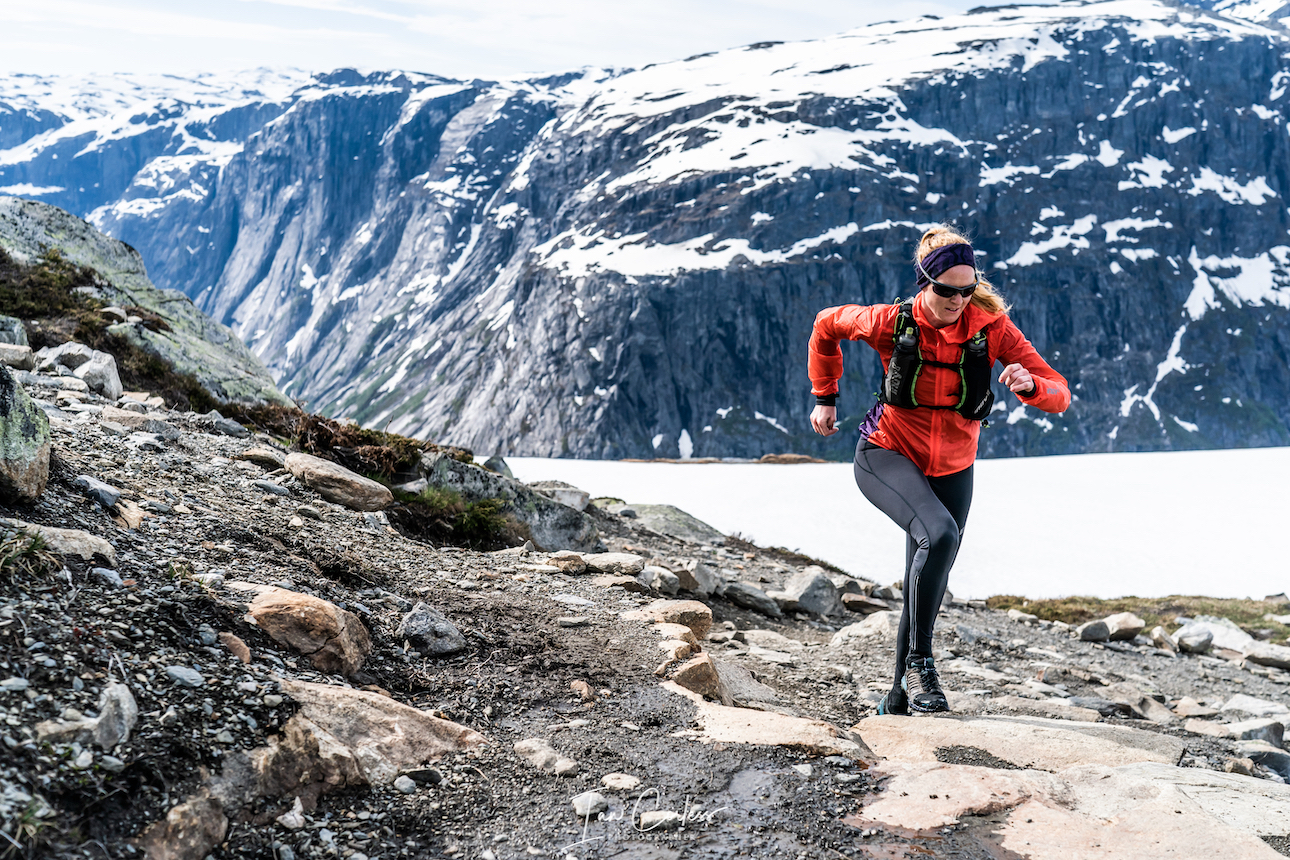
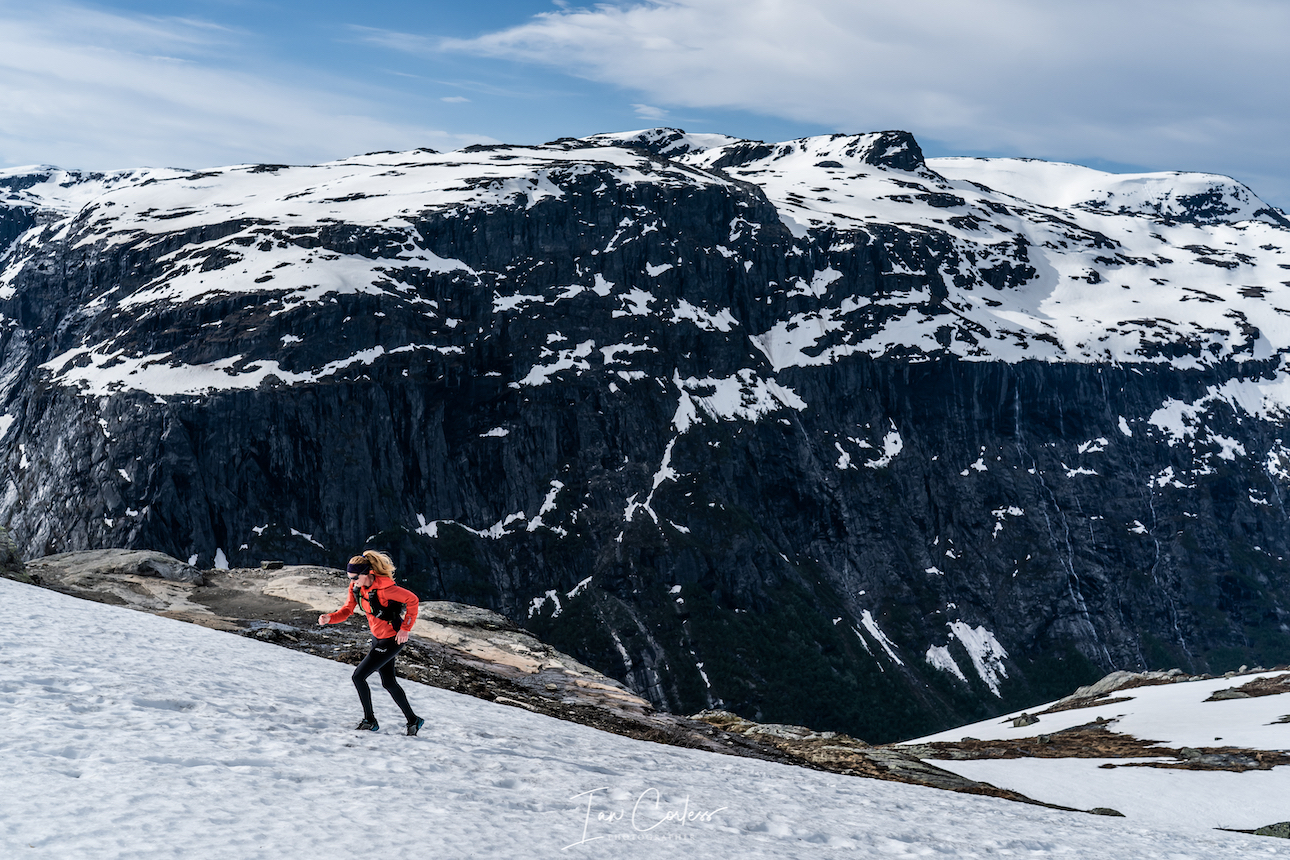
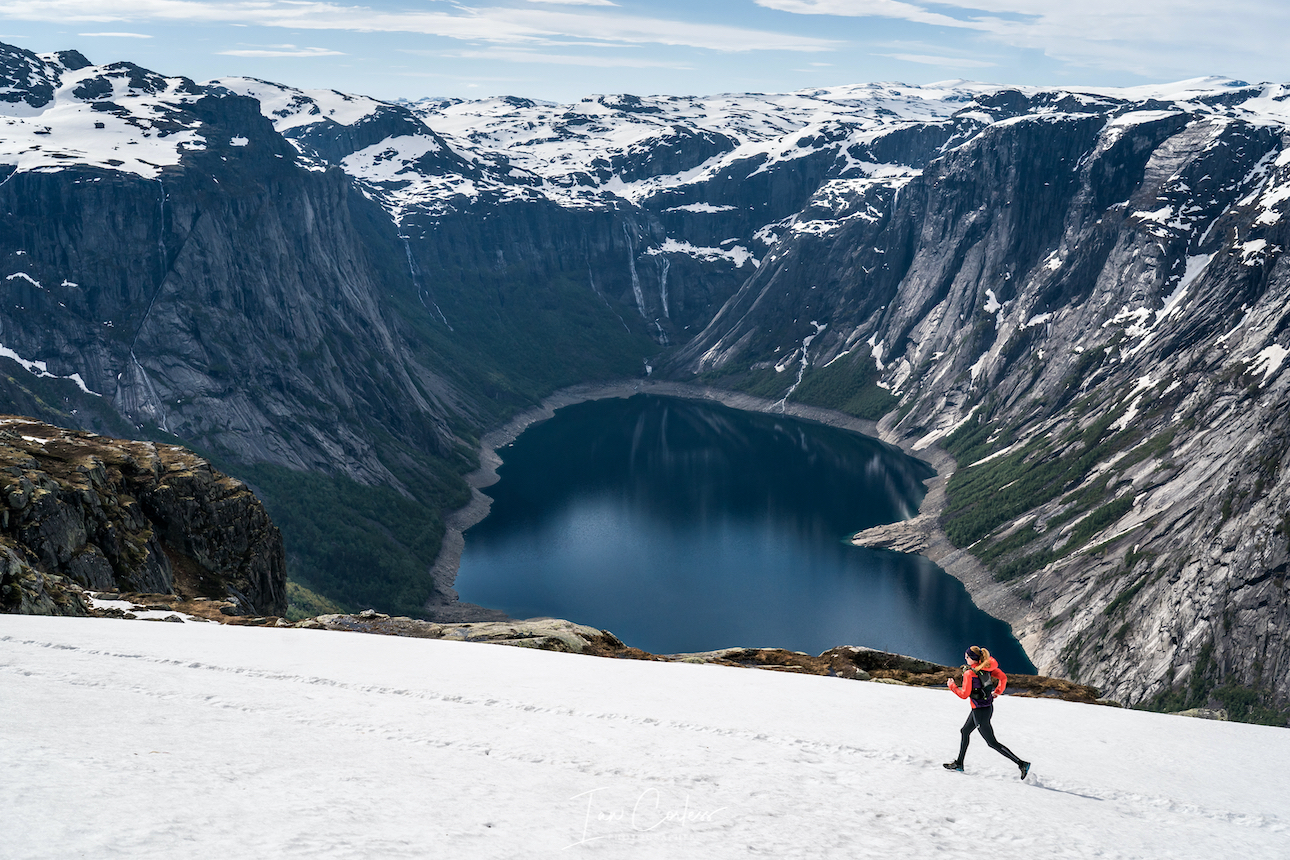
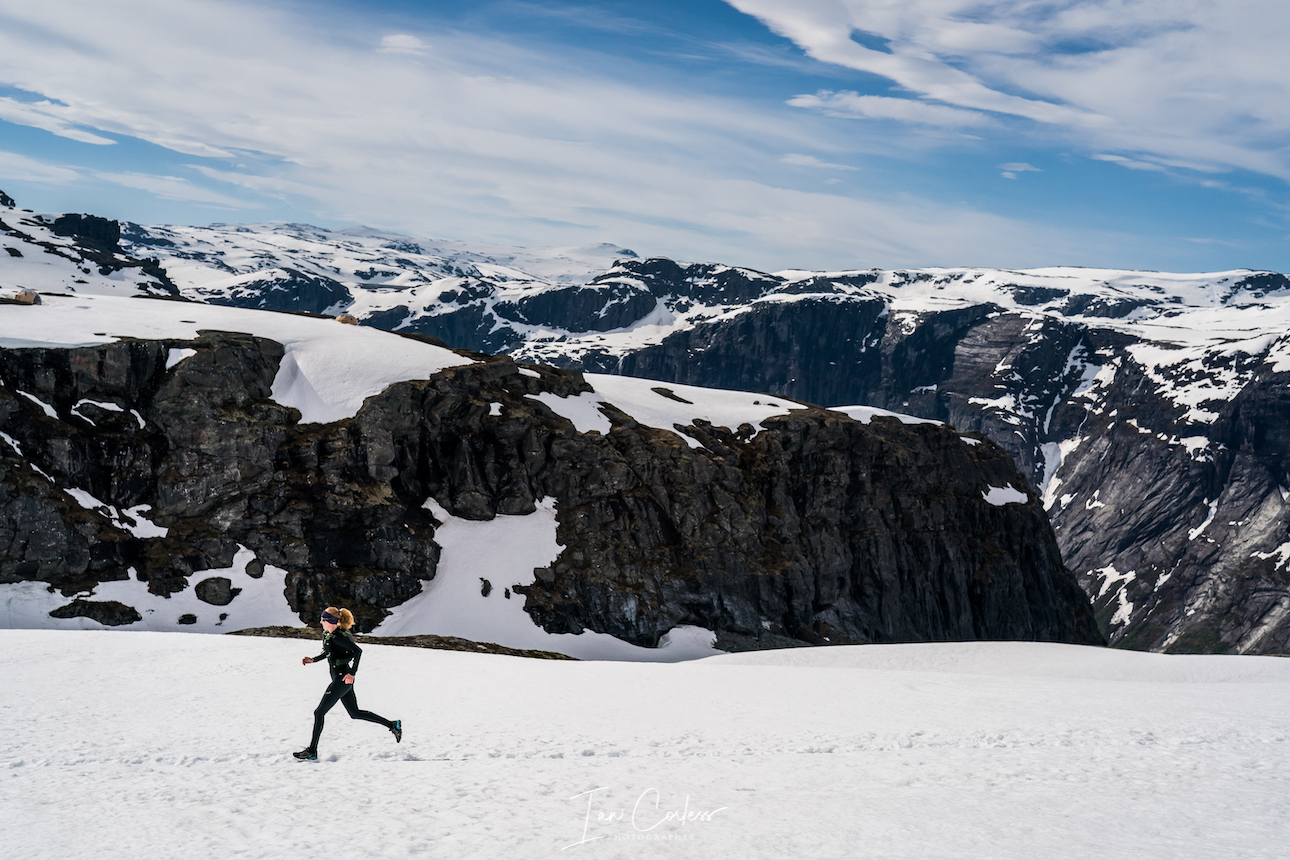
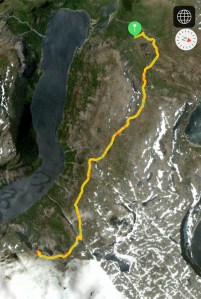
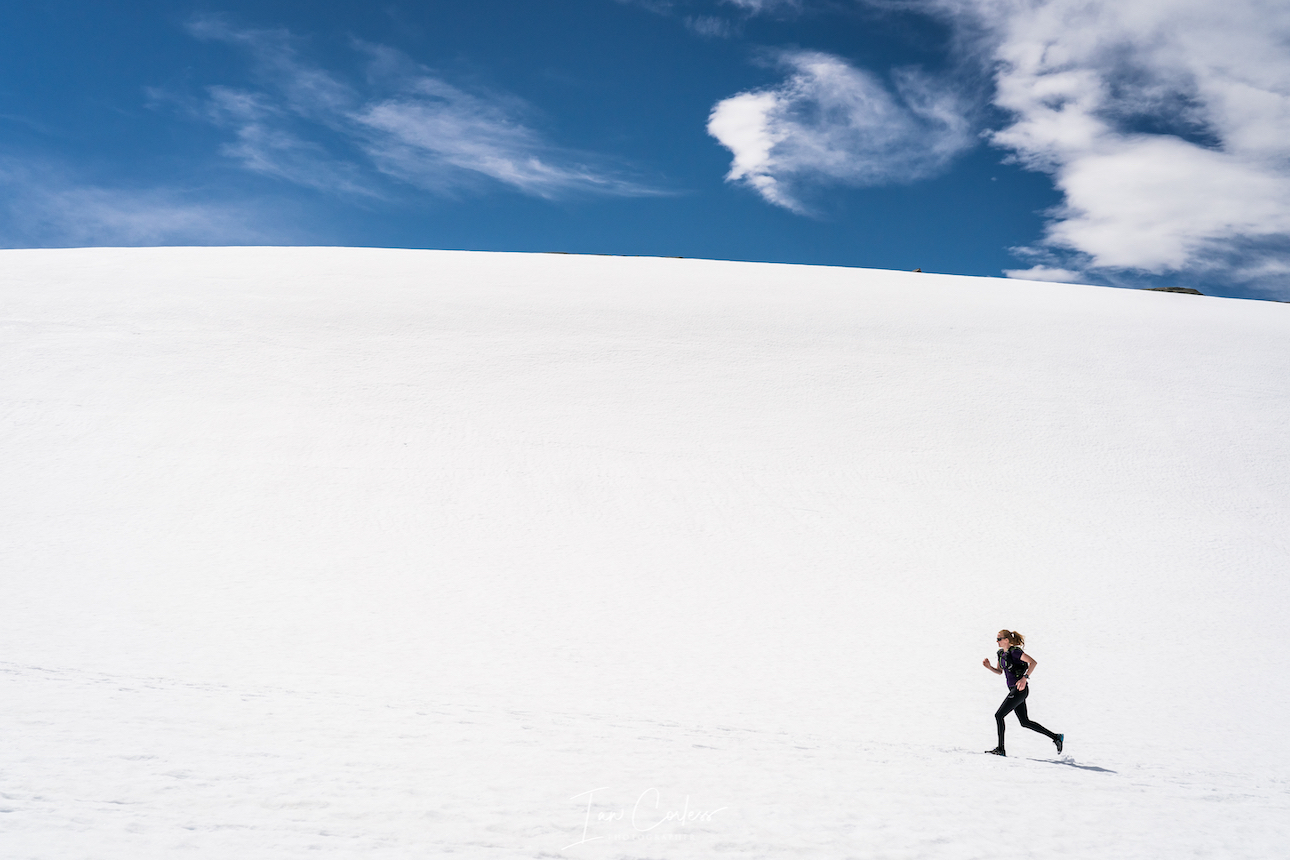

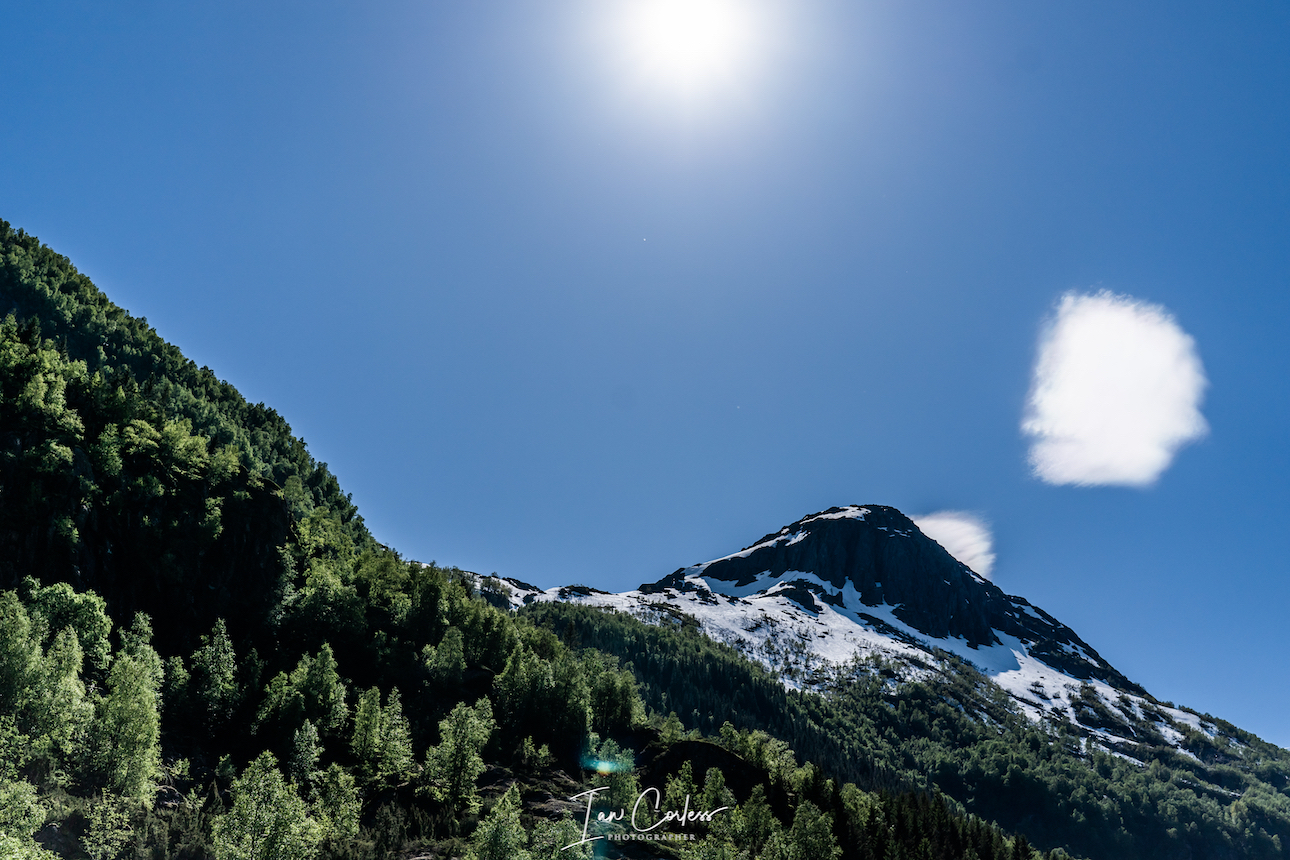
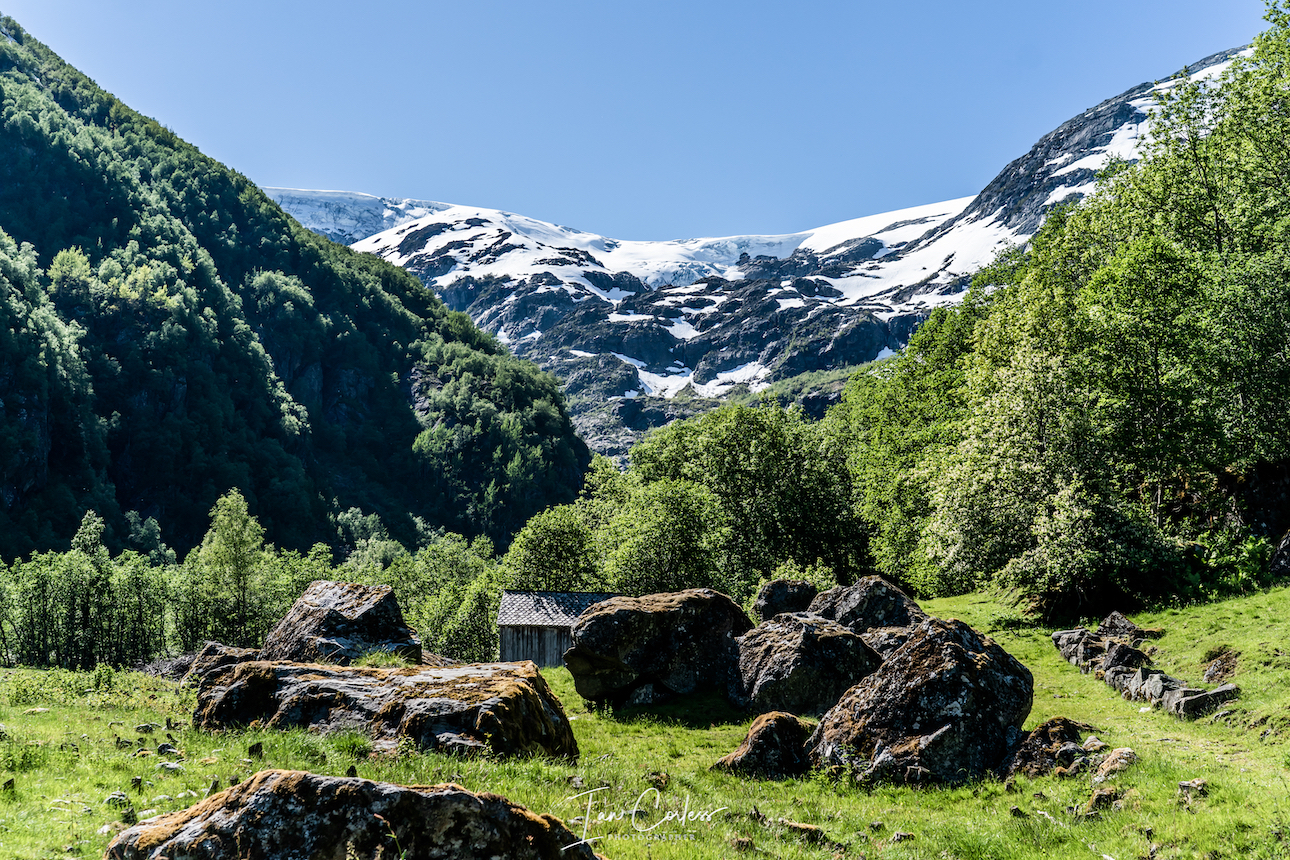
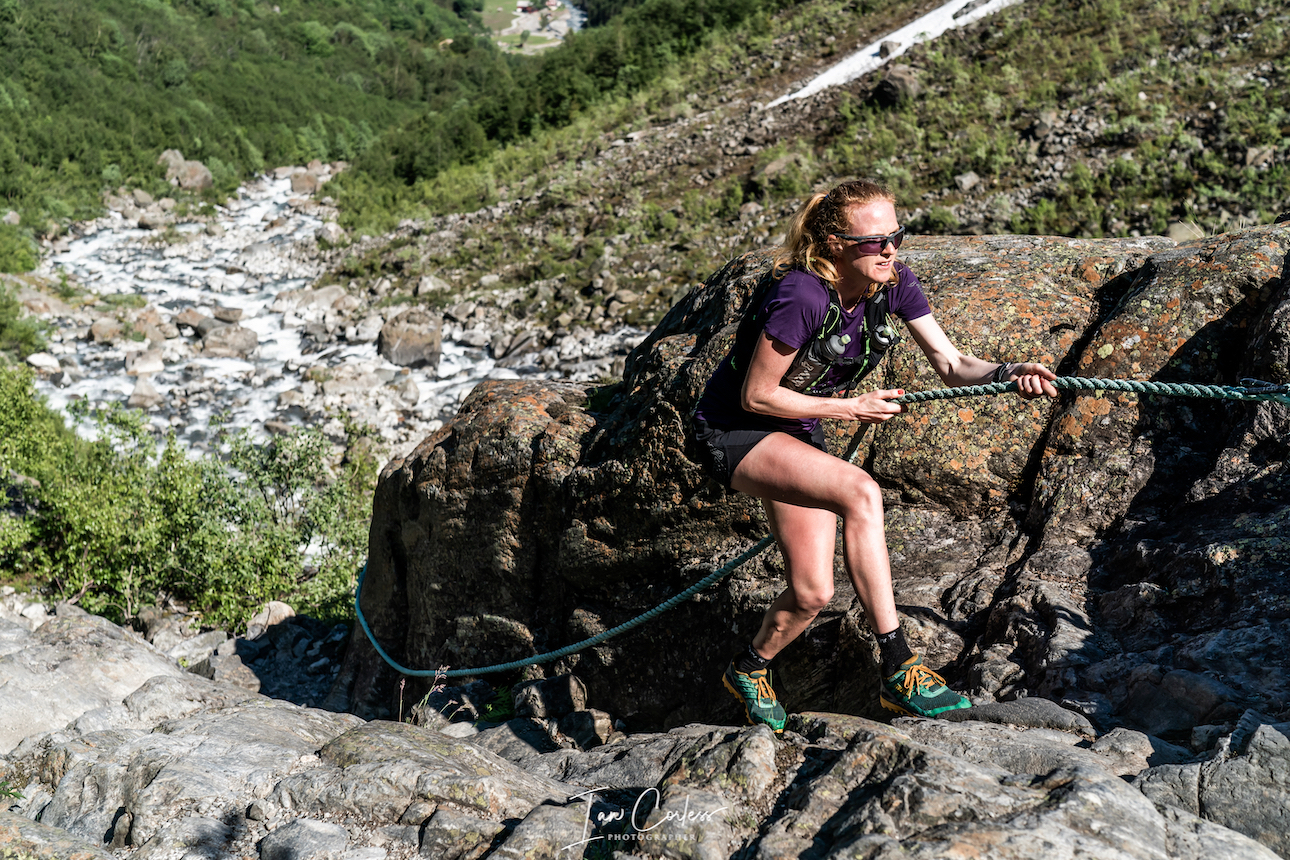
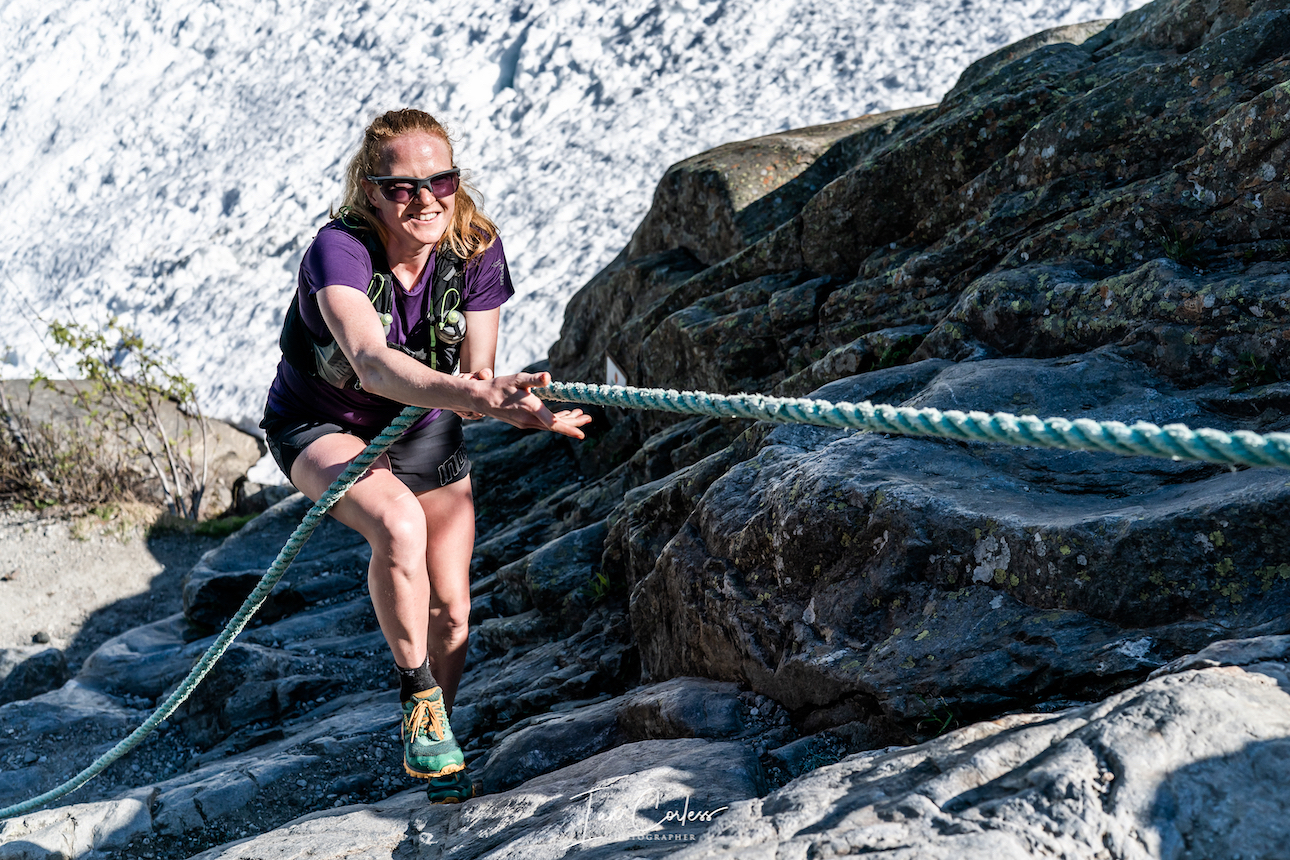
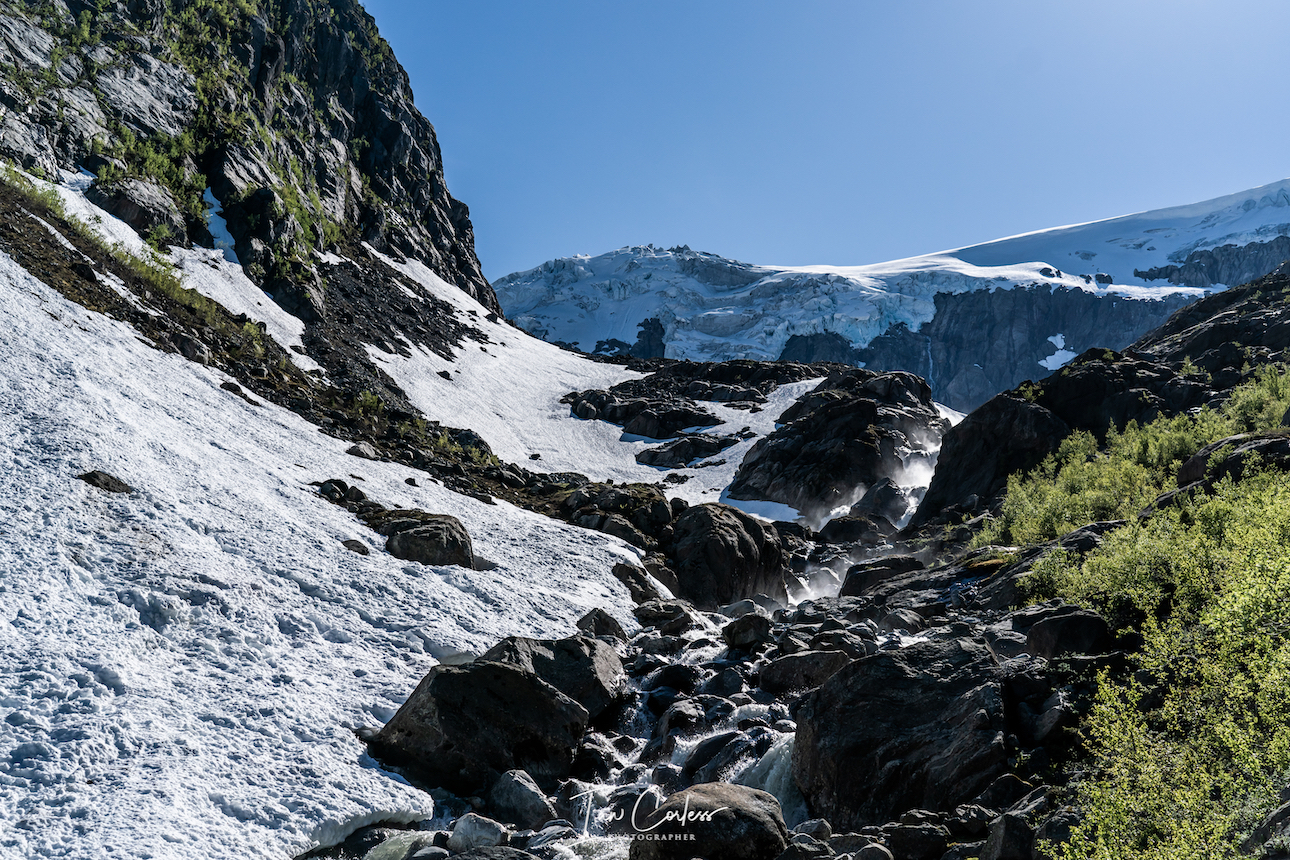

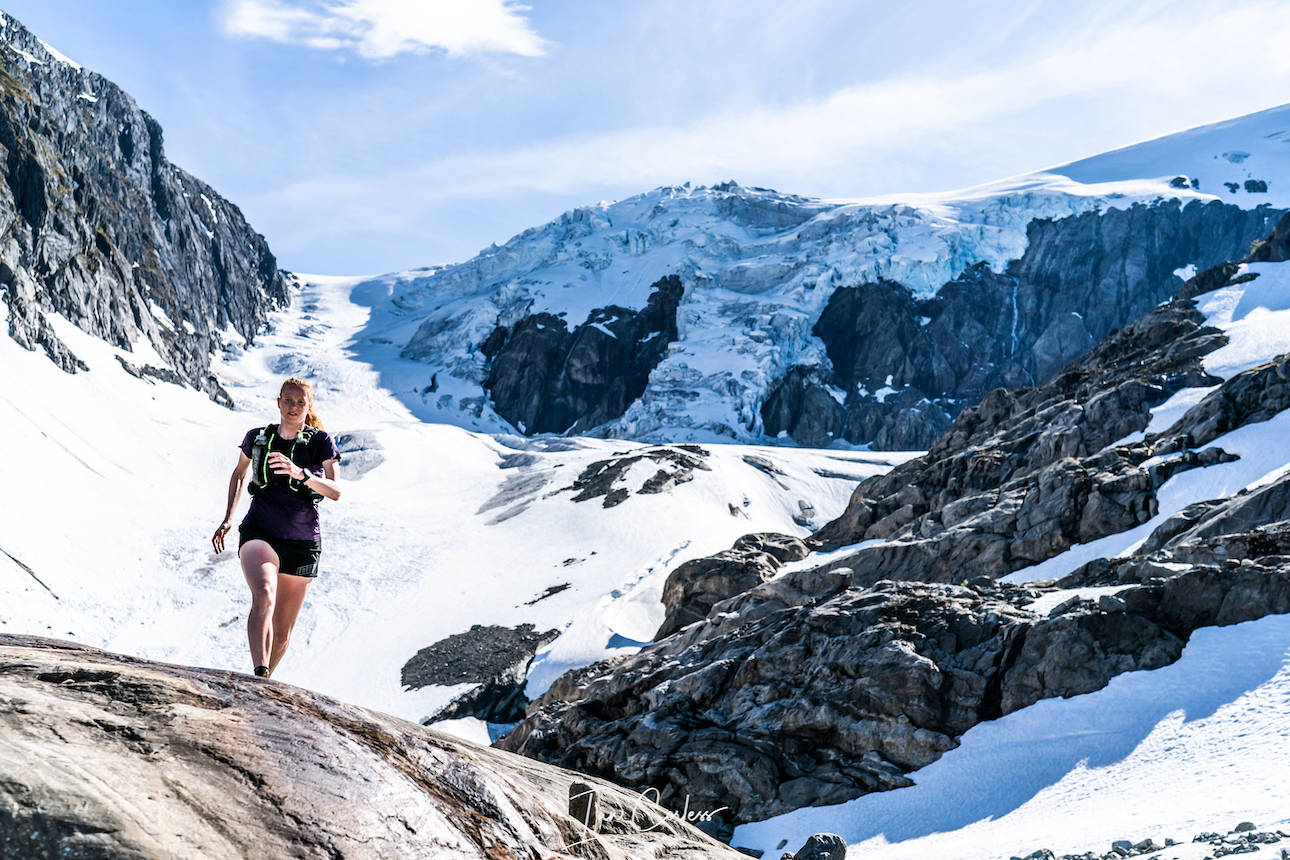
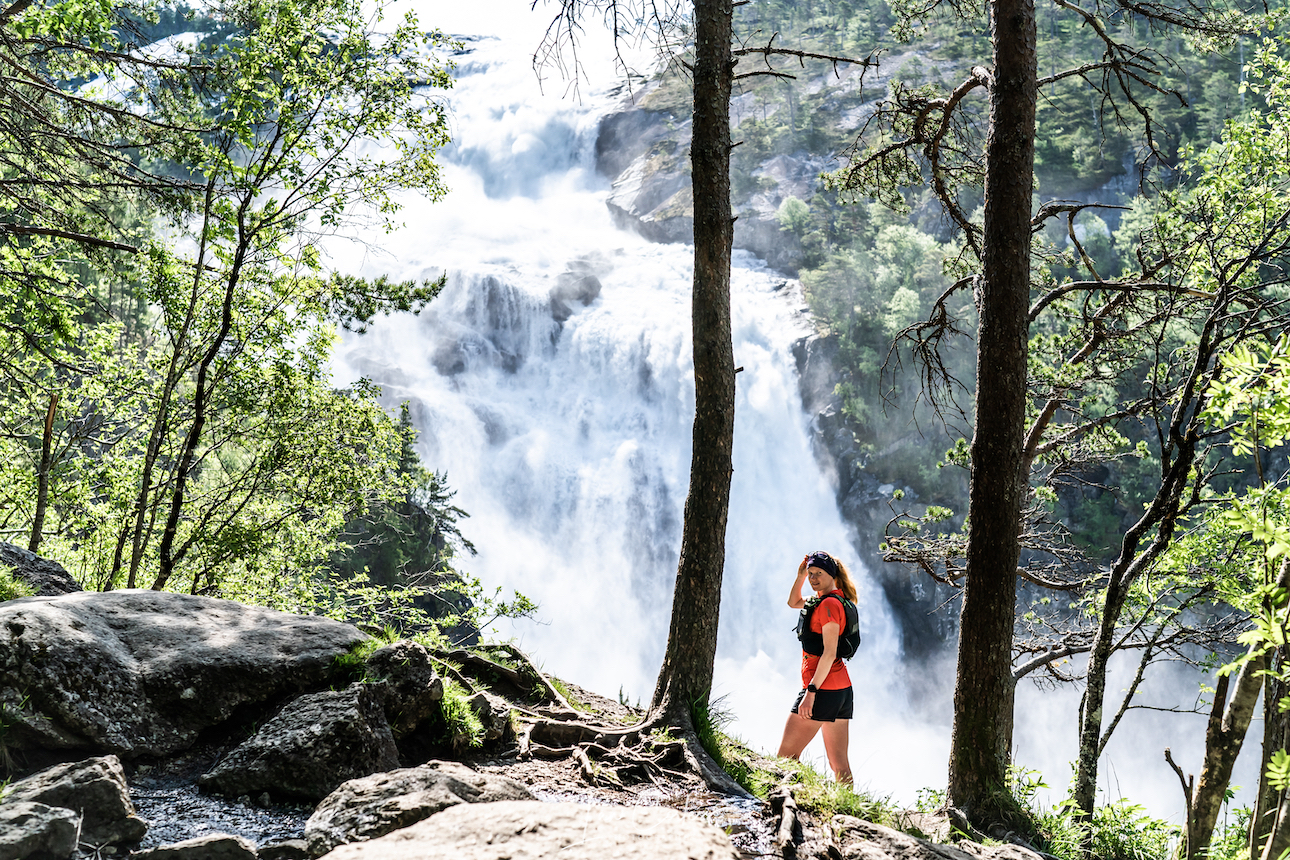
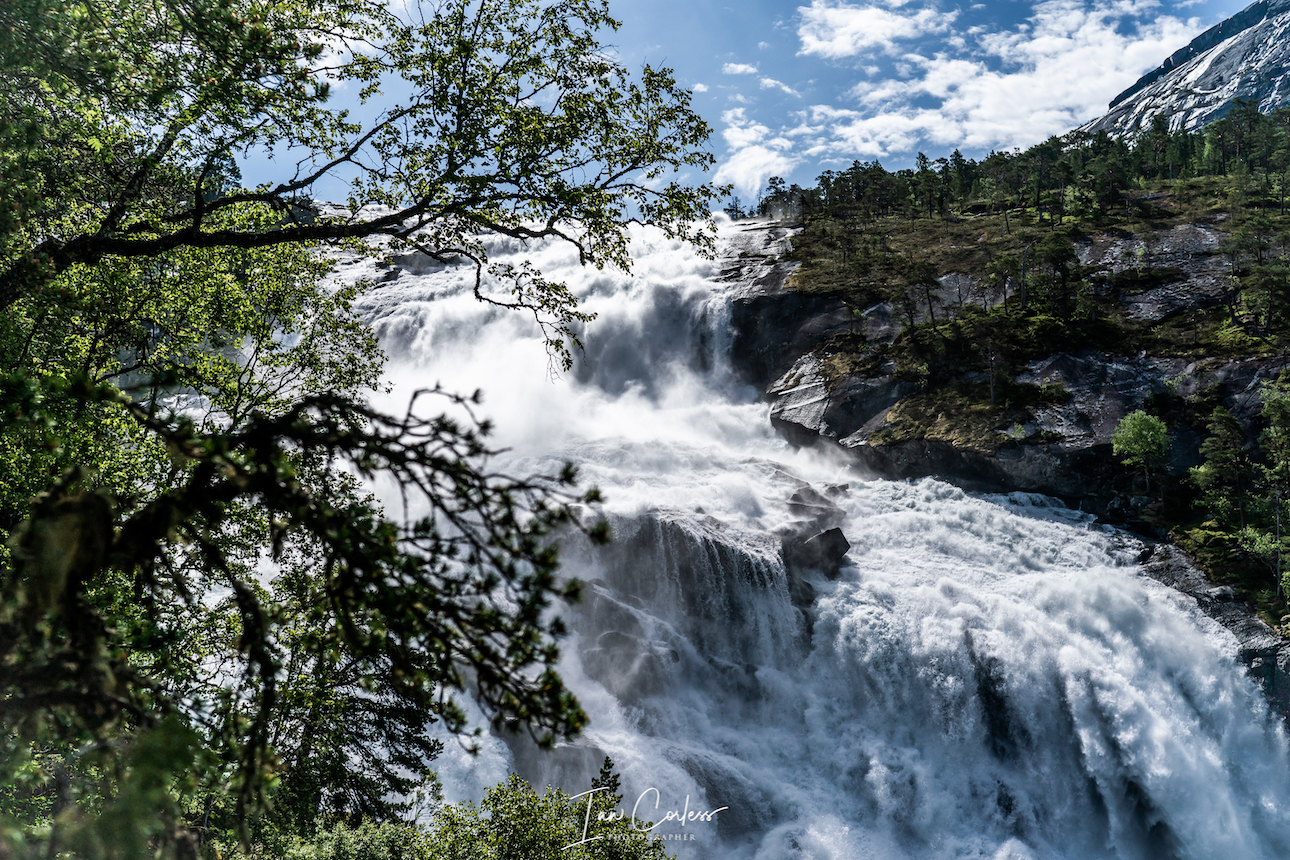
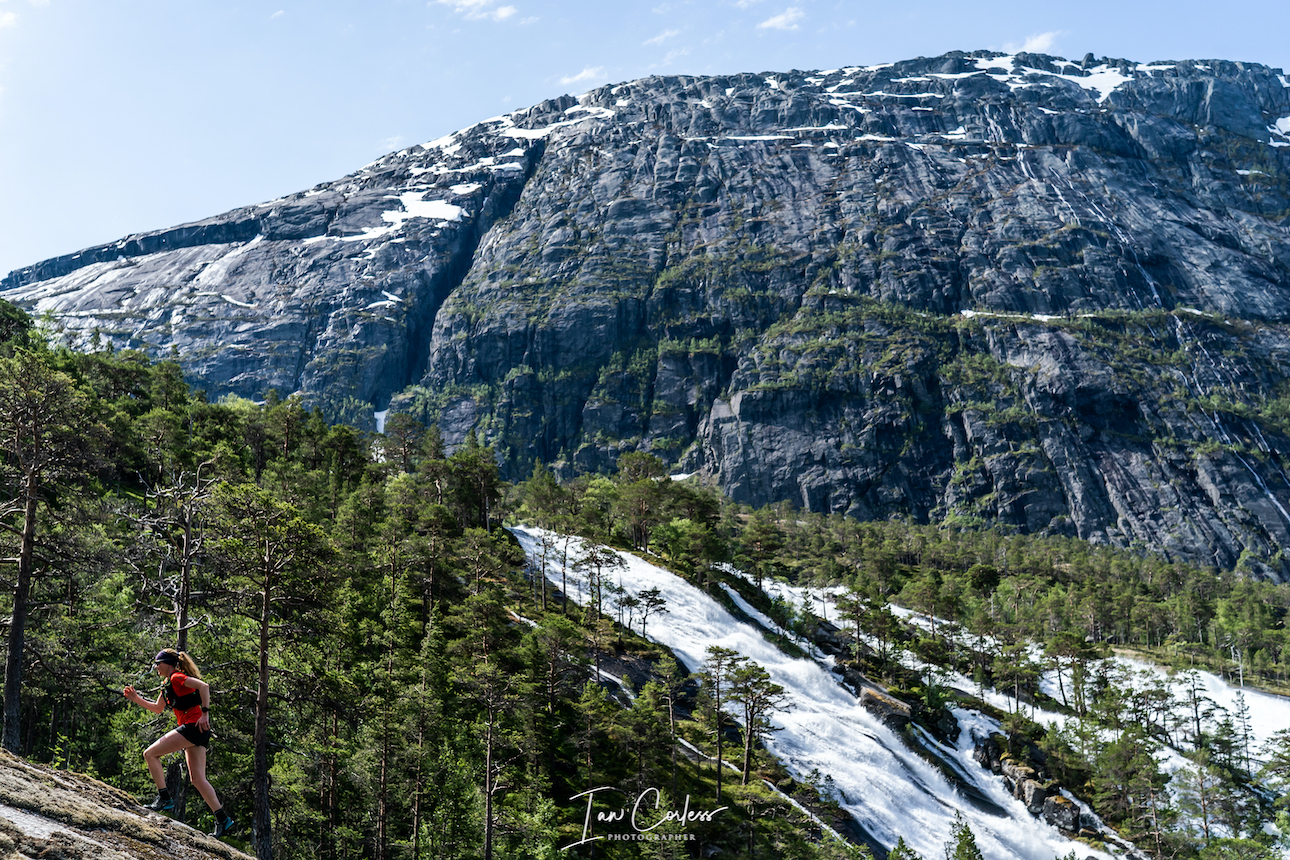
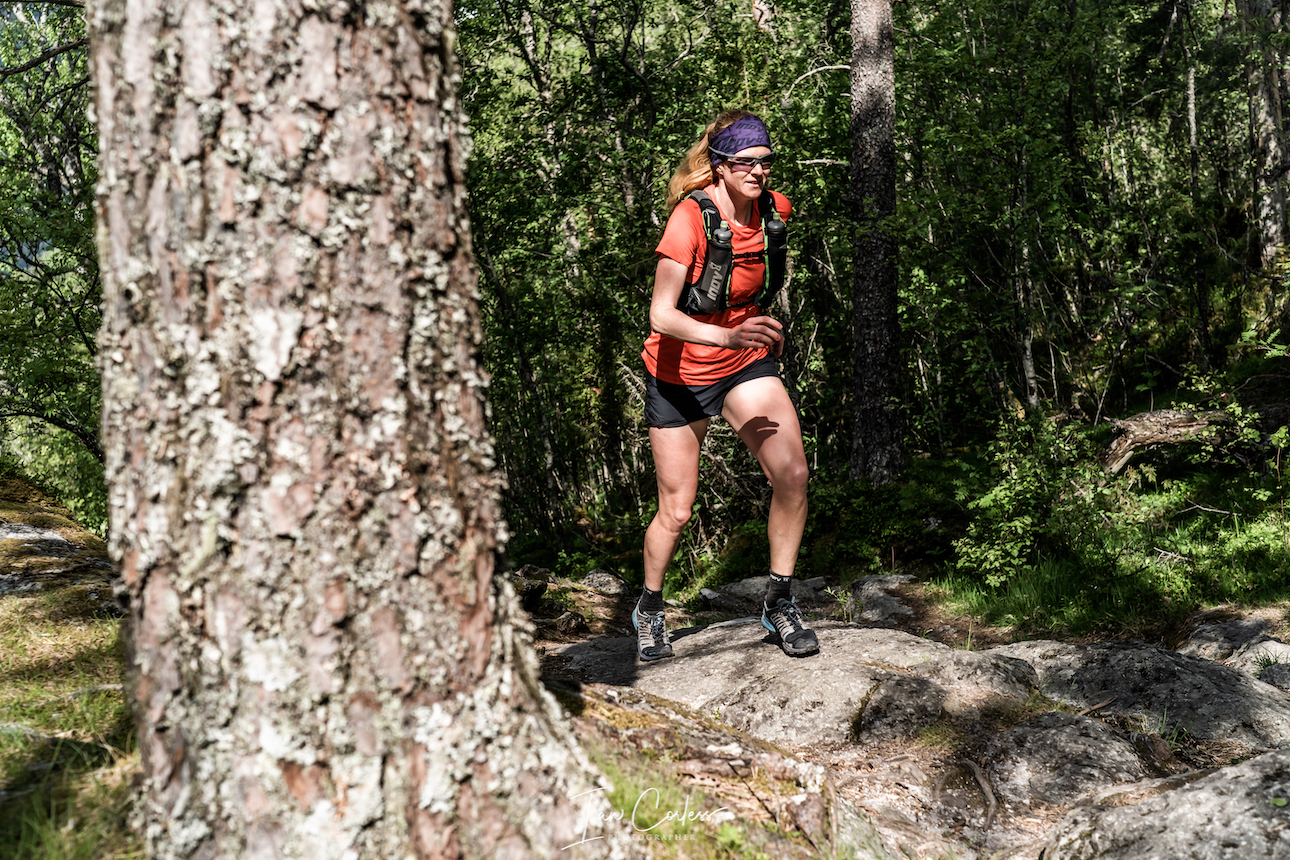
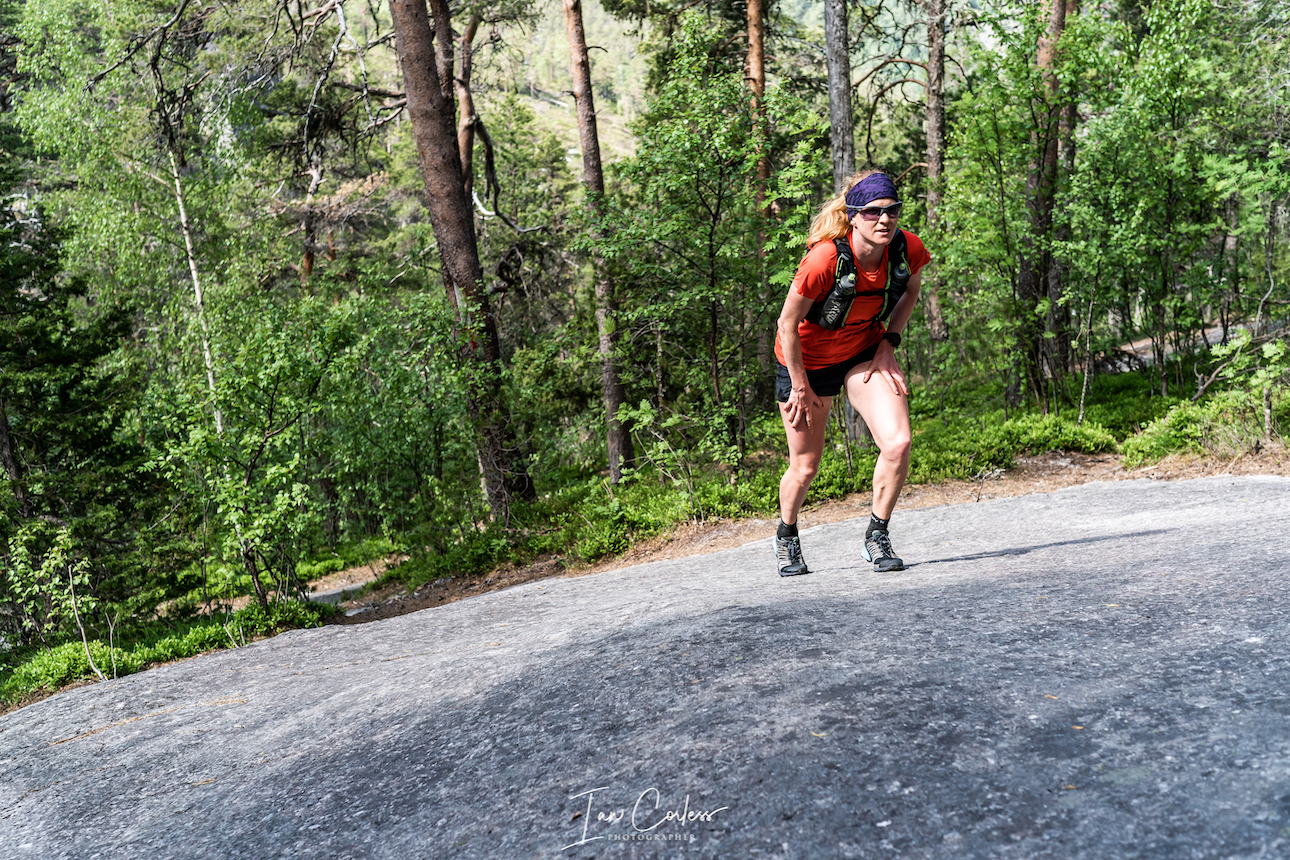
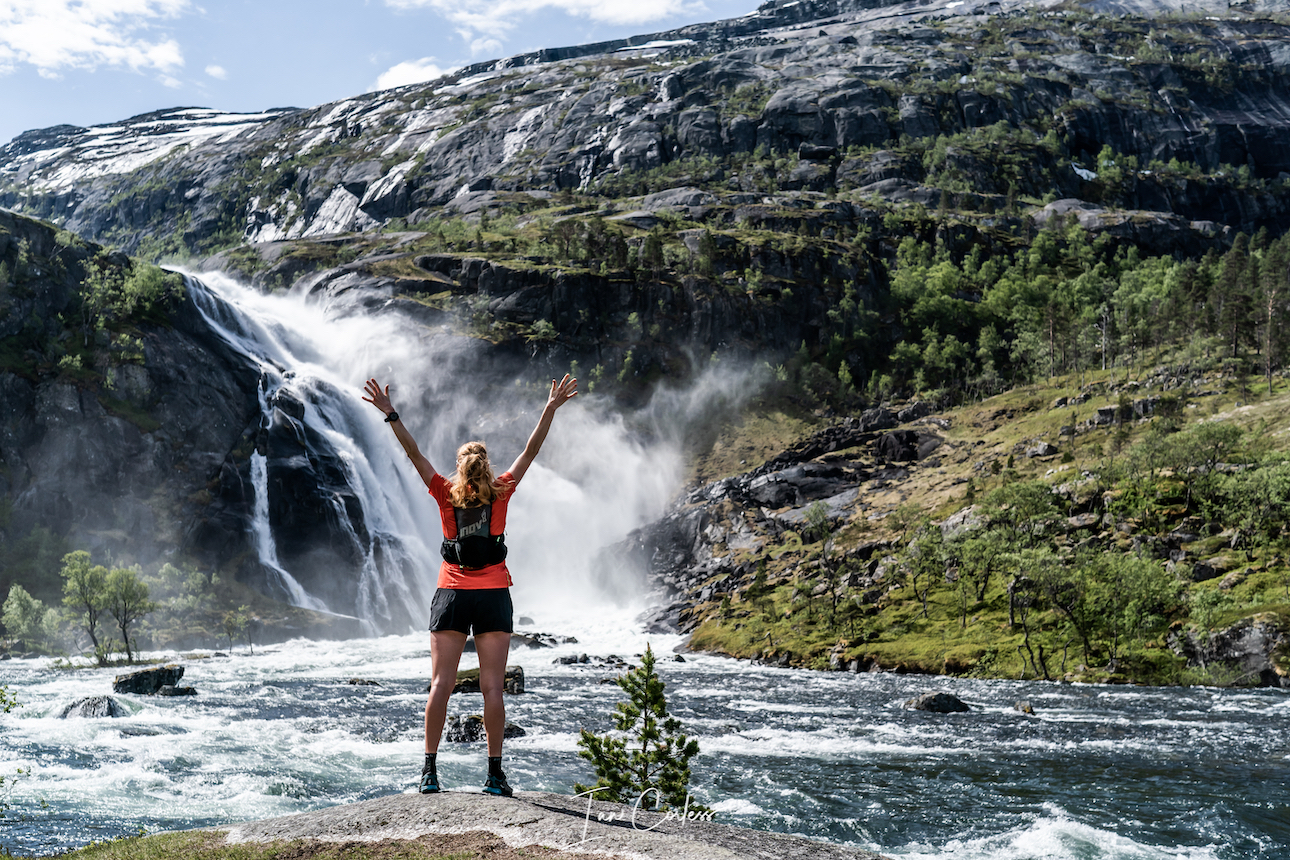

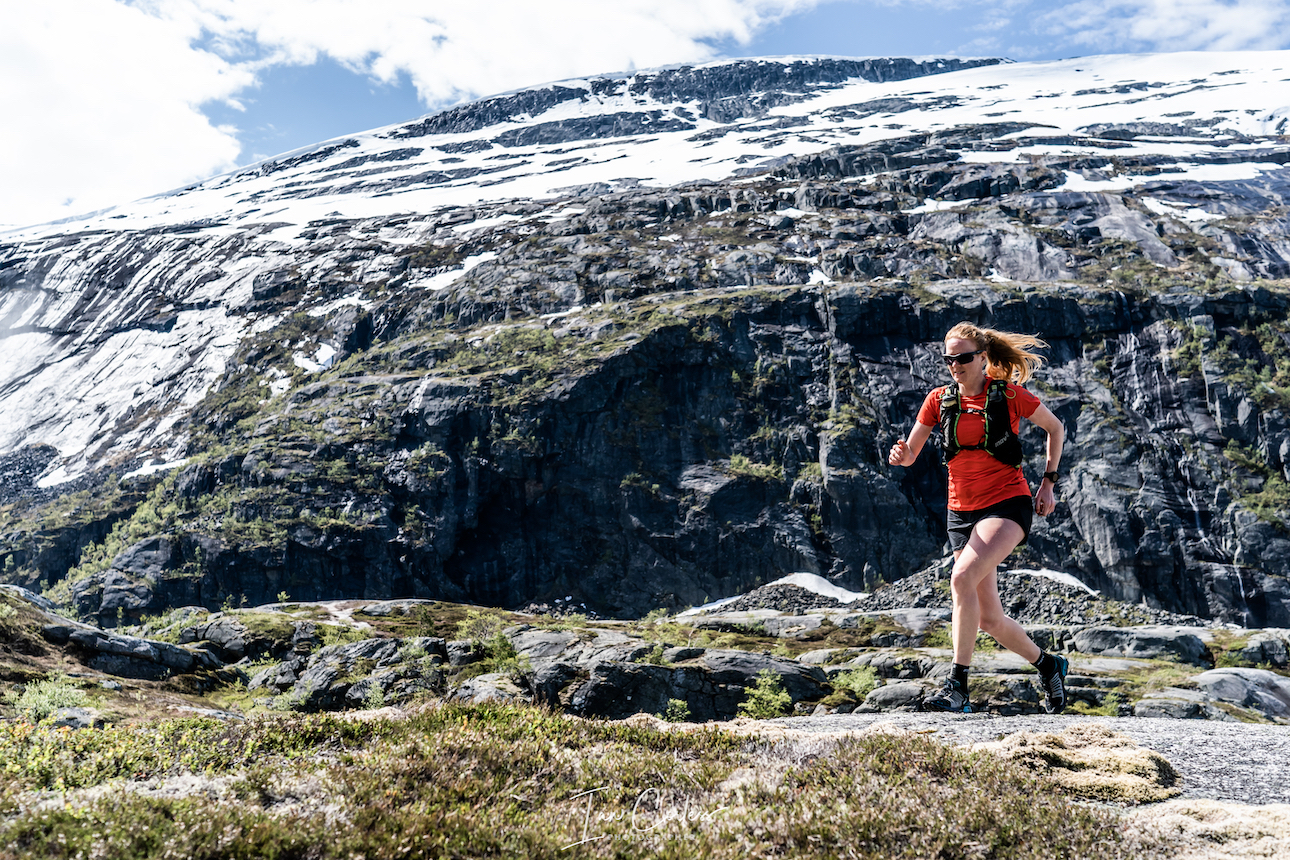
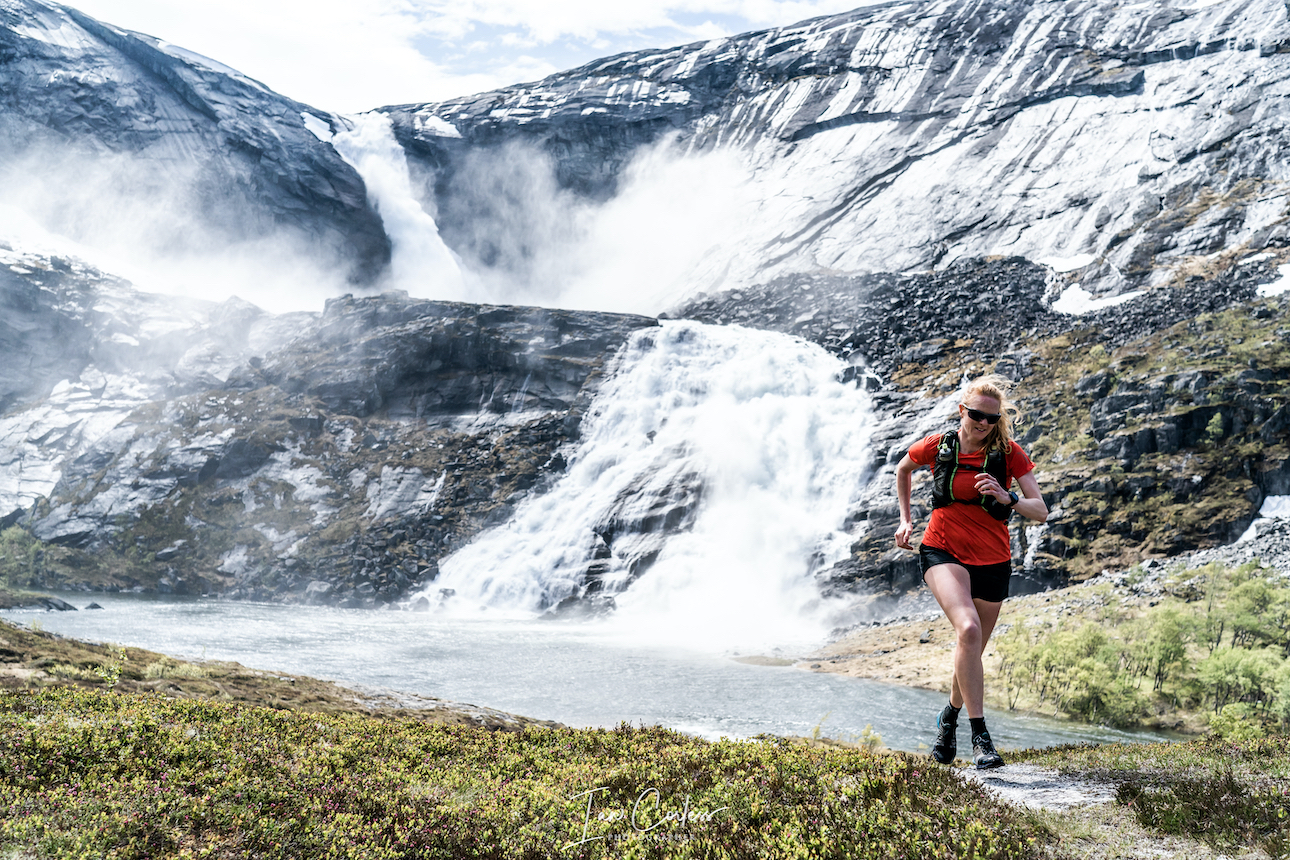
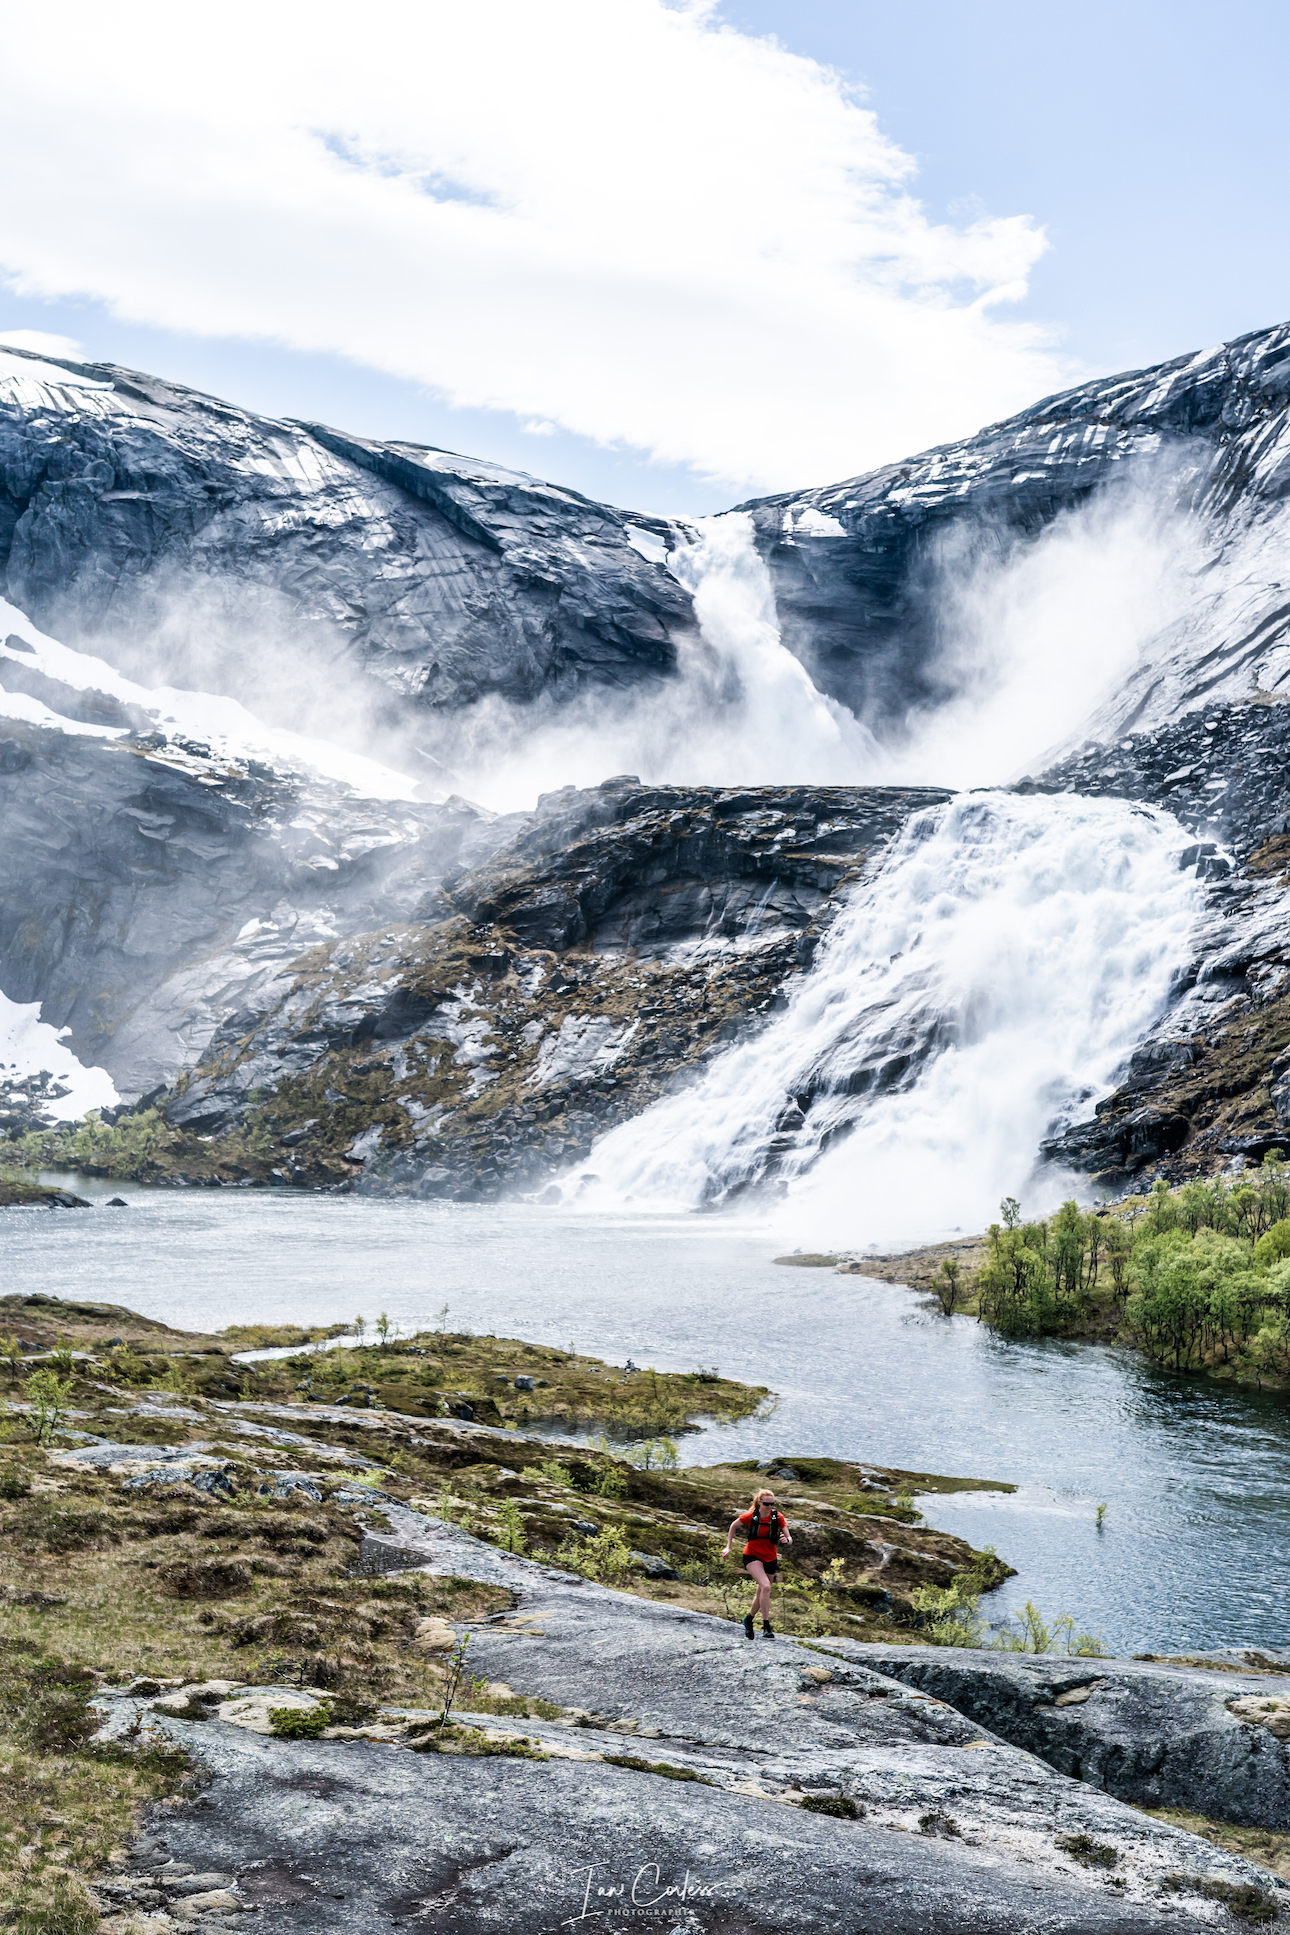
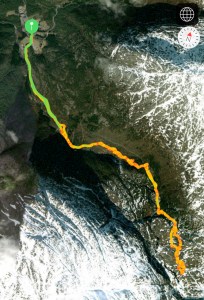
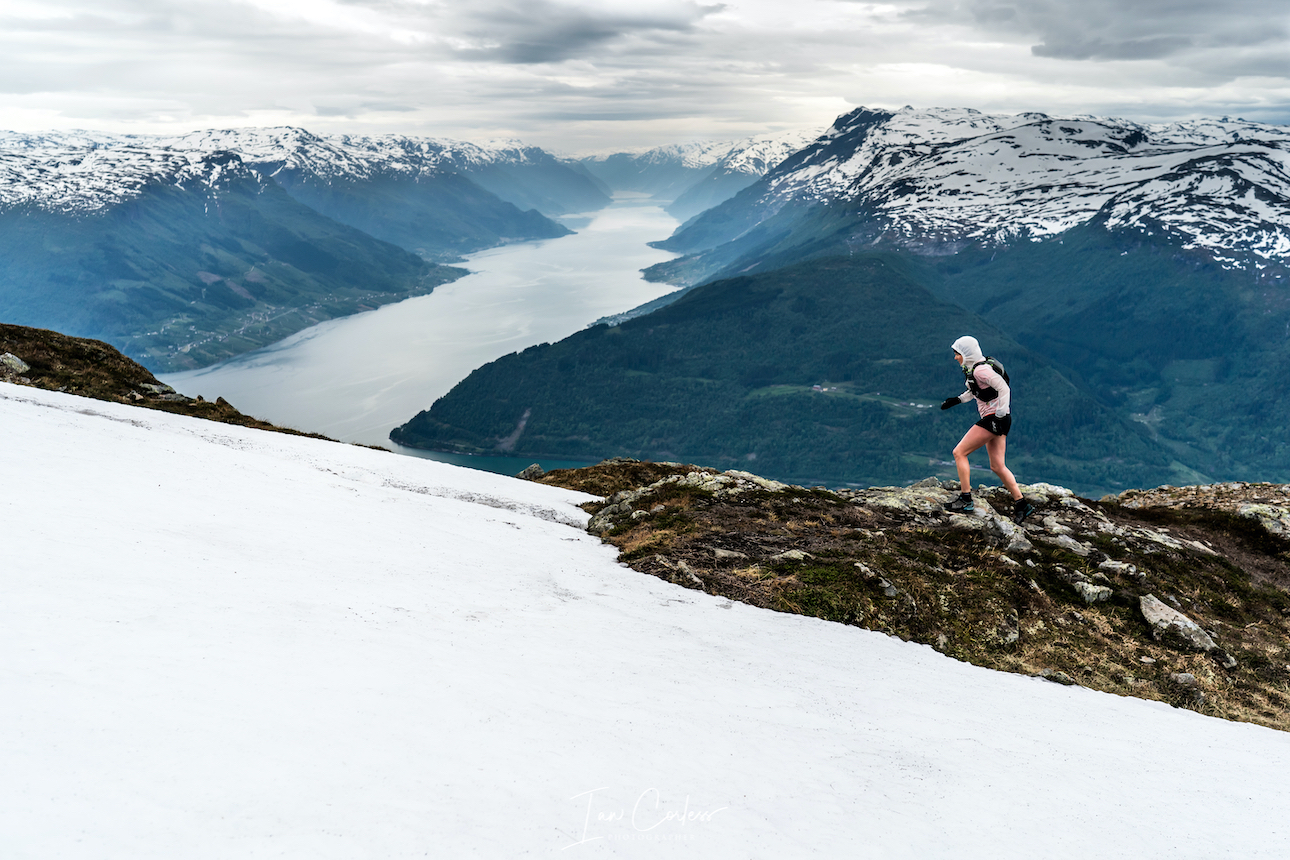


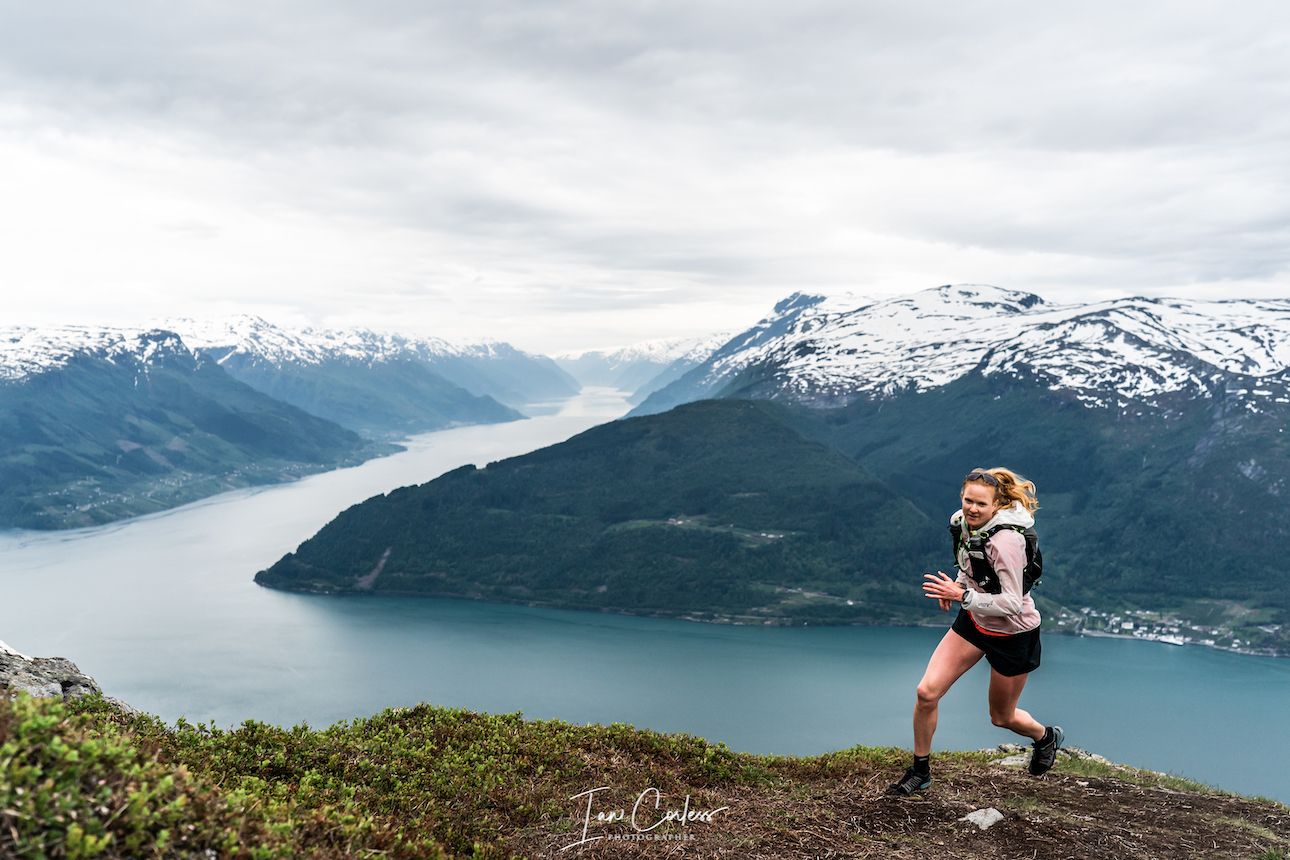
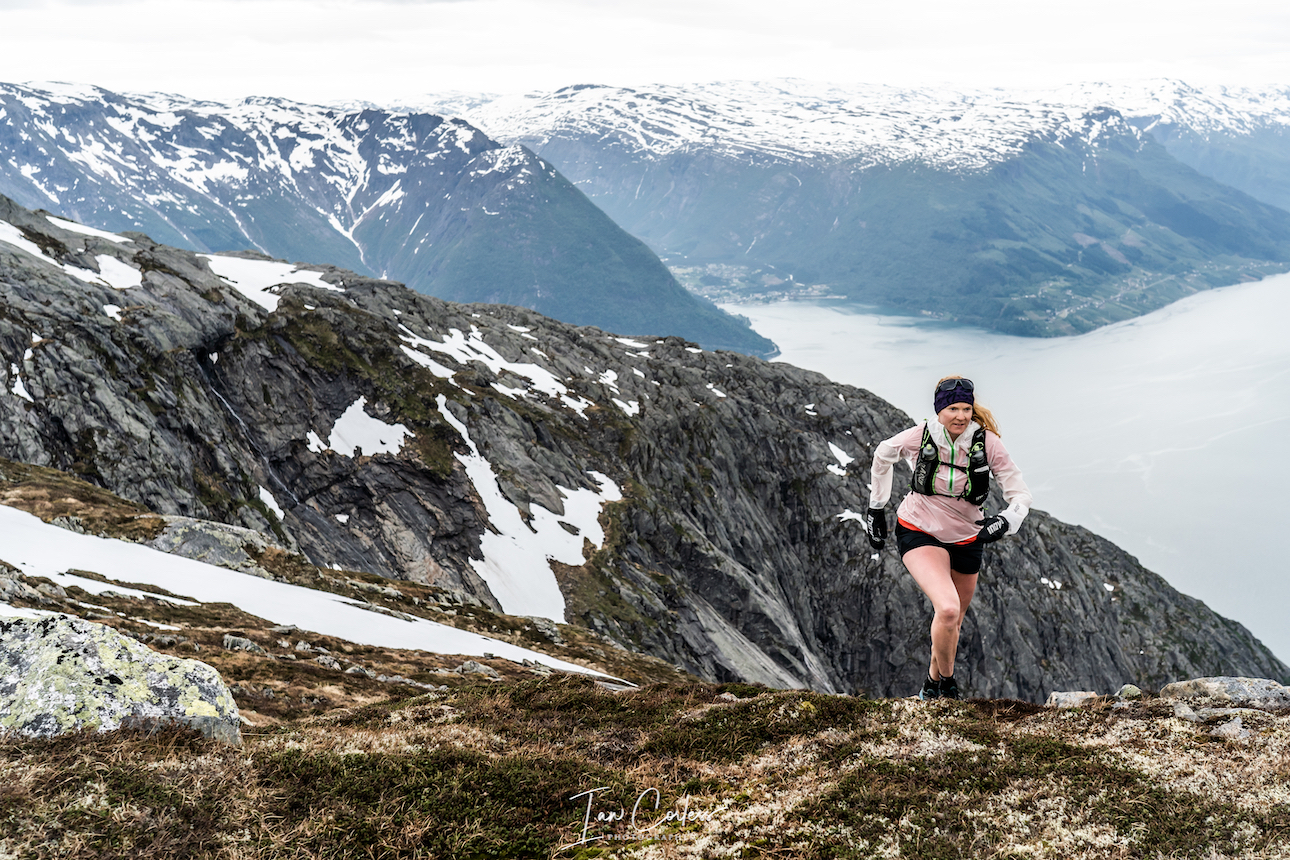
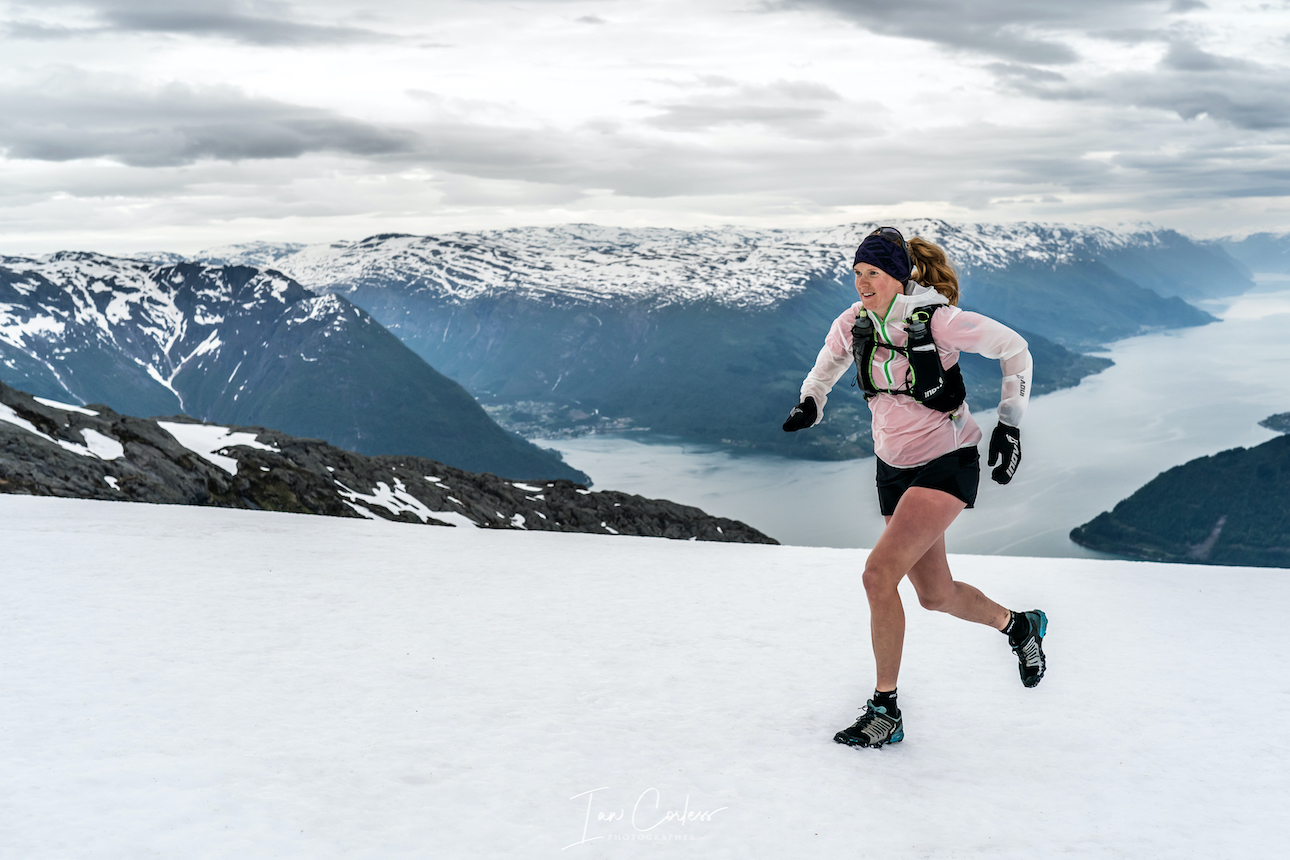
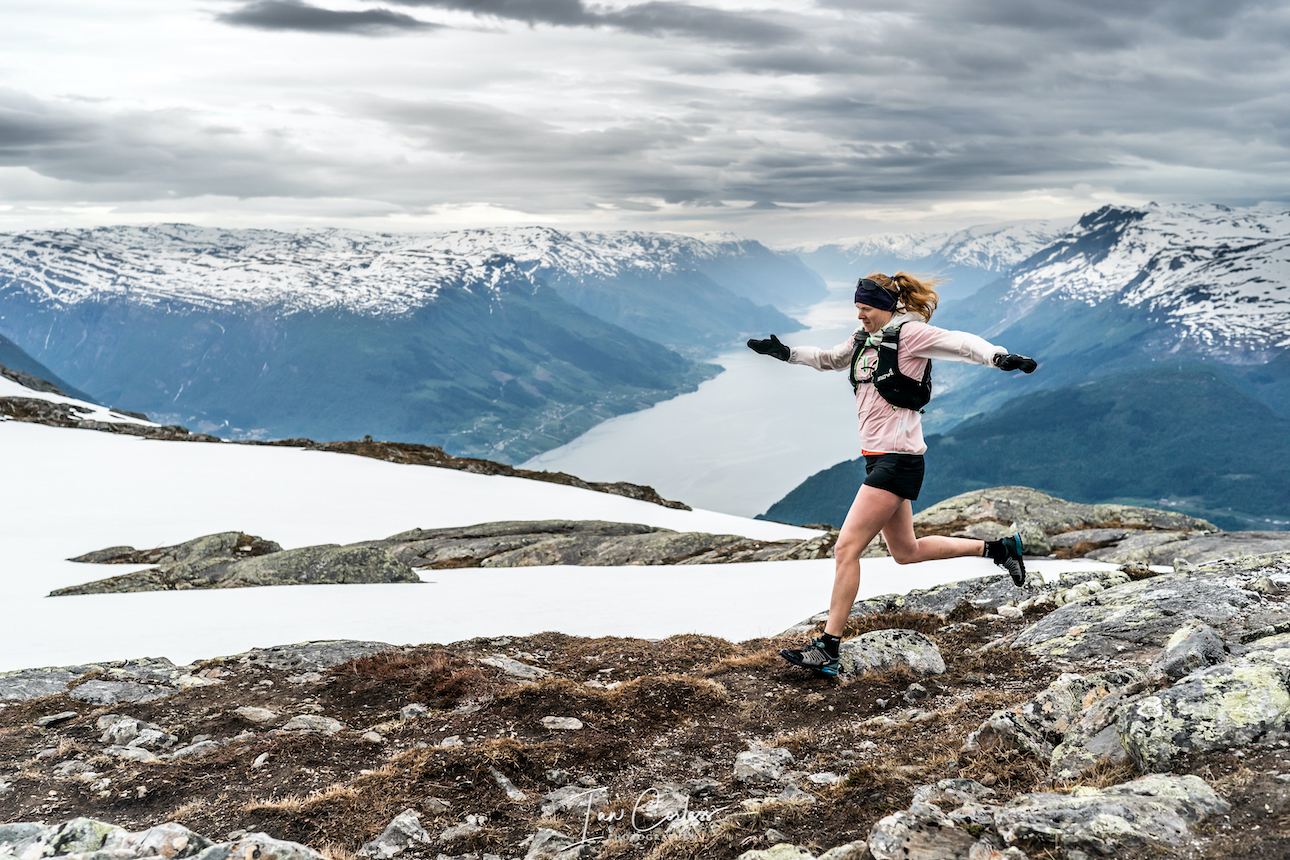
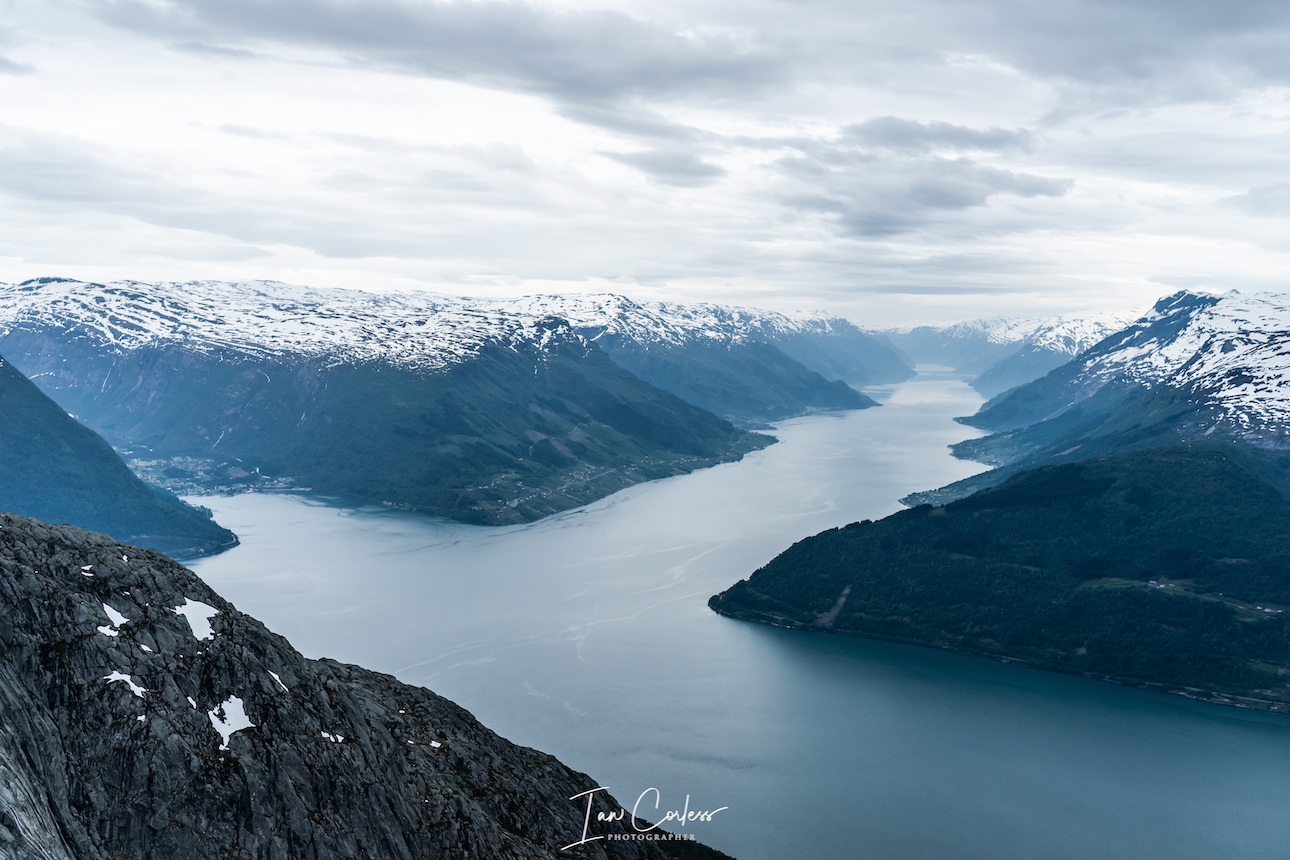
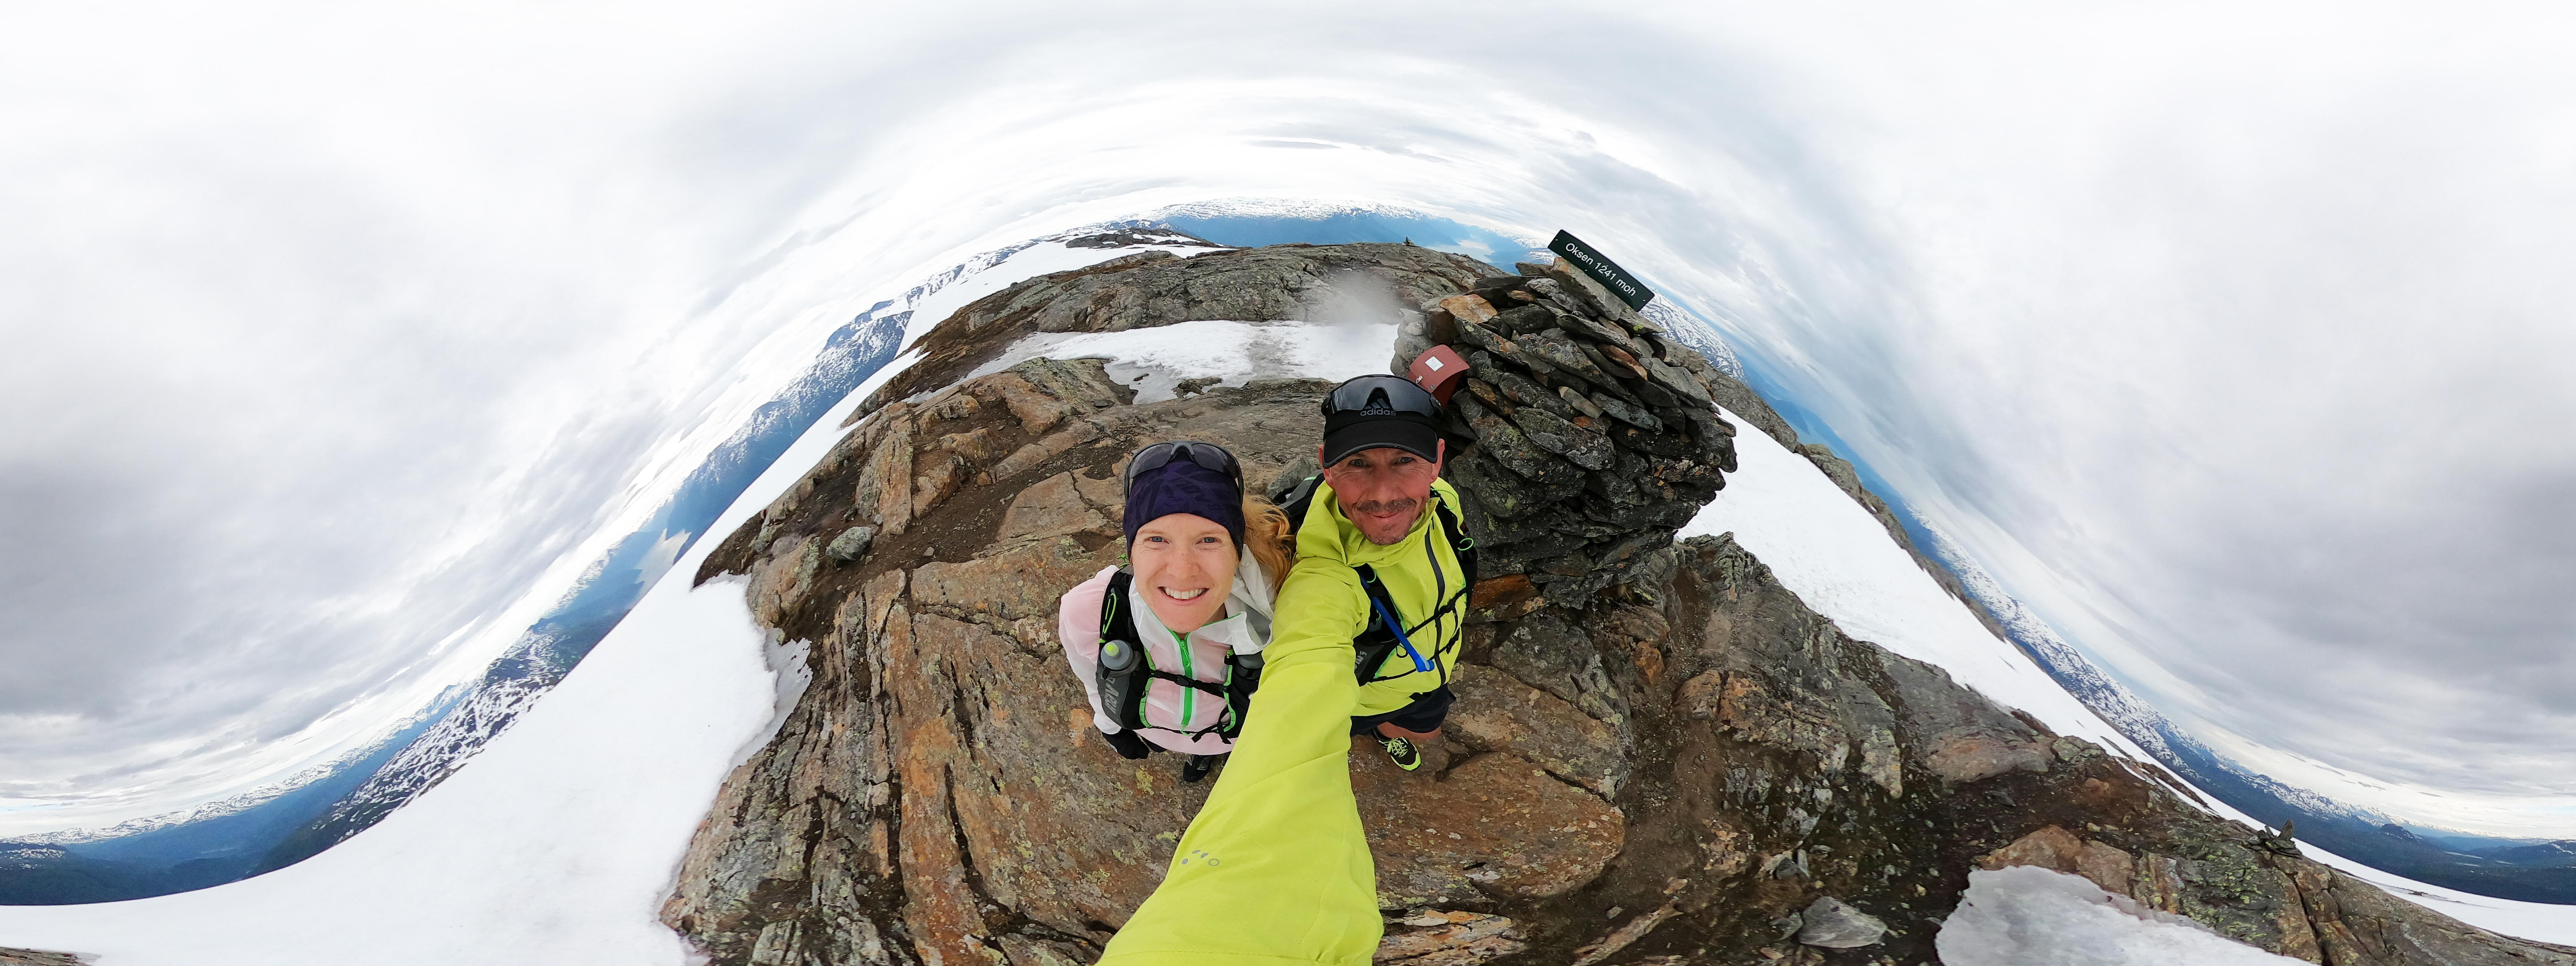
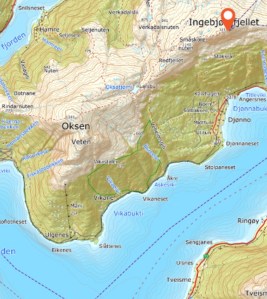
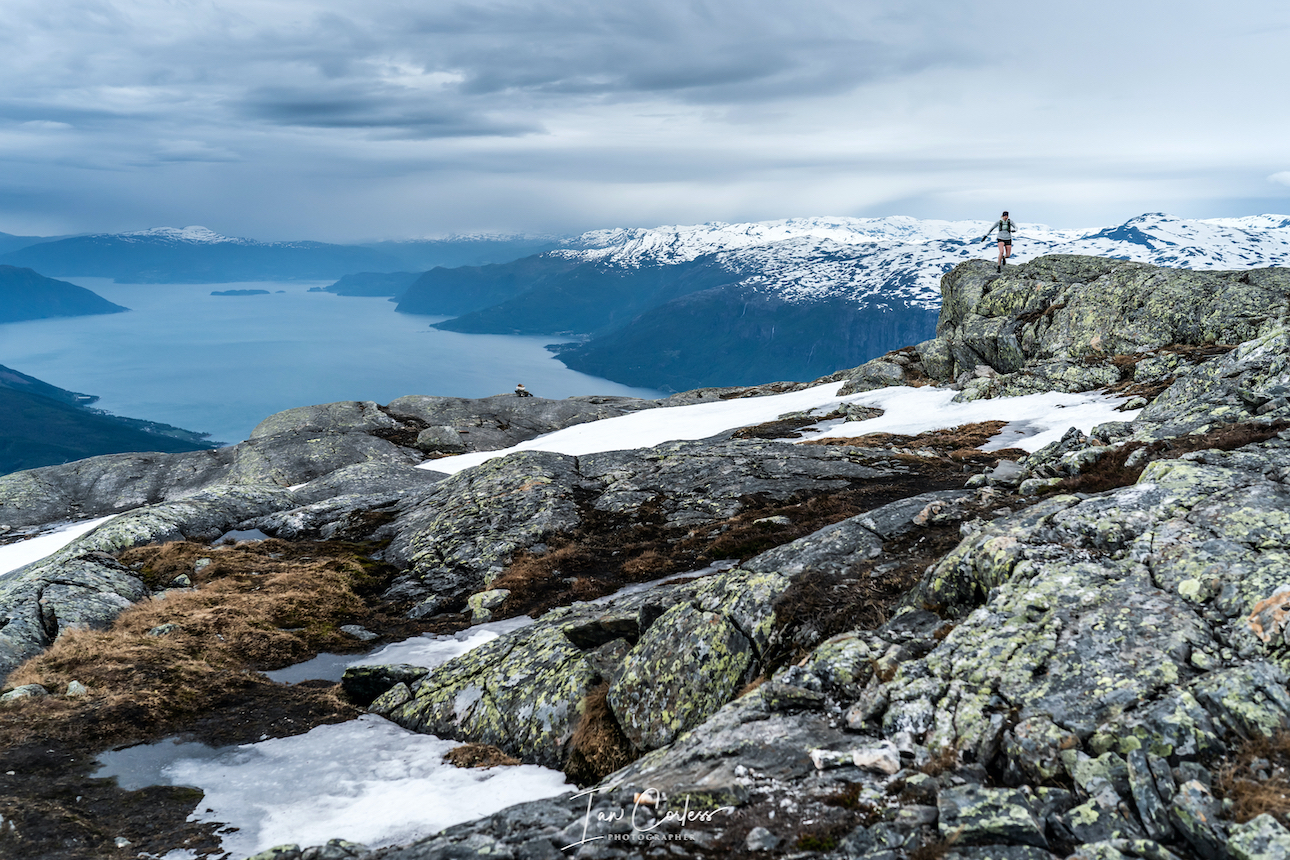
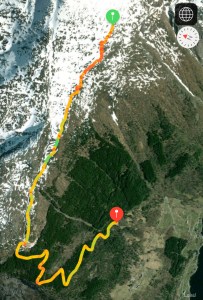

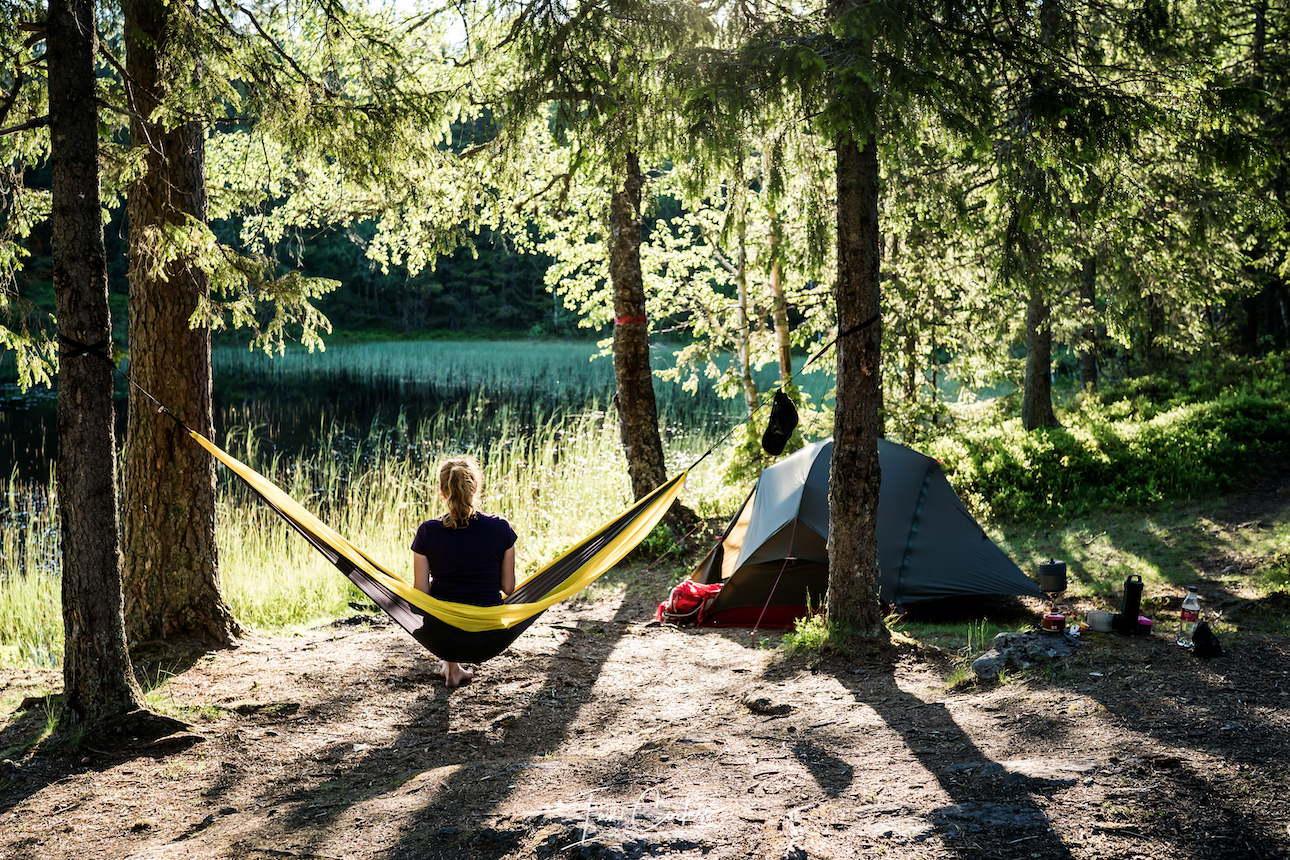
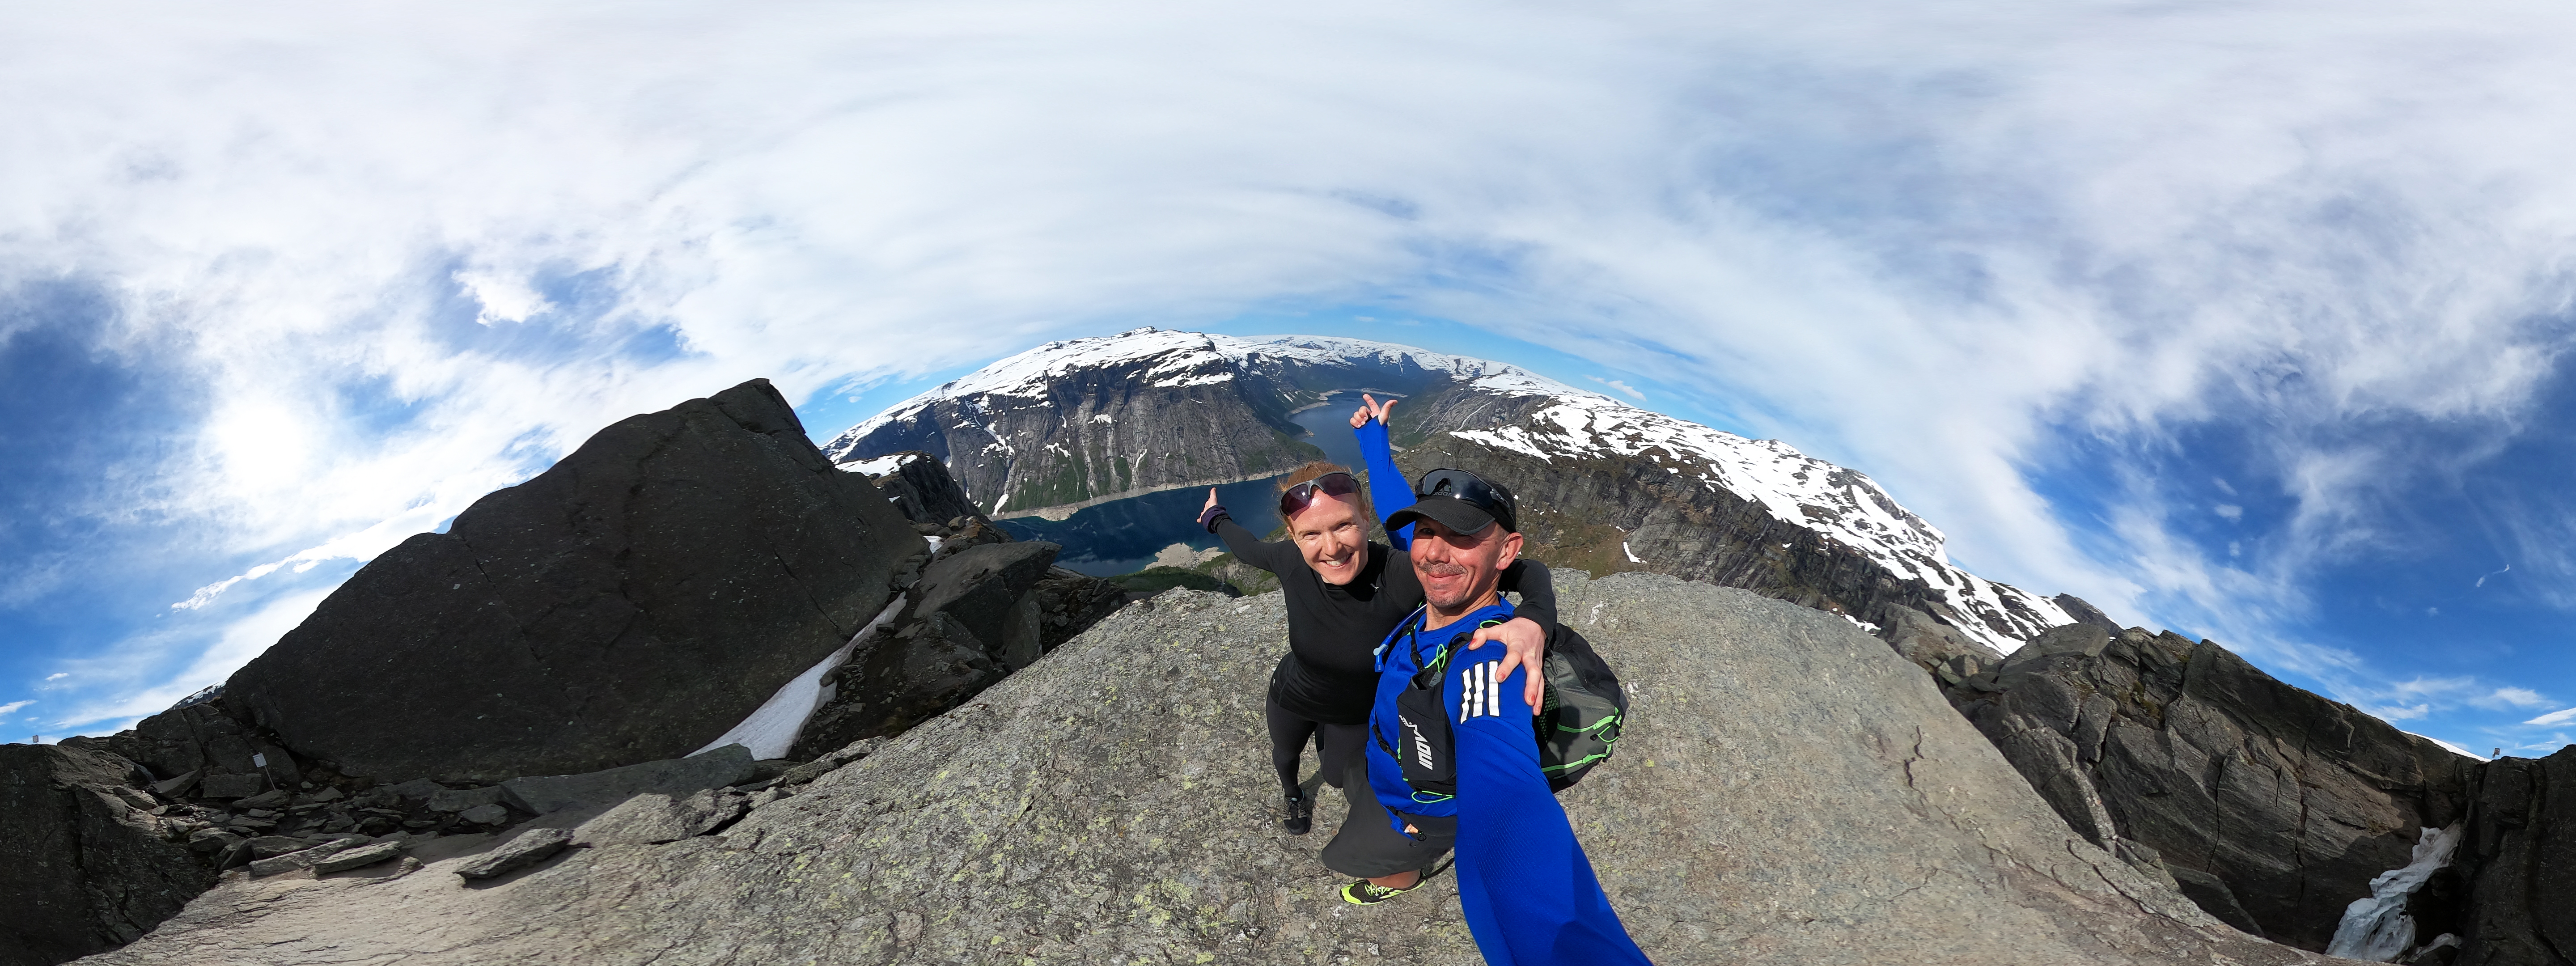
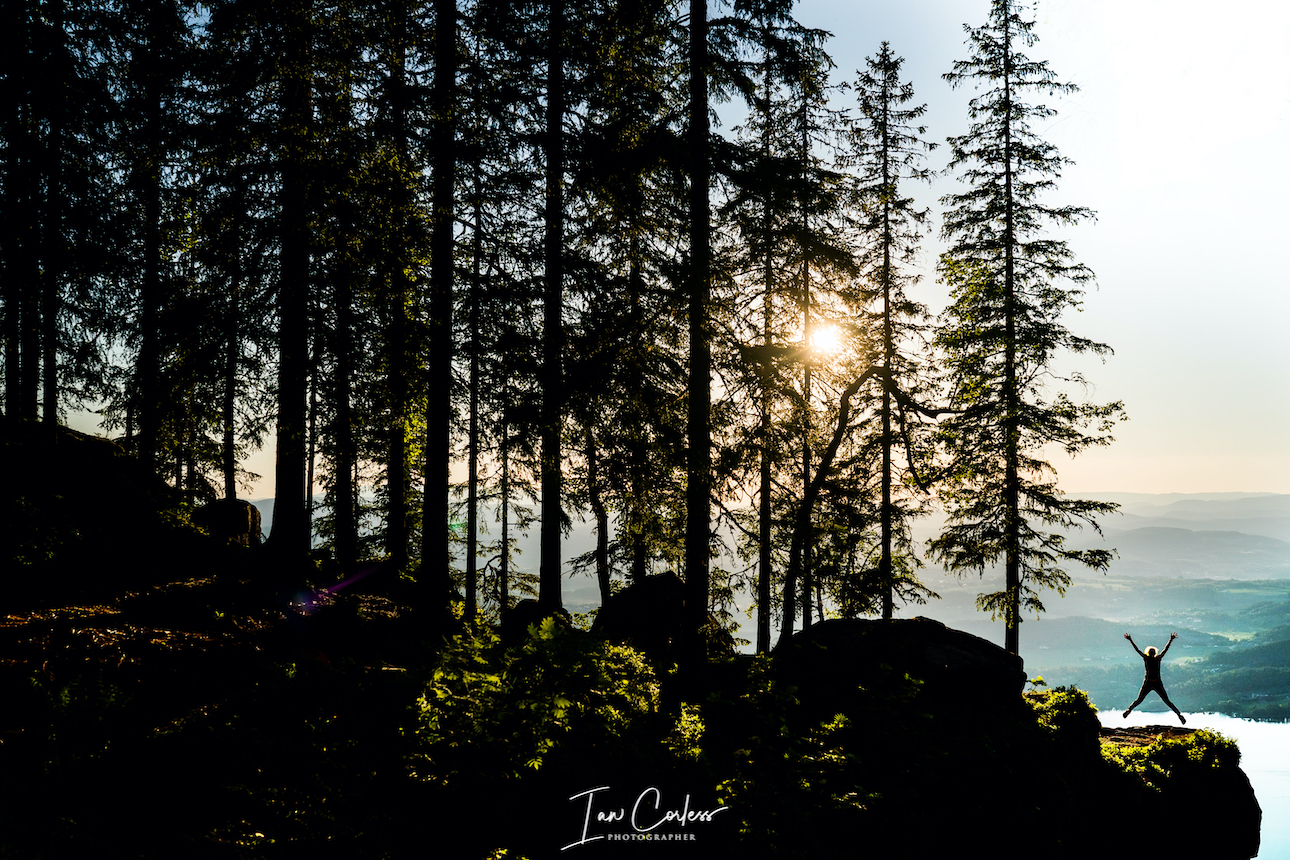
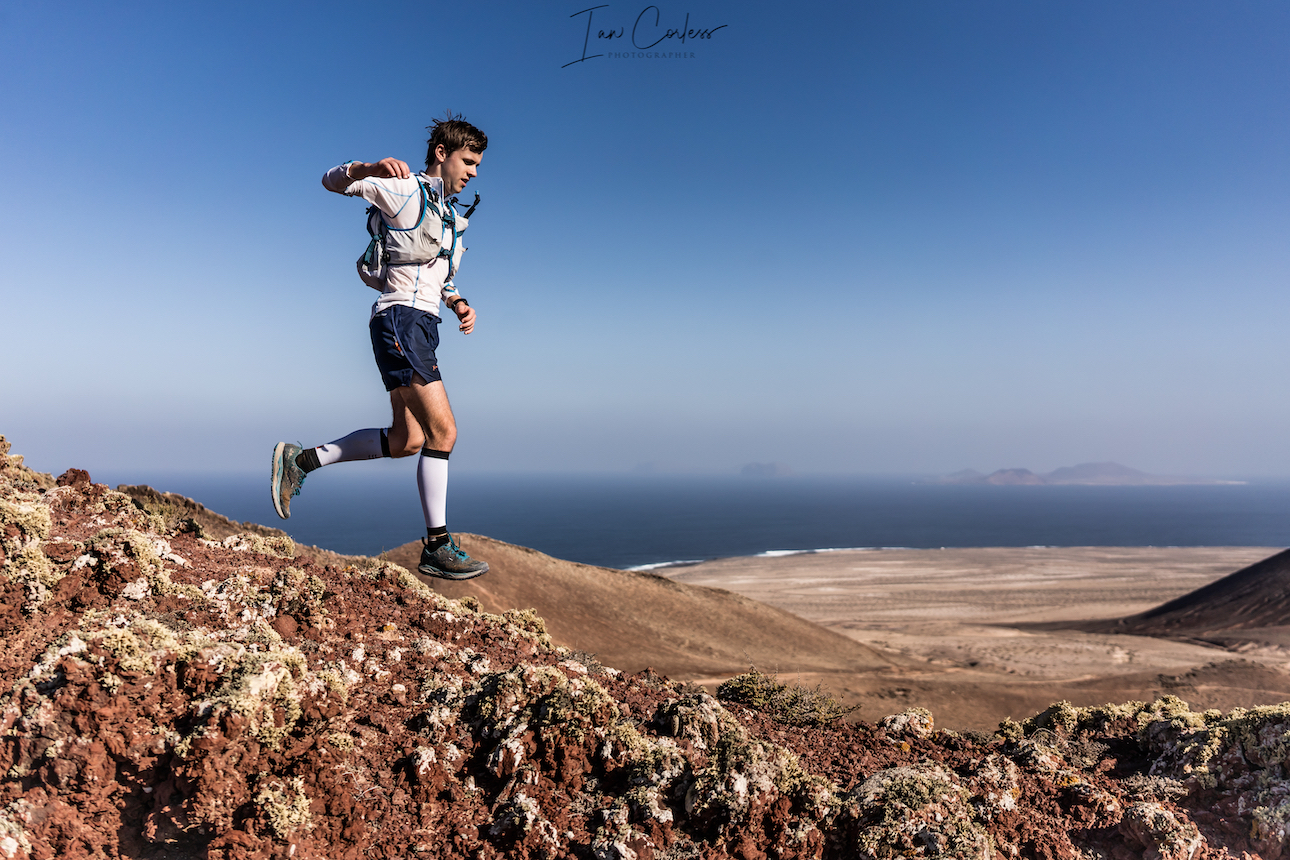
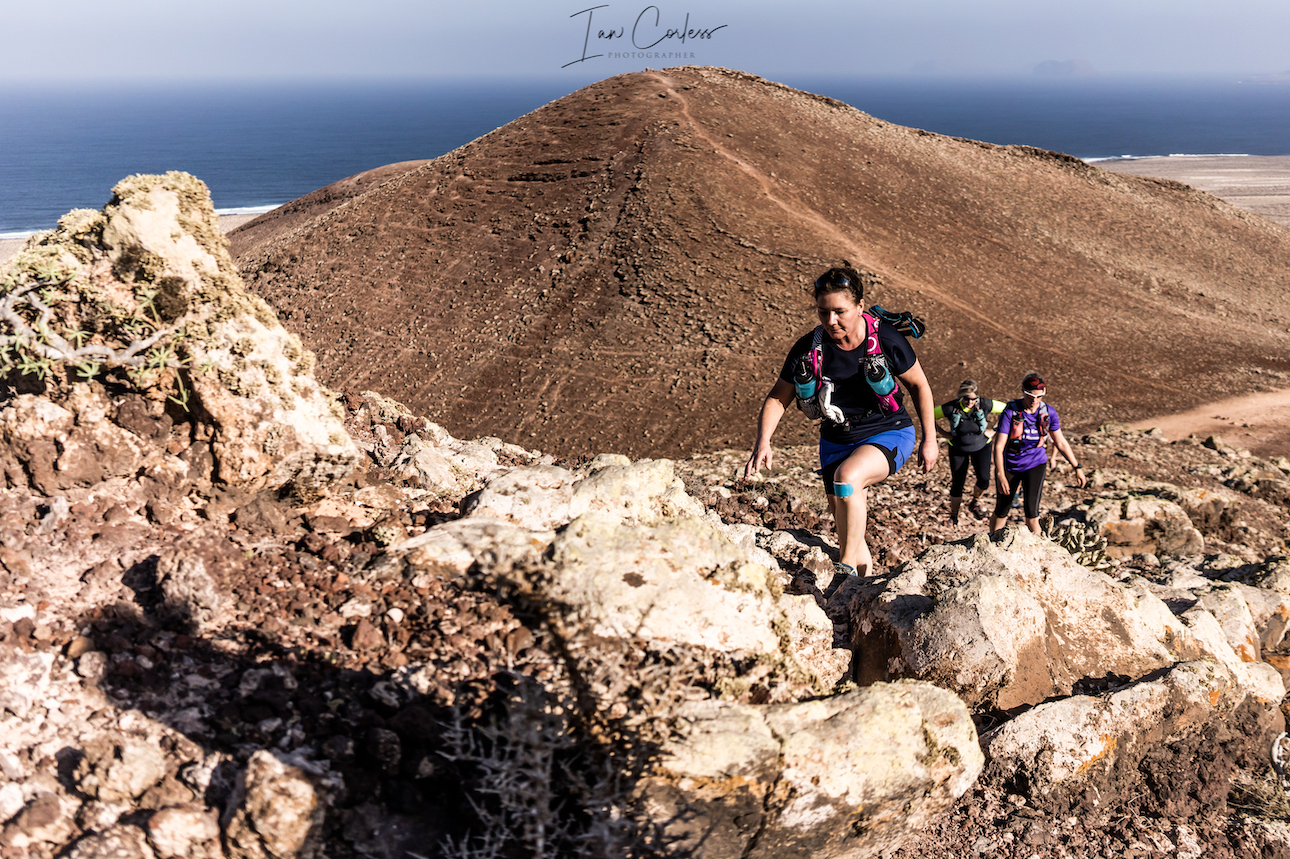
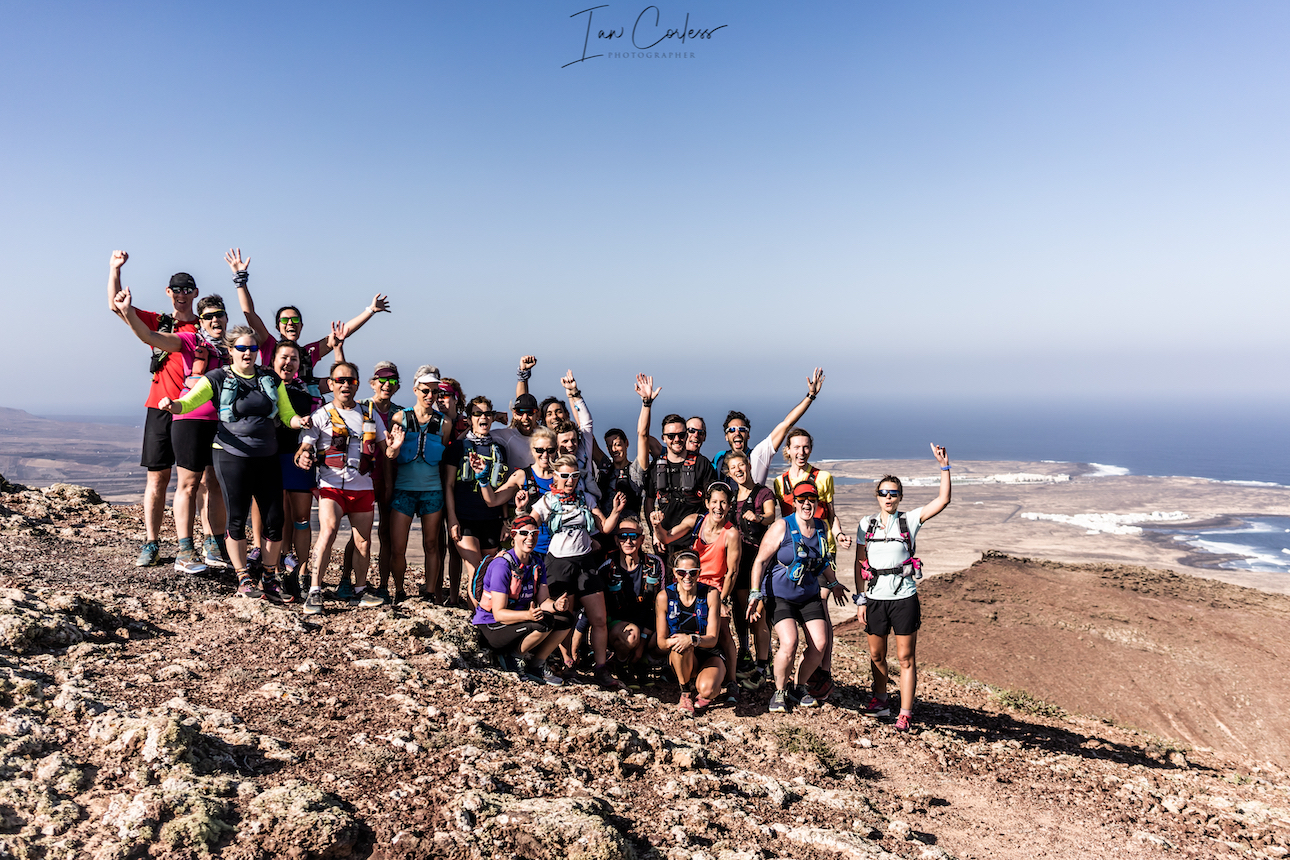
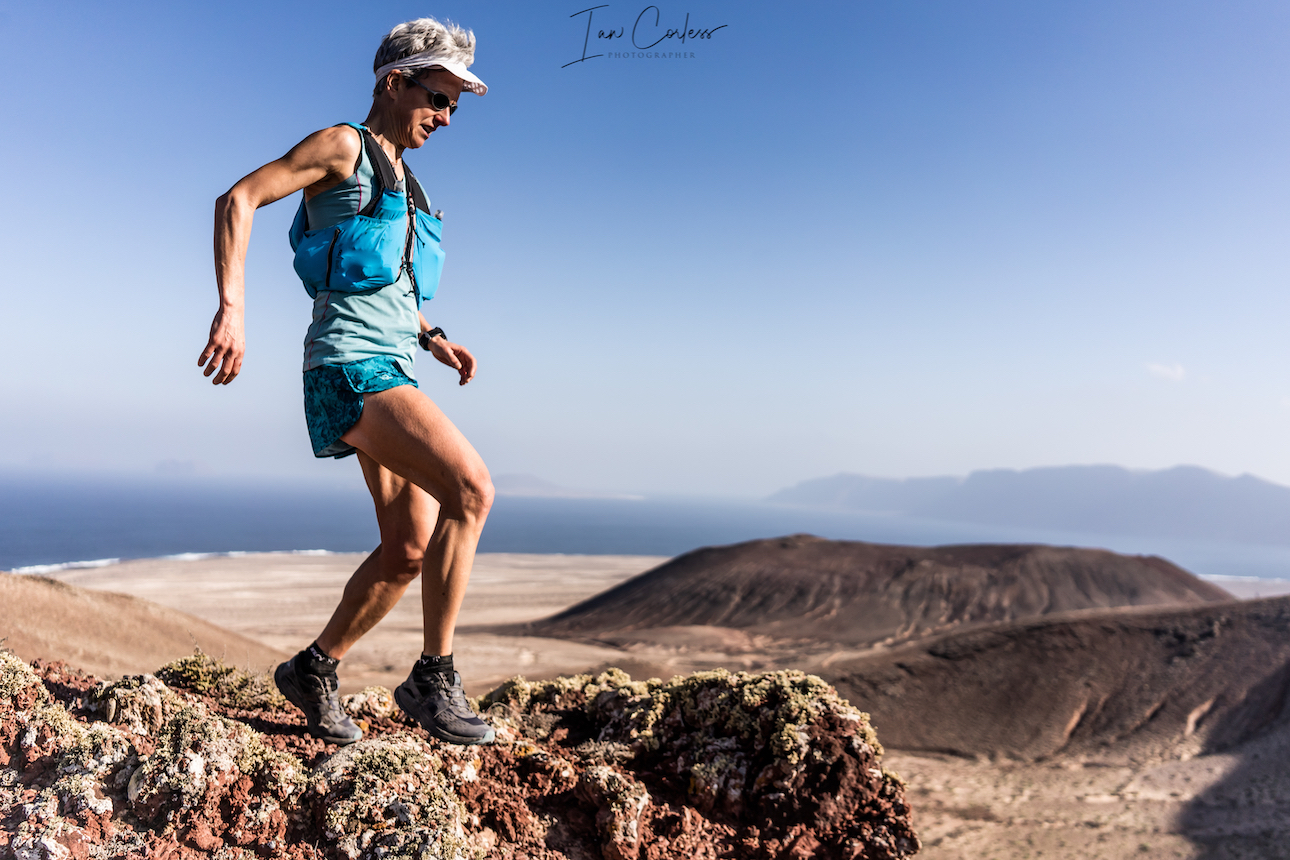
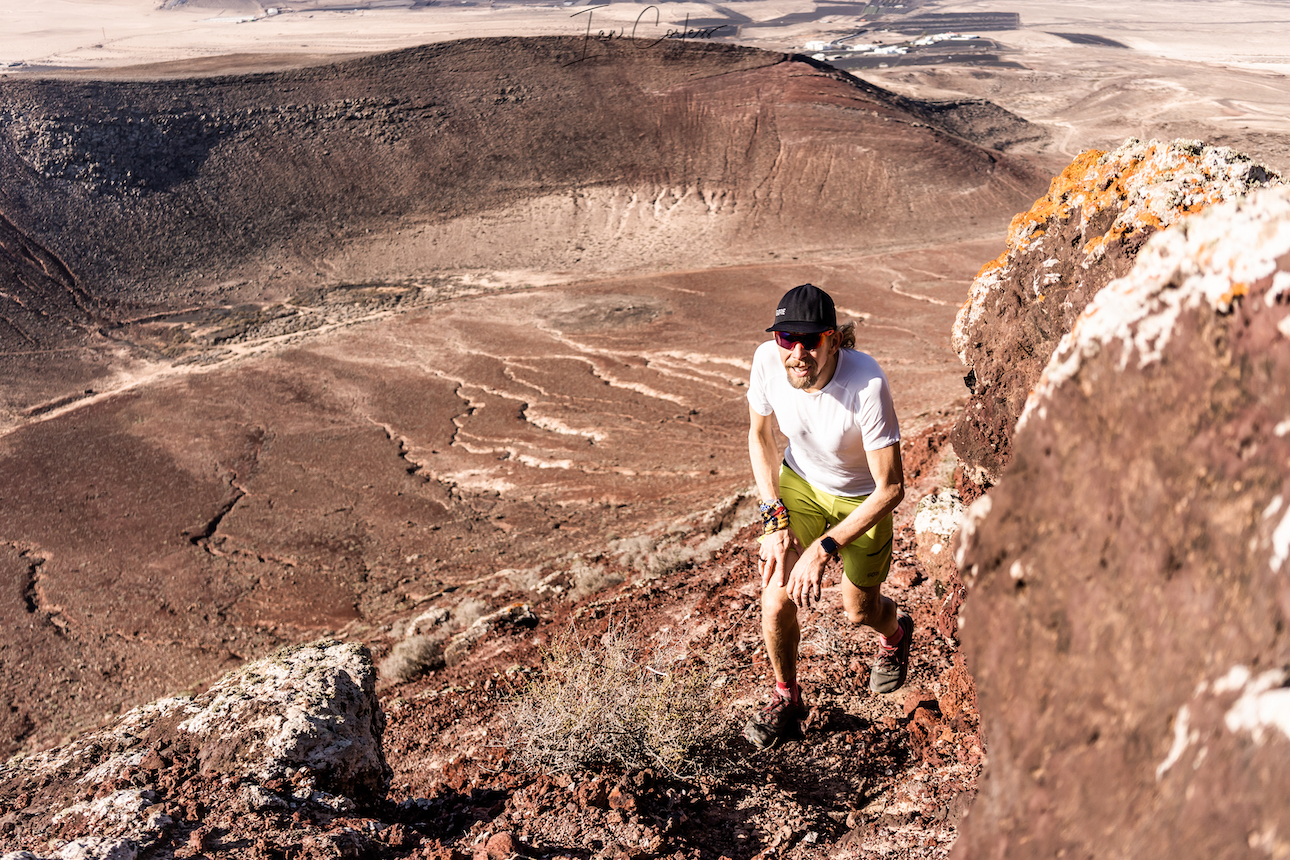
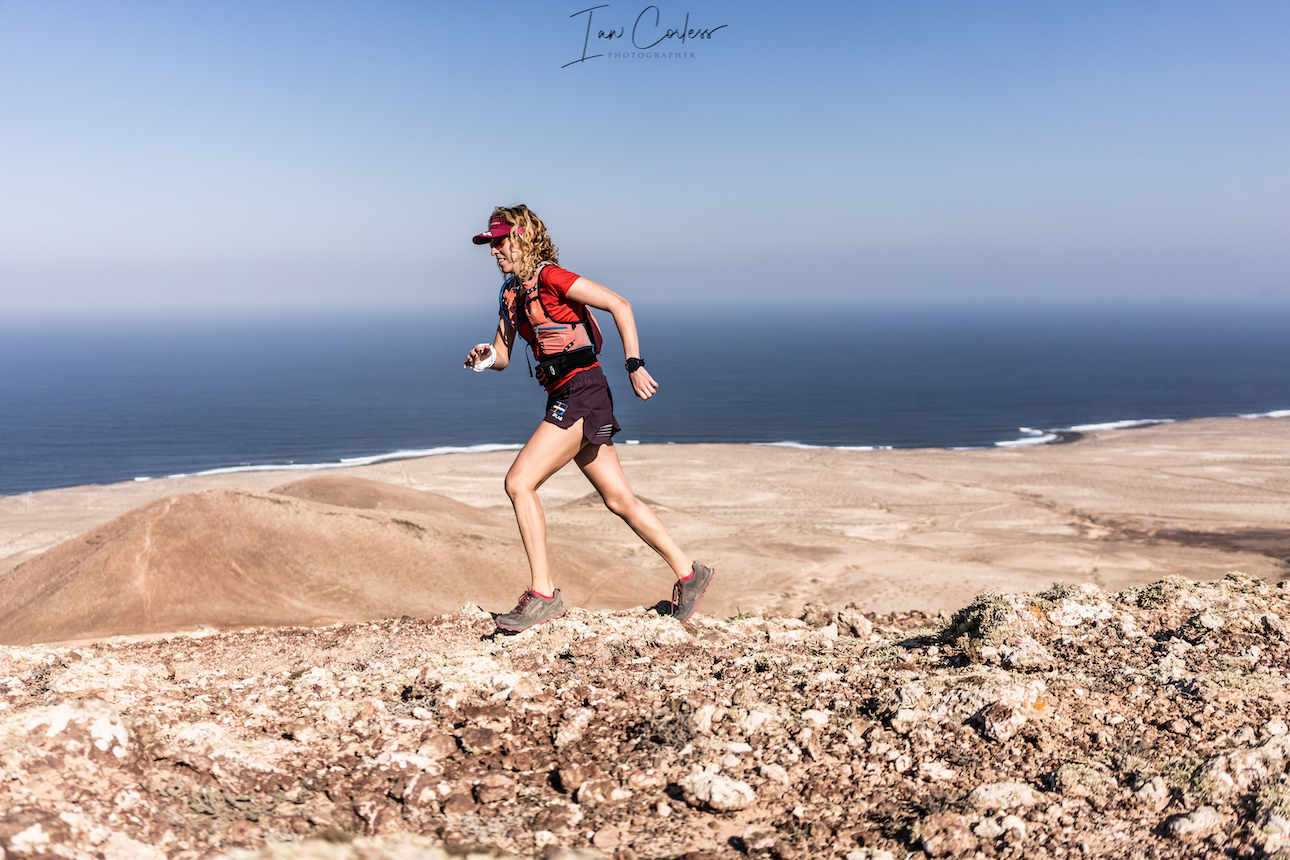

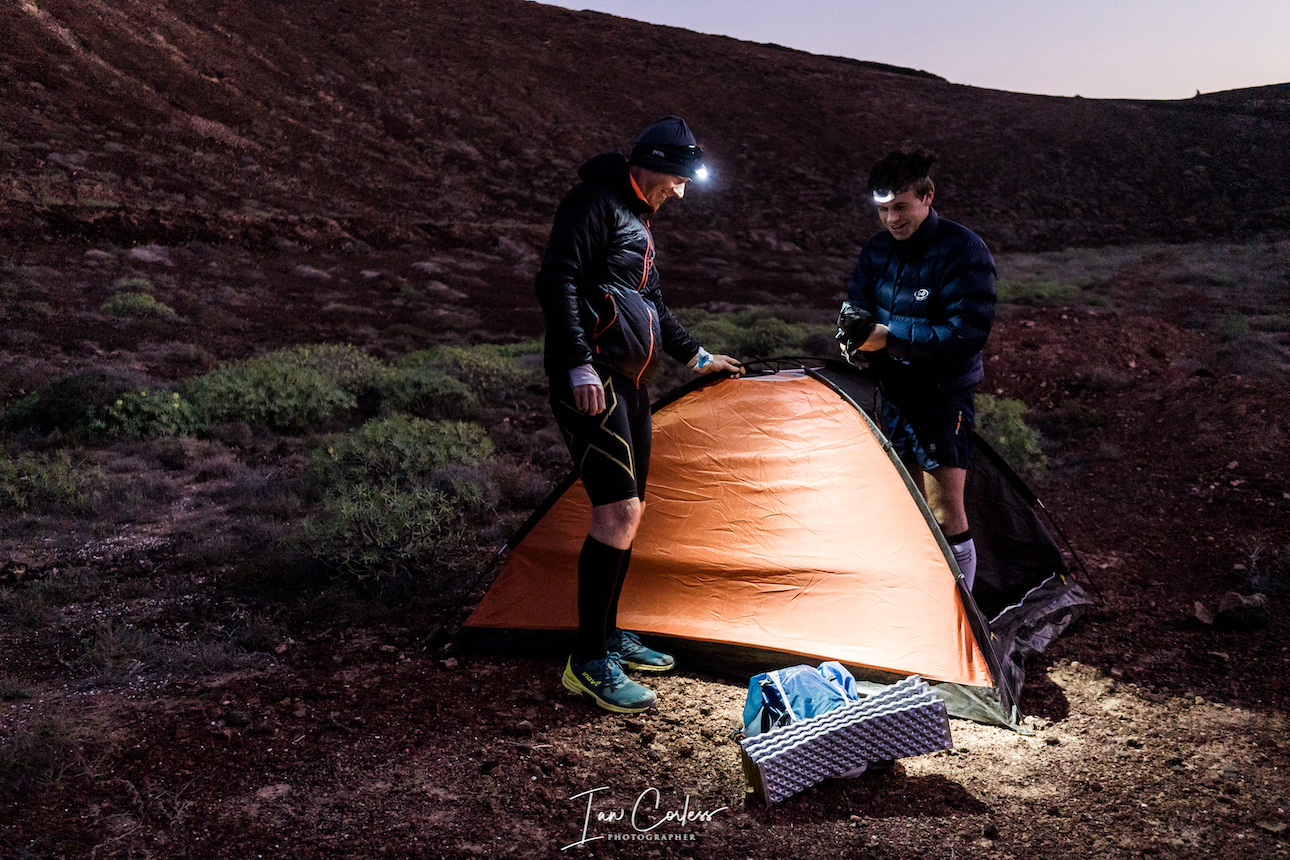
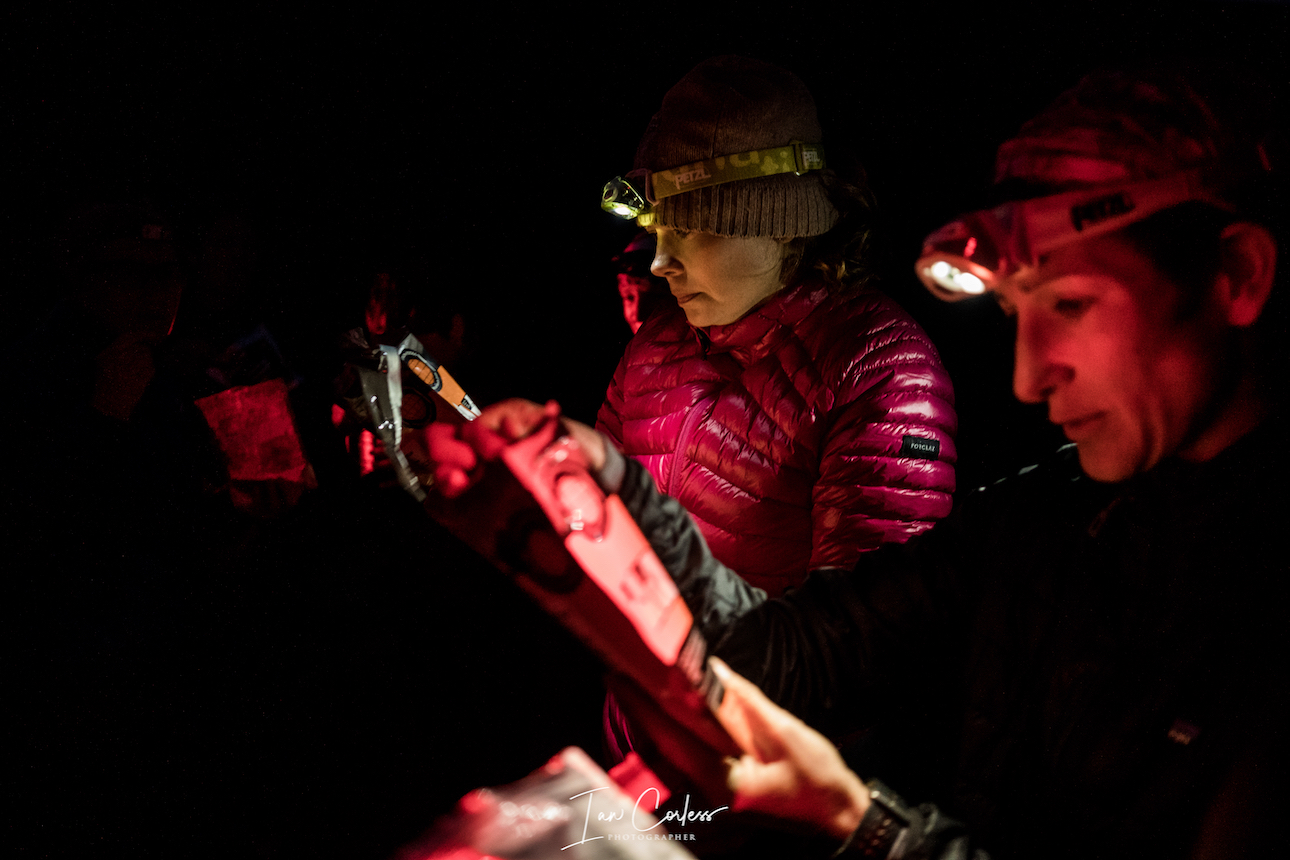
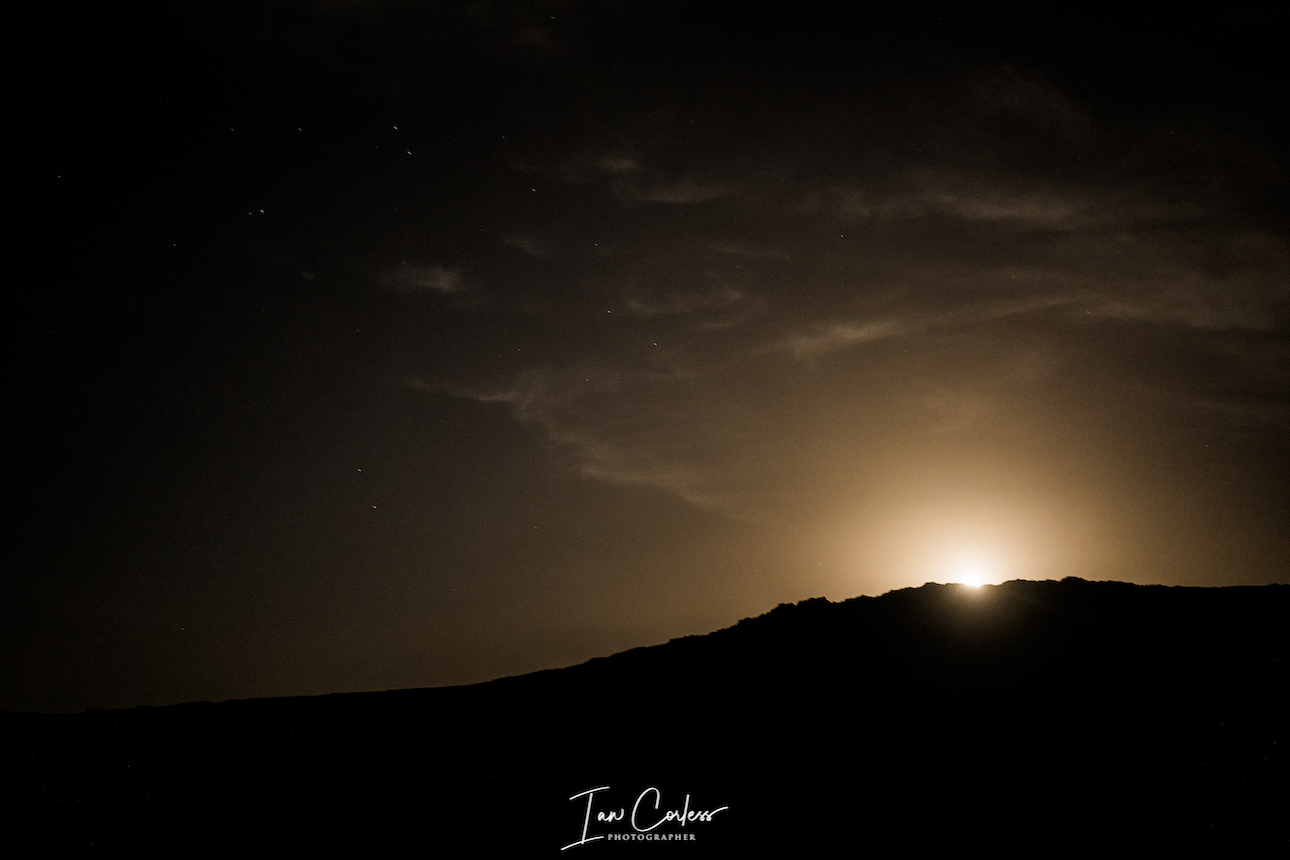
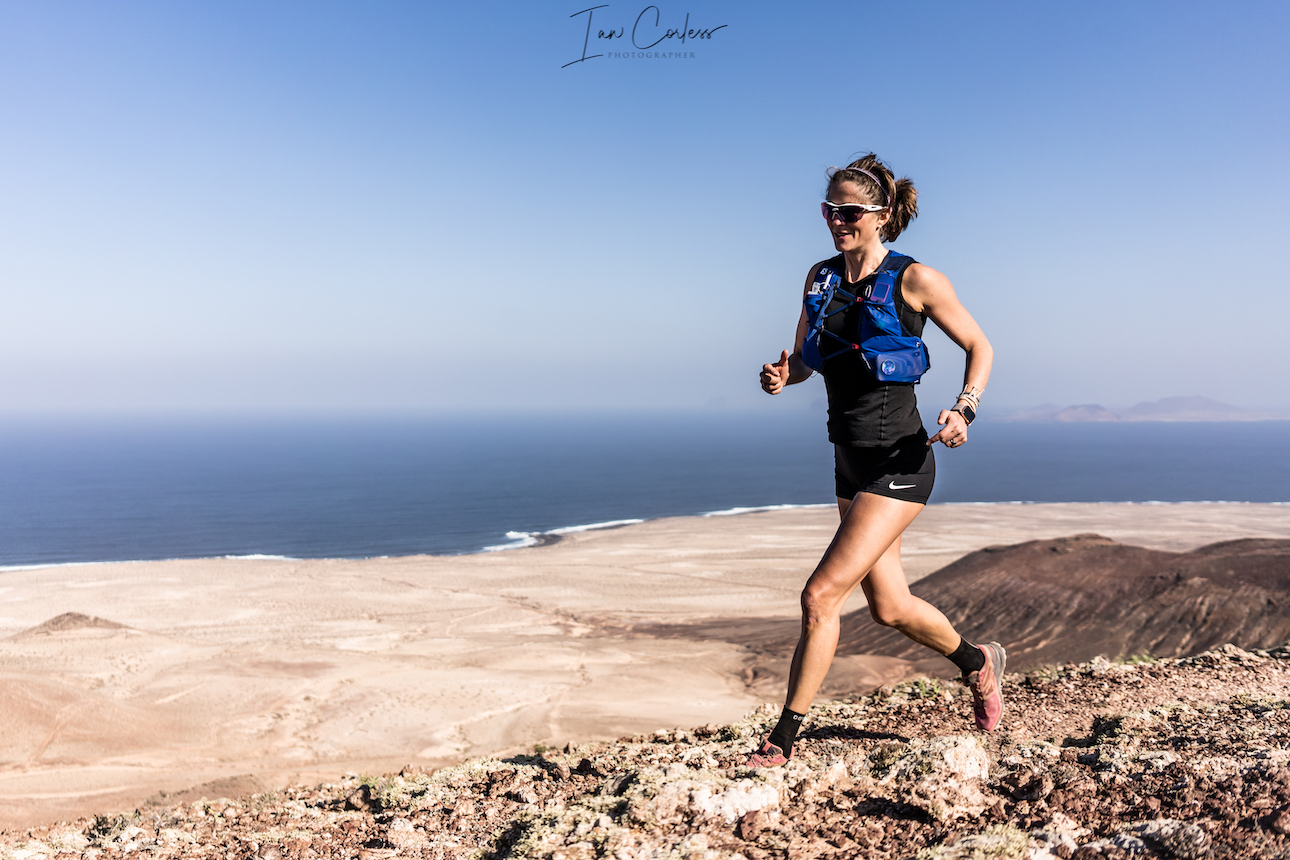
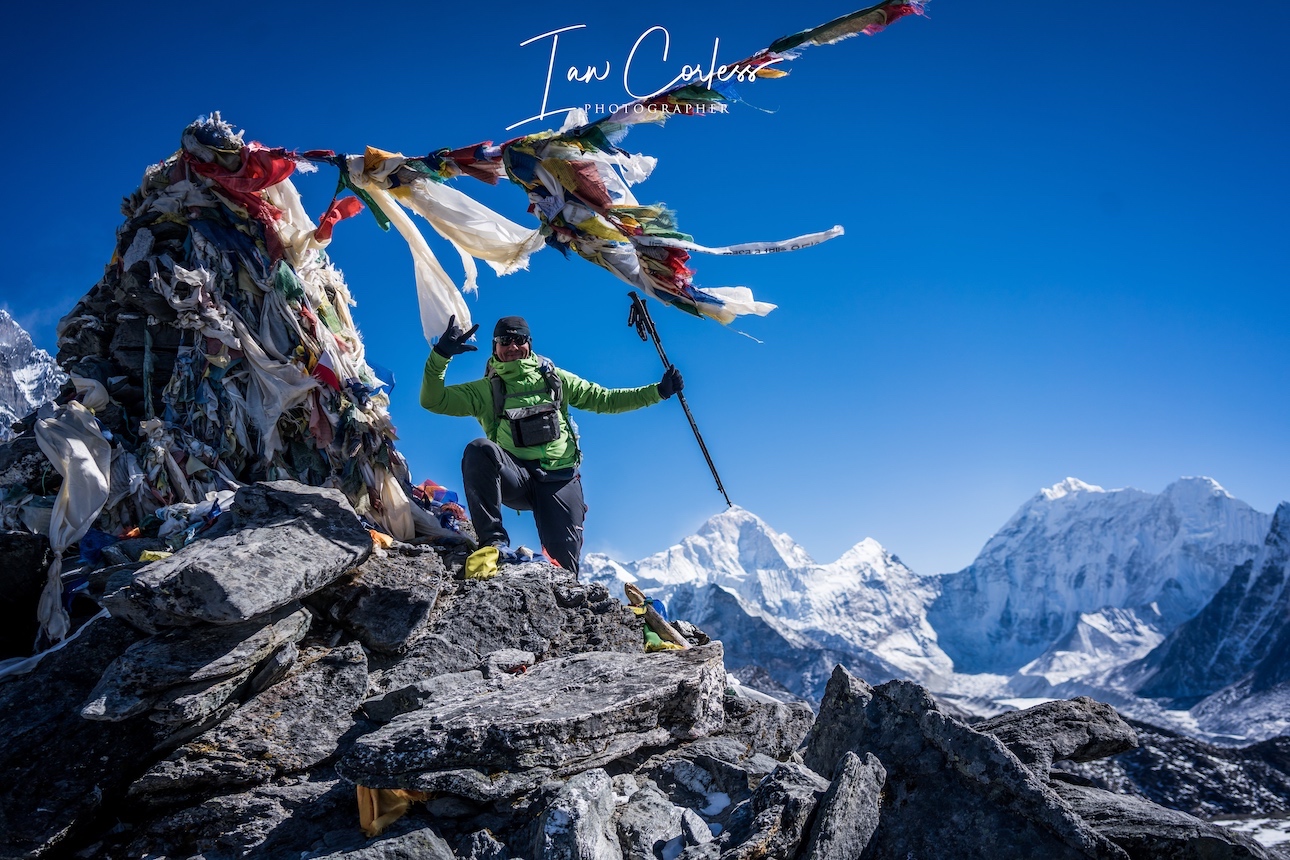
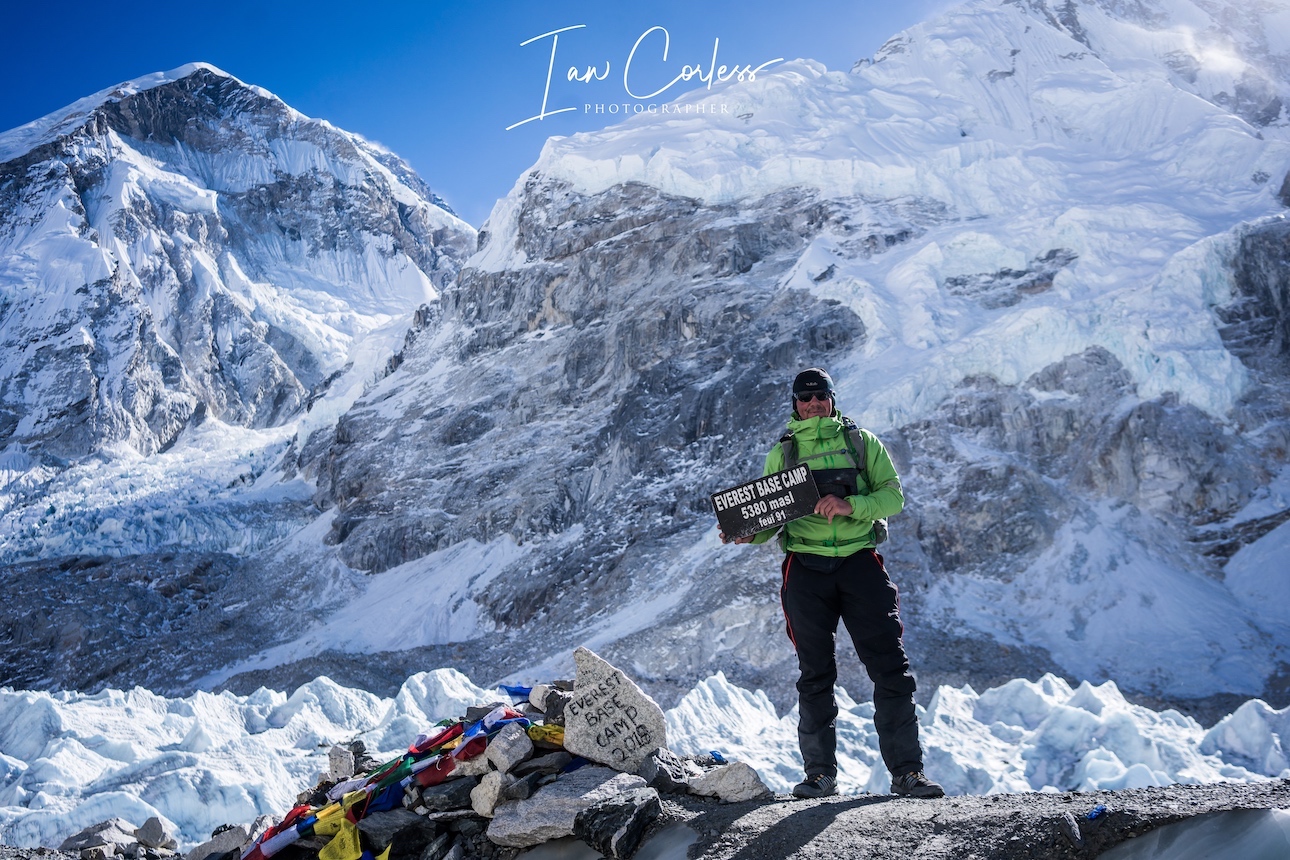
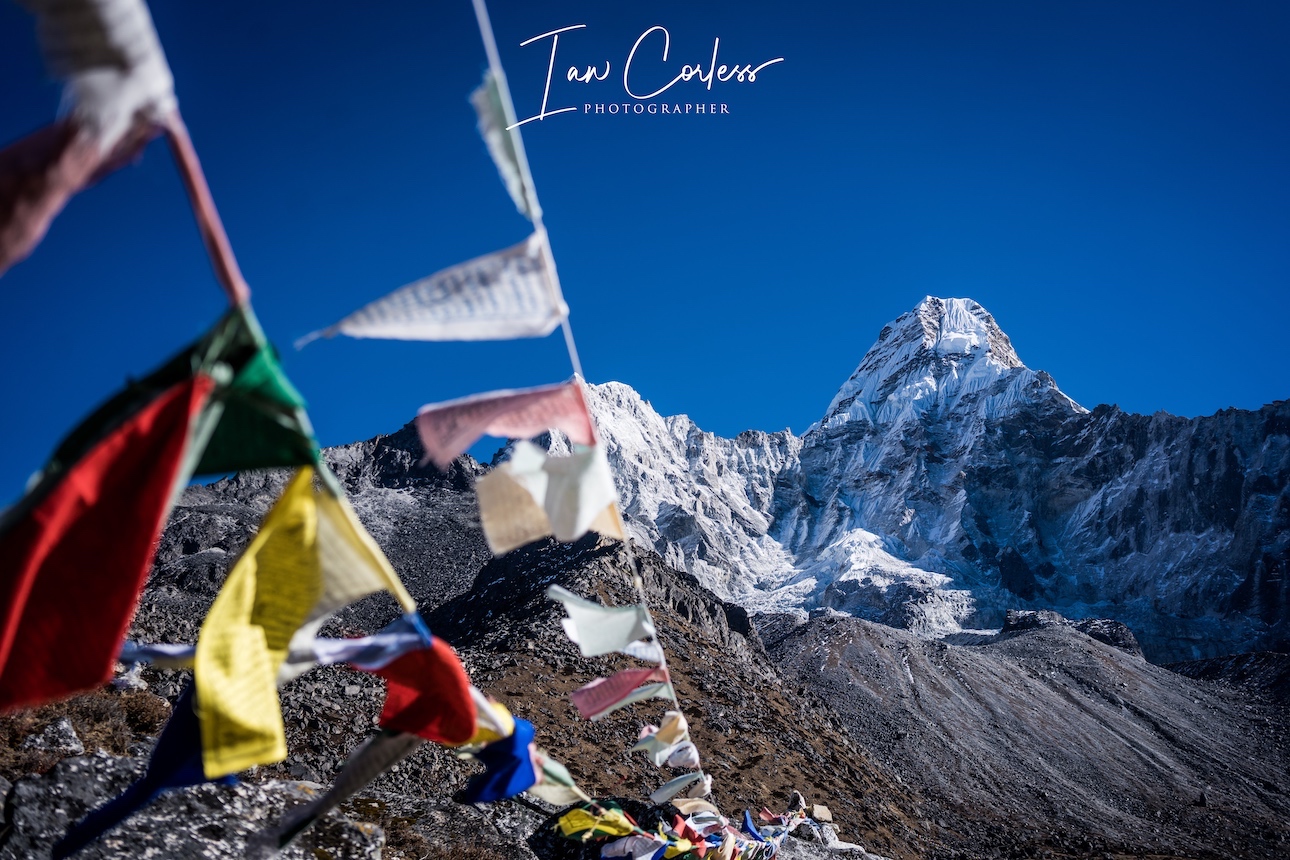
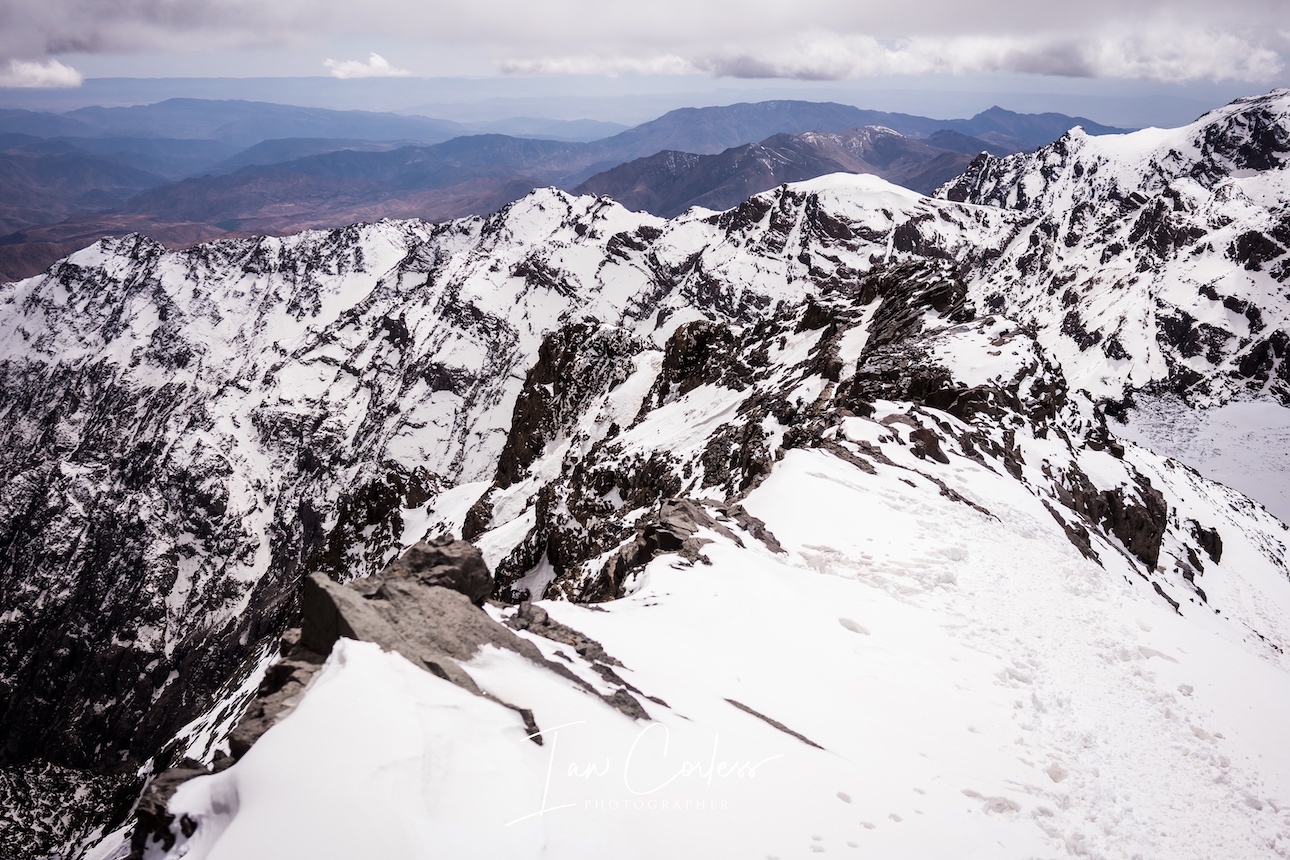

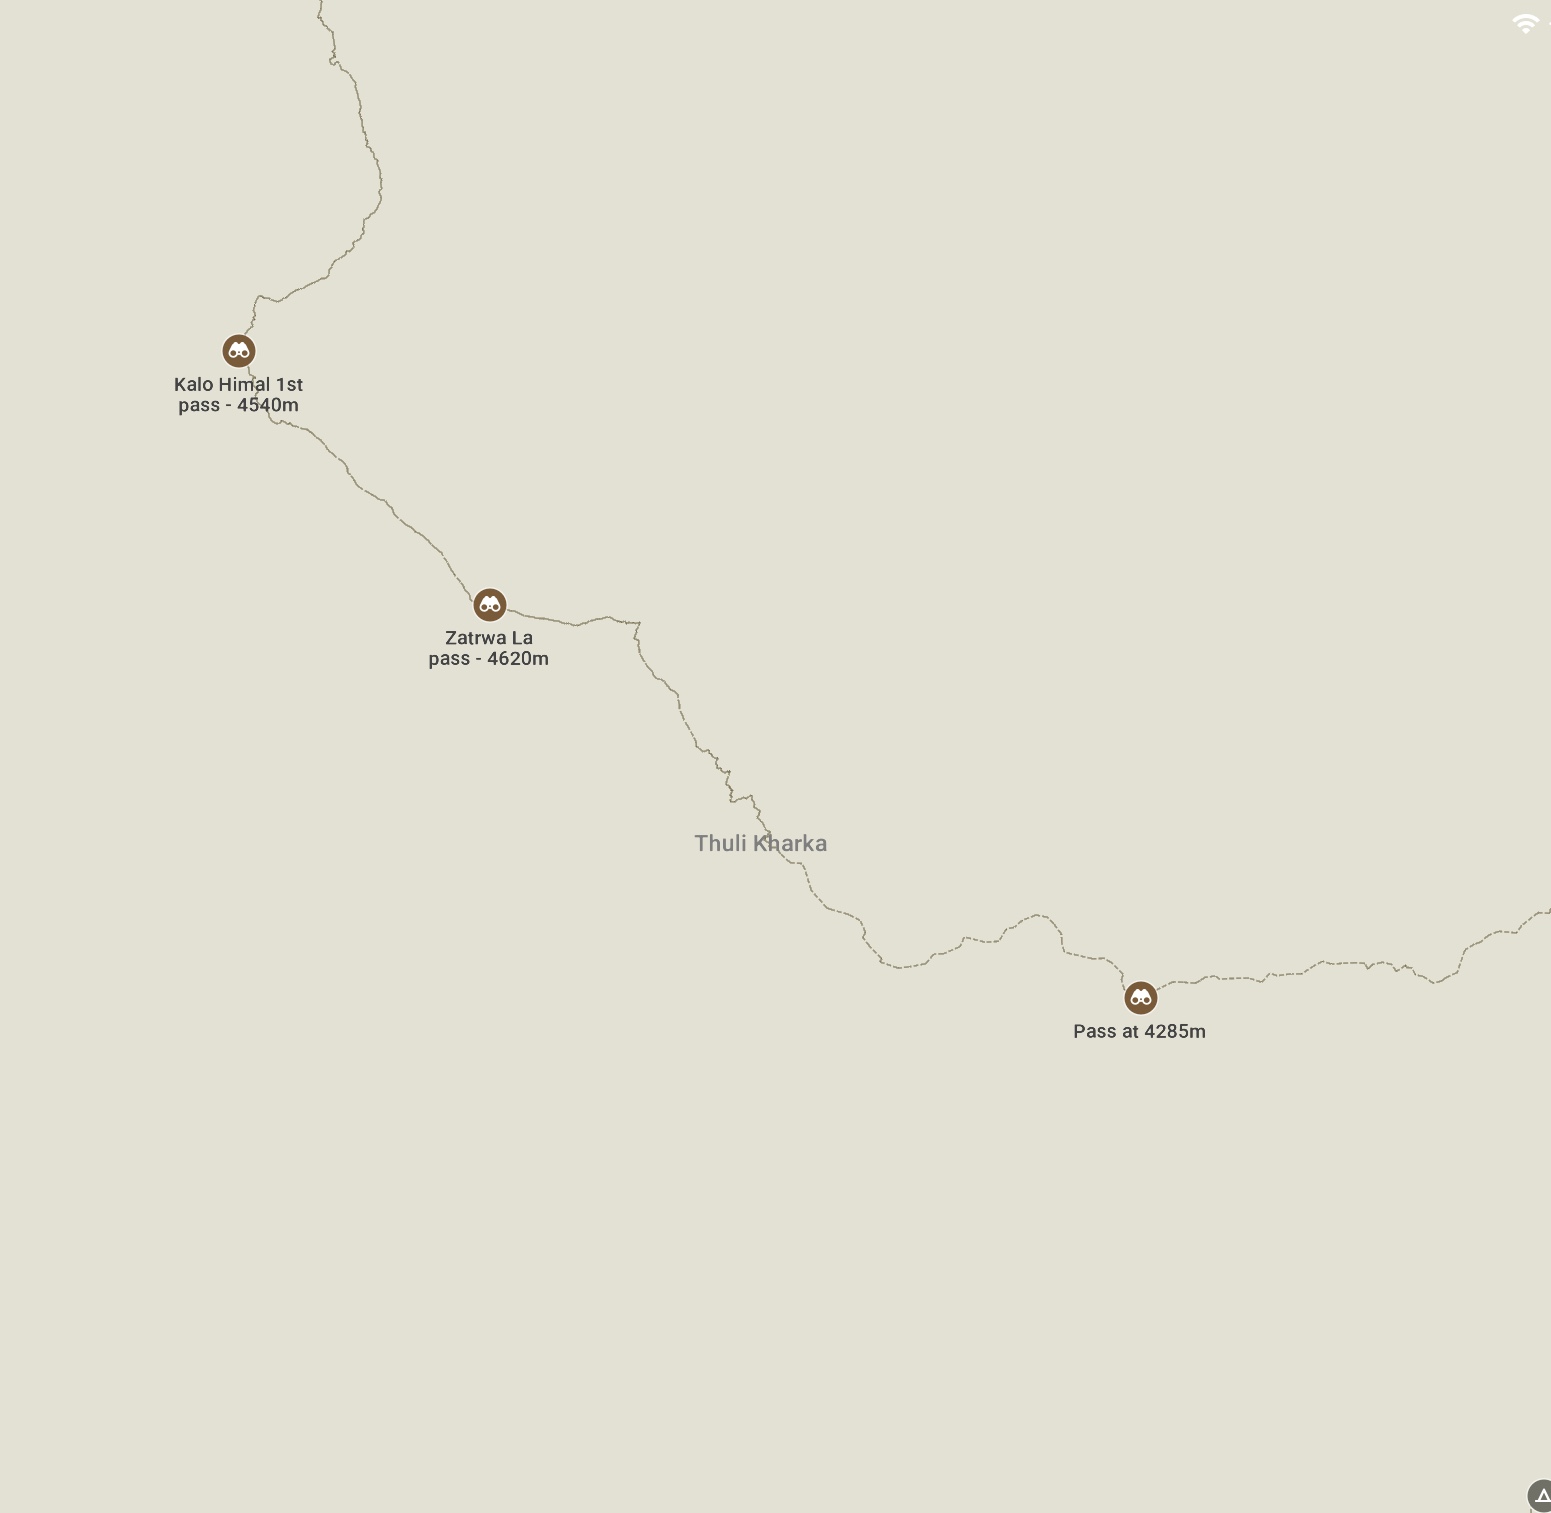
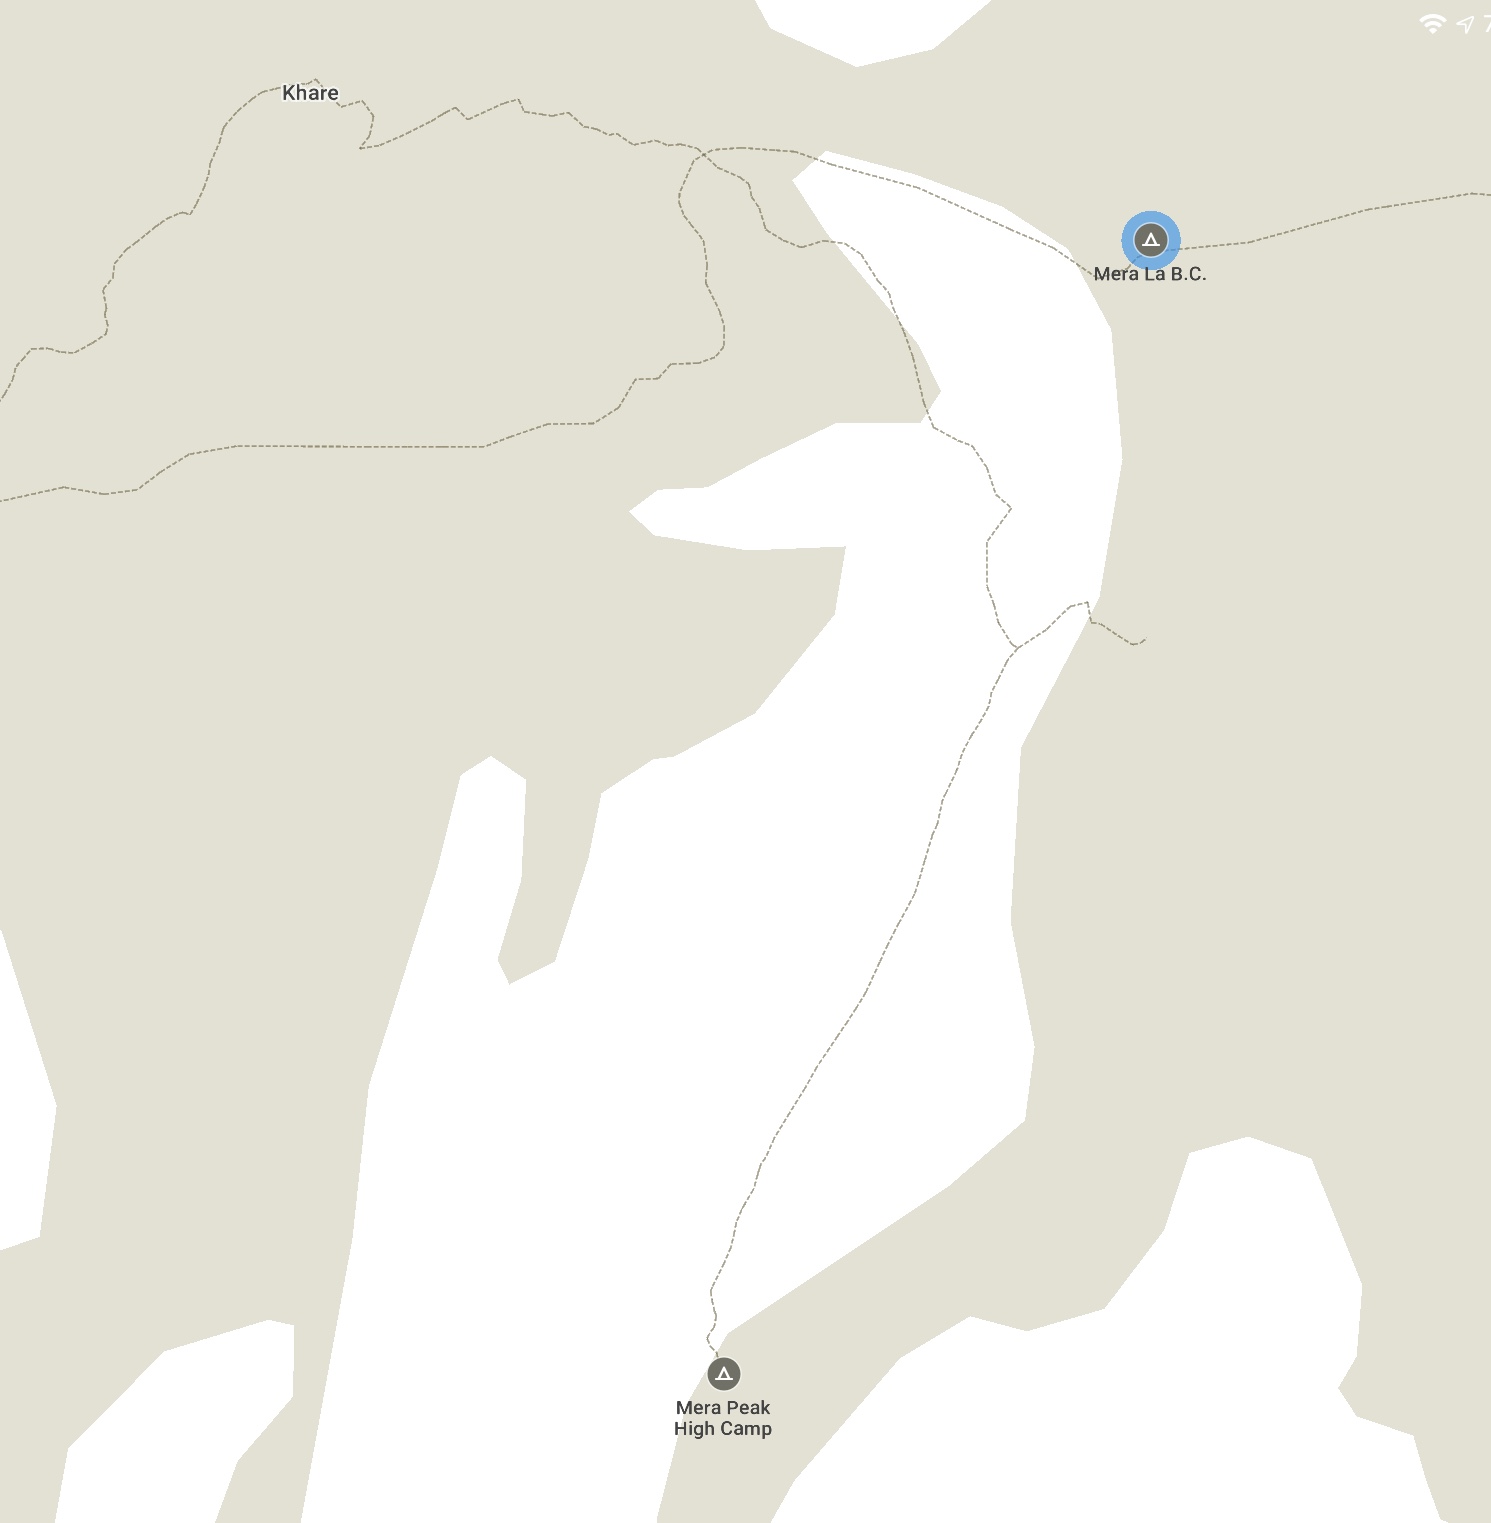 Of all the peaks we will attempt on this expedition, Mera is not technically demanding but climbing at this altitude is physically challenging, we will also need to be attentive to snow conditions and wait for an optimal weather window. From the summit, we will have perfect views of five of the six highest mountains on earth.